Embed Size (px)
Citation preview

ち ょ っ と だ け 不 親 切 な 製 作 ガ イ ド
A036 NXT Walker
Instruction
この製作ガイドは、写真と必要最小限の要点説明で構成しています。作り方の手順などは一切ありませんので、
写真から構造、部品、結合方法を読み取るだけのスキルが必要となります。でも、あなたならきっと大丈夫。
お楽しみください。
2006/11 五十川芳仁(ISOGAWA Yoshihito)
http://www.isogawastudio.co.jp/legostudio/

http://www.isogawastudio.co.jp/legostudio/ 2
写真Photo

http://www.isogawastudio.co.jp/legostudio/ 3
写真Photo
http://www.isogawastudio.co.jp/legostudio/ 4
写真Photo

http://www.isogawastudio.co.jp/legostudio/ 5
写真Photo

http://www.isogawastudio.co.jp/legostudio/ 6
写真Photo

http://www.isogawastudio.co.jp/legostudio/ 7
写真Photo

http://www.isogawastudio.co.jp/legostudio/ 8
写真Photo

http://www.isogawastudio.co.jp/legostudio/ 9
写真Photo

http://www.isogawastudio.co.jp/legostudio/ 10
写真Photo

http://www.isogawastudio.co.jp/legostudio/ 11
写真Photo

http://www.isogawastudio.co.jp/legostudio/ 12
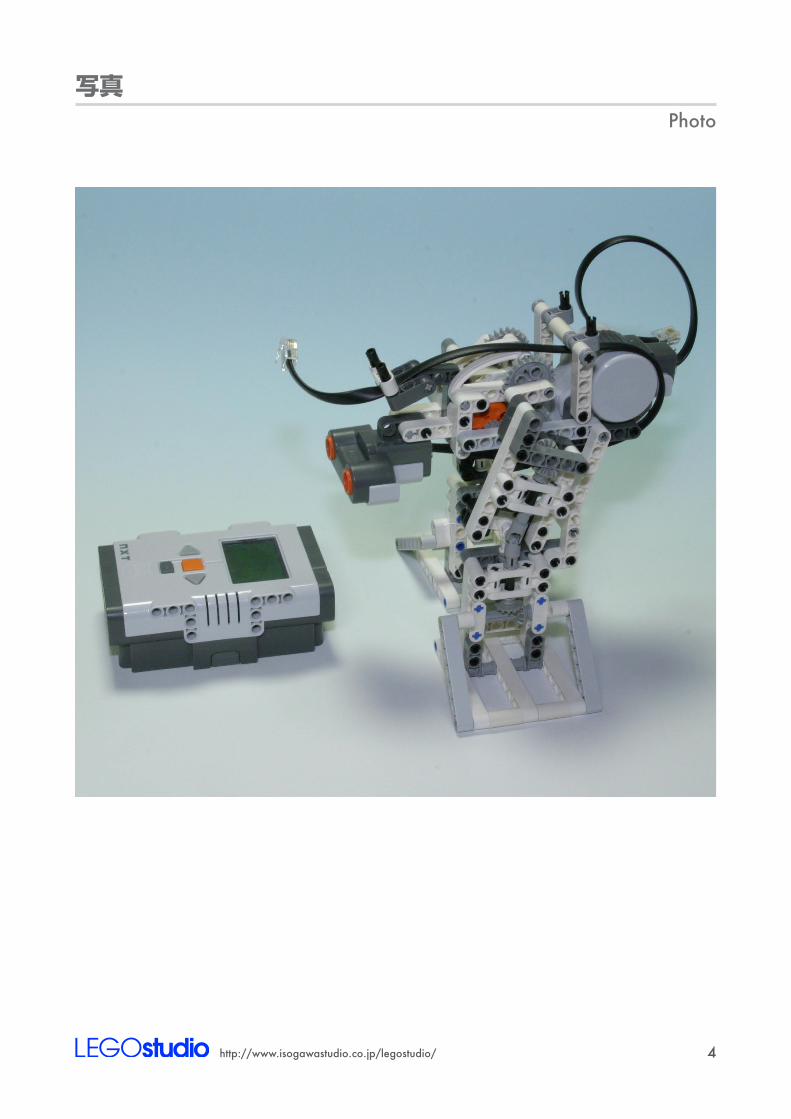
写真Photo
http://www.isogawastudio.co.jp/legostudio/ 13
写真Photo

http://www.isogawastudio.co.jp/legostudio/ 14
写真Photo

http://www.isogawastudio.co.jp/legostudio/ 15
ProgramProgram

http://www.isogawastudio.co.jp/legostudio/ 16
NXTの取り付けについてInstallation of the NXT
使っている電池の重さによっては、歩行時に前または後に倒れてしまう場合がある。そんなときは、下図に示した部分を工夫してNXTの取り付け位置を調整する。また、プログラム内のモーターパワーも適宜調整すること。なお、私はニッケル水素(Ni-MH)充電池(トータル7.2V)を使っている。
By weight of batteries, the Walker may fall down in front or back while walking. In such a case, adjust the installation positions (shown below) of the NXT. Also, change a value of the motor power in a program appropriately. I am using Ni-MH rechargeable batteries (total 7.2V).

http://www.isogawastudio.co.jp/legostudio/ 17
脚のセッティングSetting of feet
下図矢印のコネクタの差し込み位置は、右と左で180度ずらす。
Each connector of right and left sides should be set in the different position (180 degrees) . See the arrows below.

http://www.isogawastudio.co.jp/legostudio/ 18
足首のセッティングSetting of ankles
この足首のセッティングが、一番重要で難しい。うまく調整しないと足が上がらないどころか、全く歩けない。
Setting of ankles is the most important, and is difficult. Unless adjusting it appropriately, the Walker cannot raise each foot, but also walk at all.
1.まず、モーターのオレンジ色の部分を手でゆっくり回し、左右の脚の角度を合わせる。
At first, turn the orange part of the motor slowly by hand and adjust that each angle of right and left feet becomes the same.
2.このとき、片方の足首が最大に伸び、もう片方の足首が最小に縮んでいる状態になるように、足首のギアを調整する。
Adjust gears of ankles so that the one angle of ankle becomes the greatest, and the other becomes the smallest.
3.実際に歩かせてみて、後ろ方向に進むようであれば、足首のセッティングがちょうど180度ずれていることになる。手順2の状態にして、左右の足首の傾きを反対にする。
Try to let the Walker walk. If it walks to the back direction, setting of angles of ankles may be wrong (just 180 degrees). Back to the procedure 2 and adjust angles again.