Embed Size (px)
Citation preview
OpenClassGetting Started for Teachers and Students
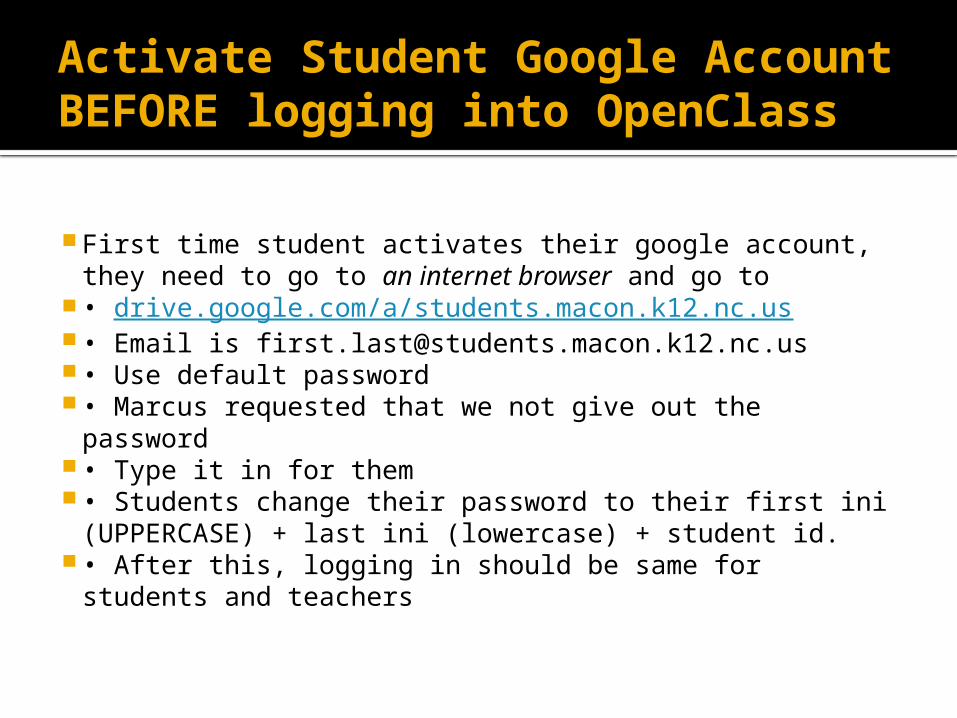
Activate Student Google Account BEFORE logging into OpenClass
First time student activates their google account, they need to go to an internet browser and go to
• drive.google.com/a/students.macon.k12.nc.us • Email is [email protected] • Use default password • Marcus requested that we not give out the
password • Type it in for them • Students change their password to their first ini
(UPPERCASE) + last ini (lowercase) + student id. • After this, logging in should be same for students
and teachers
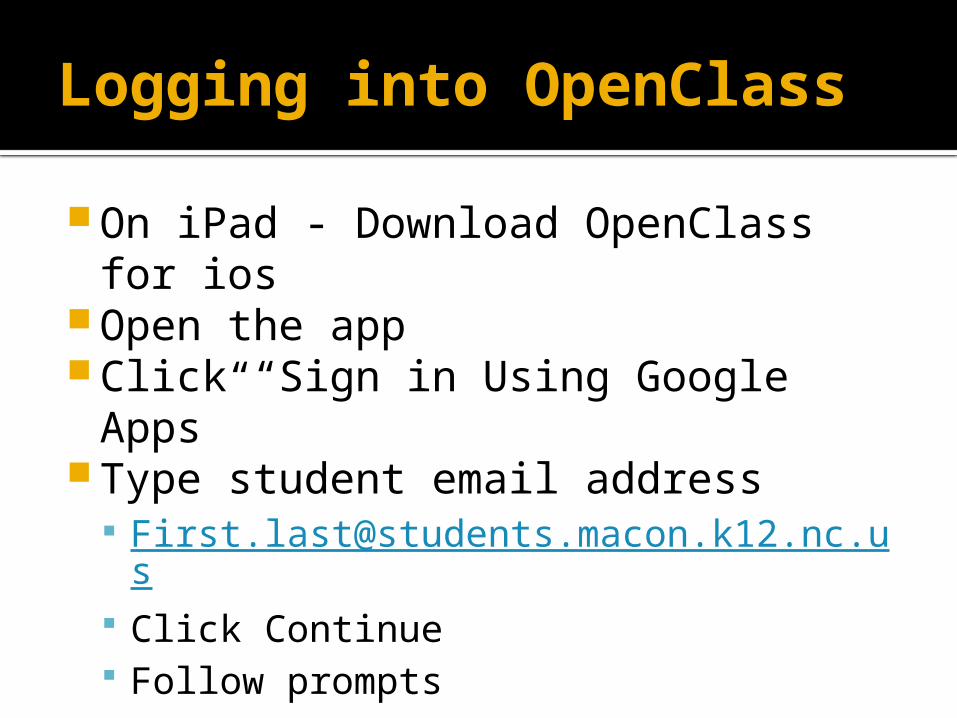
Logging into OpenClass
On iPad - Download OpenClass for ios
Open the app Click “Sign in Using Google Apps” Type student email address
[email protected] Click Continue Follow prompts
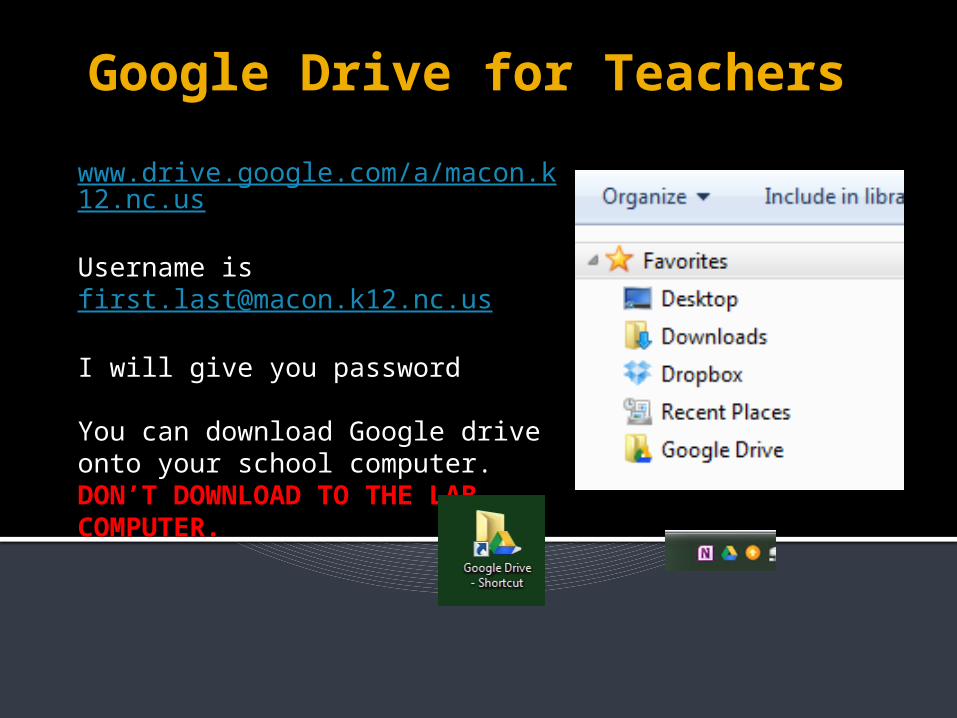
Google Drive for Teachers
www.drive.google.com/a/macon.k12.nc.us
Username is [email protected]
I will give you password
You can download Google drive onto your school computer. DON’T DOWNLOAD TO THE LAB COMPUTER.
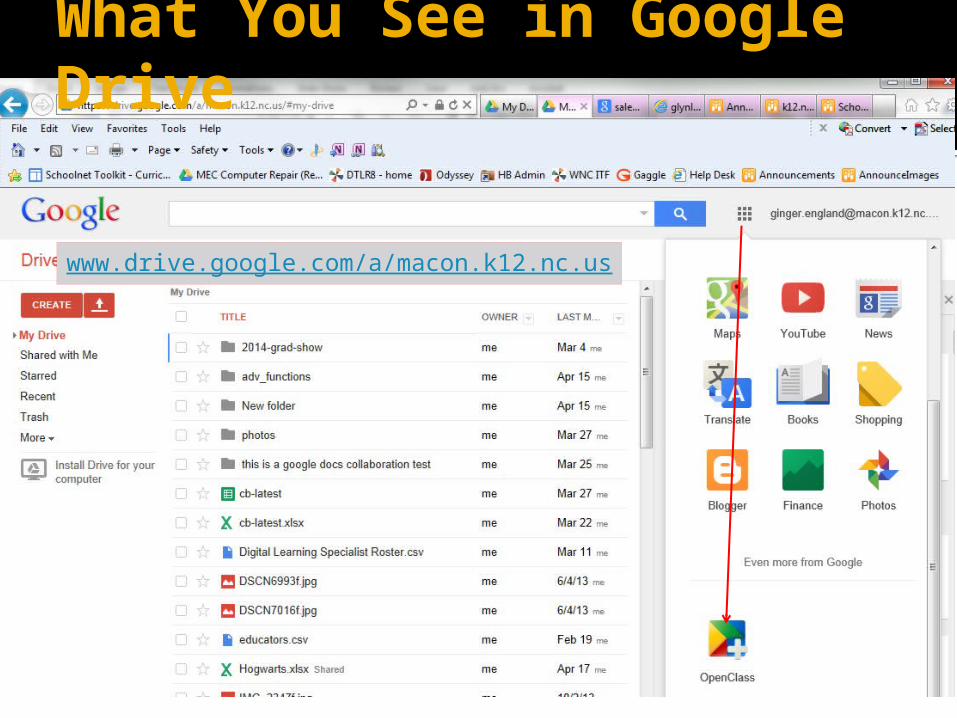
What You See in Google Drive
www.drive.google.com/a/macon.k12.nc.us
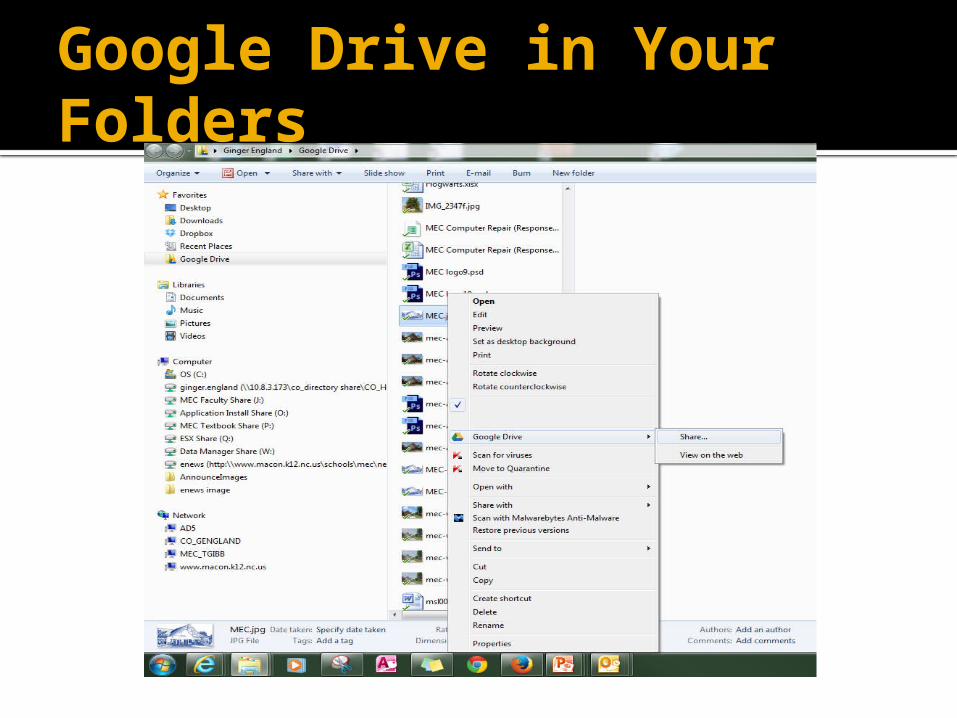
Google Drive in Your Folders

Teachers’ Link to OpenClass
OpenClass link Copy and paste in FireFox – NOT IE:
https://pearsonopenclass.com
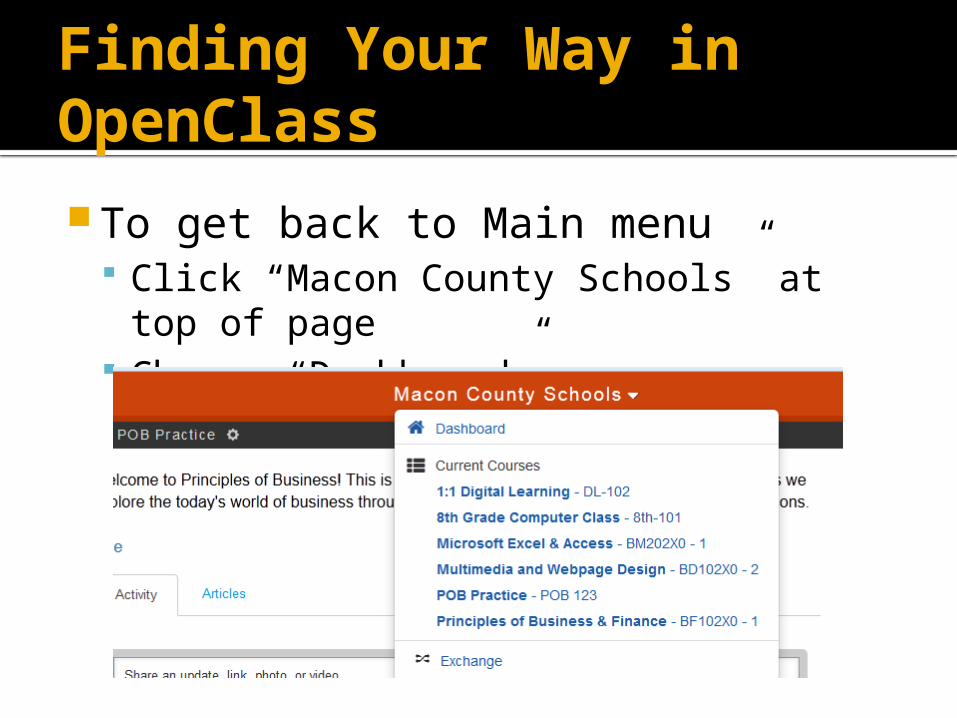
Finding Your Way in OpenClass
To get back to Main menu Click “Macon County Schools” at top of
page Choose “Dashboard”
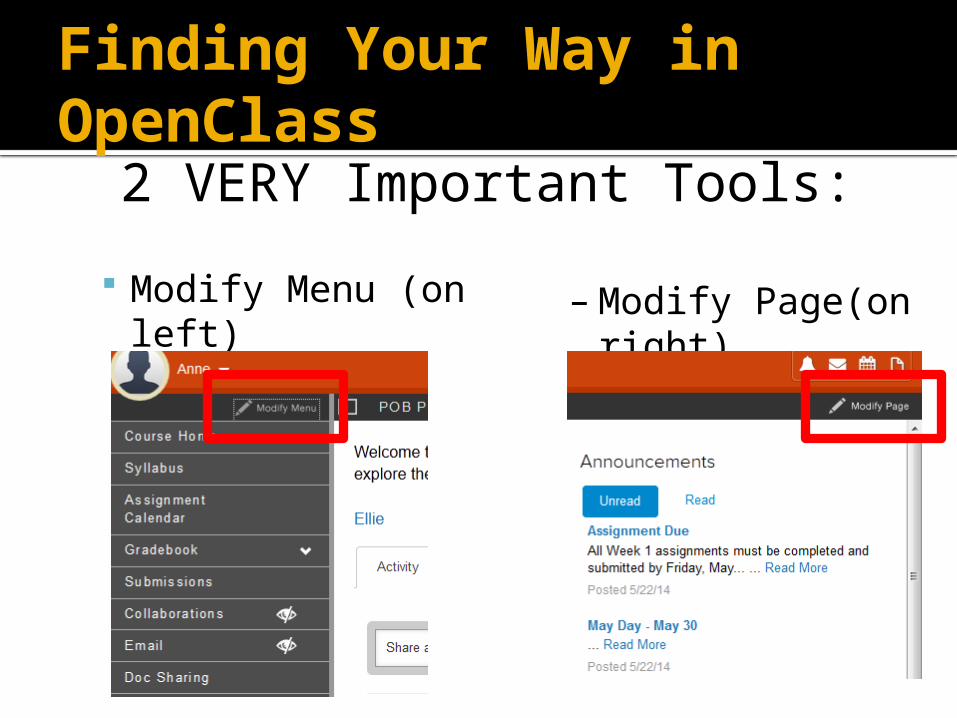
Finding Your Way in OpenClass
Modify Menu (on left)
2 VERY Important Tools:
–Modify Page(on right)
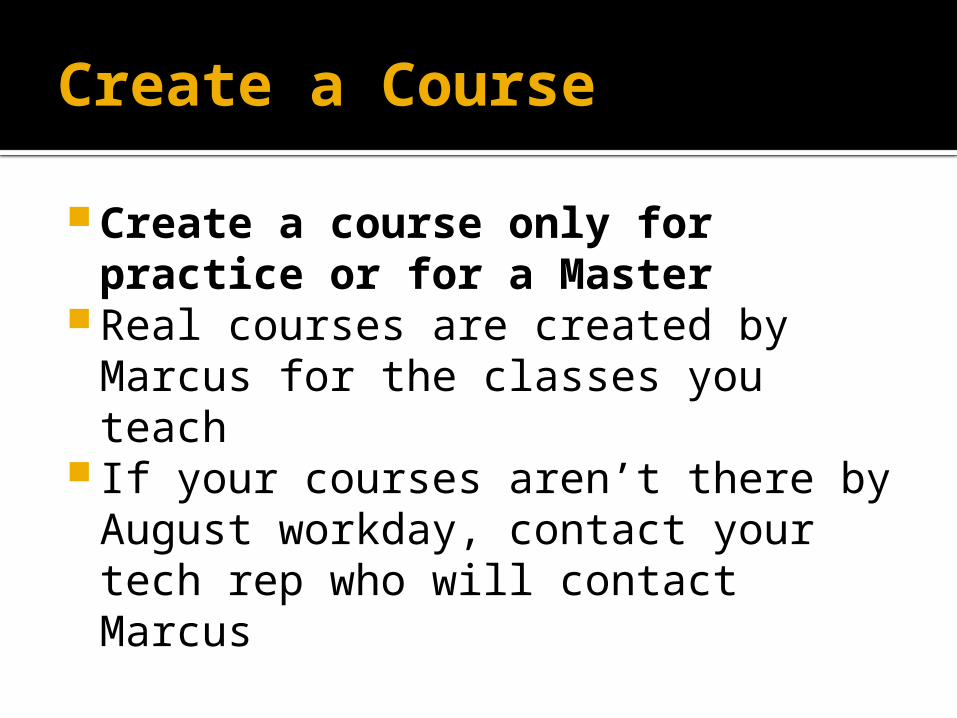
Create a Course
Create a course only for practice or for a Master
Real courses are created by Marcus for the classes you teach
If your courses aren’t there by August workday, contact your tech rep who will contact Marcus
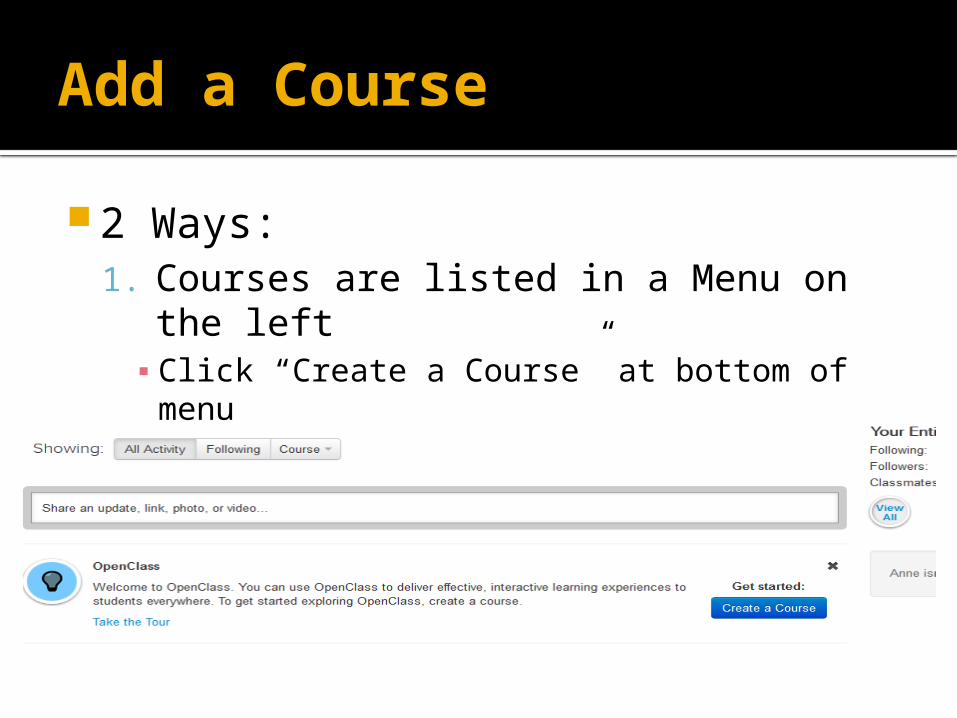
Add a Course
2 Ways:1. Courses are listed in a Menu on the left▪ Click “Create a Course” at bottom of menu
2. OR Click the blue “Create a Course” box
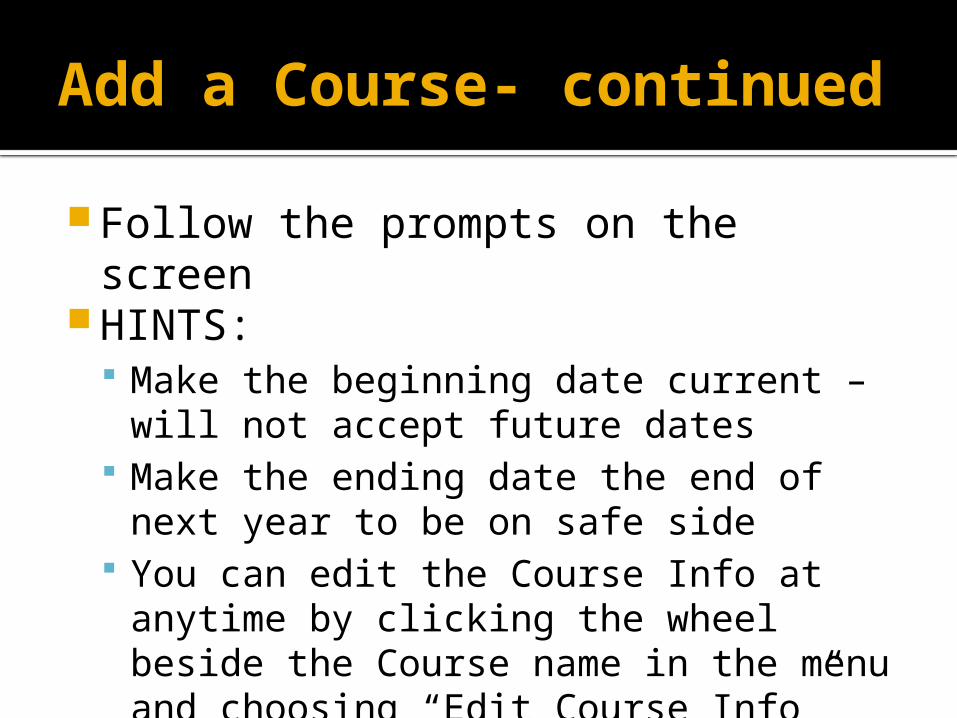
Add a Course- continued
Follow the prompts on the screen HINTS:
Make the beginning date current – will not accept future dates
Make the ending date the end of next year to be on safe side
You can edit the Course Info at anytime by clicking the wheel beside the Course name in the menu and choosing “Edit Course Info”
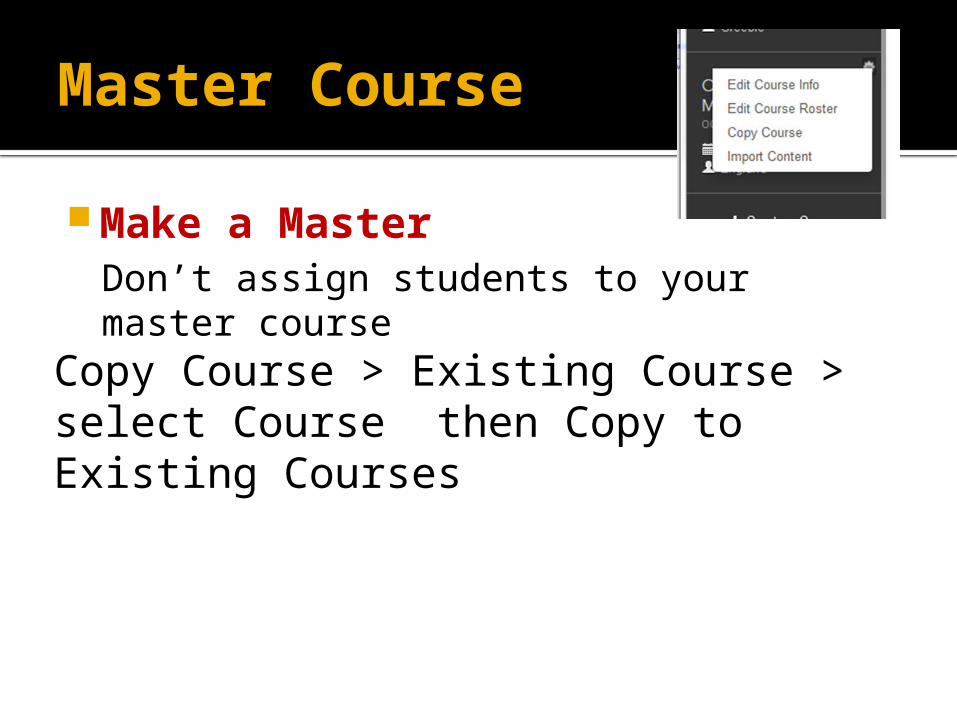
Master Course
Make a Master Don’t assign students to your master course
Copy Course > Existing Course > select Course then Copy to Existing Courses

What’s Next?PPT MENU
How you choose to add Content will depend on your purposes for OpenClass
My directions are for: Viewing the Roster Adding students to Roster FOR PRACTICE CLASS ONLY Modifying the Home Page Organizing Content by Sections Adding Assessments Sharing assignments (documents) by Objectives for students
to open and complete (Upload a File) Assigning Due Dates for assignments Viewing and Grading Assignments on iPad Opening and grading Student Submissions Recording grades in the Gradebook
More Links
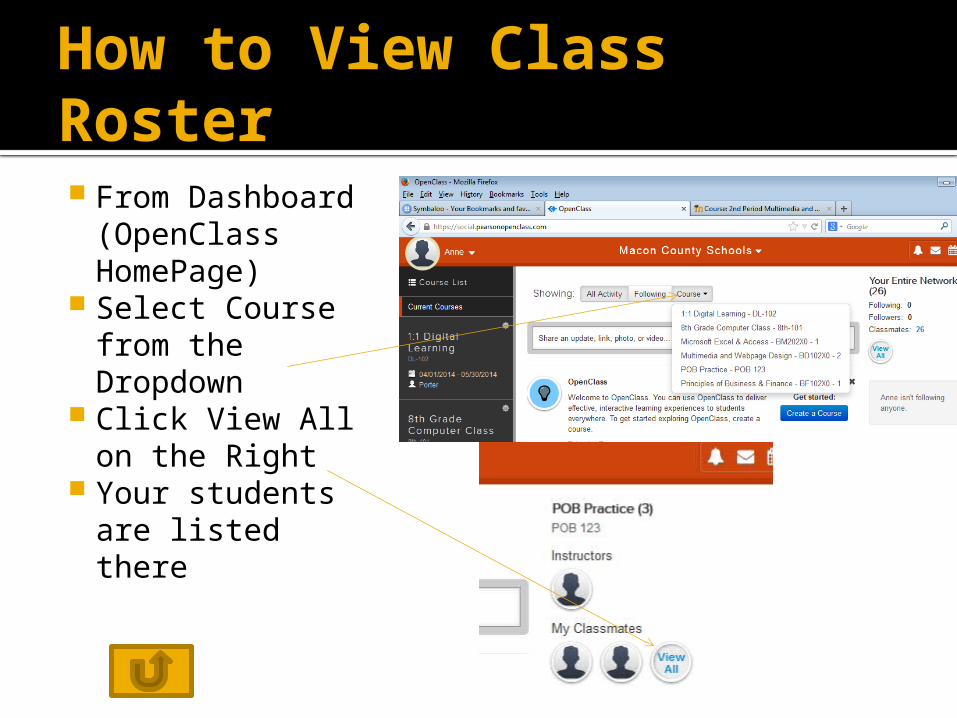
How to View Class Roster From
Dashboard (OpenClass HomePage)
Select Course from the Dropdown
Click View All on the Right
Your students are listed there
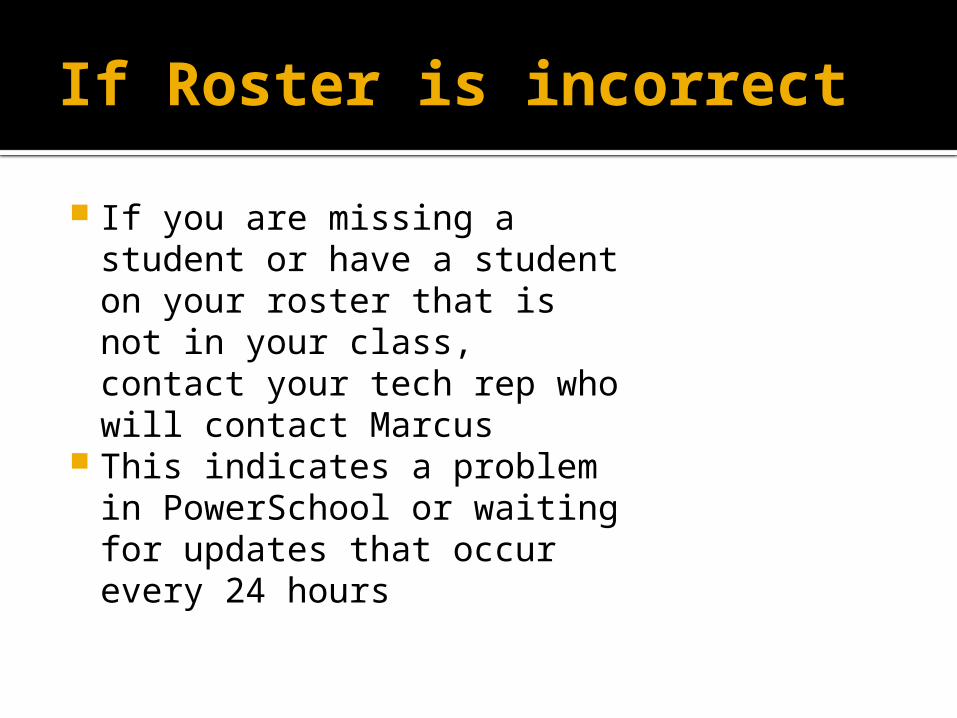
If Roster is incorrect
If you are missing a student or have a student on your roster that is not in your class, contact your tech rep who will contact Marcus
This indicates a problem in PowerSchool or waiting for updates that occur every 24 hours
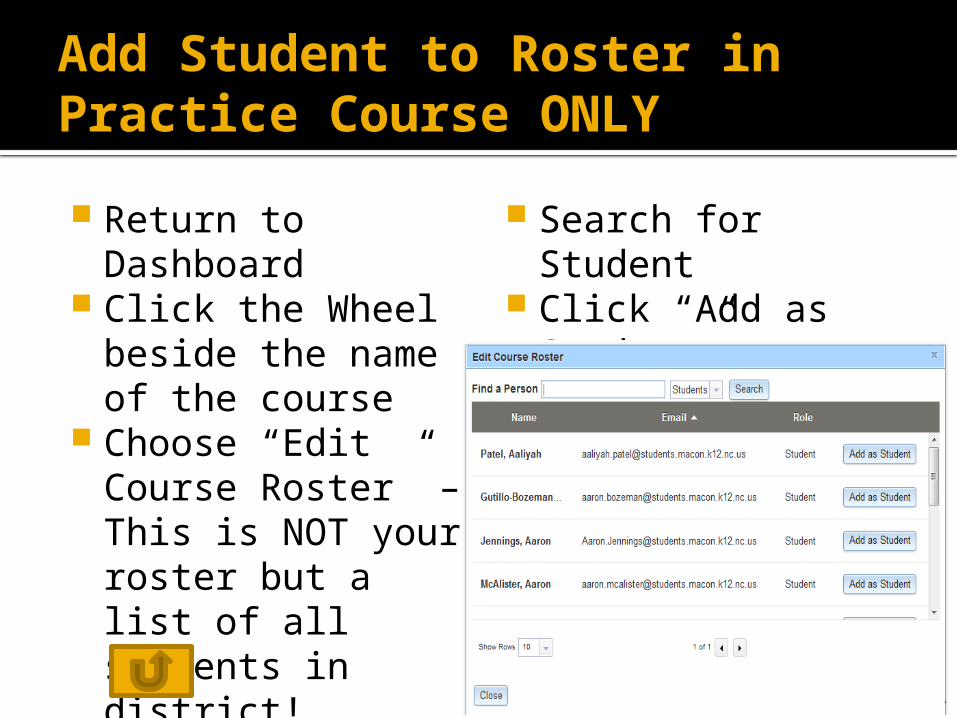
Add Student to Roster in Practice Course ONLY
Return to Dashboard
Click the Wheel beside the name of the course
Choose “Edit Course Roster” – This is NOT your roster but a list of all students in district!
Search for Student Click “Add as
Student” Click “Close”
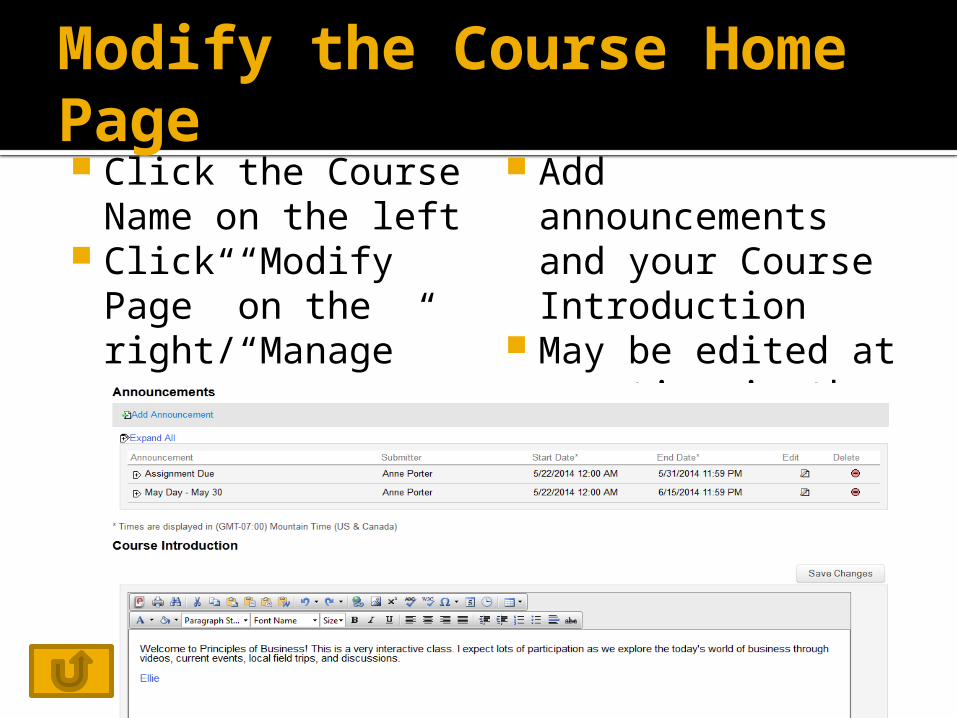
Modify the Course Home Page Click the Course
Name on the left Click “Modify
Page” on the right/“Manage”
Add announcements and your Course Introduction
May be edited at any time in the same way
Create a “Section” in a Course Open the Course by clicking on the
Course name on the left Click “Modify Menu” on the left Click the “Add and Arrange” tab To start a new “Section” for a particular
unit or objective, click “Add new item to main level” at the bottom of the list
Choose “Content Page” for Type (see next slide for explanation of types)
Type in a name (Ex: Obj 2.05)
Types of Pages
Description of Page Types NOTES:
I use “Content Page” so I can type in directions for the assignment
“Uploaded Content” will allow you to upload a file and display it as part of the OpenClass webpage
You cannot “attach” or upload a file here that students can download

Add Sub-Items to a “Section” in a Course Click on the
Arrow beside the Section name
Click “Add new item to…”
Make these selections to add content to the page:
Click Save Close the
Settings window
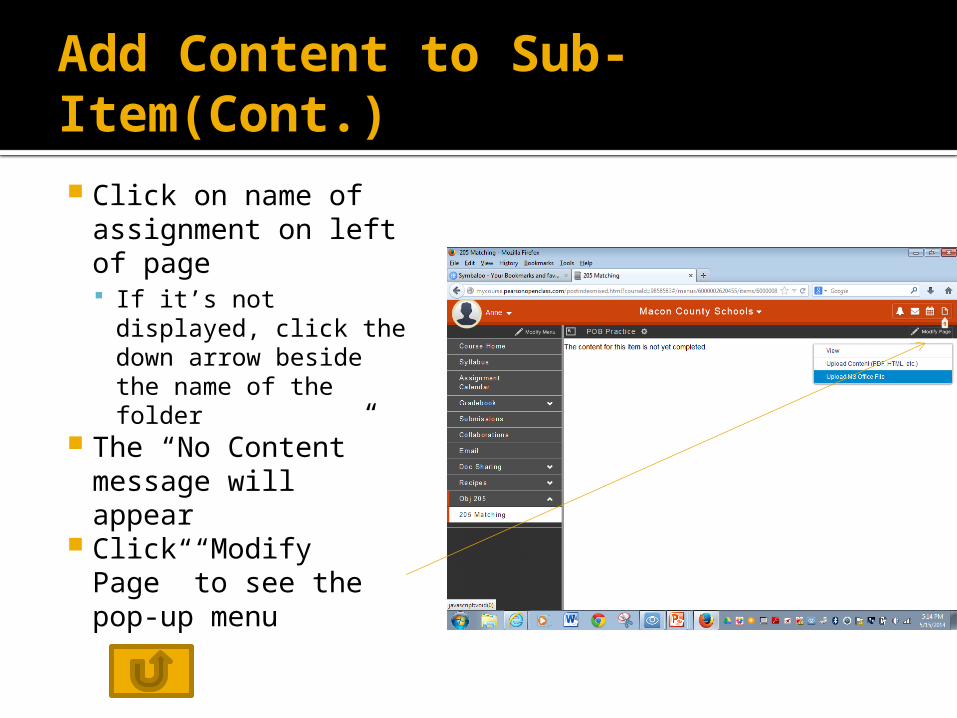
Add Content to Sub-Item(Cont.) Click on name of
assignment on left of page If it’s not displayed,
click the down arrow beside the name of the folder
The “No Content” message will appear
Click “Modify Page” to see the pop-up menu

Add Content to Pagewith Uploaded Content
If you choose the “Upload Content” item type:
Click the appropriate “Upload” depending on the type file you plan to upload (Microsoft File OR other)
Browse & Select the file Click Upload & Convert
File Wait for file to upload Click OK when it loads
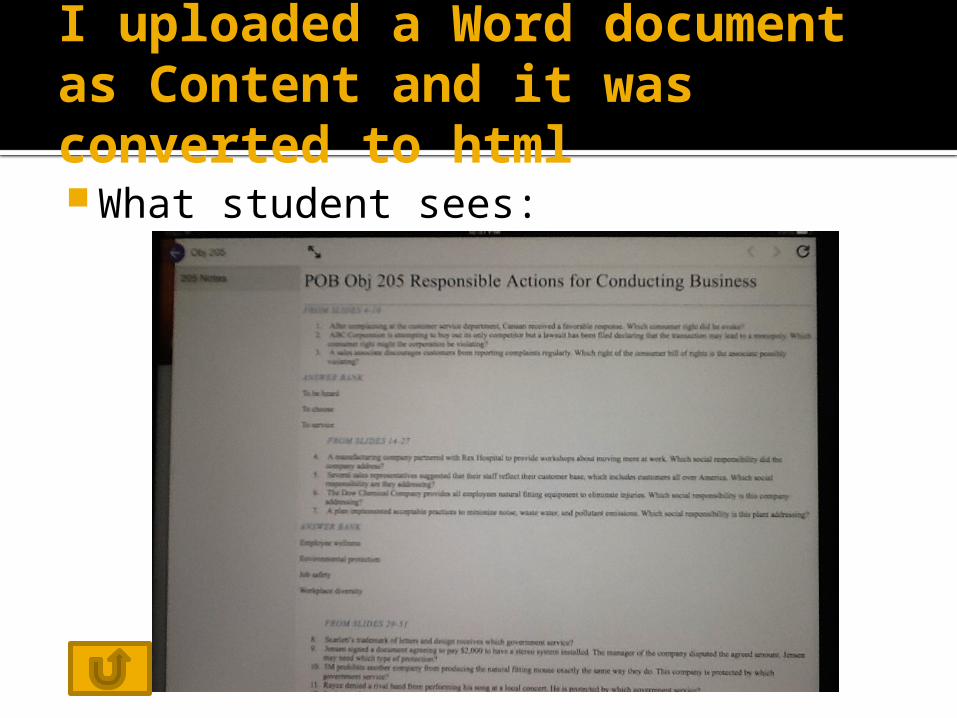
I uploaded a Word document as Content and it was converted to html What student sees:
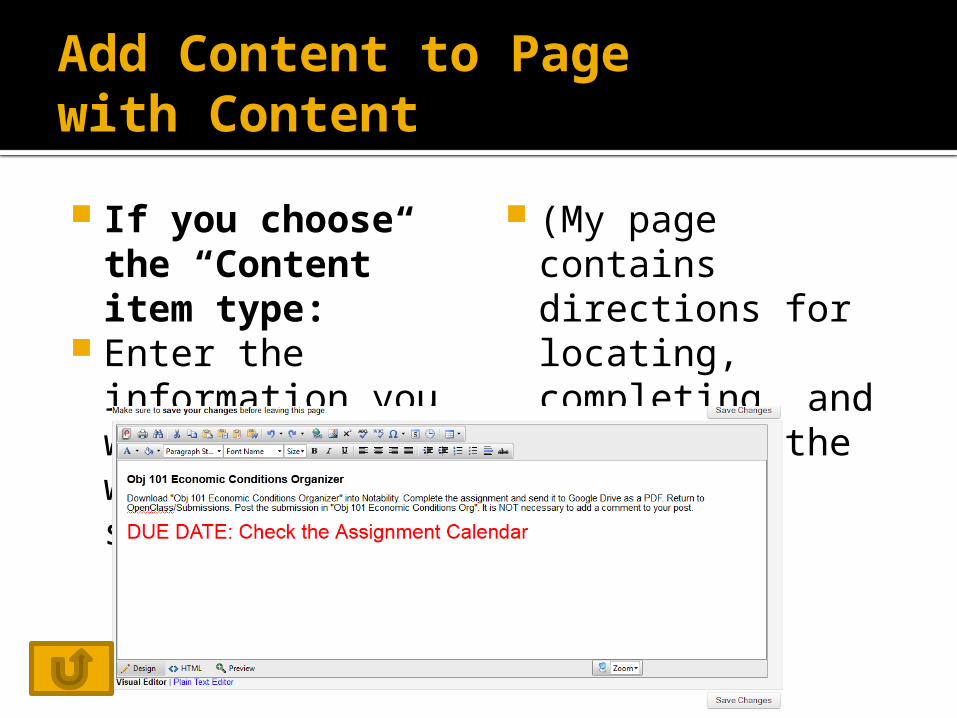
Add Content to Page with Content
If you choose the “Content” item type:
Enter the information you want to share with your students
(My page contains directions for locating, completing, and submitting the assignment)
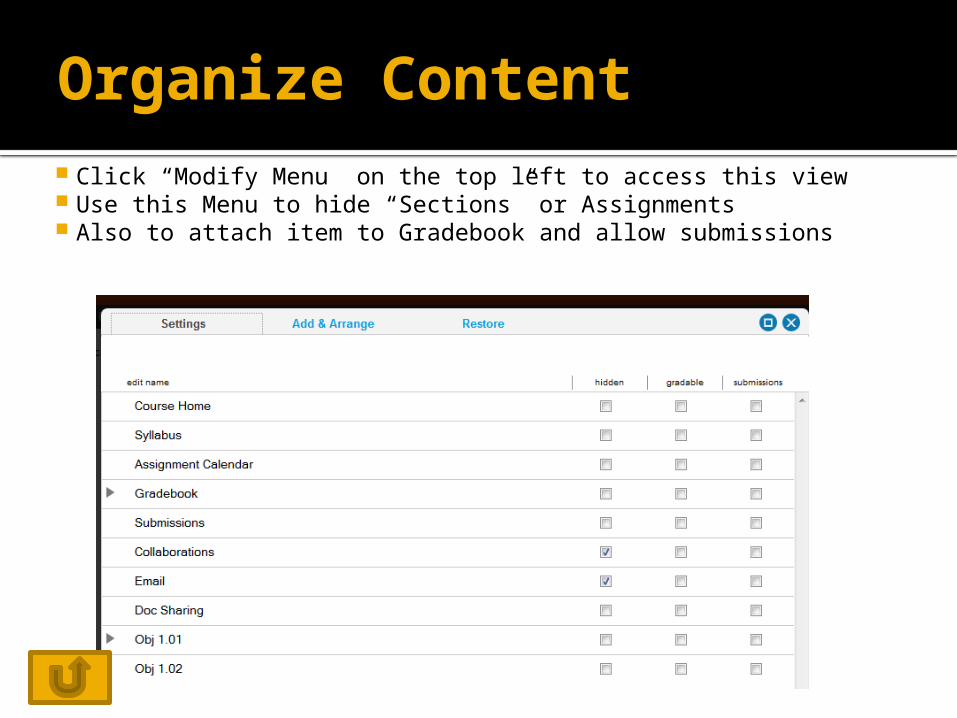
Organize Content Click “Modify Menu” on the top left to access this view Use this Menu to hide “Sections” or Assignments Also to attach item to Gradebook and allow submissions
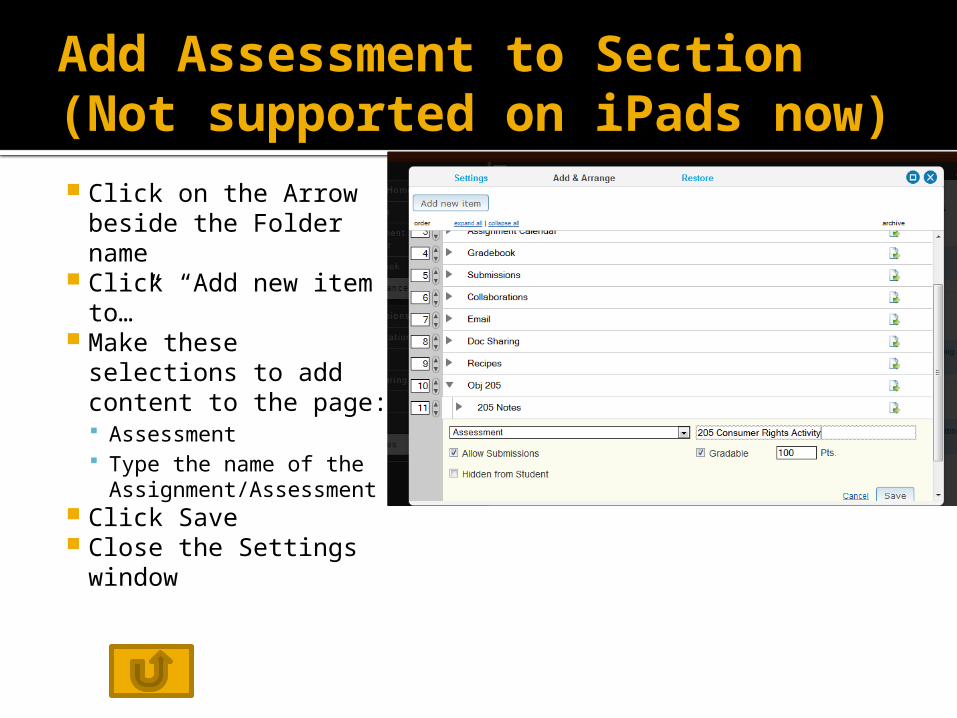
Add Assessment to Section(Not supported on iPads now) Click on the Arrow
beside the Folder name
Click “Add new item to…”
Make these selections to add content to the page: Assessment Type the name of the
Assignment/Assessment
Click Save Close the Settings
window
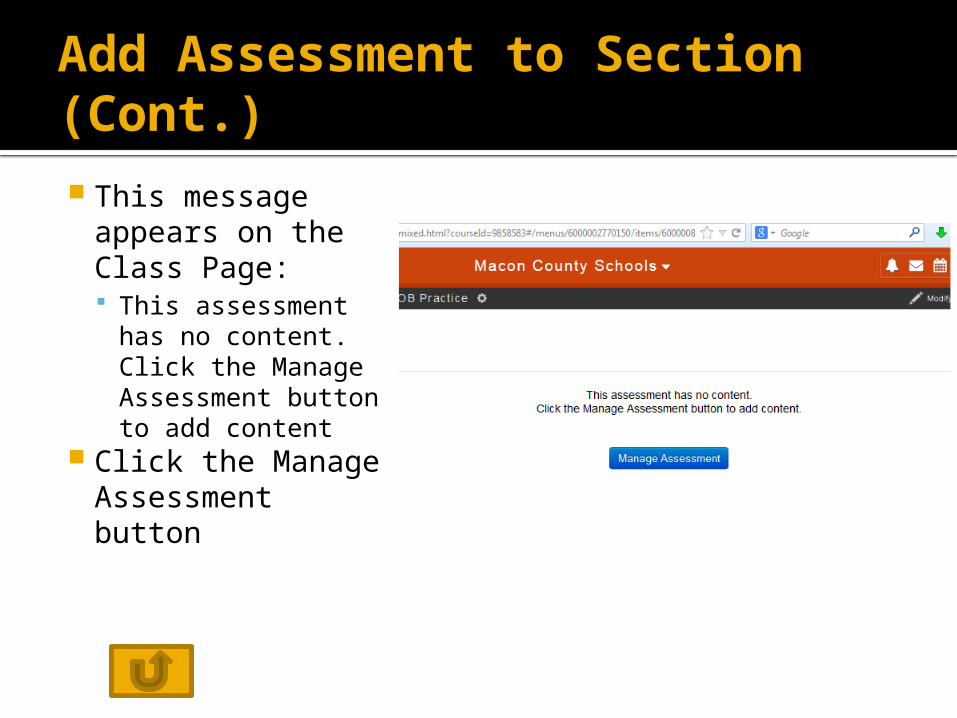
Add Assessment to Section(Cont.) This message
appears on the Class Page: This assessment
has no content. Click the Manage Assessment button to add content
Click the Manage Assessment button
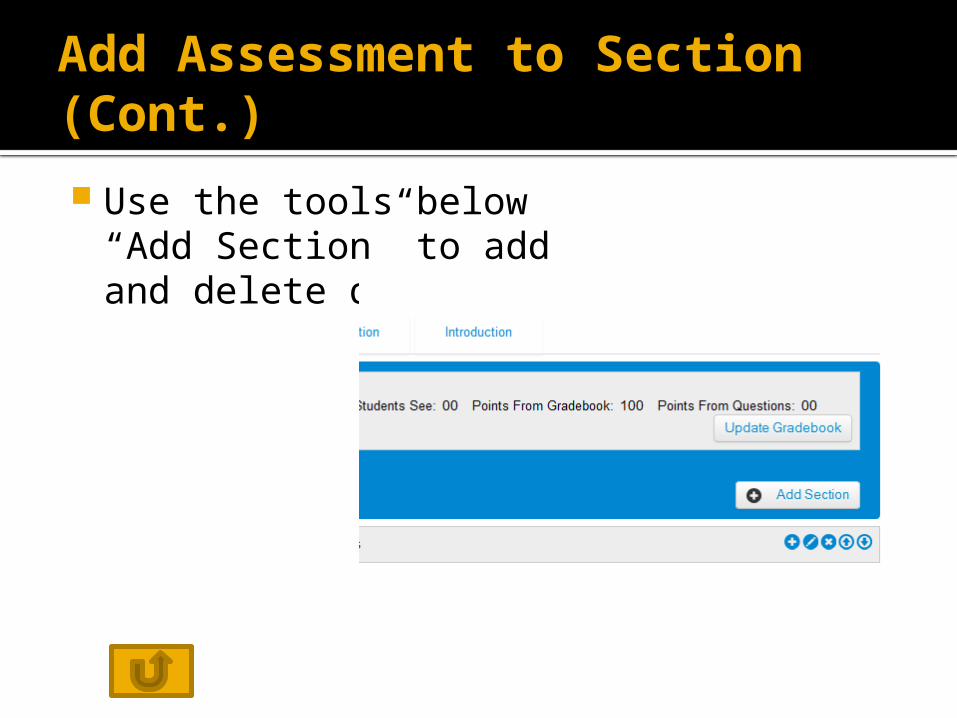
Add Assessment to Section(Cont.)
Use the tools below “Add Section” to add and delete questions.
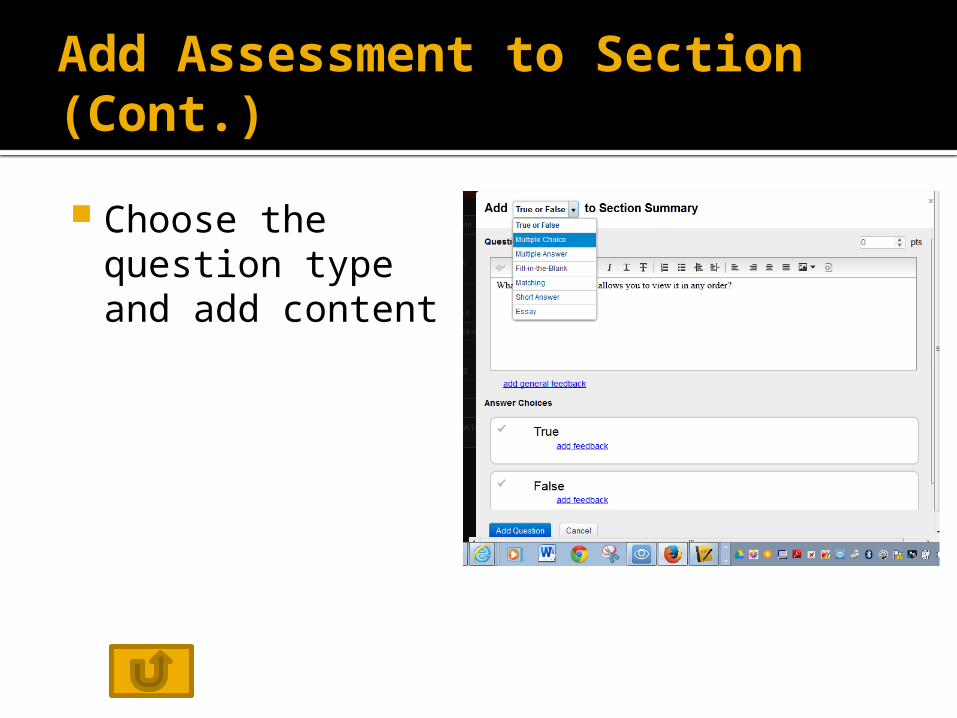
Add Assessment to Section(Cont.)
Choose the question type and add content
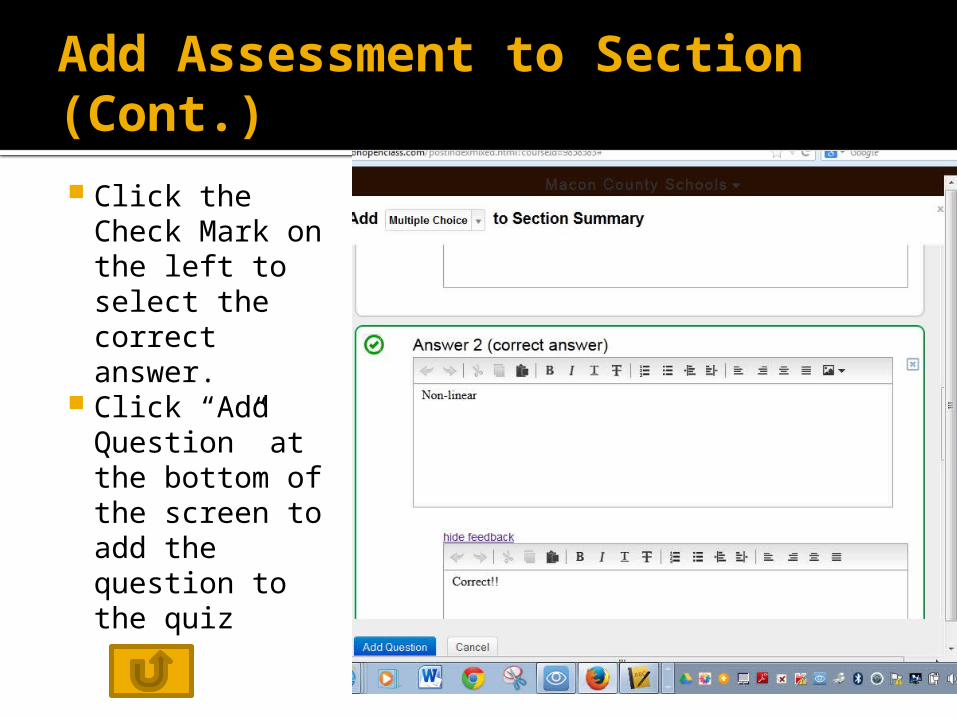
Add Assessment to Section(Cont.) Click the
Check Mark on the left to select the correct answer.
Click “Add Question” at the bottom of the screen to add the question to the quiz
Different Types of Assessment Questions More instructions – Scroll
down the page to see instructions for adding various types of questions to assessments in OpenClass
How to Schedule Items with Assignment Calendar
Simple Directions: https://
www.youtube.com/watch?v=HxyuT8Eb2dw
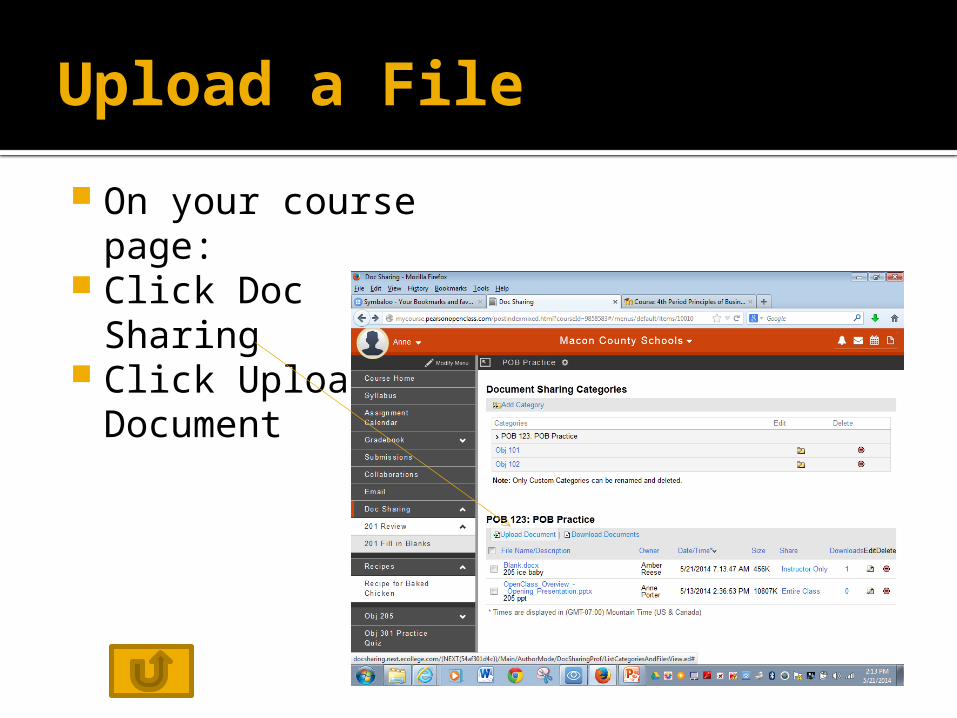
Upload a File
On your course page:
Click Doc Sharing Click Upload
Document
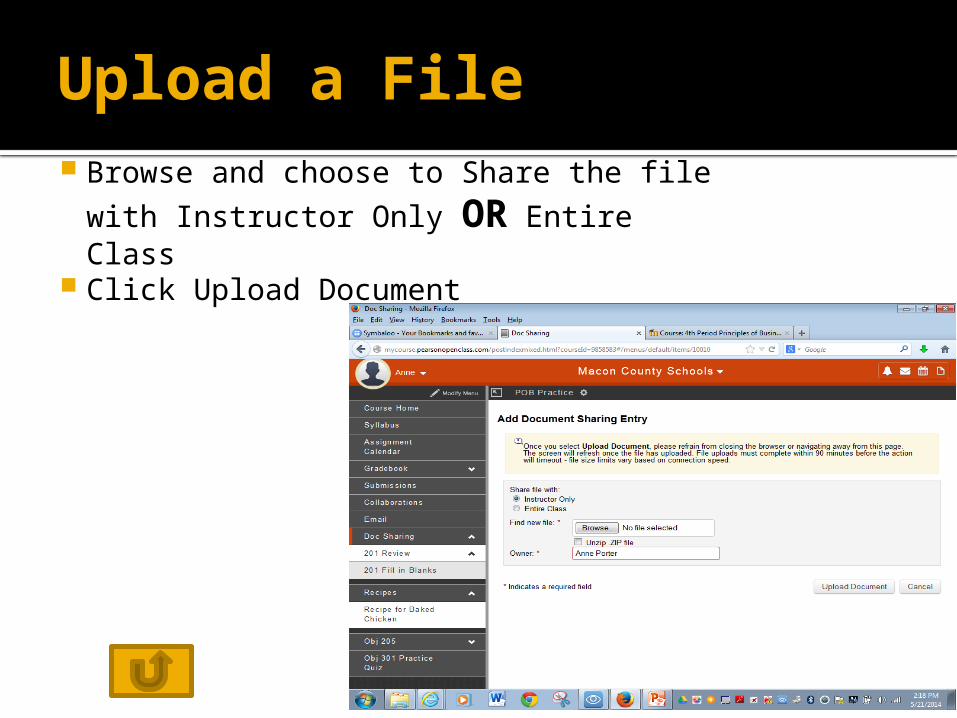
Upload a File Browse and choose to Share the file
with Instructor Only OR Entire Class Click Upload Document
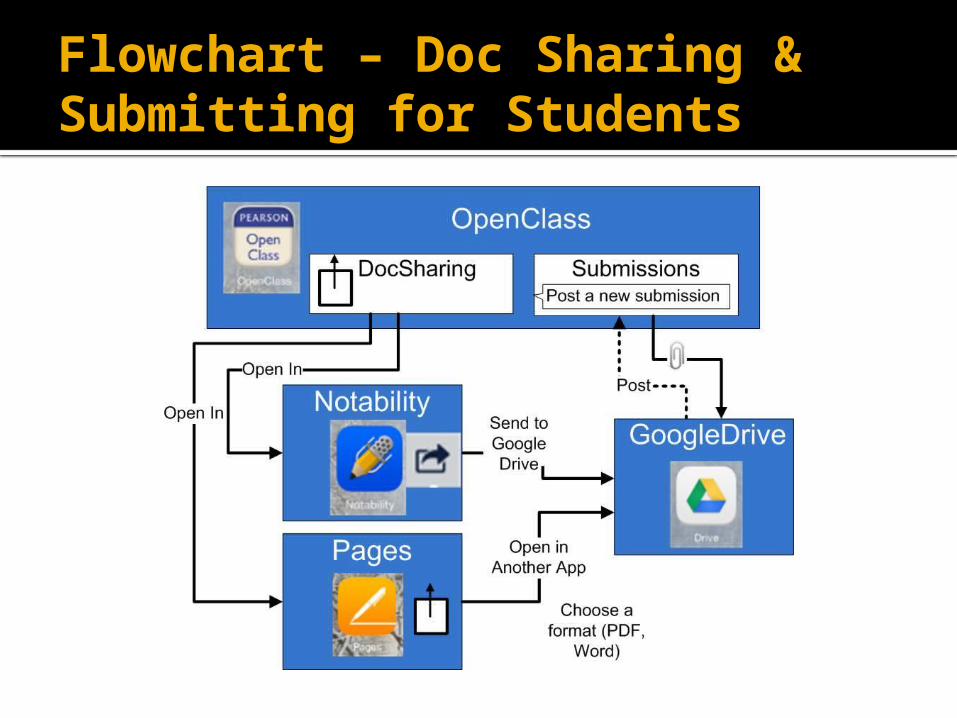
Flowchart – Doc Sharing & Submitting for Students
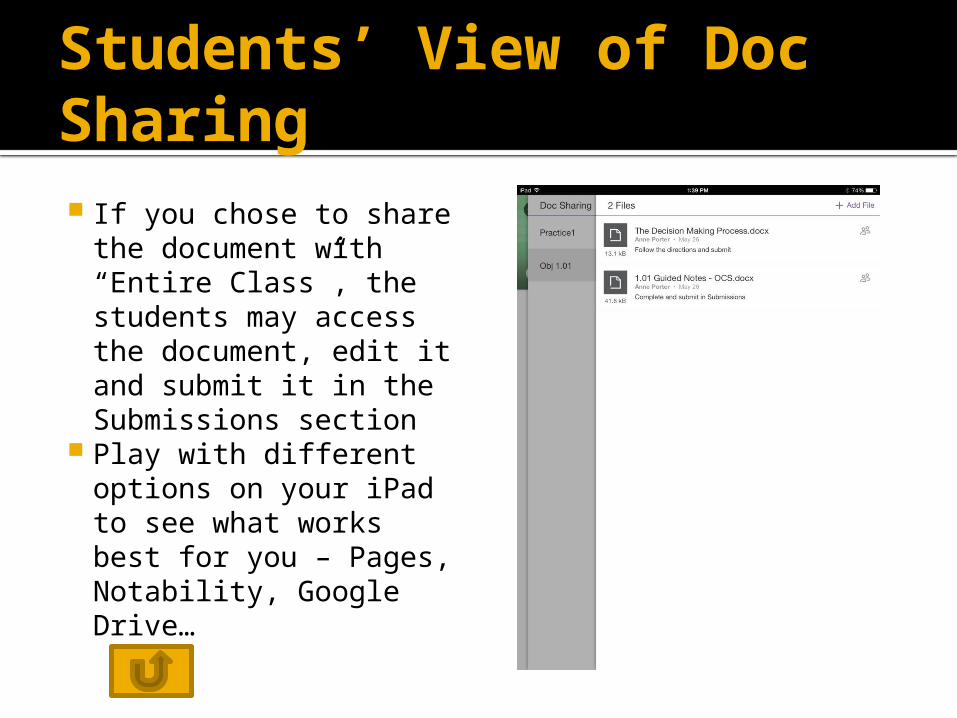
Students’ View of Doc Sharing If you chose to share
the document with “Entire Class”, the students may access the document, edit it and submit it in the Submissions section
Play with different options on your iPad to see what works best for you – Pages, Notability, Google Drive…
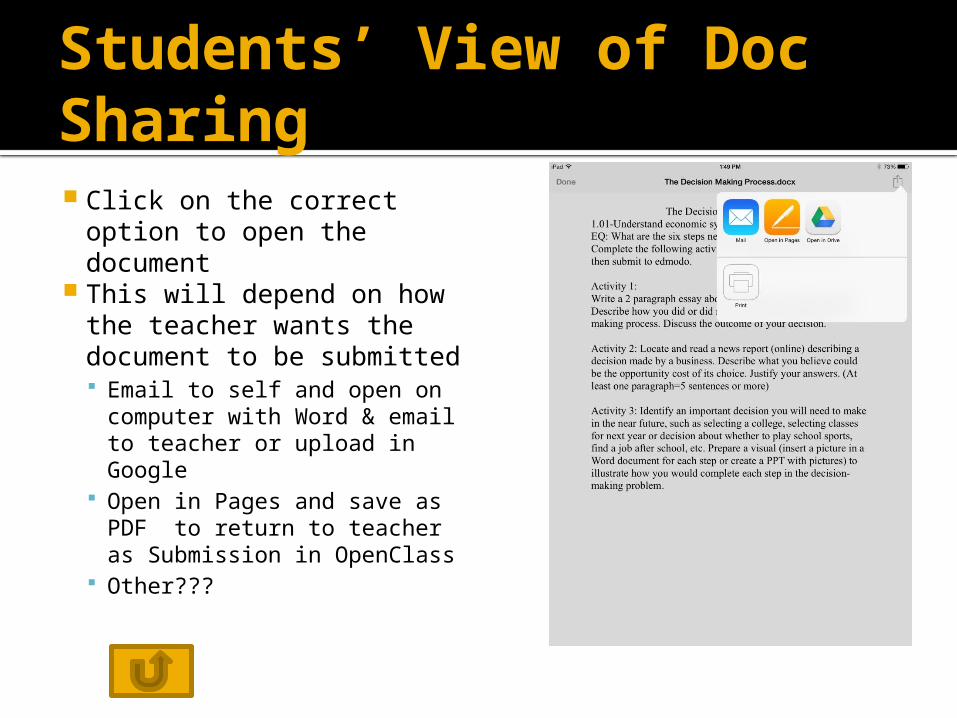
Students’ View of Doc Sharing Click on the correct option
to open the document This will depend on how
the teacher wants the document to be submitted Email to self and open on
computer with Word & email to teacher or upload in Google
Open in Pages and save as PDF to return to teacher as Submission in OpenClass
Other???

Viewing and Grading on iPad Click Submissions Click the Assignment Click Submitted beside
the Student’s Name Click on the
Submission you want to check
Use the Comment and/or Record buttons on top right to add comments
Click Return when finished
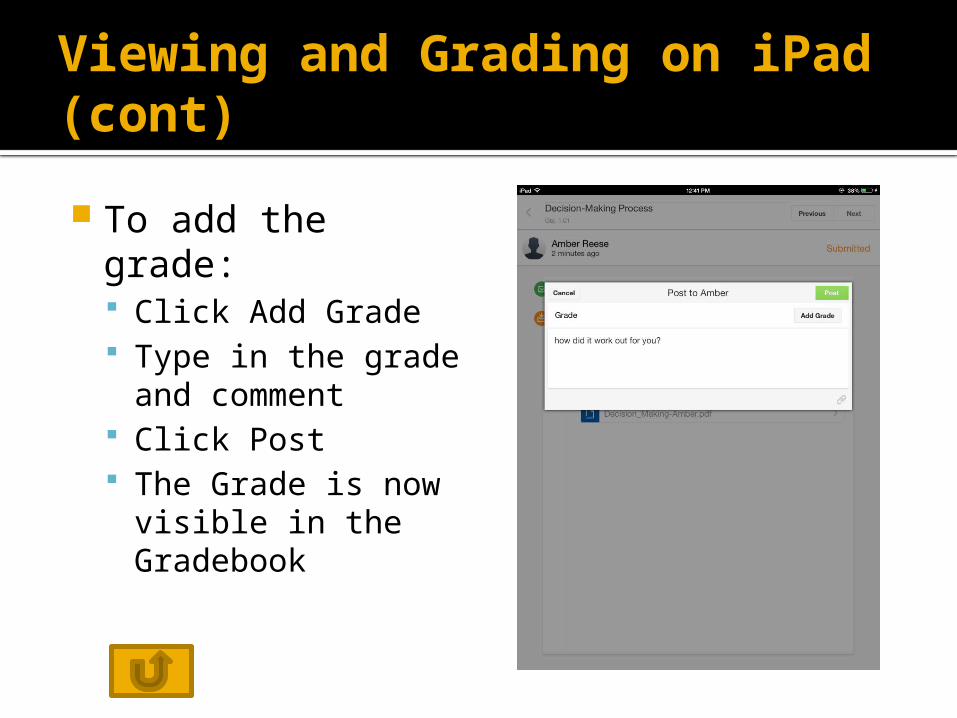
Viewing and Grading on iPad (cont)
To add the grade: Click Add Grade Type in the grade
and comment Click Post The Grade is now
visible in the Gradebook
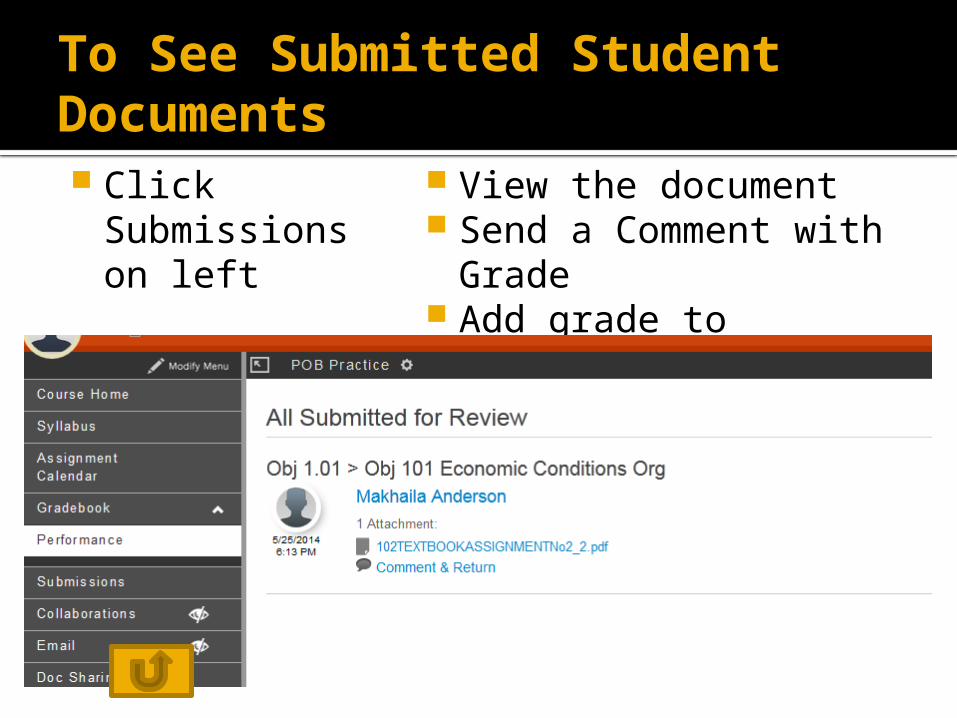
To See Submitted Student Documents Click
Submissions on left
View the document Send a Comment with
Grade Add grade to
Gradebook
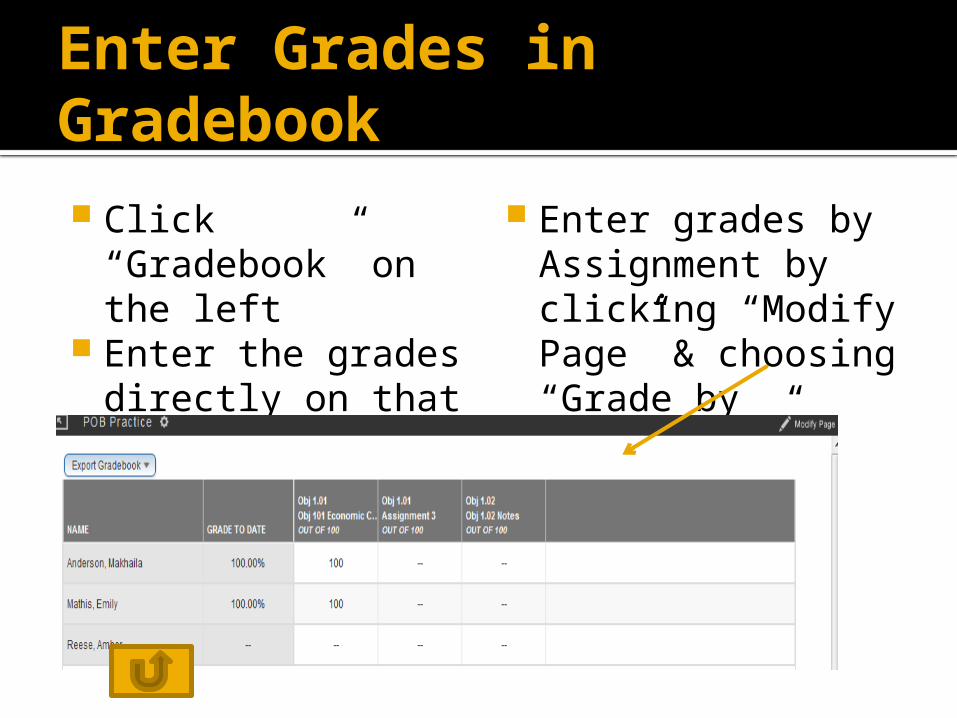
Enter Grades in Gradebook Click “Gradebook”
on the left Enter the grades
directly on that screenOR
Enter grades by Assignment by clicking “Modify Page” & choosing “Grade by Assignment”
No Internet
Students working at home need to open their document in Pages, Keynote, Numbers, etc. before going off the internet so they can work on it offline.
Also, there is an option to keep a file on the device in the Google drive
There are additional instructions for signing out of apps when an iPad is shared, checked out from cart, etc.
More Links to OpenClass Help OpenClass
Knowledge Base Explanations and videos
OpenClass Knowledge Base How-To in 2 Videos
OpenClass How-To's