Embed Size (px)
DESCRIPTION
CCSF Jerry Lum Spring 2015 ARCH 20 class.
Citation preview
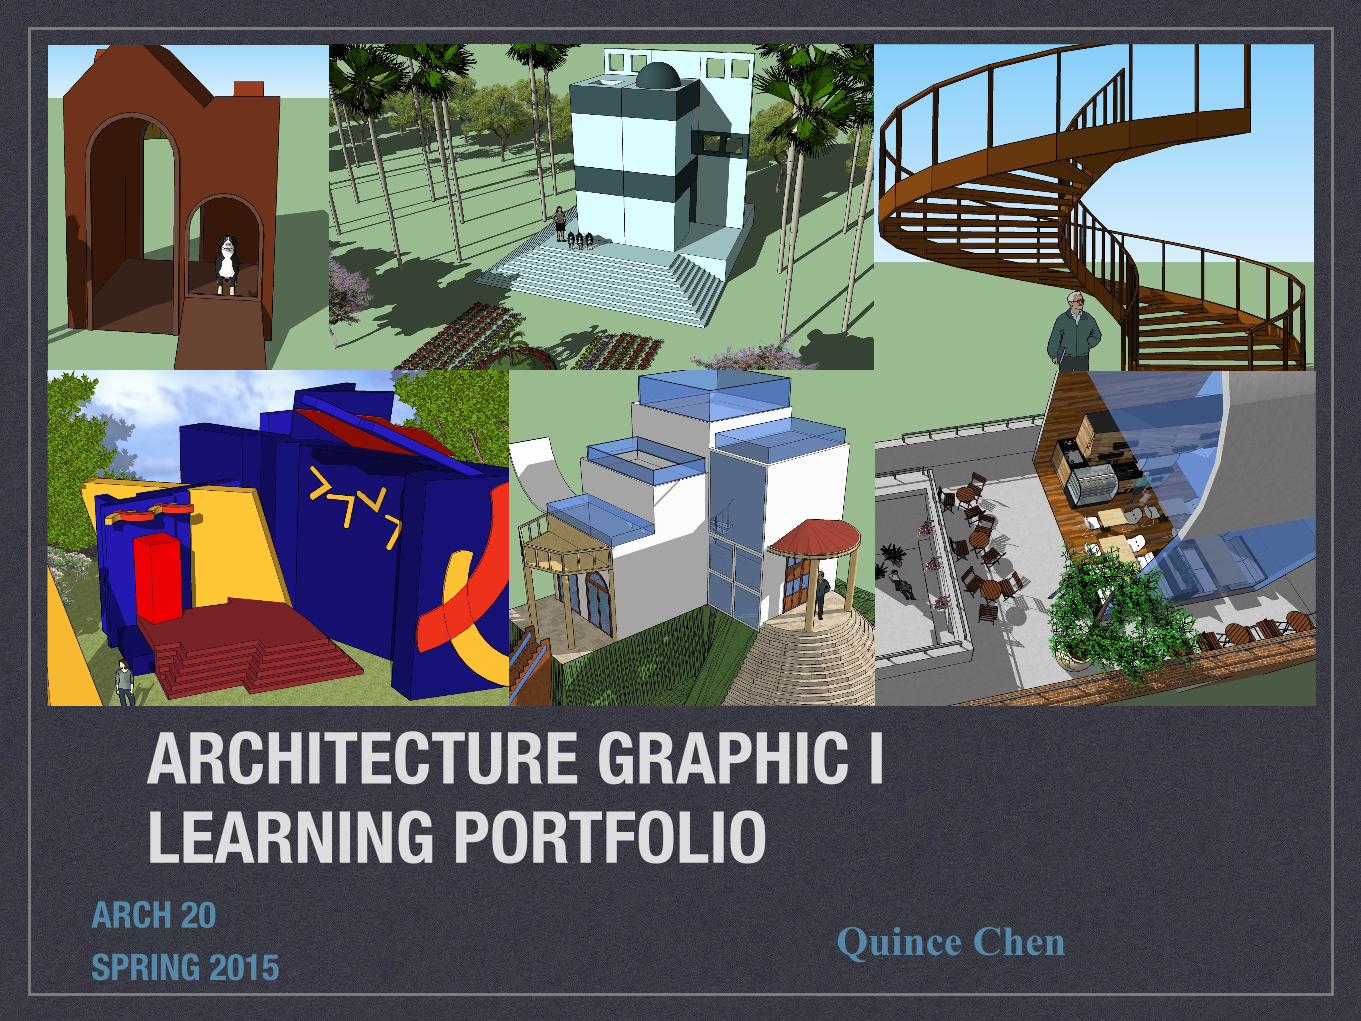
ARCHITECTURE GRAPHIC I LEARNING PORTFOLIO
ARCH 20 SPRING 2015 Quince Chen
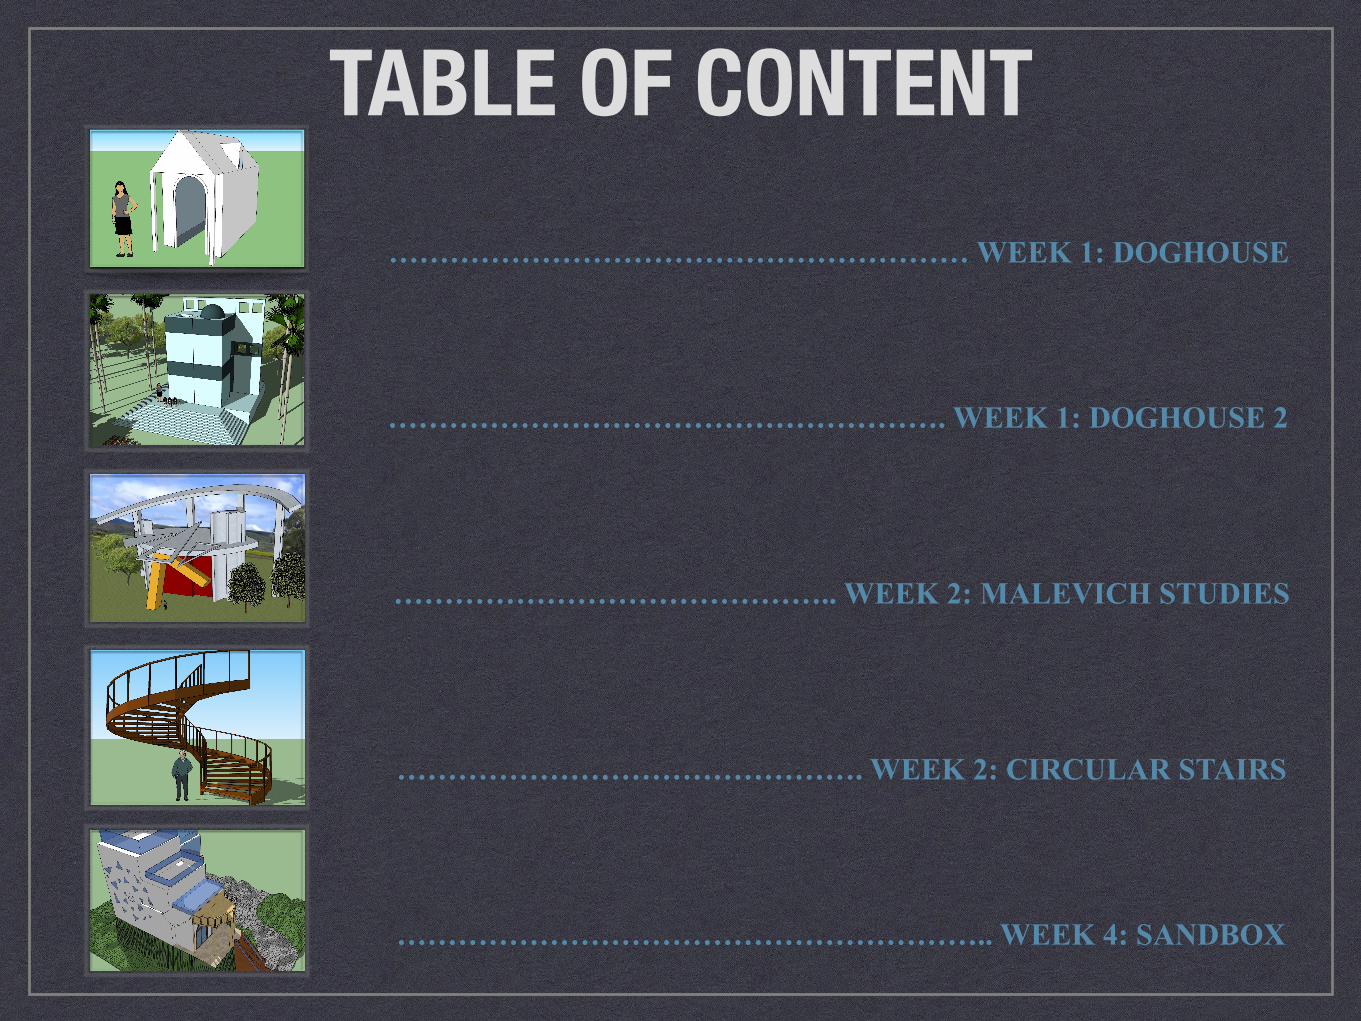
TABLE OF CONTENT………………………………………………… WEEK 1: DOGHOUSE
………………………………………………. WEEK 1: DOGHOUSE 2
…………………………………….. WEEK 2: MALEVICH STUDIES
………………………………………. WEEK 2: CIRCULAR STAIRS
………………………………………………….. WEEK 4: SANDBOX
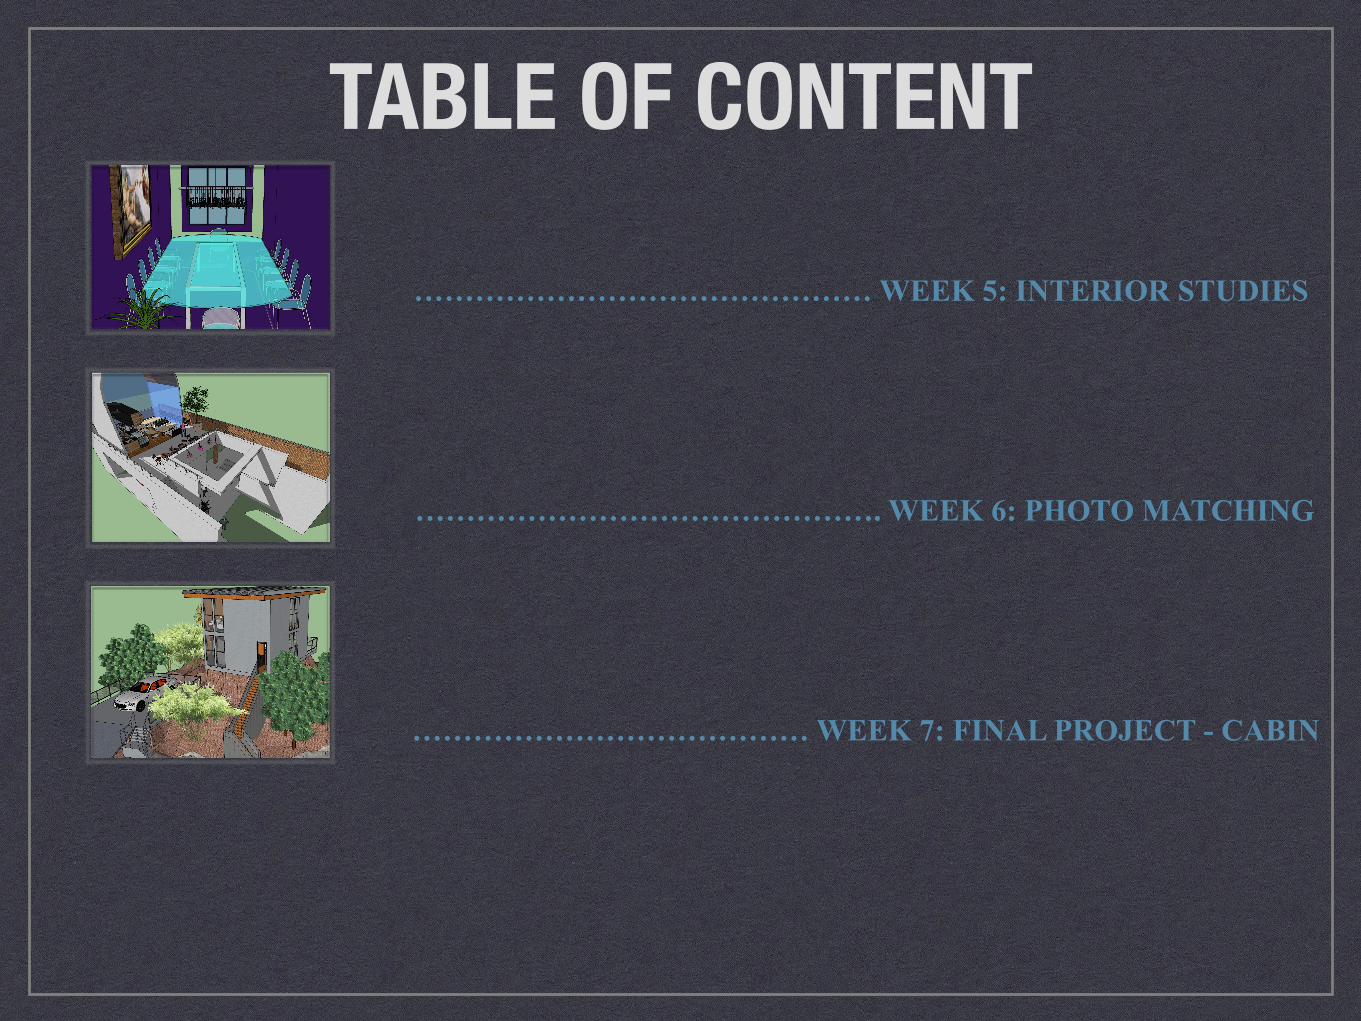
TABLE OF CONTENT
……………………………………… WEEK 5: INTERIOR STUDIES
………………………………………. WEEK 6: PHOTO MATCHING
………………………………… WEEK 7: FINAL PROJECT - CABIN
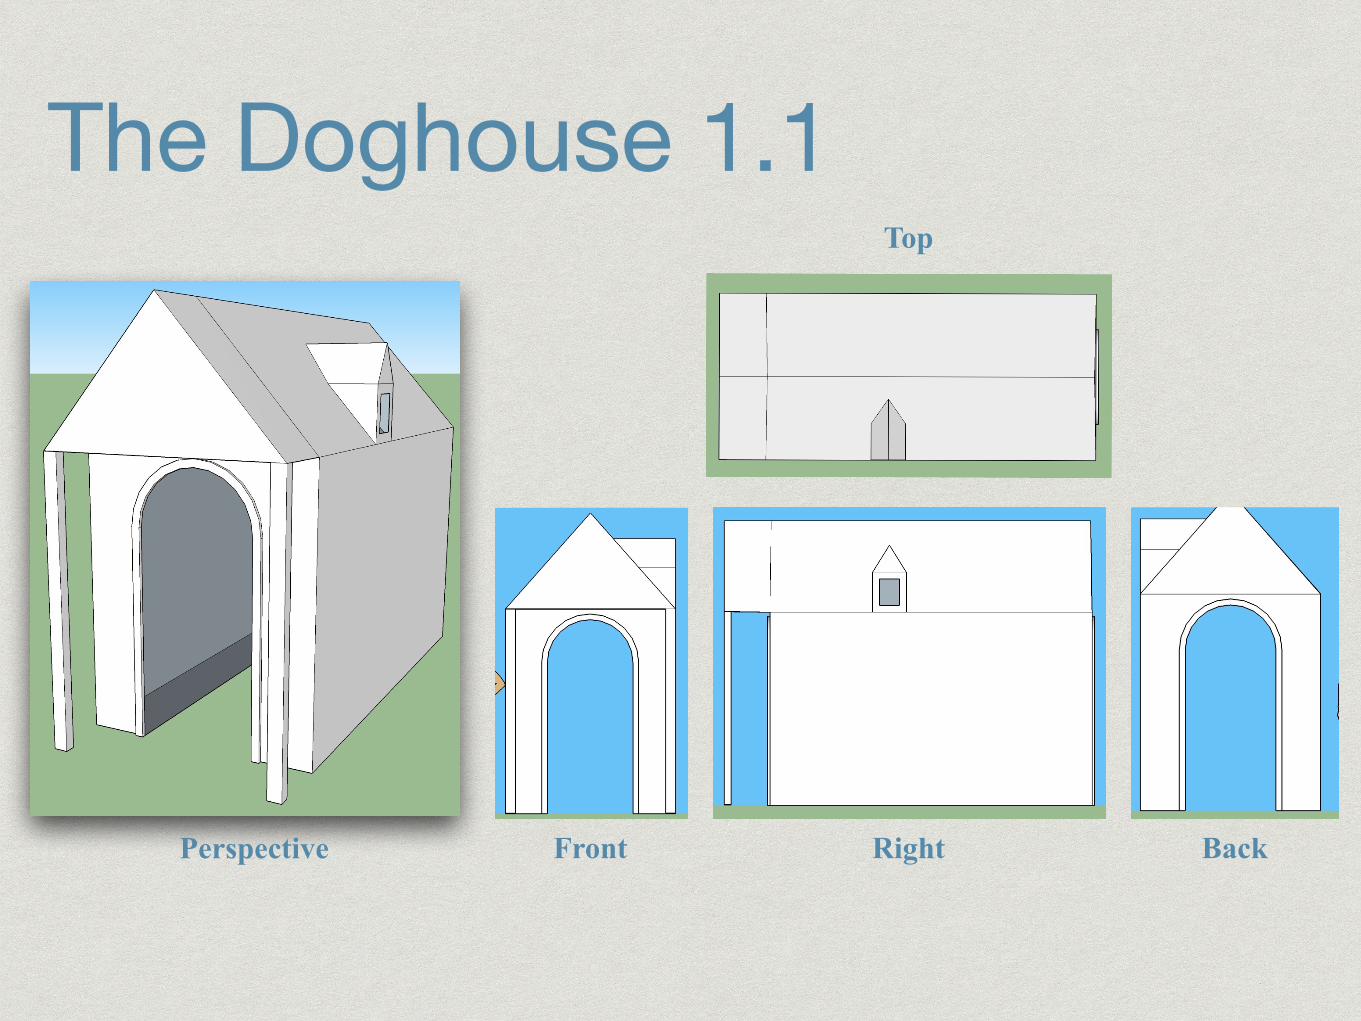
The Doghouse 1.1
Perspective Front Right Back
Top
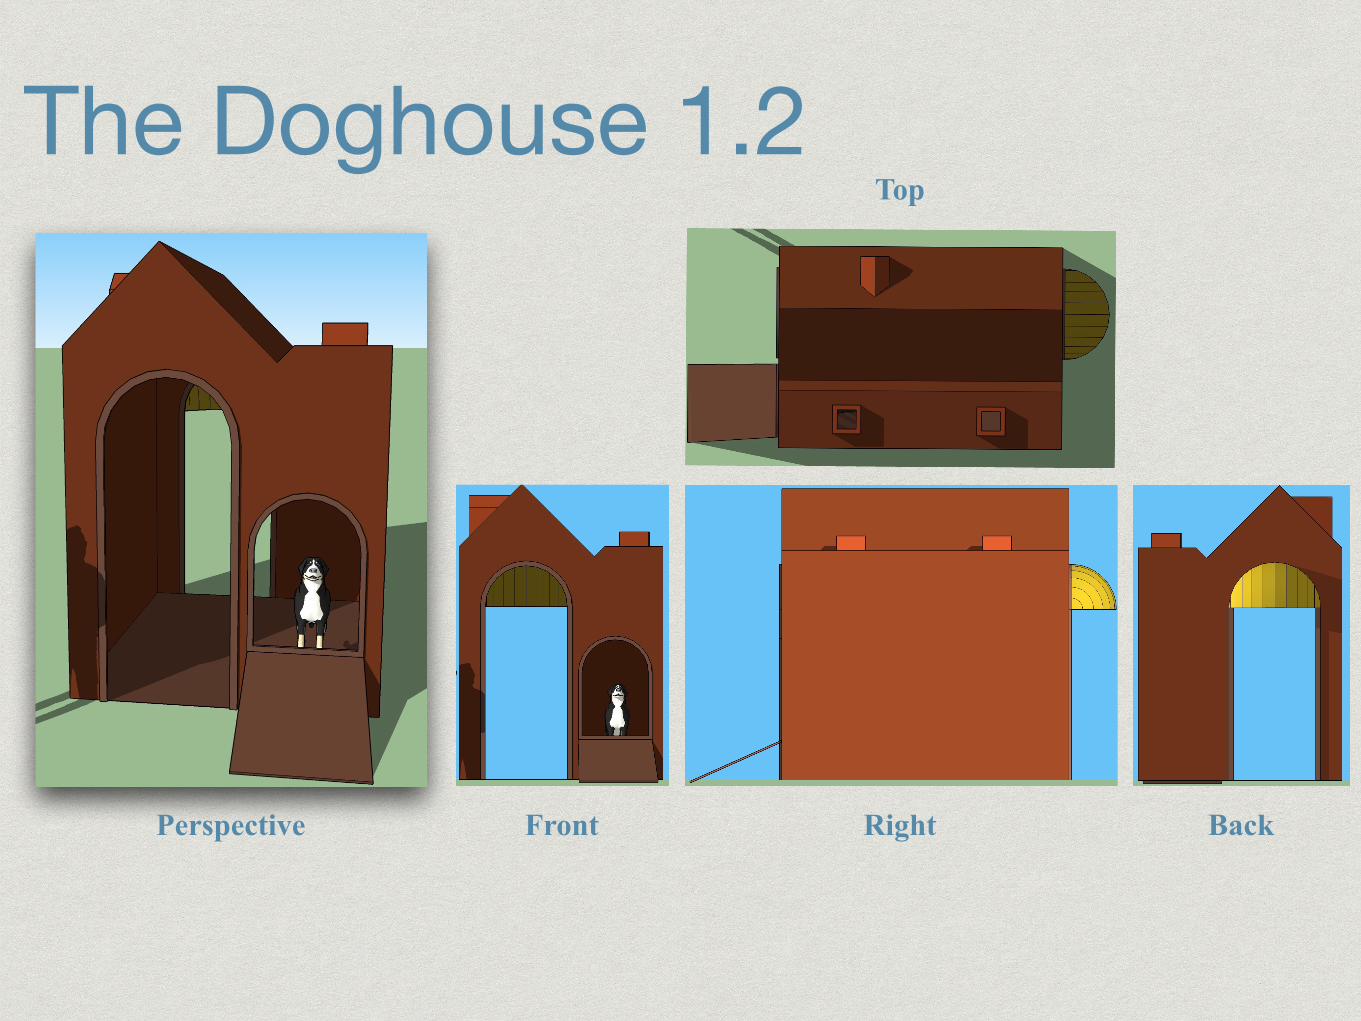
The Doghouse 1.2
Perspective
Top
Right BackFront
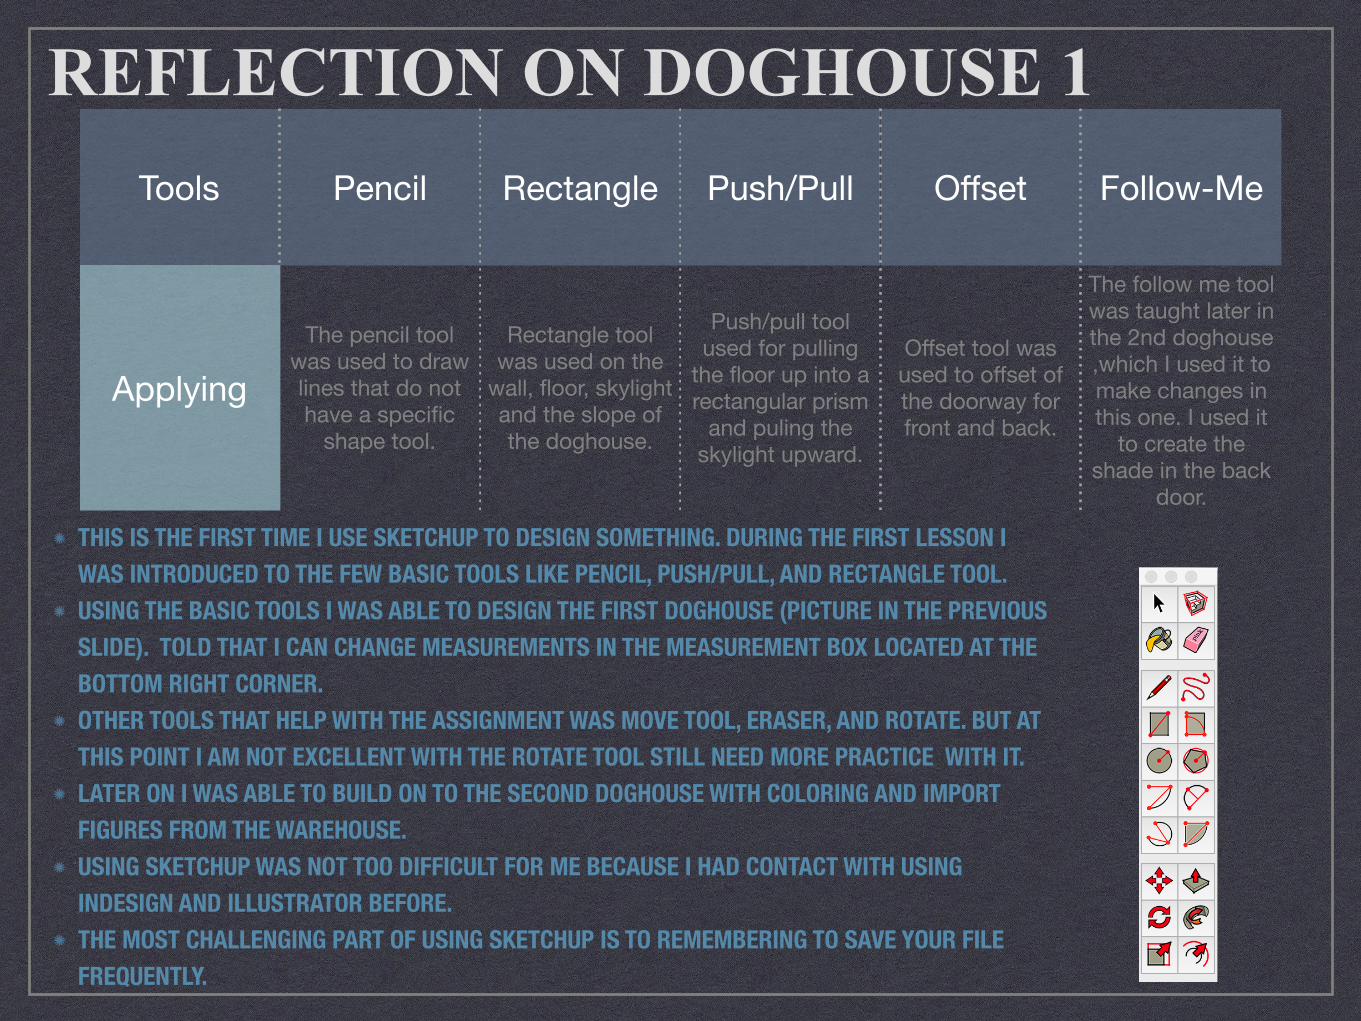
REFLECTION ON DOGHOUSE 1
THIS IS THE FIRST TIME I USE SKETCHUP TO DESIGN SOMETHING. DURING THE FIRST LESSON I WAS INTRODUCED TO THE FEW BASIC TOOLS LIKE PENCIL, PUSH/PULL, AND RECTANGLE TOOL. USING THE BASIC TOOLS I WAS ABLE TO DESIGN THE FIRST DOGHOUSE (PICTURE IN THE PREVIOUS SLIDE). TOLD THAT I CAN CHANGE MEASUREMENTS IN THE MEASUREMENT BOX LOCATED AT THE BOTTOM RIGHT CORNER. OTHER TOOLS THAT HELP WITH THE ASSIGNMENT WAS MOVE TOOL, ERASER, AND ROTATE. BUT AT THIS POINT I AM NOT EXCELLENT WITH THE ROTATE TOOL STILL NEED MORE PRACTICE WITH IT. LATER ON I WAS ABLE TO BUILD ON TO THE SECOND DOGHOUSE WITH COLORING AND IMPORT FIGURES FROM THE WAREHOUSE. USING SKETCHUP WAS NOT TOO DIFFICULT FOR ME BECAUSE I HAD CONTACT WITH USING INDESIGN AND ILLUSTRATOR BEFORE. THE MOST CHALLENGING PART OF USING SKETCHUP IS TO REMEMBERING TO SAVE YOUR FILE FREQUENTLY.
Tools Pencil Rectangle Push/Pull Offset Follow-Me
ApplyingThe pencil tool
was used to draw lines that do not have a specific
shape tool.
Rectangle tool was used on the
wall, floor, skylight and the slope of the doghouse.
Push/pull tool used for pulling
the floor up into a rectangular prism
and puling the skylight upward.
Offset tool was used to offset of the doorway for front and back.
The follow me tool was taught later in the 2nd doghouse ,which I used it to make changes in this one. I used it
to create the shade in the back
door.
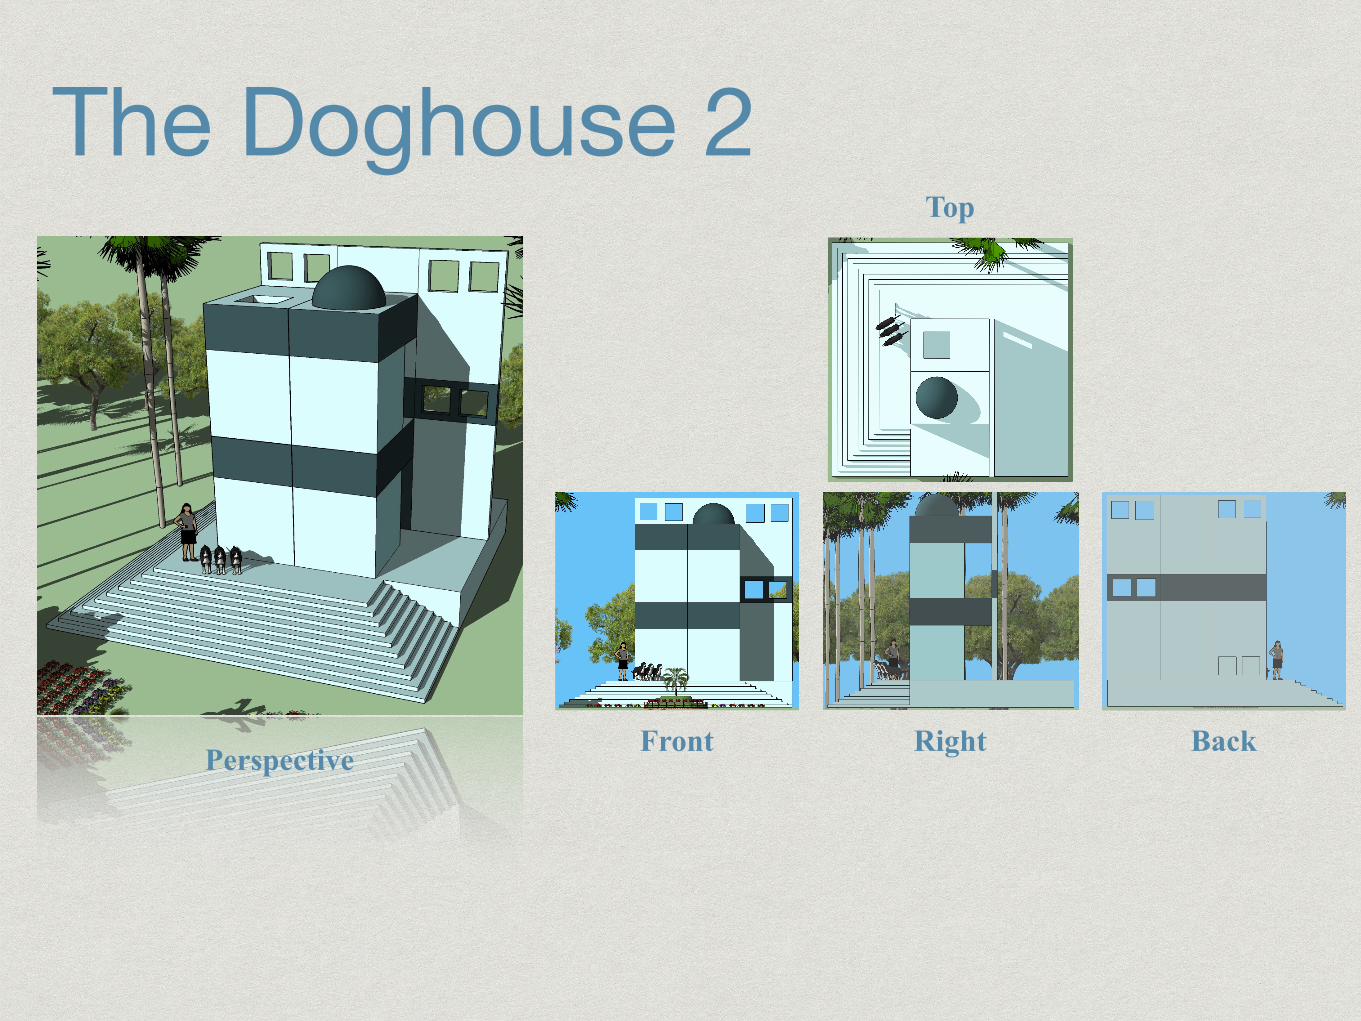
The Doghouse 2
Perspective Back
Top
Front Right
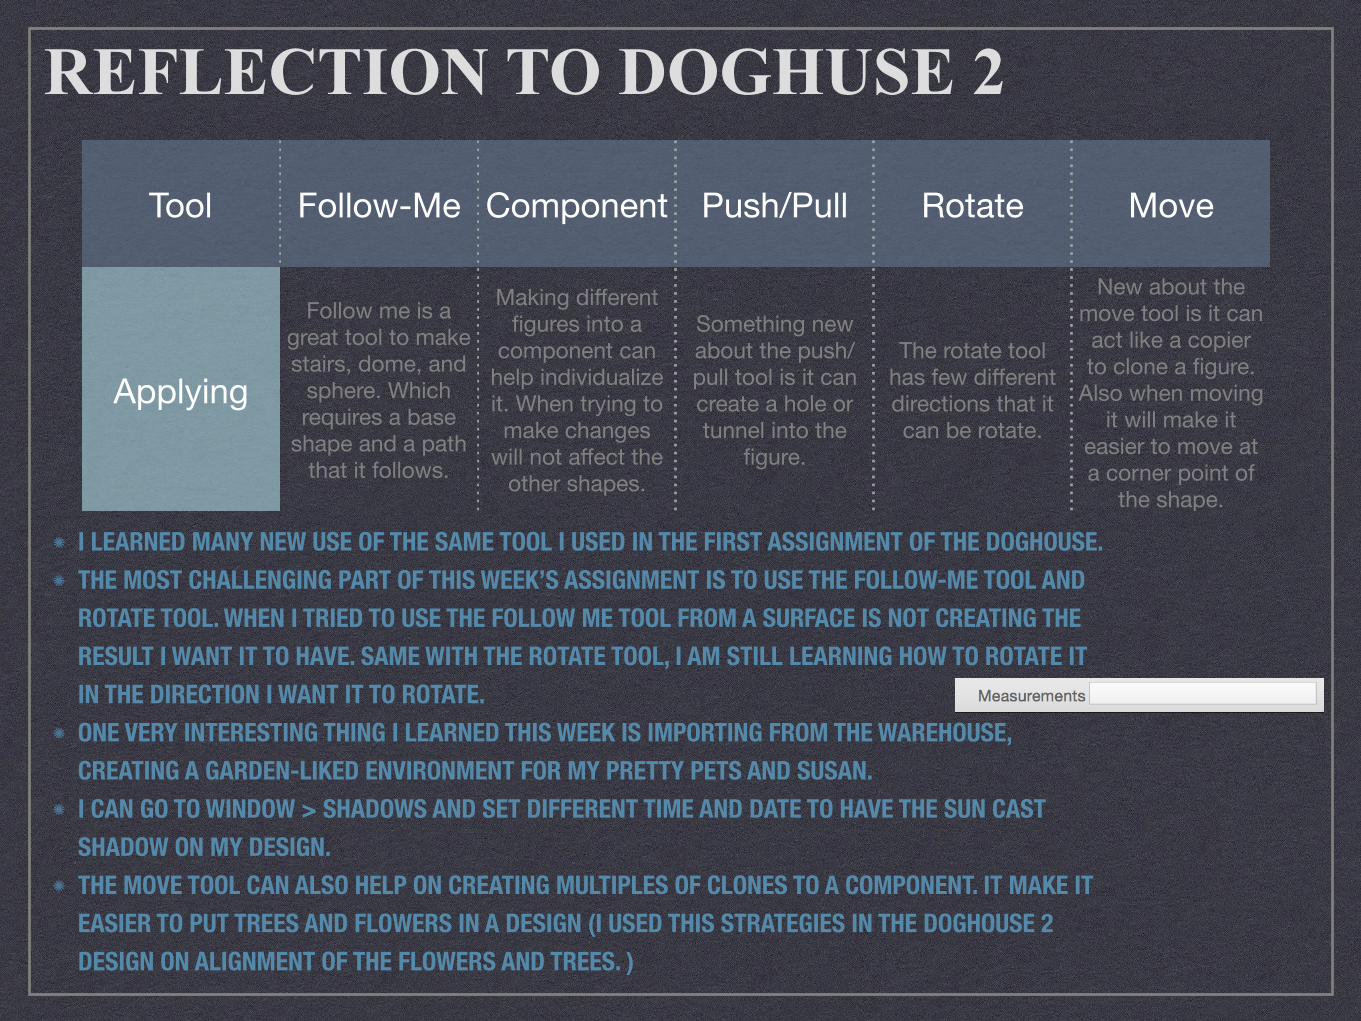
REFLECTION TO DOGHUSE 2
I LEARNED MANY NEW USE OF THE SAME TOOL I USED IN THE FIRST ASSIGNMENT OF THE DOGHOUSE. THE MOST CHALLENGING PART OF THIS WEEK’S ASSIGNMENT IS TO USE THE FOLLOW-ME TOOL AND ROTATE TOOL. WHEN I TRIED TO USE THE FOLLOW ME TOOL FROM A SURFACE IS NOT CREATING THE RESULT I WANT IT TO HAVE. SAME WITH THE ROTATE TOOL, I AM STILL LEARNING HOW TO ROTATE IT IN THE DIRECTION I WANT IT TO ROTATE. ONE VERY INTERESTING THING I LEARNED THIS WEEK IS IMPORTING FROM THE WAREHOUSE, CREATING A GARDEN-LIKED ENVIRONMENT FOR MY PRETTY PETS AND SUSAN. I CAN GO TO WINDOW > SHADOWS AND SET DIFFERENT TIME AND DATE TO HAVE THE SUN CAST SHADOW ON MY DESIGN. THE MOVE TOOL CAN ALSO HELP ON CREATING MULTIPLES OF CLONES TO A COMPONENT. IT MAKE IT EASIER TO PUT TREES AND FLOWERS IN A DESIGN (I USED THIS STRATEGIES IN THE DOGHOUSE 2 DESIGN ON ALIGNMENT OF THE FLOWERS AND TREES. )
Tool Follow-Me Component Push/Pull Rotate Move
Applying
Follow me is a great tool to make stairs, dome, and
sphere. Which requires a base
shape and a path that it follows.
Making different figures into a
component can help individualize it. When trying to make changes
will not affect the other shapes.
Something new about the push/pull tool is it can create a hole or tunnel into the
figure.
The rotate tool has few different directions that it can be rotate.
New about the move tool is it can act like a copier to clone a figure.
Also when moving it will make it
easier to move at a corner point of
the shape.
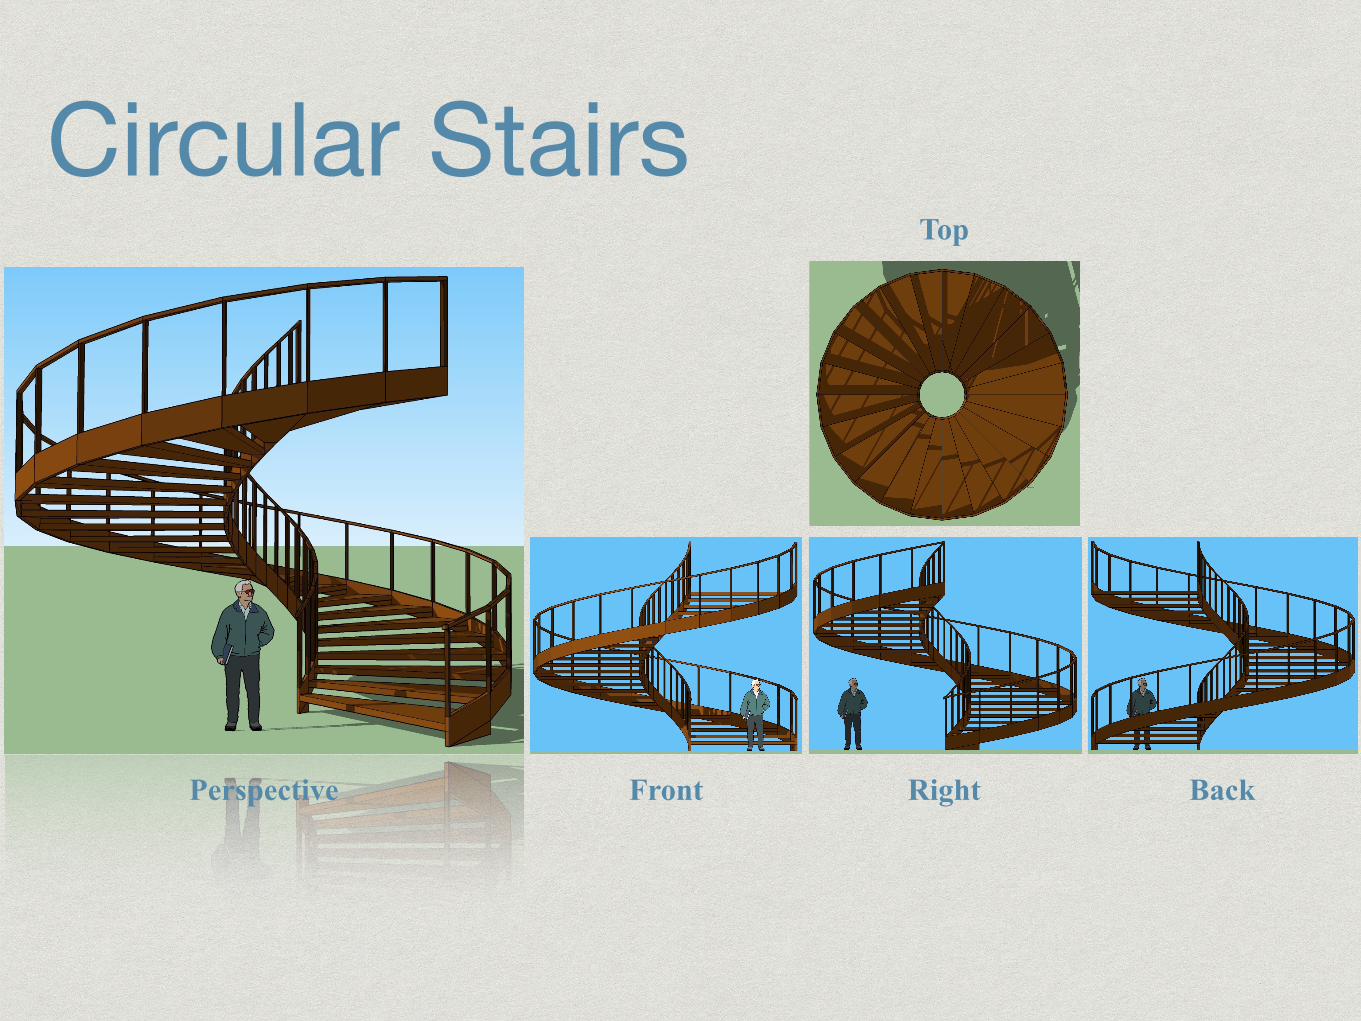
Circular Stairs
Perspective
Top
Front Right Back
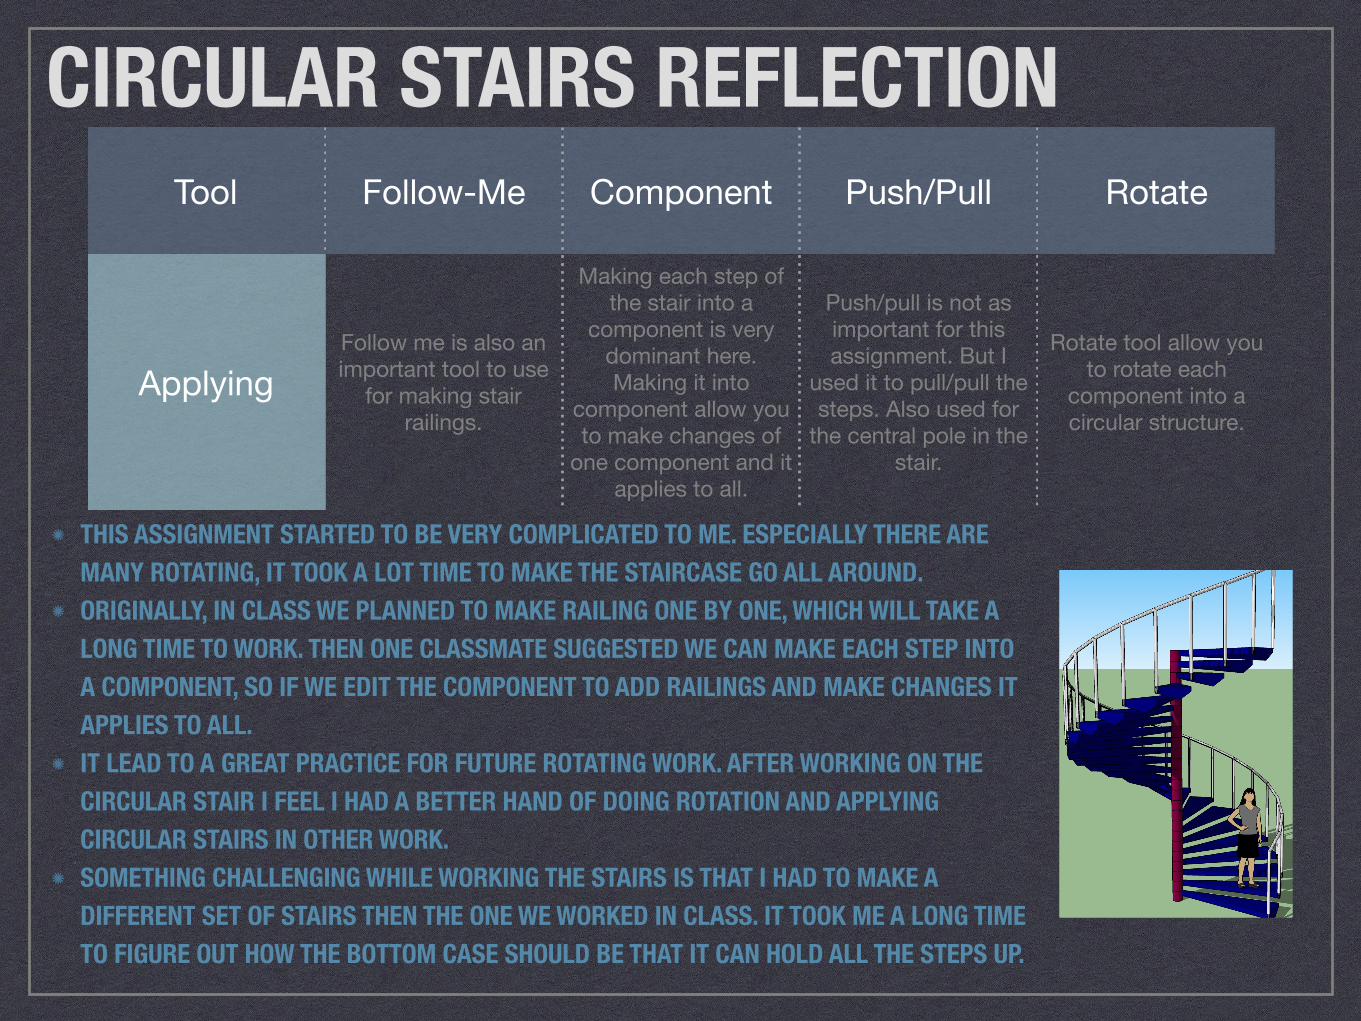
CIRCULAR STAIRS REFLECTIONTool Follow-Me Component Push/Pull Rotate
ApplyingFollow me is also an important tool to use
for making stair railings.
Making each step of the stair into a
component is very dominant here. Making it into
component allow you to make changes of
one component and it applies to all.
Push/pull is not as important for this assignment. But I
used it to pull/pull the steps. Also used for
the central pole in the stair.
Rotate tool allow you to rotate each
component into a circular structure.
THIS ASSIGNMENT STARTED TO BE VERY COMPLICATED TO ME. ESPECIALLY THERE ARE MANY ROTATING, IT TOOK A LOT TIME TO MAKE THE STAIRCASE GO ALL AROUND. ORIGINALLY, IN CLASS WE PLANNED TO MAKE RAILING ONE BY ONE, WHICH WILL TAKE A LONG TIME TO WORK. THEN ONE CLASSMATE SUGGESTED WE CAN MAKE EACH STEP INTO A COMPONENT, SO IF WE EDIT THE COMPONENT TO ADD RAILINGS AND MAKE CHANGES IT APPLIES TO ALL. IT LEAD TO A GREAT PRACTICE FOR FUTURE ROTATING WORK. AFTER WORKING ON THE CIRCULAR STAIR I FEEL I HAD A BETTER HAND OF DOING ROTATION AND APPLYING CIRCULAR STAIRS IN OTHER WORK. SOMETHING CHALLENGING WHILE WORKING THE STAIRS IS THAT I HAD TO MAKE A DIFFERENT SET OF STAIRS THEN THE ONE WE WORKED IN CLASS. IT TOOK ME A LONG TIME TO FIGURE OUT HOW THE BOTTOM CASE SHOULD BE THAT IT CAN HOLD ALL THE STEPS UP.

Malevich Inspired Construction
Perspective
Top
Back Left Front
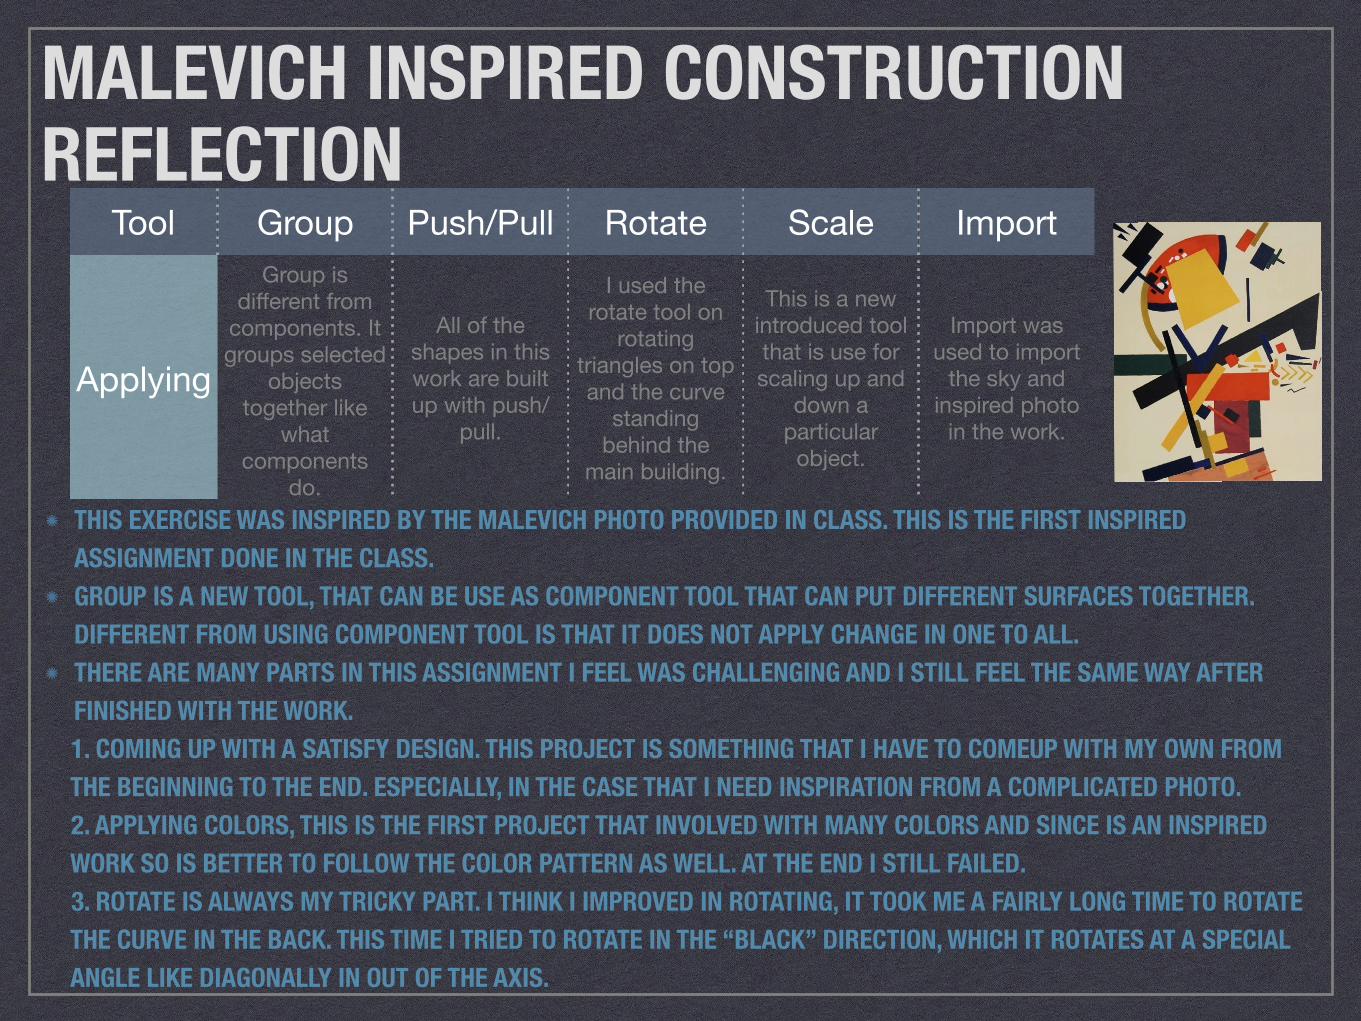
MALEVICH INSPIRED CONSTRUCTION REFLECTION
Tool Group Push/Pull Rotate Scale Import
Applying
Group is different from
components. It groups selected
objects together like
what components
do.
All of the shapes in this work are built up with push/
pull.
I used the rotate tool on
rotating triangles on top and the curve
standing behind the
main building.
This is a new introduced tool that is use for scaling up and
down a particular
object.
Import was used to import
the sky and inspired photo
in the work.
THIS EXERCISE WAS INSPIRED BY THE MALEVICH PHOTO PROVIDED IN CLASS. THIS IS THE FIRST INSPIRED ASSIGNMENT DONE IN THE CLASS. GROUP IS A NEW TOOL, THAT CAN BE USE AS COMPONENT TOOL THAT CAN PUT DIFFERENT SURFACES TOGETHER. DIFFERENT FROM USING COMPONENT TOOL IS THAT IT DOES NOT APPLY CHANGE IN ONE TO ALL. THERE ARE MANY PARTS IN THIS ASSIGNMENT I FEEL WAS CHALLENGING AND I STILL FEEL THE SAME WAY AFTER FINISHED WITH THE WORK.
1. COMING UP WITH A SATISFY DESIGN. THIS PROJECT IS SOMETHING THAT I HAVE TO COMEUP WITH MY OWN FROM THE BEGINNING TO THE END. ESPECIALLY, IN THE CASE THAT I NEED INSPIRATION FROM A COMPLICATED PHOTO. 2. APPLYING COLORS, THIS IS THE FIRST PROJECT THAT INVOLVED WITH MANY COLORS AND SINCE IS AN INSPIRED WORK SO IS BETTER TO FOLLOW THE COLOR PATTERN AS WELL. AT THE END I STILL FAILED. 3. ROTATE IS ALWAYS MY TRICKY PART. I THINK I IMPROVED IN ROTATING, IT TOOK ME A FAIRLY LONG TIME TO ROTATE THE CURVE IN THE BACK. THIS TIME I TRIED TO ROTATE IN THE “BLACK” DIRECTION, WHICH IT ROTATES AT A SPECIAL ANGLE LIKE DIAGONALLY IN OUT OF THE AXIS.
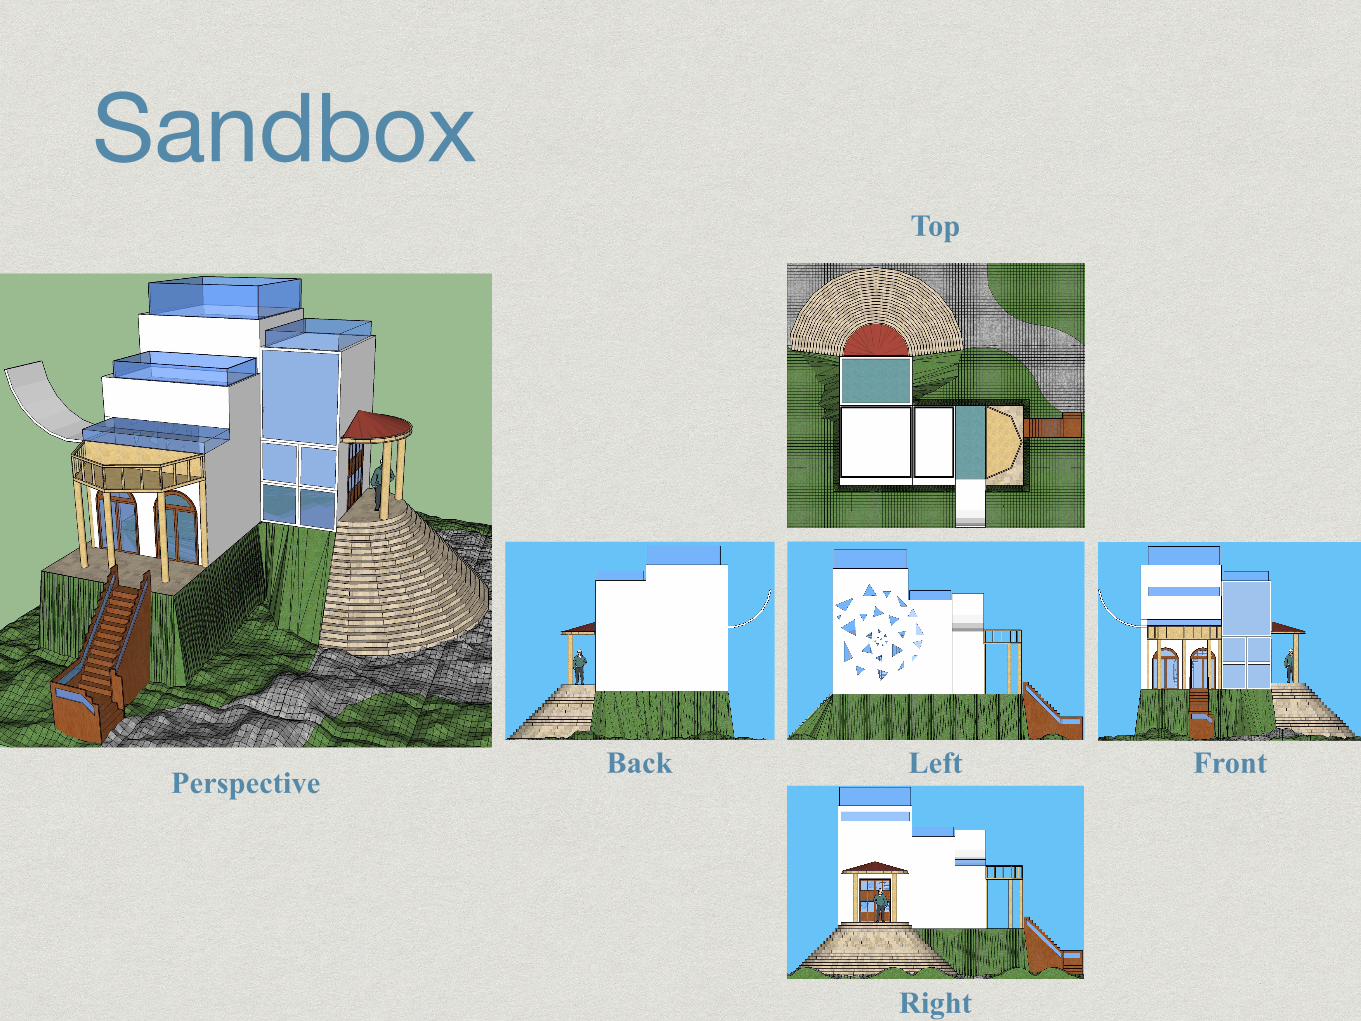
Sandbox
Perspective
Top
Back Left Front
Right

SANDBOX REFLECTIONTool Sandbox Materials Follow-Me Off-Set Hide
ApplyingSandbox tool bar included a set of
different tools that are use to create
terrains.
Materials included many colors, tinted or saturated. Also
with pattern material like
fencing, stone, metal, and translucent.
I used follow me to create fencing on the balcony and the stone
stairs.
Created the offset with the glass
ceiling and glass fencings.
“Hide” can be use to hide surfaces
or lines so to create a more
smooth looking surface.
USE OF STYLE MENTIONED IN THE NEXT PAGE.
SANDBOX REFLECTIONSANDBOX IS A VERY VERY VERY COMPLICATED TOOL TO USE. THERE ARE DIFFERENT MANY STEPS: SANDBOX FROM SCRATCH, SMOOVE TOOL, STAMP TOOL, AND DRAPE TOOL IS WHAT I USED. SANDBOX TOOLBAR CAN BE FIND VIEW>TOOL PALETTE>SANDBOX. I BECAME USED OF USING FOLLOW ME. I FINALLY REALIZED THAT I WILL NEED A SURFACE OF WHAT SHAPE YOU WANT TO CREATE AND THEN A PATH FOR THE TOOL TO FOLLOR. IT TOOK ME SOME TIME TO FIGURE OUT. I CAN ALSO DRAW TRIANGLES WITH THE POLYGON TOOL, BY JUST TYPING IN HOW MANY EDGES I WANT IN THE POLYGON (WHICH IS 3 FOR TRIANGLE). I LEARNED THAT WHILE YOU DREW LINES CONNECTING TOGETHER BUT THE SURFACE IS NOT CLOSING, THEN YOU CAN TRY TO DRAW THE SIDES AGAIN. IF THAT STILL WON’T WORK I TRIED TO GO TO WINDOW>STYLES>EDIT TAG>COLOR>SELECT BY AXIS, THEN IT WILL SHOW ALL YOUR LINES BY THE COLOR OF THE AXIS. IF IS BLACK THEN YOU NEED TO ERASE THE LINE AND DRAW IT TO THE AXIS. HIDING LINES BY RIGHT CLICK THE LINE AND HIDE CAN HELP CREATE A SMOOTHER SURFACE LIKE IN A CURVE. OVERALL, I THINK I ENJOYED DOING MY WORK, IT WAS NOT TOO COMPLEX NOR CHALLENGING. I FIGURE OUT THE SANDBOX TOOL AFTER A FEW TIMES OF TRYING AND HAD FUN PUTTING IN ALL THE DIFFERENT MATERIALS.
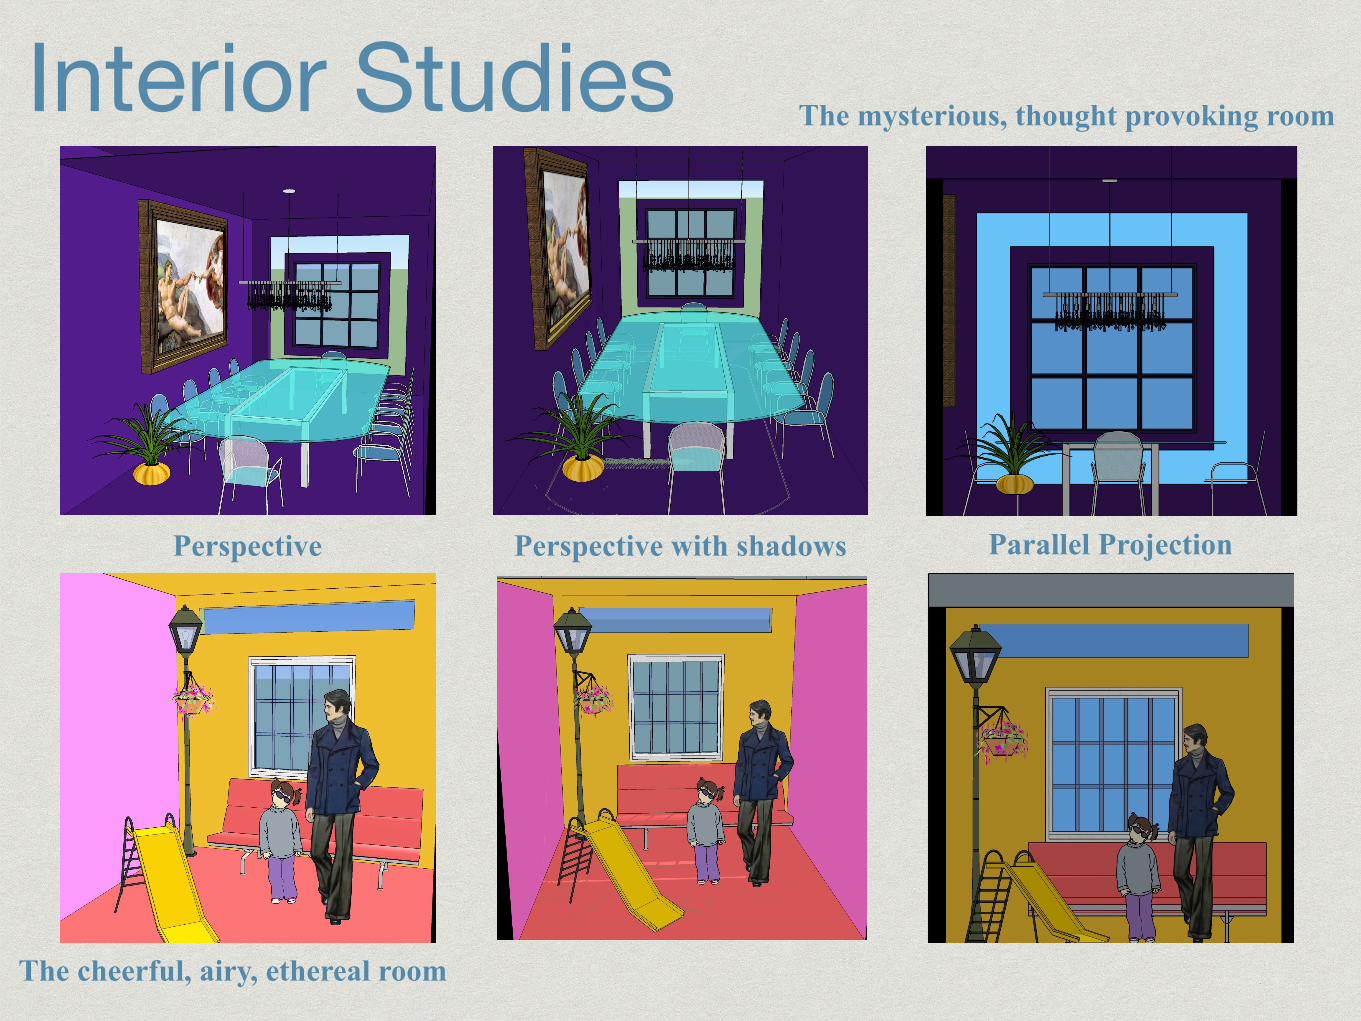
Interior Studies
Perspective Parallel ProjectionPerspective with shadows
The mysterious, thought provoking room
The cheerful, airy, ethereal room
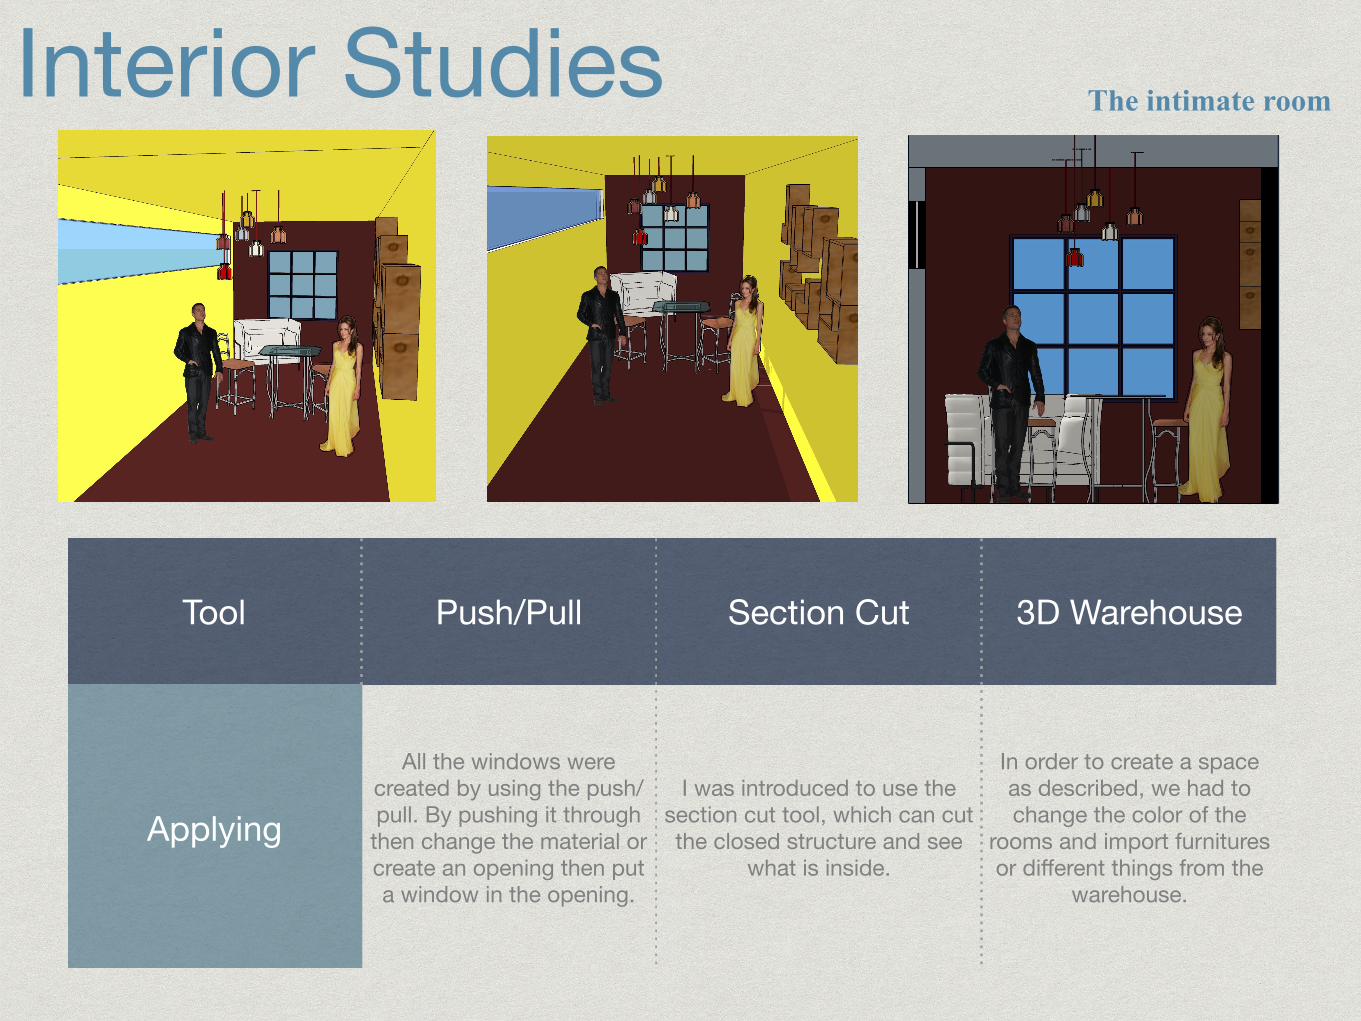
Interior Studies The intimate room
Tool Push/Pull Section Cut 3D Warehouse
Applying
All the windows were created by using the push/pull. By pushing it through then change the material or create an opening then put a window in the opening.
I was introduced to use the section cut tool, which can cut the closed structure and see
what is inside.
In order to create a space as described, we had to change the color of the
rooms and import furnitures or different things from the
warehouse.
INTERIOR STUDIES REFLECTIONTHIS ONE IS A CHALLENGING ONE. AND OUR FIRST INTERIOR STUDIES ASSIGNMENT. THE USE OF COLORS PLACEMENT OF FURNITURES WILL ALL EFFECT THE DIFFERENT EMOTIONS IN A ROOM. WE STARTED OFF WITH A 10 X 10 X 10 BOX, THEN WHEN CUT THROUGH THE BOX WITH SECTION TOOL WE PLACED WINDOWS OR OPENINGS IN THE WALL. AFTER THAT WE TURNED ON THE SHADOW MODE WINDOW>SHADOWS, TO SEE HOW DIFFERENT OPENINGS CAN CAST SHADOWS IN THE ROOM. LATER ON WE EXPANDED ON WITH OTHER SIZES AND MORE COMPLICATED WINDOWS. BECAUSE EVERYONE FEELS DIFFERENTLY SO TO ME THIS ROOM MIGHT FEEL THIS WAY BUT OTHERS MIGHT NOT. COLORS TOOK AN IMPORTANT PART HERE, LIGHTER COLORS SHOW WARMTH AND DARKER COLORS SHOW COOL. BY TAKING THAT I PLACE BRIGHTER, LIGHTER COLORS IN THE CHEERFUL AND INTIMATE FEELING ROOM AND PURPLE THE COOL COLOR IN THE MYSTERIOUS ROOM.
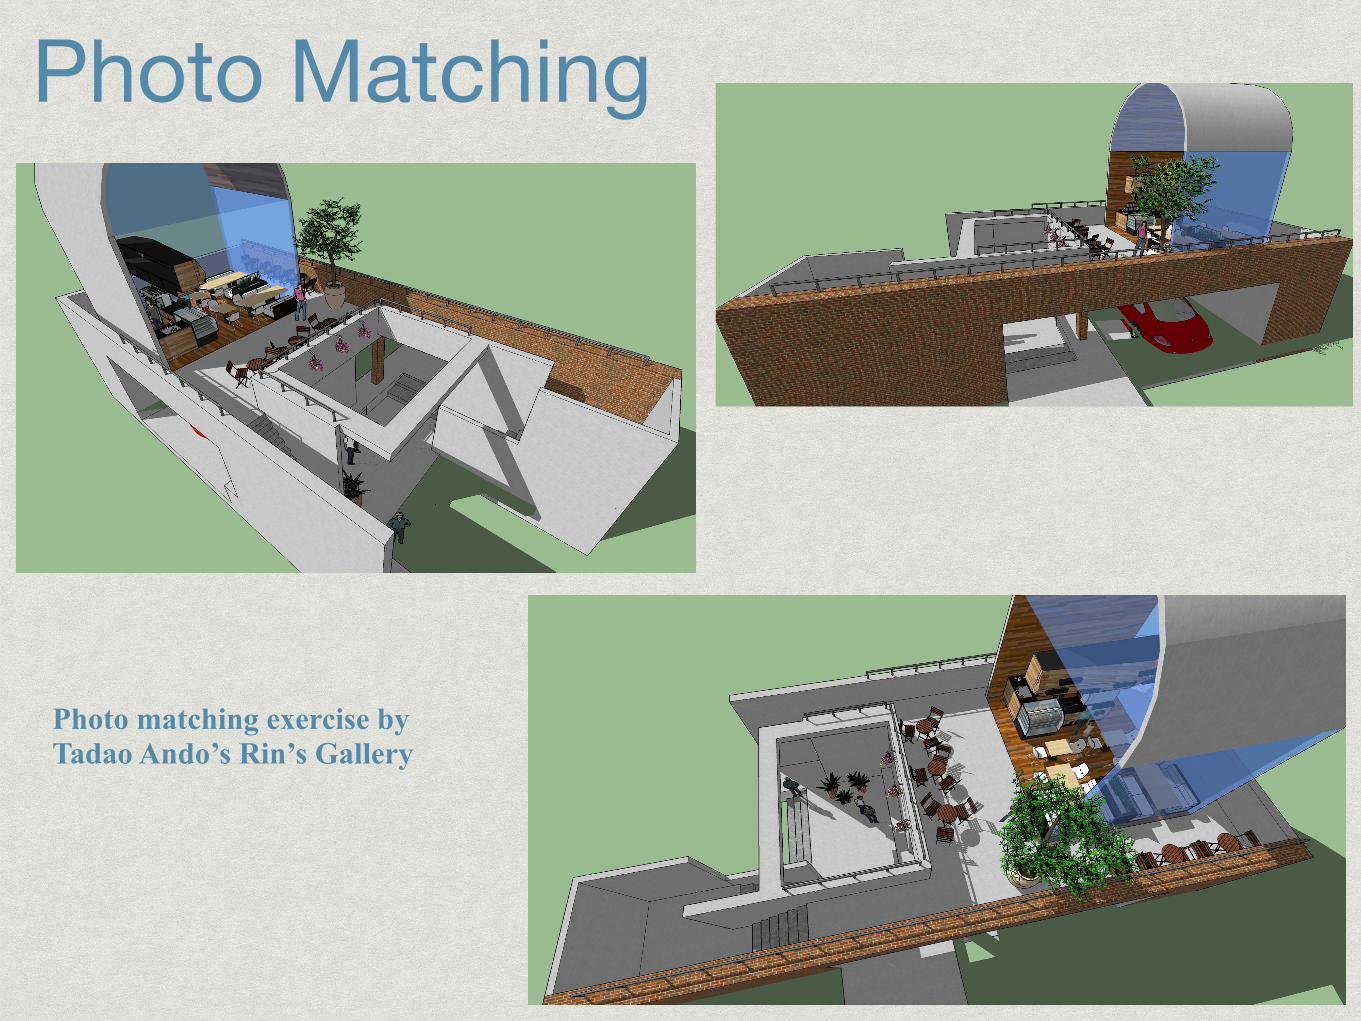
Photo Matching
Photo matching exercise by Tadao Ando’s Rin’s Gallery
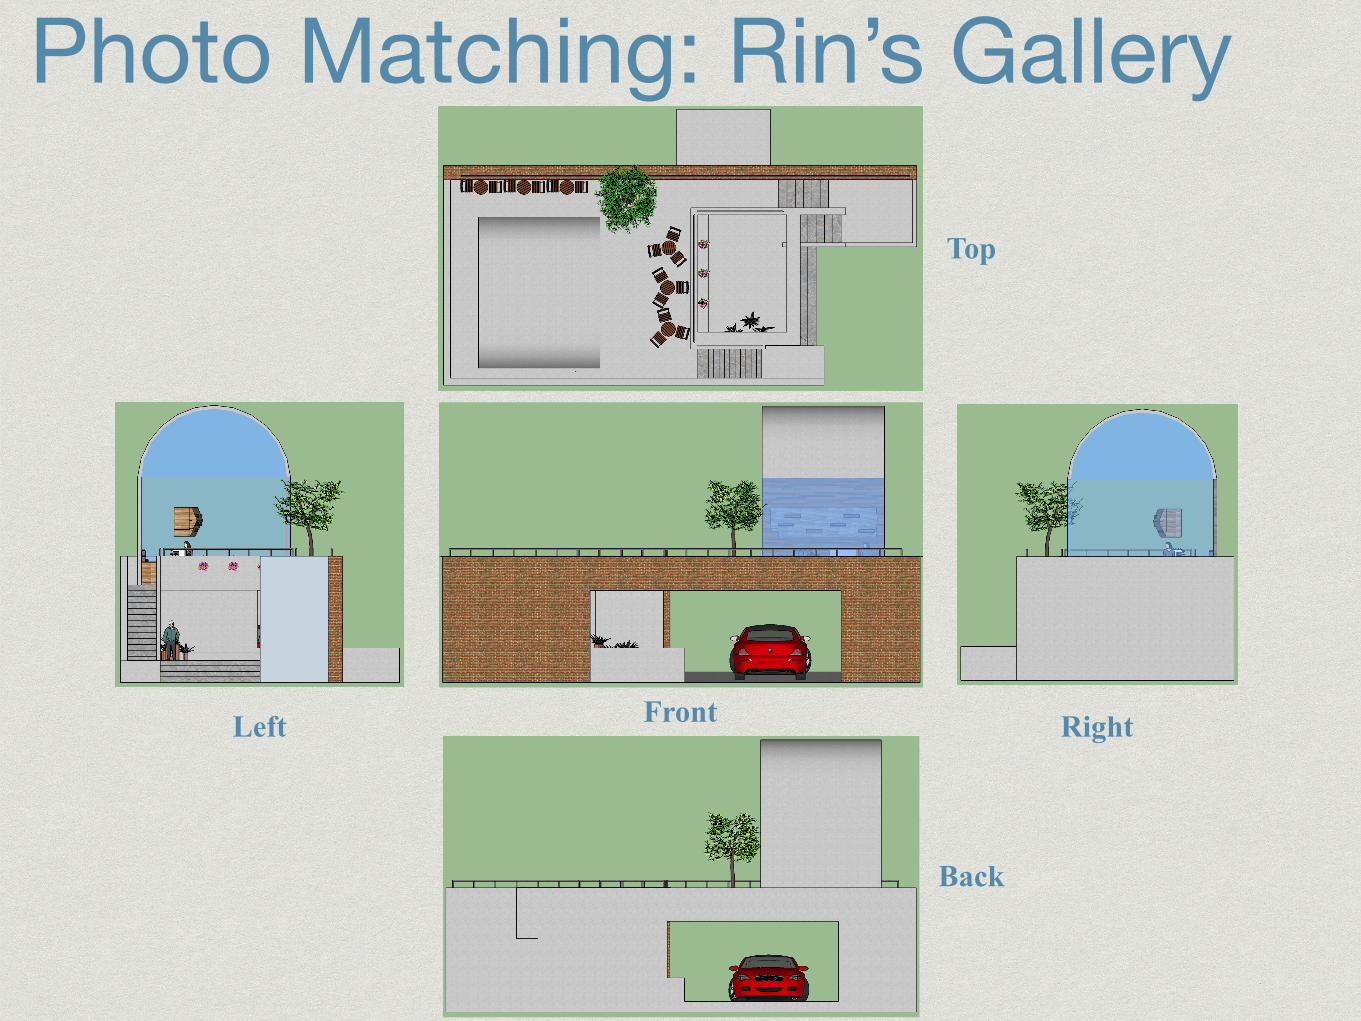
Photo Matching: Rin’s Gallery
Top
Front
Back
Left Right
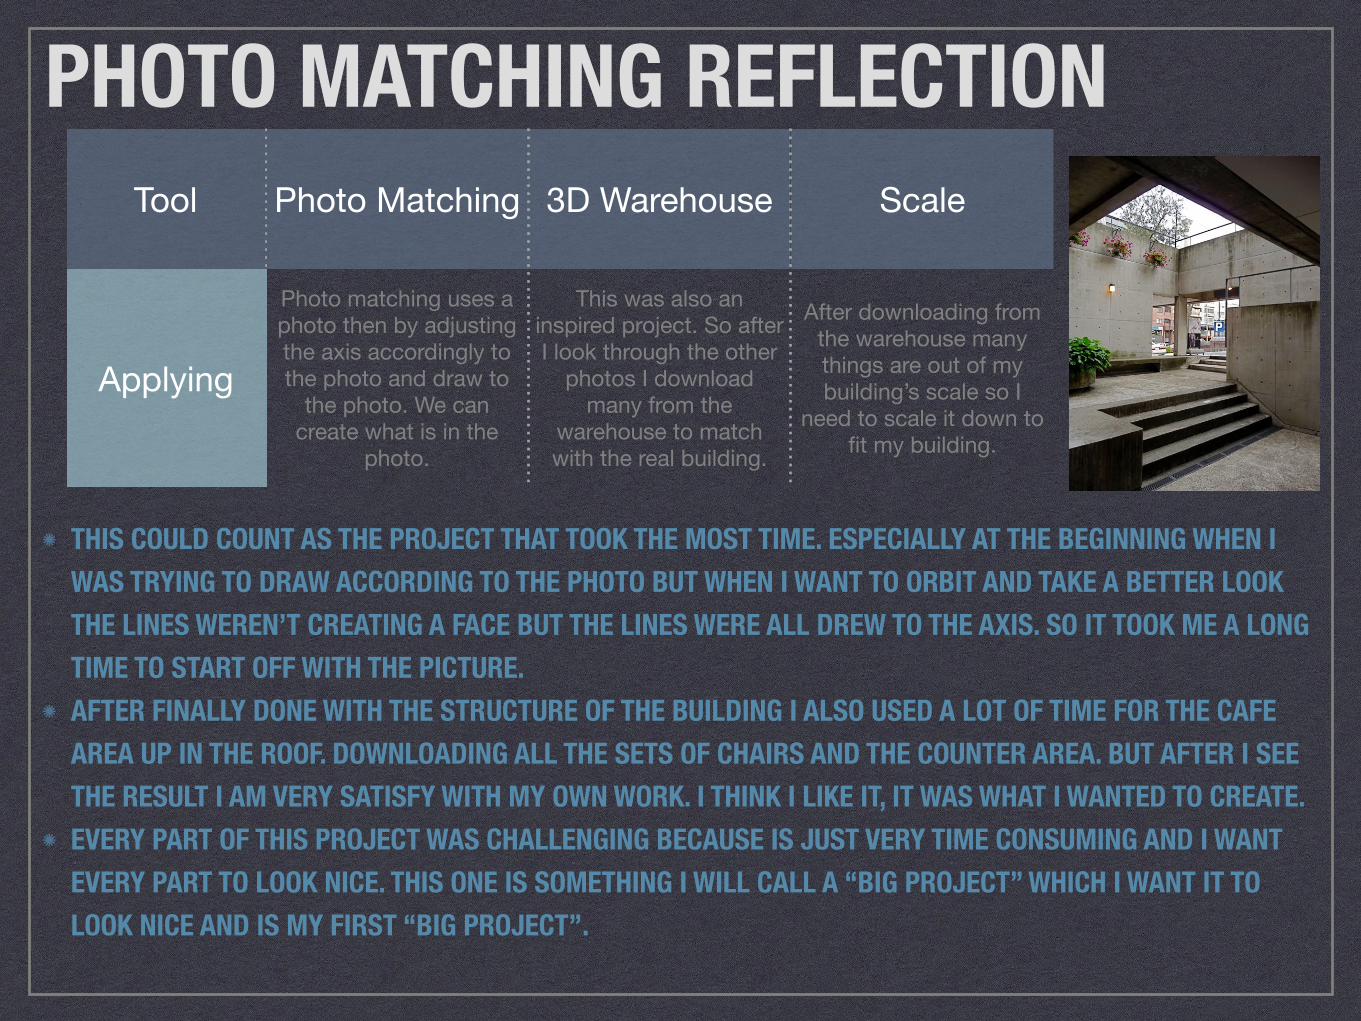
PHOTO MATCHING REFLECTIONTool Photo Matching 3D Warehouse Scale
Applying
Photo matching uses a photo then by adjusting the axis accordingly to the photo and draw to
the photo. We can create what is in the
photo.
This was also an inspired project. So after I look through the other
photos I download many from the
warehouse to match with the real building.
After downloading from the warehouse many things are out of my building’s scale so I
need to scale it down to fit my building.
THIS COULD COUNT AS THE PROJECT THAT TOOK THE MOST TIME. ESPECIALLY AT THE BEGINNING WHEN I WAS TRYING TO DRAW ACCORDING TO THE PHOTO BUT WHEN I WANT TO ORBIT AND TAKE A BETTER LOOK THE LINES WEREN’T CREATING A FACE BUT THE LINES WERE ALL DREW TO THE AXIS. SO IT TOOK ME A LONG TIME TO START OFF WITH THE PICTURE. AFTER FINALLY DONE WITH THE STRUCTURE OF THE BUILDING I ALSO USED A LOT OF TIME FOR THE CAFE AREA UP IN THE ROOF. DOWNLOADING ALL THE SETS OF CHAIRS AND THE COUNTER AREA. BUT AFTER I SEE THE RESULT I AM VERY SATISFY WITH MY OWN WORK. I THINK I LIKE IT, IT WAS WHAT I WANTED TO CREATE. EVERY PART OF THIS PROJECT WAS CHALLENGING BECAUSE IS JUST VERY TIME CONSUMING AND I WANT EVERY PART TO LOOK NICE. THIS ONE IS SOMETHING I WILL CALL A “BIG PROJECT” WHICH I WANT IT TO LOOK NICE AND IS MY FIRST “BIG PROJECT”.
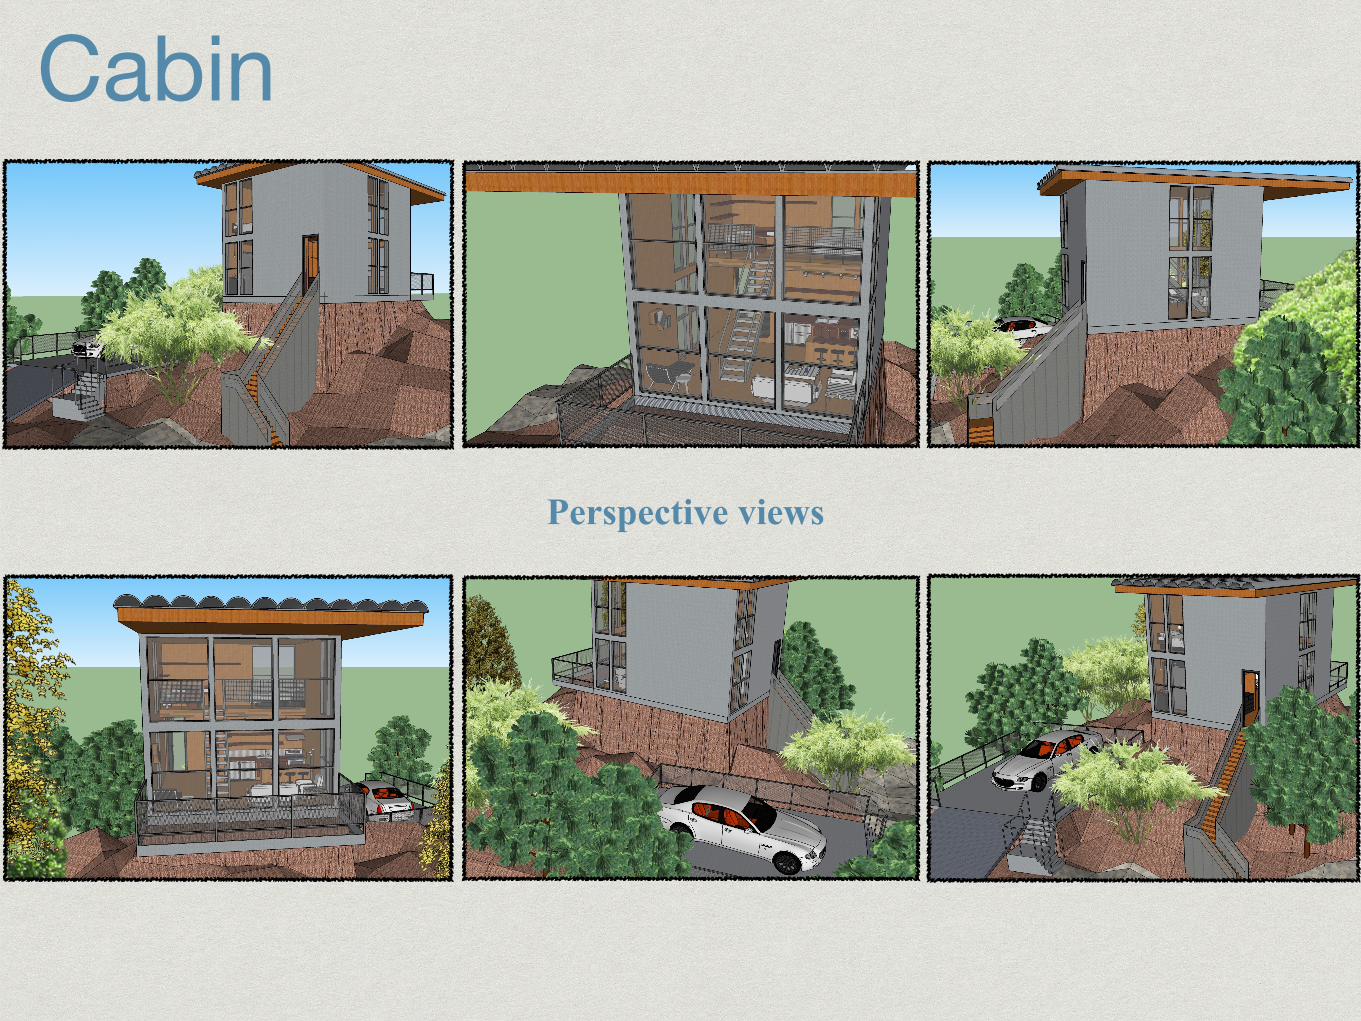
Cabin
Perspective views
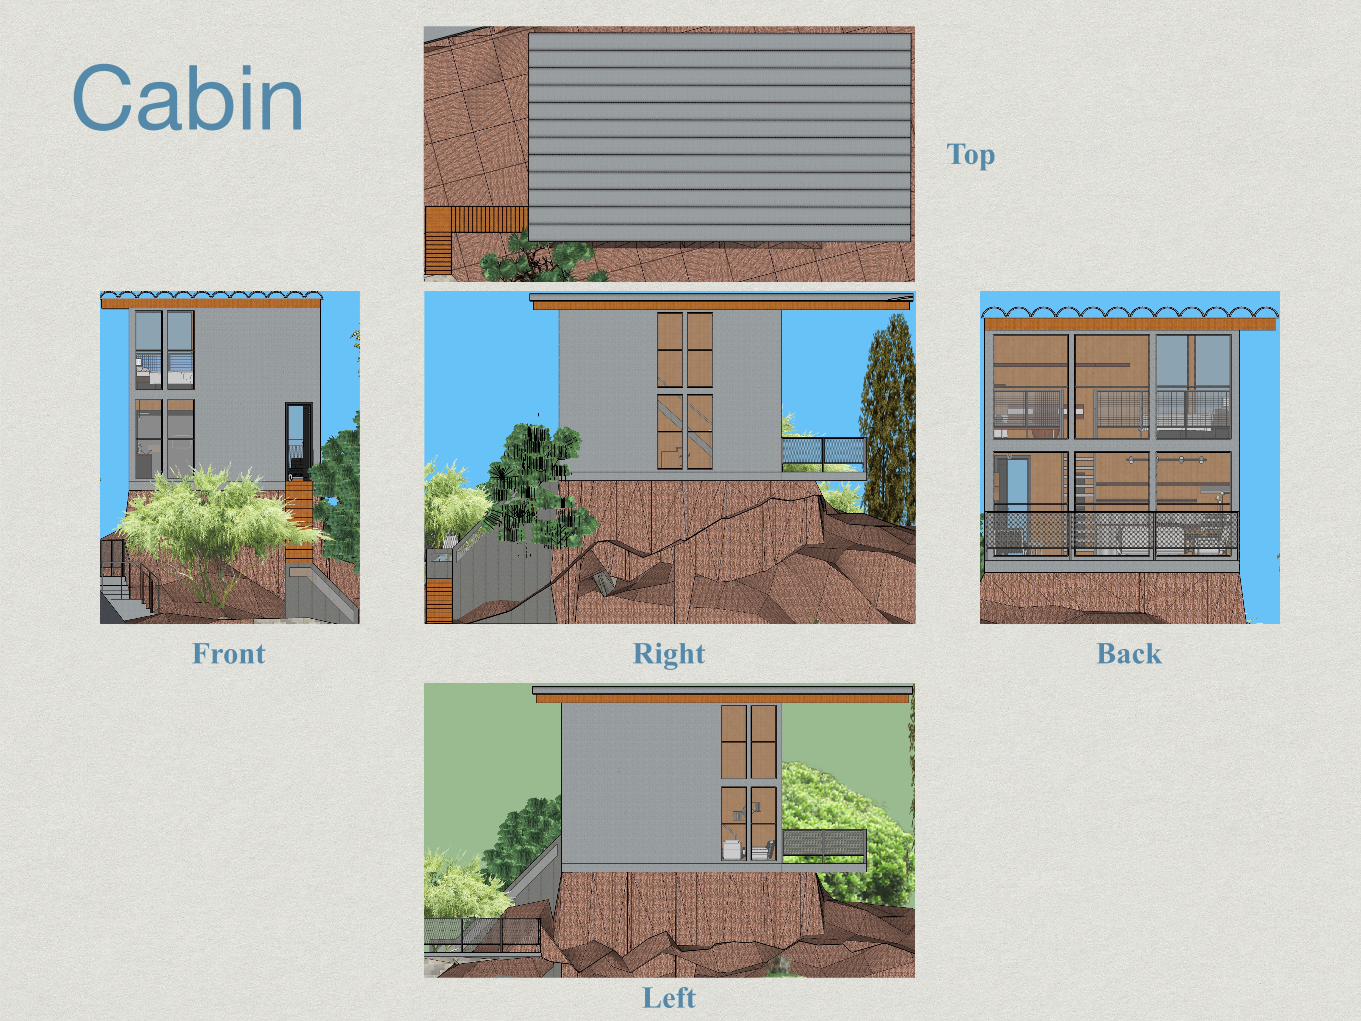
CabinTop
BackRightFront
Left
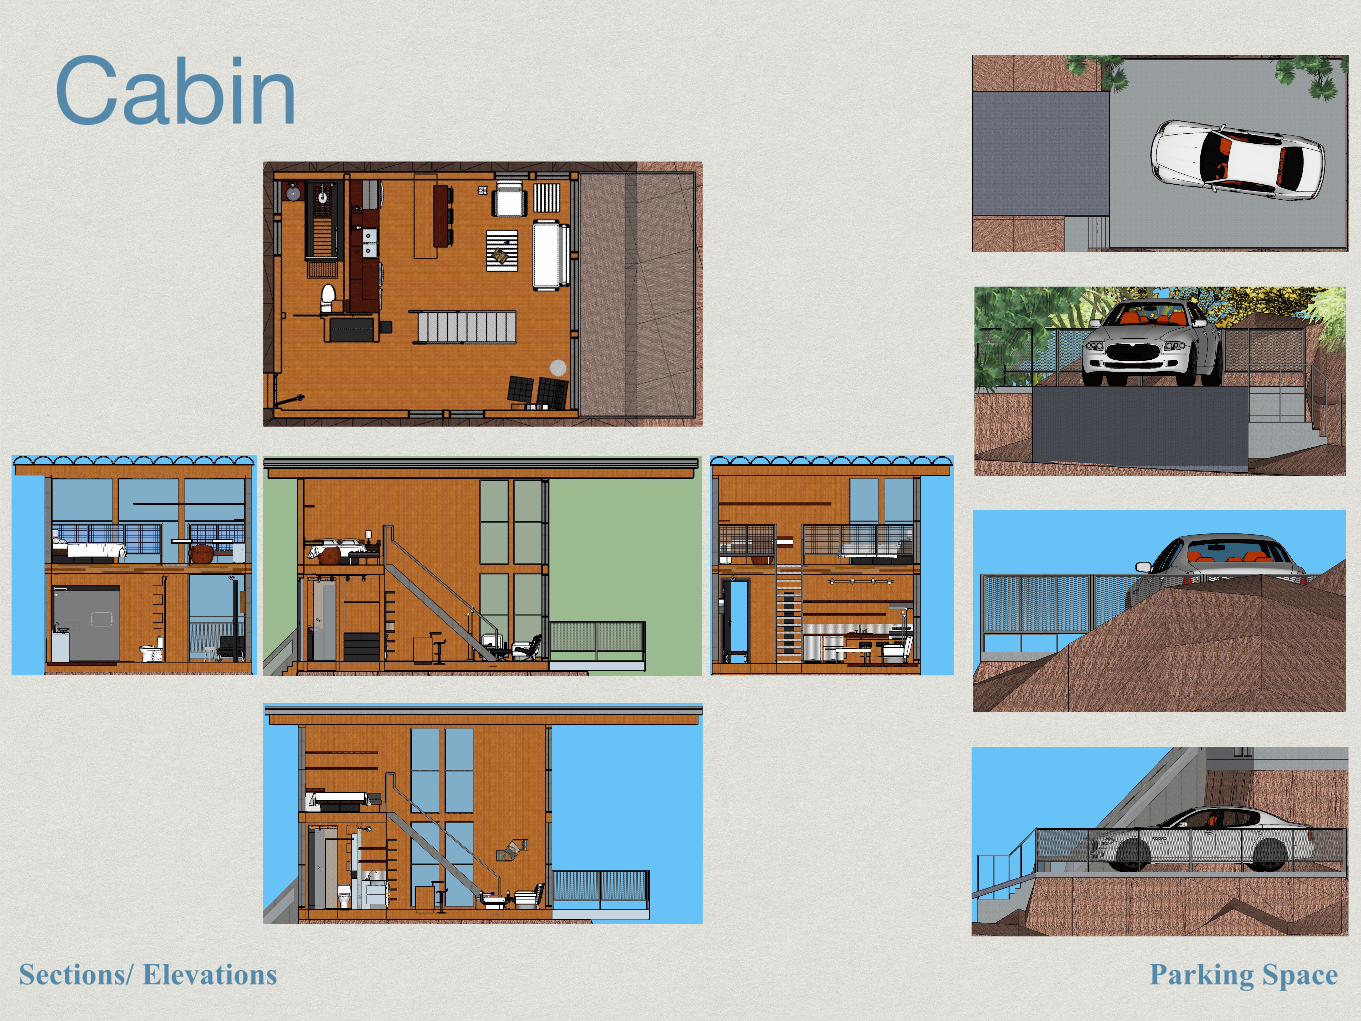
Cabin
Sections/ Elevations Parking Space
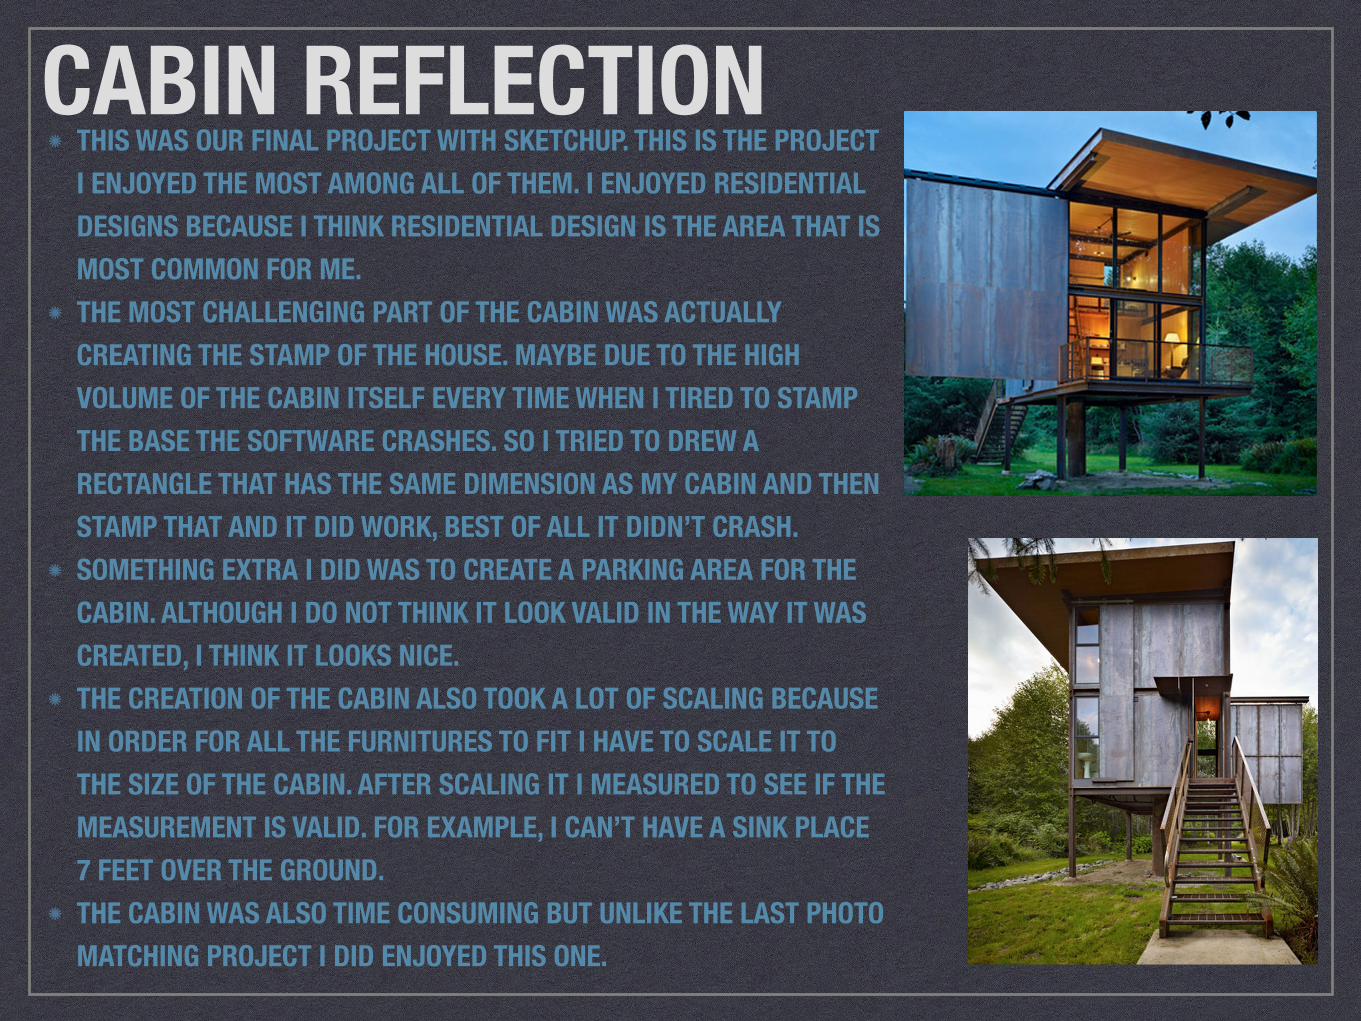
CABIN REFLECTIONTHIS WAS OUR FINAL PROJECT WITH SKETCHUP. THIS IS THE PROJECT I ENJOYED THE MOST AMONG ALL OF THEM. I ENJOYED RESIDENTIAL DESIGNS BECAUSE I THINK RESIDENTIAL DESIGN IS THE AREA THAT IS MOST COMMON FOR ME. THE MOST CHALLENGING PART OF THE CABIN WAS ACTUALLY CREATING THE STAMP OF THE HOUSE. MAYBE DUE TO THE HIGH VOLUME OF THE CABIN ITSELF EVERY TIME WHEN I TIRED TO STAMP THE BASE THE SOFTWARE CRASHES. SO I TRIED TO DREW A RECTANGLE THAT HAS THE SAME DIMENSION AS MY CABIN AND THEN STAMP THAT AND IT DID WORK, BEST OF ALL IT DIDN’T CRASH. SOMETHING EXTRA I DID WAS TO CREATE A PARKING AREA FOR THE CABIN. ALTHOUGH I DO NOT THINK IT LOOK VALID IN THE WAY IT WAS CREATED, I THINK IT LOOKS NICE. THE CREATION OF THE CABIN ALSO TOOK A LOT OF SCALING BECAUSE IN ORDER FOR ALL THE FURNITURES TO FIT I HAVE TO SCALE IT TO THE SIZE OF THE CABIN. AFTER SCALING IT I MEASURED TO SEE IF THE MEASUREMENT IS VALID. FOR EXAMPLE, I CAN’T HAVE A SINK PLACE 7 FEET OVER THE GROUND. THE CABIN WAS ALSO TIME CONSUMING BUT UNLIKE THE LAST PHOTO MATCHING PROJECT I DID ENJOYED THIS ONE.
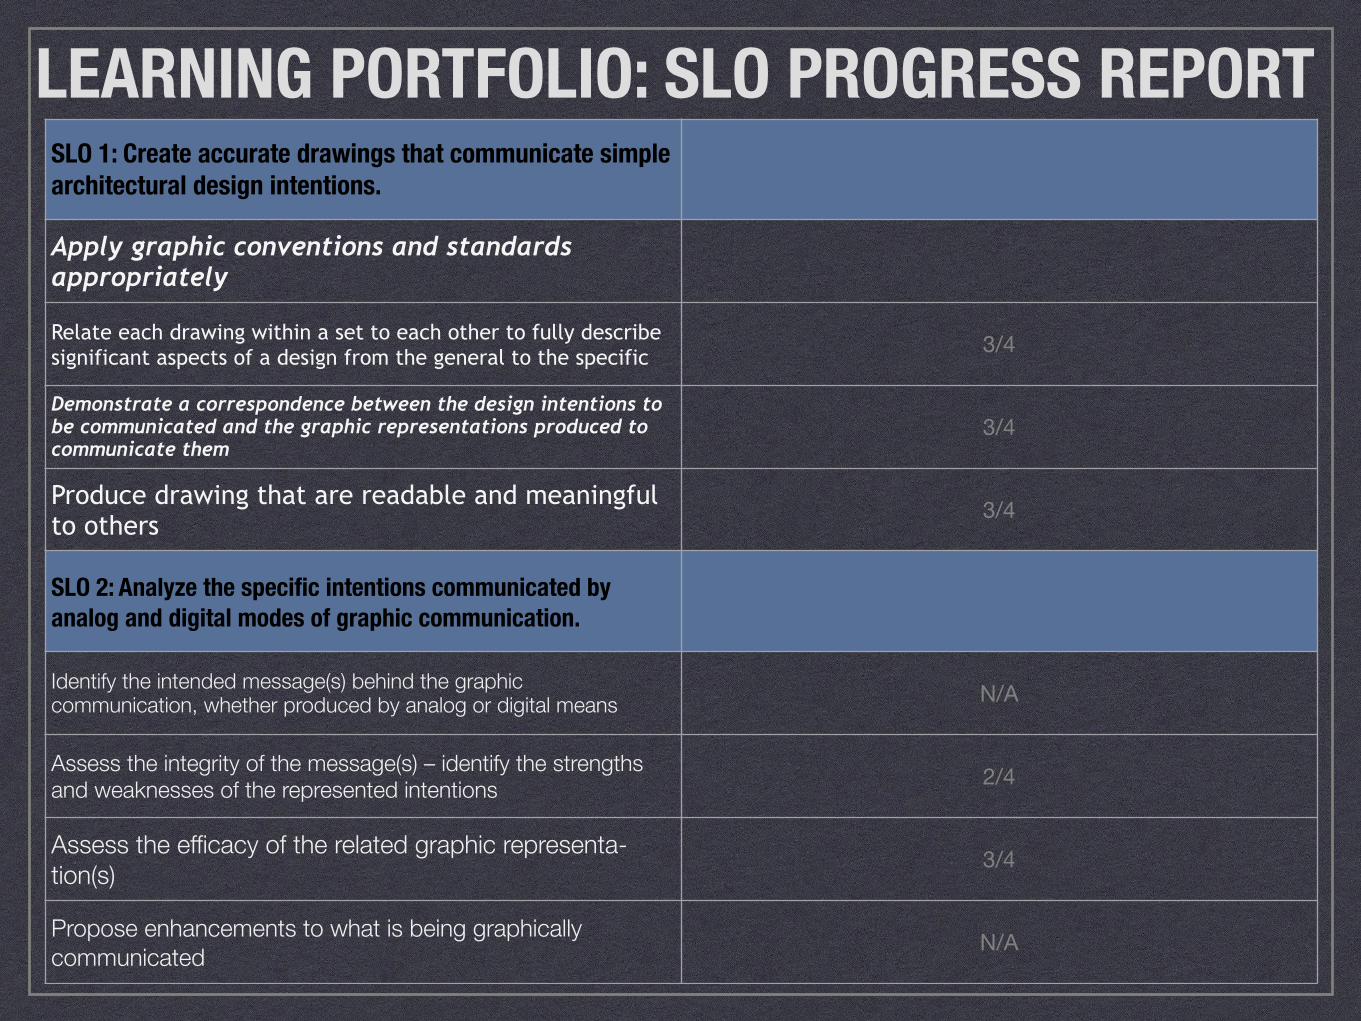
LEARNING PORTFOLIO: SLO PROGRESS REPORTSLO 1: Create accurate drawings that communicate simple architectural design intentions.
Apply graphic conventions and standards appropriately
Relate each drawing within a set to each other to fully describe significant aspects of a design from the general to the specific 3/4
Demonstrate a correspondence between the design intentions to be communicated and the graphic representations produced to communicate them
3/4
Produce drawing that are readable and meaningful to others
3/4
SLO 2: Analyze the specific intentions communicated by analog and digital modes of graphic communication.
Identify the intended message(s) behind the graphic communication, whether produced by analog or digital means N/A
Assess the integrity of the message(s) – identify the strengths and weaknesses of the represented intentions 2/4
Assess the efficacy of the related graphic representa-tion(s) 3/4
Propose enhancements to what is being graphically communicated N/A
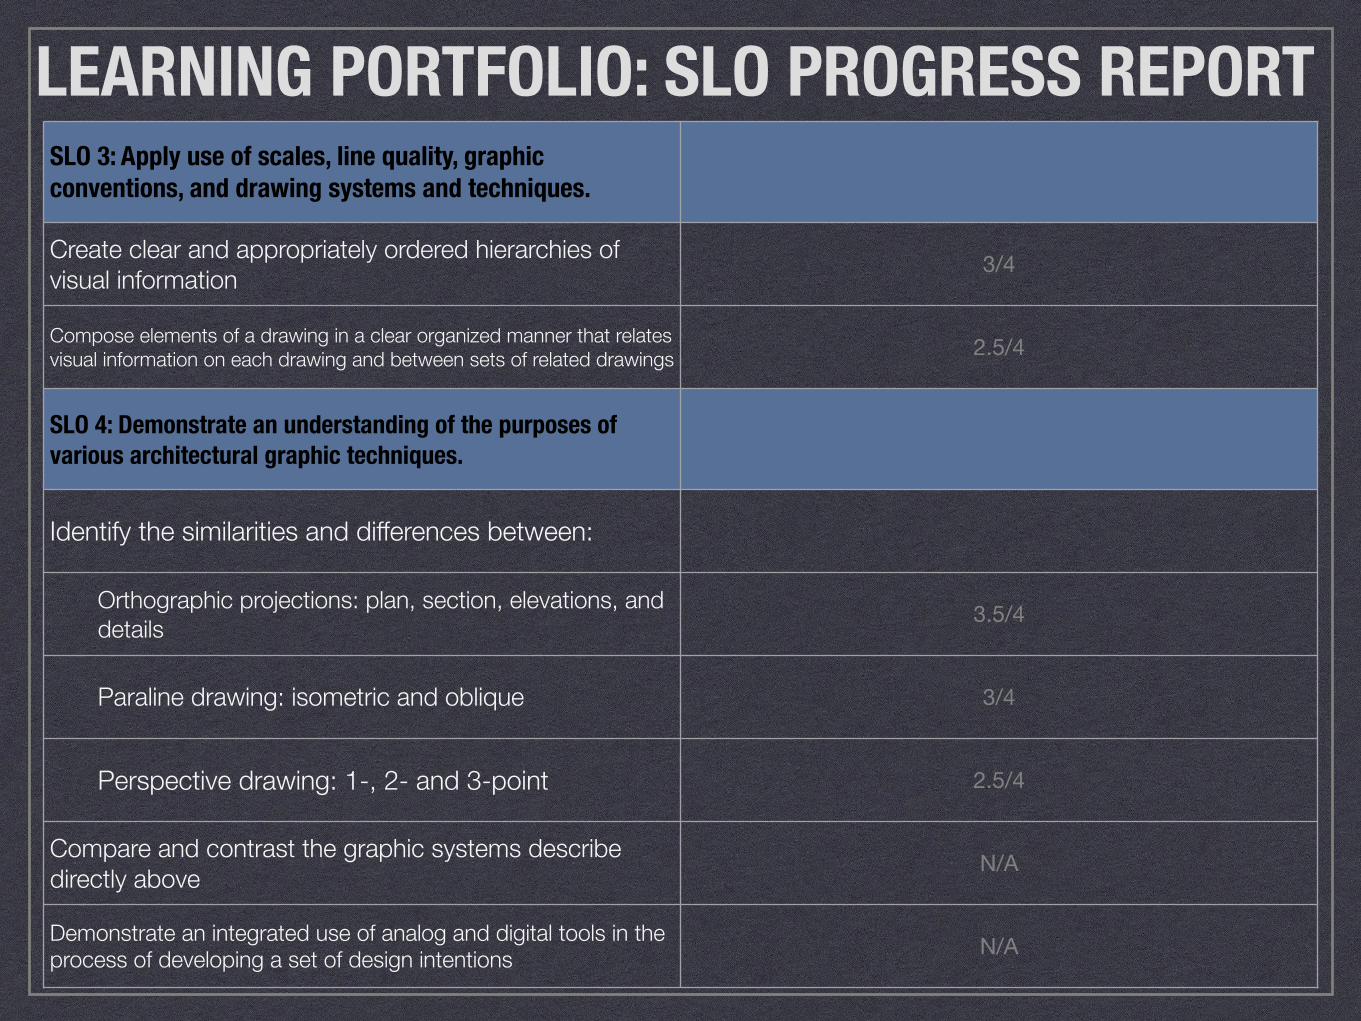
LEARNING PORTFOLIO: SLO PROGRESS REPORTSLO 3: Apply use of scales, line quality, graphic conventions, and drawing systems and techniques.
Create clear and appropriately ordered hierarchies of visual information 3/4
Compose elements of a drawing in a clear organized manner that relates visual information on each drawing and between sets of related drawings 2.5/4
SLO 4: Demonstrate an understanding of the purposes of various architectural graphic techniques.
Identify the similarities and differences between:
Orthographic projections: plan, section, elevations, and details 3.5/4
Paraline drawing: isometric and oblique 3/4
Perspective drawing: 1-, 2- and 3-point 2.5/4
Compare and contrast the graphic systems describe directly above N/A
Demonstrate an integrated use of analog and digital tools in the process of developing a set of design intentions N/A


![Nuno Ricardo Soares [ARCH]Portfolio](https://img.pdfslide.tips/doc/110x75/579074ce1a28ab6874b19e0b/nuno-ricardo-soares-archportfolio.jpg)