Embed Size (px)
Citation preview
7/21/2019 Baby Bunny Knitted
http://slidepdf.com/reader/full/baby-bunny-knitted 1/5
Pattern by Justyna Kacprzak – cuteandkaboodle.com All rights reserved
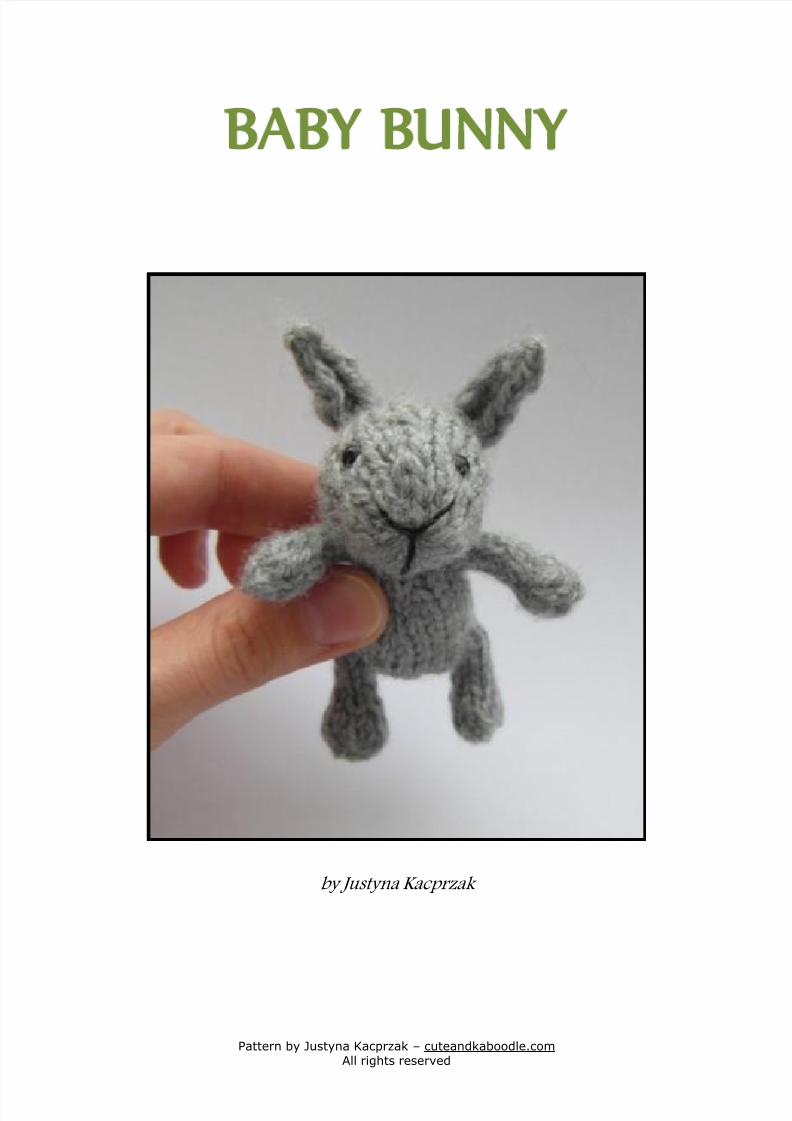
B BY BUNNY
by Justyna Kacprzak
7/21/2019 Baby Bunny Knitted
http://slidepdf.com/reader/full/baby-bunny-knitted 2/5
List of abbreviations used:
CO – cast onk – knitp – purlk2tog – knit 2sts togetherk3tog – knit 3sts togetherm1 – make 1 st (see notes onincreasing)kfb – knit front and back(increase)BO – bind off
(n) – number of stitches in around
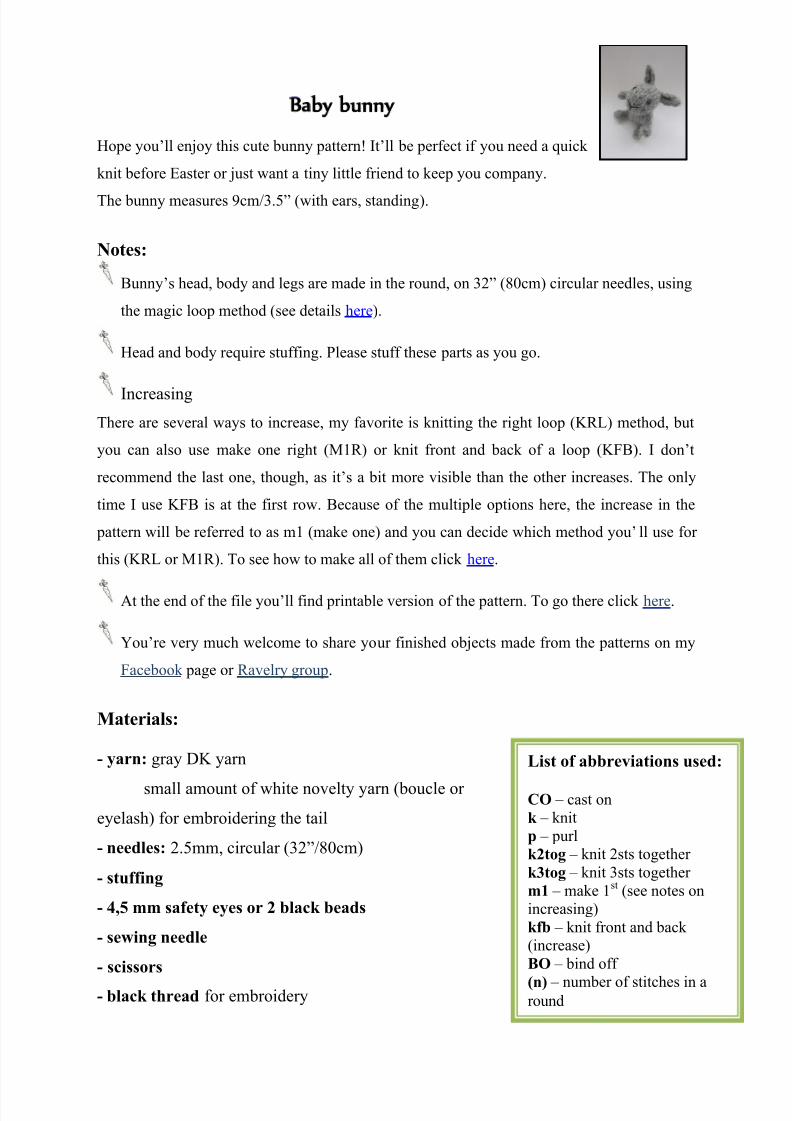
Baby bunny
Hope you’ll enjoy this cute bunny pattern! It’ll be perfect if you need a quick
knit before Easter or just want a tiny little friend to keep you company.
The bunny measures 9cm/3.5” (with ears, standing ).
Notes:
Bunny’s head, body and legs are made in the round, on 32” (80cm) circular needles, using
the magic loop method (see details here ).
Head and body require stuffing. Please stuff these parts as you go.
IncreasingThere are several ways to increase, my favorite is knitting the right loop (KRL) method, but
you can also use make one right (M1R) or knit front and back of a loop (KFB). I don’t
recommend the last one, though, as it’s a bit more visible than the other increases. The only
time I use KFB is at the first row. Because of the multiple options here, the increase in the
pattern will be referred to as m1 (make one) and you can decide which method you’ ll use for
this (KRL or M1R). To see how to make all of them click here .
At the end of the file you’ll find printable version of the pattern. To go there click here .
You’re very much welcome to share yo ur finished objects made from the patterns on my
Facebook page or Ravelry group .
Materials:
- yarn: gray DK yarn
small amount of white novelty yarn (boucle or
eyelash) for embroidering the tail
- needles: 2.5mm, circular (32”/80cm)
- stuffing
- 4,5 mm safety eyes or 2 black beads
- sewing needle
- scissors
- black thread for embroidery
7/21/2019 Baby Bunny Knitted
http://slidepdf.com/reader/full/baby-bunny-knitted 3/5
Pattern by Justyna Kacprzak – cuteandkaboodle.com All rights reserved
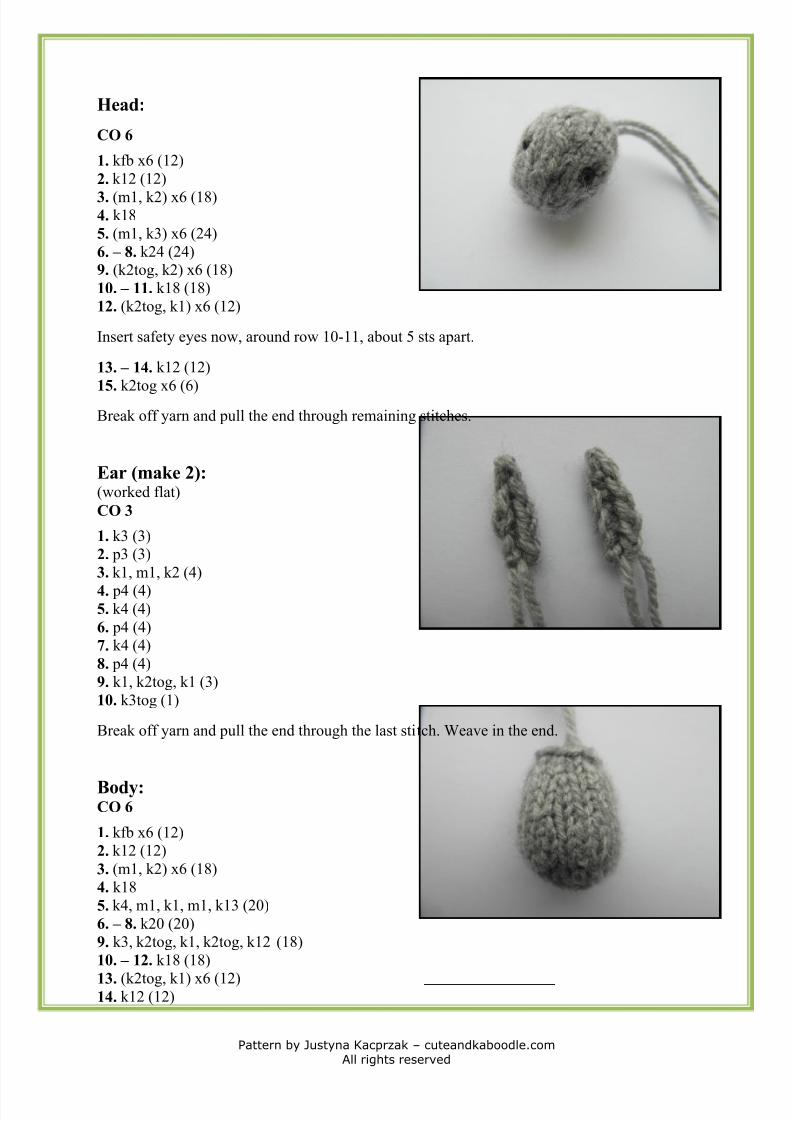
Head:
CO 6
1. kfb x6 (12)2. k12 (12)
3. (m1, k2) x6 (18)4. k185. (m1, k3) x6 (24)6. – 8. k24 (24)9. (k2tog, k2) x6 (18)10. – 11. k18 (18)12. (k2tog, k1) x6 (12)
Insert safety eyes now, around row 10-11, about 5 sts apart.
13. – 14. k12 (12)
15. k2tog x6 (6)Break off yarn and pull the end through remaining stitches.
Ear (make 2):(worked flat) CO 3
1. k3 (3)2. p3 (3) 3. k1, m1, k2 (4)4. p4 (4)5. k4 (4)6. p4 (4) 7. k4 (4) 8. p4 (4)9. k1, k2tog, k1 (3)10. k3tog (1)
Break off yarn and pull the end through the last stitch. Weave in the end.
Body:CO 6
1. kfb x6 (12)2. k12 (12) 3. (m1, k2) x6 (18)4. k185. k4, m1, k1, m1, k13 (20)6. – 8. k20 (20)9. k3, k2tog, k1, k2tog, k12 (18)10. – 12. k18 (18)
13. (k2tog, k1) x6 (12)14. k12 (12)
7/21/2019 Baby Bunny Knitted
http://slidepdf.com/reader/full/baby-bunny-knitted 4/5
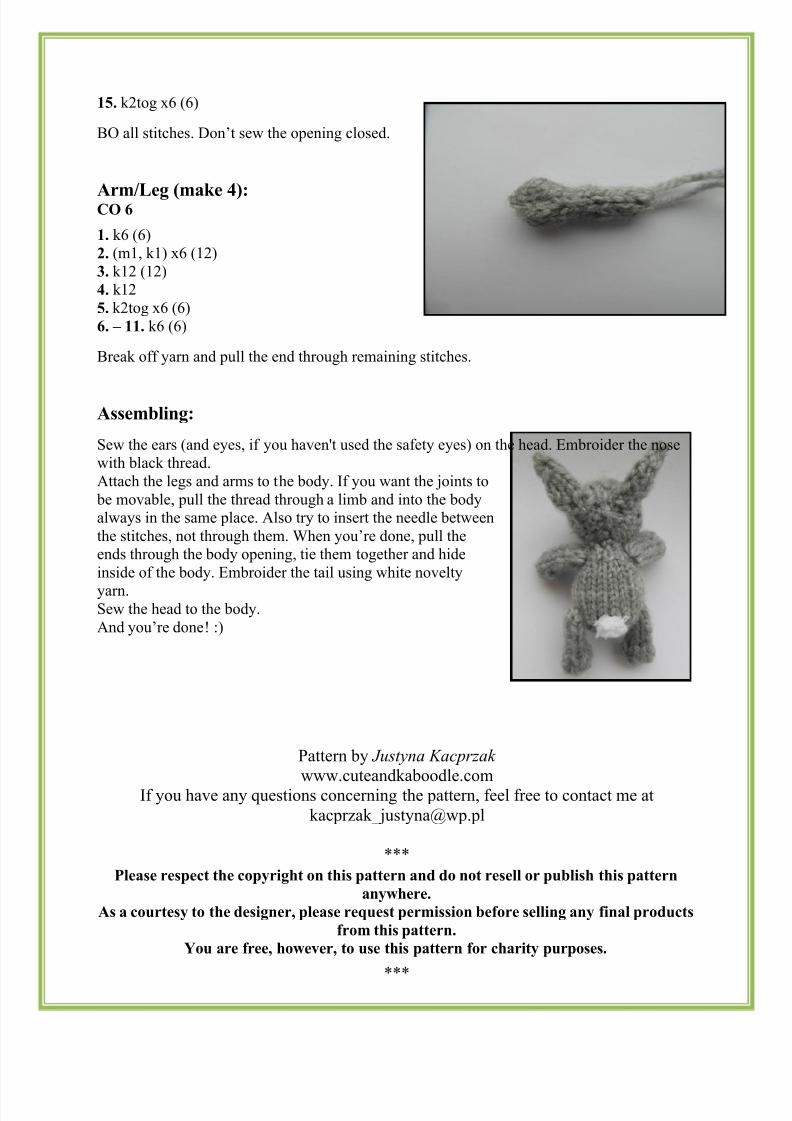
15. k2tog x6 (6)
BO all stitches. Don’t sew the opening closed.
Arm/Leg (make 4):CO 6
1. k6 (6)2. (m1, k1) x6 (12)3. k12 (12)4. k125. k2tog x6 (6)6. – 11. k6 (6)
Break off yarn and pull the end through remaining stitches.
Assembling:
Sew the ears (and eyes, if you haven't used the safety eyes) on the head. Embroider the nosewith black thread.Attach the legs and arms to the body. If you want the joints to
be movable, pull the thread through a limb and into the bodyalways in the same place. Also try to insert the needle betweenthe stitches, not through them. When you’re done, pull theends through the body opening, tie them together and hideinside of the body. Embroider the tail using white noveltyyarn.Sew the head to the body.And you’re done ! :)
Pattern by Justyna Kacprzak www.cuteandkaboodle.com
If you have any questions concerning the pattern, feel free to contact me [email protected]
***Please respect the copyright on this pattern and do not resell or publish this pattern
anywhere.As a courtesy to the designer, please request permission before selling any final products
from this pattern.You are free, however, to use this pattern for charity purposes.
***
7/21/2019 Baby Bunny Knitted
http://slidepdf.com/reader/full/baby-bunny-knitted 5/5
Pattern by Justyna Kacprzak – cuteandkaboodle.com All rights reserved
Bunny’s head, body and legs are made in the
round, on 32” (80cm) circular needles, using the
magic loop method.
There are several ways to increase, my favorite is
knitting the right loop (KRL) method, but you can
also use make one right (M1R) or knit front and
back of a loop (KFB). I don’t recommend the last
one, though , as it’s a bit more visible than the
other increases. The only time I use KFB is at the
first row. Because of the multiple options here, the
increase in the pattern will be referred to as m1
(make one) and you can decide which method
you’ll use for this (KRL or M1R).
Head:
CO 6
1. kfb x6 (12)2. k12 (12) 3. (m1, k2) x6 (18)4. k185. (m1, k3) x6 (24)6. – 8. k24 (24)9. (k2tog, k2) x6 (18)10. – 11. k18 (18)12. (k2tog, k1) x6 (12)
Insert safety eyes now, around row 10-11,about 5 sts apart.
13. – 14. k12 (12)15. k2tog x6 (6)
Break off yarn and pull the end throughremaining stitches.
Ear (make 2):(worked flat) CO 3
1. k3 (3)2. p3 (3) 3. k1, m1, k2 (4)4. p4 (4)5. k4 (4)6. p4 (4) 7. k4 (4)
8. p4 (4)9. k1, k2tog, k1 (3)10. k3tog (1)
Break off yarn and pull the end through thelast stitch. Weave in the end.
Body:CO 6
1. kfb x6 (12)2. k12 (12) 3. (m1, k2) x6 (18)4. k18
5. k4, m1, k1, m1, k13 (20)6. – 8. k20 (20)9. k3, k2tog, k1, k2tog, k12 (18)10. – 12. k18 (18)13. (k2tog, k1) x6 (12)14. k12 (12)15. k2tog x6 (6)
BO all stitches. Don’ t sew the opening closed.
Arm/Leg (make 4):CO 6
1. k6 (6)2. (m1, k1) x6 (12)3. k12 (12)4. k125. k2tog x6 (6)6. – 11. k6 (6)
Break off yarn and pull the end throughremaining stitches.
Assembling:
Sew the ears (and eyes, if you haven't usedthe safety eyes) on the head. Embroider thenose with black thread.Attach the legs and arms to the body. If youwant the joints to be movable, pull the thread
through a limb and into the body always inthe same place. Also try to insert the needle
between the stitches, not through them. Whenyou’re done, pull the ends through the bodyopening, tie them together and hide inside ofthe body. Embroider the tail using whitenovelty yarn.Sew the head to the body.And you’re done! :)