Embed Size (px)
Citation preview


Contents:
Lesson Focus & Standards ……………………… Lesson Content …………………………………… Review …………………………………………….. Vocabulary .…………………………………….….. Math Content ……………………………………… Trivia ……………………………………………….. ¼ Turn Practice …………………………………... Memory Game ....................................................
p. 1 - 2p. 3 - 9p. 10 - 11p. 11p. 12p. 12p. 13 - 15p. 16 - 17
21st Century Learning Skills
Learning & Innovation Skills: • Creativity and Innovation• Critical Thinking and ProblemSolving• Communication and Collaboration
Life & Career Skills: • Flexibility and Adaptability• Initiative and Self Direction• Social and Cross-Cultural Skills• Productivity and Accountability• Leadership and Responsibility
Media Literacy: • Information Literacy
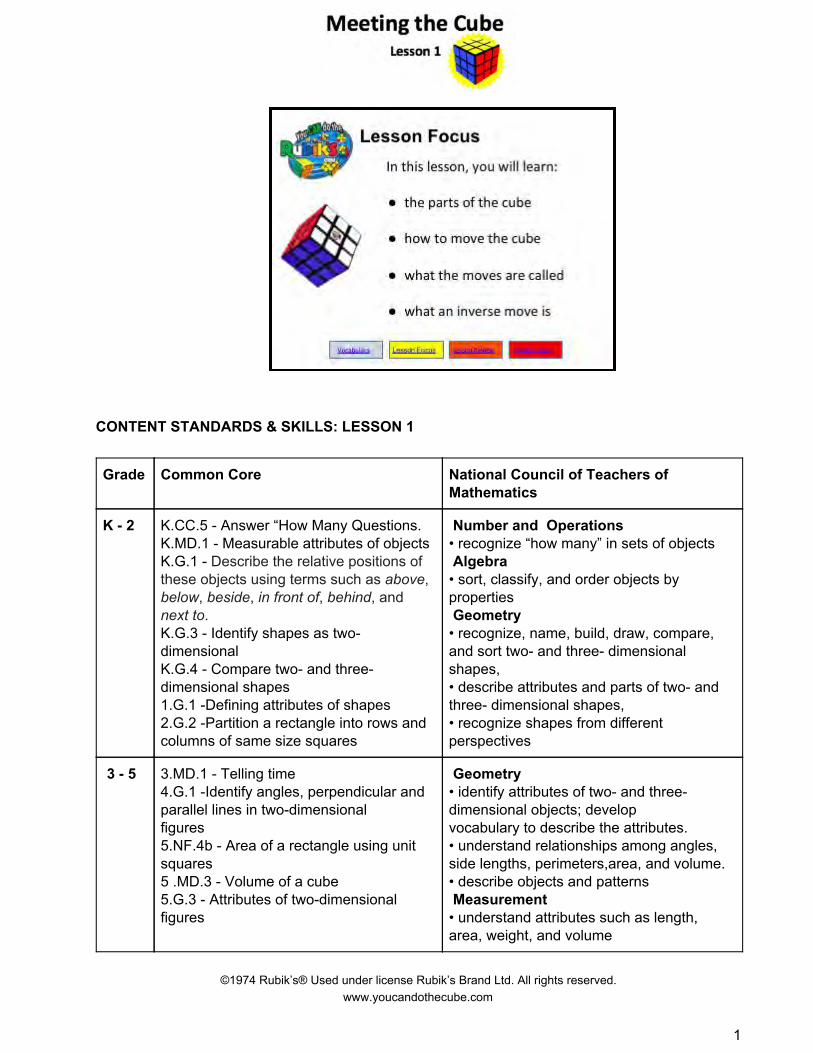
CONTENT STANDARDS & SKILLS: LESSON 1
Grade Common Core National Council of Teachers of Mathematics
K - 2 K.CC.5 - Answer “How Many Questions. K.MD.1 - Measurable attributes of objects K.G.1 - Describe the relative positions of these objects using terms such as above, below , beside, in front of, behind, and next to. K.G.3 - Identify shapes as two- dimensional K.G.4 - Compare two- and three- dimensional shapes 1.G.1 -Defining attributes of shapes 2.G.2 -Partition a rectangle into rows and columns of same size squares
Number and Operations • recognize “how many” in sets of objects Algebra • sort, classify, and order objects by properties Geometry • recognize, name, build, draw, compare, and sort two- and three- dimensional shapes, • describe attributes and parts of two- and three- dimensional shapes, • recognize shapes from different perspectives
3 - 5 3.MD.1 - Telling time 4.G.1 -Identify angles, perpendicular and parallel lines in two-dimensional figures 5.NF.4b - Area of a rectangle using unit squares 5 .MD.3 - Volume of a cube 5.G.3 - Attributes of two-dimensional figures
Geometry • identify attributes of two- and three- dimensional objects; develop vocabulary to describe the attributes. • understand relationships among angles, side lengths, perimeters,area, and volume. • describe objects and patterns Measurement • understand attributes such as length, area, weight, and volume
©1974 Rubik’s® Used under license Rubik’s Brand Ltd. All rights reserved. www.youcandothecube.com
1
Grade Common Core National Council of Teachers of Mathematics
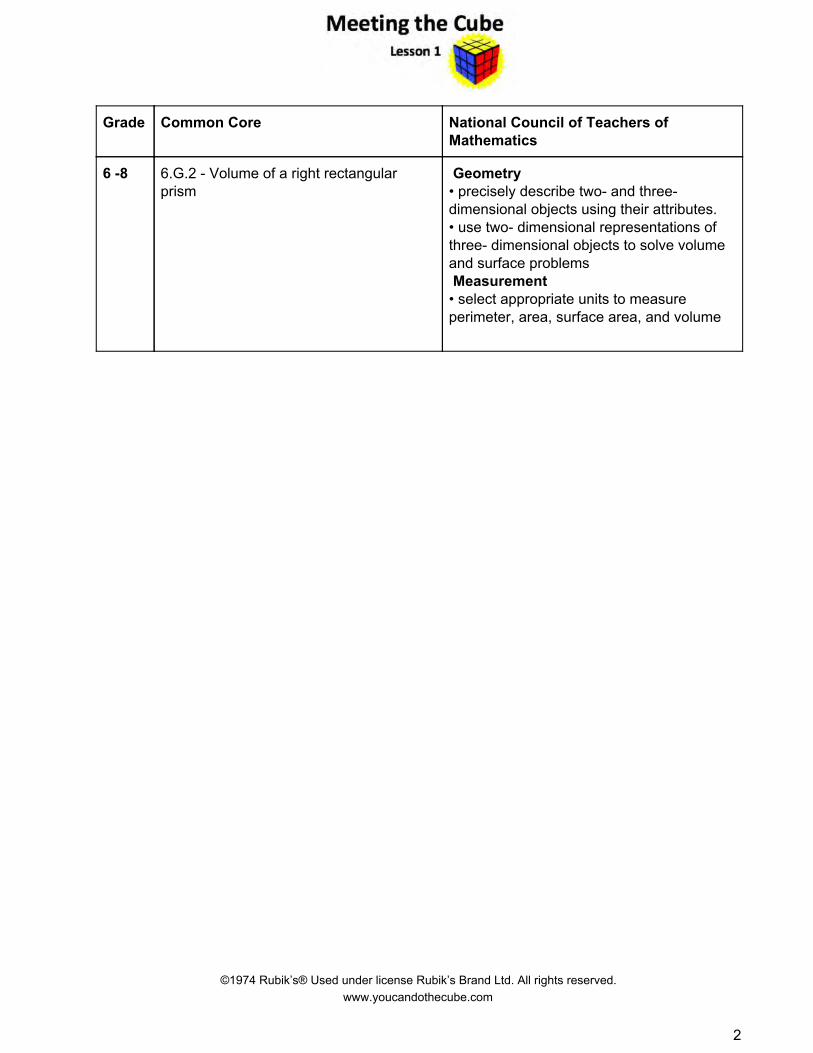
6 -8 6.G.2 - Volume of a right rectangular prism
Geometry • precisely describe two- and three- dimensional objects using their attributes. • use two- dimensional representations of three- dimensional objects to solve volume and surface problems Measurement • select appropriate units to measure perimeter, area, surface area, and volume
©1974 Rubik’s® Used under license Rubik’s Brand Ltd. All rights reserved. www.youcandothecube.com
2
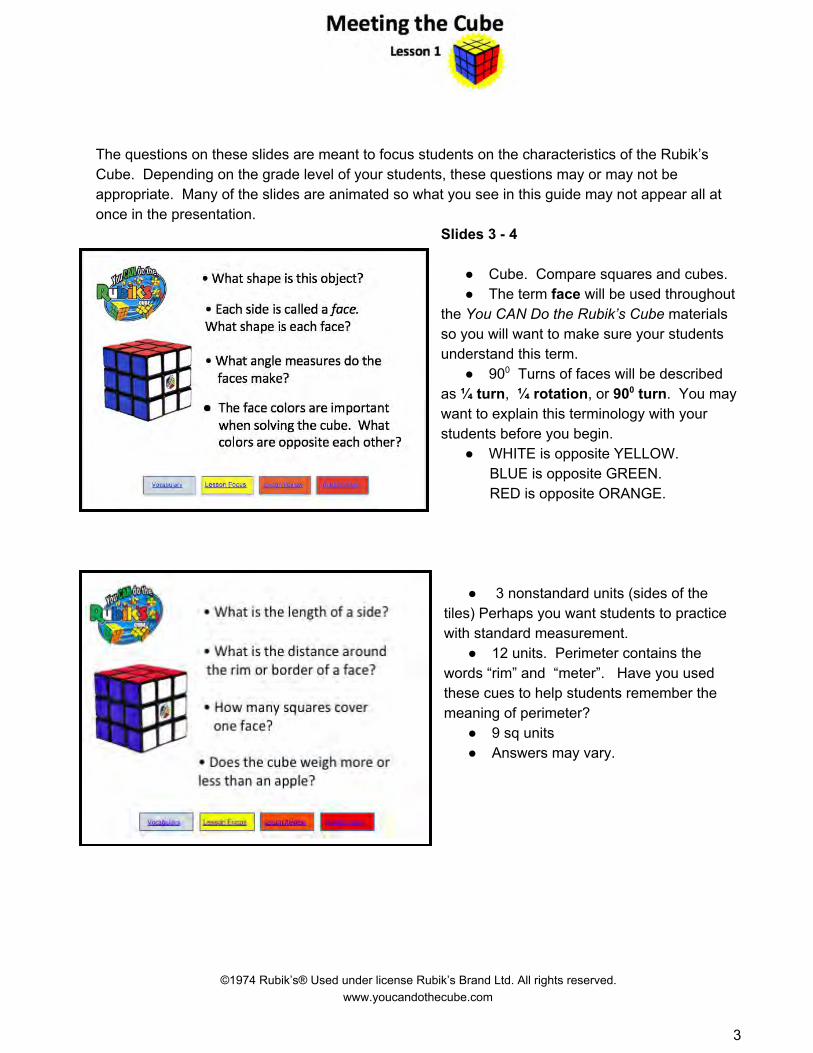
The questions on these slides are meant to focus students on the characteristics of the Rubik’s Cube. Depending on the grade level of your students, these questions may or may not be appropriate. Many of the slides are animated so what you see in this guide may not appear all at once in the presentation.
Slides 3 - 4
● Cube. Compare squares and cubes. ● The term face will be used throughout
the You CAN Do the Rubik’s Cube materials so you will want to make sure your students understand this term.
● 900 Turns of faces will be described as ¼ turn, ¼ rotation, or 900 turn. You may want to explain this terminology with your students before you begin.
● WHITE is opposite YELLOW. BLUE is opposite GREEN. RED is opposite ORANGE.
● 3 nonstandard units (sides of the tiles) Perhaps you want students to practice with standard measurement.
● 12 units. Perimeter contains the words “rim” and “meter”. Have you used these cues to help students remember the meaning of perimeter?
● 9 sq units ● Answers may vary.
©1974 Rubik’s® Used under license Rubik’s Brand Ltd. All rights reserved. www.youcandothecube.com
3
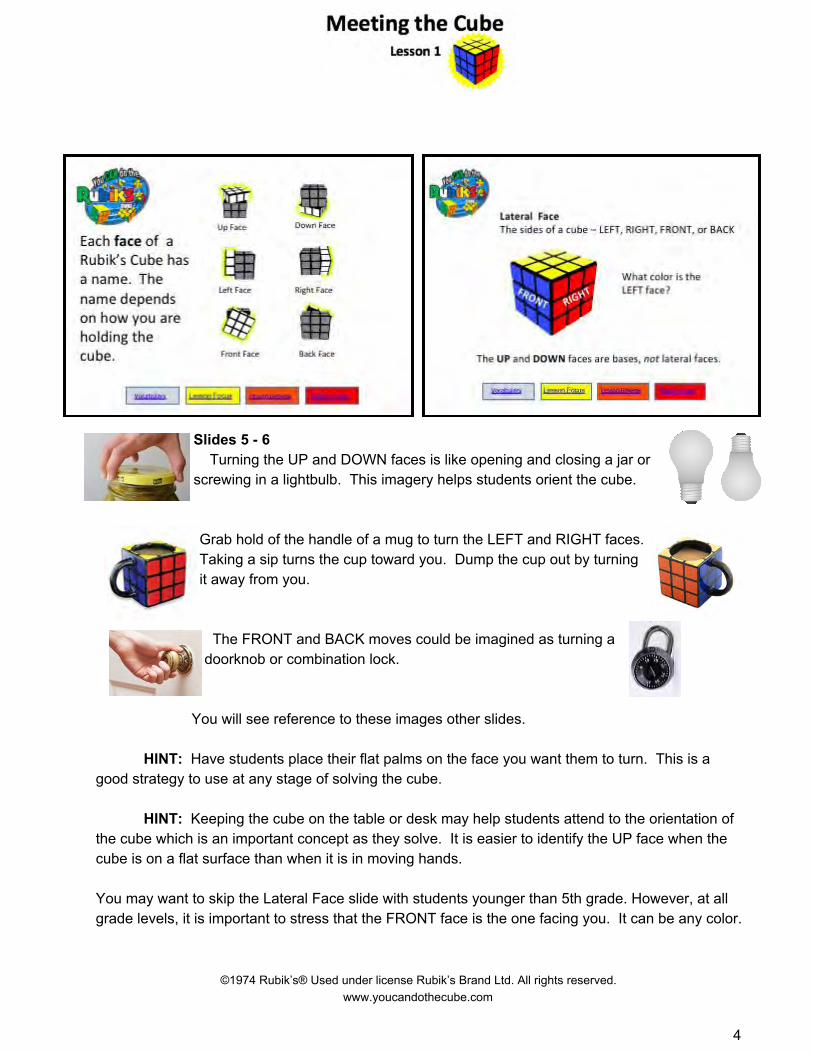
Slides 5 - 6 Turning the UP and DOWN faces is like opening and closing a jar or screwing in a lightbulb. This imagery helps students orient the cube. Grab hold of the handle of a mug to turn the LEFT and RIGHT faces. Taking a sip turns the cup toward you. Dump the cup out by turning it away from you. The FRONT and BACK moves could be imagined as turning a doorknob or combination lock.
You will see reference to these images other slides.
HINT: Have students place their flat palms on the face you want them to turn. This is a good strategy to use at any stage of solving the cube.
HINT: Keeping the cube on the table or desk may help students attend to the orientation of
the cube which is an important concept as they solve. It is easier to identify the UP face when the cube is on a flat surface than when it is in moving hands.
You may want to skip the Lateral Face slide with students younger than 5th grade. However, at all grade levels, it is important to stress that the FRONT face is the one facing you. It can be any color.
©1974 Rubik’s® Used under license Rubik’s Brand Ltd. All rights reserved. www.youcandothecube.com
4
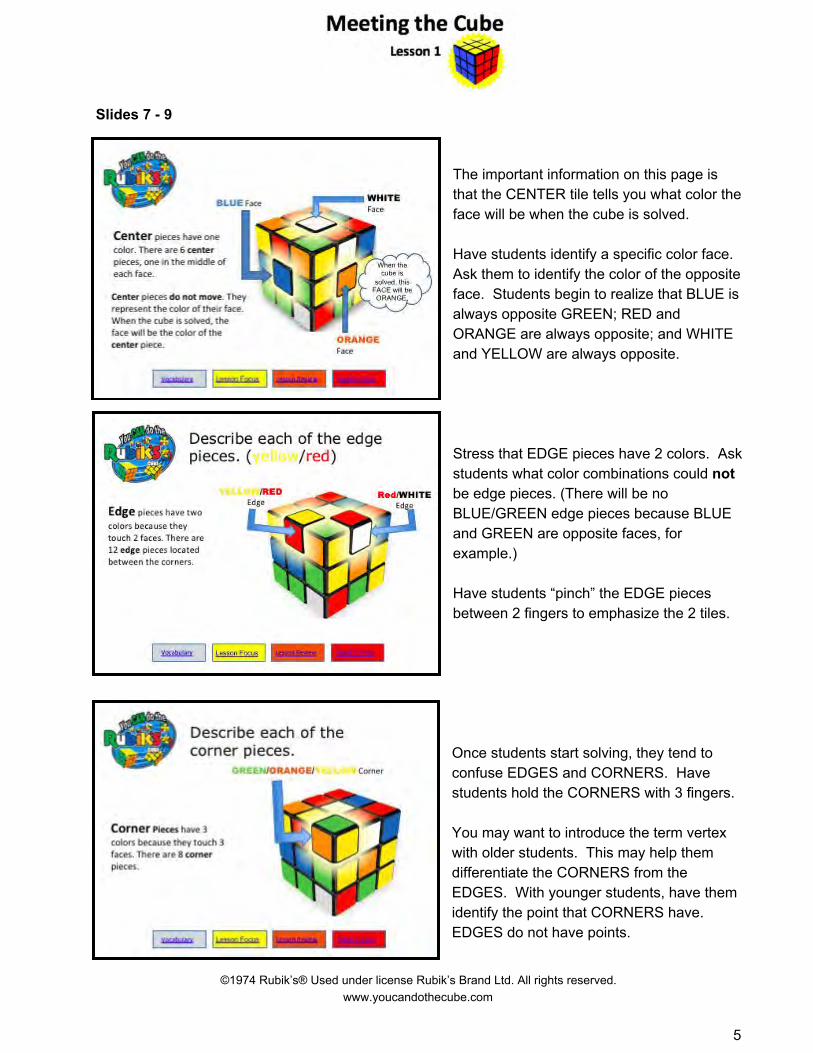
Slides 7 - 9 The important information on this page is that the CENTER tile tells you what color the face will be when the cube is solved. Have students identify a specific color face. Ask them to identify the color of the opposite face. Students begin to realize that BLUE is always opposite GREEN; RED and ORANGE are always opposite; and WHITE and YELLOW are always opposite. Stress that EDGE pieces have 2 colors. Ask students what color combinations could not be edge pieces. (There will be no BLUE/GREEN edge pieces because BLUE and GREEN are opposite faces, for example.) Have students “pinch” the EDGE pieces between 2 fingers to emphasize the 2 tiles. Once students start solving, they tend to confuse EDGES and CORNERS. Have students hold the CORNERS with 3 fingers. You may want to introduce the term vertex with older students. This may help them differentiate the CORNERS from the EDGES. With younger students, have them identify the point that CORNERS have. EDGES do not have points.
©1974 Rubik’s® Used under license Rubik’s Brand Ltd. All rights reserved. www.youcandothecube.com
5

Slides 10 - 11
The clockwise turn is as if you are looking at the face. You may want to put small clock faces on the sides of the cube for younger students. With older students, you may want to use mental imagery of the clock face on the cube face. HINT: Have students place their flat palms on the face you want them to turn. This is a good strategy to use at any stage of solving the cube. Slides 12 - 13
A counterclockwise or inverse turn is always indicated by a lowercase i after the face name. There is a slide demonstrating each turn and its inverse.
©1974 Rubik’s® Used under license Rubik’s Brand Ltd. All rights reserved. www.youcandothecube.com
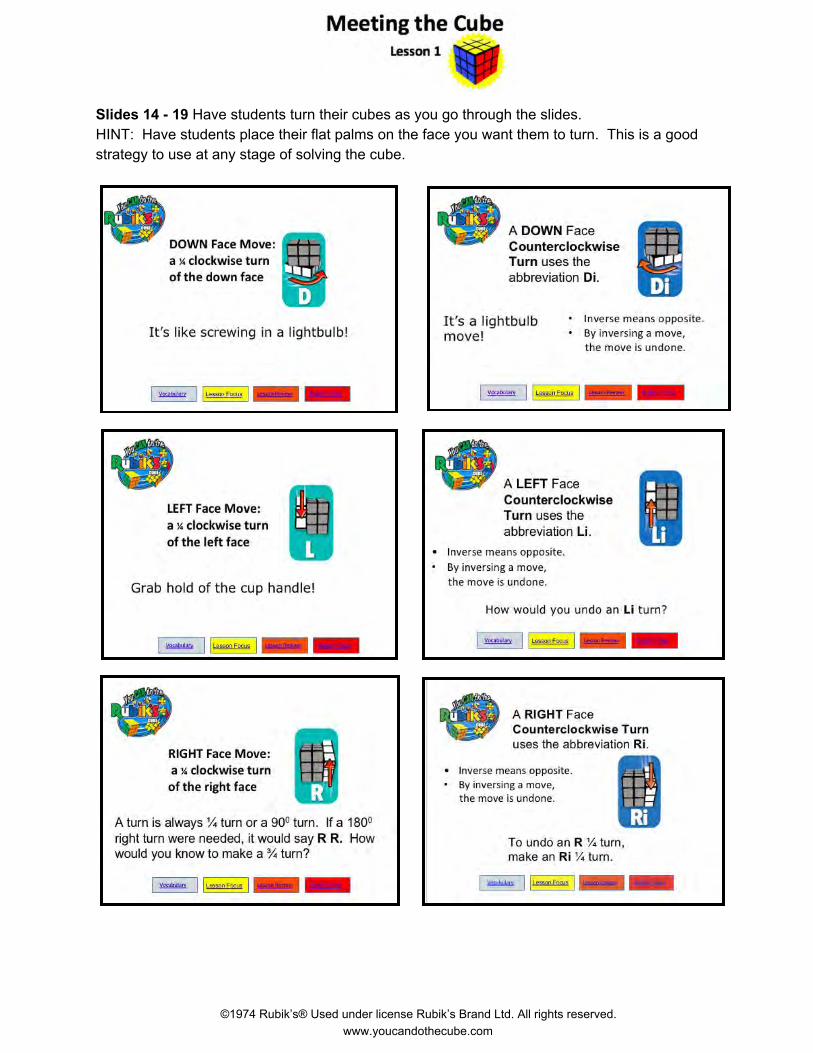
Slides 14 - 19 Have students turn their cubes as you go through the slides. HINT: Have students place their flat palms on the face you want them to turn. This is a good strategy to use at any stage of solving the cube.
©1974 Rubik’s® Used under license Rubik’s Brand Ltd. All rights reserved. www.youcandothecube.com
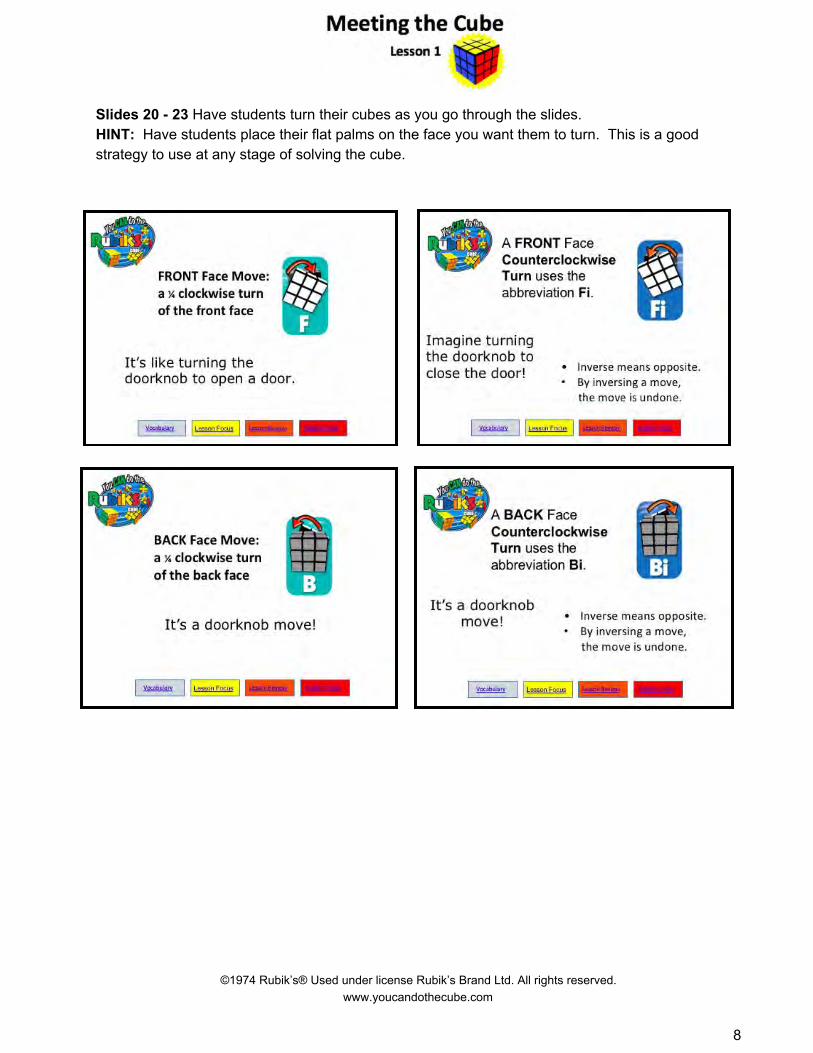
Slides 20 - 23 Have students turn their cubes as you go through the slides. HINT: Have students place their flat palms on the face you want them to turn. This is a good strategy to use at any stage of solving the cube.
©1974 Rubik’s® Used under license Rubik’s Brand Ltd. All rights reserved. www.youcandothecube.com
8
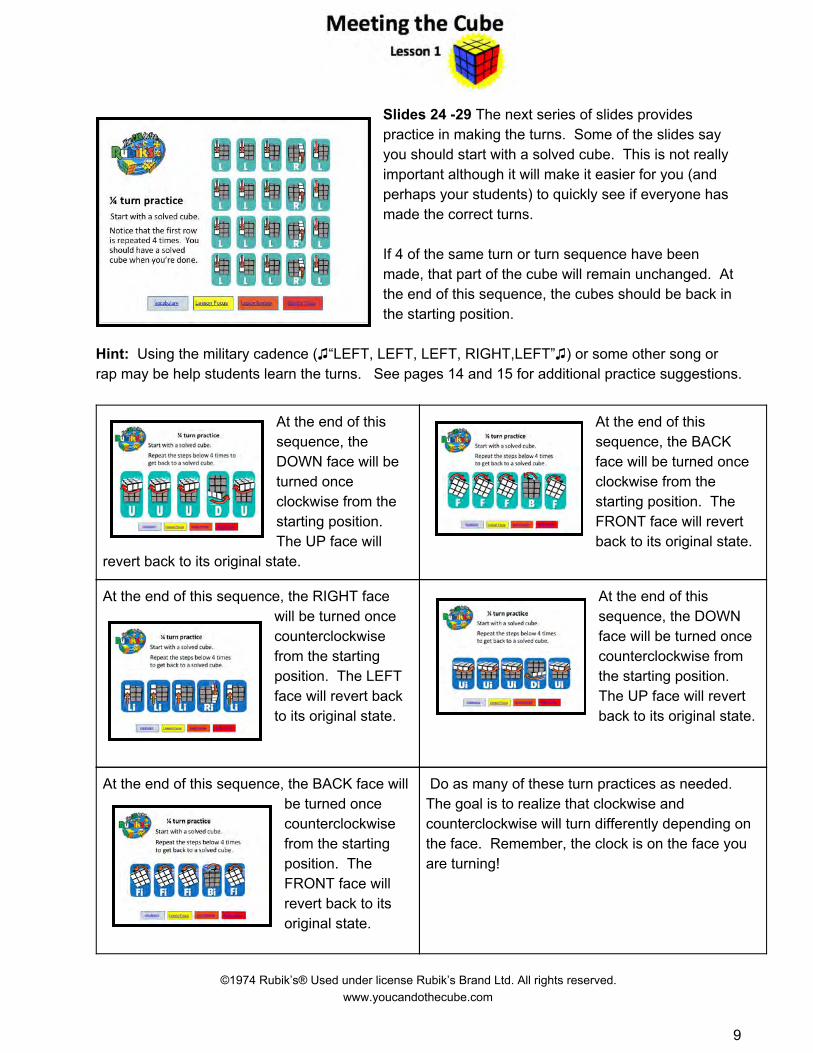
Slides 24 -29 The next series of slides provides practice in making the turns. Some of the slides say you should start with a solved cube. This is not really important although it will make it easier for you (and perhaps your students) to quickly see if everyone has made the correct turns. If 4 of the same turn or turn sequence have been made, that part of the cube will remain unchanged. At the end of this sequence, the cubes should be back in the starting position.
Hint: Using the military cadence (♫“LEFT, LEFT, LEFT, RIGHT,LEFT”♫) or some other song or rap may be help students learn the turns. See pages 14 and 15 for additional practice suggestions.
At the end of this sequence, the DOWN face will be turned once clockwise from the starting position. The UP face will
revert back to its original state.
At the end of this sequence, the BACK face will be turned once clockwise from the starting position. The FRONT face will revert back to its original state.
At the end of this sequence, the RIGHT face will be turned once counterclockwise from the starting position. The LEFT face will revert back to its original state.
At the end of this sequence, the DOWN face will be turned once counterclockwise from the starting position. The UP face will revert back to its original state.
At the end of this sequence, the BACK face will be turned once counterclockwise from the starting position. The FRONT face will revert back to its original state.
Do as many of these turn practices as needed. The goal is to realize that clockwise and counterclockwise will turn differently depending on the face. Remember, the clock is on the face you are turning!
©1974 Rubik’s® Used under license Rubik’s Brand Ltd. All rights reserved. www.youcandothecube.com
9
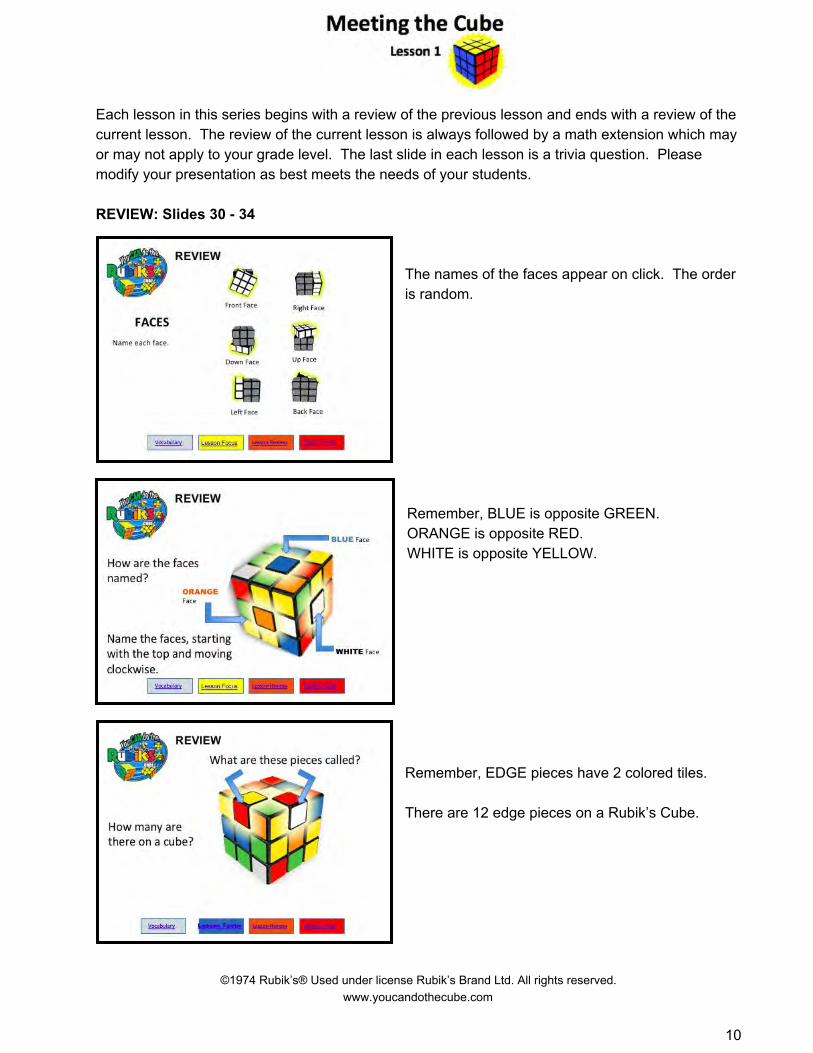
Each lesson in this series begins with a review of the previous lesson and ends with a review of the current lesson. The review of the current lesson is always followed by a math extension which may or may not apply to your grade level. The last slide in each lesson is a trivia question. Please modify your presentation as best meets the needs of your students.
REVIEW: Slides 30 - 34
The names of the faces appear on click. The order is random. Remember, BLUE is opposite GREEN. ORANGE is opposite RED. WHITE is opposite YELLOW. Remember, EDGE pieces have 2 colored tiles. There are 12 edge pieces on a Rubik’s Cube.
©1974 Rubik’s® Used under license Rubik’s Brand Ltd. All rights reserved. www.youcandothecube.com
10
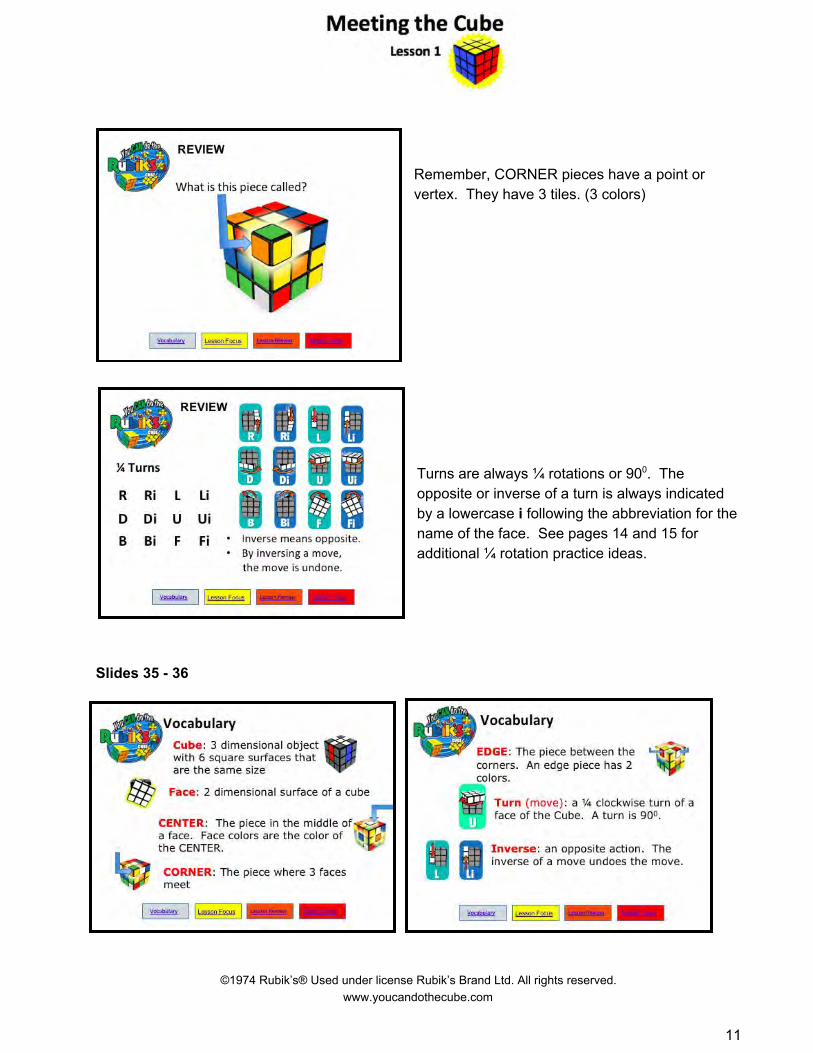
Remember, CORNER pieces have a point or vertex. They have 3 tiles. (3 colors) Turns are always ¼ rotations or 900. The opposite or inverse of a turn is always indicated by a lowercase i following the abbreviation for the name of the face. See pages 14 and 15 for additional ¼ rotation practice ideas.
Slides 35 - 36
©1974 Rubik’s® Used under license Rubik’s Brand Ltd. All rights reserved. www.youcandothecube.com
11
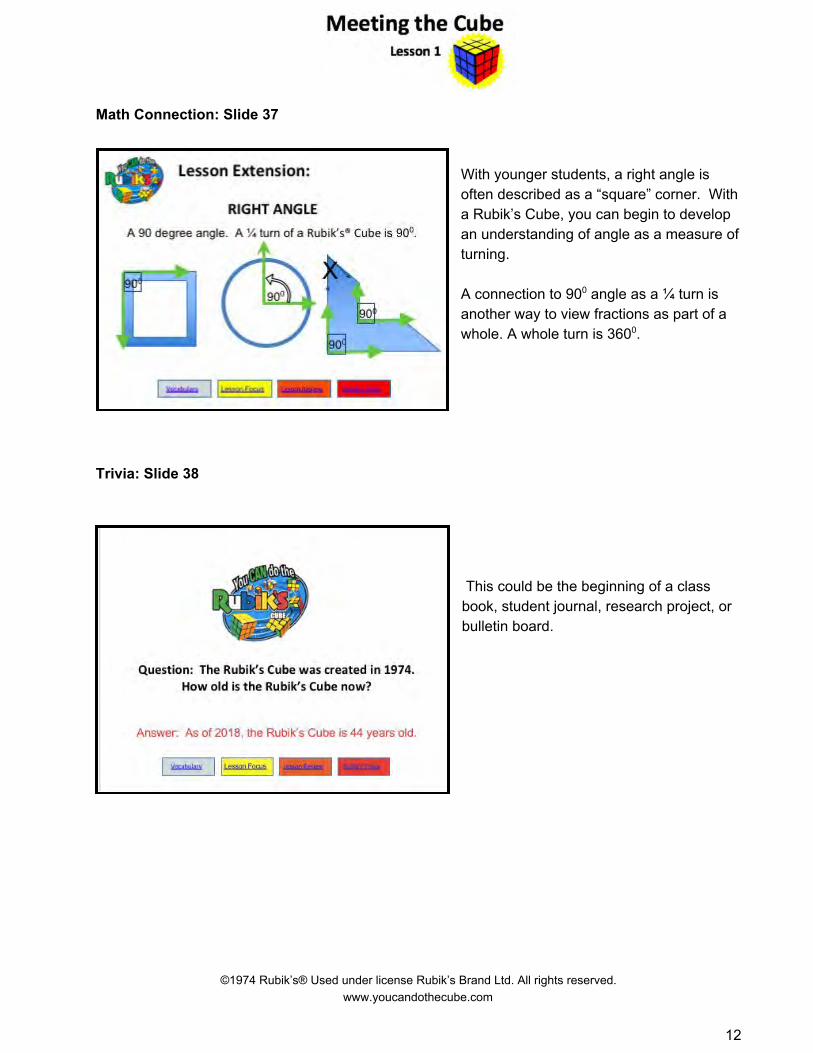
Math Connection: Slide 37 With younger students, a right angle is often described as a “square” corner. With a Rubik’s Cube, you can begin to develop an understanding of angle as a measure of turning. A connection to 900 angle as a ¼ turn is another way to view fractions as part of a whole. A whole turn is 3600.
Trivia: Slide 38
This could be the beginning of a class book, student journal, research project, or bulletin board.
©1974 Rubik’s® Used under license Rubik’s Brand Ltd. All rights reserved. www.youcandothecube.com
12
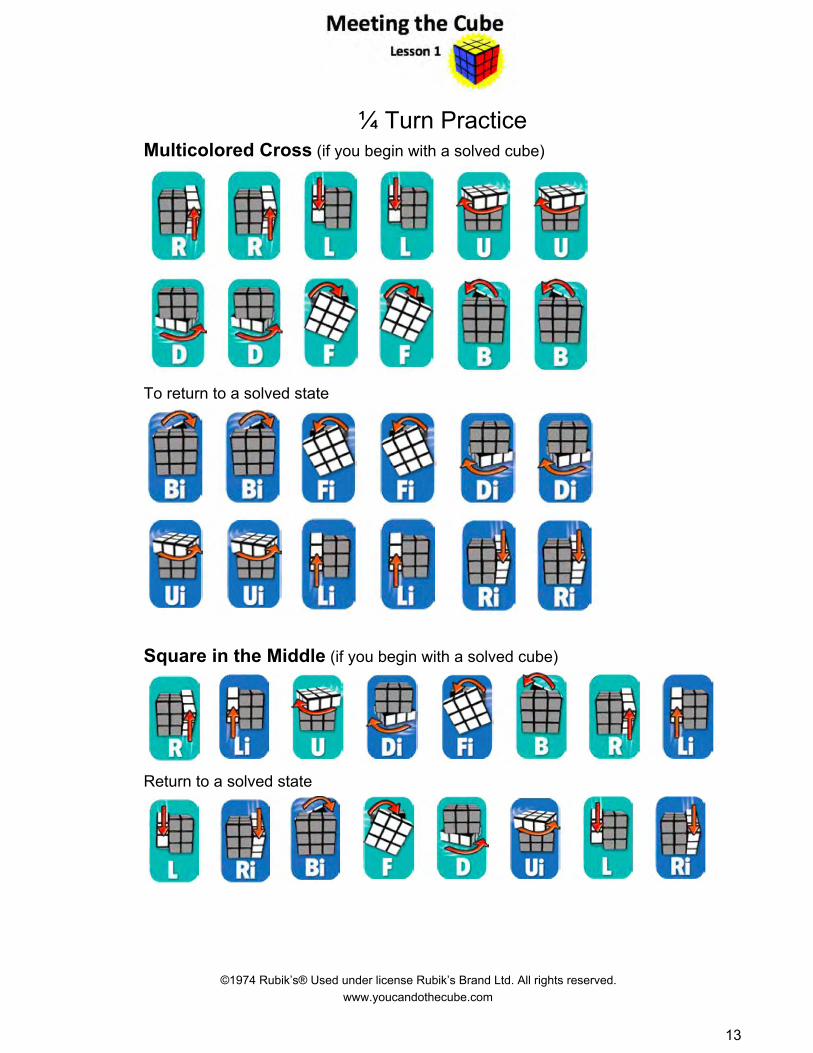
¼ Turn Practice Multicolored Cross (if you begin with a solved cube)
To return to a solved state
Square in the Middle (if you begin with a solved cube)
Return to a solved state
©1974 Rubik’s® Used under license Rubik’s Brand Ltd. All rights reserved. www.youcandothecube.com
13
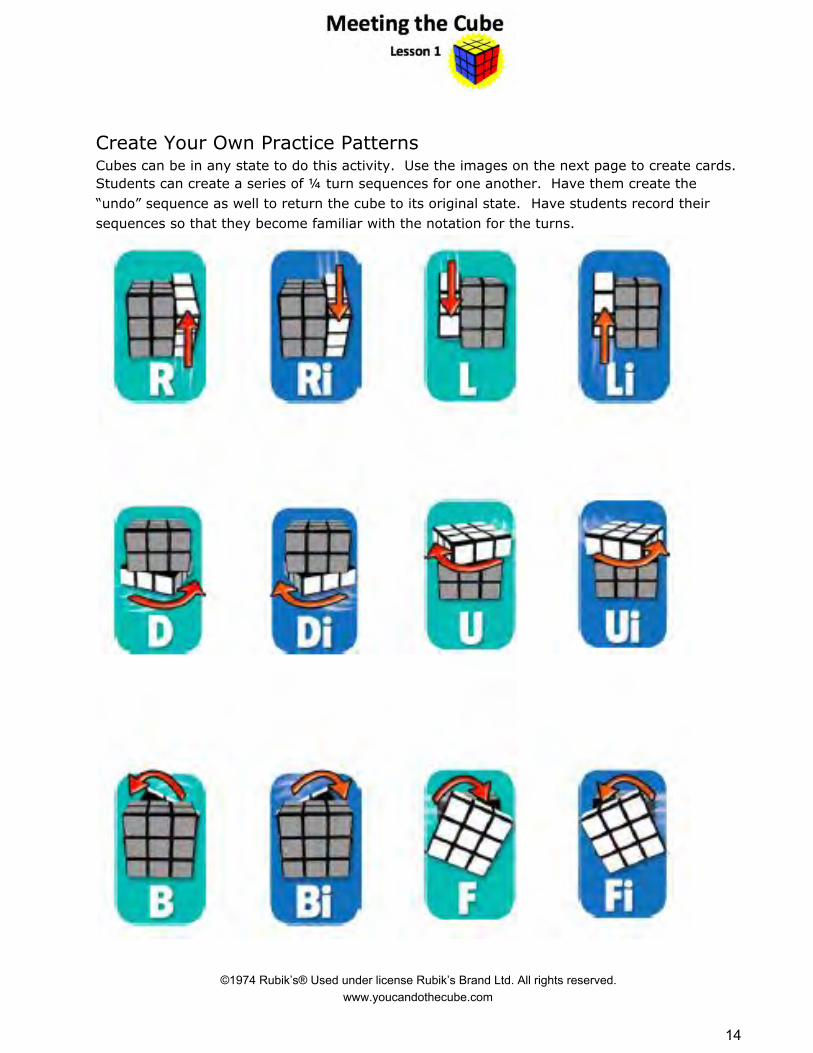
Create Your Own Practice Patterns Cubes can be in any state to do this activity. Use the images on the next page to create cards. Students can create a series of ¼ turn sequences for one another. Have them create the “undo” sequence as well to return the cube to its original state. Have students record their sequences so that they become familiar with the notation for the turns.
©1974 Rubik’s® Used under license Rubik’s Brand Ltd. All rights reserved. www.youcandothecube.com
14
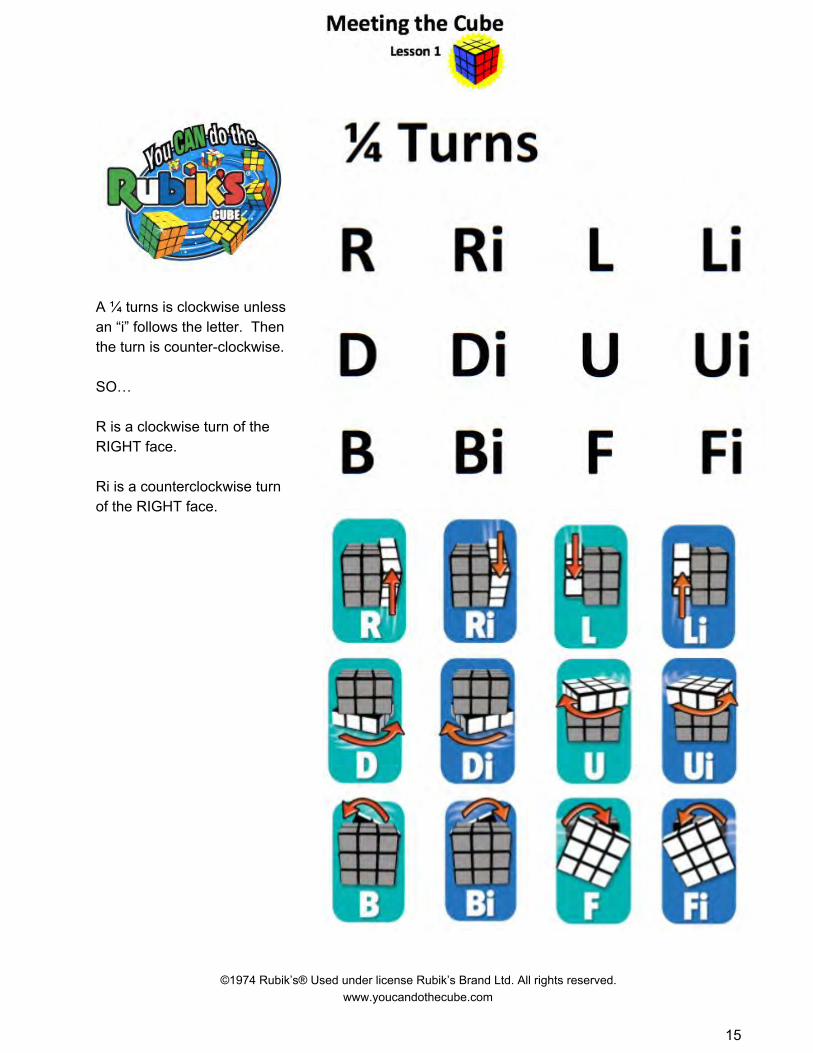
A ¼ turns is clockwise unless an “i” follows the letter. Then the turn is counter-clockwise. SO… R is a clockwise turn of the RIGHT face. Ri is a counterclockwise turn of the RIGHT face.
©1974 Rubik’s® Used under license Rubik’s Brand Ltd. All rights reserved. www.youcandothecube.com
15

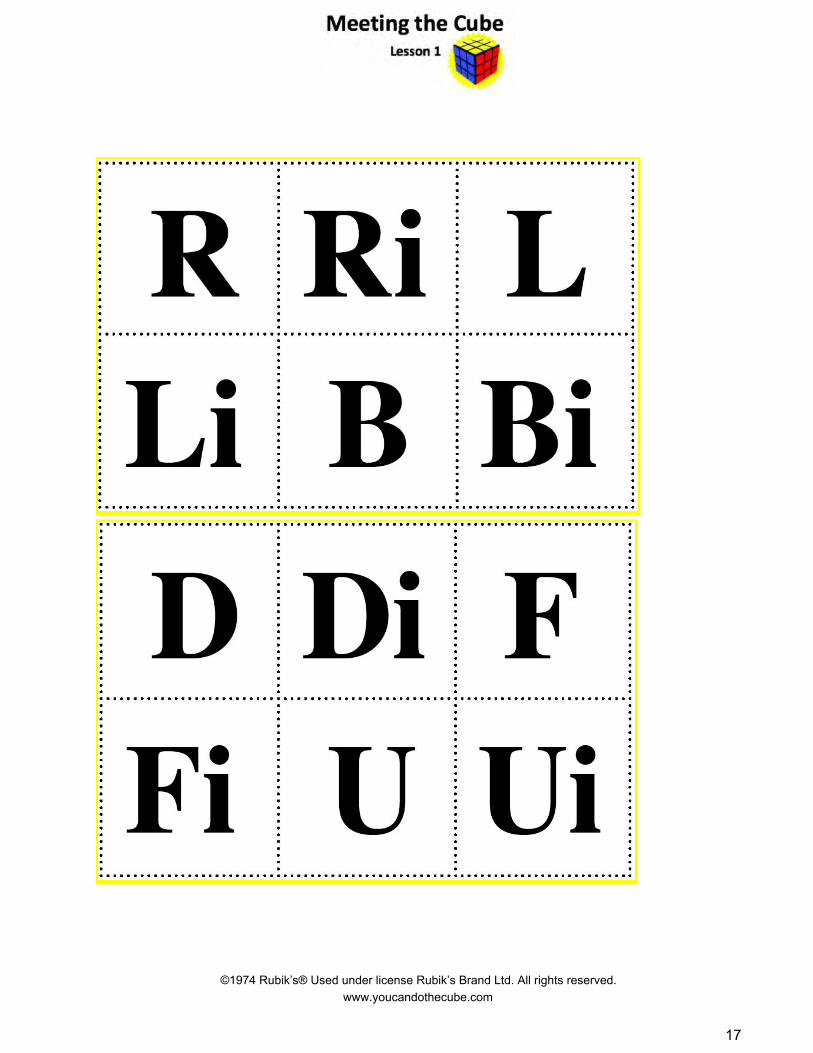
Memory Game ● Cut out each card. ● Place cards face down on the table. ● Take turns trying to match the image with the correct letter.
©1974 Rubik’s® Used under license Rubik’s Brand Ltd. All rights reserved. www.youcandothecube.com
16
©1974 Rubik’s® Used under license Rubik’s Brand Ltd. All rights reserved. www.youcandothecube.com
17