Embed Size (px)
DESCRIPTION
[Civilization] Call to Power 2 Player Manual
Citation preview
CALL TO POWER™ II MANUAL
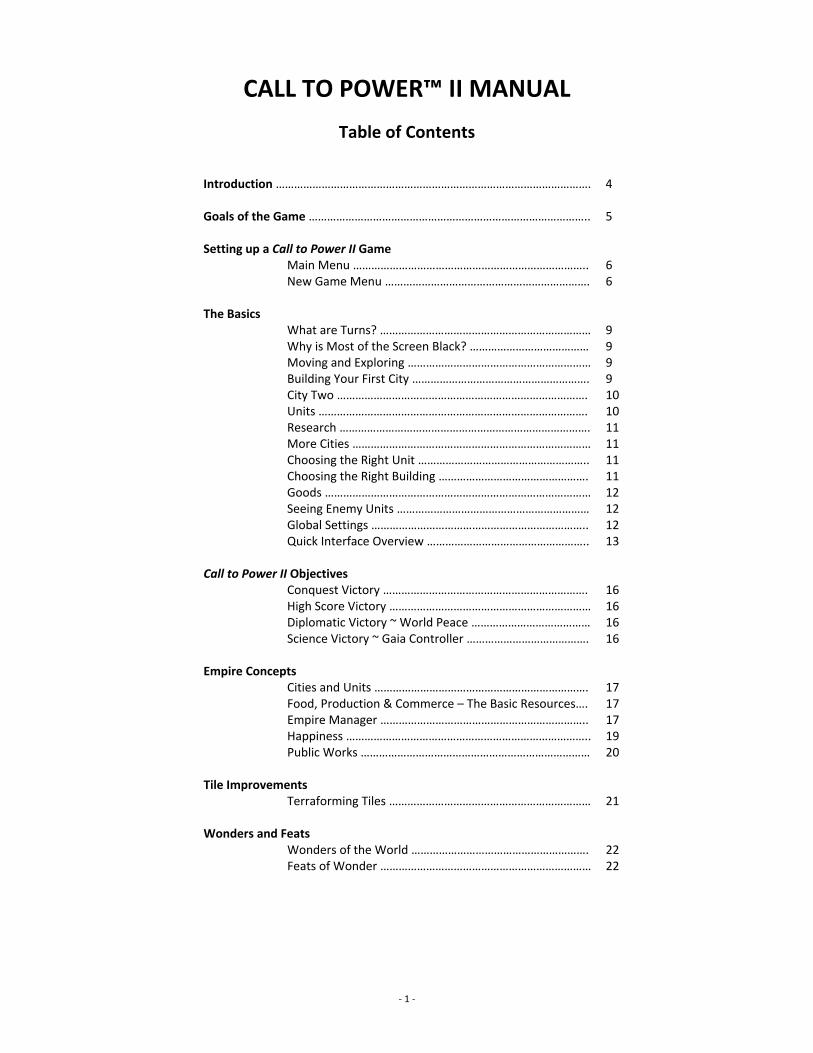
Table of Contents
Introduction …………………………………………………………………………………………. 4 Goals of the Game ……………………………………………………………………………….. 5 Setting up a Call to Power II Game Main Menu ………………………………………………………………….. 6 New Game Menu …………………………………………………………. 6 The Basics What are Turns? …………………………………………………………… 9 Why is Most of the Screen Black? ………………………………… 9 Moving and Exploring …………………………………………………… 9 Building Your First City …………………………………………………. 9 City Two ………………………………………………………………………. 10 Units ……………………………………………………………………………. 10 Research ………………………………………………………………………. 11 More Cities …………………………………………………………………… 11 Choosing the Right Unit ……………………………………………….. 11 Choosing the Right Building …………………………………………. 11 Goods …………………………………………………………………………… 12 Seeing Enemy Units ……………………………………………………… 12 Global Settings …………………………………………………………….. 12 Quick Interface Overview …………………………………………….. 13 Call to Power II Objectives Conquest Victory …………………………………………………………. 16 High Score Victory ………………………………………………………… 16 Diplomatic Victory ~ World Peace ………………………………… 16 Science Victory ~ Gaia Controller …………………………………. 16 Empire Concepts Cities and Units ……………………………………………………………. 17 Food, Production & Commerce – The Basic Resources…. 17 Empire Manager ………………………………………………………….. 17 Happiness …………………………………………………………………….. 19 Public Works ………………………………………………………………… 20 Tile Improvements Terraforming Tiles ………………………………………………………… 21 Wonders and Feats Wonders of the World …………………………………………………. 22 Feats of Wonder …………………………………………………………… 22
‐ 1 ‐

City Concepts Creating Cities ……………………………………………………………… 23 How Cities Work …………………………………………………………… 25 The Build Manager ……………………………………………………… 26 Mayors …………………………………………………………………………. 28 The City Tab …………………………………………………………………. 29 The City Manager Screen ……………………………………………… 29 City Conditions …………………………………………………………….. 31 Undersea Cities …………………………………………………………… 31 Disbanding Cities …………………………………………………………. 31 Advanced City Concepts National Manager ………………………………………………………… 32 Pollution Causes of Pollution in Cities …………………………………………. 34 Local Pollution and Dead Tiles ……………………………………… 34 Causes of Global Pollution ……………………………………………. 34 Pollution Indicators ……………………………………………………… 35 Solutions ………………………………………………………………………. 36 Unit Concepts What Do Units Look Like? …………………………………………….. 37 How Do I Build Units? …………………………………………………… 37 Unit Combat Characteristics ………………………………………… 37 When Units Become Obsolete ……………………………………… 38 Special Units ………………………………………………………………… 38 Veterans ………………………………………………………………………. 39 Unit Movement Characteristics ……………………………………. 39 Military Support Costs and Military Readiness ……………… 40 Unit Orders ………………………………………………………………….. 41 Armies and Army Manager …………………………………………… 44 Combat ………………………………………………………………………… 44 Government Effects of Government …………………………………………………. 45 Why Change Governments? …………………………………………. 46 How Do I Change My Government? ……………………………… 46 Government Types in Call To Power II ………………………….. 47 Governments and Special Units ……………………………………. 48 Diplomacy Making Contact ……………………………………………………………. 49 Regard and Trust ‐ The Keys To Diplomacy …………………… 49 The Diplomacy Manager ………………………………………………. 49 Intelligence ………………………………………………………………….. 50 Sending Diplomatic Messages ……………………………………… 50 Declaring War ………………………………………………………………. 54 Diplomats and Empathic Diplomats ……………………………… 54 Other Factors that Affect Diplomacy ……………………………. 55
‐ 2 ‐
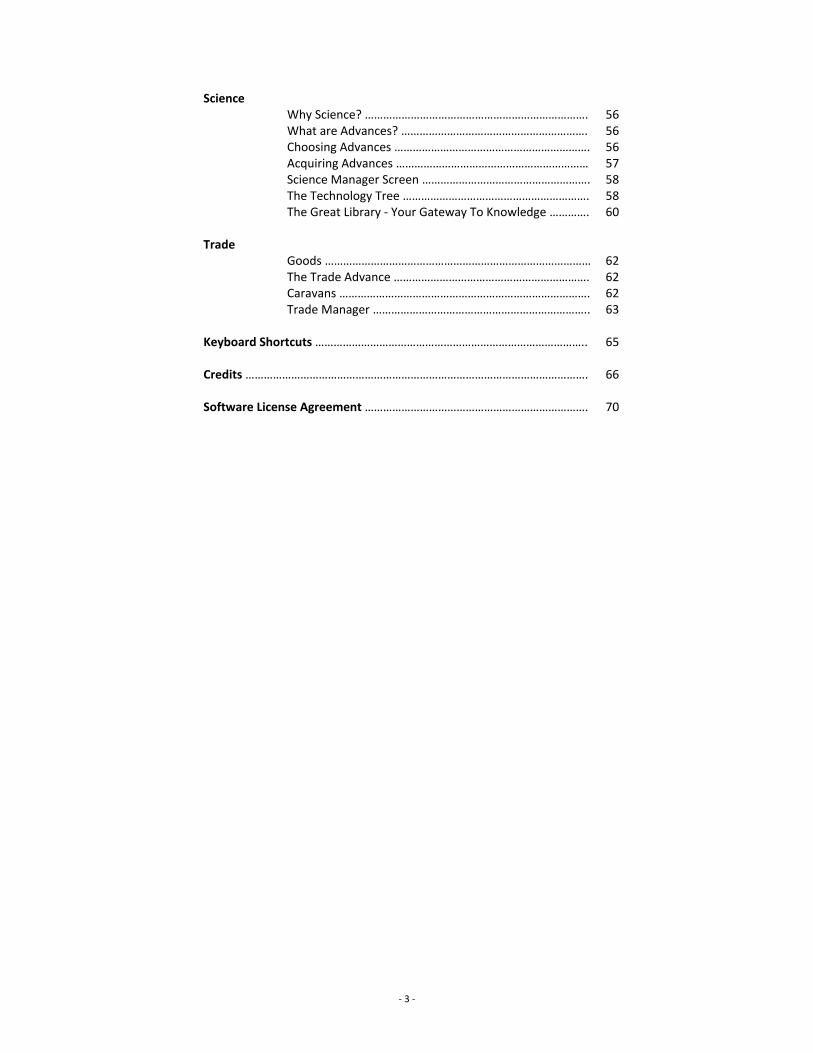
Science Why Science? ………………………………………………………………. 56 What are Advances? ……………………………………………………. 56 Choosing Advances ………………………………………………………. 56 Acquiring Advances ……………………………………………………… 57 Science Manager Screen ………………………………………………. 58 The Technology Tree ……………………………………………………. 58 The Great Library ‐ Your Gateway To Knowledge …………. 60 Trade Goods …………………………………………………………………………… 62 The Trade Advance ………………………………………………………. 62 Caravans ………………………………………………………………………. 62 Trade Manager …………………………………………………………….. 63 Keyboard Shortcuts …………………………………………………………………………….. 65 Credits …………………………………………………………………………………………………. 66 Software License Agreement ………………………………………………………………. 70
‐ 3 ‐

INTRODUCTION
Call To Power II is an epic game of strategy and empire building. Nurture a fledgling nation into the most powerful empire in history. How you weigh your desires to explore the world, discover advances, conquer other nations, and maintain peace will mean the difference between victory and defeat. Leading an entire nation of people is a Herculean task, and success is not guaranteed. Compelled by duty to your people, you will need to build cities, establish populations, and manage their needs. You will have to master the forces of nature and use land to your advantage without upsetting the delicate balance of the ecology. You must fend off barbarian invasions and engage other nations of all stripes in various arenas‐on the battlefield and at the negotiations table. And, perhaps most important, you will shepherd your people through the cultural and scientific advances that will enable your progress through time. You will have a vast array of resources available. How you allocate these resources will dramatically affect your empire's viability and prosperity. You may choose to sacrifice scientific advancement in favor of a strong military. You may concentrate on building a few large cities and minimize your expansion. You may set out to explore the world, only to find out that a sudden invasion of your homeland forces you to protect your people. Above all, you must manage your objectives thoughtfully and temper your personal desires by accommodating the needs of your ever‐changing empire. A variety of factors internal and external to your empire will affect your success as a leader. Such things as your proximity to rival empires, access to natural resources and goods, the defensibility of the terrain you control, and your access to navigable waterways will influence your choices. The paths to victory in Call To Power II are many. You can conquer the world by destroying your enemies, or forge an alliance with every nation to achieve world peace. You can also win through technological supremacy by being the first to develop the magnificent Gaia Controller. In Call To Power II, your destiny is intertwined with the destinies of the people you rule. Lead them to victory, and you will be immortalized in the annals of history. Lead them astray and your name may be forever enshrouded in the fog of time. The choice is yours.
‐ 4 ‐

GOALS OF THE GAME In Call To Power II, a successful leader must effectively manage three primary resources, food, production, and commerce. Food affects the ability of individual city populations to survive and grow, enabling these cities to expand. Production denotes the raw materials and labor required for building units and city improvements. Commerce represents your empire’s wealth and buying power. Each section of the map, comprising individual tiles on land or water, has a varying and indefinite supply of these three resources. However, only a limited amount of each resource may be harvested in a given turn. To win the game, you must utilize these fundamental resources, as well as your wits and opportunities, to achieve the following basic goals: EXPLORATION: When you begin each game, most of the game map is obscured except for a small portion immediately surrounding your settlers. The black areas are parts of the map you have never visited. The gray parts are areas you have visited at one time but are no longer completely visible. You will be able to see things through the shroud, such as terrain, goods, ancient ruins, and foreign cities. If something changes on a grayed‐out tile, for instance a unit occupies it or a city is captured, you will not know until you "visit" that area again. You can only see action on tiles if they are within the range of vision of your units, cities, or special, vision‐enhancing tile improvements. As you begin to explore your surroundings, you will reveal new terrain, resources, and information critical to your survival and growth. Among other things, you will discover trade goods, friends and foes, roving units, and mysterious ruins. GROWTH: An empire is comprised of individual cities which must prosper and grow if your nation is to thrive and expand. Accumulating sufficient food will enable population growth, giving you the resources to build additional cities. BUILDING: Increasing the production capacity within your cities will enable you to build new units, improvements, and wonders of the world. They will benefit your cities and overall empire by enhancing growth, science, production, commerce, defensive, or other capacities. CONFLICT: A powerful military can be a blunt instrument, a surgical tool, or a powerful bargaining chip. Regardless, it is an effective means of achieving your empire’s strategic objectives. Maintaining a powerful military capability requires a significant investment of your nation’s production and commercial resources. A costly arms race could tax your civilization to its limits. SCIENCE: By allocating a certain portion of your commercial resources to scientific research, you can achieve critical discoveries and advances that will in turn provide your empire with significant advantages. TRADE: Careful consideration should be given to what trade goods are available when choosing a location for your cities. These resources represent an important source of income within your empire, and form the basis for trade with other empires. DIPLOMACY: Your wits and the opportunities afforded you are the key resources at your disposal when conducting diplomacy. Of course, it doesn’t hurt to speak softly and carry a big stick.
‐ 5 ‐
SETTING UP A CALL TO POWER II GAME To start a game of Call To Power II, click the Call To Power II icon in the Call To Power II folder contained in the Programs section of the Start menu. After you view the movie, the main menu screen will appear. Select one of the following options: Single Player, Credits, or Quit. At any time, you may select "Quit" from any screen to exit Call To Power II and return to Windows. To play a single‐player game (and to play the in‐game tutorial), click the Single Player Button. The next screen has the following options:
Main Menu NEW GAME This is the starting point for launching a new game. LOAD GAME Select a previously saved game that you want to continue. Note: Trading saved games between different versions of Call To Power II is not supported (e.g. saved games from one foreign language version of the game will not function correctly in another language version). OPTIONS Allows you to customize many of the game settings, including music, sound volume, keyboard layout, and gameplay options.
New Game Menu After clicking the New Game Button, you will be given several choices regarding your game. Each choice consists of a heading and a button. Within the button, the default choice is listed. Your choices are: EMPIRE Under the heading Empire you will see a button that says Romans. Click the button. If you do not want to play as the Roman Empire, you have the opportunity to choose a different name for your people. You can choose from 41 ancient and modern nationalities; and you can choose the gender of your leader persona, male or female. In the game, other empires will refer to you by this name. Your choice of nationality has no bearing whatsoever on the nature of your empire. In other words, there are no advantages or disadvantages to your choice. You can also change your name from this screen as well. LEADER NAME Under the heading Leader Name you will see a narrow white box with the name Julius Caesar in it. This is the name you will be known by in the game. As other nations will refer to your people by your empire name, they will address you directly by this name. Your in‐game advisors will also occasionally call you by this name (although many of them opt for the customary “Sir” or “Madam.” After all, you are the one in charge). If you would like to be known as Julius Caesar, leave this box as is. If you prefer another name, click once in the white box and type in your new name. You may select your own name, a colorful pseudonym, or the name of a great leader from history. Be sure to select a name you like. As the next ruler of a powerful empire, you'll be hearing about yourself a lot!
‐ 6 ‐
DIFFICULTY The default skill level is Medium. If you are new to turned‐based strategy games and the Call To Power universe, you are strongly encouraged to select the Beginner level. It will start the game with a tutorial. The tutorial will walk you through the elementary steps of empire building. Keep in mind, you can always turn the tutorial off and forge ahead on your own. Experienced players may wish to up the skill level of the game to adequately challenge them. Higher skill levels pit you against shrewder computer players than the lower levels. Under the difficulty level, there is also an option to determine the threat of barbarians. Novice players should keep it at its current level of Bandits. After you have selected your skill and barbarian threat levels, return to the New Game Menu by clicking Close. NUMBER OF EMPIRES The standard number of empires for a game is five. This includes your empire (e.g. a game of five empires would pit you against four computer opponents). You can lower the number of empires to three and up it to as many as eight. Generally, with fewer opponents, you will have less of a threat to deal with and more time and resources to put into building your empire. However, your rivals will have less to deal with, as well. Increasing or decreasing the number of empires will add subtle differences to the game and will require changes in strategy. Five empires is a good starting number, though, and novice players should leave this level unchanged. RULES You may choose to alter two important rules in the game. Those rules are:
BLOODLUST The Bloodlust option determines your options for winning the game. With it on, you have only one way to win‐total conquest of your enemies. With it off (as is the default), you have four ways to win Call To Power II: Conquest, High Score, World Peace, and the Science Fiction victories. Consult the Call To Power II Objectives section on page 16 for more information on the various end conditions in Call To Power II. POLLUTION You may choose to play the game without the threat of pollution. The default choice is On. With the Pollution option on, you will have to deal with the pollution your cities create. Pollution adds a level of realism to the game, and you are encouraged to play with it enabled. Nevertheless, you have the choice to disable pollution in the game.
SELECT SCENARIO Call To Power II comes with three pre‐designed scenarios, as well as a custom “Earth” map. Some scenarios are historically based and some are fantastical. Each scenario has a series of objectives you must complete in order to win. They are recommended for experienced players only. If you want to play a scenario, click the Select Scenario Button and choose from the list. WORLD SHAPE The World Shape setting determines how the edges of the map behave in the game. The default setting is Earth World and it is recommended for beginners. The world shapes are as follows:
EARTH WORLD The Earth World option makes the map behave like a flat map of the earth. In other words, the map represents a spherical world, with the east and west edges of the map connecting. If you move a unit off the right edge of the map, it will appear on the left. The top and bottom edges of the map do not "wrap" around, and units moving toward them will reach a barrier. DOUGHNUT WORLD Unlike the Earth World, the Doughnut map connects the east/west borders and the north/south edges. Units traveling to any edge of the map will appear on the opposite edge.
‐ 7 ‐

MAP SIZE The map size option allows you to change the size of the world map. The larger the map, the more territory there is, and the more physical space there exists between nations. Smaller maps will usually mean you will encounter rival nations sooner and may be fighting over land more. Your map size has a profound effect on your strategic considerations. Novice players are advised to keep the default size of Regular. The sizes to choose from are Small, Regular, Huge, and Gigantic. Considerations of territoriality, resource shortages, strategic locations, and exploration should inform your decision on map size. Please note: In the interest of preserving acceptable game performance, players on lower‐end hardware computers should not play on Huge or Gigantic maps. CUSTOMIZE MAP After you have selected the map size, you may want to customize the physical makeup of the world map. This can add new challenges to the game and make for a more enriching and rewarding experience. You can determine the following conditions for your world:
WET VS. DRY This determines the general humidity levels of the land. Jungles and swamps comprise most of the terrain in wet worlds, whereas dry worlds tend toward desert and sand dunes. WARM VS. COLD The general temperature of the world will have an effect on terrain as well. Warmer worlds tend toward deserts and savanna, whereas cold worlds contain a lot of tundra, glaciers and polar mountains. OCEAN VS. LAND You can choose between wide, expansive, deep oceans with small pockets of land or massive expanses of terrain interspersed with seas and minor oceans. ISLAND VS. CONTINENT This setting determines how dense the land is. Move the slider toward Island and the world will be made up of small archipelagos. The Continent setting will ensure that whatever land is present will be connected, forming for huge continents. UNIFORM VS. DIVERSE This determines the variety of terrain. A uniform world will tend to have large patches of the same terrain type, whereas a diverse world will look more like a patchwork of land. FEW GOODS VS. MANY GOODS The amount of goods will have an effect on the economy of your game. In general, less goods on a map means less of an opportunity to make money from trade. However, because the geographic availability of goods plays a role in market prices, abundant goods may equate to more trade routes that are, in turn, less profitable.
LAUNCH EDITOR Call To Power II includes a map editor that enables you to create an entire map exactly to your specifications. With it you can lay down any combination of terrain types you wish. LAUNCH! Once you have made all of your choices, click the Launch Button to start Call to Power II. Consult the next chapter, The Basics, on page 9, for information on starting your empire.
‐ 8 ‐
THE BASICS This section is intended for those players new to the Call To Power universe, and new to the turned‐based strategy game genre. It will explain what Call To Power II is, how the game works, and some basic concepts you must be familiar with in order to derive the maximum amount of enjoyment from the game. Although the game has a tutorial on the Beginner level of the game that walks you through the basics of building an empire, this section will introduce you to some of the basics of the turn‐based strategy game.
What are Turns? Call To Power II plays much like a board game in many respects. In it, players take turns in which they perform actions to advance their position in the game. These actions could include moving units or building a city.
Why is Most of the Screen Black? You may notice that your Settler is standing on the map surrounded by black. The black area you see is called the Shroud. This represents the parts of the map that you have never seen or explored. Behind the shroud could be fertile lands ripe for new cities, wastelands that will stunt growth, possible friends, or dangerous enemies. Your settlers will move where you tell them to go, enabling you to explore your initial surroundings. Each settler is capable of founding new cities‐a very important skill. It is important to start your first cities soon so your empire doesn’t fall behind. When the game starts, the first settler is already selected. A selected unit has a green circle around it and its health bar will blink.
Moving and Exploring Begin to explore your initial surroundings. First close the dialog boxes (after reading them carefully). Click on the first settler, holding down the left mouse button. While still holding the button, drag your mouse away from the Settler. You will see his path stretch out. Numbers along the path indicate how long it will take the unit to get to a specific place. If the line is red, it is crossing a point that the unit cannot traverse (such as over the ocean for a land unit). If the line is yellow without numbers, the territory is unknown, so it is impossible to estimate the best path. You may also notice that units will travel faster along rivers. Release the left mouse button and the settler will begin to move. Don’t go too far‐remember, you want to get settled as soon as possible.
Building Your First City You’ll want to begin your first city quickly. You’ll also want to start your first city in an area in which it will be able to flourish. When your settler is not moving, you’ll see that he is surrounded by nine highlighted tiles (a 3x3 square). This represents the area of influence a city founded in that spot would start with. In other words, those are the areas the city would use for farming, production, and trade. Ideally, you want an area that has some grassland (green tiles) to grow food, access to waterways for easy transportation, some hills or mountains for production, and a Trade Good (see Trade, on page 62). Just as some places are good for city growth, there are others that are bad. You will want to avoid large desert, swamp or snowy areas. Those will not provide as many opportunities to grow and may also slow the movement of units around it. It is doubtful that you will be able to find the perfect spot. More than likely, you will need to strike a balance. You’ll want more good tiles than bad‐sooner rather than later. Move your settlers around to find a decent spot for a city. You will not be able to build a city if your unit has already moved in that turn. A Settler will usually only be able to move one space each turn (more along rivers). At the end of a turn, hit the End Turn Button. At the beginning of the next turn, click on the Settle Button under the Unit Tab (or right click the Settler and choose Settle from the context menu). The first city built will automatically serve as your new empire’s capital.
‐ 9 ‐
Once the city is built you will be shown the Build Manager. This is where you tell your city what to build. A city can build Units (troops), Improvements (city structures that add to growth, happiness, income, and more), or Wonders (magnificent achievements that can only be built once per game). To begin, build two warriors and another settler. The first warrior will defend your city from chance encounters with barbarians or other empires. You will want to have additional defenders soon, but one is a good start. The second warrior will explore the map to uncover new lands and new areas to colonize. The settler will be used to grow your empire to an additional city. Double‐click on the warrior listed under Units. You will notice that he is added to the Current Queue. Double‐click on the warrior again and you will see that now two are listed in the Queue. Finally, double‐click on the settler. Next to each unit name in the Queue is the number of turns it will take to produce it. Progress takes time. Press the Close Button to exit the screen and return to the map. Click the End Turn Button a few times to move time along. Congratulations! You’ve built your first city and started your empire on a glorious path. Now more than ever, it is important that you carefully weigh your decisions. As the leader, your people depend on you.
City Two Continue to explore the map to find a good spot for another city. It is important to keep your cities close enough‐but not too close. As a city grows, it will have influence over more of the surrounding tiles. If your cities are too close they will compete for the same tiles‐one will win and the other will lose (only one city can control any given tile). It is best if your cities are far enough so that they have plenty of room to grow, and are not constrained by one another. A distance of five or six tiles between your first cities is usually a good start. You don’t want your cities too far apart either. The large colored border that circles your city signifies your Empire’s territory. If your cities are too far apart you could end up with neutral territory between them. That could lead to other nations claiming that land, significantly dividing your empire. Not only that, widely separated cities are harder to defend from attack. Furthermore, you will only be able to build roads and other improvements on your own territory. Once you have found a suitable location for your new city, move your settler and build it. Again, you will want to start your build queue with some units to defend, explore, and to continue the expansion of your empire.
Units Once your first Warrior is built, you will see him standing in your city. Clicking on him will highlight him with a green circle (a red circle means the city is selected). For the first unit, we will want to Fortify him. A fortified unit is better at defending a city or territory. The world is a dangerous place. If trouble comes looking for you (and it will), it is best to be prepared. Press the Fortify Button under the Unit Tab. The Warrior will immediately disappear when fortified within a city. Press the End Turn Button to continue on (if you have the Auto Cycle Turns option on, your turns will end automatically until you have a new unit to move). You will notice that a castle icon is next to your city’s name. The icon shows you that a unit is fortified within the city. If you ever want to get the unit out, select the city, and then go to the City Management screen by clicking the building icon on the Helm (the circle of buttons at the bottom‐center of the screen)‐or right click the city and choose City Management from the menu. You can Activate any units you want to remove from the city garrison from the Units Tab. Press the End Turn Button again until your second Warrior is built. As you did with the Settlers, left‐click the Warrior and drag a path out of your city in a promising direction. The Warrior will only be able to move one tile at a time. After you’ve completed your moves for a turn, press the End Turn button. Continue to explore to find new areas to place cities.
‐ 10 ‐
Research At some point, you will see the Research screen pop up. The top box will tell you what new advance your people have learned. Each advance may allow your people to build new units, buildings, or wonders, and may lead to other advances. For more information on any advance (or anything else within Call To Power II), take a look in the Great Library. The box on the left will tell you what advances your people could start on next. Choose wisely! The box on the right will briefly describe what the selected advance could get you. Click on any underlined word to hyperlink to the Great Library for more details. Once you have decided which advance to research, press the OK Button to continue.
More Cities Once your Settler is built by your capital, move him to a good spot to further expand your empire. The more cities you have, the stronger you will be. Balance the need to create additional Settlers to expand your empire, with the importance of building units and improvements within each city for their individual defense, growth and general well being. The completion of the Settler unit in your first city will leave that city’s build queue empty. Hit the City Manager Button on the Helm. If the city you want is not selected, toggle to it using the arrows on either side of the City Selector at the top left of the City Manager screen (or click the city name and select the city you want from the pull down menu). Click on the Build Button once you have selected the correct city. As your scientists discover new Advances, new things to build will become available. Look over the options of Units, Buildings and Wonders and decide what is best for the city you selected.
Choosing the Right Unit Throughout the game, there will be many units available. Each has various attributes that enable them to specialize in a wide variety of tasks. Some are best for attacking enemies, while others are good for defending. Some are well suited for exploration while others are not. Some are special units which conduct special attacks (for example, the Slaver who enslaves). The Settler is a unique unit in that his sole purpose is to construct cities, the cornerstone of your empire. Some units can move farther than other units in a given turn. The distance a unit can move is measured in movement points. The higher the movement points, the farther a unit can move when all other things are the same. Units will be able to move faster than usual over rivers and roads and slower over hills and tundra. Units on foot will be able to cross any land terrain, while vehicles and units on horseback won’t be able to cross over mountains without roads. Decide what your goals are and then build the units best suited to them. For more information examine the Great Library or Unit Concepts, on page 37 ‐ or try your own combinations to see what works best for you.
Choosing the Right Building To succeed in Call To Power II, you need food to feed your people, you need to maximize your production, you need to earn gold, and you will need to keep your people happy. Choosing the right buildings for your cities will have a direct impact on these requirements. Each improvement affects how your city will utilize these resources. When you select a building from your list of buildable items, the box on the top right will briefly describe its effect. For more information about the city improvements, examine the Great Library or City Concepts: Building Improvements on page 27.
‐ 11 ‐
Goods You may notice objects representing natural resources or animals on the map like diamonds, bears, elephants, grapes, or alligators. These objects are called Goods. Goods form the basis of the Trade system in the game and are the best source of Gold for your empire. Hopefully you’ve built one of your cities next to a Good. If not, consider locating your next city near a Good. Once the Trade Advance is discovered, you will be able to build Caravans to sell these goods between cities inside and outside of your empire.
Seeing Enemy Units Your units are always on the lookout. Any tile that they can see is colorful and bright. Some tiles are completely black‐this means your units have never seen them at all. Other tiles are covered in a gray fog ‐this is called the Fog of War. If you see the Fog of War, you know that none of your units can currently see the tile, but you have explored that area at some time in the past. This area will not update to reflect information such as new units, cities, or tile improvements that have entered the area since you last visited. The information will be updated when one of your units revisits the area.
Global Settings Now that you have two cities, it is important to understand that in Call To Power II there are sets of rules that affect your entire empire such as Rations, Workday, Wages, Government, and others. These are all important to the difficult challenge of maintaining your people’s productivity while sustaining happiness. Click on the Empire Manager Button on the Helm. The Empire Manager screen is where you go to change your global settings. Notice that there are three sliders that say Rations, Workday, and Wages. The three main things that impact your people’s happiness are how much they work (workday), how much they eat (rations), and how much they are paid (wages). The more they eat and earn and the less they work, the happier they will be. When you start the game, the sliders are set to the appropriate settings for your current government. If you move the sliders to make your people work harder, eat or earn less, they will become less happy. Sometimes the cost in Happiness is worth increases to Production, Commerce, and Growth of your empire. You can balance this with the other sliders. In the top center of the menu is a Happiness status bar (this is also on the top right of the main screen). It displays the average happiness of your empire. If the bar turns yellow or red, you may have a problem as this indicates happiness has fallen below the minimum threshold. Angry citizens will riot, stop producing, and eventually revolt. In the middle column of the menu, under Workday, you will find a box for Public Works. You can use the box to change the percentage of Production that will get allocated to Public Works. Public Works are used to build Tile Improvements such as roads, farms, and mines. On the upper right‐hand side of the main screen you will see a hammer icon representing Public Works. This number signifies the amount of public works available. Remember that the more Production you allocate for Public Works, the less you have to build items in your cities and to maintain your military. In the right column of the menu, under Wages, you will find a box for Science Tax. You can use the box to adjust the percentage of gold that goes to science. The more you put toward science, the faster new Advances will be discovered but the less money you will have left over for Rush Buying items your cities are building or Improvement upkeep. The Government Tab is also available under Empire Manager. At the start of the game, you will only know Tyranny. Looking at the Government Tab you will see that overall, tyranny is not an excellent government type. Later in the game, you will discover other governments such as Monarchy, Republic, and Communism. Each government type provides various benefits in production, research, growth, and more. When they are available, you should change governments by selecting them on the Government screen and pressing the Enact Button. Between governments there is always a period of anarchy so try to minimize the number of revolutions.
‐ 12 ‐
Quick Interface Overview You’ve tinkered with some of the various menus and buttons on the screen, but most of them remain a mystery. Let’s take a moment to quickly examine what does what, and where to find the information you’ll need to lead your empire and master Call To Power II. The heart of the interface is in the bottom center of the screen. The Helm has shortcuts to all the critical managers of the game. Starting with the top button and working counter‐clockwise:
(1) EMPIRE MANAGER: From this screen you can change your global domestic policies such as Rations, Workday, Wages, Public Works percentage, and Science Tax. You can change your government from here as well. (2) CITY MANAGER: Everything you need to know and adjust in an individual city can be found within this screen. (3) NATIONAL MANAGER: This screen provides powerful summaries and tools to evaluate and work with all your cities at once. (4) TRADE MANAGER: This screen allows you to establish Trade Routes, by assigning Caravans, to generate Gold from the sale of your various Trade Goods. (5) GREAT LIBRARY: This is the fountain of all knowledge within Call To Power II. From here you can discover more information about any Advances, Units, Improvements, game concepts, and much, much more. (6) SCIENCE MANAGER: This screen allows you to view what your empire is currently researching. Once you have embassies with other empires, you can compare what you know against what they know. (7) DIPLOMACY MANAGER: Within this screen you will be able to view the other empires you have contact with, examine any intelligence about them, and engage in diplomatic negotiations. (8) UNIT MANAGER: If you want to quickly view all the units available in your empire, this is the screen to examine. This is also where you’ll want to go to adjust your military alert status. (9) CALENDAR: In the center of the Helm is your calendar. By default it will show you what year your game has progressed to, in game time. By clicking on it you can switch between counting years and counting the number of turns you have taken. When you end your turn, a color bar will be displayed here, indicating the progress of the other empire’s turns.
Directly to the right of the Helm is the Control Panel. This will give you at‐a‐glance information, access to important functions, unit control, and more. The Control Panel is divided into five tabs:
• EMPIRE TAB: From here you will be able to quickly see what your empire is researching (clicking the Advance will enable you to change it). You will also find critical information about the current status of your empire. • CITY TAB: This tab will give you information about the currently selected city. You can see what that city is building (clicking on the item will enable you to go to the Build Manager). You can Rush Buy the item being built, see your mayor’s selected priority, or toggle between all the cities of your empire. • UNIT TAB: The Unit Tab is one of the most active in Call To Power II. Using the unit toggle, you can switch between your units with available movement. It will show you a picture of the selected unit and that unit’s stats (including available movement points, attack strength, defense strength, etc.). It also provides a control panel for the selected unit with quick access to that unit’s abilities.
‐ 13 ‐
• MSGS TAB: The Messages Tab is your ‘In‐Box’ of information. All tutorial messages are stored within the Msgs Tab for reference. Critical messages that appear on screen will be stored in this tab after you close them. In addition, each turn you will be sent non‐critical messages that will only appear in this tab (they will not appear on screen without opening them). Whenever you have an unread message, the tab will be red. You may right‐click on any message to delete it from the Messages Tab. • TILE TAB: From here you can select Tile Improvements to build, such as farms, roads or fishing nets. Placing Tile Improvements costs Public Works. As you discover new Advances, more Tile Improvements will become available.
Across the top of the screen from the left is the Menu Bar.
• EMPIRE: Empire Manager, Trade ‐ Open Market, Trade ‐ Summary, Science Manager, Gaia Controller • CITIES: City ‐ Build Manager, City Manager, National Manager • UNITS: Unit Manager, Army Manager • DIPLOMACY: Diplomacy Manager, New Proposal • STATS: Great Library, Ranking, Score, Wonders. • OPTIONS: This pull‐down gives you the ability to tweak your game settings (sound, graphics, etc.) as well as the crucial load/save functions.
Also at the top of the screen are the Resource Indicators. These give you a quick view of resources available to you.
• GOLD: You can spend gold to Rush Buy items you are building, to grease the wheels in diplomacy, or to raise the pay (and happiness) of your workers. This indicator shows you how much gold you have accumulated so far. • PUBLIC WORKS: Farms, roads, mines, fisheries, fortifications, and terraforming, all cost public works. This will show you the amount of public works you have available to spend. • HAPPINESS: Happy citizens are productive citizens. Unhappy citizens lead to bloody uprisings. To quickly see the overall state of your people’s, you need look no further than this indicator. Green is good, yellow is average, and red means you have an unhappy nation. • POLLUTION: As the empires of the world grow and modernize they will begin to produce pollution. If pollution gets out of control, tiles surrounding the heaviest polluters will die (no longer able to provide food or production). If pollution remains a problem for too many turns, oceans will rise as a result of global warming‐possibly washing away coastal cities! The Pollution indicator will show you what the state of the global environment. The indicator will fill up with red as pollution increases.
In the bottom left of the screen you will find your critical minimap. The minimap will show you your world at a glance. The white rectangle within the map indicates the area that is currently in view on the main screen. The buttons across the top will enable you to sort the map to best serve your needs:
(1) UNITS: This will turn on or off units from the minimap. With it on, your units and any enemy units within view will appear on the map. (2) CITIES: This will turn cities on or off in the minimap. With it on, your cities and any enemy cities you are aware of will appear on the map. (3) BORDERS: This will turn empire borders on or off in the minimap. With it on you will see the known borders for each empire on the map. (4) FILTERED: This will sharpen or smooth the image of the minimap.
‐ 14 ‐

(5) TRADE: This will turn Trade Routes on or off in the minimap. With it on, known Trade Routes will trace across the map in an intricate web of Commerce. (6) TERRAIN: This will determine how terrain is displayed on the minimap. With it on, terrain is distinguished by color on the minimap so you can separate deserts from grassland. With it off, terrain is all one color making it easy to tell manmade items from natural. (7) MINIMAP TOGGLE: This will minimize or restore the minimap.
‐ 15 ‐
CALL TO POWER II OBJECTIVES As you begin to play Call To Power II, you will be faced with many choices as to the direction of your empire. You may amass a formidable military for the purpose of vanquishing those who would stand in your path, or you may strive to get along with your neighbors and work toward a peaceful, tolerant, and just world. You may be drawn to science, and consume yourself with the pursuit of knowledge. Regardless of your path, there are four distinct ways in which you can claim victory in Call To Power II. You may set out to achieve one of these end conditions, only to change course midway through. You need not determine your goal at the inauguration of your empire. Your experiences, the unfolding of history and a few surprises will play a role in your empire's direction.
Conquest Victory In order to achieve the Conquest victory, you must conquer the world. No empire but yours must appear on the map. You will be required to raise an army of epic proportions, rule the seas, explore the world, and form strategic alliances. Although other nations may dislike you, they will come to fear the day your bloodthirsty soldiers land on their shores. Once you have either destroyed or taken over every enemy city on the map, you will have achieved world domination.
High Score Victory As you progress through the game, you will accumulate a score based on your performance as a leader. AD 2300 is the chronological end of the game. The player with the highest score at the end of the game wins.
Diplomatic Victory ~ World Peace You may not wish to destroy all of your rivals in bloody combat. You may instead long for a world without war and suffering. By engaging your neighbors in diplomacy, you can help win their regard and trust. When you forge a permanent alliance with every nation in the world, you win the World Peace Diplomatic Victory.
Science Victory ~ Gaia Controller Much of scientific research is in the pursuit of ways to improve the world, end its problems, and make it more efficient. Throughout Call To Power II, you will have the opportunity to research new scientific advances, which will, in turn, provide you and your people with better ways of living through art, culture, technology and understanding. The Gaia Controller is the culmination of more than six millennia of human determination, ingenuity and perseverance in the field of science. A device that makes a limitless supply of energy available, the Gaia Controller opens the door to a true world utopia, free from want, conflict, scarcity, and strife. In order to achieve this magnificent creation, you must wind your way through the Technology Tree of scientific advances in the game. Once you research the Gaia Controller advance, you will be able to build the Solaris Project, a wonder of the world. When the Solaris Project is built, the whole world can race to build the Gaia Controller. The first nation to build all the components of the Gaia Controller wins the game.
‐ 16 ‐

EMPIRE CONCEPTS Your empire is much more than people you rule. It is a living entity with unique characteristics and needs. For it to prosper you must take care of as many of these needs as possible, including: keeping your people happy, cultivating a thriving economy, and ridding your cities of crime. Because your choices will directly affect the future of your people, your leadership will define the nature and character of your empire. As your empire expands, its needs will become increasingly complex. You will find many voices clamoring for their share of finite resources. You will have to weigh the costs and benefits of exploration, growth, expansion, and conquest. This section will allow you to get familiar with the issues you will need to manage. How you manage these things is entirely up to you.
Cities and Units Your empire is comprised of two basic parts: cities and units. CITIES Cities belong to the empire, but they are individual entities with their own unique makeup, policies, advantages, and disadvantages. Created by settlers, they are home to the citizens of your empire. They also contain the buildings and wonders you construct, and any tile improvements within their areas of influence. They each have land, population, and they all contribute their resources to the empire. It is up to you, as their leader, to decide how and when to minister to their needs. For a more in‐depth introduction to cities, consult the section on page 23 of this manual. UNITS Units are the soldiers, vehicles, and weapons of war that make up your military. There are myriad types of units, including offensive and defensive combat units, subversive and stealth units, as well as highly specialized units. Throughout the course of the game you will use units to explore the world, defend your cities, wage war, and various other things. Consult the Unit Concepts section of this manual for a complete introduction to units and their functions.
Food, Production & Commerce ‐ The Basic Resources Much of your success in cultivating an empire depends on how you manage the basic resources of food, production, and commerce. These basic resources enable your cities and empire to function. FOOD Food is the most essential resource in the game. Without it, you cannot sustain a population of much size. Production and commerce, the two other basic resources of the game are partially dependent on population size. Therefore, enabling your cities to produce and store copious amounts of food will be critical to your success as a leader. PRODUCTION The production resource represents the power of citizens to build and manufacture things. When you start building a unit, city improvement, or wonder, the production of the city determines how quickly the item is built. COMMERCE Commerce represents the total market activity of your empire. Each city has some level of commerce, the fruits of which comprise your national treasury. You can use the gold in your national treasury for a variety of purposes: to Rush Buy items your cities are building, or for gifts to foreign nations to help increase their diplomatic regard for you.
Empire Manager In managing your empire, you must make global policy decisions that affect every city and unit under your control, as well as local and city‐based decisions. The three global settings correspond directly to the three basic resources, and determine how much your people work, how much they are paid, and how much they eat. Be careful, however. Your citizens will come to expect a certain standard of living. Their expectations will be based on the form of government under which you rule. Fail to meet their expectations and they will register their dissent.
‐ 17 ‐
DOMESTIC POLICY‐SETTING RATIONS, WORKDAY AND WAGES From the Empire Manager screen, you can make large‐scale alterations to the lives of your citizens. Under the Domestic Policy tab, you can adjust the food, production, and commerce outputs of your empire. Remember, the changes you make here affect all cities. At a glance, you can see how many cities you have, your empire’s population, how happy your people are, and your current form of government. RATIONS You can adjust how food is distributed by changing the amount of rations for each citizen. The amount of rations determines not only the quantity but also the quality of food that people eat. Call To Power II calculates the total food production of all of your cities. The rations level determines the food requirements for your empire. This amount, along with losses from crime, is automatically deducted from the total collected. If there is a surplus, it will be stored for future use. If you set the rations below the level consumed by your people (and what is lost to crime), the balance will be extracted from the food surplus. If the surplus runs out, people will starve and your population will dwindle. The amount of food also has an impact on your population growth. If you feed your people less, your cities will grow faster. You may want to keep in mind the effect on happiness that rations has. People like to have large quantities of good food to eat. Deny them this, and your people may resent you. WORKDAY By adjusting how many hours people work in a day, you will affect the total production output of your empire. Shorter workdays mean a proportionally smaller amount of production available to each city. After subtracting losses from crime and the upkeep costs of all existing improvements in your cities, the balance goes to your cities. After determining the length of your workday, you can assess a public works tax. Public works enables you to build tile improvements. However, it is extracted from the total production of your empire. Therefore, a public works tax of 20% decreases the production levels of all of your cities 20% across the board, regardless of their individual production output. (See the Public Works section on page 20 for further information.) The more production your cities have, the faster they can build units, improvements, and wonders. The speed at which your cities build will have a direct impact on your empire. Cities that can crank out units make you better prepared to explore, conquer, and defend. Cities that build improvements quickly tend to produce faster, be happier, and be more efficient. Shorter workdays make people happier. But you must weigh the needs of your cities, the demands of your military, the safety of your borders, and the need for public works to determine the workday length. WAGES You can set the wages for your workers under the Commerce heading in the Domestic Policy Tab of the Empire Manager screen. You can also set a science tax, which comes out of the total commerce output of your empire. Call To Power II calculates the total commerce from all of your cities. The wages for all of your workers are automatically deducted from the total collected, as are losses from crime. If there is a surplus, it goes into your treasury as savings. If your wages level exceeds available commerce, the balance will be extracted from your treasury. If your treasury is depleted, your cities will be forced to sell off improvements until the shortfall is covered. After determining the wages level, you can set the science tax. Science requires money to fund scientific research that leads to the discovery of new Advances. Like the public works tax, the science tax is extracted "across the board" and affects all of your cities. High wages make your people happy. But higher wages make less funds available for science, which could end up hampering your progress. You may want to consider maintaining a treasury to facilitate diplomatic gifts and, most importantly, to Rush Buy items you need in a hurry.
‐ 18 ‐
Happiness As the leader of a nation, you are empowered by the citizens of your nation to govern many aspects of their lives. In return, your citizens expect to have many of their needs provided for, including food, shelter, and protection from harm. By providing for them, you make your citizens happy. In Call To Power II, the overall happiness of your populace is one of the measures by which you can gauge your effectiveness as a leader. The happiness of your nation can have a powerful bearing on your ability to rule. Several factors contribute to happiness in both positive and negative ways. GLOBAL HAPPINESS INDICATOR In the upper right hand corner of the screen, there is a colored indicator next to a "happy face" icon. This gives you your empire’s happiness level at a glance.
• Green indicates high levels of happiness. People feel well taken care of and safe in their homes. They take pride in their great nation, and even take the time to have a celebration in your honor from time to time. • Yellow indicates contentedness. The basic needs of your citizens are met. People may have little to complain about‐but they have little to celebrate as well. • Red indicates extreme unhappiness! You are failing in your duties as a provider. Perhaps people are starving, being attacked by hostile forces, being overworked, or being underpaid. If you find your empire or a city in the red, you are dangerously close to losing the city to revolution.
Although the aggregate of your cities’ happiness ratings is shown in the Main Menu, each city has an individual happiness rating as well. Even if total happiness is high, you may have cities that are merely content, rioting, or even on the brink of revolution. It is important to manage the happiness of all of your cities. It is critical that you know your people and their expectations. Depending on what form of government you have enacted, your people’s expectations will change. Your empire’s government type determines the effects of pollution and crime, modifies your rate of research, and limits amount of resources you can devote to research in the first place. Your government also determines the maximum size and number of cities that you can effectively rule. Citizens under different governments have different expectations for workday, rations, and wages. These factors in turn have the greatest impact on their happiness. Consult Government, on page 45, for more information. Besides the global empire settings of rations, wages, and workday, there are several factors contributing to happiness on the city level. Such things as pollution levels, discontent associated with war, overcrowding, and crime all decrease happiness in your cities. The best way to remove the negative effects of these things is to build improvements in your cities that reduce crime, pollution, overcrowding, and war discontent. HOW DO I KNOW IF MY CITIES ARE HAPPY? View your cities in the City Manager screen and click the Status tab. You can find out what is affecting happiness in your cities and respond accordingly. HAPPINESS AND POLLUTION Every empire contributes to global pollution, which causes unhappiness in your cities and for your empire as a whole. Generating too much pollution has an impact on your own empire and others. If global pollution reaches a high enough level, flooding or other disasters may ensue. (See Pollution, on page 34, for more detail.) Highly productive cities can pollute and even destroy their own surrounding terrain, so you will have to watch for the signs of pollution and manage cities accordingly. Larger cities especially, with improvements and workforces devoted to production, will most often generate more pollution than less industrialized or smaller cities. Certain improvements create pollution directly, like the Airport for example. You can counter this pollution by selling these improvements, or building others that actually reduce pollution by cleansing the environment. You can view the amount of pollution created in a city,
‐ 19 ‐
or the resulting unhappiness that comes of it, from the City Manager screen. Click the Status tab to check on a given city and review the factors contributing to or reducing its level of pollution. HAPPINESS AND WAR Your people are sensitive to military units leaving their cities, and the loss of life in war. Your choice of government moderates the degree to which war discontent affects your empire; however, the resulting effect is invariably unhappiness. Like pollution, you can view the effects of war discontent, along with other factors affecting a city’s happiness, under the Status tab within the City Manager screen. By exceeding the expectations of your citizens, you will prosper. Forsake them, and you may see your empire slip through your fingers as your people rise up against you. RIOTS AND REVOLUTION There will be times when your people are so upset with the conditions of their lives that they take to the streets in a righteous display of civil disobedience. If your people become discontent due to the many factors that decrease happiness, they will riot. You will receive a message indicating which of your cities is rioting when this occurs. You can also tell by viewing the city on the map. The city name will be in red, and there will be a yellow icon with a raised fist, the symbol of civil disobedience. Riots are particularly devastating to your empire. While a city is rioting, it produces nothing. Production, food, science, and commerce activity grind to a halt. Because of this, it is important to maintain high levels of happiness in your cities. HOW DO I QUELL A RIOT? You are encouraged to find out what the problem is in a rioting city. Take a look at the happiness indicators in the Status tab in the City Manager screen. It will tell you what is affecting happiness, positive and negative. In a certain way, you can view a riot as indicating an imbalance of negative factors versus positive factors. Therefore, to make your people happy and quell the riot, you should increase happiness. You can assign workers as entertainers. You can build improvements that increase happiness, such as shrines and basilicas, or you can build improvements that reduce pollution, overcrowding, and war discontent. Consider building happiness improvements before you have a riot on your hands. If not, you may find yourself devoting substantial resources to extinguishing the flames of discontent‐resources you could be using in expanding, conquering, researching, and exploring. THE PRICE OF REVOLUTION If conditions become deplorable in a city, the people will simply revolt. Cities that revolt do not merely stop working (as they do during riots), they completely break from your empire and form a new nation. You, as the leader, lose control of the city. This new empire will harbor a strong resentment toward you, so it is extremely doubtful you will be able to diplomatically negotiate the return of the city. If you wish to take back a revolting city, you must take it by force. Keep in mind, though, that the city will contain all of the units, improvements, and wonders you have built within it. Retaking a city may prove to be extremely difficult, so it is best to avoid the danger of revolution altogether by taking care of your peoples' needs.
Public Works Public Works is a special pool of resources established to build Tile Improvements such as farms, roads, mines, airbases, listening posts, radar stations, and so on. Tile improvements can be built anywhere within the borders of your empire, but most of them are best placed with the radius of your individual cities. Farms are a good example, as they are best placed within a city’s radius‐if they are not, you will have to wait until a city grows to encompass them before any benefit will be derived. You can learn more specifics about Tile Improvements in the Great Library.
‐ 20 ‐
TILE IMPROVEMENTS Tile improvements are extraordinary tools to augment your empire's resource gathering operations, as well as enhance such things as vision scope, transportation, and border strength. One of the most effective ways to maximize the yield of food, production, and commerce from the terrain tiles surrounding your cities is by building tile improvements. You add to the resources on a tile by building tile improvements. When you have discovered an Advance that enables a tile improvement, an icon will appear in the Tile Tab on the Main Control Panel. You must use the production in your Public Works to build Tile Improvements. Each improvement has a fixed cost and time that it will take to be completed. When you have enough public works to build a tile improvement, the icon becomes active. By clicking the icon, you activate the tile improvement mode. The cursor becomes a transparent picture of the improvement, which turns green over tiles upon which you can build, and red over tiles upon which you cannot build. You will also see information about the cost, in Public Works, and the adjusted values for food, production and gold, after any bonuses the tile improvement adds to the tile. The icons are disabled in the Tile Tab when you cannot afford to build them. To build a Tile Improvement or Installation, click on the Tile Tab on the Control Panel. Select the improvement or installation you would like to build. Then, simply click on the terrain tile where you wish to build the tile improvement. To cancel and exit tile improvement mode, right‐click anywhere on the map.
Terraforming Tiles Some tile types can be transformed into other, more useful tile types. This type of tile transformation is called terraforming. When you begin the game, you can chop down forests to create grasslands, provided you have built up enough production available. Other types of terraforming come with different Advances. Each type of terrain transformation costs a certain amount of public works and takes a certain amount of time. DEAD TILES Later in the game, you may start seeing blackened, charred tiles. These tiles have been destroyed by pollution. (See Global Pollution Disasters in Pollution on page 34.) This means that the tile can no longer produce food, production, commerce, or goods. You can repair this damage with terraforming, but it is expensive. Because of the cost (both social and financial), it is advisable to avoid generating too much pollution. RUINS Other empires may have passed this way long before you, and may leave behind the remnants of their lives. These will be evidenced by the mysterious, archaic structures left behind. You enter them at your own risk, however. Occasionally, mercenaries who refused to abandon their home when their own empire died out will be impressed by the accomplishments of your nation and will wish to join forces with you. Sometimes the tomes in which an Advance was chronicled will be found and deciphered. Occasionally, a city is left behind which is still habitable and intact. Knowing the lure of such lucrative prizes, barbarians may set up an ambush in some of the ruins, and will lie in wait for the greedy and curious alike. Often outnumbered, your unit will have to flee or fight.
‐ 21 ‐

WONDERS AND FEATS
Wonders of the World Wonders of the World embody the absolute zenith of human achievement for their time. Wonders are extraordinary achievements, and give the nations that build them bonuses in accordance with the particular kind of achievement they are. For example, the Great Wall of China was a tremendous achievement of military preparedness, designed to keep foreign invaders out of China and protect against barbarian hordes. In Call To Power II, the nation that builds the Great Wall can protect against barbarian invasions. Some wonders give a bonus to units, some give a bonus to the city in which they are built, and some give a bonus to an entire empire. There are dozens of wonders in Call To Power II. They represent major achievements in science, art, industrialization, commerce, and architecture. Every wonder is unique. In other words, once it is built, no other nation may build it. Also, if a city containing a wonder is attacked, there is a chance the wonder itself will be destroyed. If this happens, the wonder is irrevocably destroyed. All of its benefits are lost forever. HOW WONDERS ARE BUILT Scientific advances give you the opportunity to build wonders. Once you discover a certain advance, you can begin construction on a wonder. All wonders are built, like units and improvements, in a city's build queue. They usually take a considerable amount of time to build and their rush buy costs are substantial. However, given their extraordinary benefits to your empire, they are worth the wait and expense.
Feats of Wonder Feats of wonder represent major milestones in the course of history. They impart temporary, wonder‐like bonuses to the nation who achieves them. For instance, the first empire to circumnavigate the world will have an advantage over his rivals, and may enjoy a movement bonus to all of his ships for a period of time. Likewise, a nation who is the first to discover key advances may find they have an edge in combat, science, or production for several turns. Throughout the game, there are feats of wonder in scientific achievement, exploration, building construction, and military conquest.
‐ 22 ‐
CITY CONCEPTS Cities are the lifeblood of your empire. Together they contribute the resources necessary to sustain and connect your people, improve the land, build infrastructure, and promote cultural and societal growth. Without them, you cannot begin to defend your people or utilize the resources around you. But it wasn’t always so. Humanity developed as wandering tribes of hunter‐gatherers, scouring the landscape in search of food to sustain them and shelter against the elements. What prey and resources they could find was quickly depleted, and so their migrations would inevitably continue. Moving from region to region, one season to the next, they found life harsh and unforgiving. Due to the harshness of the elements, vulnerability to attack, competition from fierce predators, and the threat of becoming prey themselves, they eventually tired of a life of uncertainty and wandering. Nomads began to discover ways to cultivate the land and raise crops. This brought on increased food supply, which lead to an increase in tribal population. As they became more dependent on their crops for food, there was a need for more permanent settlements in order to tend the plant and protect the supply. These settlements became the first cities.
Creating Cities Depending on the level of difficulty you have chosen, you will begin the game with one or two settler units, each representing a nomadic tribe. You will have to guide your Settlers across the landscape in search of habitable sites. When you tire of wandering, you too must settle on the land and sow the seeds of empire. After finding a suitable place to build a city, choose the Settle option from your settler’s list of actions.
• You can give the order to Settle by clicking the Settle order (city icon) under the Unit tab of the Control Panel. • You can also give orders by right‐clicking on the Settler or using the keyboard shortcut B key. • If your Settler’s selection box is yellow, or if you have already moved him that turn, you will have to let him rest and wait another turn before he can settle.
When you order your Settler to settle, he will disappear and be replaced by a city. The name of your new city and a number representing your citizens will appear just above the city itself. Special icons may appear above your city later on. These will provide information about the status of your city, whether you have units garrisoned within, whether your city is rioting as a result of unhappiness, or whether an agent of another empire has affected your city. You should start construction of a unit or improvement within your city as soon as it has been settled. An improvement is any building, structure, or object that enhances your city in some measurable way. For example, building a Granary will help your city to grow, and constructing a City Wall will help units to defend your city. Units are the mobile forces that comprise your army. You need to build some units to defend your cities and explore the territory around them. See The Build Manager, below, for more information on building things in your cities and managing build lists, or queues. WHERE TO SETTLE In order for your city to thrive, you will have had to find a good place to settle. Generally, the best places to settle have some combination of grasslands, forests, mountains or hills, possibly a trade good as well as river or sea access. In searching for a suitable location to build a city, you should consider the following factors:
TERRAIN As you explore the world of Call To Power II, you may observe different colors of tiles signifying various terrain types. Each terrain type has values for food, production, and commerce that represent the land’s natural yield for each basic resource. The terrain types correspond to the kinds of terrain you are familiar with here on Earth‐grasslands, mountains, tundra, sand dunes, and several others. You should consider these resource values before building a city. A city "works" not only the terrain tile on which it is built, but also the eight tiles immediately surrounding it. As a city grows in population, its area of influence will eventually spread out even further, as much
‐ 23 ‐
as two more tiles in every direction for extremely large cities. Therefore, you should take into consideration the surrounding area and the resources they contain. FOOD Your city’s rate of growth will depend on the amount of food available to it. A city must collect enough food to feed its citizens, and accumulate food in storage to bolster growth. When enough surplus food is stored, your city will grow in population. You can adjust how much your people consume by reducing Rations in the Empire Manager. This will affect all cities, and will enable you to support a larger, albeit less satisfied population. Feeding them more will mean you can support fewer citizens, though they will be more content. (See Domestic Policy under Empire Concepts on page 18.) Terrain tiles approximate real conditions on Earth, so it is not surprising that rivers, grasslands, plains, and shallow water are more fertile and produce more food. Forests are a moderate source of food, while Glaciers and Deserts provide no food. PRODUCTION This resource represents the raw materials necessary for your city to build units, improvements, and wonders. Production is also used for unit upkeep costs to maintain your military from turn to turn. Your city’s rate of production depends on the amount of production resources available to it and the number of workers and laborers allocated. (See How Cities Work on page 25.) Improvements you build in your cities will aid in food collection and production, generate commerce, and enhance your city’s defensive capabilities. Wonders built in your cities will provide similar benefits across your entire empire. Mountains and Jungles are rich in mineral deposits and natural resources and provide ample production. Deserts are devoid of any production resources. COMMERCE Commerce is more than money. More specifically, it represents the amount of revenue derived from the sale of miscellaneous goods and services and any other commercial activities on a given tile. This money, or gold, goes into your empire’s treasury from which wages and improvement maintenance costs are paid. You can use any commerce left over after paying these expenses to fund scientific research or save for other expenses. Allocating commerce to science will help you to achieve new Advances more quickly. You can right‐click the terrain tiles for more information about the resources they contain, including food, production, and commerce. You can also see this resource information in the status text window at the bottom of the Control Panel. You can also view any Goods or Movement Costs associated with tiles in this way. For more information on terrain types and their characteristics, consult the Great Library on page 60. GOODS You will see natural resources on the map such as crab, oil, and jade. These are trade goods and they provide an alternative source of revenue. If a trade good appears on a tile within your city’s area of influence, you will be able to trade it on the open market. Building your city directly on top of a good will derive the same benefit as building next to it (provided it is within your city’s area of influence). If for strategic reasons you cannot situate your city so that its area of influence encompasses a trade good, try to build it near enough so it will eventually grow to control it. For more information on goods and trade see Trade on page 62. DEFENSIBILITY Being able to protect your cities from hostile forces is of paramount importance. Although you will always be able to fortify units in your cities and build improvements that can bolster your cities’ defenses; you can place cities strategically on the map to make them harder to conquer. Certain terrain types actually provide a defensive bonus for defending units. Use this natural defensive bonus to make your cities more defensible. You only get a defense
‐ 24 ‐

bonus from the single tile you build your city on. Hard‐to‐pass terrain within your area of influence will help slow enemy approaches. It will also slow your reinforcements. Weigh the benefits and disadvantages of locating your cities by the sea. Ocean access is beneficial, but it also makes your cities vulnerable to naval attacks. PROXIMITY TO OTHER CITIES If your cities are healthy and well managed, they will expand their area of influence and work even more of the surrounding terrain for resources. For this reason, you should avoid building cities too close to one another. Two cities cannot share the resources in a single tile‐one or the other will always win out. Also, keep in mind that a city's area of influence can expand considerably over the span of time. Although they may start out small and remain so for hundreds of years, eventually cities may grow to control every terrain tile within a five‐tile radius of the city center! Consider this when placing your cities. Cities without adequate space to grow will reach their limit early. DISTANCE TO CAPITAL The capital of your empire is the first city you build, and it includes a free capitol building. Your capital is the seat of government for your empire, and it has a stabilizing effect on all of your other cities. The farther a city is from the capital, the less it benefits from this stabilizing influence. Critical information disseminated from the capital takes longer to reach far away cities and nearby cities benefit when their complaints reach the capital more rapidly. Cities that are close to your nation’s capital are easier to manage, less prone to lawlessness and criminal activity, and are generally happier. Keep this in mind when you build cities far away from your capital city. You can build happiness and crime‐reducing improvements to offset the unhappiness associated with distance from the capital. Building roads, railroads, or other transportation tile improvements to far away cities will speed communications with the capital and alleviate their distress. Your entire empire will suffer distress if your capital is captured. You must defend this city at all costs. If it is lost, you will have to rebuild your capital in another city, though to do this you will need the Feudalism Advance.
How Cities Work Each city you build uses its workers to draw the three basic resources of Call To Power II‐food, production, and commerce‐from the surrounding land. Your cities will then use these resources to grow, build things, to fund public works and research, and for unit upkeep and building maintenance. FOOD & GROWTH The rate at which your city grows depends on how much food is available. Each city must produce enough food to feed its citizens. If a city produces more food than it consumes, the excess is stored. However, if the population of a city consumes more than the city produces, and there is no food in storage to draw from, people will starve. For every turn a city starves, it loses one point of population. If a city in your empire is in danger of starving, you will be notified with a message. There are several ways to increase a city’s food yield. You can build improvements in the city itself such as the granary and food silo to help your citizens more efficiently farm, process, and store food. Crime reducing improvements, like the courthouse, will indirectly lower losses of food to crime. You can build tile improvements around your city like farms or fishing nets to increase the amount of food available to it. These tile improvements must be placed within your city’s radius to be effective. If you have the Agriculture advance, you can hire farmers (see Specialists under City Manager, page 30). Farmers grow food because of their expertise, not because of the terrain; however, they cannot collect production or commerce, so you should be careful not to handicap your city’s ability to collect these resources by converting too many workers to farmers. As your population grows, overcrowding will occur. Overcrowding causes unhappiness and will ultimately limit your city’s ability to grow. Building certain city improvements, like the aqueduct or aqua‐filter, can offset overcrowding and minimize unhappiness.
‐ 25 ‐
PRODUCTION & PUBLIC WORKS Your cities need production to build items, such as units, improvements, and wonders. The more production available to a city, the less time it will take to build these items. Production pays for unit upkeep, which includes training, vehicle maintenance, and other costs associated with maintaining a standing army. This cost is affected by your military readiness setting. The higher your readiness, the higher your cost. As with food, there are various methods to increase your cities’ production. You can build structures in your cities to help increase production, like the Mill or Factory. As with food, a certain portion of production is often lost to crime. Limiting crime by building crime‐reducing improvements will curtail this. Additionally, you can place mines on surrounding tiles to augment production available to your cities. Hiring laborers (possible with the Industrial Revolution advance) will also bolster production in production‐poor terrains. Your city’s production contributes to a global fund for public works (see below), based on the percentage you choose in the Empire Manager screen. You can use these resources to build the roads, farms, mines, and defenses that tie your empire together. These tile improvements must generally be placed within your cities’ area of influence to be effective. COMMERCE & GOLD Commerce generated by your cities creates gold for your empire. Gold, in turn, can be used to pay your workers’ wages; to Rush Buy units, improvements, or wonders; or to make gifts to foreign nations. You can view the amount of gold available to your empire next to the gold coin icon in the menu bar at the top of the screen. Improvements built within your cities require maintenance, and the costs associated with that are also deducted from commerce. You can boost commerce in much the same way as you increase food or production. Building certain improvements, like the Bazaar or Bank, will enhance commerce within your cities, generating more gold for your empire. Gold lost to crime will be limited when crime reducing improvements are built. You can build tile improvements like the Trading Post or the Shopping Mall to enhance commerce within a city’s area of influence. Hiring Merchants, enabled by the Economics advance, will boost commerce and generate more gold in terrains with low commerce. Commerce within your cities also pays for scientific research conducted by your empire at large. You can assess the science tax from within the Empire Management screen.
The Build Manager One of the most important things your cities can do is build things, including units, city improvements, and wonders. The Build Manager is where you determine what things to build in which cities, and in what order. The Build Manager screen will automatically appear as soon as you settle a city. If you have disabled this option, you can double click the new city to open the City Manager screen and then open the Build Manager from there. You can also open the Build Manager from the City Tab of the Control Panel. Select the city you wish to build something in using the city selector, and then click the Edit Queue Button on the left side of the tab (this button will contain an image of any item currently being built, and the number of turns to complete the project will be displayed in the button just below it). Alternatively, you can open the City Manager screen by right‐clicking the city and selecting that option from the context menu. You can make lists of things to build in any city (or multiple cities‐see Advanced City Concepts) from the Build Manager. In the upper left corner of the Build Manager you will find the city selector. This is the same city selector found in the City Tab of the Control Panel, and in the City Manager screen. Click the left or right arrow buttons to select between your cities, or click the city name from a pop‐up list of your cities, and click the city you want to build in. To view available units, improvements, and wonders, click the appropriate button on the left‐hand side of the Build Manger, below the city selector and above the build options list box. You can scroll up and down on this list and sort items by Name, Attack, Defense, Armor, Range, Strength, Movement, or Production/Turns to Build. Selecting any of these items will display a picture of it and specific information about that item in the upper right hand corner of the Build Manager.
‐ 26 ‐

You will need to add items to your Current Queue in order for your city to start constructing them. A queue is just a fancy word for the list of items you want to build in a certain order. Select items you wish to build and double‐click on them to add them to your queue or you can use the Add or Insert Buttons to add items to the end of your queue or to insert them in front of other items. Once you have created a list of items to build, you can select them and move them up or down within the queue using the buttons to the right of your Current Queue. Selecting items in your Current Queue will update the picture and information displayed in the upper right hand corner of the Build Manager. Use the Delete and Clear Buttons to the right of your Current Queue to delete individual items, or clear the queue altogether and start again. See Advanced City Concepts, on page 32, for more information on creating and loading custom queues. You also have the option to Rush Buy the item at the top of the queue. Click the Rush Buy Button below the picture of the current building item and that item will be completed at the beginning of the next turn. Rush Buying an item costs gold as opposed to production. While it is the quickest way to build an item, it can cost in gold up to ten times the amount of production required to build the item across a number of turns. WHAT SHOULD I BUILD? Units are essential for protecting against your enemies and exploring, while City Improvements help your city grow, improve its efficiency, and add to its defenses. Wonders can greatly impact your overall empire. These needs must be weighed carefully when deciding what to build‐and what order to build in. Discovering new Advances can add new items to build, but they can also cause some to be obsolete and unavailable. BUILDING UNITS Units make up your military and include soldiers, vehicles, boats, aircraft, and other, more subversive characters like spies, clerics, and lawyers. Unlike cities, your units are mobile and can be used to explore the world around you, settle new cities, engage the enemy in combat, and defend your cities or parts of the map. See Unit Concepts, page 37, for a description of the various types of units. Units are created in cities, but they belong to your empire. They can move from city to city, across your empire, and beyond. Because units are part of your empire’s military and can be used to defend any city, all cities must contribute production to support them. You will have to weigh the cost benefits of maintaining a large standing army. When your empire cannot afford to feed, clothe, equip, and shelter its military, your army will be reduced when your units are automatically disbanded. For more on military support costs see Military Support Costs and Military Readiness under Unit Concepts on page 40. When using your units to defend a city, it is a good idea to fortify them to gain an added defensive bonus. Simply move your units to the desired city and press the F key, right‐click the unit and select Fortify from the context menu, or click the Fortify icon from the Unit tab of the Control Panel. To move a unit out of a city, select the city, then click and drag the selected unit to your desired destination. Use the Unit tab to select between multiple units. You can build most units once you have the technology, or Advance, to create them. Some special units require you to have a specific form of government. For example, the cleric cannot be built unless you are a Theocracy. You can only build Fascists if you have chosen Fascism as your government. As your level of technology advances, some of your more primitive units will become obsolete. When this happens, you will no longer be able to build them; however, you can keep obsolete units you have already built for as long as you like or until they are lost in combat or disbanded. BUILDING IMPROVEMENTS Improvements are any buildings, structures, or systems that benefit the cities in which they are created. While they benefit your empire indirectly, they do not help other cities. Improvements may enhance all aspects of a city, from defensibility and attack potential to happiness, food storage, and production capabilities. The effects of improvements are cumulative. For example, an improvement that increases production by 25% plus another improvement that increases production by 50% will cumulatively increase your city’s production by 75%.
‐ 27 ‐
You will want to choose improvements to build based on your empire’s goals and the needs of your individual cities. For example:
GRANARY The granary increases your city’s ability to store food, and hence its ability to grow. MILL The mill boosts your city’s production capabilities, enabling you to build units, improvements, or wonders more rapidly. SHRINE This improvement increases the happiness in a city, which will offset dissatisfaction from pollution, war, crime, overcrowding, or other factors.
Your improvements must be maintained, and a certain amount of gold is deducted from your Commerce at the beginning of each turn for all improvements other than your Capitol. If your commerce, or income, is insufficient, these costs will be taken out of your savings (see Empire Concepts, page 17, for more information). Improvements will be automatically sold when you do not have enough income or savings to maintain them. Improvements can be sold for gold, or destroyed when your cities are attacked. They can also be destroyed by nuclear attacks and nano‐warfare attacks. The nano‐attack is particularly deadly. If successful, it can destroy improvements in a city and can even spread to other cities! See Unit Concepts, page 37, for more information on special unit attacks and abilities. Improvements that are sold are worth, in gold, a fraction of their original cost in production. To sell an improvement, go to the Inventory tab of the City Management screen, select the item from the list, and click the Sell Button. When you fear your city cannot be defended, you might want to sell your improvements to recoup some of the inevitable loss. You may also want to reduce the amount of commerce, or gold, going to building maintenance to get quick access to enough gold to rush buy critical units. BUILDING WONDERS Wonders are special monuments or technologies that benefit your entire empire. Unlike improvements, wonders can only be built in one city in the entire world. Once a wonder has been built, no other empire can ever build it again, even if that wonder has been destroyed. When a city containing a wonder is captured, the wonder bonus benefits the empire that controls the city. Wonders can be rendered obsolete by the discovery of new Advances by your own empire or any other nation. Obsolete wonders do not disappear; they just cease to have any benefit.
Mayors For those who do not wish to micromanage every city, especially when you have large numbers of cities in your empire, mayors offer welcome support. You can appoint a mayor in any city you choose. When you activate a mayor, it will automatically manage the fundamental aspects of your city for you. Your mayor will also construct basic tile improvements like roads, farms, mines, and fishing nets. You can have your mayor focus on production, growth, offense, defense, science, gold, wonders. or happiness. When you give this order, your mayor will do whatever it can to maximize the city's output in that area. The mayor will not, however, throw caution to the wind and send your city into a tailspin of rioting and starvation. Based on the priority you choose, your mayor will add units, improvements, or wonders to the city’s queue. Your mayor may also choose to adjust the allocation of specialists within your city to fulfill your orders (see Specialists, on page 30). You can still place tile improvements and adjust specialists while your mayor is active, but the mayor may reverse any changes you make. You can also continue to modify the build queue while your mayor is active. Mayors will only add items to a city’s queue and will not modify the order of items within the queue.
‐ 28 ‐
The City Tab The City tab provides convenient access to what your cities are building and their mayors’ priorities. You can use the city selector to cycle between your cities, or click the city name and select any of your cities from the pop‐up menu. You can also view what any given city is building and how many turns remain until the item is completed. Click the Rush Buy button to complete critical items you can afford. Clicking the picture of the item being built or the Turns Remaining button will open the Build Manager. You can also turn your city’s mayor on or off from this tab and select your mayor’s priority from the associated pop‐up menu.
The City Manager Screen You will need to make sure your cities are managed appropriately if your empire is to thrive and enable you to achieve your goals. There are five critical aspects of city management that you will need to master to keep them healthy, happy, and productive.
PRODUCTION: What your cities are building. INVENTORY: What improvements and wonders you have already built. SPECIALISTS: Workers specializing in fields that maximize one aspect of your city’s efficiency. STATUS: The factors effecting your city’s happiness, pollution, or crime. UNITS: Those units garrisoned, or fortified, within your city for its defense.
The City Manager screen provides you with access to all of the information concerning any city you have selected, and some key management options. Information provided includes what the city is building, what items it has already built, what specialists have been allocated, what factors are affecting happiness and pollution in your city, and what units have been garrisoned in your city. From the City Manager screen you can quickly cycle between your cities to compare the above conditions, and you can launch the Build Manager to modify each city’s Current Queue. The City Manager screen includes an image of your city and its surrounding terrain. This is particularly useful when cycling between your cities and comparing their areas of influence. You can also view key city statistics from this tab that include your city’s population, food, commerce and production outputs, growth rate, and happiness level. The bread represents food, the gear represents production, the coin represents commerce, and the flask represents science. Population determines the size of your city and the number of citizens you will have. As your population grows, you will gain new citizens that can work the land as general workers or become specialists. Your city’s growth bar moves from left to right, and displays red for overcrowding (or lost growth potential), and green for rate of growth. Your rate of growth is a number based on your city’s population increase per turn. As your city approaches its maximum size, the effects of overcrowding increase and will limit your growth. The happiness bar reflects the feelings of the city’s population. A red display means your people are unhappy and near rioting (if not already rioting). When the bar is yellow your people are merely content, while a green bar means your people are happy. PRODUCTION TAB Here, you can view items in your city’s current build queue along with key statistics, turns to complete building, and gold required to rush buy the item. Selecting items in the list will display their pictures and statistics, but turns to complete and gold to rush buy will still pertain to the topmost item in the queue. Units, Improvements, and Wonders are built using a single city’s production. If you need something fast and you have gold to spare, you can Rush Buy the item to get it next turn. Your gold goes to pay overtime to your people and to pay shipping
‐ 29 ‐
costs to get the rest of the material you need right away. You can do this by selecting the city and clicking the Rush Buy Button on the Production Tab of the City Management screen. INVENTORY TAB Your city’s inventory is displayed in a list along with pictures and statistics. You can select any item in your city’s inventory and view the salvage value in gold should you choose to sell the item. You can sell any improvement you have built, (including the Capitol for zero gold), but you cannot sell a wonder. You can only sell one item per city for each turn. SPECIALISTS TAB This is where you determine the focus and makeup of your city’s workforce, and affect its overall efficiency. The most efficient city will have no specialists, and will be collecting food, production, and commerce evenly. However, depending on your city’s needs or the goals of your empire, efficiency may be less important than optimization toward certain benefits or resources.
CITIZENS & WORKERS Every city of a given size has a certain number of citizens, depending on its population (citizens=population/10,000). All of your citizens are employed by your city and begin life as workers until they are converted to specialists. Workers collect food, production, and commerce evenly from the tiles your city controls. Your efficiency will approach 100% as your city grows in population and you have more workers to collect all of the resources from the tiles your city controls. When your city influence increases, your efficiency will be reduced until you gain more workers to collect a greater percentage of resources from the new area. Your workers will work the tiles closest to your city first until they are able to collect 100% of the resources available in previous areas of influence. This is important because tile improvements placed within your city’s influence will be more efficiently utilized when placed closer to your cities. SLAVES These unfortunate souls have been trapped, imprisoned, and forced into a life of servitude. Slaves are not part of your population or citizenry, but do function as workers in service of your cities. They are paid nothing for their work, and are fed only what they can gather for themselves. Slaves never lose their desire for freedom, and if left unguarded or aided by an Abolitionist, they will find a way to freedom. While having slaves in your city increases the collection of resources, the threat of uprising is always present. SPECIALISTS Your workers may be "hired" to do more specialized work, in which case they will be converted to specialists. However, you must have certain Advances to support specialists. Also, remember that hiring specialists will mean a loss of efficiency in your city’s ability to collect resources from the land. Specialists include:
• Entertainers ‐ These minstrels, thespians, jesters, and their more modern equivalents are always able to raise the spirits of your people and ease their discontent. Hiring Entertainers increases Happiness. The Drama Advance is required. • Farmers ‐ Adding farmers will generate food in your city. Farmers do not collect food or any other resources from the land, like gatherers or migrant workers. Rather, they "grow" food. Increasing the number of farmers early in the game, after you get the Agriculture Advance, will help your cities grow more quickly. • Laborers ‐ When you reach the Modern Age with the Industrial Revolution Advance, you can begin to industrialize by hiring Laborers. Laborers do not collect resources. Instead they generate production, just as farmers create food. Adding Laborers will help your cities build things more quickly. • Merchants ‐ These cunning businessmen and investors generate commerce, using their business acumen and knowledge of economics. While they do not collect resources from the land, adding Merchants will increase your city’s output of gold. • Scientists ‐ With the advent of Classical Education, these scholars focus their intellectual abilities and research on generating science in your city. When a lack of resources prevents your city from contributing much gold to science, it can still generate science by hiring scientists.
‐ 30 ‐
STATUS TAB The Status tab displays factors affecting your city’s happiness and pollution. It also displays your current crime rate. You can scroll through the Happiness or Pollution displays when you have many factors involved. Things that make your population happy or unhappy are listed in the center of the Happiness display, with positive or negative numbers listed on the right hand side. Negative factors, including War Discontent or Pollution, will have unhappy faces displayed to the left; and, positive factors, including Wonders, Entertainers, or Buildings, will display happy faces on the right. The larger the positive or negative factor, the more happy or unhappy faces you will see. Pollution listed in the Happiness display relates only to the unhappiness associated with it, not the level of pollution itself. Things generating pollution are listed in the Pollution display, along with a value for the level of pollution they are causing. See City Conditions below. UNITS TAB The Units tab displays only units you have fortified, and thereby garrisoned within your city. It does not show units in your city that has not been fortified. Units garrisoned within your city cannot be selected or moved on the map until they are activated. They will however defend your city with an added defensive bonus for fortification. You can select any of the units, or armies, displayed, and either activate them or disband them. When activated, your units and armies will become selectable, and moveable, once more from your city. If you disband them, they will be removed from play permanently.
City Conditions Cities in your empire provide your population with increased resources, protection, wealth, and prosperity. However, city life also brings new pressures to bear on your citizens that will affect their happiness and environment. In addition to the bare necessities, your citizens need to be happy, they need clean air and water, and they need protection from crime. If you fail to provide for these needs, you will not be able to ensure the loyalty of your citizenry.
Undersea Cities Just as you can build cities on land, you can also build cities under the sea. To do this you need to build the Sea Engineer and take him into deep water. The tiles in the sea are super‐abundant in natural resources, so if you are interested in growing your empire, constructing sea cities is a good idea. To boost their output even more, you can build tile improvements like Fisheries. If you wish to move land units into your sea cities, you will need to construct underwater tunnels. These tunnels, however, are vulnerable to attack. If any portion of the connecting tunnel is destroyed, all units that are inside the tunnel will die. HOW TO ATTACK SEA CITIES Like an invasion of a one‐tile island, the best way to invade a sea city is to begin by bombarding the city to weaken it. After this, you can unload Marines into the enemy city for battle. In order to transport the Marines in the water, you can load them into the Crawler, which allows Marines to attack the city.
Disbanding Cities You may, in the course of your leadership, wish to disband an existing city. It may be in a poor location, be hard to defend, or be too far from your capital to maintain adequate happiness. Regardless of the reason, you can opt to disband a city that has a population of size three or less (under 40,000 people). When you disband a city, all units garrisoned within it remain on the tile and are freed up to move again. Also, the remnants of the city are represented by a settler unit, which you can move to a new location or disband. All wonders and improvements within the city are lost forever. To disband a city you must go to the National Manager screen and select the city that you wish to disband. Disbanding a city will not penalize your score.
‐ 31 ‐
ADVANCED CITY CONCEPTS
National Manager Many great leaders have found that ruling a vast empire can be challenging from a logistical perspective. As you develop more cities over the map, you may find it difficult to keep up with them. The National Manager screen is designed to enable you to help you manage all your cities at once. There are two tabs within the National Manager‐Resources and Status. From the Resources tab you can view and sort your cities by name, population, happiness, production points, food, gold, science, pollution, and crime rate. From the Status screen you can view and sort by mayor and mayor’s priority, what they’re building, and how many turns to complete the item. From here you can also group cities to manage multiple Build Queues at the same time. RESOURCES TAB Under the Resources tab you will find several columns. Clicking on the column headers will enable you to sort your list of cities by that category. The first click will sort in ascending order, the second in descending order. The higher the number in the column, the more of that item the city is producing. The columns are as follows:
CITY NAME This is the name of your city POPULATION This is the size of your city in tens of thousands of people (1 per 10,000). HAPPINESS This is the percentage of happy citizens in the city (as opposed to content or unhappy). FOOD This is how much food is being produced to feed the citizens. You’ll want at least the amount of your rations times the number of citizens to ensure that no one starves. PRODUCTION This represents how many production points that city has. The higher this number, the faster the city will be able to complete items in the build queue. GOLD This is the amount of gold this city is adding to your treasury. SCIENCE This is the number of science points this city is contributing toward the discovery of new advances. POLLUTION This shows how many pollution points this city is generating. The higher this number, the greater the risk of destroying the land around the city. CRIME This is the crime rate of this city.
STATUS TAB Similar to the Resources Tab, there are additional columns under the Status Tab. However, these columns focus more on your cities’ objectives and what they are building. You can see at a glance what your empire is building, and you have the power to adjust the build queues of multiple cities at a time.
‐ 32 ‐
As you know, assigning a Mayor to a city will automate production within the city. You can set the Mayor to focus on a specific task (Growth, Defense, Offense, etc.) and your queue will automatically be filled with the most necessary items first. From the Status Tab you can highlight several cities and assign a Mayor to all of them at once, change the goals, or disable the Mayors entirely. Similarly, you can view what it will cost to Rush Buy the items being built by more than one city. Simply highlight the cities and the total cost is shown next to the Rush Buy Button. If you have enough money, the Rush Buy Button will be active, allowing you to purchase all those items at once. WORKING WITH MULTIPLE BUILD QUEUES You can also add to or change the build queues in multiple cities at once. Highlight several cities and click the Build Queue Button at the bottom of the window. This will take you to a screen similar to the city Build Manager, with a few important differences. The names of all the cities you are adjusting are listed in the top left of the window. At the bottom right of the window are a few new buttons: Insert, Append, and Overwrite. Looking over the list of buildings you may find some that look familiar. If one of your grouped cities has already built a shrine, for example, but the other cities haven’t, the shrine will be listed as available to build. The city that has already built the shrine will not build another one, but will go on to the next item in its queue. Adding items to the queue is done exactly the same as with individual City Queues. You can double‐click on Units, Buildings, or Wonders, or you can press the Add or Insert Buttons to adjust the queue. However, nothing will actually change for the cities until you decide what to do with this new queue, using the following buttons on the bottom right of the window.
Insert This will insert the new queue in front of any previous queues in any selected cities. If you insert, the new items will be built before any previously listed in an individual city’s queue. For example, if you group three cities building a granary and insert a shrine, the shrine will build before the granary in all three queues. Append Hitting append will place the new items at the end of any pre‐existing build queue. For example, if you group three cities building a granary and append a shrine, a shrine will be built in each city after its granary is complete. Overwrite This will replace any items that had been in each city’s queue with the items in the new queue, removing the previous queues entirely.
CREATING CUSTOM QUEUES Call To Power II allows you to save your build queues for reuse in other cities. For example, if you find yourself always building a warrior, then a granary, then a shrine in a new city, you should create a Custom Queue. Doing this is as easy as setting up your first build queue. The first step is going into the Build Manager for any city. Press the Create Custom Queue Button at the bottom of the window. Set the list of items you want to save as a reusable queue. Once you’re done, press the Save Queue Button at the bottom of the screen. You will be prompted to give your Custom Queue a name. Once you’ve decided, press OK to save it. Any time you wish to load that queue, simply press the Load Button from the Build Manager of any city. This will replace any previous queue within a given city.
‐ 33 ‐
POLLUTION Even the earliest civilizations had to contend with the problem of pollution. As early human tribes abandoned their nomadic lifestyle and settled, they had to deal with the accumulated detritus of their daily living. As civilizations evolved and as industry and manufacturing became more complex, cities began creating more pollution. By the end of the Industrial Revolution, people began to see pollution affecting the environment, including air quality, water quality, and the cleanliness of cities. Modern age urban planners began to implement systems to minimize pollution, but it was often barely enough to stem the rising tide of industrial and urban waste. As a leader of a great nation, you must come to terms with not only the pollution your cities create, but also the effects of pollution on the world as a whole. Will you maximize production and growth at the expense of the environment, or will you tug on the reins of runaway industry and keep them in check? Will you lead the world in heeding the call for global pollution reduction, or will you be forced to watch in horror as ocean levels rise and destroy your cities? This section provides what you need to know about the pollution system in Call To Power II. Read this section carefully. The lives of your citizens hang in the balance.
Causes of Pollution in Cities PRODUCTION One of the main factors that cause pollution is production. Each city extracts production resources from the surrounding terrain and uses it to build items and pay for public works. Certain tile improvements, such as mines, and city improvements like factories and oil refineries increase the total production output of a city. The more production a city creates, the more pollution it creates. Production‐related pollution represents smoke, soot, and airborne contaminants; agricultural and industrial runoff chemical and hazardous waste; and the various by‐products of industry. POPULATION The other main factor that contributes to pollution is the population of your cities. As cities become more populous, solid waste products, including organic and inorganic waste, accumulate in city streets, sewers, and landfills. As cities become more advanced and complex, and as commerce and services increase, people tend to create more waste per person than less advanced societies. Therefore, cities with greater populations create more pollution than less populous ones. NUCLEAR WARFARE The only other things that can create pollution in Call To Power II are nuclear weapons. Whether by launching a nuke unit or using a spy to plant a nuke in a city, the explosion devastates the area surrounding a city, reducing much of it to dead tiles. Nuclear weapons also contribute to global pollution, hastening the global warming process. All players should consider the far‐reaching implications of nuclear war before they choose to wage it. A full‐scale nuclear war could potentially create an ecological catastrophe.
Local Pollution Disasters and Dead Tiles The most common form of pollution disasters occurs when cities create sustained levels of toxic pollution. The effect on the environment is so devastating, the terrain surrounding the city runs the risk of being poisoned and rendered unusable. The resulting "dead tile" creates no food, production, or commerce. Tile improvements are destroyed when tiles become dead as well. Once you discover the Conservation advance, you can "clean up" dead tiles by terraforming them back to their original state. After terraforming the tile, you are able to extract resources and build tile improvements on it again. If a tile had a trade good on it before being rendered a dead tile, however, the good will be forever lost, even after the tile is restored.
Causes of Global Pollution Your empire‐wide pollution level reflects the sum of your cities' pollution output. Therefore, the global pollution level is the amalgamation of each empire's pollution level. Although you must strive to curb your city pollution levels, it behooves you to monitor global pollution levels as well. But, because you are but one nation in a world community, sometimes even your best efforts at curbing your own pollution may not be enough to counter the high levels of pollution wrought by another nation.
‐ 34 ‐
GLOBAL POLLUTION DISASTERS
GLOBAL WARMING The earth's atmosphere is comprised of a complex system of airborne chemicals that help maintain the general range of air temperature throughout the world. As the world entered the modern age, the impact of human society, particularly industry and transportation, dramatically increased the emissions of several chemical by‐products, known collectively as "greenhouse" gases, into the atmosphere. The main greenhouse gas released from anthropogenic activities is carbon dioxide, which helps keep the planet warm. Unfortunately, high concentrations of carbon dioxide in the atmosphere caused an increase in the mean temperature of the earth over the last half of the twentieth century. This troubling phenomenon is known as global warming. Besides wreaking havoc on the earth's climate and ecosystems, the main threat of global warming is the buildup of carbon dioxide that traps heat within the atmosphere. This behavior, reminiscent of a greenhouse, contributed to the melting of polar ice caps and glaciers worldwide, causing the ocean levels to rise. The threat of global warming manifests itself as rising ocean levels in Call To Power II. If pollution levels reach a certain point across the world, each body of land will lose one tile of land on every side. Coastal cities will be decimated, thousands of people will die and the available area of land will be forever reduced. OZONE DEPLETION The ozone layer is a region of the Earth's upper atmosphere that contains high concentrations of O3, an oxygen compound formed from oxygen molecules disassociated by short‐wave solar ultraviolet radiation. It is vital to the survival of plants and animals on the surface of the earth, as it blocks almost all of the harmful ultraviolet radiation from injuring or killing surface life. Although ozone levels naturally fluctuate over the course of time, certain by‐products of modern industry, most notably chlorofluorocarbons and halogens, vastly increase the rate at which ozone is depleted. As pollution in Call To Power II represents not only solid but airborne pollution, high levels of global pollution contribute to ozone depletion. This increases the number of harmful ultraviolet radiation that penetrates the atmosphere, and, at a certain point, begins to have an affect on life on the surface. If pollution levels remain high worldwide, every land tile on the map runs the risk of being turned into a dead tile. This is in addition to any effects global warming may have on pollution. Continued abuse of the ecology will slowly render the land unusable, making it more difficult to sustain life.
Pollution Indicators GLOBAL POLLUTION DISPLAY In the upper right hand corner of the main screen, there is a series of four boxes. The box farthest to the right, with the icon of a factory belching smoke, indicates the global pollution level. As mentioned before, the global pollution level is the aggregate of all the pollution on the map. You would be wise to monitor the progress of global pollution. It can inform your decisions on when to take action with other nations who are creating significant amounts of pollution and it can warn you of pollution disasters looming on the horizon. THE INTELLIGENCE SCREEN You can find out how much pollution other nations are creating by consulting the Intelligence screen in the Diplomacy Manager screen. Open the Diplomacy Manager screen by clicking on the Diplomacy Button on the right side of the Helm. Select the nation you would like information on by clicking their entry in the list of nations. Now click the Intelligence Button at the bottom of the Diplomacy Manager screen. The Domestic tab contains a numeral indicating the empire‐wide pollution level for that nation. This information will be helpful in determining which nation is creating the most pollution, and may help you decide which nation to request a pollution reduction pact from. THE CITY MANAGER SCREEN Within the City Manager screen, there are five separate tabs that provide you with information about the various aspects and qualities of your city. Click the Status tab to see how much pollution your city is creating. You can cycle through your cities by clicking the arrow keys on either side of the city name display to successively view each city's pollution levels. In the pollution display, you can find out not only what is causing citywide pollution but what, if anything is helping to reduce it.
‐ 35 ‐
Solutions The most effective way of managing pollution is to avoid creating it the first place. Cities with a large amount of industrial production tend to pollute the most. Also, cities with the most people create a lot of pollution as well. Although early in the game, pollution levels are usually benign, as you approach the end of the Renaissance Age and the beginning of the Modern Age, pollution starts to become a problem. IMPROVEMENTS AND WONDERS Fortunately, pollution can be contained by certain city improvements such as the Recycling Plant and the Matter Decompiler that reduce pollution associated with production. The Public Transportation and Eco‐Transit improvements also eliminate pollution based on population level. The Central Matter Decompiler, a wonder of the world, can significantly reduce pollution across your empire. ADJUSTING YOUR PRODUCTION LEVELS As a last resort, you can divert workers in highly productive cities away from production by assigning them as entertainers, farmers, scientists, or merchants. This will force the workers to focus less on production and more on happiness, food, science, or commerce. This is advised only if production levels are unusually high, pollution is increasing, and you lack any other recourse (such as the improvements and wonders listed above) to mitigate pollution.
‐ 36 ‐
UNIT CONCEPTS Units are a key element in the game. Unlike the cities that produce them, they are mobile, and are the means by which you accomplish many of your goals. Units can defend your cities, initiate diplomacy, scout for invaders, explore uncharted waters, and attack your enemies. They can fly across continents, transport other units across wide oceans, and even destroy an entire city in a single attack. As your empire advances through the ages, your scientific and cultural achievements will make powerful units available to you. This section will instruct you in everything needed to build, manage, and use units in the game. Everything from attributes and movement, to special rules and conditions are included in this section. For a detailed list of all units, consult the unit list on the back of the Technology Tree poster.
What Do Units Look Like? Whereas cities look like small collections of buildings on the map, units look like humans and vehicles. Each unit has a small health bar and a flag next to it. All units attack and defend as ordered until their health is depleted. The color of the flag indicates the nationality of the unit. Your units will always have a blue flag. If the flag has a number on it, then other units are sharing the tile (the number of units indicates how many). If the unit has a star below the number, then some of those units are formed into an Army. If the unit has a badge below the flag, then the unit is a Veteran.
How Do I Build Units? Each new unit is enabled by the discovery of an Advance. As you gain Advances, more and more units become available for construction. In order to build a unit, you must select and insert it into the build queue of one of your cities. Access the Build Queue in one of the following ways:
1) Click the City Tab on the Control Panel. Then click the picture of the item that is being built. This will open the Build Manager. 2) Select the City Manager screen from the Helm on the Control Panel. When that screen appears, click the Build Button.
Once you are in the Build Manager, click the Unit Button to see the list of available units. To add the unit to the Build Queue, select the unit name in the list and click the Add Button. You can also double‐click the unit name. If you would like to build the unit immediately, select the unit in the build queue and click the Move Up Button to move it to the top of the queue. Close the Build Manager to return to the game. If you would like to add a new item to the top of the build queue, select the first item in the current build queue and use the Insert Button to insert the unit you wish to build ahead of it. Like any other build item, a unit will take a certain number of turns to build. Once it is built, the unit appears in your city, ready to do your bidding.
Unit Combat Characteristics All Units have the following attributes. The differences in the values for each unit are what make them unique. ATTACK The attack rating represents the unit’s probability of successful attack. They higher the attack rating, the greater the chance the unit will hit its target. RANGED ATTACK This represents the probability of a ranged attack. Not all units have ranged attack capability. See the section on Combat, on page 44, for more information on the progression of combat.
‐ 37 ‐
DEFENSE This represents the unit’s ability to avoid being hit. The higher the rating, the easier it is for the unit to avoid or deflect attacks. ARMOR The armor rating indicates the unit’s ability to withstand a successful attack. The higher the rating, the less damage a unit takes when attacked. STRENGTH This represents the amount of damage a unit inflicts with each successful attack. The higher the number, the greater the damage. VISION Each unit has a range of vision that is equal to at least one tile in every direction. Some units have greater vision ranges. Vision enables a unit, and therefore you, to see everything within their range, including terrain, tile improvements, cities, and other units. As a unit moves it reveals whatever is surrounding it. Stealth units do not appear in the vision range of ordinary units. See below for more information on stealth units and the rules governing stealth unit visibility. COST A unit’s cost is measured by the amount of production it takes to build the unit. Cities that have high levels of production will build units faster than less productive cities. Generally, the more powerful the unit, the more production it will take to build it. HEALTH The health of a unit is represented by a colored bar that appears over the flag next to the unit itself. Green indicates good health. Yellow indicates some damage. Red indicates severe damage. Each time a unit is successfully attacked, its health is reduced accordingly and the color and length of the health bar changes to reflect it. If the damage from an attack exceeds the unit’s health, the unit dies.
When Units Become Obsolete As your empire progresses through the ages, your units will become obsolete. This means that you will no longer be able to build that unit type. If the discovery of an advance renders a unit obsolete, there will be a new unit available to take its place. If you have existing units that become obsolete, they will not disappear. You will simply be unable to build them again. For example, when you discover the Neural Interface advance, you are able to build the Cyber Ninja unit. The Spy unit becomes obsolete, but the Cyber Ninja does everything the Spy does more effectively. The discovery of Fusion enables you to build very powerful Fusion Tanks, which replace standard Tanks. Although your existing Tanks remain in play, you no longer have the option to build Tanks in the build queue. See the list of Advances on your Technology Tree poster or consult the Great Library for more information on advances and their benefits.
Special Units GOVERNMENT‐SPECIFIC UNITS A handful of units are only available with specific types of governments:
CLERIC: Can be built by a Theocracy. FASCIST: Can be built by a Fascist empire. ECO‐TERRORIST: Can be built by an Ecotopia.
‐ 38 ‐
ECO‐RANGER: Can be built by an Ecotopia.
Important Note: Any government‐specific units that you have will disband if you change your government type. For example: A Theocracy that switches to Republic loses any Cleric units that exist. FLANKING UNITS Flanking units have special combat abilities that make them welcome additions to any fighting force. Whereas offensive and defensive units ordinarily attack only the enemies directly in front of them on the battlefield, flanking units can "gang up" on other units to their right or left and attack concurrently with other units. For example, an army of three warriors attacks an enemy hoplite. Only one of those warriors actually engages the hoplite in combat until either one is destroyed. The other two warriors do not attack, nor are they subject to counterattack. If the attacking warrior is destroyed, the next warrior engages the hoplite, until either the warrior, or the hoplite, is destroyed. However, if three knights attack a hoplite, all three knights attack the hoplite simultaneously. One of the knights attacks the hoplite directly, while the other two knights "flank" the hoplite. The hoplite stands a considerably smaller chance of success in this scenario. Flanking units include cavalry, fusion tanks, knights, and tanks. When added to an army, they are very effective. SPECIAL FORCES UNITS There are a few units that fall under the category of Special Forces. They are always "at war" and, therefore, require full military support costs at all times. Special Forces units include the knight and the samurai units. STEALTH UNITS Stealth units are a special class of unit. They are invisible to cities and most standard units, but can be seen by other stealth units. They each have at least one attack, the effects of which are anything but invisible. If a stealth unit attacks one of your cities or units, you will be notified of the effects. If an attack is unsuccessful, the target city automatically becomes wary of stealth attacks. You will know a city is wary by an eyeball icon over the city. If a city is wary, there is an extremely small chance of a successful stealth attack. There are several stealth units in Call To Power II, including slavers, abolitionists, spies, and clerics. Consult the Units section of the Great Library for more information on stealth units. RANGED ATTACKING UNITS Some units specialize in fighting from a distance. For example, the catapult, artillery, and Archer can all be devastating attackers. All of these units trade off defensive capabilities and are usually at a disadvantage when attempting to fight a non‐ranged attacker. It is best to combine ranged attackers with non‐ranged attackers to maximize results. Ranged attackers include the archer, cannon, and artillery units, among others.
Veterans All units that survive a battle are eligible for veteran status. Due to their experience on the battlefield, veteran units are better equipped for combat, and enjoy a bonus to their attack rating. Units retain their veteran status until they die or are disbanded.
Unit Movement Characteristics MOVEMENT POINTS Movement points determine a unit’s mobility. Units with higher movement points can travel farther in a single turn. Each terrain tile has a movement point "cost" that represents the difficulty associated with travel on that terrain. Roads, railroads, and maglevs are tile improvements that reduce the terrain’s movement cost. LAND UNITS
‐ 39 ‐
Most land‐based units can travel on any land tile, including rivers. They cannot move onto beach or ocean tiles. You can, however, load them into naval or air transport units in order to get them across water. MOUNTAINOUS TERRAIN RESTRICTIONS Mounted units such as knights, and vehicles such as tanks, cannot travel on mountains without using roads or railroads. You will know whether a unit is forbidden from moving on a tile when the drag‐and‐drop line turns red. NAVAL UNITS Naval units cannot move onto land tiles or travel on river tiles. They can, however, move onto beach tiles and into coastal cities, and onto any ocean tile. Ocean tiles each have the same movement point restrictions. In other words, it does not take any longer to move on deep water than it does on shallow water. DEEP WATER LIMITS Early naval units like the coracle cannot venture into deep waters. If a unit with this limitation tries to enter a deep‐water tile, it will be prevented. AIR UNITS Air units can move over any tile without terrain‐based movement restrictions. Accordingly, they do not get movement bonuses from roads, railroads, and maglevs. REFUELING Air units must periodically refuel at an airbase, city, or aircraft carrier. If an air unit runs out of fuel before it lands at a suitable location for refueling, it will crash. You can see the amount of fuel in the Unit tab (next to the health bar and below the unit stats).
Military Support Costs and Military Readiness Each unit you build has a cost in production associated with military support. You can reduce the military support cost by altering the military readiness of your forces. This will save your empire valuable production in keeping up a military, especially in times where a full military is not necessary. Keep in mind that units without full support costs will suffer a health reduction for as long as the lower readiness is in effect. Military Readiness is set in the Unit Manager screen and represents the cost of maintaining a war machine. It takes time for a change in this setting to take effect. For example, it will take ten turns to move your military from peace to war, so you will need to prepare in advance before committing your forces to a lengthy campaign. If you find your neighbors acting in a provocative manner, invading your territory, building up their own military forces, or declaring war on you or your allies, you would be well served to increase your readiness in time. However, standing down a readiness level takes effect immediately. AT WAR This is the default setting in for military readiness. It indicates that your units are fully trained and equipped for battle at all times. When at war, the military support costs are at their highest. ON ALERT With this setting, military support costs are reduced by a certain percentage, and the health of your units is decreased accordingly. AT PEACE There is little need for a military during peaceful times, and this setting reflects a minimal level of support. This setting keeps military support costs as low as possible, but unit health suffers dramatically. To restore your units’ health to full strength, you can return your military readiness to At War status.
‐ 40 ‐
Unit Orders STANDARD ORDERS
MOVE Each turn you will have the opportunity to move each of your units. You can move your units in one of four ways. The first way is to click the unit and drag to the location you’d like the unit to move to. While you hold the left mouse button, you will see a colored line extending out from your unit’s position. This colored line indicates whether your unit is able to move to that location. A green line means that the unit is able to move onto the tile. If you drag to a location that would require more movement points than your unit has, the line will turn yellow. A red line means your unit cannot move onto that tile. You may see numbers along the line. These numbers indicated how many turns it will take to move to that location. When you have picked your desired location, release the mouse button and, provided it has enough movement points, the unit will move to that location. If the unit cannot make it to that location in the turn, it will continue on its path at the end of each turn until it reaches its destination. In this way, you may send units across great distances with a single action. The second way to move is to right‐click on the unit and select Move from the pop‐up menu. A colored line will extend from your unit as above. Once you choose a location, click the mouse button again. The unit will move to the desired location. The third way is to click on the Move icon in the Unit tab. A colored line will extend from your unit as above. Once you choose a location, click the mouse button again. The unit will move to the desired location. The fourth way is to move the unit one space at a time with the number keypad. You can move a unit one square in any of the eight directions by pressing the corresponding key surrounding the number 5 key. Units will immediately move as far as their movement points allow as soon as you give them a move order. Once a unit is in motion, it cannot be stopped. However, if it has several more turns to reach its destination, you can cancel the rest of the move order by right clicking the unit and selecting Clear Orders or Sentinel from the context menu. You can select units with pre‐existing move orders to view their paths, which will appear in gray. ATTACK This command instructs the unit to assault another unit or city. Moving your unit onto another tile occupied by an enemy unit or city implicitly gives the attack command. FORTIFY This command instructs the unit to set up a defensive position. Once a unit is fortified (a small wall around the unit indicates that the unit is fortified) it enjoys an additional defense bonus above and beyond any defense bonus given by the terrain. The fortification process takes a few turns to complete. SENTINEL This command instructs a unit to wait until an enemy unit is in sight. The unit is grayed out and remains so until the unit is attacked or an enemy unit comes within visual range of the unit. The player can also wake the unit by clicking on it. DISBAND This command removes the unit from the game. If you disband a unit inside a city that is constructing another unit, a small percentage of the disbanded unit’s total production cost will provide a boost to the current build queue. If the unit is disbanded in the field, or there is not a unit being built in the build queue of the city, the unit simply disappears.
‐ 41 ‐
SPECIAL ORDERS
ADVERTISE Commands a corporate branch to advertise in a foreign city. Successful attacks extract gold from cities. AID UPRISING Commands an abolitionist to aid an uprising in a foreign city that contains slaves. If the attack is successful, the slaves will revolt, declaring themselves a new empire. BOARD TRANSPORT Commands units to board a transport unit. BOMBARD Commands a unit with bombard capability to attack units or cities in an adjacent tile. The attack is less accurate than standard attacks, but there is no danger of counterattack. Bombard attacks against cities can damage units within the cities and reduce population as well. CONDUCT HIT Commands an eco‐terrorist to assassinate a public figure in a city. Success brings a sharp reduction in happiness in the target city for several turns. CONVERT CITY Commands a cleric or televangelist to attempt to convert a foreign city to your religion. Successful attacks bring in a small amount of cash for your empire. ENSLAVE Commands a slaver unit to go on a slave raid. Slavers can capture individual settler units and can attack cities. When successful, the settler is captured (or the city population is reduced by one) and the slaver's nation gets a new slave to put to work in a city. ESTABLISH EMBASSY Commands a diplomat or empathic diplomat to establish an embassy in a foreign city. This enables high‐level diplomatic relations. This can only be done once per foreign empire. EXPEL UNIT Commands any military unit to remove another empire’s unit from your lands without negatively affecting diplomatic regard. It is an alternative to attacking stealth and non‐military units that are in your territory without sparking a conflict. FAITH HEALING Commands a televangelist to put on a faith healing event. If successful, the attack brings profits to your empire. FILE INJUNCTION Commands a lawyer to halt all production in a city for one turn. If successful, the target city loses all production for one turn. FRANCHISE Commands a corporate branch to attempt to establish a franchise in a foreign city. If successful, the franchise extracts a percentage of the production from that city and gives it to the attacking empire. FREE SLAVES Commands an abolitionist to attempt to free slaves in a foreign city. If successful, it frees one slave from the target city and converts it to a citizen in the nearest friendly city.
‐ 42 ‐
INCITE REVOLUTION Commands a spy or cyber ninja to infiltrate an enemy city and incite the citizens to revolt. If the attack is successful, the city forms a new empire. INFECT CITY Commands an infector to release a bio‐weapons attack on an enemy city. Although this attack does not kill people, it makes a large percentage of the populace extremely ill, rendering them unhappy and unable to work. LAUNCH Commands a space plane to perform a sub‐orbital launch, transporting cargo to any friendly city within four turns. NANITE CLEANSING Commands an eco‐ranger to self‐destruct, releasing a powerful nanite bomb. The attack totally annihilates any trace of humanity in the target area, including cities, units and tile improvements. This attack constitutes an atrocity. NANO‐ATTACK Commands an eco‐terrorist to release a nanite bomb in a city. Successful attacks have a small chance of destroying every improvement in a city. PILLAGE Commands a unit to destroy the tile improvements on a tile. PIRATE Commands a unit to hijack a trade route and steal the profits for one turn. This attack does not destroy the trade route. PLAGUE Commands an infector to release a highly contagious, extremely lethal supervirus into the air. The target city’s population is decreased significantly. PLANT NUKE Commands a spy or cyber ninja to attempt detonating a small nuclear device in an enemy city. If the attack is successful, the nuke detonates, destroying the target city and all tile improvements within three tiles of the city. REFORM CITY Commands a unit to reform a friendly city that has fallen prey to a cleric or televangelist’s conversion. The city is unhappy for one turn as a result of the reformation. SELL INDULGENCES Orders clerics to attempt to sell official favors and religious pardons in enemy cities. When successful, it makes the target city happy, and generates cash for your empire. SETTLE Commands one of the three settler units in the game‐the settler, urban planner and sea engineer‐to create a city. SOOTHSAY Commands a cleric or televangelist to attempt to preach doom and damnation for the people of the target city. When successful, it sends people into a panic, and happiness takes a sharp dive for a turn. SPY Commands a spy or cyber ninja to attempt to acquire information about the target city. When successful, it reveals crucial details about the production, gold, military, and improvements of the targeted city.
‐ 43 ‐

STEAL TECHNOLOGY Commands a spy or cyber ninja to attempt to steal an advance from a rival empire. If successful, the attacker gains the advance immediately, including any new building options. SUE Commands a lawyer to either rid friendly cities of enemy franchises or destroy other lawyers or corporate branches. UNLOAD Commands a transport unit to unload units from its cargo hold.
Armies and Army Manager In Call To Power II you have the ability to group your units into armies. Army management‐the creation and implementation of effective armies‐is crucial to your success as a military leader. Once units are grouped into armies, they move together, attack together, and defend together. A proper blend of offensive, defensive, flanking, and even special units can make a considerable difference in the overall effectiveness of armies. Armies can be no more than twelve units strong. To create an army, move several units onto a single tile. You can access the Army Manager in the following ways:
• Double‐click the stack of units. • Right‐click the stack of units and select Army Manager.
Combat Most of the units available to you in Call To Power II are present for a single purpose: combat. Whether defending your cities from invaders, running intruders off your territory, or setting out to conquer a rival empire, you will use countless units to achieve your goals. THE BATTLE VIEW When one of your units attacks or is attacked, the battle view automatically appears. The battle view shows all of the units involved in the combat, with attacking forces on the left and defending forces on the right. It divides forces into offensive, defensive, ranged, and flanking units to maximize the abilities of each. Offensive units are always at the front and in the center of the battle, with defensive units close by. Ranged attack units position themselves in the back, and flanking units occupy the sides. Offensive and defensive units always attack the opposing unit directly in front of them. Ranged units attack the offensive units in their "column." Flanking units attack the center‐most opposing offensive units. In this way, flanking units substantially increase the attack power of an army. As units die, other units fill their place from the sides. Offensive and defensive units fill the center ranks. When they are all defeated, flanking units and ranged units take to the front lines and fight to the bitter end. The more flanking and ranged units you have in an army the more attack power you have per round of combat. However, too many of these units may prove to be a weakness, as their direct offensive and defensive capabilities are often less than standard offensive and defensive units. Armies with a mix of offensive, defensive, ranged, and flanking units are the best forces to muster. They fight with coordination and balance each other's strengths and weaknesses, making for an effective fighting force. Combat is resolved using several formulas that take into account the attack, defense, armor, ranged attack, strength, and health ratings of each unit. Call To Power II automatically factors in terrain, tile improvement, and city defense bonuses. Combat continues in rounds until one side defeats the other or the attacker retreats.
TACTICAL RETREAT If the battle looks grim, the attacker always has the opportunity to retreat from the fight. The defending armies cannot. To retreat, simply press the Retreat Button from within the battle view. As your armies run away, each unit on the defending side will get a free shot.
‐ 44 ‐
GOVERNMENT At the beginning of Call To Power II, you rule your empire as a tyrant. Your grip on power in your nascent nation is tenuous, and there is a lack of formal government structures. As you progress through the technology tree, you will discover new forms of government, which open your empire to new levels of prosperity and growth. Your government type represents a particular ideology. Most of the structures that comprise a government type, be they a strong military, a tight grip on the means of production, a laissez‐faire market economy, or a strict religious code of conduct are born of the unique viewpoint native to the particular government type.
Effects of Government The type of government you choose to rule your empire has an impact on many of the key factors of the game. MAXIMUM NUMBER OF CITIES While some governments are suited to large empires, others are not. In general, the more advanced the form of government, the better equipped it is to handle empires with greater numbers of cities. Tyranny, the first form of government, is suited to small empires only. It has a small max cities number. When your empire reaches the maximum cities allowed by your current government, you will get a message warning you of that fact. If your empire continues to grow beyond the levels your government is suited to, you will start to incur a happiness penalty. If you switch to a government that can accommodate larger empires, the unhappiness associated with the government type will go away. GROWTH RATE Government type has an effect on how quickly your cities grow. PRODUCTION Government type has an effect on how much production your empire produces. RESEARCH Some governments consider science and scientific achievement a necessary and worthwhile pursuit, whereas others see it as frivolous. If technological and cultural advancement is important to you, select a government that has a high science rating. ECONOMIC Some governments are conducive to economic growth and developments. Others opt to keep tight control on markets, trade, and commerce. The higher the economic rating, the better commerce and gold production will be. CRIME AND CORRUPTION Different government types have varying levels of control over crime. Some governments are rife with internal corruption and have little control over the criminal activity in their cities. Others run a tight ship and have powerful police forces that successfully monitor criminal activity. Lower crime ratings indicate a government in control of crime and corruption. This means more efficient food, production and commerce output and lower crime in cities across the nation. MILITARY SUPPORT Not all governments are well suited to supporting the military. As a result, military support costs vary from government to government. If you are a militaristic leader, you may want to seek a government that will make it possible to have a large army for as little cost as possible. On the other hand, peaceful nations may opt to funnel resources in to other areas. NATIONAL LOYALTY The loyalty of your people has a bearing on your power as a leader, Some governments incline people to support the leader unflaggingly, making it possible for you to rule with impunity. As long as their basic needs are taken care of, these people
‐ 45 ‐

will be happy. Other government types have a culture of popular contribution to public policy. People in these types of governments will want to have a say in whether your nation goes to war or not. National loyalties range from apathetic to fanatical. MARTIAL LAW Government type has a bearing on how effective your military units are at keeping the peace within cities. Governments with a harsh or strict martial law have strong police forces. In other words, if happiness drops low in a city, units garrisoned with that city will maintain order through force of arms. Relaxed martial law rating strips police of certain powers, which equates with a population with more power of assembly, civil disobedience, and dissent. ANTI‐POLLUTION MEASURES Under some government types, your people will have varying levels of tolerance for pollution. Some governments, most notable the Ecotopia, have no tolerance for pollution. Other government types have relaxed attitudes toward pollution. In addition, government types produce different levels of pollution. Some enforce strict regulations on industry and cities, demanding they minimize their detrimental impact on the environment. Still others have relaxed policies regarding pollution, and thus free people to pollute with impunity. The anti‐pollution measures rating for governments reflects both anti‐pollution regulations as well as the pollution tolerance of people.
Why Change Governments? While some governments require greater investment in workday, rations, and wages, they may also increase the production, commercial, or research capabilities of your empire. Different governments may also enhance or degrade the level of control you have over your population in the form of loyalty. The more loyal your citizens, the more hardship they will endure and the less likely they will be to revolt. Certain governments provide special units that offer superior military might or subversive capabilities.
How Do I Change My Government? Whenever you change government types there is a brief period of anarchy. This represents the dramatic upheaval in daily life that a major shift in power creates. During this time, it will seem as if your empire has ground to a halt. Cities will cease to produce food, commerce, and production. Within four turns, however, your new government will be enacted and all the benefits of the new government type will take effect. To change government types, open the Empire Manager by clicking on the top‐most button of the Helm, then select the Government tab. You will see your current government as well as a list of that government’s levels for growth, production, etc. Under the Compare To: heading, click the pull‐down menu once. This will show you all of the forms of government that are available to you. To view a particular government type’s levels, click the name of the government type. Under each government type's name, you will see the comparison of levels. Words in green indicate a better value compared to the other. Words in red indicate a worse value. Black words indicate an identical value. If you do not like the way the new government affects the factors of your empire, you may choose another government type to view, or simply close the Empire Manager. Unless you press the Enact Button, you will maintain your current government. This enables you to compare different government types without consequence. Regardless of which government you choose, your empire will first spend several turns in anarchy. During this time production, science, growth, commerce, and food production will stop. Once your new government is enacted you will resume progress, albeit at new levels. Remember: you will not switch to the new government until you click the Enact button!
‐ 46 ‐
Government Types in Call To Power II There are twelve forms of government in Call To Power II including anarchy. Anarchy is less a form of government than a state of chaos that exists between governments. ANARCHY Anarchy is the brief period of lawlessness and upheaval that is brought about by a change in government. It never lasts more than four turns. All production, research, food production, and economic activity cease during this period of political upheaval. COMMUNISM This form of government affords high productivity and is well‐suited to medium sized empires wanting to build up their cities and military. Communist empires tend to have poor economies in comparison to others, but are excellent at waging war. CORPORATE REPUBLIC This post‐modern form of government is efficient and economically robust. Scientific research thrives under this government, and its people tend to be happy and productive. DEMOCRACY Democracies are well balanced for growth and advancement. Their people have a low tolerance for pollution, war, or a heavy military presence in their cities. Otherwise, their citizens are generally content and productive. ECOTOPIA As the name suggests, Ecotopian empires strive to marry technological progress with environmental responsibility. They believe the ultimate expression of humanity is an ecologically harmonious way of life. The Ecotopian ideology inspires growth, economic strength and avid research. Ecotopians have little regard or patience for chronically polluting empires. FASCISM This harsh form of government limits the personal freedoms and privacy of its populace. Nevertheless, it inspires fierce loyalty and is able to maintain a powerful military. Fascist cities are productive, but are handicapped by slow growth and weak economies. MONARCHY Monarchies advance most aspects of their empires beyond the pathetic state of tyranny. Strict martial law keeps cities safe, and people are devoted to their sovereign. REPUBLIC The republic, another early form of government, provides stronger growth potential, greater production, and more emphasis on research than a monarchy. Its economy and military, on the other hand, are slightly weaker. TECHNOCRACY Another post‐modern government, the technocracy places the highest emphasis on science and technology. Technocracies move swiftly through the technology tree, and their cities are productive. Commerce is very strong within a technocracy, and the people are loyal. THEOCRACY The theocracy knows no separation of church and state. It is growth‐oriented and promotes commerce and a healthy economy. Its support for the military is strong, but its commitment to science is not. People are loyal and moderately productive. TYRANNY You begin your empire in tyranny, a form of government characterized by poor city growth, production, and scientific development. It is best for your empire, and your people, that you move beyond this type of government as soon as possible.
‐ 47 ‐
VIRTUAL DEMOCRACY Empires achieving this future government form are highly advanced and very peaceful. They also tend to be rich, prosperous, fast‐growing, and very large. Virtual Democracies place high importance on research, commerce, and the environment.
Governments and Special Units Certain governments enable special units that cannot be built under any other form of government. The cleric, for example, can only exist under a theocracy. Any of these special units you build can only exist under the government in which they were built. When you enact a new form of government, all of these special units will automatically disband and disappear from the game. For example, all clerics created under a theocracy will be lost when you switch to a republic. Special units by government are as follows:
CLERIC: Can be built by a theocracy. FASCIST: Can be built by a fascist empire. ECO‐TERRORIST: Can be built by an ecotopia. ECO‐RANGER: Can be built by an ecotopia.
‐ 48 ‐

DIPLOMACY
Making Contact In the beginning of Call To Power II you know very little of the world around you and have no contact with or any knowledge of other nations. By exploring the map or by encountering a foreign unit that wanders into your country, you eventually cross paths with other civilizations. Once you make contact with another empire, you may begin diplomatic relations. Making contact is simple: just place one of your units next to a unit or city from another empire. What you do next‐whether you offer a gift, request an advance, or propose a treaty‐is up to you. In this section, you will learn all you need to know about the machinations of the Call To Power II diplomacy system.
Regard and Trust ‐ The Keys to Diplomacy REGARD Your regard with other nations is critical to your success in the realm of diplomacy. What your fellow world leaders think of you, your government, and your policies, both foreign and domestic, is a very important indicator to monitor. High regard on behalf of other empires means that they are more likely to grant your diplomatic requests. On the other hand, low regard might indicate that a nation is angry, mistrustful, and may even be on the brink of declaring war on you. Your overall regard within the world community as a whole is important as well. If other leaders see that you are well‐liked across the world, they are more inclined to trust you. Low regard with many nations might nudge your rivals against you. TRUST Although trust and regard are interrelated, there are still distinct parts of diplomatic negotiations. In other words, nations may regard you highly, admiring your nation, celebrating when you vanquish their enemies, and grateful when you come to their aid. However, the same nation may not trust you, due to your conduct with other nations, your history of keeping or breaking agreements, and your track record with regards to observing the rules of war. If a nation does not trust you, they will be less inclined to enter into agreements with you. On the other side of the coin, a nation may have little regard for you but maintain a high level of trust. In this case, they will enter agreements with you, but only if it fits their goals and proves advantageous to them. The following factors affect trust:
• Every turn you maintain an alliance, treaty, or pact, your trust level goes up. • Breaking agreements, on the other hand, erodes trust. • Unprovoked attacks on cities and units drastically undermines your trust. If you are not explicitly at war with another nation, you run the risk of appearing as a backstabbing, rogue nation by attacking them with no warning. This especially applies to non‐military units (settlers, diplomats, etc.).
The Diplomacy Manager In order to initiate and respond to diplomatic correspondence, you must use the Diplomacy Manager screen. You can access it by clicking the button with the shaking hands icon on the Helm. Once you open the Diplomacy Manager, you will see a list of every empire that you have made contact with. They will be listed with the following headings: NATION The Nation column lists each empire by name. REGARD
‐ 49 ‐
Under this heading, there is a small icon that shows a face. This indicates the nation’s regard for you. Happy faces indicate high regard. Sad or angry faces indicate low regard. STRENGTH This icon gives you an indication of how powerful each nation is. EMBASSY This column indicates whether you have established an embassy in any of their cities. ALLIANCES/TREATIES This heading indicates any active agreements you have with each nation. Agreements can include pollution or trade pacts, peace treaties, and alliances. See the Treaties section, on page 53, for more information.
Intelligence If you would like to see the latest intelligence report on a particular nation, select the nation and click the Details Button in the Diplomacy Manager. From there you will learn about the leader of your rival nation including the leader’s name, personality, and their general disposition toward you. FOREIGN RELATIONS The Foreign Relations Tab provides a list similar to the one in the Diplomacy Manager, from the rival nation’s point of view. Other empires contacted by the rival nation will be listed along with their regard, strength, any embassies, and alliances or treaties. It is important to note that the regard listed is that of the foreign nations toward the rival nation you selected for your Intelligence Report. For example, if you selected France and then clicked Intelligence, the Regard listed with England and Rome represent how they feel about France. Similarly, the Embassy column will indicate whether France, your selected rival nation, has established an embassy in any of the foreign nations it has contacted. DOMESTIC INFO The Domestic Tab displays information about your rival such as their empire size (i.e. how many cities they have), population, pollution level, the name of their nation’s capital, and so on. It also lists the names of all of the wonders they have built. This is privileged information, however. If you wish to learn more about your rivals and access‐privileged information, you must establish an embassy in one of their cities. SCIENCE INFO This information is also only available with an established embassy. If you have an embassy with your rival, the Science Tab will compare the advances known to you and your rival. These lists display advances your rival has that you do not, and those you have that your rival does not. These lists do not pertain to the rest of the world. For example, when Gunpowder is listed for your rival, it means that you do not have Gunpowder.
Sending Diplomatic Messages To send a diplomatic message, open the Diplomacy Manager, select a nation, and click the Create Proposal Button. SELECT RECIPIENT You can change the recipient of the message if you wish. To do this, click the name of the recipient and choose another nation from the pop‐up menu. Your choices will be limited to the nations with which you have established contact. TONE OF VOICE After you have selected your recipient, choose the tone of voice in which the message will be written. You should consult your Intelligence Report before choosing your tone, as it will substantially affect your recipient’s response to your messages.
MAGNANIMOUS/KIND A magnanimous tone communicates generosity, benevolence, and nobility. It is appropriate for addressing empires that are weaker than you are.
‐ 50 ‐
FRIENDLY/EQUAL: A friendly tone conveys a neighborly, trusting sentiment. It is appropriate for addressing empires with which you either have an established friendship, or are equal to in size and strength. OBSEQUIOUS/MEEK An obsequious tone conveys subservience and deference to your audience. Use this tone with an empire that is stronger than you, in order to curry favor with them. HAUGHTY/INDIGNANT A haughty tone brings across unabashed arrogance. Your messages will have an unmistakably disdainful, superior attitude. It is only appropriate for addressing civilizations you suspect are weaker than you. HOSTILE/ANGRY The hostile tone is plainly antagonistic and belligerent. It communicates little to no regard for your audience and is suited to addressing civilizations that are much weaker than you, or that you are enemies with. Don’t use this tone unless you want to make steadfast enemies with other nations!
FORMULATING YOUR MESSAGE Once you’ve carefully selected your tone of voice, click the Next Button. Select the request type by selecting the Request, Offer, or Treaty tabs. Below these headings, you have several options.
REQUESTS • Request City… If you select this request, you will be prompted to specify the city you are requesting. If the recipient agrees to this request, they will relinquish control of the specified city and it immediately joins your empire. • Request Withdrawal This asks the recipient to remove their units from your soil. After this, they will actually need to honor that agreement since they are not automatically "bumped out". You will need to monitor their compliance. • Request They Stop Piracy This asks the recipient to stop pirating your trade routes. • Request They Break Agreements… This asks the recipient to break any agreements, treaties, or pacts they have with a particular nation. If you choose this request, you will be prompted to specify the nation you would like the agreements broken with. • Request They Honor Military Agreement This requests that the recipient honor their military agreement with you. This option will only appear if you have entered into an agreement with another player to provide military support for each other. • Request They Honor Pollution Agreement This requests that the recipient honor their pollution agreement with you. This option will only appear if you have signed a mutual reduce pollution agreement. • Request They Stop Research This requests the recipient to stop researching their current advance and switch to another one. • Request Nuke Reduction… This asks the recipient to reduce their arsenal of nuclear weapons by a certain percentage. You will have the opportunity to specify the percentage. • Request Bio Weapon Reduction…
‐ 51 ‐
This asks the recipient to reduce their arsenal of biological warfare weapons by a specific percentage. You must stipulate the percentage to initiate the request. • Request Nano Weapon Reduction… This requests the recipient to reduce their nanotechnology weapons arsenal by a certain percentage. You will be prompted to specify the percentage. • Request Advance… This requests that the recipient give you the secrets to an advance that they have and you do not. You will be able to specify the advance. If this request is honored, you will immediately discover the advance and be able to reap the benefits. • Request Gold… This asks for a gift of gold in the amount you stipulate. You will be prompted to specify an amount. If this request is honored, your treasury will automatically be credited. • Request Pollution Reduction… This requests the recipient reduce their total pollution by a certain percentage. You will be prompted to provide the required numeric amount. Be sure to consult your Domestic information in the Intelligence screen • Request Map This asks the recipient to reveal their map to you. If this request is honored, you will see all of the areas of the map that the recipient nation has explored to date, including their cities and units, as well as any foreign cities or units they have knowledge of. • Request End Trade Embargo This asks the recipient to cease their embargo of trade against you.
OFFERS
• Offer City… This offers the recipient control of one of your cities. You will be prompted to specify the city. If the recipient accepts the offer, the city and all the units it contains will immediately join their empire. • Offer To Withdraw This is an offer to withdraw your units from the recipient’s territory. If the recipient accepts, they will expect you to manually move (or disband) your units out of their territory as soon as possible. • Offer To Stop Piracy This is an offer to stop pirating the recipient’s trade routes. • Offer To Break Agreements… This is an offer to break your agreements with a particular nation. You will be prompted to specify the nation. If the recipient accepts the offer, all of your treaties and/or pacts will be nullified with the nation you specify. • Offer To Honor Military Agreement This is an offer to honor the agreements you made with the recipient nation. If the recipient accepts the offer, you will be expected to uphold any treaty or pact you have made with the recipient nation. • Offer To Honor Pollution Agreement With this, you pledge to honor the pollution agreement you previously made with the recipient nation. If the recipient accepts the offer, you will be expected to uphold any treaty or pact you have made with the recipient nation.
‐ 52 ‐
• Offer To Stop Research This is an offer to stop researching the advance you are currently working on. If the recipient accepts the offer, you will be expected to change to an advance they find less threatening. • Offer To Reduce Nukes… This is an offer to reduce your nuclear weapons arsenal by a fixed percentage. You will be prompted to specify the percentage. • Offer To Reduce Bio Weapons… This is an offer to reduce your biological weapons arsenal by a fixed percentage. You will be prompted to specify the percentage. • Offer To Reduce Nano Weapons… This is an offer to reduce your nanotech weapons arsenal by a fixed percentage. You will be prompted to specify the percentage. • Offer Advance… This is an offer to share an advance with the recipient nation. If they accept your offer, they will immediately gain the advance you specify. • Offer Gold… This is an offer of a gift in the form of gold. You will be prompted to specify an amount. If they accept your offer, the amount of gold will be deducted from your treasury at once. • Offer To Reduce Pollution… This is an offer to reduce your empire’s total pollution by a fixed percentage. • Offer Map This is an offer to reveal your map to the recipient. If they accept your offer, they will see all of the areas of the map that you have explored to date, including your cities and units, as well as any foreign cities or units you have knowledge of. • Offer to End Trade Embargo With this offer, you agree to lift your ban on trade with the recipient nation. If you make this offer and they accept, the nation will be free to trade with you once again.
TREATIES
• Declare War… This is a pledge to declare war on the empire you specify. You will be prompted to name the empire you intend to declare war on. • Cease‐Fire This is a proposal to end all fighting between you and another empire. If both empires agree to a cease‐fire, they must refrain from attacking any units or cities. • Peace Treaty This is a proposal to not only stop any fighting between nations, but to actually declare a state of peace between them. A peace treaty signifies that there is no conflict between nations. • Trade Pact This is a proposal to enter into a trade agreement with another nation. Two empires that sign a trade pact get a bonus for each trade route they have between each other’s cities. • Research Pact This agreement gives both nations who sign it a bonus to their science.
‐ 53 ‐
• Military Pact This is a pledge to come to the aid of another nation should they require military assistance. If you sign a military pact, you will be expected to provide military assistance should the other signer need it. • Pollution Pact… This is an agreement to keep pollution below a certain level. You will be prompted to specify the level. Two nations who agree to this pact are obligated to take measures to curb the total pollution their cities create and maintain it at or below the level specified. • Alliance An alliance is the supreme achievement of diplomacy in Call To Power II. An alliance is actually a combination of agreements, treaties, and pacts that signify a robust and long term partnership between two empires. If you enter into an alliance with another nation, both of you must abide by the terms of a peace treaty and a military pact. If you have a trade or research pact with a nation you are also allied with, there is an additional bonus to trade and science.
THREATS
• Embargo This is a threat to stop trading with the recipient. • Declare War This is a threat to declare war on the recipient. • Destroy City This is a threat to use weapons of mass destruction.
Declaring War If all diplomatic options have been fruitlessly explored, or if you are militaristically inclined, you may want to declare war on one or more of your neighbors. To do this, select a country in the Diplomacy Manager and then click the Declare War Button. You will be asked to confirm the order. If you choose Yes, your martial intentions will become public knowledge. Every nation on the map, regardless of their affiliation with you will receive word that you have declared war on a rival. You may attack another empire without a formal declaration of war, but it will have a negative effect on your regard and trust levels with other nations.
Diplomats and Empathic Diplomats The diplomat and, later in the game, the empathic diplomat are units which provide a powerful way to take diplomacy to the next level. Although you do not need to build or deploy diplomats in order to conduct diplomacy, without them your diplomatic options will be limited. Diplomats serve a variety of functions. They "grease the wheels" of communication between rivals, act as your representatives in the halls of foreign governments, and establish embassies. ESTABLISHING EMBASSIES An embassy increases your diplomatic options with the empire in which it is established. It also enables you to see which advances the other empire has that you do not, and vice versa. See Intelligence, above, for more on what embassies provide. To establish an embassy, move your diplomat next to a foreign city you are not at war with. Then choose the Establish Embassy order from the Unit Tab or by right‐clicking on your Diplomat, and click on the target city.
‐ 54 ‐
If you go to war with a nation, any embassies you have are destroyed; and if you construct the Forbidden City wonder, all of your embassies in foreign cities will be closed. HOLDING RECEPTIONS Diplomats can hold a reception in a foreign city. Although the event costs you gold, it gives you a regard bonus with that empire. You cannot hold a reception in a foreign city if you are at war with that empire. To hold a reception, place your diplomat next to a foreign city with which you are friendly. Select the Hold Reception order from the Unit Tab or right‐click on your Diplomat, and click on the target city.
Other Factors that affect Diplomacy Your success in diplomacy depends largely on how other nations regard you as a leader and as a nation. If you wish to be effective in diplomacy, consider the following things when interacting with other nations: PILLAGING AND PIRATING Pillaging another nation’s tile improvements and pirating their trade routes will lower their regard for you. On the other hand, if you happen to be the victim of a nation which pillages your land or pirates your trade, it can be easy to escalate into war by attacking the offending units. Consider expelling the offending units as an alternative to attacking them. BREAKING ALLIANCES Nations will hold you in contempt when you break cease‐fires, peace treaties, or alliances and attack their units or cities. Violating other agreements, like a stop piracy agreement, will also lower their opinion of you. UNCONVENTIONAL WARFARE Although unconventional warfare seldom ends in the loss of human life, it can severely affect a nation's day‐to‐day operations. City conversions, lawsuits, injunctions, and franchises can drain resources from a rival’s empire, while contract hits on public figures, uprisings, and revolutions reduce happiness and can even result in the loss of a city. Since stealth units perpetrate most of these attacks, they often complete their objectives under a veil of secrecy. Occasionally, a vigilant nation will capture a stealth unit in the act. In this event, the victim nation certainly expresses outrage at the attacker's underhandedness and guile. Remember, stealth attacks that succeed can be devastating. But even the best fail or get sloppy once in a while. The ensuing diplomatic firestorm is usually hard to weather. WONDERS A few wonders of the world can increase your regard with all nations. If you are inclined to win the game diplomatically, it is advised that you seek to build these regard‐enhancing wonders as soon as possible. ATROCITIES Although any military aggression is certain to anger your enemies, there are certain attacks that the world community considers heinous crimes, worthy of scorn and contempt. Attacks with nuclear, biological, and nanotechnological weapons are all considered atrocities. Although these will be at your disposal throughout the game, you will invite the condemnation of all nations should you opt to unleash them on your foes. Atrocities substantially decrease your regard and trust with all nations for a long time. You should consider the price of your actions, and the inevitability of rogue nation status, before you give the order to launch weapons of mass destruction.
‐ 55 ‐

SCIENCE
Why Science? History is littered with the unfortunate consequences of nations ill equipped to resist the imperialistic overtures of a more scientifically advanced nation. In Call To Power II, all nations, regardless of geography or nationality, have access to the same Technology Tree‐a complex web of scientific and cultural advances that builds upon itself, mirroring the complex and nonlinear progression of human achievement throughout the ages. By committing a portion of your resources to scientific research, you will gain insight into these advances. Discover an advance and you will immediately reap the benefits of the knowledge it represents. You will be able to build new units, improvements, tile improvements, and wonders. You will have access to new government types. And, most importantly, you will be able to research newer advances, which lead to even greater items to build and employ. The key to world domination lies not only in diplomatic prowess, effective government, or even military force, but in the uninterrupted drive to best one’s rivals in the realms of science and culture. You cannot master the arenas of diplomacy, government, or war without the strategic advantages inherent in technological superiority.
What are Advances? Every advance represents a significant achievement in human understanding. Advances can represent technological achievements, such as the discovery of concrete or the theory of flight, cultural developments like jurisprudence or theology; or earth‐shattering breakthroughs in human conception like philosophy or physics. INITIAL ADVANCES You will begin the game with anywhere from three to six advances from the ancient age, depending on the difficulty level of the game. Once you have built your first city, you will have the opportunity to begin research on new advances. You will usually have a choice of more than one advance. How you progress through the technology tree will have a major impact on your progress in the game. Depending on the size of the map, the number of foreign rivals, the rules of the game, and even your starting point, your decisions regarding the direction your scientists take could propel you toward world domination, or leave you scrambling to keep your head above water.
Choosing Advances You will need to choose the order in which you research advances carefully, as they will determine your progress through the game. You can access the Research window from the Empire Tab, on the Control Panel or the Science Manager screen. Just click the image of the advance you are currently researching on the Empire Tab or Change Research from the Empire Manager screen, and the Research window will appear. The top of the window will prompt you to select a new advance to research. This window will automatically appear whenever you finish researching an advance. You can select any of the advances listed on the left side of the window. Selecting any advance will display information on the right about what that advance provides, including units, improvements, wonders, new governments, and access to other advances. The number of turns required to advance will be listed just below this information. Clicking any of the items listed on the right side of the screen will take you to the Great Library for more information. To select an advance and begin researching it, just select the advance and click OK. To continue researching your previously selected advance, click Cancel. SETTING GOALS You can select a research goal from the Research window to help you achieve certain goals in the game. For example, you might want to get cavalry units as quickly as possible. Clicking the Goal Button will take you to the Great Library where you
‐ 56 ‐
can select Cavalry under Units, and set the goal from there. When you return to the Research window, you will notice asterisks (*) next to the advances that lead to your goal, Cavalry.
Acquiring Advances RESEARCH The most common way of acquiring advances is through research. The game will automatically prompt you to select an advance to research. The speed with which you discover new advances, however, depends on how much science your empire produces. The more money you dedicate to fund science, the less time, in turns, it takes to discover advances. To increase science, you can choose from the following:
SCIENCE TAX This is the most common way of increasing science to gain advances. In the Empire Manager you may set a tax to fund scientific research. The money from the research comes out of your nation’s treasury. Higher taxes provide more funds for more rapid advancement, but you should be careful not to sacrifice the financial integrity of your nation in pursuit of science. You will be faced with improvement maintenance and military support costs that will increase as your empire grows. SCIENTISTS Scientists are one of the many specialists you may employ in your cities. In order to increase the science output of your cities, you can reassign workers to be scientists. Keep in mind that Scientists do not collect food, production, or commerce like standard workers. Make sure you are collecting enough basic resources in your cities before hiring specialists. IMPROVEMENTS AND WONDERS Some improvements, like the academy and university, directly increase the science output of your cities. Science‐boosting wonders that increase science nationwide include Aristotle’s Lyceum and Galileo’s Telescope. Consult the Great Library for information on improvements and wonders. GOVERNMENT TYPE Your choice of government will determine the emphasis your empire places on scientific research and cultural advancement. Governments such as democracy, corporate republic, and technocracy are conducive to robust scientific exploration. DIPLOMACY You have several diplomatic options available that can help you acquire advances. After establishing an embassy in a foreign city, you can exchange advances with that nation. This is only possible if you have an advance that they do not, and vice versa. You can also request advances from other nations. The nation’s willingness to divulge such secrets depends greatly on their regard for you. Pay particular attention to the tone of your diplomatic missives‐it may be the key to gaining the favor you need to sway a hesitant or wary nation. EXPLORATION As you explore new territory, you will occasionally encounter ruins of ancient civilizations. If you choose to enter the ruins, you have a chance of discovering an advance unknown to you. Nevertheless, beware! By entering the ruins, you run the risk of a barbarian ambush. THEFT You may steal an advance from a rival empire with the help of a spy or cyber ninja unit. If the attack is a success, you gain the advance. If the attack fails, your unit is captured and killed. More importantly, you run the risk of arousing the ire of your rival and must contend with the diplomatic consequences of a blemished reputation.
‐ 57 ‐
Science Manager Screen The Science Manager screen will enable you to view the advance you are currently researching, advances you have already achieved, and the advances of other empires with which you have established an embassy. Advances you have already researched will be listed in the large box at the bottom of the screen. You can sort this list by name, from the most primitive advances to the most modern. You can also sort the list by nation. Nations you have discovered but do not yet have an embassy with will appear, but you will not be able to see their advances. Click the header to sort by name or nation, in ascending or descending order. When you select an advance in the list, information about what that advance provides will be displayed in the upper right side of the screen. The advance you are currently researching will be displayed in the upper center of the screen, with how many turns remaining just below it. Turns to discovery, current spendings, and total cost are listed in the upper right side of the screen. Total cost refers to the amount of gold require to research the advance, and current spendings is the amount of gold you have already contributed toward that advance. To change what you are currently researching, click Change Research at the bottom of the screen to go to the Research window.
The Technology Tree How you gain access to new advances is not arbitrary. Each advance you discover gives you the opportunity to discover other advances. All advances are organized into a matrix called the Technology Tree. You can access the Technology Tree in the Great Library in the game, as well as view it in its entirety on the poster included with Call To Power II. AGES There are five distinct ages in the game, representing major epochs in human history.
ANCIENT AGE The Ancient Age represented the first iterations of human societies. Across the world peoples began to abandon nomadic life in favor of settling near a river or fertile plain. The discovery of agriculture, in part, made settlement possible, giving people the power to expand their tribe by feeding greater numbers of people. Religion was often a major part of ancient societies, unifying people in times of struggle and uncertainty. Jurisprudence, philosophy, drama and writing enriched ancient civilizations, proving social order, entertainment and intellectual stimulation. Ancient times were marked by brutal and bloody conflicts, as nations sought to expand their territories and conquer their enemies. Advancements in bronze and iron working, ship building and siege weapons fueled an almost constant state of war throughout the last four millennia BC. RENAISSANCE AGE After the tumult of the Dark Ages in Europe, nations struggled to come to grips with their historical, cultural and national identities. Particularly in Italy, the Renaissance sparked a renewed interest in the period of Greek and Roman dominance known as the classical period. As the thinkers of the age grappled with the wisdom of the ancients, they opened up new frontiers in science, art, philosophy and culture. Mimicking their ancestors' interest in the physical world, the great minds of the Renaissance began to explore the fields of optics, chemistry, physics and astronomy. Advancements in shipbuilding made larger, more powerful ships available for exploration and warfare. More than anything, the discovery of gunpowder changed the nature of war. As strong nations equipped their soldiers with muskets and cannon, cultures still relying on catapults, archers and swordsmen were easily wiped out and conquered. International trade proliferated as ships laden with exotic goods traveled the seven seas, bringing spices to Europe, muskets to Asia and horses to the New World. MODERN AGE The Modern Age was marked by an explosion of growth in the areas of human industry and ingenuity. New manufacturing techniques brought on by the Industrial Revolution contributed to an increase in the productive power of cities. Breakthroughs in science, such as electricity, quantum physics and modern medicine led to the development of televisions, airplanes and hospitals. Railroads crisscrossed nearly every continent, expanding the
‐ 58 ‐
speed and efficacy of transport and travel. The invention of the internal combustion engine led to the rise of the automobile as the dominant form of land transportation in the mid 20th century. By the end of the modern age, computers had pervaded every aspect of human life. They facilitated more rapid scientific research, intercontinental communications, and global commerce. Despite these leaps in human understanding and productivity, the modern age bore witness to a staggering array of new warfare technology. From machine guns and tanks to nuclear missiles and stealth aircraft, battlefields heated up as science begat newer and better ways to destroy life. As technology began to exponentially increase, new questions about the role of technology in society, the responsibility of scientists and even the eventual obsolescence of humanity at the hands of future advances plagued the thinkers of the age. GENETIC AGE With the deciphering of the mysteries of human life at the hands of researchers involved in the Human Genome Project, the Genetic Age built on the solid foundation of scientific achievement established in the Modern Age. What distinguished the Genetic Age from the Modern Age was a collective increase in responsibility towards humanity and the environment. Whereas technology continued to streamline the process of manufacturing, it also found equally powerful ways to help curb pollution. Human mastery of the physical world continued at breakneck pace with the applications of chaos theory and unified physics. More than anything else, the achievements of the Genetic Age began to blur the lines between human and machine. Neural interfaces enabled people to control computers with their thoughts. Medical scientists began to apply their knowledge of genetics towards not only the eradication of disease but the customization of all forms of life. As the computer revolutionized the lives of people in the 20th century, so did genetics irrevocably alter life in the 21st century. DIAMOND AGE The Diamond Age was a period of intense scientific breakthroughs. With the perfecting of nanotechnology and further developments in genetics, human beings possessed power over their lives and their worlds in ways that seemed unfathomable in previous centuries. Human cloning and life extension enabled people to achieve immortality, as the limitations of the physical body no longer presented an obstacle. More than any other science, nanotechnology affected the lives of citizens most profoundly. Sub‐microscopic machines called nanites could manipulate molecules, seek out nuclear weapons, eat pollution, release toxins and countless other tasks. With the aid of nanites, entire cities were constructed underwater. The power of nanites manifest in two disparate realms, however, and represented both the future and the demise of human life. The Gaia Controller had the power to grant a new utopia in the world, by providing limitless supplies of resources. However, Eco‐Rangers could just as easily obliterate entire cities in a matter of minutes, leaving behind only pristine wilderness. Though some saw this as a triumph, others feared the day that human beings sought to undue six millennia of evolution, progress and creation. For all of its technological breakthroughs, the Diamond Age represented a world at a crossroads. With the power of eternal life, limitless energy, and an end to material scarcity, people were finally in control of every aspect of their own destinies. The only question that remained was whether people would live in peace or ultimately destroy themselves in the acts of nanotechnological war.
BRANCHES The Technology Tree can be divided into branches, each describing a general, unifying characteristic of the Advances it contains. These branches are arranged in the chart that accompanies the game. You can accelerate the development of your empire in areas that are important to you by researching Advances within any of the specific branches listed below:
CONSTRUCTION ADVANCES help cities grow and provide defense. Advances in this branch include, Stone Working, Masonry and Concrete. ENGINEERING ADVANCES provide new ways to fashion tools, weapons, railroads, and buildings. These Advances include, Iron Working, Modern Metallurgy. and Smart Materials. SEA FARING ADVANCES lead to naval units and undersea cities. This Branch will lead to, Ship Building, Naval Tactics, and Ultra‐Pressure Machinery among others. AEROSPACE ADVANCES offer a pathway to aircraft and space travel. Examples: Aerodynamics, Jet Propulsion. and Supersonic Flight.
‐ 59 ‐

MILITARY ADVANCES lead to a strong national defense and offensive military units. Ballistics, Gunpowder, and Tank Warfare are some of them. ECONOMIC ADVANCES increase gold and lead to new forms of government. Trade, Banking, and Communism are all in this branch. PHYSICAL SCIENCES ADVANCES lead to the Diamond Age. Examples: Chemistry, Quantum Physics, and Chaos Theory. CULTURAL ADVANCES increase science and lead to more complex forms of government. These advances include Drama, Philosophy, and Theology. ENVIRONMENTAL SCIENCES ADVANCES reduce pollution and lead to Gaia Theory. Mass Transit, Conservation, and Ecotopia are some of these essential Advances. ENERGY SCIENCES ADVANCES increases science and lead to Diamond Age technology. Examples include, Computer, Nuclear Power, and Superconductor. MEDICINE ADVANCES help promote growth and defend cities in the Genetic Age. Pharmaceuticals, Medicine and Human Cloning are all healthy examples. GOVERNMENT & EDUCATION ADVANCES promote learning, law and order, and government institutions. Writing, Jurisprudence, and Democracy are just some of them.
The Great Library ‐ Your Gateway to Knowledge The greatest tool you have at your disposal is the Great Library. Within its pages, you will find details on every aspect of Call To Power II. The easiest way to access the Great Library is by clicking the bottom button on the Helm. Every item in the game has an entry in the Great Library. From Units, Wonders, and Improvements to Advances, government types, and game concepts, the Great Library is the ultimate repository of information in the game. There are two types of entries, gameplay and historical. Gameplay entries give you essential information about how things work in the game, for example which advance enables a particular unit or how many resources a terrain type has. If you have a question about an item, you should consult the Great Library's gameplay entry for all of the pertinent information. Some items also have historical entries. These provide background on the items in the game, placing them in their proper historical perspective. Because Call to Power II is a game largely based on actual human history, it can be enlightening and enriching to learn about the history behind the advances, wonders, units, improvements, and governments. NAVIGATING THE GREAT LIBRARY Navigating around the Great Library is easy. You can enter any term in the search box at the top of the left side or you can follow any of the hyperlinks. You can use the Back and Next Buttons at the bottom to go back over pages you have visited. The most common way to scan the Great Library is by using the Navigation Buttons on the left side. The buttons are as follows:
(1) ADVANCES ‐ These are all the various things you can research through science. The Great Library will show you what advances are prerequisites and what new things the advance will give you. Additionally, you can read the summaries of how the advance will impact your gameplay and how it fits in history. The Tech Tree can also be directly accessed through Advances. (2) UNITS ‐ All the units that can be constructed and used in the game are listed here. You can find what advance is required to build it, any special abilities, and the statistics of the unit. Gameplay and Historical entries are also available. (3) IMPROVEMENTS ‐ All the structures that can be built in a city are here. Information on the impact of the improvement, what it costs, and what advance is required is included in each entry.
‐ 60 ‐
(4) WONDERS ‐ Every wonder in Call To Power II can be found in the Great Library by pressing this button. Explanations on the impact of the wonder, along with which advance is required, and what it costs are listed. (5) TERRAIN ‐ The general statistics of every terrain type is available. Examining these Great Library entries will help you discover the best places to build cities and to focus tile improvements. (6) GOODS ‐ General summaries of each trade good in Call To Power II are included. (7) TILE IMPROVEMENTS ‐ Explanations on each kind of tile improvement including farms, roads, undersea mines, and much more are described here. (8) GOVERNMENTS ‐ Details about each form of government and its impact are specified in this section of the Great Library (9) ORDERS ‐ Every type of order for every unit is listed with a description here. (10) CONCEPTS ‐ This is the general glossary of Call To Power II. All the concepts touched on within the manual and upon which the game is based are described here.
‐ 61 ‐

TRADE Trade is one of the most effective ways to generate gold for your empire. This section will give you every detail about the trade system in Call To Power II including what you need to get started trading, a list of goods to trade, and what you can expect.
Goods In order for you to engage in trade, you will need to have a good within a city's area of influence. The maps in Call To Power II are dotted with icons that represent naturally occurring goods. The trade system in the game revolves around the buying and selling of these goods. They can range from raw materials like lumber or oil, to foodstuff such as crab or coffee, and even finished goods like glass. Goods are valued based on their scarcity in the world and their distance to any given city that will buy them. Goods are broken down into common and rare goods, and are generally associated with specific terrain types, as listed below:
TERRAIN TYPE COMMON GOOD RARE GOOD Forest Hardwood Bear Plains Spices Elephant Grasslands Cotton Tobacco Green Hills Coffee Grapes Jungle Medicinal Herbs Jade Desert Glass Oil Sand Dunes Glass Oil Swamp Alligator Tundra Caribou Alpine Mountains Tea Emeralds Desert Mountains Tea Emeralds Polar Mountains Rubies Diamonds Shallow Oceans Crabs Pearls Beach Crabs Pearls Kelp Beds Crabs Pearls Coral Reefs Crabs Pearls Deep Ocean Whales Giant Squid Continental Shelf Whales Giant Squid Suboceanic Ridge Whales Giant Squid Submarine Volcano Rubies Diamonds
The Trade Advance Once you discover the trade advance, you may begin to engage in both foreign and domestic trade. You will need to research both agriculture and jurisprudence before getting to trade. The trade advance enables you to build caravans, which are required to transport goods between cities. The trade advance also enables roads, the bazaar improvement, and the Appian Way, all of which enhance commerce and trade.
Caravans Caravans are a special kind of improvement representing the means by which traders physically transport trade goods, be it by camels, wagons, trucks, or ships. You can build caravans in cities like any other improvement. While caravans represent vehicles and pack animals, they only appear on the map in the form of a trade route, along with the goods transported. Instead, they go into a pool of caravans, ready and waiting to transport goods to from city to city across the map. The longer the distance between cities on a trade route, the more caravans it will require to complete the job. After you have built a few caravans, open the Trade Manager located on the Helm to begin trading goods.
‐ 62 ‐
FREIGHT TRANSPORT Freight transport is the modern equivalent of the caravan. Once you discover the global economics advance, freight transport replaces the caravan as the means of shipping goods.
Trade Manager The Trade Manager is your key to the marketplace. From here, you can view possible trade routes, create them and then view and break trade routes you have already set up. You can also get advice from your trade advisor, evaluate your use of caravans, and see your profits. MARKET TAB The Market Tab provides a list of available trade, both foreign and domestic. Trade in Call To Power II is demand‐driven. In other words, only trade goods that you supply are listed in your market report. Furthermore, a trade good will not be listed unless another city is willing to pay for it. You can list available trade routes using the Show Cities Buttons. If you wish, you can show only domestic trade demand by clicking the Own Button. Clicking the Friendly Button will show cities from friendly foreign nations who wish to buy your goods. The All Button shows all potential trade routes, domestic or foreign, hostile or friendly. You can sort these lists by column heading if you wish. The list is sorted by the Our City column by default, to show which of your cities offers a trade good. You can sort by the good itself, cities interested in buying, nationality, price, and caravans required. Trade to foreign cities is often more profitable than trade within your own empire, however these routes are the first to be broken in the event of hostility or conflict. Trade with hostile nations is dangerous and subject to piracy. You can also list up to five possible routes per city using the Cities Per Good slider. Normally, you will want to list only the most profitable routes, setting the slider to 1, the leftmost position. However, there are many times when the most profitable routes require more caravans than you have. On the other hand, a high profit route may pass by enemy territory and have potential to suffer from frequent piracy. In these cases, try setting the slider to the right so you can view alternate routes that suit your purposes. TRADE SUMMARY TAB The Trade Summary lists all of the trade routes you have created. You can sort this list in the same manner as the Market Tab.
PIRACY INDICATOR If foreign scoundrels are pirating your trade routes, you will see the color of their nation under the column marked by a pirate flag. If a nation is pirating your routes, you may want to send them a diplomatic message requesting they stop! BREAKING TRADE ROUTE You can always cancel a current trade route to free up caravans if you want to initiate a route somewhere else. To do this, simply select the route and click the Break Route Button.
THE TRADE ADVISOR The Trade Advisor will provide you with advice with respect to which routes are the most profitable, and will summarize routes you have selected from the market. Important information concerning how many caravans you have available or in use, your current profit from trade, and the total number of trade routes you have set up will also be provide by your advisor. You can choose to heed or ignore your advisor, and you can open or close the Advisor by clicking Show Advisor or Hide Advisor at the bottom left of the Trade Manager screen. ESTABLISHING TRADE ROUTES To establish a trade route, simply select it from the list you are viewing and click the Create Route Button. If you select a route for which you have enough caravans, the Create Route Button will become enabled. If the Create Route Button is not enabled when a route is selected, you do not have enough caravans. When you create a route, it will appear under the Trade Summary Tab (above). However, you will notice that another possible route, which is less profitable, will appear in
‐ 63 ‐
place of the route you just set up. The good will appear in red, indicating you are already selling this good. No city can sell the same good to more than one city, but you can still establish this route by clicking the Create Route Button. If you do this, you will replace your more profitable route with the less profitable one. Remember to consider not only the profit from a trade route, but also how many caravans it will require to transport the good. Caravans take time and production to build, so ask yourself if the number of caravans is worth the extra profit when comparing one route to another.
FOREIGN TRADES Before you have met any other empires, you can only trade items between your own cities. After you have encountered other empires, you may begin to trade with foreign cities. At that point, foreign trading is no different from trading within your own empire. However, foreign routes often require more caravans to transport your goods, and you will want to consider the territories your routes will pass through. If you are at war with a nation, you may not trade with them at all. Considering the profit potential for foreign trade routes, you may want to consider the price, both literally and figuratively, of war on your economy. PIRACY You can order your military units to pirate trade routes by moving onto the route and giving the pirate order. When a trade route is pirated, it is not broken. Rather, you pirate the profits, in gold, from the route for every turn you pirate the route. Piracy can play a hand in diplomatic relationships. You can request a nation stop piracy (see Diplomacy, on page 49), or you can hunt the offending units down and deal with them directly. This goes for other nations as well. Some leaders may see your piracy as the last straw, and use it as an excuse to declare war against you.
‐ 64 ‐
‐ 65 ‐
KEYBOARD SHORTCUTS Note: All keyboard shortcuts are case‐sensitive. BASIC COMMANDS 8 Move North 7 Move Northwest 9 Move Northeast 4 Move West 6 Move East 1 Move Southwest 2 Move South 3 Move Southeast U Unit/City Toggle n Next Unit/City Item o Select Unit ENTER Next Turn UNIT CONTROLS . Open Army Manager s Sentinel f Fortify b Settle P Pillage B Bombard Ctrl + r Reform E Expel u Unload Transport I Investigate City M Plant Nuke V Infect City N Nano-attack x Create Park l Launch Space
SCREEN CONTROLS F1 Empire Manager F2 National Manager F3 City Manager Ctrl + b City Build Queue Ctrl + j Clear Queue F6 Science Manager F8 Unit Manager F4 Trade Manager F7 Open Diplomacy Status Ctrl + d New Proposal TAB Message Ctrl + g Science Victory F5 Great Library F9 Current Score W Wonders Ctrl + k Rank q Empire Tab w City Tab e Unit Tab r Message Tab t Tile Tab ' Chat Key Ctrl + n Network Players Screen ! Open Scenario Editor
MAP CONTROLS c Toggle City Names " Show Trade Routes a Center Map R Toggle Minimap Ctrl + u Toggle Control Panel / Toggle All +/- Zoom In/Zoom Out GAME CONTROLS K Map Keyboard F10 Options Screen Ctrl + v Sound Options Ctrl + f Graphics Options F Gameplay Options Ctrl + z Restart Ctrl + x New Game S Save Game L Load Game Ctrl + s Quick Save Ctrl + l Quick Load Q Quit Ctrl + P Advanced Options
CREDITS DEVELOPMENT TEAM PARKER A. DAVIS SENIOR PRODUCER DAVID WHITE LEAD DESIGNER JOE RUMSEY LEAD PROGRAMMER DAVID DALZELL ART DIRECTOR CHRISTIAN ASTILLERO LINE PRODUCER JONATHAN MOSES ASSOCIATE PRODUCER PROGRAMMING RICHARD MYERS SENIOR PROGRAMMER DAVID RAY PROGRAMMER STEVE MARIOTTI TECHNICAL DIRECTION ART ARLENE SOMERS DIGITAL ARTIST (2D) FRANZ BOEHM ANIMATOR/DIGITAL ARTIST JAMES MAYEDA CONCEPTUAL/DIGITAL ARTIST (2D) JODY MCMURRIAN DIGITAL ARTIST (2D) STANLEY WOO ANIMATOR
GAME DESIGN WINNIE LEE GAME DESIGNER DAN HAGERTY GAME DESIGNER TONY EVANS GAME DESIGNER PRODUCTION TEST ERIC LEE PRODUCTION COORDINATOR PRODUCTION TEST/PLAY BALANCING BRIAN DIGGS PRODUCTION TESTER CHAD BORDWELL PRODUCTION TESTER ERIC GROSSMAN PRODUCTION TESTER GLENN IGE PRODUCTION TESTER AARON GRAY PRODUCTION TESTER ADDITIONAL PROGRAMMING BRIAN HAWKINS, CLANCY IMISLUND, GEOFFREY PLITT MAD DOC SOFTWARE DR. IAN LANE DAVIS, TIM FARRAR, JAMES FLEMING, MATTHEW NORDHAUS, KEVIN WASSERMAN, TARA TEICH, STEVE NADEAU ADDITIONAL ART CHRISTIAN BRADLEY, KEN FAIMAN, CHRISTOPHER O’NEIL, MAD DOC SOFTWARE
PRELIMINARY ART DIRECTION PHILIP SALAS, RICK GLENN MANDELBROT IMAGE COURTESY OF ED CLUNE ADDITIONAL SCENARIO DESIGN HARLAN THOMPSON MOVIES CECILIA BARAJAS CINEMATICS DIRECTION CREAT STUDIO, LLC ST. PETERSBURG, SAN FRANCISCO DANIEL PROUSLINE EXECUTIVE PRODUCER VLADIMIR ALEXANDROV PROJECT LEADER/DIRECTOR INTRO MOVIE ANDREY KRAVCHUK CO‐DIRECTOR VITALIY ANIKIN PRODUCTION ART DMITRI HOLODOV LIGHTING OLGA CHEREMISOVA POST WONDER MOVIES AND OUTROS MALIK HOTOSHAEV CO‐EXECUTIVE PRODUCER SERGEI TITARENKO ASSISTANT PRODUCER MODELING DMITRIY ASTAHOV, FEDAIL GILMUTDINOV, BLAGOI BORISOV, PAVEL ROSTOVCEV
‐ 66 ‐
ANIMATION SRGEI BOGINSKY, ANNA KSENZ, ALEXANDER MIALA, IRINA NIKIFOROVA, DMITRIY USHANOV, DENIS DAVIDOV, ROMAN BERMAS, VASILI BOGDANOV, PAVEL GOLUBEV, PETR ANIKIN, ANNA ZIBROVA PRODUCTION ART & ANIMATION ANDREI KALYUKIN MODELING, ANIMATION & LIGHTING YURIY TCHERNISH ANIMATION & SFX ANTON LOMAKIN DIGITAL EDITING AND POST PRODUCTION CHRIS HEPBURN PRODUCTIONS SOUND EFFECTS & VOICE OVER BIG FAT KITTY PRODUCTIONS, HOLLYWOOD, CA BILL BLACK SOUND EDITING & VO DIRECTION UNIT AND MOVIE VO CHRISTINE DUNFORD, DARAN NORRIS, DWIGHT SCHULTZ, GUY SINER, MARI WEISS, WAYNE GRACE, WILLIAM SCHILLING MUSIC CAREY CHICO COMPOSER TRACK 1 A FORTIORI (LATIN) TRACK 2 PACARI TAMPU (INCAN) TRACK 3 AMAETHON (WELSH).
TRACK 4 A’TUGEWINU (NATIVE AMERICAN) TRACK 5 SUMMUM BONUM (LATIN) TRACK 6 CASUS BELLI (LATIN) TRACK 7 ANKH DJET (EGYPTIAN) TRACK 8 SHAOLIN SAN (CHINESE) ADDITIONAL TRACKS TRACK 9 QUIET OUTBACK, COMPOSED BY MICHAEL HARRITON; DIDGERIDOO AND BULLROAR BY RANDY GRAVES TRACK 10 KALI DANCE, COMPOSED BY MICHAEL HARRITON; VOCALS BHALOBASHA ADDITIONAL SAMPLES PROVIDED BY BIG FISH AUDIO INSTALLER PROGRAMMING ALEXANDER ROHRA, DREW PETTERSON ACTIVISION STUDIOS DOUG PEARSON PRODUCER MARK LAMIA EXECUTIVE PRODUCER STEVE CRANE VP, NORTH AMERICAN STUDIOS LARRY GOLDBERG EVP, WORLDWIDE STUDIOS LOCALISATION STEPHANIE O’MALLEY LOCALISATION MANAGER
INTERNATIONAL NATHALIE DOVE LOCALISATION SUPERVISOR TAMSIN LUCAS LOCALISATION SUPERVISOR PETER NIELSEN LOCALISATION SUPERVISOR MARK NUTT LOCALISATION ASSISTANT SIMON DAWES LOCALISATION ASSISTANT EMILY KNIGHT PRODUCTION MANAGER JACKIE WHALE CREATIVE SERVICES MANAGER GERMANY NATASCHA CONRAD LOCALISATION DIRECTOR BETTINA BUTCHER LOCALISATION COORDINATOR KLAUS MÜLLER LOCALISATION COORDINATOR LOCALISATION BY MB OFFICE SERVICE EFFECTIVE MEDIA GMBH INTERNATIONAL LOCALISATIONS EXEQUO, FR DL MULTIMEDIA, SP PROJECT SYNTHESIS, IT
‐ 67 ‐
BRAND MANAGEMENT JOHN HEINECKE GLOBAL BRAND MANAGER MATTI KUOREHJARVI SENIOR BRAND MANAGER, UK & ROE MANTEJ BRAR ASSOCIATE BRAND MANAGER, UK & ROE GUILLAUME LAIRAN BRAND MANAGER, FR CHRISTIAN STREIL BRAND MANAGER, GR LEIGH GLOVER BRAND MANAGER, ASIA‐PACIFIC DUSTY WELCH DIR, GLOBAL BRAND MGMT KATHY VRABECK EVP, GLOBAL BRAND MGMT PUBLIC RELATIONS MICHAEL JAMES LARSON SENIOR PUBLICIST, US GUY CUNIS PR MANAGER, UK SARAH RICCHIUTI PR MANAGER, EUROPE DIANE DE DOMECY PR MANAGER, FR MARKUS WILDING PR DIRECTOR, GR AMY PYM PUBLIC RELATIONS, ASIA‐PACIFIC INTERNATIONAL SALES AND MARKETING BERNARD SIZEY MARKETING DIRECTOR, FR GAUTIER ORMANCEY MARKETING ASSISTANT, FR
ANTOINE SEUX SALES MANAGER, FR ACHIM KASPERS MARKETING MANAGER, GR CREATIVE SERVICES DENISE WALSH VP, CREATIVE SERVICES JILL BARRY MGR, CREATIVE SERVICES LEGAL THAINE LYMAN DIR, PRODUCT DEVELOPMENT GEORGE ROSE SR. VP & GENERAL COUNSEL MICHAEL HAND DIR., BUSINESS & LEGAL AFFAIRS MICHAEL WALKER SR MGR, BUSINESS & LEGAL AFFAIRS MICHAEL LARSON PARALEGAL ELLIOT BROWN, IRELL & MANELLA ACTIVISION QUALITY ASSURANCE SIÔN RODRIGUEZ Y GIBSON PROJECT LEAD MATT POWERS MANAGER OF PC TITLES NADINE THEUZILLOT SENIOR PROJECT LEAD JOHN SHERWOOD ACTING SENIOR LEAD ADAM HARTSFIELD NIGHT CREW LEAD ERIC ZIMMERMAN LOCALISATION PROJECT LEAD ERIC ZALA
QA MANAGER JIM SUMMERS VICE PRESIDENT, QUALITY ASSURANCE FLOOR LEADS JON VIRTES SINGLE PLAYER LEAD ALEX PLACHOWSKI MULTIPLAYER LEAD HENRY VILLANUEVA SCENARIO LEAD DOUG ROTHMAN DATABASE MANAGER ERIN MARTEL NIGHT CREW FLOOR LEAD FRANK SO LOCALISATIONS FLOOR LEAD TESTERS CARLOS ESTIANDAN, CARLOS MONROY, CHAD FARRARO, CHARLES PRICE, CLAUDE CONKRITE, DAN CARREKER, DAN ERICSSON, DAVE MIAO, DAVID FEINBERG, DAVID STOLFA, GARRETT OSHIRO, J. RICHARDS, JASON GROSSMAN, JEREMY GAGE, JEREMY G. EVANGELISTA, JOHN YANG, JON HILBOURN, JOSEPH LIMBAUGH, KIRK KOSINSKI, MARCO SCATAGLINI, MARIO SANCHEZ, MATTHEW BEAL, MICHAEL MARZOLA, JEFFRY MOXLEY, PAUL KENNEDY, PHILIP TOPHAM, ROBERT FLEISCHACKER, ROBERT LAI, TAFARAI BAYNE, THADDEUS SASSER, THOMAS FLOOD, TODD BROWN, DANIEL LEE, MICHAEL WADE, GORDON READER, HANS WAKELIN, JASON GROSSMAN, MARK DOUGLAS, SAAM SHABAHANG, PATRICK HEARNE, ANTHONY KOROTKO, WAYNE FISHER
‐ 68 ‐
‐ 69 ‐
COMPATIBILITY LAB NEIL BARIZO COMPATIBILITY TEAM LEAD COMPATIBILITY TESTERS JASON KIM, SEAN OSBORN, CINDY LE NETWORK LAB CHRIS KEIM NETWORK LAB LEAD CODE RELEASE GROUP TIM VANLAW MANAGER JUAN VALDEZ SENIOR PROJECT LEAD CUSTOMER SUPPORT BOB MCPHERSON CUSTOMER SUPPORT MANAGER ROB LIM CUSTOMER SUPPORT, TECHNOLOGY LEAD GARY BOLDUC CUSTOMER SUPPORT PHONE LEAD MIKE HILL CUSTOMER SUPPORT E‐MAIL LEAD EXTERNAL TESTING LINDA LOZANO EXTERNAL TEST COORDINATOR VISIONEERS John Aubin, Cj Biro, Joseph Bott, Dan Carter, Paul Castillo, Wayne Chang, Paul Chouy, Armond B. Clark, Akiva Clark, Aaron Cox, TJ Curry, Jason Davis, James Dicken, Bob Dudley, Ron Duncan, Mike Dunn, Michael Dwiel, Trae Faught, David Finan, Seth Flaum, Jimmy Gardner, Gary Gray, Keith L. Graydon, Randy Hanley, Scott
Harlow, Ian Hayes, Adam Heller, Anthony Helton, Iain Hill, Jason Hitchens, Seth Hoe, Richard Hoggren, Scott Howie, Lloyd Jessee, Ben Jones, Onawahya Jones, David M. Joy, Allan Klein, Kevin Ko, Dan Kramer, Andrew Kuschnerait, Grant LaFrance, William Leppala, Charles Little, Jr., Peter Lolley, Ian MacInnes, Robert Mackey, David Marcinowski, Chris Massey, Gary McCoy, Mike McCurdy, Matthew Monaco, Adrian Moscher, Heather Moses, Christian Nash, Karim Nouri, Dan Oliver, Sierra Olson, Jordan Olson, Darrel Pantalone, Josh Pollak. Jason Reid, Angelo Ricci, Jeff Rizzo, Joseph Ruffolo, Ken Rumsey, Jon Savin, David Seale, John Sefchick, John Shackleton, Kunal Shah, John Silva, Daniel Smith, Ryan Smolar, Jedd Snaid, David Soohoo, Chris Squatritto, Brian Stacy, Robert Stenberg, Ryan Sugimoto, Brian Sutton, Don “Machman” Swanner, Jr., Clint Swereda, Joshua Tacey, Russell Taylor, David Teague, Glenn Vistante, Aaron Wade, Tim Waite, Andrew Webster, Michael Wedge, Brian Winslow, Phil Worthen, James Wright Jr., Omar Yehia, Brendan Young, Lee Zane, Marc Zaritsky, Dimitri Zelepuhin, Dominick Ziccarelli, Grayden Zuver IN MEMORY OF LEE BRISKEN SPECIAL THANKS THE ORIGINAL CALL TO POWER TEAM ALAN GERSHENFELD, BRIAN SIMKIN, CAROLYN PEDEGO, CLARENCE WASHINGTON, DION BRAIN, ED CLUNE, EHTISHAM RABBANI, ERIC DALLAIRE, FRANK GALE, FRANK STANKOWSKY, GLENN BAPTISTE, JAMEY GOTTLIEB , JASON WONG, JENNY CASSEL, JERMAINE CLARKE, JIM SUMMERS, JUDY NG, JUSTIN BERENBAUM, LAURA WEISSMAN, LEE BRISKEN, MERCEDES MCBRIDE, MICHAEL
CARTER, MICHAEL HIGA, MICHAEL POLE, MICHAEL ROWE, MIKE RIXFORD, MITCH LASKY, NEIL LALWANI, NEYSA JACKSON, PAGE MORRIS, PETER KARPAS, PETER KIM, ROBERT KOTICK, ROBIN WOLLAEGER, RON DOORNINK, RONALD SCOTT, RUTH PEARSON, SCOTT LAHMAN, STACEY YTUARTE‐BUSH, STACY SOOTER, STEPHEN WASHINGTON, SUZY LUKO, TANYA LANGSTON, TODD KOMESU, WILLIE BOLTON, RANDY D’AMORE CREATIVE SERVICES ERIK JENSEN PACKAGE DESIGN PRODUCTION RON GRAENING CINDY WHITLOCK KAREN LOPEZ MICHAEL RIVERA SYLVIA ORZEL MANUAL LAYOUT & PRODUCTION LICENSES USES MILES SOUND SYSTEM. COPYRIGHT © 1991‐2000 BY RAD GAME TOOLS, INC STOCK FOOTAGE DETAIL OF ROMAN STATUE ‐CORBIS/MIMMO JODICE © 2000 NELSON MANDELA SPEAKING ‐PAUL VELASCO; GALLO IMAGES/CORBIS © 2000 PORTRAIT OF ABRAHAM LINCOLN ‐CORBIS BETTMANN © 2000 JOHN BARRYMORE AND CAROLE LOMBARD IN “TWENTIETH CENTURY” ‐ CORBIS BETTMANN © 2000 MICRO SCOPE ‐ VIEWPOINT DIGITAL © 2000
SOFTWARE LICENSE AGREEMENT IMPORTANT ‐ READ CAREFULLY: USE OF THIS PROGRAM IS SUBJECT TO THE SOFTWARE LICENSE TERMS SET FORTH BELOW. "PROGRAM" INCLUDES ALL SOFTWARE INCLUDED WITH THIS AGREEMENT, THE ASSOCIATED MEDIA, ANY PRINTED MATERIALS, AND ANY ONLINE OR ELECTRONIC DOCUMENTATION, AND ANY AND ALL COPIES OF SUCH SOFTWARE AND MATERIALS. BY OPENING THIS PACKAGE, INSTALLING, AND/OR USING THE PROGRAM AND ANY SOFTWARE PROGRAMS INCLUDED WITHIN OR, IF YOU ARE DOWNLOADING THIS PROGRAM FROM AN AUTHORIZED ACTIVISION ONLINE RESELLER, BY DOWNLOADING, INSTALLING AND/OR USING THIS PROGRAM, YOU ACCEPT THE TERMS OF THIS LICENSE WITH ACTIVISION PUBLISHING, INC. AND ITS AFFILIATES ("ACTIVISION"). LIMITED USE LICENSE. Subject to the conditions described below, Activision grants you the non‐exclusive, non‐transferable, limited right and license to install and use one copy of this Program solely and exclusively for your personal use. All rights not specifically granted under this Agreement are reserved by Activision and, as applicable, Activision’s licensors. This Program is licensed, not sold, for your use. Your license confers no title or ownership in this Program and should not be construed as a sale of any rights in this Program. This Software License Agreement shall also apply to any patches or updates you may obtain for the Program. LICENSE CONDITIONS. You shall not: ‐ Exploit this Program or any of its parts commercially, including but not limited to use at a cyber cafe, computer gaming center or any other location‐based site. Activision may offer a separate Site License Agreement to permit you to make this Program available for commercial use; see the contact information below.
‐ Use this Program, or permit use of this Program, on more than one computer, computer terminal, or workstation at the same time.
‐ Make copies of this Program or any part thereof, or make copies of the materials accompanying this Program. ‐ Copy this Program onto a hard drive or other storage device except as specifically permitted herein; you must run this Program from the included CD‐ROM or DVD‐ROM (although this Program itself may automatically copy a portion of this Program onto your hard drive during installation in order to run more efficiently)unless you are downloading this Program from an authorized Activision online reseller.
‐ Use the program, or permit use of this Program, in a network, multi‐user arrangement or remote access arrangement, including any online use, except as otherwise explicitly provided by this Program.
‐ Sell, rent, lease, license, distribute or otherwise transfer this Program, or any copies of this Program, without the express prior written consent of Activision.
‐ Reverse engineer, derive source code, modify, decompile, disassemble, or create derivative works of this Program, in whole or in part.
‐ Hack or modify (or attempt to modify or hack) the Program, or create, develop, modify, distribute or use any software programs, in order to gain (or allow others to gain) advantage of this Program in an on‐line multiplayer game settings including but not limited to local area network or any other network play or on the internet.
‐ Remove, disable or circumvent any proprietary notices or labels contained on or within the Program. ‐ Export or re‐export this Program or any copy or adaptation in violation of any applicable laws or regulations of the United States government.
PERMITTED INSTALLATION. If you are downloading this Program from an authorized Activision online reseller, you may install this Program onto your computer hard drive. OWNERSHIP. All title, ownership rights and intellectual property rights in and to this Program (including but not limited to any patches and updates) and any and all copies thereof (including but not limited to any titles, computer code, themes, objects, characters, character names, stories, dialog, catch phrases, locations, concepts, artwork, animation, sounds, musical compositions, audio‐visual effects, methods of operation, moral rights, any related documentation, and "applets" incorporated into this Program) are owned by Activision, affiliates of Activision or Activision’s licensors. This Program is protected by the copyright laws of the United States, international copyright treaties and conventions and other laws. This Program contains certain licensed materials and Activision’s licensors may protect their rights in the event of any violation of this Agreement.
‐ 70 ‐

PROGRAM UTILITIES. This Program may contain certain design, programming and processing utilities, tools, assets and other resources ("Program Utilities") for use with this Program that allow you to create customized new game levels and other related game materials for personal use in connection with the Program ("New Game Materials"). The use of any Program Utilities is subject to the following additional license restrictions: ‐ You agree that, as a condition to your using the Program Utilities, you will not use or allow third parties to use the Program Utilities and the New Game Materials created by you for any commercial purposes, including but not limited to selling, renting, leasing, licensing, distributing, or otherwise transferring the ownership of such New Game Materials, whether on a stand alone basis or packaged in combination with the New Game Materials created by others, through any and all distribution channels, including, without limitation, retail sales and on‐line electronic distribution. You agree not to solicit, initiate or encourage any proposal or offer from any person or entity to create any New Game Materials for commercial distribution. You agree to promptly inform Activision in writing of any instances of your receipt of any such proposal or offer.
‐ If you decide to make available the use of the New Game Materials created by you to other gamers, you agree to do so solely without charge.
‐ New Game Materials shall not contain modifications to any COM, EXE or DLL files or to any other executable Product files. ‐ New Game Materials may be created only if such New Game Materials can be used exclusively in combination with the retail version of the Program. New Game Materials may not be designed to be used as a stand‐alone product.
‐ New Game Materials must not contain any illegal, obscene or defamatory materials, materials that infringe rights of privacy and publicity of third parties or (without appropriate irrevocable licenses granted specifically for that purpose) any trademarks, copyright‐protected works or other properties of third parties.
‐ All New Game Materials must contain prominent identification at least in any on‐line description and with reasonable duration on the opening screen: (a) the name and E‐mail address of the New Game Materials’ creator(s) and (b) the words "THIS MATERIAL IS NOT MADE OR SUPPORTED BY ACTIVISION."
‐ All New Game Materials created by you shall be exclusively owned by Activision and/or its licensors as a derivative work (as such term is described under U.S. copyright law) of the Program and Activision and its licensors may use any New Game Materials made publicly available by you for any purpose whatsoever, including but not limited to, for purpose of advertising and promoting the Program. LIMITED WARRANTY: Excepting patches, updates and any downloaded content, and this Program if you are downloading it from an authorized Activision online reseller, Activision warrants to the original consumer purchaser of this Program that the recording medium on which the Program is recorded will be free from defects in material and workmanship for 90 days from the date of purchase. If the recording medium is found defective within 90 days of original purchase, Activision agrees to replace, free of charge, any product discovered to be defective within such period upon its receipt of the Product, postage paid, with proof of the date of purchase, as long as the Program is still being manufactured by Activision. In the event that the Program is no longer available, Activision retains the right to substitute a similar program of equal or greater value. This warranty is limited to the recording medium containing the Program as originally provided by Activision and is not applicable to normal wear and tear. This warranty shall not be applicable and shall be void if the defect has arisen through abuse, mistreatment, or neglect. Any implied warranties prescribed by statute are expressly limited to the 90‐day period described above. EXCEPT AS SET FORTH ABOVE, THIS WARRANTY IS IN LIEU OF ALL OTHER WARRANTIES, WHETHER ORAL OR WRITTEN, EXPRESS OR IMPLIED, INCLUDING ANY WARRANTY OF MERCHANTABILITY, FITNESS FOR A PARTICULAR PURPOSE OR NON‐INFRINGEMENT, AND NO OTHER REPRESENTATIONS OR CLAIMS OF ANY KIND SHALL BE BINDING ON OR OBLIGATE ACTIVISION. IN NO EVENT WILL ACTIVISION BE LIABLE FOR SPECIAL, INCIDENTAL, OR CONSEQUENTIAL DAMAGE RESULTING FROM POSSESSION, USE OR MALFUNCTION OF THIS PRODUCT, INCLUDING DAMAGE TO PROPERTY AND, TO THE EXTENT PERMITTED BY LAW, DAMAGES FOR PERSONAL INJURY, EVEN IF ACTIVISION HAS BEEN ADVISED OF THE POSSIBILITY OF SUCH DAMAGES. SOME STATES DO NOT ALLOW LIMITATIONS ON HOW LONG AN IMPLIED WARRANTY LASTS AND/OR THE EXCLUSION OR LIMITATION OF INCIDENTAL OR CONSEQUENTIAL DAMAGES, SO THE ABOVE LIMITATIONS AND/OR EXCLUSION OR LIMITATION OF LIABILITY MAY NOT APPLY TO YOU. THIS WARRANTY GIVES YOU SPECIFIC LEGAL RIGHTS, AND YOU MAY HAVE OTHER RIGHTS WHICH VARY FROM STATE TO STATE. Except with respect to patches, updates, downloaded content and this Program if you download it from an authorized Activision online reseller, please refer to Warranty procedures relating to your country of residence from the lists below. If you download this Program from an authorized Activision online reseller, please refer to your authorized Activision online reseller for warranty information and procedures.
‐ 71 ‐

In the U.S. When returning merchandise for replacement please send the original product disks only in protective packaging and include: 1. A photocopy of your dated sales receipt 2. Your name and return address, typed or clearly printed 3. A brief note describing the defect, the problem(s) you encountered and the system on which you are running the
product 4. If you are returning the product after the 90‐day warranty period, but within one year after the date of purchase,
please include a check or money order for $10.00 U.S. per CD replacement or $15.00 U.S. per DVD replacement. Note: Certified mail is recommended. In the U.S. send to: Warranty Replacements Activision Publishing, Inc. P.O. Box 67713 Los Angeles, California 90067 In Europe: When returning merchandise for replacement please send the original product disks only in protective packaging and include: 1. A photocopy of your dated sales receipt 2. Your name and return address, typed or clearly printed 3. A brief note describing the defect, the problem(s) you encountered and the system on which you are running the
product 4. If you are returning the product after the 90‐day warranty period, but within one year after the date of purchase,
please include a cheque or money order for £6.00 sterling per CD replacement or £9.00 sterling per DVD replacement.
Note: Certified mail is recommended. In Europe send to: WARRANTY REPLACEMENTS ACTIVISION (UK) Ltd., 3 Roundwood Avenue, Stockley Park, Uxbridge UB11 1AH, United Kingdom. Disc Replacement: +44 (0) 870 241 2148 In Australia: For all Warranty replacements, please return to the store of purchase along with your receipt or proof of purchase. If you are returning the software product after the 90‐day warranty period, but within one year after the date of purchase, please contact Activision on 02 9869 0955. Note: No returns will be issued unless you have contacted Activision first. If an Activision representative advises you that your game is valid for a return, please return the original software product disc to: In Australia send to: Activision Asia Pacific, Level 5, 51 Rawson St Epping, NSW 2121, Australia and include: 1. A Photocopy of your dated sales receipt 2. Your name and return address, typed or clearly printed 3. A brief note describing the defect, the problem(s) you encountered and the system on which you are running the software product. 4. Please include a cheque or money order for AUD $20 per CD or AUD $25 per DVD replacement (subject to availability).
‐ 72 ‐
‐ 73 ‐
LIMITATION ON DAMAGES: IN NO EVENT WILL ACTIVISION BE LIABLE FOR SPECIAL, INCIDENTAL OR CONSEQUENTIAL DAMAGES RESULTING FROM POSSESSION, USE OR MALFUNCTION OF THE PROGRAM, INCLUDING DAMAGES TO PROPERTY, LOSS OF GOODWILL, COMPUTER FAILURE OR MALFUNCTION AND, TO THE EXTENT PERMITTED BY LAW, DAMAGES FOR PERSONAL INJURIES, EVEN IF ACTIVISION HAS BEEN ADVISED OF THE POSSIBILITY OF SUCH DAMAGES. ACTIVISION’S LIABILITY SHALL NOT EXCEED THE ACTUAL PRICE PAID FOR THE LICENSE TO USE THIS PROGRAM. SOME STATES/COUNTRIES DO NOT ALLOW LIMITATIONS ON HOW LONG AN IMPLIED WARRANTY LASTS AND/OR THE EXCLUSION OR LIMITATION OF INCIDENTAL OR CONSEQUENTIAL DAMAGES, SO THE ABOVE LIMITATIONS AND/OR EXCLUSION OR LIMITATION OF LIABILITY MAY NOT APPLY TO YOU. THIS WARRANTY GIVES YOU SPECIFIC LEGAL RIGHTS, AND YOU MAY HAVE OTHER RIGHTS WHICH VARY FROM JURISDICTION TO JURISDICTION. TERMINATION: Without prejudice to any other rights of Activision, this Agreement will terminate automatically if you fail to comply with its terms and conditions. In such event, you must destroy all copies of this Program and all of its component parts. U.S. GOVERNMENT RESTRICTED RIGHTS: The Program and documentation have been developed entirely at private expense and are provided as "Commercial Computer Software" or "restricted computer software." Use, duplication or disclosure by the U.S. Government or a U.S. Government subcontractor is subject to the restrictions set forth in subparagraph (c)(1)(ii) of the Rights in Technical Data and Computer Software clauses in DFARS 252.227‐7013 or as set forth in subparagraph (c)(1) and (2) of the Commercial Computer Software Restricted Rights clauses at FAR 52.227‐19, as applicable. The Contractor/Manufacturer is Activision Publishing, Inc., 3100 Ocean Park Boulevard, Santa Monica, California 90405. INJUNCTION: Because Activision would be irreparably damaged if the terms of this Agreement were not specifically enforced, you agree that Activision shall be entitled, without bond, other security or proof of damages, to appropriate equitable remedies with respect to breaches of this Agreement, in addition to such other remedies as Activision may otherwise have under applicable laws. INDEMNITY: You agree to indemnify, defend and hold Activision, its partners, affiliates, licensors, contractors, officers, directors, employees and agents harmless from all damages, losses and expenses arising directly or indirectly from your acts and omissions to act in using the Product pursuant to the terms of this Agreement.
MISCELLANEOUS: This Agreement represents the complete agreement concerning this license between the parties and supersedes all prior agreements and representations between them. It may be amended only by a writing executed by both parties. If any provision of this Agreement is held to be unenforceable for any reason, such provision shall be reformed only to the extent necessary to make it enforceable and the remaining provisions of this Agreement shall not be affected. This Agreement shall be construed under California law as such law is applied to agreements between California residents entered into and to be performed within California, except as governed by federal law and you consent to the exclusive jurisdiction of the state and federal courts in Los Angeles, California.