Embed Size (px)
Citation preview
Determination of the Chemical Formula
• Place pre-lab report on table for the TA to sign• Hand in “Lab Safety Certification and Identification” with
photo
Collect laboratory equipment:• Clean and oven dry one large test tube and a drying tube• 250 mL Erlenmeyer flask, thistle tube and rubber tube• Alcohol lamp, matches, and wind shields• Ring stand, two extension clamps
Prepare personal equipment:• One clean 100 mL beaker (take 40 mL of 6 M HCl)• 10 test tubes (collecting hydrogen gas over water)
1(2015/09/23 revised)
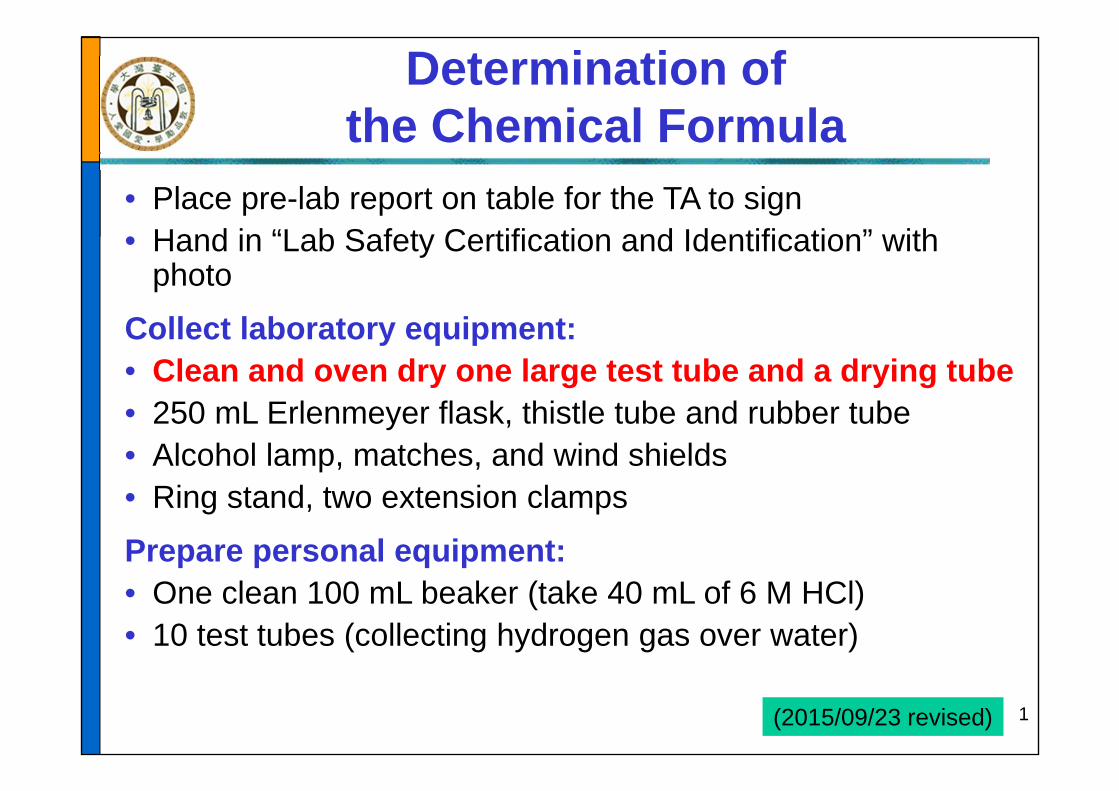
Objective Objective:
determine the empirical formula of copper oxide by the analytical method.
Techniques:-Weighing chemicals-Preparing and collecting hydrogen gas over water-Using an alcohol lamp
Cu : O (Mole ratio)
Chemical reactions:Zn(s) + 2 HCl(aq) → ZnCl2(aq) + H2(g)
H2(g) + CuO(s) Cu(s) + H2O(l)
2
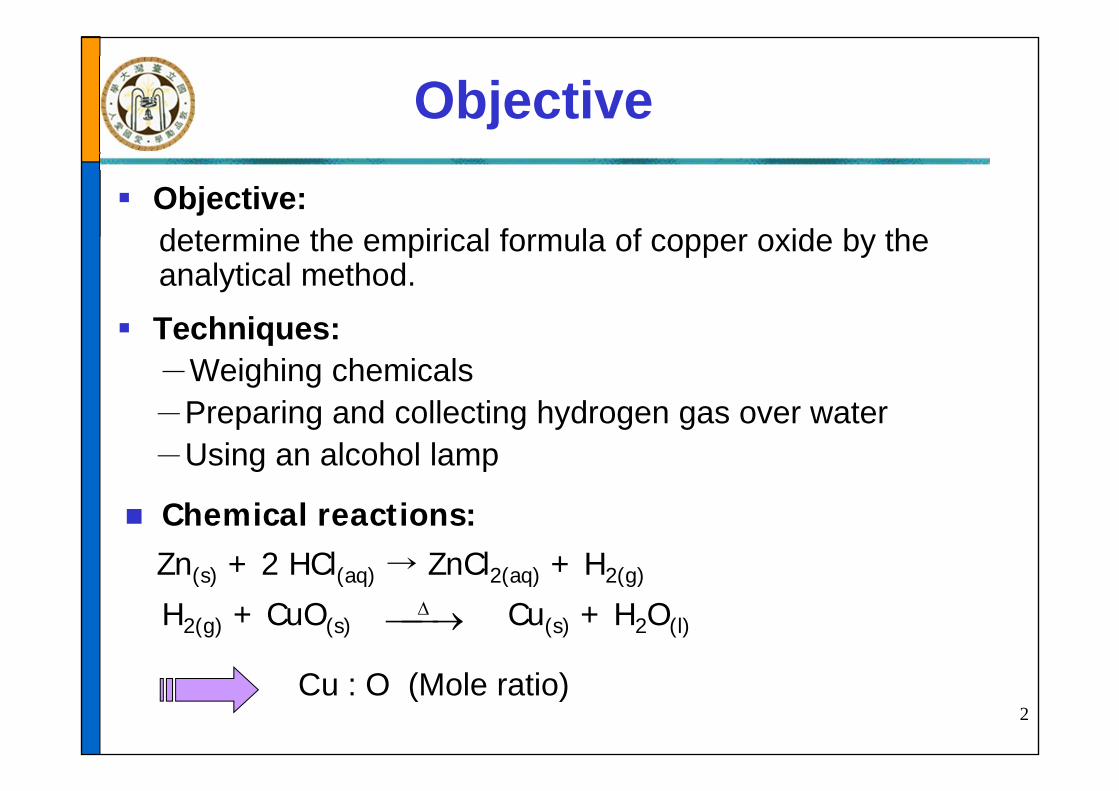
Equipment and Setting-up
3
Thistle tube
Hydrogen gas generator
Copper oxide
Extension clamp
Collecting gas over water
Drying tube
Zinc granules
Cotton
Ring stand
Plastic basin
Clamp
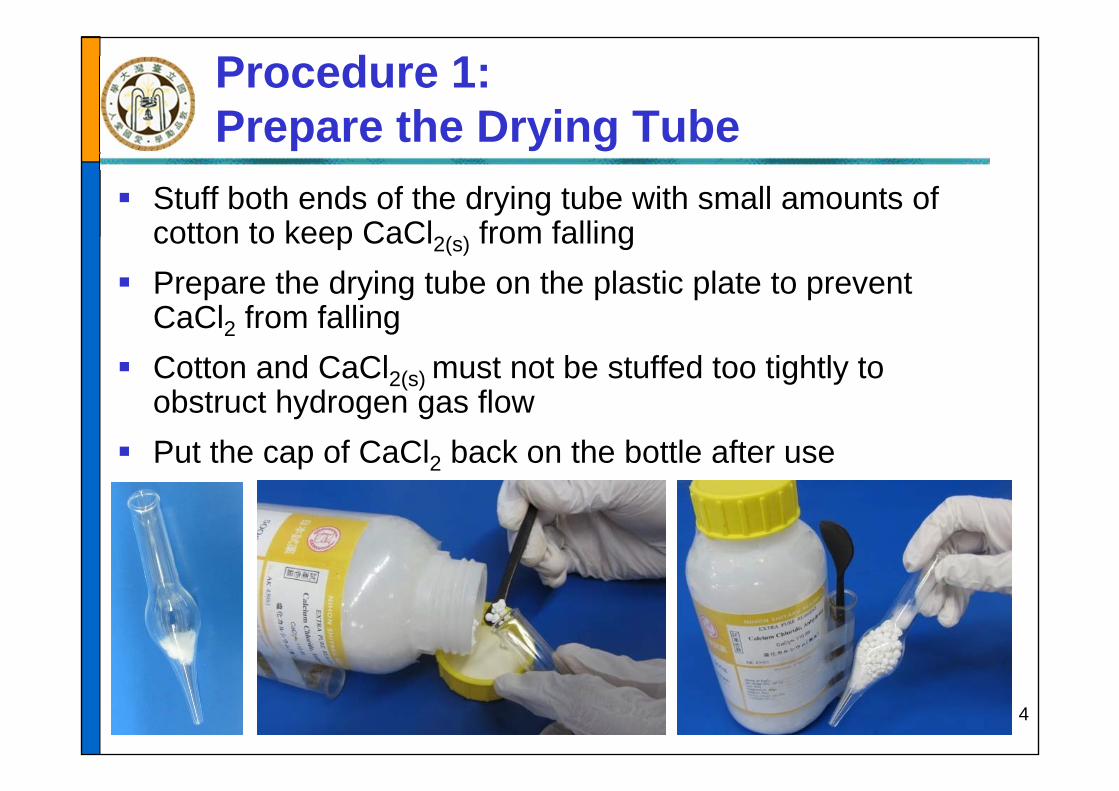
Procedure 1: Prepare the Drying Tube
Stuff both ends of the drying tube with small amounts of cotton to keep CaCl2(s) from falling
Prepare the drying tube on the plastic plate to prevent CaCl2 from falling
Cotton and CaCl2(s) must not be stuffed too tightly to obstruct hydrogen gas flow
Put the cap of CaCl2 back on the bottle after use
4
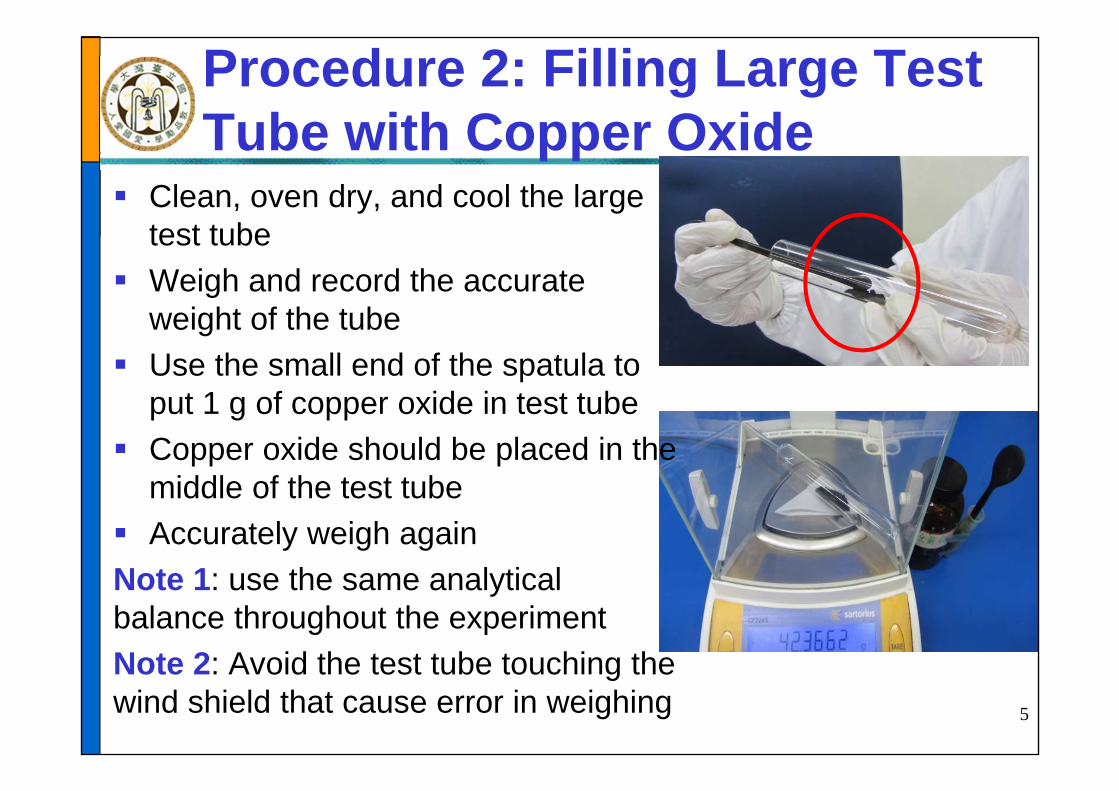
Procedure 2: Filling Large Test Tube with Copper Oxide
Clean, oven dry, and cool the large test tube
Weigh and record the accurate weight of the tube
Use the small end of the spatula to put 1 g of copper oxide in test tube
Copper oxide should be placed in the middle of the test tube
Accurately weigh againNote 1: use the same analytical balance throughout the experimentNote 2: Avoid the test tube touching the wind shield that cause error in weighing 5
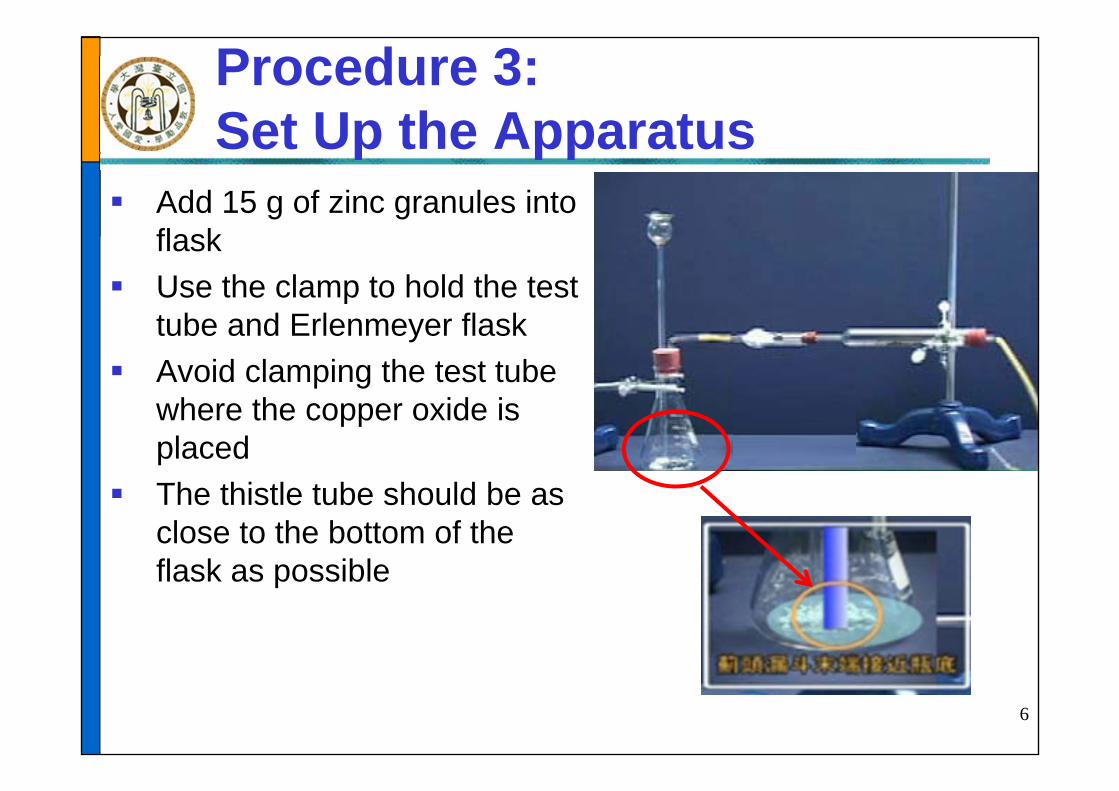
Procedure 3: Set Up the Apparatus
Add 15 g of zinc granules into flask
Use the clamp to hold the test tube and Erlenmeyer flask
Avoid clamping the test tube where the copper oxide is placed
The thistle tube should be as close to the bottom of the flask as possible
6
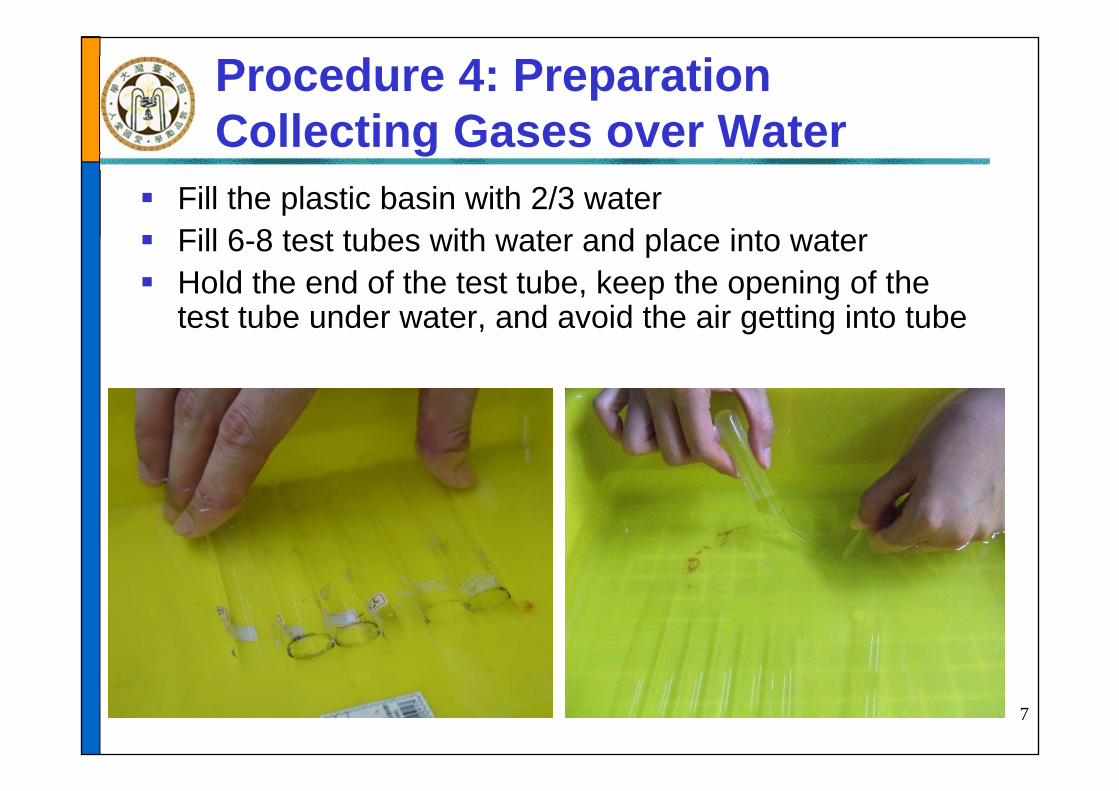
Procedure 4: Preparation Collecting Gases over Water
Fill the plastic basin with 2/3 water Fill 6-8 test tubes with water and place into water Hold the end of the test tube, keep the opening of the
test tube under water, and avoid the air getting into tube
7
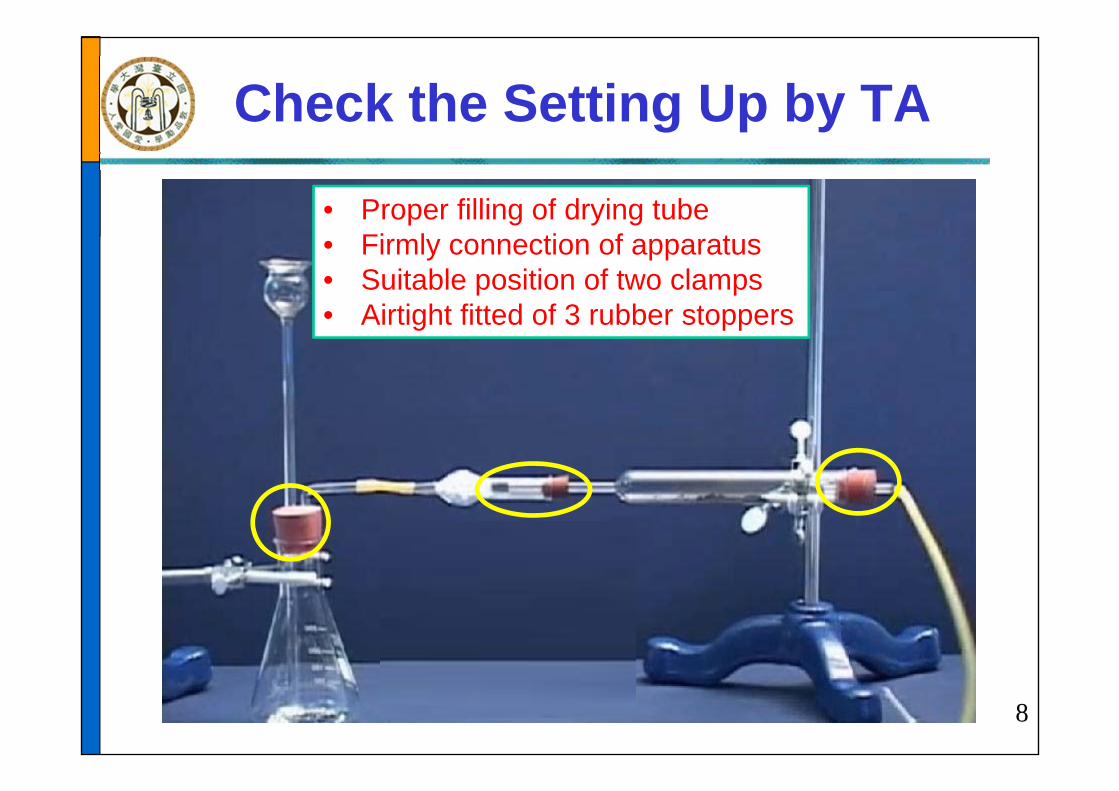
Check the Setting Up by TA
8
• Proper filling of drying tube• Firmly connection of apparatus• Suitable position of two clamps• Airtight fitted of 3 rubber stoppers
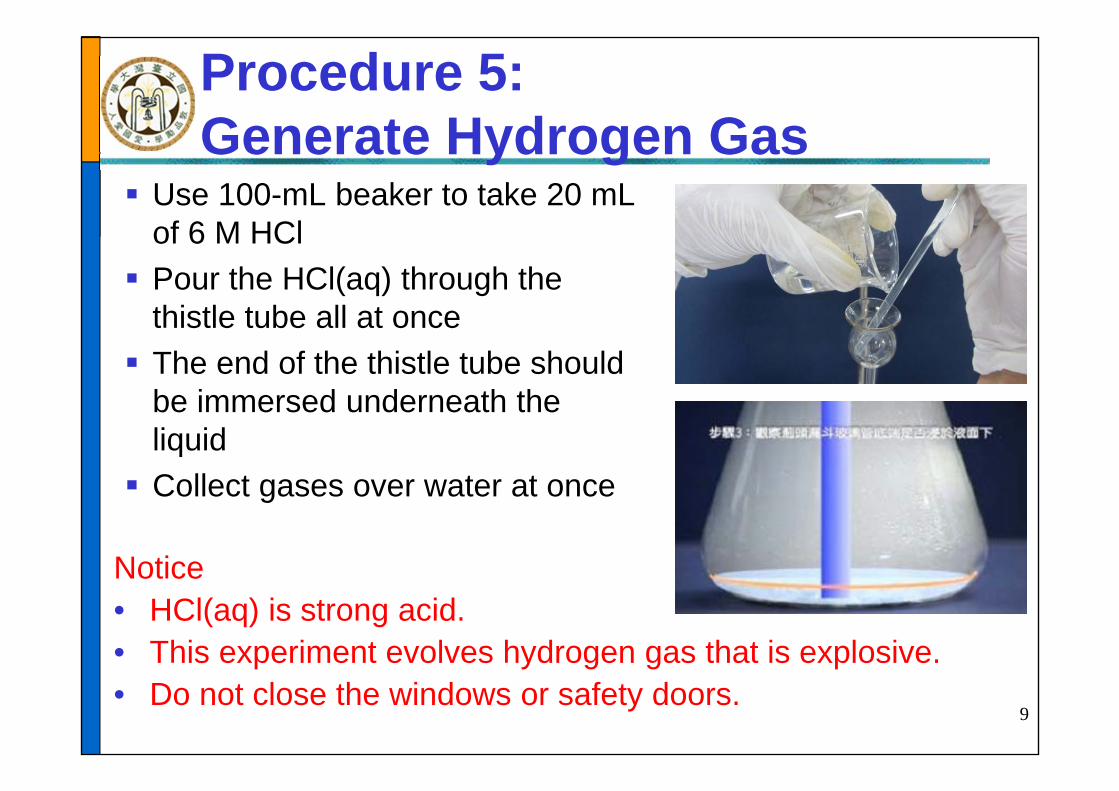
Notice• HCl(aq) is strong acid.• This experiment evolves hydrogen gas that is explosive.• Do not close the windows or safety doors.
Procedure 5: Generate Hydrogen Gas
Use 100-mL beaker to take 20 mL of 6 M HCl Pour the HCl(aq) through the
thistle tube all at once The end of the thistle tube should
be immersed underneath the liquid Collect gases over water at once
9
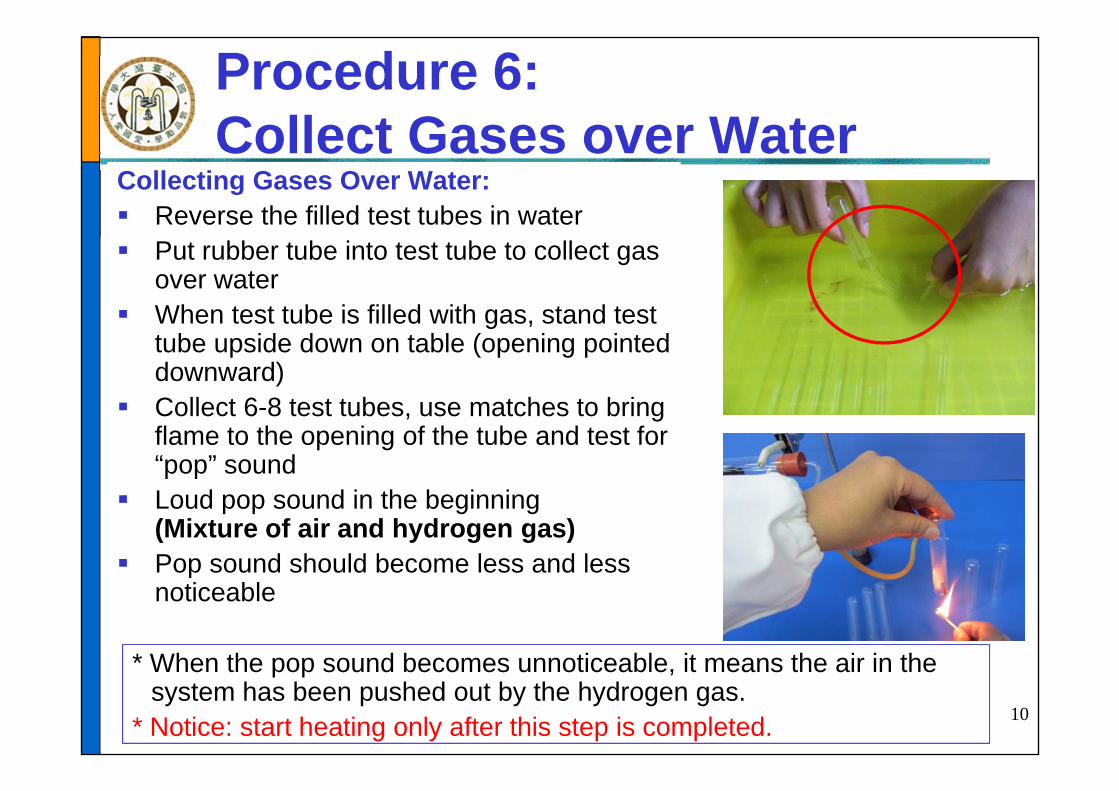
Procedure 6: Collect Gases over Water
Collecting Gases Over Water: Reverse the filled test tubes in water Put rubber tube into test tube to collect gas
over water When test tube is filled with gas, stand test
tube upside down on table (opening pointed downward)
Collect 6-8 test tubes, use matches to bring flame to the opening of the tube and test for “pop” sound
Loud pop sound in the beginning(Mixture of air and hydrogen gas)
Pop sound should become less and less noticeable
* When the pop sound becomes unnoticeable, it means the air in the system has been pushed out by the hydrogen gas.
* Notice: start heating only after this step is completed. 10
• Check the length of the wick of alcohol lamp• Put out the fire first and use a funnel when adding alcohol• The alcohol should be half filled
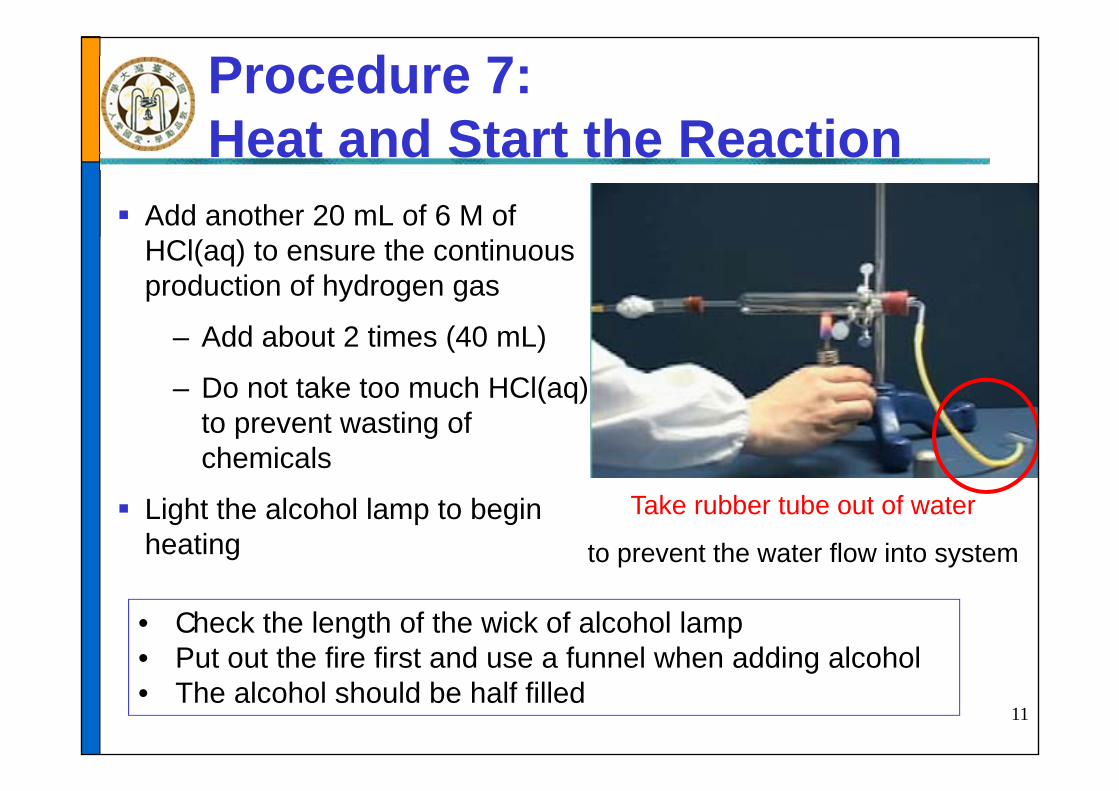
Procedure 7: Heat and Start the Reaction
Add another 20 mL of 6 M of HCl(aq) to ensure the continuous production of hydrogen gas
– Add about 2 times (40 mL)
– Do not take too much HCl(aq) to prevent wasting of chemicals
Light the alcohol lamp to begin heating
Take rubber tube out of water
to prevent the water flow into system
11
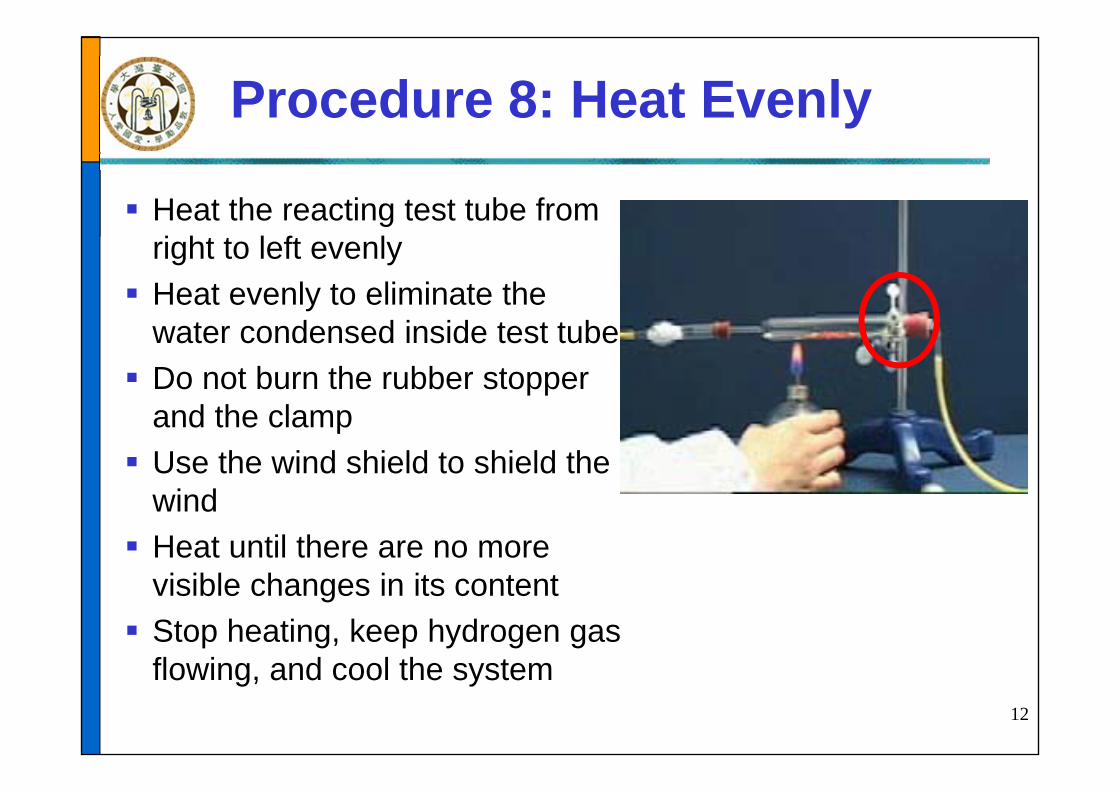
Procedure 8: Heat Evenly
12
Heat the reacting test tube from right to left evenly Heat evenly to eliminate the
water condensed inside test tube Do not burn the rubber stopper
and the clamp Use the wind shield to shield the
wind Heat until there are no more
visible changes in its content Stop heating, keep hydrogen gas
flowing, and cool the system
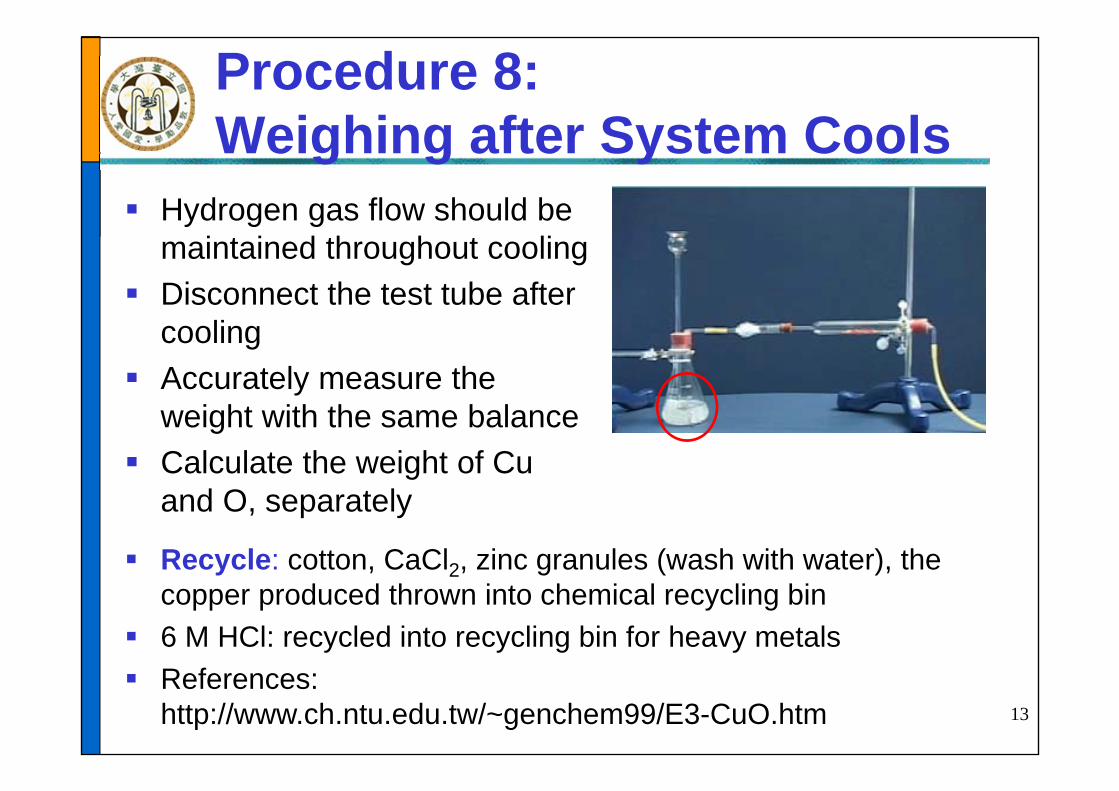
Procedure 8: Weighing after System Cools
Hydrogen gas flow should be maintained throughout cooling
Disconnect the test tube after cooling
Accurately measure the weight with the same balance
Calculate the weight of Cu and O, separately
Recycle: cotton, CaCl2, zinc granules (wash with water), the copper produced thrown into chemical recycling bin
6 M HCl: recycled into recycling bin for heavy metals References:
http://www.ch.ntu.edu.tw/~genchem99/E3-CuO.htm 13