Embed Size (px)
Citation preview
Instruction Manual
Preface
- i -
Thank you for purchasing this product.Before using this product, read this document carefully so that you can use this product correctly and safely.
Preface
For safe usage
- ii -
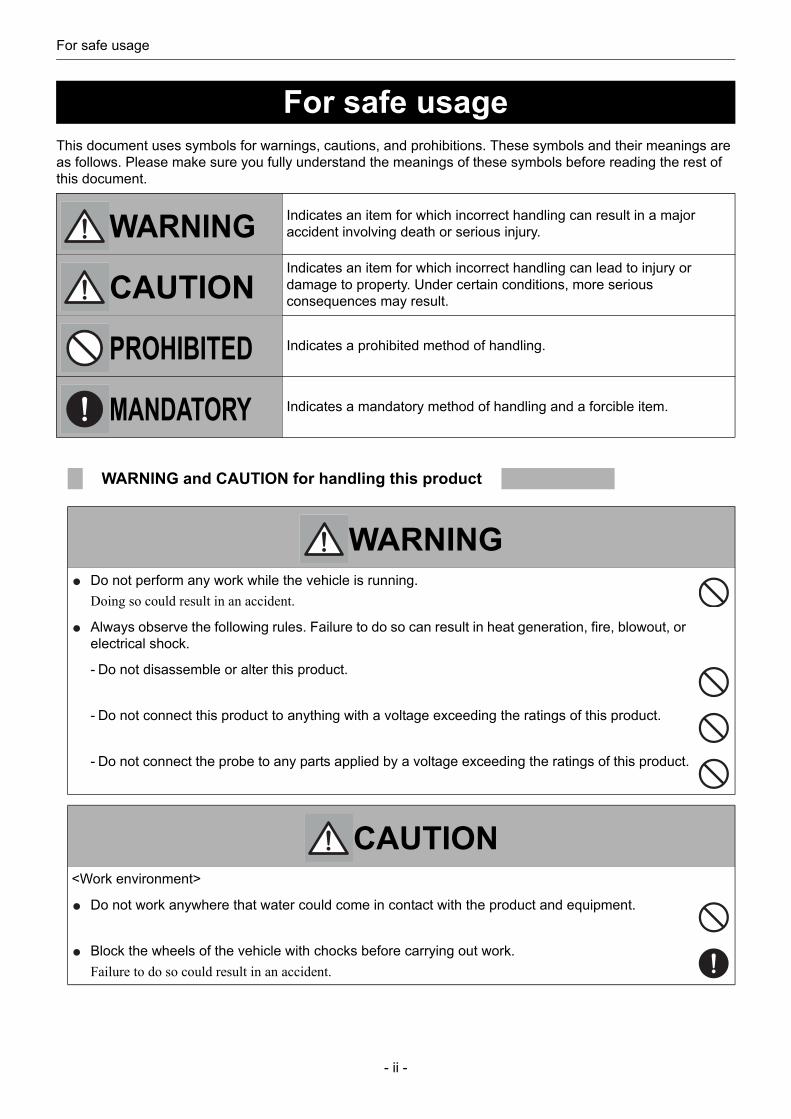
This document uses symbols for warnings, cautions, and prohibitions. These symbols and their meanings are as follows. Please make sure you fully understand the meanings of these symbols before reading the rest of this document.
For safe usage
WARNING Indicates an item for which incorrect handling can result in a major accident involving death or serious injury.
CAUTIONIndicates an item for which incorrect handling can lead to injury or damage to property. Under certain conditions, more serious consequences may result.
PROHIBITED Indicates a prohibited method of handling.
MANDATORY Indicates a mandatory method of handling and a forcible item.
WARNING and CAUTION for handling this product
WARNINGDo not perform any work while the vehicle is running.Doing so could result in an accident.
Always observe the following rules. Failure to do so can result in heat generation, fire, blowout, or electrical shock.
- Do not disassemble or alter this product.
- Do not connect this product to anything with a voltage exceeding the ratings of this product.
- Do not connect the probe to any parts applied by a voltage exceeding the ratings of this product.
CAUTION<Work environment>
Do not work anywhere that water could come in contact with the product and equipment.
Block the wheels of the vehicle with chocks before carrying out work.Failure to do so could result in an accident.
For safe usage
- iii -
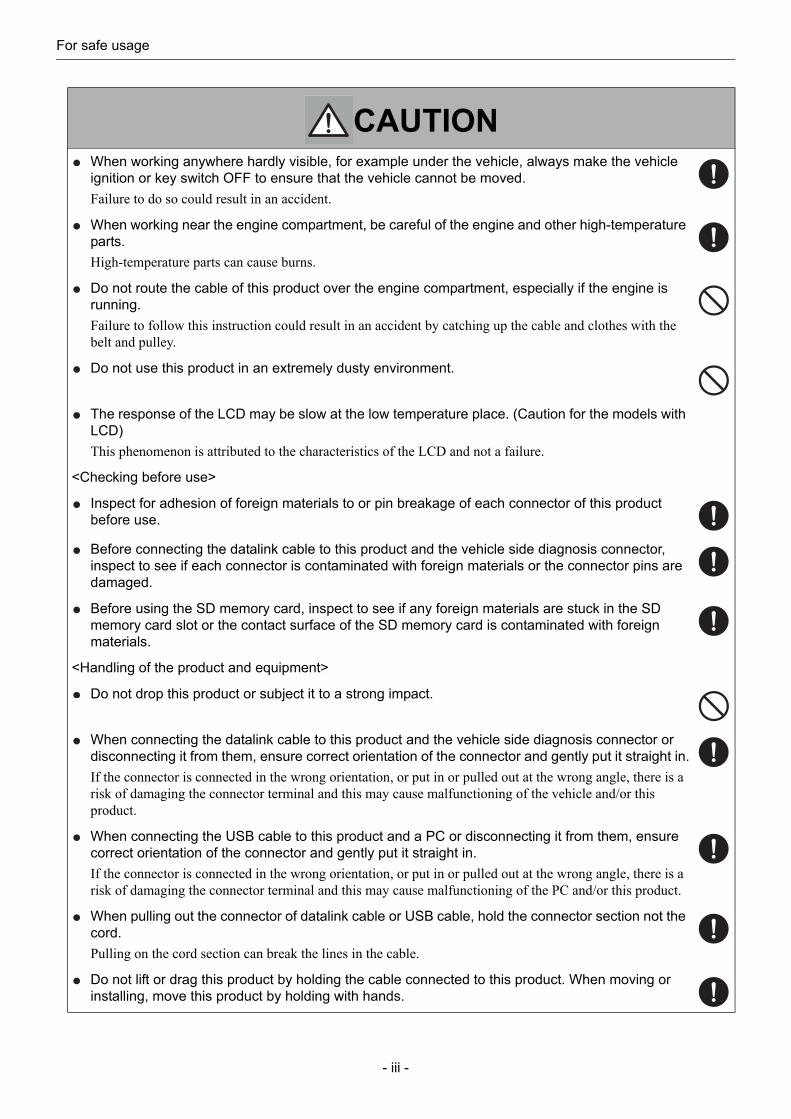
CAUTIONWhen working anywhere hardly visible, for example under the vehicle, always make the vehicle ignition or key switch OFF to ensure that the vehicle cannot be moved.Failure to do so could result in an accident.
When working near the engine compartment, be careful of the engine and other high-temperature parts.High-temperature parts can cause burns.
Do not route the cable of this product over the engine compartment, especially if the engine is running.Failure to follow this instruction could result in an accident by catching up the cable and clothes with the belt and pulley.
Do not use this product in an extremely dusty environment.
The response of the LCD may be slow at the low temperature place. (Caution for the models with LCD)This phenomenon is attributed to the characteristics of the LCD and not a failure.
<Checking before use>
Inspect for adhesion of foreign materials to or pin breakage of each connector of this product before use.
Before connecting the datalink cable to this product and the vehicle side diagnosis connector, inspect to see if each connector is contaminated with foreign materials or the connector pins are damaged.
Before using the SD memory card, inspect to see if any foreign materials are stuck in the SD memory card slot or the contact surface of the SD memory card is contaminated with foreign materials.
<Handling of the product and equipment>
Do not drop this product or subject it to a strong impact.
When connecting the datalink cable to this product and the vehicle side diagnosis connector or disconnecting it from them, ensure correct orientation of the connector and gently put it straight in.If the connector is connected in the wrong orientation, or put in or pulled out at the wrong angle, there is a risk of damaging the connector terminal and this may cause malfunctioning of the vehicle and/or this product.
When connecting the USB cable to this product and a PC or disconnecting it from them, ensure correct orientation of the connector and gently put it straight in.If the connector is connected in the wrong orientation, or put in or pulled out at the wrong angle, there is a risk of damaging the connector terminal and this may cause malfunctioning of the PC and/or this product.
When pulling out the connector of datalink cable or USB cable, hold the connector section not the cord.Pulling on the cord section can break the lines in the cable.
Do not lift or drag this product by holding the cable connected to this product. When moving or installing, move this product by holding with hands.

For safe usage
- iv -
The product shall be disposed in accordance with all applicable legislation for disposal of Electrical and Electronic Equipment in each country and region. (e.g. WEEE Directive in EU)Please contact our authorized distributor or our sales agent when disposing it.
CAUTIONDo not apply the load causing stress to the connector connected to this product.Applying too much force could result in breaking the connector terminal and this may cause malfunctioning of the vehicle, the PC and/or this product.
Do not insert anything other than an SD memory card in the SD memory card slot on this product.
Do not turn the power of this product OFF or remove the SD memory card while the SD memory card indicator is flashing.Failure to do so results in failure of the SD memory card or loss of the data in it.
Do not pull out an SD memory card when power is on.
<Usage restrictions>
Do not use a datalink cable other than the dedicated datalink cable supplied with this product.
When you start this product only by USB power (BUS power), be careful not to set the PC to "low power consumption mode" / "suspend mode".
The USB port to be connected to this product requires a power supply capability of 500 mA current source.
As for connecting this product to the PC, directly connect it to the USB port on the PC or via a USB hub that has the capability of supplying sufficient current.Some types of USB hubs may have insufficient power supply capability for normal operation. (For example, a hub on PC keyboard is not suitable for this connection.)
<Storage and maintenance of the product>
Do not expose this product to direct sunlight for long periods of time.
The backlight of the LCD may be deteriorated and its luminance could be reduced consequently in a high humid environment. (Caution for the models with LCD)Use and store this product in a dry environment.
Do not use solvents or thinners such as benzine when cleaning.To do so could cause deformation, discoloration, cracking, etc., and also result in loss of functions. To clean, wipe gently with a soft damp cloth with diluted neutral detergent.
<Disposal of the product>
When discarding the product or its accessories, contact authorized industrial waste-disposal service.Those who discard waste without authorization will be punished by law.
Disposal Requirements
For safe usage
- v -
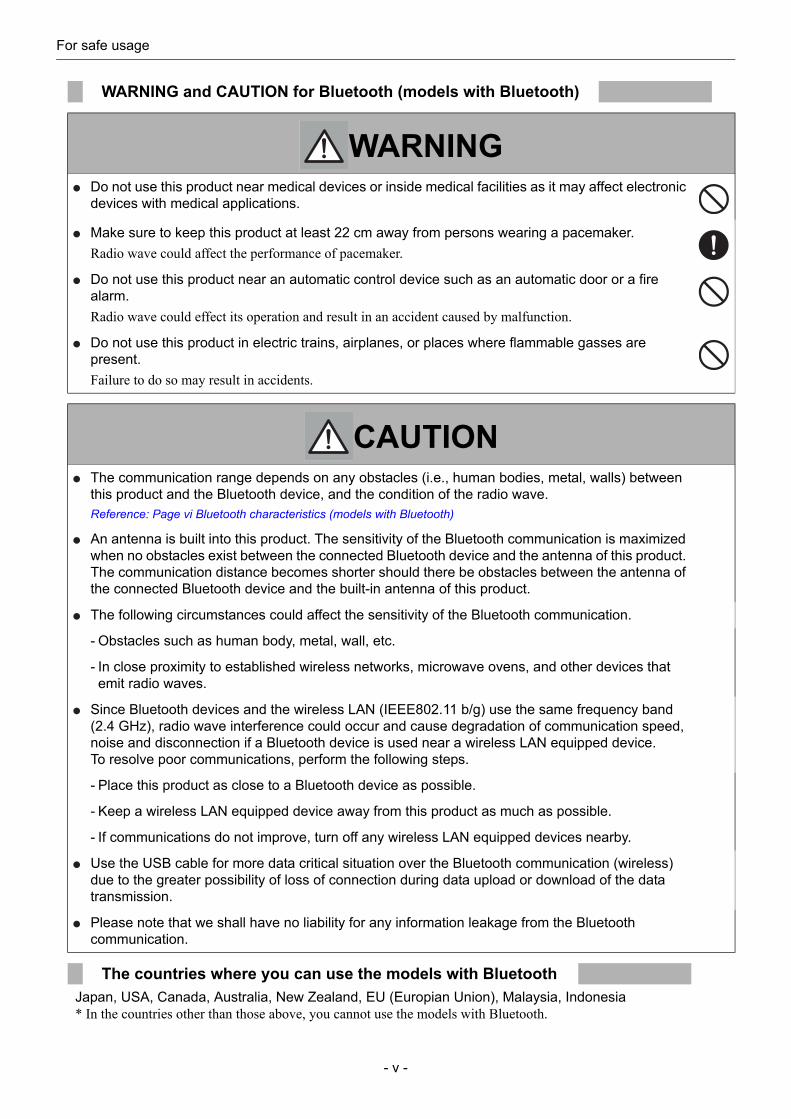
Japan, USA, Canada, Australia, New Zealand, EU (Europian Union), Malaysia, Indonesia* In the countries other than those above, you cannot use the models with Bluetooth.
WARNING and CAUTION for Bluetooth (models with Bluetooth)
WARNINGDo not use this product near medical devices or inside medical facilities as it may affect electronic devices with medical applications.
Make sure to keep this product at least 22 cm away from persons wearing a pacemaker.Radio wave could affect the performance of pacemaker.
Do not use this product near an automatic control device such as an automatic door or a fire alarm.Radio wave could effect its operation and result in an accident caused by malfunction.
Do not use this product in electric trains, airplanes, or places where flammable gasses are present.Failure to do so may result in accidents.
CAUTIONThe communication range depends on any obstacles (i.e., human bodies, metal, walls) between this product and the Bluetooth device, and the condition of the radio wave.Reference: Page vi Bluetooth characteristics (models with Bluetooth)
An antenna is built into this product. The sensitivity of the Bluetooth communication is maximized when no obstacles exist between the connected Bluetooth device and the antenna of this product. The communication distance becomes shorter should there be obstacles between the antenna of the connected Bluetooth device and the built-in antenna of this product.
The following circumstances could affect the sensitivity of the Bluetooth communication.
- Obstacles such as human body, metal, wall, etc.
- In close proximity to established wireless networks, microwave ovens, and other devices that emit radio waves.
Since Bluetooth devices and the wireless LAN (IEEE802.11 b/g) use the same frequency band (2.4 GHz), radio wave interference could occur and cause degradation of communication speed, noise and disconnection if a Bluetooth device is used near a wireless LAN equipped device.To resolve poor communications, perform the following steps.
- Place this product as close to a Bluetooth device as possible.
- Keep a wireless LAN equipped device away from this product as much as possible.
- If communications do not improve, turn off any wireless LAN equipped devices nearby.
Use the USB cable for more data critical situation over the Bluetooth communication (wireless) due to the greater possibility of loss of connection during data upload or download of the data transmission.
Please note that we shall have no liability for any information leakage from the Bluetooth communication.
The countries where you can use the models with Bluetooth
For safe usage
- vi -
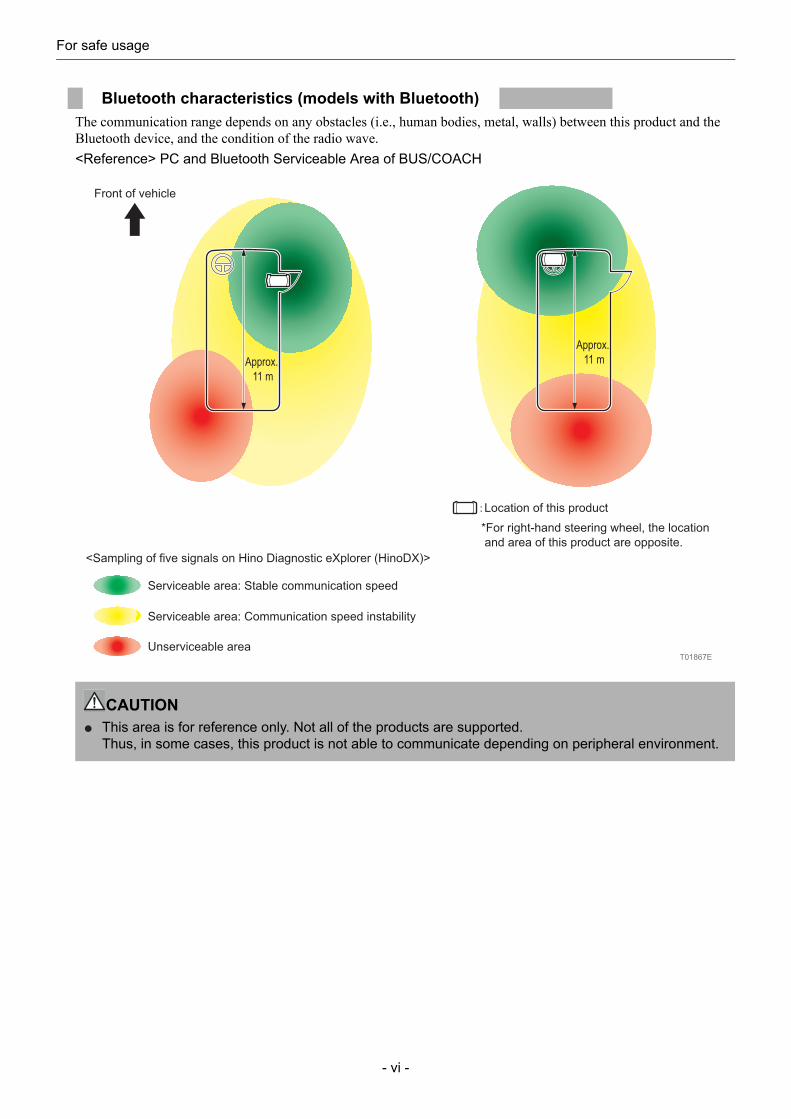
The communication range depends on any obstacles (i.e., human bodies, metal, walls) between this product and the Bluetooth device, and the condition of the radio wave.<Reference> PC and Bluetooth Serviceable Area of BUS/COACH
Bluetooth characteristics (models with Bluetooth)
CAUTIONThis area is for reference only. Not all of the products are supported.Thus, in some cases, this product is not able to communicate depending on peripheral environment.
T01867E
Front of vehicle
Approx.
11 m
<Sampling of five signals on Hino Diagnostic eXplorer (HinoDX)>
*For right-hand steering wheel, the location
and area of this product are opposite.
Serviceable area: Stable communication speed
Serviceable area: Communication speed instability
Unserviceable area
Location of this product
Approx.
11 m
For safe usage
- vii -
Microsoft, Windows®, Internet Explorer, Windows 10, Windows 8.1, Windows 7 are the trademarks or registered trademarks of the Microsoft Corporation of the United States in the United States and other countries.
Bluetooth® is the trademark or registered trademark of Bluetooth SIG, Inc. in the United State and other countries.
SD Memory CardTM and SDHC Memory CardTM are the registered trademarks of Panasonic Corporation, SanDisk Corporation in the United State and Toshiba Corporation.Names of products and companies in this document are registered trademarks or trademarks of their owners.
TRON, iTRON and µiTRON are not the names for specific products and series of products.TRON is an abbreviation of "The Real-time Operating System Nucleus".µiTRON is an abbreviation of "Micro Industrial TRON".
Trademarks
Table of contents
- viii -
1 Before Use
1-1 Product Configuration ...........................................................................................................................1Components ............................................................................................................................................1
1-2 Names of the Parts ...............................................................................................................................21-3 Setup.....................................................................................................................................................3
Required operating environment of the PC.............................................................................................3Necessary Setup.....................................................................................................................................4Installing DST-i setup software to a PC (all models) ...............................................................................5Installing DST-i software for HINO Vehicles (all models) ........................................................................5
1-4 Connection............................................................................................................................................6Connecting to the vehicle........................................................................................................................6Connecting to a PC .................................................................................................................................7
1-5 SD Memory Card ..................................................................................................................................8Inserting/removing an SD memory card..................................................................................................8
2 Basic Operations
2-1 Starting..................................................................................................................................................9
2-2 Ending................................................................................................................................................. 11
3 Indicator
3-1 Indicator ..............................................................................................................................................12
4 Product Specifications
4-1 Specifications of This Product.............................................................................................................13
5 Warranty
5-1 Warranty..............................................................................................................................................14
Table of contents
1 Before Use
- 1 -
1 Before Use
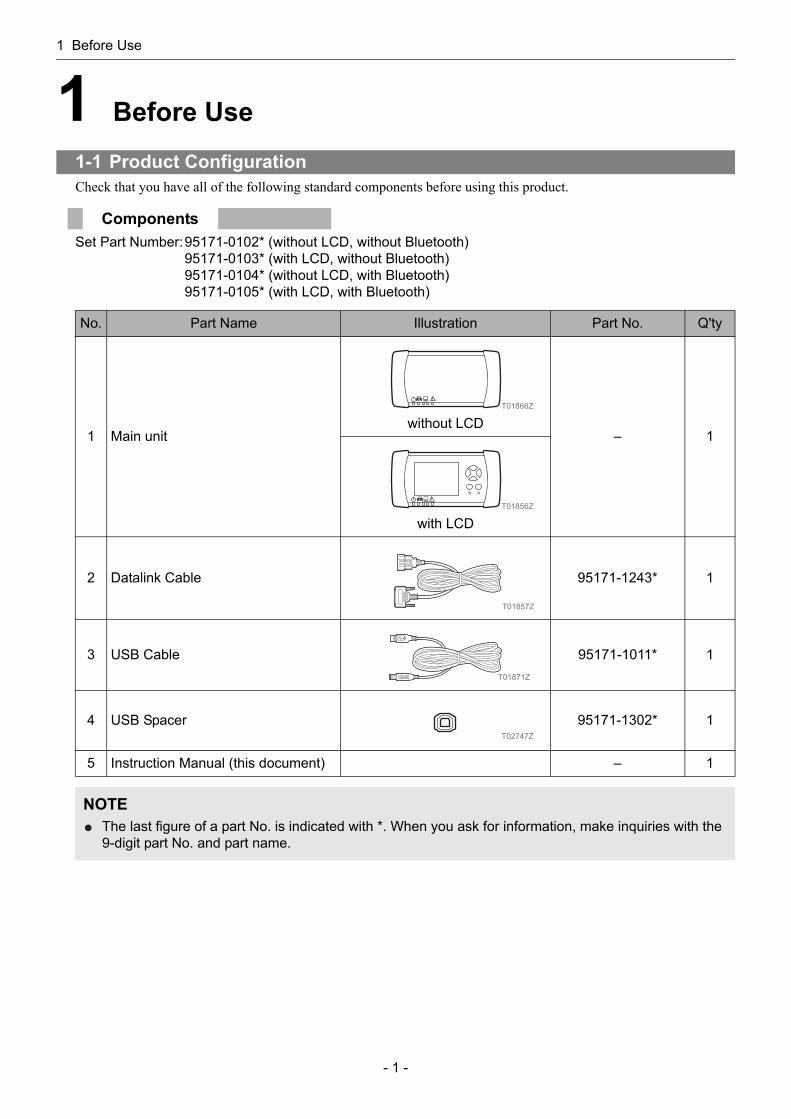
Check that you have all of the following standard components before using this product.
Set Part Number:95171-0102* (without LCD, without Bluetooth)95171-0103* (with LCD, without Bluetooth)95171-0104* (without LCD, with Bluetooth)95171-0105* (with LCD, with Bluetooth)
1-1 Product Configuration
Components
No. Part Name Illustration Part No. Q'ty
1 Main unitwithout LCD
– 1
with LCD
2 Datalink Cable 95171-1243* 1
3 USB Cable 95171-1011* 1
4 USB Spacer 95171-1302* 1
5 Instruction Manual (this document) – 1
NOTEThe last figure of a part No. is indicated with *. When you ask for information, make inquiries with the 9-digit part No. and part name.
T01866Z
T01856Z
T01857Z
T01871Z
T02747Z
1 Before Use
- 2 -
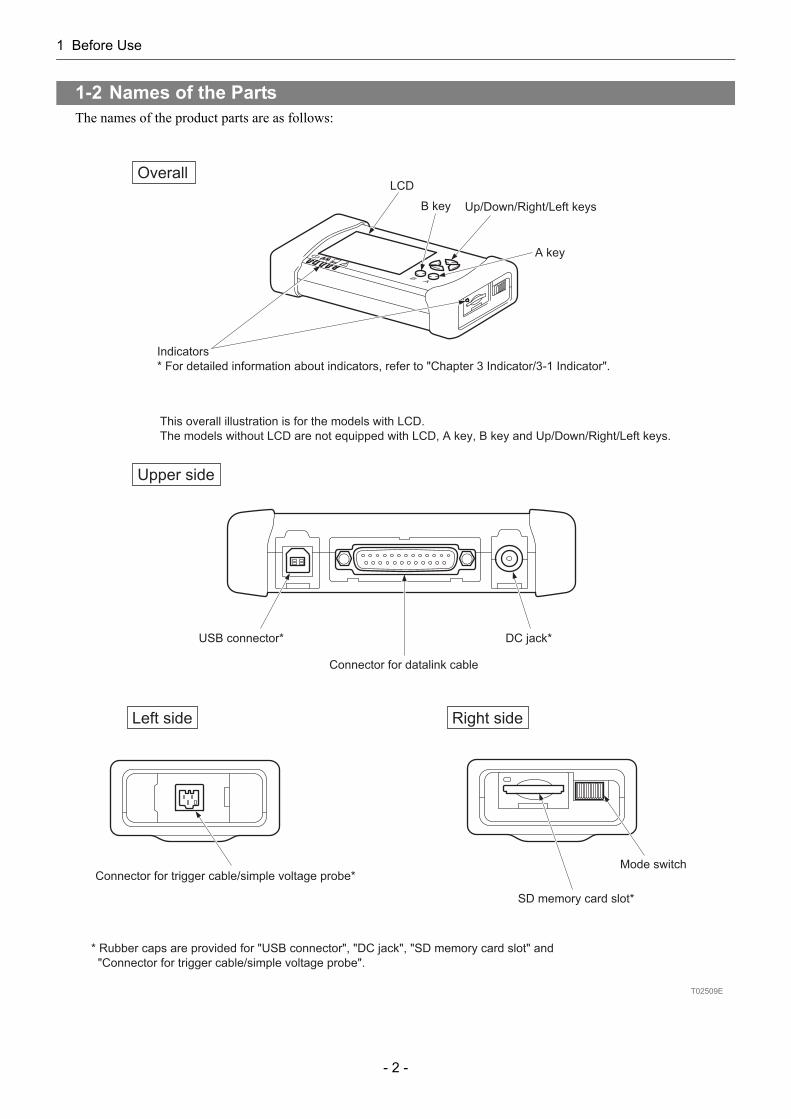
The names of the product parts are as follows:
1-2 Names of the Parts
OverallLCD
A key
Up/Down/Right/Left keys
Indicators
* For detailed information about indicators, refer to "Chapter 3 Indicator/3-1 Indicator".
B key
* Rubber caps are provided for "USB connector", "DC jack", "SD memory card slot" and
"Connector for trigger cable/simple voltage probe".
This overall illustration is for the models with LCD.
The models without LCD are not equipped with LCD, A key, B key and Up/Down/Right/Left keys.
T02509E
USB connector*
SD memory card slot*
Connector for trigger cable/simple voltage probe*Mode switch
DC jack*
Connector for datalink cable
Upper side
Left side Right side
1 Before Use
- 3 -
You must carry out the setup necessary for use of this product.
For using this product, a PC with following operating environments is required.• OS:
Microsoft Windows 7 (SP1) (32bit, 64bit) English versionMicrosoft Windows 8.1 (32bit, 64bit) English versionMicrosoft Windows 10 (32bit, 64bit) English version
• With USB 2.0 interface as standard• Internet Explorer 11.0 or later version should be installed.• Access to Internet is allowed. (Broadband internet connection is recommended)
Confirm the latest information in the following website.http://www.ds3.denso.co.jp/dst-i/dst-i.html
1-3 Setup
Required operating environment of the PC
NOTEIf this product is used as the interface, the operating environment of the software (Hino DX) on a PC side is needed in addition to the above operating environment.
1 Before Use
- 4 -
For using this product, following setup is needed.Installing DST-i setup software to a PC (all models)A dedicated USB driver, the setup utility (DST-i configuration tool), etc. which is required for connecting this product and a PC using a USB cable or Bluetooth shall be installed to the PC.
Reference: Page 5 Installing DST-i setup software to a PC (all models) (Chapter 1 Before Use/Setup)
Installing DST-i software for HINO Vehicles (all models)You must install the DST-i software for HINO Vehicles to this product.For obtaining the DST-i software for HINO Vehicles, "The license certification of the DST-i software for HINO Vehicles" is required separately.
Reference: Page 5 Installing DST-i software for HINO Vehicles (all models) (Chapter 1 Before Use/Setup)
Installing Bluetooth driver software and Paring to a PC (models with Bluetooth)For the models with Bluetooth, to connect this product with a PC through the Bluetooth communication function, you must install the Bluetooth driver software to the PC beforehand.In addition, you must execute pairing between the PC and this product.
Necessary Setup
CAUTIONDo not connect this product with a PC using the USB cable before the DST-i setup software installation to your PC is completed.To install the DST-i setup software to a PC, log on with administrator privileges and close all running applications before installation.In installing the DST-i software for HINO Vehicles, execute the install by using the USB cable in the state that this product and the PC are connected.Do not execute the install in using Bluetooth communication.
Use of a Bluetooth driver software equipped as standard to the PC with Microsoft® Windows® operating system is recommended for use of a Bluetooth communication.This information does not guarantee the connection between all of commercially available Bluetooth modules and information terminals equipped with Bluetooth (e.g., PC and cellular phone).Use a Bluetooth module that is labeled with the Bluetooth logo mark and conforms to the Bluetooth standard 2.0.
Total eight Bluetooth modules and information terminals having Bluetooth can execute paring with this product. If ninth Bluetooth module or information terminal executes paring, first Bluetooth module or information terminal will be cancelled.
1 Before Use
- 5 -
To connect this product with a PC using the USB cable or Bluetooth, installing the DST-i setup software to your PC is needed.
1. Access the following download site and install the DST-i setup software following the displayed instructions.http://www.ds3.denso.co.jp/dst-i/hino/setup/
You must install the DST-i software for HINO Vehicles to this product.For obtaining the DST-i software for HINO Vehicles, "The license certification of the DST-i software for HINO Vehicles" is required separately.
1. Access to the download site describing "The license certification of the DST-i software for HINO Vehicles" (sold it separately)
2. Enter the access key described on "The license certification of the DST-i software for HINO Vehicles" and execute login.
3. Download the installation manual of the DST-i software for HINO Vehicles and install the software according to the manual.
Installing DST-i setup software to a PC (all models)
Installing DST-i software for HINO Vehicles (all models)
CAUTIONIn installing the DST-i software for HINO Vehicles, execute the install by using the USB cable in the state that this product and the PC are connected.Do not execute the install in using Bluetooth communication.

1 Before Use
- 6 -
Use the datalink cable to connect this product with the vehicle.Check the position of the diagnosis connector of the vehicle side in the repair manual of the vehicle.
1. First, connect this product and the datalink cable.
2. Next, connect the datalink cable to the vehicle side diagnosis connector.
1-4 Connection
Connecting to the vehicle
CAUTIONPerform the connection of step 1 and step 2 according to the order.
NOTEThe power supply of this product is turned ON by turning the mode switch ON after connected with the vehicle.
[1] Connected to this product
[2] Connected to vehicle side diagnosis connector
Tighten with screws.
Notch (Center)
T02932E
1 Before Use
- 7 -
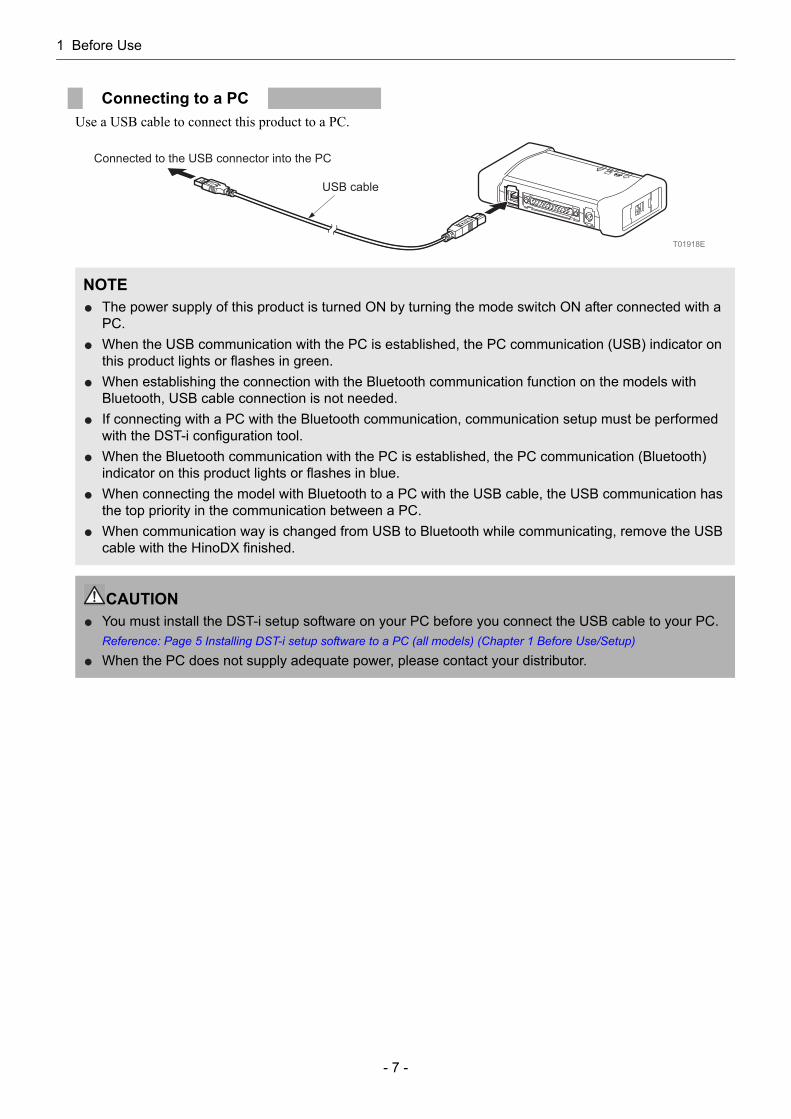
Use a USB cable to connect this product to a PC.Connecting to a PC
NOTEThe power supply of this product is turned ON by turning the mode switch ON after connected with a PC.When the USB communication with the PC is established, the PC communication (USB) indicator on this product lights or flashes in green.When establishing the connection with the Bluetooth communication function on the models with Bluetooth, USB cable connection is not needed.If connecting with a PC with the Bluetooth communication, communication setup must be performed with the DST-i configuration tool.When the Bluetooth communication with the PC is established, the PC communication (Bluetooth) indicator on this product lights or flashes in blue.When connecting the model with Bluetooth to a PC with the USB cable, the USB communication has the top priority in the communication between a PC.When communication way is changed from USB to Bluetooth while communicating, remove the USB cable with the HinoDX finished.
CAUTIONYou must install the DST-i setup software on your PC before you connect the USB cable to your PC.Reference: Page 5 Installing DST-i setup software to a PC (all models) (Chapter 1 Before Use/Setup)
When the PC does not supply adequate power, please contact your distributor.
T01918E
USB cable
Connected to the USB connector into the PC
1 Before Use
- 8 -
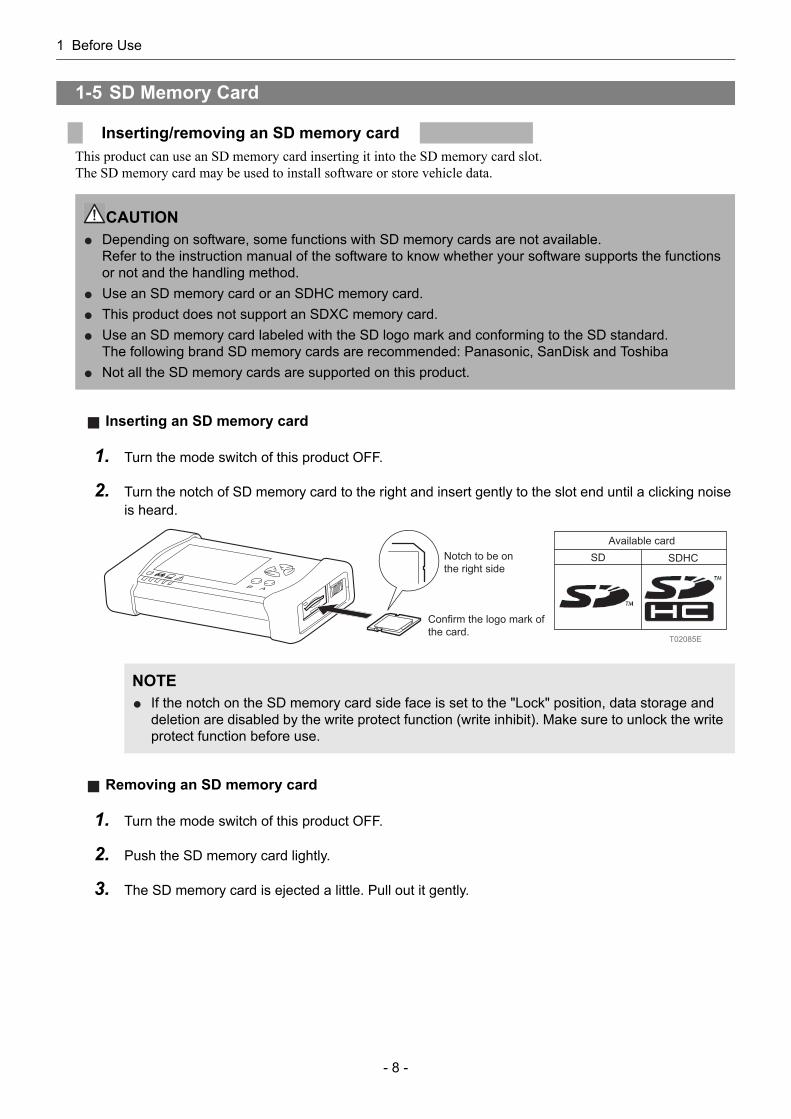
This product can use an SD memory card inserting it into the SD memory card slot.The SD memory card may be used to install software or store vehicle data.
Inserting an SD memory card
1. Turn the mode switch of this product OFF.
2. Turn the notch of SD memory card to the right and insert gently to the slot end until a clicking noise is heard.
Removing an SD memory card
1. Turn the mode switch of this product OFF.
2. Push the SD memory card lightly.
3. The SD memory card is ejected a little. Pull out it gently.
1-5 SD Memory Card
Inserting/removing an SD memory card
CAUTIONDepending on software, some functions with SD memory cards are not available.Refer to the instruction manual of the software to know whether your software supports the functions or not and the handling method.Use an SD memory card or an SDHC memory card.This product does not support an SDXC memory card.Use an SD memory card labeled with the SD logo mark and conforming to the SD standard.The following brand SD memory cards are recommended: Panasonic, SanDisk and ToshibaNot all the SD memory cards are supported on this product.
NOTEIf the notch on the SD memory card side face is set to the "Lock" position, data storage and deletion are disabled by the write protect function (write inhibit). Make sure to unlock the write protect function before use.
T02085E
Notch to be on
the right side
Confirm the logo mark of
the card.
SDHCSD
Available card
2 Basic Operations
- 9 -
2 Basic Operations
1. Connect the datalink cable to this product.Reference: Page 6 Connecting to the vehicle (Chapter 1 Before Use/Connection)
2. Connect the datalink cable to the vehicle side diagnosis connector.Reference: Page 6 Connecting to the vehicle (Chapter 1 Before Use/Connection)
3. Connect this product and a PC with the USB cable.Reference: Page 7 Connecting to a PC (Chapter 1 Before Use/Connection)
2-1 Starting
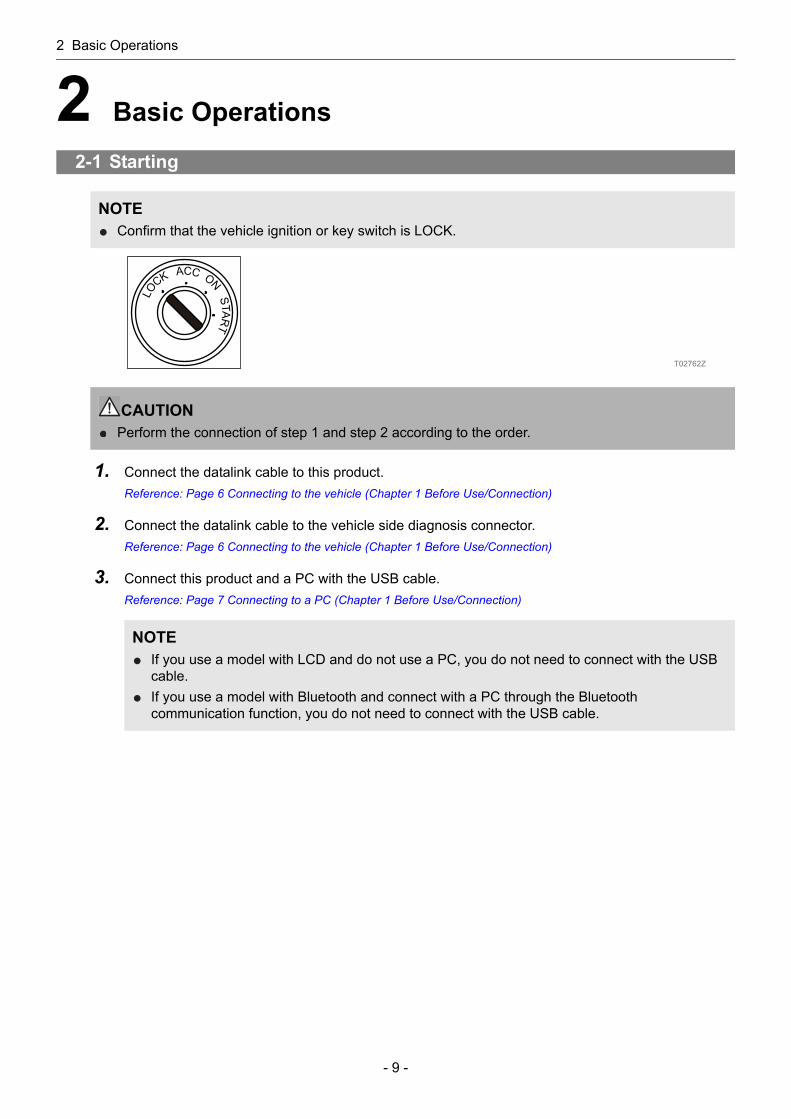
NOTEConfirm that the vehicle ignition or key switch is LOCK.
CAUTIONPerform the connection of step 1 and step 2 according to the order.
NOTEIf you use a model with LCD and do not use a PC, you do not need to connect with the USB cable.If you use a model with Bluetooth and connect with a PC through the Bluetooth communication function, you do not need to connect with the USB cable.
T02762Z
2 Basic Operations
- 10 -
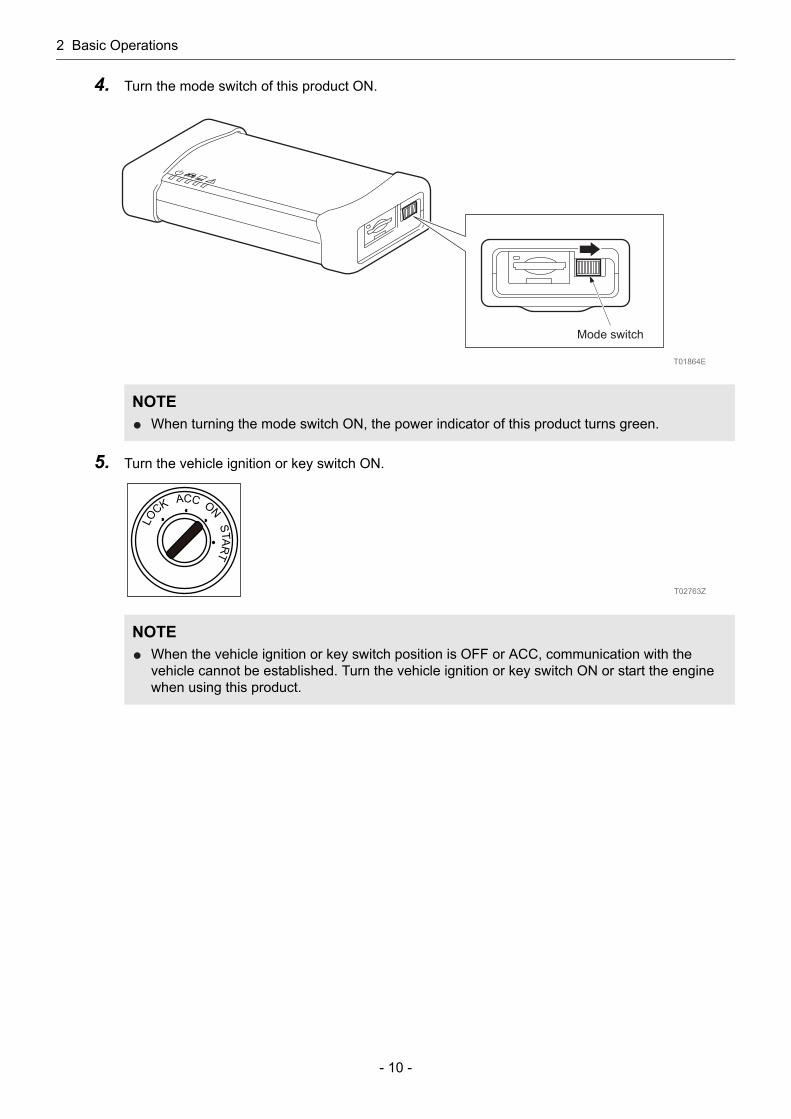
4. Turn the mode switch of this product ON.
5. Turn the vehicle ignition or key switch ON.
NOTEWhen turning the mode switch ON, the power indicator of this product turns green.
NOTEWhen the vehicle ignition or key switch position is OFF or ACC, communication with the vehicle cannot be established. Turn the vehicle ignition or key switch ON or start the engine when using this product.
T01864E
Mode switch
T02763Z
2 Basic Operations
- 11 -
1. Finish communications with the vehicle by HinoDX or DST-i software for HINO Vehicles.
2. Turn the mode switch of this product OFF.
3. Turn the vehicle ignition or key switch OFF.
4. Disconnect the USB cable from this product and the PC.
5. Disconnect the datalink cable from the vehicle side diagnosis connector.
6. Disconnect the datalink cable from this product.
2-2 Ending
CAUTIONDo not turn the mode switch of this product OFF or disconnect the datalink cable from this product during the active test. The diagnosed actuators could be stopped still in the drive status. Make sure to execute the ending procedure after finishing the active test.
CAUTIONWhen disconnecting the datalink cable from the vehicle side diagnosis connector, go after turn the vehicle ignition or key switch OFF.Perform the disconnection of step 5 and step 6 according to the order.
3 Indicator
- 12 -
3 Indicator
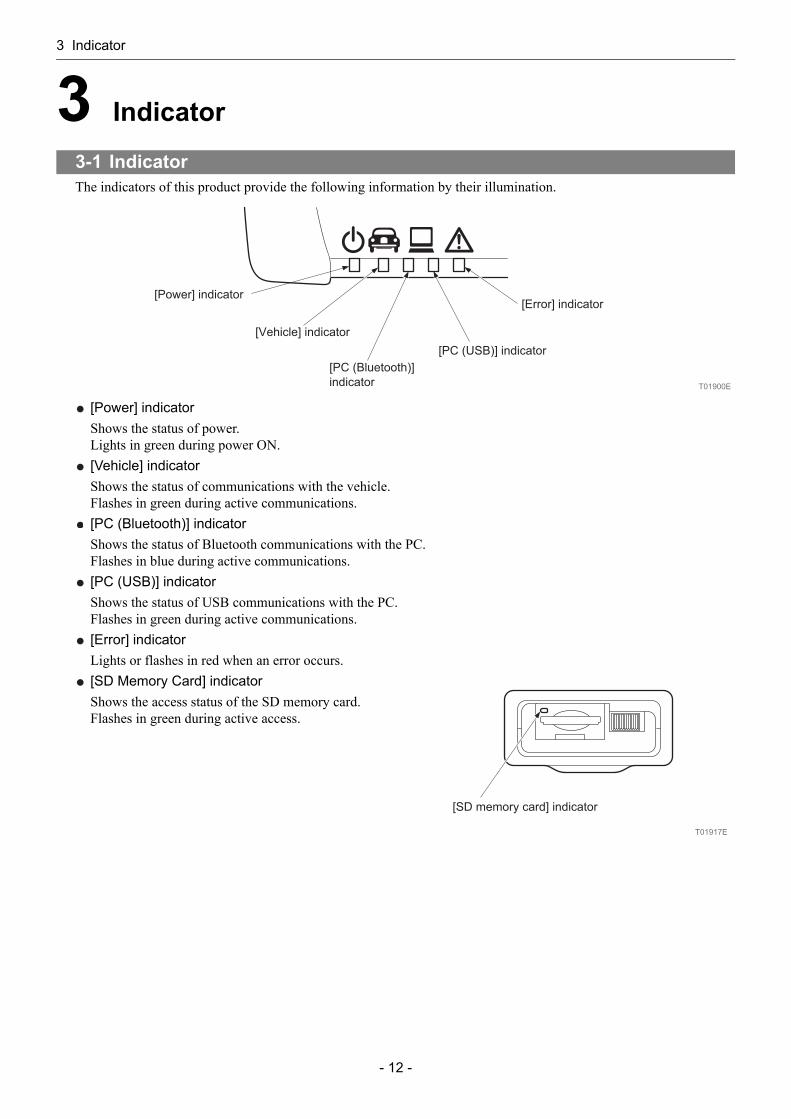
The indicators of this product provide the following information by their illumination.
[Power] indicatorShows the status of power.Lights in green during power ON.[Vehicle] indicatorShows the status of communications with the vehicle.Flashes in green during active communications.[PC (Bluetooth)] indicatorShows the status of Bluetooth communications with the PC.Flashes in blue during active communications.[PC (USB)] indicatorShows the status of USB communications with the PC.Flashes in green during active communications.[Error] indicatorLights or flashes in red when an error occurs.[SD Memory Card] indicatorShows the access status of the SD memory card.Flashes in green during active access.
3-1 Indicator
T01900E
[Power] indicator
[Vehicle] indicator
[PC (USB)] indicator
[PC (Bluetooth)]
indicator
[Error] indicator
T01917E
[SD memory card] indicator
4 Product Specifications
- 13 -
4 Product Specifications
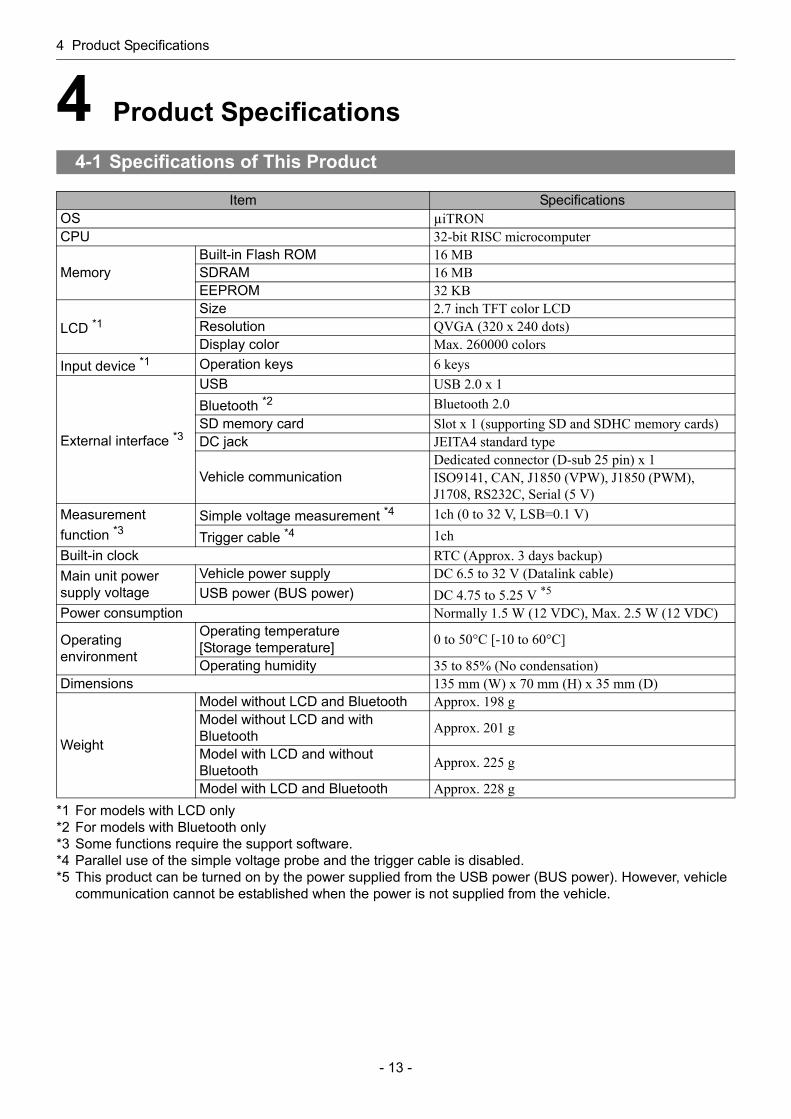
*1 For models with LCD only*2 For models with Bluetooth only*3 Some functions require the support software.*4 Parallel use of the simple voltage probe and the trigger cable is disabled.*5 This product can be turned on by the power supplied from the USB power (BUS power). However, vehicle
communication cannot be established when the power is not supplied from the vehicle.
4-1 Specifications of This Product
Item SpecificationsOS µiTRONCPU 32-bit RISC microcomputer
MemoryBuilt-in Flash ROM 16 MBSDRAM 16 MBEEPROM 32 KB
LCD *1Size 2.7 inch TFT color LCDResolution QVGA (320 x 240 dots)Display color Max. 260000 colors
Input device *1 Operation keys 6 keys
External interface *3
USB USB 2.0 x 1Bluetooth *2 Bluetooth 2.0SD memory card Slot x 1 (supporting SD and SDHC memory cards)DC jack JEITA4 standard type
Vehicle communicationDedicated connector (D-sub 25 pin) x 1ISO9141, CAN, J1850 (VPW), J1850 (PWM), J1708, RS232C, Serial (5 V)
Measurement function *3
Simple voltage measurement *4 1ch (0 to 32 V, LSB=0.1 V)
Trigger cable *4 1chBuilt-in clock RTC (Approx. 3 days backup)Main unit power supply voltage
Vehicle power supply DC 6.5 to 32 V (Datalink cable)USB power (BUS power) DC 4.75 to 5.25 V *5
Power consumption Normally 1.5 W (12 VDC), Max. 2.5 W (12 VDC)
Operating environment
Operating temperature[Storage temperature] 0 to 50°C [-10 to 60°C]
Operating humidity 35 to 85% (No condensation)Dimensions 135 mm (W) x 70 mm (H) x 35 mm (D)
Weight
Model without LCD and Bluetooth Approx. 198 gModel without LCD and with Bluetooth Approx. 201 g
Model with LCD and without Bluetooth Approx. 225 g
Model with LCD and Bluetooth Approx. 228 g
5 Warranty
- 14 -
5 Warranty
1. The warranty period of this set is two years after the purchase day. However accessories are not covered, main body only.
2. Free repair warranty is applied only for the failure under proper operation conditions within the warranty period.
3. Non-free repair is applied to the following cases even if the valid warranty period remains.• Failure or damage from fire and natural disaster.• Failure or damage as a result of a falling during transportation and movement after purchase or from the
improper handling. • Failure or damage caused from handling in a way contrary to proper operating methods and cautions described
in this document.• Failure or damage from modification or liability for operations. • Replacement of external parts such as the resin case.
4. We shall have no liability for any direct or indirect damage resulting from failure or use of this product.
5. For request of repair, please contact your distributor.
Data preservationRecorded data in this product could be lost in repair. Please note that we shall have no liability for any damage and data preservation derived in conjunction with data loss.
5-1 Warranty
5 Warranty
- 15 -
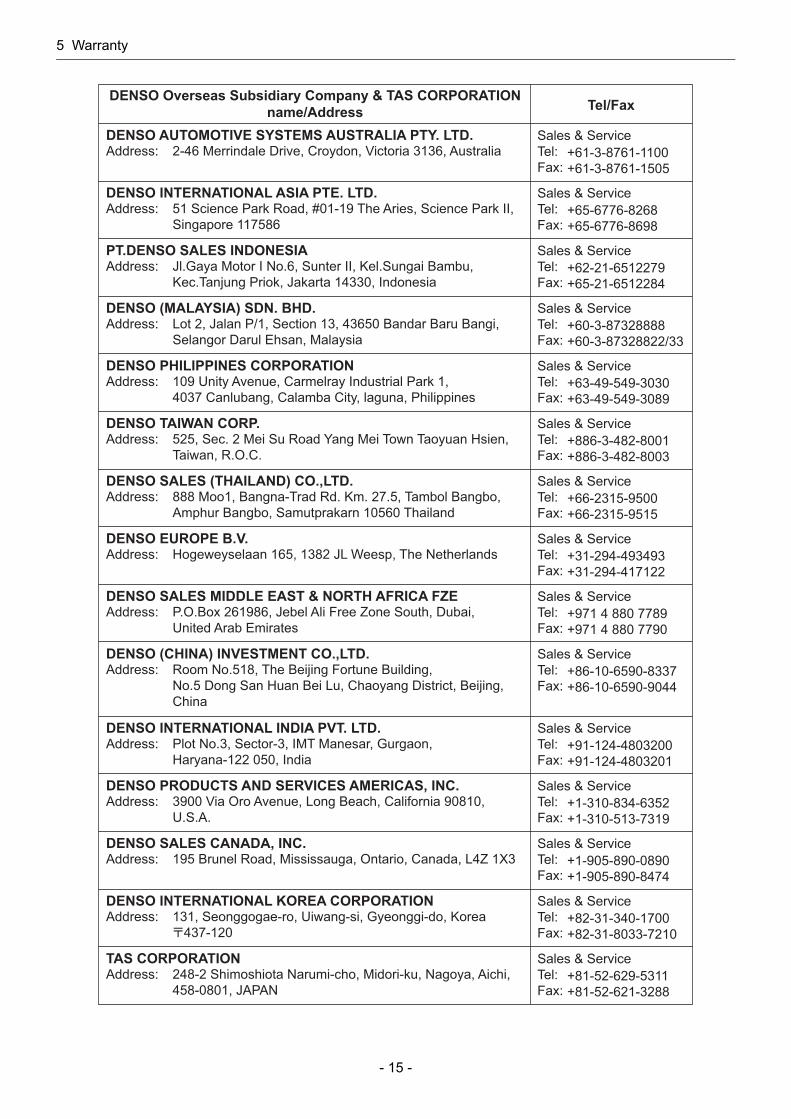
DENSO Overseas Subsidiary Company & TAS CORPORATIONname/Address
DENSO AUTOMOTIVE SYSTEMS AUSTRALIA PTY. LTD. Sales & ServiceTel:Fax:
+61-3-8761-1100+61-3-8761-1505
Address: 2-46 Merrindale Drive, Croydon, Victoria 3136, Australia
DENSO INTERNATIONAL ASIA PTE. LTD. Sales & ServiceTel:Fax:
+65-6776-8268+65-6776-8698
Address: 51 Science Park Road, #01-19 The Aries, Science Park II, Singapore 117586
PT.DENSO SALES INDONESIA Sales & ServiceTel:Fax:
+62-21-6512279+65-21-6512284
Address: Jl.Gaya Motor I No.6, Sunter II, Kel.Sungai Bambu, Kec.Tanjung Priok, Jakarta 14330, Indonesia
DENSO (MALAYSIA) SDN. BHD. Sales & ServiceTel:Fax:
+60-3-87328888+60-3-87328822/33
Address: Lot 2, Jalan P/1, Section 13, 43650 Bandar Baru Bangi, Selangor Darul Ehsan, Malaysia
DENSO PHILIPPINES CORPORATION Sales & ServiceTel:Fax:
+63-49-549-3030+63-49-549-3089
Address: 109 Unity Avenue, Carmelray Industrial Park 1, 4037 Canlubang, Calamba City, laguna, Philippines
DENSO TAIWAN CORP. Sales & ServiceTel:Fax:
+886-3-482-8001+886-3-482-8003
Address: 525, Sec. 2 Mei Su Road Yang Mei Town Taoyuan Hsien, Taiwan, R.O.C.
DENSO SALES (THAILAND) CO.,LTD. Sales & ServiceTel:Fax:
+66-2315-9500+66-2315-9515
Address: 888 Moo1, Bangna-Trad Rd. Km. 27.5, Tambol Bangbo, Amphur Bangbo, Samutprakarn 10560 Thailand
DENSO EUROPE B.V. Sales & ServiceTel:Fax:
+31-294-493493+31-294-417122
Address: Hogeweyselaan 165, 1382 JL Weesp, The Netherlands
DENSO SALES MIDDLE EAST & NORTH AFRICA FZE Sales & ServiceTel:Fax:
+971 4 880 7789+971 4 880 7790
Address: P.O.Box 261986, Jebel Ali Free Zone South, Dubai, United Arab Emirates
DENSO (CHINA) INVESTMENT CO.,LTD.Address: Room No.518, The Beijing Fortune Building,
No.5 Dong San Huan Bei Lu, Chaoyang District, Beijing, China
DENSO INTERNATIONAL INDIA PVT. LTD. Sales & ServiceTel:Fax:
+91-124-4803200+91-124-4803201
Sales & ServiceTel:Fax:
+86-10-6590-8337+86-10-6590-9044
Address: Plot No.3, Sector-3, IMT Manesar, Gurgaon, Haryana-122 050, India
DENSO PRODUCTS AND SERVICES AMERICAS, INC. Sales & ServiceTel:Fax:
+1-310-834-6352+1-310-513-7319
Address: 3900 Via Oro Avenue, Long Beach, California 90810, U.S.A.
DENSO SALES CANADA, INC. Sales & ServiceTel:Fax:
+1-905-890-0890+1-905-890-8474
Address: 195 Brunel Road, Mississauga, Ontario, Canada, L4Z 1X3
DENSO INTERNATIONAL KOREA CORPORATION Sales & ServiceTel:Fax:
+82-31-340-1700+82-31-8033-7210
Address: 131, Seonggogae-ro, Uiwang-si, Gyeonggi-do, Korea437-120
TAS CORPORATION Sales & ServiceTel:Fax:
+81-52-629-5311+81-52-621-3288
Address: 248-2 Shimoshiota Narumi-cho, Midori-ku, Nagoya, Aichi, 458-0801, JAPAN
Tel/Fax

T02982Z
Regulatory Information to user
MODEL : DN-VIM-002
1.
2. EMC and Radio Regulation in U.S.A.Model with Bluetooth, Model without BluetoothFCC WARNINGChanges or modifications not expressly approved by the party responsible for compliance could void the user’s authority to operate the equipment.
NOTICE: This device has been tested and found to comply with the limits for a Class A digital device, pursuant to part 15 of the FCC Rules.These limits are designed to provide reasonable protection against harmful interference when the device is operated in a commercial environment.This device generates, uses, and can radiate radio frequency energy and, if not installed and used in accordance with the instruction manual, may cause harmful interference to radio communications.Operation of this device in a residential area is likely to cause harmful interference in which case the user will be required to correct the interference at his own expense.
NOTEThis device complies with part 15 of the FCC Rules. Operation is subject to the following two conditions:(1) this device may not cause harmful interference, and(2) this device must accept any interference received, including interference that may cause undesired operation.
CAUTION: Radio Frequency Radiation ExposureThis device complies with FCC radiation exposure limits set forth for an uncontrolled environment and meets the FCC radio frequency (RF) Exposure Guidelines in Supplement C to OET65. This device has very low levels of RF energy that it deemed to comply without maximum permissive exposure evaluation (MPE). But it is desirable that it should be installed and operated keeping the radiator at least 20 cm or more away from person’s body (excluding extremities: hands, wrists, feet and ankles).
Co-location: This transmitter must not be co-located or operated in conjunction with any other antenna or transmitter.
Model with Bluetooth

T02983Z
3. EMC and Radio Regulation in CANADAModel with Bluetooth
4. EMC and Radio Directive in EU, EFTAModel without Bluetooth
Harmonized Standards applied : EN 55011 (This product falls under group 1 and class A): EN 61000-6-2
ManufacturerName : DENSO CORPORATIONAddress : 1-1 Showa-cho, Kariya-shi, Aichi-ken, 448-8661 Japan
Authorised representativesName : DENSO EUROPE B.V.
Sales & Service+31-294-493-493+31-294-417-122
Address : Hogeweyselaan 165, 1382 JL Weesp, the Netherlands
Model Name : DN-VIM-002Radio Frequency : 2402-2480 MHzRadio Output Power : +4 dBm max.
2014/30/EU
NOTEOperation is subject to the following two conditions:(1) this device may not cause interference; and(2) this device must accept any interference, including interference that may cause undesired operation of the device.This device complies with IC radiation exposure limits set forth for an uncontrolled environment and meets RSS-102 of the IC radio frequency (RF) Exposure rules. This device has very low levels of RF energy that it deemed to comply without maximum permissive exposure evaluation (MPE). But it is desirable that it should be installed and operated keeping the radiator at least 20 cm or more away from person's body (excluding extremities: hands, wrists, feet and ankles).
Co-location: This transmitter must not be co-located or operated in conjunction with any other antenna or transmitter.
L’opération est soumise aux deux conditions suivantes:(1) Ce périphérique ne peut être la cause d’interférence, et(2) Ce périphérique se doit d’accepter toute(s) interférense(s), y compris celle(s) susceptible(s) de provoquer des opérations indésirables dans le cadre de son fonctionnement.Cet équipement est en conformité avec les limites d’exposition aux rayonnements IC précédemment énoncées dans un environnement non contrôlé et répond aux règles d’exposition aux radiofréquences (RF) IC définies par RSS-102. Parcequ’il bénéficie de très faibles niveaux d’énergie RF, cet équipement a été jugé conforme sans qu’il soit nécessaire de procéder à une évaluation de l’exposition permissive maximale (MPE).Toutefois, il est recommandé que cet équipement soit installé et opéré en prenant soin que le radiateur soit à une distanceminimum de 20 cm de toute personne se trouvant dans sa périphérie (à l’exclusion des extrémités corporelles suivantes: mains et poignets et, pieds et chevilles).
Co-implantation: Cet émetteur ne doit pas être co-implanté ou exploité conjointement avec une autre antenne ou émetteur.
T02978Z
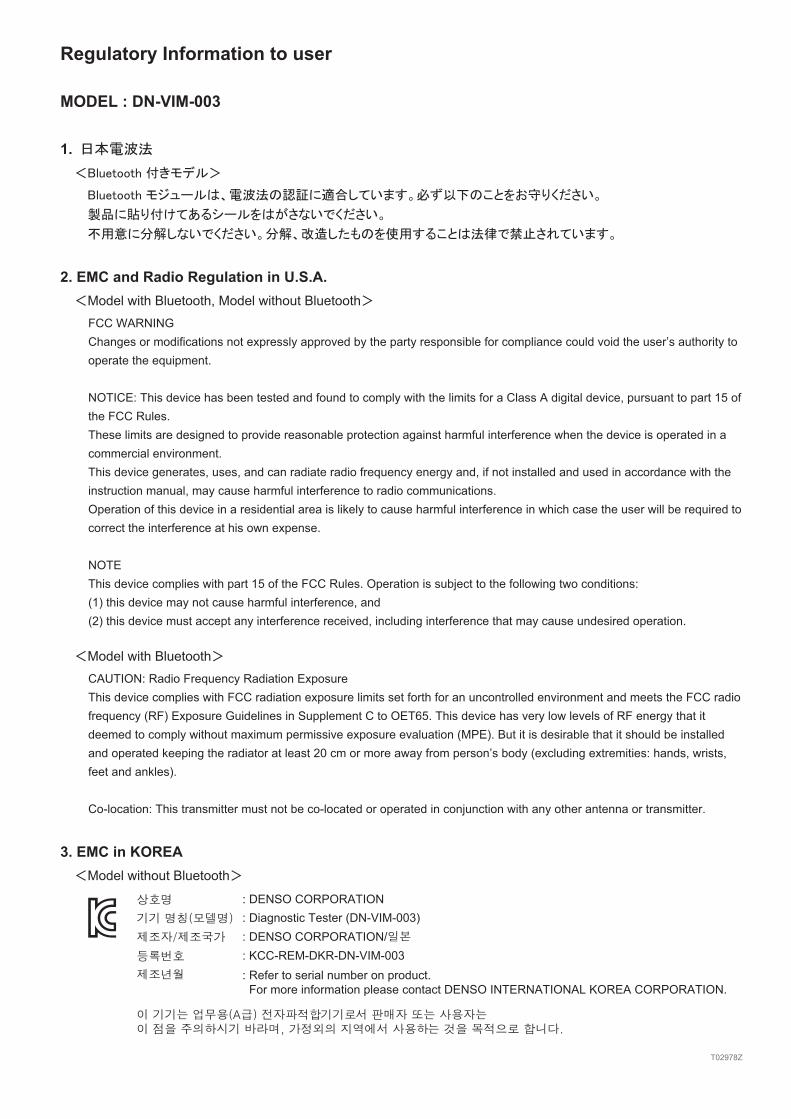
3. EMC in KOREAModel without Bluetooth
: DENSO CORPORATION: Diagnostic Tester (DN-VIM-003): DENSO CORPORATION/: KCC-REM-DKR-DN-VIM-003: Refer to serial number on product. For more information please contact DENSO INTERNATIONAL KOREA CORPORATION.
Regulatory Information to user
MODEL : DN-VIM-003
1.
2. EMC and Radio Regulation in U.S.A.Model with Bluetooth, Model without BluetoothFCC WARNINGChanges or modifications not expressly approved by the party responsible for compliance could void the user’s authority to operate the equipment.
NOTICE: This device has been tested and found to comply with the limits for a Class A digital device, pursuant to part 15 of the FCC Rules.These limits are designed to provide reasonable protection against harmful interference when the device is operated in a commercial environment.This device generates, uses, and can radiate radio frequency energy and, if not installed and used in accordance with the instruction manual, may cause harmful interference to radio communications.Operation of this device in a residential area is likely to cause harmful interference in which case the user will be required to correct the interference at his own expense.
NOTEThis device complies with part 15 of the FCC Rules. Operation is subject to the following two conditions:(1) this device may not cause harmful interference, and(2) this device must accept any interference received, including interference that may cause undesired operation.
CAUTION: Radio Frequency Radiation ExposureThis device complies with FCC radiation exposure limits set forth for an uncontrolled environment and meets the FCC radio frequency (RF) Exposure Guidelines in Supplement C to OET65. This device has very low levels of RF energy that it deemed to comply without maximum permissive exposure evaluation (MPE). But it is desirable that it should be installed and operated keeping the radiator at least 20 cm or more away from person’s body (excluding extremities: hands, wrists, feet and ankles).
Co-location: This transmitter must not be co-located or operated in conjunction with any other antenna or transmitter.
Model with Bluetooth
T02979Z
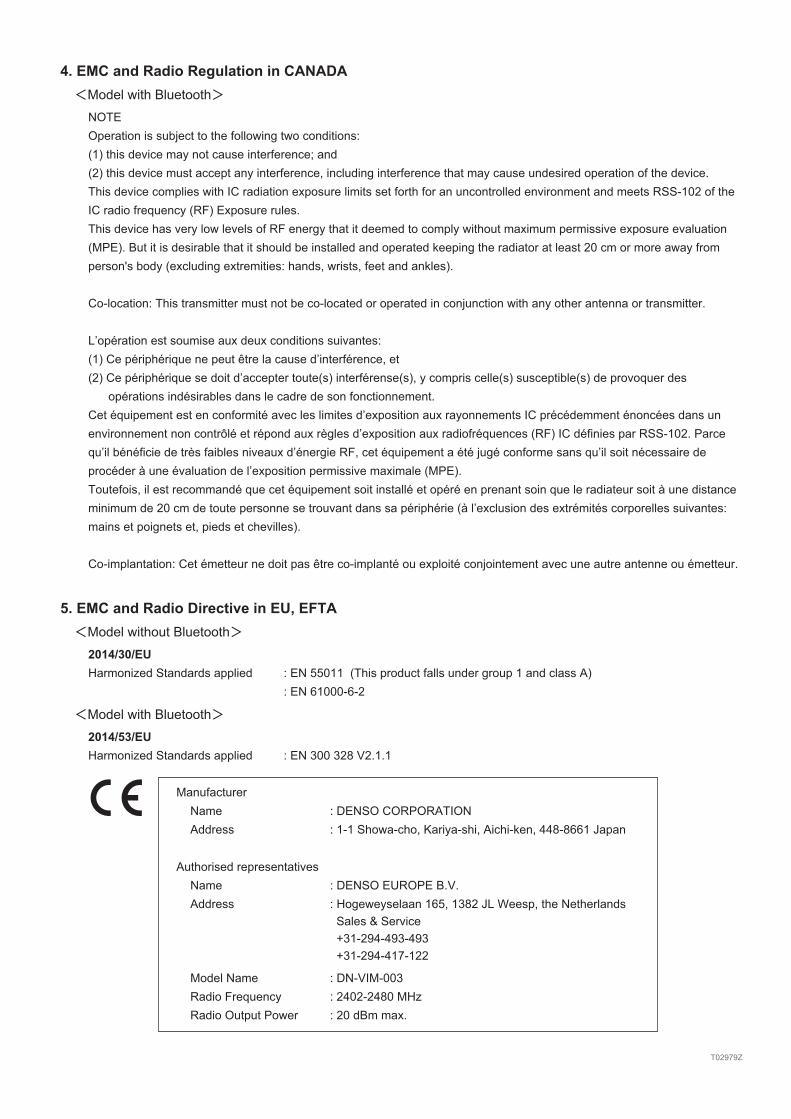
4. EMC and Radio Regulation in CANADAModel with Bluetooth
5. EMC and Radio Directive in EU, EFTAModel without Bluetooth
Harmonized Standards applied : EN 55011 (This product falls under group 1 and class A): EN 61000-6-2
Model with Bluetooth
ManufacturerName : DENSO CORPORATIONAddress : 1-1 Showa-cho, Kariya-shi, Aichi-ken, 448-8661 Japan
Authorised representativesName : DENSO EUROPE B.V.
Sales & Service+31-294-493-493+31-294-417-122
Address : Hogeweyselaan 165, 1382 JL Weesp, the Netherlands
Model Name : DN-VIM-003Radio Frequency : 2402-2480 MHzRadio Output Power : 20 dBm max.
2014/30/EU
Harmonized Standards applied : EN 300 328 V2.1.12014/53/EU
NOTEOperation is subject to the following two conditions:(1) this device may not cause interference; and(2) this device must accept any interference, including interference that may cause undesired operation of the device.This device complies with IC radiation exposure limits set forth for an uncontrolled environment and meets RSS-102 of the IC radio frequency (RF) Exposure rules. This device has very low levels of RF energy that it deemed to comply without maximum permissive exposure evaluation (MPE). But it is desirable that it should be installed and operated keeping the radiator at least 20 cm or more away from person's body (excluding extremities: hands, wrists, feet and ankles).
Co-location: This transmitter must not be co-located or operated in conjunction with any other antenna or transmitter.
L’opération est soumise aux deux conditions suivantes:(1) Ce périphérique ne peut être la cause d’interférence, et(2) Ce périphérique se doit d’accepter toute(s) interférense(s), y compris celle(s) susceptible(s) de provoquer des opérations indésirables dans le cadre de son fonctionnement.Cet équipement est en conformité avec les limites d’exposition aux rayonnements IC précédemment énoncées dans un environnement non contrôlé et répond aux règles d’exposition aux radiofréquences (RF) IC définies par RSS-102. Parcequ’il bénéficie de très faibles niveaux d’énergie RF, cet équipement a été jugé conforme sans qu’il soit nécessaire de procéder à une évaluation de l’exposition permissive maximale (MPE).Toutefois, il est recommandé que cet équipement soit installé et opéré en prenant soin que le radiateur soit à une distanceminimum de 20 cm de toute personne se trouvant dans sa périphérie (à l’exclusion des extrémités corporelles suivantes: mains et poignets et, pieds et chevilles).
Co-implantation: Cet émetteur ne doit pas être co-implanté ou exploité conjointement avec une autre antenne ou émetteur.
T02980Z
ț
T02981Z
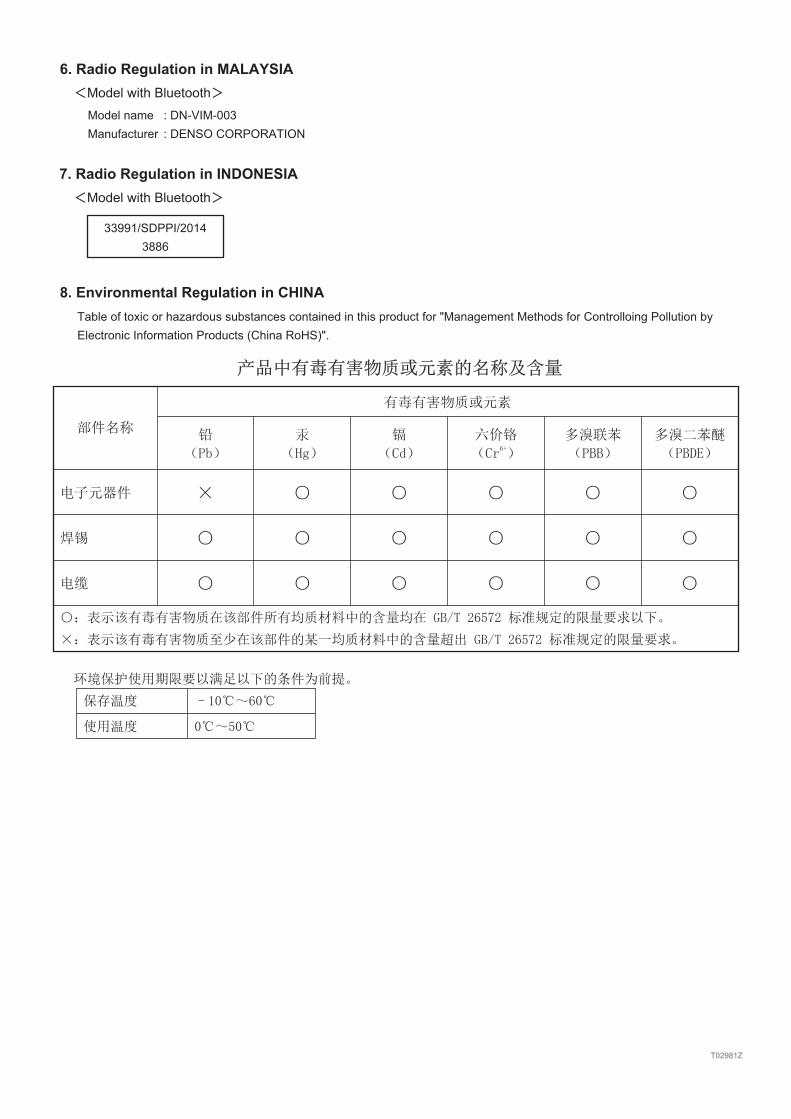
6. Radio Regulation in MALAYSIAModel with BluetoothModel nameManufacturer
: DN-VIM-003: DENSO CORPORATION
8. Environmental Regulation in CHINATable of toxic or hazardous substances contained in this product for "Management Methods for Controlloing Pollution by Electronic Information Products (China RoHS)".
7. Radio Regulation in INDONESIAModel with Bluetooth
33991/SDPPI/20143886
First setup date
Store purchased
S/N
Instruction Manual
1st Ed. October, 201014th Ed. October, 2017