Embed Size (px)
Citation preview
JACE-8000 Backup and RestoreGuide
February 19, 2019
Technical Document
JJAACCEE--88000000 BBaacckkuupp aanndd RReessttoorree GGuuiiddee
TTrriiddiiuumm,, IInncc..3951 Westerre Parkway, Suite 350Richmond, Virginia 23233U.S.A.
CCoonnffiiddeennttiiaalliittyyThe information contained in this document is confidential information of Tridium, Inc., a Delaware corpora-tion (“Tridium”). Such information and the software described herein, is furnished under a license agreementand may be used only in accordance with that agreement.
The information contained in this document is provided solely for use by Tridium employees, licensees, andsystem owners; and, except as permitted under the below copyright notice, is not to be released to, or re-produced for, anyone else.
While every effort has been made to assure the accuracy of this document, Tridium is not responsible fordamages of any kind, including without limitation consequential damages, arising from the application of theinformation contained herein. Information and specifications published here are current as of the date of thispublication and are subject to change without notice. The latest product specifications can be found by con-tacting our corporate headquarters, Richmond, Virginia.
TTrraaddeemmaarrkk nnoottiicceeBACnet and ASHRAE are registered trademarks of American Society of Heating, Refrigerating and Air-Con-ditioning Engineers. Microsoft, Excel, Internet Explorer, Windows, Windows Vista, Windows Server, and SQLServer are registered trademarks of Microsoft Corporation. Oracle and Java are registered trademarks ofOracle and/or its affiliates. Mozilla and Firefox are trademarks of the Mozilla Foundation. Echelon, LON, Lon-Mark, LonTalk, and LonWorks are registered trademarks of Echelon Corporation. Tridium, JACE, NiagaraFramework, NiagaraAX Framework, and Sedona Framework are registered trademarks, and Workbench,WorkPlaceAX, and AXSupervisor, are trademarks of Tridium Inc. All other product names and services men-tioned in this publication that are known to be trademarks, registered trademarks, or service marks are theproperty of their respective owners.
CCooppyyrriigghhtt aanndd ppaatteenntt nnoottiicceeThis document may be copied by parties who are authorized to distribute Tridium products in connectionwith distribution of those products, subject to the contracts that authorize such distribution. It may not oth-erwise, in whole or in part, be copied, photocopied, reproduced, translated, or reduced to any electronicmedium or machine-readable form without prior written consent from Tridium, Inc.
Copyright © 2019 Tridium, Inc. All rights reserved.
The product(s) described herein may be covered by one or more U.S. or foreign patents of Tridium.
CCoonntteennttssPreface................................................................................................................5
About this Guide.................................................................................................5Document change log ................................................................................5Related documentation ..............................................................................6
Chapter 1 USB backup and restore ...................................................................7Creating a USB backup ...............................................................................7Restoring from a USB backup......................................................................9Restoring factory defaults.........................................................................11Resetting platform credentials ..................................................................13Shutting down the controller ....................................................................15
Chapter 2 Reference information....................................................................17Platform and station backup options .........................................................17Restore options........................................................................................17Shutdown operations ...............................................................................18
February 19, 2019 3

Contents JACE-8000 Backup and Restore Guide
4 February 19, 2019
PPrreeffaaccee
AAbboouutt tthhiiss GGuuiiddeeThis topic contains important information about the purpose, content, context, and intended audience forthis document.
PPrroodduucctt DDooccuummeennttaattiioonnThis document is part of the Niagara technical documentation library. Released versions of Niagara softwareinclude a complete collection of technical information that is provided in both online help and PDF format.The information in this document is written primarily for Systems Integrators. In order to make the most ofthe information in this book, readers should have some training or previous experience with Niagara 4 or Ni-agaraAX software, as well as experience working with JACE network controllers.
DDooccuummeenntt CCoonntteennttThis document includes topics that describe how to create USB backups and restore them to your JACE-8000 controller. Also included are instructions for recovering factory defaults, and safely shutting down acontroller.
DDooccuummeenntt cchhaannggee lloogg
Updates and changes to the document are listed in this topic.
FFeebbrruuaarryy 1199,, 22001199Regarding changes in the backup/restore functionality for Niagara 4.7U1, added a note in the followingtopics: “USB Backup and restore feature”, “Restoring from a USB backup” and “Recovering factorydefaults”.
JJaannuuaarryy 2233,, 22001188Added the procedure, “Resetting platform credentials”. Also, changed the title of another procedure to,“Recovering factory defaults”.
MMaarrcchh 2277,, 22001188Revised procedure, “Resetting platform credentials”.
DDeecceemmbbeerr 1122,, 22001166Minor branding correction in two topics, “Restoring from a USB backup,” and “Restore Options.”
OOccttoobbeerr 1111,, 22001166Revised wording of the caution included in the following topics: “USB Backup and Restore feature”, “Createa USB Backup”, “Restoring from a USB Backup”, and “Platform and station backup options”.
SSeepptteemmbbeerr 1144,, 22001166Minor changes to step 2 of the procedure, “Restoring factory defaults”, to clarify functionality.
AAuugguusstt 1199,, 22001166• In the topic, “Restoring from a USB Backup”, revised content in steps 5–11.
• Added a caution to the following topics regarding connecting large-capacity USB drives (>128GB): “USBBackup and Restore feature”, “Create a USB Backup”, “Restoring from a USB Backup”, and “Platformand station backup options”.
• Removed the Caution regarding Sandisk Cruiser USB flash drives causing the unit to fail from the USBBackup and Restore feature topic.
February 19, 2019 5
Preface JACE-8000 Backup and Restore Guide
JJuullyy 1199,, 22001166Added a note about supported file systems for USB backup to the topics: “USB backup and restore”, Creat-ing a USB backup”, and “Platform and station backup options”.
MMaayy 66,, 22001166Modified note after the first paragraph in chapter 1, included the other features not supported when runningAX.
AApprriill 1133,, 22001166• Edited wording in About this guide to include “shutdown”.
• Added a note, after the first paragraph in chapter 1, stating that USB Backup/Restore and USB port func-tionality is not supported for any JACE-8000 running AX.
• In the topic, “Creating a USB Backup,” added a similarly worded note above the first step in theprocedure.
• In the topic, “Restoring from a USB Backup,” added the same note (as that used in the “Creating...”topic) above the first step in the procedure.
• In the topic, “Recovering factory defaults,” added a note after the image callouts table, stating that forany JACE-8000 running AX, USB Backup/Restore and USB port functionality is not supported. And, thatwhile holding the Backup button during power up/boot up still initiates a factory recovery image, it re-stores the controller to its factory ship state which is N4.1, etc.
• Added the topic, “Shutting down the controller.”
• Added the topic, “Shutdown operations” under the Reference Information.
DDeecceemmbbeerr 22,, 22001155• In the USB Backup and Restore feature topic, added a caution about USB drives causing the unit to fail.
• In the Create a USB Backup topic, added a caution about USB drives causing the unit to fail.
NNoovveemmbbeerr 2200,, 22001155The USB backup restore procedure was updated to reflect a change in the restore options.
OOccttoobbeerr 2266,, 22001155Changes throughout to reflect Niagara 4.1 updates.
AAuugguusstt 1188,, 22001155Initial release publication.
RReellaatteedd ddooccuummeennttaattiioonn
Additional related information is available in the following document(s).
• JACE-8000 Mounting and Wiring Guide
• JACE-8000 Install and Startup Guide
• Niagara Platform Guide
February 19, 2019 6

February 19, 2019 7
CChhaapptteerr 11 UUSSBB bbaacckkuupp aanndd rreessttoorree
Topics covered in this chapter♦ Creating a USB backup♦ Restoring from a USB backup♦ Restoring factory defaults♦ Resetting platform credentials♦ Shutting down the controller
The JACE-8000 allows you to back up the entire platform and station to a USB flash drive without requiringthe backup functions of Workbench. Called a clone backup, the file created by a USB backup contains acomplete image of the platform and station, including system modules and the QNX OS.
NNOOTTEE:: Starting in Niagara 4.2, the JACE-8000 can be converted (downgraded) to run AX-3.8U1–with somefeature limitations. For example, for any JACE-8000 running AX the USB Backup/Restore functionality is notsupported. When running AX the USB port on the device is not monitored. Other unsupported features areIEEE 802.1X wired authentication and WiFi functionality.
The BackupService, which comes standard with Workbench, backs up station files to a local Supervisor orbrowser PC. A backup made by the BackupService includes only pointers to required core softwaremodules. To restore from a backup made using Workbench, not only do you need Workbench, but also itssoftware database with matching versions of all required core .dist files, OS .dist files, and softwaremodules. Afterwards, use the DDiissttrriibbuuttiioonn FFiillee Installer to restore the backup.
The JACE-8000 provides the ability to:
• Initiate a backup manually by inserting a USB flash drive into the USB port and pressing the backup andrestore button on the unit itself.
NNOOTTEE:: USB backup supports only FAT32 and FAT32X file systems. NTFS is not supported.
CCAAUUTTIIOONN:: Only flash drives (USB sticks ≤128GB) are recommended for backup/restore operations. USBbus powered external hard drives often have higher power requirements and so may not function asexpected, possibly resulting in permanent damage to the drive or to the JACE-8000. Plugging in anexternal hard drive may cause the controller to become unresponsive, requiring a reboot.
• Restore a USB backup image using a USB flash drive, USB-to-microUSB cable connection and a terminalemulator program.
• Recover the factory default image. This feature does not require a USB flash drive, special cable orterminal emulator. The system pulls the factory image from non-volatile, read-only memory.
NNOOTTEE:: In Niagara 4.7U1 and later, the presence of a USB device inserted in the USB backup/restore portprevents you from accidentally launching the factory defaults recovery process while attempting torestore a backup. If a USB device, of any type, is inserted in the backup/restore port, then recovery isskipped. Consequently, when factory defaults recovery is desired, no USB device can be inserted in theUSB port.
• In Niagara 4.4 and later, the Secure Platform Account Recovery feature provides customers with a securemethod of regaining access to their JACE-8000 without losing station data and configuration.
CCrreeaattiinngg aa UUSSBB bbaacckkuupp
You may create a clone backup while a station is running or stopped. When the controller is powered on, thesoftware continuously monitors the USB port. Putting a USB flash drive in the port triggers backup/restoremode.
PPrreerreeqquuiissiitteess::
Chapter 1 USB backup and restore JACE-8000 Backup and Restore Guide
• USB backups are enabled on the controller:PPllaattffoorrmm AAddmmiinniissttrraattiioonn→→AAddvvaanncceedd OOppttiioonnss→→UUSSBB BBaacckkuupp EEnnaabblleedd property is selected
NNOOTTEE:: USB backup supports only FAT32 and FAT32X file systems. NTFS is not supported.
• You need a USB flash drive with enough memory to contain the complete platform and station imagealong with the operating system and all software modules.
CCAAUUTTIIOONN:: Only flash drives (USB sticks ≤128GB) are recommended for backup/restore operations. USBbus powered external hard drives often have higher power requirements and so may not function as ex-pected, possibly resulting in permanent damage to the drive or to the JACE-8000. Plugging in an exter-nal hard drive may cause the controller to become unresponsive, requiring a reboot.
Step 1 Confirm that the controller’s power is on.
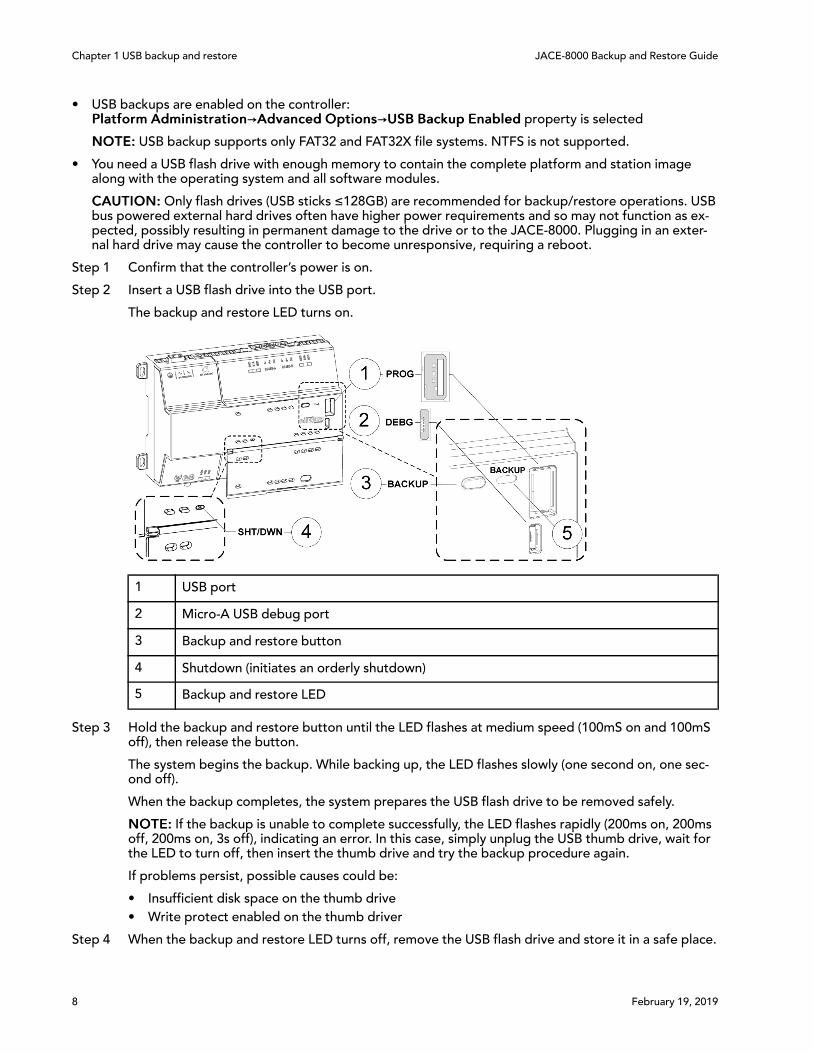
Step 2 Insert a USB flash drive into the USB port.
The backup and restore LED turns on.
1 USB port
2 Micro-A USB debug port
3 Backup and restore button
4 Shutdown (initiates an orderly shutdown)
5 Backup and restore LED
Step 3 Hold the backup and restore button until the LED flashes at medium speed (100mS on and 100mSoff), then release the button.
The system begins the backup. While backing up, the LED flashes slowly (one second on, one sec-ond off).
When the backup completes, the system prepares the USB flash drive to be removed safely.
NNOOTTEE:: If the backup is unable to complete successfully, the LED flashes rapidly (200ms on, 200msoff, 200ms on, 3s off), indicating an error. In this case, simply unplug the USB thumb drive, wait forthe LED to turn off, then insert the thumb drive and try the backup procedure again.
If problems persist, possible causes could be:
• Insufficient disk space on the thumb drive• Write protect enabled on the thumb driver
Step 4 When the backup and restore LED turns off, remove the USB flash drive and store it in a safe place.
8 February 19, 2019

JACE-8000 Backup and Restore Guide Chapter 1 USB backup and restore
The backup image includes the contents of the boot partition, /home/Niagara, /opt/Niagara, etc. The nameof the resulting image file follows this convention: hostid (unique host ID of the JACE-8000), underscore (_)timestamp, For example:
• Qnx-TITAN-D01C-CA36–CB10–4E3B_20170912230355
• Qnx-TITAN-D01C-CA36–CB10–4E3B_20171015212346
RReessttoorriinngg ffrroomm aa UUSSBB bbaacckkuupp
Restoring from a USB backup returns the controller to the state it was in when the system made the backup.You may restore to a controller other than the one on which the backup was made, provided that the targetcontroller is the same model. The restore procedure does not require access to Workbench.
PPrreerreeqquuiissiitteess::
• The USB flash drive on which the backup is stored.
CCAAUUTTIIOONN:: Only flash drives (USB sticks ≤128GB) are recommended for backup/restore operations. USBbus powered external hard drives often have higher power requirements and so may not function as ex-pected, possibly resulting in permanent damage to the drive or to the JACE-8000. Plugging in an exter-nal hard drive may cause the controller to become unresponsive, requiring a reboot.
• A USB-to-micro USB cable (same cable as that used to connect a smart phone to a computer). The Debugport on a controller is a standard Micro-A type USB port for debugging serial communications.
• A terminal emulator (system shell program), such as PuTTY.
You use this program to access the controller’s system shell menu, which lists the restore options.
• The system passphrase of the system to which you are restoring the backup.
• The system passphrase used to create the backup. If you are restoring the image to a different controller(another of the same model), or if the system passphrase for the controller on which the backup wasmade changed since you made the backup, the passphrase required to decode the backup will be differ-ent from the current system passphrase.
NNOOTTEE:: For any JACE-8000 converted to run AX, USB Backup/Restore functionality is not supported. Also,the USB port on the device is not monitored for insertion/removal of devices.
Step 1 Set up the terminal emulator program running on your PC with the following settings:
• baud rate: 115200
• data bits: 8
• parity: N
• stop bits: 1
For details on using a serial connection to this port, see “Secure storage and the SD card”, “Prepar-ing for new JACE commissioning” and System shell” topics in the JACE-8000 Install and StartupGuide.
Step 2 Ensure that the controller’s power is off.
Step 3 Connect the USB-to-microUSB cable from the computer to the controller’s microUSB port (Debugport).
Step 4 Insert the USB flash drive that contains the backup into the USB port.
Step 5 Press and hold down the backup and restore button throughout the boot-up process (approxi-mately 5 seconds) until the button press is detected and this confirmation banner displays:
*******************************************************Backup/Restore button press detected. Release buttonnow to proceed.
*******************************************************
February 19, 2019 9
Chapter 1 USB backup and restore JACE-8000 Backup and Restore Guide
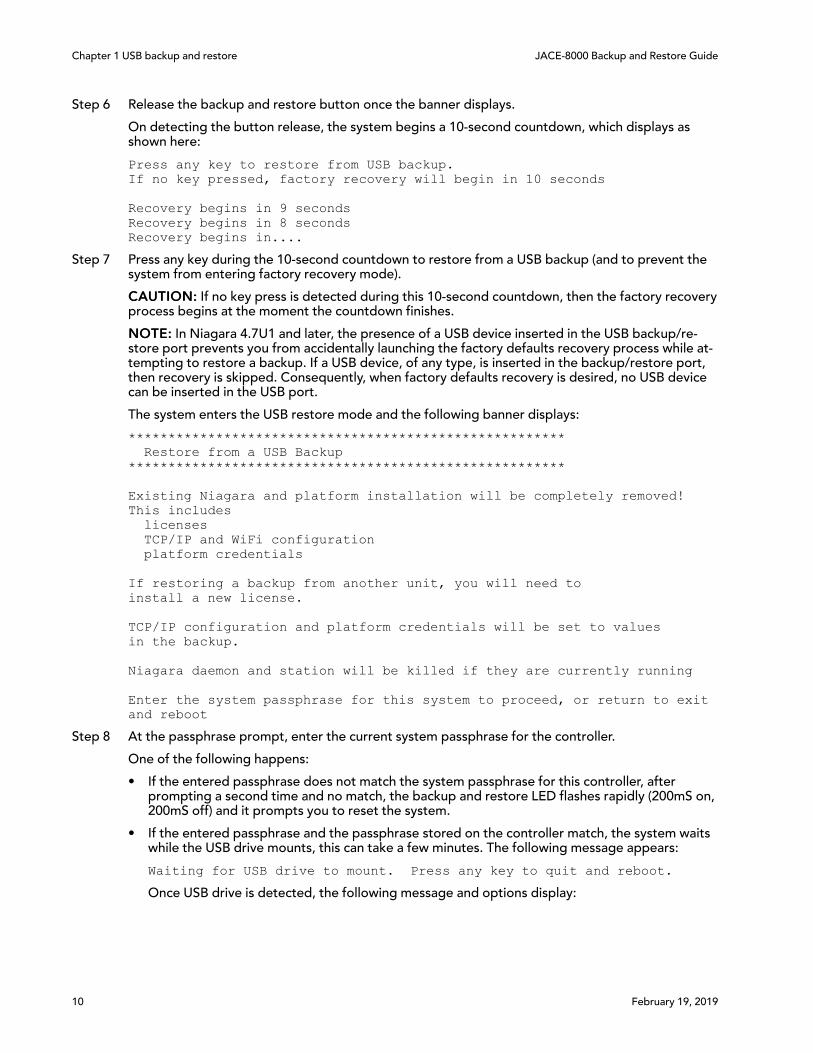
Step 6 Release the backup and restore button once the banner displays.
On detecting the button release, the system begins a 10-second countdown, which displays asshown here:
Press any key to restore from USB backup.If no key pressed, factory recovery will begin in 10 seconds
Recovery begins in 9 secondsRecovery begins in 8 secondsRecovery begins in....
Step 7 Press any key during the 10-second countdown to restore from a USB backup (and to prevent thesystem from entering factory recovery mode).
CCAAUUTTIIOONN:: If no key press is detected during this 10-second countdown, then the factory recoveryprocess begins at the moment the countdown finishes.
NNOOTTEE:: In Niagara 4.7U1 and later, the presence of a USB device inserted in the USB backup/re-store port prevents you from accidentally launching the factory defaults recovery process while at-tempting to restore a backup. If a USB device, of any type, is inserted in the backup/restore port,then recovery is skipped. Consequently, when factory defaults recovery is desired, no USB devicecan be inserted in the USB port.
The system enters the USB restore mode and the following banner displays:
*******************************************************Restore from a USB Backup
*******************************************************
Existing Niagara and platform installation will be completely removed!This includes
licensesTCP/IP and WiFi configurationplatform credentials
If restoring a backup from another unit, you will need toinstall a new license.
TCP/IP configuration and platform credentials will be set to valuesin the backup.
Niagara daemon and station will be killed if they are currently running
Enter the system passphrase for this system to proceed, or return to exitand reboot
Step 8 At the passphrase prompt, enter the current system passphrase for the controller.
One of the following happens:
• If the entered passphrase does not match the system passphrase for this controller, afterprompting a second time and no match, the backup and restore LED flashes rapidly (200mS on,200mS off) and it prompts you to reset the system.
• If the entered passphrase and the passphrase stored on the controller match, the system waitswhile the USB drive mounts, this can take a few minutes. The following message appears:
Waiting for USB drive to mount. Press any key to quit and reboot.
Once USB drive is detected, the following message and options display:
10 February 19, 2019
JACE-8000 Backup and Restore Guide Chapter 1 USB backup and restore
USB drive detectedThis platform is Qnx-TITAN-61BA-B6DB-88FE-4A31Please make your selection below1) Abort Recovery/Restore mode2) Show backups for other host IDs3) Qnx-TITAN-61BA-B6DB-88FE-4A31_20151119154109
Step 9 Type the number for a listed backup file name (for example: 3) or other option and press EEnntteerr.
NNOOTTEE:: The backup file name is the name of the backup file stored on the USB flash drive:
(hostid (unique host ID of the controller), underscore (_) timestamp)
The system prompts you to enter the passphrase for the backup file.
Step 10 At the prompt asking if the backup file’s passphrase is the same as the system passphrase for thecontroller, type Y (yes) or N (no).
• If Yes, then the system passphrase entered in the earlier step is used to decode the backup.
• If No, you must enter the passphrase for the backup file to decode the backup.
Step 11 If you entered N in the previous step, at the prompt enter the passphrase for the backup file, andconfirm it.
The restore begins.
CCAAUUTTIIOONN:: Once a restore begins, do not interrupt the process by removing the USB flash drive,disconnecting the power, or pressing the backup and restore button again. If you do not allow therestore to complete, the controller could be left in a non-functional state.
When the restore successfully completes, the backup and restore LED turns off and the system dis-plays a message indicating that the restore is complete and that the controller requires a reset.
Step 12 Turn the controller’s power off and back on again.
RReessttoorriinngg ffaaccttoorryy ddeeffaauullttss
The process of recovering factory defaults returns the controller to the state it was in when it shipped fromthe factory. This procedure describes the steps to recover factory defaults when using a terminal emulatorprogram to access the controller’s system shell menu.
PPrreerreeqquuiissiitteess::
• A USB-to-micro USB cable (same cable as that used to connect a smart phone to a computer) connectingthe controller to your PC. The Debug port on a controller is a standard Micro-A type USB port for debug-ging serial communicaStions. For more details, refer to the JACE-8000 Install and Startup Guide.
• A terminal emulator (system shell program), such as PuTTY, installed on your PC.
CCAAUUTTIIOONN:: Recovering factory defaults removes all platform and station data in the controller. Be sure tobackup data prior to performing this procedure.
Following are a couple of scenarios for which you might choose to recover factory defaults:
• While commissioning a brand new JACE, you make an error entering the default platform daemon cre-dentials or passphrase. The result is that you cannot commission the controller. In this scenario, your onlyoption is to recover the factory defaults.
• When decommissioning the JACE, a best practice to follow is recovering the factory defaults in order towipe all of the platform and station data in the controller.
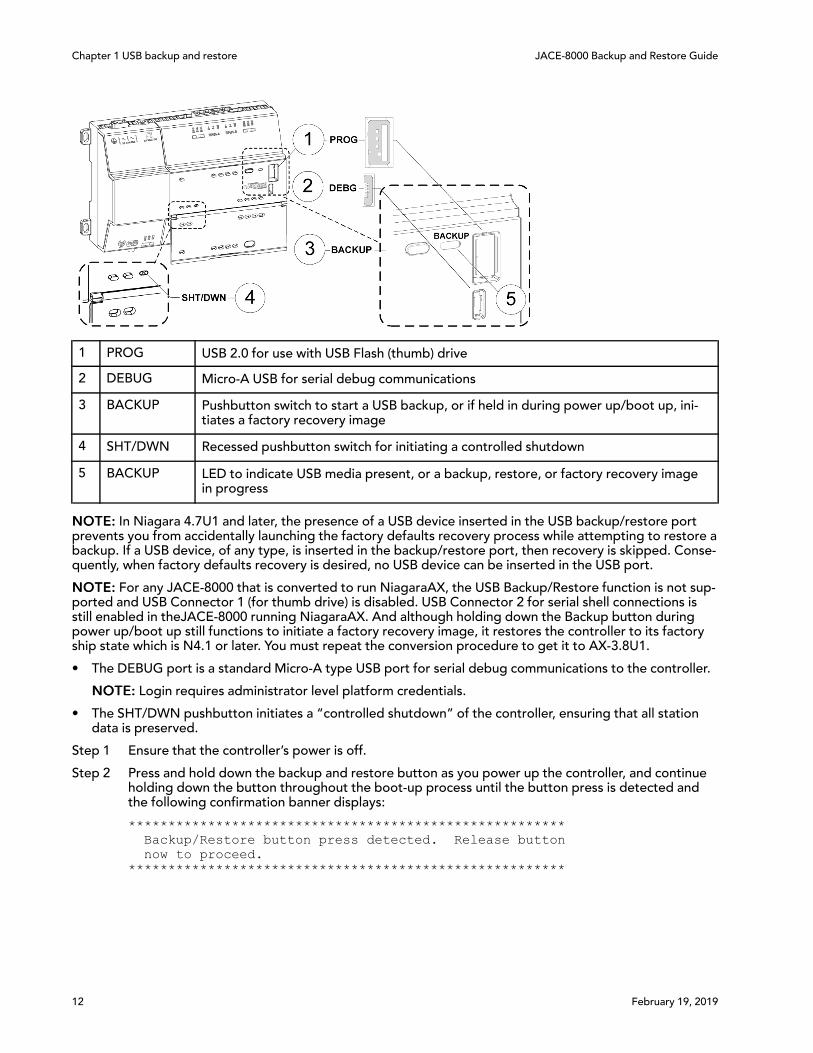
The figure with numbered call-outs, shown here, indicates the position of USB ports and switches behind theaccess door.
February 19, 2019 11
Chapter 1 USB backup and restore JACE-8000 Backup and Restore Guide
1 PROG USB 2.0 for use with USB Flash (thumb) drive
2 DEBUG Micro-A USB for serial debug communications
3 BACKUP Pushbutton switch to start a USB backup, or if held in during power up/boot up, ini-tiates a factory recovery image
4 SHT/DWN Recessed pushbutton switch for initiating a controlled shutdown
5 BACKUP LED to indicate USB media present, or a backup, restore, or factory recovery imagein progress
NNOOTTEE:: In Niagara 4.7U1 and later, the presence of a USB device inserted in the USB backup/restore portprevents you from accidentally launching the factory defaults recovery process while attempting to restore abackup. If a USB device, of any type, is inserted in the backup/restore port, then recovery is skipped. Conse-quently, when factory defaults recovery is desired, no USB device can be inserted in the USB port.
NNOOTTEE:: For any JACE-8000 that is converted to run NiagaraAX, the USB Backup/Restore function is not sup-ported and USB Connector 1 (for thumb drive) is disabled. USB Connector 2 for serial shell connections isstill enabled in theJACE-8000 running NiagaraAX. And although holding down the Backup button duringpower up/boot up still functions to initiate a factory recovery image, it restores the controller to its factoryship state which is N4.1 or later. You must repeat the conversion procedure to get it to AX-3.8U1.
• The DEBUG port is a standard Micro-A type USB port for serial debug communications to the controller.
NNOOTTEE:: Login requires administrator level platform credentials.
• The SHT/DWN pushbutton initiates a “controlled shutdown” of the controller, ensuring that all stationdata is preserved.
Step 1 Ensure that the controller’s power is off.
Step 2 Press and hold down the backup and restore button as you power up the controller, and continueholding down the button throughout the boot-up process until the button press is detected andthe following confirmation banner displays:
*******************************************************Backup/Restore button press detected. Release buttonnow to proceed.
*******************************************************
12 February 19, 2019
JACE-8000 Backup and Restore Guide Chapter 1 USB backup and restore
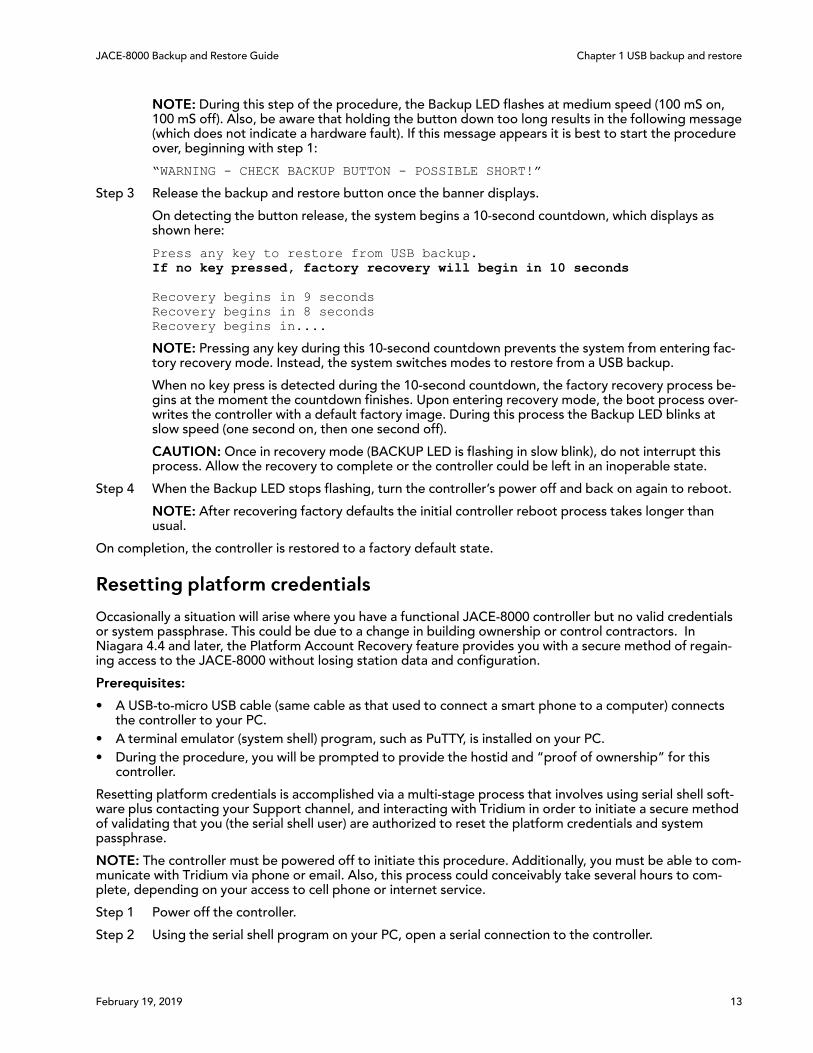
NNOOTTEE:: During this step of the procedure, the Backup LED flashes at medium speed (100 mS on,100 mS off). Also, be aware that holding the button down too long results in the following message(which does not indicate a hardware fault). If this message appears it is best to start the procedureover, beginning with step 1:
“WARNING - CHECK BACKUP BUTTON - POSSIBLE SHORT!”
Step 3 Release the backup and restore button once the banner displays.
On detecting the button release, the system begins a 10-second countdown, which displays asshown here:
Press any key to restore from USB backup.If no key pressed, factory recovery will begin in 10 seconds
Recovery begins in 9 secondsRecovery begins in 8 secondsRecovery begins in....
NNOOTTEE:: Pressing any key during this 10-second countdown prevents the system from entering fac-tory recovery mode. Instead, the system switches modes to restore from a USB backup.
When no key press is detected during the 10-second countdown, the factory recovery process be-gins at the moment the countdown finishes. Upon entering recovery mode, the boot process over-writes the controller with a default factory image. During this process the Backup LED blinks atslow speed (one second on, then one second off).
CCAAUUTTIIOONN:: Once in recovery mode (BACKUP LED is flashing in slow blink), do not interrupt thisprocess. Allow the recovery to complete or the controller could be left in an inoperable state.
Step 4 When the Backup LED stops flashing, turn the controller’s power off and back on again to reboot.
NNOOTTEE:: After recovering factory defaults the initial controller reboot process takes longer thanusual.
On completion, the controller is restored to a factory default state.
RReesseettttiinngg ppllaattffoorrmm ccrreeddeennttiiaallss
Occasionally a situation will arise where you have a functional JACE-8000 controller but no valid credentialsor system passphrase. This could be due to a change in building ownership or control contractors. InNiagara 4.4 and later, the Platform Account Recovery feature provides you with a secure method of regain-ing access to the JACE-8000 without losing station data and configuration.
PPrreerreeqquuiissiitteess::
• A USB-to-micro USB cable (same cable as that used to connect a smart phone to a computer) connectsthe controller to your PC.
• A terminal emulator (system shell) program, such as PuTTY, is installed on your PC.• During the procedure, you will be prompted to provide the hostid and “proof of ownership” for this
controller.
Resetting platform credentials is accomplished via a multi-stage process that involves using serial shell soft-ware plus contacting your Support channel, and interacting with Tridium in order to initiate a secure methodof validating that you (the serial shell user) are authorized to reset the platform credentials and systempassphrase.
NNOOTTEE:: The controller must be powered off to initiate this procedure. Additionally, you must be able to com-municate with Tridium via phone or email. Also, this process could conceivably take several hours to com-plete, depending on your access to cell phone or internet service.
Step 1 Power off the controller.
Step 2 Using the serial shell program on your PC, open a serial connection to the controller.
February 19, 2019 13
Chapter 1 USB backup and restore JACE-8000 Backup and Restore Guide
Step 3 Power up the controller and during the boot sequence, press EESSCC to enter the recovery modewhich presents alternate boot options.
Step 4 While viewing the AAlltteerrnnaattee BBoooott OOppttiioonnss menu in the serial shell window, enter 88 to select theoption to “Reset Platform Credentials”, and when prompted to confirm that you intend to resetplatform credentials and system passphrase, enter YY to continue.
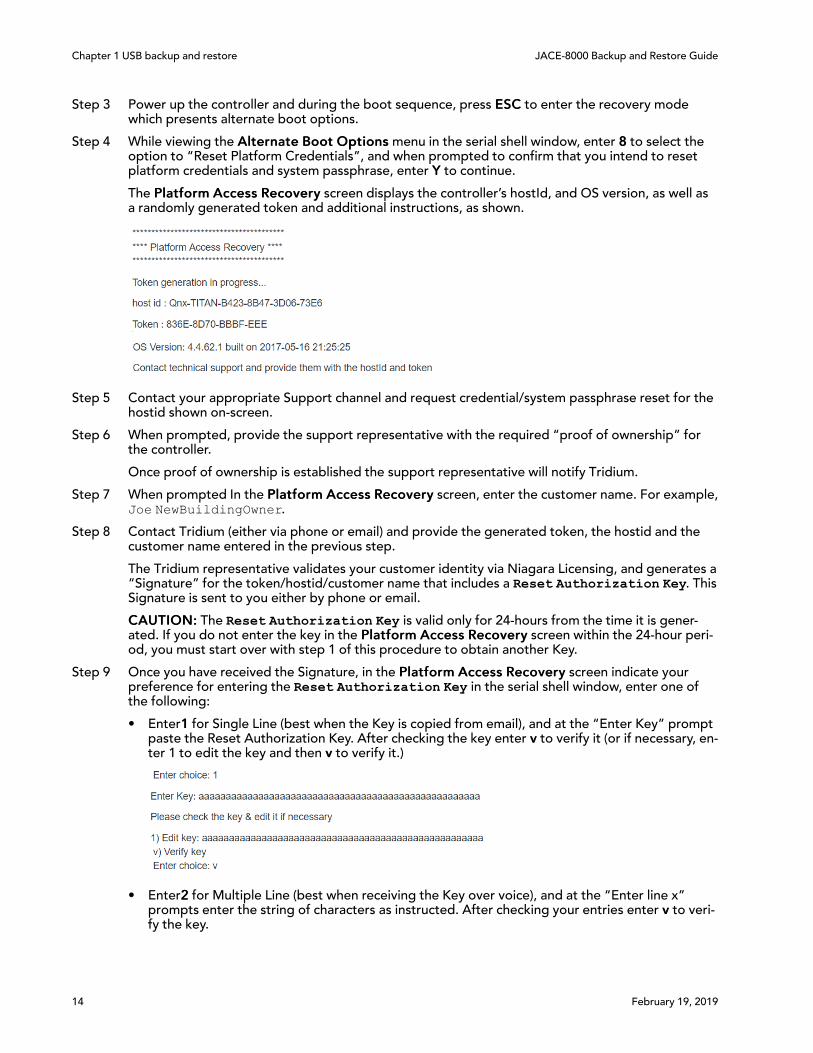
The PPllaattffoorrmm AAcccceessss RReeccoovveerryy screen displays the controller’s hostId, and OS version, as well asa randomly generated token and additional instructions, as shown.
Step 5 Contact your appropriate Support channel and request credential/system passphrase reset for thehostid shown on-screen.
Step 6 When prompted, provide the support representative with the required “proof of ownership” forthe controller.
Once proof of ownership is established the support representative will notify Tridium.
Step 7 When prompted In the PPllaattffoorrmm AAcccceessss RReeccoovveerryy screen, enter the customer name. For example,Joe NewBuildingOwner.
Step 8 Contact Tridium (either via phone or email) and provide the generated token, the hostid and thecustomer name entered in the previous step.
The Tridium representative validates your customer identity via Niagara Licensing, and generates a“Signature” for the token/hostid/customer name that includes a Reset Authorization Key. ThisSignature is sent to you either by phone or email.
CCAAUUTTIIOONN:: The Reset Authorization Key is valid only for 24-hours from the time it is gener-ated. If you do not enter the key in the PPllaattffoorrmm AAcccceessss RReeccoovveerryy screen within the 24-hour peri-od, you must start over with step 1 of this procedure to obtain another Key.
Step 9 Once you have received the Signature, in the PPllaattffoorrmm AAcccceessss RReeccoovveerryy screen indicate yourpreference for entering the Reset Authorization Key in the serial shell window, enter one ofthe following:
• Enter11 for Single Line (best when the Key is copied from email), and at the “Enter Key” promptpaste the Reset Authorization Key. After checking the key enter vv to verify it (or if necessary, en-ter 1 to edit the key and then vv to verify it.)
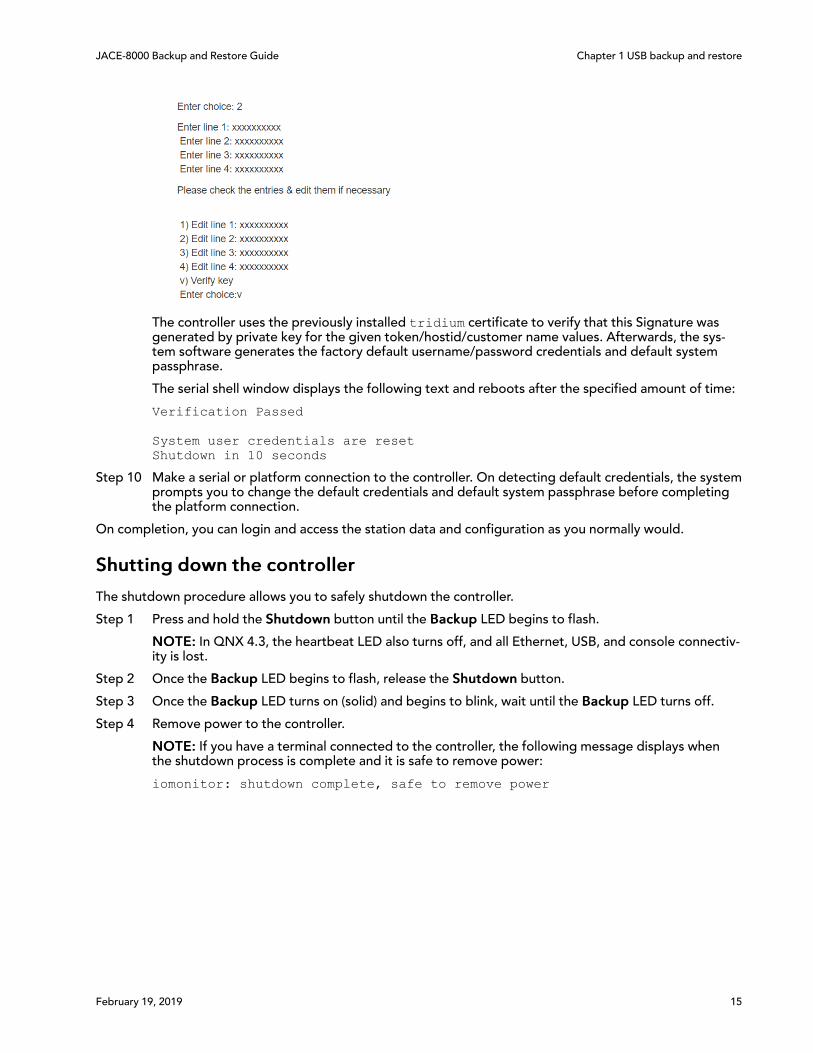
• Enter22 for Multiple Line (best when receiving the Key over voice), and at the “Enter line x”prompts enter the string of characters as instructed. After checking your entries enter vv to veri-fy the key.
14 February 19, 2019
JACE-8000 Backup and Restore Guide Chapter 1 USB backup and restore
The controller uses the previously installed tridium certificate to verify that this Signature wasgenerated by private key for the given token/hostid/customer name values. Afterwards, the sys-tem software generates the factory default username/password credentials and default systempassphrase.
The serial shell window displays the following text and reboots after the specified amount of time:
Verification Passed
System user credentials are resetShutdown in 10 seconds
Step 10 Make a serial or platform connection to the controller. On detecting default credentials, the systemprompts you to change the default credentials and default system passphrase before completingthe platform connection.
On completion, you can login and access the station data and configuration as you normally would.
SShhuuttttiinngg ddoowwnn tthhee ccoonnttrroolllleerr
The shutdown procedure allows you to safely shutdown the controller.
Step 1 Press and hold the SShhuuttddoowwnn button until the BBaacckkuupp LED begins to flash.
NNOOTTEE:: In QNX 4.3, the heartbeat LED also turns off, and all Ethernet, USB, and console connectiv-ity is lost.
Step 2 Once the BBaacckkuupp LED begins to flash, release the SShhuuttddoowwnn button.
Step 3 Once the BBaacckkuupp LED turns on (solid) and begins to blink, wait until the BBaacckkuupp LED turns off.
Step 4 Remove power to the controller.
NNOOTTEE:: If you have a terminal connected to the controller, the following message displays whenthe shutdown process is complete and it is safe to remove power:
iomonitor: shutdown complete, safe to remove power
February 19, 2019 15

Chapter 1 USB backup and restore JACE-8000 Backup and Restore Guide
16 February 19, 2019
February 19, 2019 17
CChhaapptteerr 22 RReeffeerreennccee iinnffoorrmmaattiioonn
Topics covered in this chapter♦ Platform and station backup options♦ Restore options♦ Shutdown operations
The following sections provide additional backup, restore, and shutdown reference information.
PPllaattffoorrmm aanndd ssttaattiioonn bbaacckkuupp ooppttiioonnss
Several options are available for backing up platform and station data.
NNOOTTEE:: USB backup supports only FAT32 and FAT32X file systems. NTFS is not supported.
CCAAUUTTIIOONN:: Only flash drives (USB sticks ≤128GB) are recommended for backup/restore operations. USBbus powered external hard drives often have higher power requirements and so may not function as ex-pected, possibly resulting in permanent damage to the drive or to the JACE-8000. Plugging in an externalhard drive may cause the controller to become unresponsive, requiring a reboot.
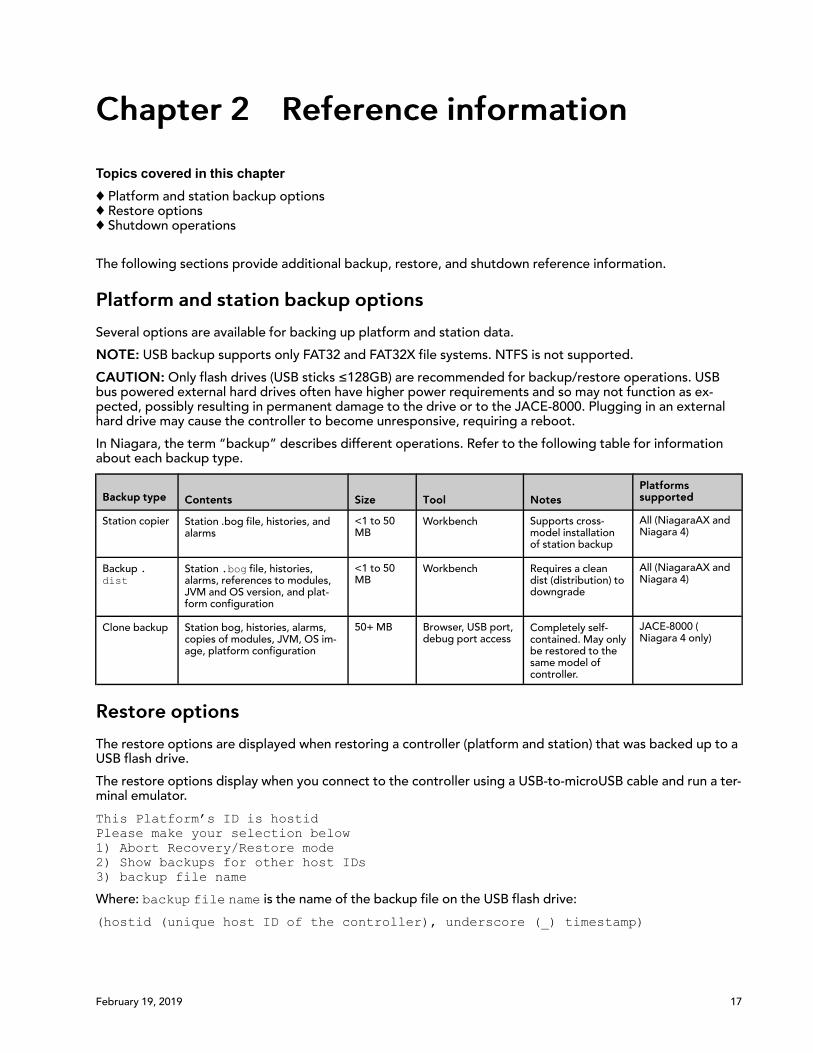
In Niagara, the term “backup” describes different operations. Refer to the following table for informationabout each backup type.
BBaacckkuupp ttyyppee CCoonntteennttss SSiizzee TTooooll NNootteessPPllaattffoorrmmssssuuppppoorrtteedd
Station copier Station .bog file, histories, andalarms
<1 to 50MB
Workbench Supports cross-model installationof station backup
All (NiagaraAX andNiagara 4)
Backup .dist
Station .bog file, histories,alarms, references to modules,JVM and OS version, and plat-form configuration
<1 to 50MB
Workbench Requires a cleandist (distribution) todowngrade
All (NiagaraAX andNiagara 4)
Clone backup Station bog, histories, alarms,copies of modules, JVM, OS im-age, platform configuration
50+ MB Browser, USB port,debug port access
Completely self-contained. May onlybe restored to thesame model ofcontroller.
JACE-8000 (Niagara 4 only)
RReessttoorree ooppttiioonnss
The restore options are displayed when restoring a controller (platform and station) that was backed up to aUSB flash drive.
The restore options display when you connect to the controller using a USB-to-microUSB cable and run a ter-minal emulator.
This Platform’s ID is hostidPlease make your selection below1) Abort Recovery/Restore mode2) Show backups for other host IDs3) backup file name
Where: backup file name is the name of the backup file on the USB flash drive:
(hostid (unique host ID of the controller), underscore (_) timestamp)
Chapter 2 Reference information JACE-8000 Backup and Restore Guide
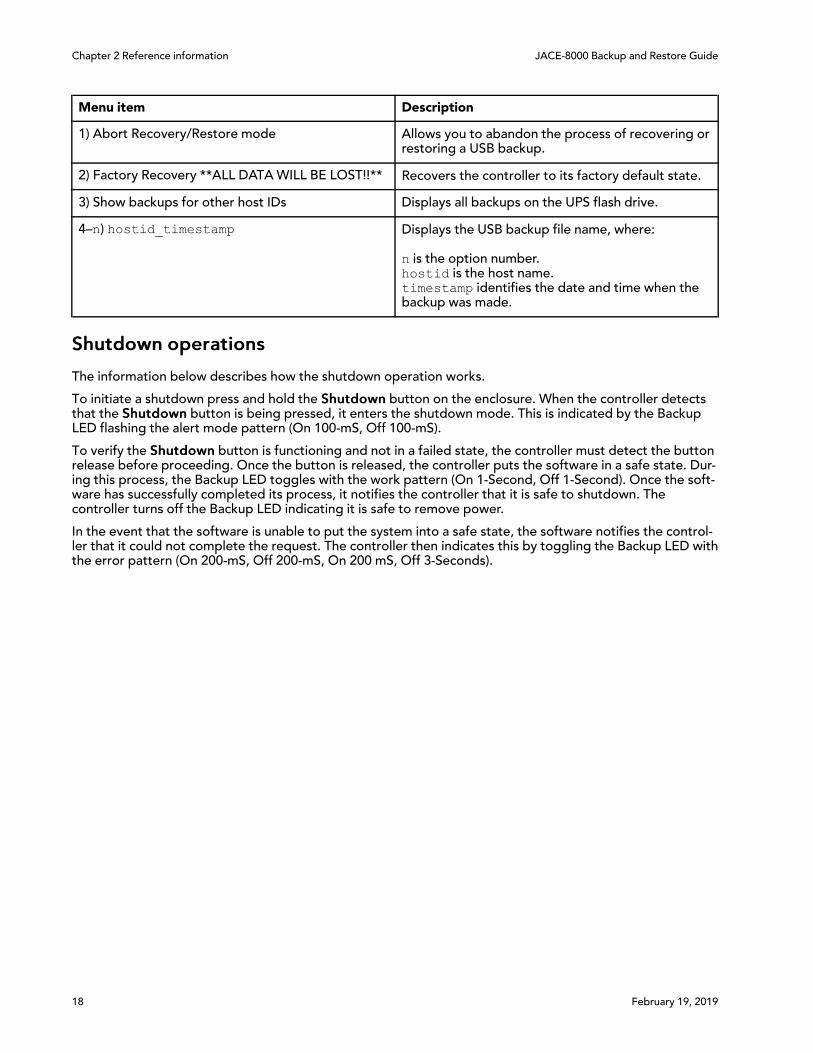
Menu item Description
1) Abort Recovery/Restore mode Allows you to abandon the process of recovering orrestoring a USB backup.
2) Factory Recovery **ALL DATAWILL BE LOST!!** Recovers the controller to its factory default state.
3) Show backups for other host IDs Displays all backups on the UPS flash drive.
4–n) hostid_timestamp Displays the USB backup file name, where:
n is the option number.hostid is the host name.timestamp identifies the date and time when thebackup was made.
SShhuuttddoowwnn ooppeerraattiioonnss
The information below describes how the shutdown operation works.
To initiate a shutdown press and hold the SShhuuttddoowwnn button on the enclosure. When the controller detectsthat the SShhuuttddoowwnn button is being pressed, it enters the shutdown mode. This is indicated by the BackupLED flashing the alert mode pattern (On 100-mS, Off 100-mS).
To verify the SShhuuttddoowwnn button is functioning and not in a failed state, the controller must detect the buttonrelease before proceeding. Once the button is released, the controller puts the software in a safe state. Dur-ing this process, the Backup LED toggles with the work pattern (On 1-Second, Off 1-Second). Once the soft-ware has successfully completed its process, it notifies the controller that it is safe to shutdown. Thecontroller turns off the Backup LED indicating it is safe to remove power.
In the event that the software is unable to put the system into a safe state, the software notifies the control-ler that it could not complete the request. The controller then indicates this by toggling the Backup LED withthe error pattern (On 200-mS, Off 200-mS, On 200 mS, Off 3-Seconds).
18 February 19, 2019