Embed Size (px)
Citation preview

MANUALE UTENTE - USER GUIDE - MANUEL UTILISATEUR
Centrali integrate - Integrated Panels - Centrale IntegréeKSI1000016.300 - KSI1100016.300 - KSI1000048.300 - KSI1100048.300 - KSI1100128.300
www.kseniasecurity.com
lares2
INDICE
INDEX
TABLE DES MATIERÈS
Introduzione ....................................................................................................................6Operazioni da tastiera ...................................................................................................7Operazioni a riposo ........................................................................................................7Visualizzazione informazioni a riposo ...........................................................................8Ingresso PIN utente/Scenari ........................................................................................10Menù Principale ...........................................................................................................11Menù Avanzato............................................................................................................12Operazioni con la chiave ...........................................................................................13Menù vocale da remoto.............................................................................................14Operazioni da remoto via SMS ...................................................................................15Controllo remoto via Web ..........................................................................................16
Introduction .................................................................................................................. 17Keyboard operations ................................................................................................... 18Actions in stand-by mode ........................................................................................... 18Display information in stand-by mode ...................................................................... 19Login by user pin .......................................................................................................... 21Main menu .................................................................................................................... 22Advanced menu ......................................................................................................... 23Operations with key ..................................................................................................... 24Remote vocal menu .................................................................................................... 25Remote operations via sms ......................................................................................... 26Remote control via web browser ............................................................................... 27
Introduction .................................................................................................................. 28Operations au clavier .................................................................................................. 29Actions sur clavier en attente ..................................................................................... 29Affichage de l’information en mode d’attente (stand-by) .................................... 30Login via code ............................................................................................................. 32Menu principal ............................................................................................................. 33Options avancées ....................................................................................................... 34Operations avec badge /smartphone ..................................................................... 35Menu vocal a distance ............................................................................................... 36Operations a distance via sms ................................................................................... 37Controle a distance via web browser ....................................................................... 38
3lares
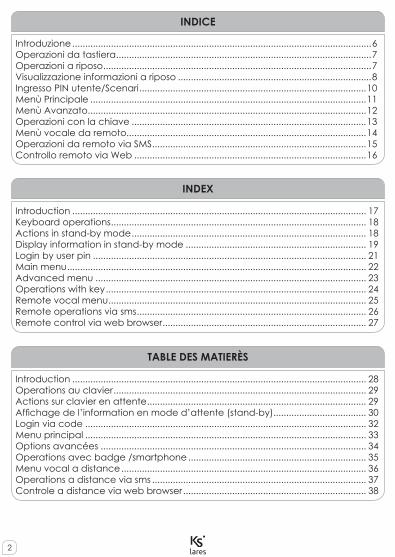
COME EFFETTUARE LE OPERAZIONIHOW TO PERFORM THE OPERATIONS
COMMENT EFFECTUER LES OPÉRATIONS
INSERIRE I CODICI - INSERT CODES - INSÉRER LES CODES
SCORRERE I MENÙ - SCROLL THE MENU - FAIRE DÉFILER LE MENU
ESC
Enter PINxxxxxx
=
ProgrammingZones
ESC
=
lares4
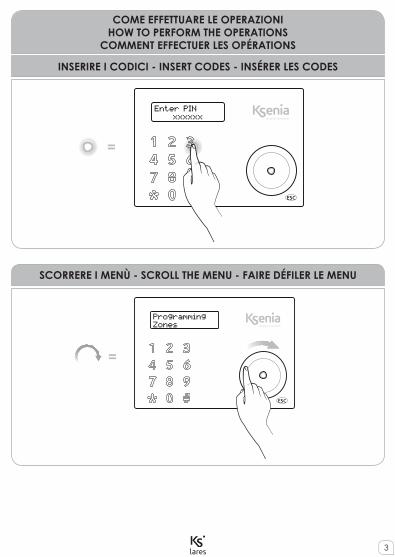
CONFERMARE LE OPERAZIONI - TASTO “ENTER”CONFIRM THE OPERATION - “ENTER” KEY
CONFIRMER LES OPÉRATIONS - TOUCHE “ENTRER”
USCIRE DALLE OPERAZIONI - TASTO “ESC”EXIT FROM THE OPERATIONS - “ESC” KEY
SORTIE DE PROGRAMMATION - TOUCHE “ESC”
ESC
=
ProgrammingPartition
ENTER
ESC
=ESC
SYSTEM OK12:30 01/01/12

5lares
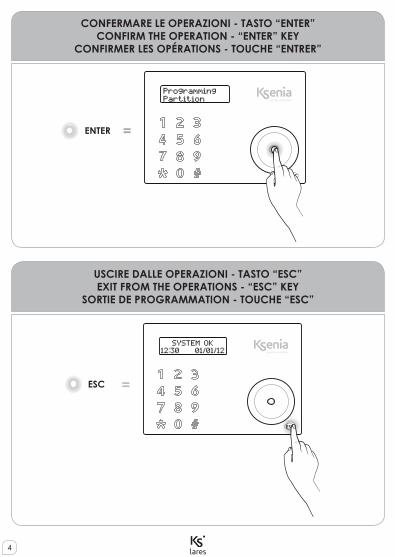
AVVICINARE LA CHIAVE ALLA TASTIERAAPPROACH THE TAG TO THE KEYPADAPPROCHER LE BADGE DU CLAVIER
AVVICINARE LA CHIAVE AL LETTORE voloAPPROACH THE KEY TO THE volo OUTDOOR READER
APPROCHER LE BADGE DU LECTEUR DE PROXIMITÉ volo
ESC
SYSTEM OK12:30 01/01/12
lares
ITALIA
NO
6
INTRODUZIONE
lares è una centrale antintrusione e domotica al tempo stesso, che può essere controllata da tastiera LCD ergo, da remoto via telefono oppure via WEB tramite il web-server integrato.In questo manuale sono presentate le operazioni che possono essere eseguite dall’utente finale.
Specifiche tecniche, aspetto, funzionalità e altre caratteristiche del prodotto possono cambiare senza preavviso
Informazioni sullo smaltimento per gli utenti (Direttive RAEE - WEEE)
Attenzione: Per smaltire il presente dispositivo, non utilizzare il normale bidone della spazzatura!Le apparecchiature elettriche ed elettroniche usate devono essere gestite a parte e in conformità alla legislazione che richiede il trattamento, il recupero e il riciclaggio adeguato dei suddetti prodotti.In seguito alle disposizioni attuate dagli Stati membri, i privati residenti nella UE possono conferire gratuitamente le apparecchiature elettriche ed elettroniche usate a centri di raccolta designati* o al rivenditore locale che può ritirare gratuitamente se l’utente acquista un altro prodotto nuovo di tipologia simile.Se le apparecchiature elettriche o elettroniche usate hanno batterie o accumulatori, l’utente dovrà smaltirli a parte preventivamente in conformità alle disposizioni locali.Lo smaltimento corretto del presente prodotto contribuirà a garantire che i rifiuti siano sottoposti al trattamento, al recupero e al riciclaggio necessari prevenendone il potenziale impatto negativo sull’ambiente e sulla salute umana, che potrebbe derivare da un’inadeguata gestione dei rifiuti. Sono previste sanzioni molto elevate nel caso di irregolarità nel rispetto del Decreto Leg.vo 151/05.
* Per maggiori informazioni si prega di contattare l’autorità locale competente.
L’installazione di queste apparecchiature deve essere effettuata a regola d’arte, in accordo con le norme vigenti. Queste apparecchiature sono state sviluppate secondo criteri di qualità, affidabilità e prestazioni adottati dalla Ksenia Security.Si raccomanda di verificare il corretto funzionamento del sistema almeno una volta al mese. Le procedure per il collaudo dipendono dalla configurazione del sistema.Rivolgersi all’installatore del sistema per conoscere le procedure da seguire.Ksenia Security Srl declina ogni responsabilità nel caso in cui le apparecchiature vengano manomesse da personale non autorizzato. Il contenuto di questo manuale può essere soggetto a modifiche, senza preavviso, e non rappresenta un impegno da parte della KSENIA SECURITY.
7lares
ITALI
AN
O
OPERAZIONI DA TASTIERA
OPERAZIONI A RIPOSO
Per l’uso delle funzionalità dei tasti e dello scroll circolare della tastiera CapSense ergo, fare riferimento al manuale relativo1.
1 Se la tastiera non è configurata nel sistema, sul display della stessa non sarà riportata alcuna informazione ed il pin utente sarà disabilitato. In questo stato è permesso l’accesso con il solo pin installatore.
Dallo stato di riposo possono essere effettuate sei operazioni:
1. Visualizzazione dettaglio informazioni (premendo il tasto ENTER)2. Visualizzazione dello stato delle partizioni (premendo il tasto #)3. Visualizzazione dello stato delle zone (premendo il tasto )4. Attivazione macro (tenendo premuto per 3 secondi il tasto numerico corrispondente)5. Inserimento PIN (default 147258)6. Blocco tastiera per pulizia: pressione per 3 secondi del tasto ESC
Nello stato di riposo, premendo il tasto ENTER, possono essere visualizzate le seguenti informazioni:
- Nel caso siano presenti delle condizioni di allarme, è possibile visualizzare le zone in allarme (se è abilitata la visualizzazione degli avvisi senza PIN)- Dettaglio partizioni inserite (se è abilitata la visualizzazione dello Stato di inserimento dell’impianto)- Dettaglio zone aperte (se è abilitata la visualizzazione delle Zone aperte in tempo reale)- Informazioni installatore
Per navigare tra queste informazioni usare lo scroll circolare.Per attivare uno scenario senza l’inserimento del PIN (funzione macro) tenere premuto il tasto numerico corrispondente per 3 secondi. Tale funzione deve essere abilitata dall’installatore.
lares
ITALIA
NO
8
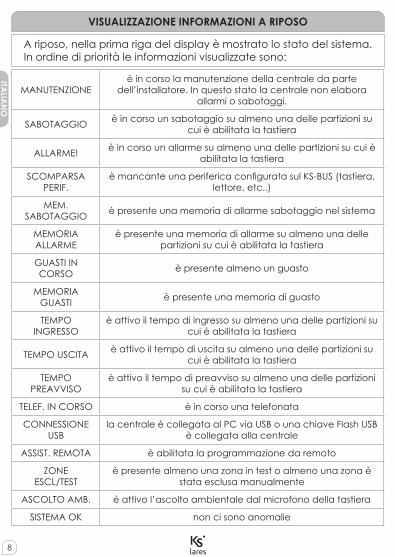
VISUALIZZAZIONE INFORMAZIONI A RIPOSO
A riposo, nella prima riga del display è mostrato lo stato del sistema. In ordine di priorità le informazioni visualizzate sono:
MANUTENZIONEè in corso la manutenzione della centrale da parte
dell’installatore. In questo stato la centrale non elabora allarmi o sabotaggi.
SABOTAGGIO è in corso un sabotaggio su almeno una delle partizioni su cui è abilitata la tastiera
ALLARME! è in corso un allarme su almeno una delle partizioni su cui è abilitata la tastiera
SCOMPARSA PERIF.
è mancante una periferica configurata sul KS-BUS (tastiera, lettore, etc..)
MEM.SABOTAGGIO è presente una memoria di allarme sabotaggio nel sistema
MEMORIA ALLARME
è presente una memoria di allarme su almeno una delle partizioni su cui è abilitata la tastiera
GUASTI IN CORSO è presente almeno un guasto
MEMORIAGUASTI è presente una memoria di guasto
TEMPO INGRESSO
è attivo il tempo di ingresso su almeno una delle partizioni su cui è abilitata la tastiera
TEMPO USCITA è attivo il tempo di uscita su almeno una delle partizioni su cui è abilitata la tastiera
TEMPO PREAVVISO
è attivo il tempo di preavviso su almeno una delle partizioni su cui è abilitata la tastiera
TELEF. IN CORSO è in corso una telefonata
CONNESSIONE USB
la centrale è collegata al PC via USB o una chiave Flash USB è collegata alla centrale
ASSIST. REMOTA è abilitata la programmazione da remoto
ZONEESCL/TEST
è presente almeno una zona in test o almeno una zona è stata esclusa manualmente
ASCOLTO AMB. è attivo l’ascolto ambientale dal microfono della tastiera
SISTEMA OK non ci sono anomalie
9lares
ITALI
AN
O
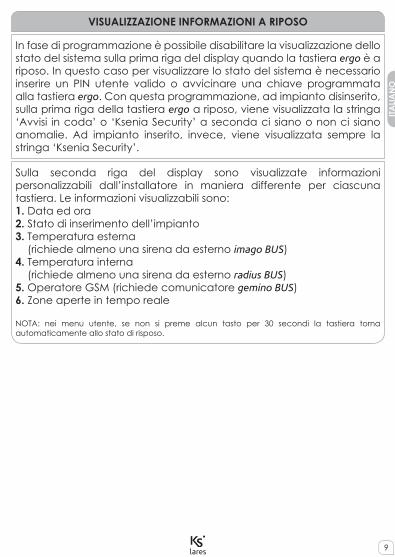
In fase di programmazione è possibile disabilitare la visualizzazione dello stato del sistema sulla prima riga del display quando la tastiera ergo è a riposo. In questo caso per visualizzare lo stato del sistema è necessario inserire un PIN utente valido o avvicinare una chiave programmata alla tastiera ergo. Con questa programmazione, ad impianto disinserito, sulla prima riga della tastiera ergo a riposo, viene visualizzata la stringa ‘Avvisi in coda’ o ‘Ksenia Security’ a seconda ci siano o non ci siano anomalie. Ad impianto inserito, invece, viene visualizzata sempre la stringa ‘Ksenia Security’.
Sulla seconda riga del display sono visualizzate informazioni personalizzabili dall’installatore in maniera differente per ciascuna tastiera. Le informazioni visualizzabili sono:1. Data ed ora2. Stato di inserimento dell’impianto3. Temperatura esterna (richiede almeno una sirena da esterno imago BUS)4. Temperatura interna (richiede almeno una sirena da esterno radius BUS)5. Operatore GSM (richiede comunicatore gemino BUS)6. Zone aperte in tempo reale
NOTA: nei menu utente, se non si preme alcun tasto per 30 secondi la tastiera torna automaticamente allo stato di risposo.
VISUALIZZAZIONE INFORMAZIONI A RIPOSO
lares
ITALIA
NO
10
INGRESSO CON IL PIN UTENTE / SCENARI
Subito dopo aver inserito il PIN utente, sempre composto da 6 cifre, la tastiera ci propone una serie di scenari (a partire dal più usato, in funzione delle abilitazioni in fase di programmazione) e l’ingresso almenu principale.Supponiamo ad esempio che sulla tastiera siano abilitati due scenari, assegnati rispettivamente al tasto 0 (‘Disinserimento’ ed al tasto 1 (‘Inserimento’); la tastiera ci propone lo scenario da applicare o il più usato; se non premiamo alcun tasto dopo 3 secondi è automaticamente eseguita l’azione riportata sul display e la tastiera torna allo stato di risposo2.
TASTI VELOCILa pressione di un tasto numerico attiva lo scenario corrispondente, la pressione del tasto # (cancelletto) ci permette l’ingresso nel menu principale.ESECUZIONE SEQUENZIALE DI PIÙ SCENARIPer eseguire più scenari in modo sequenziale è sufficiente la pressione del tasto enter dopo l’esecuzione del primo scenario senza dover inserire nuovamente il codice utente.
2 Se lo scenario proposto non deve essere applicato è sufficiente spostarsi con lo scroll sull’azione desiderata, e confermarla con il tasto ENTER.
Il menu di navigazione principale è costituito dalle seguenti voci.Scorrere utilizzando lo scroll circolare.
11lares
ITALI
AN
O
MENÙ PRINCIPALE
RESET ALLARMIPremendo il tasto Enter si fermano eventuali allarmi in corso e si cancellano le relative memorie.STATO PARTIZIONIPremendo il tasto Enter, è possibile vedere lo stato di inserimento delle partizioni.STATO ZONEPremendo il tasto Enter, è possibile vedere lo stato in tempo reale delle zone. Inoltre è possibile effettuare le operazioni di esclusione / inclusione delle zone.MODIFICA PINPremendo il tasto Enter, è possibile modificare il PIN di accesso.OPZIONI ERGOPremendo il tasto Enter, è possibile modificare i parametri della tastiera su cui si sta operando, ovvero luminosità del display, il volume dell’altoparlante, la segnalazione acustica quando viene violata una zona ‘campanello’ ed infine la sensibilità dei sensori capacitivi della tastiera.MENU AVANZATOPremendo il tasto Enter si accede alle funzioni avanzate. Vedere il prossimo paragrafo.RITARDO INSERIMENTOQuesta funzione consente di posticipare l’inserimento automatico del programmatore orario. Premendo il tasto Enter è poi possibile inserire il ritardo espresso in minuti.STATO GUASTIPremendo il tasto Enter è possibile entrare nella visualizzazione dei guasti, e navigare tra essi attraverso lo scroll circolare. Eventuali memorie guasto presenti nel sistema verranno cancellate visualizzando lo stato guasti.
lares
ITALIA
NO
12
STATO GEMINOPremendo il tasto Enter è possibile visualizzare l’operatore GSM, la potenza del segnale, il credito residuo e la scadenza della SIM. Questa voce è disponibile solamente quando è presente un gemino BUS configurato nel sistema.RESET TELEFONATEPremendo il tasto Enter è possibile interrompere eventuali azioni dell’avvisatore (telefonate, SMS ed e-mail).
MENÙ PRINCIPALE
MENÙ AVANZATO
Il menu di navigazione avanzato è costituito dalle seguenti voci, sulle quali è possibile muoversi utilizzando lo scroll circolare.Questo menu è disponibile solo se il pin inserito è programmato con l’attributo ‘codice principale’ abilitato.
REGISTRO EVENTIVisualizzazione del registro eventi. Premendo il tasto Enter è possibile entrare nella visualizzazione del registro eventi, e navigare tra gli eventi partendo dall’ultimo registrato. Per avere ulteriori dettagli sull’evento è sufficiente premere di nuovo il tasto Enter.PROGRAMM. ORARIOQuesta funzione consente di abilitare/disabilitare il programmatore orario.PERMESSO INSTALL.In questo menu è possibile abilitare la manutenzione del sistema all’installatore. Se questa opzione è impostata su OFF l’installatore non potrà effettuare alcuna operazione sull’impianto.ASSIST. REMOTAIn questa sezione è possibile abilitare la programmazione da remoto dell’impianto.EVENTO DI TESTPremendo il tasto Enter è possibile generare l’evento ‘Test periodico’.
RUBRICAIn questo menu è possibile programmare la rubrica della centrale.
13lares
ITALI
AN
O
IMPOSTA DATA ED ORAPremendo il tasto Enter si può modificare la data e l’ora della centrale; è sufficiente agire sullo scroll circolare per cambiare il valore. Per passare da un campo all’altro è sufficiente premere il tasto Enter.MENU VOCALEIn questo menu si abilita il menù vocale, che permette la gestione del sistema da remoto via telefono (richiede la scheda gemino BUS per comunicazione via GSM o pontis per comunicazione via PSTN). Fare riferimento al successivo paragrafo per le funzioni disponibili.GESTIONE CODICIIn questo menu è possibile modificare l’abilitazione ed il PIN di codici utente che hanno la maschera delle partizioni in comune con il codice principale in uso.GESTIONE CHIAVIIn questo menù è possibile modificare l’abilitazione delle chiavi che hanno la maschera delle partizioni in comune con il codice principale in uso.TELECOMANDIIn questo menù è possibile modificare l’abilitazione dei telecomandi che hanno la maschera delle partizioni in comune con il codice principale in uso.CAMBIO LEXANIn questo menu è possibile effettuare la sostituzione del lexan colorato della tastiera senza che sia generato il sabotaggio per l’apertura. Seguire le istruzioni riportate sul manuale della tastiera per l’apertura e la chiusura del coperchio.
MENÙ AVANZATO
OPERAZIONI CON LA CHIAVE
La chiave a trasponder o il vostro telefono NFC possono essere utilizzati in alternativa ai codici: è sufficiente avvicinare una chiave valida alla zona di lettura della tastiera (posta in alto a destra) per accedere al menu utente.

lares
ITALIA
NO
14
MENU VOCALE DA REMOTO
Nel caso in cui sia installato un comunicatore (gemino BUS oppure pontis) è possibile accedere ad un menu guidato vocale:1. Ascolto ambientale dal microfono della tastiera2. Informazioni stato zone ed inclusione / esclusione delle zone3. Informazioni stato partizioni4. Attivazione scenari (ovvero attivazione uscite e/o inserimento disinserimento impianto)
Il menu è completamente guidato da una voce, e ad ogni operazione sono indicati i tasti da premere. In generale con il tasto # del telefono si conferma l’operazione mentre con il tasto * si annulla.Per entrare nel menu vocale guidato da remoto ci sono tre possibilità:1. Chiamando il numero di telefono della SIM installata sul gemino BUS, se è abilitato il risponditore.2. Chiamando il numero di telefonia fissa al quale è collegata l’interfaccia pontis.3. Durante una telefonata ricevuta dalla centrale, premendo il tasto #.
15lares
ITALI
AN
O
OPERAZIONI DA REMOTO VIA SMS
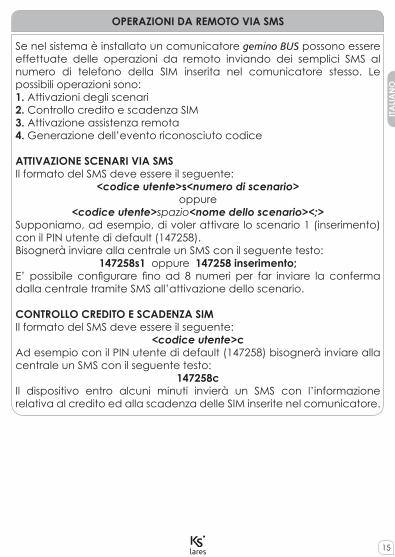
Se nel sistema è installato un comunicatore gemino BUS possono essere effettuate delle operazioni da remoto inviando dei semplici SMS al numero di telefono della SIM inserita nel comunicatore stesso. Le possibili operazioni sono:1. Attivazioni degli scenari2. Controllo credito e scadenza SIM3. Attivazione assistenza remota4. Generazione dell’evento riconosciuto codice
ATTIVAZIONE SCENARI VIA SMSIl formato del SMS deve essere il seguente:
<codice utente>s<numero di scenario>oppure
<codice utente>spazio<nome dello scenario><;>Supponiamo, ad esempio, di voler attivare lo scenario 1 (inserimento) con il PIN utente di default (147258).Bisognerà inviare alla centrale un SMS con il seguente testo:
147258s1 oppure 147258 inserimento;E’ possibile configurare fino ad 8 numeri per far inviare la conferma dalla centrale tramite SMS all’attivazione dello scenario.
CONTROLLO CREDITO E SCADENZA SIMIl formato del SMS deve essere il seguente:
<codice utente>cAd esempio con il PIN utente di default (147258) bisognerà inviare alla centrale un SMS con il seguente testo:
147258cIl dispositivo entro alcuni minuti invierà un SMS con l’informazione relativa al credito ed alla scadenza delle SIM inserite nel comunicatore.
lares
ITALIA
NO
16
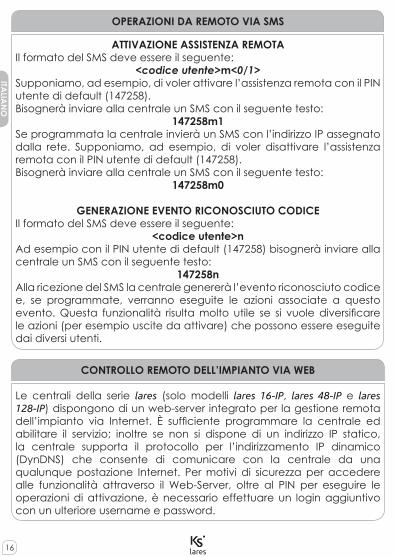
ATTIVAZIONE ASSISTENZA REMOTAIl formato del SMS deve essere il seguente:
<codice utente>m<0/1>Supponiamo, ad esempio, di voler attivare l’assistenza remota con il PIN utente di default (147258).Bisognerà inviare alla centrale un SMS con il seguente testo:
147258m1Se programmata la centrale invierà un SMS con l’indirizzo IP assegnato dalla rete. Supponiamo, ad esempio, di voler disattivare l’assistenza remota con il PIN utente di default (147258).Bisognerà inviare alla centrale un SMS con il seguente testo:
147258m0
GENERAZIONE EVENTO RICONOSCIUTO CODICEIl formato del SMS deve essere il seguente:
<codice utente>nAd esempio con il PIN utente di default (147258) bisognerà inviare alla centrale un SMS con il seguente testo:
147258nAlla ricezione del SMS la centrale genererà l’evento riconosciuto codice e, se programmate, verranno eseguite le azioni associate a questo evento. Questa funzionalità risulta molto utile se si vuole diversificare le azioni (per esempio uscite da attivare) che possono essere eseguite dai diversi utenti.
OPERAZIONI DA REMOTO VIA SMS
CONTROLLO REMOTO DELL’IMPIANTO VIA WEB
Le centrali della serie lares (solo modelli lares 16-IP, lares 48-IP e lares 128-IP) dispongono di un web-server integrato per la gestione remota dell’impianto via Internet. È sufficiente programmare la centrale ed abilitare il servizio; inoltre se non si dispone di un indirizzo IP statico, la centrale supporta il protocollo per l’indirizzamento IP dinamico (DynDNS) che consente di comunicare con la centrale da una qualunque postazione Internet. Per motivi di sicurezza per accedere alle funzionalità attraverso il Web-Server, oltre al PIN per eseguire le operazioni di attivazione, è necessario effettuare un login aggiuntivo con un ulteriore username e password.
lares
ENG
LISH
17
INTRODUCTION
lares is a burglar alarm & Home Automation system that can be controlled by means of an ergo LCD keyboard, as well as remotely by telephone, and even via the Internet through a built-in WEB server. This manual describes the operations that can be performed by the end user.
Technical specification, appearance, functionally and other product charateristics may change without notice.
Information for users: Disposal (RAEE - WEEE Directive)
Warning! Do not use an ordinary dustbin to dispose of this equipment.Used electrical and electronic equipment must be treated separately, in accordance with the relative legislation which requires the proper treatment, recovery and recycling of used electrical and electronic equipment.Following the implementation of directives in member states, private households within the EU may return their used electrical and electronic equipment to designated collection facilities free of charge*. Local retailers may also accept used products free of charge if a similar product is purchased from them.If used electrical or electronic equipment has batteries or accumulators, these must be disposed of separately according to local provisions.Correct disposal of this product guarantees it undergoes the necessary treatment, recovery and recycling. This prevents any potential negative effects on both the environment and public health which may arise through the inappropriate handling of waste.
* Please contact your local authority for further details.
Installation of these systems must be carried out strictly in accordance with the instructionsdescribed in this manual, and in compliance with the local laws and bylaws in force. These devices hare been designed and made with the highest standards of quality and performance adopted by Ksenia Security. Is recommended that the installed system should be completely tested at least once a month. Test procedures depends on the system configuration. Ask to the installer for the procedures to be followed. Ksenia Security srl shall not be responsible for damage arising from improper installation or maintenance by unauthorized personnel. The content of this guide can change without prior notice from KSENIA SECURITY.
lares
ENG
LISH
18
KEYBOARD OPERATIONS
ACTIONS IN STAND-BY MODE
Refer to the keyboard manual to use the ergo capsense keyboard and get familiar with the functions of its keys and circular scroll1.
1 If the keyboard is not configured in the system, the keyboard display does not show any information, and the user PIN is disabled. In this way, login is permitted only through the installer PIN.
Six operations can be performed while the system is in stand-by mode:
1. Detailed list of information (by pressing the Enter key)2. Partitions status (by pressing the # key) 3. Zones status (by pressing the key)4. Activation of a function (by holding down the corresponding numeric key for 3 seconds)5. Entering the PIN (default PIN is 147258)6. Keyboard lock for cleaning: hold the ESC key pressed for 3 seconds
In stand-by mode, the following informations can be displayed by pressing the ENTER key:
- If an alarm occurs, it is possible to see which zone is in alarm (if the notices “without PIN display” is enabled)- List of armed (if the system activation status display is enabled)- List of open zones (if open zones real time display is enabled)- Information about the installer
Use the circular scroll to browse through these lines.To activate a function (macro) without entering the PIN, keep the corresponding numeric key pressed for seconds. This function must be enabled by the installer.

lares
ENG
LISH
19
DISPLAY INFORMATION IN STAND-BY MODE
In stand-by mode the upper line of the display shows the system status. The informations are displayed in the following order of priority:
MAINTENANCE maintenance by the installator. In this case no intrusion alarm nor tamper alarm will go off.
TAMPER tamper condition on at least one of the partitions enabled for the keypad
ALARM! an alarm is active on at least one of the partitions enabled for the keypad
MISSING PERIPH. at least one KS-BUS peripheral is missing
TAMPER MEMORY
tamper memory on at least one of the partitions enabled for the keypad
ALARM MEMORY alarm memory on at least one of the partitions enabled for the keypad
SYSTEM FAULTS the system has at least one fault
FAULT MEMORY there is a fault in memory
ENTRY TIME entry time is active on at least one of the partitions enabled for the keypad
EXIT TIME exit time is active on at least one of the partitions enabled for the keypad
WARNING TIME warning time is active on the partitions enabled for the keypad
PHONE CALL ACTIVE a telephone call is in progress
USB CONNECTION
the panel is connected to the pc by USB port or a flash USB key is connected to the panel
REMOTE ASS. remote assistancee is enable on the panel
ZONE BYP/TEST at least one zone is in test or manually bypassed
REMOTE LISTENING the remote listening from the keypad microphone is active
SYSTEM OK there are no faults
lares
ENG
LISH
20
The lower line of the display shows pieces of information that can be tailored by the installer on each keyboard:1. Date and time2. System activation status (On or Off)3. Outdoor temperature (requires at least an imago BUS outdoor siren)4. Indoor temperature (requires at least a radius BUS indoor siren)5. GSM operator (requires a gemino BUS link)6. Real-time indication of open zones
NOTE: in the user menu, if no key is pressed within 30 seconds, the keyboard will automatically return to the stand-by mode.
During programming it is possible to disable the system status display on the first row when the keypad is in stand-by. In this case, to display the status of the system, you must enter a valid user PIN or approach a programmed key to the keypad. with this setting, when the system is disarmed, on the first row it displays the strings ‘Alerts queued’ or ‘Ksenia security’ depending of whether there are or there are not anomalies. When the system is armed it always displays the string ‘Ksenia Security’.
DISPLAY INFORMATION IN STAND-BY MODE

lares
ENG
LISH
21
LOGIN BY USER PIN / SCENARIOS
After the user digit user PIN, that is always 6 digit long, the keypad will show the enabled functions (starting from the most used one, depending on the enabled choices2) and access is granted to the first level of the menu.Let’s assume, for example, that two functions are enabled on the keyboard, assigned to key 0 (system off) and to key 1 (system on) respectively; the keyboard shows the function to be applied, or the most frequently used one; if you don’t press any key within 3 seconds, the function shown on the display is performed automatically and the keyboard returns to the stand-by mode3.
SHORTCUTSPress a numeric key to activate the corresponding function, or press the # key to go into the main menu.SEQUENTIAL EXECUTION OF MULTIPLE SCENARIOSTo execute multiple scenarios in sequential mode, simply press the enter key after the first scenario without having to re-enter user code.
3 If the proposed function is not to be applied, use the circular scroll to move to the desired action and confirm it using the Enter key
2 On basis step on Bus Peripherals / ergo x / Macro Functions
In the user menu you can browse through the following items using the circular scroll.
lares
ENG
LISH
22
MAIN MENU
RESET ALARMPress the Enter key to reset any active alarm and delete the alarm record.PARTITION STATUSPress the Enter key to display the activation status (on/off) of all partitions.ZONE STATUSPress the Enter key to display the real time activation status (on/off) of all zones.CHANGE PINPress the Enter key to change the access PIN.ERGO OPTIONSPress the Enter key to modify the settings of the keyboard you are operating on, namely display backlight, loudspeaker volume, the acoustic signal when a ‘Chime’ zone is violated. and touch sensitivity.ADVANCED OPTIONPress the Enter key to gain access to the advanced functions. Please, refer to the next paragraph.OVERTIME REQUESTPress the Enter key to do an overtime request and delay the arming of the system.FAULTS STATUSPress the Enter key to display the detected faults; you can browse through them using the circular scroll. Any failure in the system memory will be erased showing fault status.STOP CALLSPress the Enter key to stop any actions of the telephone dialer in consequence of an alarm (calls, SMS or e-mail).OVERTIME REQUESTPress the Enter key to do an overtime request and delay the arming of the system.FAULTS STATUSPress the Enter key to display the detected faults; you can browse through them using the circular scroll. Any failure in the system memory will be erased showing fault status.

lares
ENG
LISH
23
GEMINO STATUSPress the Enter key to display the GSM operator, signal strength, your remaining credit and the expiry of the SIM. This item is available only if there is a configured gemino BUS into the system.STOP CALLSPress the Enter key to stop any actions of the telephone dialer in consequence of an alarm (calls, SMS or e-mail).
MAIN MENU
ADVANCED MENU
The advanced browsing menu consists of the following items, which can be browsed using the circular scroll. This menu is available only if the entered PIN has been programmed with the ‘Main Code’ parameter enabled.
EVENT LOGGEREvent record display. Press Enter to display the record; you can browse through the events starting from the last recorded one. For additional details of the event, press the Enter key again.SCHEDULERIn this menu it is possible to enable/disable the autoarming featureENABLE MAINT.In this menu you can enable the installer to log in for system maintenance. If this option is set to OFF, the installer will have no access to the system for any operation whatsoever.REMOTE ASS.In this menu it is possible to enable/disable the remote assistanceTEST EVENTPress Enter to generate the ‘Periodic Test’ eventPHONE BOOKIn this menu it is possible to program the phone numbers to call.DATE & TIMEAfter pressing the Enter key on this item, you will be able to change the system’s date and time simply by operating the circular scroll. To skip from one field to the other, do not to press any key for 3 seconds.
lares
ENG
LISH
24
VOICE MENUIn this menu you can enable the voice menu, which enables the system to be managed remotely by telephone. For the functions available in this section, see next paragraph. MANAGE CODESIn this menu you can modify the enable function and the user PIN codes enabled in the same partitions as login code.MANAGE KEYSIn this menu it is possible to modify the enable function of keys enabled in the same partition as login code.MANAGE REMOTE COMMANDSIn this menu it is possible to modify the enable function of remote com-mands enabled in the same partition as login code.REPLACE LEXANThis menu allows the colour lexan layer of the keyboard to be replaced without triggering a tampering alarm. To open and close the cover, you should follow the instructions provided in the keyboard manual.
ADVANCED MENU
OPERATIONS WITH KEY
The transponder key or your own NFC telephone can be used instead of the keyboard keys to activate the codes: to access the user menu, bring a valid key near the reading zone of the keyboard (located at top right).
lares
ENG
LISH
25
REMOTE VOCAL MENU
In the case that a gemino BUS or a pontis communication interface is configured in the system, it is possible to use a vocally guided remote menu which affords the following operations:
1. Listening to the monitored environment from the keyboard panel microphone2. Getting information on the status of the zones and inclusion / exclusion of them3. Getting information on the status of the partitions4. Activating functions (output and/or arming/disarming panel)
The menu is completely voice-guided and the keys to be pressed are shown for every operation. Generally, any operation is confirmed by pressing the # key and cancelled by pressing the * key on your telephone. There are three different ways to gain access to the vocally guided remote menu:
1. Calling the phone number of the SIM installed on the gemino BUS, if the responder is enabled2. Calling the PSTN number the pontis interface is connected to3. Press the # key during an incoming call received from the system
lares
ENG
LISH
26
REMOTE OPERATIONS VIA SMS
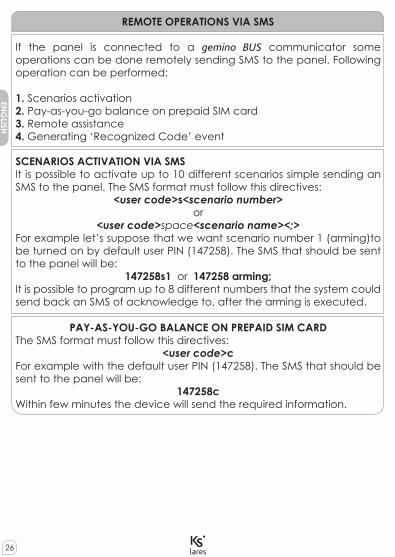
If the panel is connected to a gemino BUS communicator some operations can be done remotely sending SMS to the panel. Following operation can be performed:
1. Scenarios activation2. Pay-as-you-go balance on prepaid SIM card3. Remote assistance4. Generating ‘Recognized Code’ event
PAY-AS-YOU-GO BALANCE ON PREPAID SIM CARDThe SMS format must follow this directives:
<user code>cFor example with the default user PIN (147258). The SMS that should be sent to the panel will be:
147258cWithin few minutes the device will send the required information.
SCENARIOS ACTIVATION VIA SMSIt is possible to activate up to 10 different scenarios simple sending an SMS to the panel. The SMS format must follow this directives:
<user code>s<scenario number>or
<user code>space<scenario name><;>For example let’s suppose that we want scenario number 1 (arming)to be turned on by default user PIN (147258). The SMS that should be sent to the panel will be:
147258s1 or 147258 arming;It is possible to program up to 8 different numbers that the system could send back an SMS of acknowledge to, after the arming is executed.
lares
ENG
LISH
27
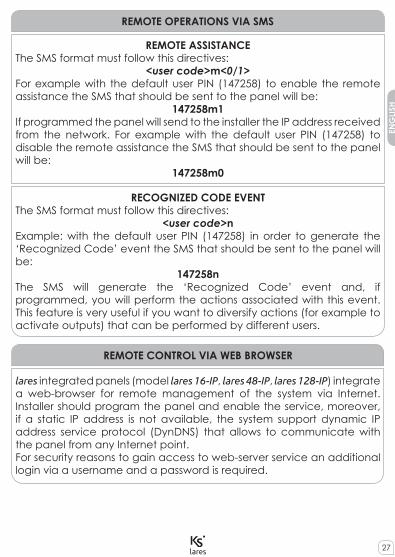
REMOTE ASSISTANCEThe SMS format must follow this directives:
<user code>m<0/1>For example with the default user PIN (147258) to enable the remote assistance the SMS that should be sent to the panel will be:
147258m1If programmed the panel will send to the installer the IP address received from the network. For example with the default user PIN (147258) to disable the remote assistance the SMS that should be sent to the panel will be:
147258m0
RECOGNIZED CODE EVENTThe SMS format must follow this directives:
<user code>nExample: with the default user PIN (147258) in order to generate the ‘Recognized Code’ event the SMS that should be sent to the panel will be:
147258nThe SMS will generate the ‘Recognized Code’ event and, if programmed, you will perform the actions associated with this event. This feature is very useful if you want to diversify actions (for example to activate outputs) that can be performed by different users.
REMOTE CONTROL VIA WEB BROWSER
lares integrated panels (model lares 16-IP, lares 48-IP, lares 128-IP) integrate a web-browser for remote management of the system via Internet. Installer should program the panel and enable the service, moreover, if a static IP address is not available, the system support dynamic IP address service protocol (DynDNS) that allows to communicate with the panel from any Internet point.For security reasons to gain access to web-server service an additional login via a username and a password is required.
REMOTE OPERATIONS VIA SMS

lares
FRAN
ÇA
IS
28
INTRODUCTION
lares est un système d’alarme et système de domotique qui peut être contrôlé sur place au moyen du clavier LCD ergo, ainsi qu’à distance par téléphone, et même via Internet par le biais d’un serveur WEB intégré. Ce manuel décrit les opérations qui peuvent être effectuées par l’utilisateur final.
Spécifications techniques, l’apparence, la fonctionnalité et les autres caractéristiques du produit peuvent changer sas préavis
Informations pour les utilisateurs: Evacuation (Directive RAEE - WEEE)
Attention! Ne pas utiliser une poubelle ordinaire pour se débarrasser de cet équipement.Les appareils électriques et électroniques usagés doivent être traités séparément, conformément à la législation relative qui nécessite le traitement, la valorisation et le recyclage des équipements électriques et électroniques usagés.Suite à la mise en œuvre des directives dans les Etats membres, les ménages résidant au sein de l’UE peuvent remettre gratuitement leurs équipements électriques et électroniques usagés aux centres de collecte désignés gratuitement *. Les détaillants locaux peuvent également accepter des produits usagés gratuitement, si un produit similaire est acheté chez eux. En cas d’utilisation d’équipements électriques ou électroniques qui comportent des piles ou des accumulateurs, ceux-ci doivent être jetés séparément, conformément aux dispositions locales.La mise au rebut de ce produit garantit qu’il subit le traitement nécessaire, la récupération et le recyclage. Cela permet d’éviter les éventuels effets négatifs sur l’environnement et la santé publique qui peuvent résulter de la manipulation inappropriée des déchets.
* Veuillez contacter les autorités locales pour plus de détails
L’installation de ces systèmes doit être effectuée de manière stricte, en respectant les descriptions du présent manuel et en accord avec les lois locales et règlements en vigueur. Ces dispositifs ont eté conçus et fabriqués avec les plus hauts standards de qualité et de performance adoptés par Ksenia Security. Il est recommandé de tester le système une fois installé et au moins une fois par mois. Les procédures de test dépendent de la configuration du système. Demandez à votre installateur de suivre les procédures. Ksenia Security srl ne sera responsable d’aucun dommage, de quelque ordre qu’il soit, provenant d’une installation ou d’un entretien réalisé de manière impropre ou par un personnel non autorisé ou formé à le faire. Le contenu du présent guide d’installation peut être modifié à tout moment et sans préavis par KSENIA SECURITY.
lares
FRA
NÇ
AIS
29
OPERATIONS AU CLAVIER
ACTIONS SUR CLAVIER EN ATTENTE
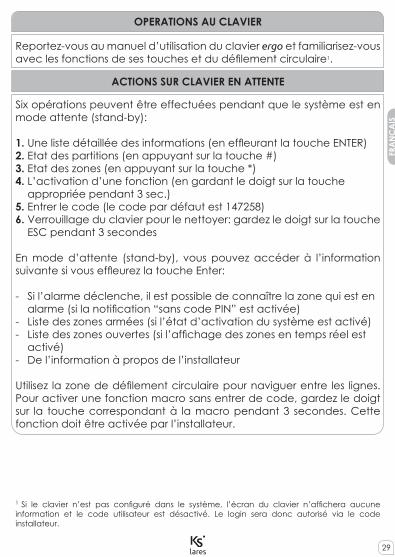
Reportez-vous au manuel d’utilisation du clavier ergo et familiarisez-vous avec les fonctions de ses touches et du défilement circulaire1.
1 Si le clavier n’est pas configuré dans le système, l’écran du clavier n’affichera aucune information et le code utilisateur est désactivé. Le login sera donc autorisé via le code installateur.
Six opérations peuvent être effectuées pendant que le système est en mode attente (stand-by):
1. Une liste détaillée des informations (en effleurant la touche ENTER)2. Etat des partitions (en appuyant sur la touche #)3. Etat des zones (en appuyant sur la touche *)4. L’activation d’une fonction (en gardant le doigt sur la touche appropriée pendant 3 sec.)5. Entrer le code (le code par défaut est 147258)6. Verrouillage du clavier pour le nettoyer: gardez le doigt sur la touche ESC pendant 3 secondes
En mode d’attente (stand-by), vous pouvez accéder à l’information suivante si vous effleurez la touche Enter:
- Si l’alarme déclenche, il est possible de connaître la zone qui est en alarme (si la notification “sans code PIN” est activée)- Liste des zones armées (si l’état d’activation du système est activé)- Liste des zones ouvertes (si l’affichage des zones en temps réel est activé)- De l’information à propos de l’installateur
Utilisez la zone de défilement circulaire pour naviguer entre les lignes. Pour activer une fonction macro sans entrer de code, gardez le doigt sur la touche correspondant à la macro pendant 3 secondes. Cette fonction doit être activée par l’installateur.
lares
FRAN
ÇA
IS
30
AFFICHAGE DE L’INFORMATION EN MODE D’ATTENTE (STAND-BY)
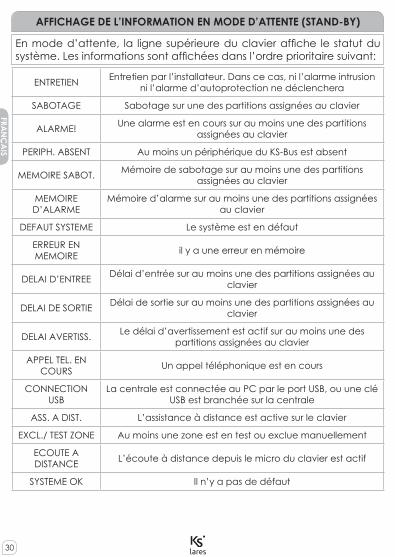
En mode d’attente, la ligne supérieure du clavier affiche le statut du système. Les informations sont affichées dans l’ordre prioritaire suivant:
ENTRETIEN Entretien par l’installateur. Dans ce cas, ni l’alarme intrusion ni l’alarme d’autoprotection ne déclenchera
SABOTAGE Sabotage sur une des partitions assignées au clavier
ALARME! Une alarme est en cours sur au moins une des partitions assignées au clavier
PERIPH. ABSENT Au moins un périphérique du KS-Bus est absent
MEMOIRE SABOT. Mémoire de sabotage sur au moins une des partitions assignées au clavier
MEMOIRE D’ALARME
Mémoire d’alarme sur au moins une des partitions assignées au clavier
DEFAUT SYSTEME Le système est en défaut
ERREUR EN MEMOIRE il y a une erreur en mémoire
DELAI D’ENTREE Délai d’entrée sur au moins une des partitions assignées au clavier
DELAI DE SORTIE Délai de sortie sur au moins une des partitions assignées au clavier
DELAI AVERTISS. Le délai d’avertissement est actif sur au moins une des partitions assignées au clavier
APPEL TEL. EN COURS Un appel téléphonique est en cours
CONNECTION USB
La centrale est connectée au PC par le port USB, ou une clé USB est branchée sur la centrale
ASS. A DIST. L’assistance à distance est active sur le clavier
EXCL./ TEST ZONE Au moins une zone est en test ou exclue manuellement
ECOUTE A DISTANCE L’écoute à distance depuis le micro du clavier est actif
SYSTEME OK Il n’y a pas de défaut
lares
FRA
NÇ
AIS
31
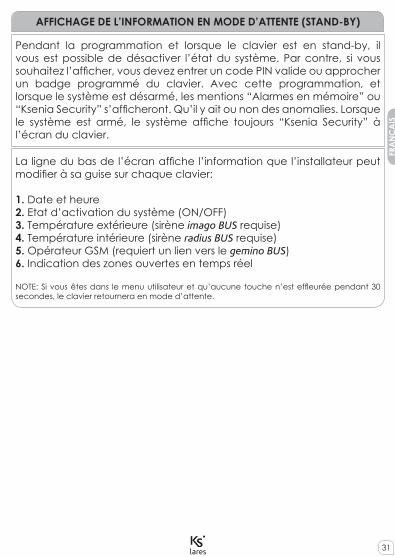
La ligne du bas de l’écran affiche l’information que l’installateur peut modifier à sa guise sur chaque clavier:
1. Date et heure2. Etat d’activation du système (ON/OFF)3. Température extérieure (sirène imago BUS requise)4. Température intérieure (sirène radius BUS requise)5. Opérateur GSM (requiert un lien vers le gemino BUS)6. Indication des zones ouvertes en temps réel
NOTE: Si vous êtes dans le menu utilisateur et qu’aucune touche n’est effleurée pendant 30 secondes, le clavier retournera en mode d’attente.
Pendant la programmation et lorsque le clavier est en stand-by, il vous est possible de désactiver l’état du système. Par contre, si vous souhaitez l’afficher, vous devez entrer un code PIN valide ou approcher un badge programmé du clavier. Avec cette programmation, et lorsque le système est désarmé, les mentions “Alarmes en mémoire” ou “Ksenia Security” s’afficheront. Qu’il y ait ou non des anomalies. Lorsque le système est armé, le système affiche toujours “Ksenia Security” à l’écran du clavier.
AFFICHAGE DE L’INFORMATION EN MODE D’ATTENTE (STAND-BY)
lares
FRAN
ÇA
IS
32
LOGIN VIA CODE / SCENARIOS
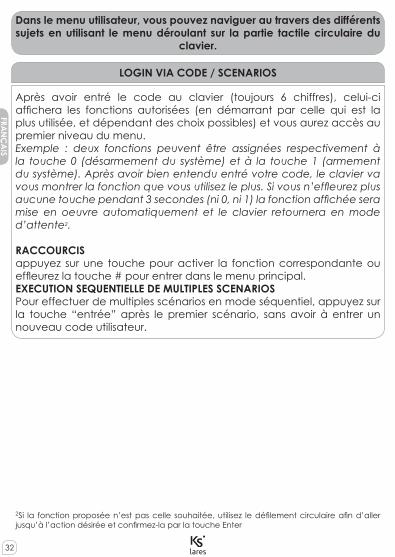
Après avoir entré le code au clavier (toujours 6 chiffres), celui-ci affichera les fonctions autorisées (en démarrant par celle qui est la plus utilisée, et dépendant des choix possibles) et vous aurez accès au premier niveau du menu.Exemple : deux fonctions peuvent être assignées respectivement à la touche 0 (désarmement du système) et à la touche 1 (armement du système). Après avoir bien entendu entré votre code, le clavier va vous montrer la fonction que vous utilisez le plus. Si vous n’effleurez plus aucune touche pendant 3 secondes (ni 0, ni 1) la fonction affichée sera mise en oeuvre automatiquement et le clavier retournera en mode d’attente2.
RACCOURCISappuyez sur une touche pour activer la fonction correspondante ou effleurez la touche # pour entrer dans le menu principal.EXECUTION SEQUENTIELLE DE MULTIPLES SCENARIOSPour effectuer de multiples scénarios en mode séquentiel, appuyez sur la touche “entrée” après le premier scénario, sans avoir à entrer un nouveau code utilisateur.
2Si la fonction proposée n’est pas celle souhaitée, utilisez le défilement circulaire afin d’aller jusqu’à l’action désirée et confirmez-la par la touche Enter
Dans le menu utilisateur, vous pouvez naviguer au travers des différents sujets en utilisant le menu déroulant sur la partie tactile circulaire du
clavier.
lares
FRA
NÇ
AIS
33
MENU PRINCIPAL
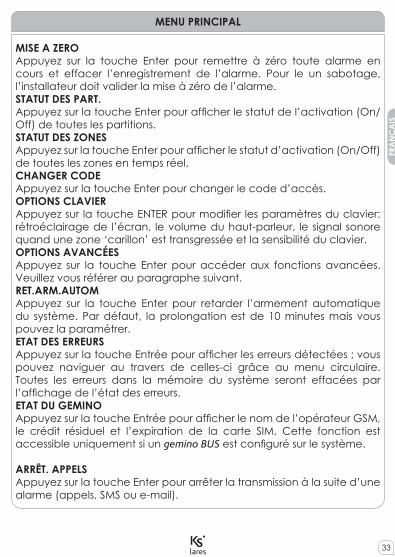
MISE A ZEROAppuyez sur la touche Enter pour remettre à zéro toute alarme en cours et effacer l’enregistrement de l’alarme. Pour le un sabotage, l’installateur doit valider la mise à zéro de l’alarme.STATUT DES PART.Appuyez sur la touche Enter pour afficher le statut de l’activation (On/Off) de toutes les partitions.STATUT DES ZONESAppuyez sur la touche Enter pour afficher le statut d’activation (On/Off) de toutes les zones en temps réel.CHANGER CODEAppuyez sur la touche Enter pour changer le code d’accès.OPTIONS CLAVIERAppuyez sur la touche ENTER pour modifier les paramètres du clavier: rétroéclairage de l’écran, le volume du haut-parleur, le signal sonore quand une zone ‘carillon’ est transgressée et la sensibilité du clavier.OPTIONS AVANCÉESAppuyez sur la touche Enter pour accéder aux fonctions avancées. Veuillez vous référer au paragraphe suivant.RET.ARM.AUTOMAppuyez sur la touche Enter pour retarder l’armement automatique du système. Par défaut, la prolongation est de 10 minutes mais vous pouvez la paramétrer.ETAT DES ERREURSAppuyez sur la touche Entrée pour afficher les erreurs détectées ; vous pouvez naviguer au travers de celles-ci grâce au menu circulaire. Toutes les erreurs dans la mémoire du système seront effacées par l’affichage de l’état des erreurs.ETAT DU GEMINOAppuyez sur la touche Entrée pour afficher le nom de l’opérateur GSM, le crédit résiduel et l’expiration de la carte SIM. Cette fonction est accessible uniquement si un gemino BUS est configuré sur le système.
ARRÊT. APPELSAppuyez sur la touche Enter pour arrêter la transmission à la suite d’une alarme (appels, SMS ou e-mail).
lares
FRAN
ÇA
IS
34
OPTIONS AVANCÉES
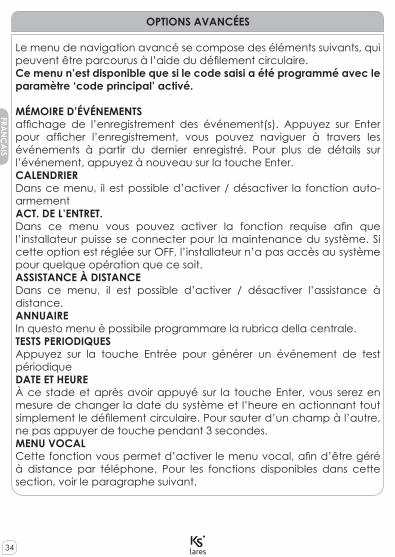
Le menu de navigation avancé se compose des éléments suivants, qui peuvent être parcourus à l’aide du défilement circulaire.Ce menu n’est disponible que si le code saisi a été programmé avec le paramètre ‘code principal’ activé.
MÉMOIRE D’ÉVÉNEMENTSaffichage de l’enregistrement des événement(s). Appuyez sur Enter pour afficher l’enregistrement, vous pouvez naviguer à travers les événements à partir du dernier enregistré. Pour plus de détails sur l’événement, appuyez à nouveau sur la touche Enter.CALENDRIERDans ce menu, il est possible d’activer / désactiver la fonction auto-armementACT. DE L’ENTRET.Dans ce menu vous pouvez activer la fonction requise afin que l’installateur puisse se connecter pour la maintenance du système. Si cette option est réglée sur OFF, l’installateur n’a pas accès au système pour quelque opération que ce soit.ASSISTANCE À DISTANCEDans ce menu, il est possible d’activer / désactiver l’assistance à distance.ANNUAIREIn questo menu è possibile programmare la rubrica della centrale.TESTS PERIODIQUESAppuyez sur la touche Entrée pour générer un événement de test périodiqueDATE ET HEUREÀ ce stade et après avoir appuyé sur la touche Enter, vous serez en mesure de changer la date du système et l’heure en actionnant tout simplement le défilement circulaire. Pour sauter d’un champ à l’autre, ne pas appuyer de touche pendant 3 secondes.MENU VOCALCette fonction vous permet d’activer le menu vocal, afin d’être géré à distance par téléphone. Pour les fonctions disponibles dans cette section, voir le paragraphe suivant.
lares
FRA
NÇ
AIS
35
CODESDans ce menu, vous pouvez modifier la fonction et valider les codes des utilisateurs dans les partitions pour lesquelles le code maître est valable
GESTION DES BADGESDans ce menu, il est possible de modifier la fonction de validation des badges (minitags).
COMMANDES À DISTANCEDans ce menu, il est possible de modifier la fonction de validation des commandes à distance.
CHANG.COUL.CLAV.Ce menu permet à l’utilisateur de changer la couleur de la face avant du clavier sans provoquer de sabotage. Pour ouvrir et fermer le couvercle, vous devez suivre les instructions fournies dans le manuel du clavier.
OPERATIONS AVEC BADGE / SMARTPHONE
Votre badge ou votre téléphone muni de la technologie NFC peut être utilisée à la place des touches du clavier pour activer les codes: pour accéder au menu utilisateur, placez votre badge valide ou votre smartphone à proximité de la zone de lecture du clavier (située en haut à droite).
OPTIONS AVANCÉES
lares
FRAN
ÇA
IS
36
MENU VOCAL A DISTANCE
Dans le cas où un gemino BUS ou un transmetteur RTC/PSTN pontis est configuré dans le système, on peut utiliser un menu vocal à distance qui permet les opérations suivantes:1. L’écoute de l’environnement contrôlé à partir du micro du clavier2. Obtenir des informations sur l’état des zones ainsi que l’inclusion ou l’exclusion de celles-ci3. Obtenir des informations sur l’état des partitions4. Activer des fonctions (sorties et/ou armement/désarmement de la centrale)
Le guide vocal vous mènera au travers du menu et les touches à appuyer vous seront indiquées pour chaque opération. En règle générale, toute opération est confirmée en appuyant sur la touche # et annulée en appuyant sur la touche * de votre téléphone.Il y a trois façons différentes pour avoir accès au menu vocal à distance:1. Appeler le numéro de téléphone de la carte SIM installée sur le gemino BUS, si le répondeur est activé2. Appeler le numéro du transmetteur pontis RTC/PSTN.3. Appuyez sur la touche # pendant un appel entrant reçu par le système.
lares
FRA
NÇ
AIS
37
OPERATIONS A DISTANCE VIA SMS
Si la centrale est connectée à un transmetteur gemino BUS, certaines opérations peuvent être effectuées à distance en envoyant des SMS à la centrale comme:1. L’activation de scénarios2. Connaître le crédit actuel sur la carte SIM prépayée3. L’assistance à distance4. Générer un événement “Code Reconnu”
ACTIVATION DE SCENARIOS VIA SMS10 scénarios peuvent être activés en envoyant des SMS à la centrale. Le format du SMS doit répondre aux exigences suivantes:
<code utilisateur>s<numéro du scénario>ou
<code utilisateur>espace<numéro du scénario><;>Exemple: vous souhaitez activer le scénario n°1 (armer à distance) par le code 147258. Le SMS qui doit être transmis sera:
147258s1 ou 147258 armer;Vous pouvez programmer 8 n° de téléphones afin de leur transmettre l’acquis d’armement.
CONNAÎTRE LE CRÉDIT RÉSIDUEL SUR LA CARTE SIM PRÉPAYÉELe format du SMS doit répondre aux exigences suivantes:
<code utilisateur>cExemple: avec le code par défaut 147258, le SMS à transmettre sera à la centrale sera:
147258cDans quelques minutes, la centrale vous communiquera le crédit actuel.
lares
FRAN
ÇA
IS
38
L’ASSISTANCE À DISTANCELe format du SMS doit répondre aux exigences suivantes:
<code utilisateur>m<0/1>Exemple: avec le code par défaut 147258, afin d’autoriser l’assistance à distance, le SMS qui devrait être envoyé à la centrale est le suivant:
147258m1Pour désactiver la fonction d’assistance à distance, le SMS qui devrait être envoyé sera:
147258m0
EVENEMENT CODE RECONNULe SMS doit avoir la forme suivante :
<Code utilisateur>n
Exemple: si nous utilisons le code PIN 147258 pour générer un «Code Reconnu», le SMS qui doit être envoyé à la centrale est le suivant:
147258nLe SMS va générer l’événement “Code Reconnu” (si programmé) et va effectuer les actions associées à cet événement. Cette fonction est très pratique si vous souhaitez diversifier des actions (activer des sorties par exemple) qui pourraient être effectuées par différents utilisateurs.
CONTROLE A DISTANCE VIA WEB BROWSER
Les centrales lares (modèles lares 16-IP, lares 48-IP, lares 128-IP) disposent d’un navigateur web pour la gestion du système à distance par l’intermédiaire d’Internet. L’installateur doit programmer la centrale pour activer le service. En outre, si une adresse IP statique n’est pas disponible, le système autorise l’emploi d’adresse IP dynamique (protocole (DynDNS) qui permet de communiquer avec la centrale depuis n’importe où, si une connexion internet est possible. Pour des raisons de sécurité, l’accès au Webserver de la centrale est soumis à un login additionnel via un nom d’utilisateur et un mot de passe.
OPERATIONS A DISTANCE VIA SMS
CERTIFICAZIONI - CERTIFICATIONS - CERTIFICATIONS
T 014 / 1th Edition 2003 + A1:2002 + A2:2003 + A3:2005EN50131-3 • EN50131-6 • EN50136-1-1
ENTE CERTIFICATORE: IMQ - Sistemi di Sicurezza
GRADO 3 • CLASSE II

www.kseniasecurity.com
29 / 11 / 2013RMX0300005.100