Embed Size (px)
Citation preview

8/6/2019 Orchestra Apprenticeship
http://slidepdf.com/reader/full/orchestra-apprenticeship 1/70
Orchestra Apprenticeship
Description
Teach how to play a stringed instrument by exploring the rhythmic values of notes andrests, examining sheet music, teaching how to position their bodies correctly when
playing, and explaining how to care for and set up instruments. Apprentices are requiredto practice at home and are motivated by a practice tracker as a reward. Note: Need toinvest parents or guardians to help motivate apprentices to practice outside of apprenticeship.
WOW!
Assist apprentices while they perform several songs they perfected throughout theapprenticeship for an audience!
Resource GuideListed below are a number of different resources that were very helpful in creating and teaching
my music apprenticeship. In addition to the more general resources included here, I would recommend finding some instrument-specific websites or books so that you can better tailor
your lessons to fit the needs and expectations of your apprentices (like a Suzuki book).
Music Theory: Gary Ewer’s Easy Music Theoryhttp://www.musictheory.halifax.ns.ca/lessons.html
Free Sample Lessons, $$$ for Full Curriculum
Although this website is designed to sell a curriculum, there are 25 well-developed samplelessons available for free. All of the lessons break down new vocabulary and concepts into easy
to understand chunks that work really well with the apprenticeship model. In addition, eachlesson includes a quiz that can be used as-is or adapted to better fit your specific apprenticeship.
Music Theory: Note Reading and Music Theory Basicshttp://theheartstring.org/theory_basics.htm FreUnlike the website listed above, this resource does not break down music theory concepts intocompartmentalized lesson plans. Still, it is very helpful because it explains the concepts a littlebit differently and the diagrams are helpful. Again, the resources on this website are free.
Music Theory: Music Instruction By A Computerhttp://www.mibac.com/Pages/Theory/Main_Theory.h
tm
Fre
This website resembles an in-depth glossary of music theory concepts. In addition to the concisedefinitions provided, there are diagrams that are very helpful in making flip chart and handouts.Also, this website includes information on and diagrams of different clefs, which is helpful if thestudents in the apprenticeship are playing different instruments (violin plays treble clef, violaplays alto clef, and cello plays bass clef).
Music Theory: Teoriahttp://www.teoria.com/tutorials/reading/index.h Fre
Page 1 of 70

8/6/2019 Orchestra Apprenticeship
http://slidepdf.com/reader/full/orchestra-apprenticeship 2/70
tmUnless each student has access to a computer, these lessons will not be directly applicable in theclassroom since they are in Flash format. The website is a great resource for the instructor,however, especially for reviewing different theory concepts.
Sheet Music: Curriculum Onlinehttp://www.mtrs.co.uk/resources_11_16.htm Fre
This United Kingdom website is a government sponsored forum for teachers to share their lessonplans, activities, resources, and best practices. There are a variety of classroom activities to befound throughout the site and there are links to free sheet music that is appropriate for beginners(or for activities like “Create Your Own Fingering Guide”).
Sheet Music: Suzuki Method BooksAvailable at most music stores or Amazon.com Under $10 Per Boo
These inexpensive books are available for musicians at all levels for more than 10 instruments,although the series for string instruments is probably the most popular. The books includearrangements of famous classical pieces that have been rewritten as solos or duets for variousskill levels.
Staff Paper Generatorhttp://www.8notes.com/school/theory/musictheory/files/utilities/html/id96_en.html
Fre
There are a number of websites that will create staff paper to your specifications – at this websiteyou can choose number of staffs and which clefs to print.
Page 2 of 70

8/6/2019 Orchestra Apprenticeship
http://slidepdf.com/reader/full/orchestra-apprenticeship 3/70
Page 3 of 70

8/6/2019 Orchestra Apprenticeship
http://slidepdf.com/reader/full/orchestra-apprenticeship 4/70
Page 4 of 70
Week Stage
done today?
Learning
Objective:
What will the
students learn
today?
Activities
1Learn new
skillsMODEL WOW ‘em!
SWBAT teach back about how to
handle and care for
their instruments,compare and
contrast various
string instruments,and chose which
instrument to play
this semester
Activity 1: Introduce
students to string
instrument family,
compare and contrastdifferent instruments
Activity 2:Demonstrate Do’s
and Don’ts of
instrument care
Activity 3: Try out
each instrument that
is available anddecide which one to
pursue
2Learn new
skillsMODEL
1. Learn (or relearn) how to
correctly hold the instruments
2. Learn rhythmic note valuesand various rhythm patterns
3. Practice “Twinkle,Twinkle, Little Star”
SWBAT teach
back about the
values of differentnotes, correctly
hold their
instruments, and play an easy song
Activity 1: Model
how to play the entire
“Twinkle, Twinkle,Little Star” song and
coach students
through the song
Activity 2: Teach
about note names and
their rhythmic valuesand then play
“Memory” to
reinforce knowledge
Activity 3: Discuss
the importance of practicing, pass out
practice logs, and
outline expectations
for practice this week
3Learn new
skillsMODEL
1. Learn rhythms that will
help students develop bowcontrol (like “Massachusetts
Up Down” and “Alligator,
Alligator)
2. Practice reading and
clapping note rhythms
3. Discuss new vocabulary
SWBAT play
“Massachusetts Up
Down,”demonstrate
understanding of
rhythmic notevalues by reading
and clapping
complex rhythms,and teach back the
Activity 1: Model
how to play“Massachusetts Up
Down” (this song
helps studentsdevelop their bow
skills) and coach
students throughlearning it
Activity 2: Model an
coach how to claprhythms based on
what students already
know about notevalues
WOW! Plan

8/6/2019 Orchestra Apprenticeship
http://slidepdf.com/reader/full/orchestra-apprenticeship 5/70
Lesson # 1
Name of the Apprenticeship: Orchestra Apprenticeship
Citizen Teacher:
Pre-Planning
Lesson Objectives: What do we need to get done today?
By the end of the lesson, the students will be able to:
1. Pluck the first few measures of “Twinkle, Twinkle, Little Star”2. Teach back important instructions for instrument care
3. Students will get excited about learning to play a new instrument
Learning Objectives: What will the students learn today?
By the end of the lesson, the students will have learned:
1. Recognize their prior knowledge about music and string instruments
2. Be able to identify several key similarities and differences between the violin,viola, and cello
3. Understand how to properly care for their instruments
4. Be able to correctly hold their instruments
Agenda based on the lesson plan. Post in the room for the students to see.
1. Opening Ritual
2. Review Agenda and Set Context
3. Activity: Instrument Introduction
4. Activity: Parts, Pieces, and Care
5. Activity: Try-Outs!
6. Closing and Teach Back
7. Clean up
10 Minutes
15 Minutes
10 Minutes
10 Minutes
15 Minutes
10 Minutes
2-3 MinutesPreparation and Space Set up:
•
Meet with the NBPS music teacher and agree on information to becovered this week
• Talk to apprentices and their guardians ahead of time about this
opportunity and what it means (practice outside of Citizen Schools, return theinstrument at the end of the semester, etc.)
Page 5 of 70

8/6/2019 Orchestra Apprenticeship
http://slidepdf.com/reader/full/orchestra-apprenticeship 6/70
Vocabulary What terms or concepts will you introduce in this session? Post these for the
students to see.
• Instruments: Violin, Viola, Cello
• Parts of the Instrument: Fingerboard, Strings, Bridge, F-Holes, Peg Box, Shoulder, Neck, Chin Rest, Bow, Frog, Tip
• Instrument Care: Rosin, Varnish
Materials and Equipment
Visual with agenda and objectives
One violin, one viola, and one cello for students to try out
Loan agreement contracts and permission slips to participate in music lessons
(NBPS District Requirement)
Blank flip chart paper or whiteboard and markers for teach backs
“Parts of your Instrument” Handout
Page 6 of 70

8/6/2019 Orchestra Apprenticeship
http://slidepdf.com/reader/full/orchestra-apprenticeship 7/70
Lesson # 1
Planning the Lesson
Foreshadowing (A regular opening ritual will be introduced
next week when students have their instruments)
Time: 10 Minutes
Ask students to sit or stand in a circle along with the Citizen Teacher and Team Leader.
The goal is for everyone to introduce themselves and share something with the group.
Citizen Teacher or Team Leader should specify what each participant should include inhis/her introduction (name, grade, team, favorite band, favorite song, why they picked
this apprenticeship, etc). After introducing him/herself, the CT or TL tosses the ball toanyone else in the circle. The receiver must thank that person by name and then
introduce him/herself. The game ends after everyone has introduced themselves.
Set the Context and Review Agenda Time: 15 Minutes
Thank students for participating in the opening activity, and ask a volunteer to read
today’s agenda and objectives out loud. Explain that a lot of what will happen today is an
introduction, but that students will have the opportunity to actually try out all of theinstruments that are being offered and ultimately select which one they will start with the
following week.
Although many students may not have had the opportunity to play musical instruments in
the past, they may know more than they think about music and instruments. Ask students
to line up on one side of the room (the path in front of them should be relatively clear).Explain that this is an activity that will help us figure out how much each of them knows
about music – the goal (but don’t tell them this yet) is to demonstrate that even if you
haven’t had the chance to formally study music, you probably know more than you think.
Tell students that you will read out loud a series of “I” statements. If they feel that thestatement is true for them, they should take a step forward. The statements should be
geared towards the specific group of students, but might include some of the following:
- I have played a musical instrument- I know how to read music
- I have a favorite band or artist
- I like to sing in the shower
- I know about fractions
- Someone in my family is a musician
- I have taken a music class in school
- I have messed around on the piano before
- I have heard a string instrument other than guitar in pop/rap/hip hop music before
- I can name at least one composer
After reading 10 or 12 “I” statements, ask students to stay where they are to debrief. Atthis point, it is unlikely that anyone is still at the starting position. Point out to studentsthat even though they may not have answered yes to all of the questions, they still know
something about music. Also point out that even though some people may have
answered yes to more questions than other people, everyone here will be a beginner onthe instrument they choose. If you have past experience, share it with the group to help
everyone learn!
Page 7 of 70

8/6/2019 Orchestra Apprenticeship
http://slidepdf.com/reader/full/orchestra-apprenticeship 8/70
ACTIVITIES (Please factor a 5 minute break in the middle of 1
activity or in between 2 activities)Time: 35 minutes
Activity 1: Instrument Introduction Time: 10 minutes
Includes demonstration, guided practice, individual or group practice. Be sure and link to
your learning objectives.
After students are seated in a semi-circle, explain the
concept of “family” as it applies to instruments. Justlike in families of people, not every instrument in thestrings family is exactly the same, but there are some
similarities between all of them. Hang a Venn
diagram on the wall and ask a volunteer to scribe thesimilarities and differences between the instruments
throughout the discussion.
Introduce the first instrument, tell students which it isand play a short piece that demonstrates the volume,
range, and sound of that instrument. Vocabulary isn’t
the focus right now – rather, students shouldconcentrate on finding their own words to verbalize
what they are hearing. Try to fit the sounds into a
framework that students are already comfortable withlike emotions (does the instrument sound happy, sad,
mellow, strong, goofy, etc). Ask students to articulate
why they picked the emotions they did (It soundshappy, because the sounds are high, like a bird; It
sounds mellow because the sounds are smooth and
deep). Then follow up with the other instruments. Be
sure to pause and ask student which sounded the most
similar, and how they sounded different. Encouragestudents to think about the range and tone, and try to
describe that in words.
After students have brainstormed similarities and
differences based their observations of the look andsound of instruments, point out some others that they
may not have noticed (different strings, different sized
bows, etc). Ask students to make an initial assessment
of which instrument they think they are mostinterested in now that they have seen and heard them
all – they can still change their minds.
Objective
Be able to identify several keysimilarities and differences between the violin, viola, and
cello
Activity 2: Parts, Pieces, and Care Time: 10 minutes
Includes demonstration, guided practice, individual or group practice. Be sure and link to
your learning objectives.
Page 8 of 70

8/6/2019 Orchestra Apprenticeship
http://slidepdf.com/reader/full/orchestra-apprenticeship 9/70
Note: Before the apprenticeship fair, apprentices andfamilies were notified through a family mailing that
string instrument lessons would be an apprenticeship
option this semester. Interested apprentices and their families were invited to attend an information session
at a Citizen Schools family potluck where guardians
learned more about this apprenticeship, where theinstruments were coming from, and what expectations
there were for instrument care. When apprenticeswere selected for this apprenticeship after the
apprenticeship fair, a Citizen Schools staff member called home to talk with apprentices and their families
about the contract they would need to sign with New
Bedford Public Schools to be able to bring theinstrument home. Both apprentices and their
guardians were given the basics of instrument care at
that time (do not try to tune the instrument unless youhave been taught to by the instructor; if the instrument
breaks, do not try to repair it – instead bring it to class
to have it fixed; always keep the instrument in a warm,dry place; etc). Families were required to sign acontract acknowledging that they knew and
understood these guidelines before students started the
apprenticeship.
Activity: Transition smoothly from the discussion
comparing and contrasting the instruments by pointingout that all of the instruments have many common
parts. Point out all of the parts of the violin and viola
first, noting not only their names, but also what they
do. Then ask students to see if they can identify the parts of a cello. Students should come up one by one
to point parts out and describe how they are similar
and different compared to the violin and viola. Also point out the things that are different on the cello
(endpin, larger bow, etc). Pass out the “Parts of Your
Instrument” Handout with the parts blank. Ask students to put it in their agendas for now, and take it
out again in a few days. Ask students to fill in as
many parts as they can remember as an extra mile or during their free time.
This is also a good time to talk about how fragile and
delicate string instruments are. Note how thin the bridge is and how the strings can snap easily if over
tightened. Explain the care procedures for string
instruments – a scribe may write these on thewhiteboard or flip chart paper if appropriate for the
group. Be sure to cover temperature variations, how
cleaning products affects the varnish, why it’s
Objective
Identify different common parts
on string instruments,
Understand how to properly
care for their instruments
Teach back important
instructions for instrument care
Page 9 of 70

8/6/2019 Orchestra Apprenticeship
http://slidepdf.com/reader/full/orchestra-apprenticeship 10/70
important not to touch the bow hair, and why it isimportant that only a professional tries to repair the
instrument if it breaks. Remind students about the
contracts that they and their parents signed agreeing tothis.
Activity 3: Try-Outs! Time: 15 minutes
Includes demonstration, guided practice, individual or group practice. Be sure and link to
your learning objectives. Note: This can be done as a station activity if the
instructor to student ratio allows. If there are not
enough instructors available, students can passinstruments around one at a time.
Activity: This will be the first time that students willhave the chance to actually hold and practice with the
various instruments. The instructor should model first
with the violin, demonstrating body position and
where the instrument sits. Then she should
demonstrate how to pluck, and play the first few notesof “Twinkle, Twinkle, Little Star.” Next, it is each
student’s turn to try it out. In turns and with peer support and suggestions, each student should try
holing the violin and plucking those notes. The
instructor should be giving as much one-on-oneattention as possible to the student who is “trying out,”
coaching him or her through the process. As soon as
the student is done, pass the instrument along. Follow
the same procedure with the viola and cello.
Then go around and ask each student to decide whichinstrument they will play this semester (write thisdown). Walk through the process of putting the
instruments away, modeling for students how to
loosen the bow, clean the strings, and close the case.
Objective
Be able to correctly hold their
instruments, Decide whichinstrument they like the best
Page 10 of 70

8/6/2019 Orchestra Apprenticeship
http://slidepdf.com/reader/full/orchestra-apprenticeship 11/70
Closing: Mini-Performance Time: 10 Minutes
Review what you covered in this session and tell them what is coming for the next
session. Be sure students learned by having one or more of them teach back.
Objectives: Students will get excited about learning to play a new instrument
Activity: To get students excited before they walk out the door today, do a mini-
performance of the songs that will be played at the WOW! Introduce the name of eachsong (and who it is by) and then model how it will sound when students play it at the endof the apprenticeship. After performing, point out that it takes a lot of work to get good
at a string instrument – you can’t just show up every week and expect to be able to play
these songs perfectly by the end. To really master the songs, apprentices will need to practice consistently. Ask the group if anyone has a definition of “consistent.” Wrap up
the closing activity by asking student which of the 7 Citizen Schools values will help
them be successful in this apprenticeship and why. Push apprentices to link every valueinto success in this apprenticeship (for instance, teamwork because we will all be playing
together, perseverance because we need to keep practicing even when it is hard, joy
because we need to have a positive attitude, etc).
Clean Up Time: 2-3 Minutes
What roles can you designate for each student to build team accountability?
Since we packed up the instruments as during the “Try-Outs!” activity, there will not be
much to clean up. Ask students to take care of their own space and have a volunteer take
down the flip charts.
Page 11 of 70

8/6/2019 Orchestra Apprenticeship
http://slidepdf.com/reader/full/orchestra-apprenticeship 12/70
Lesson # 2
Name of the Apprenticeship: Orchestra Apprenticeship
Citizen Teacher:
Pre-Planning
Lesson Objectives: What do we need to get done today?
By the end of the lesson, the students will:
1. Play “Twinkle, Twinkle, Little Star”2. Complete note duration “Memory” game
Learning Objectives: What will the students learn today?
By the end of the lesson, the students will be able to:
1. Demonstrate correct body position when playing instrument
2. Identify the names and rhythmic values of notes and rests
3. Play a complete song4. Commit to a regular practice schedule
Agenda based on the lesson plan. Post in the room for the students to see.
1. Opening Ritual
2. Review Agenda and Set Context
3. Activity: Body Position Review
4. Activity: “Twinkle, Twinkle, Little Star”
5. Activity: Pack It Up
6. Activity: Rhythm Part 1
7. Activity: Note Duration “Memory” Game
8. Closing and Teach Back
9. Clean up
15 Minutes
2-3 Minutes
5 Minutes
15 Minutes
5 Minutes
10 Minutes
15 Minutes
10 Minutes
2-3 Minutes
Preparation and Space Set up:Make sure all instruments are ready to go home with students (check strings, tuning,rosin, etc.)
Vocabulary What terms or concepts will you introduce in this session? Post these for the
students to see.
• Notes: Eighth Note, Half Note, Quarter Note, Whole Note
• Rests: Eighth Rest, Quarter Rest, Half Rest, Whole Rest
Materials and Equipment
Agenda and objectives “Twinkle, Twinkle, Little Star” handout for all apprentices (copyrighted
material – not included in lesson plan)
Note values flip chart
Cards for “Memory” game
Note duration worksheet for groups that finish quickly
Practice logs
Practice Tracking System – Includes tracker and explanation of rewards
Page 12 of 70

8/6/2019 Orchestra Apprenticeship
http://slidepdf.com/reader/full/orchestra-apprenticeship 13/70
Page 13 of 70

8/6/2019 Orchestra Apprenticeship
http://slidepdf.com/reader/full/orchestra-apprenticeship 14/70
Lesson # 2
Planning the Lesson
Opening Ritual (It should be tied to the focus of your
Apprenticeship and this session if possible)
Time: 15 Minutes
Students will receive their instruments today (as long as they returned their permission
slips and loan agreements). Although instrument care was covered last week, studentsneed to be reminded about how to care for their instruments. The instructor should
review the Do’s and Don’ts of instrument care before handing them out.
After reviewing care instructions, the instructor can hand out instruments to students.
Before students even start to open the cases they need to listen closely to the instructions.The instructor should model and talk through EVERY SINGLE STEP, and ask students
to do unpack their instruments at that time. Apprentices should focus on how/where to
attach the shoulder rest, tightening the bow, and rosining the bow.
(This will be the opening ritual in subsequent lessons.)
Set the Context and Review Agenda Time: 2-3 Minutes
Provide Apprentices with a visual agenda – written on flipchart paper and taped up in the
classroom
ACTIVITIES (Please factor a 5 minute break in the middle of 1
activity or in between 2 activities)Time: 50 minutes
Activity 1: Body Position Review Time: 5 Minutes
Includes demonstration, guided practice, individual or group practice. Be sure and link to
your learning objectives.
Ask a volunteer to demonstrate how to correctly hold
the instrument and bow. Ask other students to critiqueit and chime in with suggestions. After the volunteer
has achieved perfect body position based on his/her
own memory and the suggestions of peers, ask all
students to hold their instruments correctly. Theinstructor should give feedback and make corrections
to all students.
ObjectiveDemonstrate correct body
position when playinginstrument
Activity 2: “Twinkle, Twinkle, Little Star” Time: 15 Minutes
Includes demonstration, guided practice, individual or group practice. Be sure and link toyour learning objectives.
Instructor should pass out “Twinkle, Twinkle, Little
Star” handout and explain to students that it is a guide
for helping to remember how to play the song, so thatthey don’t have to memorize it – handout is a fingering
guide for each of the notes in “Twinkle, Twinkle” and
is not written on a staff or using notes. Instructor
Objective
Play “Twinkle, Twinkle, Little
Star”
Page 14 of 70

8/6/2019 Orchestra Apprenticeship
http://slidepdf.com/reader/full/orchestra-apprenticeship 15/70
should tell students about how to read the guide (eachline gives the string and fingers down for one note)
and model how to play each note. As a large group,
apprentices should play through the entire song slowlyand with plenty of pauses for the instructor to give
directions and help students. Play through the song a
couple of times until students are confident.
Activity 3: Pack It Up Time: 5 MinutesIncludes demonstration, guided practice, individual or group practice. Be sure and link toyour learning objectives.
Ask students to think about the steps they will need to
go through to pack up their instruments safely. Have
apprentices teach back different steps that they mayremember from last week or that they infer based on
their knowledge of instrument care. Apprentices
should follow all of the steps they just talked about
whenever packing up their instruments. After all of
the instruments are safely packed away, have studentsset the cases to the side and transition to chairs/desks
for today’s theory activity.
Objective
Teach back about instrument
care (objective from lesson 1)
Activity 4: Rhythm Part 1 Time: 10 Minutes
Includes demonstration, guided practice, individual or group practice. Be sure and link to
your learning objectives.
After students are settled in a semi-circle of desks or
chairs, instructor should explain that musicians need to
have a way to write down their different melodies and
rhythms on paper so that they can remember how to play songs and share their pieces with others. Just like
we have whole system of reading and writing usingletters, words, and punctuation, musicians have a
system so that they can write down songs on paper.
The first thing that we will learn about is how
musicians write rhythm. In music writing, a “note” is
the same as a letter in English. Just like there aredifferent letters, there are different types of notes that
mean different things. When talking about rhythm and
beats, musicians use eighth notes, quarter notes, half notes, and whole notes. Explain the “beat value” of each note, using the flip chart as a guide. Explain that
in addition to notes, there are rests, which are like
spaces and punctuation in between words. Whenever there is a rest in written music, it means that the
musician should pause. Just like different notes last
different numbers of beats, rests tell you how long the
Objective
Identify the names and rhythmic
values of notes and rests
Page 15 of 70

8/6/2019 Orchestra Apprenticeship
http://slidepdf.com/reader/full/orchestra-apprenticeship 16/70
pause should be.
Make sure that students understand that they are not
expected to know and understand all of this right now.It will take some practice to really understand how all
of these pieces fit together, and for now, they just need
to familiar with the basic vocabulary and informationon the flip chart.
Activity 5: Note Duration “Memory” Game Time: 15 Minutes
Includes demonstration, guided practice, individual or group practice. Be sure and link to
your learning objectives.
Now that students have learned about the rhythmic
values of notes and rests, they are going to play agame where they will have to remember not only
where to find things, but also all of the stuff we just
talked about. Ask students if they have every played
the game “Memory” or “Concentration” (this is where
there is a deck of cards in a grid face down, and players take turns trying to find pairs – the winner is
the person with the most pairs of cards at the end). Astudent should teach back the rules, or if no one is
familiar with the game, the instructor can outline the
rules.
This game of memory is a little different, because the
pairs of cards don’t look exactly the same. On onecard of the pair is a picture of a note, rest, or other
symbol. On the other card in that pair is the name of
the note, rest, or symbol. In pairs, apprentices shouldtake turns trying to find pairs of cards, but there is atwist: in order to keep the match, the player must also
tell how many beats long the note or rest is, or what
the other symbols mean (i.e. This pair is a quarter noteand quarter notes are worth one beat; This pair is a bar
line and bar lines tell where measures start and end).
If a pair of students finishes the game really early, they
can fill out the note duration worksheet attached below
for extra credit.
Objective
Identify the names and rhythmic
values of notes and rests
Page 16 of 70

8/6/2019 Orchestra Apprenticeship
http://slidepdf.com/reader/full/orchestra-apprenticeship 17/70
Closing & Teach Back Time: 10 Minutes
Review what you covered in this session and tell them what is coming for the next
session. Be sure students learned by having one or more of them teach back.
Note: During the information and phone conversations with apprentices and families preceding the apprenticeship, expectations for practice were outlined. Participants
understood that they would have spent some time outside of Citizen Schools practicing
every week to be successful. Families committed to providing space and time to childrenfor practice as well.
Activity: Instructor should relate a story to students about how much practice it takes to
get good at the violin or viola. Convey that “self-efficacy” (remember School Navigation?) is at work here: the more that students practice, the better they are going to
get. As an added bonus, apprentices will be able to see and hear the progress they are
making immediately! Apprentices have an awesome opportunity to get really good attheir instruments because they get to bring them home. In addition to the benefit of
getting better with practice, students will also be competing for prizes. Every week they
will take a practice log home and fill out important information every time they practice.
They should note the day that they practiced, how long they practiced for, and whichsongs or drills they practiced. For every hour of practice that apprentices complete, they
will earn a quarter note on the practice tracker. There will also be other ways to earn
notes throughout the apprenticeship. The person with the most complete measures at theend wins a prize! Instructor should collect practice logs every week (and hand out new
ones) and update the tracker so that students can view their progress compared to others.
This week, students should practice as much of “Twinkle, Twinkle” as they canremember and just experiment with the instrument, getting used to the sound and feeling
of it.
Clean Up Time: 2-3 MinutesWhat roles can you designate for each student to build team accountability?
Students should already have their instruments cleaned up and put away (from the “Pack It Up” activity). Each group of students needs to put away their memory cards and clean
up their own space.
Curriculum Analysis (Tips for the teacher)
I cut out a significant amount of the vocabulary in this lesson in response to suggestions
that it might be overwhelming for students. For instance, I had originally included dotted
notes, time signature, bar lines, etc. The students in my group quickly picked up all of
the new vocabulary, and if your group is doing well with the notes and rests, I wouldrecommend introducing some of the other concepts this week.
Cards for Memory Game (Print and Cut Out)
Page 17 of 70

8/6/2019 Orchestra Apprenticeship
http://slidepdf.com/reader/full/orchestra-apprenticeship 18/70
Quarter Rest
EightRest
EightNote
Quarter Note
Half RestWholeRest
Half Note
Page 18 of 70

8/6/2019 Orchestra Apprenticeship
http://slidepdf.com/reader/full/orchestra-apprenticeship 19/70
WholeNote
Pair of Eight
Notes
Page 19 of 70

8/6/2019 Orchestra Apprenticeship
http://slidepdf.com/reader/full/orchestra-apprenticeship 20/70
Note Durations Extra Credit Worksheet
1) Assume for now that a whole note = 4, half note = 2, quarter note = 1, and eighth note = . Add upthe numbers in each equation and write one note that represents the resulting number:
a) 1 + 1 _______
d) 1 + + ________
b) 2 + 1 + 1 _______
e) 1 + 1 +1 + + _____
c) 0.5 + 1 + _______
f) 4 - 2 _______
2) Complete the following:
a) How many eighth notes equal one half note: ________.
b) _____ quarter note(s) equal 2 half notes.
c) Four ___________ notes equal one whole note.
d) Two eighth notes equal one ____________ note.
e) One whole note can be made up of one half note and ______ quarter note(s).
f) Two whole notes is the same length as ________ quarter note(s).
g) ________eighth note(s) is the same length as two quarter notes.
h) Three eighth notes is the same as a quarter note plus _______ eighth(s).
Page 20 of 70

8/6/2019 Orchestra Apprenticeship
http://slidepdf.com/reader/full/orchestra-apprenticeship 21/70
Weekly Practice LogName:____________
Day/Date:
Total Time: I Practiced:
Day/Date:
Total Time: I Practiced:
Day/Date:
Total Time: I Practiced:
Day/Date:
Total Time: I Practiced:
Day/Date
:
Total Time: I Practiced:
Day/Date:
Total Time: I Practiced:
Day/Date:
Total Time: I Practiced:
Total Practice Time This Week:________Page 21 of 70

8/6/2019 Orchestra Apprenticeship
http://slidepdf.com/reader/full/orchestra-apprenticeship 22/70
Practice Tracker
Page 22 of 70

8/6/2019 Orchestra Apprenticeship
http://slidepdf.com/reader/full/orchestra-apprenticeship 23/70
"Lesson # 3
Name of the Apprenticeship: Orchestra Apprenticeship
Citizen Teacher:
Pre-Planning
Lesson Objectives: What do we need to get done today?
By the end of the lesson, the students will:
1. Play “Massachusetts Up Down” and “Alligator, Alligator”, rhythms that helpdevelop bow control
2. Clap several written rhythms of varying difficulty
3. Complete musical arithmetic problems
Learning Objectives: What will the students learn today?
By the end of the lesson, the students will have learned:
1. Develop bow control and play consistent rhythms2. Demonstrate understanding of note durations by clapping out rhythms
Agenda based on the lesson plan. Post in the room for the students to see.
1. Opening Ritual
2. Review Agenda and Set Context
3. Activity: “Twinkle, Twinkle” Teach Back
4. Activity: Two New Rhythmic Songs
5. Activity: Review Note Durations
6. Activity: Clap Out Rhythms
7. Closing and Teach Back
8. Clean up
5 Minutes
5 Minutes
10 Minutes
15 Minutes
15 Minutes
15 Minutes
10 Minutes
2-3 MinutesPreparation and Space Set up:
Coordinate with NBPS music teacher to align goals of instrument and theory lessonsWrite in a rhythm for the last section on the quiz before making copies
Vocabulary What terms or concepts will you introduce in this session? Post these for the students to see.
• Notes: Eighth Note, Quarter Note, Half Note, Whole Note, Dotted Notes
• Rests: Eighth Rest, Quarter Rest, Half Rest, Whole Rest
Materials and Equipment
Agenda and objectives
Instrument for each apprentice
Flip chart with note durations
Rhythm lines for clapping activity
Copies of quiz and rhythm to clap
One partial deck of memory cards from last week (with only cards that picturenotes and rests)
Page 23 of 70

8/6/2019 Orchestra Apprenticeship
http://slidepdf.com/reader/full/orchestra-apprenticeship 24/70
Lesson # 3
Planning the Lesson
Opening Ritual (It should be tied to the focus of your
Apprenticeship and this session if possible)
Time: 5 Minutes
This is the first week that students will need to set up their instruments on their own.
Instructor should walk students through the steps of getting the instrument out of the case,
attaching the shoulder rest, and tightening/rosining the bow. After all instruments areready, apprentices should play open strings individually so that the instructor can tune
instruments as needed.
Set the Context and Review Agenda Time: 5 Minutes
Ask a student to read the agenda out loud (agenda below only includes activities for the
theory portion of the lesson, but activities for the instrumental portion of the lesson could be included as well). The theme for today, just like last week, is rhythm. Both the songs
students will learn to play as well as the new concepts they will learn will all help build
on the rhythm concepts that were covered last week.
ACTIVITIES (Please factor a 5 minute break in the middle of 1activity or in between 2 activities)
Time: 55 minutes
Activity 1: “Twinkle, Twinkle” Teach Back Time: 10 Minutes
Includes demonstration, guided practice, individual or group practice. Be sure and link to
your learning objectives.
Ask if there is one brave volunteer who would bewilling to take a positive risk and play the portion of
“Twinkle, Twinkle” that they practiced over the last
week. After one student performs and jogs everyone
else’s memory, play through the passage a few timesas a group. Encourage students to keep practicing
“Twinkle, Twinkle” both by plucking and using the bow, because this will be one of the WOW! songs.
Objective
Review last week’s lesson andtransition into learning a new
“song”
Activity 2: Two New Rhythmic Songs Time: 15 Minutes
Includes demonstration, guided practice, individual or group practice. Be sure and link to
your learning objectives.
Before actually starting the activity, the instructor
should explain that we will learn two short rhythm
patterns that will help students get better at using their bows. Begin this activity with a review of how to grip
the bow. Instructor should model a good bow grip andthen ask apprentices to demonstrate theirs. Instructor
should coach students, giving feedback for
improvement.
After everyone is all set with their bow grips, the
instructor should model the rhythm for “Alligator,
Objective
Develop bow control and play
consistent rhythms
Page 24 of 70

8/6/2019 Orchestra Apprenticeship
http://slidepdf.com/reader/full/orchestra-apprenticeship 25/70
Alligator” on an open string (say the words out loudand play down and up bow strokes in time with the
syllables). Then apprentices try out the rhythm on
their own instruments. As students are playing“Alligator, Alligator” the instructor should watch bow
strokes very carefully, and give tips when needed so
that students can begin building a strong musclememory.
After all of the students can confidently play
“Alligator, Alligator” on an open string, move onto“Massachusetts Up Down.” The instructor should
model this rhythm for apprentices and give an
explanation of the difference between a down strokeand an up stroke. Ask apprentices to try it on an open
string, and again the instructor should be coaching
students to success. After students have mastered bothrhythms on a single open string, they should try it on
other open strings, and finally using fingerings.
Practice Assignment (post on whiteboard): Practice“Alligator, Alligator” and “Massachusetts Up Down”
on open strings and with different fingers down every
day.
Students should pack up their instruments at the end of
this activity. Most beginner string instrument playerscannot practice for more than 20-30 minutes at a time
because it is difficult to maintain correct body position
for that long. Ask a volunteer to lead the class through
pack up, teaching back step-by-step instructions for putting the instruments away.
Activity 3: Review Note Durations Time: 15 Minutes
Includes demonstration, guided practice, individual or group practice. Be sure and link to
your learning objectives.
Review flip chart from last week about note durations,asking students questions about how many beats each
note or rest is and what all of the different notes are
called.
Then, take down or cover the flip chart. Using the
partial deck of memory cards from last week (only
cards with notes and rests), go around to eachapprentice and ask him/her to draw a card. After the
apprentice draws the card, he/she must identify the
note or rest by name and tell how many beats it isworth. If an apprentice doesn’t answer both parts
correctly, that card is up for grabs and another student
Objective
Activate prior knowledge aboutnote durations and rhythm
vocabulary
Page 25 of 70

8/6/2019 Orchestra Apprenticeship
http://slidepdf.com/reader/full/orchestra-apprenticeship 26/70
can volunteer to answer the questions. If an apprenticeanswers both parts correctly, he/she keeps the card.
The apprentice with the most cards at the end is the
winner and earns a half note on the practice tracker.
Activity 4: Clap Out Rhythms Time: 15 Minutes
Includes demonstration, guided practice, individual or group practice. Be sure and link to
your learning objectives.
The instructor should ask students to think back to thetwo rhythms they learned to play today. We used
words to help us “sound out” those rhythms, but we
can also write those rhythms using the different noteswe have learned about last week and today. Also, we
can practice rhythms even if we don’t have our
instruments out – by using our hands to clap.
Instructor should demonstrate the “Alligator,
Alligator” and “Massachusetts Up Down” rhythmswith clapping. Explain that there is a very similar
system that we can use where we combine words and
claps to create different rhythms.
Instructor should model how to clap different written
notes and rests (the beginning of each note gets a clap
and every subsequent beat in that note gets a pulsewith hands together; rests get pulses with hands open;
eighth notes are counted with 1 and, 2 and, 3 and, 4
and).
Ask students to look at the three rhythm lines posted
on flip chart paper. First, the instructor should model
how the first line is clapped using the system he/she just explained. Then, invite the students to join in and
clap the rhythm line as a group. Do the same with the
next two (and increasingly harder) rhythm lines.
Finally, split students into three groups and put each
group in charge of a different rhythm line. Studentsshould practice their group’s line a few times in small
groups. After ample practice time, the groups should
come back together and in unison, all groups clap outtheir rhythms.
Objective
Demonstrate understanding of note durations by clapping out
rhythms
Page 26 of 70

8/6/2019 Orchestra Apprenticeship
http://slidepdf.com/reader/full/orchestra-apprenticeship 27/70
Closing & Teach Back Time: 10 Minutes
Review what you covered in this session and tell them what is coming for the next
session. Be sure students learned by having one or more of them teach back.
Students will demonstrate what they have learned today by passing a short quiz aboutmusical mathematics, slurs and ties, and clapping rhythms (can be done with partners if
appropriate). Explain that if everyone who gets a 90% or above on the quiz will get a
bonus eighth note added to their practice tracker (worth 30 minutes of practice time).Apprentices should answer written questions and then practice rhythm at the bottom withclapping technique learned today to be performed for the instructor.
Practice Assignment: Before students leave, remind them of what songs they havelearned so far: “Twinkle, Twinkle,” “Alligator, Alligator,” and “Massachusetts Up
Down.” They should be using their practice time in the next week to get better at these
songs. Also, briefly point out how far different individuals are on the practice tracker.Ask students to consider whether they have heard and felt themselves getting better with
practice.
Clean Up Time: 2-3 Minutes
What roles can you designate for each student to build team accountability?
Instruments are already put away, so all that is left for students to do is clean up their space and help take down flip charts/erase the whiteboard.
Curriculum Analysis: Tips for the teacher
Be sure to read through all activities very thoroughly and think about potential questions
or problems that may come up with your particular group of students. Also, make sure
that all small groups include students with various ability and experience levels – this willhelp group activities go more smoothly and prevent some groups from falling behind
while others finish quickly. Finally, set very clear expectations for the time that
apprentices have their instruments out, like “No playing while I am talking,” etc. If you
don’t, students will be much more interested in messing around on their instruments thanlistening to your directions.
See “Newby, Lesson 3 Attachments” for all Visual Aids and Handouts
Page 27 of 70

8/6/2019 Orchestra Apprenticeship
http://slidepdf.com/reader/full/orchestra-apprenticeship 28/70
Lesson # 4
Name of the Apprenticeship: Orchestra Apprenticeship
Citizen Teacher:
Pre-Planning
Lesson Objectives: What do we need to get done today?
By the end of the lesson, the students will:
1. Create a funny or interesting acronym to help remember note order on the staff 2. Play a new song for the WOW!
Learning Objectives: What will the students learn today?
By the end of the lesson, the students will be able to:
1. Establish a forum for students to share their experiences with practicing
2. Play “Ode To Joy” and the D-Major Scale
3. Relate prior knowledge of reading words to reading musical notes4. Identify notes on a treble or alto clef
Agenda based on the lesson plan. Post in the room for the students to see.
1. Opening Ritual
2. Review Agenda and Set Context
3. Activity: How Was Practice?
4. Activity: “Ode To Joy” and the D-Major Scale
5. Activity: Musical Alphabet
6. Activity: Note Acronyms
7. Closing and Teach Back
8. Clean up
5 Minutes
5 Minutes
5 Minutes
25 Minutes
10 Minutes
10 Minutes
15 Minutes
2-3 MinutesPreparation and Space Set up:
Think of ways to smoothly transition from the instrument component to the theorycomponent of this lesson
Coordinate with NBPS music teacher to make sure that note reading will be a focus of both the instrumental and theory components of this lesson
Print staff paper with the treble and alto clefs from an online staff paper generator such as
http://www.8notes.com/school/theory/musictheory/files/utilities/html/id96_en.html
Vocabulary What terms or concepts will you introduce in this session? Post these for the
students to see.• Pitch, Musical Alphabet, ABCDEFG
• Acronym
• Staff, Treble Clef, Alto Clef
Page 28 of 70

8/6/2019 Orchestra Apprenticeship
http://slidepdf.com/reader/full/orchestra-apprenticeship 29/70
Materials and Equipment
Agenda and Objectives
Instruments for each apprentice
Copies of “Ode To Joy” with fingering guide written in (copyrighted material –
not attached in this lesson plan)
Musical Alphabet visual with treble and alto clefs
Blank flip chart paper for acronyms
Flip chart with game instructions
Staffs on flip chart paper (2 treble clef and 2 alto clef)
Quarters (1 for each student)
Staff paper for scoring in game
Page 29 of 70

8/6/2019 Orchestra Apprenticeship
http://slidepdf.com/reader/full/orchestra-apprenticeship 30/70
Lesson # 4
Planning the Lesson
Opening Ritual (It should be tied to the focus of your
Apprenticeship and this session if possible)
Time: 5 Minutes
Apprentices should follow the same procedure for setting up their instruments that they
used last week. Instructor should supervise as apprentices get the instruments out of cases, attach shoulder rests, and tighten/rosin bows. After all instruments are ready,
apprentices should play open strings individually so that the instructor can tuneinstruments as needed.
Set the Context and Review Agenda Time: 5 Minutes
Instructor should ask a volunteer to read the agenda and objectives aloud. Emphasize that
apprentices will start working on “Ode To Joy” today, which is one of the pieces theywill perform at the WOW! This song is written differently than “Twinkle, Twinkle,
Little Star” was: it is on a musical staff with notes instead of as numbers and letters.Along with learning this new song, apprentices will have to build their note reading skills because from now on, all songs are going to be written using musical notations. (Agenda
pictured in the attachments document does not include “Ode To Joy” or the D-Major
scale activities – it only features activities from the theory component).
ACTIVITIES (Please factor a 5 minute break in the middle of 1activity or in between 2 activities)
Time: 50 minutes
Activity 1: How Was Practice? Time: 5 Minutes
Includes demonstration, guided practice, individual or group practice. Be sure and link toyour learning objectives.
Take about 5 minutes to debrief on how practice went
last week. What was difficult? What was rewarding?
How did you overcome challenges like not
remembering exactly how to play something? Did youget tired while you were practicing? This should be a
time for students to share their experiences with each
other and ask questions of each other and of theinstructor.
Objective
Establish a forum for students to
share their experiences with
practicing
Activity 2: “Ode To Joy” and the D-Major Scale Time: 25 Minutes
Includes demonstration, guided practice, individual or group practice. Be sure and link to
your learning objectives.
Page 30 of 70

8/6/2019 Orchestra Apprenticeship
http://slidepdf.com/reader/full/orchestra-apprenticeship 31/70
Instructor should introduce “Ode To Joy” and tell a
little bit about the piece’s history, and then pass out
copies of the piece written in regular musical notationwith a fingering guide written in. Instructor should
model the song by playing it and then explain how to
read the fingering guide, relating it to how studentsread the notes for “Twinkle, Twinkle, Little Star.”
Then the students should work through the entire song,measure by measure, with the instructors help and
guidance. After each small piece of the song is solid,students can put the whole piece together any play it as
a group.
After playing “Ode To Joy” a few times, the instructor
can introduce the D-Major scale. First, apprentices
should play the scale straight through without anyrhythmic variation to focus on finger position. After
they can play the scale as is, students can start
applying the rhythmic variations that they learned lastweek (“Alligator, Alligator” and “Massachusetts UpDown”) to the scale.
When the instrumental activities are over, studentsshould follow the same pack it up procedure that they
have in previous weeks. One student leads the group
through the step-by-step process for puttinginstruments away safely.
Objective
Play “Ode To Joy” and the D-
Major Scale
Activity 3: Musical Alphabet Time: 10 Minutes
Includes demonstration, guided practice, individual or group practice. Be sure and link toyour learning objectives.
Instructor should start this activity by asking students
how they could have figured out how to play “Ode ToJoy” if the fingering guide hadn’t been written in for
them. Explain that just like we write and read using a
system of letters in our regular lives, musicians have asystem of reading and writing to help them
communicate.
This week apprentices are going to start learning howto read notes on a musical staff – they already covered
rhythm, and this week they will focus on “pitch.”
Using the flip chart visual, the instructor shouldexplain that pitch is the highness or lowness of a note
(giving a vocal demonstration of high vs. low). A note
that sounds higher to the ear is written higher up onthe musical staff.
Objective
Relate prior knowledge of
reading words to readingmusical notes
Page 31 of 70

8/6/2019 Orchestra Apprenticeship
http://slidepdf.com/reader/full/orchestra-apprenticeship 32/70
Point out that reading notes is like reading words; after you read a note on a staff you can translate it into
sound if you know what it is and what that means, just
like you can say a word out loud that you read on paper. After learning how to read the pitch of notes,
apprentices will be able to read a note on a musical
staff and know how to make that pitch on their instruments.
Unlike our alphabet which has 26 letters, the musical
alphabet only has 7 letters that continuously repeat: AB C D E F G. After you get to the letter G, you start
over again at the beginning (A) – this means that there
are high, medium, and low versions of the same note.Every note has an assigned spot on the musical staff,
and the different clefs indicate which range of notes it
will represent.
Violinists read music on the treble clef staff; violists
read music on the alto clef (the two cover differentranges of notes because the two instruments cover different ranges of notes). Instructor should use the
flip chart with treble and alto clef staffs to point out
where each note (A-G) is written on the musical staff.
Activity 4: Note Acronyms Time: 10 Minutes
Includes demonstration, guided practice, individual or group practice. Be sure and link toyour learning objectives.
Instructor should transition into the acronym activityusing the Musical Alphabet visual. Point out that
some notes fall on lines, while others are in spaces –
this is important because it can be a good memorytool. On the treble clef, the notes on the lines go E G
B D F and the notes in the spaces go F A C E
On the alto clef the line notes go F A C E G and thespace notes go G B D F
Many people use acronyms to remember which notenames match with the places on the staff; for instance,
people use Every Good Boy Does Fine to remember
Objective
Create a funny or interestingacronym to help remember note
order on the staff
Page 32 of 70

8/6/2019 Orchestra Apprenticeship
http://slidepdf.com/reader/full/orchestra-apprenticeship 33/70
the line notes and the word FACE for the space noteson the treble clef.
In small groups, apprentices need to come up with aneasy and fun acronym to remember the notes on the
clef that they use (remember “acronym” from school
navigation?). Students should take about 5 minutes tothink of a clever phrase that they will teach back to the
big group. After time is up, the instructor should ask groups for the acronyms they thought of and write
them onto a piece of flip chart paper (or ask avolunteer scribe to do it). This flip chart can be
brought to future lessons to help students jog their
memories as they are trying to read notes.
Page 33 of 70

8/6/2019 Orchestra Apprenticeship
http://slidepdf.com/reader/full/orchestra-apprenticeship 34/70
Closing & Teach Back Time: 15 Minutes
Review what you covered in this session and tell them what is coming for the next
session. Be sure students learned by having one or more of them teach back.
Objective: Identify notes on a treble or alto clef
Instead of filling out a worksheet today, students will demonstrate what they have learned
through a game called “Quarter Note Toss.” Before students begin, the instructor shouldread ALL rules aloud and model how to play the game. Groups of 2-3 apprentices needto collect the following supplies: the appropriate staff for their instrument on flip chart
paper (treble clef for violin, alto clef for viola), a quarter for each person, and a staff
paper sheet for each person to keep score. The goal of this game is to create a song usingevery note on the staff at least once. Apprentices take turns tossing or sliding their
quarters (to symbolize a quarter note) onto the flip chart paper staff that is on the floor in
front of them. After tossing the quarter, the player should identify the name/letter of thenote where the quarter landed on the staff paper (use your best judgment) and then mark
it with a quarter note and the note letter on your score sheet. Whoever uses every note on
the staff first (from the bottom line to the top line) first wins. If some groups finish
earlier than others, have them complete the “bonus” task: select a time signature (2/4, 3/4,or 4/4) and add bar lines to the appropriate spots. Award an option eighth note to the
winner in each group to be added to the practice tracker.
Clean Up Time: 2-3 Minutes
What roles can you designate for each student to build team accountability?
Groups should return the materials they used for the quarter-note toss and take down flip
charts from the wall.
Curriculum Analysis: Tips for the teacher
This is a really confusing concept for a lot of children – be prepared and willing to
answer A LOT of questions throughout this activity. Pausing for questions, even if they
are unrelated, may disrupt the flow of the lesson but will ultimately be beneficial for student learning especially because this is a foreign concept for a lot of kids.
See “Newby, Lesson 4 Attachments” for visual aids and handout materials
Page 34 of 70

8/6/2019 Orchestra Apprenticeship
http://slidepdf.com/reader/full/orchestra-apprenticeship 35/70
Lesson # 5
Name of the Apprenticeship: Orchestra Apprenticeship
Citizen Teacher:
Pre-Planning
Lesson Objectives: What do we need to get done today?
By the end of the lesson, the students will:
1. Play “Ode To Joy” and the D-Major scale well2. Play half and whole steps on instruments
Learning Objectives: What will the students learn today?
By the end of the lesson, the students will have learned:
1. Confidently play “Ode To Joy” and the D-Major scale
2. Correctly identify whole and half steps in the D-Major scale
3. Teach back how sharps and flats affect notes
Agenda based on the lesson plan. Post in the room for the students to see.
1. Opening Ritual2. Review Agenda and Set Context
3. Activity: Practice Last Week’s New Material
4. Activity: Introduce New Song – IF TIME
PERMITS
5. Activity: Note Reading Part Two – Intro
6. Activity: Sharp Pins, Flat Tires
7. Activity: Halves and Wholes
8. Closing and Teach Back
9. Clean up
5 Minutes5 Minutes
15 Minutes
10 Minutes
5 Minutes
10 Minutes
15 Minutes
5 Minutes
5 Minutes
Preparation and Space Set up:Select another song for a WOW! (must be appropriate for the group) – makecopies and write in fingering guide (this song will only be taught if students
have mastered the current material and there is extra time)
Create all visual aidsCheck in with students one-on-one outside of the apprenticeship time about
how practice has been going – follow up with family phone calls if necessary
(Some students said they weren’t “allowed” to practice at home; upon talkingwith their parents, I discovered that they were very much on board and didn’t
know about the practice expectations)
Vocabulary What terms or concepts will you introduce in this session? Post these for the
students to see.• Sharp, Flat
• Whole Step, Half Step
Page 35 of 70

8/6/2019 Orchestra Apprenticeship
http://slidepdf.com/reader/full/orchestra-apprenticeship 36/70
Materials and Equipment
Agenda and objectives
Copies of “Ode To Joy” from previous week
Copies of a new song (to be taught only if there is time and students are ready for
new material)
Flat/Sharp Visual
Notes on a staff (flip chart), Sharp and Flat slips of paper with note names on back
D-Major Scale Visual
Whole Step/Half Step Visual
Copies of Speed Quiz
Instrument for each apprentice and instructor
Page 36 of 70

8/6/2019 Orchestra Apprenticeship
http://slidepdf.com/reader/full/orchestra-apprenticeship 37/70
Lesson # 5
Planning the Lesson
Opening Ritual (It should be tied to the focus of your
Apprenticeship and this session if possible)
Time: 5 Minutes
Ask students to begin leading the opening ritual. Have a volunteer or two walk everyone
through the steps of setting up instruments out loud. Other students should chime in if the leader forgets something. In future weeks, have different students lead the ritual so
that all of the students will be prepared to give a verbal teach back during workshop timeat the WOW!
Set the Context and Review Agenda Time: 5 Minutes
This week’s lesson is largely a follow-up to last week's activities. Apprentices will
practice “Ode To Joy” and the D-Major scale which were introduced last week, and then participate in a second note reading lesson. Instructor should have a volunteer read the
agenda out loud. Then ask apprentices to get ready for the start playing.
ACTIVITIES (Please factor a 5 minute break in the middle of 1
activity or in between 2 activities)Time: 60 minutes
Activity 1: Practice Last Week’s New Material Time: 15 Minutes
Includes demonstration, guided practice, individual or group practice. Be sure and link to
your learning objectives.
Instructor should engage students in a discussion about
how practice went the previous week. What weresome successes and challenges in practicing “Ode To
Joy”? Did anyone have trouble reading the musicafter they got home and didn’t have the visual aids to
help them? Did you enjoy practicing this piece? Did
anyone in your family comment on how you are doing
with it? Students should raise their hands or respond popcorn style. Be sure to address any statements that
students make about their family reacting negatively to
their practicing. Brainstorm with those studentsalternative practice venues or times that would disrupt
others less (for instance, some students decided to practice in their basements where they wouldn’t bother anyone). Conclude with a reminder that you don’t get
good at the violin just by showing up to lessons every
week: the amount you practice directly affects how
good you will become.
After gauging where students are at with the song
based on their comments about practicing, the
Objective
Confidently play “Ode To Joy”
and the D-Major scale
Page 37 of 70

8/6/2019 Orchestra Apprenticeship
http://slidepdf.com/reader/full/orchestra-apprenticeship 38/70
instructor should initiate a large group run through of the song. Students should play the song together and
according to the cues given by the instructor (such as
when to start, how fast to go, etc). During the first andsecond run through, the instructor should be
evaluating student performance and looking for weak
points in the piece.
Ask students to take a few minutes with their stand partners to identify some of the hardest parts of the
song. Have them circle or underline those passages ontheir music. After each group has had some to identify
difficult passages, ask for each stand to share their
thoughts. Point out commonalities between thegroups, and make sure students understand that there
are parts of the song that are hard for everyone, not
just them. Practice the hard passages together a fewtimes and encourage students to do the same when
they are practicing. The instructor should pay special
attention to how correctly students are playing thesedifficult passages to keep students from continually practicing their mistakes.
Ask for comments from students about whether theygot better since the first time they played it today.
Why do you think the last time was better than the first
time? Were you better at the parts that you struggledthrough the first time? Why? Did it help you to break
up the hard parts and practice certain measures a few
times? Do you think you could do this when you are
practicing at home?
Transition away from “Ode To Joy” and begin
practicing the D-Major scale. Ask students what theyremember about playing the D-Major scale from last
week. Which string does it start on? How many notes
long is it? Have students play through the scale as alarge group once with no rhythm variations. Then
remind them of the rhythm variations that they learned
earlier in the class (“Massachusetts Up Down” and“Alligator, Alligator”). The next time playing the
scale students will use one of the rhythm variations.Practice a few times with the rhythm variations,
modeling first, and then asking students to mimic.
Activity 2: Introduce New Song – IF TIME PERMITS Time: 10 Minutes
Includes demonstration, guided practice, individual or group practice. Be sure and link toyour learning objectives.
Page 38 of 70

8/6/2019 Orchestra Apprenticeship
http://slidepdf.com/reader/full/orchestra-apprenticeship 39/70
If students speed through “Ode To Joy” and the D-
Major scale and are ready for new material, introduce
a new song for the WOW! Instructor should modelthe song by playing it all the way through and then
have students work through it measure by measure as
a large group.
Objective
Introduce a new song for the
WOW!
Activity 3: Note Reading Part Two – Intro Time: 5 MinutesIncludes demonstration, guided practice, individual or group practice. Be sure and link toyour learning objectives.
Ask students to set their instruments down in their
cases, but they do not have to pack them up
completely. Last week we learned how to read noteson a musical staff – this week we are going to take it a
step further and learn how to translate the note letters
we learned to read last week to fingerings on our
instruments. In order to do that we will learn four new
vocabulary words – sharp, flat, whole step, and half step.
Objective
Activate prior knowledge about
note reading and transition into
theory lesson
Activity 4: Sharp Pins, Flat Tires Time: 10 Minutes
Includes demonstration, guided practice, individual or group practice. Be sure and link toyour learning objectives.
Using visual aid as a guide, introduce the concepts of
sharps and flats. A "sharp" looks like a number or tic-
tac-toe sign (#) and means to go one half step higher in
pitch. On the fingerboard "higher" means moving
toward the musician and away from the scroll.Instructor should model on her instrument the
difference between a regular note and a sharp note,asking students if they heard and saw the difference.
A "flat" looks like a squished letter b and means to go
one half step lower in pitch. (Toward the scrollapproximately one finger's width) Instructor should
model this as well and ask students if they can hear the
difference between sharps and flats by playing a seriesof 2 notes and asking which was flat and which was
sharp. You can remember that sharp means going up
in pitch if you think about what you do when you siton a SHARP pin; you can remember that flat meansgoing down in pitch if you think about what happens
to a car when it has a FLAT tire.
Sharps and flats can be written in two different places
o Key Signature: At the beginning of the
song after the time signature (the sharp
Objective
Teach back how sharps and flats
affect notes
Page 39 of 70
8/6/2019 Orchestra Apprenticeship
http://slidepdf.com/reader/full/orchestra-apprenticeship 40/70
or flat falls on the same line or in thesame space as the note of the same
letter would)
o Accidentals: Right before the note that
is supposed to be flat or sharp
Before starting the guided practice activity, ask
students to think back to last week when they came up
with their acronyms – review the note order on thestaff. After students can confidently identify notes on
a staff, give students small slips of paper with a flat or
sharp written on one side, and the letter of a note onthe other. Ask students to write their names on the
same side as the flat or sharp; one by one invite
students up to tape their flats or sharps onto the flipchart in front of the note written on the back, and ask
students to identify whether they symbol they placed
in front of the note makes it higher or lower in pitch.
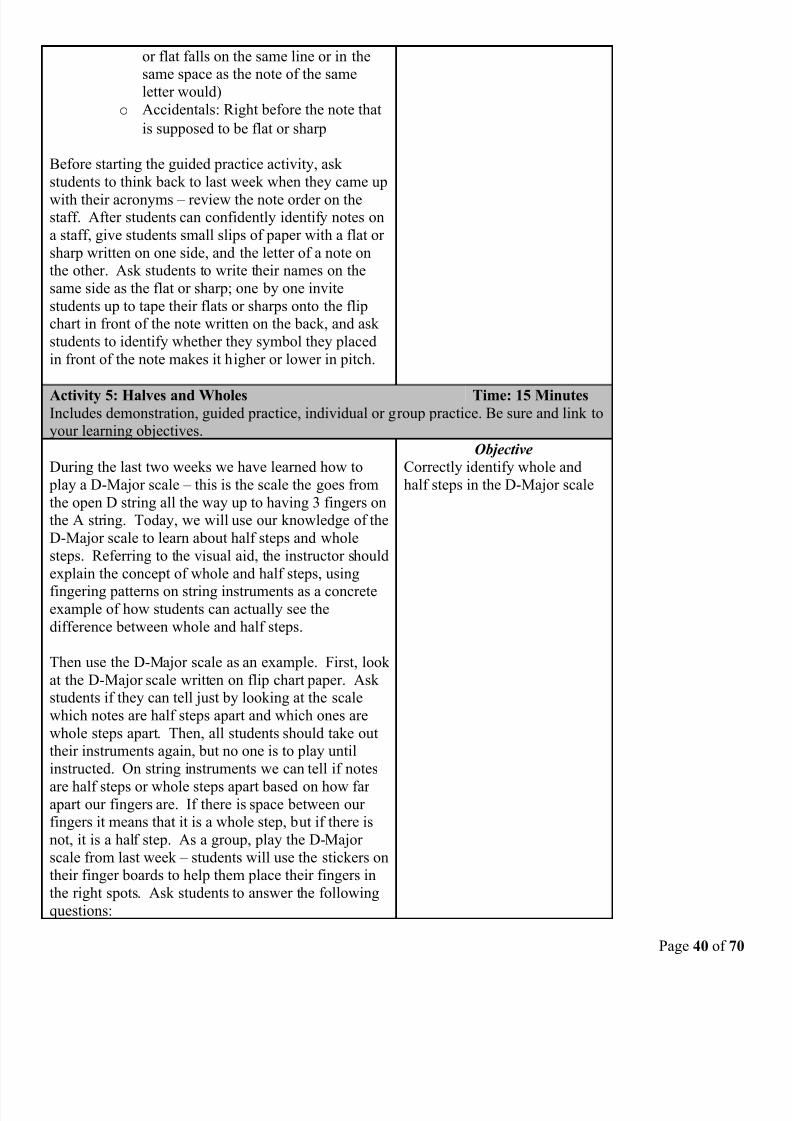
Activity 5: Halves and Wholes Time: 15 MinutesIncludes demonstration, guided practice, individual or group practice. Be sure and link toyour learning objectives.
During the last two weeks we have learned how to
play a D-Major scale – this is the scale the goes from
the open D string all the way up to having 3 fingers onthe A string. Today, we will use our knowledge of the
D-Major scale to learn about half steps and whole
steps. Referring to the visual aid, the instructor should
explain the concept of whole and half steps, using
fingering patterns on string instruments as a concreteexample of how students can actually see the
difference between whole and half steps.
Then use the D-Major scale as an example. First, look
at the D-Major scale written on flip chart paper. Ask students if they can tell just by looking at the scale
which notes are half steps apart and which ones are
whole steps apart. Then, all students should take outtheir instruments again, but no one is to play until
instructed. On string instruments we can tell if notes
are half steps or whole steps apart based on how far apart our fingers are. If there is space between our fingers it means that it is a whole step, but if there is
not, it is a half step. As a group, play the D-Major
scale from last week – students will use the stickers ontheir finger boards to help them place their fingers in
the right spots. Ask students to answer the following
questions:
Objective
Correctly identify whole and
half steps in the D-Major scale
Page 40 of 70

8/6/2019 Orchestra Apprenticeship
http://slidepdf.com/reader/full/orchestra-apprenticeship 41/70
o Which of the notes have half steps
between them (Hint there are two pairsof notes that only have a half step
between them) – Students can tell
which order half and whole stepsoccurred at this point
o Refer to the D-Major scale written on
flip chart paper – Where are the notes
with half steps on the staff? (Ask student to come up draw them in – green brackets for whole steps and red
carrots for half steps) What are the
names of those notes?
o Remind students of how sharps and
flats are indicated – Are either of those
notes sharp or flat?
Point out to students that even though they couldn’ttell half steps from whole steps just by looking at the
scale, when they played the scale it was prettyobvious.
Finally, use the visual with the piano keyboard to
point out the exact same note can have two differentnames: B-flat is the same as A-Sharp. What other
example can you see where one note can have two
different names?
Closing & Teach Back Time: 5 Minutes Review what you covered in this session and tell them what is coming for the next
session. Be sure students learned by having one or more of them teach back.
Objective: Demonstrate understanding of flats, sharps, half steps and whole steps
Activity: Apprentices should form groups of 2-3 to complete a speed quiz – the group
that correctly answers all the questions first gets extra eighth notes added to their practicetracker. After quiz is complete and there is a winner, go over all the questions and ask for
teach backs and questions from various groups about how they found the answers.
Clean Up Time: 5 Minutes
What roles can you designate for each student to build team accountability?
Students should follow the same pack it up procedure that they have in previous weeks.
One student leads the group through the step-by-step process for putting instruments
away safely.
As students are putting their instruments away the instructor can take down flip charts
Page 41 of 70

8/6/2019 Orchestra Apprenticeship
http://slidepdf.com/reader/full/orchestra-apprenticeship 42/70
and erase the board.
Curriculum Analysis: Tips for the teacher
At this point in the apprenticeship you should have a pretty clear sense of which students
are excelling because of their practice efforts and natural talent, and which are lagging behind. If you have the staff resources (like 2 CTs and a TL), you may want to consider splitting students into smaller groups to more effectively develop each student’s
strengths. In addition, be sure to carefully evaluate where students are at before assigning
any new material – the focus at week 5 should be preparing for the WOW! and if new
songs won’t be ready in time or would only distract student from practicing their WOW! pieces, then hold off.
Obviously, lack of practice is going to be an issue for some apprentices. Try as hard asyou can to motivate students to practice outside of the apprenticeship time by pointing
out the self efficacy angle and using the practice tracker as a reward. Also engage parents
in conversations about how important practice is for their children to be successful asviolinists and violists. If students face genuine barriers to practice at home, be prepared
to set up alternative arrangements. For instance, invite those students to practice in the
Citizen Schools office on Friday afternoons or ask the school music teacher if thosestudents can use a practice room during Celebration Time.
See “Newby, Lesson 5 Attachments” for photos of visuals (Speed Quiz below)
Page 42 of 70
8/6/2019 Orchestra Apprenticeship
http://slidepdf.com/reader/full/orchestra-apprenticeship 43/70
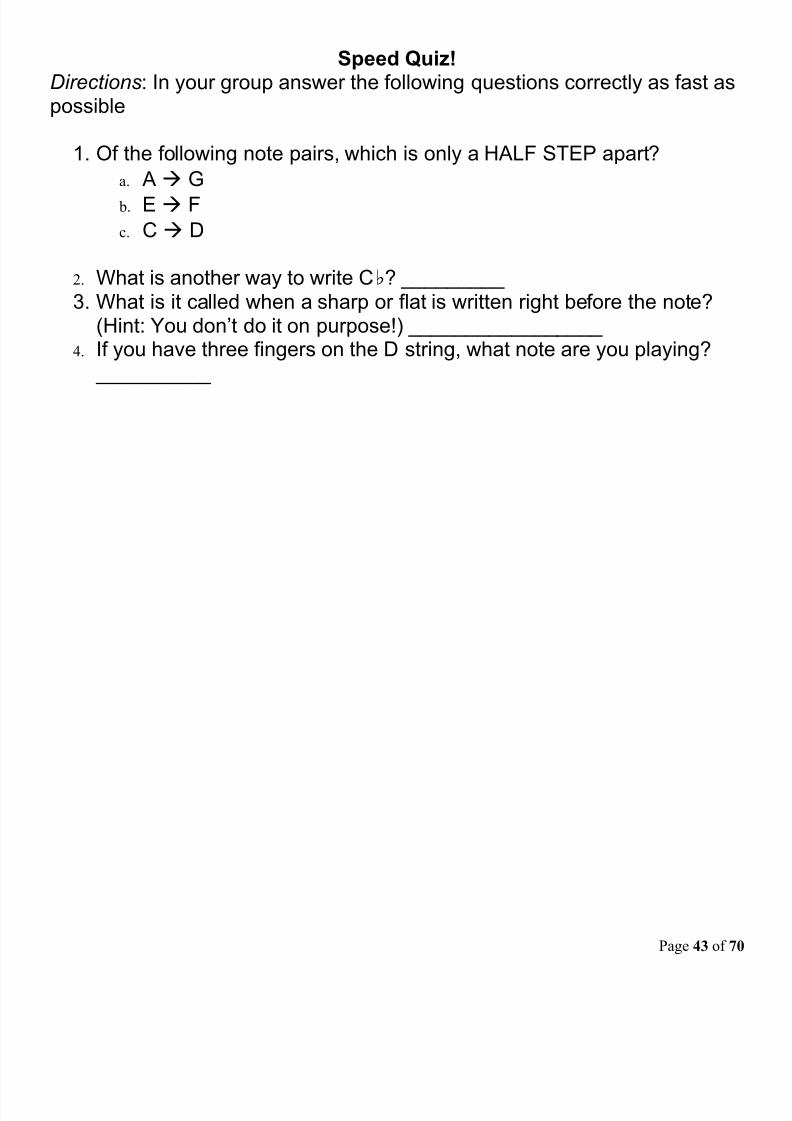
Speed Quiz!Directions: In your group answer the following questions correctly as fast aspossible
1. Of the following note pairs, which is only a HALF STEP apart?
a. A G
b. E F
c. C D
2. What is another way to write C♭? _________ 3. What is it called when a sharp or flat is written right before the note?
(Hint: You don’t do it on purpose!) _________________ 4. If you have three fingers on the D string, what note are you playing?
__________
Page 43 of 70

8/6/2019 Orchestra Apprenticeship
http://slidepdf.com/reader/full/orchestra-apprenticeship 44/70
Lesson # 6
Name of the Apprenticeship: Orchestra Apprenticeship
Citizen Teacher:
Pre-Planning
Lesson Objectives: What do we need to get done today?
By the end of the lesson, the students will:
4. Create a fingering guide for an easy song
Learning Objectives: What will the students learn today?
By the end of the lesson, the students will have learned:
1. Play two songs to be performed at the WOW!2. Identify how to finger various notes on their instruments
3. Write fingering guides for themselves on sheet music
Agenda based on the lesson plan. Post in the room for the students to see.
1. Opening Ritual
2. Review Agenda and Set Context3. Activity: Group Practice
4. Activity: Note Reading Review
5. Activity: Create Your Own Fingering Guide –
Teacher Directed Portion
6. Activity: Create a Fingering Guide – Guided
Practice
7. Closing and Teach Back/Clean-Up
5 Minutes
5 Minutes25 Minutes
10 Minutes
15 Minutes
10 Minutes
5 MinutesPreparation and Space Set up:
Make all necessary copies
Find two easy pieces to add fingering guides toCheck in with NBPS music teacher about readiness for WOW!
Vocabulary What terms or concepts will you introduce in this session? Post these for the students to see.
• Ledger Lines
• Fingering Chart
• Fingering Guide
Materials and Equipment
Instruments for apprentices and instructor
Copies of “Ode To Joy” and “Twinkle, Twinkle, Little Star” from
previous weeks Agenda and objectives
Copies of new song (if applicable)
WOW! Program on flip chart paper (songs listed in order they will be
played)
Copies of Treble Clef and Alto Clef Ledger Line handouts
Ledger Line flip chart
Copies of Violin and Viola Fingering Charts
Page 44 of 70

8/6/2019 Orchestra Apprenticeship
http://slidepdf.com/reader/full/orchestra-apprenticeship 45/70
Fingering Chart flip chart
Copies of two easy pieces in treble and alto clefs to add fingering guides
to
Flip chart with one easy piece in alto and treble clef to add fingering
guides to
Flip chart instructions for writing fingering guides
Treble/Alto Clef flip chart from previous week
Acronym flip chart from previous week
Page 45 of 70

8/6/2019 Orchestra Apprenticeship
http://slidepdf.com/reader/full/orchestra-apprenticeship 46/70
Lesson # 6
Planning the Lesson
Opening Ritual (It should be tied to the focus of your
Apprenticeship and this session if possible)
Time: 5 Minutes
Apprentices should follow the same procedure for setting up their instruments that they
used last week. Instructor should supervise as apprentices get the instruments out of cases, attach shoulder rests, and tighten/rosin bows. After all instruments are ready,
apprentices should play open strings individually so that the instructor can tuneinstruments as needed.
Set the Context and Review Agenda Time: 5 Minutes
So far apprentices have only been given music with fingering guides already written in.
This week they will take their note reading and fingering skills a step further by creatingtheir own fingering guides for new songs that they have never seen before. In addition,
they will polish some of the songs they have learned already, and possibly learn a newone (if not done last week). Instructor should go over agenda and objectives out loud andthen ask students to take their seats or places standing to start playing.
ACTIVITIES (Please factor a 5 minute break in the middle of 1
activity or in between 2 activities)Time: 65 minutes
Activity 1: Group Practice Time: 25 Minutes
Includes demonstration, guided practice, individual or group practice. Be sure and link to
your learning objectives.
Ask a student volunteer to read through the WOW!
Program. Students should understand that they will play “Ode To Joy” first and then “Twinkle, Twinkle”
with four rhythm variations (these should also be
listed in order).
As a large group, students should run through “Ode To
Joy” with sheet music visible. The instructor should
then focus on problem passages (like last week) practicing those first as a group and then each student
or pair of students individually. Run through theentire song again a few more times.
Then, move onto “Twinkle, Twinkle” with the
fingering cheat sheet from the first lesson. Practice
this song once or twice as written and then introducedifferent rhythmic patterns. Explain that even though
this is a pretty easy song, we will play it at the WOW!
with rhythmic variations that demonstrate our bow
ObjectivePlay two songs to be performed
at the WOW!
Page 46 of 70

8/6/2019 Orchestra Apprenticeship
http://slidepdf.com/reader/full/orchestra-apprenticeship 47/70
skills.
If a third song was introduced last week, practice that
as a group as well, paying special attention to problematic passages.
If a third song was not introduced last week, andstudents are now ready, pass out copies of that song.
Instructor should model the song first so that studentsknow how it is supposed to sound, and then play
through the song slowly and as a group several times.Assign this piece as “homework.”
Students should set their instruments aside in their cases, but not fully disassemble them yet.
Activity 2: Note Reading Review Time: 10 Minutes
Includes demonstration, guided practice, individual or group practice. Be sure and link to
your learning objectives.
Using visual aids and handouts from previous classesremind apprentices of some of the topics covered in
the theory component of lessons thus far. Ask
students questions about
• Note reading and acronyms to help remember
note order on a musical staff
• Flats, sharps, half steps, and whole steps
• Rhythm and note durations
Tell students that they will need to call up all of the
information and skills they have learned so far tosuccessfully complete today’s activity.
There is one new piece of information that studentsneed to be successful today. Using the flip chart
visual, explain what ledger lines are and how to figure
out which notes are on the ledger lines.
ObjectiveActivate prior knowledge of note reading, sharps and flats,
and fingering musical passages
Activity 3: Create Your Own Fingering Guide – Teacher
Directed Portion
Time: 15 Minutes
Includes demonstration, guided practice, individual or group practice. Be sure and link to
your learning objectives.
In this activity, the instructor will guide students, step-
by-step, through creating fingering guides for newsongs. First ask students to pull out “Ode To Joy” and
look at the fingering guide that was written in for
them. Ask them to identify the different parts of thefingering guide (string, which finger is down, whether
Objective
Identify how to finger various
notes on their instruments
Page 47 of 70
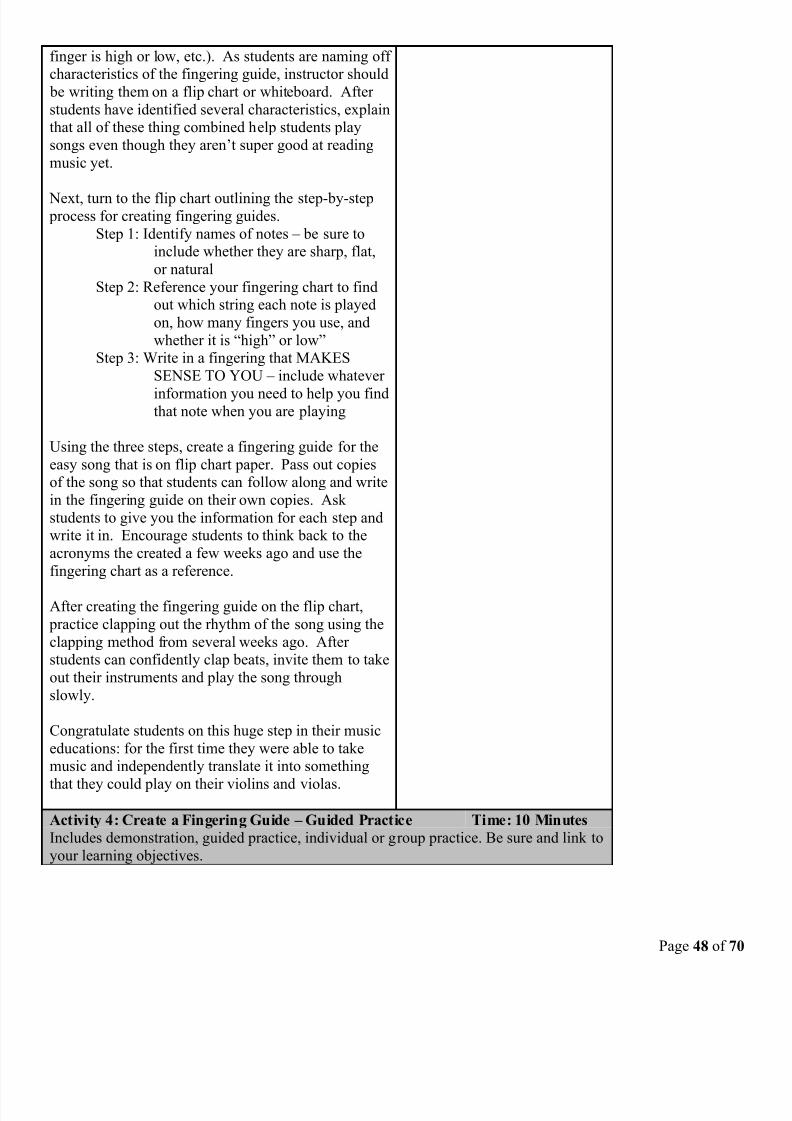
8/6/2019 Orchestra Apprenticeship
http://slidepdf.com/reader/full/orchestra-apprenticeship 48/70
finger is high or low, etc.). As students are naming off characteristics of the fingering guide, instructor should
be writing them on a flip chart or whiteboard. After
students have identified several characteristics, explainthat all of these thing combined help students play
songs even though they aren’t super good at reading
music yet.
Next, turn to the flip chart outlining the step-by-step process for creating fingering guides.
Step 1: Identify names of notes – be sure toinclude whether they are sharp, flat,
or natural
Step 2: Reference your fingering chart to findout which string each note is played
on, how many fingers you use, and
whether it is “high” or low”Step 3: Write in a fingering that MAKES
SENSE TO YOU – include whatever
information you need to help you findthat note when you are playing
Using the three steps, create a fingering guide for the
easy song that is on flip chart paper. Pass out copiesof the song so that students can follow along and write
in the fingering guide on their own copies. Ask
students to give you the information for each step andwrite it in. Encourage students to think back to the
acronyms the created a few weeks ago and use the
fingering chart as a reference.
After creating the fingering guide on the flip chart,
practice clapping out the rhythm of the song using the
clapping method from several weeks ago. After students can confidently clap beats, invite them to take
out their instruments and play the song through
slowly.
Congratulate students on this huge step in their music
educations: for the first time they were able to takemusic and independently translate it into something
that they could play on their violins and violas.
Activity 4: Create a Fingering Guide – Guided Practice Time: 10 Minutes
Includes demonstration, guided practice, individual or group practice. Be sure and link to
your learning objectives.
Page 48 of 70

8/6/2019 Orchestra Apprenticeship
http://slidepdf.com/reader/full/orchestra-apprenticeship 49/70
Ask students to set their instruments aside again. Split
students into small groups of 2-3 and make sure they
are armed with the fingering guide and ledger linehandouts. Give them a second easy song (similar to
the one in the teacher directed activity) and instruct
groups to create a fingering guide following the samesteps we just used as a group. Instructor should float
between groups, checking on progress, givingfeedback and suggestions, and helping students along.
When students have completed their fingering guides,
collect them (look over guides after class to make sure
they are accurate and bring them to next week’s class).Again, congratulate students on taking this huge step
and tell them that next week they will test out their
fingering guides to see just how well they did increating them.
Objective
Write fingering guides for
themselves on sheet music
Closing & Teach Back/Clean Up Time: 5 Minutes
Review what you covered in this session and tell them what is coming for the next
session. Be sure students learned by having one or more of them teach back.
Ask one student to lead clean up. This student should talk the group through the steps of
disassembling the instruments, cleaning them, and packing them safely away in their
cases.
Curriculum Analysis: Tips for the teacher
What roles can you designate for each student to build team accountability?
When I actually taught this lesson, most students weren’t ready by the end to create
fingering guides independently. I could tell that they would be frustrated if I sent them
off into small groups to work on it. Instead, we created the second fingering guide as alarge group, but students directed the process – each pair of students was responsible for
1 measure which they figured out and taught back. There was immediate feedback for
students who were on the wrong track, and students who excelled had the opportunity to
use the tools they were given to figure out the answers on their own.
See “Newby, Lesson 6 Attachments” for all Visual Aids and Handouts
Page 49 of 70

8/6/2019 Orchestra Apprenticeship
http://slidepdf.com/reader/full/orchestra-apprenticeship 50/70
Lesson # 7
Name of the Apprenticeship: Orchestra Apprenticeship
Citizen Teacher:
Pre-Planning
Lesson Objectives: What do we need to get done today?
By the end of the lesson, the students will:
1. Practice final song selection for WOW! straight through and as a large group2. Test the quality of last week’s fingering guides by practicing and critiquing them
3. Cover the basics of sight reading
Learning Objectives: What will the students learn today?
By the end of the lesson, the Students Will Be Able To:
1. Play, almost perfectly, the songs for the WOW!
2. Sight read a new song with the fingerings written in3. Use their new sight reading and fingering skills to solve a sheet music mystery
Agenda based on the lesson plan. Post in the room for the students to see.
1. Opening Ritual
2. Review Agenda and Set Context
3. Activity: Large Group Practice
4. Activity: Sight Reading Basics
5. Activity: Fingering Feedback
6. Closing and Teach Back
7. Clean up
5 Minutes
5 Minutes
25 Minutes
10 Minutes
20 Minutes
5 Minutes
5 MinutesPreparation and Space Set up:
- Reserve 1 room for class today – students will be participating in activities in one
large group rather than two smaller lesson groups today
- Make follow up phone calls to students who forgot their instruments last week
Vocabulary What terms or concepts will you introduce in this session? Post these for the students to see.
Sight Reading
Materials and Equipment
All handouts from last week (fingering charts, sheet music, etc)
Agenda and objectives
Sight Reading Basics flip chart
Instructions for feedback activity on a flip chart
Copies of “Twinkle, Twinkle” in musical notation without fingering guide and
without the title written at the top (copyrighted material – not included in lesson plan)
Page 50 of 70

8/6/2019 Orchestra Apprenticeship
http://slidepdf.com/reader/full/orchestra-apprenticeship 51/70
Lesson # 7
Planning the Lesson
Opening Ritual (It should be tied to the focus of your
Apprenticeship and this session if possible)
Time: 5 Minutes
Apprentices should follow the same procedure for setting up their instruments that they
used last week. Instructor should supervise as apprentices get the instruments out of
cases, attach shoulder rests, and tighten/rosin bows. After all instruments are ready,apprentices should play open strings individually so that the instructor can tune
instruments as needed.
Set the Context and Review Agenda Time: 5 Minutes
Provide Apprentices with a visual agenda – written on flipchart paper and taped up in the
classroom
This week, we are going to put together our entire WOW! performance for the first time.
In addition to that, we will have some time to experiment with the fingering guides thatapprentices created last week, and solve a sheet music mystery.
ACTIVITIES Time: 60 minutes
Activity 1: Large Group Practice Time: 25 minutes
Includes demonstration, guided practice, individual or group practice. Be sure and link toyour learning objectives.
Have students stand or sit approximately how they
will on stage during dress rehearsals and the WOW!
performance. Students should put their sheet music
for both “Twinkle, Twinkle” and “Ode To Joy” on thestand in front of them (students should probably share
stands and music). Remind students of the programorder from last week and set expectations for how
each song should be played (straight through, no stops,
order of rhythmic variations, etc). The instructor
should count down to get students started and then play along with exaggerated bow strokes to keep
students on beat. After the first song is finished,
transition immediately into the second song, againcounting down to start and playing along. Students
should practice taking their bows (bend over, say hi toyour feet, and count to 5).
Then the instructor should engage students in a debrief
discussion about how that practice went. Was it weird
to go straight from song to song without stopping?Was it difficult not to stop when you made mistakes?
Did you get tired after playing for so long? This is
how we are going to play at the WOW!, so we need to
Objective
Play, almost perfectly, the songs
for the WOW!
Page 51 of 70

8/6/2019 Orchestra Apprenticeship
http://slidepdf.com/reader/full/orchestra-apprenticeship 52/70
practice getting used to it.
After debriefing, the instructor should lead students
through practice as it has been done in previous weeks,where the group plays the songs several times and
repeats weak spots.
Then, repeat the first part of this activity, and again
practice the songs straight through without pauses or repeats.
Ask students to set aside their instruments in the open
cases, but not pack them up yet. Transition into a
semi-circle of chairs for the theory activities.
Activity 2: Sight Reading Basics Time: 10 minutes
Includes demonstration, guided practice, individual or group practice. Be sure and link to
your learning objectives.
Start this activity by talking about what it means to
“sight read” music – playing a song from writtenmusic without ever practicing or hearing it before.Explain that this is an important skill for violinists and
violists in orchestras because often they will show up
for a rehearsal and will be expected to play a brand-
new song right away.Outline the Sight Reading Basics using the flip chart
as a guide
1. Look for major clues before you get started – key signature, time signature, etc
2. If there is a fingering guide, look to see which
strings you will be playing on3. If there isn’t a fingering guide, quickly review
your note reading acronyms and fingering chart
4. Try clapping out the rhythm using thetechnique we learned if you aren’t sure about
the beat
5. Play nice and slow – if you start the song
playing fast you are more likely to stumblelater on
6. If you make a mistake or miss a note, just
move on – it might be hard the first couple of
times not to stop, but it is better if you justkeep going
Transition into the next activity in which students will practice sight reading
Objective
Cover the basics of sightreading
Activity 3: Fingering Feedback Time: 20 minutes
Includes demonstration, guided practice, individual or group practice. Be sure and link toyour learning objectives.
Page 52 of 70

8/6/2019 Orchestra Apprenticeship
http://slidepdf.com/reader/full/orchestra-apprenticeship 53/70
Ask students to reform the groups they were in lastweek when they wrote the fingering guide. This
activity will test both the quality of the fingering guide
you wrote last week and let you practice sight reading.Each group will give receive the fingering guide they
wrote last week, try it out, and then critique their own
work. Outline instructions for this activity:1. Either taking turns as individuals or as a small
group, follow the “Sight Reading Basics” to play the song on your instrument
2. After you have sight read it once, go back tothe spots where you had trouble and practice
them a few times
3. Think about what you will do differently nexttime you write a fingering guide for yourself.
Answer the following questions on a piece of
scrap paper.
Was the hand writing clear enough to
read?
Did the fingerings make sense? What was one thing that you did very
well when you wrote the fingering
guide?
What is one thing that you couldimprove next time?
Student groups should split up throughout the room,staying away from each other so that they won’t get
distracted. Students should be trying to play the song
and giving encouragement to each other. Throughout
this activity the instructor should also be floating between groups giving encouragement to the students
who are sight reading and making sure groups stay ontask. Try to get students to let go of mistakes and
move on – this is often the hardest thing for beginners
to learn to do.
After students have had some time to try sight reading,
ask groups to answer the critique questions. Give
groups a few minutes to critically evaluate their work.Ask for a teach back from each group about one plus
and one delta that they identified for their fingeringguide.
Objective
Sight read a new song with the
fingerings written in
Test the quality of last week’s
fingering guides by practicing
and critiquing them
Closing & Teach Back Time: 5 minutes
Page 53 of 70

8/6/2019 Orchestra Apprenticeship
http://slidepdf.com/reader/full/orchestra-apprenticeship 54/70
Review what you covered in this session and tell them what is coming for the next
session. Be sure students learned by having one or more of them teach back.
Option 1: Ask students for teach backs about one thing that they think they have
improved on in the last week. This could be something from today’s lesson like sightreading or bowing for long enough, or it can be something that they got better at because
they practiced at home like holding the bow so that it doesn’t squeak against the strings.
Option 2 (if there is extra time): Solving the Sheet Music Mystery
Hand out a copy of “Twinkle, Twinkle” in musical notation, but without a fingeringguide and without the title written on the top. Tell students that you accidentally cut off
the song title, and you need to figure out which one it is. Have students write in afingering guide using their fingering chart and then sight read the song. Does it sound
familiar? The first team to identify the song correctly wins an eighth note on the practice
tracker.
Clean Up Time: 5 minutes
What roles can you designate for each student to build team accountability?
Ask one student to lead clean up. This student should talk the group through the steps of disassembling the instruments, cleaning them, and packing them safely away in their
cases.
See “Newby, Lesson 7 Attachments” for all visual aids and handouts
Page 54 of 70

8/6/2019 Orchestra Apprenticeship
http://slidepdf.com/reader/full/orchestra-apprenticeship 55/70
Lesson # 8
Name of the Apprenticeship: Orchestra Apprenticeship
Citizen Teacher:
Pre-Planning
Lesson Objectives: What do we need to get done today?
By the end of the lesson, the students will:
1. Play WOW! pieces in unison as a large group2. Work out any problem passages with individual apprentices
3. Motivate students to practice at home to prepare for the WOW!
Learning Objectives: What will the students learn today?
By the end of the lesson, the students will be able to:
1. Follow the instructor’s lead
2. Teach back about what and how to practice in the next two weeks3. Demonstrate body position, composure, and presence appropriate for performance
Agenda based on the lesson plan. Post in the room for the students to see.
1. Opening Ritual
2. Review Agenda and Set Context
3. Activity: One-on-One Extra Help
4. Activity: D-Major Scale and Follow the
Leader
5. Activity: Switch it Up!
6. Activity: Ode To Joy
7. Closing and Teach Back
8. Clean up
5 Minutes
5 Minutes
5 Minutes
15 Minutes
15 Minutes
15 Minutes
10 Minutes
5 Minutes
Preparation and Space Set up:- Set up enough stands in a line for all of the students (two students per stand)- Secure practice room for students to take turns working one-on-one with the
instructor
- Remind students to bring their instruments
Vocabulary What terms or concepts will you introduce in this session? Post these for the students to see.
- Stage Presence
- Rest Position
Materials and Equipment Agenda and Objectives
Instruments
Music Stands
Practice Room
Page 55 of 70

8/6/2019 Orchestra Apprenticeship
http://slidepdf.com/reader/full/orchestra-apprenticeship 56/70
Lesson # 8
Planning the Lesson
Opening Ritual (It should be tied to the focus of your
Apprenticeship and this session if possible)
Time: 5 Minutes
Apprentices should follow the same procedure for setting up their instruments that they
used last week. Instructor should supervise as apprentices get the instruments out of cases, attach shoulder rests, and tighten/rosin bows. After all instruments are ready,
apprentices should play open strings individually so that the instructor can tuneinstruments as needed.
Set the Context and Review Agenda Time: 5 Minutes
Today we will rehearse for our WOW! There are only a couple of weeks left for us to
work together and get these songs to the level where we can perform them for anaudience. Everyone needs to be on the ball today, paying attention to instructions and
participating.
ACTIVITIES (Please factor a 5 minute break in the middle of 1
activity or in between 2 activities)Time: 60 minutes
Activity 1: One-on-One Extra Help (Outline Expectations) Time: 5 Minutes
Includes demonstration, guided practice, individual or group practice. Be sure and link to
your learning objectives.
Even though practice today will be as a large group,
apprentices will have the opportunity to get some one-on-one help if they think they need it. While Daniela
is working with the large group, apprentices can taketurns practicing with Kate in the adjoining practice
room. Outline expectations for one-on-one practice:
- Come prepared: Think ahead of time about
what you need extra help with- Stay on Task: Only student who demonstrate
that they are staying on task both in the large
group and in one-on-one practice time willhave this opportunity
- Be Considerate: Remember that there are probably a lot of people who need extra help – come and practice what you need to and then
go back to the large group
Practice sessions will last 10-15 minutes. Ask for a
couple of volunteers who need some extra help tocome first. After they are finished ask if any other
students would like to come spend some one-on-one
time practicing. One instructor should always stay
Objective
Work out any problem passages
with individual apprentices
Page 56 of 70

8/6/2019 Orchestra Apprenticeship
http://slidepdf.com/reader/full/orchestra-apprenticeship 57/70
with the large group while small groups of apprenticestake turns either until the end of the session or until
everyone is satisfied.
During the one-on-one or small group practice
sessions students should bring their instruments and
the pieces that they want to practice. Depending onhow comfortable and confident students are, they
should play their problem songs or passages first for the instructor. After that the instructor can identify
problems and help students work through the difficult passages with some combination of modeling,
practicing together, talking students through the steps,
and establishing practice techniques. Students willonly have a short amount of time getting one-on-one
help, so they need to make the most of it.
Activity 2: D-Major Scale and Follow the Leader Time: 15 minutes
Includes demonstration, guided practice, individual or group practice. Be sure and link to
your learning objectives.
Begin the large group session today with the D-Major
scale. Ask students to stand in “rest position” at their
stands. Then, when given the cue, students should get
into correct playing position (in our case, the “cue”was the instructor doing it herself). The instructor
should verbally remind students of how they should be
standing and give feedback to individual apprenticeswhen necessary. Then, the instructor should model the
scale for students, reminding them of the fingering.
Then, students should play along.
After students have finished the basic D-Major scale,
instructor should incorporate rhythm variations(Massachusetts Up Down, Alligator Alligator) through
a follow the leader game. The goal of the game is for
students to mimic the rhythm the instructor plays – the
rhythms will be ones that they have already learned, but they will not be told which one it is. Students need
to remain totally silent with their bows off the strings
while the instructor is playing so that they can hear
which rhythm they need to mimic. Students who break this rule will be asked to sit out. Instructor
should start with a “practice round” by playing arhythm on the open D-string. Then give the cue for
apprentices (could verbal or an action) to follow the
leader. Ask if anyone could identify that rhythm just
from hearing it. Play the game a couple more times ona single note.
Objective
Follow the instructor’s lead
Demonstrate body position,
composure, and presenceappropriate for performance
Page 57 of 70

8/6/2019 Orchestra Apprenticeship
http://slidepdf.com/reader/full/orchestra-apprenticeship 58/70
Then, add another component to the game. Instead of
just playing back the rhythm once on one note,
students will need to play the rhythm on each note inthe D-Major scale. Instructor should play the rhythm
once on the D-String, and then students should copy it
on every note of the scale. Try it out with a fewdifferent rhythms. After students have gotten the hang
of mimicking the instructor, move onto the nextactivity.
Activity 3: Switch it Up! Time: 15 minutes
Includes demonstration, guided practice, individual or group practice. Be sure and link toyour learning objectives.
Take a quick break from Follow the Leader, but let
students know that they will return to the game in just
a little bit. Ask students to take out their sheet music
for “Twinkle, Twinkle.” Instructor should model how
the song looks and sounds on her instrument, and thenask students to play along. Play through the song a
few times, making sure that students are playing theright notes and in-tune.
Then, ask students to incorporate “Twinkle, Twinkle”into the Follow the Leader activity. Just like we did
with the D-Major scale, students will be playing this
familiar song, but will have to pay attention to theinstructor to figure out which rhythm to play with it.
Instructor should tell students which rhythm she will
play first and then model how the song will soundwith a different rhythm. Then ask students to playalong with the instructor, paying special attention to
the rhythm. This is the way that we will play
“Twinkle, Twinkle” at the WOW! For the nextrhythm, the instructor should just model (don’t tell
which one it is), and then students should mimic.
Keep running through different rhythms until studentsare really paying attention to the instructor and
following along. End with a run through of “Twinkle,
Twinkle” using all of the rhythm variations without
any pauses (Instructor models, students play,instructor models, students play, etc). During the time
the instructor is modeling the rhythm, students should
be poised to play (in playing position with a good bowgrip, but the bow not on the strings).
Objective
Follow the instructor’s lead
Play WOW! pieces in unison as
a large group
Demonstrate body position,
composure, and presenceappropriate for performance
Activity 4: Ode To Joy Time: 15 minutes
Includes demonstration, guided practice, individual or group practice. Be sure and link to
Page 58 of 70

8/6/2019 Orchestra Apprenticeship
http://slidepdf.com/reader/full/orchestra-apprenticeship 59/70
your learning objectives.
Take a quick break from playing by asking students to
teach back facts that they know about “Ode To Joy”and Beethoven (there is a paragraph about the song
and its composer on the sheet music). Students should
be standing in rest position as they teach back a few
facts. Ask for one or two volunteers who would bewilling to write a summary of these facts to present at
the WOW! as an introduction to the song. Instructor
should follow up with these students after class to getthem started on the project, potentially as an extra mile
activity.
Ask students to get their sheet music set up on their
stands. Instructor should outline the procedure for
playing “Ode To Joy” out loud, and then model how itwill go. (In our case, the instructor played the first 4
measures as an “intro” and then everyone started at the beginning and played all the way through.) Havestudents get into playing position, making sure that
they are following cues and paying attention to each
other. Instructor should play the intro and then kids
should join in. Play the song all the way through, evenif kids mess up or get lost. At the end, indicate to kids
that they should go into rest position (tell them and
model it), and then practice your bows (say hi to your feet and count to 5). Follow the same procedure a few
more times until kids are used to playing the piece
straight through without stops. Any students who arestill struggling with certain passages should take this
opportunity to go into the practice room for one-on-
one coaching.
Objective
Play WOW! pieces in unison as
a large group
Demonstrate body position,
composure, and presence
appropriate for performance
Page 59 of 70

8/6/2019 Orchestra Apprenticeship
http://slidepdf.com/reader/full/orchestra-apprenticeship 60/70
Closing & Teach Back Time: 10 Minutes
Review what you covered in this session and tell them what is coming for the next
session. Be sure students learned by having one or more of them teach back.
Students will probably be tired from practicing for so long today (most of the kids in this
apprenticeship could only go about 20 minutes until they started complaining non-stopabout being tired). Instead of making kids do a teach back today, the instructor will.
Students should put their instruments away and find a seat on the floor or in a desk.
(Students who still need extra help are welcome to go for one-on-one coaching duringthis time instead.) The instructor should play some of the solo pieces or other fun piecesthat she has learned over the years. In our class, the kids made requests and Daniela did
the best she could. This should be a chance for kids to sit back and just enjoy the music:
they have worked hard so far in the semester and will have to set it up in the next twoweeks for the WOW!, but this is a time for them to just have fun.
Clean Up Time: 5 Minutes
What roles can you designate for each student to build team accountability?
Most students should have put their instruments away before the Teach Back, but any
who were still getting extra help need to pack up with others make sure the room is clean.
Curriculum Analysis/Tips for Teacher
Throughout this apprenticeship kids complained of being too tired to play after only 15 or 20 minutes of playing because it takes quite a bit of endurance build up to be able to
maintain correct body position for any longer than that. This was particularly true in this
lesson when kids had an even longer practice session than they ever had before. Onereally useful way to combat complains and whining from the kids is to plan a few 5
minute activities that you can throw in as mini-breaks when the kids need it. For
instance, students could do teach backs about the history of the pieces they have learned,they could review note reading by identifying the different notes on their sheet music, or
they could shuffle stand partners (this transition always takes a while).
Page 60 of 70
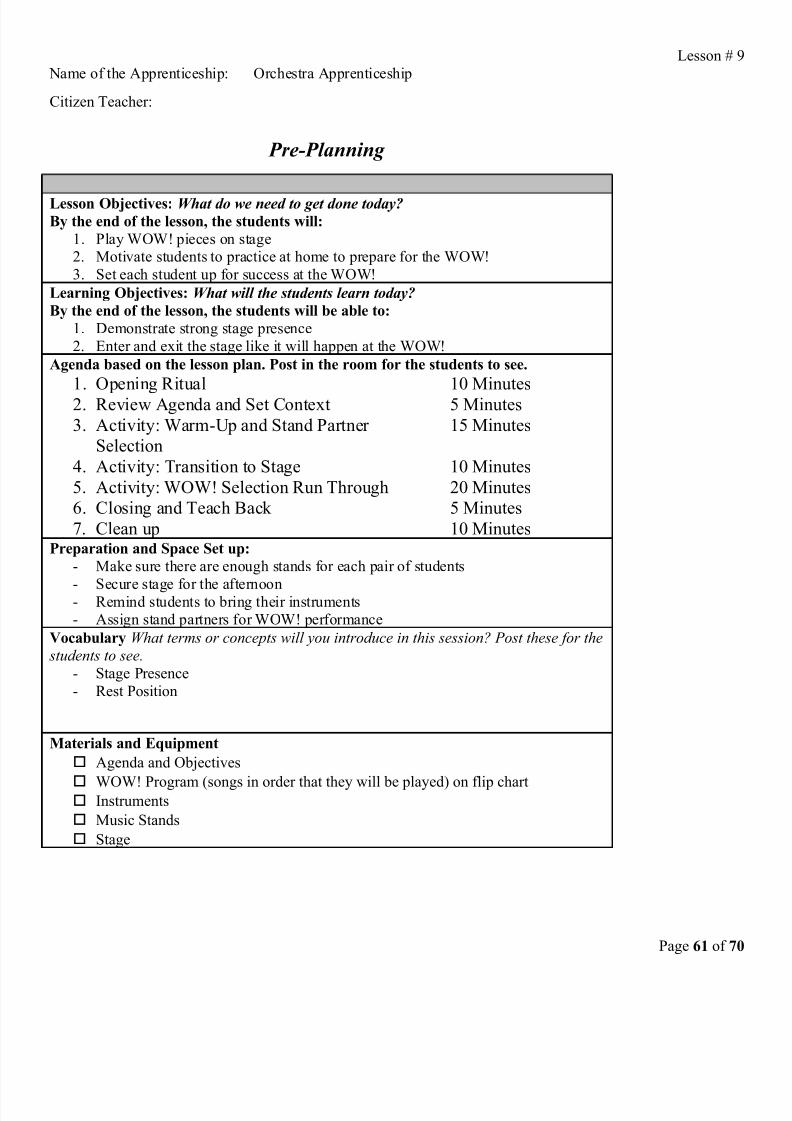
8/6/2019 Orchestra Apprenticeship
http://slidepdf.com/reader/full/orchestra-apprenticeship 61/70
Lesson # 9
Name of the Apprenticeship: Orchestra Apprenticeship
Citizen Teacher:
Pre-Planning
Lesson Objectives: What do we need to get done today?
By the end of the lesson, the students will:
1. Play WOW! pieces on stage2. Motivate students to practice at home to prepare for the WOW!
3. Set each student up for success at the WOW!
Learning Objectives: What will the students learn today?
By the end of the lesson, the students will be able to:
1. Demonstrate strong stage presence
2. Enter and exit the stage like it will happen at the WOW!
Agenda based on the lesson plan. Post in the room for the students to see.
1. Opening Ritual2. Review Agenda and Set Context
3. Activity: Warm-Up and Stand Partner
Selection
4. Activity: Transition to Stage
5. Activity: WOW! Selection Run Through
6. Closing and Teach Back
7. Clean up
10 Minutes5 Minutes
15 Minutes
10 Minutes
20 Minutes
5 Minutes
10 MinutesPreparation and Space Set up:
- Make sure there are enough stands for each pair of students
- Secure stage for the afternoon- Remind students to bring their instruments- Assign stand partners for WOW! performance
Vocabulary What terms or concepts will you introduce in this session? Post these for the
students to see.
- Stage Presence
- Rest Position
Materials and Equipment
Agenda and Objectives
WOW! Program (songs in order that they will be played) on flip chart Instruments
Music Stands
Stage
Page 61 of 70

8/6/2019 Orchestra Apprenticeship
http://slidepdf.com/reader/full/orchestra-apprenticeship 62/70
Lesson # 9
Planning the Lesson
Opening Ritual (It should be tied to the focus of your
Apprenticeship and this session if possible)
Time: 10 Minutes
Ask one or two apprentices to lead the group through the Opening Ritual. In the front of
the room with other students in a semi-circle around them, the leaders should walk everyone through the steps of setting up instruments. The job of the audience is not only
to follow along setting up their own instruments, but also offer feedback in the form of suggestions and guiding questions. This can be done popcorn style or with raised hands
depending on the group.
Set the Context and Review Agenda Time: 5 Minutes
Today we will rehearse for our WOW! on the stage. There are only a couple of weeksleft for us to work together and get these songs to the level where we can perform them
for an audience. Everyone needs to be on the ball today, paying attention to instructionsand participating, especially because we are going to be in a new space.
ACTIVITIES (Please factor a 5 minute break in the middle of 1activity or in between 2 activities)
Time: 60 minutes
Activity 1: Warm-Up and Stand Partner Selection Time: 15 Minutes
Includes demonstration, guided practice, individual or group practice. Be sure and link toyour learning objectives.
Throughout the apprenticeship students have rotatedstand partners, but for the last two weeks everyone is
going to need to remain with the same person.Instructor should assign student pairs as stand partners
based on their strengths, weaknesses, and needs.
Explain to students that stand partner assignments
were selected so that they will be the best performers possible. Also assign students to specific stands in the
lineup.
After students have settled into their stand
assignments, check to make sure that each stand has acopy of all of the music on the program. Review the program with apprentices, asking volunteers to read
the song order out loud. Students should stack their
sheet music in the order that the songs will be played.
Warm-up today will be the D-Major scale. As they
are playing, students should be paying attention to
how their instruments sound (are they playing the right
Objective
Set each student up for successat the WOW!
Page 62 of 70

8/6/2019 Orchestra Apprenticeship
http://slidepdf.com/reader/full/orchestra-apprenticeship 63/70
notes, are they on the right string, are they playing intune) and to how everyone else sounds (are they
playing at the same speed as everyone else, do their
notes sound the same as their stand partners’).
After Warm-up is complete, get ready to transition to
the stage. Everyone should keep their instrumentssafely in rest position, and one student at each stand
should carry the sheet music, while the other carriesthe stand.
Activity 2: Transition to Stage Time: 10 minutes
Includes demonstration, guided practice, individual or group practice. Be sure and link toyour learning objectives.
Walk slowly through the hall to the auditorium/stage,
making sure students are carefully transporting their
instruments and stands carefully. Ask students to setup their stands in the same order that they were
assigned in the classroom. Make sure that stands areevenly spaced and well situated on the stage. Then,students should exit the stage with just their music and
instruments. Have students line up in order so that
they can practice entering the stage. Ask students to
brainstorm some of the do’s and don’ts of stage presence – walk confidently, don’t talk to your friends,
smile, don’t be silly, stay in the correct order, pay
attention to the person in front of you, etc. Consider acting out “mistakes” to get students to think about
how to enter the stage like professional performers.
Have students walk onto the stage in the manner they
just discussed, asking them to behave in the exact way
they would at the WOW! If students can’t take theexercise seriously or aren’t paying attention, have
them repeat their entrance until they get it right. After
students are on stage at their stands, they should
arrange their music and remain in rest position.
Objective
Enter and exit the stage like it
will happen at the WOW!
Activity 3: WOW! Selection Run Through Time: 20 minutes
Includes demonstration, guided practice, individual or group practice. Be sure and link to
your learning objectives.
Even though we are on the stage today, the run
through of our WOW! songs will be just like last
week. Review the order of songs from the program,and check to make sure everyone still has all of their
sheet music. Start with “Ode To Joy.” The instructor
should play the intro like in previous weeks and then
Objective
Play WOW! pieces on stage
Demonstrate strong stage presence
Page 63 of 70

8/6/2019 Orchestra Apprenticeship
http://slidepdf.com/reader/full/orchestra-apprenticeship 64/70
students should join in. After “Ode To Joy,” everyoneshould take a bow, and then get set up for “Twinkle,
Twinkle.” Instructor should remind the students that
she will play the rhythm first, and then they will joinin. Run through all four “Twinkle, Twinkle”
variations without stopping. Take a bow again, and
practice exiting the stage quickly and quietly.
Use the remaining time in this activity to run throughthe program a few more times, taking breaks to bow,
enter and exit.
Closing & Teach Back Time: 5 Minutes
Review what you covered in this session and tell them what is coming for the next
session. Be sure students learned by having one or more of them teach back.
While still on the stage, ask students to teach back some things they learned and practiced
today. Have students raise their hands to answer. Did playing on the stage make you feelnervous? Are you nervous to perform in front of an audience because you don’t think
you are good enough? Point out that there is still plenty of time for students to practiceand get better if they didn’t feel completely confident when they were on stage today.
Clean Up Time: 10 Minutes
What roles can you designate for each student to build team accountability?
Transition back into the classroom with instruments, music and stands, making sure that
students are carefully carrying their things as they walk through the halls. Have students
put their instruments away and re-stack the stands.
Page 64 of 70

8/6/2019 Orchestra Apprenticeship
http://slidepdf.com/reader/full/orchestra-apprenticeship 65/70
Lesson # 10
Name of the Apprenticeship: Orchestra Apprenticeship
Citizen Teacher:
Pre-Planning
Lesson Objectives: What do we need to get done today?
By the end of the lesson, the students will:
1. Polish WOW! pieces2. Review stage presence expectations
Learning Objectives: What will the students learn today?
By the end of the lesson, the students will be able to:
1. Confidently and professionally perform several pieces for an authentic audience
2. Sit quietly in the audience with instruments and music
Agenda based on the lesson plan. Post in the room for the students to see.
1. Opening Ritual
2. Review Agenda and Set Context3. Activity: Warm-Up
4. Activity: WOW! Performance Run Through
5. Closing and Teach Back
6. Clean up
10 Minutes
10 Minutes10 Minutes
30 Minutes
10 Minutes
5 MinutesPreparation and Space Set up:
- Set up enough stands in a line for all of the students (two students per stand)
- Secure stage for dress rehearsal
- Remind students to bring their instruments
Vocabulary What terms or concepts will you introduce in this session? Post these for the students to see.
- Stage Presence
- Rest Position
Materials and Equipment
Agenda and Objectives
WOW! Program (full campus dress rehearsal)
Program for Strings group on flip chart paper
Instruments
Music Stands
Page 65 of 70

8/6/2019 Orchestra Apprenticeship
http://slidepdf.com/reader/full/orchestra-apprenticeship 66/70
Lesson # 10
Planning the Lesson
Opening Ritual (It should be tied to the focus of your
Apprenticeship and this session if possible)
Time: 10 Minutes
Apprentices should follow the same procedure for setting up their instruments that they
used last week. Instructor should supervise as apprentices get the instruments out of cases, attach shoulder rests, and tighten/rosin bows. After all instruments are ready,
apprentices should play open strings individually so that the instructor can tuneinstruments as needed.
Set the Context and Review Agenda Time: 10 Minutes
Today’s dress rehearsal will be with the entire campus – all of the performance
apprenticeships will take turns practicing on stage in the order that they will appear at theactual WOW! This means that apprentices not only need to practice performing, but they
also need to practice being good audience members.
ACTIVITIES (Please factor a 5 minute break in the middle of 1
activity or in between 2 activities)Time: 60 minutes
Activity 1: Warm-Up Time: 10 Minutes
Includes demonstration, guided practice, individual or group practice. Be sure and link to
your learning objectives.
After all of the students have set up and tuned their
instruments, and the agenda and expectations have been covered, have students warm up as a group with
the D-Major scale. As students play the D-Major scaleas they have in previous weeks, the instructor should
make sure that student are correctly holding their
instruments. If there is time, warm up with “Twinkle,
Twinkle” and “Ode to Joy” as well. Also, be sure toreview expectations for entering and leaving the stage
before sending students to their seats in the audience.
Objective
Warm-up and review body
position, etc.
Review stage presenceexpectations
Activity 2: WOW! Performance Run Through Time: 30 Minutes
Includes demonstration, guided practice, individual or group practice. Be sure and link toyour learning objectives.
Seat students in the audience in the same way they will
be seated at the WOW! They should also be sitting in
the same order that they stand on stage so as tofacilitate a smooth transition onto the stage. Strings
students should be holding their instruments in rest
position or across their laps at their seats. Run through
Objective
Confidently and professionally
perform several pieces for an
authentic audience
Sit quietly in the audience with
instruments and music
Page 66 of 70

8/6/2019 Orchestra Apprenticeship
http://slidepdf.com/reader/full/orchestra-apprenticeship 67/70
the entire WOW! performance with all of theapprenticeship groups.
When it is the strings group’s turn, apprentices shouldwalk quickly and quietly on stage, set their sheet
music up on the stands, and stand in rest position
waiting for the instructors cue. A student speaker or team leader should introduce the group. Students
should follow the cues of the instructor, getting into playing position. Students should play through their
WOW! songs as they have rehearsed in previousweeks. After students have taking their final bow,
they should put their instruments in rest position, pick
up their music, and file off stage back to their seats.
Finish with the WOW! dress rehearsal.
Closing & Teach Back Time: 10 Minutes
Review what you covered in this session and tell them what is coming for the next session. Be sure students learned by having one or more of them teach back.
Congratulate the entire campus on their hard work and success. Remind music students
to bring their instruments to the WOW! and remind everyone to wear their Citizen
Schools t-shirts.
Clean Up Time: 5 Minutes
What roles can you designate for each student to build team accountability?
Students should pack up their instruments independently, and get ready for closing circle.
Page 67 of 70

8/6/2019 Orchestra Apprenticeship
http://slidepdf.com/reader/full/orchestra-apprenticeship 68/70
Reflection Lesson
Name of the Apprenticeship: Orchestra Apprenticeship
Citizen Teacher:
Pre-Planning
Lesson Objectives: What do we need to get done today?
By the end of the lesson, the students will:
1. Reflect on the apprenticeship2. Identify a few of their favorite parts of the apprenticeship
3. Write short essays about their experience
Learning Objectives: What will the students learn today?
By the end of the lesson, the students will be able to:
1. Think more intentionally about their own strengths and weaknesses
Agenda based on the lesson plan. Post in the room for the students to see.
1. Review Agenda and Set Context
2. Pluses/Deltas of Apprenticeship3. Identify Successes and Challenges
4. Reflection Essay
5. Hand in instruments
6. Clean up
10 Minutes
10 Minutes10 Minutes
15 Minutes
10 Minutes
5 MinutesPreparation and Space Set up:
- Create Visuals
Vocabulary What terms or concepts will you introduce in this session? Post these for the
students to see.
- Reflection- Successes and Challenges- Pluses/Deltas
Materials and Equipment
Agenda and Objectives
Plus/Delta Flip Chart
Instruments
Reflection Essay Prompt
Paper for reflection essay and successes/challenges
Checklist for handing in instruments
Page 68 of 70

8/6/2019 Orchestra Apprenticeship
http://slidepdf.com/reader/full/orchestra-apprenticeship 69/70
Reflection Lesson
Planning the Lesson
Set the Context and Review Agenda Time: 10 Minutes
Today’s lesson is a wrap up of the entire apprenticeship – we will be reflecting on the
successes and challenges of our work together and you can give you suggestions for
improvement.
ACTIVITIES (Please factor a 5 minute break in the middle of 1
activity or in between 2 activities)Time: 45 minutes
Activity 1: Pluses/Deltas of Apprenticeships Time: 10 Minutes
Includes demonstration, guided practice, individual or group practice. Be sure and link to
your learning objectives.
Ask apprentices if they can remember what pluses and
deltas are (think back to one of the very first schoolnavigation lessons). Review that deltas are not only
things that were bad, but that they also have to be
phrased in a way that we can think of a solution.Begin by reviewing some of the specific activities
from throughout the apprenticeship. Think way back
to the very beginning. Select a scribe to write
apprentice ideas on the flip chart. Set an expectationthat for every delta, students must think of a plus as
well. Ask for raised hands and have the scribe record
ideas.
Objective
Identify a few of their favorite
parts of the apprenticeship
Reflect on the apprenticeship
Closing & Teach Back Time: 10 Minutes Review what you covered in this session and tell them what is coming for the next session. Be sure students learned by having one or more of them teach back.
Congratulate the entire campus on their hard work and success. Remind music students
to bring their instruments to the WOW! and remind everyone to wear their Citizen
Schools t-shirts.
Activity 3: Reflection Essay Time: 15 Minutes
Page 69 of 70

8/6/2019 Orchestra Apprenticeship
http://slidepdf.com/reader/full/orchestra-apprenticeship 70/70
Includes demonstration, guided practice, individual or group practice. Be sure and link to
your learning objectives.
The last reflection activity before we hand in our instruments for the semester will be writing a short
essay about some of our experiences in this
apprenticeship. This essay is really important becausewe will send them to the Massachusetts Cultural
Council, which is the organization that gave us themoney to help pay for this apprenticeship. Post thereflection essay prompt and read it out loud.
(Example: Write at least 5 paragraphs about something
that was fun, interesting, or challenging about this
apprenticeship.) Remind students that this is anindependent, silent activity, and that they need to take
it seriously so that we can have another instrumental
apprenticeship next semester. Give students about 10minutes to write, and then collect essays.
Objective
Identify a few of their favorite parts of the apprenticeship
Reflect on the apprenticeship
Write short essays about their experience
Activity 4: Hand in Instruments Time: 10 MinutesIncludes demonstration, guided practice, individual or group practice. Be sure and link to
your learning objectives.
Pass out checklists for students to use to make suretheir instruments are in order to hand in. Checklist
should include things like instrument, bow, rosin, and
a space for writing anything that is wrong with theinstrument (like a broken string). Ask students to
open their cases and make sure that everything is in
order, complete checklists, and turn in their
instruments.
Objective
Hand in instruments
Clean Up Time: 5 Minutes
What roles can you designate for each student to build team accountability?
Students should help take down any visuals, put desks back where they belong, and line
up to go to circle.