Embed Size (px)
Citation preview

PP66 PPrrooffeessssiioonnaall ffoorr EEPPPPMM IInnssttaallllaattiioonn aanndd CCoonnffiigguurraattiioonn GGuuiiddee
1155 RR22
JJuullyy 22001166

3
Contents
Installing P6 Professional ............................................................................. 5
Database Client Software ............................................................................... 5
Oracle Database Client Software ............................................................... 5
Configuring Client Machines for Oracle Instant Client ......................... 6
Microsoft SQL Server Database Client Software .............................................. 6
Previous Versions of P6 Professional .................................................................. 6
About the P6 Professional Setup Wizard ............................................................. 7
Installing the P6 Professional Application ............................................................ 8
Configuring the Database Connection for P6 Professional .................................. 9
Enabling Excel Import/Export with the 64-Bit Version of P6 Professional .............. 10
Set the Industry Type (P6 EPPM Only) .............................................................. 11
Installing Local Copies of P6 Professional Help .................................................... 12
About the Database Configuration Wizard for P6 Professional .................................. 12
Changing Database Connection Settings for P6 Professional ............................. 13
Configuring Client Machines to Transfer Data Between P3 and P6 Professional .............. 15
Configuring Client Machines for a Non-Default Microsoft SQL Server Port .................... 15
Database Administrator Settings for a Non-Default Microsoft SQL Server Port ............... 15
Connect P6 Professional to a Contract Management HTTPS URL ............................... 16
Configuring P6 Professional to Connect to a Contract Management HTTPS URL ............. 16
Configuring P6 Professional Internal Plug-ins for Authentication ............................... 17
P6 Visualizer ........................................................................................... 18
Installing P6 Visualizer Only .......................................................................... 18
Installing Local Copies of Visualizer Help .......................................................... 19
Unattended Setup for P6 Professional ............................................................ 21
Unattended Setup ..................................................................................... 21
Running Unattended Setup ........................................................................... 22
Creating Database Connections for Unattended Setup ........................................... 23
Configuring ClickOnce ............................................................................... 25
Prerequisites for ClickOnce .......................................................................... 25
Customizing the DeployClickOnceEppm.bat File .................................................. 26
Description of Parameters Used in DeployClickOnceEppm.bat .......................... 27
Deploying ClickOnce ................................................................................... 29
Upgrading P6 Professional Using ClickOnce ........................................................ 30
Installing P6 Professional Using ClickOnce ......................................................... 31
P6 Professional Setup for Windows Terminal Services and Citrix ........................... 33
Pre-Installation Considerations ...................................................................... 33
Installing P6 Professional on Terminal Services ................................................... 34
P6 Professional for EPPM Installation and Configuration Guide
4
Setting PM.ini to Terminate a Current Session .................................................... 36
Using Oracle Secure Global Desktop .............................................................. 37
Setting PM.ini to Terminate a Current Session .................................................... 37
For More Information ................................................................................ 38
Where to Get Documentation ........................................................................ 38
Where to Get Training ................................................................................ 41
Where to Get Support ................................................................................. 41
Legal Notices .......................................................................................... 43
5
This section describes how to install P6 Professional, the P6 Professional SDK, P6 Visualizer and Job Service. Run the Setup wizard on the client/desktop computers that will be used by project personnel.
Install P6 Professional only after you install and configure the database server. The Setup wizard needs to connect to the database server when installing P6 Professional.
In This Section
Database Client Software .......................................................................................... 5 Previous Versions of P6 Professional ........................................................................ 6 About the P6 Professional Setup Wizard ................................................................... 6 Installing the P6 Professional Application .................................................................. 8 Set the Industry Type (P6 EPPM Only) ................................................................... 11 Installing Local Copies of P6 Professional Help ....................................................... 12 About the Database Configuration Wizard for P6 Professional ................................ 12 Configuring Client Machines to Transfer Data Between P3 and P6 Professional ..... 14 Configuring Client Machines for a Non-Default Microsoft SQL Server Port .............. 15 Database Administrator Settings for a Non-Default Microsoft SQL Server Port ....... 15 Connect P6 Professional to a Contract Management HTTPS URL .......................... 16 Configuring P6 Professional to Connect to a Contract Management HTTPS URL ... 16 Configuring P6 Professional Internal Plug-ins for Authentication ............................. 17
Database Client Software
Before you install P6 Professional, first install the client software for the database you will be using. The database client software enables the client computer to connect over the network to the database on the server computer.
Oracle Database Client Software
Use your Oracle installation CD to set up an application user and configure your Oracle Net Services client files to match your network. If you are unfamiliar with this process, please contact your database administrator.
Installing P6 Professional
P6 Professional for EPPM Installation and Configuration Guide
6
Notes:
During the P6 Professional installation, use the Oracle EZCONNECT string (//server name:listen port/service name) to connect to the P6 EPPM database. If you wish to use the TNSNAMES file instead of EZCONNECT, the TNSNAMES file will be in the Oracle home folder on the client machine, not in a shared location. Reference the TNSPING.EXE location in your path environment variable.
If you are going to launch content repository documents from P6 Professional, you will have to use the TNSNAMES method rather than the EZCONNECT method. The TNSNAMES file will be in the Oracle home folder on the client machine, not in a shared location. Reference the TNSPING.EXE location in your path environment variable.
Ensure that all clients are configured to use TCP/IP as the default network protocol.
Configuring Client Machines for Oracle Instant Client
To configure a client machine for Oracle Instant Client:
1) Copy Oracle Instant Client to a local drive.
2) Go to System Properties, Advanced tab.
3) Click the Environment Variables button.
4) To the Path variable, add the location of the Oracle Instant Client specified in step 1.
Microsoft SQL Server Database Client Software
When you install P6 Professional on a client computer, the Microsoft SQL Server client files necessary to connect to P6 EPPM are automatically installed for you. Alternatively, you can use your Microsoft SQL Server installation CD to install the client network utility. If you are unfamiliar with this process, please contact your database administrator.
See Configuring Client Machines for a Non-Default Microsoft SQL Server Port (on page 15) after you install P6 Professional if you use a port other than the default (1433) to connect to your Microsoft SQL Server P6 EPPM database.
Previous Versions of P6 Professional
P6 Professional replaces previous versions. To update to P6 Professional 15 R2 from R8.1. R8.2, R8.3, or R8.4, run Setup. P6 Professional, P6 Professional SDK, and Job Services will be updated. P6 Professional 15 R2 will run alongside Oracle Primavera P6 6.2 or 7.0.

Installing P6 Professional
7
About the P6 Professional Setup Wizard
Install P6 Professional by running the Setup wizard.
The Setup wizard presents several options, the following are the only applicable options when installing P6 Professional for EPPM:
Typical - This choice installs P6 Professional.
Advanced - This choice allows:
An alternate installation folder path, as described in Installing the P6 Professional Application (on page 8).
An option that allows the installation of P6 Visualizer for standalone use, as described in Installing P6 Visualizer Only.
(All other options are for use in a P6 Professional-only environment. See the P6 Professional Administrator's Guide for details.)
The Setup wizard displays the amount of disk space required to install P6 Professional. Administrator rights are required to install on the client computer. Also, the network protocol TCP/IP must be installed on the client computer.
If you do not want to install P6 Professional manually, you can run an unattended setup. See Unattended Setup for P6 Professional (on page 21).
Notes:
See Previous Versions of P6 Professional (on page 6) before running the Setup wizard if version 6.0 or later of P6 Professional is currently installed.
Primavera P6 Visualizer will be automatically installed when you install P6 Professional.
The P3 application is required for users with 32-bit operating systems to be able to import and export P3 data. Make sure that P3 is installed PRIOR to running the P6 EPPM setup wizard. See Configuring Client Machines to Transfer Data Between P3 and P6 Professional (on page 14) after P6 Professional is installed for additional configuration procedures. See Troubleshooting Importing Projects from P3 to P6 Professional in the P6 Professional Help for instructions on how to manually register required files after the installations are complete if you install P3 after you install P6 Professional, if you do not want to install P3 on the same machine where P6 Professional is installed, or if you are using 64-bit operating systems.
P6 Professional for EPPM Installation and Configuration Guide
8
Starting with P6 EPPM R8, all recurring job service functions are hosted by P6. Due to this change, after upgrading to P6 EPPM R8 or later, you must configure Scheduled Services settings in the Primavera P6 Administrator to use this functionality. Also, if you're upgrading from version 7.0 or earlier, you must RESUMMARIZE ALL PROJECTS to accurately reflect your summary data. See the P6 EPPM System Administrator's Guide for information on Scheduled Services and configuring separate servers for job services.
By default, help is not installed locally, and it is only available when you have an internet connection. To install a local copies of the help, follow the instructions under Installing Local Copies of P6 Professional Help (on page 12).
Installing the P6 Professional Application
Note: If you have a standalone database installed the installer will prompt you for your database credentials when installing P6 Professional. See the P6 Professional Standalone Installation and Configuration guide for details on completing a standalone installation or upgrade.
To install the application:
1) Download and extract the media zip file locally to the client computer.
2) In the extracted media zip file, double-click setup.exe in the Client_Applications folder to launch the installation wizard.
Notes:
Click Next on each wizard dialog box to advance to the next step. Click Cancel at any time to exit the wizard.
Microsoft .NET Framework, Windows Installer, and the Java Runtime Environment are required to run P6 Professional. If they are not installed, follow the prompts to install them and then restart your computer as needed. Allow setup.exe to run when your computer restarts and follow the prompts to complete installation of the required components.
3) On the Welcome screen, select the option to install either 32-bit version or the 64-bit version of P6 Professional.
Note: If you are using the 32-bit version of Microsoft Office and intend to use Excel Import/Export with P6 Professional, you must install the 32-bit version of P6 Professional.
4) Click Next.
5) On the Choose Setup Type screen, select Typical.
6) Click Install to begin the installation.
Installing P6 Professional
9
Note: During installation the Database Configuration wizard prompts you for your database credentials. If you prefer to supply database credentials later, click Cancel. You can run the database configuration tool from the Start menu at any time.
If the database is an Oracle SSL database installed on the client machine by a different user than the current system user, click Cancel and run the database configuration tool from the start menu after the installation is complete.
7) Click Finish to complete the installation.
Configuring the Database Connection for P6 Professional
To configure or change the database connection for P6 Professional:
1) From the client computer’s desktop, click Start, then choose Programs, Oracle - Primavera P6, P6 Professional <release_level>, P6 Professional <release_level> Help & Tools, Database Configuration.
2) On the Select or Create Alias dialog box, select values for the following fields:
a. In the Database alias field, enter a new alias. For example, PMDB.
b. In the Driver type field, select the driver type of the database from the following options:
Oracle
Proceed to the Configure ORACLE Connection dialog box.
Microsoft SQL Server / SQL Express
SQLite
Note: For information about the Microsoft SQL Server / SQL Express driver type, see the P6 Professional Administrator's Guide for Microsoft SQL Server Database Guide.
Primavera Compression Server (Only available for 32-bit P6 Professional)
Note: For information about the Primavera Compression Server driver
type, see the P6 Compression Server Administrator's Guide.
P6 Professional Cloud Connect
Choose this driver only if you have installed P6 Professional Cloud Connect in the P6 EPPM suite to set up a remote method of access to connect to the EPPM Oracle database and the P6 APIs. Select this driver to connect to the P6 Professional Cloud Connect server. Proceed to the Configure P6 Professional Connect Server dialog box.
3) Enter the new database connection settings:
a. For an Oracle Database:
1. On the Configure ORACLE Connection dialog box, enter the new database connection settings.
P6 Professional for EPPM Installation and Configuration Guide
10
2. Type the Oracle EZCONNECT string; for example, //server name:listen port/service name. If using the TNSNAMES file, type the Oracle database name.
Note: "//" is mandatory for API applications like Update Baseline, XML Export/import, and Schedule Comparison.
b. For a Microsoft SQL Server database:
1. On the Configure SQL Server Connection dialog box, enter the new database connection settings.
2. Type the database host name and database name. The host name is the name of the computer or IP address where Microsoft SQL Server is installed, along with the port number, for example localhost, 1733. The database name was specified when the database was created; for example, PMDB.
c. For a P6 Professional Cloud Connect database:
1. On the Configure P6 Professional Cloud Connect Server dialog box, in the Database field, enter the P6 Web BRE database alias name.
2. In the URL field, enter the case-sensitive URL for the P6 Professional Cloud Connect service.
Note: Contact your P6 EPPM administrator to obtain the URL for P6 Professional Cloud Connect.
4) On the Enter Public Login Information dialog box, enter your public login information that was defined by your administrator.
5) On the Validate Database Connection dialog box, review the settings and click Next to test the database connection.
6) If the connection was not successful, click Back to revise the database information.
If the connection was successful, click Finish to complete the database connection configuration.
7) Click Finish to complete the installation.
Tips
PrmBootStrapV2.xml file is used regardless of the Driver type selected above.
If you create a new database alias for a module, the module’s PrmBootStrapV2.xml file is updated to reflect the change. If multiple modules are installed on one client computer, changing the database alias for one module does not affect the other modules.
If you change the database connection settings for a database alias and multiple modules share that alias to access the database, your changes affect all the modules that share the alias.
For instructions on how to configure P6 Compression Server, see the P6 Compression Server Administrator's Guide.
Enabling Excel Import/Export with the 64-Bit Version of P6 Professional
The 64-bit version of P6 Professional requires the Microsoft Access Database Engine 2010 Redistributable for Excel Import/Export.

Installing P6 Professional
11
Note: If you installed the 32-bit version of P6 Professional, skip this
procedure.
If you installed the 64-bit version of P6 Professional, complete the following steps:
1) Go to https://www.microsoft.com/en-us/download/details.aspx?id=13255 to download the Microsoft Access Database Engine 2010 Redistributable.
2) Close all Microsoft Office applications.
3) If you have a previous version of Microsoft Access Database Engine installed, uninstall it using Windows Control Panel.
4) Open a command line and enter the following:
<downloaded directory_location>\AccessDatabaseEngine_x64.exe /passive
Note: The Microsoft Access Database Engine 2010 Redistributable may already be installed on some systems depending on your version of Microsoft Office.
Set the Industry Type (P6 EPPM Only)
P6 Professional requires you to choose an industry type. The industry type determines the terminology and default calculation settings that display in P6 Professional. You choose an industry type from P6, Application Settings, General link.
The following table lists each industry type and its corresponding terminology and default settings. Choose the option that best matches your industry.
Industry Types
Industry Type Industry Terminology Examples
Default project comparison tool
Default startup window in P6 Professional
Engineering and Construction
Budgeted Units Budgeted Cost Original Duration
Claim Digger Activities window
Government, Aerospace, and Defense
Planned Units Planned Cost Planned Duration
Schedule Comparison
Projects window
High-Technology, Manufacturing
Planned Units Planned Cost Planned Duration
Schedule Comparison
Projects window
Utilities, Oil, and Gas Budgeted Units Budgeted Cost Original Duration
Claim Digger Projects window

P6 Professional for EPPM Installation and Configuration Guide
12
Notes:
If you choose the Engineering and Construction or the Utilities, Oil, and Gas industry type, P6 Professional users will see different terminology and defaults when switching to other P6 EPPM applications, such as P6.
If you set the industry type and later change it, the new industry setting is immediately effective for new users. However, the change will not take effect for users who have logged in since it was last set. For information on how to make it effective for existing users, refer to My Oracle Support’s Knowledge article How To Change The P6 Industry Type In P6 PPM (Professional), P6 EPPM R8.2 And Later Releases (Doc ID 1386047.1).
Installing Local Copies of P6 Professional Help
By default, P6 Professional help is available through OTN. Follow these instructions to install a local copies of P6 Professional Help.
1) Open Control Panel.
2) Navigate to Programs and Features.
3) Right-click P6 Professional and select Change.
4) On the Welcome dialog box, click Next.
5) On the Change, repair, or remove installation dialog box, choose Change.
6) Expand P6 Professional Common Components.
7) Expand P6 Professional.
8) Expand Internationalized PM Help.
9) Click the name of the language for the Help you want to install locally and select Will be installed on local hard drive.
Note: Except for Chinese (Simplified), French, German, and Japanese, all of the language selections install English Help. In order for the Help to work properly, you should select the language that matches the languages in which you use the P6 Professional user interface.
10) Click Next then click Install.
About the Database Configuration Wizard for P6 Professional
Use the Database Configuration wizard to change connection settings for the client module if your database server configuration changes. For example, if the database is moved to a new server, run the Database Configuration wizard to configure the connection to the new server.
Installing P6 Professional
13
Note: To be able to change database connection settings, the Database Configuration wizard must access the module’s PrmBootStrapV2.xml file. This file is located here:
local drive\%LOCALAPPDATA%\Oracle\Primavera P6\P6 Professional
Changing Database Connection Settings for P6 Professional
To configure or change the database connection for P6 Professional:
1) From the client computer’s desktop, click Start, then choose Programs, Oracle - Primavera P6, P6 Professional <release_level>, P6 Professional <release_level> Help & Tools, Database Configuration.
2) On the Select or Create Alias dialog box, select values for the following fields:
a. In the Database alias field, enter a new alias. For example, PMDB.
b. In the Driver type field, select the driver type of the database from the following options:
Oracle
Proceed to the Configure ORACLE Connection dialog box.
Microsoft SQL Server / SQL Express
SQLite
Note: For information about the Microsoft SQL Server / SQL Express driver type, see the P6 Professional Administrator's Guide for Microsoft SQL Server Database Guide.
Primavera Compression Server (Only available for 32-bit P6 Professional)
Note: For information about the Primavera Compression Server driver type, see the P6 Compression Server Administrator's Guide.
P6 Professional Cloud Connect
Choose this driver only if you have installed P6 Professional Cloud Connect in the P6 EPPM suite to set up a remote method of access to connect to the EPPM Oracle database and the P6 APIs. Select this driver to connect to the P6 Professional Cloud Connect server. Proceed to the Configure P6 Professional Connect Server dialog box.
3) Enter the new database connection settings:
a. For an Oracle Database:
1. On the Configure ORACLE Connection dialog box, enter the new database connection settings.
2. Type the Oracle EZCONNECT string; for example, //server name:listen port/service name. If using the TNSNAMES file, type the Oracle database name.
Note: "//" is mandatory for API applications like Update Baseline, XML Export/import, and Schedule Comparison.
P6 Professional for EPPM Installation and Configuration Guide
14
b. For a Microsoft SQL Server database:
1. On the Configure SQL Server Connection dialog box, enter the new database connection settings.
2. Type the database host name and database name. The host name is the name of the computer or IP address where Microsoft SQL Server is installed, along with the port number, for example localhost, 1733. The database name was specified when the database was created; for example, PMDB.
c. For a P6 Professional Cloud Connect database:
1. On the Configure P6 Professional Cloud Connect Server dialog box, in the Database field, enter the P6 Web BRE database alias name.
2. In the URL field, enter the case-sensitive URL for the P6 Professional Cloud Connect service.
Note: Contact your P6 EPPM administrator to obtain the URL for P6 Professional Cloud Connect.
4) On the Enter Public Login Information dialog box, enter your public login information that was defined by your administrator.
5) On the Validate Database Connection dialog box, review the settings and click Next to test the database connection.
6) If the connection was not successful, click Back to revise the database information.
If the connection was successful, click Finish to complete the database connection configuration.
7) Click Finish to complete the installation.
Tips
PrmBootStrapV2.xml file is used regardless of the Driver type selected above.
If you create a new database alias for a module, the module’s PrmBootStrapV2.xml file is updated to reflect the change. If multiple modules are installed on one client computer, changing the database alias for one module does not affect the other modules.
If you change the database connection settings for a database alias and multiple modules share that alias to access the database, your changes affect all the modules that share the alias.
For instructions on how to configure P6 Compression Server, see the P6 Compression Server Administrator's Guide.
Installing P6 Professional
15
Configuring Client Machines to Transfer Data Between P3 and P6 Professional
In order to use P3 import/export functionality in P6 Professional with 32-bit operating systems, you must have P3 installed on the same machine where P6 Professional resides.
Note: If you install P3 after you install P6 Professional, if you do not want to install P3 on the same machine where P6 Professional is installed, or if you are using 64-bit operating systems, direct your P3 users to use a separate P3/XER import/export utility available from the P6 Professional installation location. By default, the path is local drive\Program Files\Oracle\Primavera P6\P6 Professional\Convert or local drive\Program Files (x86)\Oracle\Primavera P6\P6 Professional\Convert (on a 64-bit operating system with a 32-bit installation). Refer to the My Oracle Support's Knowledge Articles for more information.
Configuring Client Machines for a Non-Default Microsoft SQL Server Port
If you use a port other than the default (1433) to connect to your Microsoft SQL Server P6 EPPM database, you might have to perform additional configuration steps. To determine if you need to perform those steps, proceed as follows after installation of P6 Professional:
1) Launch P6 Professional from the client machine.
2) Choose Help, About Primavera P6 Professional.
3) From the About Primavera P6 Professional dialog box, click the System tab.
4) Under BRE Database, locate the database port number.
5) If the non-default port number appears, no further action is necessary.
If port number 1433 is listed, the user does not have Microsoft SQL Server 2005 Backward Compatibility Components installed. Proceed to the next step.
6) Choose to either globally specify the connection string in the P6 EPPM database SETTINGS table or install Microsoft SQL Server 2005 Backward Compatibility Components on each client machine.
See Database Administrator Settings for a Non-Default Microsoft SQL Server Port if you choose to specify the connection string. If you choose to configure each client machine, proceed to the next step.
7) Download an updated version of Microsoft SQL Server 2005 Backward Compatibility Components (SQL Server2005_BC.msi for 32-bit operating systems and SQLServer2005_BC_x64.msi for 64-bit operating systems) from the following location: http://www.microsoft.com/en-us/download/details.aspx?id=15748
Database Administrator Settings for a Non-Default Microsoft SQL Server Port
To enable users to utilize P6 Integration API functionality within P6 Professional when using a non-default Microsoft SQL Server port, add an ADMINISTRATOR_SETTINGS row to the SETTINGS table for each Microsoft SQL Server database you use with P6 EPPM. The table below summarizes the settings.
P6 Professional for EPPM Installation and Configuration Guide
16
ADMINISTRATOR_SETTINGS Settings
Setting Description: Points to the JDBC connection URL for a P6 EPPM Microsoft SQL Server database.
Namespace Administrator_Settings
Setting Name JdbcConnectionURL
Setting Value jdbc connection url
When entering a value for jdbc connection url for Microsoft SQL Server, use the standard connection string. For example,
jdbc:sqlserver://servername:portnumber;database=databasename;
Connect P6 Professional to a Contract Management HTTPS URL
If you try to connect P6 Professional to a Contract Management HTTPS URL, and the SSL library is not loaded, the following message displays:
Could not load SSL library. See Oracle Primavera Help for documentation regarding linking to Contract Management via HTTPS.
To correct this problem:
1) Go to the http://www.slproweb.com/products/Win32OpenSSL.html website.
2) Click the Visual C++ 2008 Redistributables link.
3) A new Web page opens. Click Download to download the Microsoft Visual C++ 2008 Redistributable Package (x86).
4) On the http://www.slproweb.com/products/Win32OpenSSL.html website, click the Win32 OpenSSL v0.9.8k Light link to install OpenSSL.
5) Follow the prompts in the Setup wizard to install OpenSSL.
Note: In the Setup wizard, on the Select Additional Tasks screen, be sure to choose the Windows system directory option (this is selected by default).
Configuring P6 Professional to Connect to a Contract Management HTTPS URL
If P6 Professional connects to Contract Management hosted at an HTTPS URL, additional client configuration is required.
To configure P6 Professional client machines:
1) Determine the P6 Professional client machines that will be used to import data from Contract Management.
2) Close P6 Professional on the client machines if necessary.
3) On each client machine, go to the following website:
Installing P6 Professional
17
http://www.slproweb.com/products/Win32OpenSSL.html
4) On the website, click the Visual C++ 2008 Redistributables link.
5) On the page that opens, click Download to download the Microsoft Visual C++ 2008 RedistributablePackage (x86).
Configuring P6 Professional Internal Plug-ins for Authentication
P6 EPPM and P6 Professional come with built in applications, such as Schedule Comparison or Claim Digger, that use P6 Integration API technology. You must configure these plug-ins separately for Single Sign-On or LDAP authentication. These applications read a configuration
stored in the database (called INTERNAL_PLUGINS by default) to determine how to authenticate.
Note: This procedure is not applicable for the P6 Professional Cloud Connect driver type.
This procedure uses two utilities:
dbconfig.cmd: To create a new temporary configuration to launch the Internal API
Administration utility, admin.cmd.
admin.cmd: To access and modify the INTERNAL_PLUGINS configuration used by the
Internal API tools.
To change the authentication type, proceed as follows:
1) Launch the Internal API Database Configuration utility, dbconfig.cmd.
For P6 EPPM, the database configuration utility is located in %P6PROFESSIONAL_HOME%\P6 Professional\EPPM\Java\dbconfig.cmd
For P6 Professional, the database configuration utility is located in %P6PROFESSIONAL_HOME%\P6 Professional\PRO\Java\dbconfig.cmd
2) Create a new temporary configuration called TEMP_CLIENT_SETUP, to access the
administration utility.
3) Launch the Internal API administration utility admin.cmd.
For P6 EPPM, the API administration utility is located in %P6PROFESSIONAL_HOME%\P6 Professional\EPPM\Java\admin.cmd
For P6 Professional, the API administration utility is located in %P6PROFESSIONAL_HOME%\P6 Professional\PRO\Java\admin.cmd
4) Login using the Privileged Database username and password.
5) Click on the Authentication tab.
a. Expand the INTERNAL_PLUGINS configuration.
b. In the Authentication folder, set the Login Mode equal to the authentication mode configured for P6.
c. In the Database Instance: <your_instance_name> folder, set the Authentication Mode equal to the authentication mode configured for P6.
6) In the Configurations tab, select the TEMP_CLIENT_SETUP configuration.
a. Right-click and delete TEMP_CLIENT_SETUP.
P6 Professional for EPPM Installation and Configuration Guide
18
b. Click OK in the Confirmation window.
c. Click Save, and OK in the Confirmation window.
7) Exit the administration utility, admin.cmd.
8) Delete the BREBOOTSTRAP.XML file located in %P6PROFESSIONAL_HOME%\P6 Professional\EPPM\Java\
Tip:
For more information on P6 Integration API, refer to the P6 Integration API Configuration Guide.
P6 Visualizer is installed by default when installing P6 Professional, but you may choose to install P6 Visualizer as a standalone application.
Installing P6 Visualizer Only
To install the application:
1) Download and extract the media zip file locally to the client.
2) Double-click setup.exe in the Client_Applications folder of the P6 EPPM physical media or download.
Note: Click Next on each wizard screen to advance to the next step. Click Cancel at any time to exit the wizard.
3) Microsoft .NET Framework, Windows Installer, and Java Runtime Environment are required to run P6 Professional. If they are not installed or if they have to be updated, follow the prompts to install them and then restart your computer when prompted. Allow setup.exe to run when your computer restarts and follow the prompts to complete installation of the required components.
4) On the Welcome screen, you are given a choice between 32-bit and 64-bit platforms. Choose your preference based on which P6 Professional components you need.
Note: If you are using a 32-bit operating system, you must install 32-bit.
5) Click Next.
6) On the Choose Setup Type dialog box, choose Advanced Setup.
7) On the Advanced Setup screen, expand P6 professional Common Components, click P6 Professional Entire feature will be unavailable.
8) Click Next then click Install.
P6 Visualizer

P6 Visualizer
19
Note: During installation the Database Configuration wizard will prompt you for your database credentials. If you prefer to supply database credentials later, click Cancel. You can run the database configuration tool from the start menu at any time.
If the database is an Oracle SSL database installed on the client machine by a different user than the current system user, click Cancel and run the database configuration tool from the start menu after the installation is complete.
9) Click Finish to complete the installation.
Installing Local Copies of Visualizer Help
By default Visualizer Help is available through OTN. Follow these instructions to install a local copy of Visualizer Help.
1) Double-click setup.exe in the Client_Applications folder of the physical media or download.
2) On the Welcome dialog box, click Next.
3) On the Change, repair, or remove installation dialog box, choose Change.
4) Expand P6 Professional Common Components.
5) Expand Visualizer.
6) Expand Internationalized Visualizer Help.
7) Click the language for the Help you want to install locally and select Will be installed on local hard drive.
Note: All of the language selections install English Help. In order for the Help to work properly, select the language that matches the languages in which you use the Visualizer user interface.
8) Click Next then click Install.

21
This chapter provides instructions for performing unattended setup of P6 Professional. An unattended setup enables administrators to run setup in silent mode and ensures that each user receives the same configuration.
As an administrator, you have several options for installing P6 Professional on client machines using the unattended setup. For example, you can physically run the unattended setup on each machine, write scripts that will run the unattended setup on the client machines you specify, or provide these instructions to users with administrator privileges, who can run the unattended setup on his/her computer.
In This Section
Unattended Setup ................................................................................................... 21 Running Unattended Setup ..................................................................................... 21 Creating Database Connections for Unattended Setup ........................................... 23
Unattended Setup
An unattended setup allows an administrator to install P6 Professional on a client computer without having to answer the configuration prompts of the P6 Professional Setup wizard. All configuration details for the installation are specified in the command line. Unattended installations ensure that the client module is configured identically at setup.
To create an unattended setup, you format a command lines to silently launch setup.
The unattended setup can be run by an administrator on client computers by entering the appropriate command lines. The unattended setup will silently install P6 Professional according to the parameters you specify in the command line.
The following prerequisites, available in the Client_Applications folder of the P6 Professional physical media or download, must be installed on each client computer before running unattended setup:
Microsoft .NET Framework
JRE
An administrator should push these prerequisites to client computers before running unattended setup.
Unattended Setup for P6 Professional

P6 Professional for EPPM Installation and Configuration Guide
22
Running Unattended Setup
To run unattended setup:
Note: The P6 Professional installer has changed to use the Oracle Universal Installer, which does not use a response file. Instead, save your setup command line in a batch file in the install directory and execute the batch file for silent installs.
1) Copy the contents of the files in the Client_Applications folder to a local folder.
Oracle recommends creating a new folder, such as 'Installer.' Do not include spaces in the folder name.
2) Open a command line by choosing Start, Run. Type cmd and click OK.
Note: Run cmd from the SysWOW64 folder.
3) On the command line window, enter the location of the Installer folder. For example,
cd c:\Installer
4) On the command line window, enter the following commands:
setup /q
This runs setup silently and there is no indication of the installer running. This will install to the default location: local drive\Program Files\Oracle\Primavera P6\P6 Professional.
Installing individual components only:
Notes:
If you use the p6pro.msi from \x86\en-us folder, you will get P6 Professional (x86).
If you use the p6pro.msi from \x64\en-us folder, you get P6 Professional (x64).
Visualizer
For installing Visualizer only at the default location, enter the following command:
msiexec /i p6pro.msi /l*v "<LogfileLocation>" REMOVE=PM
ADDLOCAL=Visualizer
For installing Visualizer only at a non-default location, enter the following command:
msiexec /i p6pro.msi /l*v "<LogfileLocation>"
INSTALLDIR="<Programlocation>" REMOVE=PM ADDLOCAL=Visualizer
SDK
For installing SDK only at the default location, enter the following command:
msiexec /i p6pro.msi /l*v "<LogfileLocation>" REMOVE=PM ,Visualizer
ADDLOCAL=PMSDK
For installing SDK only at a non-default location, enter the following command:
msiexec /i p6pro.msi /l*v "<LogfileLocation>"
INSTALLDIR="<Programlocation>" REMOVE=PM,Visualizer ADDLOCAL=PMSDK
Unattended Setup for P6 Professional
23
P6 Professional Job Services
For installing P6 Professional Job Services only at the default location, enter the following command:
msiexec /i p6pro.msi /l*v "<LogfileLocation>" REMOVE=PM,Visualizer
ADDLOCAL=PrmJob
For installing P6 Professional Job Services only at a non-default location, enter the following command:
msiexec /i p6pro.msi /l*v "<LogfileLocation>"
INSTALLDIR="<Programlocation>" REMOVE=PM,Visualizer
ADDLOCAL=PrmJob
Tips:
PM and Visualizer components will be installed by default if you do not use REMOVE/ADDLOCAL parameters.
Different combinations of components (PM,Visualizer,PMDK, PrmJob) can be specified separated by "," for REMOVE/ADDLOCAL.
All components are case-sensitive.
To specify a directory other than the default directory use the following command:
msiexec /i p6pro.msi INSTALLDIR="<Programlocation>"
To install with a log file use the following command:
msiexec /i p6pro.msi/l "<LogfileLocation>"
INSTALLDIR="<Programlocation>"
<Programlocation> = The location where you want to install the application
<LogfileLocation> = The location where you want to save the logfile
You may save your setup command line in a batch file in the install directory and run the batch file.
Access documentation for command line parameters by typing msiexec /help.
SDK is compatible with 32-bit installations only.
P6 Professional Job Services is only compatible with 64-bit installations. Jobs can be submitted to P6 Job Services for both 32-bit and 64-bit clients.
Creating Database Connections for Unattended Setup
The database connection should be set on one administrator computer. After configuring the
database connection, push PrmBootStrapV2.xml from the administrator computer(host
computer) with database configuration details to each target client computer.
1) Install P6 Professional on one administrator computer (host computer).
2) Create the database connection on the host machine. Follow the instructions in About the Database Configuration Wizard for P6 Professional (on page 12).
The default location of PrmBootStrapV2.xml for the host computer is:
\%LOCALAPPDATA%\Oracle\Primavera P6\P6 Professional

P6 Professional for EPPM Installation and Configuration Guide
24
The default location of PrmBootStrapV2.xml for the target computer is:
\%PROGRAMDATA%\Oracle\Primavera P6\P6 Professional
25
This section details the necessary configuration and deployment steps for ClickOnce on Oracle WebLogic. Deploy ClickOnce to allow your users to install and configure P6 Professional quickly and easily.
You may choose to configure ClickOnce on a staging machine before deploying to your deployment machine (the WebLogic server). Alternatively, if your web server is installed on a Windows machine, you may choose to configure and deploy directly on your deployment machine without using a staging machine. These instructions assume you will use a staging machine.
Notes:
Your staging machine must be a Windows machine. If your web server is installed on a Linux machine, you must use separate staging and deployment machines.
ClickOnce allows you to configure the P6 Professional installation so that the user does not need to configure anything in order to install and run P6 Professional. However, this is only supported for the P6 Pro Cloud Connect driver type. If your users need to connect using a different driver type, they can still download and install from the ClickOnce page, however they will need to configure the connection separately using Database Configuration. See the P6 Professional Administrator's Guide for details.
If you have installed P6 Professional or Visualizer from any media pack version, you must un-install that version before installing P6 Professional via ClickOnce. If you have installed an earlier version via ClickOnce then want to install P6 Professional or Visualizer from the media pack version, you must un-install that version before installing from the media pack.
In This Section
Prerequisites for ClickOnce ..................................................................................... 25 Customizing the DeployClickOnceEppm.bat File ..................................................... 26 Deploying ClickOnce ............................................................................................... 29 Upgrading P6 Professional Using ClickOnce ........................................................... 30 Installing P6 Professional Using ClickOnce ............................................................. 31
Prerequisites for ClickOnce
The following prerequisites apply to the process of configuring and deploying ClickOnce:
Staging Machine
The machine on which you will prepare the files for ClickOnce.
Configuring ClickOnce
P6 Professional for EPPM Installation and Configuration Guide
26
The staging machine must be running Windows 7, 8, 2008 Release 2, or 2012 Release 2.
Microsoft Windows SDK for .NET Framework must be installed.
The location of the Windows SDK for .NET Framework must exist in the Path environment variable.
Deployment Machine
The machine where your webserver is installed.
The deployment machine can be a Windows or Linux machine.
Other Prerequisites
You must obtain a digital certificate from a certificate authority (for example VeriSign) for signing the ClickOnce files. The certificate must be in Personal Information Exchange (PFX) format and must include the private key created on your staging machine.
Notes:
The DeployClickOnceEppm.bat file assumes that the certificate is
called myserver.pfx. If your certificate file has a different name, you
must modify the set Certificate_File_Full_Path_And_Name= line in
the DeployClickOnceEppm.bat file to provide the correct file
name.
The ClickOnce installer allows you to choose between 32-bit and 64-bit. If you are using a 32-bit machine, you must choose 32-bit ClickOnce.
Modify the DeployClickOnceEppm.bat file to supply the information specific to your installation. See Customizing the DeployClickOnceEppm.bat File (on page 26)
Customizing the DeployClickOnceEppm.bat File
Before deploying ClickOnce, you should customize the DeployClickOnceEppm.bat file to
provide the data which is specific to your environment.
To customize the DeployClickOnceEppm.bat file:
1) On your staging machine, create the following folders: C:\Source and C:\Destination.
Note: If you cannot or do not want to create folders with those names, you
must change the Source_Location and Destination_Location
parameters in DeployClickOnceEppm.bat. See Description of
Parameters Used in DeployClickOnceEppm.bat (on page 27)
2) Extract the ClickOnce_Eppm.zip file from the download media to C:\Source on your
staging machine.
3) Navigate to C:\Source\DeployClickOnceEppm.bat and open the file in a text editor.
4) Under the heading ENTER INFORMATION HERE, edit the following lines:
a. Modify the set Update_URL= line with the location of the p6professionalcloud
folder.
Configuring ClickOnce
27
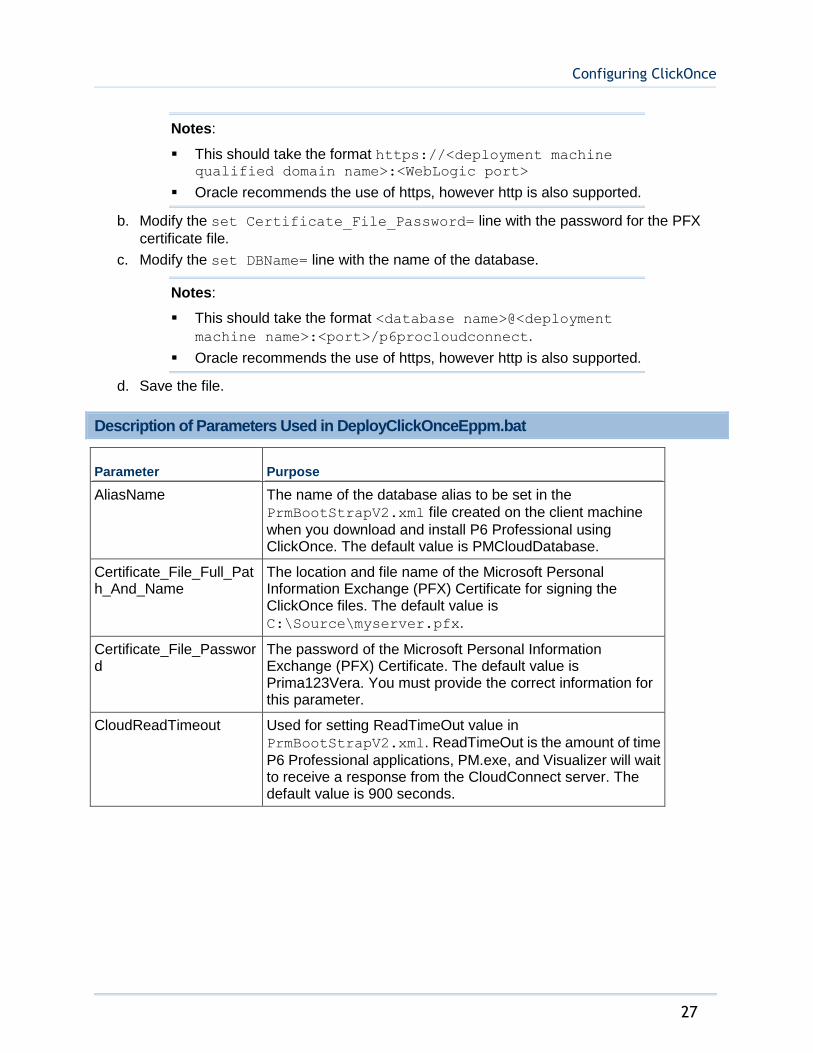
Notes:
This should take the format https://<deployment machine qualified domain name>:<WebLogic port>
Oracle recommends the use of https, however http is also supported.
b. Modify the set Certificate_File_Password= line with the password for the PFX
certificate file.
c. Modify the set DBName= line with the name of the database.
Notes:
This should take the format <database name>@<deployment
machine name>:<port>/p6procloudconnect.
Oracle recommends the use of https, however http is also supported.
d. Save the file.
Description of Parameters Used in DeployClickOnceEppm.bat
Parameter Purpose
AliasName The name of the database alias to be set in the
PrmBootStrapV2.xml file created on the client machine
when you download and install P6 Professional using ClickOnce. The default value is PMCloudDatabase.
Certificate_File_Full_Path_And_Name
The location and file name of the Microsoft Personal Information Exchange (PFX) Certificate for signing the ClickOnce files. The default value is
C:\Source\myserver.pfx.
Certificate_File_Password
The password of the Microsoft Personal Information Exchange (PFX) Certificate. The default value is Prima123Vera. You must provide the correct information for this parameter.
CloudReadTimeout Used for setting ReadTimeOut value in
PrmBootStrapV2.xml. ReadTimeOut is the amount of time
P6 Professional applications, PM.exe, and Visualizer will wait to receive a response from the CloudConnect server. The default value is 900 seconds.

P6 Professional for EPPM Installation and Configuration Guide
28
DBName The name database to be set in the PrmBootStrapV2.xml
file created on the client machine when you download and install P6 Professional using ClickOnce. The default value is <mydbname>@https://<Deployment Machine Full
Computer Name>:<port>/p6procloudconnect where:
<mydbname> is the database alias.
<port> is the WebLogic server port on which the ClickOnce deployment is configured.
Oracle recommends the use of https, however http is also supported. You must provide the correct information for this parameter.
Destination_Location The location to which DeployClickOnceEppm.bat outputs
signed ClickOnce files.
DriverType The name of the driver type to be set in the
PrmBootStrapV2.xml file created on the client machine
when you download and install P6 Professional using ClickOnce. The default and only supported value is CloudServer. Do not change this value.
MandatoryUpdate Used to force an update of P6 Professional if ClickOnce is invoked on a machine which already has P6 Professional installed via ClickOnce. If this parameter is set to n, during the ClickOnce install, the user will be prompted to choose whether to install an update if there is one available. If the parameter is set to y, the ClickOnce installer will automatically install the most recent version of P6 Professional available on eDelivery. The default value is n. Acceptable values are y or n.
MandatoryVersion If you force an update by setting MandatoryUpdate=y, you must specify the version that the update process will install. For example, 8.4.2.11214.
missingfile This is an internal temporary variable. Do not modify this parameter.
Source_Location The location of the files extracted from
ClickOnce_Eppm.zip. This parameter is case sensitive. If
you change this from the default value of C:\Source you
must also update the following parameters accordingly:
Certificate_File_Full_Path_And_Name
Update_Version_Folder
tempMVString This is an internal temporary variable. Do not modify this parameter.
Configuring ClickOnce
29
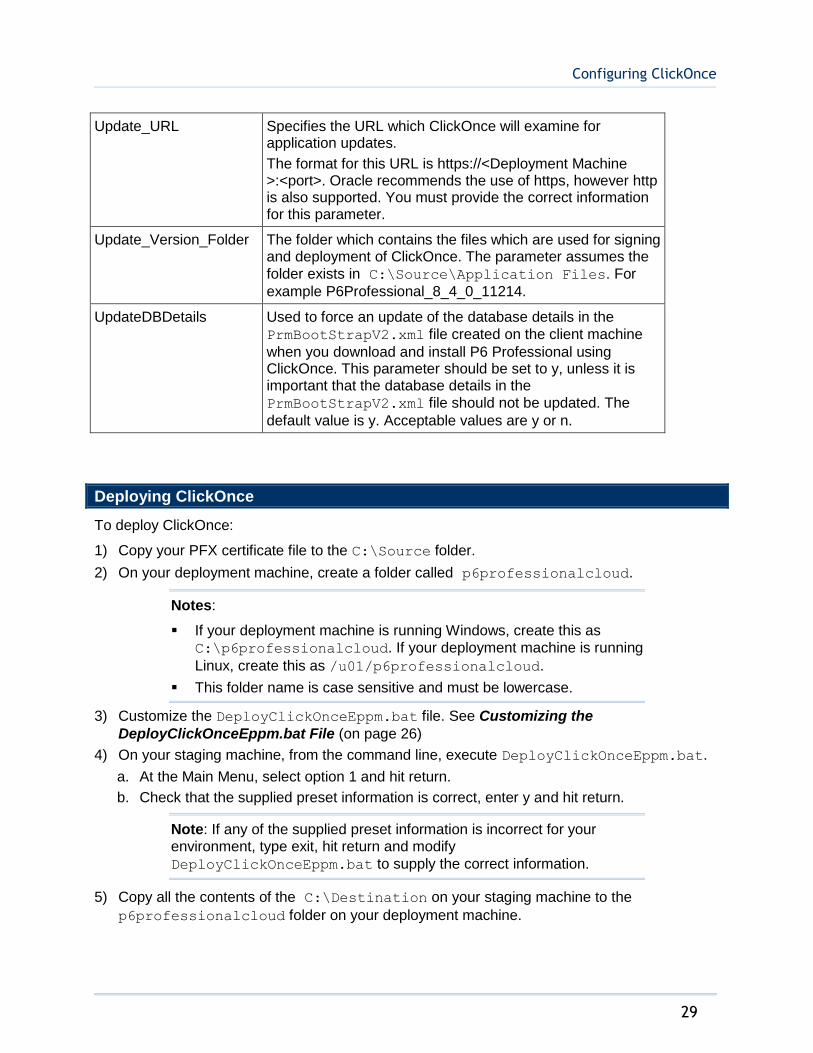
Update_URL Specifies the URL which ClickOnce will examine for application updates.
The format for this URL is https://<Deployment Machine >:<port>. Oracle recommends the use of https, however http is also supported. You must provide the correct information for this parameter.
Update_Version_Folder The folder which contains the files which are used for signing and deployment of ClickOnce. The parameter assumes the
folder exists in C:\Source\Application Files. For
example P6Professional_8_4_0_11214.
UpdateDBDetails Used to force an update of the database details in the
PrmBootStrapV2.xml file created on the client machine
when you download and install P6 Professional using ClickOnce. This parameter should be set to y, unless it is important that the database details in the
PrmBootStrapV2.xml file should not be updated. The
default value is y. Acceptable values are y or n.
Deploying ClickOnce
To deploy ClickOnce:
1) Copy your PFX certificate file to the C:\Source folder.
2) On your deployment machine, create a folder called p6professionalcloud.
Notes:
If your deployment machine is running Windows, create this as
C:\p6professionalcloud. If your deployment machine is running
Linux, create this as /u01/p6professionalcloud.
This folder name is case sensitive and must be lowercase.
3) Customize the DeployClickOnceEppm.bat file. See Customizing the
DeployClickOnceEppm.bat File (on page 26)
4) On your staging machine, from the command line, execute DeployClickOnceEppm.bat.
a. At the Main Menu, select option 1 and hit return.
b. Check that the supplied preset information is correct, enter y and hit return.
Note: If any of the supplied preset information is incorrect for your environment, type exit, hit return and modify
DeployClickOnceEppm.bat to supply the correct information.
5) Copy all the contents of the C:\Destination on your staging machine to the
p6professionalcloud folder on your deployment machine.
P6 Professional for EPPM Installation and Configuration Guide
30
6) Navigate to the p6professionalcloud folder and create a folder called WEB-INF.
7) Navigate into the WEB-INF folder and create a file called web.xml.
8) Open web.xml in a text editor and copy in the following text:
<?xml version="1.0" encoding="UTF-8"?>
<!DOCTYPE web-app PUBLIC
"-//Sun Microsystems, Inc.//DTD Web Application 2.3//EN"
"http://java.sun.com/j2ee/dtds/web-app_2_2.dtd">
<web-app>
<mime-mapping>
<extension>png</extension>
<mime-type>image/png</mime-type>
</mime-mapping>
</web-app>
9) Save web.xml.
10) On your deployment machine, launch WebLogic Admin Server Console and go to the Deployments section.
11) Install a new deployment choosing the p6professionalcloud folder.
Upgrading P6 Professional Using ClickOnce
To upgrade P6 Professional with ClickOnce:
1) On a client machine, open a browser and navigate to the ClickOnce URL.
2) Click the Install link. If you are using a 64-bit machine, you can choose between 32-bit and 64-bit. Choose the option that supports your desired components. If you are using a 32-bit machine, you must choose 32-bit.
Notes:
You may not receive a notification dialog when an update is available. Check with your system administrator to ensure you have the latest version of P6 Professional.
Upgrades can be found on the ClickOnce landing page.
The ClickOnce URL follows the format https://<deployment machine>:<port>/p6professionalcloud/en/publishP6.ht
ml.
When you initiate the installer, previous versions of P6 Professional will be removed.
If the ClickOnce Maintenance dialog stays, you must choose the Remove option.

Configuring ClickOnce
31
Installing P6 Professional Using ClickOnce
To install P6 Professional using ClickOnce:
1) On a client machine, open a browser and navigate to the ClickOnce URL.
2) Click the Install link. If you are using a 64-bit machine, you can choose between 32-bit and 64-bit. Choose the option that supports your desired components. If you are using a 32-bit machine, you must choose 32-bit.
Notes:
The ClickOnce URL follows the format https://<deployment machine>:<port>/p6professionalcloud/en/publishP6.ht
ml.
ClickOnce allows you to configure the P6 Professional installation so that the user does not need to configure anything in order to install and run P6 Professional. However, this is only supported for the P6 Pro Cloud Connect driver type. If your users need to connect using a different driver type, they can still download and install from the ClickOnce page, however they will need to configure the connection separately using Database Configuration. See the P6 Professional Administrator's Guide for details.

33
Overview of Terminal Services and Citrix
P6 Professional fully supports Microsoft Windows 2008 SP2 Terminal Services along with Citrix XenApp (Citrix), check the tested configurations for supported versions.
Running P6 Professional under Windows Terminal Services, published through Citrix is recommended in the following cases:
P6 Professional users running thru a WAN connection are having performance issues whereas users on the local LAN are achieving acceptable performance.
The connect speed between the desktop client and database server is a T1/T3 WAN link or slower with 50 Milliseconds or more of Latency.
You have sensitive project data that you want to secure thru an SSL connection (Citrix supports SSL/High RCA encryption technologies).
You do not want to upgrade the hardware of all your desktop clients or maintain remote client configurations, but would rather centralize your users for easier administration.
Windows Terminal Server with Citrix provides users with the ability to run P6 Professional over slower asynchronous dial up or WAN connection from Windows, UNIX and Mac terminals and get better performance since only screen refreshes and key strokes are sent across the communication line. Windows Terminal Server 2008 without Citrix can also be used to run P6 Professional but other considerations need to be taken into account.
The Citrix add-on enhances Terminal Server by adding the ICA protocol which supports IPX/SPX, NetBIOS as well as TCP/IP protocols. Using Citrix adds support for UNIX, Linux, and Macintosh, as well as Microsoft clients. Also, Citrix automatically configures client’s as they connect and has the ability to auto-configure local printers.
In This Section
Pre-Installation Considerations ................................................................................ 33 Installing P6 Professional on Terminal Services ...................................................... 34 Setting PM.ini to Terminate a Current Session ........................................................ 36
Pre-Installation Considerations
Considerations:
You need a knowledge of Windows 2008 Terminal Services and Citrix
You need the Local Administrator account for software installation and Citrix publishing
It is recommended that a shared drive be used on the LAN local to the terminal services server for project imports and exports due to WAN performance considerations.
P6 Professional Setup for Windows Terminal Services and Citrix
P6 Professional for EPPM Installation and Configuration Guide
34
It is recommended that the users' home directories reside on the same LAN as the Terminal Server/Citrix server due to potential performance issues across various functions in P6 Professional
P6 Professional User requirements:
To run on Windows Terminal Services published through Citrix,
Each P6 Professional user must use a unique Windows account
Each P6 Professional user must use a unique account in P6 Professional.
Home Directories
Windows 2008 Terminal Server Home Directories (Local Profiles)
Windows 2008 Terminal Services creates local directories (on the Terminal Server) for each client in C:\Users\ (default). In most cases, you will use these default Home directories when storing P6 Professional user specific files under the manually created Windows Folder.
For example, C:\Users\Default User\Windows\PM.INI
You can also configure each Terminal Services user to use a different location for the Home directory – either on the Local Terminal Server or on shared network drive. Do this under:
Local Group Policy Editor /Computer Configuration/Administrative Templates/Windows Components/Terminal Services/Terminal Server/Profiles
Each local account on the Windows 2008 Terminal Server could have a common letter drive mapped to their own unique folder.
Windows Domain Accounts Home Directories (Roaming Profiles)
Terminal Server/Citrix ICA clients can connect to the Terminal Server/Citrix server using a domain account. For Windows 2008 Active Directory domains, home directories can be configured at the Active Directory Data Store/Global Catalog using the "Active Directory Users and Computers" console.
The domain account's profile can be configured to map a letter drive to a network share and folder upon login. The same result can be accomplished using login scripts for each domain user. The common letter drive should be applied for all users to map to a unique folder for each domain account. For example:
When User1 logs in, his Terminal Server/Citrix ICA Client shows the P:\ drive mapped to \\SERVER\Share\user1
When User2 logs in, Terminal Server/Citrix ICA Client shows the P:\ drive mapped to \\SERVER\Share\user2.
Provided that each client sees their own unique location when logging into the Terminal Server/Citrix ICA Client, any available drive letter can be used.
For more information on assigning letter drives via user profiles or login scripts please refer to Microsoft documentation for Windows 2008 Server at http://www.microsoft.com/.
Installing P6 Professional on Terminal Services
To install P6 Professional, the Administrator or an account in the local Administrators group must log into the Terminal Server.
P6 Professional Setup for Windows Terminal Services and Citrix
35
Prerequisites
Install Oracle or SQL Server Client drivers as appropriate on the Windows Terminal Servers as described in their respective docs.
If using an Oracle database platform, confirm the Create Global Objects Windows Security Policy is setup on the Terminal Servers and add the domain Users or Groups of the end-users who will be accessing the published application. If the local security policy is not setup, the following steps can be used to add the policy:
1) Click Start, Programs, Administrative Tools, and then click Local Security Policy.
2) Expand Local Policies, and then click User Rights Assignments.
3) In the right pane, double-click Create Global Objects.
4) In the Local Security Policy Setting dialog box, click Add.
5) In the Select Users or Group dialog box, select the user group that these end users are a part of, click Add, and then click OK.
6) Click OK.
If using an Oracle database platform, the Oracle client software also requires that you give the Authenticated User Group, Read and Execute privilege to the Oracle Home Directory and ALL its sub directories and files on the Terminal Servers.
Installation Steps:
1) Run the P6 Professional setup.
Note: Terminal Services Automatically runs setup in Terminal Services install mode.
2) Install P6 Professional.
3) When setup completes, click the Finish dialog to the Terminal Services install mode.
4) Copy PM.INI into each user's respective …\home\user_name\windows\ directory.
The default PM.INI location is:
%ProgramData%\Oracle\Primavera P6\P6 Professional
Note: On 64 bit operating systems the path is Program files (x86). Be sure to Display Hidden files in this directory, since Default user may be hidden.
5) Rename the above mentioned .INI file from PM.INI to PMINI.OLD on the terminal service server, otherwise each user’s unique*.INI file will be ignored.
6) After configuring database connections as described in the installation documentation, deploy PrmBootStrapV2.xml to the ALLUsers appdata folder from the admin user's appdata folder, so that users who launch P6 for the first time will inherit the PrmBootStrap.xml file with existing database configurations. Change DeploymentVersion in the header of PrmBootStrap.xml file to force a new deployment of PrmBootStrap.xml.

P6 Professional for EPPM Installation and Configuration Guide
36
Note: Force a new deployment of the PrmBootstrapV2.xml file to users who have an existing PrmBootstrapV2.xml by incrementing the deployment version one number higher in the PrmBootstrap.xml which exists in the ALLUSERS profile. Never change MajorVersion or MinorVersion. If the deployment version is not incremented and a user already has a PrmBootstrap.xml file in their local profile, it will use the existing file rather than deploy a new copy from the ALLUSERS profile. Example incrementing the deployment version from 0 to 1:
<BootStrap MajorVersion="8" MinorVersion="2" PatchVersion="0" DeploymentVersion="1"
Default PRMBootStrapV2.xml location:
\%ALLUSERSPROFILE%\Oracle\Primavera P6\P6 Professional
7) Test the application by logging up to 2 users into the Terminal Server. If errors occur, contact Oracle Support for assistance.
Note: The Citrix Administrator Application can also publish the application through Citrix.
Setting PM.ini to Terminate a Current Session
If you are running P6 Professional using Citrix or in a cluster of Windows Terminal servers, you may need to set the session to terminate on the database engine. In that case, complete the following steps to update the PM.ini file in the Citrix Home Directory or the Windows directory in the terminal Server user profile:
1) Open PM.ini in a text editor.
2) Add the following setting to the PM.ini file under the Database section:
DeleteCurrentUserSessions=TRUE
Note: You must enter the "TRUE" value in all uppercase letters.
If any sessions are active when the setting is added to the PM.ini file, the user receives the following message:
"[User] already logged in at a terminal [machine] under Windows login account [windows login] Do you want to clear this user?"
3) Select Yes to continue.
37
You can use Oracle Secure Global Desktop to publish P6 EPPM and P6 Professional to remote users.
Check the tested configurations for supported versions of Oracle Secure Global Desktop.
For details on publishing Windows desktops see the Oracle Secure Global Desktop Administration Guide. You will find the Secure Global Desktop documentation library here: http://www.oracle.com/technetwork/documentation/sgd-193668.html.
In This Section
Setting PM.ini to Terminate a Current Session ........................................................ 37
Setting PM.ini to Terminate a Current Session
If you are running P6 Professional using Citrix or in a cluster of Windows Terminal servers, you may need to set the session to terminate on the database engine. In that case, complete the following steps to update the PM.ini file in the Citrix Home Directory or the Windows directory in the terminal Server user profile:
1) Open PM.ini in a text editor.
2) Add the following setting to the PM.ini file under the Database section:
DeleteCurrentUserSessions=TRUE
Note: You must enter the "TRUE" value in all uppercase letters.
If any sessions are active when the setting is added to the PM.ini file, the user receives the following message:
"[User] already logged in at a terminal [machine] under Windows login account [windows login] Do you want to clear this user?"
3) Select Yes to continue.
Using Oracle Secure Global Desktop
P6 Professional for EPPM Installation and Configuration Guide
38
Where to Get Documentation
Complete documentation libraries for P6 EPPM releases are available on the Oracle Technology Network (OTN) at:
http://www.oracle.com/technetwork/documentation/primavera-093289.html
From this location you can either view libraries online or download them to have local copies. We recommend viewing them from OTN to ensure you always access the latest versions, including critical corrections and enhancements.
P6 EPPM is configured to access its help systems on OTN. However, you can also install local versions when you install the software.
The documentation assumes a standard setup of the product, with full access rights to all features and functions.
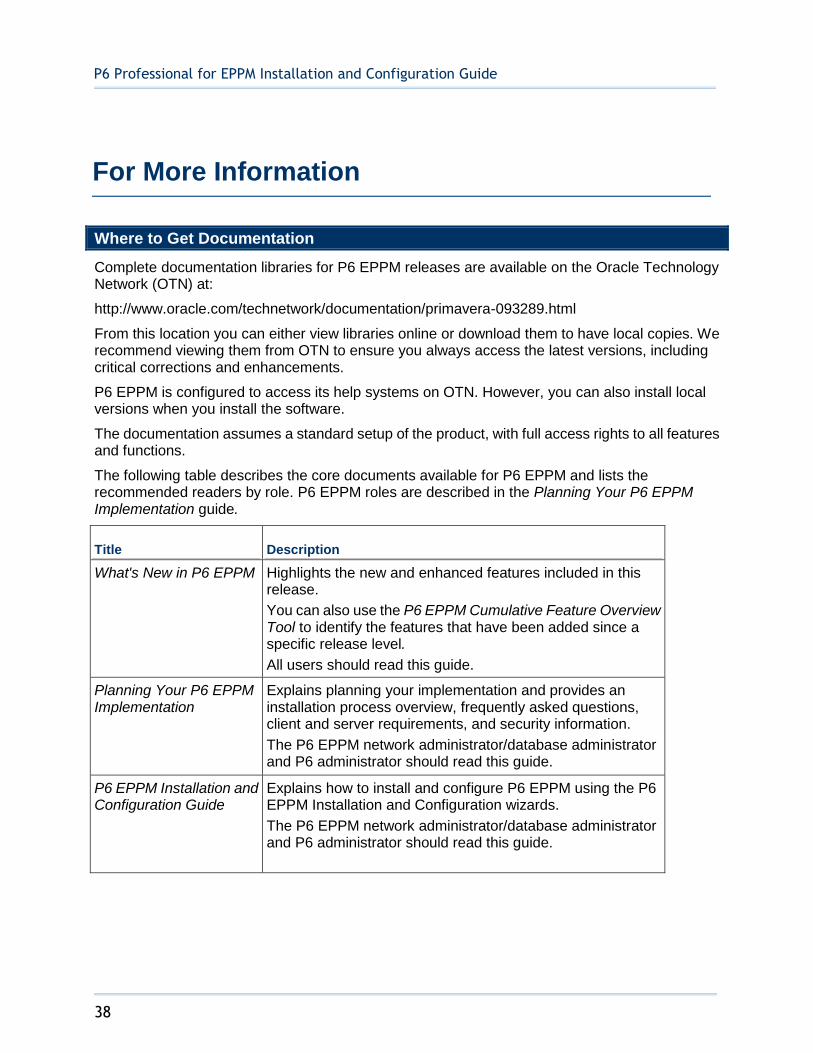
The following table describes the core documents available for P6 EPPM and lists the recommended readers by role. P6 EPPM roles are described in the Planning Your P6 EPPM Implementation guide.
Title Description
What's New in P6 EPPM Highlights the new and enhanced features included in this release.
You can also use the P6 EPPM Cumulative Feature Overview Tool to identify the features that have been added since a specific release level.
All users should read this guide.
Planning Your P6 EPPM Implementation
Explains planning your implementation and provides an installation process overview, frequently asked questions, client and server requirements, and security information.
The P6 EPPM network administrator/database administrator and P6 administrator should read this guide.
P6 EPPM Installation and Configuration Guide
Explains how to install and configure P6 EPPM using the P6 EPPM Installation and Configuration wizards.
The P6 EPPM network administrator/database administrator and P6 administrator should read this guide.
For More Information
For More Information
39
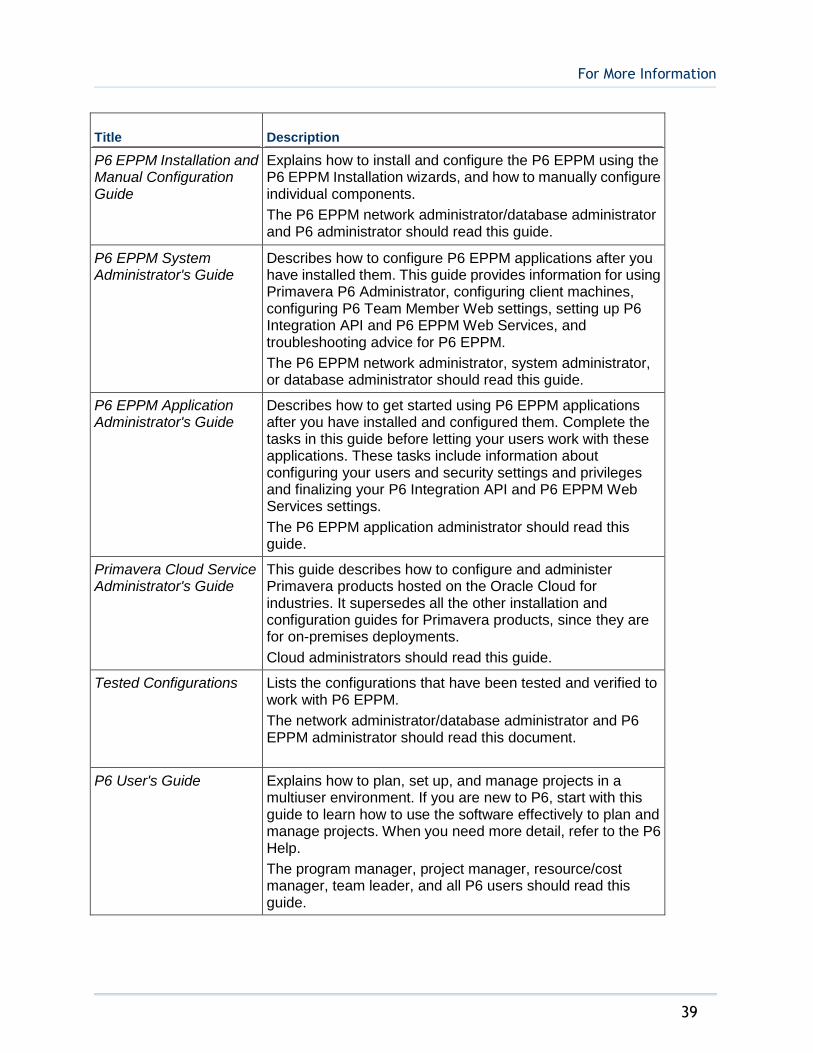
Title Description
P6 EPPM Installation and Manual Configuration Guide
Explains how to install and configure the P6 EPPM using the P6 EPPM Installation wizards, and how to manually configure individual components.
The P6 EPPM network administrator/database administrator and P6 administrator should read this guide.
P6 EPPM System Administrator's Guide
Describes how to configure P6 EPPM applications after you have installed them. This guide provides information for using Primavera P6 Administrator, configuring client machines, configuring P6 Team Member Web settings, setting up P6 Integration API and P6 EPPM Web Services, and troubleshooting advice for P6 EPPM.
The P6 EPPM network administrator, system administrator, or database administrator should read this guide.
P6 EPPM Application Administrator's Guide
Describes how to get started using P6 EPPM applications after you have installed and configured them. Complete the tasks in this guide before letting your users work with these applications. These tasks include information about configuring your users and security settings and privileges and finalizing your P6 Integration API and P6 EPPM Web Services settings.
The P6 EPPM application administrator should read this guide.
Primavera Cloud Service Administrator's Guide
This guide describes how to configure and administer Primavera products hosted on the Oracle Cloud for industries. It supersedes all the other installation and configuration guides for Primavera products, since they are for on-premises deployments.
Cloud administrators should read this guide.
Tested Configurations Lists the configurations that have been tested and verified to work with P6 EPPM.
The network administrator/database administrator and P6 EPPM administrator should read this document.
P6 User's Guide Explains how to plan, set up, and manage projects in a multiuser environment. If you are new to P6, start with this guide to learn how to use the software effectively to plan and manage projects. When you need more detail, refer to the P6 Help.
The program manager, project manager, resource/cost manager, team leader, and all P6 users should read this guide.

P6 Professional for EPPM Installation and Configuration Guide
40
Title Description
P6 Help Explains how to use P6 to administer, plan, set up, and manage projects, portfolios, workflows, timesheets, documents, and reports in a multiuser environment. Describes how to analyze performance and ROI, and analyze budgets. If you are new to P6, use this Help to learn how to use the software effectively.
The operations executive, P6 EPPM and P6 administrator, program manager, project manager, resource/cost manager, team leader, and all users should read this Help.
P6 Data Dictionary Defines fields used in P6.
All P6 users should refer to this guide if they need a field definition.
P6 Team Member Web Help
Describes how to use P6 Team Member Web to provide status on activities.
P6 Team Member Web users should read this Help.
P6 EPPM Web Services Programmer’s Guide
Describes how to invoke, use, and troubleshoot the available services and operations within supported environments. When you need specific information about the services and operations available, refer to the P6 EPPM Web Services Reference Manual.
Anyone who wants to develop applications that interact with P6 should read this guide.
P6 EPPM Web Services Reference Manual
Describes all services and operations available in P6 EPPM Web Services.
Anyone who wants to develop applications that interact with P6 should read this guide.
P3 to P6 EPPM Migration Guide
Provides best practices for migrating your P3 data to P6 EPPM and details how P3 functionality maps to P6 EPPM functionality.
All administrators should read this guide if your organization is moving from P3 to P6.
For More Information
41
Distributing Information to the Team
You can copy the online documentation to a network drive for access by project participants. Team members can then view or print those portions that specifically relate to their roles in the organization.
Throughout this documentation, the Security Guidance icon helps you to quickly identify security-related content to consider during the installation and configuration process.
Where to Get Training
To access comprehensive training for all Primavera products, go to:
http://education.oracle.com
Oracle Learning Library
The Oracle Learning Library (OLL) provides online learning content covering Primavera products. Content includes whitepapers, videos, tutorials, articles, demos, step-by-step instructions to accomplish specific tasks, and self-paced interactive learning modules. To access the learning library’s Primavera content, go to:
http://www.oracle.com/oll/primavera
Where to Get Support
To get the latest information about Critical Patch Updates, visit http://www.oracle.com/technetwork/topics/security/alerts-086861.html.
Access to Oracle Support
Oracle customers that have purchased support have access to electronic support through My Oracle Support. For information, visit http://www.oracle.com/us/corporate/accessibility/support/index.html.
P6 EPPM integrates with different Oracle applications; when you create a Service Request, be sure to open the request with the proper Support team. To ensure you reach the proper Support team, enter the correct product information when you create the Service Request. Each product has its own support line.
Use the Primavera P6 EPPM support line when you are having installation, configuration, or connection issues related to P6 EPPM.
Use one of the following support lines when you are having installation or configuration issues that do not relate to P6 EPPM.
Oracle WebLogic Server
Oracle Database Server
BI Publisher
BPM
Oracle Webcenter Content Core Capabilities (formerly Universal Content Management)
P6 Professional for EPPM Installation and Configuration Guide
42
Oracle Enterprise Manager
Oracle Access Manager
Oracle AutoVue
Oracle customers have access to electronic support through My Oracle Support. For information, visit http://www.oracle.com/us/support/contact-068555.html or visit http://www.oracle.com/us/corporate/accessibility/support/index.html if you are hearing impaired.
Using Primavera's Support Resource Centers
Primavera’s Support Resource Center provides links to important support and product information. Primavera's Product Information Centers (PICs) organize documents found on My Oracle Support (MOS), providing quick access to product and version specific information such as important knowledge documents, Release Value Propositions, and Oracle University training. PICs also offer documentation on Lifetime Management, from planning to installs, upgrades, and maintenance.
Visit https://support.oracle.com/epmos/faces/DocumentDisplay?id=1486951.1 to access links to all of the current PICs.
PICs also provide access to:
Communities which are moderated by Oracle providing a place for collaboration among industry peers to share best practices.
News from our development and strategy groups.
Education via a list of available Primavera product trainings through Oracle University. The Oracle Advisor Webcast program brings interactive expertise straight to the desktop using Oracle Web Conferencing technology. This capability brings you and Oracle experts together to access information about support services, products, technologies, best practices, and more.

43
Oracle Primavera P6 Professional for EPPM Installation and Configuration Guide
Copyright © 1999, 2016, Oracle and/or its affiliates. All rights reserved. Oracle and Java are registered trademarks of Oracle and/or its affiliates. Other names may be trademarks of their respective owners.
This software and related documentation are provided under a license agreement containing restrictions on use and disclosure and are protected by intellectual property laws. Except as expressly permitted in your license agreement or allowed by law, you may not use, copy, reproduce, translate, broadcast, modify, license, transmit, distribute, exhibit, perform, publish or display any part, in any form, or by any means. Reverse engineering, disassembly, or decompilation of this software, unless required by law for interoperability, is prohibited.
The information contained herein is subject to change without notice and is not warranted to be error-free. If you find any errors, please report them to us in writing.
If this is software or related documentation that is delivered to the U.S. Government or anyone licensing it on behalf of the U.S. Government, the following notice is applicable:
U.S. GOVERNMENT END USERS: Oracle programs, including any operating system, integrated software, any programs installed on the hardware, and/or documentation, delivered to U.S. Government end users are “commercial computer software" pursuant to the applicable Federal Acquisition Regulation and agency-specific supplemental regulations. As such, use, duplication, disclosure, modification, and adaptation of the programs, including any operating system, integrated software, any programs installed on the hardware, and/or documentation, shall be subject to license terms and license restrictions applicable to the programs. No other rights are granted to the U.S. Government.
This software or hardware is developed for general use in a variety of information management applications. It is not developed or intended for use in any inherently dangerous applications, including applications that may create a risk of personal injury. If you use this software or hardware in dangerous applications, then you shall be responsible to take all appropriate failsafe, backup, redundancy, and other measures to ensure its safe use. Oracle Corporation and its affiliates disclaim any liability for any damages caused by use of this software or hardware in dangerous applications.
This software or hardware and documentation may provide access to or information on content, products and services from third-parties. Oracle Corporation and its affiliates are not responsible for and expressly disclaim all warranties of any kind with respect to third-party content, products, and services. Oracle Corporation and its affiliates will not be responsible for any loss, costs, or damages incurred due to your access to or use of third-party content, products, or services.
Legal Notices