Embed Size (px)
Citation preview

PI Interface for OPC XML-DA HTTP Plug-in
Version 1.5.1.x
OSIsoft, LLC777 Davis St., Suite 250San Leandro, CA 94577 USATel: (01) 510-297-5800Fax: (01) 510-357-8136Web: http://www.osisoft.com
OSIsoft Australia • Perth, AustraliaOSIsoft Europe GmbH • Frankfurt, GermanyOSIsoft Asia Pte Ltd. • SingaporeOSIsoft Canada ULC • Montreal & Calgary, CanadaOSIsoft, LLC Representative Office • Shanghai, People’s Republic of ChinaOSIsoft Japan KK • Tokyo, JapanOSIsoft Mexico S. De R.L. De C.V. • Mexico City, MexicoOSIsoft do Brasil Sistemas Ltda. • Sao Paulo, Brazil
PI Interface for OPC XML-DA HTTP Plug-inCopyright: © 2002-2013 OSIsoft, LLC. All rights reserved.No part of this publication may be reproduced, stored in a retrieval system, or transmitted, in any form or by any means, mechanical, photocopying, recording, or otherwise, without the prior written permission of OSIsoft, LLC.
OSIsoft, the OSIsoft logo and logotype, PI Analytics, PI ProcessBook, PI DataLink, ProcessPoint, PI Asset Framework(PI-AF), IT Monitor, MCN Health Monitor, PI System, PI ActiveView, PI ACE, PI AlarmView, PI BatchView, PI Data Services, PI Manual Logger, PI ProfileView, PI WebParts, ProTRAQ, RLINK, RtAnalytics, RtBaseline, RtPortal, RtPM, RtReports and RtWebParts are all trademarks of OSIsoft, LLC. All other trademarks or trade names used herein are the property of their respective owners.
U.S. GOVERNMENT RIGHTSUse, duplication or disclosure by the U.S. Government is subject to restrictions set forth in the OSIsoft, LLC license agreement and as provided in DFARS 227.7202, DFARS 252.227-7013, FAR 12.212, FAR 52.227, as applicable. OSIsoft, LLC.
Published: 01/2013

Table of Contents
Chapter 1. Introduction...................................................................................................1Reference Manuals............................................................................................2Plug-in Specific Features...................................................................................2
Exception Reporting................................................................................2Source of Timestamps.............................................................................2Output Points...........................................................................................2
Chapter 2. Principles of Operation................................................................................3
Chapter 3. Installation Checklist....................................................................................5
Chapter 4. Plug-in Installation and Administration......................................................7Locating Plug-in Directory..................................................................................7Modifying PIXML.BAT........................................................................................7Configuring PI Tags...........................................................................................7Upgrading Plug-in..............................................................................................7Uninstalling Plug-In............................................................................................8
Chapter 5. Startup Command File.................................................................................9Configuring the Interface with PI ICU.................................................................9
HTTP Plug-In.........................................................................................10Command-line Parameters..............................................................................11
Plug-in Specific Parameters...................................................................11General PI-XML Interface Parameters...................................................12
Sample PIXML.bat File....................................................................................16
Appendix A. Error and Informational Messages......................................................17Message Logs..................................................................................................17System Errors and PI Errors............................................................................17
Appendix B. Debugging..............................................................................................19
Appendix C. Terminology...........................................................................................21
Appendix D. Technical Support and Resources......................................................25Before You Call or Write for Help...........................................................25Help Desk and Telephone Support........................................................25Search Support......................................................................................26Email-based Technical Support.............................................................26Online Technical Support.......................................................................26Remote Access......................................................................................27On-site Service......................................................................................27Knowledge Center.................................................................................27Upgrades...............................................................................................27
PI Interface for OPC XML-DA HTTP Plug-in
OSIsoft Virtual Campus (vCampus).......................................................28
Appendix E. Revision History....................................................................................29
PI Interface for OPC XML-DA HTTP Plug-in
Chapter 1. Introduction
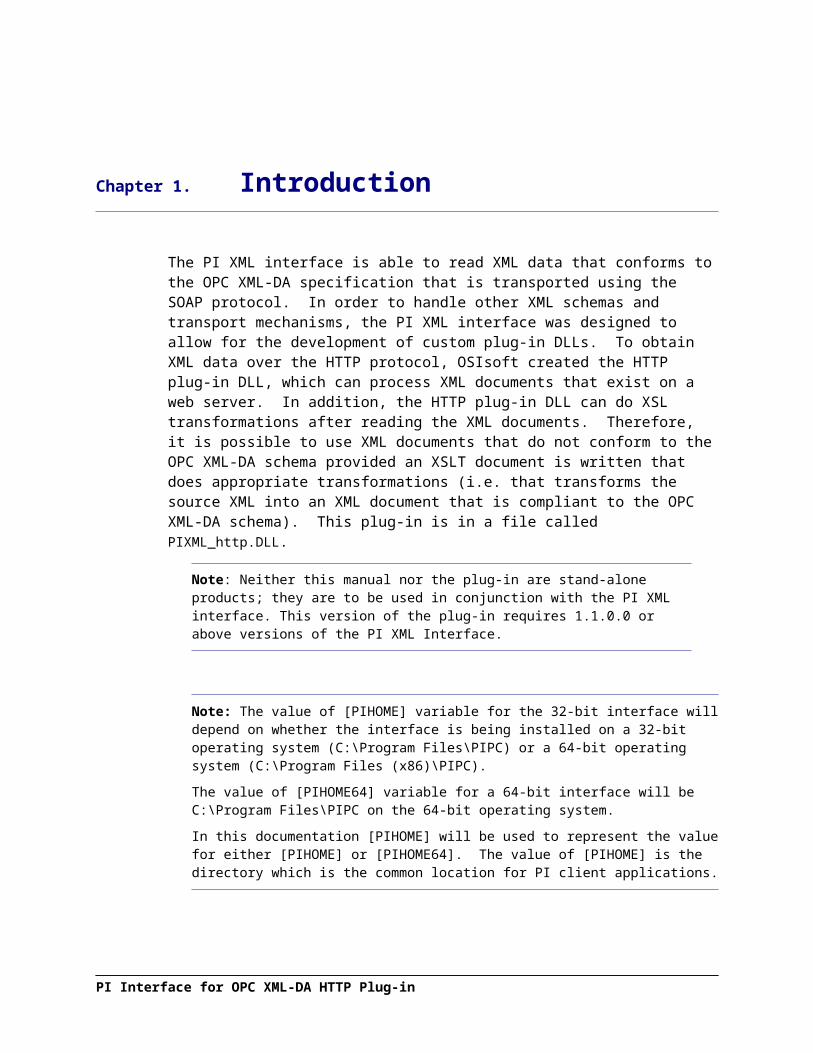
The PI XML interface is able to read XML data that conforms to the OPC XML-DA specification that is transported using the SOAP protocol. In order to handle other XML schemas and transport mechanisms, the PI XML interface was designed to allow for the development of custom plug-in DLLs. To obtain XML data over the HTTP protocol, OSIsoft created the HTTP plug-in DLL, which can process XML documents that exist on a web server. In addition, the HTTP plug-in DLL can do XSL transformations after reading the XML documents. Therefore, it is possible to use XML documents that do not conform to the OPC XML-DA schema provided an XSLT document is written that does appropriate transformations (i.e. that transforms the source XML into an XML document that is compliant to the OPC XML-DA schema). This plug-in is in a file called PIXML_http.DLL.
Note: Neither this manual nor the plug-in are stand-alone products; they are to be used in conjunction with the PI XML interface. This version of the plug-in requires 1.1.0.0 or above versions of the PI XML Interface.
Note: The value of [PIHOME] variable for the 32-bit interface will depend on whether the interface is being installed on a 32-bit operating system (C:\Program Files\PIPC) or a 64-bit operating system (C:\Program Files (x86)\PIPC).
The value of [PIHOME64] variable for a 64-bit interface will be C:\Program Files\PIPC on the 64-bit operating system.
In this documentation [PIHOME] will be used to represent the value for either [PIHOME] or [PIHOME64]. The value of [PIHOME] is the directory which is the common location for PI client applications.
Note: Throughout this manual there are references to where messages are written by the interface which is the PIPC.log. This interface has been built against a UniInt version (4.5.0.59 and later) which now writes all its messages to the local PI Message log.
Please note that any place in this manual where it references PIPC.log should now refer to the local PI message log. Please see the document UniInt Interface Message Logging.docx in the %PIHOME%\Interfaces\UniInt directory for more details on how to access these messages.
Reference Manuals
OSIsoft
PI Interface for OPC XML-DA HTTP Plug-in

PI Server manuals
PI API Installation Instructions manual
UniInt Interface User Manual
XML Interface to the PI System
Vendor Extensible Markup Language (XML) 1.0 (Second Edition)
OPC XML-DA specification (version 1.01)
Plug-in Specific Features
Several features of this product are unique to this plug-in. These features are detailed below.
Exception Reporting
It is not possible to request that exception reporting be performed by the XML server through the use of the /sn command-line option when using the HTTP plug-in.
If the /sn command-line option is specified, the PI XML interface will not do any exception reporting.
The /returnallitems command-line option that typically can be used to force the XML server to return data after each scan has no effect when this plug-in is being used.
Source of Timestamps
If the HTTP plug-in is being used, the timestamps can be specified in the XML. However, the interface can ignore these timestamps if the /TS command-line option is specified, and instead, local timestamps will be used. For timestamps supplied in the XML, the interface calculates the offset between the PI server and the local time on the machine where the interface is being run from and applies that correction to the timestamps received from the XML server.
Output Points
The HTTP plug-in does not support outpoint points.
PI Interface for OPC XML-DA HTTP Plug-in
Chapter 2. Principles of Operation
The HTTP plug-in provides a mechanism to read non-OPC XML DA compliant data from URLs using the HTTP transport protocol. The plug-in forces the PI XML interface to read one file from a URL that is specified through the /server command-line option. After reading the raw XML, it is possible to do an XSL transformation by specifying the path to an XSLT file through the use of the /xsl command-line option. The transformed XML is then passed on to the interface and it must be compliant with the OPC XML DA schema. A diagram outlining this process is shown below:
Raw XML Files Residing on Web
Server
<xml>
<raw data>
<tag item=“Abc”
timestamp=“6-6-2004”>19.86
</tag>
…
</raw data>
</xml>
PIXML_Http_plugin
Plugin DLL applies XSL Transform to Raw XML
data if needed
PIXML interface receives OPC XML DA compliant data
PIXML Interface
XSL Transform<xsl:stylesheetversion="1.0"
xmlns:xsl="http://www.w3.org/1999/XSL/Transform">
<xsl:templatematch="/">…
PI
PI Interface for OPC XML-DA HTTP Plug-in

The format of the transformed XML should conform to the ReadResponse extract of the OPC XML-DA schema. A sample of this format is listed below, but a more detailed description including the schema definition can be found at http://opcfoundation.org. If XSLT files are being used to transform the raw XML, it is highly recommended that the transformation is tested and validated before using with the HTTP plug-in. <?xml version="1.0"?><ReadResponse xmlns="http://opcfoundation.org/webservices/XMLDA/1.0/"><RItemList><Items ItemName="file/testA" Timestamp="2004-06-20T06:16:31.6718750-07:00">
<Value>14.467</Value></Items><Items ItemName="file/testB" Timestamp="2004-06-20T06:16:31.6718750-07:00">
<Value>15.467</Value></Items><Items ItemName="file/testA" Timestamp="2004-06-21T06:16:31.6718750-07:00">
<Value>17.467</Value></Items><Items ItemName="file/testC" Timestamp="2004-06-20T06:16:31.6718750-07:00">
<Value>16.467</Value></Items></RItemList></ReadResponse>
The format of the transformed XML is fairly straightforward. Each item below the RItemList node corresponds to one data value. It is necessary to specify the ItemName attribute which should match to the InstrumentTag field of the corresponding PI tag. The timestamp attribute is specified in the ISO8601 timestamp format. Note that multiple values for the same ItemName can be specified as long as a separate Items node is defined. In the above example, it can be seen that two values are specified for the “file/testA” ItemName. When multiple values are specified for the same ItemName, they should appear in chronological order to improve performance, although it is not necessary to group the nodes together. If multiple values are being sent, then the Location3 field for the tag in question should be set to 0.
The interval of this scan class will define how often the plug-in polls the URL. After the XML is retrieved, the plug-in will compare the InstrumentTag fields for all the tags in the scan class to each ItemName attribute for all Items nodes in the transformed XML and will discard any Items nodes with ItemName attributes that do not have a corresponding match. Further internal processing of the transformed XML will occur in order to conform to the SubscribeResponse and the SubscribePolledRefreshResponse extracts of the OPC XML-DA schema.
PI Interface for OPC XML-DA HTTP Plug-in

Chapter 3. Installation Checklist
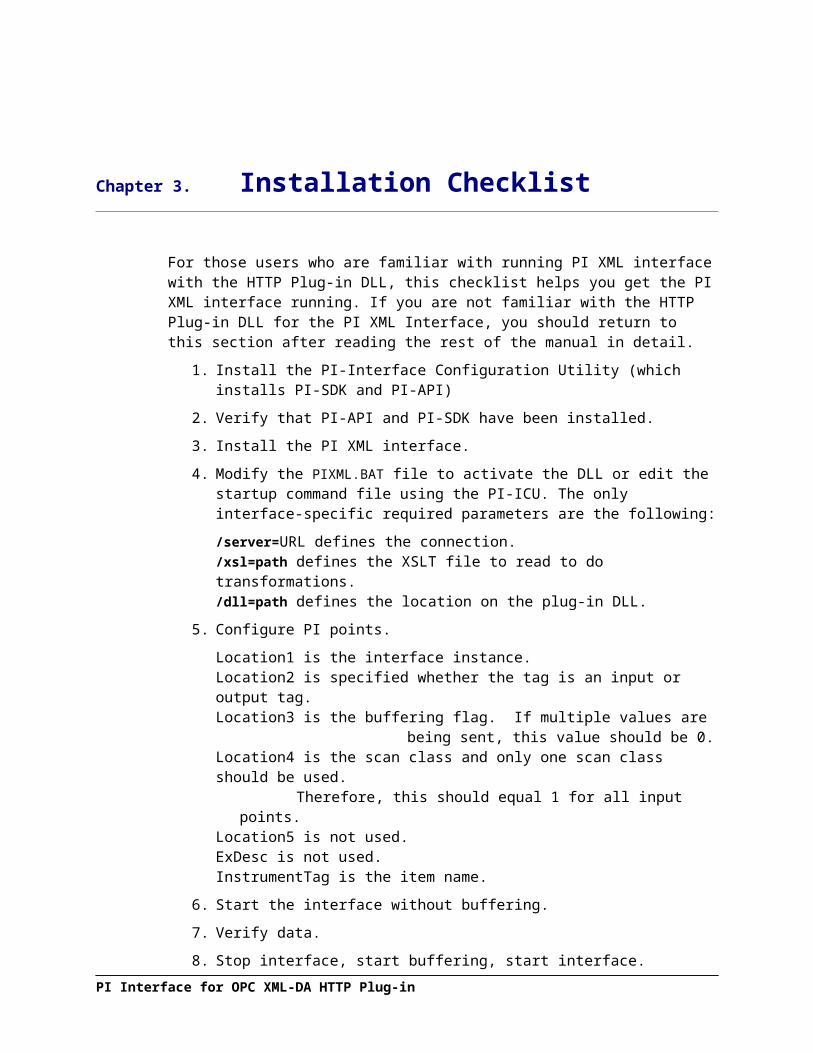
For those users who are familiar with running PI XML interface with the HTTP Plug-in DLL, this checklist helps you get the PI XML interface running. If you are not familiar with the HTTP Plug-in DLL for the PI XML Interface, you should return to this section after reading the rest of the manual in detail.
1. Install the PI-Interface Configuration Utility (which installs PI-SDK and PI-API)
2. Verify that PI-API and PI-SDK have been installed.
3. Install the PI XML interface.
4. Modify the PIXML.BAT file to activate the DLL or edit the startup command file using the PI-ICU. The only interface-specific required parameters are the following:
/server=URL defines the connection./xsl=path defines the XSLT file to read to do transformations. /dll=path defines the location on the plug-in DLL.
5. Configure PI points.
Location1 is the interface instance.Location2 is specified whether the tag is an input or output tag.Location3 is the buffering flag. If multiple values are being sent, this value should be
0.Location4 is the scan class and only one scan class should be used.
Therefore, this should equal 1 for all input points.Location5 is not used.ExDesc is not used.InstrumentTag is the item name.
6. Start the interface without buffering.
7. Verify data.
8. Stop interface, start buffering, start interface.
PI Interface for OPC XML-DA HTTP Plug-in

Chapter 4. Plug-in Installation and Administration
Locating Plug-in Directory
The PIXML_http.dll is installed in the PI XML interface directory in the plug-ins sub-directory. For instance if the interface is installed in this folder[PIHOME]\Interfaces\XML
then the DLL should be present in the corresponding plug-in folder in[PIHOME]\Interfaces\XML\Plug-ins\http
The other plug-in DLLs are installed in their own separate sub-folders.
Modifying PIXML.BAT
To activate the DLL, use the XML ICU ICU Control to select this Plug-In which will add the DLL for the following command-line option to the PI XML interface startup file, pixml.bat, and specify the location of the DLL For example:/DLL="c:\PIPC\Interfaces\XML\Plug-ins\http\PIXML_http.dll"
If the pathname contains spaces, the whole parameter must be surrounded by double quotes. In addition, the /server option should be modified to point to a web server from which the XML will be read. In addition, if an XSLT file is being used to transform the XML then it is necessary to use the /xsl option to point to the location of the XSLT file.
Configuring PI Tags
A detailed description for configuring tags can be found in the XML Interface user manual. However, when using the HTTP Plug-in DLL, there are a few notable differences that should be followed. First, it is recommended that all tags support buffering by setting Location3 equal to 0. Additionally, the InstrumentTag field should correspond to ItemName attribute for the appropriate Items node in the transformed XML.
Upgrading Plug-in
If the plug-in is upgraded independent of the PI XML interface, it will be necessary to stop the PI XML interface, install the plug-in in the appropriate directory and then restart the interface according to the instructions in the XML Interface user manual.
PI Interface for OPC XML-DA HTTP Plug-in
Uninstalling Plug-In
To run the interface without the plug-in, the default plug-in, PIXML_OPC.dll should be selected using the XML ICU control. If the ICU control is not being used, it will be necessary to delete the /DLL command-line parameter from the batch file, pixml.bat, and stop and restart the interface according to the instructions in the XML Interface user manual. Note that if the HTTP plug-in is not used, the operation of the XML interface will change drastically depending on new DLL that is selected.
PI Interface for OPC XML-DA HTTP Plug-in

Chapter 5. Startup Command File
Command-line parameters can begin with a / or with a -. For example, the /ps=M and -ps=M command-line parameters are equivalent.
For Windows, command file names have a .bat extension. The Windows continuation character (^) allows for the use of multiple lines for the startup command. The maximum length of each line is 1024 characters (1 kilobyte). The number of parameters is unlimited, and the maximum length of each parameter is 1024 characters.
The PI Interface Configuration Utility (PI ICU) provides a tool for configuring the interface startup command file.
Configuring the Interface with PI ICU
Note: PI ICU requires PI 3.3 or greater.
The PI Interface Configuration Utility provides a graphical user interface for configuring PI interfaces. If the interface is configured by the PI ICU, the batch file of the interface (pixml.bat) will be maintained by the PI ICU and all configuration changes will be kept in that file and the module database. The procedure below describes the necessary steps for using PI ICU to configure the PI XML interface.
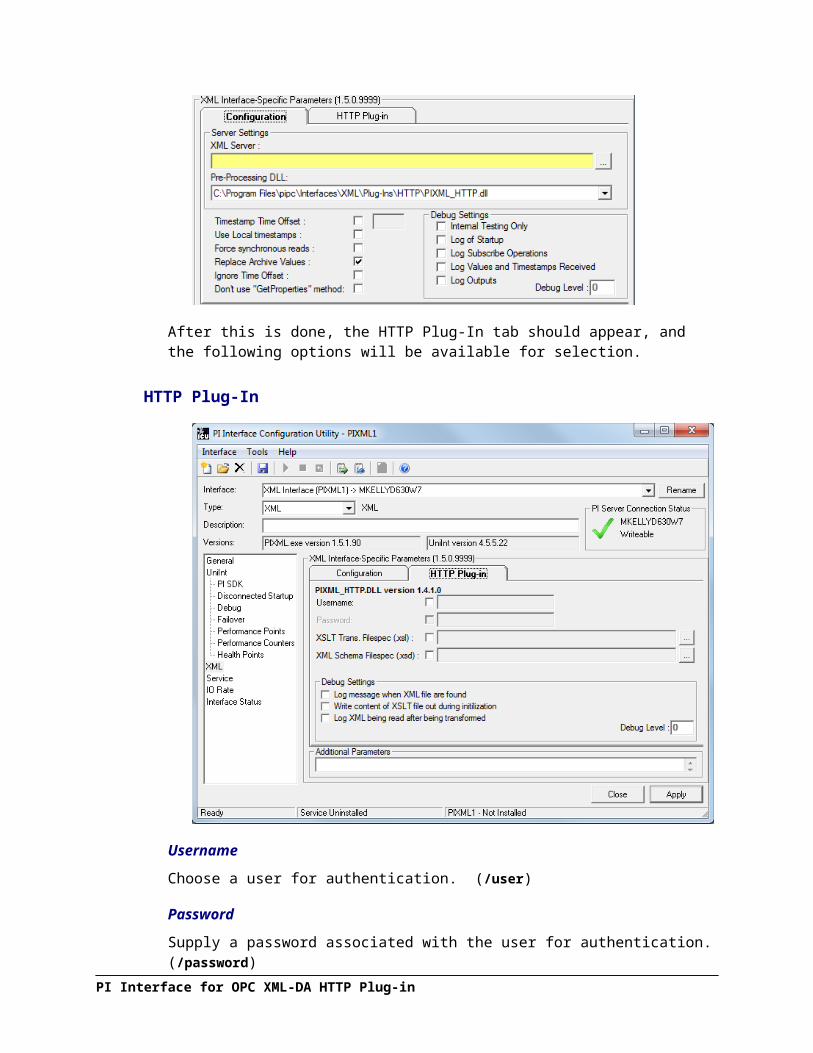
When using the XML ICU control with the HTTP plug-in, it is necessary to choose the appropriate plug-in DLL. To do this select the PIXML_http.dll in the Configuration tab of the XML ICU control as shown below.
After this is done, the HTTP Plug-In tab should appear, and the following options will be available for selection.
PI Interface for OPC XML-DA HTTP Plug-in

HTTP Plug-In
UsernameChoose a user for authentication. (/user)
PasswordSupply a password associated with the user for authentication. (/password)
XSLT Trans. Filespec (.xsl)Specify he path and filename for the XSLT file that is used to transform the raw XML into OPC XML-DA compliant XML. The browse button can be used to locate the XSLT file. (/xsl)
XML Schema Filespec (.xsd)This specifies the path and filename of the schema file that is used to validate the XML that is read from the files. If this argument is not specified, no validation will be performed. Use the browse button to locate the XML schema file. (/xsd=path\filename)
Log message when XML files are foundThis setting will cause messages to be written to the pipc.log file when XML files are found. (/dbdll=1)
PI Interface for OPC XML-DA HTTP Plug-in
Write content of XSLT file during initializationThis setting will force the HTTP plug-in to output the entire contents of the XSLT file being read during initialization of the DLL to the pipc.log file. Long XSLT files could be truncated. (/dbdll=2)
Log XML being read after being transformedThis setting will cause the HTTP plug-in to log the XML being read from input files after being transformed with an XSLT file, which can be helpful in creating and debugging XSLT files for inputs. The XML that is written to the pipc.log file should conform to the ReadResponse extract of the OPC XML-DA schema as described in section Principles of Operation. (/dbdll=4)
Command-line Parameters
Plug-in Specific Parameters
Parameter Description
/dbdll=flagOptional
Used to print plug-in-level debug messages. See Appendix B for more information.
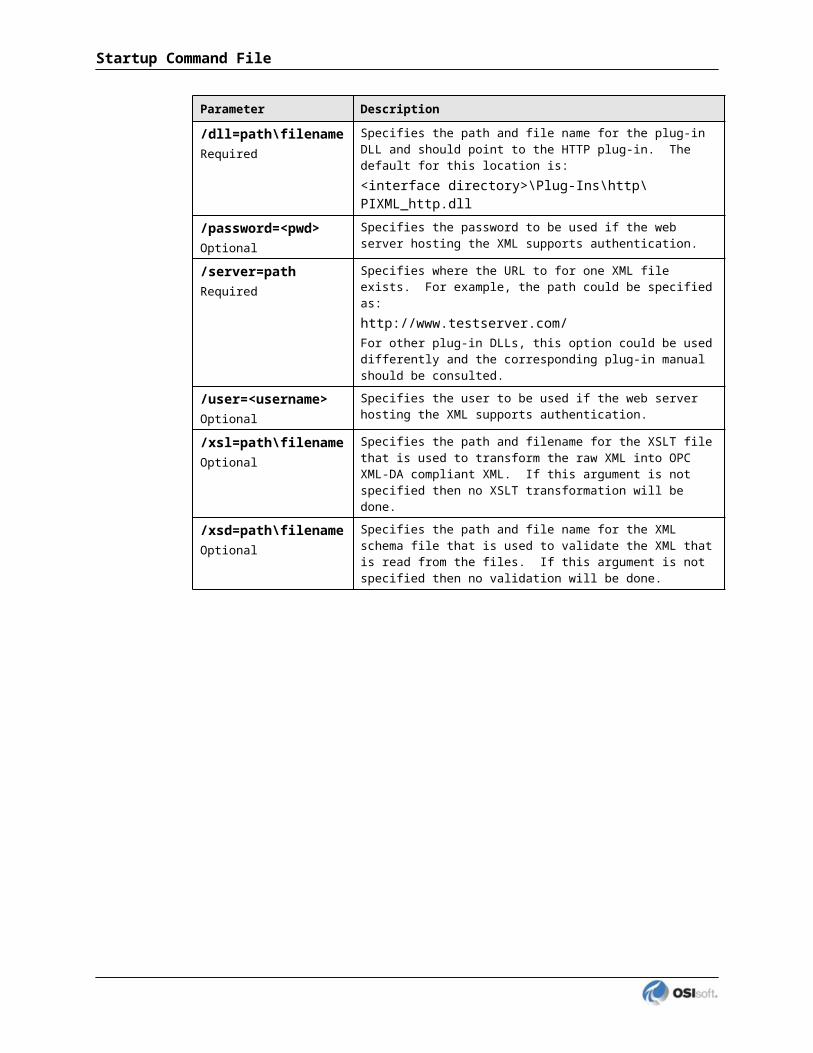
/dll=path\filenameRequired
Specifies the path and file name for the plug-in DLL and should point to the HTTP plug-in. The default for this location is:<interface directory>\Plug-Ins\http\PIXML_http.dll
/password=<pwd>Optional
Specifies the password to be used if the web server hosting the XML supports authentication.
/server=pathRequired
Specifies where the URL to for one XML file exists. For example, the path could be specified as:http://www.testserver.com/For other plug-in DLLs, this option could be used differently and the corresponding plug-in manual should be consulted.
/user=<username>Optional
Specifies the user to be used if the web server hosting the XML supports authentication.
/xsl=path\filenameOptional
Specifies the path and filename for the XSLT file that is used to transform the raw XML into OPC XML-DA compliant XML. If this argument is not specified then no XSLT transformation will be done.
/xsd=path\filenameOptional
Specifies the path and file name for the XML schema file that is used to validate the XML that is read from the files. If this argument is not specified then no validation will be done.
PI Interface for OPC XML-DA HTTP Plug-in
Startup Command File
General PI-XML Interface Parameters
Parameter Description
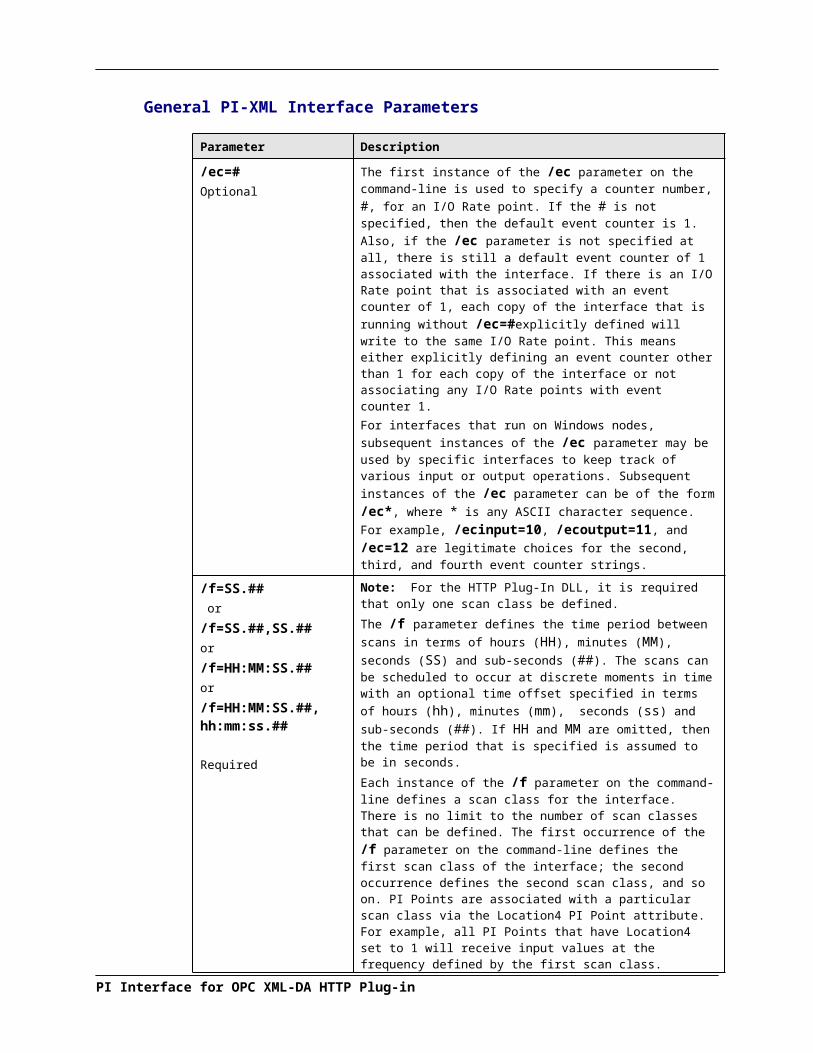
/ec=#Optional
The first instance of the /ec parameter on the command-line is used to specify a counter number, #, for an I/O Rate point. If the # is not specified, then the default event counter is 1. Also, if the /ec parameter is not specified at all, there is still a default event counter of 1 associated with the interface. If there is an I/O Rate point that is associated with an event counter of 1, each copy of the interface that is running without /ec=#explicitly defined will write to the same I/O Rate point. This means either explicitly defining an event counter other than 1 for each copy of the interface or not associating any I/O Rate points with event counter 1.For interfaces that run on Windows nodes, subsequent instances of the /ec parameter may be used by specific interfaces to keep track of various input or output operations. Subsequent instances of the /ec parameter can be of the form /ec*, where * is any ASCII character sequence. For example, /ecinput=10, /ecoutput=11, and /ec=12 are legitimate choices for the second, third, and fourth event counter strings.
/f=SS.## or/f=SS.##,SS.##or/f=HH:MM:SS.##or/f=HH:MM:SS.##,hh:mm:ss.##
Required
Note: For the HTTP Plug-In DLL, it is required that only one scan class be defined.The /f parameter defines the time period between scans in terms of hours (HH), minutes (MM), seconds (SS) and sub-seconds (##). The scans can be scheduled to occur at discrete moments in time with an optional time offset specified in terms of hours (hh), minutes (mm), seconds (ss) and sub-seconds (##). If HH and MM are omitted, then the time period that is specified is assumed to be in seconds.Each instance of the /f parameter on the command-line defines a scan class for the interface. There is no limit to the number of scan classes that can be defined. The first occurrence of the /f parameter on the command-line defines the first scan class of the interface; the second occurrence defines the second scan class, and so on. PI Points are associated with a particular scan class via the Location4 PI Point attribute. For example, all PI Points that have Location4 set to 1 will receive input values at the frequency defined by the first scan class. Similarly, all points that have Location4 set to 2 will receive input values at the frequency specified by the second scan class, and so on.Two scan classes are defined in the following example:/f=00:01:00,00:00:05 /f=00:00:07or, equivalently:/f=60,5 /f=7The first scan class has a scanning frequency of 1 minute with an offset of 5 seconds, and the second scan class has a scanning frequency of 7 seconds. When an offset is specified, the scans occur at discrete moments in time according to the formula:scan times = (reference time) + n(frequency) + offsetwhere n is an integer and the reference time is midnight on the day that the interface was started. In the above example, frequency is 60 seconds and offset is 5 seconds for the first scan class. This means that if the interface was started at 05:06:06, the first scan would be at 05:07:05, the second scan would be at 05:08:05, and so on. Since no offset is specified for the second scan class, the absolute scan times are undefined.The definition of a scan class does not guarantee that the associated points will be scanned at the given frequency. If the
Parameter Description
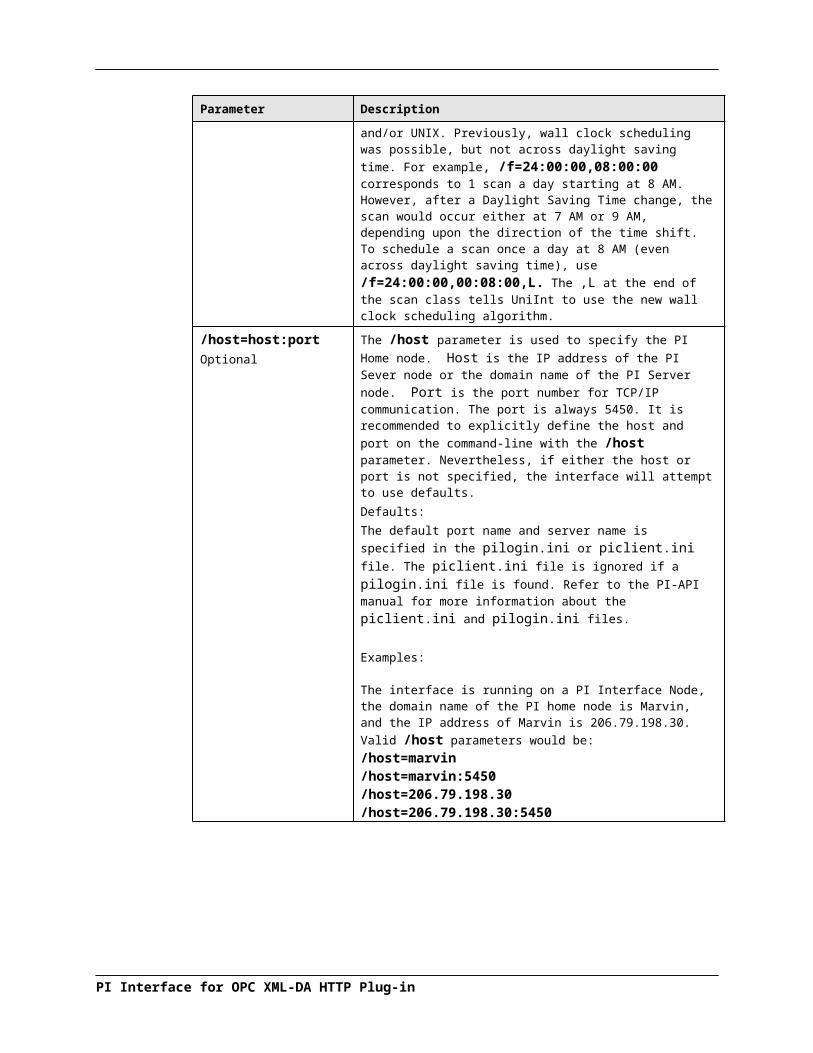
interface is under a large load, then some scans may occur late or be skipped entirely. See the section “Performance Summaries” in the UniInt Interface User Manual.doc for more information on skipped or missed scans.Sub-second Scan ClassesSub-second scan classes can be defined on the command-line, such as/f=0.5 /f=00:00:00.1where the scanning frequency associated with the first scan class is 0.5 seconds and the scanning frequency associated with the second scan class is 0.1 of a second.Similarly, sub-second scan classes with sub-second offsets can be defined, such as/f=0.5,0.2 /f=1,0Wall Clock SchedulingScan classes that strictly adhere to wall clock scheduling are now possible. This feature is available for interfaces that run on Windows and/or UNIX. Previously, wall clock scheduling was possible, but not across daylight saving time. For example, /f=24:00:00,08:00:00 corresponds to 1 scan a day starting at 8 AM. However, after a Daylight Saving Time change, the scan would occur either at 7 AM or 9 AM, depending upon the direction of the time shift. To schedule a scan once a day at 8 AM (even across daylight saving time), use /f=24:00:00,00:08:00,L. The ,L at the end of the scan class tells UniInt to use the new wall clock scheduling algorithm.
/host=host:portOptional
The /host parameter is used to specify the PI Home node. Host is the IP address of the PI Sever node or the domain name of the PI Server node. Port is the port number for TCP/IP communication. The port is always 5450. It is recommended to explicitly define the host and port on the command-line with the /host parameter. Nevertheless, if either the host or port is not specified, the interface will attempt to use defaults.Defaults:The default port name and server name is specified in the pilogin.ini or piclient.ini file. The piclient.ini file is ignored if a pilogin.ini file is found. Refer to the PI-API manual for more information about the piclient.ini and pilogin.ini files.
Examples:
The interface is running on a PI Interface Node, the domain name of the PI home node is Marvin, and the IP address of Marvin is 206.79.198.30. Valid /host parameters would be:/host=marvin/host=marvin:5450/host=206.79.198.30/host=206.79.198.30:5450
PI Interface for OPC XML-DA HTTP Plug-in

Startup Command File
Parameter Description
/id=xRequired
The /id parameter is used to specify the interface identifier.The interface identifier is a string that is no longer than 9 characters in length. UniInt concatenates this string to the header that is used to identify error messages as belonging to a particular interface. See Appendix A Error and Informational Messages for more information.UniInt always uses the /id parameter in the fashion described above. This interface also uses the /id parameter to identify a particular interface copy number that corresponds to an integer value that is assigned to Location1. For this interface, use only numeric characters in the identifier. For example,/id=1
/ps=xRequired
The /ps parameter specifies the point source for the interface. X is not case sensitive and can be any single or multiple character string. For example, /ps=P and /ps=p are equivalent. The length of X is limited to 100 characters by UniInt. X can contain any character except ‘*’ and ‘?’.The point source that is assigned with the /ps parameter corresponds to the PointSource attribute of individual PI Points. The interface will attempt to load only those PI points with the appropriate point source.If the PI API version being used is prior to 1.6.x or the PI Server version is prior to 3.4.370.x, the PointSource is limited to a single character unless the SDK is being used.
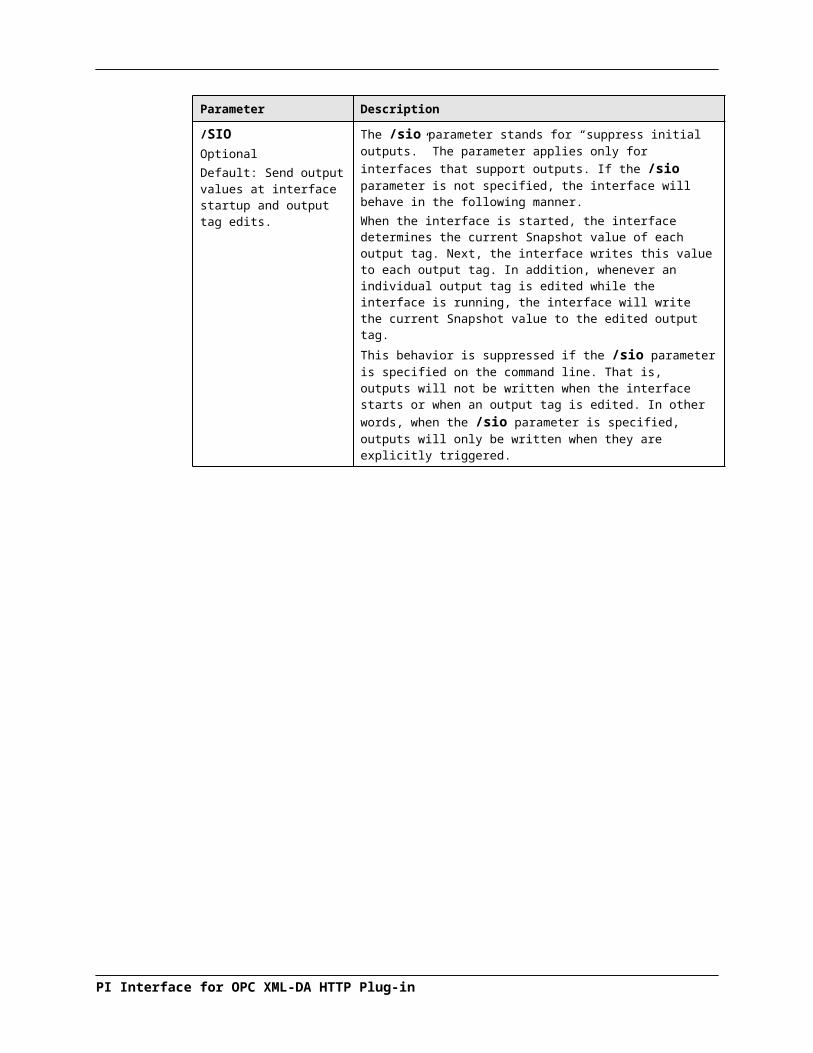
/SIOOptionalDefault: Send output values at interface startup and output tag edits.
The /sio parameter stands for “suppress initial outputs.” The parameter applies only for interfaces that support outputs. If the /sio parameter is not specified, the interface will behave in the following manner.When the interface is started, the interface determines the current Snapshot value of each output tag. Next, the interface writes this value to each output tag. In addition, whenever an individual output tag is edited while the interface is running, the interface will write the current Snapshot value to the edited output tag.This behavior is suppressed if the /sio parameter is specified on the command line. That is, outputs will not be written when the interface starts or when an output tag is edited. In other words, when the /sio parameter is specified, outputs will only be written when they are explicitly triggered.
Parameter Description
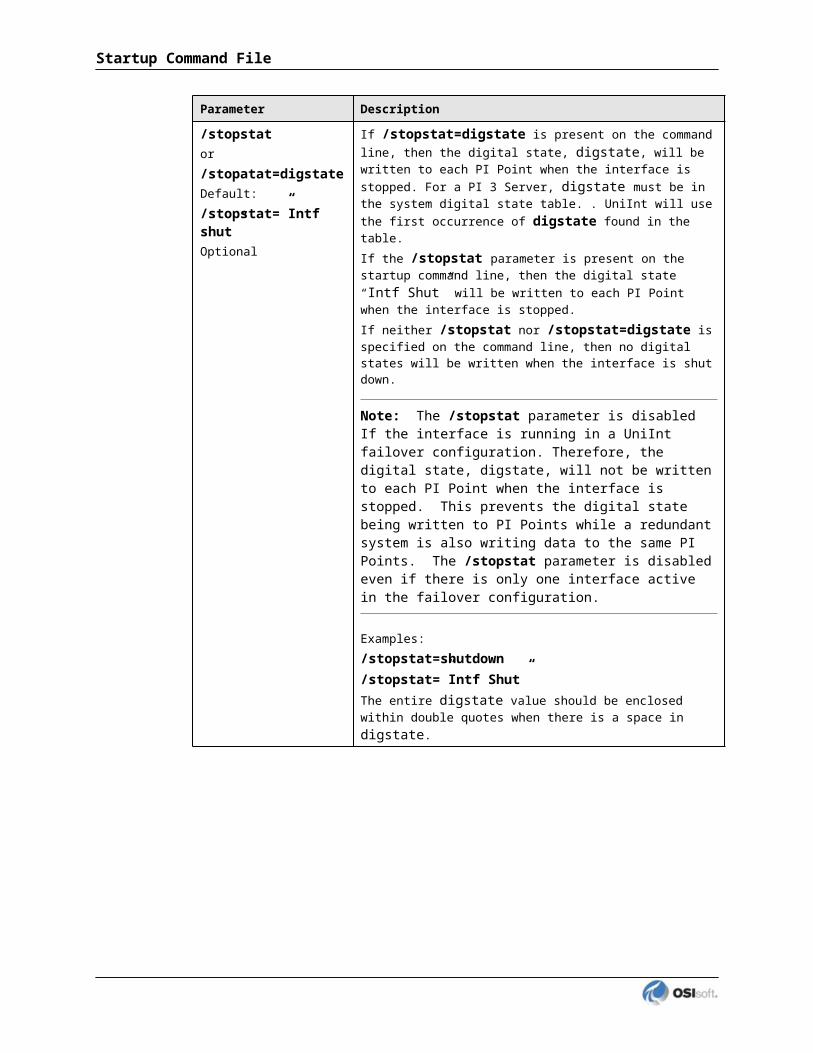
/stopstator/stopatat=digstateDefault:/stopstat=”Intf shut”Optional
If /stopstat=digstate is present on the command line, then the digital state, digstate, will be written to each PI Point when the interface is stopped. For a PI 3 Server, digstate must be in the system digital state table. . UniInt will use the first occurrence of digstate found in the table.If the /stopstat parameter is present on the startup command line, then the digital state “Intf Shut” will be written to each PI Point when the interface is stopped.If neither /stopstat nor /stopstat=digstate is specified on the command line, then no digital states will be written when the interface is shut down.
Note: The /stopstat parameter is disabled If the interface is running in a UniInt failover configuration. Therefore, the digital state, digstate, will not be written to each PI Point when the interface is stopped. This prevents the digital state being written to PI Points while a redundant system is also writing data to the same PI Points. The /stopstat parameter is disabled even if there is only one interface active in the failover configuration.
Examples:/stopstat=shutdown/stopstat=”Intf Shut”The entire digstate value should be enclosed within double quotes when there is a space in digstate.
PI Interface for OPC XML-DA HTTP Plug-in
Startup Command File
Sample PIXML.bat File
The following is an example file that exists in the
PIHOME\Interfaces\XML\Plug-Ins\http\ directory. REM=======================================================================REMREM pixml.batREMREM Sample startup file for the PI XML InterfaceREMREM=======================================================================REM REM OSIsoft strongly recommends using PI ICU to modify startup files.REMREM Sample command lineREM
.\pixml.exe ^/ps=XML ^/id=1 ^/f=00:00:30 ^/host=XXXXXX:5450 ^/server="http://www.testserver.com " ^/dll=".\Plug-Ins\http\PIXML_http.dll" ^/xsl="c:\XSLT\process.xsl"
REMREM End of pixml.bat File
The above command line instructs the Interface to
service PI points whose PointSource is XML and Location1 is 1,
use the PIXML_http.dll to process data,
define one scan class with a period of 30 seconds,
read files from a directory whose location is www.testserver.com.
The installation program installs a sample command file named pixml.bat_new. If you are not using the PI-ICU, you should use this file as a template for your own pixml.bat.

Appendix A. Error and Informational Messages
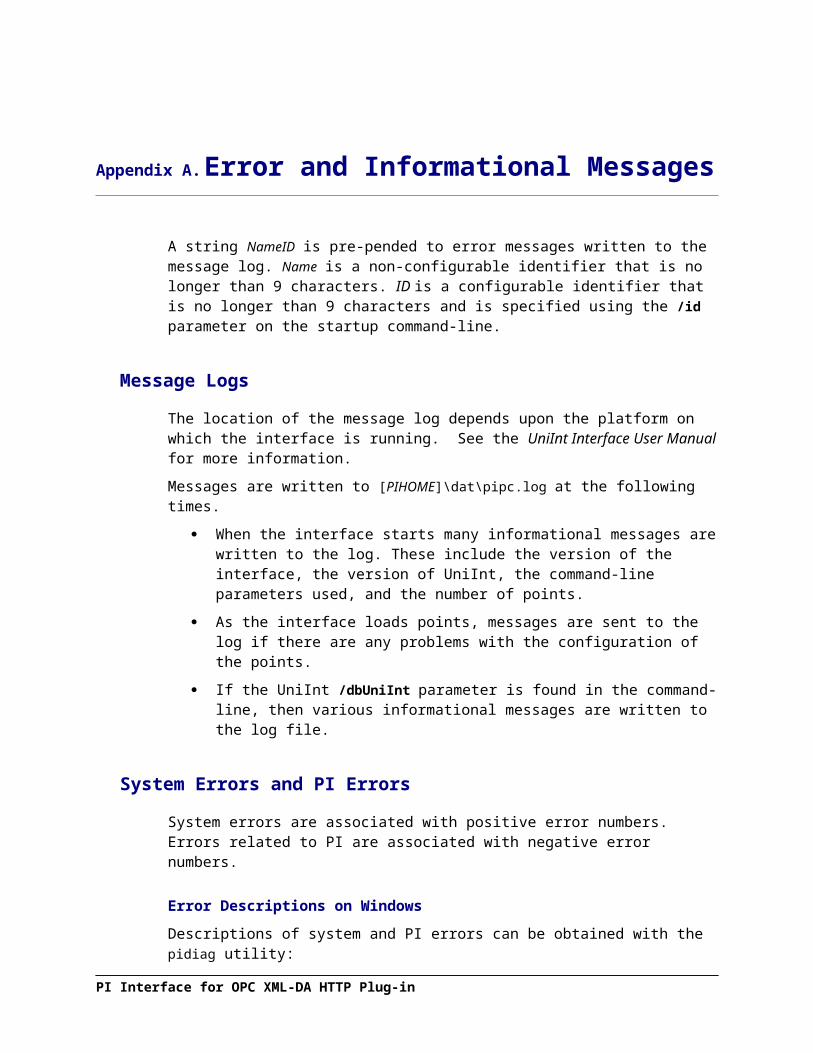
A string NameID is pre-pended to error messages written to the message log. Name is a non-configurable identifier that is no longer than 9 characters. ID is a configurable identifier that is no longer than 9 characters and is specified using the /id parameter on the startup command-line.
Message Logs
The location of the message log depends upon the platform on which the interface is running. See the UniInt Interface User Manual for more information.
Messages are written to [PIHOME]\dat\pipc.log at the following times.
When the interface starts many informational messages are written to the log. These include the version of the interface, the version of UniInt, the command-line parameters used, and the number of points.
As the interface loads points, messages are sent to the log if there are any problems with the configuration of the points.
If the UniInt /dbUniInt parameter is found in the command-line, then various informational messages are written to the log file.
System Errors and PI Errors
System errors are associated with positive error numbers. Errors related to PI are associated with negative error numbers.
Error Descriptions on WindowsDescriptions of system and PI errors can be obtained with the pidiag utility:
\PI\adm\pidiag – e error_number
PI Interface for OPC XML-DA HTTP Plug-in
Appendix B. Debugging
The debug flag is included to assist in understanding problematic or unexplained behavior, such as duplicate values or invalid timestamps. Use of the debug flag should be limited to short periods of time. The flag itself is actually a bit mask, which means you can set more than one option at the same time. A value of /DBDLL=5 is the same as /DBDLL=1 and /DBDLL=4. The following are a few of the possible settings and what they do:
/DBDLL=1
This setting causes messages to be written to the pipc.log file when XML files are found.
/DBDLL=2
This setting forces the HTTP plug-in to output the entire contents of the XSLT file being read during initialization of the DLL to the pipc.log file. Long XSLT files could be truncated.
/DBDLL=4
This setting causes the HTTP plug-in to log the XML being read from the web server after being transformed with an XSLT file, which can be helpful in creating and debugging XSLT files for inputs. The XML that is written to the pipc.log file should conform to the ReadResponse extract of the OPC XML-DA schema as described in section Principles of Operation.
PI Interface for OPC XML-DA HTTP Plug-in

Appendix C. Terminology
To understand this interface manual, you should be familiar with the terminology used in this document.
BufferingBuffering refers to an interface node’s ability to store temporarily the data that interfaces collect and to forward these data to the appropriate PI Servers.
N-Way BufferingIf you have PI Servers that are part of a PI Collective, PIBufss supports n-way buffering. N-way buffering refers to the ability of a buffering application to send the same data to each of the PI Servers in a PI Collective. (Bufserv also supports n-way buffering to multiple PI Servers however it does not guarantee identical archive records since point compressions attributes could be different between PI Servers. With this in mind, OSIsoft recommends that you run PIBufss instead.)
ICUICU refers to the PI Interface Configuration Utility. The ICU is the primary application that you use to configure PI interface programs. You must install the ICU on the same computer on which an interface runs. A single copy of the ICU manages all of the interfaces on a particular computer.
You can configure an interface by editing a startup command file. However, OSIsoft discourages this approach. Instead, OSIsoft strongly recommends that you use the ICU for interface management tasks.
ICU ControlAn ICU Control is a plug-in to the ICU. Whereas the ICU handles functionality common to all interfaces, an ICU Control implements interface-specific behavior. Most PI interfaces have an associated ICU Control.
Interface NodeAn interface node is a computer on which
the PI API and/or PI SDK are installed, and
PI Server programs are not installed.
PI APIThe PI API is a library of functions that allow applications to communicate and exchange data with the PI Server. All PI interfaces use the PI API.
PI Interface for OPC XML-DA HTTP Plug-in
PI CollectiveA PI Collective is two or more replicated PI Servers that collect data concurrently. Collectives are part of the High Availability environment. When the primary PI Server in a collective becomes unavailable, a secondary collective member node seamlessly continues to collect and provide data access to your PI clients.
PIHOMEPIHOME refers to the directory that is the common location for PI 32-bit client applications.
A typical PIHOME on a 32-bit operating system is C:\Program Files\PIPC.
A typical PIHOME on a 64-bit operating system is C:\Program Files (x86)\PIPC.
PI 32-bit interfaces reside in a subdirectory of the Interfaces directory under PIHOME.
For example, files for the 32-bit Modbus Ethernet Interface are in
[PIHOME]\PIPC\Interfaces\ModbusE.
This document uses [PIHOME] as an abbreviation for the complete PIHOME or PIHOME64 directory path. For example, ICU files in [PIHOME]\ICU.
PIHOME64PIHOME64 is found only on a 64-bit operating system and refers to the directory that is the common location for PI 64-bit client applications.
A typical PIHOME64 is C:\Program Files\PIPC.
PI 64-bit interfaces reside in a subdirectory of the Interfaces directory under PIHOME64.
For example, files for a 64-bit Modbus Ethernet Interface would be found in
C:\Program Files\PIPC\Interfaces\ModbusE.
This document uses [PIHOME] as an abbreviation for the complete PIHOME or PIHOME64 directory path. For example, ICU files in [PIHOME]\ICU.
PI Message LogThe PI message log is the file to which OSIsoft interfaces based on UniInt 4.5.0.x and later write informational, debug and error messages. When a PI interface runs, it writes to the local PI message log. This message file can only be viewed using the PIGetMsg utility. See the UniInt Interface Message Logging.docx file for more information on how to access these messages.
PI SDKThe PI SDK is a library of functions that allow applications to communicate and exchange data with the PI Server. Some PI interfaces, in addition to using the PI API, require the use of the PI SDK.
PI Server NodeA PI Server Node is a computer on which PI Server programs are installed. The PI Server runs on the PI Server Node.
PI Interface for OPC XML-DA HTTP Plug-in
PI SMTPI SMT refers to PI System Management Tools. PI SMT is the program that you use for configuring PI Servers. A single copy of PI SMT manages multiple PI Servers. PI SMT runs on either a PI Server Node or a interface node.
Pipc.logThe pipc.log file is the file to which OSIsoft applications write informational and error messages. When a PI interface runs, it writes to the pipc.log file. The ICU allows easy access to the pipc.log.
PointThe PI point is the basic building block for controlling data flow to and from the PI Server. For a given timestamp, a PI point holds a single value.
A PI point does not necessarily correspond to a “point” on the foreign device. For example, a single “point” on the foreign device can consist of a set point, a process value, an alarm limit, and a discrete value. These four pieces of information require four separate PI points.
ServiceA Service is a Windows program that runs without user interaction. A Service continues to run after you have logged off from Windows. It has the ability to start up when the computer itself starts up.
The ICU allows you to configure a PI interface to run as a Service.
Tag (Input Tag and Output Tag)The tag attribute of a PI point is the name of the PI point. There is a one-to-one correspondence between the name of a point and the point itself. Because of this relationship, PI System documentation uses the terms “tag” and “point” interchangeably.
Interfaces read values from a device and write these values to an Input Tag. Interfaces use an Output Tag to write a value to the device.
PI Interface for OPC XML-DA HTTP Plug-in

Appendix D. Technical Support and Resources
You can read complete information about technical support options, and access all of the following resources at the OSIsoft Technical Support Web site:
http://techsupport.osisoft.com (http://techsupport.osisoft.com)
Before You Call or Write for Help
When you contact OSIsoft Technical Support, please provide:
Product name, version, and/or build numbers
Computer platform (CPU type, operating system, and version number)
The time that the difficulty started
The log file(s) at that time
Help Desk and Telephone Support
You can contact OSIsoft Technical Support 24 hours a day. Use the numbers in the table below to find the most appropriate number for your area. Dialing any of these numbers will route your call into our global support queue to be answered by engineers stationed around the world.
Office Location Access Number Local Language OptionsSan Leandro, CA, USA 1 510 297 5828 English
Philadelphia, PA, USA 1 215 606 0705 English
Johnson City, TN, USA 1 423 610 3800 English
Montreal, QC, Canada 1 514 493 0663 English, French
Sao Paulo, Brazil 55 11 3053 5040 English, Portuguese
Frankfurt, Germany 49 6047 989 333 English, German
Manama, Bahrain 973 1758 4429 English, Arabic
Singapore 65 6391 181186 021 2327 8686
English, MandarinMandarin
Perth, WA, Australia 61 8 9282 9220 English
PI Interface for OPC XML-DA HTTP Plug-in
Support may be provided in languages other than English in certain centers (listed above) based on availability of attendants. If you select a local language option, we will make best efforts to connect you with an available Technical Support Engineer (TSE) with that language skill. If no local language TSE is available to assist you, you will be routed to the first available attendant.
If all available TSEs are busy assisting other customers when you call, you will be prompted to remain on the line to wait for the next available TSE or else leave a voicemail message. If you choose to leave a message, you will not lose your place in the queue. Your voicemail will be treated as a regular phone call and will be directed to the first TSE who becomes available.
If you are calling about an ongoing case, be sure to reference your case number when you call so we can connect you to the engineer currently assigned to your case. If that engineer is not available, another engineer will attempt to assist you.
Search Support
From the OSIsoft Technical Support Web site, click Search Support.
Quickly and easily search the OSIsoft Technical Support Web site’s Support Solutions, Documentation, and Support Bulletins using the advanced MS SharePoint search engine.
Email-based Technical Support
When contacting OSIsoft Technical Support by email, it is helpful to send the following information:
Description of issue: Short description of issue, symptoms, informational or error messages, history of issue
Log files: See the product documentation for information on obtaining logs pertinent to the situation.
Online Technical Support
From the OSIsoft Technical Support Web site, click Contact us > My Support > My Calls.
Using OSIsoft’s Online Technical Support, you can:
Enter a new call directly into OSIsoft’s database (monitored 24 hours a day)
View or edit existing OSIsoft calls that you entered
View any of the calls entered by your organization or site, if enabled
See your licensed software and dates of your Service Reliance Program agreements
PI Interface for OPC XML-DA HTTP Plug-in

Remote Access
From the OSIsoft Technical Support Web site, click Contact Us > Remote Support Options.
OSIsoft Support Engineers may remotely access your server in order to provide hands-on troubleshooting and assistance. See the Remote Access page for details on the various methods you can use.
On-site Service
From the OSIsoft Technical Support Web site, click Contact Us > On-site Field Service Visit.
OSIsoft provides on-site service for a fee. Visit our On-site Field Service Visit page for more information.
Knowledge Center
From the OSIsoft Technical Support Web site, click Knowledge Center.
The Knowledge Center provides a searchable library of documentation and technical data, as well as a special collection of resources for system managers. For these options, click Knowledge Center on the Technical Support Web site.
The Search feature allows you to search Support Solutions, Bulletins, Support Pages, Known Issues, Enhancements, and Documentation (including user manuals, release notes, and white papers).
System Manager Resources include tools and instructions that help you manage: Archive sizing, backup scripts, daily health checks, daylight savings time configuration, PI Server security, PI System sizing and configuration, PI trusts for interface nodes, and more.
Upgrades
From the OSIsoft Technical Support Web site, click Contact Us > Obtaining Upgrades.
You are eligible to download or order any available version of a product for which you have an active Service Reliance Program (SRP), formerly known as Tech Support Agreement (TSA). To verify or change your SRP status, contact your Sales Representative or Technical Support (http://techsupport.osisoft.com / ) for assistance.
PI Interface for OPC XML-DA HTTP Plug-in

Technical Support and Resources
OSIsoft Virtual Campus (vCampus)
The OSIsoft Virtual Campus (vCampus) Web site offers a community-oriented program that focuses on PI System development and integration. The Web site's annual online subscriptions provide customers with software downloads, resources that include a personal development PI System, online library, technical webinars, online training, and community-oriented features such as blogs and discussion forums.
OSIsoft vCampus is intended to facilitate and encourage communication around PI programming and integration between OSIsoft partners, customers and employees. See the OSIsoft vCampus Web site, http://vCampus.osisoft.com (http://vCampus.osisoft.com) or contact the OSIsoft vCampus team at [email protected] for more information.
Appendix E. Revision History
Date Author Comments
08-Dec-2005 ASingh Version 1.0.0.0 Rev A: Initial Release
20-Dec-2005 Chrys Version 1.0.0.0 Rev C: Fixed headers & footers
10-Aug-2007 SPatterson Version 1.2.1.0
17-Oct-2007 MKelly Version 1.2.1.0, Rev A: Fixed page layout, updated TOC, fixed headers and footers, saved as Final.
18-Oct-2007 Janelle Version 1.2.1.0, Revision B: alphabetized startup command line parameters table
19-Oct-2007 Janelle Version 1.2.1.0, Revision C: separated startup command line parameters into 2 tables – general, and plug-in specific
03-Jun-2008 ASingh Updated manual to indicate that only 1 file at a URL will be read.
14-Sep-2010 RGilbert Version 1.4.1.0, Updated version number.
16-Sep-2010 MKelly Version 1.4.1.0; Revision A, Updated the Title page, copyright page, TOC and several screenshots. Fixed headers and footers.
04-Feb-2011 SBranscomb Version 1.4.1.0 Revision B; Updated to Skeleton Version 3.0.31.
25-Jul-2012 SBranscomb Version 1.4.1.0 Revision C; Updated to Skeleton Version 3.0.35.
PI Interface for OPC XML-DA HTTP Plug-in