Embed Size (px)
Citation preview
Red Hat Satellite 5.7
Client Configuration Guide
Configuring, registering, and updating your Red Hat Enterprise Linux clients with
Red Hat Satellite
Last Updated: 2017-09-26


Red Hat Satellite 5.7 Client Configuration Guide
Configuring, registering, and updating your Red Hat Enterprise Linux clients with Red Hat Satellite
Red Hat Satellite Documentation Team
Legal Notice
Copyright © 2014 Red Hat.
This document is licensed by Red Hat under the Creative Commons Attribution-ShareAlike 3.0Unported License. If you distribute this document, or a modified version of it, you must provideattribution to Red Hat, Inc. and provide a link to the original. If the document is modified, all RedHat trademarks must be removed.
Red Hat, as the licensor of this document, waives the right to enforce, and agrees not to assert,Section 4d of CC-BY-SA to the fullest extent permitted by applicable law.
Red Hat, Red Hat Enterprise Linux, the Shadowman logo, JBoss, OpenShift, Fedora, the Infinitylogo, and RHCE are trademarks of Red Hat, Inc., registered in the United States and othercountries.
Linux ® is the registered trademark of Linus Torvalds in the United States and other countries.
Java ® is a registered trademark of Oracle and/or its affiliates.
XFS ® is a trademark of Silicon Graphics International Corp. or its subsidiaries in the UnitedStates and/or other countries.
MySQL ® is a registered trademark of MySQL AB in the United States, the European Union andother countries.
Node.js ® is an official trademark of Joyent. Red Hat Software Collections is not formally relatedto or endorsed by the official Joyent Node.js open source or commercial project.
The OpenStack ® Word Mark and OpenStack logo are either registered trademarks/service marksor trademarks/service marks of the OpenStack Foundation, in the United States and othercountries and are used with the OpenStack Foundation's permission. We are not affiliated with,endorsed or sponsored by the OpenStack Foundation, or the OpenStack community.
All other trademarks are the property of their respective owners.
Abstract
This guide covers how to properly configure Red Hat Enterprise Linux systems to register withand download updates from Red Hat Satellite. It covers how to register systems, how to deploy thelatest packages, and other topics related to server and client synchronization. For furtherinformation, see the Red Hat Satellite Getting Started Guide and the Red Hat Satellite InstallationGuide.

. . . . . . . . . . . . . . . . . . . . . . . . . . . . . . . . . . . . . . . . . . . . . . . . . . . . . . . . . . . . . . . . . . . . . . . . . . . . . . . . . . . . . . . . . . . . . . . . . . . . . . . . . . . . . . . . . . . . . . . . . . . . . . . . . . . . . . . . . . . . . . . . . . . . . . . . . . . . . . . . . . . . . . . . . . . . . . . . . . . . . . . . . . . . . . . . . . . . . . . . . . . . . . . . . . . . . . . . . . . . . . . . . . . . . . . . . . . . . . . . . . . . . . . . . . . . . . . . . . . . . . . . . . . . . . . . . . . . . . . .
. . . . . . . . . . . . . . . . . . . . . . . . . . . . . . . . . . . . . . . . . . . . . . . . . . . . . . . . . . . . . . . . . . . . . . . . . . . . . . . . . . . . . . . . . . . . . . . . . . . . . . . . . . . . . . . . . . . . . . . . . . . . . . . . . . . . . . . . . . . . . . . . . . . . . . . . . . . . . . . . . . . . . . . . . . . . . . . . . . . . . . . . . . . . . . . . . . . . . . . . . . . . . . . . . . . . . . . . . . . . . . . . . . . . . . . . . . . . . . . . . . . . . . . . . . . . . . . . . . . . . . . . . . . . . . . . . . . . . . . .
. . . . . . . . . . . . . . . . . . . . . . . . . . . . . . . . . . . . . . . . . . . . . . . . . . . . . . . . . . . . . . . . . . . . . . . . . . . . . . . . . . . . . . . . . . . . . . . . . . . . . . . . . . . . . . . . . . . . . . . . . . . . . . . . . . . . . . . . . . . . . . . . . . . . . . . . . . . . . . . . . . . . . . . . . . . . . . . . . . . . . . . . . . . . . . . . . . . . . . . . . . . . . . . . . . . . . . . . . . . . . . . . . . . . . . . . . . . . . . . . . . . . . . . . . . . . . . . . . . . . . . . . . . . . . . . . . . . . . . . .
. . . . . . . . . . . . . . . . . . . . . . . . . . . . . . . . . . . . . . . . . . . . . . . . . . . . . . . . . . . . . . . . . . . . . . . . . . . . . . . . . . . . . . . . . . . . . . . . . . . . . . . . . . . . . . . . . . . . . . . . . . . . . . . . . . . . . . . . . . . . . . . . . . . . . . . . . . . . . . . . . . . . . . . . . . . . . . . . . . . . . . . . . . . . . . . . . . . . . . . . . . . . . . . . . . . . . . . . . . . . . . . . . . . . . . . . . . . . . . . . . . . . . . . . . . . . . . . . . . . . . . . . . . . . . . . . . . . . . . . .
. . . . . . . . . . . . . . . . . . . . . . . . . . . . . . . . . . . . . . . . . . . . . . . . . . . . . . . . . . . . . . . . . . . . . . . . . . . . . . . . . . . . . . . . . . . . . . . . . . . . . . . . . . . . . . . . . . . . . . . . . . . . . . . . . . . . . . . . . . . . . . . . . . . . . . . . . . . . . . . . . . . . . . . . . . . . . . . . . . . . . . . . . . . . . . . . . . . . . . . . . . . . . . . . . . . . . . . . . . . . . . . . . . . . . . . . . . . . . . . . . . . . . . . . . . . . . . . . . . . . . . . . . . . . . . . . . . . . . . . .
Table of Contents
CHAPTER 1. INTRODUCTION
CHAPTER 2. CONFIGURING CLIENT APPLICATIONS2.1. REGISTERING CLIENTS WITH RED HAT SATELLITE SERVER2.2. USING ACTIVATION KEYS TO REGISTER CLIENTS WITH RED HAT SATELLITE2.3. UPDATING THE CONFIGURATION FILES MANUALLY2.4. IMPLEMENTING SERVER FAILOVER2.5. ENABLING STAGING CONTENT
CHAPTER 3. SSL INFRASTRUCTURE3.1. A BRIEF INTRODUCTION TO SSL3.2. THE RED HAT SATELLITE SSL MAINTENANCE TOOL
3.2.1. Generating SSL Certificates3.2.2. Red Hat Satellite SSL Maintenance Tool Options3.2.3. Generating the Certificate Authority SSL Key Pair3.2.4. Generating Web Server SSL Key Sets
3.3. DEPLOYING THE CA SSL PUBLIC CERTIFICATE TO CLIENTS3.4. CONFIGURING CLIENT SYSTEMS TO USE CERTIFICATES
CHAPTER 4. RED HAT SATELLITE AND SOLARIS-SPECIFIC INFORMATION4.1. UNIX SUPPORT GUIDE
4.1.1. Supported UNIX Variants4.1.2. Prerequisites4.1.3. Included Features4.1.4. Differences in Functionality4.1.5. Excluded Features4.1.6. Satellite Server Preparation and Configuration4.1.7. UNIX Client System Preparation
4.1.7.1. Downloading and Installing Additional Packages4.1.7.1.1. Installing Third-Party Packages4.1.7.1.2. Configuring the Library Search Path4.1.7.1.3. Downloading Red Hat Network Client Packages4.1.7.1.4. Installing the Red Hat Network Packages4.1.7.1.5. Including Red Hat Network Packages in the PATH
4.1.7.2. Deploying Client SSL Certificates4.1.7.3. Configuring the Clients
4.1.8. UNIX Client Registration and Updates4.1.8.1. Registering UNIX Systems4.1.8.2. Obtaining Updates
4.1.8.2.1. Uploading Packages to the Satellite4.1.8.2.2. Updating Through the Web Interface4.1.8.2.3. rhnsd4.1.8.2.4. Updating From the Command Line
4.1.9. Using Remote Commands4.1.9.1. Enabling Commands4.1.9.2. Issuing Commands
CHAPTER 5. REPORTING SOFTWARE FAILURES5.1. INSTALLING SOFTWARE FAILURE REPORTING TOOLS5.2. USING SOFTWARE FAILURE REPORTING TOOLS5.3. MANUALLY REPORTING SOFTWARE FAILURES5.4. CREATING SOFTWARE FAILURES FOR TESTING
4
556778
99
10111212131414
15151515161616171718181919
2020212122222323252525262627
2828282829
Table of Contents
1
. . . . . . . . . . . . . . . . . . . . . . . . . . . . . . . . . . . . . . . . . . . . . . . . . . . . . . . . . . . . . . . . . . . . . . . . . . . . . . . . . . . . . . . . . . . . . . . . . . . . . . . . . . . . . . . . . . . . . . . . . . . . . . . . . . . . . . . . . . . . . . . . . . . . . . . . . . . . . . . . . . . . . . . . . . . . . . . . . . . . . . . . . . . . . . . . . . . . . . . . . . . . . . . . . . . . . . . . . . . . . . . . . . . . . . . . . . . . . . . . . . . . . . . . . . . . . . . . . . . . . . . . . . . . . . . . . . . . . . . .APPENDIX A. REVISION HISTORY 30
Client Configuration Guide
2

Table of Contents
3
CHAPTER 1. INTRODUCTIONThis guide is designed to help users of Red Hat Satellite and Red Hat Satellite Proxy to configure theirclient systems.
By default, all Red Hat Network client applications are configured to communicate with central Red HatNetwork servers. When clients connect to a Red Hat Satellite or Red Hat Satellite Proxy instead, thedefault settings change. This document is intended to assist by offering mass reconfiguration stepswhich will help large enterprise environments, containing hundreds or thousands of systems, addressthe default setting changes.
Due to the complexity of this undertaking, customers can use a pre-populated script that automatesmany of the tasks necessary to access their Satellite or Satellite Proxy server; see the Getting StartedGuide for details. Red Hat believes that understanding the implications of these changes is helpful andtherefore describes the manual steps for reconfiguration in the opening chapters. Use your bestjudgement in determining the ideal solution for your organization.
Although many of the commands provided within this guide can be applied as they appear, it isimpossible to predict all potential network configurations adopted by customers. Therefore, Red Hatencourages you to use these commands as references that must take into account your organization'sindividual settings.
Client Configuration Guide
4
CHAPTER 2. CONFIGURING CLIENT APPLICATIONSIn order to use most enterprise-class features of Red Hat Network, such as registering with Red HatSatellite, configuration of the latest client applications is required. Obtaining these applications beforethe client has registered with Red Hat Network can be difficult. This paradox is especially problematicfor customers migrating large numbers of older systems to Red Hat Network. This chapter identifiestechniques to resolve this dilemma.
IMPORTANT
Red Hat strongly recommends that clients connected to a Red Hat Proxy Server orRed Hat Satellite Server be running the latest update of Red Hat Enterprise Linux toensure proper connectivity.
Additionally, if client firewalls are configured, ports 80 and 443 should be open forproper functionality with Red Hat Network.
Not every customer must connect securely to a Red Hat Satellite or Red Hat Proxy within theirorganization, nor build and deploy a GPG key for custom packages, but every customer who uses theseproducts must reconfigure the following:
Red Hat Update Agent - This is the update mechanism for Red Hat channels. Use of theUpdate Agent differs for certain operating systems:
On Red Hat Enterprise Linux 5, 6, and 7 - As a yum plugin (yum-rhn-plugin)
On Red Hat Enterprise Linux 3 and 4 - As a standalone application (up2date)
Red Hat Network Registration Client (rhn_register) - This is the mechanism to registerclients. By default, rhn_register registers to the main Red Hat Network servers. You needto reconfigure client systems to register to Red Hat Satellite or Red Hat Proxy.
IMPORTANT
By default, the yum command on Red Hat Enterprise Linux 5, 6, and 7 uses SSL forcommunication with remote repositories. Consequently, you should ensure thatfirewalls allow connections over port 443.
To bypass SSL, change the value of serverURL from https to http in the /etc/sysconfig/rhn/up2date file. Similarly, to use Red Hat Network's Monitoringfeature and probes requiring the Red Hat Network Monitoring Daemon, client systemsmust allow connections on port 4545 (or port 22, if it is using sshd instead).
The latest versions of Red Hat Update Agent can be configured to accommodate several Red HatSatellite servers, which provides failover protection in case the primary server is inaccessible. SeeSection 2.4, “Implementing Server Failover” for instructions on enabling this feature.
The following sections describe different methods of configuring the client systems to access yourRed Hat Satellite or Proxy. See the Red Hat Satellite Getting Started Guide for information aboutscripting configuration commands.
2.1. REGISTERING CLIENTS WITH RED HAT SATELLITE SERVER
CHAPTER 2. CONFIGURING CLIENT APPLICATIONS
5

The following procedure describes how to use the rhn_register command to register a system withRed Hat Satellite. Ensure you replace the example host names and domain names with those that applyto your configuration.
Procedure 2.1. To Use rhn_register to Register a System with Red Hat Satellite:
1. Change into the /usr/share/rhn/ directory and download the SSL certificate to the client:
# cd /usr/share/rhn/# wget http://satellite.example.com/pub/RHN-ORG-TRUSTED-SSL-CERT
2. Edit the /etc/sysconfig/rhn/up2date file and ensure that it contains the followingentries:
serverURL=https://satellite.example.com/XMLRPCnoSSLServerURL=http://satellite.example.com/XMLRPCsslCACert=/usr/share/rhn/RHN-ORG-TRUSTED-SSL-CERT
3. Use the rhn_register command to register the machine:
# rhn_register
2.2. USING ACTIVATION KEYS TO REGISTER CLIENTS WITH RED HATSATELLITE
Red Hat recommends using activation keys for registering and configuring client systems that accessRed Hat Proxy or Red Hat Satellite. You can use activation keys to register, entitle, and subscribemultiple systems in a single operation. See the relevant section in the Red Hat Satellite Getting StartedGuide for more information about activation keys.
Procedure 2.2. To Use Activation Keys to Register a System with Red Hat Satellite:
1. Generate an activation key. See "Using Activation Keys" in the Red Hat Satellite GettingStarted Guide.)
2. Import custom GPG keys.
3. Download and install the SSL Certificate RPM from the /pub/ directory of the Red Hat Proxyor Red Hat Satellite. For example (update the URL to suit your environment):
# rpm -Uvh http://satellite.example.com/pub/rhn-org-trusted-ssl-cert-1.0-1.noarch.rpm
4. Register the system with the Red Hat Proxy or Red Hat Satellite:
# rhnreg_ks --activationkey mykey --serverUrl https://satellite.example.com/XMLRPC --sslCACert=/usr/share/rhn/RHN-ORG-TRUSTED-SSL-CERT
Alternatively, use the bootstrap script (bootstrap.sh) that Satellite generates. The bootstrap script,available for both Red Hat Satellite Server and Red Hat Proxy Server, is such a script. Script generationis discussed more in detail in 4.1.1. Using Red Hat Network Bootstrap to Register a System of the Getting
Client Configuration Guide
6
Started Guide.
To obtain the bootstrap script, run the following command:
wget http://satellite.example.com/pub/bootstrap/bootstrap.sh
IMPORTANT
The bootstrap script requires some manual editing after its generation on the Satelliteserver. An initial running of an unedited bootstrap script displays a message regardingmanual edits required. Follow these instructions and edit the bootstrap script on theSatellite server prior to downloading the script on the client.
2.3. UPDATING THE CONFIGURATION FILES MANUALLY
As an alternative to the GUI interface described in the previous section, users may also reconfigure theRed Hat Update Agent by editing the application's configuration file.
To configure the Update Agent on client systems that connect to Red Hat Proxy or Satellite, edit thevalues of the serverURL and noSSLServerURL settings in the /etc/sysconfig/rhn/up2dateconfiguration file (as root). Replace the default Red Hat Network URL with the fully qualified domainname (FQDN) of the Proxy or Satellite. For example:
serverURL[comment]=Remote server URLserverURL=https://your_primary.your_domain.com/XMLRPC
noSSLServerURL[comment]=Remote server URL without SSLnoSSLServerURL=http://your_primary.your_domain.com/XMLRPC
WARNING
The httpProxy setting in /etc/sysconfig/rhn/up2date does not refer to theRed Hat Proxy. It is used to configure an optional HTTP proxy for the client. With aRed Hat Proxy in place, the httpProxy setting must be blank (not set to anyvalue).
2.4. IMPLEMENTING SERVER FAILOVER
Procedure 2.3. To Implement Server Failover:
1. Ensure that you are running Red Hat Enterprise Linux 5, 6, or 7. For Red Hat Enterprise Linux 3or 4, use the latest version of up2date.
2. Manually add the secondary servers to the serverURL and noSSLServerURL settings in the /etc/sysconfig/rhn/up2date configuration file (as root).
3. Add the fully qualified domain names (FQDN) of Red Hat Proxy or Red Hat Satelliteimmediately after the primary server, separated by a semicolon (;). Your client will attempt to
CHAPTER 2. CONFIGURING CLIENT APPLICATIONS
7
connect to these servers in the order provided here. Include as many servers as necessary.For example:
serverURL[comment]=Remote server URLserverURL=https://satellite.example.com/XMLRPC;https://your_secondary.your_domain.com/XMLRPC;
noSSLServerURL[comment]=Remote server URL without SSLnoSSLServerURL=http://satellite.example.com/XMLRPC;http://your_secondary.your_domain.com/XMLRPC;
2.5. ENABLING STAGING CONTENT
Staging content is a feature that stages package or errata deployment on the client system before ascheduled installation. Within the 24 hours before scheduled deployment, the client pre-downloads theRPM content onto the local disk of the system. Then when executing the scheduled action, the specificpackages and errata are already cached on client. This results in:
A faster installation than without staging content.
The ability to spread out client requests to the Satellite server.
Less time needed for the installation and upgrade of client packages.
Prerequisite
Red Hat Enterprise Linux 5.6 or later, or Red Hat Enterprise Linux 6.1 or later, is required on the client.
This feature is disabled by default on the Satellite. The client default configuration file is enabled. Touse staging content you have to enable it on both client systems and within the Satellite server foreach Organization using it.
To enable staging content on the Satellite server, navigate to Admin → Organization → YourOrganization → Configuration and select the Enable Staging Contents option.
To enable staging content on a client, open the file /etc/sysconfig/rhn/up2date in your texteditor. Make the file includes the following lines:
stagingContent[comment]=Retrieve content of future actions in advancestagingContent=1
...
stagingContentWindow[comment]=How much forward we should look for future actions. In hoursstagingContentWindow=24
Without these entries, staging content within on the client defaults to disabled and window of timewould be 24 hours in advance:
stagingContent=0stagingContentWindow=24
Client Configuration Guide
8
CHAPTER 3. SSL INFRASTRUCTUREFor Red Hat Satellite customers, security concerns are of the utmost importance. One of the strengthsof Red Hat Satellite is its ability to process every single request using the Secure Sockets Layer (SSL)protocol. To maintain this level of security, customers installing Red Hat Satellite within theirinfrastructures must generate custom SSL keys and certificates.
Manual creation and deployment of SSL keys and certificates can be quite involved. Both the Red HatProxy Server and the Red Hat Satellite Server allow users to build their own SSL keys and certificatesbased on their own private Certificate Authority (CA) during installation. In addition, a separatecommand line utility, the Red Hat Satellite SSL Maintenance Tool , exists for this purpose. Even so,these keys and certificates must then be deployed to all systems within the managed infrastructure. Inmany cases, deployment of these SSL keys and certificates is automated. This chapter describesefficient methods for conducting all of these tasks.
NOTE
This chapter does not explain SSL in depth. The Red Hat Satellite SSL MaintenanceTool was designed to hide much of the complexity involved in setting up andmaintaining the public-key infrastructure (PKI). For more information, see the relevantsections of the Red Hat Enterprise Linux Deployment Guide.
3.1. A BRIEF INTRODUCTION TO SSL
Secure Sockets Layer (SSL) is a protocol that enables client-server applications to pass informationsecurely. SSL uses a system of public and private key pairs to encrypt communication passed betweenclients and servers. Public certificates can be left accessible, while private keys must be secured. It isthe mathematical relationship (a digital signature) between a private key and its paired publiccertificate that makes this system work. Through this relationship, a connection of trust is established.
NOTE
SSL private keys and public certificates are discussed throughout this document. Bothcan be referred to as keys, one public and one private. However, when discussing SSL, itis the convention to refer to the public half of an SSL key pair (or key set) as the SSLpublic certificate.
An organization's SSL infrastructure is generally made up of the following SSL keys and certificates:
Certificate Authority (CA) SSL private key and public certificate: only one set per organizationgenerally generated. The public certificate is digitally signed by its private key. The publiccertificate is distributed to every system.
Web server SSL private key and public certificate: one set per application server. The publiccertificate is digitally signed by both its private key and the CA SSL private key. It is oftenreferred to as a Web server's key set; this is because there is an intermediary SSL certificaterequest that is generated. The details of what this is used for are not important to thisdiscussion. All three are deployed to a Red Hat Satellite Server.
The following is a scenario to help visualize the concept: An organization with one Red HatSatellite Server and five Red Hat Proxy Servers will need to generate one CA SSL key pair and six Webserver SSL key sets. A CA SSL public certificate is distributed to all systems and used by all clients toestablish a connection to their respective upstream servers. Each server has its own SSL key set thatis specifically tied to that server's host name and generated using its own SSL private key and the CA
CHAPTER 3. SSL INFRASTRUCTURE
9
SSL private key in combination. This establishes a digitally verifiable association between the Webserver's SSL public certificate and the CA SSL key pair and server's private key. The Web server's keyset cannot be shared with other web servers.
IMPORTANT
The most critical portion of this system is the CA SSL key pair. From that private key andpublic certificate an administrator can regenerate any Web server's SSL key set. This CASSL key pair must be secured. It is highly recommended that once the entire Red HatSatellite infrastructure of servers is set up and running, archive the SSL build directorygenerated by this tool and/or the installers onto separate media, write down the CApassword, and secure the media and password in a safe place.
3.2. THE RED HAT SATELLITE SSL MAINTENANCE TOOL
Red Hat Satellite provides a command line tool to ease the management of the organization's secureinfrastructure: the Red Hat Satellite SSL Tool , commonly known by its command rhn-ssl-tool. Thistool is available as part of the spacewalk-certs-tools package. This package can be found withinthe software channels for the latest Red Hat Proxy Server and Red Hat Satellite Server (as well as theRed Hat Satellite Server ISO). The Red Hat Satellite SSL Tool enables organizations to generate theirown Certificate Authority SSL key pair, as well as Web server SSL key sets (sometimes called key pairs).
This tool is only a build tool. It generates all of the SSL keys and certificates that are required. It alsopackages the files in RPM format for quick distribution and installation on all client machines. It doesnot deploy them. That is left to the administrator, or in many cases, automated by the Red HatSatellite Server.
NOTE
The spacewalk-certs-tools, which contains rhn-ssl-tool, can be installed andrun on any current Red Hat Enterprise Linux system with minimal requirements. This isoffered as a convenience for administrators who want to manage their SSLinfrastructure from their workstation or another system other than their Satellite orProxy servers.
The Red Hat Satellite SSL Tool is required in the following situations:
When updating the Certificate Authority (CA) public certificate.
When installing a Red Hat Proxy Server 3.6 or later that connects to the central Red HatSatellite Servers as its top-level service. The hosted service, for security reasons, cannot be arepository for the CA SSL key and certificate, which is private to the organization.
When reconfiguring the Satellite or Proxy infrastructure to use SSL where it previously did not.
When adding multiple Red Hat Satellite Servers to the Red Hat Satellite infrastructure. Consultwith a Red Hat representative for instructions regarding this.
The Red Hat Satellite SSL Tool is not required in the following situations:
During installation of a Red Hat Satellite Server. All SSL settings are configured during theinstallation process. The SSL keys and certificate are built and deployed automatically.
During installation of a Red Hat Proxy Server 3.6 or later if connected to a Red Hat
Client Configuration Guide
10
Satellite Server 3.6 or later as its top-level service. The Red Hat Satellite Server contains all ofthe SSL information needed to configure, build and deploy the Red Hat Proxy Server's SSLkeys and certificates.
The installation procedures for both the Red Hat Satellite Server and the Red Hat Proxy Server ensurethe CA SSL public certificate is deployed to the /pub directory of each server. This public certificate isused by the client systems to connect to the Red Hat Satellite Server. See Section 3.3, “Deploying theCA SSL Public Certificate to Clients” for more information.
In summary, if the organization's Satellite or Proxy infrastructure deploys the latest version of Red HatSatellite Server as its top-level service, there should be little need to use the Red Hat Satellite SSLTool.
3.2.1. Generating SSL Certificates
The primary benefits of using the Red Hat Satellite SSL Maintenance Tool are security, flexibility, andportability. Security is achieved through the creation of distinct Web server SSL keys and certificatesfor each Red Hat Satellite server, all signed by a single Certificate Authority SSL key pair created bythe organization. Flexibility is supplied by the tool's ability to work on any machine that has thespacewalk-certs-tools package installed. Portability exists in a build structure that can be storedanywhere for safe keeping and then installed whenever the need arises.
If the organization infrastructure's top-level Server is the most current Red Hat Satellite Server, themost that may be required is to restore the ssl-build tree from an archive to the /root directoryand utilize the configuration tools provided within the Red Hat Satellite Server's website.
To make the best use of the Red Hat Satellite SSL Maintenance Tool , complete the following high-level tasks in the following order. See the remaining sections for the required details:
1. Install the spacewalk-certs-tools package on a system within the organization, perhaps but notnecessarily the Red Hat Satellite Server or Red Hat Proxy Server.
2. Create a single Certificate Authority SSL key pair for the organization and install the resultingRPM or public certificate on all client systems. See Section 3.2.3, “Generating the CertificateAuthority SSL Key Pair” for more information.
3. Create a Web server SSL key set for each of the Proxy and Satellite servers to be deployed andinstall the resulting RPM files on the Red Hat Satellite servers.
4. Restart the httpd service:
# service httpd restart
5. Back up the SSL build tree - consisting of the primary build directory and all subdirectories andfiles - to removable media, such as a CD or DVD. (Disk space requirements are insignificant.)
6. Verify and then store that archive in a safe location, such as the one described for backups inthe Additional Requirements sections of either the Proxy or Satellite installation guide.
7. Record and secure the CA password for future use.
8. Delete the build tree from the build system for security purposes, but only after the entireSatellite infrastructure is in place and configured.
CHAPTER 3. SSL INFRASTRUCTURE
11
NOTE
When additional Web server SSL key sets are needed, restore the build tree on asystem running the Red Hat Satellite SSL Maintenance Tool and repeat steps 3through 7.
3.2.2. Red Hat Satellite SSL Maintenance Tool Options
The Red Hat Satellite SSL Maintenance Tool offers numerous command line options for generatingCertificate Authority SSL key pair and managing your server SSL certificates and keys. The followingcommand-line help options are available:
rhn-ssl-tool --help: for general help.
rhn-ssl-tool --gen-ca --help: for Certificate Authority help.
rhn-ssl-tool --gen-server --help: for Web server help.
See the manual page (man rhn-ssl-tool) for more information.
3.2.3. Generating the Certificate Authority SSL Key Pair
Before creating the SSL key set required by the Web server, generate a Certificate Authority (CA) SSLkey pair. A CA SSL public certificate is distributed to client systems of the Satellite or Proxy. The RedHat Satellite SSL Maintenance Tool allows you to generate a CA SSL key pair if needed and reuse itfor all subsequent Red Hat Satellite server deployments.
The build process automatically creates the key pair and public RPM for distribution to clients. All CAcomponents are created in the build directory specified at the command line, typically /root/ssl-build (or /etc/sysconfig/rhn/ssl for older Satellite and Proxy servers). To generate a CA SSLkey pair, run the following command.
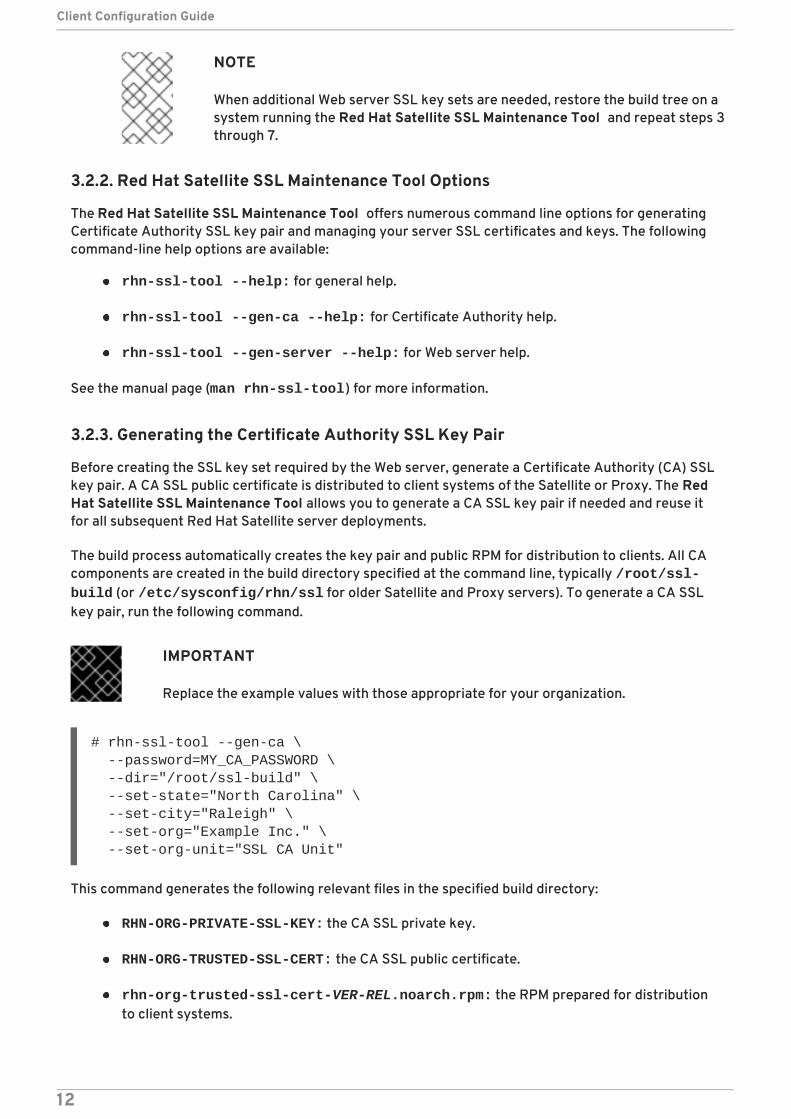
IMPORTANT
Replace the example values with those appropriate for your organization.
# rhn-ssl-tool --gen-ca \ --password=MY_CA_PASSWORD \ --dir="/root/ssl-build" \ --set-state="North Carolina" \ --set-city="Raleigh" \ --set-org="Example Inc." \ --set-org-unit="SSL CA Unit"
This command generates the following relevant files in the specified build directory:
RHN-ORG-PRIVATE-SSL-KEY: the CA SSL private key.
RHN-ORG-TRUSTED-SSL-CERT: the CA SSL public certificate.
rhn-org-trusted-ssl-cert-VER-REL.noarch.rpm: the RPM prepared for distributionto client systems.
Client Configuration Guide
12
This file contains the CA SSL public certificate (above) and installs it as /usr/share/rhn/RHN-ORG-TRUSTED-SSL-CERT
rhn-ca-openssl.cnf: the SSL CA configuration file.
latest.txt: lists the latest versions of the relevant files.
When this process is complete, distribute the RPM file to the client systems. See Section 3.3,“Deploying the CA SSL Public Certificate to Clients” for more information.
3.2.4. Generating Web Server SSL Key Sets
At this point, a CA SSL key pair should already be generated. However there is a likelihood ofgenerating web server SSL key sets more frequently, especially if more than one Proxy or Satellite isdeployed. A distinct set of SSL keys and certificates must be generated and installed for every distinctSatellite or Proxy server host name. The value for --set-hostname is therefore different for eachserver.
The server certificate build process works in a similar fashion to CA SSL key pair generation, with oneexception: All server components are saved in subdirectories of the build directory. Thesesubdirectories reflect the build system's machine name, such as /root/ssl-build/MACHINE_NAME.To generate a server certificate, run the following command.
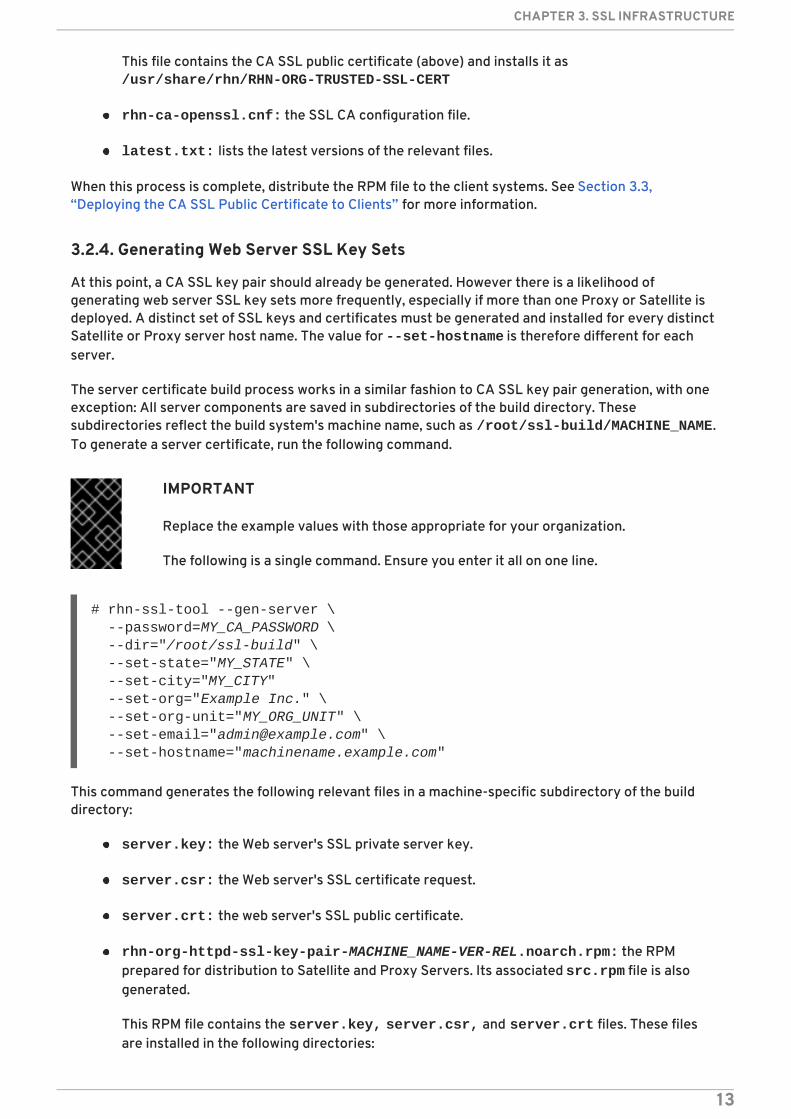
IMPORTANT
Replace the example values with those appropriate for your organization.
The following is a single command. Ensure you enter it all on one line.
# rhn-ssl-tool --gen-server \ --password=MY_CA_PASSWORD \ --dir="/root/ssl-build" \ --set-state="MY_STATE" \ --set-city="MY_CITY" --set-org="Example Inc." \ --set-org-unit="MY_ORG_UNIT" \ --set-email="[email protected]" \ --set-hostname="machinename.example.com"
This command generates the following relevant files in a machine-specific subdirectory of the builddirectory:
server.key: the Web server's SSL private server key.
server.csr: the Web server's SSL certificate request.
server.crt: the web server's SSL public certificate.
rhn-org-httpd-ssl-key-pair-MACHINE_NAME-VER-REL.noarch.rpm: the RPMprepared for distribution to Satellite and Proxy Servers. Its associated src.rpm file is alsogenerated.
This RPM file contains the server.key, server.csr, and server.crt files. These filesare installed in the following directories:
CHAPTER 3. SSL INFRASTRUCTURE
13
/etc/httpd/conf/ssl.key/server.key
/etc/httpd/conf/ssl.csr/server.csr
/etc/httpd/conf/ssl.crt/server.crt
rhn-server-openssl.cnf: the Web server's SSL configuration file.
latest.txt: lists the latest versions of the relevant files.
When this process is complete, distribute and install the RPM file on its respective Satellite or ProxyServer, and then restart the httpd service.
# service httpd restart
3.3. DEPLOYING THE CA SSL PUBLIC CERTIFICATE TO CLIENTS
The Red Hat Satellite Proxy Server and Red Hat Satellite Server installation processes generate a CASSL public certificate and package it in an RPM file. These installation processes make the certificateand RPM file publicly available by placing a copy of one or both into the /var/www/html/pub/directory of the Satellite or Proxy Server.
You can use your web browser to inspect the contents of this directory: http://proxy-or-sat.example.com/pub/. You can use the wget or curl commands to download the CA SSL publiccertificate to a client system.
IMPORTANT
Confirm the name of the certificate or RPM file before running any of these commands.
# curl -O http://proxy-or-sat.example.com/pub/RHN-ORG-TRUSTED-SSL-CERT# wget http://proxy-or-sat.example.com/pub/RHN-ORG-TRUSTED-SSL-CERT
Alternatively, if the CA SSL public certificate RPM file exists in the /pub directory, you can use the rpm command to install the package. For example:
# rpm -Uvh http://proxy-or-sat.example.com/pub/rhn-org-trusted-ssl-cert-VER-REL.noarch.rpm
3.4. CONFIGURING CLIENT SYSTEMS TO USE CERTIFICATES
After you have deployed the RPM file or the certificate to a client system, you need to edit theconfiguration files of the Red Hat Update Agent and the Red Hat Satellite Registration Client (ifnecessary) to use the new CA SSL public certificate file. You also need to update the configuration sothat it connects to the appropriate Red Hat Proxy Server or Red Hat Satellite Server. The generallyaccepted location for that CA SSL public certificate is in the /usr/share/rhn directory.
The Red Hat Proxy Server and Red Hat Satellite Server both have Red Hat Satellite Bootstrapinstalled by default, which can greatly reduce these repetitive steps and simplify the process ofregistering and configuring client systems. See the Red Hat Satellite Getting Started Guide for details.
Client Configuration Guide
14
CHAPTER 4. RED HAT SATELLITE AND SOLARIS-SPECIFICINFORMATIONThis is a section on using Red Hat Satellite with Solaris systems.
4.1. UNIX SUPPORT GUIDE
This chapter documents the installation procedure for, and identifies differences in, Red Hat Networkfunctionality when used to manage UNIX-based client systems. Red Hat Network offers UNIX supportto help customers migrate from UNIX to Linux. Because of the limited scope of this task, the featuresoffered for UNIX client management are not as comprehensive as those available for managing RedHat Enterprise Linux systems.
Subsequent sections specify supported UNIX variants, Red Hat Network features supported by theUNIX management system, the prerequisites for managing a UNIX system with Red Hat Network, aswell as the installation procedure for UNIX clients.
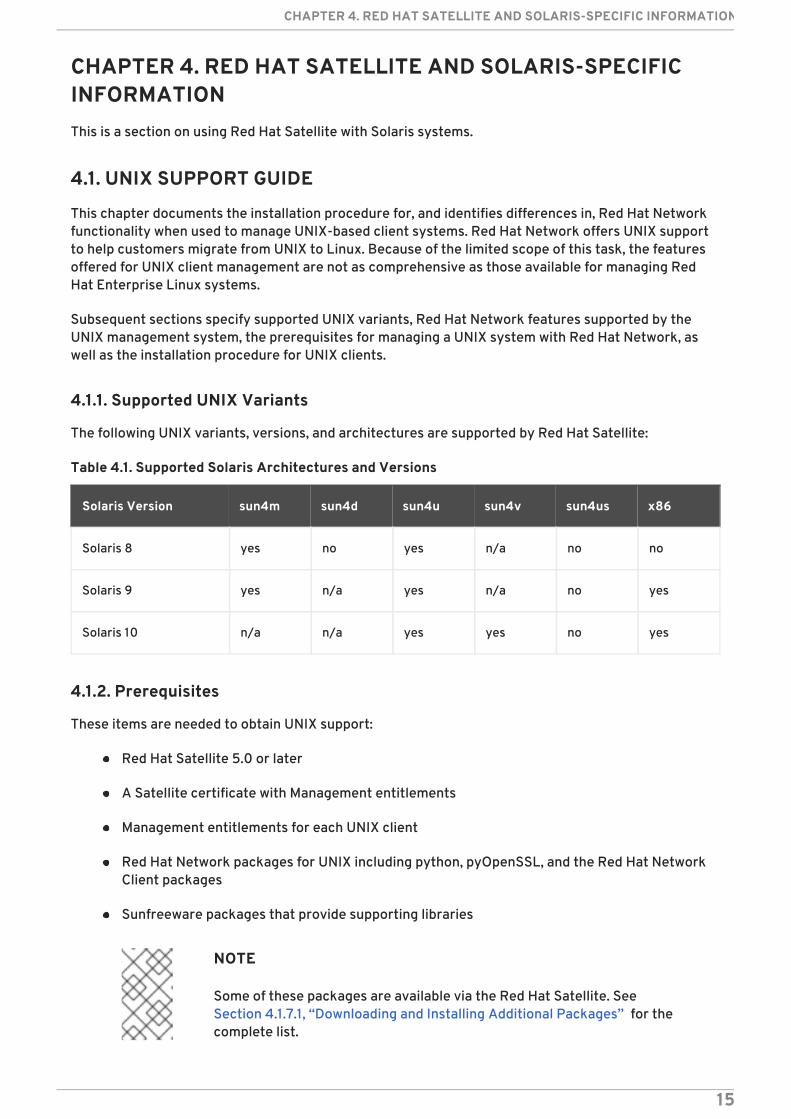
4.1.1. Supported UNIX Variants
The following UNIX variants, versions, and architectures are supported by Red Hat Satellite:
Table 4.1. Supported Solaris Architectures and Versions
Solaris Version sun4m sun4d sun4u sun4v sun4us x86
Solaris 8 yes no yes n/a no no
Solaris 9 yes n/a yes n/a no yes
Solaris 10 n/a n/a yes yes no yes
4.1.2. Prerequisites
These items are needed to obtain UNIX support:
Red Hat Satellite 5.0 or later
A Satellite certificate with Management entitlements
Management entitlements for each UNIX client
Red Hat Network packages for UNIX including python, pyOpenSSL, and the Red Hat NetworkClient packages
Sunfreeware packages that provide supporting libraries
NOTE
Some of these packages are available via the Red Hat Satellite. SeeSection 4.1.7.1, “Downloading and Installing Additional Packages” for thecomplete list.
CHAPTER 4. RED HAT SATELLITE AND SOLARIS-SPECIFIC INFORMATION
15
4.1.3. Included Features
The following features are included in the UNIX support service level agreement as they exist withinRed Hat Network:
The Red Hat Network Service Daemon (rhnsd), which triggers rhn_check according to aconfigurable interval
The Red Hat Network Configuration Client (rhncfg-client), which executes allconfiguration actions scheduled from the Satellite
The Red Hat Network Configuration Manager (rhncfg-manager), which allows commandline administration of Red Hat Network configuration channels
The rhn_check program, which checks in with the Satellite and performs any actionsscheduled from the server
All Management-level functionality, such as system grouping, package profile comparison, anduse of the System Set Manager to administer multiple systems at once
A Provisioning feature called Remote Command which enables users to schedule root-levelcommands on any managed client through the Satellite's website, if the client allows this action
4.1.4. Differences in Functionality
The following Red Hat Network features work differently in a UNIX environment:
The Red Hat Update Agent for UNIX offers a much smaller set of options than its Linuxcounterpart and relies upon the operating system's native toolset for package installation,rather than rpm - See Section 4.1.8.2.4, “Updating From the Command Line” for the preciselist of options.
The Red Hat Network Push application has been similarly modified to upload native UNIX filetypes, including packages, patches, and patch clusters.
Since Solaris package, patch and patch cluster files are different from RPM files, the channelupload mechanism is somewhat different.There are two applications in the rhnpush packagefor Solaris:
The first, solaris2mpm, is an Red Hat Network utility that creates an MPM file for eachSolaris package or patch. The neutral format of the MPM file allows the Satellite tounderstand and manage the uploaded files.
The second, rhnpush, has been extended so that it can handle MPM as well as RPM files.Otherwise, it operates identically to the Linux version of rhnpush.
The Channels tab of the Red Hat Network website has been augmented to accommodate thestorage and installation of native UNIX file types.
4.1.5. Excluded Features
The following Red Hat Network features are not available with the UNIX support system:
All Provisioning-level functionality, such as kickstarting and package rollback, with theexception of configuration file management
Client Configuration Guide
16
All Errata-related options, since the concept of Errata Updates is not understood in UNIX
Source files for packages
Answer files are not supported. Support for such files is planned for a future release.
There is also no support for IPv6 for Solaris systems.
Additionally, relocating RHAT*.pkg files during installation is not supported.
4.1.6. Satellite Server Preparation and Configuration
Configure the Satellite to support UNIX clients before the required files are available for deploymentto the client systems. This can be accomplished in one of two ways, depending on whether you haveinstalled your Satellite server:
1. During the Satellite installation:
Enable UNIX support on the Satellite by checking the "Enable Solaris Support" box on the RedHat Satellite configuration screen during the installation process.
2. After the Satellite has been installed:
Enable UNIX support by configuring the Satellite after it has been installed. To do so, selectAdmin in the top menu bar, then select Satellite Configuration in the left navigation bar. Inthe screen that follows, check the Enable Solaris Support box.
Click the Update button to confirm the change.
3. Finally, create a base channel to which your client systems may subscribe. Red Hat Networkdoes not provide UNIX content, satellite-sync cannot be used to create the channel.
To create a Solaris channel, login to the web interface of the Satellite as either a SatelliteAdministrator or a certificate authority. Navigate to the Channel tab, followed by the Manage Software Channels from the left navigation bar. Click the create new channel link inthe upper right of the resulting screen. Provide a name and label for your new channel, andselect either SPARC Solaris or i386 Solaris as the architecture, depending on thearchitecture of the client.
4.1.7. UNIX Client System Preparation
Before your UNIX-based client systems benefit from Red Hat Network, they must be prepared forconnection:
1. Download and install gzip and the required third-party libraries.
2. Download the Red Hat Network application tarball from the Satellite to the client and installthe contents.
3. Next, deploy the SSL certificates required for a secure connection.
4. Configure the client applications to connect to the Red Hat Satellite.
Once finished, your systems will be ready to begin receiving Red Hat Network updates. The followingsections explain these steps in detail.
CHAPTER 4. RED HAT SATELLITE AND SOLARIS-SPECIFIC INFORMATION
17
4.1.7.1. Downloading and Installing Additional Packages
This section steps you through the process of downloading and installing third-party applications andthe Red Hat Network applications from the Satellite onto the UNIX client.
Of primary importance is the Red Hat Update Agent for UNIX (up2date), which provides the linkbetween your client systems and Red Hat Network. The UNIX-specific version of the Red Hat UpdateAgent is limited in functionality compared to its Linux counterpart but still enables system registrationand facilitates package installs and patches. See Section 4.1.8, “UNIX Client Registration and Updates”for a full description of the tool's options.
NOTE
It may be useful to enter the command bash when first logging into the Solaris client. Ifthe BASH shell is available, it will make the system's behavior as Linux-like as possible.
4.1.7.1.1. Installing Third-Party Packages
Installation of the Red Hat Network applications cannot proceed unless the following utilities andlibraries are present:
gzip
libgcc
openssl
zlib
The gzip utility is provided by the SUNW gzip package and may be downloaded fromhttp://www.sunfreeware.com.
On recent versions of Solaris, the necessary libraries are provided by the following natively installedpackages:
SUNWgccruntime
SUNWopenssl*
SUNWzlib
For older Solaris versions, the following required packages may be downloaded fromhttp://www.sunfreeware.com:
SMClibgcc or SMCgcc
SMCossl
SMCzlib
To verify if a package is installed on the client, use the pkginfo command. For example, to check for apackage that contains "zlib" in the name, run the following command:
# pkginfo | grep zlib
Client Configuration Guide
18
NOTE
Solaris package archive names differ from the name of the installed package. Forexample, the package archive libgcc<version>-sol<solaris-version>-sparc-local.gz becomes SMClibgcc after installation
4.1.7.1.2. Configuring the Library Search Path
To allow the Solaris client to use the libraries installed in the previous step, you must add their locationto the library search path. To do so, first check the current library search path:
# crle -c /var/ld/ld.config
Make a note of the current Default Library Path. Next, modify the path to also include the componentsshown below. Note that the -l option resets the value, rather than appending it, so if there alreadywere values set on your system, prepend them to the -l parameter.
On sparc:
# crle -c /var/ld/ld.config -l /other/existing/path:/lib:/usr/lib:/usr/local/lib
On x86:
# crle -c /var/ld/ld.config -l /other/existing/path:/lib:/usr/lib:/usr/local/lib:/usr/sfw/lib
4.1.7.1.3. Downloading Red Hat Network Client Packages
Download the appropriate tarball of packages from the /var/www/html/pub/ directory of yourSatellite. If you are able to use a GUI web browser like Mozilla, navigate to the /pub directory of theSatellite and save the appropriate tarball to your client:
http://your-satellite.example.com/pub/rhn-solaris-bootstrap-<version>-<solaris-arch>-<solaris-version>.tar.gz
If you must download the tarball from the command line, it should be possible to use ftp to transferthe file from the Satellite to the client.
Using gzip, decompress the tarball. You should have the following packages:
RHATpossl
RHATrhnrcfg
RHATrhnrcfga
RHATrhnrcfgc
RHATrhnrcfgm
RHATrhnc
CHAPTER 4. RED HAT SATELLITE AND SOLARIS-SPECIFIC INFORMATION
19
RHATrhnl
RHATrpush
RHATsmart
SMClibgcc and SMCosslg may also be included in the tarball.
4.1.7.1.4. Installing the Red Hat Network Packages
Change to the uncompressed directory and use the UNIX variant's native installation tool to installeach package. For example, on Solaris, use the pkgadd command. Answer "yes" to any prompts duringpackage install.
Here is how a typical installation might proceed:
# pkgadd -d RHATpossl-0.6-1.p24.6.pkg all# pkgadd -d RHATpythn-2.4.1-2.rhn.4.sol9.pkg all# pkgadd -d RHATrhnl-1.8-7.p23.pkg all...
NOTE
Use the -n option for pkgadd to run the command in non-interactive mode. However,this may cause the installation of some packages to fail silently on Solaris 10.
Continue until each package is installed in the Red Hat Network-specific path: /opt/redhat/rhn/solaris/.
4.1.7.1.5. Including Red Hat Network Packages in the PATH
In order to make the Red Hat Network packages available at each login, you may wish to add them toyour PATH. To do so, add these commands to your login script:
# PATH=$PATH:/opt/redhat/rhn/solaris/bin# PATH=$PATH:/opt/redhat/rhn/solaris/usr/bin# PATH=$PATH:/opt/redhat/rhn/solaris/usr/sbin# export PATH
To enable access to the Red Hat Network client command man pages, add them to your MANPATH. Todo so, add the following commands to your login script:
# MANPATH=$MANPATH:/opt/redhat/rhn/solaris/man# export MANPATH
Alternatively, you can also access the man pages from the command line, with the following command:
# man -M /opt/redhat/rhn/solaris/man <man page>
Finally, add the Red Hat Libraries to your PATH as you did with libgcc, openssl and zlib.
Client Configuration Guide
20
crle -c /var/ld/ld.config -l <current library paths>:/opt/redhat/rhn/solaris/lib
4.1.7.2. Deploying Client SSL Certificates
To ensure secure data transfer, Red Hat strongly recommends the use of SSL. The Red Hat Satelliteeases implementation of SSL by generating the necessary certificates during its installation. Theserver-side certificate is automatically installed on the Satellite itself, while the client certificate isplaced in the /pub/ directory of the Satellite's Web server.
To install the certificate, follow these steps for each client:
1. Download the SSL certificate from the /var/www/html/pub/ directory of the Red HatSatellite onto the client system. The certificate will be named something similar to RHN-ORG-TRUSTED-SSL-CERT. It is accessible via the web at the following URL: https://your-satellite.example.com/pub/RHN-ORG-TRUSTED-SSL-CERT.
2. Move the client SSL certificate to the Red Hat Network-specific directory for your UNIXvariant. For Solaris, this can be accomplished with a command similar to:
mv /path/to/RHN-ORG-TRUSTED-SSL-CERT /opt/redhat/rhn/solaris/usr/share/rhn/
When finished, the new client certificate will be installed in the appropriate directory for your UNIXsystem. If you have a large number of systems to prepare for Red Hat Network management, you mayscript this entire process.
Now you must reconfigure the Red Hat Network client applications to refer to the newly installed SSLcertificate. See Section 4.1.7.3, “Configuring the Clients” for instructions.
4.1.7.3. Configuring the Clients
The final step before registering your client systems with Red Hat Network is to reconfigure their RedHat Network applications to use the new SSL certificate and obtain updates from the Red Hat Satellite.Both of these changes can be made by editing the configuration file of the Red Hat Update Agent ,which provides registration and update functionality.
Follow these steps on each client system:
1. As root, change to the Red Hat Network configuration directory for the system. For Solaris, thefull path is /opt/redhat/rhn/solaris/etc/sysconfig/rhn/.
2. Open the up2date configuration file in a text editor.
3. Find the serverURL entry and set its value to the fully qualified domain name (FQDN) of yourRed Hat Satellite:
serverURL[comment]=Remote server URLserverURL=https://your-satellite.example.com/XMLRPC
4. Ensure the application refers to the Red Hat Satellite even when SSL is turned off by alsosetting the noSSLServerURL value to the Satellite:
noSSLServerURL[comment]=Remote server URL without SSL
CHAPTER 4. RED HAT SATELLITE AND SOLARIS-SPECIFIC INFORMATION
21
noSSLServerURL=http://your-satellite.example.com/XMLRPC
5. With the up2date configuration file still open, find the sslCACert entry and set its value tothe name and location of the SSL certificate described in Section 4.1.7.2, “Deploying Client SSLCertificates”, for example:
sslCACert[comment]=The CA cert used to verify the ssl serversslCACert=/opt/redhat/rhn/solaris/usr/share/rhn/RHN-ORG-TRUSTED-SSL-CERT
Your client systems are now ready for registration with Red Hat Network and management by yourSatellite.
4.1.8. UNIX Client Registration and Updates
Now that you have installed Red Hat Network-specific packages, implemented SSL, and reconfiguredyour client systems to connect to the Red Hat Satellite, you are ready to begin registering systems andobtaining updates.
4.1.8.1. Registering UNIX Systems
This section describes the Red Hat Network registration process for UNIX systems. You must use the rhnreg_ks command to accomplish this; the use of activation keys for registering your systems isoptional. These keys allow you to predetermine settings within Red Hat Network, such as basechannels and system groups, and to apply those automatically to systems during their registration.
Since activation key generation and use is covered extensively in other chapters, this section focuseson differences when applying them to UNIX variants.
To register UNIX systems with your Red Hat Satellite, accomplish the following tasks in this order:
1. Log into the Satellite's web interface and click the Systems tab in the top navigation barfollowed by Activation Keys in the left navigation bar. Then click the create new keylink at the top-right corner of the page.
2. On the following page, select the base channel you created at the end of Section 4.1.6,“Satellite Server Preparation and Configuration”.
3. After creating the key, click its name in the Activation Keys list to enhance its Red HatNetwork settings by associating software and configuration channels and system groups.
4. Open a terminal on the client system to be registered and switch user to root.
5. Use rhnreg_ks along with the --activationkey option to register the client with theSatellite. The string of characters that make up the key may be copied directly from the Activation Keys list on the website. The resulting command will look something like thefollowing:
rhnreg_ks --activationkey=b25fef0966659314ef9156786bd9f3af
6. Go back to the website, click the name of the activation key, and ensure the new systemappears within the Activated Systems tab.
Client Configuration Guide
22
4.1.8.2. Obtaining Updates
Package updates in UNIX are handled differently compared to Linux. For instance, Solaris relies onPatch Clusters to update multiple packages at once, while Red Hat operating systems use ErrataUpdates to associate upgrades with specific packages. In addition, Solaris uses answer files toautomate interactive package installations, something Linux doesn't understand, while Red Hat offersthe concept of source packages. For this reason, this section seeks to highlight differences in using RedHat Network tools on UNIX systems. (Note: Red Hat Network does not support Solaris answer files inthe current release; such support is planned for future releases.)
Despite inherent differences, such as the lack of Errata, the channel and package managementinterfaces within the Red Hat Network website on the Satellite work largely the same for UNIXsystems. All software channels designed to serve UNIX variants can be constructed almost exactly asthe custom channels described in the Red Hat Satellite Getting Started Guide. The most significantdifference is the architecture. When creating a UNIX software channel, ensure you select the basechannel architecture appropriate for the systems to be served.
Break down your packages into base and child channels depending on their nature. For example, onSolaris, installation packages should go in the Solaris base channel, while patches and Patch Clustersshould go in a child channel of the Solaris base channel. Extra installation packages can go in aseparate Extras child channel.
Red Hat Network treats patches similarly to packages; they are listed and installed in the same wayand with the same interface as normal packages. Patches are 'numbered' by Solaris, and will havenames like "patch-solaris-108434". The version of a Solaris patch is extracted from the original Solarismetadata, and the release is always 1.
Patch Clusters are bundles of patches that are installed as a unit. Red Hat Network keeps track of thelast time that a Patch Cluster was installed successfully on a system. However, Patch Clusters are nottracked on the client as installed entities so they do not appear in the installed packages or patcheslist. Patch Cluster names look like "patch-cluster-solaris-7_Recommended". The version is adatestring, such as "20040206", the release is always 1 and the epoch is always 0.
4.1.8.2.1. Uploading Packages to the Satellite
Red Hat Network does not provide UNIX content; any Solaris packages, patches or Patch Clusters mustbe uploaded to the Satellite in a format that it understands from a client system. That package can thenbe managed and distributed to other systems. Red Hat Network created solaris2mpm to translateSolaris packages, patches, and patch clusters to a format that the Satellite can understand.
4.1.8.2.1.1. solaris2mpm
As mentioned briefly in Section 4.1.4, “Differences in Functionality”, solaris2mpm is part of Red HatNetwork Push for Solaris. The content that is pushed to a Solaris channel on the Satellite must first bein .mpm format.
A .mpm file is an archive containing a description of the package data and the package or patch itself.The solaris2mpm command must be run on the client, never the Satellite.
NOTE
solaris2mpm requires free space equal to three times the size of any package, patch, orpatch cluster it is converting. Normally, space in /tmp/ will be used for this purpose.However, the --tempdir option allows you to specify another directory if necessary.
CHAPTER 4. RED HAT SATELLITE AND SOLARIS-SPECIFIC INFORMATION
23
Multiple files may be specified on the command line of solaris2mpm. Below is a usage example:
# solaris2mpm RHATrpush-3.1.5-21.pkg RHATrpush-3.1.5-23.pkgOpening archive, this may take a whileWriting out RHATrpush-3.1.5-21.sparc-solaris.mpmOpening archive, this may take a whileWriting out RHATrpush-3.1.5-23.sparc-solaris.mpm
Because no other directory was specified, the resulting .mpm files are written to the /tmp/ directory.Note that the name of the resulting .mpm files includes the architecture of the client on which it wascreated. In this case, this was SPARC Solaris. The general format of mpm file names is:
name-version-release.arch.mpm
Patch clusters are "exploded" - .mpm files are generated for each patch in the cluster, as well as a top-level "meta" .mpm file containing information about the cluster as a whole.
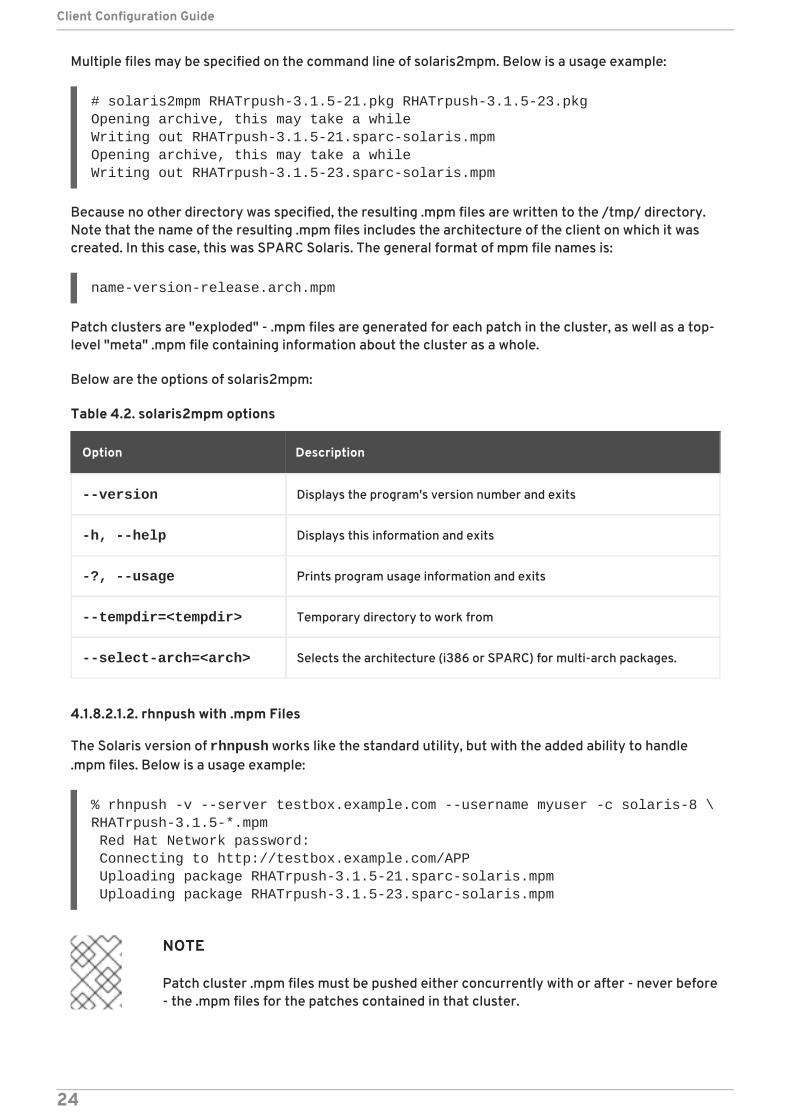
Below are the options of solaris2mpm:
Table 4.2. solaris2mpm options
Option Description
--version Displays the program's version number and exits
-h, --help Displays this information and exits
-?, --usage Prints program usage information and exits
--tempdir=<tempdir> Temporary directory to work from
--select-arch=<arch> Selects the architecture (i386 or SPARC) for multi-arch packages.
4.1.8.2.1.2. rhnpush with .mpm Files
The Solaris version of rhnpush works like the standard utility, but with the added ability to handle.mpm files. Below is a usage example:
% rhnpush -v --server testbox.example.com --username myuser -c solaris-8 \RHATrpush-3.1.5-*.mpm Red Hat Network password: Connecting to http://testbox.example.com/APP Uploading package RHATrpush-3.1.5-21.sparc-solaris.mpm Uploading package RHATrpush-3.1.5-23.sparc-solaris.mpm
NOTE
Patch cluster .mpm files must be pushed either concurrently with or after - never before- the .mpm files for the patches contained in that cluster.
Client Configuration Guide
24
Use solaris2mpm on each of the packages, patches, or patch clusters you wish to manage via theSatellite, then use Red Hat Network Push to upload them to the channel created for them.
4.1.8.2.2. Updating Through the Web Interface
To install packages or patches on an individual system, click the name of the system in the Systemscategory, select the packages from the Upgrade or Install lists of the Packages or Patches tab, andclick Install/Upgrade Selected Packages.
To run a remote command while installing the package, click Run Remote Command rather than Confirm. See Section 4.1.9, “Using Remote Commands” for instructions.
To install packages or patches on multiple systems at once, select the systems and click System Set Manager in the left navigation bar. Then, in the Packages tab, select the packages from the Upgradeor Install lists and click Install/Upgrade Packages. To complete the action, schedule the updates.
4.1.8.2.3. rhnsd
On Red Hat Enterprise Linux systems, the rhnsd daemon, which instructs the client system to check inwith Red Hat Network, automatically starts at boot time. On Solaris systems, rhnsd does not start atboot time by default. It can be started from the command line in this way:
rhnsd --foreground --interval=240
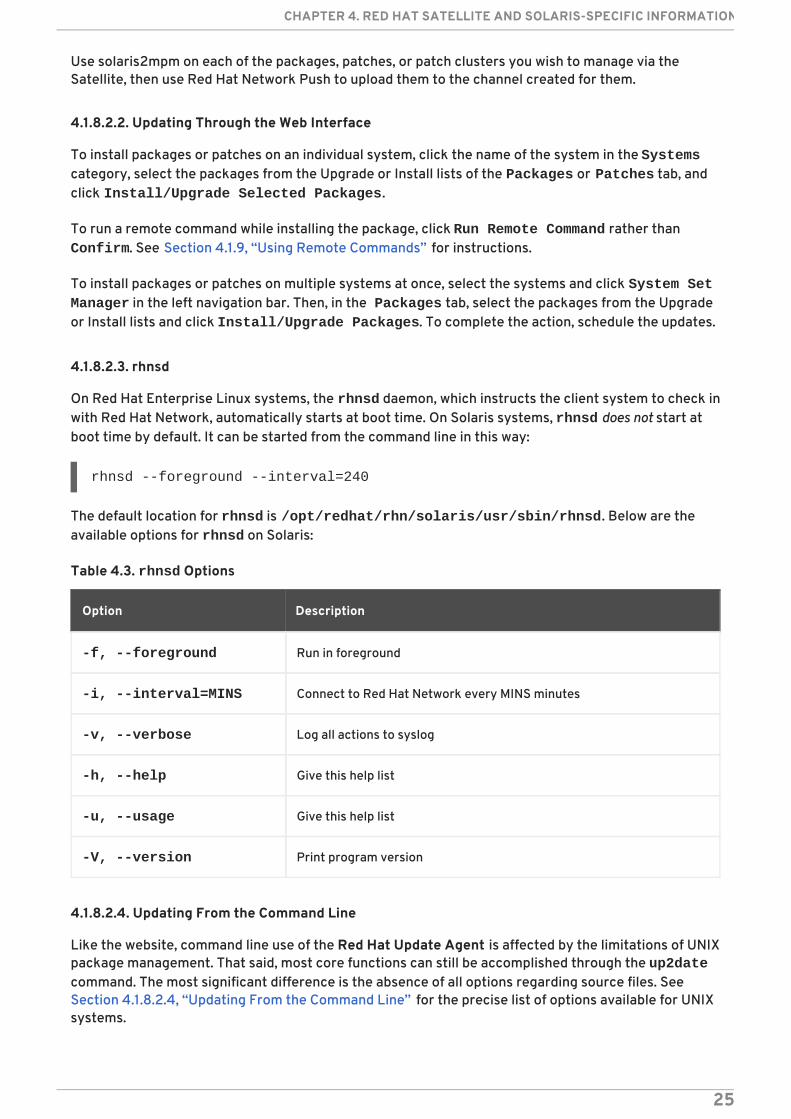
The default location for rhnsd is /opt/redhat/rhn/solaris/usr/sbin/rhnsd. Below are theavailable options for rhnsd on Solaris:
Table 4.3. rhnsd Options
Option Description
-f, --foreground Run in foreground
-i, --interval=MINS Connect to Red Hat Network every MINS minutes
-v, --verbose Log all actions to syslog
-h, --help Give this help list
-u, --usage Give this help list
-V, --version Print program version
4.1.8.2.4. Updating From the Command Line
Like the website, command line use of the Red Hat Update Agent is affected by the limitations of UNIXpackage management. That said, most core functions can still be accomplished through the up2datecommand. The most significant difference is the absence of all options regarding source files. SeeSection 4.1.8.2.4, “Updating From the Command Line” for the precise list of options available for UNIXsystems.
CHAPTER 4. RED HAT SATELLITE AND SOLARIS-SPECIFIC INFORMATION
25
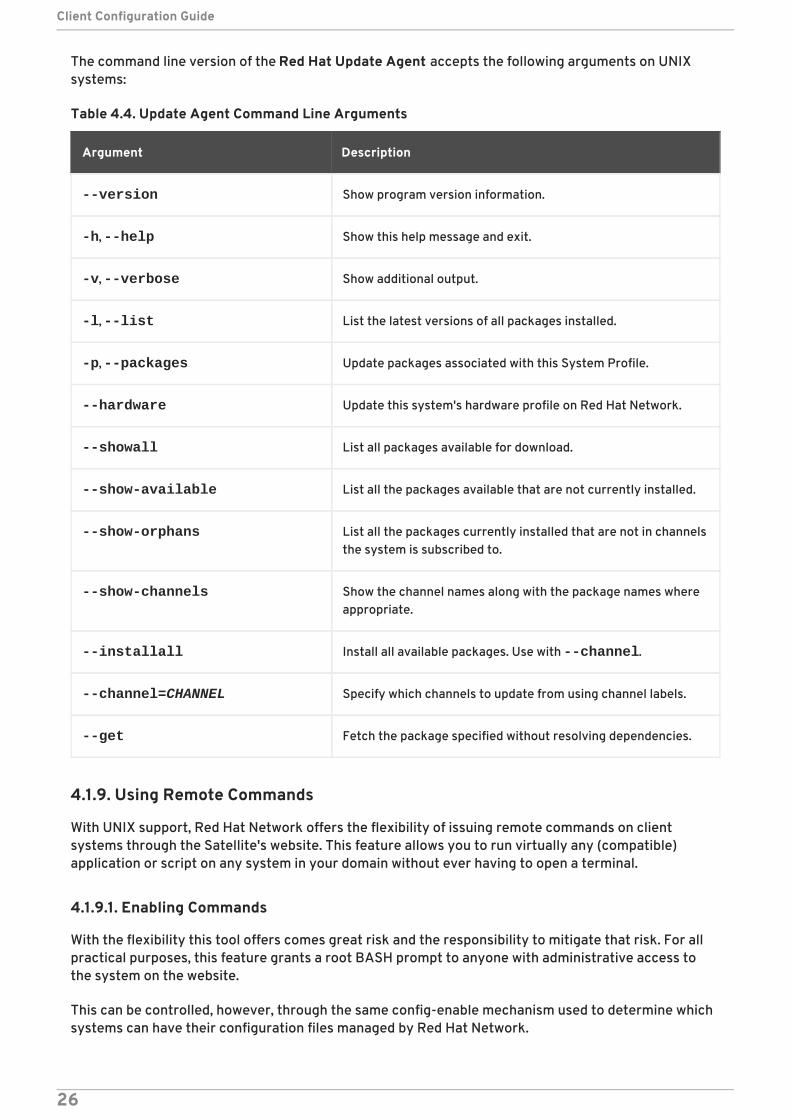
The command line version of the Red Hat Update Agent accepts the following arguments on UNIXsystems:
Table 4.4. Update Agent Command Line Arguments
Argument Description
--version Show program version information.
-h, --help Show this help message and exit.
-v, --verbose Show additional output.
-l, --list List the latest versions of all packages installed.
-p, --packages Update packages associated with this System Profile.
--hardware Update this system's hardware profile on Red Hat Network.
--showall List all packages available for download.
--show-available List all the packages available that are not currently installed.
--show-orphans List all the packages currently installed that are not in channelsthe system is subscribed to.
--show-channels Show the channel names along with the package names whereappropriate.
--installall Install all available packages. Use with --channel.
--channel=CHANNEL Specify which channels to update from using channel labels.
--get Fetch the package specified without resolving dependencies.
4.1.9. Using Remote Commands
With UNIX support, Red Hat Network offers the flexibility of issuing remote commands on clientsystems through the Satellite's website. This feature allows you to run virtually any (compatible)application or script on any system in your domain without ever having to open a terminal.
4.1.9.1. Enabling Commands
With the flexibility this tool offers comes great risk and the responsibility to mitigate that risk. For allpractical purposes, this feature grants a root BASH prompt to anyone with administrative access tothe system on the website.
This can be controlled, however, through the same config-enable mechanism used to determine whichsystems can have their configuration files managed by Red Hat Network.
Client Configuration Guide
26
In short, you must create a directory and file on the UNIX system that tells Red Hat Network it isacceptable to run remote commands on the machine. The directory must be named script, the filemust be named run, and both must be located in the /etc/sysconfig/rhn/allowed-actions/directory specific to your UNIX variant.
For instance, in Solaris, issue this command to create the directory:
mkdir -p /opt/redhat/rhn/solaris/etc/sysconfig/rhn/allowed-actions/script
To create the requisite file in Solaris, issue this command:
touch /opt/redhat/rhn/solaris/etc/sysconfig/rhn/allowed-actions/script/run
4.1.9.2. Issuing Commands
You may schedule a remote command in a variety of ways: on an individual system, on multiplesystems at once, and to accompany a package action.
To run a remote command on an individual system by itself, open the System Details page and clickthe Remote Command subtab. (Note that this subtab only appears if the system has a Provisioningentitlement.) On this page, establish the settings for the command. You may identify a specific user,group, and timeout period, as well as the script itself. Select a date and time to begin attempting thecommand, and click the Schedule Remote Command link.
Similarly, you may issue a remote command on multiple systems at once through the System Set Manager. Select the systems, go to the System Set Manager, click the Provisioning tab, andscroll down to the Remote Command section. From there you may run a remote command on theselected systems at once.
To run a remote command with a package action, schedule the action through the Packages tab of theSystem Details page and click Run Remote Command while confirming the action. Use the radiobuttons at the top to determine whether the command should run before or after the package action,establish the settings for the command, and click Schedule Package Install/Upgrade.
Note that installing multiple packages that have different remote commands requires scheduling theinstalls separately or combining the commands into a single script.
CHAPTER 4. RED HAT SATELLITE AND SOLARIS-SPECIFIC INFORMATION
27

CHAPTER 5. REPORTING SOFTWARE FAILURESYou can take advantage of Red Hat Satellite's software failure reporting capabilities and the AutomaticBug Reporting Tool (ABRT) to extend the overall reporting functionality of your systems. Thisextended functionality allows your clients to automatically report software failures captured by ABRTto the Satellite server, and also to process the captured failures in a centralized fashion. You can useeither the webUI or the API to process these failure reports.
5.1. INSTALLING SOFTWARE FAILURE REPORTING TOOLS
The following procedure describes how to install Red Hat Satellite tools for ABRT on clients.
Procedure 5.1. To Use the Software Failure Reporting Functionality:
1. Log into your client system as the root user.
2. Install the spacewalk-abrt package on your client systems. This package installs the abrtpackage as a dependency.
# yum install spacewalk-abrt
NOTE
Neither the abrt nor spacewalk-abrt packages are available for Red HatEnterprise Linux 5.
5.2. USING SOFTWARE FAILURE REPORTING TOOLS
The spacewalk-abrt package has two important components:
The configuration file for ABRT: /etc/libreport/events.d/spacewalk.conf
The spacewalk-abrt utility: /usr/bin/spacewalk-abrt
The configuration file instructs the abrt daemon to use the /usr/bin/spacewalk-abrt utility toautomatically report every software failure that occurs on the system to your Satellite server. This is afully automated process and ordinarily does not require any human intervention.
Use the Red Hat Satellite Web UI to view software failure reports from clients. For more information,see the Red Hat Satellite User Guide.
5.3. MANUALLY REPORTING SOFTWARE FAILURES
Use the spacewalk-abrt utility to manually report software failures to your Satellite server. Thefollowing procedure shows how to perform a manually send a software failure report.
Procedure 5.2. To manually report software failures
1. Use the abrt-cli list parameter to display a list of existing failure reports.
# abrt-cli list
Client Configuration Guide
28
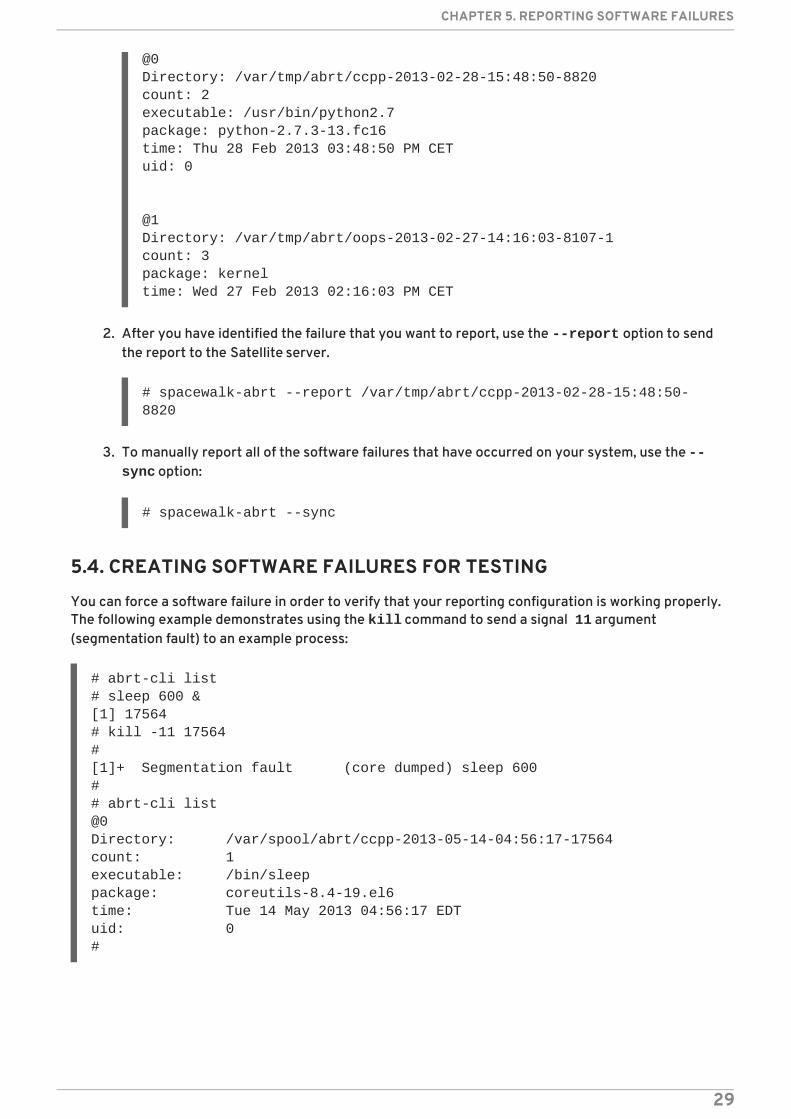
@0Directory: /var/tmp/abrt/ccpp-2013-02-28-15:48:50-8820count: 2executable: /usr/bin/python2.7package: python-2.7.3-13.fc16time: Thu 28 Feb 2013 03:48:50 PM CETuid: 0
@1Directory: /var/tmp/abrt/oops-2013-02-27-14:16:03-8107-1count: 3package: kerneltime: Wed 27 Feb 2013 02:16:03 PM CET
2. After you have identified the failure that you want to report, use the --report option to sendthe report to the Satellite server.
# spacewalk-abrt --report /var/tmp/abrt/ccpp-2013-02-28-15:48:50-8820
3. To manually report all of the software failures that have occurred on your system, use the --sync option:
# spacewalk-abrt --sync
5.4. CREATING SOFTWARE FAILURES FOR TESTING
You can force a software failure in order to verify that your reporting configuration is working properly.The following example demonstrates using the kill command to send a signal 11 argument(segmentation fault) to an example process:
# abrt-cli list# sleep 600 &[1] 17564# kill -11 17564#[1]+ Segmentation fault (core dumped) sleep 600## abrt-cli list@0Directory: /var/spool/abrt/ccpp-2013-05-14-04:56:17-17564count: 1executable: /bin/sleeppackage: coreutils-8.4-19.el6time: Tue 14 May 2013 04:56:17 EDTuid: 0#
CHAPTER 5. REPORTING SOFTWARE FAILURES
29
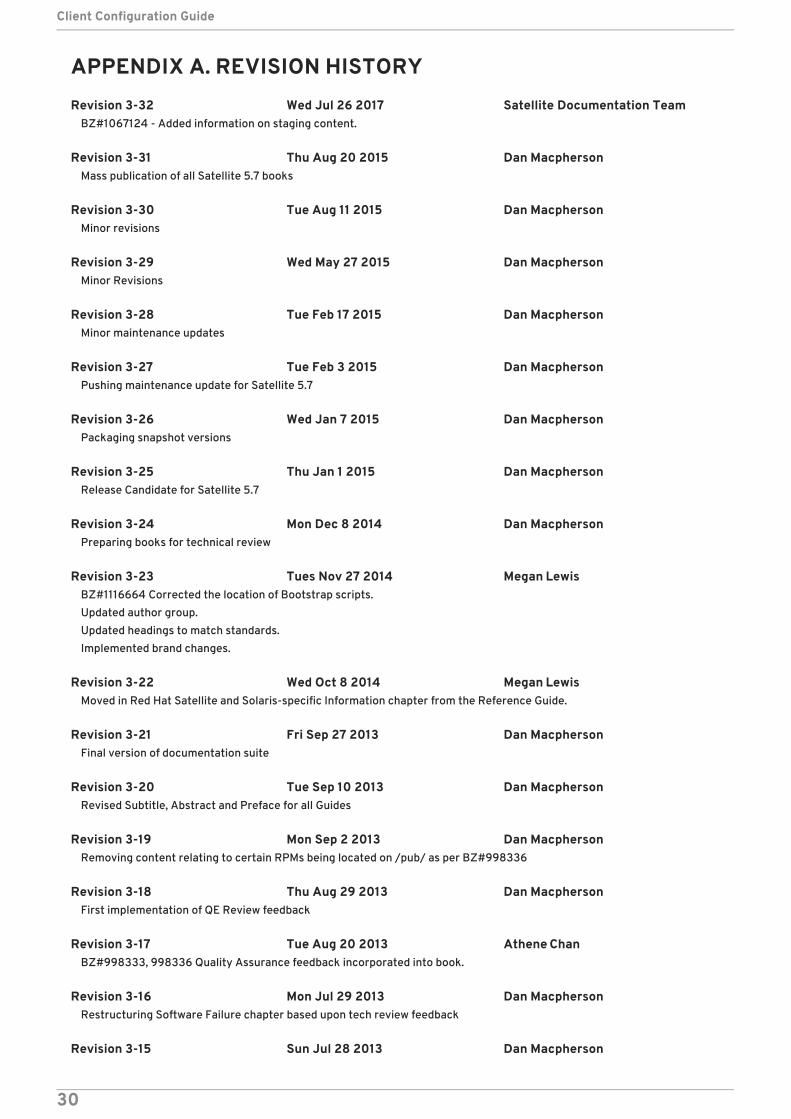
APPENDIX A. REVISION HISTORY
Revision 3-32 Wed Jul 26 2017 Satellite Documentation TeamBZ#1067124 - Added information on staging content.
Revision 3-31 Thu Aug 20 2015 Dan MacphersonMass publication of all Satellite 5.7 books
Revision 3-30 Tue Aug 11 2015 Dan MacphersonMinor revisions
Revision 3-29 Wed May 27 2015 Dan MacphersonMinor Revisions
Revision 3-28 Tue Feb 17 2015 Dan MacphersonMinor maintenance updates
Revision 3-27 Tue Feb 3 2015 Dan MacphersonPushing maintenance update for Satellite 5.7
Revision 3-26 Wed Jan 7 2015 Dan MacphersonPackaging snapshot versions
Revision 3-25 Thu Jan 1 2015 Dan MacphersonRelease Candidate for Satellite 5.7
Revision 3-24 Mon Dec 8 2014 Dan MacphersonPreparing books for technical review
Revision 3-23 Tues Nov 27 2014 Megan LewisBZ#1116664 Corrected the location of Bootstrap scripts.Updated author group.Updated headings to match standards.Implemented brand changes.
Revision 3-22 Wed Oct 8 2014 Megan LewisMoved in Red Hat Satellite and Solaris-specific Information chapter from the Reference Guide.
Revision 3-21 Fri Sep 27 2013 Dan MacphersonFinal version of documentation suite
Revision 3-20 Tue Sep 10 2013 Dan MacphersonRevised Subtitle, Abstract and Preface for all Guides
Revision 3-19 Mon Sep 2 2013 Dan MacphersonRemoving content relating to certain RPMs being located on /pub/ as per BZ#998336
Revision 3-18 Thu Aug 29 2013 Dan MacphersonFirst implementation of QE Review feedback
Revision 3-17 Tue Aug 20 2013 Athene ChanBZ#998333, 998336 Quality Assurance feedback incorporated into book.
Revision 3-16 Mon Jul 29 2013 Dan MacphersonRestructuring Software Failure chapter based upon tech review feedback
Revision 3-15 Sun Jul 28 2013 Dan Macpherson
Client Configuration Guide
30
Second implementation of tech review feedback
Revision 3-14 Wed Jul 24 2013 Dan MacphersonCorrections for BZ#987245
Revision 3-13 Tue Jul 23 2013 Dan MacphersonFirst implementation of tech review feedback
Revision 3-12 Fri Jul 19 2013 Dan MacphersonTypo correction
Revision 3-11 Fri Jul 12 2013 Dan MacphersonTypo correction
Revision 3-10 Fri Jul 12 2013 Dan MacphersonFinal beta updates
Revision 3-8 Fri Jul 12 2013 Dan MacphersonUpdate to Beta docs
Revision 3-6 Fri Jul 12 2013 David O'BrienUpdate section on CAs.Add section on new reports.Add section on using ABRT.Update section about using rhn_register.Remove chapter on Bootstraps and Scripting.Remove redundant tables that reproduce man pages.
Revision 3-5 Wed Sep 19 2012 Dan MacphersonFinal packaging for 5.5
Revision 3-4 Fri Aug 10 2012 Athene ChanStaging for review
Revision 3-0 Thu Jun 28 2012 Athene ChanPrepared for Red Hat Satellite Server 5.5 publicationTechnical Review EditsBZ#837703 Custom GPG Key note added
Revision 2-2 Mon Aug 15 2011 Lana BrindleyFolded z-stream release into y-stream
Revision 2-1 Wed Jun 15 2011 Lana BrindleyPrepared for publication
Revision 2-0 Sat May 7 2011 Lana BrindleyPrepared for translation
Revision 1-8 Mon Feb 7 2011 Lana BrindleyBZ#662876 - Certificates
Revision 1-7 Tue Feb 1 2011 Lana BrindleyBZ#636703 - Latest Clients
APPENDIX A. REVISION HISTORY
31

Client Configuration Guide
32