Embed Size (px)
Citation preview
EX
CLUSIVE
SNOW ISGLISTENING
by Debby Forshey-Choma

2 | artistsclub.com
PALETTE:DecoArt Americana AcrylicsBleached Sand #13251Blue Mist #13178DecoArt Extreme Sheen Silver #16085Deep Midnight Blue #13166Forest Green #13050Grape Juice #13236Hauser Medium Green #13132Heritage Brick #13219Honey Brown #13163Ice Crystal Glamour Dust Glitter Paint #13598Moon Yellow #13007Payne’s Grey #13167Snow White (Titanium White) #13001Tangelo Orange #13196Teal Green #13107Terra Coral #13286Wasabi Green #13519Winter Blue #13190
DECOART SEALERS/FINISHES:Acrylic Sealer Finisher Matte Spray #70836Dura Clear Matte Varnish #87395Dura Clear Satin Varnish #87394Faux Finish Glazing MediumMulti Purpose Sealer #87392
SURFACE:7” Grooved Fancy Bulb #63185
BRUSHES:Royal BrushesDebby’s Texture brushes (sm, med)5 /8” Majestic angle3 /4” White Blending mop8 Majestic fi lbert1 Oval Wash Combo5/0, 0 Majestic liners0, 2, 4, 6, 8, 12 Majestic shaders3 /4” Majestic glaze washSilk Sponge
MISC. SUPPLIES:Blue Shop TowelC-Thru Graph RulerCosmetic Wedge SpongeCling Stamps Delicate Snow Set #70895
White Graphite Paper 18 x 36 #70139Large Handle 4”x6” #70894Soft Grip Embossing & Stylus set of 3 #70125
SURFACE PREP:Seal the entire ornament with Multi-Purpose Sealer; using the glaze wash brush. Lightly sand; wipe off with a lint-free cloth.
PAINTING INSTRUCTIONS:Basecoat the surface, side edge and back side; by us-ing the silk sponge and Deep Midnight Blue.
Dampened the sponge with water, squeeze out the excess water, pick up Deep Midnight Blue, dance over the entire ornament (not the top cap).
Place the Delicate Snow Cling Stamp on the clear handle, pounce Snow White over the stamp; using the cosmetic wedge. Then stamp over the ornament surface.
When using paint on stamps it is important that you do not overload the image. Pounce the cosmetic wedge sponge into acrylic paint and then on a clean area of the palette. When you look at the bottom of the sponge it should be covered in paint, but you should still be able to see the texture of the sponge. Now quickly pounce the loaded sponge over the en-tire image and stamp it on the surface; refer to photo for placement.
Re-load the sponge and stamp as needed. When dry, lightly mist with the matte spray.
Transferring Houses and Snow HillsTransfer the houses and snow hills to the surface. Then transfer any straight lines, by dragging the sty-lus along the ruler’s edge.
Snow HillsCorner load the angle with Winter Blue, fl oat a wide highlight and walk it out along the front side of each snow hill; mop to soften. Now corner load the angle with Snow White, re-fl oat a narrower highlight along the front side of each snow hill; mop to soften. Then corner load the angle with Snow White, randomly chisel fl oat* over the foreground of each snow hill area; more snow will be added after the design is completed.
Snow Is Glisteningby Debby Forshey-Choma
artistsclub.com | 3
*chisel fl oat by corner loading the angle, blend off on your palette, lay the bristles of the brush fl at on the surface, chisel edge up. Push the paint on the bristles front left to right in a scratching motion, allowing the bristles to pull a broken line that is slightly fl oated.
Background PinesWith a pencil and graph ruler, transfer the center line for each pine. Work only on a couple of pines at a time. Slightly pre-dampen the surface area with clean water. This will help the paint bleed; giving the boughs a softer eff ect.
Using the 8 fi lbert, load with the Blue Mist mixture (Teal Green + Blue Mist 1:1 mixture) across the chisel edge, horizontally tap in the boughs. Up on the chisel edge, slightly pull the top of the pine. Tapping from left to right for the boughs, slowly and slightly widening as you work towards the base of the pine. Allow a bit of the background to show through; so the pine doesn’t look like a triangle. When dry, randomly repeat tapping the Blue Mist mixture over the boughs; to deepen a few areas. Repeat the same steps with the remaining pines.
When dry, repeat the same steps with Snow White; for highlight and snow.
Background ShrubsWith the appropriate size Texture brush and For-est Green, lightly dance in the shrubs behind houses (shrubs in front of houses will be completed later). Then lightly dance with Snow White; for highlight and snow.
For the proper use of the Texture Brush, use the follow-ing method. Dampen the bristles with water to start the separation of bristles. Tap bristles into the paint on your palette, hold it perpendicular to your palette, pounce it up and down to get some of the paint off —keeping the paint sparse on the brush. Note—this brush can be used on the whole foot or just the toe. Tap lightly on the surface, dance with the brush up and down, roll-ing the brush in diff erent directions in between your fi ngers when it is up in the air (like dancing the twist, light on your feet). Allow some drying time in between dances so the paint sets up and you don’t end up with a globby or muddy look.
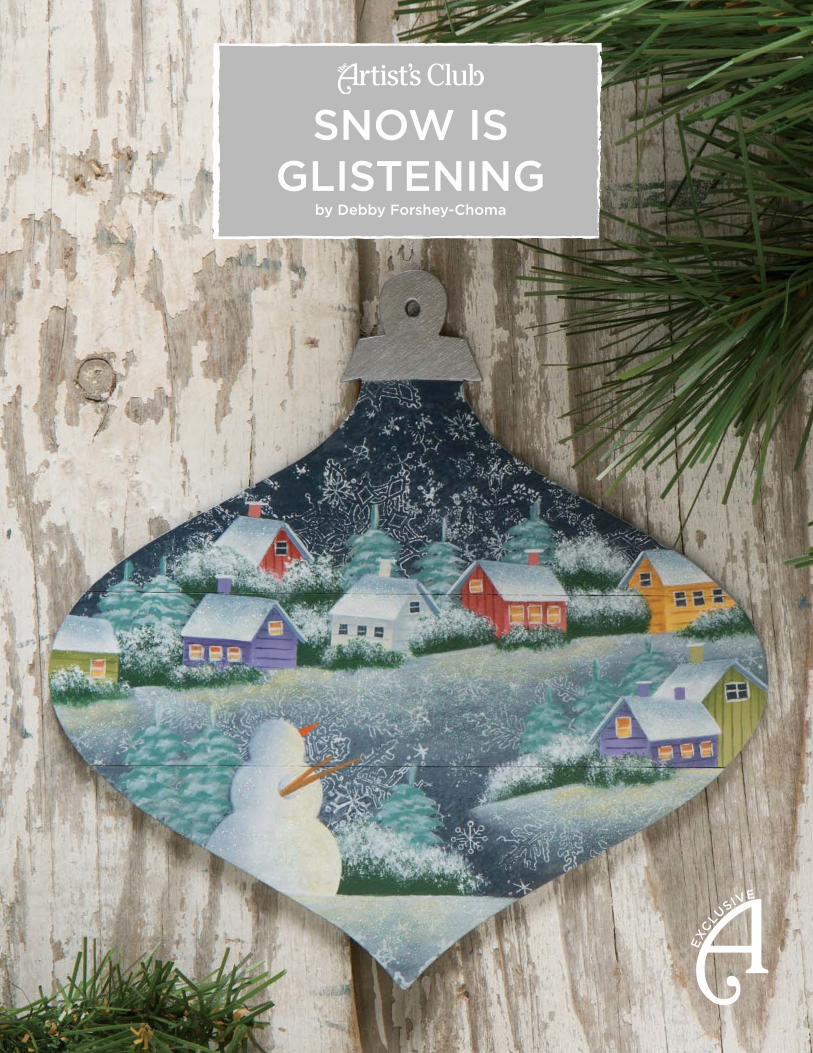
House Basecoats (paint by numbers)Refer to the line drawing included for house number-ing. For each house use the appropriate size shaders to basecoat, pull wall lines, and wash over the shade side walls; corner load the angle to fl oat shade on the opposite wall. The roofs and windows of the houses will be completed in a later step.
HOUSES #1 & #8• Wasabi Green—basecoat walls, chimney on house
#8• Hauser Medium Green—pull wall lines, fl oat shade
under the roofsHOUSES #2 & #5• Terra Coral—basecoat walls, chimneys• Heritage Brick—pull wall lines, wash over left wall
on houses #5, fl oat shade under roofs
artistsclub.com | 5
HOUSES #3 & #7• Grape Juice + Snow White 1:1
mixture—basecoat walls, chimneys• Payne’s Grey—pull wall lines, wash
over shade side walls, fl oat shade across top of opposite walls
HOUSE #4• Bleached Sand—basecoat walls,
chimney• Winter Blue—pull wall lines, wash
over right side wall, fl oat shade across top of left wall
HOUSE #6• Moon Yellow—basecoat walls• Honey Brown—pull wall lines, wash
over left wall, fl oat shade across top of right wall
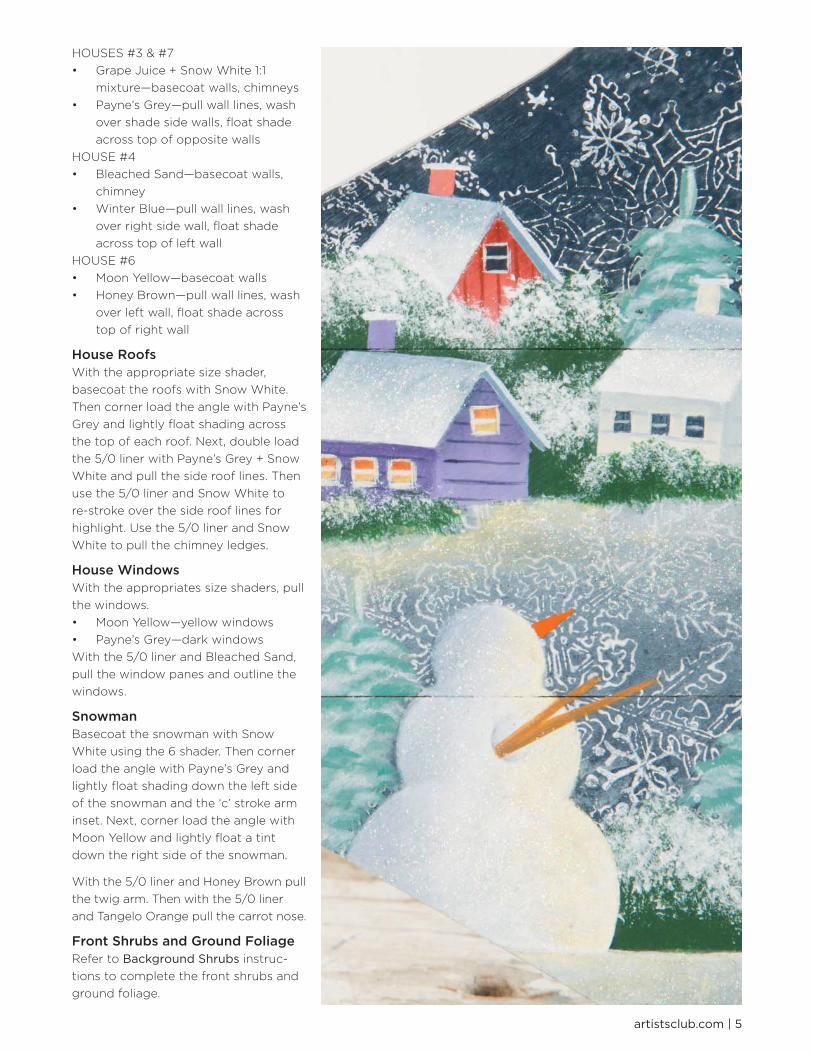
House RoofsWith the appropriate size shader, basecoat the roofs with Snow White. Then corner load the angle with Payne’s Grey and lightly fl oat shading across the top of each roof. Next, double load the 5 /0 liner with Payne’s Grey + Snow White and pull the side roof lines. Then use the 5 /0 liner and Snow White to re-stroke over the side roof lines for highlight. Use the 5 /0 liner and Snow White to pull the chimney ledges.
House WindowsWith the appropriates size shaders, pull the windows. • Moon Yellow—yellow windows• Payne’s Grey—dark windowsWith the 5 /0 liner and Bleached Sand, pull the window panes and outline the windows.
SnowmanBasecoat the snowman with Snow White using the 6 shader. Then corner load the angle with Payne’s Grey and lightly fl oat shading down the left side of the snowman and the ‘c’ stroke arm inset. Next, corner load the angle with Moon Yellow and lightly fl oat a tint down the right side of the snowman.
With the 5 /0 liner and Honey Brown pull the twig arm. Then with the 5 /0 liner and Tangelo Orange pull the carrot nose.
Front Shrubs and Ground FoliageRefer to Background Shrubs instruc-tions to complete the front shrubs and ground foliage.
6 | artistsclub.com
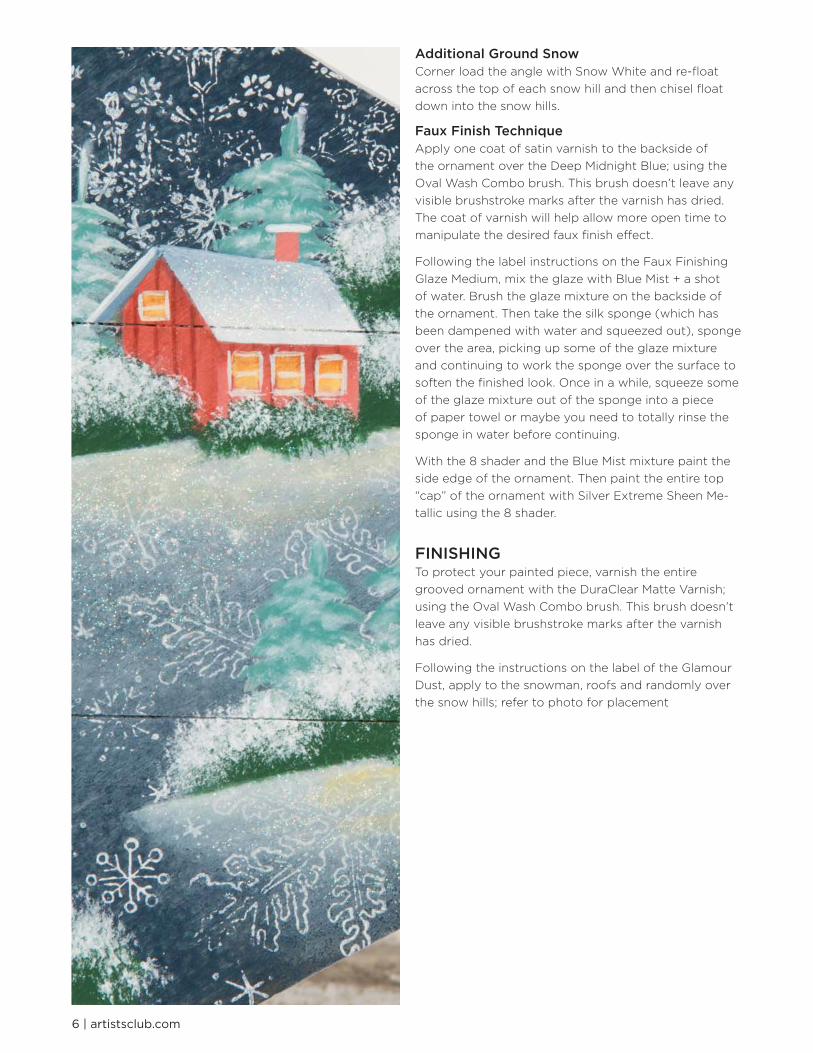
Additional Ground SnowCorner load the angle with Snow White and re-fl oat across the top of each snow hill and then chisel fl oat down into the snow hills.
Faux Finish TechniqueApply one coat of satin varnish to the backside of the ornament over the Deep Midnight Blue; using the Oval Wash Combo brush. This brush doesn’t leave any visible brushstroke marks after the varnish has dried. The coat of varnish will help allow more open time to manipulate the desired faux fi nish eff ect.
Following the label instructions on the Faux Finishing Glaze Medium, mix the glaze with Blue Mist + a shot of water. Brush the glaze mixture on the backside of the ornament. Then take the silk sponge (which has been dampened with water and squeezed out), sponge over the area, picking up some of the glaze mixture and continuing to work the sponge over the surface to soften the fi nished look. Once in a while, squeeze some of the glaze mixture out of the sponge into a piece of paper towel or maybe you need to totally rinse the sponge in water before continuing.
With the 8 shader and the Blue Mist mixture paint the side edge of the ornament. Then paint the entire top “cap” of the ornament with Silver Extreme Sheen Me-tallic using the 8 shader.
FINISHINGTo protect your painted piece, varnish the entire grooved ornament with the DuraClear Matte Varnish; using the Oval Wash Combo brush. This brush doesn’t leave any visible brushstroke marks after the varnish has dried.
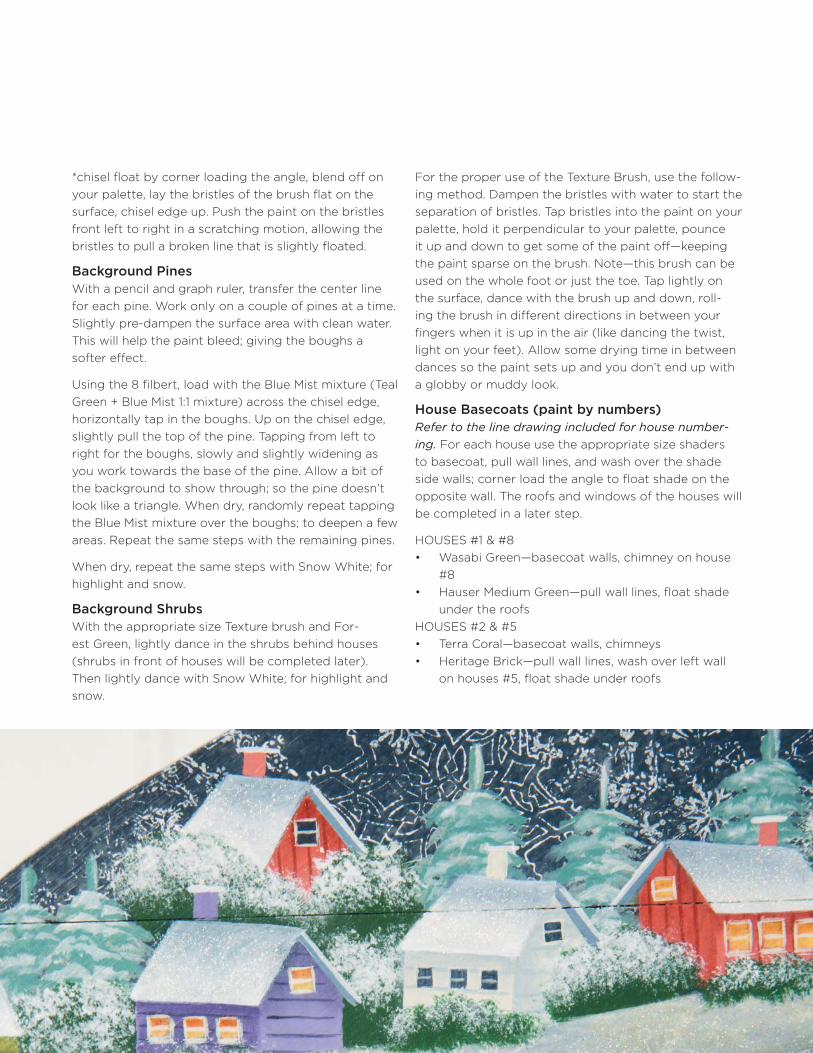
Following the instructions on the label of the Glamour Dust, apply to the snowman, roofs and randomly over the snow hills; refer to photo for placement

artistsclub.com | 7
Pattern at 100%1” x 1”
To ensure yourpattern is at 100%,
this box should measure 1” x 1” when printed.

Copyright 2018 by Debby Forshey-Choma and Crafts Americana Group, Inc.All Rights Reserved. #332309
No. *A332309*© Artist’s Club ®. All rights reserved. For private, non-commercial use only.
Please see our web site for terms of use.

![RED BULL SNOW CHARGE MAIKO SNOW RESORT ......RED BULL SNOW CHARGE MAIKO SNOW RESORT 2019/5/7 [RESULT] SNOW BOARD OVERALL PLACE BIB NAME GENDER TEAM TIME 31 78 オンダ マサユキ](https://img.pdfslide.tips/doc/110x75/5f45535a20fb882c7d702293/red-bull-snow-charge-maiko-snow-resort-red-bull-snow-charge-maiko-snow-resort.jpg)