Embed Size (px)
DESCRIPTION
Â
Citation preview

VANDERWEESSPRING 2015

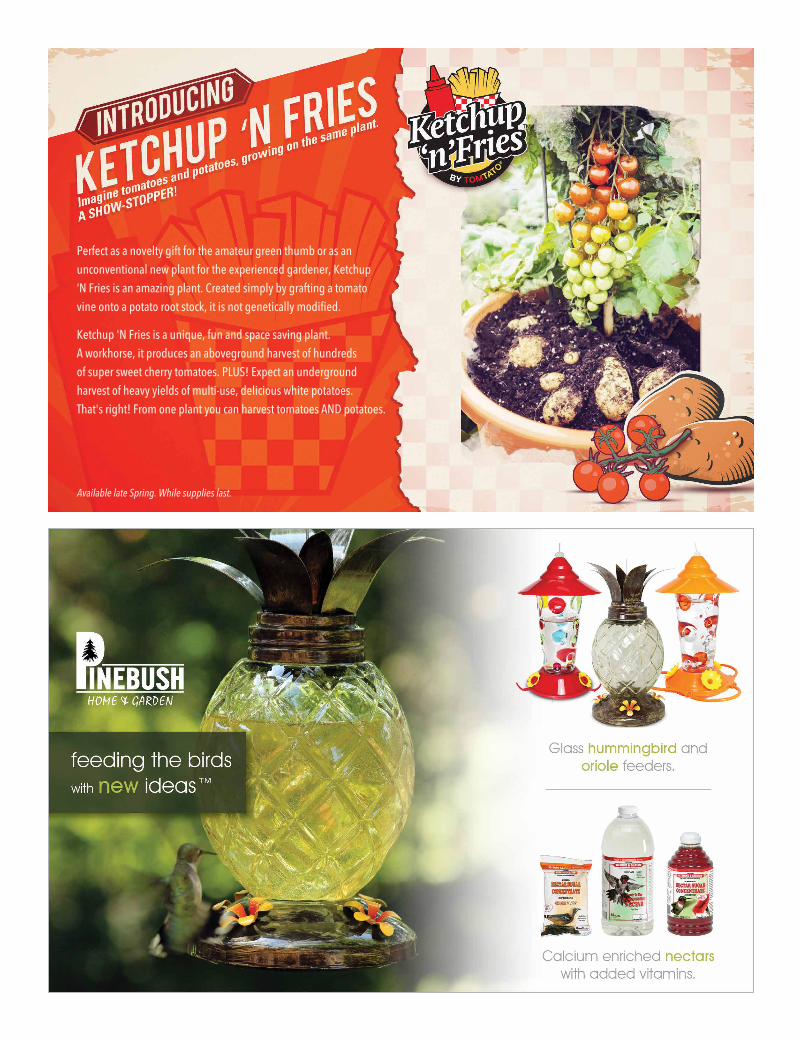
Perfect as a novelty gift for the amateur green thumb or as an unconventional new plant for the experienced gardener, Ketchup ‘N Fries is an amazing plant. Created simply by grafting a tomato vine onto a potato root stock, it is not genetically modified.
Ketchup 'N Fries is a unique, fun and space saving plant. A workhorse, it produces an aboveground harvest of hundreds of super sweet cherry tomatoes. PLUS! Expect an underground harvest of heavy yields of multi-use, delicious white potatoes. That's right! From one plant you can harvest tomatoes AND potatoes.
Available late Spring. While supplies last.

4 • VANDERWEES HOME & GARDEN - 807-767-3666 - VANDERWEESHOMEANDGARDEN.COM
This publication may not be reproduced, all or in part, without written consent from the publisher and Vanderwees Home & Garden. Every effort has been made to ensure the accuracy of all content in the publication, however, the publisher will not be held accountable for omissions or errors. Note that products may vary between retailers and regions, and supplies may be limited. Pricing is subject to change and is not valid with any other offer. Home & Garden Showplace is a registered trade mark for use by its members, of which the Garden Centre Group Co-Op is an alliance member. Photo credit to Proven Winners® for a selection of photos provided to this magazine.
9 Edibles & Ornamentals
12 Design a Beautiful Succulent Wreath
14 Grilling Vegetables with Chef Michael Smith
18 Hydrangeas Demystified
20 2015 Spring Fashion Trends
22 Easy Care for Gorgeous Dahlias
24 Ornamental Grasses
30 5 Spring Cleansing Tips12
14
22
24Feel The heat
with Chef Michael Smith
Contents

SPRING 2015 • 5
FROM THE
SPRING GREETINGS!Spring is Nature’s way of saying, Let’s Party!
- Robin Williams
The late comedian Robin Williams could not have said it better – after the cold and monochrome coloured weeks of winter, the bright green of new
leaves and gardens bursting with spring flowers are such a welcome sight, it can make you feel like dancing. At Vanderwees Home & Garden, we also get spring fever, and can’t wait to fill our greenhouses with new seedlings and show off our fabulous selection of new products for this most long-awaited of seasons.
I am always eager to get out into the garden in the spring and see how everything fared through the winter. This year we have some wonderful new plant selections in annuals and perennials, and a new vegetable program featuring veggies for a healthy lifestyle. You will also find an extensive selection of soils, fertilizers, tools and gardening supplies to help make your spring and summer garden the best ever. Our dedicated staff is always on hand to assist you with your gardening questions,
and I thank them for their hard work. I would also like to thank our advertisers and ask you to consider them as you read this magazine.
We are always looking for the newest and best products to offer you, our customer, and this spring is no exception. Be sure to see our selection of bar-b-ques, patio furniture and our amazing new outdoor kitchen. A perfect complement to this kitchen is our extensive selection of gourmet foods, and especially our new olive oil and balsamic vinegar tasting bar where you can sample the oils and vinegars before you buy.
Always hoping to make your shopping experience a memorable one, Vanderwees Home & Garden offers some great family activities – play 18 holes of golf on our miniature golf course, visit our animal farm, take a walk down our nature trail and enjoy a delicious lunch at Tulips Café.
We welcome you and spring at the garden centre with greenhouses full of bedding plants and exciting new products for you and your garden…so kick up your heels and come out to Vanderwees where spring is a party! Remember, gardening is for life…make it part of yours!
I look forward to seeing you soon!
John Vanderwees
“ “
OWNER

6 • VANDERWEES HOME & GARDEN - 807-767-3666 - VANDERWEESHOMEANDGARDEN.COM

SPRING 2015 • 7
Outdoor KitchenThe Outdoor Kitchen Island is one of our best and most complete outdoor barbecue kitchens. Its unique design provides a backyard entertainment centre and the space to handle all of your outdoor grilling needs. It is the ultimate grilling and entertaining station! Our EZ order system gives you the options you would like and ships to us in three weeks.
This set features one loveseat, two arm chairs and one coffee table in grey, round and flat weave resin wicker. It is easy to clean, UV treated and has a powder coated aluminum frame. The ultimate in comfort this set is great for any outdoor space.
This set includes a six piece sectional sofa made of round and flat weave resin wicker, and coffee table with tempered glass. It is easy to clean, UV treated and has a powder coated aluminum frame. Perfect for the backyard or outdoor living space, this set will rival your indoor furniture in comfort!
The Blackstone TailgaterThis barbecue is the ultimate in conveinence and versatality! Great for the backyard, or simply pack it up and take it wherever your grilling takes you. With a no assembly required setup, this barbecue is ready for use in seconds and has patented legs that adjust independently for use on uneven surfaces, or folds flat to cook just about anywhere. With 30,000 BTU per burner giving you a total of 60,000 BTUs this barbecue is powerful. This barbecue features electronic ignitions, heavy duty grill box with vent, durable cast iron grates and rugged, portable steel griddles for optimal heat distrubtion and cooking performance.
FEATUREDProducts
FOR SPRING 2015
NEW PATIOFurniture
FOR SPRING 2015
Standard Features• Angus BBQ Stainless Steel 4 burner grill, 75 000 BTUs• Stucco Base – choice of four colours• Porcelain tile countertop• Stainless steel refrigerator – 4.4 cu ft• Stainless Steel Access Door with lock and key• Stainless Steel sink and faucet• GFCI electric outlet

8 • VANDERWEES HOME & GARDEN - 807-767-3666 - VANDERWEESHOMEANDGARDEN.COM
SPRING 2015 • 9
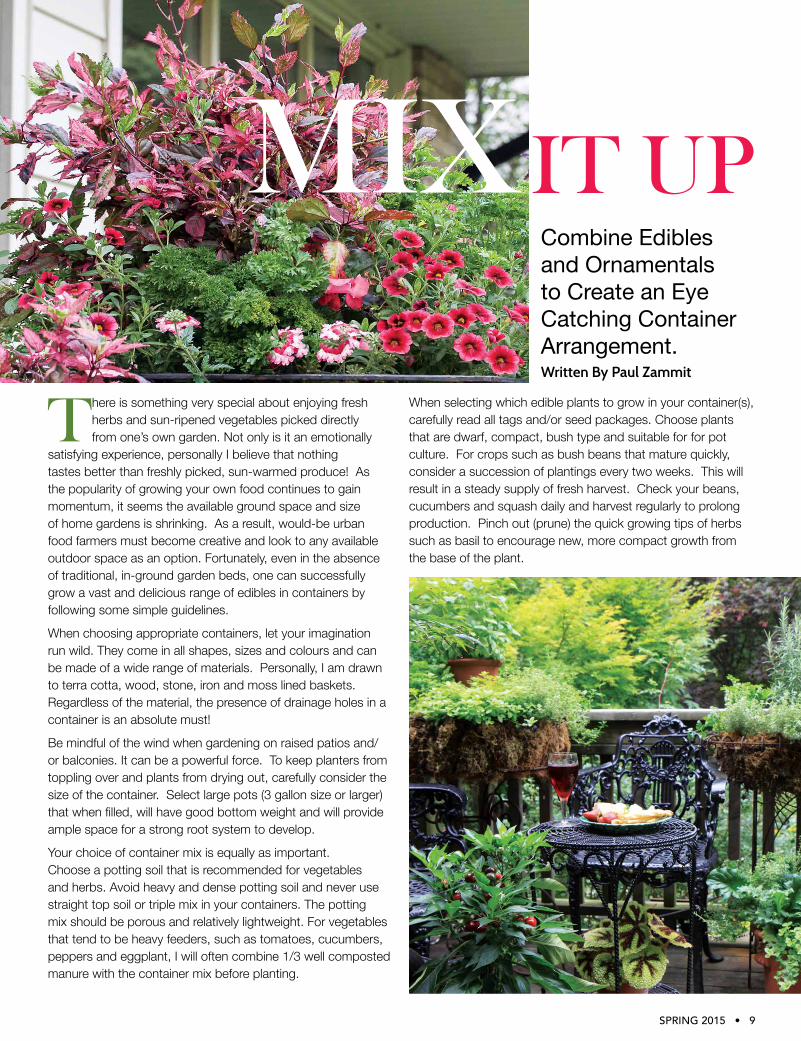
Combine Edibles and Ornamentals to Create an Eye Catching Container Arrangement.Written By Paul Zammit
IT UPMIX
There is something very special about enjoying fresh herbs and sun-ripened vegetables picked directly from one’s own garden. Not only is it an emotionally
satisfying experience, personally I believe that nothing tastes better than freshly picked, sun-warmed produce! As the popularity of growing your own food continues to gain momentum, it seems the available ground space and size of home gardens is shrinking. As a result, would-be urban food farmers must become creative and look to any available outdoor space as an option. Fortunately, even in the absence of traditional, in-ground garden beds, one can successfully grow a vast and delicious range of edibles in containers by following some simple guidelines.
When choosing appropriate containers, let your imagination run wild. They come in all shapes, sizes and colours and can be made of a wide range of materials. Personally, I am drawn to terra cotta, wood, stone, iron and moss lined baskets. Regardless of the material, the presence of drainage holes in a container is an absolute must!
Be mindful of the wind when gardening on raised patios and/or balconies. It can be a powerful force. To keep planters from toppling over and plants from drying out, carefully consider the size of the container. Select large pots (3 gallon size or larger) that when filled, will have good bottom weight and will provide ample space for a strong root system to develop.
Your choice of container mix is equally as important. Choose a potting soil that is recommended for vegetables and herbs. Avoid heavy and dense potting soil and never use straight top soil or triple mix in your containers. The potting mix should be porous and relatively lightweight. For vegetables that tend to be heavy feeders, such as tomatoes, cucumbers, peppers and eggplant, I will often combine 1/3 well composted manure with the container mix before planting.
When selecting which edible plants to grow in your container(s), carefully read all tags and/or seed packages. Choose plants that are dwarf, compact, bush type and suitable for for pot culture. For crops such as bush beans that mature quickly, consider a succession of plantings every two weeks. This will result in a steady supply of fresh harvest. Check your beans, cucumbers and squash daily and harvest regularly to prolong production. Pinch out (prune) the quick growing tips of herbs such as basil to encourage new, more compact growth from the base of the plant.
10
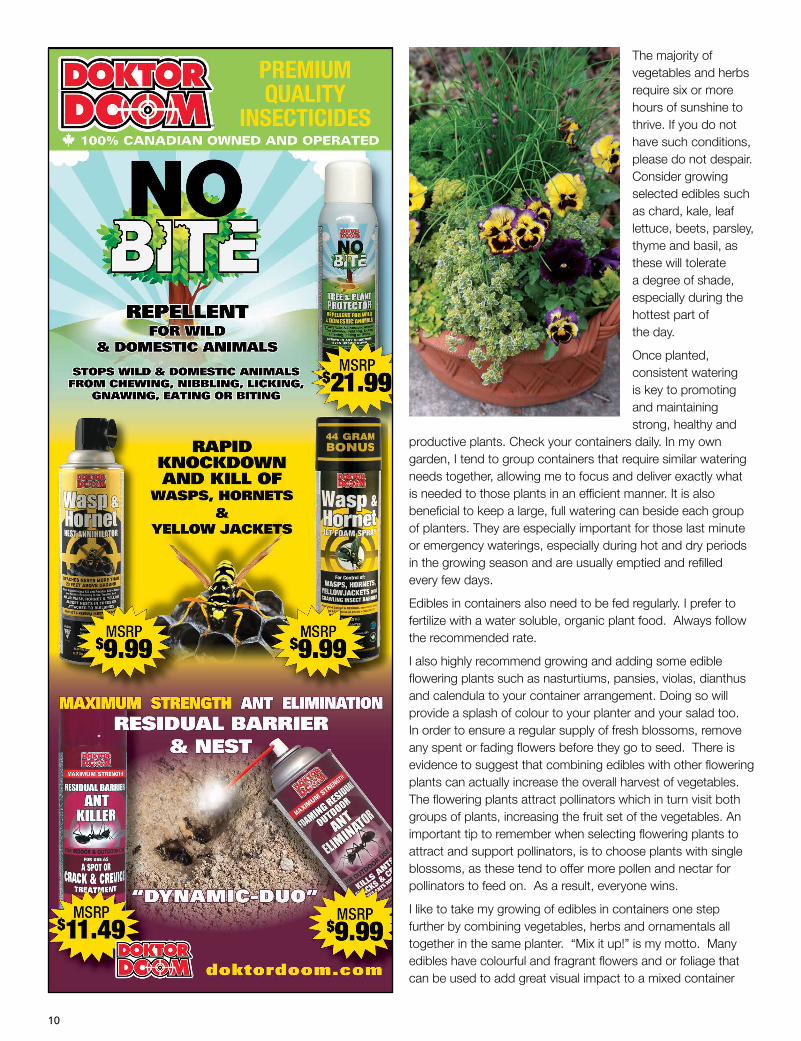
The majority of vegetables and herbs require six or more hours of sunshine to thrive. If you do not have such conditions, please do not despair. Consider growing selected edibles such as chard, kale, leaf lettuce, beets, parsley, thyme and basil, as these will tolerate a degree of shade, especially during the hottest part of the day.
Once planted, consistent watering is key to promoting and maintaining strong, healthy and
productive plants. Check your containers daily. In my own garden, I tend to group containers that require similar watering needs together, allowing me to focus and deliver exactly what is needed to those plants in an efficient manner. It is also beneficial to keep a large, full watering can beside each group of planters. They are especially important for those last minute or emergency waterings, especially during hot and dry periods in the growing season and are usually emptied and refilled every few days.
Edibles in containers also need to be fed regularly. I prefer to fertilize with a water soluble, organic plant food. Always follow the recommended rate.
I also highly recommend growing and adding some edible flowering plants such as nasturtiums, pansies, violas, dianthus and calendula to your container arrangement. Doing so will provide a splash of colour to your planter and your salad too. In order to ensure a regular supply of fresh blossoms, remove any spent or fading flowers before they go to seed. There is evidence to suggest that combining edibles with other flowering plants can actually increase the overall harvest of vegetables. The flowering plants attract pollinators which in turn visit both groups of plants, increasing the fruit set of the vegetables. An important tip to remember when selecting flowering plants to attract and support pollinators, is to choose plants with single blossoms, as these tend to offer more pollen and nectar for pollinators to feed on. As a result, everyone wins.
I like to take my growing of edibles in containers one step further by combining vegetables, herbs and ornamentals all together in the same planter. “Mix it up!” is my motto. Many edibles have colourful and fragrant flowers and or foliage that can be used to add great visual impact to a mixed container

SPRING 2015 • 11
planting. For example, herbs such as basil, thyme and rosemary, added to a mixed planter add a delightful and often unexpected fragrance to the air when brushed. Golden sage is another favourite to combine in containers. The foliage has many positive attributes. Both fragrant and colourful, once established, sage tends to be somewhat drought tolerant and can also withstand a number of light fall frosts. As an individual specimen, or in combination, golden sage is a must on my spring shopping list to the local nursery. It also combines beautifully with yet another herb I consider a staple in mixed planters, curly leaf parsley. It has so much going for it! In addition to being an essential addition to many recipes, parsley is an excellent source of antioxidants and vitamin C. Visually it provides a wonderful textural contrast of rich, dark green, ruffled foliage. This is the perfect foundation, as other colours just pop against it. In a pinch, I have used the fresh leaves when creating small floral arrangements. Established parsley plants are also cold tolerant and will continue to have a presence long after the first frost. If that were not enough, it is important to remember that parsley is an important food source for the larval stage of the swallowtail butterfly. With so many plusses, how could you not want to incorporate parsley, and other assorted edibles and herbs into your mixed planters?
Paul Zammit is the Director of Horticulture at the Toronto Botanical Garden. He is an enthusiastic and engaging plantsman and lecturer who travels across Canada, the US and Europe where he is always keen to share his passion for horticulture and gardening.

12
Items you will need:
• Wire frame – circle, square or heart• Plastic sheet• Sphagnum, Reindeer, Spanish, sheet or other assorted loose moss• Succulent cuttings and plants• Floral thread or 24-gauge paddle wire• Ferning pins • Scissors and stapler
Succulent WreathDESIGN A BEAUTIFUL
A live succulent wreath will make a beautiful welcome to your fence, outdoor wall or door. Lasting
all summer long, this low maintenance wreath will continue to grow and change, only enhancing its beauty. You will be surprised at how simple and easy it is to create this stunning masterpiece.
Written by Martha Vandepol
SPRING 2015 • 13
Step 1:Select your wire frame, line with plastic and staple the plastic securely.
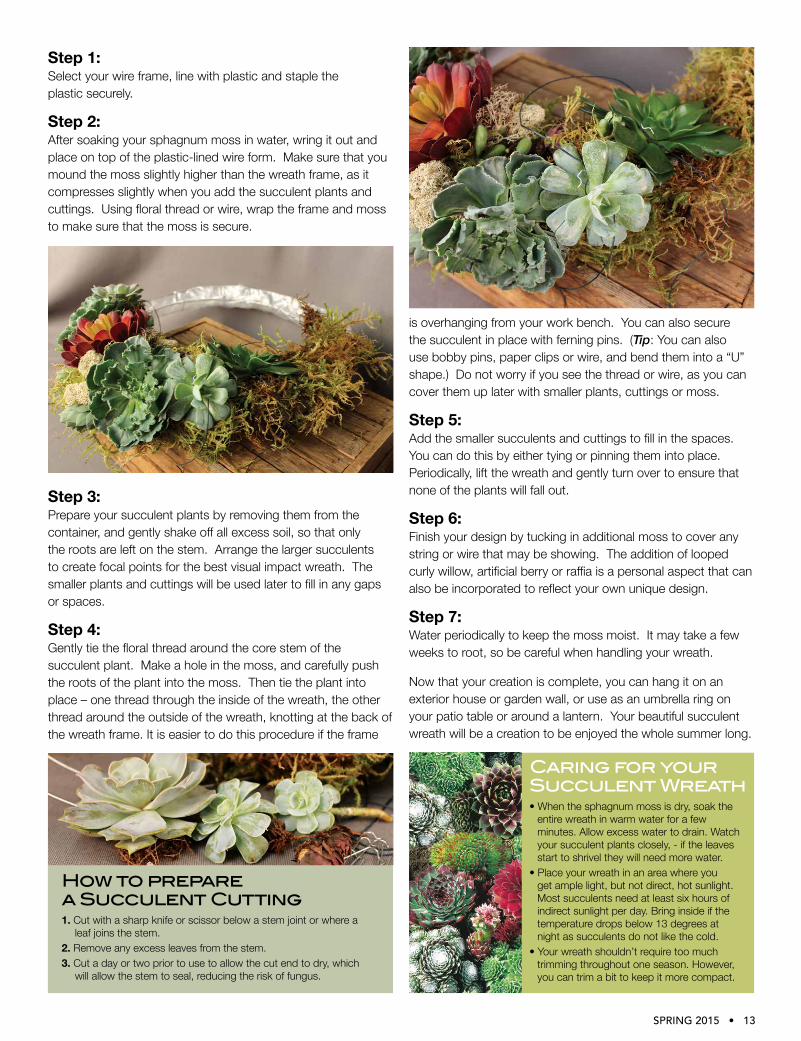
Step 2:After soaking your sphagnum moss in water, wring it out and place on top of the plastic-lined wire form. Make sure that you mound the moss slightly higher than the wreath frame, as it compresses slightly when you add the succulent plants and cuttings. Using floral thread or wire, wrap the frame and moss to make sure that the moss is secure.
Step 3:Prepare your succulent plants by removing them from the container, and gently shake off all excess soil, so that only the roots are left on the stem. Arrange the larger succulents to create focal points for the best visual impact wreath. The smaller plants and cuttings will be used later to fill in any gaps or spaces.
Step 4:Gently tie the floral thread around the core stem of the succulent plant. Make a hole in the moss, and carefully push the roots of the plant into the moss. Then tie the plant into place – one thread through the inside of the wreath, the other thread around the outside of the wreath, knotting at the back of the wreath frame. It is easier to do this procedure if the frame
is overhanging from your work bench. You can also secure the succulent in place with ferning pins. (Tip: You can also use bobby pins, paper clips or wire, and bend them into a “U” shape.) Do not worry if you see the thread or wire, as you can cover them up later with smaller plants, cuttings or moss.
Step 5:Add the smaller succulents and cuttings to fill in the spaces. You can do this by either tying or pinning them into place. Periodically, lift the wreath and gently turn over to ensure that none of the plants will fall out.
Step 6:Finish your design by tucking in additional moss to cover any string or wire that may be showing. The addition of looped curly willow, artificial berry or raffia is a personal aspect that can also be incorporated to reflect your own unique design.
Step 7:Water periodically to keep the moss moist. It may take a few weeks to root, so be careful when handling your wreath.
Now that your creation is complete, you can hang it on an exterior house or garden wall, or use as an umbrella ring on your patio table or around a lantern. Your beautiful succulent wreath will be a creation to be enjoyed the whole summer long.
1. Cut with a sharp knife or scissor below a stem joint or where a leaf joins the stem.2. Remove any excess leaves from the stem.3. Cut a day or two prior to use to allow the cut end to dry, which will allow the stem to seal, reducing the risk of fungus.
How to prepare a Succulent Cutting
• When the sphagnum moss is dry, soak the entire wreath in warm water for a few minutes. Allow excess water to drain. Watch your succulent plants closely, - if the leaves start to shrivel they will need more water.• Place your wreath in an area where you get ample light, but not direct, hot sunlight. Most succulents need at least six hours of indirect sunlight per day. Bring inside if the temperature drops below 13 degrees at night as succulents do not like the cold.• Your wreath shouldn’t require too much trimming throughout one season. However, you can trim a bit to keep it more compact.
Caring for your Succulent Wreath

14
Fire up the grill – barbecuing season is upon us! From burgers to steaks, chicken to kabobs, there’s nothing like a backyard cookout to kick off the summer. And while carnivores have long laid claim to grills across the nation, vegetables of all shapes and sizes are also starting to feel the heat. To further investigate this flavourful new trend, I consulted with one of Canada’s best-known foodies, Prince Edward Island’s culinary ambassador Chef Michael Smith, to help prep for a season of garden grilling.
Q: Is it safe to say that any vegetable can be prepared on the grill?Chef Michael Smith: Not any vegetable. It comes down to the strength of the vegetable and how hard it is. Root vegetables are just too hard; greens are on the other end of the spectrum and they’re just too soft. But in the middle, in the sweet spot, there are lots and lots of vegetables that are medium-tender – squashes, zucchinis, eggplants, and asparagus, for example – that are perfect for grilling.
Q: Charcoal versus gas, it’s been a hotly debated topic for years in the meat world, but what about when it comes to grilling vegetables? Is there a better option?Chef Michael Smith: For vegetables, it doesn’t really matter. What really matters – what the big secret is, is the heat. Lots and lots of heat. Now, if you have a wood-burning grill, that’s really your best option. I’d recommend hardwoods – fruitwoods if you can get them. This will provide you with nice, smooth, aged, woody flavours. Fruitwoods are particularly aromatic – cherry trees, peach trees, apple trees – these are all great options and provide great flavours when used on slightly harder vegetables like potatoes and sweet potatoes.
Q: What about indoor grilling options? Do you have any good apartment-friendly recommendation for grill-craving condo dwellers?Chef Michael Smith: Well, I have lots of friends in Toronto who have snuck barbecues into their buildings and out onto their balconies... but if you can’t manage to do that, then I’d recommend investing in a really good fan. Indoor grilling is all about smoking hot heat. Inside or out, that’s what grilling is all about: intense heat. To get that heat indoors, you’re going to be turning either your gas or electric up really high and that’s going to result in smoke. As long as you can handle that with a really good fan or vent, you’re in business.
Q: When it comes to prepping veggies for the grill – indoor, outdoor, gas, charcoal or wood – what’s the best way to marinade?Chef Michael Smith: One quick tip there: basically any vinaigrette salad dressing is a marinade. That being said, typically vegetables don’t have the cellular structure that benefits from a long-term marinade. So don’t worry about letting them soak in the dressing too long. Of course, there are also dry rub marinades. A light touch is necessary here, as dry rubs tend to be a bit more flavourful, full of chili powders and spices that can quickly overrun your vegetables. So really, if you’re looking for the best marinade, a little salt and pepper is fine. A bit of moisture from some grape seed oil (this is the cooking oil that’s most resistant to burning) and some salt and pepper – that’s how I do 90% of my grilling.
Q: Are there any herbs that we should keep in mind?Chef Michael Smith: You’re in a tenuous zone if you’re using herbs (dry or fresh) on a grill because they burn. Very, very strong herbs can work on the grill – such as rosemary, sage and a bit of thyme – because they hold their flavour and can handle the hot heat. But if you start moving down the scale towards lighter herbs – basil and oregano, for example – you’ll find you’re not getting any flavour because you’re charring the vegetative matter. So if you’re thinking about ways to work herbs into your meal, perhaps a better way to introduce them is to add them to foods after they’ve been grilled. I much prefer to add my herbs as part of the dressing or sauce, whatever it is
FEEL THEHEAT:Grilling Vegetableswith Chef Michael Smith
By Chantielle McFarlane

SPRING 2015 • 15
This is my all-time favourite summer salad. It’s amazing how much savoury flavour your grill can add to a simple pineapple and some red onion. Next time you fire up the works try this salad and you’ll have a new favourite for your repertoire too!
YIELD: SERVES 4INGREDIENTS1 whole pineapple, skinned (uncored), cut into thick rings2 red onions, sliced into a few very thick ringsA few generous splashes olive oilA sprinkle or two sea salt and freshly ground pepper1 lemon, zest and juiceFew handfuls fresh whole basil leaves
ABOUT CHEF MICHAEL SMITHFood Network Host, Nutritional Activist, Food Media Producer
Chef Michael Smith, one of Canada’s best-known chefs is a passionate advocate for simple, sustainable home cooking and an inspiration for families creating their own healthy food lifestyle. He’s the host of Chef Michael’s Kitchen, Chef Abroad and Chef at Home seen on Food Network Canada, Global and in more than 100 other countries. He’s a judge on Chopped Canada and traveled the world for his innovative new web series Lentil Hunter.
Michael is Prince Edward Island’s food ambassador and Canada’s best selling cookbook author, teacher, professional chef and home cook. He led the team of Sodexo chefs that cooked for the world’s Olympians in the Whistler Athletes Village in 2010. His eighth cookbook, Family Meals, hit the bestseller list last summer. His food media production company is breaking new ground online and his Twitter feed is Canada’s top choice for foodie fun.
Although Michael is a true chef at large his favourite role is Dad, home on Prince Edward Island with his wife Chastity and his children: Gabe, Ariella and Camille! Michael is an avid map collector, long-time windsurfer and novice kite sailor.
that I’m serving with the food, if I’m looking to really make the most of those flavours.
Q: Now what about dessert? Can you recommend any good fruits for grilling?Chef Michael Smith: One of the things that I really like to grill is pineapple. It’s firm, it takes grill marks well and it really holds the smokiness. I tend not to make dessert out of it though; instead, I’ll turn it into a salad. A grilled pineapple, red onion and fresh basil leaf salad is one of my all-time favorite summer salads. For dessert though, things like grilled peaches or apricots – softer fruits, again it’s about the texture. A grilled apple? Ehhhh, it’s nothing special. But a peach is just the right texture. Bananas work very well too. Simply cut the banana in half and tuck chocolate inside for a warm, gooey, chocolatey mess inside the banana skin – don’t take the banana out of the skin, you’ll want that protective layer on the grill.
Q: Your latest cookbook, Family Meals, is all about making cooking fun for the whole family. Do you have any parting advice for fun family grilling experiences?Chef Michael Smith: Just go for it. Of course you’re going to want to make sure your children are safe; when Camille was just learning how to walk and wandering around on the deck, I actually fenced off my barbequing area. I used lobster traps and child gates to keep her away. You’ve got to be careful around a hot grill. But I don’t think that means you have to keep them away from your grill. You have to teach them about it and invite them into the grilling process. When they’re six or seven, help them flip burgers on the grill, and teach them why you never press that patty with a spatula. Sure, it sizzles and you get lots of smoke, but you’ve also pressed hard-earned juice and flavour out of your dinner. It’s lessons like that which can only be learned if your kids are standing there helping you.
PROCEDURE
Preheat your barbecue or grill.
Evenly brush or drizzle the pineapple and onion rings with olive oil and season to taste with salt and pepper. Try to keep the onion rings intact as you do.
Grill the pineapple until golden grill marks appear and the fruit softens, about 5 minutes per side. Meanwhile, grill the onion until soft and lightly charred.
Quarter the grilled pineapple slices into wedges and roughly chop the onion rings. Toss everything with the lemon zest and juice and as many whole basil leaves as you can get your hands on.
VariationThis salad is very good tossed with a grilled chicken breast or two. Try tossing in some shredded coconut or sliced green onions as well.
GRILLED PINEAPPLE ONION SALAD

16

SPRING 2015 • 17
18
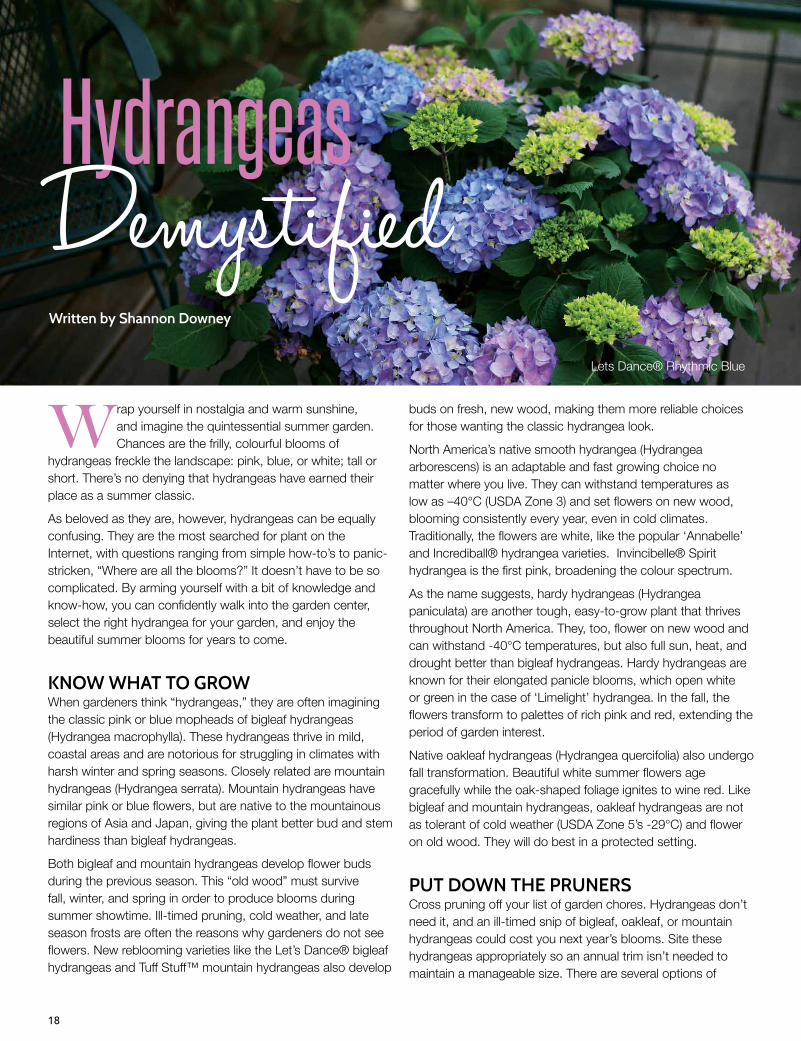
Wrap yourself in nostalgia and warm sunshine, and imagine the quintessential summer garden. Chances are the frilly, colourful blooms of
hydrangeas freckle the landscape: pink, blue, or white; tall or short. There’s no denying that hydrangeas have earned their place as a summer classic.
As beloved as they are, however, hydrangeas can be equally confusing. They are the most searched for plant on the Internet, with questions ranging from simple how-to’s to panic-stricken, “Where are all the blooms?” It doesn’t have to be so complicated. By arming yourself with a bit of knowledge and know-how, you can confidently walk into the garden center, select the right hydrangea for your garden, and enjoy the beautiful summer blooms for years to come.
KNOW WHAT TO GROWWhen gardeners think “hydrangeas,” they are often imagining the classic pink or blue mopheads of bigleaf hydrangeas (Hydrangea macrophylla). These hydrangeas thrive in mild, coastal areas and are notorious for struggling in climates with harsh winter and spring seasons. Closely related are mountain hydrangeas (Hydrangea serrata). Mountain hydrangeas have similar pink or blue flowers, but are native to the mountainous regions of Asia and Japan, giving the plant better bud and stem hardiness than bigleaf hydrangeas.
Both bigleaf and mountain hydrangeas develop flower buds during the previous season. This “old wood” must survive fall, winter, and spring in order to produce blooms during summer showtime. Ill-timed pruning, cold weather, and late season frosts are often the reasons why gardeners do not see flowers. New reblooming varieties like the Let’s Dance® bigleaf hydrangeas and Tuff Stuff™ mountain hydrangeas also develop
buds on fresh, new wood, making them more reliable choices for those wanting the classic hydrangea look.
North America’s native smooth hydrangea (Hydrangea arborescens) is an adaptable and fast growing choice no matter where you live. They can withstand temperatures as low as –40°C (USDA Zone 3) and set flowers on new wood, blooming consistently every year, even in cold climates. Traditionally, the flowers are white, like the popular ‘Annabelle’ and Incrediball® hydrangea varieties. Invincibelle® Spirit hydrangea is the first pink, broadening the colour spectrum.
As the name suggests, hardy hydrangeas (Hydrangea paniculata) are another tough, easy-to-grow plant that thrives throughout North America. They, too, flower on new wood and can withstand -40°C temperatures, but also full sun, heat, and drought better than bigleaf hydrangeas. Hardy hydrangeas are known for their elongated panicle blooms, which open white or green in the case of ‘Limelight’ hydrangea. In the fall, the flowers transform to palettes of rich pink and red, extending the period of garden interest.
Native oakleaf hydrangeas (Hydrangea quercifolia) also undergo fall transformation. Beautiful white summer flowers age gracefully while the oak-shaped foliage ignites to wine red. Like bigleaf and mountain hydrangeas, oakleaf hydrangeas are not as tolerant of cold weather (USDA Zone 5’s -29°C) and flower on old wood. They will do best in a protected setting.
PUT DOWN THE PRUNERSCross pruning off your list of garden chores. Hydrangeas don’t need it, and an ill-timed snip of bigleaf, oakleaf, or mountain hydrangeas could cost you next year’s blooms. Site these hydrangeas appropriately so an annual trim isn’t needed to maintain a manageable size. There are several options of
Hydrangeas
Written by Shannon Downey
DemystifiedLets Dance® Rhythmic Blue
SPRING 2015 • 19
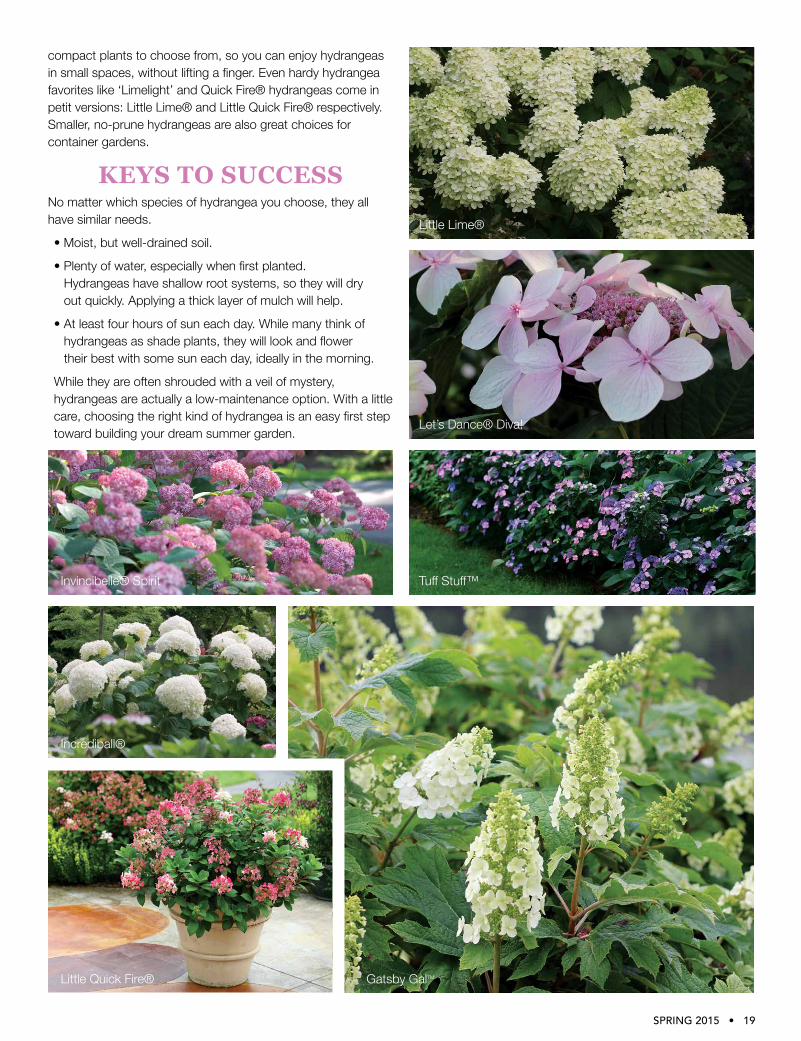
compact plants to choose from, so you can enjoy hydrangeas in small spaces, without lifting a finger. Even hardy hydrangea favorites like ‘Limelight’ and Quick Fire® hydrangeas come in petit versions: Little Lime® and Little Quick Fire® respectively. Smaller, no-prune hydrangeas are also great choices for container gardens.
Little Lime®
Let’s Dance® Diva!
KEYS TO SUCCESSNo matter which species of hydrangea you choose, they all have similar needs.
• Moist, but well-drained soil.
• Plenty of water, especially when first planted. Hydrangeas have shallow root systems, so they will dry out quickly. Applying a thick layer of mulch will help.
• At least four hours of sun each day. While many think of hydrangeas as shade plants, they will look and flower their best with some sun each day, ideally in the morning.
While they are often shrouded with a veil of mystery, hydrangeas are actually a low-maintenance option. With a little care, choosing the right kind of hydrangea is an easy first step toward building your dream summer garden.
Little Quick Fire® Gatsby Galtm
Tuff Stuff™
Incrediball®
Invincibelle® Spirit

20

SPRING 2015 • 21

22
AFTER SEASON CARE:• Dahlias bloom continuously until the first hard frost turns the leaves black. At that time, cut down the plant stalks to 6 inches above the soil.
• Gently dig up the tubers and remove excess soil from the clumps. Dry out the clumps completely for 3-5 days in a room with consistent temperatures of 5-10°C.
• Store clumps in a dry place that never freezes. Place dry clumps in burlap, layers of paper, ventilated crates or cardboard boxes. A layer of vermiculite can add protection in cold winter climates.
• When spring returns and all danger of frost has passed, plant out the tuber clumps for another summer overflowing with beautiful blooms and cut flower bouquets.
• Plant dahlia tubers in spring after all danger of frost has passed, or start in containers indoors. Dahlias aren’t too picky. They enjoy average soils and full sun locations.
• Plant tubers 4 inches deep in a shallow hole. Set a stake at the back of the tuber clump at planting time. Sprinkle in a little bone meal and cover with soil. Water in well, but don’t overwater. Keep the soil moist, but not too wet.
• The hardest part is waiting for fresh green shoots to appear, and when they do, protect the young plants from slugs. A clear plastic bottle cut in half, can help provide an overnight shelter.
• Pinch out the growing tip when the plant is 4 inches tall. This allows the plant to put out side branches.
• When the main stem needs support, use soft fabric, like an old pair of nylons, for stake ties.
• Buds appear in threes. Keep the main bud and remove the tiny side buds. This allows bigger flowers to form.
• Water regularly, 1-2 times each week, and especially on hot summer days. Dahlias need only a light application of fertilizer (5-10-10). Never spray fertilizer directly on the foliage.
• Dahlias bloom and bloom. Cut flowers for bouquets and you’ll get even more blooms!
• Cut dahlias in the morning. Choose blooms that are fully open. Place fresh cut stems in a bucket of slightly warm water.
• Dahlias make for gorgeous cut flower bouquets. And if by chance, you have too many flowers, a bouquet makes a wonderful gift for a friend or neighbour!
EASY CAREGorgeous Dahliasfor
SPRING 2015 • 23
24
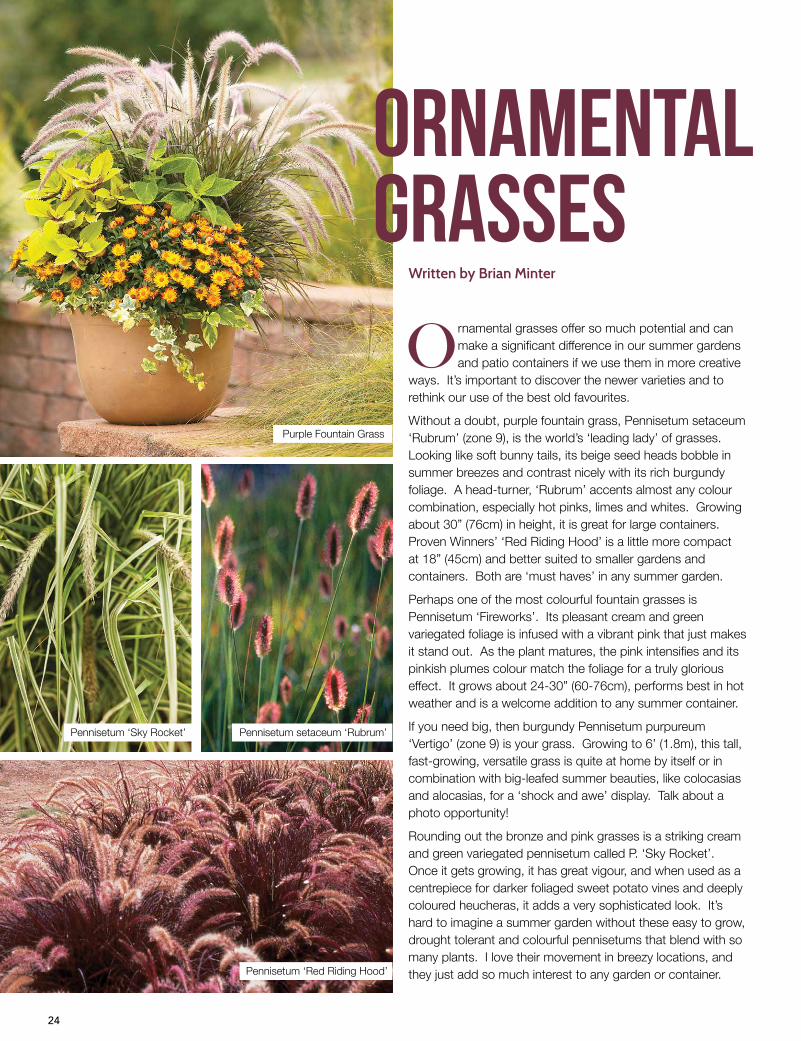
Written by Brian Minter
Ornamental grasses offer so much potential and can make a significant difference in our summer gardens and patio containers if we use them in more creative
ways. It’s important to discover the newer varieties and to rethink our use of the best old favourites.
Without a doubt, purple fountain grass, Pennisetum setaceum ‘Rubrum’ (zone 9), is the world’s ‘leading lady’ of grasses. Looking like soft bunny tails, its beige seed heads bobble in summer breezes and contrast nicely with its rich burgundy foliage. A head-turner, ‘Rubrum’ accents almost any colour combination, especially hot pinks, limes and whites. Growing about 30” (76cm) in height, it is great for large containers. Proven Winners’ ‘Red Riding Hood’ is a little more compact at 18” (45cm) and better suited to smaller gardens and containers. Both are ‘must haves’ in any summer garden.
Perhaps one of the most colourful fountain grasses is Pennisetum ‘Fireworks’. Its pleasant cream and green variegated foliage is infused with a vibrant pink that just makes it stand out. As the plant matures, the pink intensifies and its pinkish plumes colour match the foliage for a truly glorious effect. It grows about 24-30” (60-76cm), performs best in hot weather and is a welcome addition to any summer container.
If you need big, then burgundy Pennisetum purpureum ‘Vertigo’ (zone 9) is your grass. Growing to 6’ (1.8m), this tall, fast-growing, versatile grass is quite at home by itself or in combination with big-leafed summer beauties, like colocasias and alocasias, for a ‘shock and awe’ display. Talk about a photo opportunity!
Rounding out the bronze and pink grasses is a striking cream and green variegated pennisetum called P. ‘Sky Rocket’. Once it gets growing, it has great vigour, and when used as a centrepiece for darker foliaged sweet potato vines and deeply coloured heucheras, it adds a very sophisticated look. It’s hard to imagine a summer garden without these easy to grow, drought tolerant and colourful pennisetums that blend with so many plants. I love their movement in breezy locations, and they just add so much interest to any garden or container.
Pennisetum ‘Sky Rocket’ Pennisetum setaceum ‘Rubrum’
Pennisetum ‘Red Riding Hood’
Purple Fountain Grass
Ornamental Grasses

SPRING 2015 • 25
Perhaps the greatest addition in recent years to our selection of grasses is the richest blue fescue you can imagine, called appropriately ‘Beyond Blue’. Its intense blue colouration lasts throughout the year and puts all other blue fescues to shame. It’s hardy to zone 4, making it ideal for winter displays as well, and it’s fairly compact, growing about 12” x 12” (30 x 30cm). For me, it’s created a whole new appreciation of fescue grasses, not only because of its stunning colour but also because of its heat and drought tolerance and its adaptability to almost any garden or container situation.
Due to their year-round versatility, the evergreen varieties of Carex oshimensis are superstars. The old workhorse, Carex ‘Evergold’ (zone 5), growing 12” x 12”, has been my absolute favourite for use in shade or part sun. In any container, its gentle spill-over effect adds a classy touch. In the landscape, its flowing nature and variegated cream and green foliage softens and complements the look of other plants.
Carex ‘Ice Dance’ is mostly green with a tiny white stripe, and it adds a more sophisticated touch. If it’s attention you need, then your new best friend is C. Evercolor® ‘Everillo’ (zone 5). It has the hottest lime colour that accents just about everything it’s near. It’s happiest in a part sun or shade location, but we’ve tried it in full sun, and once acclimatized, it rocks! Growing about 18” x 18” (45 x 45cm), it has great vigour, and when used with anything burgundy or bronze, its magic comes alive.
Although it has been around for a while now, the award-winning architectural grass, Calamagrostis ‘Karl Foerster’ (zone 4), is the ideal columnar grass to provide vertical lift in narrow beds and planters. It’s a ‘must have’, especially if your garden needs a little discipline.
To me these are the most interesting and colourful grass additions to our spring and summer gardens. They love summer heat and tolerate drought, and they beautifully accent all the other foliage and flowers that we use to bring our patios and gardens alive. The beauty of the Carex oshimensis varieties is that they keep that colour going well into fall and winter!
Festuca ‘Beyond Blue’
Acorus ‘Ogon’ Carex ‘Evergold’
Carex ‘Ice Dance’Calamagrostis ‘Karl Foerster’ Carex Oshimensis ‘Everillo’

26 • VANDERWEES HOME & GARDEN - 807-767-3666 - VANDERWEESHOMEANDGARDEN.COM
Did someone call “Tee Time”? For an afternoon of fun in the sun for the whole family, visit the miniature golf course at Vanderwees Home & Garden. Now in its
fourth year, the course has seen some pretty fine golfers and also helped to raise some pretty fine funds for local charities. Totally 18 holes, these links feature an interesting combination of putting greens that are challenging enough for adults but still not too difficult for children. In fact, some of our best golfers had to get their parents to drive them here. Something new for the mini-golf course for 2015 will be our Golf Birthday Parties. Bring your birthday friends out for some mini-golf fun and great food from our café. The golf course is also available for corporate functions and charity events.
Just down the road from the golf course is our animal farm and nature trail. With 4 adorable alpacas, rabbits, geese, ducks, chickens and goats, the farm is a favourite with children and adults alike. Beside the animal farm is our 1 km long
nature trail. Cutting through the backwoods, the trail winds through aspen stands, past a beaver pond, and along some marshlands. Informative posts can be found along the trail explaining the different plant species found in that area. If you are looking for a quiet and peaceful place to walk amongst nature, then our trail is the perfect spot for you.
Whether its mini-golf, hiking, visiting farm animals or shopping in a full service garden centre, Vanderwees Home & Garden is a great place for the whole family. We hope to see you soon!
TEETIME

SPRING 2015 • 27

28 • VANDERWEES HOME & GARDEN - 807-767-3666 - VANDERWEESHOMEANDGARDEN.COM

SPRING 2015 • 29
John Vanderwees offers sales associate Ruth a tasting cup containing a couple of teaspoons of fresh Arbequina extra virgin olive oil from Chile. The first sip is smooth and
buttery with a slightly nutty flavor and a light hint of pepper. This is just one of the many extra virgin olive oils, flavoured olive oils, and balsamic vinegars found at the new Tulips Tasting Bar located in Vanderwees Home & Garden.
Olive-oil tasting bars are growing steadily in popularity. “It is very much like wine tasting.”
The Tulips Tasting Bar features 18 kinds of fresh olive oils, from two pressings per year, and 20 balsamic vinegars, aged between 2 and 4 years. Sources include Italy, Greece, Spain, Chile and California. Each is in a fusti, a stainless steel container with a spigot that protects the products from light and air.
Costs are very reasonable. A 200-millilitre bottle of oil or vinegar is $12. A 375-ml size is $18. “We tried to price it so it is an everyday product and not just for a special occasion,” John said.
Customers at any time can receive a tour, explanation of tasting and be able to sample any of the oils and vinegars. Products are sampled in a small cup and bread is available to cleanse the palate between tastings. A sign on each fusti lists the product name, taste and flavor information and suggested pairings with other products.
John describes fresh oil as “creamy, grassy, often with a peppery finish. A good olive oil is “soft, mellow, smooth and beautiful.” All the oils in their shop are less than eight months old from press date.
Olive oil is used in everything from salads to marinades and roasts. For anyone who is lactose intolerant, it can be used in place of butter and it works well in baking.
A Tuscan flavoured olive oil with six herbs makes meals simple, John said. “Just toss that with pasta and you’ve got dinner.” Olive oils and balsamic vinegars pair extremely well with endless combinations being possible.
BEST BAR IN TOWN

30 • VANDERWEES HOME & GARDEN - 807-767-3666 - VANDERWEESHOMEANDGARDEN.COM
SERVES 2• 2 Cups coconut water• 1 Small fennel bulb• 1/2 cucumber• 1 Heaping handful of fresh mint leaves• 2 Handfuls spinach• 1/2 avocado• 2 Tbsp chia seeds• 1 Scoop Vega One vanilla protein powder
Mandy King Bio: Mandy King, CNP, BCom, is a Holistic Nutritionist, Speaker and Founder of HEAL, a health and wellness company with the ambition to make the world a healthier place, one delicious meal at a time. HEAL offers interactive corporate wellness programs along with personalized one-on-one nutrition and online programs.
Mandy is the co-author of the “21 Day Smoothie Guide”, author of the popular blog www.HealthyEatingAndLiving.ca, and loves to spread the nutrition word at her speaking engagements.
FACEBOOK: www.facebook.com/healthyeatingandliving.caTWITTER: @mandyking_HEALWEBSITE: healthyeatingandliving.ca
Spring Cleansing GREEN Smoothie
After an indulgent winter, spring is the time of year our bodies can crave a bit of a reset. Rather than going to the extreme of an expensive juice cleanse that might
result in binging on candy and chips afterwards, there are some simple habits you can incorporate into your daily routine to help cleanse and naturally detoxify your body.
1. Drink lemon waterOne of the first steps of cleansing is to ensure your digestion is working optimally. A common condition among North Americans is low stomach acid (often shown via heartburn, acid reflux, and irregular digestion). A simple way to stimulate the digestive juices is through lemon water. Before breakfast, squeeze half of one lemon into room temperature water. Not only does this get the digestive juices flowing, but it’s also great for morning energy to avoid dehydration.
2. Remove ‘problematic’ foodsEach person is different, but the most common offenders to people’s health tends to be cow’s dairy, gluten & sugar. Breakfast can be the hardest time, as gluten-filled foods are a staple in the morning. The easiest way to kick off your morning gluten & dairy free is with a high protein smoothie - recipe below. For lunches and dinners, focus on having two to three vegetable side dishes on your plate and all of a sudden there’s no room for the problematic foods.
3. ExerciseExercise is excellent for stimulating the lymphatic system, a main detoxification system in the body. The lymph relies on movement of the body to keep it flowing properly, and one of the best ways to do this is through exercise. The more you move, the better.
4. Eat more leafy greensAdding more leafy greens to your diet is a simple way to gently help your body cleanse. The green colour of leafy greens comes from the chlorophyll content of the plant and has been shown to bind with toxic metals to prevent absorption in the body. A great goal is to incorporate a different leafy green at each meal. For breakfast, try the ‘Spring Cleansing Green Smoothie’ below, with spinach in it; for lunch, try a kale salad, and for dinner, try steamed swiss chard with garlic and onions. All of a sudden, you’ve easily incorporated a leafy green at each meal.
5. Cruciferous VeggiesNot only are cruciferous vegetables, like broccoli, cauliflower and cabbage high in fiber, but they contain a compound called indole-3-carbinol, known to be a major cancer fighting substance. Cruciferous vegetables are shown to speed up the detoxification process of harmful chemicals, along with blocking the body from producing harmful amounts of hormones.
5Spring Cleansing
FEELING YOUR
TO HAVE YOUTips
BESTby Mandy King, CNP, BCom

Reg. $79.99
LIMITED TIME OFFER
ONLY $39.99While supplies last.
Reg. $89.99
LIMITED TIME OFFER
ONLY $49.99While supplies last.