Embed Size (px)
Citation preview
Video Techniques for Participatory Design: Observation, Brainstorming & Prototyping
CHI 2000 Tutorial Professor Wendy E. Mackay Department of Computer Science Aarhus University Aabogade 34 DK-8200 N, Aarhus, Denmark + 45 89 42 56 22 [email protected] http://www.daimi.au.dk/~mackay

CHI 2000 Tutorial: Video Techniques for Participatory Design W.E. Mackay iii
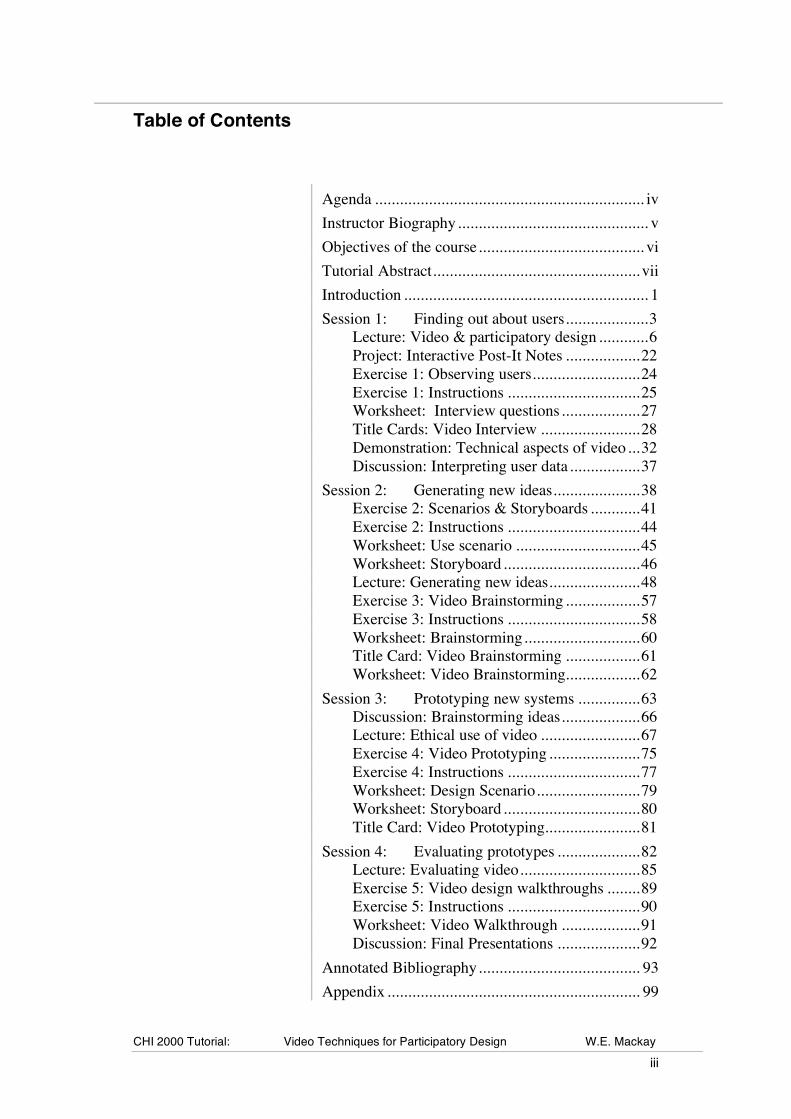
Table of Contents
Agenda ................................................................. iv Instructor Biography.............................................. v Objectives of the course........................................ vi Tutorial Abstract.................................................. vii Introduction ........................................................... 1 Session 1: Finding out about users....................3
Lecture: Video & participatory design ............6 Project: Interactive Post-It Notes ..................22 Exercise 1: Observing users..........................24 Exercise 1: Instructions ................................25 Worksheet: Interview questions...................27 Title Cards: Video Interview ........................28 Demonstration: Technical aspects of video...32 Discussion: Interpreting user data.................37
Session 2: Generating new ideas.....................38 Exercise 2: Scenarios & Storyboards ............41 Exercise 2: Instructions ................................44 Worksheet: Use scenario ..............................45 Worksheet: Storyboard.................................46 Lecture: Generating new ideas......................48 Exercise 3: Video Brainstorming ..................57 Exercise 3: Instructions ................................58 Worksheet: Brainstorming............................60 Title Card: Video Brainstorming ..................61 Worksheet: Video Brainstorming..................62
Session 3: Prototyping new systems ...............63 Discussion: Brainstorming ideas...................66 Lecture: Ethical use of video ........................67 Exercise 4: Video Prototyping ......................75 Exercise 4: Instructions ................................77 Worksheet: Design Scenario.........................79 Worksheet: Storyboard.................................80 Title Card: Video Prototyping.......................81
Session 4: Evaluating prototypes ....................82 Lecture: Evaluating video.............................85 Exercise 5: Video design walkthroughs ........89 Exercise 5: Instructions ................................90 Worksheet: Video Walkthrough ...................91 Discussion: Final Presentations ....................92
Annotated Bibliography....................................... 93 Appendix ............................................................. 99
CHI 2000 Tutorial: Video Techniques for Participatory Design W.E. Mackay iv
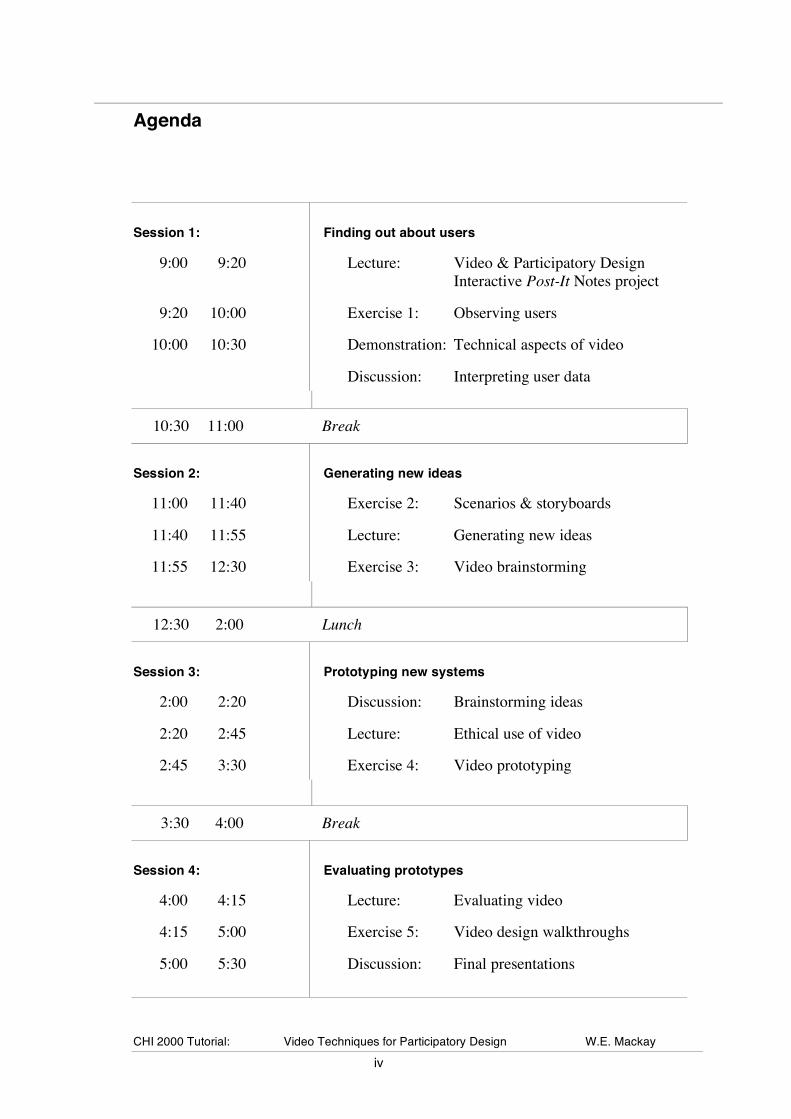
Agenda
Session 1: Finding out about users
9:00 9:20 Lecture: Video & Participatory Design Interactive Post-It Notes project
9:20 10:00 Exercise 1: Observing users
10:00 10:30 Demonstration: Technical aspects of video
Discussion: Interpreting user data
10:30 11:00 Break
Session 2: Generating new ideas
11:00 11:40 Exercise 2: Scenarios & storyboards
11:40 11:55 Lecture: Generating new ideas
11:55 12:30 Exercise 3: Video brainstorming
12:30 2:00 Lunch
Session 3: Prototyping new systems
2:00 2:20 Discussion: Brainstorming ideas
2:20 2:45 Lecture: Ethical use of video
2:45 3:30 Exercise 4: Video prototyping
3:30 4:00 Break
Session 4: Evaluating prototypes
4:00 4:15 Lecture: Evaluating video
4:15 5:00 Exercise 5: Video design walkthroughs
5:00 5:30 Discussion: Final presentations
CHI 2000 Tutorial: Video Techniques for Participatory Design W.E. Mackay v
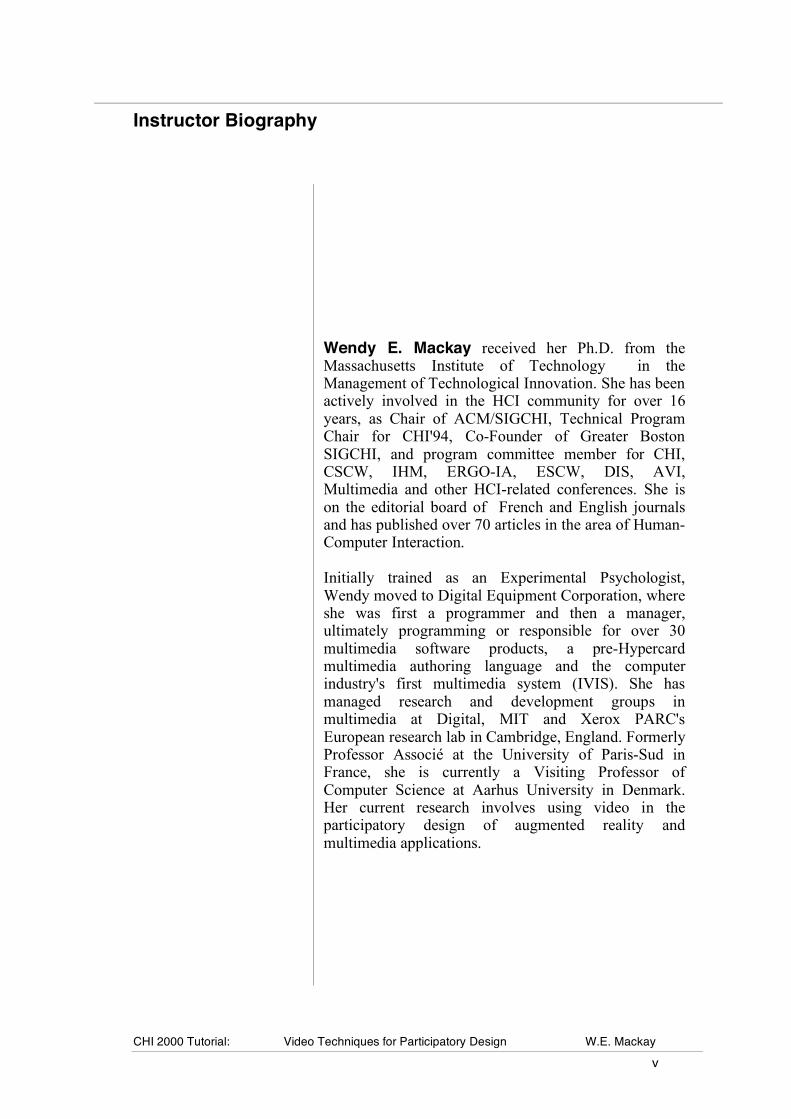
Instructor Biography
Wendy E. Mackay received her Ph.D. from the Massachusetts Institute of Technology in the Management of Technological Innovation. She has been actively involved in the HCI community for over 16 years, as Chair of ACM/SIGCHI, Technical Program Chair for CHI'94, Co-Founder of Greater Boston SIGCHI, and program committee member for CHI, CSCW, IHM, ERGO-IA, ESCW, DIS, AVI, Multimedia and other HCI-related conferences. She is on the editorial board of French and English journals and has published over 70 articles in the area of Human-Computer Interaction. Initially trained as an Experimental Psychologist, Wendy moved to Digital Equipment Corporation, where she was first a programmer and then a manager, ultimately programming or responsible for over 30 multimedia software products, a pre-Hypercard multimedia authoring language and the computer industry's first multimedia system (IVIS). She has managed research and development groups in multimedia at Digital, MIT and Xerox PARC's European research lab in Cambridge, England. Formerly Professor Associé at the University of Paris-Sud in France, she is currently a Visiting Professor of Computer Science at Aarhus University in Denmark. Her current research involves using video in the participatory design of augmented reality and multimedia applications.
CHI 2000 Tutorial: Video Techniques for Participatory Design W.E. Mackay vi
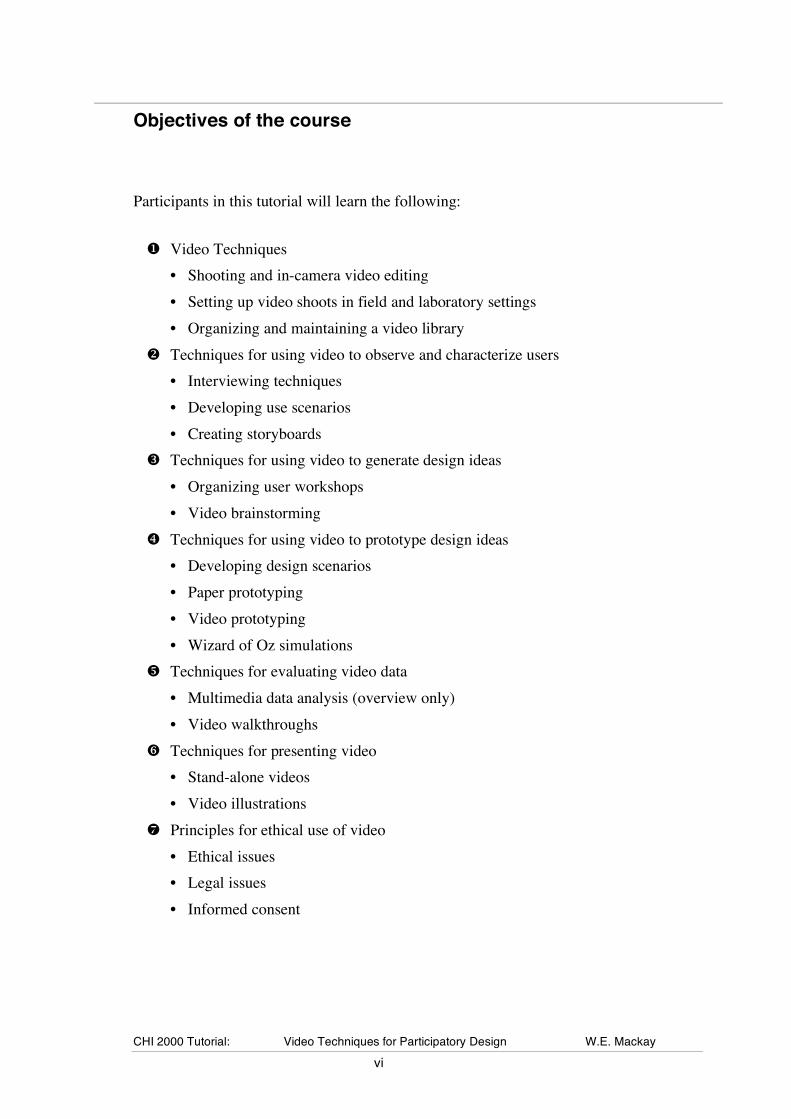
Objectives of the course
Participants in this tutorial will learn the following: Video Techniques • Shooting and in-camera video editing • Setting up video shoots in field and laboratory settings • Organizing and maintaining a video library Techniques for using video to observe and characterize users • Interviewing techniques • Developing use scenarios • Creating storyboards Techniques for using video to generate design ideas • Organizing user workshops • Video brainstorming Techniques for using video to prototype design ideas • Developing design scenarios • Paper prototyping • Video prototyping • Wizard of Oz simulations Techniques for evaluating video data • Multimedia data analysis (overview only) • Video walkthroughs Techniques for presenting video • Stand-alone videos • Video illustrations Principles for ethical use of video • Ethical issues • Legal issues • Informed consent
CHI 2000 Tutorial: Video Techniques for Participatory Design W.E. Mackay vii
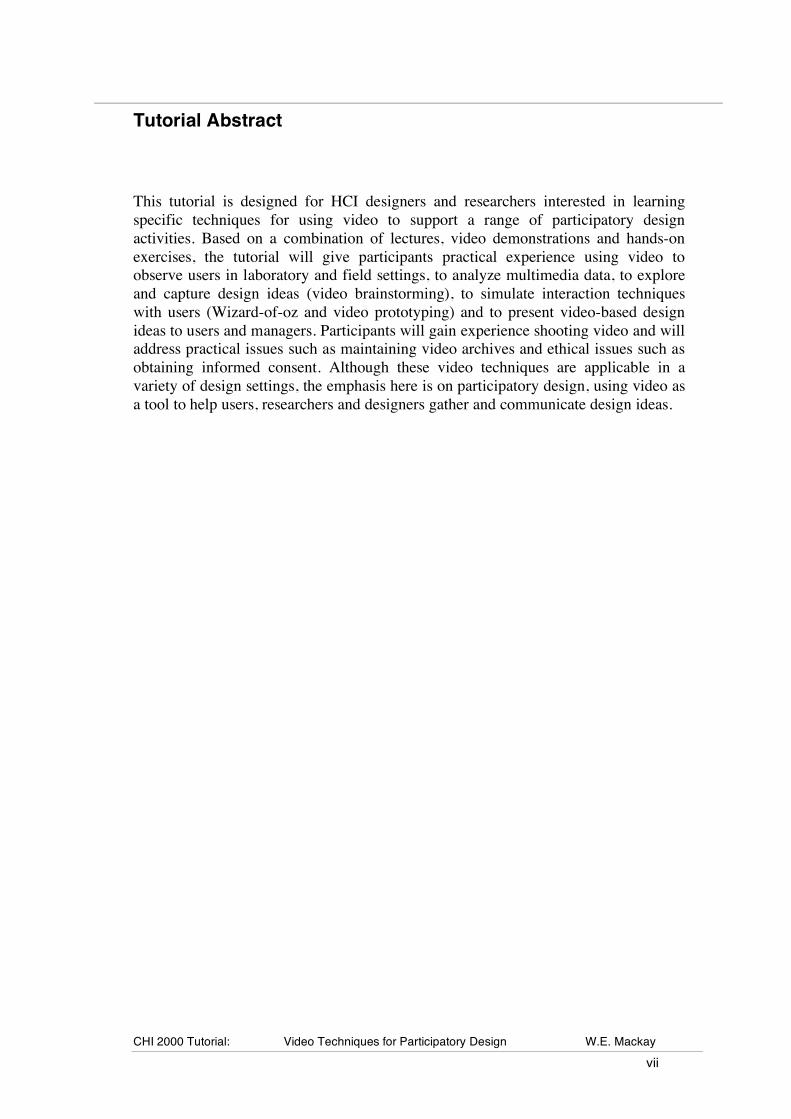
Tutorial Abstract
This tutorial is designed for HCI designers and researchers interested in learning specific techniques for using video to support a range of participatory design activities. Based on a combination of lectures, video demonstrations and hands-on exercises, the tutorial will give participants practical experience using video to observe users in laboratory and field settings, to analyze multimedia data, to explore and capture design ideas (video brainstorming), to simulate interaction techniques with users (Wizard-of-oz and video prototyping) and to present video-based design ideas to users and managers. Participants will gain experience shooting video and will address practical issues such as maintaining video archives and ethical issues such as obtaining informed consent. Although these video techniques are applicable in a variety of design settings, the emphasis here is on participatory design, using video as a tool to help users, researchers and designers gather and communicate design ideas.

CHI 2000 Tutorial: Video Techniques for Participatory Design W.E. Mackay viii
CHI 2000 Tutorial: Video Techniques for Participatory Design W.E. Mackay 1
Introduction
This is an intensive, hands-on tutorial that emphasizes the use of video techniques throughout all phases of participatory design. Video is an extremely flexible tool that can capture real-world events as they occur, either "staged" as in a laboratory test or usability study or "live" as in a field study. Video can illustrate ideas and concepts, and especially dynamic events such as how people interact with computers. Video is a creative tool for exploring new ideas, simulating new technology and allowing users to experience technology that does not yet exist. Video can also be analyzed as both quantitative and qualitative multimedia data. Finally, video is a powerful communication tool, as part of a presentation, in a participatory design workshop, or standing alone, enabling you to share research results, discuss ideas and explore envisionments of future technology.
This tutorial will provide you with a practical set of observation, design and evaluation techniques, drawn from a range of disciplines and extensively tested in both academic and industrial settings. Working in small groups, you will use video in a series of exercises that involve prototyping a (deceptively) simple application: an on-line Post-it note. You will begin by observing and interviewing people who use ordinary paper Post-It notes. Then, you will use various design and prototyping techniques to create and evaluate a new Post-it note application. The exercises are designed to let each person practice using a video camera, both shooting and in-camera editing, while experiencing the full design process involved in prototyping a new interactive software application. We will also discuss practical issues, such as maintaining your video archives, and ethical issues, such as obtaining informed consent.
This tutorial is based on a lecture/laboratory semester course entitled Design and Evaluation of Interactive Software. I have taught variations of the course to University and Master's level students at the Université de Paris-Sud, and Aarhus University over the past three years. I have also taught condensed versions of the course (ranging from one to three days) to advanced engineering students in France and Denmark, as well as to HCI researchers and software designers from industry. The specific video techniques are the result of almost 20 years of experience in the use of video for all aspects of participatory design, including ethnographic and laboratory studies of users, multimedia exploratory data analysis, and the design and implementation of a wide range of multimedia and augmented reality systems, both research prototypes and products. I have learned a great deal from my collaborations with professional video producers over the years, but most of the techniques here were created specifically to address the problem of using video to support the design of interactive software. I also learn new video techniques every time I teach this course, as we invent new techniques to solve new design problems that arise and I look forward to contributions from members of the class.
The course is organized into four sessions, each with a combination of lectures, hands-on exercises, and discussion of each groups’ work.
CHI 2000 Tutorial: Video Techniques for Participatory Design W.E. Mackay 2
Lectures emphasize participatory design activities that benefit from using video. Please feel free to ask questions, especially about your own design problems, use of video, or ethical issues you face. Lecture topics include: Overview of video and participatory design Finding out about users: Video techniques for observing & characterizing users. Critical incident interviews, Observation of users in the field, Videotaping lab
and Usability studies, Creating scenarios & storyboards Technical aspects of video: shooting tips, organizing and maintaining a video
library, video formats, choosing between digital and analog video Generating ideas: Video techniques to support design. User workshops, Brainstorming, Video prototyping, Wizard of oz Evaluation: Video walkthroughs, Multimedia data analysis Ethics, Lies & Videotape: Video ethics, Legal issues, Informed consent
Demonstrations & Discussions allow you to get direct feedback about your work and learn from others in the tutorial. I will explain technical aspects of shooting, managing and presenting video, illustrated with video clips from recent participatory design projects and other student work. Video clips include: Field and laboratory studies of users, Storyboards and design scenarios, Video brainstorming sessions, Wizard-of-Oz video prototyping, Multimedia data analysis, and Edited presentations of video prototypes.
Exercises are spelled out in detail and have been carefully designed to build upon each other to form a single design project. These exercises will give you practical experience using a video camera and, at the same time, familiarize you with participatory design techniques that can be used immediately after the tutorial. Although the exercises move very quickly, you should be able to learn enough to adapt these techniques for your own purposes. Specific exercises include: Video observation of users Scenarios and Storyboards Video brainstorming Video prototyping Video walkthrough Final video presentation
CHI 2000 Tutorial: Video Techniques for Participatory Design W.E. Mackay 3
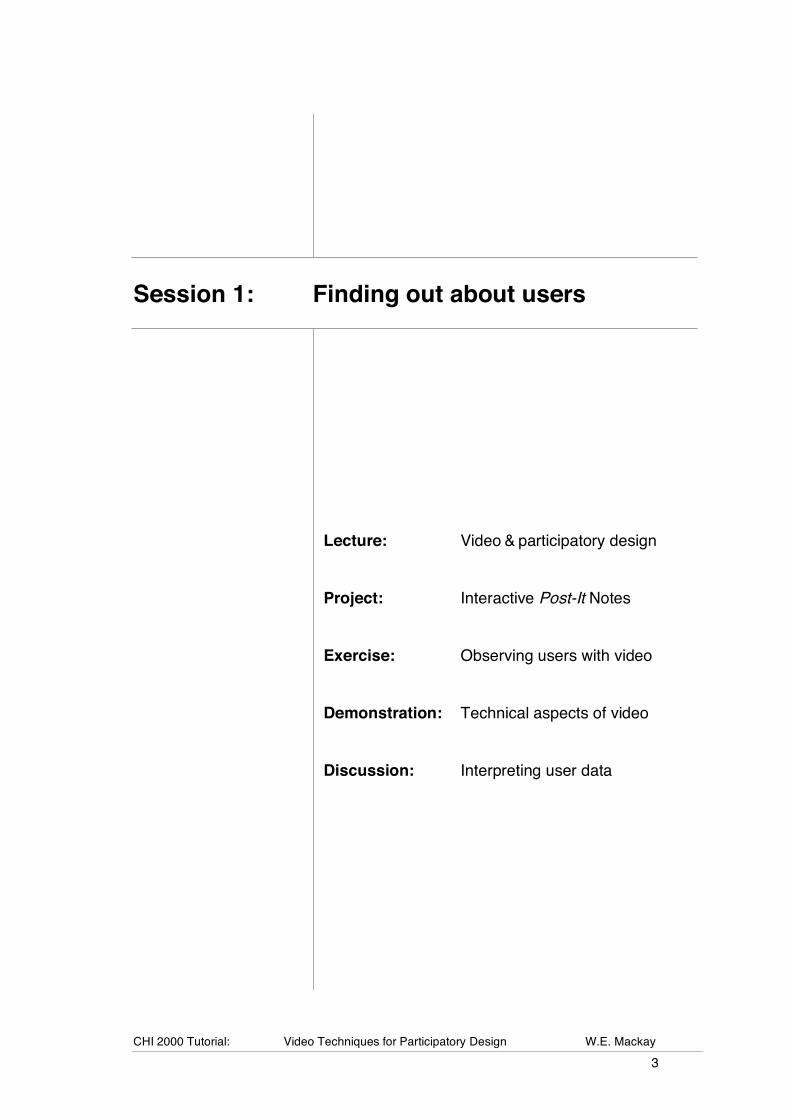
Session 1: Finding out about users
Lecture: Video & participatory design Project: Interactive Post-It Notes Exercise: Observing users with video Demonstration: Technical aspects of video Discussion: Interpreting user data

CHI 2000 Tutorial: Video Techniques for Participatory Design W.E. Mackay 4
Finding out about users
Good interactive software design requires an understanding of the ways in which the intended users work. Formal descriptions of work, such as those found in task analyses, provide generalizations of work practices. However, relying only on such generalizations is dangerous; specific details of the work practices can have a large impact on the design. Observing real users at work helps to avoid making incorrect assumptions or over-generalizing what is supposed to, rather than what actually does happen. Even limited field work can provide designers with insights that dramatically change their conception of the design problem.
The purpose of this session is to practice techniques for quickly finding out useful information about users and analyzing it in a way that is directly relevant to design. Session 1 activities include:
Lecture: Video & Participatory Design Explains the purpose of the tutorial and the accompanying exercises. Provides an overview of participatory design and the need for triangulation across disciplines. Introduces basic observation and interviewing techniques in the context of participatory design. Explains the differences between data obtained in field and laboratory settings. Provides a brief introduction to data analysis techniques, including the role of scenarios and storyboards, with references for more in-depth study.
Project: Interactive Post-It note Create an innovative electronic Post-It note, based on an analysis of video data you collect and your brainstormed ideas. Working in groups of three to four, preferably with a mix of backgrounds, create a video design scenario illustrating the new electronic Post-It note. After a video design walkthrough with another group, to evaluate your prototype, present the final design to the rest of the class.
Exercise 1: Observing users with video Assign roles, then interview at least one Post-It note user, using critical incident and other techniques, to obtain specific examples of how people use paper Post-it notes.
Video Demonstration: Technical aspects of video Demonstrates technical aspects of shooting, managing and presenting video, including shooting tricks, organizing and maintaining a video library, video formats and choosing between digital and analog video. Uses video clips from recent participatory design projects and other student work, including field and laboratory studies, video brainstorming sessions, wizard-of-Oz prototyping, multimedia data analysis and edited presentations of both video data and video prototypes.
Discussion: Interpreting user data Using participants’ work as examples, discusses technical problems and tricks in using video. Then, discusses how to interpret the collected video data, particularly with respect to the Post-It note design project.
CHI 2000 Tutorial: Video Techniques for Participatory Design W.E. Mackay 5
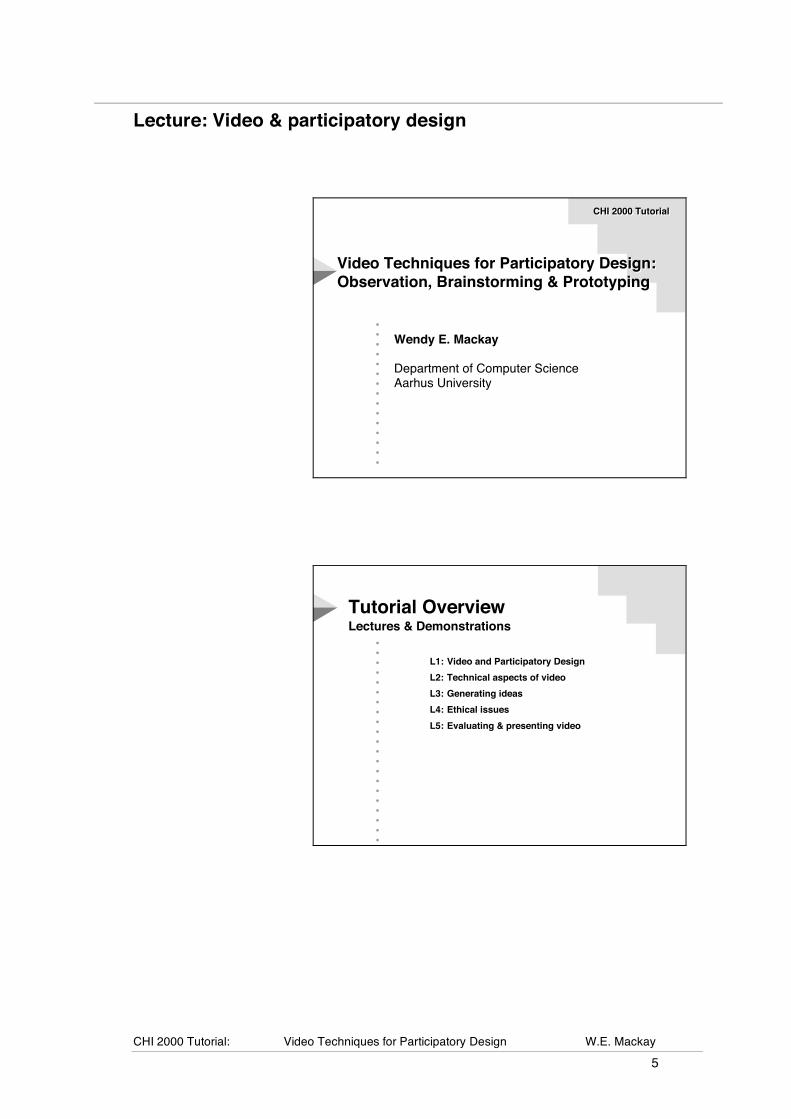
Lecture: Video & participatory design
•••••••••••••••
Video Techniques for Participatory Design:
Observation, Brainstorming & Prototyping
Video Techniques for Participatory Design: Observation, Brainstorming & Prototyping
Wendy E. Mackay
Department of Computer Science
Aarhus University
Wendy E. Mackay
Department of Computer Science Aarhus University
CHI 2000 TutorialCHI 2000 Tutorial
••••••••••••••••••••••
Tutorial OverviewTutorial OverviewLectures & DemonstrationsLectures & Demonstrations
L1:!Video and Participatory Design
L2:!Technical aspects of video
L3:!Generating ideas
L4:!Ethical issues
L5:!Evaluating & presenting video
L1:!Video and Participatory Design
L2:!Technical aspects of video
L3:!Generating ideas
L4:!Ethical issues
L5:!Evaluating & presenting video
CHI 2000 Tutorial: Video Techniques for Participatory Design W.E. Mackay 6
••••••••••••••••••••••
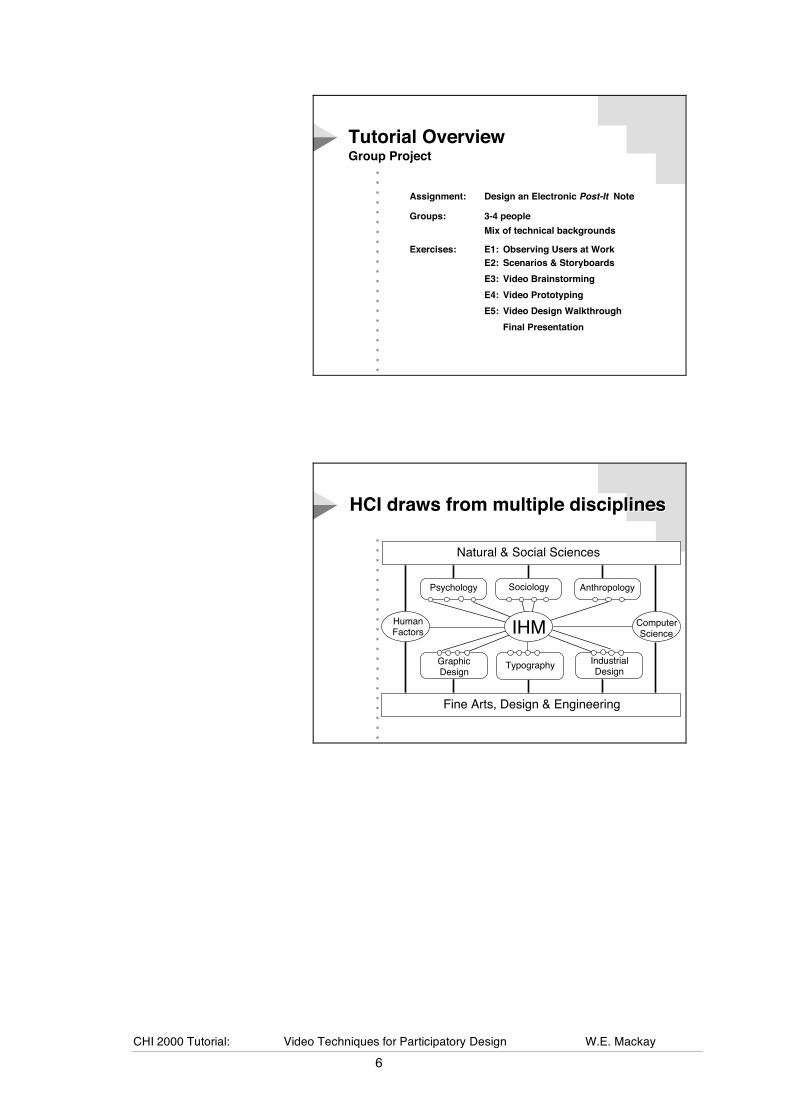
Tutorial OverviewTutorial OverviewGroup ProjectGroup Project
Assignment:! Design an Electronic Post-It Note
Groups:!! ! 3-4 people
! ! ! Mix of technical backgrounds
Exercises:! ! E1:! Observing Users at Work
! ! ! E2:! Scenarios & Storyboards
! ! ! E3:! Video Brainstorming
! ! ! E4:! Video Prototyping
! ! ! E5:! Video Design Walkthrough
! ! ! ! Final Presentation
Assignment:! Design an Electronic Post-It Note
Groups:!! ! 3-4 people
! ! ! Mix of technical backgrounds
Exercises:! ! E1:!Observing Users at Work
! ! ! E2:!Scenarios & Storyboards
! ! ! E3:!Video Brainstorming
! ! ! E4:!Video Prototyping
! ! ! E5:!Video Design Walkthrough
! ! ! ! Final Presentation
••••••••••••••••••••••
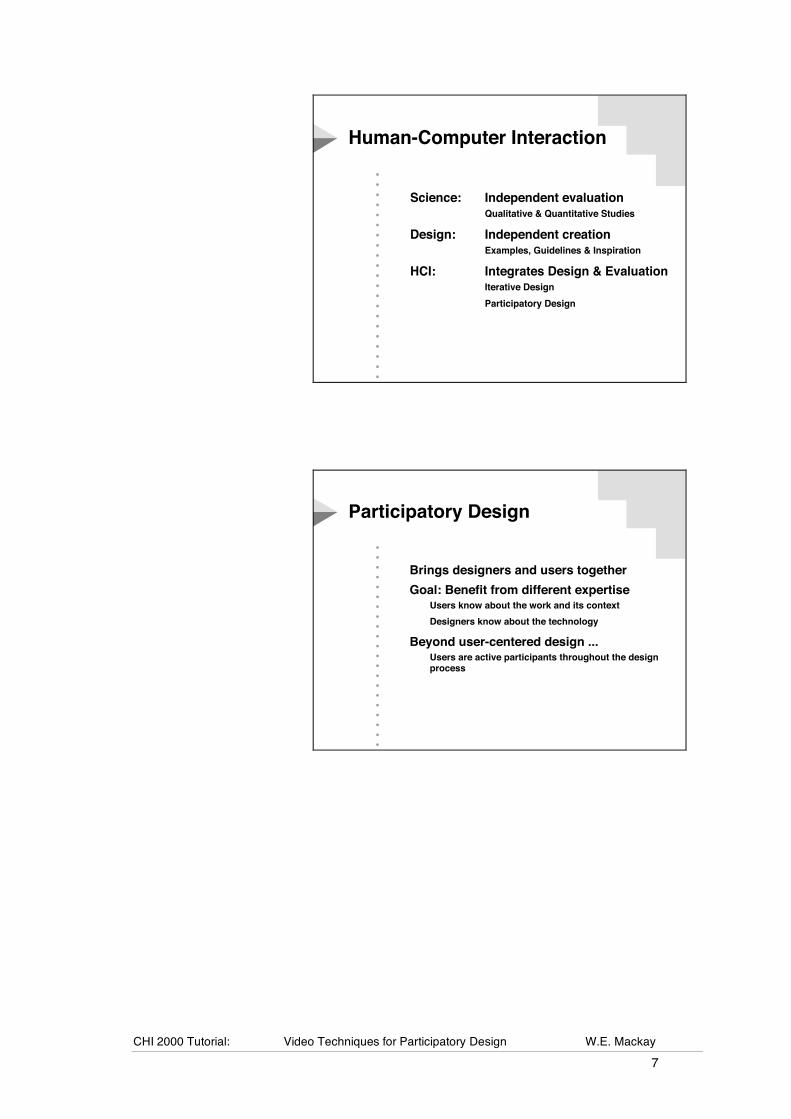
HCI draws from multiple disciplinesHCI draws from multiple disciplines
Psychology Sociology Anthropology
IndustrialDesign
TypographyGraphic Design
Fine Arts, Design & Engineering
IHMHumanFactors
ComputerScience
Natural & Social Sciences
CHI 2000 Tutorial: Video Techniques for Participatory Design W.E. Mackay 7
••••••••••••••••••••••
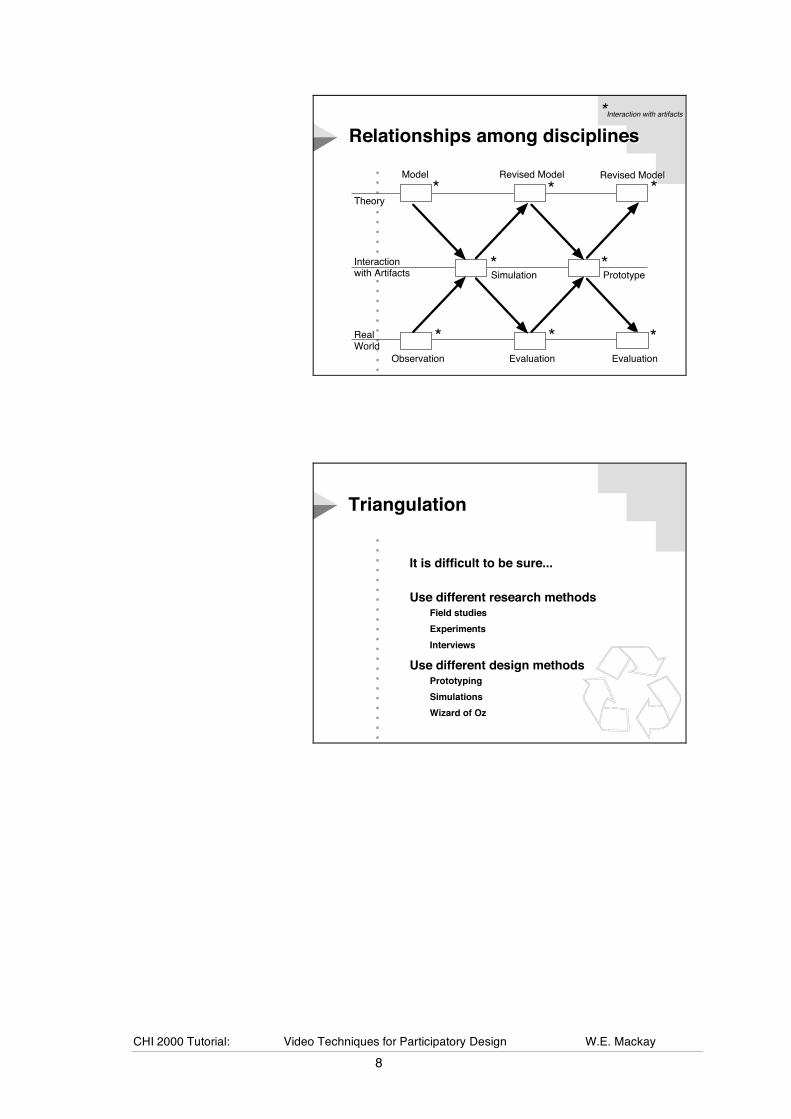
Human-Computer InteractionHuman-Computer Interaction
Science:! ! Independent evaluation ! ! ! Qualitative & Quantitative Studies
Design:! ! Independent creation ! ! ! Examples, Guidelines & Inspiration
HCI:! ! ! Integrates Design & Evaluation ! ! ! Iterative Design
! ! ! Participatory Design
Science:! ! Independent evaluation ! ! ! Qualitative & Quantitative Studies
Design:! ! Independent creation ! ! ! Examples, Guidelines & Inspiration
HCI:! ! ! Integrates Design & Evaluation ! ! ! Iterative Design
! ! ! Participatory Design
••••••••••••••••••••••
Participatory DesignParticipatory Design
Brings designers and users together
Goal: Benefit from different expertiseUsers know about the work and its context
Designers know about the technology
Beyond user-centered design ...Users are active participants throughout the design
process
Brings designers and users together
Goal: Benefit from different expertiseUsers know about the work and its context
Designers know about the technology
Beyond user-centered design ...Users are active participants throughout the design process
CHI 2000 Tutorial: Video Techniques for Participatory Design W.E. Mackay 8
••••••••••••••••••••••
Relationships among disciplinesRelationships among disciplines
TheoryTheory
Real
World
Real World
Interaction
with Artifacts
Interaction with Artifacts PrototypePrototype
ModelModel Revised ModelRevised Model
ObservationObservation
SimulationSimulation
EvaluationEvaluation EvaluationEvaluation
Revised ModelRevised Model
*
* **
*
***
*Interaction with artifacts
••••••••••••••••••••••
TriangulationTriangulation
It is difficult to be sure...
Use different research methodsField studies
Experiments
Interviews
Use different design methodsPrototyping
Simulations
Wizard of Oz
It is difficult to be sure...
Use different research methodsField studies
Experiments
Interviews
Use different design methodsPrototyping
Simulations
Wizard of Oz
CHI 2000 Tutorial: Video Techniques for Participatory Design W.E. Mackay 9
••••••••••••••••••••••
Participatory design process:Participatory design process:
"Fly-on-the-wall"
Critical incidentinterview
Questionaire
Laboratorystudy
Ethnography
Human Factors
Sociology
Psychology
Design/Arts
Eventcoding
Taskanalysis
Scenarioanalysis
Surveyanalysis
Protocolanalysis
Cognitive Psychology
Activity Theory
Sociology
Cognitive Psychology
Oralbrainstorming
Illustrateinteraction
Videobrainstorming
Designroom
Participatory Design
Paperprototyping
Videoprototyping
Softwaresimulation
Wizard ofOz
Scaledprototype
Human Factors
Computer science
Focusgroup
Usabilitystudy
Laboratorystudy
DesignWalkthrough
Marketing
Notecardbrainstorming
Culturalprobe
Does itwork?
Human Factors
Psychology
Psychology
Design/Arts
Design/Arts
Participatory Design
Participatory Design
Design/Arts
Computer science Psychology
Psychology
Human Factors
Finding out
about use
Finding out about use
Generating
ideas
Generating ideas
Designing
systems
Designing systems
Evaluating
systems
Evaluating systems
Analyzing
user data
Analyzing user data
Origin of techniquesOrigin of techniques
••••••••••••••••••••••
Video & Participatory DesignVideo & Participatory DesignVideo is a flexible tool for...Video is a flexible tool for...
Capturing events in the real world• Field studies! • Lab studies
Illustrating design ideas• Video brainstorming
Exploring interaction techniques• Video prototyping • Wizard of Oz
Evaluating user interfaces• Design walkthroughs • Video data analysis
Presenting ideas• Envisionments • Design workshops
Capturing events in the real world• Field studies! • Lab studies
Illustrating design ideas• Video brainstorming
Exploring interaction techniques• Video prototyping • Wizard of Oz
Evaluating user interfaces• Design walkthroughs • Video data analysis
Presenting ideas• Envisionments • Design workshops
CHI 2000 Tutorial: Video Techniques for Participatory Design W.E. Mackay 10
•••••••••••••••
Finding Out About UsersFinding Out About Users
CHI'2000 TutorialCHI'2000 Tutorial
••••••••••••••••••••••
How to find out what users do?How to find out what users do?
Observe usersLaboratory usability studies
Field studies
Ask usersInterviews
Questionnaires
Task analysis
Observe usersLaboratory usability studies
Field studies
Ask usersInterviews
Questionnaires
Task analysis
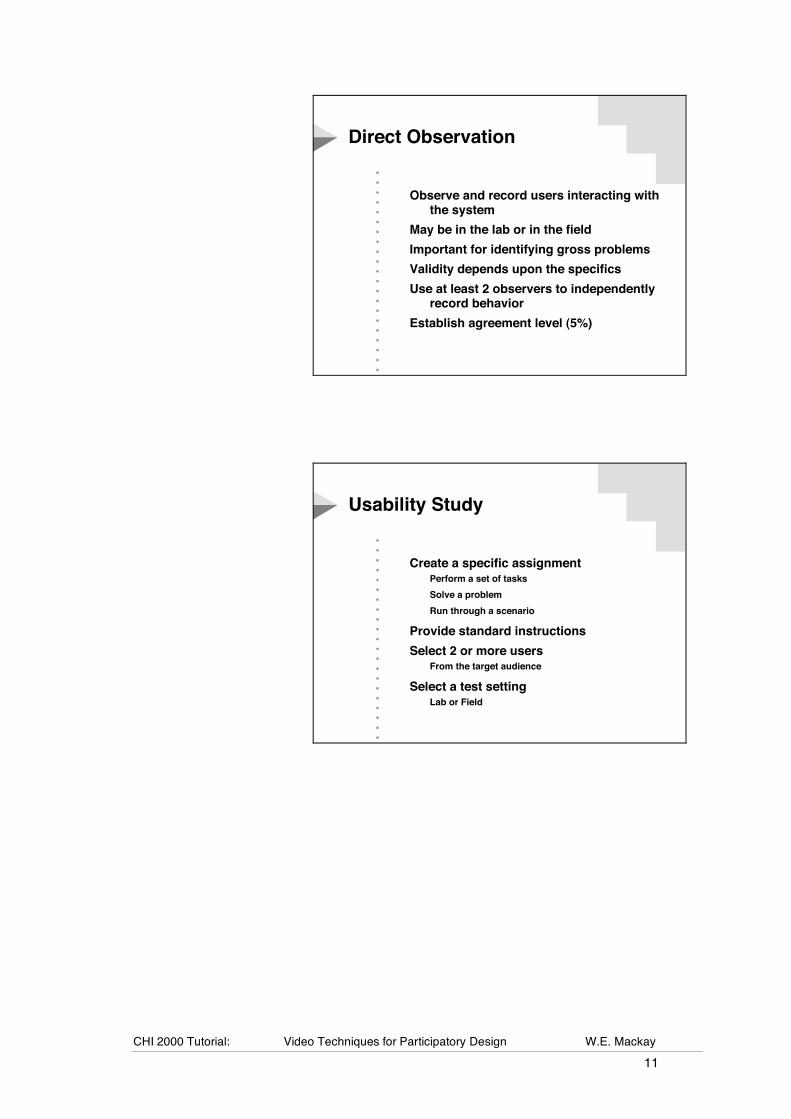
CHI 2000 Tutorial: Video Techniques for Participatory Design W.E. Mackay 11
••••••••••••••••••••••
Direct ObservationDirect Observation
Observe and record users interacting with
the system
May be in the lab or in the field
Important for identifying gross problems
Validity depends upon the specifics
Use at least 2 observers to independently
record behavior
Establish agreement level (5%)
Observe and record users interacting with the system
May be in the lab or in the field
Important for identifying gross problems
Validity depends upon the specifics
Use at least 2 observers to independently record behavior
Establish agreement level (5%)
••••••••••••••••••••••
Usability StudyUsability Study
Create a specific assignmentPerform a set of tasks
Solve a problem
Run through a scenario
Provide standard instructions
Select 2 or more usersFrom the target audience
Select a test settingLab or Field
Create a specific assignmentPerform a set of tasks
Solve a problem
Run through a scenario
Provide standard instructions
Select 2 or more usersFrom the target audience
Select a test settingLab or Field

CHI 2000 Tutorial: Video Techniques for Participatory Design W.E. Mackay 12
••••••••••••••••••••••
Usability StudyUsability Study
Decide what to measureTime to complete, errors
Ask users to perform tasksSimple observation
Talk aloud
Collaborative or Co-discovery learning
Combine with interviews or questionnaires
Decide what to measureTime to complete, errors
Ask users to perform tasksSimple observation
Talk aloud
Collaborative or Co-discovery learning
Combine with interviews or questionnaires
••••••••••••••••••••••
Gathering DataGathering Data
RecordingPaper:! cheap, low detail, miss things
Audio:! sometimes appropriate, hard to analyze
Video:! most detail, intrusive?, hard to analyze, !! retrospective analysis
Keystroke logs
CodingDefine categories
Discrete vs continuous events
Measure level of observer agreement
RecordingPaper:! cheap, low detail, miss things
Audio:! sometimes appropriate, hard to analyze
Video:! most detail, intrusive?, hard to analyze, !! retrospective analysis
Keystroke logs
CodingDefine categories
Discrete vs continuous events
Measure level of observer agreement
CHI 2000 Tutorial: Video Techniques for Participatory Design W.E. Mackay 13
••••••••••••••••••••••
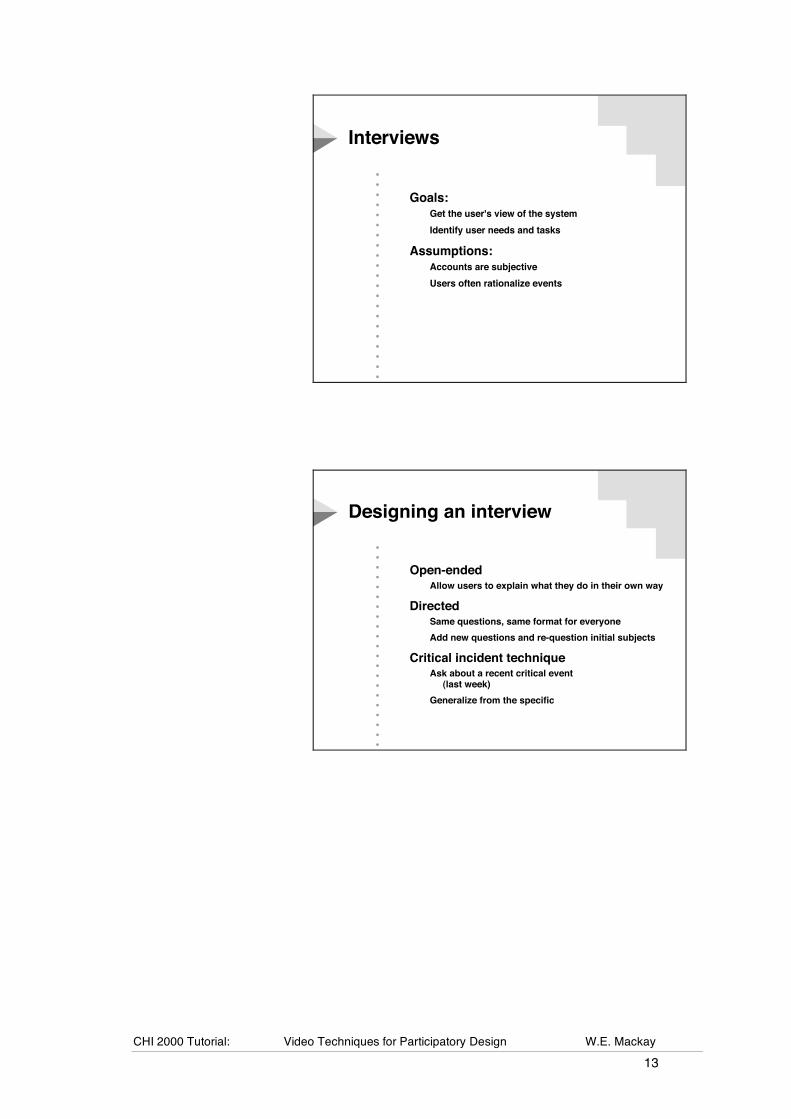
Interviews Interviews
Goals:Get the user's view of the system
Identify user needs and tasks
Assumptions:Accounts are subjective
Users often rationalize events
Goals:Get the user's view of the system
Identify user needs and tasks
Assumptions:Accounts are subjective
Users often rationalize events
••••••••••••••••••••••
Designing an interviewDesigning an interview
Open-endedAllow users to explain what they do in their own way
DirectedSame questions, same format for everyone
Add new questions and re-question initial subjects
Critical incident techniqueAsk about a recent critical event (last week)
Generalize from the specific
Open-endedAllow users to explain what they do in their own way
DirectedSame questions, same format for everyone
Add new questions and re-question initial subjects
Critical incident techniqueAsk about a recent critical event (last week)
Generalize from the specific
CHI 2000 Tutorial: Video Techniques for Participatory Design W.E. Mackay 14
••••••••••••••••••••••
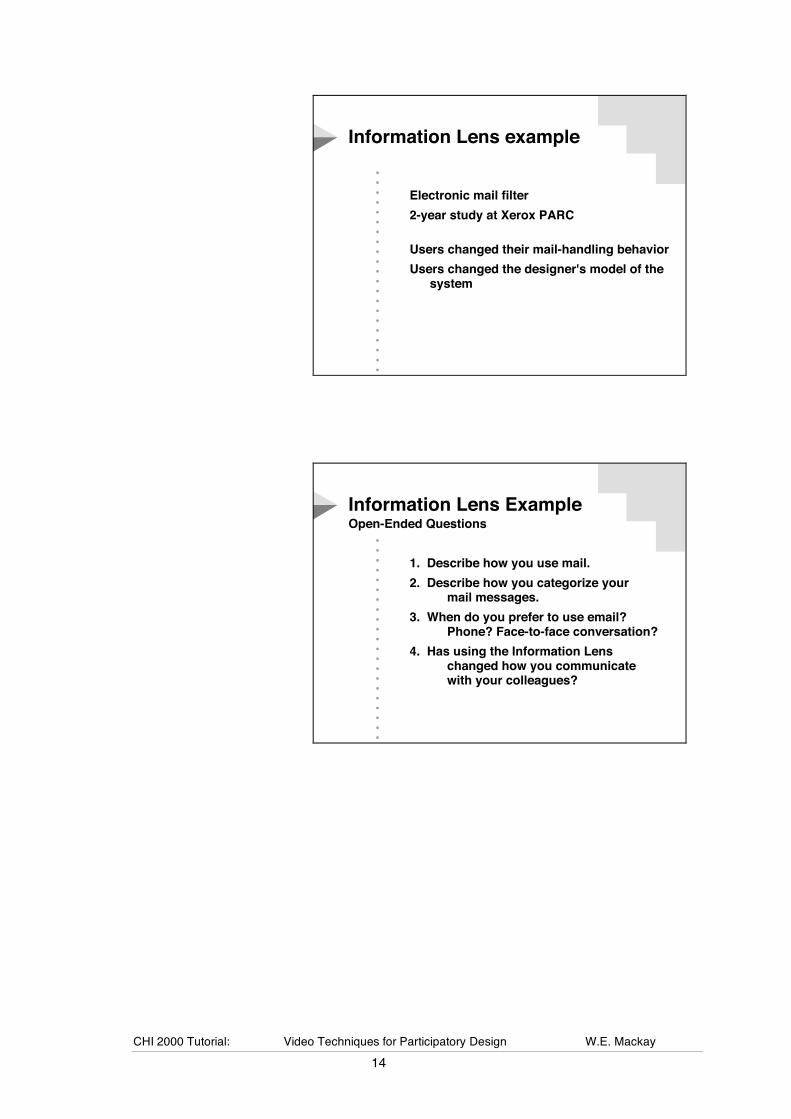
Information Lens exampleInformation Lens example
Electronic mail filter
2-year study at Xerox PARC
Users changed their mail-handling behavior
Users changed the designer's model of the
system
Electronic mail filter
2-year study at Xerox PARC
Users changed their mail-handling behavior
Users changed the designer's model of the system
••••••••••••••••••••••
Information Lens ExampleInformation Lens ExampleOpen-Ended QuestionsOpen-Ended Questions
1. Describe how you use mail.
2. Describe how you categorize your
mail messages.
3. When do you prefer to use email?
Phone? Face-to-face conversation?
4. Has using the Information Lens
changed how you communicate
with your colleagues?
1. Describe how you use mail.
2. Describe how you categorize your mail messages.
3. When do you prefer to use email? Phone? Face-to-face conversation?
4. Has using the Information Lens changed how you communicate with your colleagues?
CHI 2000 Tutorial: Video Techniques for Participatory Design W.E. Mackay 15
••••••••••••••••••••••
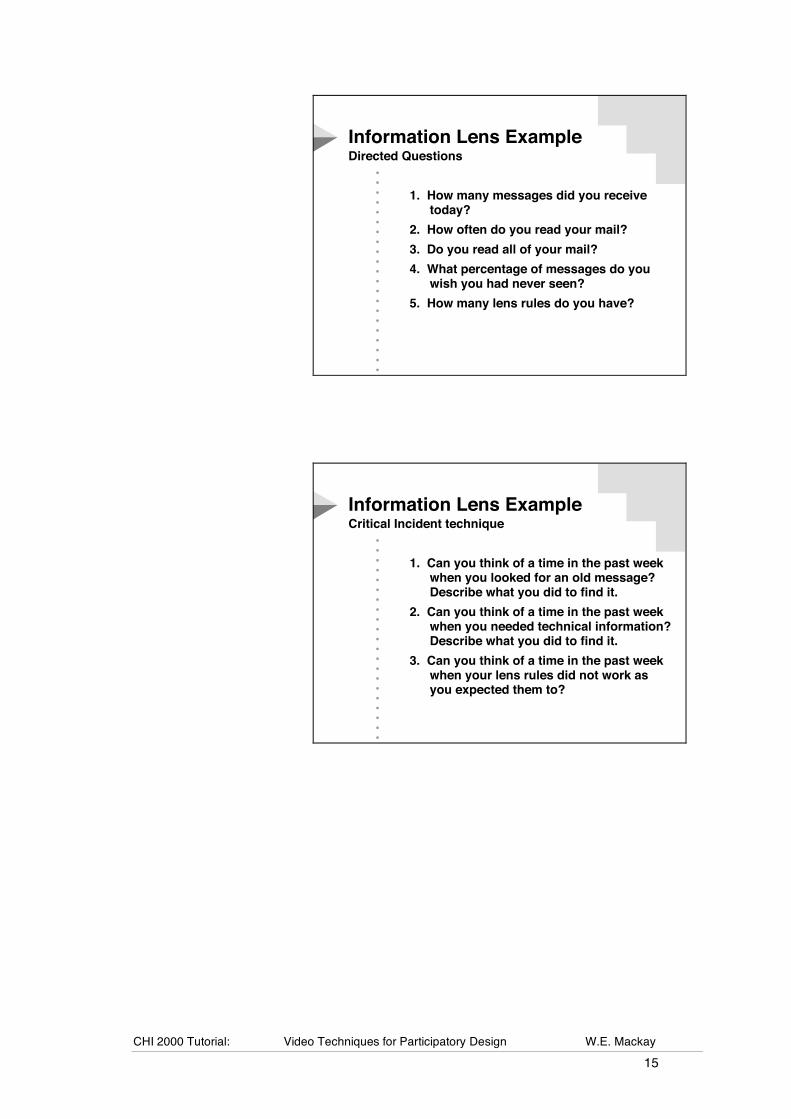
Information Lens ExampleInformation Lens ExampleDirected QuestionsDirected Questions
1. How many messages did you receive
today?
2. How often do you read your mail?
3. Do you read all of your mail?
4. What percentage of messages do you
wish you had never seen?
5. How many lens rules do you have?
1. How many messages did you receive today?
2. How often do you read your mail?
3. Do you read all of your mail?
4. What percentage of messages do you wish you had never seen?
5. How many lens rules do you have?
••••••••••••••••••••••
Information Lens ExampleInformation Lens ExampleCritical Incident techniqueCritical Incident technique
1. Can you think of a time in the past week
when you looked for an old message?Describe what you did to find it.
2. Can you think of a time in the past week
when you needed technical information?Describe what you did to find it.
3. Can you think of a time in the past weekwhen your lens rules did not work as
you expected them to?
1. Can you think of a time in the past week when you looked for an old message?Describe what you did to find it.
2. Can you think of a time in the past week when you needed technical information?Describe what you did to find it.
3. Can you think of a time in the past weekwhen your lens rules did not work as you expected them to?
CHI 2000 Tutorial: Video Techniques for Participatory Design W.E. Mackay 16
•••••••••••••••
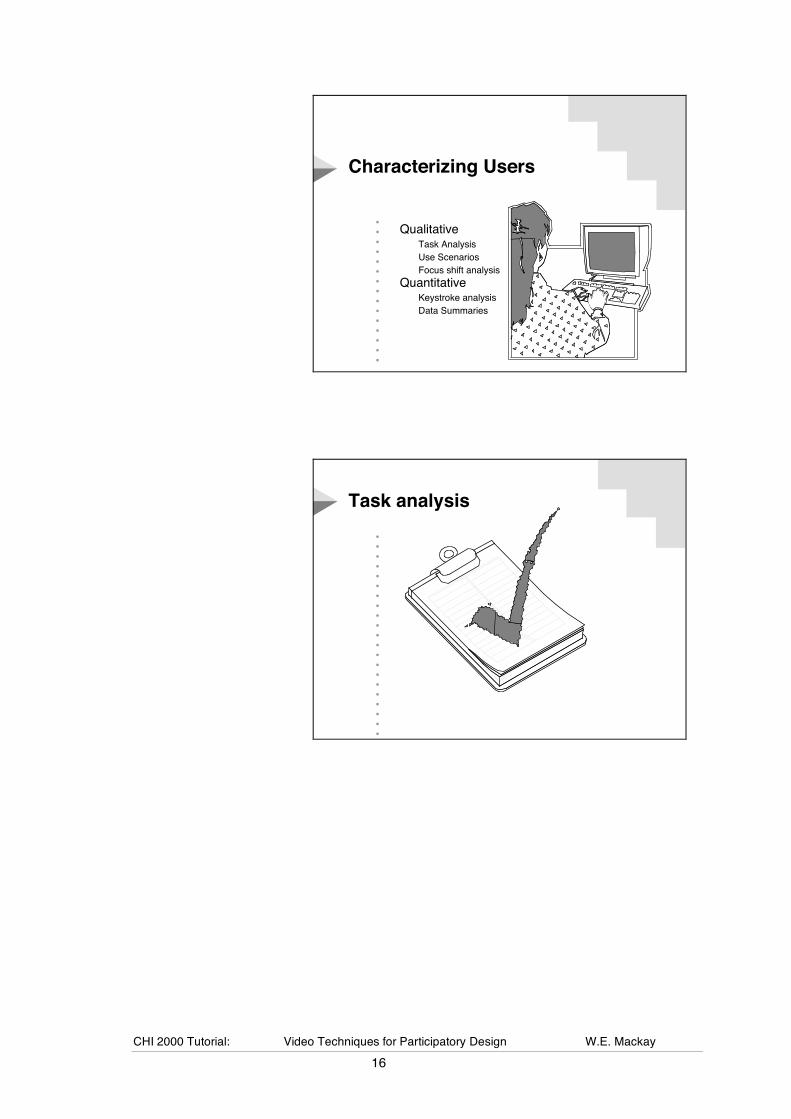
Characterizing UsersCharacterizing Users
QualitativeTask Analysis
Use Scenarios
Focus shift analysis
QuantitativeKeystroke analysis
Data Summaries
QualitativeTask Analysis
Use Scenarios
Focus shift analysis
QuantitativeKeystroke analysis
Data Summaries
••••••••••••••••••••••
Task analysisTask analysis
CHI 2000 Tutorial: Video Techniques for Participatory Design W.E. Mackay 17
••••••••••••••••••••••
Task analysisTask analysis
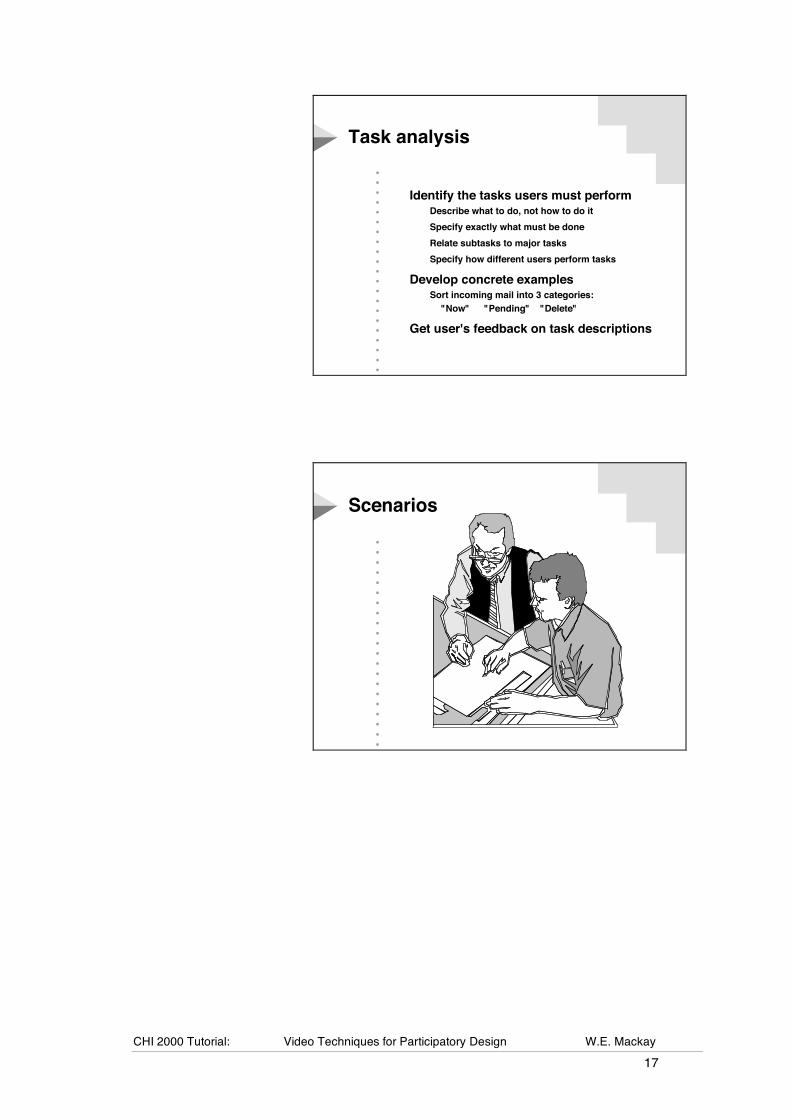
Identify the tasks users must performDescribe what to do, not how to do it
Specify exactly what must be done
Relate subtasks to major tasks
Specify how different users perform tasks
Develop concrete examplesSort incoming mail into 3 categories:
"Now"! "Pending"! "Delete"
Get user's feedback on task descriptions
••••••••••••••••••••••
ScenariosScenarios
CHI 2000 Tutorial: Video Techniques for Participatory Design W.E. Mackay 18
••••••••••••••••••••••
ScenariosScenarios
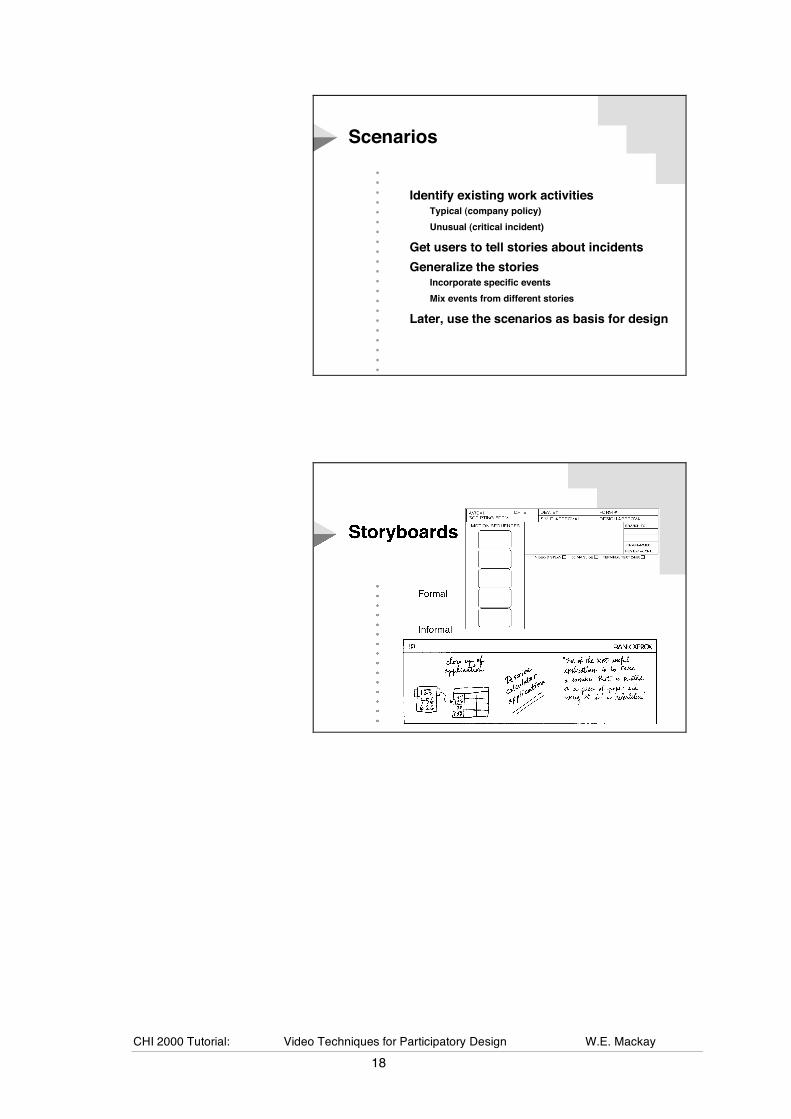
Identify existing work activitiesTypical (company policy)
Unusual (critical incident)
Get users to tell stories about incidents
Generalize the storiesIncorporate specific events
Mix events from different stories
Later, use the scenarios as basis for design
Identify existing work activitiesTypical (company policy)
Unusual (critical incident)
Get users to tell stories about incidents
Generalize the storiesIncorporate specific events
Mix events from different stories
Later, use the scenarios as basis for design
CHI 2000 Tutorial: Video Techniques for Participatory Design W.E. Mackay 19
•••••••••••••••
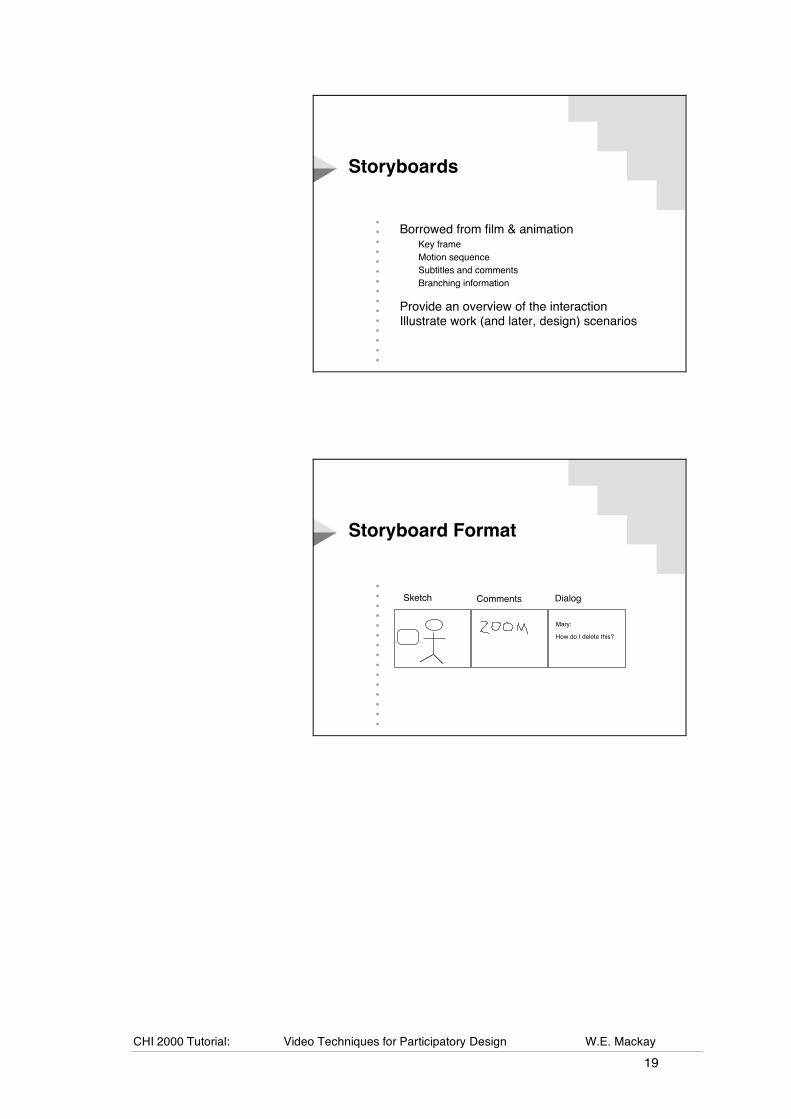
StoryboardsStoryboards
Borrowed from film & animationKey frame
Motion sequence
Subtitles and comments
Branching information
Provide an overview of the interactionIllustrate work (and later, design) scenarios
Borrowed from film & animationKey frame
Motion sequence
Subtitles and comments
Branching information
Provide an overview of the interactionIllustrate work (and later, design) scenarios
•••••••••••••••
Storyboard FormatStoryboard Format
SketchSketch CommentsComments DialogDialog
Mary:!
How do I delete this?
CHI 2000 Tutorial: Video Techniques for Participatory Design W.E. Mackay 20
•••••••••••••••
Storyboard FormatStoryboard Format

CHI 2000 Tutorial: Video Techniques for Participatory Design W.E. Mackay 21
Project: Interactive Post-It Notes
Post-It™ notes were invented by accident, a classic case of user innovation. Researchers at 3M Corporation normally spend their time trying to invent better glues, i.e. glues that adhere better to a wider variety of surfaces. When one researcher happened upon a formula for a glue that did not stick well at all; it was perceived as a failure. However, one of his colleagues had an idea: why not use this not-very-sticky glue on the small scraps of paper he was using to mark songs in his hymn book at church? The Post-It note was born. (Although there is a long and interesting story about what it took to convince upper management that there was actually a market for this product.) Today, Post-It notes come in a variety of sizes, colors and shapes and are considered an essential office stationery supply. Post-It notes are both simple and powerful: users are very creative with them.
Project Description: The goal of this project is to design and implement an electronic equivalent or enhancement to a paper Post-It note. You will begin by observing how people use paper Post-It notes in a real-world setting, i.e. this conference center. You will then analyze your data, in the form of a use scenario, to identify user requirements and new functions that are not met with current Post-It notes. Next, you will brainstorm ideas, illustrating how users might interact with a new form of Post-It note. Based on your user observations and brainstormed ideas, you will develop and videotape a design scenario that illustrates a new form of Post-It note. Each design will be the focus of a design walkthrough, and each group will have a chance to present their design to the entire class at the end.
The following questions will help your analysis: • Why do people write Post-It notes? • Do people write text? Graphics? Something else? • Who writes Post-It notes? Who reads them? • Where do people put Post-It notes? • Are they ever moved? When, how often and why? • Are they ever modified? When, how often and why? • Is there a typical life of a Post-It note? • How are they created? Modified? • Are there different types of Post-It notes? If so, what distinguishes them? • What aspects of an electronic Post-It note might be better than a paper version? • What aspects of paper may be lost when moving to an electronic version?
Functionality: You have two options. The first is to create an on-screen electronic Post-It note that meets needs of users that you discovered in your (or your colleagues’) field studies. The second is to move beyond the workstation and explore a radically new design, that merges the benefits of paper Post-It notes and the computer (augmented reality). In either case, you need to consider not only the basic functionality (creation, modification, movement, deletion) but also the context in which it will be used. The goal is to create a simple, light-weight interface that users can use immediately to address real-world user needs. To be successful, you will need
CHI 2000 Tutorial: Video Techniques for Participatory Design W.E. Mackay 22
to reflect upon what makes this particular artifact so useful and what aspects of a paper Post-It note should be shared by an electronic version.
Exercises: The following exercises have been chosen because they are very quick to learn and use and because they take advantage of the power of video.
Exercise 1 provides concrete information about what people actually do with Post-It notes. I have arranged for you to talk to people who work in this conference center. Begin by reading about the critical incident and other interview techniques in the description of the exercise. You have about 15 minutes to videotape how a particular user uses Post-It notes in his or her office, and their explanations of why they do what they do. Each group will then analyze the video, creating a user scenario and storyboard that captures both positive and negative examples of using paper Post-It notes.
Exercise 2 involves generating new ideas. You will brainstorm a series of new ideas for an electronic Post-It note and then use the video camera to illustrate how a user would interact with them.
Exercise 3 will integrate the two previous exercises. You will revise the use scenario, incorporating your new ideas into a design scenario that illustrates the electronic Post-It Note in use. Using paper (including actual Post-Its), transparencies, and video, you will envision what the new Post-It note will look like and how it will be used.
Exercise 4 will give each group feedback about their design ideas, based on a video design walkthrough. Depending upon the time remaining, one or more groups will make a final presentation to the whole class, and we will discuss what could be added to improve the video prototypes.
Project groups: The design project will require you to work in small groups, ideally with three or four people each and with mixed backgrounds. Each group will stay together throughout the day, following the exercises in turn to create a joint project.
Supplies: You should create your own prototyping and video supplies box at work, so you can set up brainstorming and prototyping sessions quickly, as the need arises. Today, you will work with the following materials:
• Flipchart stand with pad & different colored markers • Blank transparencies • Set of transparency pens • Pair of scissors • Scotch (cello) tape • Graph paper • Blank storyboard paper (A3 size) • Blank hi-8 videotape (60-90 minutes) • Assorted Post-It notes • Colored Sheets of A4 paper • Dry-erase slate and marker • Title cards • Storyboard forms
CHI 2000 Tutorial: Video Techniques for Participatory Design W.E. Mackay 23
Exercise 1: Observing users
Overview Observing people in the context of their daily work provides important insights into how people actually interact with real systems. A variety of different techniques are possible; this tutorial concentrates on three interviewing techniques that emphasize gathering specific, concrete examples of Post-It note use, as well as “fly-on-the-wall” observation.
Interviews can take a variety of forms, for a variety of purposes. When your goal is to understand how people perform their jobs, it is tempting to ask general questions, such as "Tell me about your job". The problem is that you are most likely to get general answers that describe how the job is "supposed" to be performed. People usually answer in the same style as the question posed: vague questions usually produce vague answers. The trick is how to get specific information; examples that illustrate important aspects of the work. The following techniques help the person being interviewed to think of concrete examples of things that have really occurred.
Critical Incident Technique: Critical incident technique emphasizes a specific, recent incident. Begin by asking the person to envision a particular incident that occurred within the past week. (In general, the more recent the better, since details are important.) The incident can be a situation that was frustrating, surprising, annoying or even funny. Ask the person to describe the incident, including what happened and why it was memorable. Ask for as many specific details as possible, then encourage the person reflect on why it was not typical. Usually, the person will give an example of a breakdown that occurred, followed by a description of the "normal" way things should work. If you are aware of other recent incidents that others have described to you, ask if they know of the incidents or if similar incidents have happened to them.
Recalling a specific Time: A variation of the critical incident technique involves asking the person to describe the events of a specific time and day, say, at 11:00 last Thursday. Even if nothing memorable occurred on that day, the person is likely to explain a 'typical' day; including a number of typical breakdowns. Often, people continue by describing other interesting examples and discuss other kinds of breakdowns that can occur during their work. In general, aim for specific details first, then ask for generalizations. Use this interview technique to contrast the "official" view of the work and with what actually happens.
Life cycle of a particular Post-It note: One of the most useful interviewing techniques when discussing Post-It notes (which do not often lend themselves to major disasters) is to simply ask the person to select an “interesting” Post-It note, usually visible somewhere on the desk, wall or computer screen, and ask for its life history. When did it arrive? Who wrote it and why? What has happened to it since? What is likely to happen to it next? By focusing on the specifics, you can also learn how typical or atypical this Post-It note is, and spark other discussions about related notes and the work practices that surround them.
CHI 2000 Tutorial: Video Techniques for Participatory Design W.E. Mackay 24
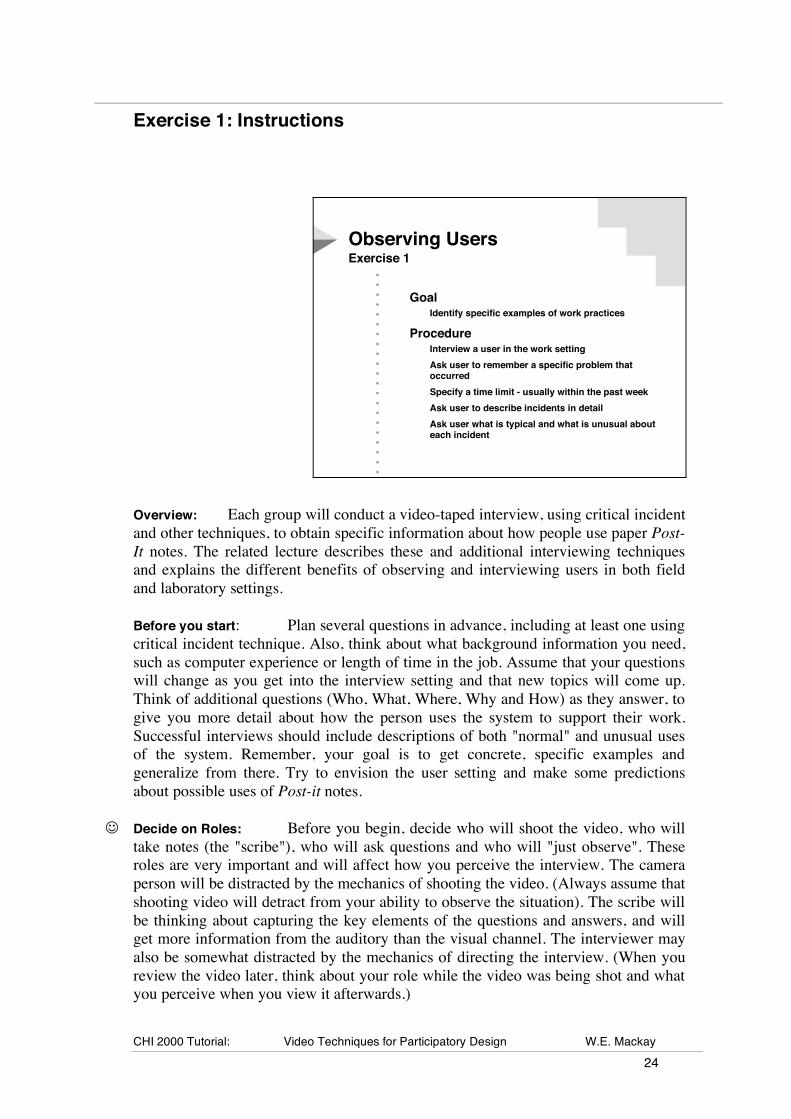
Exercise 1: Instructions
••••••••••••••••••••••
Observing UsersObserving UsersExercise 1Exercise 1
GoalIdentify specific examples of work practices
ProcedureInterview a user in the work setting
Ask user to remember a specific problem that
occurred
Specify a time limit - usually within the past week
Ask user to describe incidents in detail
Ask user what is typical and what is unusual about
each incident
GoalIdentify specific examples of work practices
ProcedureInterview a user in the work setting
Ask user to remember a specific problem that occurred
Specify a time limit - usually within the past week
Ask user to describe incidents in detail
Ask user what is typical and what is unusual about each incident
Overview: Each group will conduct a video-taped interview, using critical incident and other techniques, to obtain specific information about how people use paper Post-It notes. The related lecture describes these and additional interviewing techniques and explains the different benefits of observing and interviewing users in both field and laboratory settings.
Before you start: Plan several questions in advance, including at least one using critical incident technique. Also, think about what background information you need, such as computer experience or length of time in the job. Assume that your questions will change as you get into the interview setting and that new topics will come up. Think of additional questions (Who, What, Where, Why and How) as they answer, to give you more detail about how the person uses the system to support their work. Successful interviews should include descriptions of both "normal" and unusual uses of the system. Remember, your goal is to get concrete, specific examples and generalize from there. Try to envision the user setting and make some predictions about possible uses of Post-it notes.
Decide on Roles: Before you begin, decide who will shoot the video, who will take notes (the "scribe"), who will ask questions and who will "just observe". These roles are very important and will affect how you perceive the interview. The camera person will be distracted by the mechanics of shooting the video. (Always assume that shooting video will detract from your ability to observe the situation). The scribe will be thinking about capturing the key elements of the questions and answers, and will get more information from the auditory than the visual channel. The interviewer may also be somewhat distracted by the mechanics of directing the interview. (When you review the video later, think about your role while the video was being shot and what you perceive when you view it afterwards.)
CHI 2000 Tutorial: Video Techniques for Participatory Design W.E. Mackay 25
At the Interview: You will have 15 minutes to observer and/or interview someone about their use of Post-It notes. Begin by introducing yourselves and explain your purpose. For example: “We are taking a course on using video and are interested in real examples of how people use paper Post-It notes in their daily work. Would you mind if we spoke to you for a few minutes?”
Tell the person how long the interview is likely to last (10-15 minutes). Always ask if it is OK for you to videotape, even if the videotaping has been pre-arranged, and say what the video will be used for. Some people do not want you to videotape the content of their Post-Its. If you have an LCD screen, show them what your camera will see. In any case, explain that it is difficult or impossible to read what is written on the Post-Its. Also, you do not need video of the person, so it's best to let her talk while you shoot the Post-It notes and documents she is referring to.
Shooting: Set up the camera as explained in class. Label a new video cassette tape. You'll find room on the back of the tape to identify the participants of the group and any other information you think is relevant. Shoot at least 20 seconds of the title card before you arrive at the interview, with a voice-over giving the title, date and group number.
After you have explained what you are doing and have the user's consent, you can begin to videotape. Start with a wide-angle shot of the office area and (slowly!) zoom to the first Post-It begin described. Avoid using two functions at the same time (e.g. zooming and panning) and move slowly and steadily if you have to move. Use the pause button if you have to move from one part of the office to another. Try to shoot from behind the person, to the side, so you have the perspective of the person talking as they look at and point to their Post-It notes.
After the interview: Thank the person for their time. (This is obvious, but just in case...) Spend a few minutes after the interview reflecting upon what you heard and write down your overall impressions while they are still fresh. (This is for everyone, not just the scribe.)
The interviewer should identify which questions were actually used, how they changed and which new questions arose. The scribe should review his or her notes, then fill in any missing details. The observer should write notes and make observations that the others might have missed. The camera person must immediately set the red tab on the tape and label the tape case and tape (use the “original” stickers) with time, date, person interviewed, interviewing team, and setting. (See the “Video Tips” article for more details on videotaping interviews.)
Everyone should briefly review their predictions and try to identify what was interesting or surprising. How did the real setting contrast with your expectations?
Your group should select a video clip from your data that illustrates an innovative use of a Post-It note, an interesting problem or something that could be improved with the addition of the computer. Each group will be asked to show this clip to the rest of the tutorial during the discussion period.
CHI 2000 Tutorial: Video Techniques for Participatory Design W.E. Mackay 26
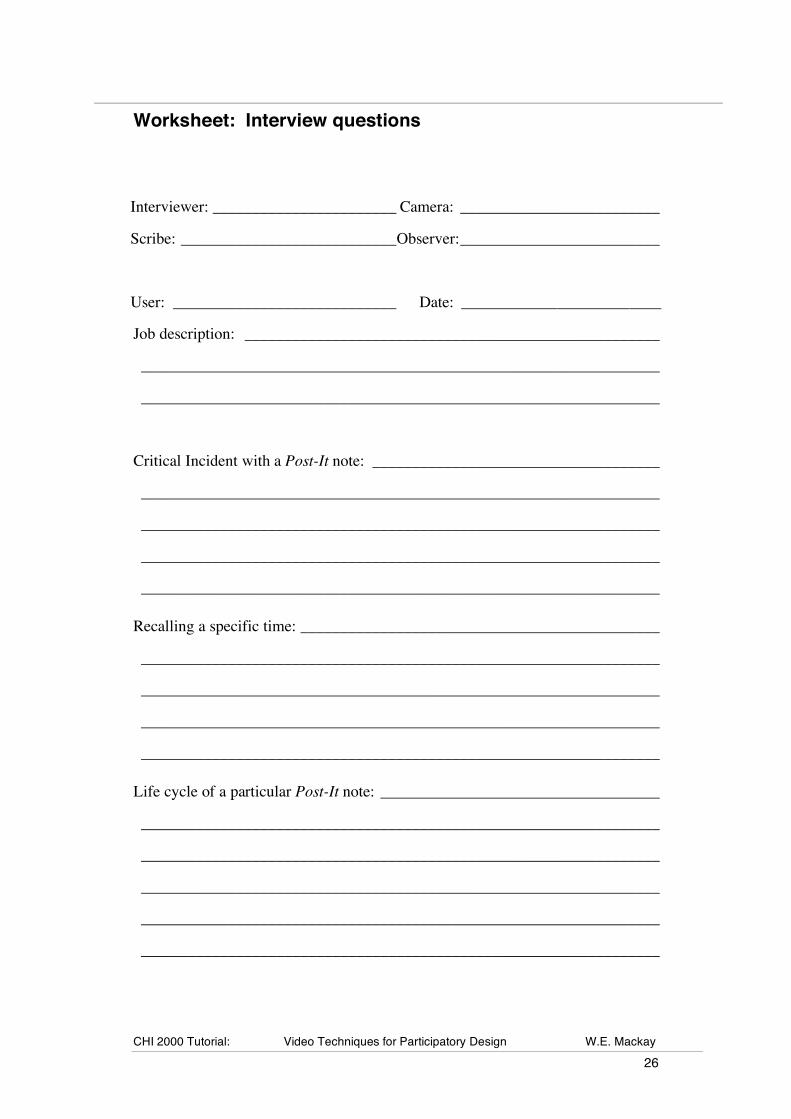
Worksheet: Interview questions
Interviewer: _______________________ Camera: _________________________
Scribe: ___________________________Observer:_________________________
User: ____________________________ Date: _________________________
Job description: ____________________________________________________
_________________________________________________________________
_________________________________________________________________
Critical Incident with a Post-It note: ____________________________________
_________________________________________________________________
_________________________________________________________________
_________________________________________________________________
_________________________________________________________________
Recalling a specific time: _____________________________________________
_________________________________________________________________
_________________________________________________________________
_________________________________________________________________
_________________________________________________________________
Life cycle of a particular Post-It note: ___________________________________
_________________________________________________________________
_________________________________________________________________
_________________________________________________________________
_________________________________________________________________
_________________________________________________________________
CHI 2000 Tutorial: Video Techniques for Participatory Design W.E. Mackay 27
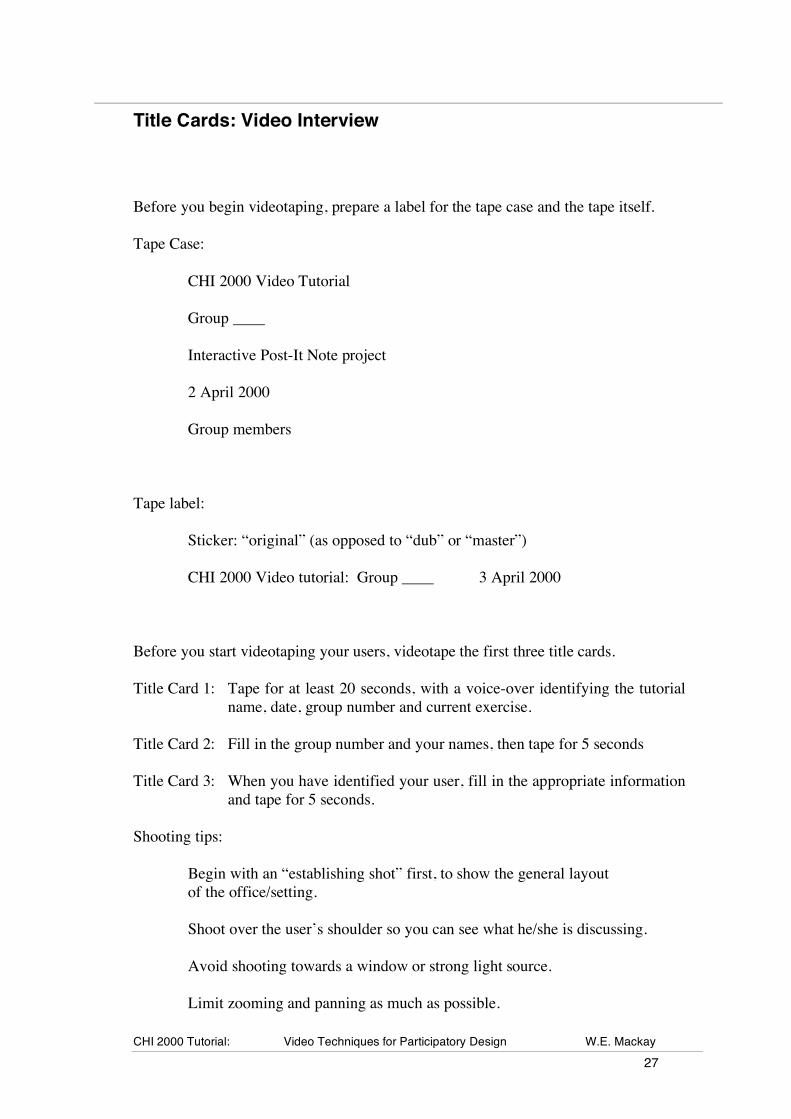
Title Cards: Video Interview
Before you begin videotaping, prepare a label for the tape case and the tape itself.
Tape Case:
CHI 2000 Video Tutorial
Group ____
Interactive Post-It Note project
2 April 2000
Group members
Tape label:
Sticker: “original” (as opposed to “dub” or “master”)
CHI 2000 Video tutorial: Group ____ 3 April 2000
Before you start videotaping your users, videotape the first three title cards.
Title Card 1: Tape for at least 20 seconds, with a voice-over identifying the tutorial name, date, group number and current exercise.
Title Card 2: Fill in the group number and your names, then tape for 5 seconds
Title Card 3: When you have identified your user, fill in the appropriate information and tape for 5 seconds.
Shooting tips:
Begin with an “establishing shot” first, to show the general layout of the office/setting.
Shoot over the user’s shoulder so you can see what he/she is discussing.
Avoid shooting towards a window or strong light source.
Limit zooming and panning as much as possible.
CHI 2000 Tutorial: Video Techniques for Participatory Design W.E. Mackay 28
. Vid
eo T
echniq
ues
Tuto
rial
CH
I20
00
3 A
pri
l 2
00
0
CHI 2000 Tutorial: Video Techniques for Participatory Design W.E. Mackay 29
...
Group:
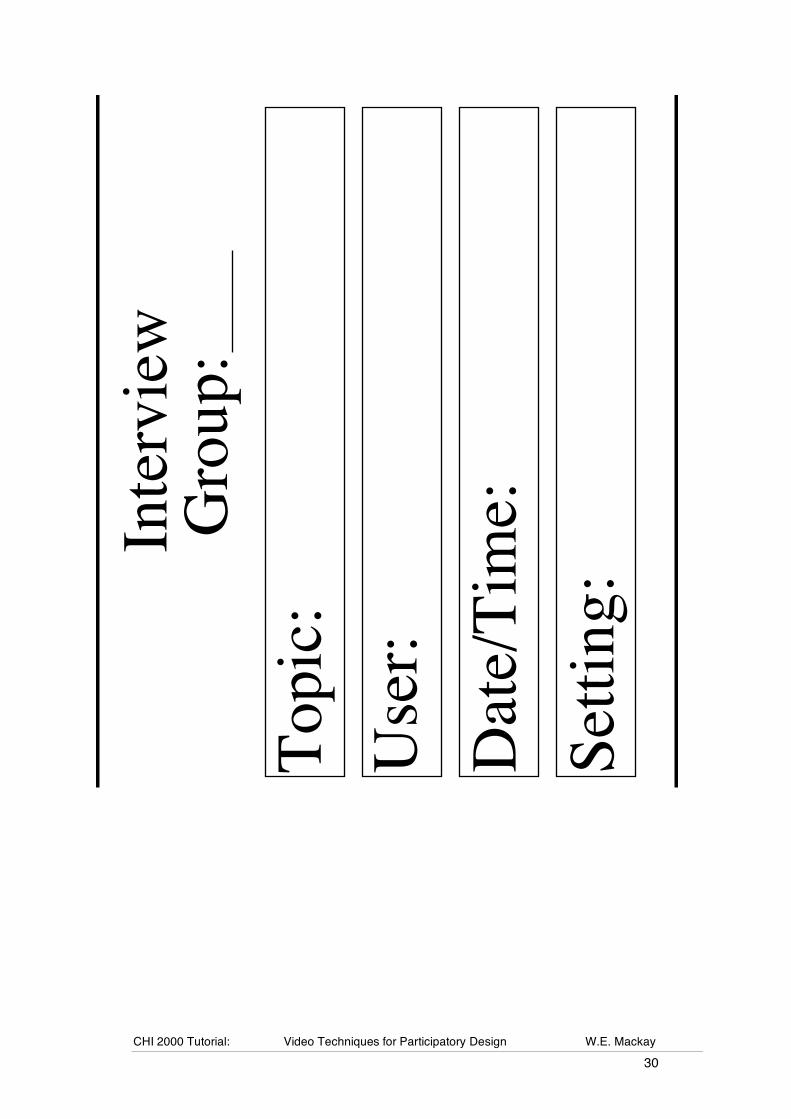
CHI 2000 Tutorial: Video Techniques for Participatory Design W.E. Mackay 30
...
Group:
Interview
Topic:
User:
Date/Time:
Setting:
CHI 2000 Tutorial: Video Techniques for Participatory Design W.E. Mackay 31
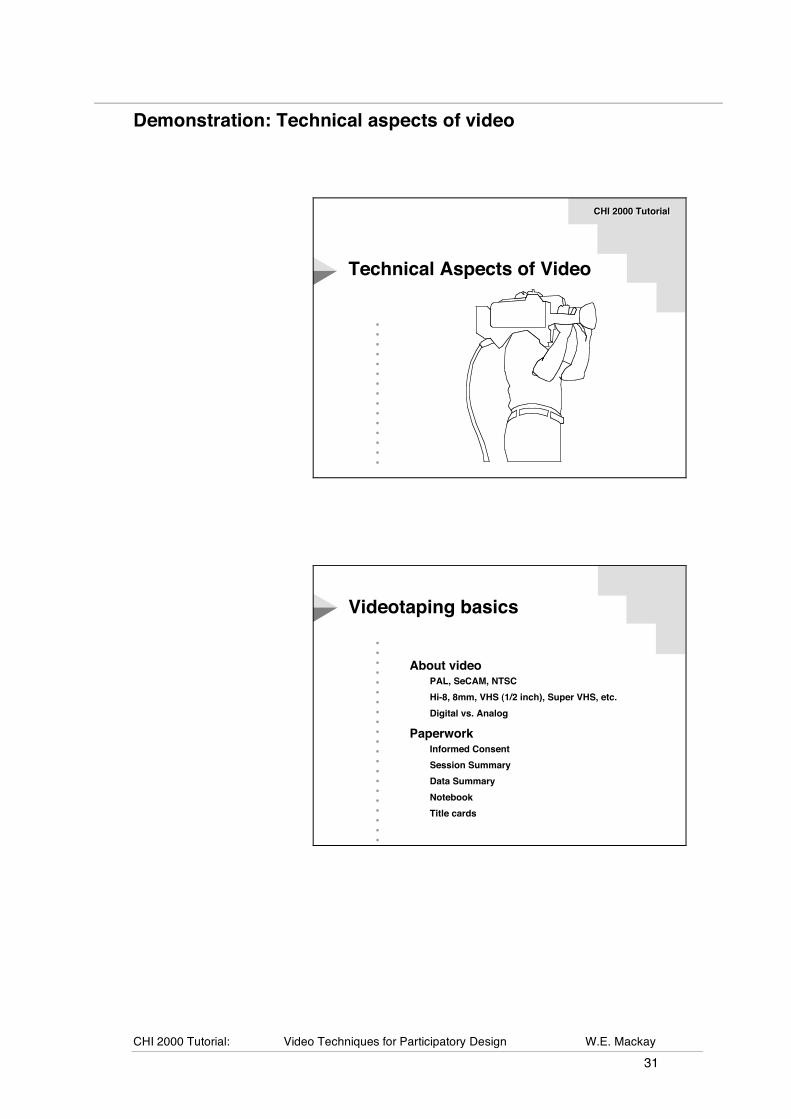
Demonstration: Technical aspects of video
•••••••••••••••
Technical Aspects of VideoTechnical Aspects of Video
CHI 2000 TutorialCHI 2000 Tutorial
••••••••••••••••••••••
Videotaping basicsVideotaping basics
About videoPAL, SeCAM, NTSC
Hi-8, 8mm, VHS (1/2 inch), Super VHS, etc.
Digital vs. Analog
PaperworkInformed Consent
Session Summary
Data Summary
Notebook
Title cards
About videoPAL, SeCAM, NTSC
Hi-8, 8mm, VHS (1/2 inch), Super VHS, etc.
Digital vs. Analog
PaperworkInformed Consent
Session Summary
Data Summary
Notebook
Title cards
CHI 2000 Tutorial: Video Techniques for Participatory Design W.E. Mackay 32
••••••••••••••••••••••
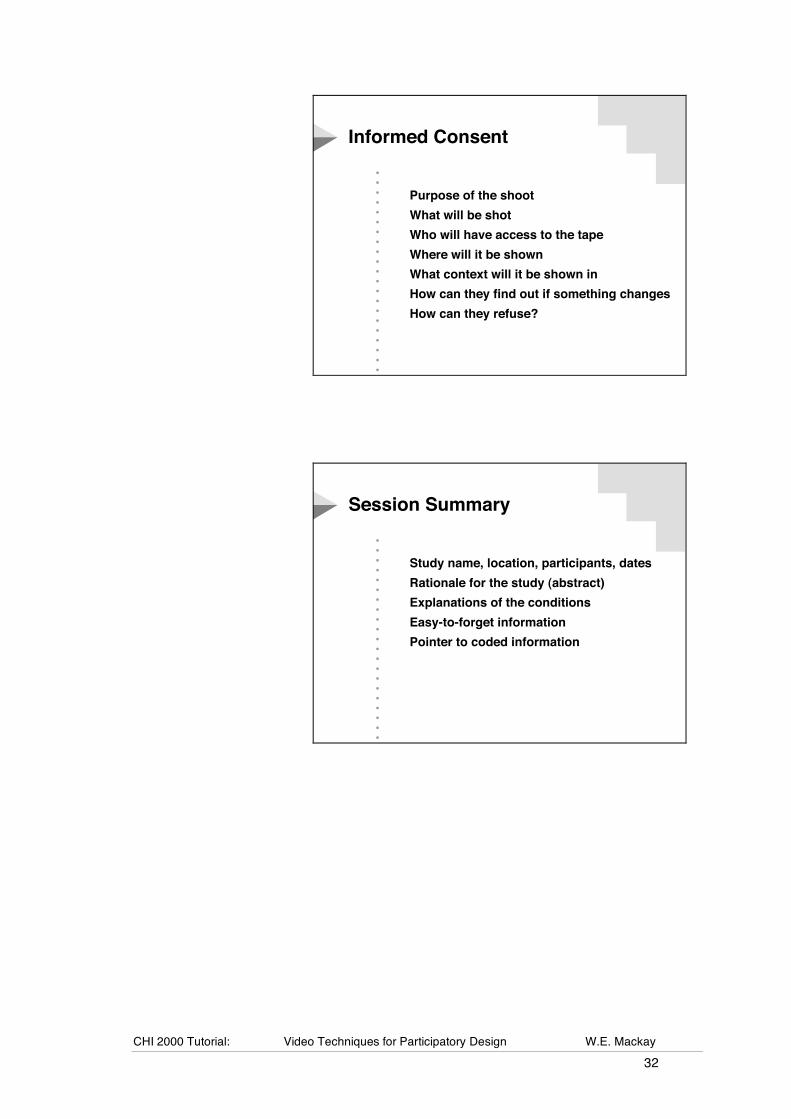
Informed ConsentInformed Consent
Purpose of the shoot
What will be shot
Who will have access to the tape
Where will it be shown
What context will it be shown in
How can they find out if something changes
How can they refuse?
Purpose of the shoot
What will be shot
Who will have access to the tape
Where will it be shown
What context will it be shown in
How can they find out if something changes
How can they refuse?
••••••••••••••••••••••
Session SummarySession Summary
Study name, location, participants, dates
Rationale for the study (abstract)
Explanations of the conditions
Easy-to-forget information
Pointer to coded information
Study name, location, participants, dates
Rationale for the study (abstract)
Explanations of the conditions
Easy-to-forget information
Pointer to coded information
CHI 2000 Tutorial: Video Techniques for Participatory Design W.E. Mackay 33
••••••••••••••••••••••
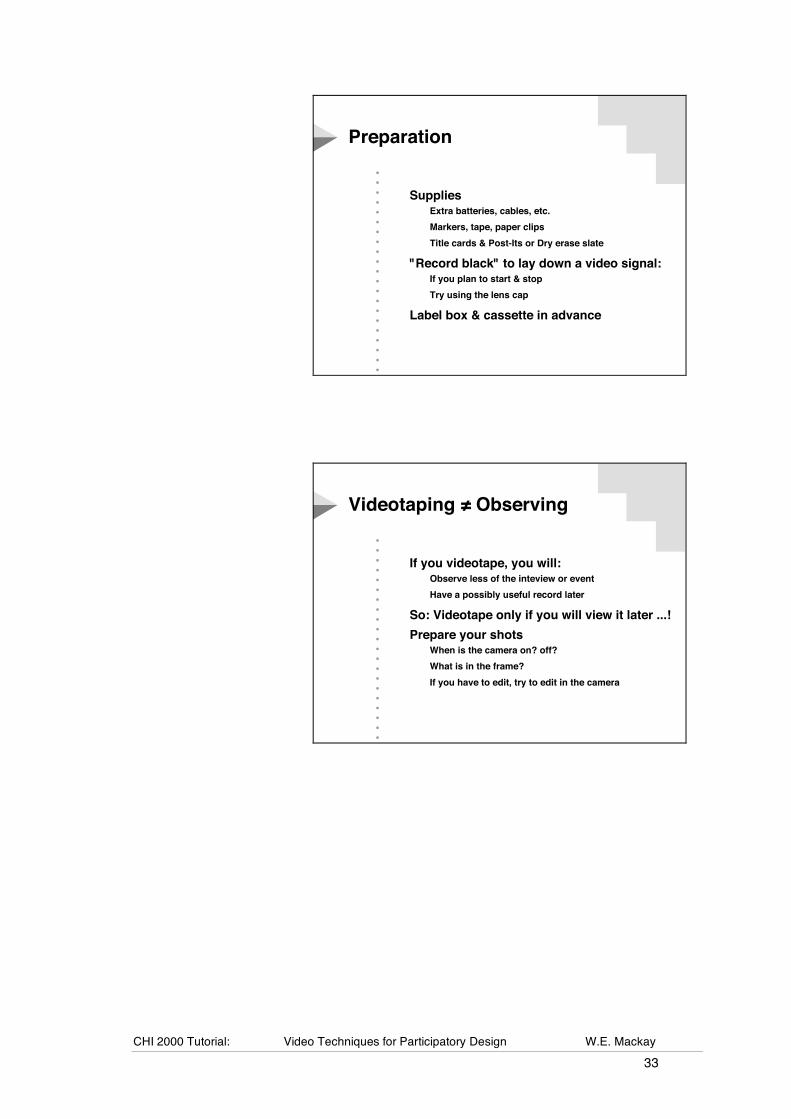
PreparationPreparation
SuppliesExtra batteries, cables, etc.
Markers, tape, paper clips
Title cards & Post-Its or Dry erase slate
"Record black" to lay down a video signal:If you plan to start & stop
Try using the lens cap
Label box & cassette in advance
SuppliesExtra batteries, cables, etc.
Markers, tape, paper clips
Title cards & Post-Its or Dry erase slate
"Record black" to lay down a video signal:If you plan to start & stop
Try using the lens cap
Label box & cassette in advance
••••••••••••••••••••••
Videotaping ! ObservingVideotaping ! Observing
If you videotape, you will:Observe less of the inteview or event
Have a possibly useful record later
So: Videotape only if you will view it later ...!
Prepare your shotsWhen is the camera on? off?
What is in the frame?
If you have to edit, try to edit in the camera
If you videotape, you will:Observe less of the inteview or event
Have a possibly useful record later
So: Videotape only if you will view it later ...!
Prepare your shotsWhen is the camera on? off?
What is in the frame?
If you have to edit, try to edit in the camera

CHI 2000 Tutorial: Video Techniques for Participatory Design W.E. Mackay 34
••••••••••••••••••••••
Observing usersObserving users
Usability studyTry to log the software and videotape the user
Often shooting off the monitor
"Steady shot" off reduces screen lines
Use a Tripod, fixed view or multiple cameras
One-way mirror? Special room?
Laboratory studyFocus on experiment, not user
Usability studyTry to log the software and videotape the user
Often shooting off the monitor
"Steady shot" off reduces screen lines
Use a Tripod, fixed view or multiple cameras
One-way mirror? Special room?
Laboratory studyFocus on experiment, not user
••••••••••••••••••••••
Observing usersObserving users
Field settings"Stationery"! (e.g. office)
Tripod or hand-held
Pre-determine views, easy zoom
"Walking"! (e.g. plant, factory)
Hand-held, monopod
Edit in camera
Field settings"Stationery"! (e.g. office)
Tripod or hand-held
Pre-determine views, easy zoom
"Walking"! (e.g. plant, factory)
Hand-held, monopod
Edit in camera

CHI 2000 Tutorial: Video Techniques for Participatory Design W.E. Mackay 35
••••••••••••••••••••••
Setting up field shotsSetting up field shots
Camera positionTripod, Monopod
Decide on framing
Camera settingsWhite balance
Time & date
Steady shot
Digital zoom
ShootingPre-roll 15 seconds
Use title cards / colors
Camera positionTripod, Monopod
Decide on framing
Camera settingsWhite balance
Time & date
Steady shot
Digital zoom
ShootingPre-roll 15 seconds
Use title cards / colors
••••••••••••••••••••••
Setting up field shotsSetting up field shots
After the sessionRecord relevant information on data sheet
Rewind the cassette
Set the red tab on the cassette!
Debrief subjects
After the sessionRecord relevant information on data sheet
Rewind the cassette
Set the red tab on the cassette!
Debrief subjects
CHI 2000 Tutorial: Video Techniques for Participatory Design W.E. Mackay 36
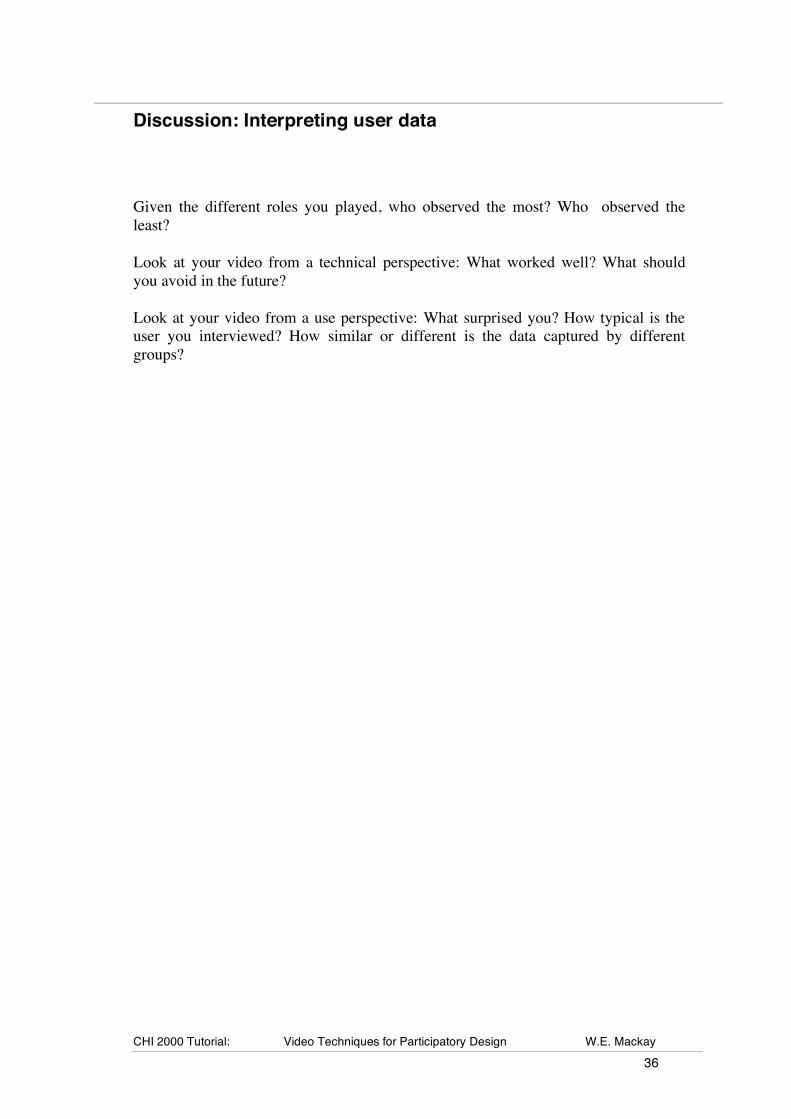
Discussion: Interpreting user data
Given the different roles you played, who observed the most? Who observed the least?
Look at your video from a technical perspective: What worked well? What should you avoid in the future?
Look at your video from a use perspective: What surprised you? How typical is the user you interviewed? How similar or different is the data captured by different groups?
CHI 2000 Tutorial: Video Techniques for Participatory Design W.E. Mackay 37
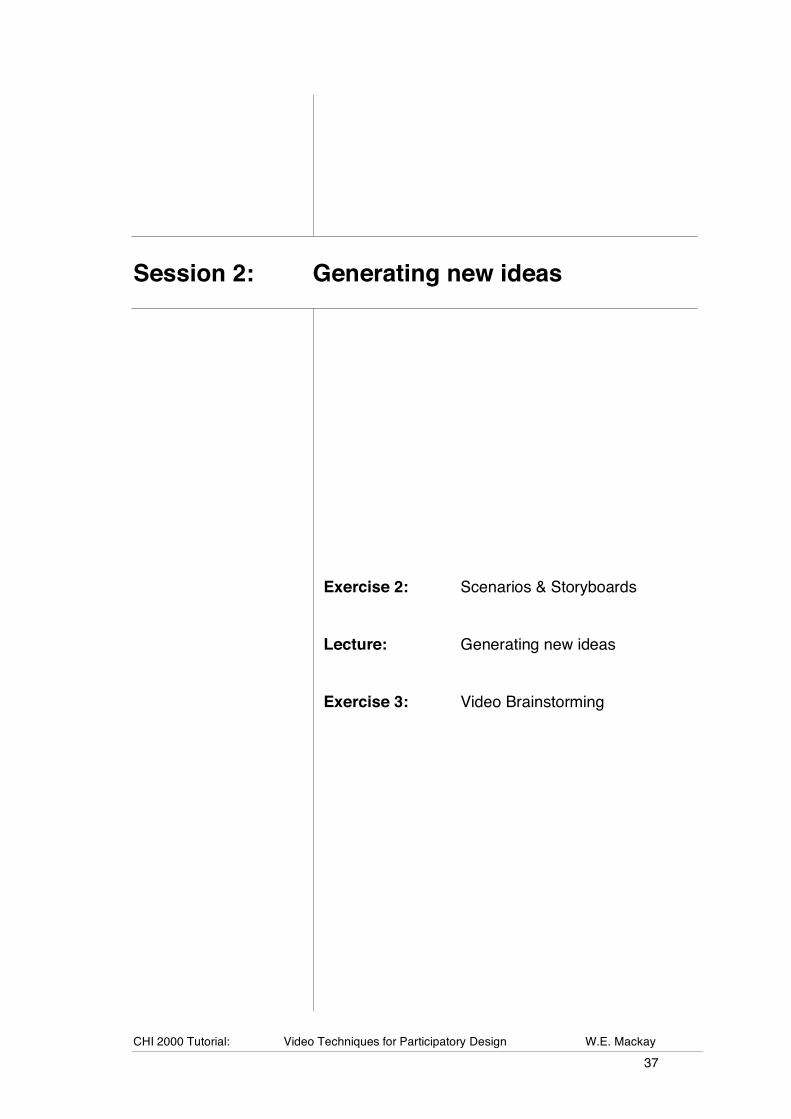
Session 2: Generating new ideas
Exercise 2: Scenarios & Storyboards Lecture: Generating new ideas Exercise 3: Video Brainstorming

CHI 2000 Tutorial: Video Techniques for Participatory Design W.E. Mackay 38
CHI 2000 Tutorial: Video Techniques for Participatory Design W.E. Mackay 39
Generating new ideas
Much of human-computer interaction concentrates on how to critique existing designs. What is more difficult is figuring out how to generate good new designs, especially designs that are grounded in the real-world needs of the users. Techniques such as brainstorming are designed to expand the design space and encourage you to consider new options and new directions. They also help to determine and redefine the problem, rather than simply solving the first problem that appears.
The purpose of this session is to explore the design space and generate as many new ideas as possible, in a form that is concretely and directly relevant to the design project. Session 2 activities include:
Exercise 2: Scenarios & storyboards Based on the video and notes taken during the interviews, each group will create a use scenario that describes both typical and unusual uses of Post-it notes in a real-world setting. The scenario will then be developed into a storyboard that illustrates the use scenario.
Lecture: Generating new ideas Explains different approaches for collaboratively generating ideas with users and the importance of avoiding too-early evaluation of ideas. Discusses the roles of users and researchers and how brainstorming can be used to improve communication.
Exercise 3: Generating design ideas Based on the interviews and observations in exercise 1, each group will brainstorm ideas for an electronic Post-it note system, demonstrating interaction ideas in front of the video camera.
CHI 2000 Tutorial: Video Techniques for Participatory Design W.E. Mackay 40
Exercise 2: Scenarios & Storyboards
Scenarios describe a sequence of events, illustrating the activities of one or more people engaged in an activity. The goals are to be as realistic as possible, as detailed as possible, and at the same time, as concise as possible. Since this is difficult to do quickly, it is best to cover only a limited period of time in the scenario. Unlike a task analysis, we are not interested in an idealized description of discrete tasks, nor should the activities be separated into "functions" that can be later be supported by technology. Instead, the goal is to provide a very specific description of what happens, including when interruptions and breakdowns occur. In real product development (and also in research settings), it is essential that people who actually perform these tasks are involved in the discussion: they are the only ones who can provide realistic details about how the work actually proceeds. Real-world use scenarios are the basis for design scenarios for creating new technology. The following example is derived from interviews with a secretary. The names and details of the setting have been changed, but the basic events are real. Example
Mary is a secretary working for a large computer firm. She is responsible for supporting the manager of the marketing department as well as his staff (8 people). It is 9:15 on Tuesday morning and she is reading her electronic mail. Several of the groups that she works with regularly have been moved into a new building across town and they have all changed their telephone numbers. She finds a message from Anne, one of her colleagues and notes the new phone number. She crosses out the old number on a Post-It note attached to her monitor and writes in the new phone number. As she is doing this, the phone rings. One of the marketing reps, John is on the road and asks her to fax him some market data. He gives her the file name and his current fax number at the hotel. Mary notes this on another Post-It and places it on her phone so she won't forget it. She returns to her email and finds a message she sent herself about a document she needs to edit and return the following week. She saves the file and puts a Post-It note in her calendar that indicates the due date and the file to edit.
Mary gets up to go to the copier to make copies of a presentation her boss is giving later in the day. On her way, she runs into another marketing rep, Joe, who asks her if the expenses have been filed for his last trip. Mary promises to check and borrows a Post-It note from another secretary she knows, June, whose office is next to the copier. She makes a note to remember the expenses, sticks it on the copies of slides she has printed and returns to her desk. When she arrives, she sees that the receptionist has called to say that a package has arrived. She takes off the Post-It reminding her of the expenses and places it on the filing cabinet that contains the expenses. She then puts a Post-It note on the copies of the slides for her boss reminding him that the presentation is at 15:00. She goes down to reception. The person who called is away on a break, but the other receptionist hands her the package, which has a Post-It note on it saying that Mary has been called and will pick it up shortly.

CHI 2000 Tutorial: Video Techniques for Participatory Design W.E. Mackay 41
Storyboards: Today, most artists and designers who work with temporal information, including cinematographers, video producers, animators, and multimedia producers, "sketch" their ideas with storyboards, proving a spatial representation of (usually) linear, temporal information. Storyboards outline the action and capture the key elements of the story. Like a comic book, the storyboard shows a sequence of rough sketches of each action or event, with accompanying dialog (or subtitles) and related annotations (e.g., notes about what is happening in the scene, the type of shot, e.g., pan or zoom, and the type of edit).
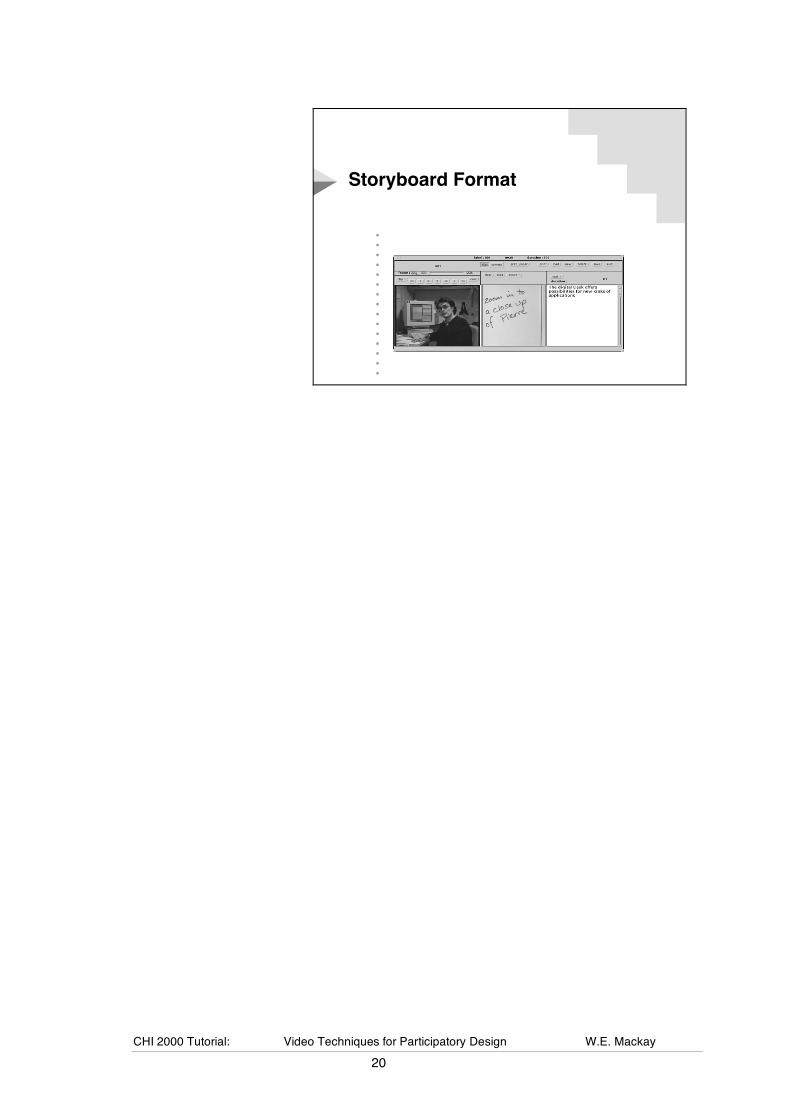
Storyboards help designers refine their ideas, generate 'what if' scenarios for different approaches to a story, and communicate with the other people who are involved in creating the production (e.g. camera, sound and actors or 'talent'). Some storyboards are very informal "sketches" of ideas. They include partial information and are generally created before any video has been shot. The figure below shows a hand-written section of a storyboard used to develop a video of a system called the Digital Desk.
Other storyboards follow a pre-defined format and are used to direct the production and editing of the final material. Storyboards make it easy to jot down notes and get a quick overview of a lengthy visual presentation. If the elements of the storyboard are placed on separate cards, the designer can easily experiment with different linear sequences and insert or delete video clips with ease. You can provide a quick overview of what a presentation will look like if you videotape the sketches in your storyboard, with a voice-over explaining the intended action in each clip.

CHI 2000 Tutorial: Video Techniques for Participatory Design W.E. Mackay 42
Example: The illustrations in this storyboard focus on the placement of the paper Post-It notes and their relationship to the story.
Close-up of Post-It already on monitor; show hand crossing out old number and writing new one.
9:15 Tuesday
Mary is reading email. She writes the new phone number of a colleague who has just moved onto a Post-It note already on her monitor .
Show Mary with the phone to her ear, writing the Post-It; hanging up and sticking it on the phone.
9:22
A marketing rep calls and asks her to fax him market data at his hotel. She makes a Post-It note with the file name and fax number and puts it on her phone.
Show Mary borrowing a Post-It from someone's desk, writing and sticking it on her stack of papers.
9:37
Mary borrows a Post-It note from a friend near the copier. She writes "Track down Joe's expenses." She puts it on the stack of copies.
Show Mary removing the Post-It from the pile of papers and sticking it on the filing cabinet.
9:44
Mary places the Post-It note about Joe's expenses on the filing cabinet containing expenses.
Show Mary writing a Post-It and placing it on the top of a stack of transparencies.
9:45
Mary places a Post-It note on the slides she made, reminding him that his presentation is at 3 pm this afternoon.
Show Mary being handed the package.
9:55
Mary retrieves the package with the Post-It with her name on it.
CHI 2000 Tutorial: Video Techniques for Participatory Design W.E. Mackay 43
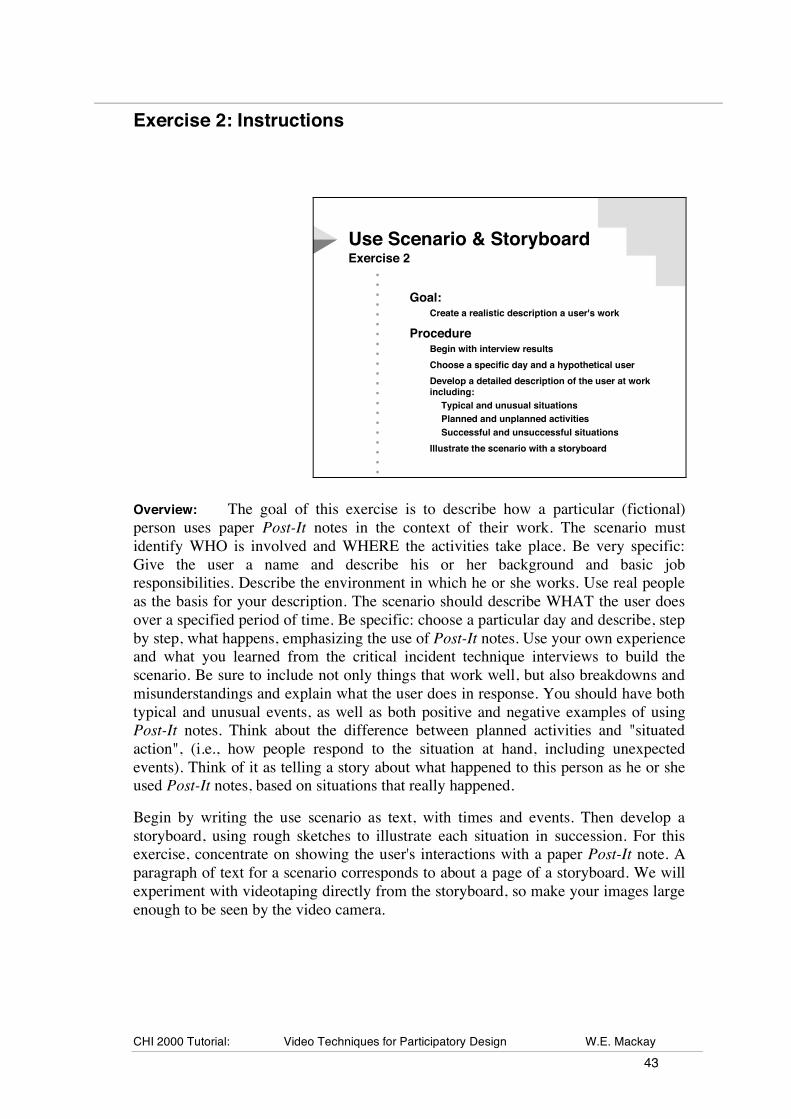
Exercise 2: Instructions
••••••••••••••••••••••
Use Scenario & StoryboardUse Scenario & StoryboardExercise 2Exercise 2
Goal:Create a realistic description a user's work
ProcedureBegin with interview results
Choose a specific day and a hypothetical user
Develop a detailed description of the user at work
including:
Typical and unusual situations
Planned and unplanned activities
Successful and unsuccessful situations
Illustrate the scenario with a storyboard
Goal:Create a realistic description a user's work
ProcedureBegin with interview results
Choose a specific day and a hypothetical user
Develop a detailed description of the user at work including:
Typical and unusual situations
Planned and unplanned activities
Successful and unsuccessful situations
Illustrate the scenario with a storyboard
Overview: The goal of this exercise is to describe how a particular (fictional) person uses paper Post-It notes in the context of their work. The scenario must identify WHO is involved and WHERE the activities take place. Be very specific: Give the user a name and describe his or her background and basic job responsibilities. Describe the environment in which he or she works. Use real people as the basis for your description. The scenario should describe WHAT the user does over a specified period of time. Be specific: choose a particular day and describe, step by step, what happens, emphasizing the use of Post-It notes. Use your own experience and what you learned from the critical incident technique interviews to build the scenario. Be sure to include not only things that work well, but also breakdowns and misunderstandings and explain what the user does in response. You should have both typical and unusual events, as well as both positive and negative examples of using Post-It notes. Think about the difference between planned activities and "situated action", (i.e., how people respond to the situation at hand, including unexpected events). Think of it as telling a story about what happened to this person as he or she used Post-It notes, based on situations that really happened.
Begin by writing the use scenario as text, with times and events. Then develop a storyboard, using rough sketches to illustrate each situation in succession. For this exercise, concentrate on showing the user's interactions with a paper Post-It note. A paragraph of text for a scenario corresponds to about a page of a storyboard. We will experiment with videotaping directly from the storyboard, so make your images large enough to be seen by the video camera.
CHI 2000 Tutorial: Video Techniques for Participatory Design W.E. Mackay 44
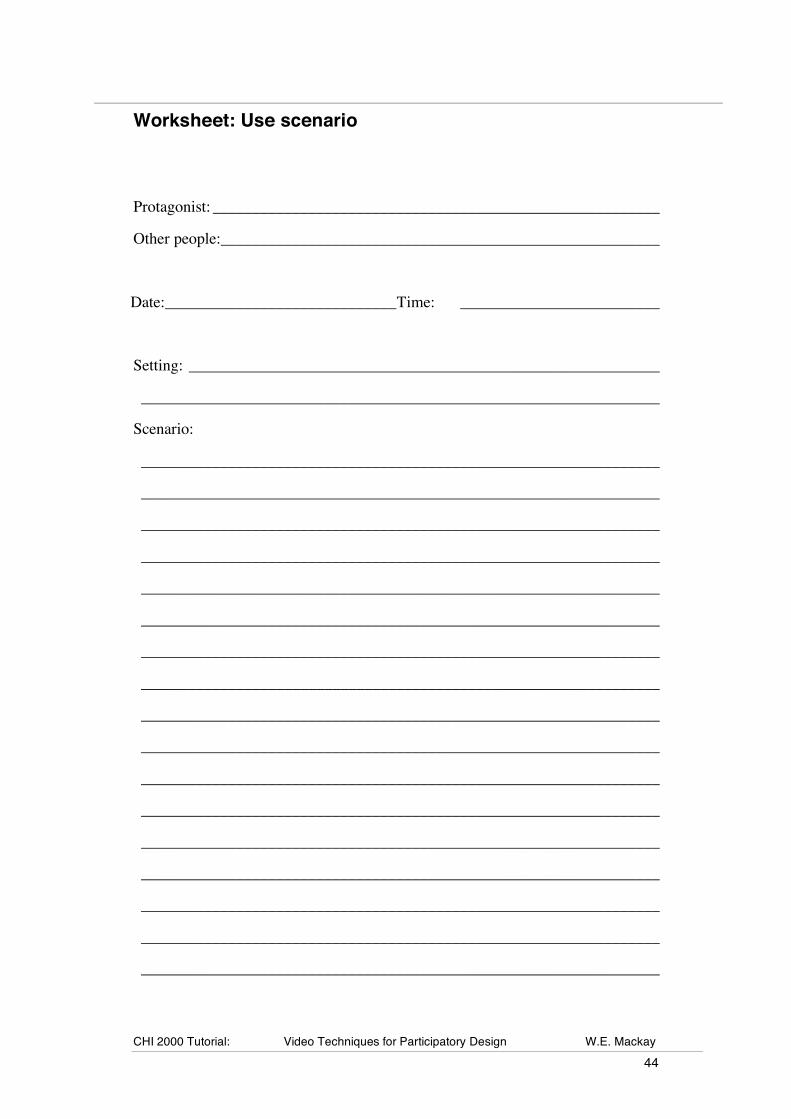
Worksheet: Use scenario
Protagonist: ________________________________________________________
Other people:_______________________________________________________
Date:_____________________________Time: _________________________
Setting: ___________________________________________________________
_________________________________________________________________
Scenario:
_________________________________________________________________
_________________________________________________________________
_________________________________________________________________
_________________________________________________________________
_________________________________________________________________
_________________________________________________________________
_________________________________________________________________
_________________________________________________________________
_________________________________________________________________
_________________________________________________________________
_________________________________________________________________
_________________________________________________________________
_________________________________________________________________
_________________________________________________________________
_________________________________________________________________
_________________________________________________________________
_________________________________________________________________
CHI 2000 Tutorial: Video Techniques for Participatory Design W.E. Mackay 45
Worksheet: Storyboard
User: Setting:
1
2
3
CHI 2000 Tutorial: Video Techniques for Participatory Design W.E. Mackay 46
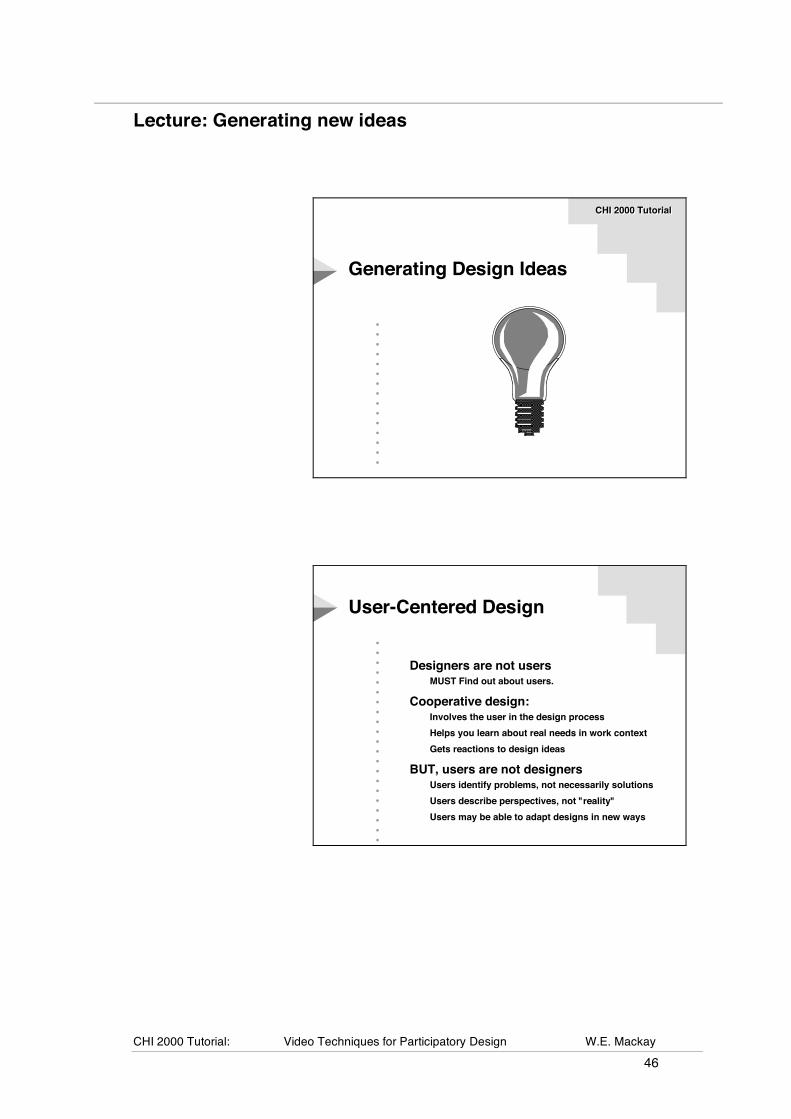
Lecture: Generating new ideas
•••••••••••••••
Generating Design IdeasGenerating Design Ideas
CHI 2000 TutorialCHI 2000 Tutorial
••••••••••••••••••••••
User-Centered DesignUser-Centered Design
Designers are not usersMUST Find out about users.
Cooperative design:Involves the user in the design process
Helps you learn about real needs in work context
Gets reactions to design ideas
BUT, users are not designersUsers identify problems, not necessarily solutions
Users describe perspectives, not "reality"
Users may be able to adapt designs in new ways
CHI 2000 Tutorial: Video Techniques for Participatory Design W.E. Mackay 47
••••••••••••••••••••••
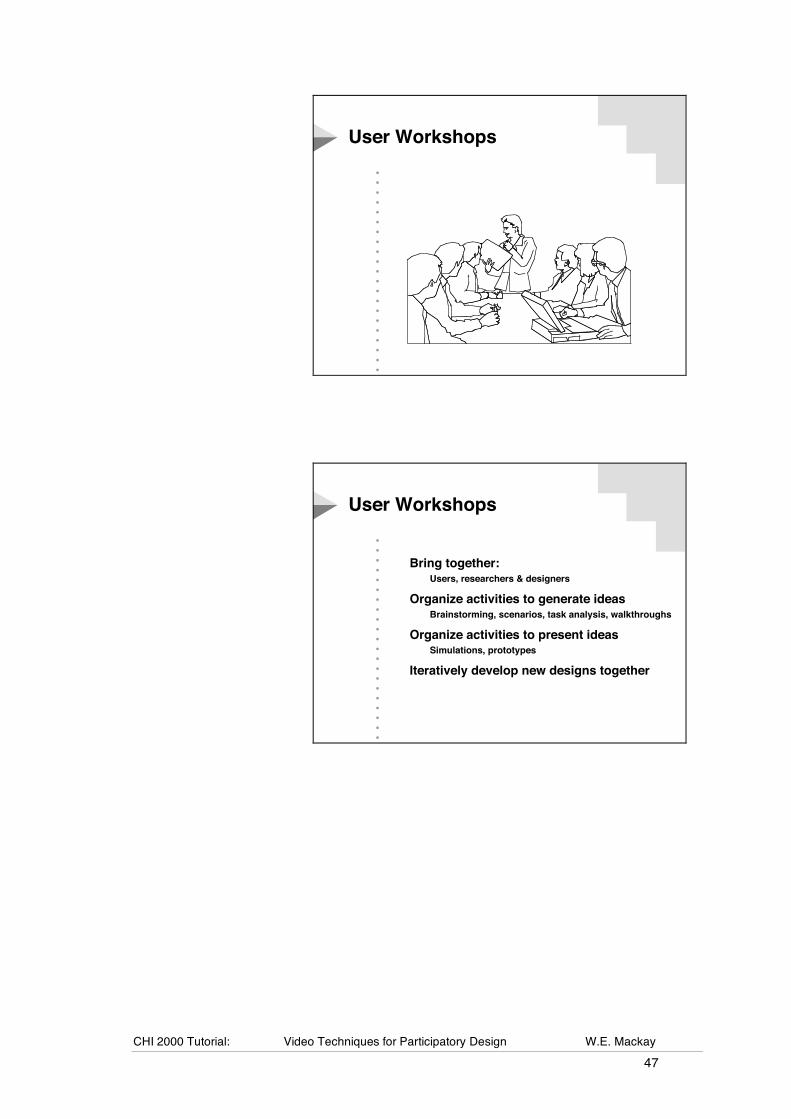
User WorkshopsUser Workshops
••••••••••••••••••••••
User WorkshopsUser Workshops
Bring together:Users, researchers & designers
Organize activities to generate ideasBrainstorming, scenarios, task analysis, walkthroughs
Organize activities to present ideasSimulations, prototypes
Iteratively develop new designs together
Bring together:Users, researchers & designers
Organize activities to generate ideasBrainstorming, scenarios, task analysis, walkthroughs
Organize activities to present ideasSimulations, prototypes
Iteratively develop new designs together
CHI 2000 Tutorial: Video Techniques for Participatory Design W.E. Mackay 48
••••••••••••••••••••••
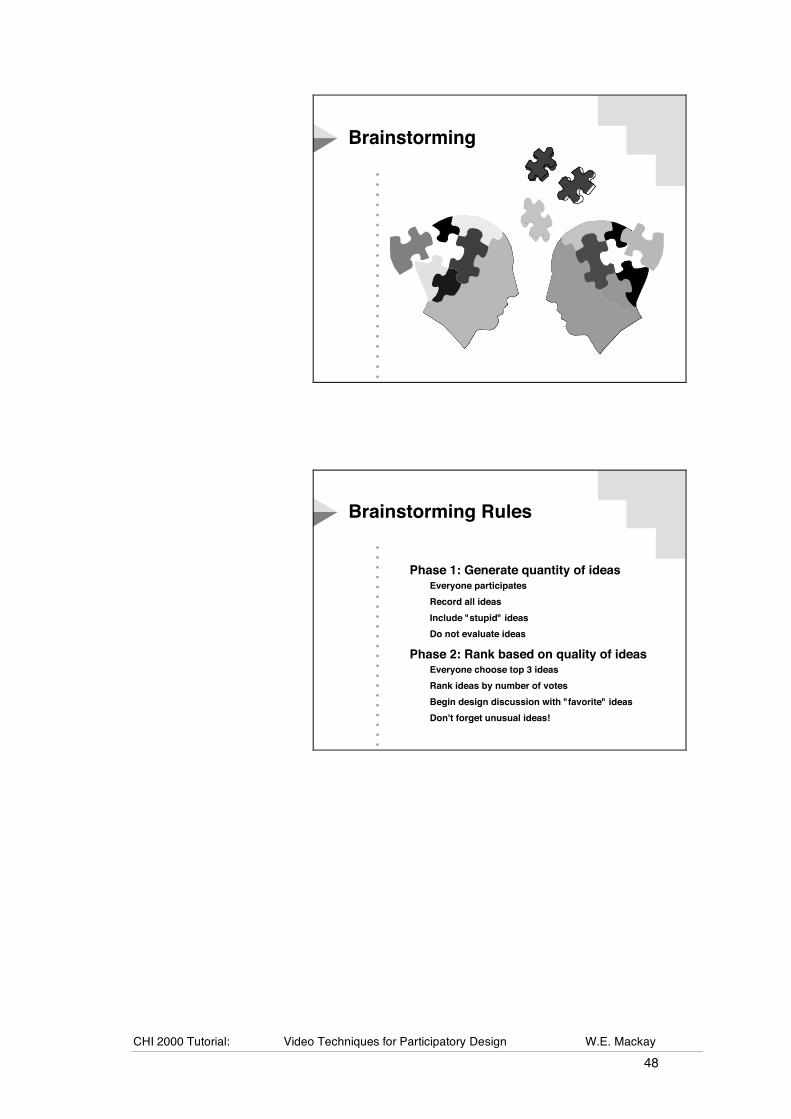
BrainstormingBrainstorming
••••••••••••••••••••••
Brainstorming RulesBrainstorming Rules
Phase 1: Generate quantity of ideasEveryone participates
Record all ideas
Include "stupid" ideas
Do not evaluate ideas
Phase 2: Rank based on quality of ideasEveryone choose top 3 ideas
Rank ideas by number of votes
Begin design discussion with "favorite" ideas
Don't forget unusual ideas!
Phase 1: Generate quantity of ideasEveryone participates
Record all ideas
Include "stupid" ideas
Do not evaluate ideas
Phase 2: Rank based on quality of ideasEveryone choose top 3 ideas
Rank ideas by number of votes
Begin design discussion with "favorite" ideas
Don't forget unusual ideas!
CHI 2000 Tutorial: Video Techniques for Participatory Design W.E. Mackay 49
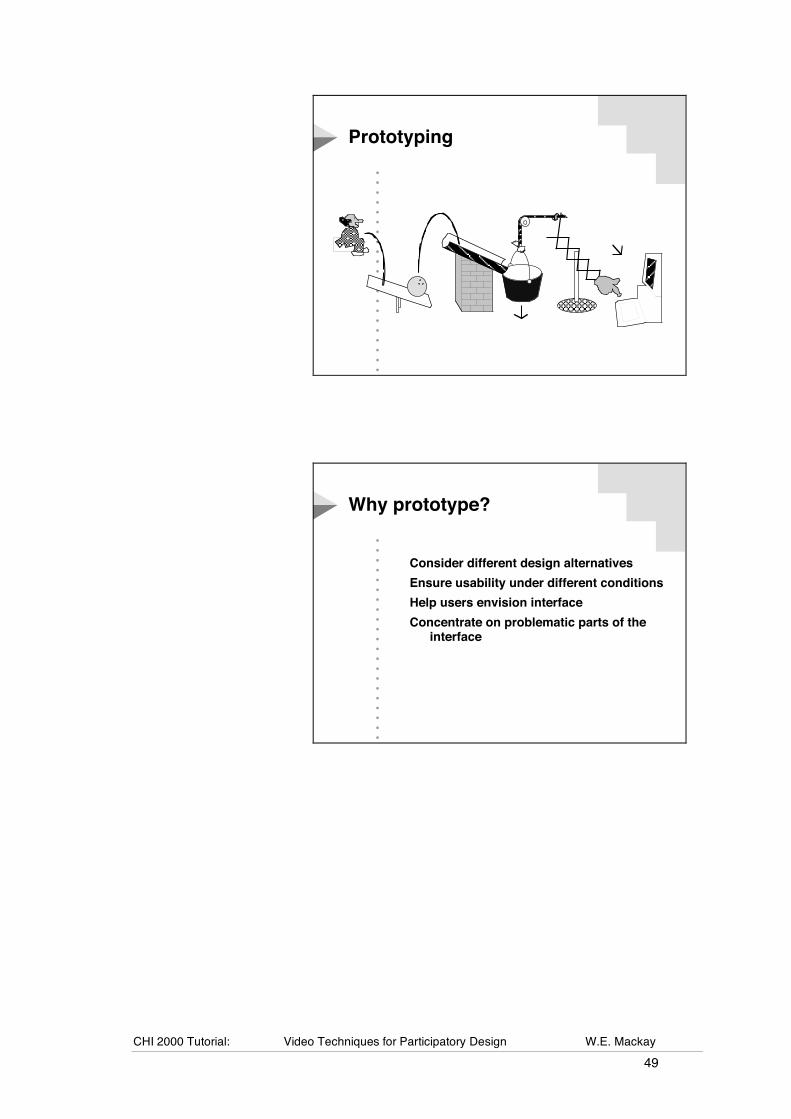
••••••••••••••••••••••
PrototypingPrototyping
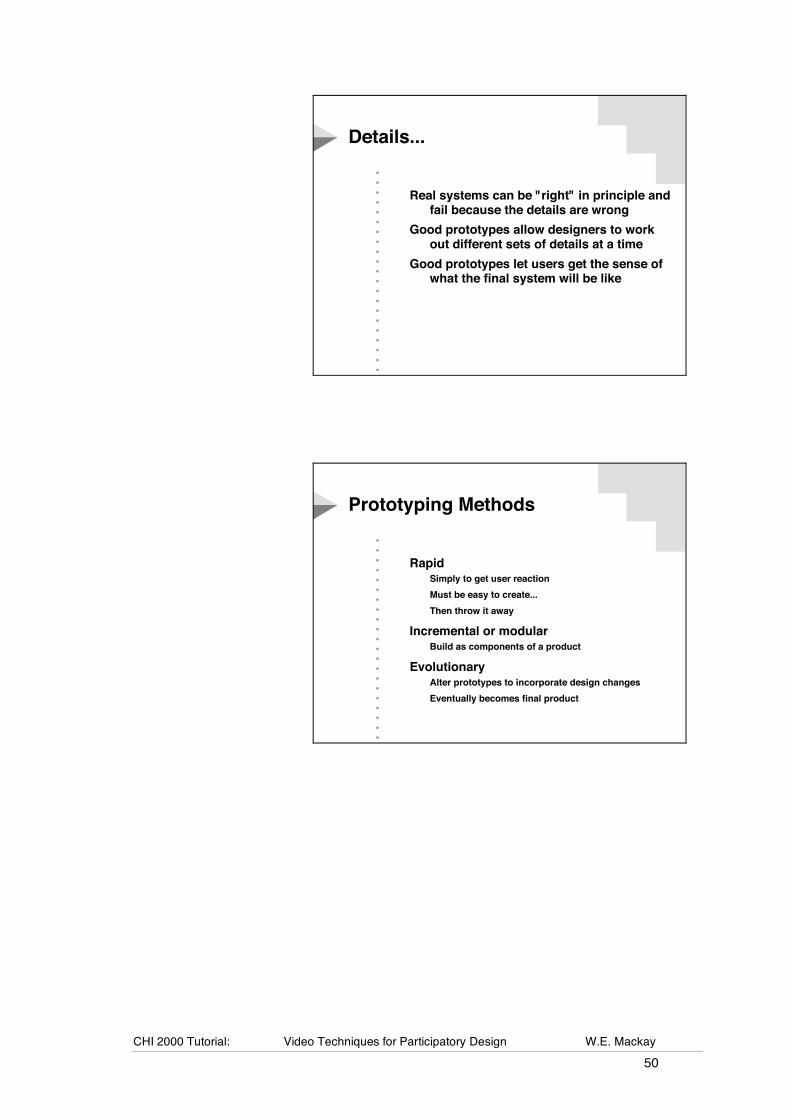
••••••••••••••••••••••
Why prototype?Why prototype?
Consider different design alternatives
Ensure usability under different conditions
Help users envision interface
Concentrate on problematic parts of the
interface
Consider different design alternatives
Ensure usability under different conditions
Help users envision interface
Concentrate on problematic parts of the interface
CHI 2000 Tutorial: Video Techniques for Participatory Design W.E. Mackay 50
••••••••••••••••••••••
Details...Details...
Real systems can be "right" in principle and
fail because the details are wrong
Good prototypes allow designers to work
out different sets of details at a time
Good prototypes let users get the sense of
what the final system will be like
Real systems can be "right" in principle and fail because the details are wrong
Good prototypes allow designers to work out different sets of details at a time
Good prototypes let users get the sense of what the final system will be like
••••••••••••••••••••••
Prototyping MethodsPrototyping Methods
RapidSimply to get user reaction
Must be easy to create...
Then throw it away
Incremental or modularBuild as components of a product
EvolutionaryAlter prototypes to incorporate design changes
Eventually becomes final product
RapidSimply to get user reaction
Must be easy to create...
Then throw it away
Incremental or modularBuild as components of a product
EvolutionaryAlter prototypes to incorporate design changes
Eventually becomes final product

CHI 2000 Tutorial: Video Techniques for Participatory Design W.E. Mackay 51
••••••••••••••••••••••
Prototyping ApproachesPrototyping Approaches
VerticalIndepth functionality
Limited scope
HorizontalEntire user interface
No underlying functionality
ScenarioInterface follows script
VerticalIndepth functionality
Limited scope
HorizontalEntire user interface
No underlying functionality
ScenarioInterface follows script
••••••••••••••••••••••
Prototyping toolsPrototyping tools
Paper and pencil
Post-its and transparencies
Video
Computer software(Hypercard, TCL/TK, MacroMind Director)
Interface builders
Paper and pencil
Post-its and transparencies
Video
Computer software(Hypercard, TCL/TK, MacroMind Director)
Interface builders

CHI 2000 Tutorial: Video Techniques for Participatory Design W.E. Mackay 52
••••••••••••••••••••••
Paper PrototypesPaper Prototypes
Low level:Sketch ideas for an icon
Select the color of a postit note
Intermediate level:Sketch a sequence of screens
Illustrate how to attach a postit to a file
Highest levelDecide on overall approach
What functionality will be included in the system?
Low level:Sketch ideas for an icon
Select the color of a postit note
Intermediate level:Sketch a sequence of screens
Illustrate how to attach a postit to a file
Highest levelDecide on overall approach
What functionality will be included in the system?
••••••••••••••••••••••
Video prototypingVideo prototypingVideo as a tool for explorationVideo as a tool for exploration
SimulationsCreate a video of the use of a prototype
Simulate functionality that does not yet work
Interactive systemUse live video to create the interaction
Simulate interaction that doesn't exist yet
SimulationsCreate a video of the use of a prototype
Simulate functionality that does not yet work
Interactive systemUse live video to create the interaction
Simulate interaction that doesn't exist yet

CHI 2000 Tutorial: Video Techniques for Participatory Design W.E. Mackay 53
••••••••••••••••••••••
SimulationsSimulations
••••••••••••••••••••••
SimulationsSimulations
Goal : Identify critical featuresGenerate examples of different functions
Illustrate user tasks
Generate scenarios of use
Videotape the interaction with the interface
Goal : Identify critical featuresGenerate examples of different functions
Illustrate user tasks
Generate scenarios of use
Videotape the interaction with the interface
CHI 2000 Tutorial: Video Techniques for Participatory Design W.E. Mackay 54
••••••••••••••••••••••
Wizard of OzWizard of Oz
••••••••••••••••••••••
Wizard of OzWizard of Oz
"Natural" not artificial intelligence
"Wizard" interprets user input and controls
system behavior
User has the sensation of using a real
system
Level of system can vary from
non-existant to fully functional
Consider how to log / record the session
Appropriate for some kinds of interactions
"Natural" not artificial intelligence
"Wizard" interprets user input and controls system behavior
User has the sensation of using a real system
Level of system can vary from non-existant to fully functional
Consider how to log / record the session
Appropriate for some kinds of interactions
CHI 2000 Tutorial: Video Techniques for Participatory Design W.E. Mackay 55
Exercise 3: Video Brainstorming
Overview Based on the interviews and observations in exercise 1, each group will brainstorm ideas for an electronic Post-It note system, demonstrating ideas and interaction using the camera. The related lecture will explain different approaches for collaboratively generating ideas with users and the importance of avoiding too-early evaluation of ideas. We will also discuss the roles of users and researchers and how brainstorming can be used to improve communication.
Brainstorming refers to strategies for generating innovative ideas. The basic procedure involves 3-7 people who are given a topic and a limited period of time. One person writes down every idea on a blackboard or flip chart. Another variation has everyone write down ideas individually, then shares them with the group. The moderator ensures that comments are constructive and that the time is spent generating ideas, not evaluating them. The moderator is also responsible for ensuring that the session finishes on time. The time limit is very important: brainstorming is very intense and, if done well, will leave everyone energized and excited by the ideas, not tired and bored. Brainstorming usually has two phases: the first for generating ideas and the second for reflecting upon them.
In phase 1, everyone suggests ideas, no matter how impractical or silly they seem at the time. The most important rule is: DO NOT EVALUATE THE IDEAS. Statements such as "that's stupid" or "they already did that" are forbidden. What makes brainstorming sessions interesting and fun is the way in which ideas spark other ideas, which is why the rule is so important. To help make people more comfortable and to encourage people to offer unfinished ideas, insist that everyone put in at least one "stupid" idea (without identifying which one it is).
In phase 2, everyone begins to evaluate the ideas. A number of strategies can work, depending upon the goal of the session. If it is important to thoroughly investigate all possibilities, then each idea can be discussed in turn. If it is important to select a small set of ideas that will become the basis for further work, the group can vote on the ideas. Each person goes up to the blackboard or the Flipchart sheets and puts a check mark next to the best (or the top three) ideas. After everyone has voted, the ideas with the highest scores can be discussed. Do not worry about ideas that are not at the top of the list; everyone has been influenced by all the ideas that have been generated, so even minor ideas may become incorporated into the final project.
Video brainstorming is a variation that involves demonstrating ideas for interaction in front of a video camera. The goal is to simulate a wide variety of ideas very quickly and capture them in a way that is easier to understand (and remember) than text notes. In general, raw notes from brainstorming sessions tend not to be very useful after a certain amount of time has passed because the participants no longer remember the context in which the ideas were created. Video brainstorming generates fewer ideas, but they are much easier to recall, since more of the context is captured. Video brainstorming is more likely to be useful at later stages in project design.
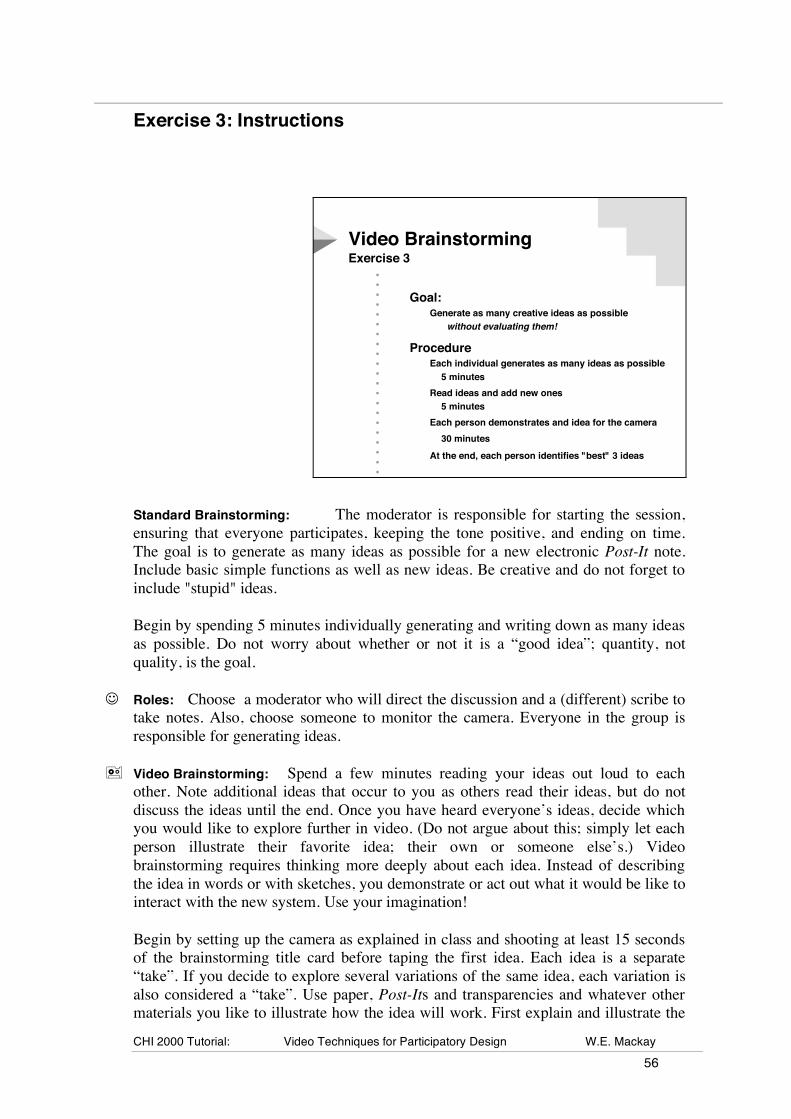
CHI 2000 Tutorial: Video Techniques for Participatory Design W.E. Mackay 56
Exercise 3: Instructions
••••••••••••••••••••••
Video BrainstormingVideo BrainstormingExercise 3Exercise 3
Goal:Generate as many creative ideas as possible !!
! without evaluating them!
ProcedureEach individual generates as many ideas as possible
5 minutes
Read ideas and add new ones
5 minutes
Each person demonstrates and idea for the camera
30 minutes
At the end, each person identifies "best" 3 ideas
Goal:Generate as many creative ideas as possible !!
! without evaluating them!
ProcedureEach individual generates as many ideas as possible
5 minutes
Read ideas and add new ones
5 minutes
Each person demonstrates and idea for the camera
30 minutes
At the end, each person identifies "best" 3 ideas
Standard Brainstorming: The moderator is responsible for starting the session, ensuring that everyone participates, keeping the tone positive, and ending on time. The goal is to generate as many ideas as possible for a new electronic Post-It note. Include basic simple functions as well as new ideas. Be creative and do not forget to include "stupid" ideas.
Begin by spending 5 minutes individually generating and writing down as many ideas as possible. Do not worry about whether or not it is a “good idea”; quantity, not quality, is the goal.
Roles: Choose a moderator who will direct the discussion and a (different) scribe to take notes. Also, choose someone to monitor the camera. Everyone in the group is responsible for generating ideas.
Video Brainstorming: Spend a few minutes reading your ideas out loud to each other. Note additional ideas that occur to you as others read their ideas, but do not discuss the ideas until the end. Once you have heard everyone’s ideas, decide which you would like to explore further in video. (Do not argue about this; simply let each person illustrate their favorite idea; their own or someone else’s.) Video brainstorming requires thinking more deeply about each idea. Instead of describing the idea in words or with sketches, you demonstrate or act out what it would be like to interact with the new system. Use your imagination!
Begin by setting up the camera as explained in class and shooting at least 15 seconds of the brainstorming title card before taping the first idea. Each idea is a separate “take”. If you decide to explore several variations of the same idea, each variation is also considered a “take”. Use paper, Post-Its and transparencies and whatever other materials you like to illustrate how the idea will work. First explain and illustrate the

CHI 2000 Tutorial: Video Techniques for Participatory Design W.E. Mackay 57
idea to the group (to work out the idea and to practice before shooting). Then, the camera person should videotape 5 seconds of the title card with the corresponding idea number (e.g. "Take 3"). The person with the idea should perform it again in front of the camera. If the camera person has the idea, the moderator should take over handling the camera. Do not try to edit in the camera, by rewinding the tape and reshooting the idea if you make a mistake. Simply shoot the title card again (modified to say "Take 3 b") and try again. Remember, you want to capture as many ideas as possible.
Voting: When you return from lunch, the scribe should re-read the list of ideas out loud, while the camera person replays the corresponding takes (video clips). Each person should then (individually!) select the three most interesting ideas to pursue. When everyone has voted, check to see if there are any clusters of votes. The purpose of the vote is not really to evaluate the ideas. Instead, the goal is to encourage you to reflect on them to help you in the design phase of the project.
CHI 2000 Tutorial: Video Techniques for Participatory Design W.E. Mackay 58
Worksheet: Brainstorming
Vote: Individual List of Ideas
_______ __________________________________________________________
_______ __________________________________________________________
_______ __________________________________________________________
_______ __________________________________________________________
_______ __________________________________________________________
_______ __________________________________________________________
_______ __________________________________________________________
_______ __________________________________________________________
_______ __________________________________________________________
_______ __________________________________________________________
_______ __________________________________________________________
_______ __________________________________________________________
_______ __________________________________________________________
_______ __________________________________________________________
_______ __________________________________________________________
_______ __________________________________________________________
_______ __________________________________________________________
_______ __________________________________________________________
_______ __________________________________________________________
_______ __________________________________________________________
_______ __________________________________________________________
_______ __________________________________________________________
_______ __________________________________________________________
CHI 2000 Tutorial: Video Techniques for Participatory Design W.E. Mackay 59
Title Card: Video Brainstorming
CHI 2000 Tutorial: Video Techniques for Participatory Design W.E. Mackay 60
Worksheet: Video Brainstorming
Take: Video Brainstorming ideas
_______ __________________________________________________________
_______ __________________________________________________________
_______ __________________________________________________________
_______ __________________________________________________________
_______ __________________________________________________________
_______ __________________________________________________________
_______ __________________________________________________________
_______ __________________________________________________________
_______ __________________________________________________________
_______ __________________________________________________________
_______ __________________________________________________________
_______ __________________________________________________________
_______ __________________________________________________________
_______ __________________________________________________________
_______ __________________________________________________________
_______ __________________________________________________________
_______ __________________________________________________________
_______ __________________________________________________________
_______ __________________________________________________________
_______ __________________________________________________________
_______ __________________________________________________________
_______ __________________________________________________________
_______ __________________________________________________________
CHI 2000 Tutorial: Video Techniques for Participatory Design W.E. Mackay 61
Session 3: Prototyping new systems
Discussion: Brainstorming ideas Lecture: Ethical use of video Exercise 4: Video Prototyping
CHI 2000 Tutorial: Video Techniques for Participatory Design W.E. Mackay 62
Prototyping new systems
Overview Designing involves making decisions, deciding to pursue some directions and omit others. Unlike the design generation phase, the design phase involves choosing a particular direction and narrowing the range of possibilities. The goal is to explore a more restricted design space, creating a grounded design that is both innovative and still makes sense to real users in the contexts in which it will be used.
In a participatory design process, users of the new system actively participate in prototyping exercises. However, most users are not trained designers. The purpose of video prototyping and related methods is to provide a means by which users and designers with different skills, interests and responsibilities can communicate with each other in a productive way. Video prototyping scenarios show situations relevant to users, while providing a concrete specification of what to build.
The purpose of this session is to create an innovative design for an electronic Post-it note, in the context of how it might really be used. Session 3 activities include:
Discussion: Brainstorming ideas Each group will have the opportunity to present some of their brainstormed ideas and discuss which ones might be relevant to the issues uncovered in the user studies.
Lecture: Ethical use of video Explains the perspectives of different related professions with respect to the legal and ethical use of video, including the concept of informed consent and how it applies in participatory design. Participants are encouraged to ask questions and discuss their own use of video, particularly design problems and ethical issues they face.
Exercise 4: Video prototyping Based on the video data gathered in exercise 1 and the design ideas generated in exercise 2, each group will develop and storyboard a design scenario that illustrates the use of a new electronic Post-it note application. Using the Wizard-of-Oz technique, with transparencies and sketches, participants will simulate a user interacting with the new system.
CHI 2000 Tutorial: Video Techniques for Participatory Design W.E. Mackay 63
Discussion: Brainstorming ideas
Did you notice a difference between the first part of the brainstorming exercise, in which you simply wrote down ideas in words, and the second part in which you had to act out your ideas in front of the camera?
Describe, act out, or show examples of some of the ideas you generated.
Which ones are you interested in pursuing in the design exercise?

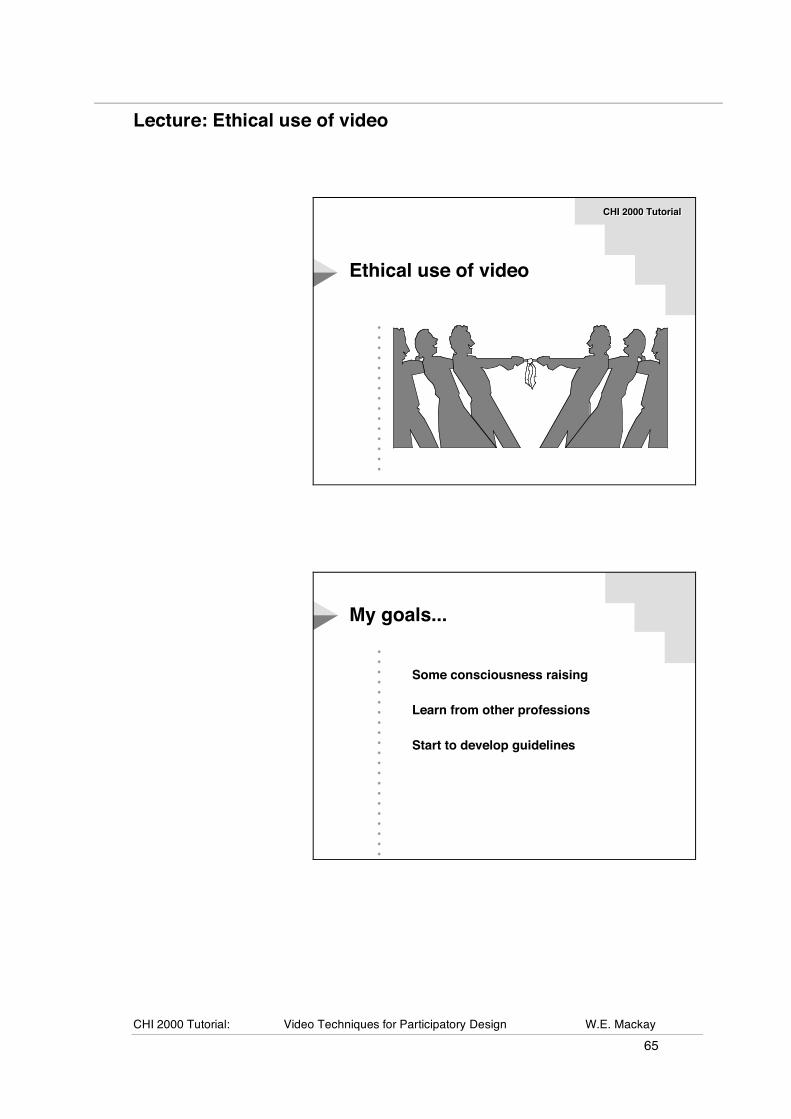
CHI 2000 Tutorial: Video Techniques for Participatory Design W.E. Mackay 65
Lecture: Ethical use of video
•••••••••••••••
Ethical use of videoEthical use of video
CHI 2000 TutorialCHI 2000 Tutorial
••••••••••••••••••••••
My goals...My goals...
Some consciousness raising
Learn from other professions
Start to develop guidelines
Some consciousness raising
Learn from other professions
Start to develop guidelines
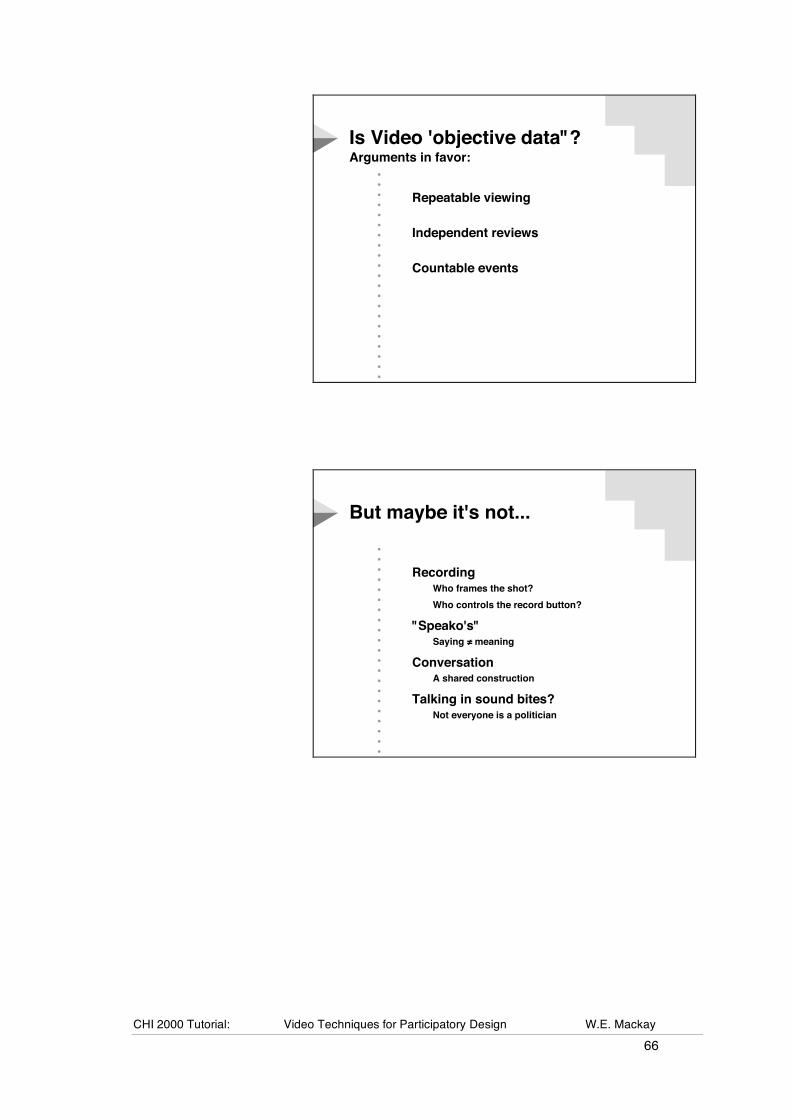
CHI 2000 Tutorial: Video Techniques for Participatory Design W.E. Mackay 66
••••••••••••••••••••••
Is Video 'objective data"?Is Video 'objective data"?Arguments in favor:Arguments in favor:
Repeatable viewing
Independent reviews
Countable events
Repeatable viewing
Independent reviews
Countable events
••••••••••••••••••••••
But maybe it's not...But maybe it's not...
RecordingWho frames the shot?
Who controls the record button?
"Speako's"
Saying ! meaning
Conversation
A shared construction
Talking in sound bites?Not everyone is a politician
RecordingWho frames the shot?
Who controls the record button?
"Speako's" Saying ! meaning
Conversation A shared construction
Talking in sound bites?Not everyone is a politician
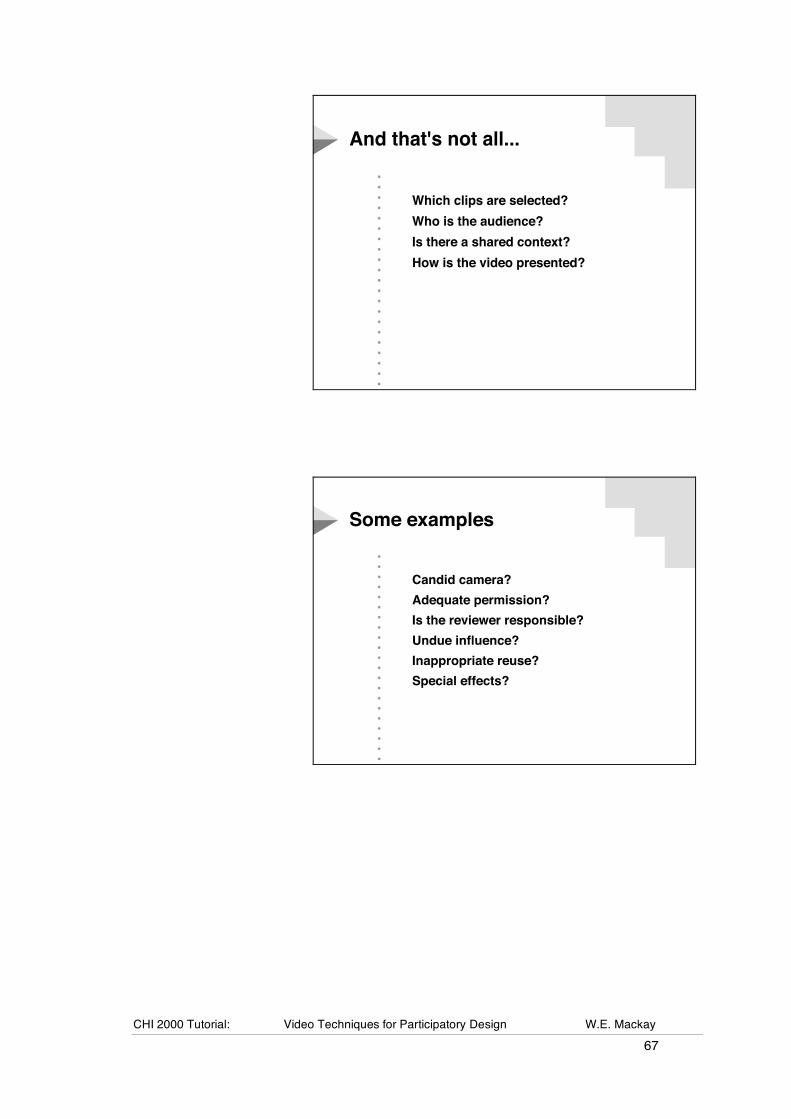
CHI 2000 Tutorial: Video Techniques for Participatory Design W.E. Mackay 67
••••••••••••••••••••••
And that's not all...And that's not all...
Which clips are selected?
Who is the audience?
Is there a shared context?
How is the video presented?
Which clips are selected?
Who is the audience?
Is there a shared context?
How is the video presented?
••••••••••••••••••••••
Some examplesSome examples
Candid camera?
Adequate permission?
Is the reviewer responsible?
Undue influence?
Inappropriate reuse?
Special effects?
Candid camera?
Adequate permission?
Is the reviewer responsible?
Undue influence?
Inappropriate reuse?
Special effects?
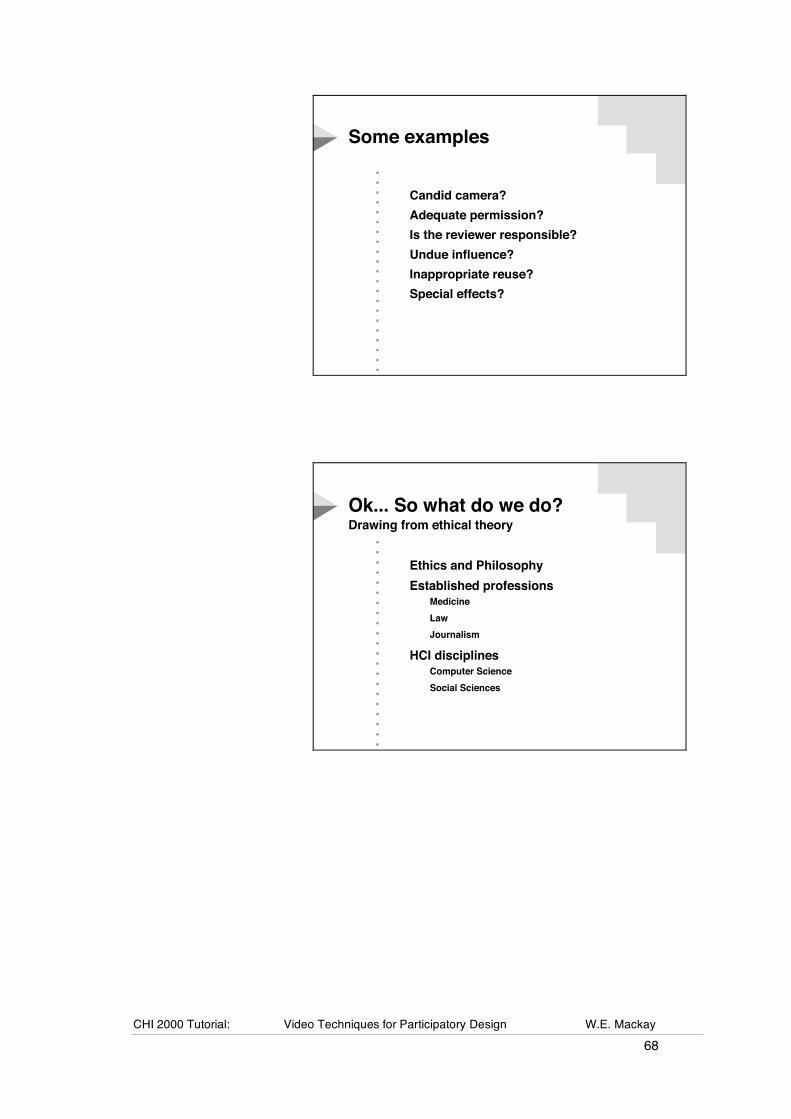
CHI 2000 Tutorial: Video Techniques for Participatory Design W.E. Mackay 68
••••••••••••••••••••••
Some examplesSome examples
Candid camera?
Adequate permission?
Is the reviewer responsible?
Undue influence?
Inappropriate reuse?
Special effects?
Candid camera?
Adequate permission?
Is the reviewer responsible?
Undue influence?
Inappropriate reuse?
Special effects?
••••••••••••••••••••••
Ok... So what do we do?Ok... So what do we do?Drawing from ethical theoryDrawing from ethical theory
Ethics and Philosophy
Established professions
Medicine
Law
Journalism
HCI disciplinesComputer Science
Social Sciences
Ethics and Philosophy
Established professions Medicine
Law
Journalism
HCI disciplinesComputer Science
Social Sciences
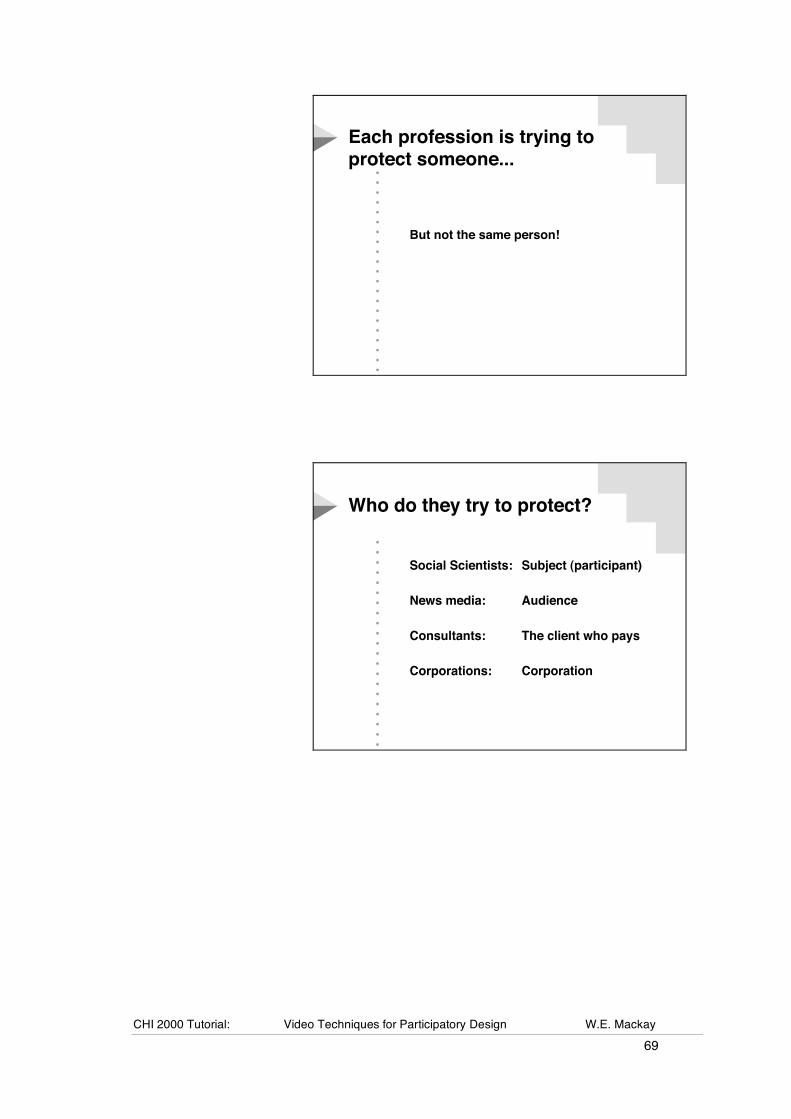
CHI 2000 Tutorial: Video Techniques for Participatory Design W.E. Mackay 69
••••••••••••••••••••••
Each profession is trying to
protect someone...
Each profession is trying to
protect someone...
But not the same person!But not the same person!
••••••••••••••••••••••
Who do they try to protect?Who do they try to protect?
Social Scientists:! Subject (participant)
News media:! ! Audience
Consultants:! ! The client who pays
Corporations:! ! Corporation
Social Scientists:! Subject (participant)
News media:! ! Audience
Consultants:! ! The client who pays
Corporations:! ! Corporation
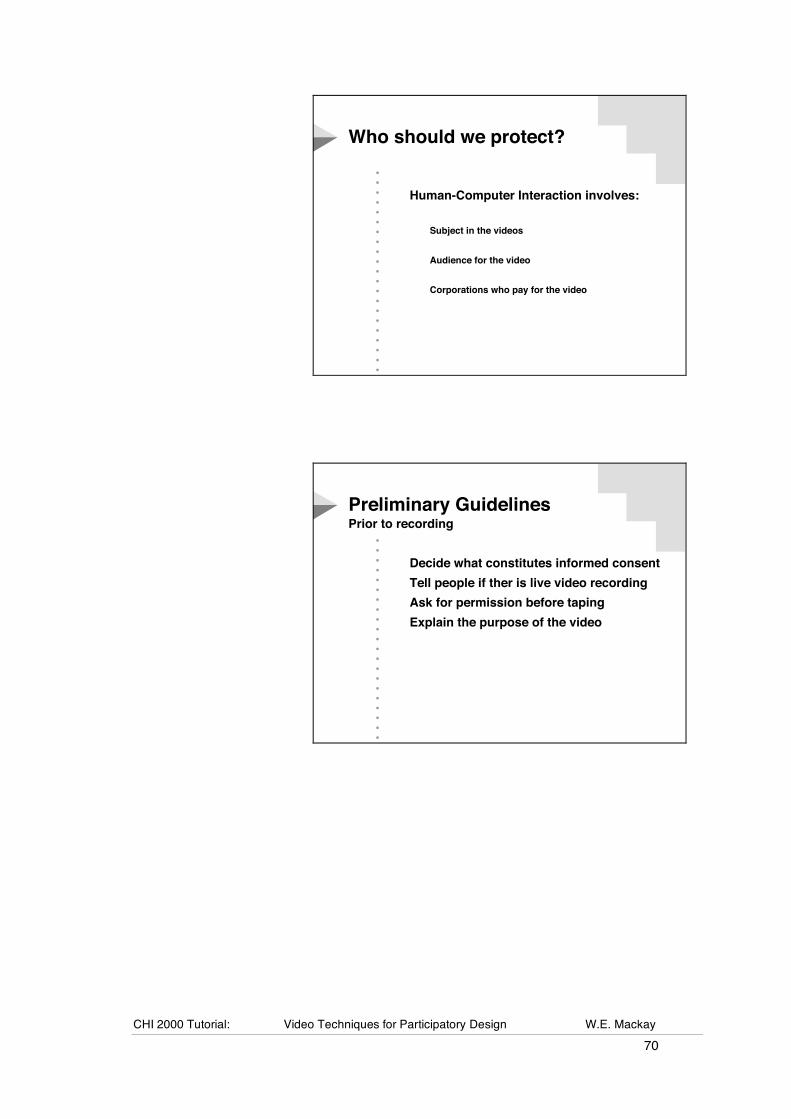
CHI 2000 Tutorial: Video Techniques for Participatory Design W.E. Mackay 70
••••••••••••••••••••••
Who should we protect?Who should we protect?
Human-Computer Interaction involves:
Subject in the videos
Audience for the video
Corporations who pay for the video
Human-Computer Interaction involves:
Subject in the videos
Audience for the video
Corporations who pay for the video
••••••••••••••••••••••
Preliminary GuidelinesPreliminary GuidelinesPrior to recordingPrior to recording
Decide what constitutes informed consent
Tell people if ther is live video recording
Ask for permission before taping
Explain the purpose of the video
Decide what constitutes informed consent
Tell people if ther is live video recording
Ask for permission before taping
Explain the purpose of the video
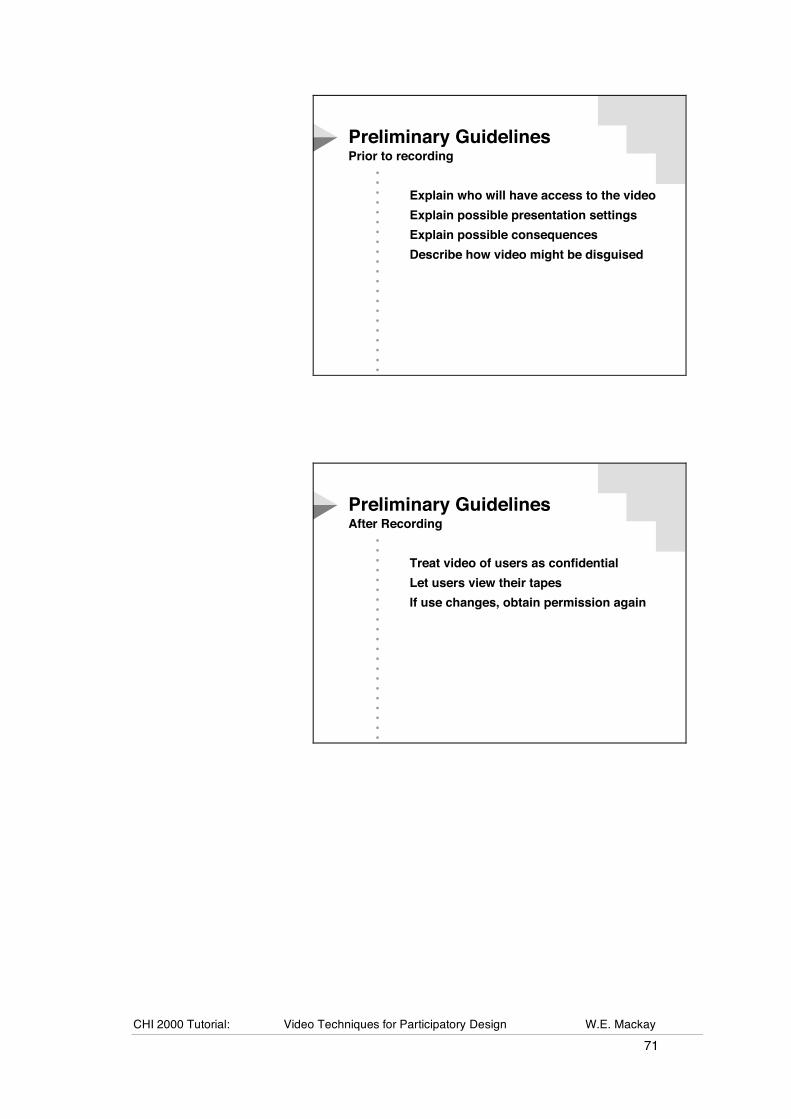
CHI 2000 Tutorial: Video Techniques for Participatory Design W.E. Mackay 71
••••••••••••••••••••••
Preliminary GuidelinesPreliminary GuidelinesPrior to recordingPrior to recording
Explain who will have access to the video
Explain possible presentation settings
Explain possible consequences
Describe how video might be disguised
Explain who will have access to the video
Explain possible presentation settings
Explain possible consequences
Describe how video might be disguised
••••••••••••••••••••••
Preliminary GuidelinesPreliminary GuidelinesAfter RecordingAfter Recording
Treat video of users as confidential
Let users view their tapes
If use changes, obtain permission again
Treat video of users as confidential
Let users view their tapes
If use changes, obtain permission again
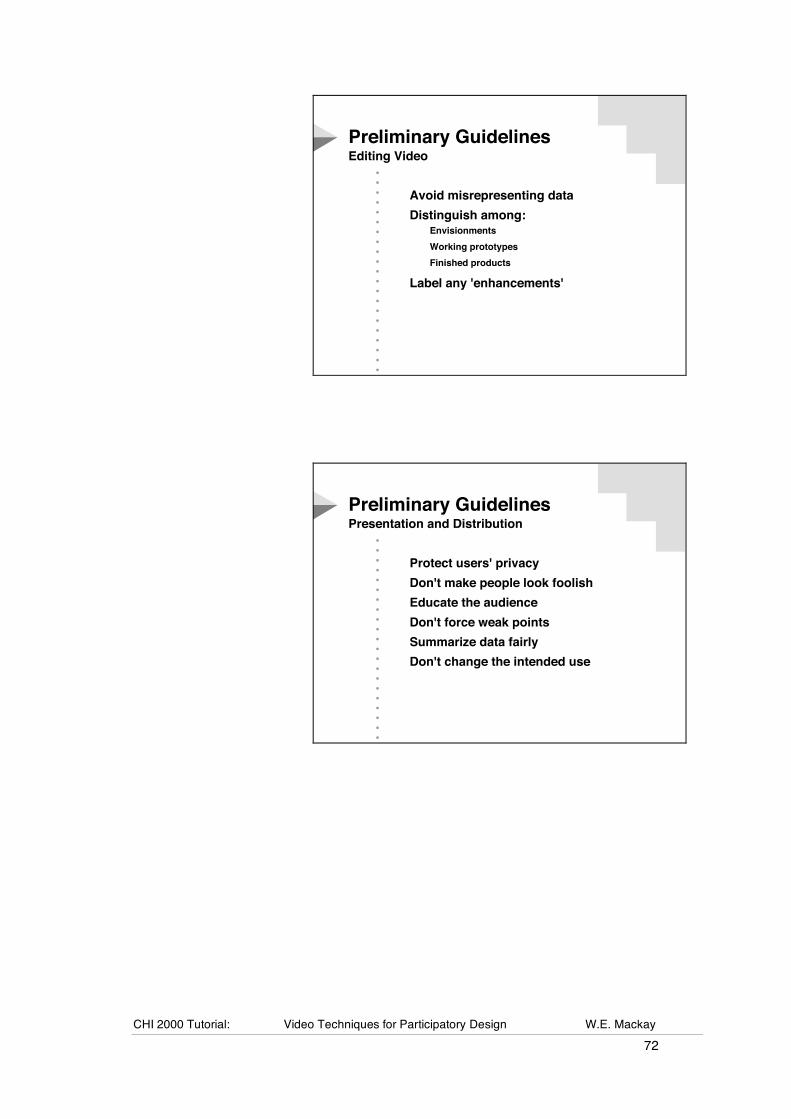
CHI 2000 Tutorial: Video Techniques for Participatory Design W.E. Mackay 72
••••••••••••••••••••••
Preliminary GuidelinesPreliminary GuidelinesEditing VideoEditing Video
Avoid misrepresenting data
Distinguish among:Envisionments
Working prototypes
Finished products
Label any 'enhancements'
Avoid misrepresenting data
Distinguish among:Envisionments
Working prototypes
Finished products
Label any 'enhancements'
••••••••••••••••••••••
Preliminary GuidelinesPreliminary GuidelinesPresentation and DistributionPresentation and Distribution
Protect users' privacy
Don't make people look foolish
Educate the audience
Don't force weak points
Summarize data fairly
Don't change the intended use
Protect users' privacy
Don't make people look foolish
Educate the audience
Don't force weak points
Summarize data fairly
Don't change the intended use

CHI 2000 Tutorial: Video Techniques for Participatory Design W.E. Mackay 73
Exercise 4: Video Prototyping
Overview Based on the ideas generated in the previous exercise, each group will storyboard and videotape a design scenario that illustrates the design of an electronic Post-It note. You will use paper, transparencies and Post-Its to simulate a user interacting with the new system. The related lecture will explain different types of scenarios, the role of storyboards, and computer-based video prototyping techniques.
Design scenarios are essentially enhanced versions of use scenarios, providing an envisionment of how the work will change when new technology is introduced. The design scenario should specify both how the users will interact with the new technology in the course of their work and illustrate how it might change their current activities. Just as in a use scenario, it is important that the discussion include people who actually perform the work, since they are most likely to be able to identify problems or unrealistic uses of the new technology. You may wish to evaluate the scenario against a checklist (e.g. from Bødker) to ensure that no important issues have been left out.
Design scenarios usually begin on paper as text and sketches. They can then be formalized into storyboards, which will help in future videotaping or design workshops. Videotaping the storyboard directly, with a voice-over to explain the action, provides the simplest form of presentation of the ideas. Some film-makers do this, inserting background scenes, music, soundtracks, and actual scenes as they are filmed, to create an evolving document of the state of the project. You can do the same thing as you experiment with implementing different aspects of the scenario, using it as a springboard discussions among designers, users and management. Note that design prototypes can be developed directly from the video prototypes and tested with users in the same way.
Rapid Prototyping: Developing software is time-consuming and expensive, particularly software that is robust. Prototyping is a way of exploring different design approaches and evaluating specific alternatives. (In this course, we are concentrating on prototyping as a way of exploring design from a user's perspective. But prototyping is, of course, also useful in any aspect of system development.)
Prototypes can take many forms, from very informal paper prototypes, to very elaborate video prototypes with special effects, to working systems. The goal is to create the illusion of real interaction between users and the future system. A good prototype need not be realistic in every detail, but it should be sufficiently detailed so that users (and developers) can judge what a "real" version of the system would look like. Note that the problem here is generally to discover what the interesting questions are; not necessarily the solutions. Prototypes allow you to explore a design space and try out different ideas, to better understand what the issues are. Implementing an efficient and effective solution can only occur when you have a clear idea of what it is that you are trying to develop.
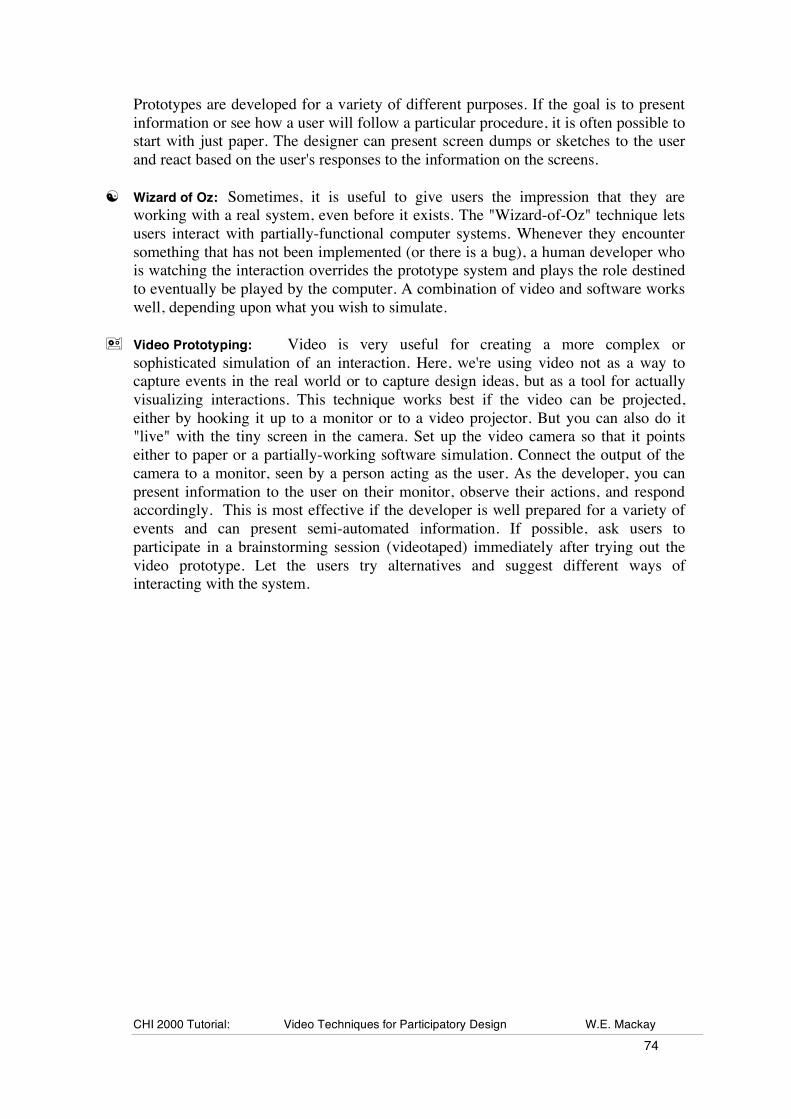
CHI 2000 Tutorial: Video Techniques for Participatory Design W.E. Mackay 74
Prototypes are developed for a variety of different purposes. If the goal is to present information or see how a user will follow a particular procedure, it is often possible to start with just paper. The designer can present screen dumps or sketches to the user and react based on the user's responses to the information on the screens.
Wizard of Oz: Sometimes, it is useful to give users the impression that they are working with a real system, even before it exists. The "Wizard-of-Oz" technique lets users interact with partially-functional computer systems. Whenever they encounter something that has not been implemented (or there is a bug), a human developer who is watching the interaction overrides the prototype system and plays the role destined to eventually be played by the computer. A combination of video and software works well, depending upon what you wish to simulate.
Video Prototyping: Video is very useful for creating a more complex or sophisticated simulation of an interaction. Here, we're using video not as a way to capture events in the real world or to capture design ideas, but as a tool for actually visualizing interactions. This technique works best if the video can be projected, either by hooking it up to a monitor or to a video projector. But you can also do it "live" with the tiny screen in the camera. Set up the video camera so that it points either to paper or a partially-working software simulation. Connect the output of the camera to a monitor, seen by a person acting as the user. As the developer, you can present information to the user on their monitor, observe their actions, and respond accordingly. This is most effective if the developer is well prepared for a variety of events and can present semi-automated information. If possible, ask users to participate in a brainstorming session (videotaped) immediately after trying out the video prototype. Let the users try alternatives and suggest different ways of interacting with the system.
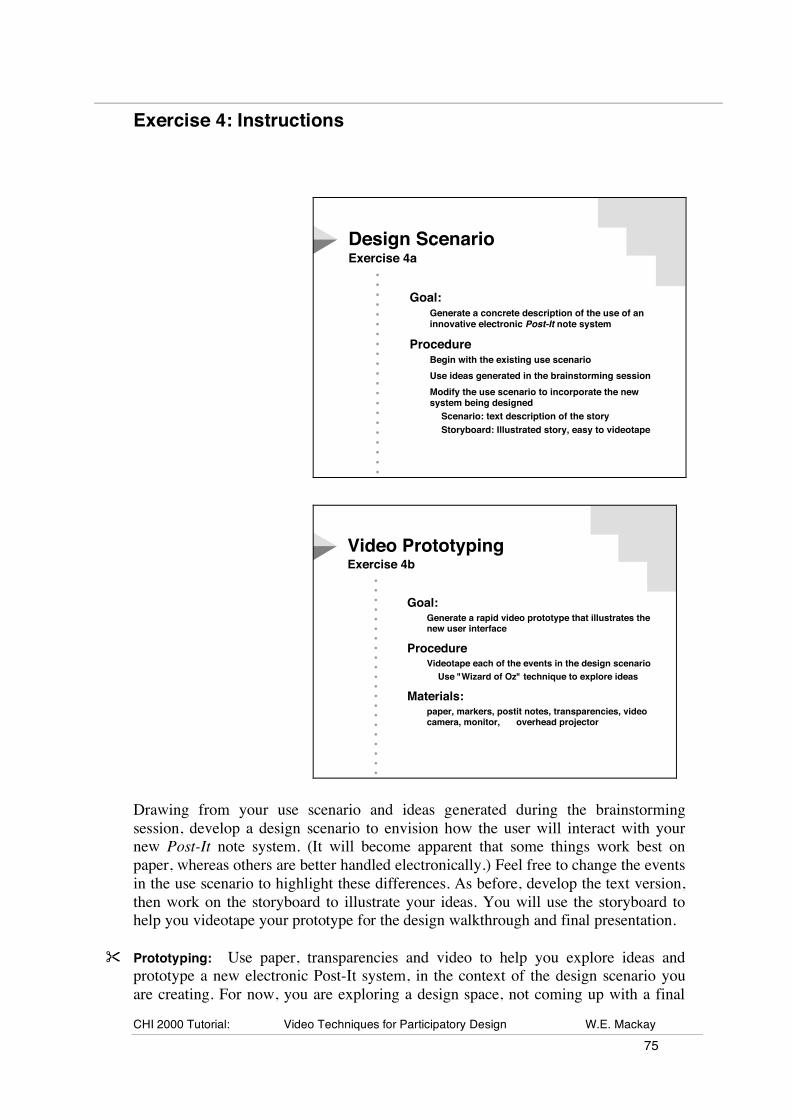
CHI 2000 Tutorial: Video Techniques for Participatory Design W.E. Mackay 75
Exercise 4: Instructions
••••••••••••••••••••••
Design ScenarioDesign ScenarioExercise 4aExercise 4a
Goal:Generate a concrete description of the use of an
innovative electronic Post-It note system
ProcedureBegin with the existing use scenario
Use ideas generated in the brainstorming session
Modify the use scenario to incorporate the new
system being designed
Scenario: text description of the story
Storyboard: Illustrated story, easy to videotape
Goal:Generate a concrete description of the use of an innovative electronic Post-It note system
ProcedureBegin with the existing use scenario
Use ideas generated in the brainstorming session
Modify the use scenario to incorporate the new system being designed
Scenario: text description of the story
Storyboard: Illustrated story, easy to videotape
••••••••••••••••••••••
Video PrototypingVideo PrototypingExercise 4bExercise 4b
Goal:Generate a rapid video prototype that illustrates the
new user interface
ProcedureVideotape each of the events in the design scenario
Use "Wizard of Oz" technique to explore ideas
Materials:!
paper, markers, postit notes, transparencies, video
camera, monitor, ! overhead projector
Goal:Generate a rapid video prototype that illustrates the new user interface
ProcedureVideotape each of the events in the design scenario
Use "Wizard of Oz" technique to explore ideas
Materials:!paper, markers, postit notes, transparencies, video camera, monitor, ! overhead projector
Drawing from your use scenario and ideas generated during the brainstorming session, develop a design scenario to envision how the user will interact with your new Post-It note system. (It will become apparent that some things work best on paper, whereas others are better handled electronically.) Feel free to change the events in the use scenario to highlight these differences. As before, develop the text version, then work on the storyboard to illustrate your ideas. You will use the storyboard to help you videotape your prototype for the design walkthrough and final presentation.
Prototyping: Use paper, transparencies and video to help you explore ideas and prototype a new electronic Post-It system, in the context of the design scenario you are creating. For now, you are exploring a design space, not coming up with a final
CHI 2000 Tutorial: Video Techniques for Participatory Design W.E. Mackay 76
solution. Try different alternatives for interacting with your new system. Think about what people will want to do with it. What are the most common and most important functions? Make these easiest to access. The design scenario limits your exploration to help you concentrate on the system in the context in which it will be used.
As you explore different ideas, think about what design problems they pose. Also, think about whether you have enough information about your user population, or if there are questions that you still need to answer. Think about what problems this software solves for your users; think too about what problems it may create. Use real Post-It notes to simulate menus or buttons, use transparencies to show how information on the screen changes. Be inventive! The goal is to build upon the isolated ideas from the video brainstorming session, and systematically apply them to the use scenario to illustrate how the interaction will work.
Roles: Choose a narrator to explain what is happening. You may need several pairs of hands to illustrate the interaction and a camera person to shoot the video.
Shooting: Shoot at least 15 seconds of the video prototyping title card. Unlike the video brainstorming session, your goal here is to shoot a presentation that will be shown to others. Following your storyboard, shoot each scene in sequence. You may decide to have transition slides or simply move from one scene to the next.
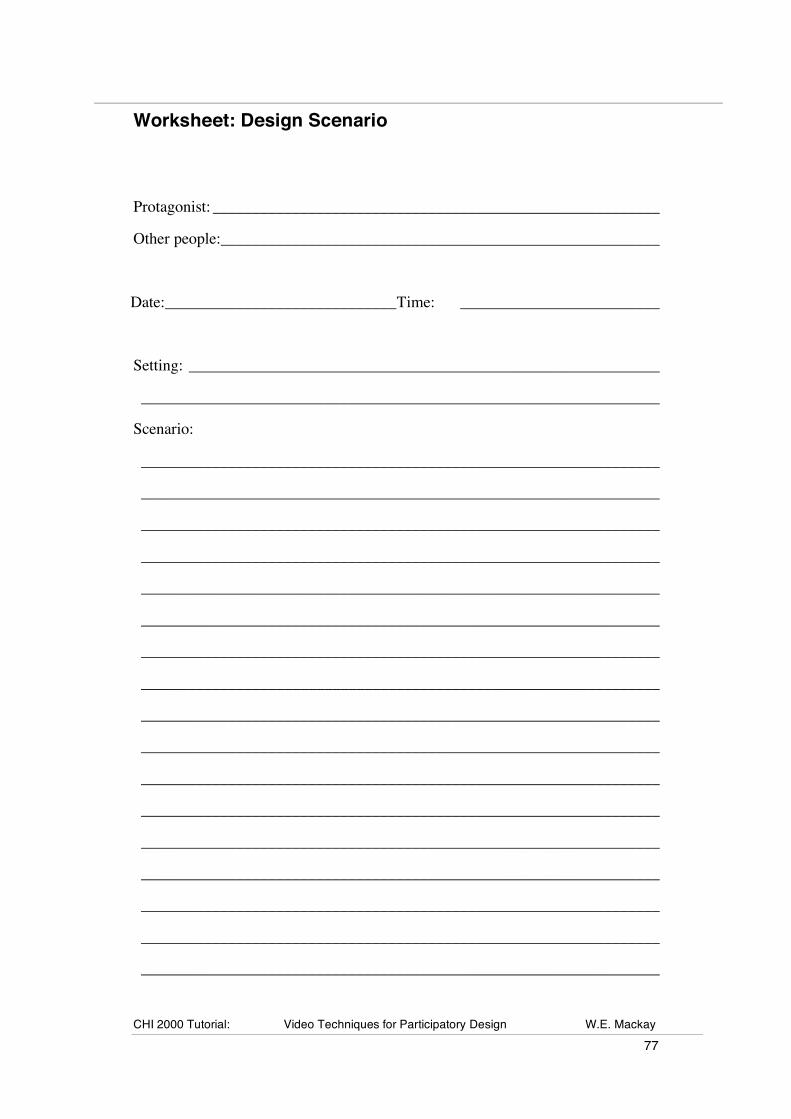
CHI 2000 Tutorial: Video Techniques for Participatory Design W.E. Mackay 77
Worksheet: Design Scenario
Protagonist: ________________________________________________________
Other people:_______________________________________________________
Date:_____________________________Time: _________________________
Setting: ___________________________________________________________
_________________________________________________________________
Scenario:
_________________________________________________________________
_________________________________________________________________
_________________________________________________________________
_________________________________________________________________
_________________________________________________________________
_________________________________________________________________
_________________________________________________________________
_________________________________________________________________
_________________________________________________________________
_________________________________________________________________
_________________________________________________________________
_________________________________________________________________
_________________________________________________________________
_________________________________________________________________
_________________________________________________________________
_________________________________________________________________
_________________________________________________________________
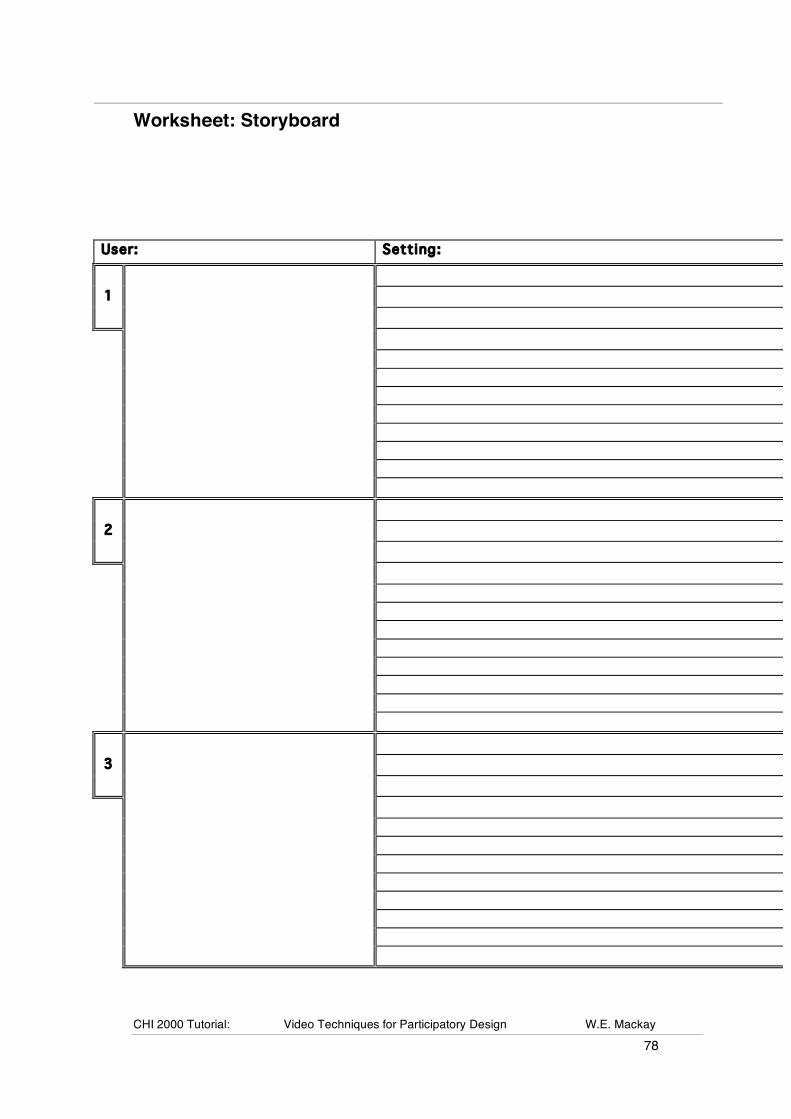
CHI 2000 Tutorial: Video Techniques for Participatory Design W.E. Mackay 78
Worksheet: Storyboard
User: Setting:
1
2
3
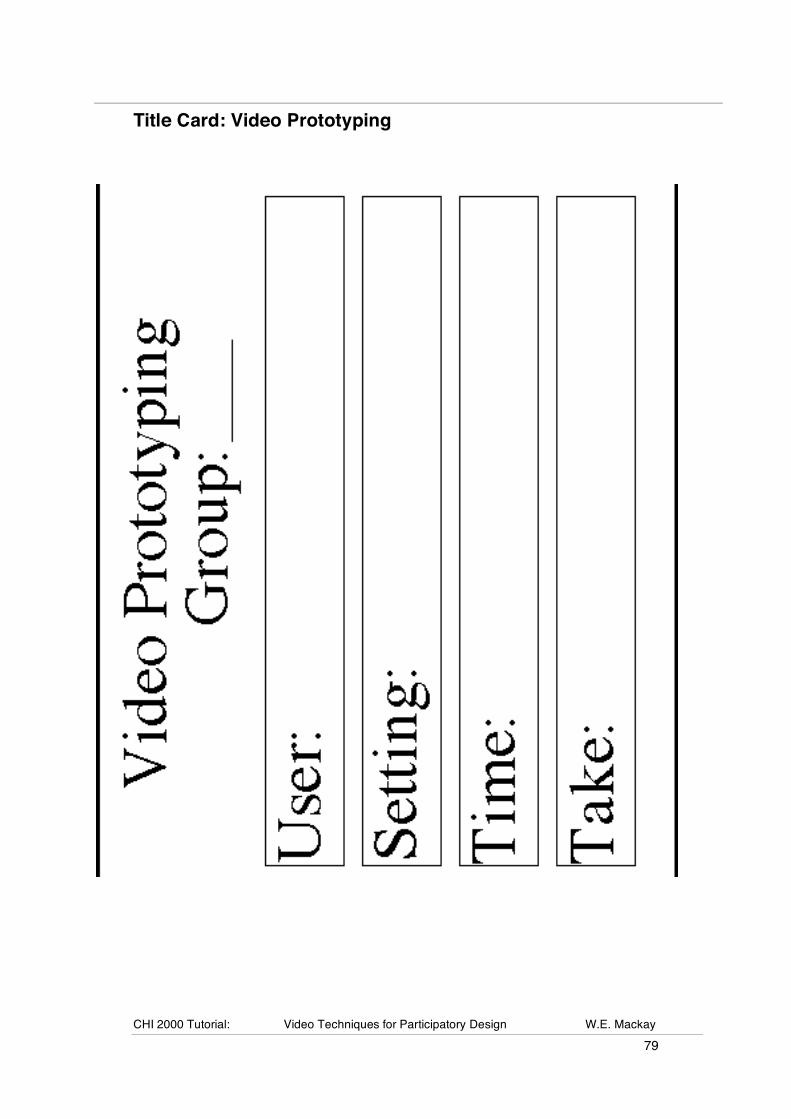
CHI 2000 Tutorial: Video Techniques for Participatory Design W.E. Mackay 79
Title Card: Video Prototyping

CHI 2000 Tutorial: Video Techniques for Participatory Design W.E. Mackay 80
CHI 2000 Tutorial: Video Techniques for Participatory Design W.E. Mackay 81
Session 4: Evaluating prototypes
Lecture: Evaluating video Exercise 5: Video design walkthroughs Discussion: Final presentations
CHI 2000 Tutorial: Video Techniques for Participatory Design W.E. Mackay 82
Evaluating prototypes
Human-computer interaction has borrowed or developed a wide variety of methods for evaluating interactive systems. Since this is a tutorial based on a participatory design approach, the strategy includes methods that involve users in the evaluation process. In addition the standard usability studies and data analysis techniques, video design walkthroughs provide an easily-accessible way for users to participate in evaluation and give feedback that is directly relevant to the design early in the process.
The purpose of this session is to identify potential design problems and suggest concrete ways of improving them. Session 4 activities include:
Lecture: Evaluating video Explains formal and informal techniques for evaluating design prototypes (including walkthroughs and usability studies), including the advantages and disadvantages of qualitative and quantitative evaluation.
Exercise 5: Video design walkthrough evaluation Each group will conduct a design walkthrough of another group's video prototype, providing specific comments from different perspectives.
Discussion: Final presentations Each group will have the opportunity to present their video prototype or some aspect of their work to the class. Although this tutorial cannot cover all the possible ways that video can be effectively used in participatory design, by the end of the tutorial, you will have gained practical experience using video for a variety of participatory design activities and will have a deeper understanding of the technical and ethical issues surrounding the use of video.
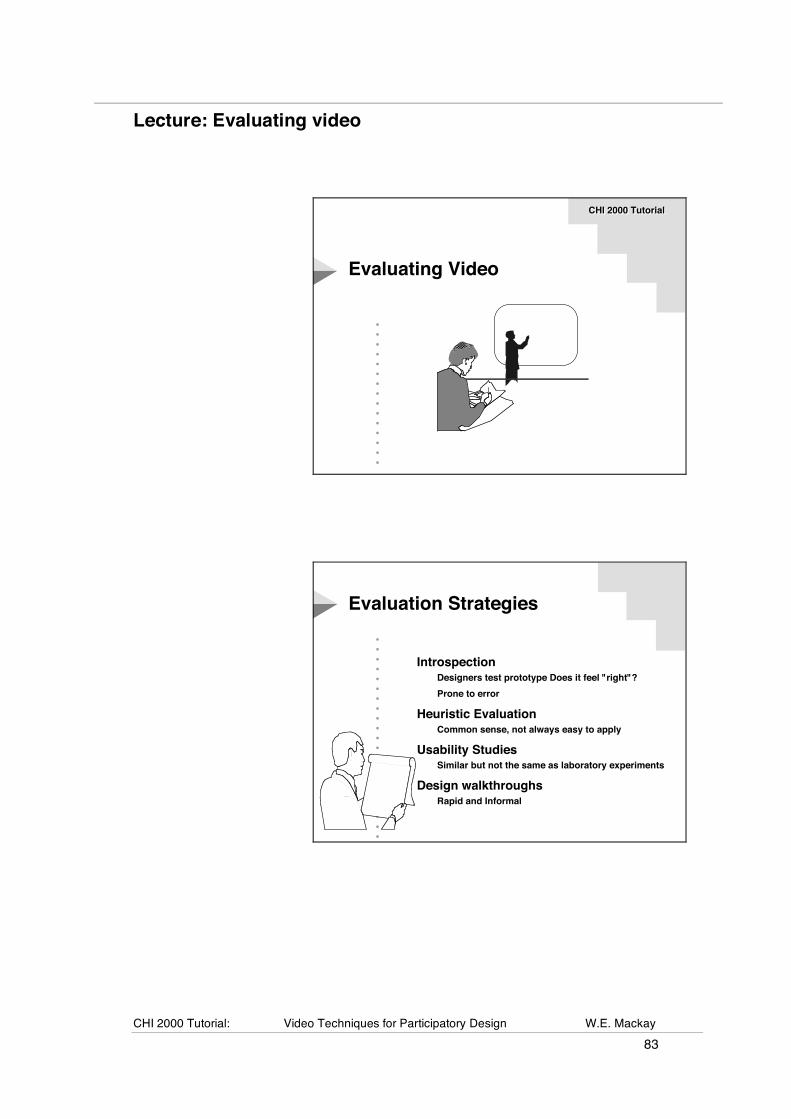
CHI 2000 Tutorial: Video Techniques for Participatory Design W.E. Mackay 83
Lecture: Evaluating video
•••••••••••••••
Evaluating VideoEvaluating Video
CHI 2000 TutorialCHI 2000 Tutorial
••••••••••••••••••••••
Evaluation StrategiesEvaluation Strategies
IntrospectionDesigners test prototype Does it feel "right"?
Prone to error
Heuristic EvaluationCommon sense, not always easy to apply
Usability StudiesSimilar but not the same as laboratory experiments
Design walkthroughsRapid and Informal
IntrospectionDesigners test prototype Does it feel "right"?
Prone to error
Heuristic EvaluationCommon sense, not always easy to apply
Usability StudiesSimilar but not the same as laboratory experiments
Design walkthroughsRapid and Informal
CHI 2000 Tutorial: Video Techniques for Participatory Design W.E. Mackay 84
••••••••••••••••••••••
Usability EvaluationsUsability Evaluations
HCI adaptations of various techniquesNOT the same as a Psychology experiment
May be quantitative or qualitative
May be formal or informal
HCI adaptations of various techniquesNOT the same as a Psychology experiment
May be quantitative or qualitative
May be formal or informal
••••••••••••••••••••••
Usability EvaluationsUsability Evaluations
Most often used to:Compare two different software systems!!! or prototypes
Evaluate the “usability” of a system in development
Styles of EvaluationDesign Walkthroughs! Claims analysis
Heuristic Evaluation!! GOMS
QOC: Questions, Options, Criteria
Goal:To CONVINCE managers or developers!!! to change what they are doing.
CHI 2000 Tutorial: Video Techniques for Participatory Design W.E. Mackay 85
••••••••••••••••••••••
Multimedia Data AnalysisMultimedia Data AnalysisTwo different approachesTwo different approaches
HypermediaTurn data into chunks
Manipulate as nodes and links
Goal: connections among nodes
StreamsTurn data into streams
Manipulate as streams
Goal: temporal relationships
HypermediaTurn data into chunks
Manipulate as nodes and links
Goal: connections among nodes
StreamsTurn data into streams
Manipulate as streams
Goal: temporal relationships
••••••••••••••••••••••
Temporal, multimedia dataTemporal, multimedia data
! Raw:! ! ! ! Generated:
Audio track!! ! Write Subtitles
Video! ! ! ! Code activities
Flight strips!! ! Count strips
RADAR!! ! ! Identify routes
Answers! ! ! Determine "Stress" level
! Raw:! ! ! ! Generated:
Audio track!! ! Write Subtitles
Video! ! ! ! Code activities
Flight strips!! ! Count strips
RADAR!! ! ! Identify routes
Answers! ! ! Determine "Stress" level
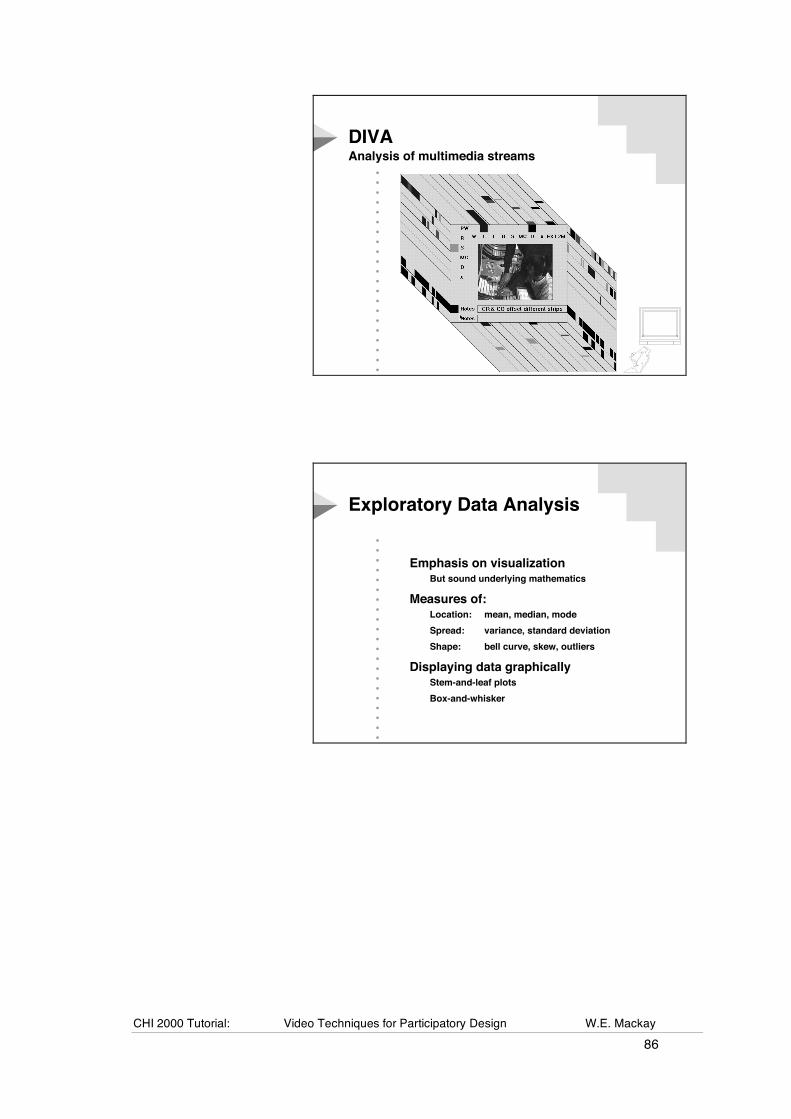
CHI 2000 Tutorial: Video Techniques for Participatory Design W.E. Mackay 86
••••••••••••••••••••••
DIVADIVAAnalysis of multimedia streamsAnalysis of multimedia streams
••••••••••••••••••••••
Exploratory Data AnalysisExploratory Data Analysis
Emphasis on visualizationBut sound underlying mathematics
Measures of:Location:! mean, median, mode
Spread:!! variance, standard deviation
Shape:! ! bell curve, skew, outliers
Displaying data graphicallyStem-and-leaf plots
Box-and-whisker
Emphasis on visualizationBut sound underlying mathematics
Measures of:Location:! mean, median, mode
Spread:!! variance, standard deviation
Shape:! ! bell curve, skew, outliers
Displaying data graphicallyStem-and-leaf plots
Box-and-whisker
CHI 2000 Tutorial: Video Techniques for Participatory Design W.E. Mackay 87
Exercise 5: Video design walkthroughs
Overview Each group will perform a video walkthrough to evaluate another group's video prototype. The related lecture will explain several formal and informal evaluation approaches and how video can be used to support each. We will discuss the benefits of qualitative and quantitative evaluations and address the benefits and dangers of making video presentations to management.
Video Walkthrough A "walkthrough" is a peer group review of a product: people at roughly the same level in the organization meet to systematically review and discuss a segment of software. One can review code, architecture or any aspect of the software. Here, we are interested in the design of the software from the user's perspective. Structured Walkthroughs (Yourdon, 1979) and code inspections have been shown to one of the most efficient and effective methods of obtaining feedback and improving the quality of computer programs.
The rules are very simple, but very important: Groups should be small (3-7 people), members of the group should be at the same level, the presenter should prepare in advance, everyone must be on time and the review should be limited to at most one hour. The goal of the walkthrough is to identify as many problems as possible, not to discuss solutions. Criticisms should be as positive as possible and should be restricted to the design at hand.
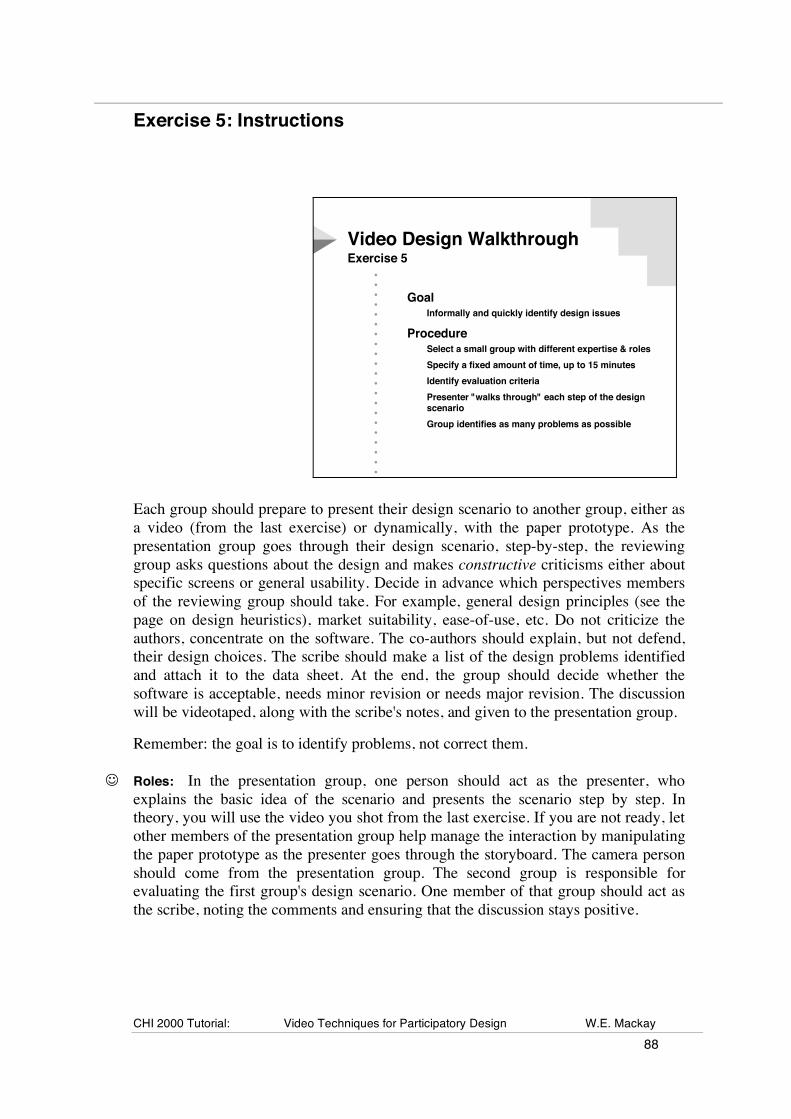
CHI 2000 Tutorial: Video Techniques for Participatory Design W.E. Mackay 88
Exercise 5: Instructions
••••••••••••••••••••••
Video Design WalkthroughVideo Design WalkthroughExercise 5Exercise 5
GoalInformally and quickly identify design issues
ProcedureSelect a small group with different expertise & roles
Specify a fixed amount of time, up to 15 minutes
Identify evaluation criteria
Presenter "walks through" each step of the design
scenario
Group identifies as many problems as possible
GoalInformally and quickly identify design issues
ProcedureSelect a small group with different expertise & roles
Specify a fixed amount of time, up to 15 minutes
Identify evaluation criteria
Presenter "walks through" each step of the design scenario
Group identifies as many problems as possible
Each group should prepare to present their design scenario to another group, either as a video (from the last exercise) or dynamically, with the paper prototype. As the presentation group goes through their design scenario, step-by-step, the reviewing group asks questions about the design and makes constructive criticisms either about specific screens or general usability. Decide in advance which perspectives members of the reviewing group should take. For example, general design principles (see the page on design heuristics), market suitability, ease-of-use, etc. Do not criticize the authors, concentrate on the software. The co-authors should explain, but not defend, their design choices. The scribe should make a list of the design problems identified and attach it to the data sheet. At the end, the group should decide whether the software is acceptable, needs minor revision or needs major revision. The discussion will be videotaped, along with the scribe's notes, and given to the presentation group.
Remember: the goal is to identify problems, not correct them.
Roles: In the presentation group, one person should act as the presenter, who explains the basic idea of the scenario and presents the scenario step by step. In theory, you will use the video you shot from the last exercise. If you are not ready, let other members of the presentation group help manage the interaction by manipulating the paper prototype as the presenter goes through the storyboard. The camera person should come from the presentation group. The second group is responsible for evaluating the first group's design scenario. One member of that group should act as the scribe, noting the comments and ensuring that the discussion stays positive.

CHI 2000 Tutorial: Video Techniques for Participatory Design W.E. Mackay 89
Worksheet: Video Walkthrough
Moderator: ________________________ Presenter : _______________________
Scribe: ___________________________ Standards: _______________________
Start:_____________________________ Stop: _________________________
Design Issues:
_________________________________________________________________
_________________________________________________________________
_________________________________________________________________
_________________________________________________________________
_________________________________________________________________
_________________________________________________________________
_________________________________________________________________
_________________________________________________________________
_________________________________________________________________
_________________________________________________________________
_________________________________________________________________
_________________________________________________________________
_________________________________________________________________
_________________________________________________________________
_________________________________________________________________
_________________________________________________________________
_________________________________________________________________
_________________________________________________________________
_________________________________________________________________

CHI 2000 Tutorial: Video Techniques for Participatory Design W.E. Mackay 90
Discussion: Final Presentations
Some video presentations are designed to stand alone, such as the videos published for SIGGRAPH or CHI. These videos must tell a story, with enough background and context to make sense to the audience. I do not have time to go into details about how to create such a video, other than to caution against excessive use of camera effects (zoom, pan, etc.) and video effects (transitions). A very important consideration, particularly when you are presenting the results of video prototyping, is to make clear what is "real", what is real but enhanced with the video and what is entirely fake. For example, if you have working software and are illustrating its use, you may not cut out the "slow" parts to make the system look faster, unless it is clear that this is what you are doing. Video can be used to mislead; this is never a good idea with videos used for research purposes. If you have created an "envisionment" of something new, label it as such.
Another very effective use of video is as illustrations during a presentation, as is often done during conferences such as CHI. Be careful when you select your clips and cue them so that you have a reasonable, but short, lead time. (10 seconds is very short for finding a clip, but very long if the audience is waiting for the clip to start). Remember that VCRs differ and that starting and stopping a videotape will add seconds. (If you stop for a short period of time, use "pause", not stop.) It's usually best (although not always practical), to organize separate video clips, with a 5-second gap between them, into a single tape for your presentation. DO NOT fast-forward through a videotape in front of an audience: you will almost certainly overshoot the mark, and spend even more time rewinding the tape.
Final Presentation Depending upon the time left, each group will be given the opportunity to present either their video prototype or some other aspect of their project. You may choose something you felt worked well, such as a particularly interesting clip of a user, a brainstormed idea captured on video or the final video prototype. You may also choose to highlight and discuss something that worked less well, and ask for (or give!) advice to others in the group. In each case, the goal is to learn from our mistakes and successes and think about how to apply these techniques in real work settings.
CHI 2000 Tutorial: Video Techniques for Participatory Design W.E. Mackay 91
Annotated Bibliography
The following books and articles provide more detailed information about the subject areas covered in this tutorial. Use these as resources, but do not be afraid to invent techniques for yourself. Designing interactive software is still a new field, video technology is changing rapidly, and there are many opportunities for finding creative new solutions.
Brainstorming: The basic ideas of brainstorming have been around for a long time. Many of the original books are out of print, but the following two survive. Brainstorming has been adopted by the pop-Business book press, but there has also been extensive research on brainstorming as a technique and debates over which specific methods are most successful.
Clark, C. (1989) Brainstorming : How to Create Successful Ideas. CA: Wilshire Book Company.
Wujec, T. (1995) Five Star Mind: Games and Exercises to Stimulate Your Creativity and Imagination, Main Street Books.
Design Walkthroughs: Ed Yourdan introduced the concept of Structured Walkthroughs, about the time of the introduction of structured programming, as a way to make the programming process more reliable. I have applied the basic techniques to a variety of different situations, not just searching for bugs but also analyzing overall designs and editing text. More recently, others in the human-computer interaction community have begun to apply these ideas to evaluating user interface designs.
Bias, R. (1991) Walkthroughs: Efficient collaborative testing. IEEE Software. 6(3) pp. 31-36.
Yourdan, E. (1979) Structured Walkthroughs. NY: Prentice-Hall.
Ethics and Legal issues: I investigated this topic in Mackay (1995), because I was concerned with the casual attitude of colleagues who used video in their work. My initial training as an Experimental Psychologist caused me to take the side of the "subject", trying to protect the person in the video. Yet when I looked at ethical issues in other related fields, it became clear that different professions seek to protect different people. Thus, journalists are more concerned with protecting the audience and consultants are more concerned with protecting their clients, i.e. the companies that hire them. Since the video techniques here involve activities that relate to a variety of people, we need to think not only about how to protect people, but also who those people are. The following books and articles scratch the surface of the ethics literature, providing examples of either ethical codes or analyses of ethical issues from a variety of professions. I have also included an article by Samuelson, who is the leading legal expert in issues relating to human-computer interaction. It is important
CHI 2000 Tutorial: Video Techniques for Participatory Design W.E. Mackay 92
to note that just because something is legal does not mean that it is acceptable. Video is a powerful, useful tool that should be used carefully.
ACM Code of Ethics and Professional Conduct, (1993) Communications of the ACM, vol. 36:2, pp. 100-105.
Gilbert, J., Tashima, N., and Fishman, C. (1991) Ethics and Practicing Anthropologists' Dialogue with the Larger World: Considerations in the Formulation of Ethical Guidelines for Practicing Anthropologists. pp. 200-012 In. Ethics and the Professions of Anthropologists: A New Dialog Era. Caroly Fluehr-Lobban, ed.
Forester, T. and Morrison, P. (1990) Computer Ethics: Cautionary Tales and Ethical Dilemmas in Computing. Cambridge: MIT Press.
Frankel, M.S. (1989) Professional Codes: Why, how and with what impact? Journal of Business Ethics, Vol. 8:2-3, pp.109-116.Shannon, T.A. (1976) Bioethics. NJ: Paulist Press.
Hulteng, J.L. (1985) The Messenger's Motives: Ethical Problems of the News Media. Englewood- Cliffs, NJ: Prentice-Hall .
ICCP (1989) ICCP Code of Ethics. Your Guide to Certification as a Computer Professional. ICCP, 2200 E. Devon Ave., Suite 268, Des Plaines, IL 60018.
IEEE (1979) IEEE Code of Ethics. IEEE, 345, East 47th St., NY, NY 10017.Samuelson, P. (January 1994) Copyright’s Fair Use Doctrine and Digital Data. Communications of the ACM, vol. 37:1, pp. 21-27.
Mackay, W.E. (1995) Ethics, Lies and Videotape. In Proceedings of Human Factors in Computing Systems, CHI '95 (Denver, CO), pp. 421-422. ACM Press, New York, 1995.
Samuelson, P. (January 1994) Copyright’s Fair Use Doctrine and Digital Data. Communications of the ACM, vol. 37:1, pp. 21-27.
Stein, H. (1982) Ethics and Other Liabilities. NY: St. Martin's Press.
Interviewing Techniques: Social scientists of various backgrounds have developed an impressive collection of techniques for observing people and interviewing them. Miller's Handbook of Research Design and Social Measurement provides a multi-disciplinary collection of research designs and specific examples, including information about conducting interviews and designing questionnaires. Beyer and Holtzblatt provide a more HCI-specific approach, showing how to incorporate input from users (customers) into designs. I have also included three references about the Critical Incident Technique (originally by Flanagan in 1954, more recently reviewed by Shattuck and Woods, with an interesting twist offered by Hartson and Castillo), because it is one of the most useful techniques for gathering information to develop work and design scenarios.
Beyer, H. & Holtzblatt, K. (1998) Contextual Design. Defining Customer-Centered Systems. Morgan Kaufmann Publishers
CHI 2000 Tutorial: Video Techniques for Participatory Design W.E. Mackay 93
Flanagan, J. (1954) The Critical Incident Technique. Psychological Bulletin. 51(4). pp. 327-358.
Glaser, B. and Strauss, A. (1967) The Discovery of Grounded Theory: Strategies for Qualitative Research. New York: Aldine de Gruter.
Hartson, R. and Castillo, J. (1998) Remote evaluation for post-deployment usability improvement. In Proceedings of the Working Conference on Advanced Visual Interfaces AVI'98. pp. 22-29. L'Aquila, IT. NY: ACM Press.
Miller, D.C. (1983) Handbook of Research Design and Social Measurement. NY: Longman, Inc.
Patton, M.Q. (1990) Qualitative Interviewing. In Qualitative Evaluation and Research Methods, Sage Publications, pp. 227-359.
Shattuck, L. and Woods, D. (1994) The Critical Incident Technique: 40 Years Later. In Proceedings of the 38th Annual Meeting of the Human Factors Society. pp. 1080-1084.
Straus, A. and Corbin, J. (1990) Basics of Qualitative Research: Grounded Theory, Procedures and Techniques. Newbury Park, CA: Sage Publications.
Participatory Design: As in many research areas, there are distinct differences between the North American and European approaches to research. "Participatory Design" is the American name for "Cooperative Design", which originated in Scandinavia. Greenbaum and Kyng's book has been influential in moving the Scandinavian approach across the Atlantic. In North American, Suchman's book has been extremely influential in challenging the more structured, task-oriented approach to system design. I've included Norman's books because they are important for understanding the basics of user-centered design and the problems with the design of everyday objects today. The Participatory Design conference, associated with the Computer-Supported Cooperative Work conference, both co-sponsored by ACM/SIGCHI, focuses on recent research and techniques in Participatory Design.
Greenbaum, J. and Kyng, M. (1991) Design at Work: Cooperative Design of Computer Systems, NJ: Erlbaum Associates.
Norman, D.A. (1988) The Design of Everyday Things New York, NY: Basic Books
Norman, D.A. & Draper, S. (1986) User Centered system design. New Perspectives on human-computer interaction. Cambridge MA: Bradford/MIT Press
Suchman, L. (1987) Plans and Situated Actions Cambridge England: Cambridge University Press
Prototyping: Much of the literature on Participatory Design includes references to prototyping, with case studies and examples from particular projects. I've included Tognazzini's and Laurel's books, because they focus on somewhat different aspects of prototyping. I have also included several of the early references on the Wizard of Oz technique (named after the movie), which is now in common use in HCI and Participatory Design.
CHI 2000 Tutorial: Video Techniques for Participatory Design W.E. Mackay 94
Laurel, B. (1993) Computers as Theater. MA: Addison-Wesley.
Mackay, W.E. (1986). Beyond the Wizard of Oz. CHI '86 Conference on Human-Computer Interaction. Boston, MA: ACM/SIGCHI, Demonstration presentation.
Muller, M., Wildman, D. and White, E. (1993) 'Equal Opportunity' Participatory Design using PICTIVE. Communications of the ACM, 36(4), pp. 54-66.
Tognazzini, B. (1993) Principles Techniques and Ethics of Stage Magic and Their Application to Human Interface Design. In Proceedings of InterCHI'93 Human Factors in Computing Systems. pp. 355-362. NY: ACM Press.
Scenarios and Storyboards: Scenarios and storyboards have been around for a long time as a method of developing storylines in film and video production. They have been more recently adopted by HCI and Participatory Design developers and researchers, as a useful method for incorporating aspects of the user's work context into the design process.
Carroll, J. (1995) Scenario-Based Design: Envisioning Work and Technology in System Development. NY: Wiley.
Chin, G., Rosson, M. and Carroll, J. (1997) Participatory analysis: Shared development of requirements from scenarios. In Proceedings of CHI'94, Human Factors in Computing Systems. pp. 162-179. Boston, MA: ACM.
Mackay, W. & Bødker, S. (1994) Workshop on Scenario-Based Design. In CHI'94 Conference Companion., Boston, MA: ACM Press.
Mackay, W.E. & Pagani, D. (1994). Video Mosaic: Laying out time in a physical space. Proceedings of Multimedia '94 . San Francisco, CA: ACM.
Multimedia Data Analysis: Many researchers have struggled with the problems of analyzing time-based video data. The following articles describe tools developed specifically to handle multimedia data in human-computer interaction. In addition, I have included several key references on exploratory data analysis (Tukey, 1977 and Hartwig & Dearing, 1979), which is particularly relevant to analyzing data captured in field settings. Cook & Campbell (1979) provide an especially thorough guide to designing field studies, including the various "threats to validity" and how to cope with them.
Cook, T. and Campbell, D. (1979) Quasi-Experimentation: Design and Analysis Issues for Field Settings. Boston, MA: Houghton-Mifflin Company.
Harrison, B. (1991) Video annotation and multimedia interfaces: from theory to practice. In Proc. Human Factors Society 35th Annual Meeting, pp. 319-323.
Hartwig, F. & Dearing, B.E. (1979) Exploratory Data Analysis. Beverly Hills, CA: Sage Publications.
Mackay, W. E., & Davenport, G. (July, 1989) Virtual Video Editing in Interactive Multimedia Applications, Communications of the ACM, 32(7), pp. 802-810.
CHI 2000 Tutorial: Video Techniques for Participatory Design W.E. Mackay 95
Mackay, W.E. (October 1989). EVA: An Experimental Video Annotator for Symbolic Analysis of Video Data. SIGCHI Bulletin, Vol. 21(2). Special Issue: Video as a Research and Design Tool.
Mackay, W.E. and Beaudouin-Lafon, M. (1998b) DIVA: Exploratory Data Analysis with Multimedia Streams. Proceedings of ACM CHI '98 Human Factors in Computing Systems. Los Angeles, California: ACM/SIGCHI.
Roschelle, J. & Goldman, S. (1991) VideoNoter: A productivity tool for video data analysis. Behavior Research Methods, Instruments and Computers. 23, pp. 219-224.
Sanderson, P., Scott, J., Johnston, T., Mainzer, J., Watanabe, L., James, J. (1994) MacSHAPA and the enterprise of exploratory sequential data analysis. (ESDA), International Journal of Human-Computer Studies, 41(5), pp. 633-681.
Sanderson, P. & Fisher, C. (1994) Exploratory sequential data analysis: foundations. Human-Computer Interaction, 9(3), pp. 251-317.
Trigg, R.H. (1989) Computer Support for Transcribing Recorded Activity. ACM SIGCHI Bulletin: Special Issue on Video as a Research and Design Tool, 21(2), pp. 72-74.
Tukey, J.W. (1977) Exploratory Data Analysis. Reading, MA: Addison-Wesley.
Tufte, E. (1983) The Visual Display of Quantitative Information. CN: Graphics Press.
Weber, K. & Poon, A. (1994) Marquee: A Tool for Real-Time Video Logging. Proceedings of CHI'94, Human Factors in Computing Systems. pp. 58-64.
Storyboards: Storyboarding is a technique learned as an apprentice, while learning animation, film-making or some other related discipline. My article below talks about storyboards in the context of an augmented reality system, in which we linked the paper storyboards to an on-line video editing system. The article by Webster is a recent example of a tutorial in a magazine aimed at computer video professionals and explains the basic steps to building a storyboard for animators.
Mackay, W.E. and Pagani, D. (October 1994). Video Mosaic: Laying out time in a physical space. In Proceedings of ACM Multimedia '94 . San Francisco, CA: ACM.
Webster, C. (December 1998) Animation Master Class: part two. Computer Arts. pp. 40-44.
Triangulation: Triangulation is the principle of using different methods to analyze the same phenomenon. If results from the different perspectives match, the likelihood is far greater that the overall result is correct. Human-computer interaction is a multi-disciplinary field, which draws from various social sciences (Psychology, Sociology, Anthropology) and engineering disciplines (computer science), as well as different design disciplines (Graphic Design, Typography). The techniques in this course are drawn from different disciplines and modified to suit the needs of interaction design.
CHI 2000 Tutorial: Video Techniques for Participatory Design W.E. Mackay 96
Mackay, W. & Fayard, A.L (1997a) HCI, Natural Science and Design : A Framework for Triangulation Across Disciplines, DIS’97 : Designing Interactive Systems. Amsterdam, Holland.
Chalmers, A. (1994) What is this thing called Science? An assessement of the nature of science and its methods. Milton Keynes: Open University Press.
Gray and Salzman (1998) Damaged Merchandise? A review of experiments that compare usability evaluation methods. Human Computer Interaction, Vol. 13 (3). (Entire issue)
McGrath, J., Martin, J. & Kulka, J. (1982) Judgment Calls in Research. CA: Sage Publications.
Video: Video analysis can be very simple or very complex, depending upon what you are trying to learn. My article below is a practical guide to organizing your video, with some technical information about video itself. The remaining articles offer examples of how experienced researchers approach analyzing their video data.
Davenport, G., Smith, T.A. and Pincever, N. (July, 1991) Cinematic Primatives for Multimedia. IEEE CGA, 11.4:67:74.
Mackay, W.E. (1998) Technical aspects of using video. Technical Report, Centre d'Études de la Navigation Aérienne.
Suchman, L.A.& Trigg, R.H., (1991) Understanding Practice: Video as a Medium for Reflection and Design, In J. Greenbaum & M. Kyng (eds.), Design at Work: Cooperative Design of Computer Systems. Hillsdale, NJ: Lawrence Erlbaum,
Karasti, H. (1997) Bridging the analysis of work practice and system redesign in cooperative workshops. In Proceedings of DIS'97, Designing Interactive Systems.
Koschmann, Th., Anderson, A., Hall, R., Heath, C., LeBaron, C., Olson, J., and Suchman, L. (1998) Six Readings of a Single Text: A Videoanalytic Session, Panel. In Proceedings of CSCW'98.
CHI 2000 Tutorial: Video Techniques for Participatory Design W.E. Mackay 97
Appendix
1. Mackay, W.E. (1999) Video Tips and Techniques.
2. Mackay, W.E. and Pagani, D. (October 1994). Video Mosaic: Laying out time in a physical space. In Proceedings of ACM Multimedia '94. San Francisco, CA: ACM.
3. Mackay, W.E. (1995) Ethics, Lies and Videotape. In Proceedings of Human Factors in Computing Systems, CHI '95 : Denver, Colorado: ACM Press, New York, pp. 421-422.
4. Mackay, W.E. and Beaudouin-Lafon, M. (1998b) DIVA: Exploratory Data Analysis with Multimedia Streams. In Proceedings of Human Factors in Computing Systems, CHI '98. Los Angeles, California: ACM Press, New York

CHI 2000 Tutorial: Video Techniques for Participatory Design W.E. Mackay 99
Video Tips and Techniques Professor Wendy E. Mackay Department of Computer Science Aarhus University Aabogade 34 DK-8200 N, Aarhus, Denmark + 45 89 42 56 22 [email protected] http://www.daimi.au.dk/~mackay
CHI 2000 Tutorial: Video Techniques for Participatory Design W.E. Mackay 100
About Video
One of the reasons it is difficult to manage video is because it can take many different forms, and the details of how it is created and stored greatly affect what you can do with it. The following is an attempt to lay out some of the different factors that affect video.
Film vs. Video
Film is actually a physical medium, a light-sensitive substance which creates particular effects when exposed to light. You choose the type of film you want before you shoot the image. Chemists create different films to handle different lighting conditions, different uses of color, etc. Good photographers and cinematographers make sophisticated choices about the type of film they use. Film choices are generally about trade-offs: a faster film speed requires more light but produces a finer grained image and different apertures affect which elements of the picture are in focus.
Film comes in different sizes and different aspect ratios. Home film-making systems often use 8 mm or 16 mm. A large, wide-screen system may be 70 mm. The sound track is actually laid down next to the separate film images and the two are synchronized in a very physical way. Film runs (usually) at 24 frames per second. Much of the editing terminology we use for video comes from the very physical aspect of cutting apart strips of film and splicing them together. A "clip" is a sequence of film containing a number of individual frames. We "cut" film and recombine the pieces in different orders. Sometimes, we take copies of film and edit those: a "rough cut" edit.
In contrast, video is really an analog signal that specifies the levels of light emitted from phosphers on a monitor (or television). A video "frame" consists of two fields that are interlaced. When field A is displayed, every other line of the frame appears on the screen (starting from the upper left corner of the screen and continuing in lines across to the bottom right corner of the screen). Field B is then displayed, filling in the alternate lines of the image.
Analog Video Standards
Different countries have different video standards. The U.S. uses NTSC (which doesn't really stand for "never twice the same color") which runs at 30 frames per second. Europe has two standards: PAL (most countries) and SECAM (France + francophones), both of which run at 25 frames per second. The original reason for these rates have to do with the power standards on either side of the Atlantic. In the U.S., it's 60 Hz, in Europe it's 50 Hz. Because the U.S. standard runs at a faster rate, there is a loss of image quality. Because the European standard is slower, the image is better (i.e. higher resolution), but there is more flicker. So there's a trade-off between image quality and flicker.
CHI 2000 Tutorial: Video Techniques for Participatory Design W.E. Mackay 101
Analog Video Formats
Another source of confusion is the number of different video tape formats that have appeared and co-exist. In the early days of video, there was only one tape format (2 inches wide), but playing the tape on different players resulted in different results. So, standardized formats began to appear. For many years, 1 inch tape was "professional", and Sony 3/4" (U-matic) tapes were used by everyone else. The VHS (1/2") size won the battle for the home video market, and there is now a higher quality version, also 1/2", called S-VHS. If you record with an S-VHS camera and tape, you can (usually) play the tape back on either an S-VHS player (full quality) or a regular VHS player (the quality is degraded by about the same amount as making a copy of an S-VHS tape and playing the copy on the S-VHS player). Sony came out with another standard, 8 mm, and a corresponding high-quality version called Hi-8. The advantage of 8 mm is superior quality and a much smaller tape size (which is why most hand-held camcorders use 8mm or hi-8 formats). The differences between 8mm and hi-8 are similar to those between VHS and S-VHS. By the way, the digital 8mm tapes used for computers are the same as hi-8 tapes, but for marketing reasons are much more expensive.
Frames, Fields and Interlaced Video
Each frame of video is displayed as a series of lines that appear on the screen, starting from the upper left-hand corner and ending at the bottom right-hand corner. Although modern computer screens can display one frame in its entirety, televisions use a system called "interlaced video", due to cost and historical reasons. Early American televisions used phosphers that last for only 1/60th of a second so that the top of the image would start to fade before the bottom of the image had appeared. In order to correct for this, each frame was divided into two fields, A and B containing every other line of information for the frame. (This is easy to picture if you interlace or alternate the fingers of your two hands. If you painted a picture on your 10 fingers, and then pulled your hands apart, you'd have two almost identical halves of the pictures, one the fingers of each hand. You can then think of the fingers of your left hand as field A, those on your right hand as field B, and the 10 fingers merged together as the full frame with the complete picture. )
Each field of a video frame is displayed at twice the video rate (either 1/60th or 1/50th of a second) and so gets to the bottom of the screen twice as fast. The result is that you see the full image, since your eye fills in the other half of the image. However, having two fields presents an awkward problem when editing video. Most modern video editing equipment can accurately select a field. But if you, by chance, get field A of one frame and interlace it with field B of another frame, you get a very disturbing image. (This would be like interlacing the fingers of your right hand with the fingers of a friend's left hand. If the friend has a different picture painted on his fingers, the result won't be a coherent picture, but a jumbled image.) Sometimes, if you "freeze-frame" a video tape (especially with older equipment), you see a shimmering image that is the result of the tape stopping between field B of one frame and field A of the subsequent frame.

CHI 2000 Tutorial: Video Techniques for Participatory Design W.E. Mackay 102
Analog Videotape Sizes
Not only are there different video standards, but there are also different videotape sizes. These are completely incompatible with each other. It used to be that the "professional" quality videotape was 2", then it got down to 1". 3/4" tape is still very common (and is often referred to as U-Matic). Several half-inch standards appeared: Sony had beta, but the VHS standard won the marketing wars, mostly by getting into the video rental stores. Beta was better quality, but then "super VHS" came out. Super Beta didn't have a chance. The tapes you rent in a video store and most home video players are VHS 1/2" and it's the most common format. However, now there is 8 mm, and "Hi-8". The latter is better than early professional 1" tape and can be used to make videodiscs. Many home video cameras now use 8 mm or Hi-8.
Recording Analog Video
You should always record on the highest possible quality original videotape. (Right now, hi-8 is the best, most practical solution). When you make copies of videotapes, they degrade. As a rule of thumb, if you start with hi-8, the first copy will be roughly the quality of an 8mm original. The next copy will be roughly the quality of 1/2" VHS. Don't bother with making copies after that. If you start with 1/2" VHS, you'll make a master copy from your original (the first dub) and then you'll find subsequent copies are quite poor.
Aspect Ratios
Video has a different 'aspect ratio' (i.e. the ratio of the height to the width) than film. Basically, video is more square, film is wider. (This is why you sometimes see movies on television with black bands at the top and bottom of the image. The alternative is to chop off part of the image to make it fit on the screen. Some films that take advantage of the entire screen really suffer: consider the opening shot in Lawrence of Arabia. One of the effects of this is that there is a "hotspot " (focus of attention) at the center of a video image, whereas the hotspot for film appears along a diagonal from upper right to lower left. Video is often shot with a single type of lens, which tends to result in closer, more centered images. Film cameras usually use a wide range of lenses and it's possible to create a correspondingly wide range of effects (from really wide-angle to macro/close-ups). While video cameras can use different lenses, in general, they are more limited.
Another difference between video and film is that video tends to have squarer waves than the sine waves of film, which has a completely continuous range of light. So the image is "harder" than that of film. Old film effects, such as rubbing Vaseline on the lens or using a nylon stocking, used to enhance the softness of the image. Now, you can use a variety of filters that accomplish similar effects.
CHI 2000 Tutorial: Video Techniques for Participatory Design W.E. Mackay 103
Storing Analog Video
Video can be recorded on tape, which is a rather poor medium that doesn't last well. Tape stretches and shrinks and the timing for video can change from one player to another. The Society of Motion Picture and Television Engineers created something called SMPTE time code, which provides a rough time sequence for matching video. But it is inexact. A much more exact medium is a videodisc. An NTSC standard videodisc contains 54,000 frames or about 30 minutes of video. The disc is laid out in concentric circles, with one frame per circle. The video signal, a sine wave with special markers to demark the beginning of each frame, is translated into lines. The length of each line corresponds to the amplitude of the sine wave. The result is like a digitized version of the video signal. (This is very different from digitized video, which usually digitizes each frame as a single image, corresponding to the pixels on the monitor. We'll get to digitized video and the ways of compressing it later.) If you look at a videodisc, you can see a narrow "X" in the disc; data on either side of the X corresponds to the two fields that make up each video frame. A videodisc can provide broadcast quality video, but tends to be very expensive. Most videodisc systems are read-only, which means that the original video information must be sent to a special factory that produces a relatively large number of copies of the disc. It is also possible to have a WORM (write-once, read-many) videodisc that allows you to record your own video onto a disc. These machines are much more expensive and the individual discs are expensive as well.
Compressed Digitized Video
Video can be digitized in a number of different ways, based on different constraints. Since video takes up a huge amount of storage space (imagine 54,000 individual bitmap images for a half-hour of video!), it is usually compressed. Some compression algorithms are "lossy", and throw out some of the data. Others preserve all the information. Some compression schemes take a very long time to compress the data, but can redisplay it in real time. (This is useful for movies, which can be compressed once and then sent and displayed many times.) Other compression schemes can compress in real-time and decompress in real-time. JPEG compresses individual frames, but does not compress across frames. MPEG compresses both within and across frames. The latter scheme can make it difficult to randomly access to individual frames, since it might require decompressing a prior key frame and all of the intervening frames to get to the desired frame. Compression algorithms have to make many trade-offs. Sometimes, audio is preserved and individual frames are thrown out. Sometimes both audio and video streams are preserved, but may not be presented in sync. Video images may be degraded in a variety of ways, to save room, and the best option often depends upon the content of the video.
Once video has been digitized, there are a number of techniques that can be used to modify the signal. (It is also possible to create a large number of special effects with analog video editing hardware.)
CHI 2000 Tutorial: Video Techniques for Participatory Design W.E. Mackay 104
HDTV
I haven't talked about HDTV, which is being discussed now as an international standard. It will be higher resolution and will have an aspect ratio in between current video and film. It will take many more bits and it won't be here for a while. The major news is that they've decided to make a single standard, rather than maintaining the current differences between European, American and Japanese countries.
Video Displays
We have a number of options for displaying video, either on a separate analog monitor, or on a digital computer screen. (RGB monitors, which stands for Red-Green-Blue, are specially designed to display video from computer sources.) Videopix boards on the Sun provide a cheap, but low-quality video image, running at 10-15 frames per second. Parallax and Raster Ops boards are very expensive, (over £ 5000) but provide very high-quality, full motion video on the screen. They digitize each frame in real time and also provide the ability to mix information from the computer screen and the video signal, to produce composite video output (which could then be recorded on to video tape). These boards are basically designed to handle analog video input and work best with precise video systems, such as video discs.
Apple's Quicktime handles digitized video. The software provides a mechanism for presenting synchronized audio and video on Macs of any size. You can edit video on a Quadra, which will look pretty good, and run it on an SE, which will look pretty awful, but you won't have to change the underlying code or synchronization. Sun's DIME board is also designed for digitized video, and doesn't have as high resolution as the Parallax or Raster Ops boards, but allows for much more flexible manipulation of the digitized video. We are also investigating new prototype boards from Xerox PARC, designed by Ron Fredricks, which are particularly suited for use with ATM networks.

CHI 2000 Tutorial: Video Techniques for Participatory Design W.E. Mackay 105
Setting up the video camera:
Most special settings degrade the image, so use them only if necessary. Otherwise, turn them off.
Steady shot on Hand-held shots only off Tripod or monitor screen shots Digital zoom on Rarely -- only for long-distance shots off Hand-held, tripod or screen shots Record light on Always - this tells the subject the camera is recording. off Never Date/Time on Only if you you’ll be using on non-Sony players. off Usually Night shot on ONLY in very dark situations with no light off Today’s video cameras operate at very low “lux” - if you
can see, so can the camera.
How to change the settings:
1. Make sure you have power and turn the camera on.
2. Open the LCD screen and press the “menu” button. You will see a menu appear on the screen.
3. Turn wheel to highlight the setting you wish to change.
4. Press the wheel to select an item or turn a setting on or off.
5. Turn the wheel to highlight other settings, or press “menu” again to go back to normal mode.
CHI 2000 Tutorial: Video Techniques for Participatory Design W.E. Mackay 106
Standard Hi-8 Video camera Settings
Steady shot on Hand-held shots off Tripod or monitor screen shots Digital zoom on Rarely -- only for long-distance shots off Hand-held, tripod or screen shots Record light on Always off Never Date/Time on If you expect to play the tape on non-Sony decks off If you only need the digital date and time
How to change the settings:
Press “MENU” button Turn wheel to choose setting Press wheel to select an item
Example:
Turn “steady shot” off
1. Turn camera on
2. Open LCD screen to reveal buttons.
3. Press “Menu” button
Display reads: Feature on Feature off Feature on
4. Turn wheel
until “steady shot” is highlighted
5. Press wheel
Display reads: Steady shot on off
6. Turn wheel to highlight “off”
7. Press menu to get back or
8. Turn wheel to select another setting
CHI 2000 Tutorial: Video Techniques for Participatory Design W.E. Mackay 107
General Advice
Think before you shoot!
Editing is time-consuming and often frustrating, so organize your shots before you shoot. (You will also get better footage this way.) Think about who will view the video and plan accordingly. Do not assume that you can just record randomly and get useful footage. What you’ll do is distract yourself while you’re shooting and end up with unwatchable video afterwards. This is not to say that you should be trying to make a Hollywood movie. But you are collecting data and it is important to think about the ways in which you will analyse it later, before you start.
Remember that the camera person is responsible for deciding what to shoot, which means that he or she will not be able to pay close attention to everything that is happening. If you cannot have a separate camera person, do not assume that a camera on a tripod sitting in the corner is just as good. You will have to make an explicit trade-off between a distracted, but intelligent camera person and an non-distracted, but non-intelligent camera.
Most special settings degrade the image, so use them only if necessary. Otherwise, turn them off.
Steady shot on Hand-held shots only off Tripod or monitor screen shots Digital zoom on Rarely -- only for long-distance shots off Hand-held, tripod or screen shots Record light on Always - this tells the subject the camera is recording. off Never Date/Time on Only if you you’ll be using on non-Sony players. off Usually Night shot on ONLY in very dark situations with no light off Today’s video cameras operate at very low “lux” - if you
can see, so can the camera.
How to change the settings:
1. Make sure you have power and turn the camera on.
2. Open the LCD screen and press the “menu” button. You will see a menu appear on the screen.
3. Turn wheel to highlight the setting you wish to change.
4. Press the wheel to select an item or turn a setting on or off.
5. Turn the wheel to highlight other settings, or press “menu” again to go back to normal mode.

CHI 2000 Tutorial: Video Techniques for Participatory Design W.E. Mackay 108
Videotaping a person sitting at a monitor:
You must decide whether it is more important to see the person or the monitor; since it is difficult to optimize the camera setup for both. The monitor is tricky to shoot: you are essentially shooting at a large light bulb with a repetitive flicker. Most cameras can only record a quarter or less of the screen, requiring zooming in and out to see the whole screen, or panning from one side to the other. Neither is particularly easy to watch; the viewer very quickly loses the context of what is on screen. If you are recording data (as opposed to recording clips to be edited into a video demonstration or other video presentation), it will be difficult to provide this context. (If you have access to editing equipment, you can cut to a wider view, then cut back to the screen. Zooming back and forth is more likely to make the viewer seasick, unless done carefully.)
You will need a tripod. Turn off all extra camera settings (i.e., no digital zoom, no steady-shot, no night-shot). Even if you do not have a tripod, you should turn off steady-shot; the scan lines on the monitor screen will be less intrusive.
Normally you will need to see both the person sitting at the computer and close-up shots of the screen. This will require some advance framing, to make sure you can zoom in quickly and accurately, without moving the camera. A rule of thumb: You will only be able to read text on the screen if you zoom in to one-quarter of the screen. (Test this in your particular situation, though, since text size can be changed, and monitors differ.) Setup Place the camera on the tripod at a height slightly higher than the user’s
head. Normally, you would like an over-the-shoulder view, that, when fully zoomed out, shows the user’s head, shoulders, hands and the monitor.
Framing Use the small screen to adjust the framing. Begin by zooming out to the
maximum view. Then, practice zooming in to a close-up of the screen. Normally, you will want three basic levels of zoom: full out will show the person and the monitor, medium will show the full monitor, and close will show a readable section of the screen. Adjust the tripod and camera position until you can get these three shots from one press of the zoom button.
Shooting Explain to the user what you are doing and let him or her see what the shot
looks like by turning the small screen around. (The image will flip over, giving the correct perspective from the other direction.) If you haven’t already taped the title card, do so now. (See information on title cards.) Tape at least 15 seconds if you are at the beginning of the tape.
Begin with an establishing shot, the full-out zoom, to show the person and the monitor. Usually, it is a good idea to have a voice-over explanation of the setting and the purpose of the shot. Try to avoid moving the camera. If it is necessary to move it, do so only in the close-up view and reposition the camera in the standard place before zooming back out. This will be least distracting for the viewer.
CHI 2000 Tutorial: Video Techniques for Participatory Design W.E. Mackay 109
Video demonstrations
If your goal is to create a video that illustrates a project or a scenario, plan things so that you edit in the camera. A minimal amount of planning will result in a much more watchable video. Prepare title cards Using your favorite text editor, prepare a title card and a credits card. I
suggest using 48 pt helvetica text. The title card usually has the project name and date. The credits card(s) contain the authors names and any other relevant information. Try printing or copying these onto colored paper.
Prepare the video tape Figure out how long your video will be and then lay down a signal onto the
blank tape, to make it easier for the camera to make precise edits. Turn the camera toward a wall and recording for at least 10 minutes longer than you plan the final tape to be.
Rewind to the beginning and record at least 20 seconds of the title card.
(This will enable you to make copies on almost any VCR.) If you have a “photo” feature on the camera, you can freeze an image for 5 seconds. If not, shoot using a tripod and tape the title card to the wall or shoot down onto a table. Some computers have a video-out that will enable you to record directly from the monitor.
Shooting In general, when you edit in the camera, you record your shot, then press the
red button to pause the camera. You now have 5 minutes to shoot again. If you take longer, the camera will automatically go into “stop” mode, and release the tape from the heads, making a precise edit more difficult. If you think you need more than 5 minutes to prepare for the next shot, shoot an extra 3-5 seconds at the end of each clip. Then, just before you are ready to shoot, go into player mode, rewind, then play forward until you reach the end of the clip. Stop, go into record mode and press “pause”. From there, you should be able to start recording again without a “jump” in the tape.
a. Establishing shot The “establishing shot” gives the viewer some context. Usually, it’s a good idea to avoid zooming. But starting with a wide shot and zooming in to the subject you will be concentrating on can work well.
b. Subsequent shots If you will be showing movement, try to practice first, before videotaping, and frame the shot so that the entire movement will occur within the same frame. You can usually do a separate close-up shot later, if you need to. If you plan to show a series of different clips or if you want to make a presentation, prepare a series of slides in advance, like the title cards. Shoot about

CHI 2000 Tutorial: Video Techniques for Participatory Design W.E. Mackay 110
5 seconds each (or more if you will be talking over them). If you print these dividers on different colored paper, it will be easier to find the related clips later.
c. Final credits Shoot the final credits slide in the same way you did the title card and the divider slides. 20 seconds should be enough.