Embed Size (px)
Citation preview
1©2017 Sugar Plum Stocking Treats by Bunny Hill Designs
Cutting DireCtions
Background, Alternate Blocks, Sashing, Borders & Binding
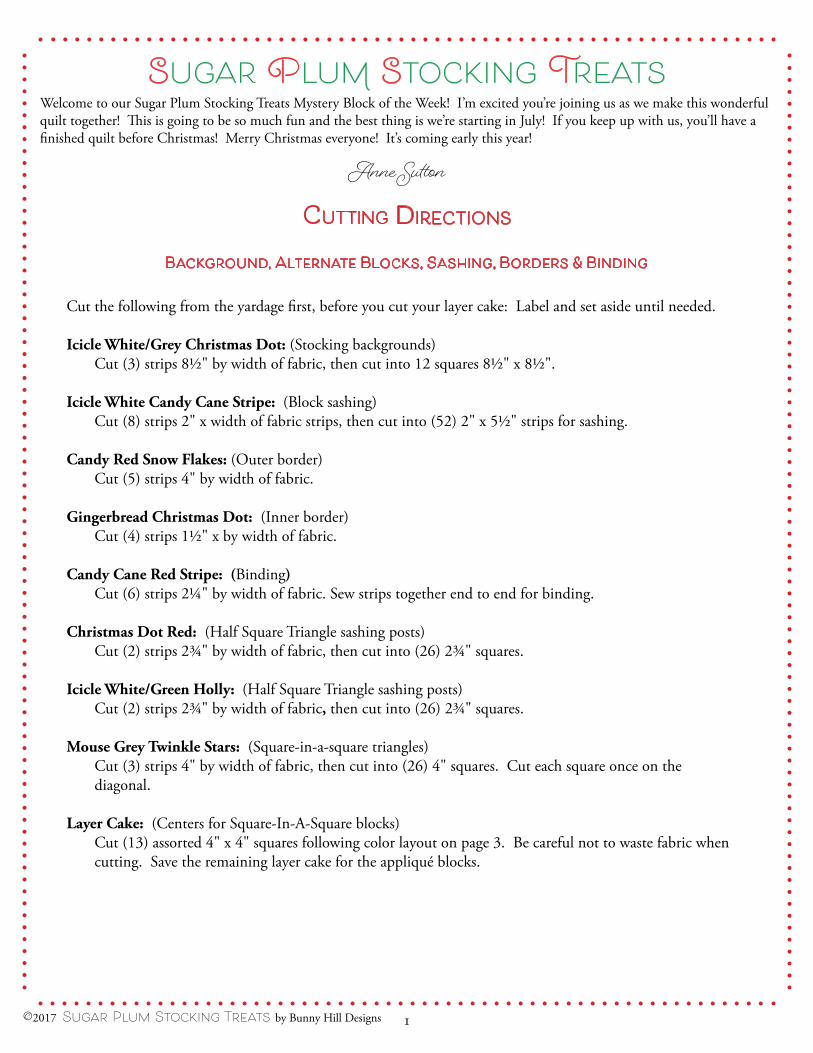
Cut the following from the yardage first, before you cut your layer cake: Label and set aside until needed.
Icicle White/Grey Christmas Dot: (Stocking backgrounds) Cut (3) strips 8½" by width of fabric, then cut into 12 squares 8½" x 8½".
Icicle White Candy Cane Stripe: (Block sashing) Cut (8) strips 2" x width of fabric strips, then cut into (52) 2" x 5½" strips for sashing.
Candy Red Snow Flakes: (Outer border) Cut (5) strips 4" by width of fabric. Gingerbread Christmas Dot: (Inner border) Cut (4) strips 1½" x by width of fabric.
Candy Cane Red Stripe: (Binding) Cut (6) strips 2¼" by width of fabric. Sew strips together end to end for binding. Christmas Dot Red: (Half Square Triangle sashing posts) Cut (2) strips 2¾" by width of fabric, then cut into (26) 2¾" squares.
Icicle White/Green Holly: (Half Square Triangle sashing posts) Cut (2) strips 2¾" by width of fabric, then cut into (26) 2¾" squares. Mouse Grey Twinkle Stars: (Square-in-a-square triangles) Cut (3) strips 4" by width of fabric, then cut into (26) 4" squares. Cut each square once on the diagonal.
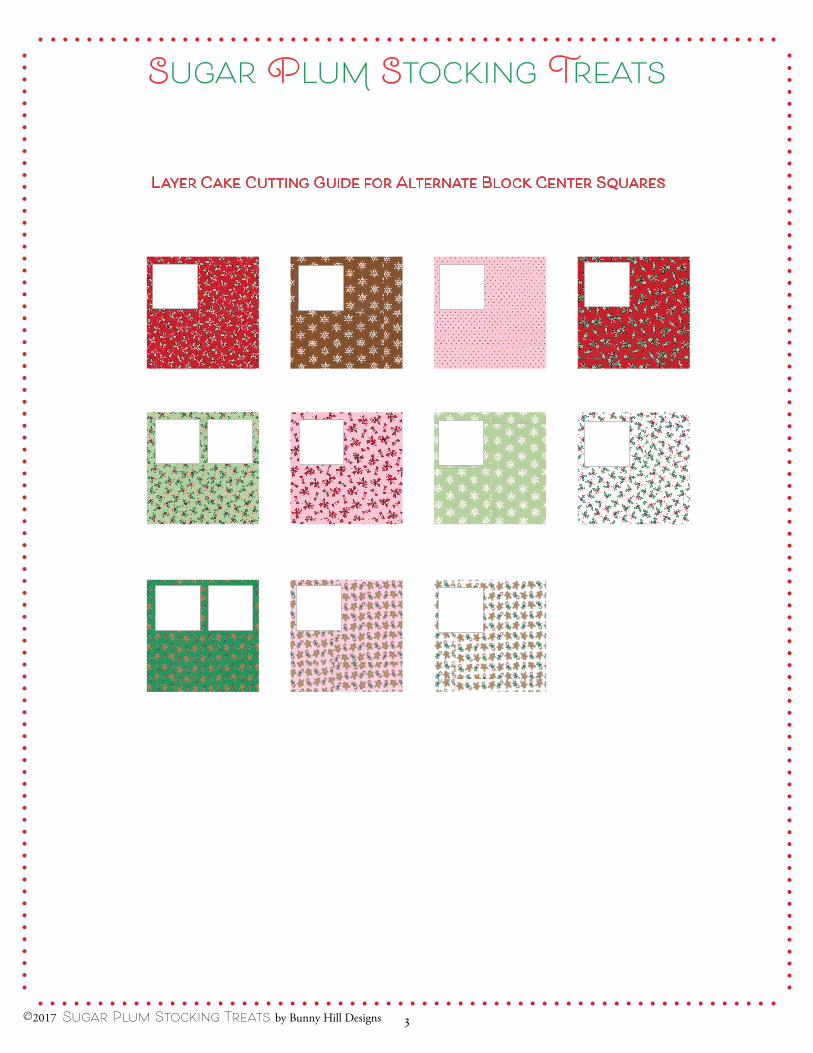
Layer Cake: (Centers for Square-In-A-Square blocks) Cut (13) assorted 4" x 4" squares following color layout on page 3. Be careful not to waste fabric when cutting. Save the remaining layer cake for the appliqué blocks.
Welcome to our Sugar Plum Stocking Treats Mystery Block of the Week! I’m excited you’re joining us as we make this wonderful quilt together! This is going to be so much fun and the best thing is we’re starting in July! If you keep up with us, you’ll have a finished quilt before Christmas! Merry Christmas everyone! It’s coming early this year!
Anne Sutton
2©2017 Sugar Plum Stocking Treats by Bunny Hill Designs
square-in-a-square BloCks
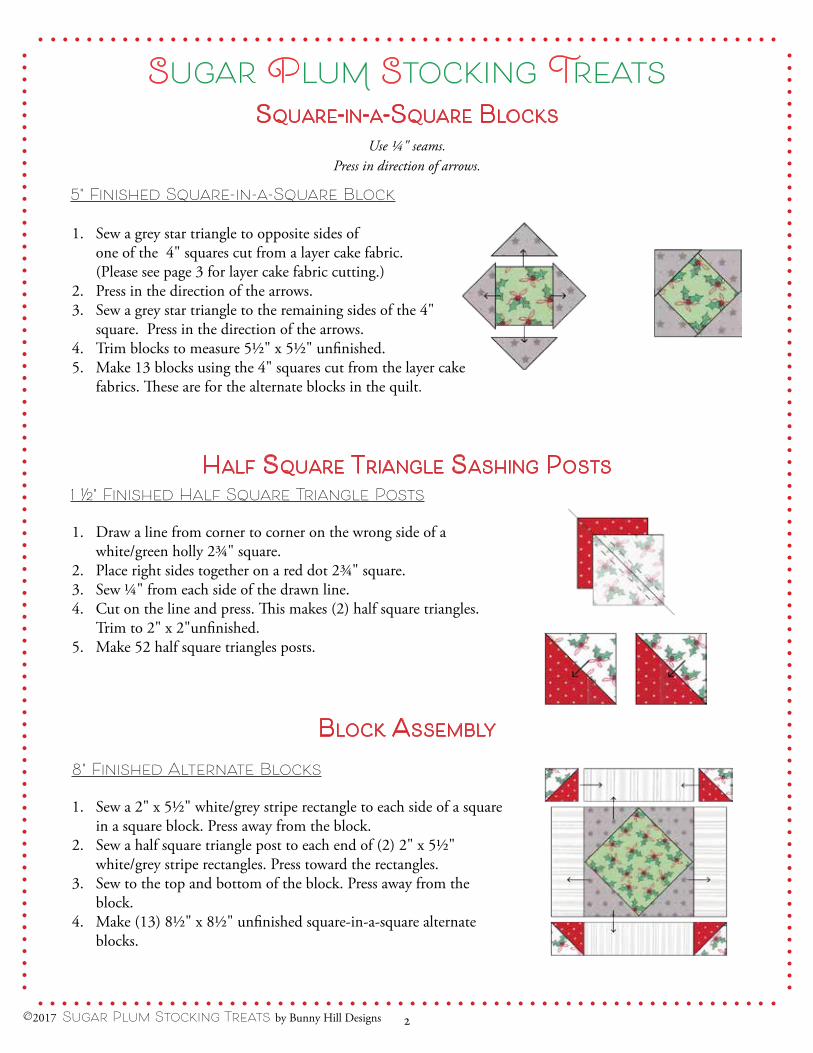
Use 1/4" seams.Press in direction of arrows.
Half square triangle sasHing Posts
1 ½" Finished Half Square Triangle Posts
1. Draw a line from corner to corner on the wrong side of a white/green holly 2¾" square.
2. Place right sides together on a red dot 2¾" square. 3. Sew ¼" from each side of the drawn line.4. Cut on the line and press. This makes (2) half square triangles.
Trim to 2" x 2"unfinished.5. Make 52 half square triangles posts.
BloCk assemBly
5" Finished Square-in-a-Square Block
1. Sew a grey star triangle to opposite sides of one of the 4" squares cut from a layer cake fabric.
(Please see page 3 for layer cake fabric cutting.) 2. Press in the direction of the arrows. 3. Sew a grey star triangle to the remaining sides of the 4"
square. Press in the direction of the arrows.4. Trim blocks to measure 5½" x 5½" unfinished. 5. Make 13 blocks using the 4" squares cut from the layer cake
fabrics. These are for the alternate blocks in the quilt.
8" Finished Alternate Blocks
1. Sew a 2" x 5½" white/grey stripe rectangle to each side of a square in a square block. Press away from the block.
2. Sew a half square triangle post to each end of (2) 2" x 5½" white/grey stripe rectangles. Press toward the rectangles.
3. Sew to the top and bottom of the block. Press away from the block.
4. Make (13) 8½" x 8½" unfinished square-in-a-square alternate blocks.
3©2017 Sugar Plum Stocking Treats by Bunny Hill Designs
Layer Cake Cutting Guide for Alternate Block Center Squares
4©2017 Sugar Plum Stocking Treats by Bunny Hill Designs
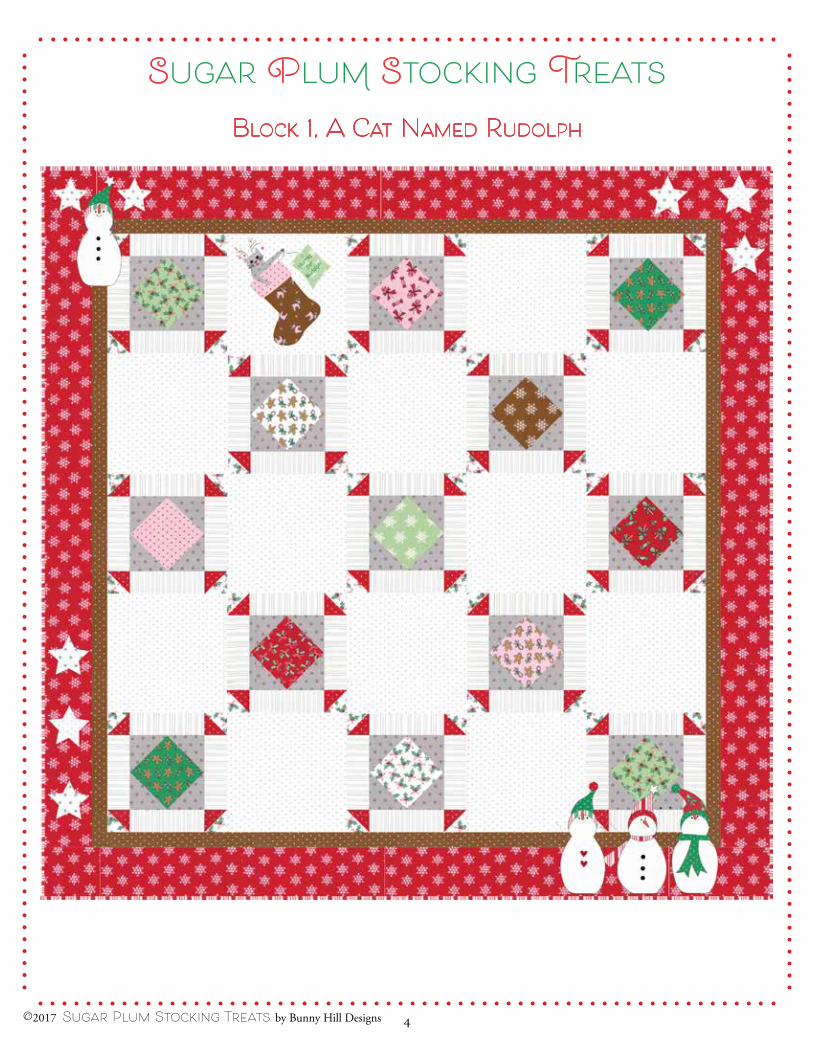
Block 1, A cAt NAmed Rudolph
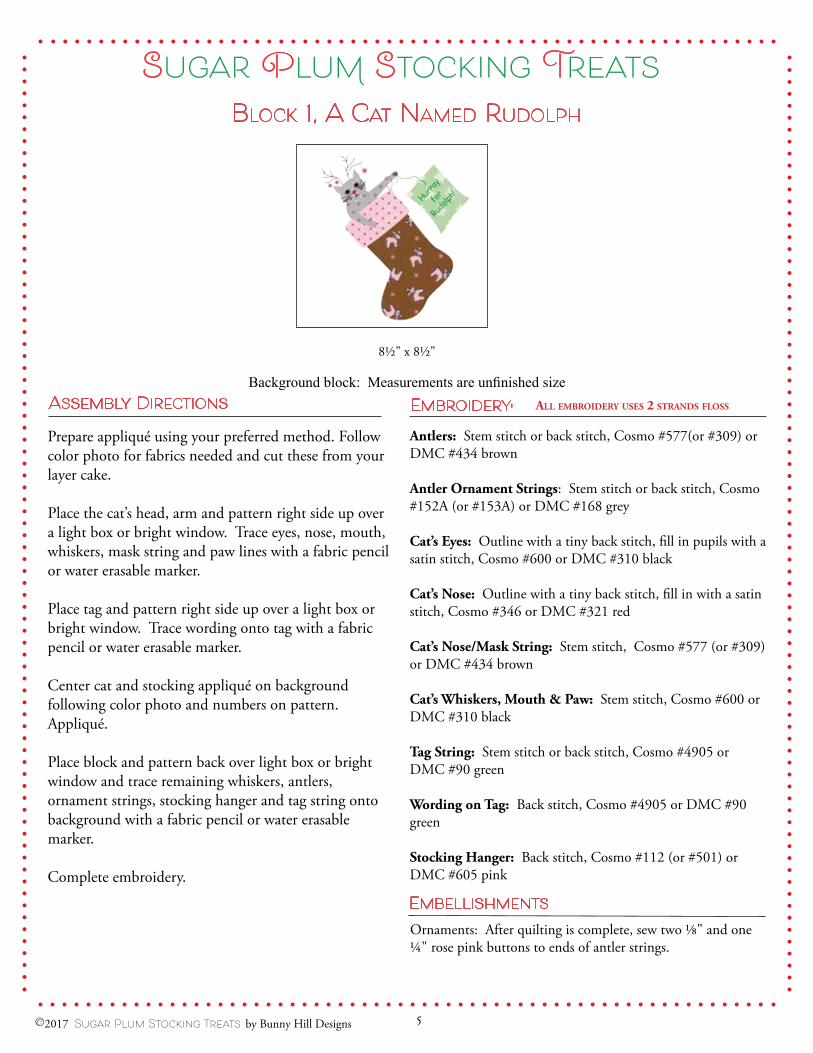
Background block: Measurements are unfinished sizeAssembly Directions Embroidery: All embroidery uses 2 strAnds floss
81/2" x 81/2"
5©2017 Sugar Plum Stocking Treats by Bunny Hill Designs
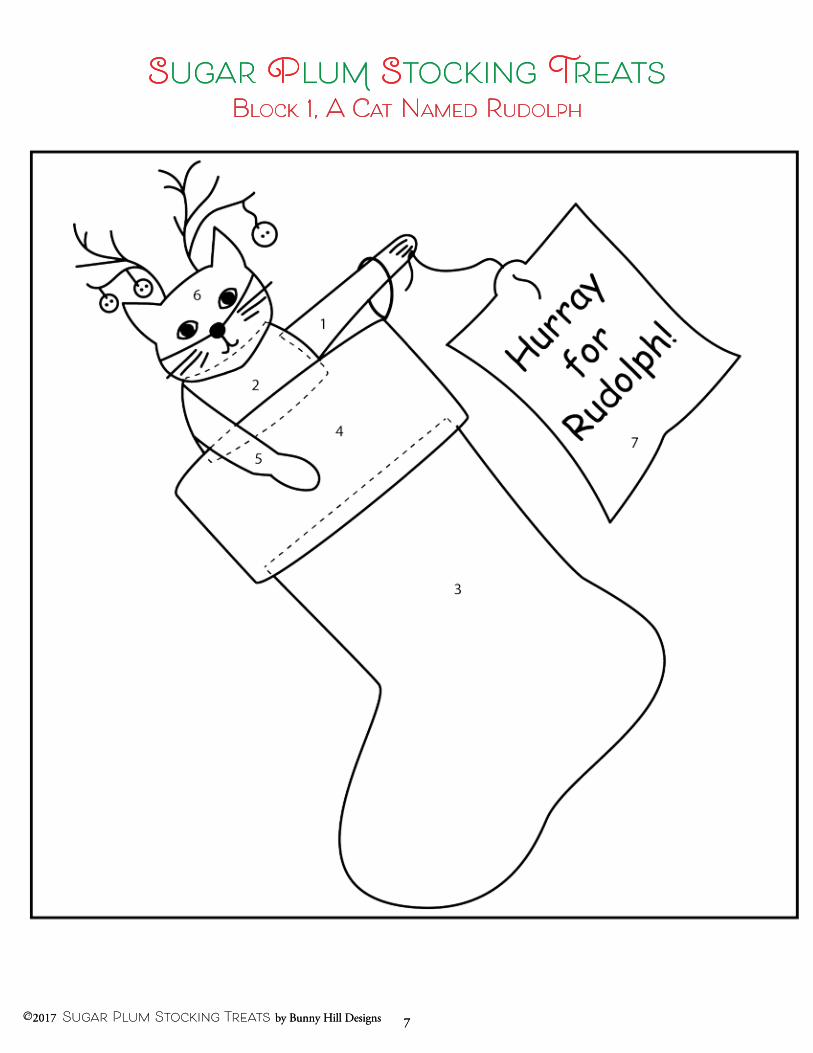
Prepare appliqué using your preferred method. Follow color photo for fabrics needed and cut these from your layer cake.
Place the cat’s head, arm and pattern right side up over a light box or bright window. Trace eyes, nose, mouth, whiskers, mask string and paw lines with a fabric pencil or water erasable marker.
Place tag and pattern right side up over a light box or bright window. Trace wording onto tag with a fabric pencil or water erasable marker.
Center cat and stocking appliqué on background following color photo and numbers on pattern. Appliqué.
Place block and pattern back over light box or bright window and trace remaining whiskers, antlers, ornament strings, stocking hanger and tag string onto background with a fabric pencil or water erasable marker.
Complete embroidery.
Antlers: Stem stitch or back stitch, Cosmo #577(or #309) or DMC #434 brown
Antler Ornament Strings: Stem stitch or back stitch, Cosmo #152A (or #153A) or DMC #168 grey
Cat’s Eyes: Outline with a tiny back stitch, fill in pupils with a satin stitch, Cosmo #600 or DMC #310 black
Cat’s Nose: Outline with a tiny back stitch, fill in with a satin stitch, Cosmo #346 or DMC #321 red
Cat’s Nose/Mask String: Stem stitch, Cosmo #577 (or #309) or DMC #434 brown
Cat’s Whiskers, Mouth & Paw: Stem stitch, Cosmo #600 or DMC #310 black
Tag String: Stem stitch or back stitch, Cosmo #4905 or DMC #90 green
Wording on Tag: Back stitch, Cosmo #4905 or DMC #90 green
Stocking Hanger: Back stitch, Cosmo #112 (or #501) or DMC #605 pink
Embellishments
Ornaments: After quilting is complete, sew two ⅛" and one ¼" rose pink buttons to ends of antler strings.
Block 1, A cAt NAmed Rudolph

6©2017 Sugar Plum Stocking Treats by Bunny Hill Designs
Block 1, A cAt NAmed Rudolph
7©2017 Sugar Plum Stocking Treats by Bunny Hill Designs 7©2017 Sugar Plum Stocking Treats by Bunny Hill Designs
Block 1, A cAt NAmed Rudolph