Embed Size (px)
Citation preview

Intr
od
uct
ion
to
Pro
gra
mm
ing wit
h
Java
Scr
ipt
JavaScriptから始めるプログラミング2016
京都大学工学部情報学科
計算機科学コース3回
KMC2回 drafear
第2回
Intr
od
uct
ion
to
Pro
gra
mm
ing
wit
h J
ava
Scr
ipt
自己紹介
• id- drafear(どらふぃあ, どらふぁー)
•所属- 京都大学工学部情報学科計算機科学コース 3回
•趣味- ゲーム(特にパズルゲー), ボドゲ, ボカロ, twitter
•参加プロジェクト- これ, 競プロ, ctf, 終焉のC++, coq, 組み合わせ最適化読書会
※青: 新入生プロジェクト
@drafear
2@drafear_ku @drafear_carryok @drafear_evolve @drafear_sl @gekimon_1d1a @cuigames

Intr
od
uct
ion
to
Pro
gra
mm
ing
wit
h J
ava
Scr
ipt
•学部学科
• id (入部してたら) or 名前
•趣味
•京大付近の好きな飲食店(あれば)
自己紹介
1. KMC 2回生
2. 新入生
3. KMC 3回生
4. KMC 4回生
5. KMC n回生
3

Intr
od
uct
ion
to
Pro
gra
mm
ing
wit
h J
ava
Scr
ipt
この講座で使用するブラウザとエディタ
• Google Chrome
- https://chrome.google.com
• Atom- https://atom.io/
4

Intr
od
uct
ion
to
Pro
gra
mm
ing
wit
h J
ava
Scr
ipt
てんぷれ
•以下から雛形をダウンロードしてください- https://github.com/kmc-jp/js2016
5

Intr
od
uct
ion
to
Pro
gra
mm
ing
wit
h J
ava
Scr
ipt
今日の目標
• HTML, CSS の違いを理解する
• CSSをいじってデザインしてみる
•じゃんけんを作る
6

Intr
od
uct
ion
to
Pro
gra
mm
ing
wit
h J
ava
Scr
ipt
本日の内容
• HTML- div要素と span要素の違い
• CSS- テキストの装飾
- ボックス
- ホバー, アニメーション
• JavaScript- 数学関数(特に乱数)
- 論理値
- if ~ else 文
- return の挙動
7

Intr
od
uct
ion
to
Pro
gra
mm
ing
wit
h J
ava
Scr
ipt
注意
•新しいことがたくさん出てきますが全部覚える必要はありません
•こんなのあったなーくらいでおkです
•必要になれば調べれば良いので
•重要な項目は、やってるうちに覚えます
8

Intr
od
uct
ion
to
Pro
gra
mm
ing
wit
h J
ava
Scr
ipt
復習
•第1回のスライドを見て復習していきます
9

Intr
od
uct
ion
to
Pro
gra
mm
ing
wit
h J
ava
Scr
ipt
復習問題
•ボタンをクリックすると Hello! と表示するHTML, JavaScriptを書いて下さい
10

Intr
od
uct
ion
to
Pro
gra
mm
ing
wit
h J
ava
Scr
ipt
<button id="btn">Click Me!!</button><span id="text"></span>
index.html
復習問題
•ボタンをクリックすると Hello! と表示するプログラムを書いて下さい
11
document.getElementById("btn").addEventListener("click", (e) => {document.getElementById("text").textContent = "Hello!!";
});
main.js

Intr
od
uct
ion
to
Pro
gra
mm
ing
wit
h J
ava
Scr
ipt
Mathオブジェクト (数学関数)
• Math.max(a, b)- a と b の大きい方を返します
• Math.min(a, b)- a と b の小さい方を返します
12
main.js
console.log( Math.max(2, 10) ); // 10console.log( Math.min(2, 10) ); // 2

Intr
od
uct
ion
to
Pro
gra
mm
ing
wit
h J
ava
Scr
ipt
Mathオブジェクト (数学関数)
• Math.floor(x)- xを切り捨てた値を返します
• Math.ceil(x)- xを切り上げた値を返します
• Math.round(x)- xを四捨五入した値を返します
13
main.js
console.log( Math.floor(3.5) ); // 3console.log( Math.ceil(3.5) ); // 4console.log( Math.round(3.5) ); // 4console.log( Math.round(3.49) ); // 3console.log( Math.floor(-3.5) ); // -4

Intr
od
uct
ion
to
Pro
gra
mm
ing
wit
h J
ava
Scr
ipt
Mathオブジェクト (数学関数)
• Math.pow(x, y)- xyを返します
• Math.sqrt(x)- xを返します
• Math.sin(x)- sin(x) を返します
- xはラジアン単位です
• Math.abs(x)- |x| を返します
• Math.PI- π = 3.14159… (定数)
14
Intr
od
uct
ion
to
Pro
gra
mm
ing
wit
h J
ava
Scr
ipt
main.js
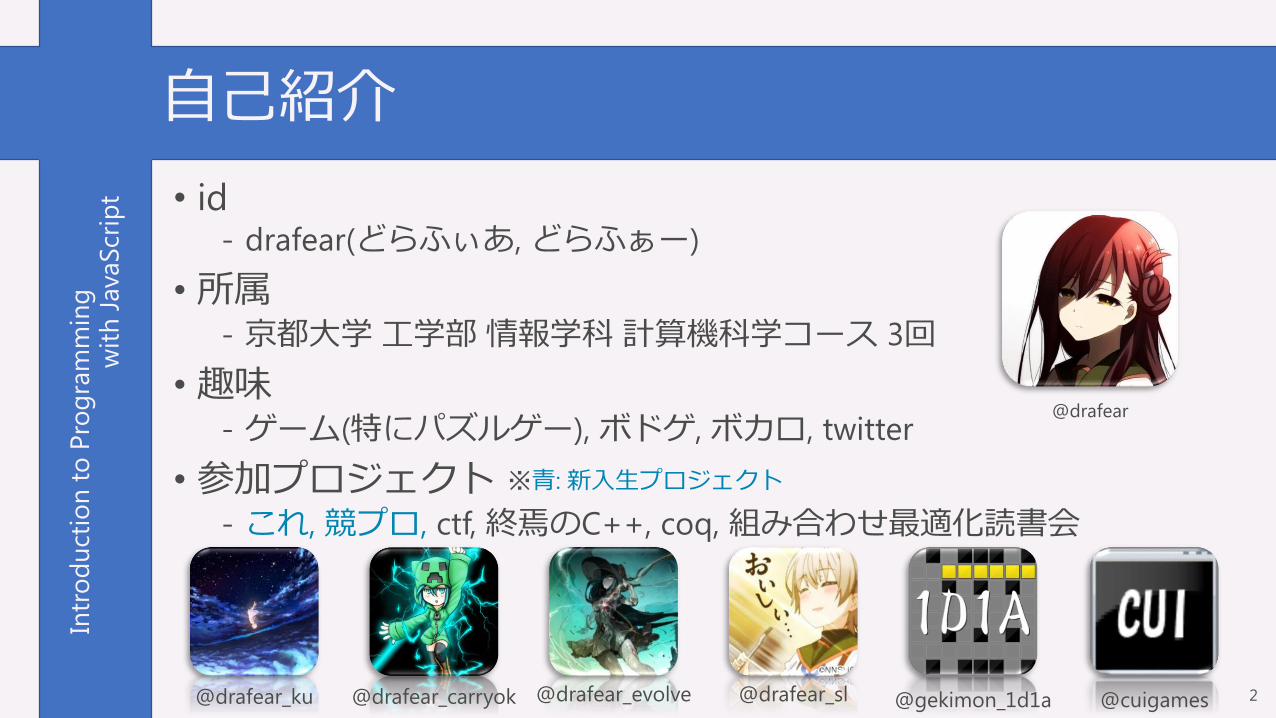
Mathオブジェクト (数学関数)
• Math.random()- 0以上1未満の乱数(ランダムな数)を返します
15
console.log( Math.random() );console.log( Math.random() );console.log( Math.random() );console.log( Math.random() );console.log( Math.random() );

Intr
od
uct
ion
to
Pro
gra
mm
ing
wit
h J
ava
Scr
ipt
main.js
整数値の乱数
• 0 から n-1 までの乱数を生成します
16
let randN = (n) => {return Math.floor( Math.random()*n );
}; > randN(10)
0
> randN(10)
4
> randN(10)
7
動作例

Intr
od
uct
ion
to
Pro
gra
mm
ing
wit
h J
ava
Scr
ipt
演習
1. Math.round を使わずに四捨五入する関数 round を作って下さい- let round = (x) => { … }
- 𝑥 ≥ 0と仮定して良い
2. 1~6の乱数を生成する関数 diceRoll を作って下さい- let diceRoll = () => { … }
3. 三角形の3辺の長さから面積を計算する関数 S を作って下さい- let S = (a, b, c) => { … }
17

Intr
od
uct
ion
to
Pro
gra
mm
ing
wit
h J
ava
Scr
ipt
main.js
演習
1. Math.round を使わずに四捨五入する関数 round を作って下さい- 0.5 足して切り捨て
18
let round = (x) => {return Math.floor(x + 0.5);
};

Intr
od
uct
ion
to
Pro
gra
mm
ing
wit
h J
ava
Scr
ipt
演習
2. 1~6の乱数を生成する関数 diceRoll を作って下さい- randN(6) + 1
19
main.js
let diceRoll = () => {// return randN(6) + 1;
return Math.floor( Math.random()*6 ) + 1;};

Intr
od
uct
ion
to
Pro
gra
mm
ing
wit
h J
ava
Scr
ipt
演習
3. 三角形の3辺の長さから面積を計算する関数 S を作って下さい- ヘロンの公式
𝑆 = 𝑠 𝑠 − 𝑎 𝑠 − 𝑏 𝑠 − 𝑐 , 𝑠 =𝑎+𝑏+𝑐
2
20
main.js
let S = (a, b, c) => {let s = (a + b + c) / 2;return Math.sqrt(s * (s - a) * (s - b) * (s - c));
};

Intr
od
uct
ion
to
Pro
gra
mm
ing
wit
h J
ava
Scr
ipt
論理値
•論理値には真(true) と偽(false) の2種類があります
21
main.js
let flag = true;console.log(flag); // true

Intr
od
uct
ion
to
Pro
gra
mm
ing
wit
h J
ava
Scr
ipt
比較演算子
• a < b- a が b より小さいとき true
- そうでないとき false
• a > b- a が b より大きいとき true
- そうでないとき false
22
main.js
let a = 10;let b = 5;console.log(a < b); // falseconsole.log(a > b); // trueconsole.log(a < a); // false

Intr
od
uct
ion
to
Pro
gra
mm
ing
wit
h J
ava
Scr
ipt
比較演算子
• a <= b- a が b 以下のとき true
- そうでないとき false
• a >= b- a が b 以上のとき true
- そうでないとき false
23
main.js
let a = 10;let b = 5;console.log(a <= b); // falseconsole.log(a >= b); // trueconsole.log(a <= a); // true

Intr
od
uct
ion
to
Pro
gra
mm
ing
wit
h J
ava
Scr
ipt
比較演算子
• a === b- a と b が等しいとき true
- そうでないとき false
• a !== b- a と b が等しくないとき true
- そうでないとき false
24
main.js
let a = 10;let b = 5;console.log(a === b); // falseconsole.log(a !== b); // trueconsole.log(a === a); // true
Intr
od
uct
ion
to
Pro
gra
mm
ing
wit
h J
ava
Scr
ipt
main.js
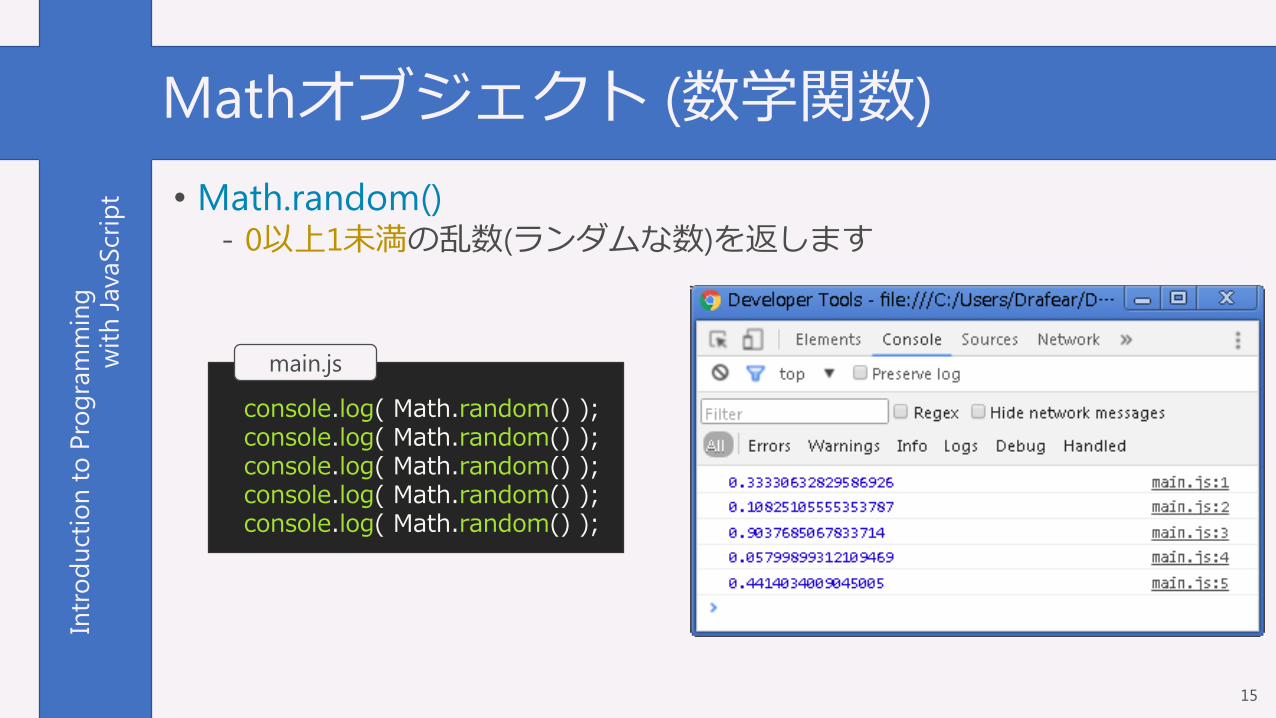
if 文
• if (論理値) { 処理 }- 論理値が true のとき処理を行います
25
let a = 10;let b = 5;if (a > b) {
console.log("a > b");}

Intr
od
uct
ion
to
Pro
gra
mm
ing
wit
h J
ava
Scr
ipt
if ~ else 文
• if (論理値) { 処理1 } else { 処理2 }- 論理値が true のとき処理1 を行います
- 論理値が false のとき処理2 を行います
26
main.js
let a = 10;let b = 5;if (a > b) {
console.log("a > b");}else {
console.log("a <= b");}

Intr
od
uct
ion
to
Pro
gra
mm
ing
wit
h J
ava
Scr
ipt
if ~ else if ~ else 文
• { 処理 } の命令が1つのとき { 処理 } の { } を省略できとくに, if が続くときに省略します
27
main.js
let a = 10;let b = 5;if (a === b) {
console.log("a === b");}else if (a < b) {
console.log("a < b");}else {
console.log("a > b");}

Intr
od
uct
ion
to
Pro
gra
mm
ing
wit
h J
ava
Scr
ipt
main.js
論理演算子
• && 演算子- and をとります
- true && true のときはtrue, それ以外のときはfalse
• || 演算子- or をとります
- false || false のときはfalse, それ以外のときはtrue
28
let a = 10;let b = 5;let flagAnd = a !== 10 && b >= 0; // 𝑎 ≠ 10かつ 𝑏 ≥ 0let flagOr = a !== 10 || b >= 0; // 𝑎 ≠ 10または 𝑏 ≥ 0console.log(flagAnd); // falseconsole.log(flagOr); // true

Intr
od
uct
ion
to
Pro
gra
mm
ing
wit
h J
ava
Scr
ipt
main.js
論理否定演算子
• !a- aが true のとき false
- aが false のとき true
29
let flag = true;flag = !flag;console.log(flag); // false
Intr
od
uct
ion
to
Pro
gra
mm
ing
wit
h J
ava
Scr
ipt
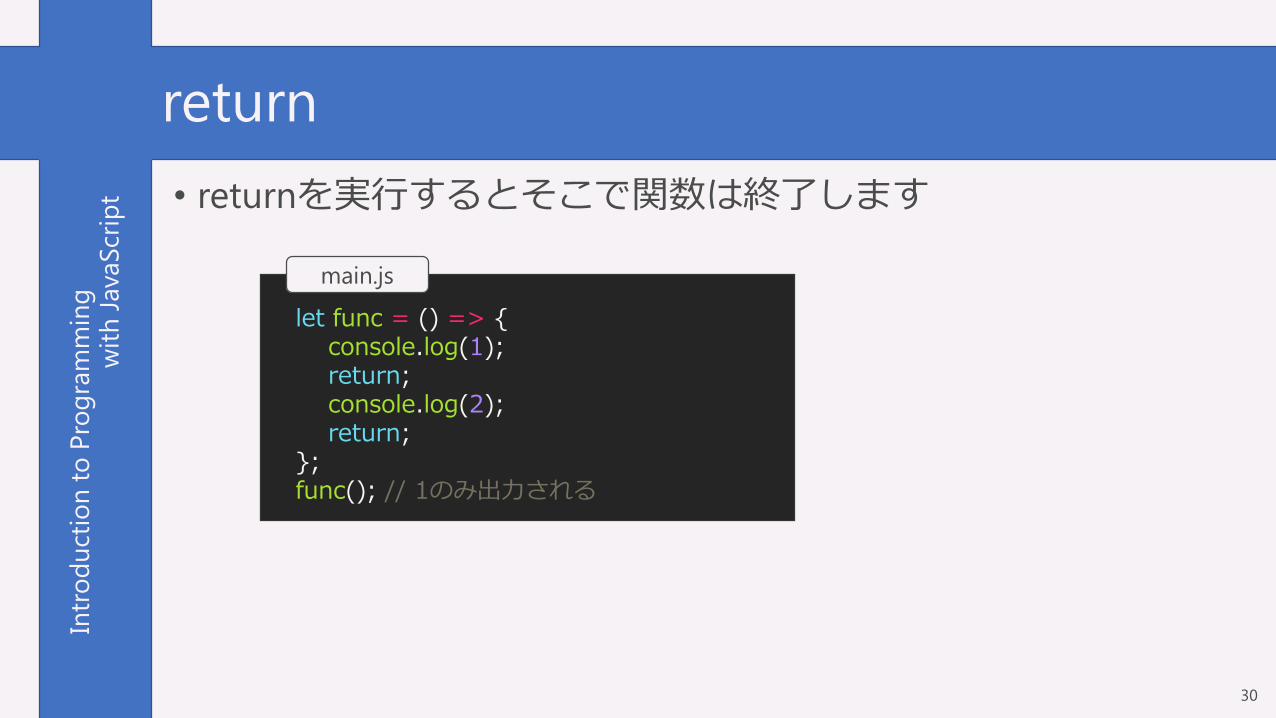
return
• returnを実行するとそこで関数は終了します
30
main.js
let func = () => {console.log(1);return;console.log(2);return;
};func(); // 1のみ出力される

Intr
od
uct
ion
to
Pro
gra
mm
ing
wit
h J
ava
Scr
ipt
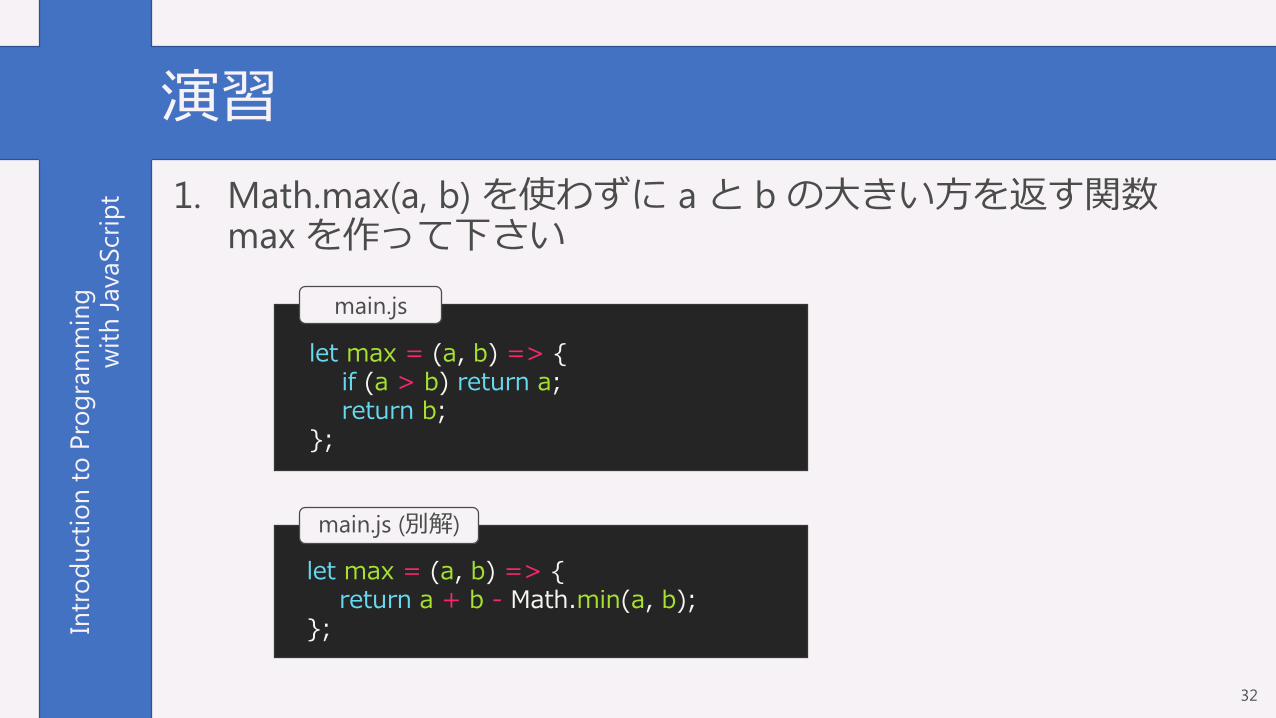
演習
1. Math.max(a, b) を使わずに a と b の大きい方を返す関数max を作って下さい- let max = (a, b) => { … }
2. 実行すると, 50%の確率で ”表” , 50%の確率で ”裏”とコンソールに出力される関数 flip を作って下さい- let flip = () => { … }
31
Intr
od
uct
ion
to
Pro
gra
mm
ing
wit
h J
ava
Scr
ipt
main.js (別解)
演習
1. Math.max(a, b) を使わずに a と b の大きい方を返す関数max を作って下さい
32
main.js
let max = (a, b) => {if (a > b) return a;return b;
};
let max = (a, b) => {return a + b - Math.min(a, b);
};

Intr
od
uct
ion
to
Pro
gra
mm
ing
wit
h J
ava
Scr
ipt
演習
2. 実行すると, 50%の確率で ”表” , 50%の確率で ”裏”とコンソールに出力される関数 flip を作って下さい
33
main.js
let flip = () => {if ( Math.random() < 0.5 ) {
console.log(“表”);}else {
console.log(“裏”);}
};

Intr
od
uct
ion
to
Pro
gra
mm
ing
wit
h J
ava
Scr
ipt
CSS
•次は, CSS を学んでいきます
• CSSは骨組みのHTMLにデザインしていくものです
• Atomの画面を3分割しましょう (右クリック → Split hoge)
34
Intr
od
uct
ion
to
Pro
gra
mm
ing
wit
h J
ava
Scr
ipt
CSS
• CSSでどんなことができるの?- http://www.nxworld.net/tips/css-only-button-design-and-hover-
effects.html
- http://www.nemuchan.com/css3/wk_base04.html
- http://coliss.com/articles/build-websites/operation/css/css3-form-styling-cheat-sheet.html
35

Intr
od
uct
ion
to
Pro
gra
mm
ing
wit
h J
ava
Scr
ipt
index.html
class属性
• CSSを適用するためにまずclass属性を設定します- 雛形の「内容」の部分だけいじっていきます
36
<span class="class1">text</span>

Intr
od
uct
ion
to
Pro
gra
mm
ing
wit
h J
ava
Scr
ipt
style.css
text装飾
• style.css に次のように記述します
37
.class1 {color: red;font-weight: bold;font-size: 40px;text-decoration: underline;
}
index.html
<span class="class1">text</span>

Intr
od
uct
ion
to
Pro
gra
mm
ing
wit
h J
ava
Scr
ipt
text装飾
•文法- .クラス名 { プロパティ名1: 値1; プロパティ名2: 値2; }
•プロパティ (順不同)
- color: red色を指定します
rgb(180, 220, 180) や #aabbcc でRGB指A定できます
- font-weight: bold太字にします
- font-size: 40px文字の大きさを指定します. 単位はここではpxで指定します(他の単位は割愛).
- text-decoration: underline下線を引きます
38

Intr
od
uct
ion
to
Pro
gra
mm
ing
wit
h J
ava
Scr
ipt
複数のクラス指定
• 1つの要素に複数のクラスを指定できます
39
index.html
<span class="red underline">text</span>
style.css
.red {color: red;
}.underline {
text-decoration: underline;}

Intr
od
uct
ion
to
Pro
gra
mm
ing
wit
h J
ava
Scr
ipt
演習
•次のような表示をするものを作って下さい
40

Intr
od
uct
ion
to
Pro
gra
mm
ing
wit
h J
ava
Scr
ipt
演習
41
index.html
<span class="red">Hell</span><span class="green">o, </span><span class="blue">World!!</span>
style.css
.red {color: red;
}.green {
color: green;}.blue {
color: blue;}

Intr
od
uct
ion
to
Pro
gra
mm
ing
wit
h J
ava
Scr
ipt
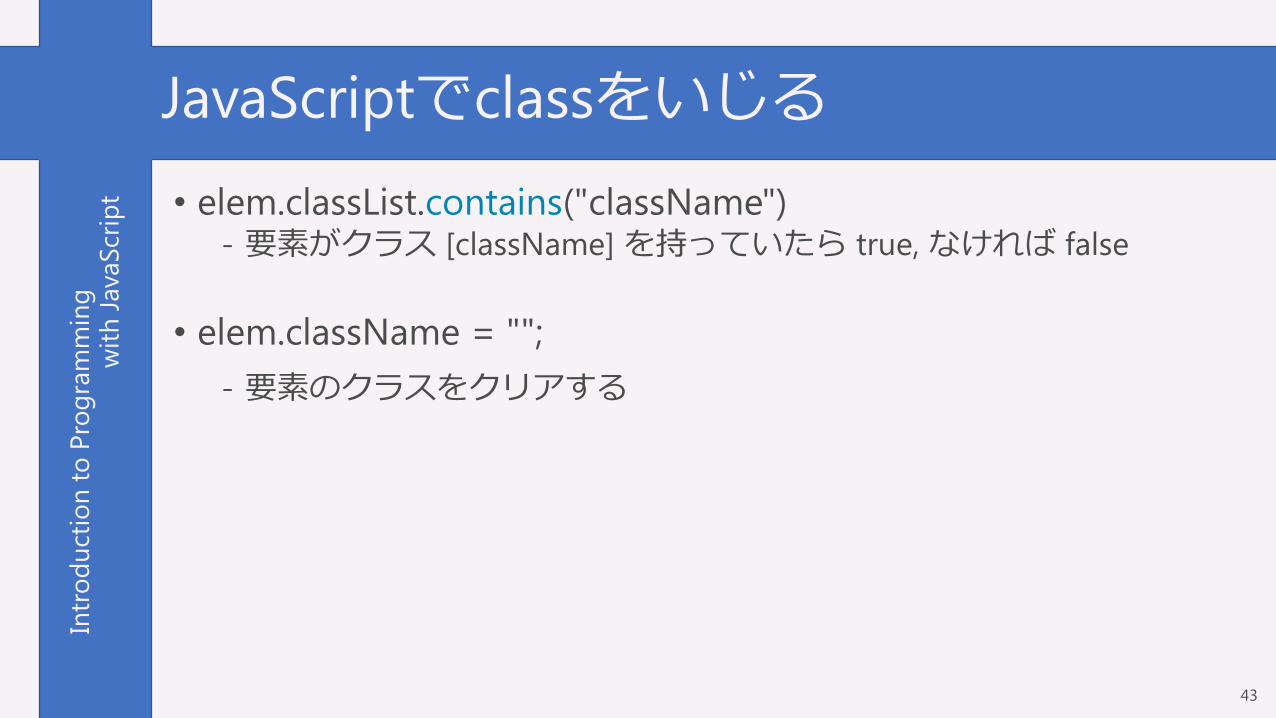
JavaScriptでclassをいじる
• elem.classList.add("className")- 要素にクラス [className] を追加する
• elem.classList.remove("className")
- 要素からクラス [className] を削除する
• elem.classList.toggle("className")
- 要素がクラス [className] を持っていれば remove持っていなければ add
42
Intr
od
uct
ion
to
Pro
gra
mm
ing
wit
h J
ava
Scr
ipt
JavaScriptでclassをいじる
• elem.classList.contains("className")- 要素がクラス [className] を持っていたら true, なければ false
• elem.className = "";
- 要素のクラスをクリアする
43

Intr
od
uct
ion
to
Pro
gra
mm
ing
wit
h J
ava
Scr
ipt
JavaScriptでclassをいじる
44
index.html
<div id="text">hogehoge</div><button id="btnRed">赤</button><button id="btnGreen">緑</button><button id="btnBlue">青</button>
style.css
.red {color: red;
}.green {
color: green;}.blue {
color: blue;}

Intr
od
uct
ion
to
Pro
gra
mm
ing
wit
h J
ava
Scr
ipt
JavaScriptでclassをいじる
45
main.js
let prevClass = null;let changeClass = (c) => { // change class to c
let target = document.getElementById("text");if (prevClass !== null) {
target.classList.remove(prevClass);}target.classList.add(c);prevClass = c;
};document.getElementById("btnRed").addEventListener("click", (e) => {
changeClass("red");});document.getElementById("btnGreen").addEventListener("click", (e) => {
changeClass("green");});document.getElementById("btnBlue").addEventListener("click", (e) => {
changeClass("blue");});

Intr
od
uct
ion
to
Pro
gra
mm
ing
wit
h J
ava
Scr
ipt
display: none;
• cssのプロパティ display に none を指定すると…- その要素が非表示になる
46
<div>elem1</div><div class="hide">elem2</div><div>elem3</div>
index.html
.hide {display: none;
}
style.css
Intr
od
uct
ion
to
Pro
gra
mm
ing
wit
h J
ava
Scr
ipt
演習
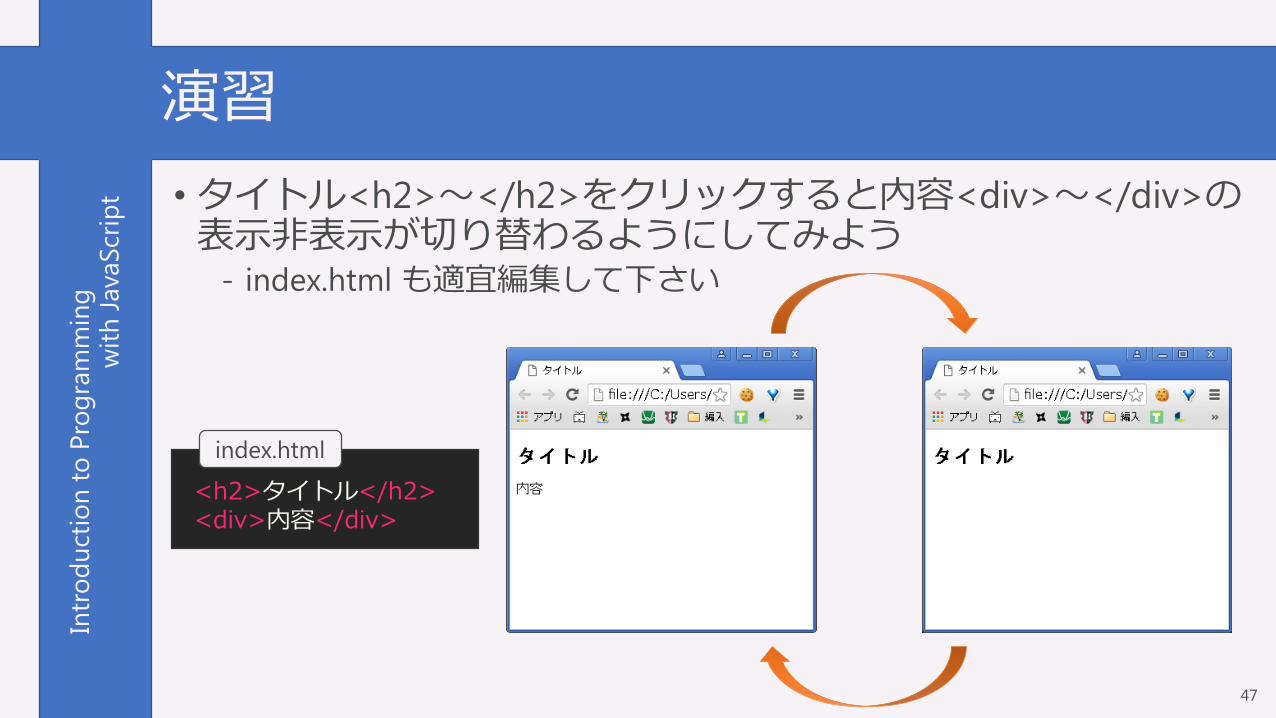
•タイトル<h2>~</h2>をクリックすると内容<div>~</div>の表示非表示が切り替わるようにしてみよう
- index.html も適宜編集して下さい
47
<h2>タイトル</h2><div>内容</div>
index.html

Intr
od
uct
ion
to
Pro
gra
mm
ing
wit
h J
ava
Scr
ipt
演習
•タイトル<h2>~</h2>をクリックすると内容<div>~</div>の表示非表示が切り替わるようにしてみよう
48
<h2 id="title">タイトル</h2><div id="content">内容</div>
index.html
document.getElementById("title").addEventListener("click", (e) => {document.getElementById("content").classList.toggle("hide");
});
main.js
.hide {display: none;
}
style.css

Intr
od
uct
ion
to
Pro
gra
mm
ing
wit
h J
ava
Scr
ipt
演習 (別解)
•タイトル<h2>~</h2>をクリックすると内容<div>~</div>の表示非表示が切り替わるようにしてみよう
49
<h2 id="title">タイトル</h2><div id="content">内容</div>
index.html
document.getElementById("title").addEventListener("click", (e) => {let elem = document.getElementById("content");if (elem.classList.contains("hide")) {
elem.classList.remove("hide");}else {
elem.classList.add("hide");}
});
main.js
.hide {display: none;
}
style.css

Intr
od
uct
ion
to
Pro
gra
mm
ing
wit
h J
ava
Scr
ipt
演習のものに装飾してみる
•タイトルにカーソルを合わせたときの挙動を変えよう- main.js はそのまま
50
.hide {display: none;
}.title {
cursor: pointer;}.title:hover {
text-decoration: underline;}.content {
margin-left: 20px;}
style.css
<h2 id="title" class="title">タイトル</h2><div id="content" class="content">内容</div>
index.html

Intr
od
uct
ion
to
Pro
gra
mm
ing
wit
h J
ava
Scr
ipt
演習のものに装飾してみる
• cursor: pointer;- 要素にマウスカーソルを合わせたときのアイコンの種類
- 一覧http://www.tagindex.com/stylesheet/page/c
ursor.html
• .title:hover- titleクラスが設定された要素にマウスオーバーされた状態の設定
• margin-left: 20px;- 要素の左側に20pxだけ余白を設ける
- margin-top/right/bottom/left
51
.hide {display: none;
}.title {
cursor: pointer;}.title:hover {
text-decoration: underline;}.content {
margin-left: 20px;}
style.css

Intr
od
uct
ion
to
Pro
gra
mm
ing
wit
h J
ava
Scr
ipt
hoverのサンプル
•マウスオーバーで赤文字にするサンプルです
52
<span class="hoverRed">てきすと</span>
index.html
.hoverRed:hover {color: red;
}
style.css

Intr
od
uct
ion
to
Pro
gra
mm
ing
wit
h J
ava
Scr
ipt
ボックス
• HTML要素は全て長方形の領域を持っています
•その領域に装飾してみます
53
index.html
<div class="class1">text</div>
style.css
.class1 {border: 3px solid red;background-color: orange;
}

Intr
od
uct
ion
to
Pro
gra
mm
ing
wit
h J
ava
Scr
ipt
border, background-color
• border: 3px solid red;- 枠線の太さが3px で一重線で赤色
- solid一重線
double(二重線), none(なし) など
• background-color: orange;- 背景色
- 背景に画像を使う場合background-image: url(“画像へのpath”);
背景画像の縦ループ, 横ループなどはまた別のプロパティ指定でできます
54

Intr
od
uct
ion
to
Pro
gra
mm
ing
wit
h J
ava
Scr
ipt
色の指定
1. white, black, red, …- 一覧: http://www5.plala.or.jp/vaio0630/hp/c_code.htm
2. #000000 ~ #FFFFFF (or #ffffff)
3. #000 ~ #FFF (or #fff)
4. rgb(0~255, 0~255, 0~255)
5. rgb(0%~100%, 0%~100%, 0%~100%)
6. hsl(色相(0以上360未満), 彩度(0~100%), 輝度(0~100%))
55

Intr
od
uct
ion
to
Pro
gra
mm
ing
wit
h J
ava
Scr
ipt
色の指定(alpha値: 透明度)
•書式- rgba(red, green, blue, alpha)
- hsla(hue, saturation, lightness, alpha)
•値- 0(透明) ~ 1(不透明)
56

Intr
od
uct
ion
to
Pro
gra
mm
ing
wit
h J
ava
Scr
ipt
色の指定(alpha値: 透明度)
•例
57
<div class="box1"><div class="box2"></div>
</div>
index.html
.box1 {width: 100px; /* 横幅 */height: 150px; /* 縦幅 */background-color: red;
}.box2 {
width: 60px; /* 横幅 */height: 60px; /* 縦幅 */background-color: rgba(0, 0, 0, 0.4);border: 1px solid black;
}
style.css

Intr
od
uct
ion
to
Pro
gra
mm
ing
wit
h J
ava
Scr
ipt
演習
•マウスオーバーで背景色が変化するボタンを作ってみましょう
58
<button class="button1">button</button>
index.html

Intr
od
uct
ion
to
Pro
gra
mm
ing
wit
h J
ava
Scr
ipt
演習
•例 (枠線の色も変えていますが)
59
.button1 {width: 100px; /* 横幅 */height: 100px; /* 縦幅 */background-color: rgb(190, 220, 190);border: 1px solid rgb(150, 180, 150);
}.button1:hover {
background-color: rgb(220, 240, 220);border: 1px solid rgb(170, 200, 170);
}
style.css
Intr
od
uct
ion
to
Pro
gra
mm
ing
wit
h J
ava
Scr
ipt
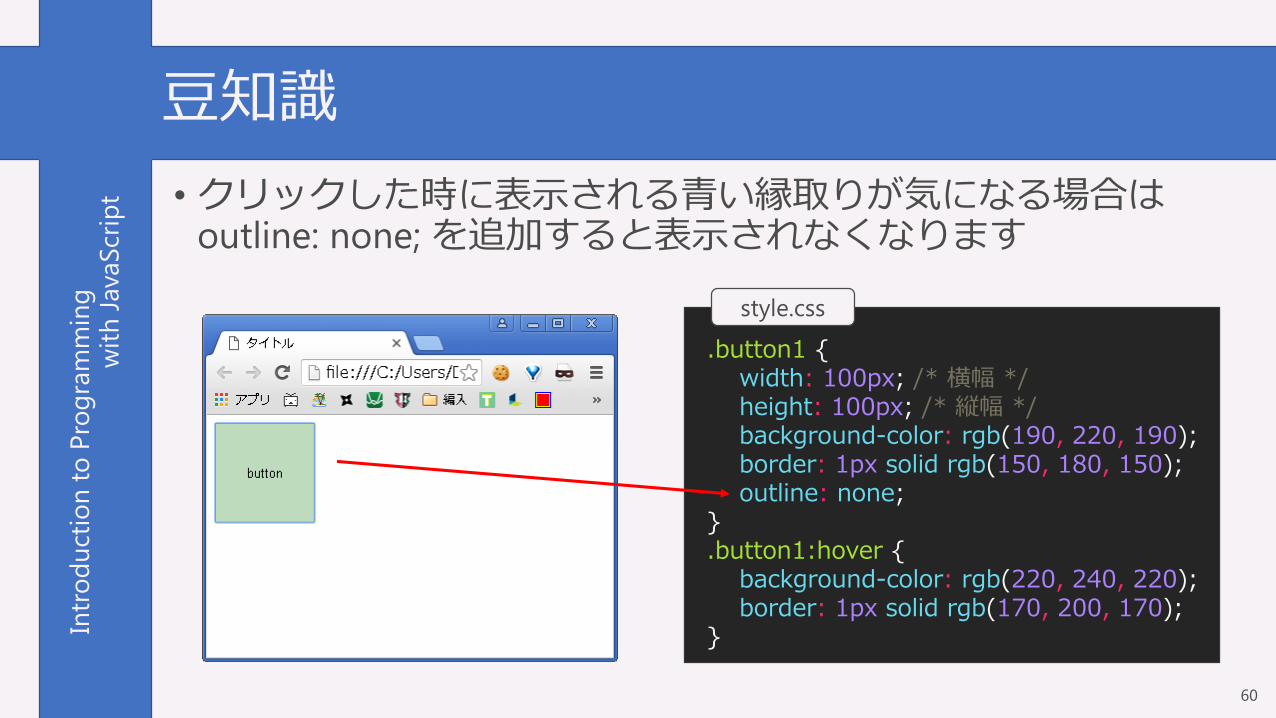
豆知識
•クリックした時に表示される青い縁取りが気になる場合はoutline: none; を追加すると表示されなくなります
60
.button1 {width: 100px; /* 横幅 */height: 100px; /* 縦幅 */background-color: rgb(190, 220, 190);border: 1px solid rgb(150, 180, 150);outline: none;
}.button1:hover {
background-color: rgb(220, 240, 220);border: 1px solid rgb(170, 200, 170);
}
style.css

Intr
od
uct
ion
to
Pro
gra
mm
ing
wit
h J
ava
Scr
ipt
アニメーション
•マウスオーバー時にふわっと背景色を変化させてみる- transition: プロパティ時間;
- [プロパティ] の値が変化するとき[時間] の間でなめらかに変化する
- 全てのプロパティに対して設定する場合は all を指定する
61
.button1 {width: 100px; /* 横幅 */height: 100px; /* 縦幅 */background-color: rgb(190, 220, 190);border: 1px solid rgb(150, 180, 150);outline: none;transition: all 0.3s; /* これだけ! */
}.button1:hover {
background-color: rgb(220, 240, 220);border: 1px solid rgb(170, 200, 170);
}
style.css

Intr
od
uct
ion
to
Pro
gra
mm
ing
wit
h J
ava
Scr
ipt
アニメーション
•マウスオーバー時にふわっと背景色を変化させてみる- 複数のプロパティを指定したい場合以下のようにする
62
.button1 {width: 100px; /* 横幅 */height: 100px; /* 縦幅 */background-color: rgb(190, 220, 190);border: 1px solid rgb(150, 180, 150);outline: none;transition-property: background-color, border-color;transition-duration: 0.3s;
}.button1:hover {
background-color: rgb(220, 240, 220);border: 1px solid rgb(170, 200, 170);
}
style.css
Intr
od
uct
ion
to
Pro
gra
mm
ing
wit
h J
ava
Scr
ipt
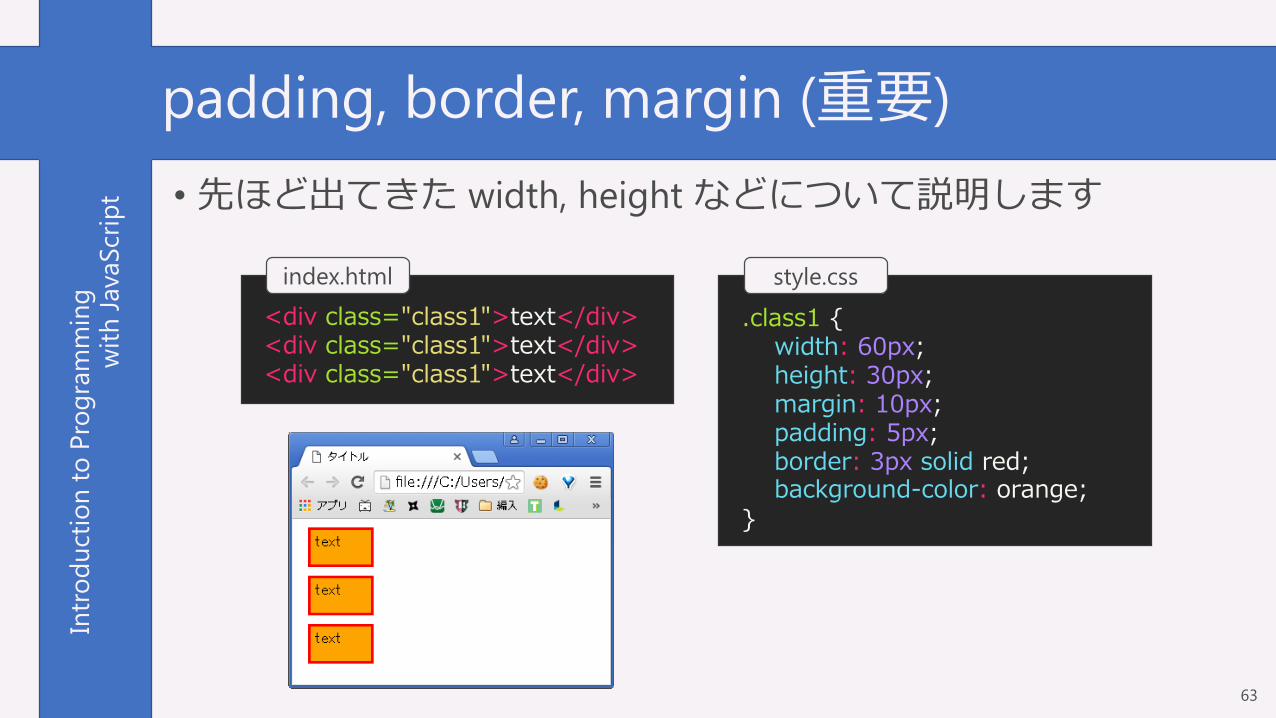
padding, border, margin (重要)
•先ほど出てきた width, height などについて説明します
63
index.html
<div class="class1">text</div><div class="class1">text</div><div class="class1">text</div>
style.css
.class1 {width: 60px;height: 30px;margin: 10px;padding: 5px;border: 3px solid red;background-color: orange;
}

Intr
od
uct
ion
to
Pro
gra
mm
ing
wit
h J
ava
Scr
ipt
padding, border, margin (重要)
64
style.css
.class1 {width: 60px;height: 30px;margin: 10px;padding: 5px;border: 3px solid red;background-color: orange;
}
https://www.addedbytes.com/articles/for-
beginners/the-box-model-for-beginners/

Intr
od
uct
ion
to
Pro
gra
mm
ing
wit
h J
ava
Scr
ipt
問題
65
style.css
.class1 {width: 60px;height: 30px;margin: 10px;padding: 5px;border: 3px solid red;background-color: orange;
}
https://www.addedbytes.com/articles/for-
beginners/the-box-model-for-beginners/
•この幅は何px でしょう

Intr
od
uct
ion
to
Pro
gra
mm
ing
wit
h J
ava
Scr
ipt
答え
66
style.css
.class1 {width: 60px;height: 30px;margin: 10px;padding: 5px;border: 3px solid red;background-color: orange;
}
https://www.addedbytes.com/articles/for-
beginners/the-box-model-for-beginners/
height + padding*2 + border*2= 46px

Intr
od
uct
ion
to
Pro
gra
mm
ing
wit
h J
ava
Scr
ipt
計算つらひ
67
• box-sizing プロパティ- width, heightの計算方法を変更する
- 値content-box (default)
padding-box
border-box
https://nulab-inc.com/ja/blog/nulab/css-basics-for-engineer-boxmodel/

Intr
od
uct
ion
to
Pro
gra
mm
ing
wit
h J
ava
Scr
ipt
box-sizing
68
style.css
.class1 {width: 76px;height: 46px;margin: 10px;padding: 5px;border: 3px solid red;background-color: orange;box-sizing: border-box;
}
https://www.addedbytes.com/articles/for-
beginners/the-box-model-for-beginners/
46px

Intr
od
uct
ion
to
Pro
gra
mm
ing
wit
h J
ava
Scr
ipt
content
•子要素は親要素のcontent領域の左上から順に配置されます
69
<div class="box1"><div class="box2"></div><div class="box2"></div>
</div>
index.html
.box1 {width: 100px; height: 150px;background-color: red;
}.box2 {
width: 60px; height: 60px;background-color: rgba(0, 0, 0, 0.4);border: 1px solid black;
}
style.css
Intr
od
uct
ion
to
Pro
gra
mm
ing
wit
h J
ava
Scr
ipt
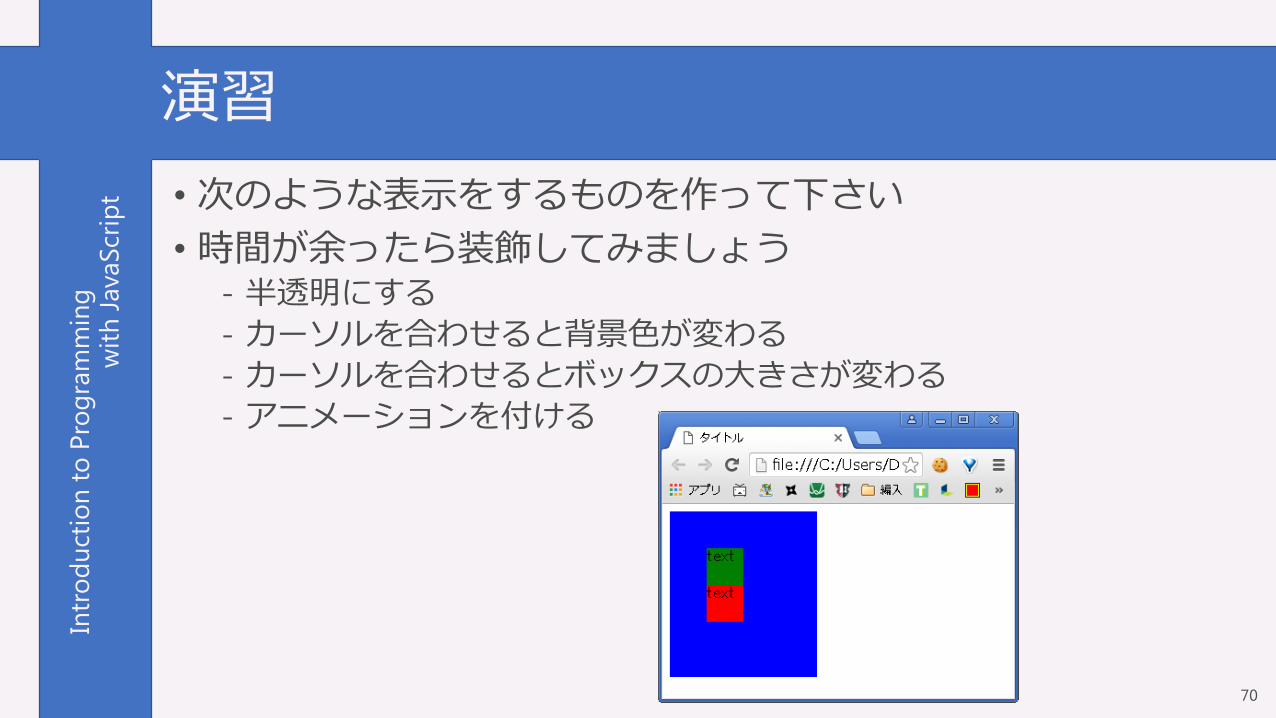
演習
•次のような表示をするものを作って下さい
•時間が余ったら装飾してみましょう- 半透明にする
- カーソルを合わせると背景色が変わる
- カーソルを合わせるとボックスの大きさが変わる
- アニメーションを付ける
70

Intr
od
uct
ion
to
Pro
gra
mm
ing
wit
h J
ava
Scr
ipt
演習
71
index.html
<div class="box1"><div class="box2">text</div><div class="box3">text</div>
</div>
style.css
.box1 {width: 80px;height: 100px;padding: 40px;background-color: blue;
}.box2 {
width: 40px;height: 40px;background-color: green;
}.box3 {
width: 40px;height: 40px;background-color: red;
}

Intr
od
uct
ion
to
Pro
gra
mm
ing
wit
h J
ava
Scr
ipt
演習
72
style.css
.box1 {width: 80px;height: 100px;padding: 40px;background-color: blue;
}.box2,.box3 {
width: 40px;height: 40px;
}.box2 { background-color: green; }.box3 { background-color: red; }
•同じ設定はまとめられます

Intr
od
uct
ion
to
Pro
gra
mm
ing
wit
h J
ava
Scr
ipt
div と span の違い (重要)
• spanは囲むだけ, divは四角いブロックを生成する
•だからspanにはwidth等が設定できない
• divの後には改行が入る
•次回、より詳しく説明します
73

Intr
od
uct
ion
to
Pro
gra
mm
ing
wit
h J
ava
Scr
ipt
じゃんけん
•作ります- http://drafear.ie-t.net/js2016/rps/
74

Intr
od
uct
ion
to
Pro
gra
mm
ing
wit
h J
ava
Scr
ipt
じゃんけん
•構造を定めます
75
div
div
div
button
button button button
div<div>
<div>0勝 0敗 0分</div></div><div>
<button></button></div><div>
<button>ぐー</button><button>ちょき</button><button>ぱー</button>
</div>
index.html
Intr
od
uct
ion
to
Pro
gra
mm
ing
wit
h J
ava
Scr
ipt
じゃんけん
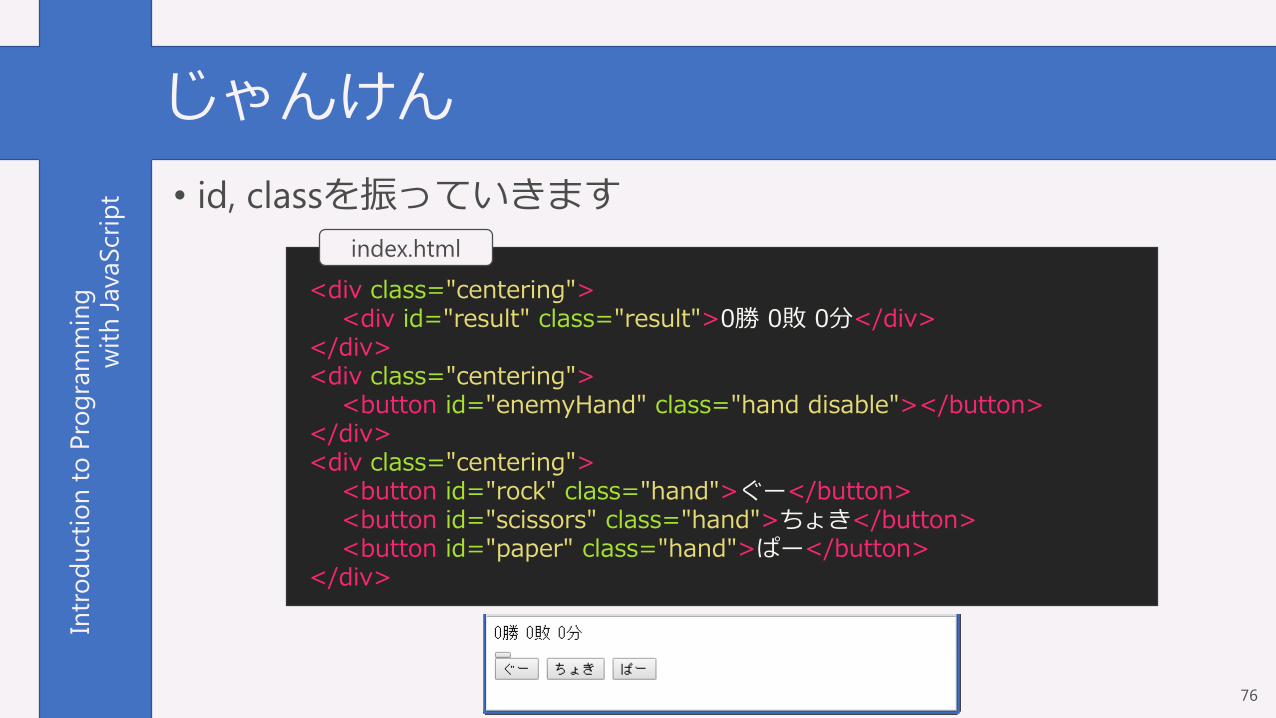
• id, classを振っていきます
76
<div class="centering"><div id="result" class="result">0勝 0敗 0分</div>
</div><div class="centering">
<button id="enemyHand" class="hand disable"></button></div><div class="centering">
<button id="rock" class="hand">ぐー</button><button id="scissors" class="hand">ちょき</button><button id="paper" class="hand">ぱー</button>
</div>
index.html

Intr
od
uct
ion
to
Pro
gra
mm
ing
wit
h J
ava
Scr
ipt
じゃんけん
•中央寄せします
•次回ちゃんと説明するので今のところは "おまじない" で大丈夫です
77
.centering {display: flex;justify-content: center;align-items: center;
}
style.css

Intr
od
uct
ion
to
Pro
gra
mm
ing
wit
h J
ava
Scr
ipt
じゃんけん
• .hand, .result をデザインします- .centering { … } は消さずに追記して下さい
78
.hand {margin: ...;width: ...;height: ...;background-color: ...;border: ...;border-radius: 3px; /* 角を丸める */outline: none;
}.result {
...text-align: center; /* テキスト中央寄せ */cursor: default;
}
style.css
.hand {margin: 20px;width: 60px;height: 80px;background-color: white;border: 2px solid rgb(240, 220, 220);border-radius: 3px;outline: none;
}.result {
width: 300px; /* height は指定しない */margin: 10px;padding: 3px;border: 2px solid rgb(220, 240, 220);background-color: rgb(230, 255, 220);border-radius: 3px;text-align: center;cursor: default;
}
style.css (サンプル)

Intr
od
uct
ion
to
Pro
gra
mm
ing
wit
h J
ava
Scr
ipt
じゃんけん
• :not(条件)- 条件に一致しないもの
- 例) .a:not(.b)クラスa が設定されていてクラスb が設定されていない要素
79
.hand:not(.disable) {cursor: pointer;
}.hand:not(.disable):hover {
background-color: rgb(255, 230, 230);}
style.css (サンプル)

Intr
od
uct
ion
to
Pro
gra
mm
ing
wit
h J
ava
Scr
ipt
じゃんけん
•次はJavaScript部分になります
80
let drawCount = 0; // 引き分けになった回数let winCount = 0; // 勝利した回数let loseCount = 0; // 敗北した回数let selectHand = (myHand) => { /* myHand番の手を出したときの処理 */ }document.getElementById("rock").addEventListener("click", (e) => {
selectHand(0);});document.getElementById("scissors").addEventListener("click", (e) => {
selectHand(1);});document.getElementById("paper").addEventListener("click", (e) => {
selectHand(2);});
main.js

Intr
od
uct
ion
to
Pro
gra
mm
ing
wit
h J
ava
Scr
ipt
じゃんけん
• selectHandを実装しましょう
81
let drawCount = 0; // 引き分けになった回数let winCount = 0; // 勝利した回数let loseCount = 0; // 敗北した回数
// [myHand] 0:ぐー / 1:ちょき / 2:ぱーlet selectHand = (myHand) => {
let enemyHand = Math.floor( Math.random()*3 ); // 相手の手/*
drawCount, winCount, loseCount を更新する(fill in here)
*/update(enemyHand); // 画面に反映する
};let update = (enemyHand) => { ... }
main.js
Intr
od
uct
ion
to
Pro
gra
mm
ing
wit
h J
ava
Scr
ipt
じゃんけん
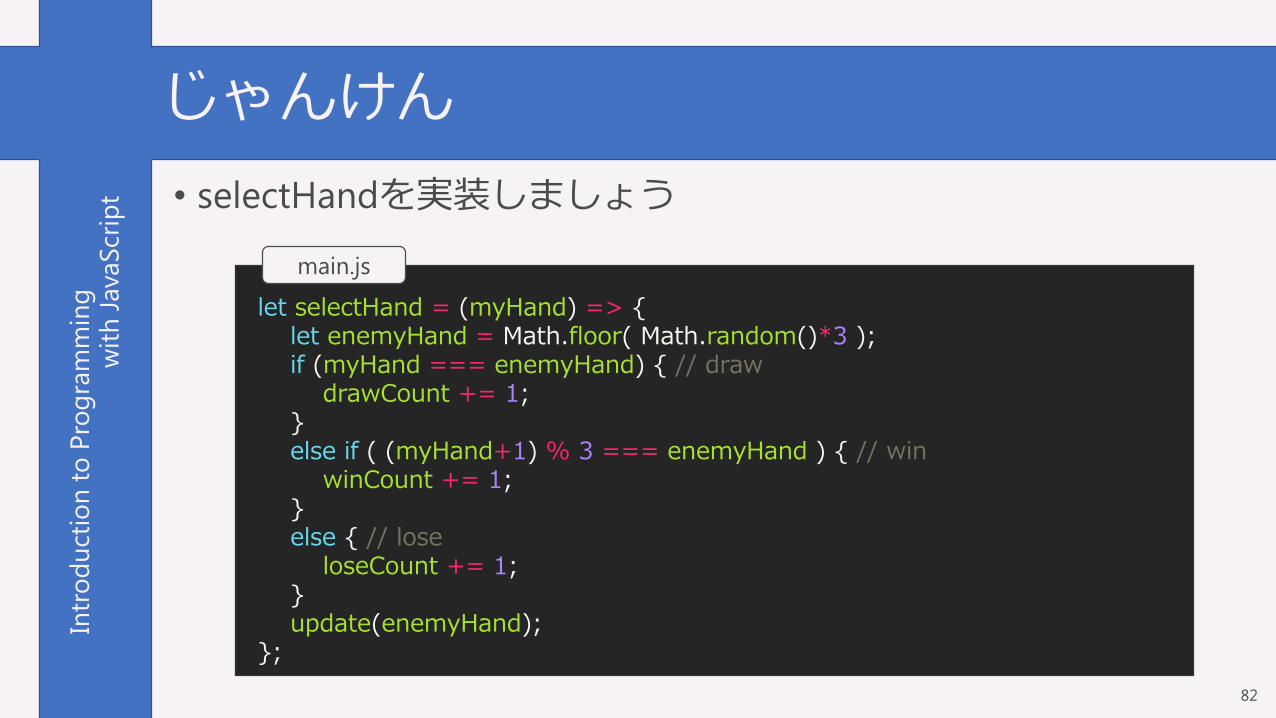
• selectHandを実装しましょう
82
let selectHand = (myHand) => {let enemyHand = Math.floor( Math.random()*3 );if (myHand === enemyHand) { // draw
drawCount += 1;}else if ( (myHand+1) % 3 === enemyHand ) { // win
winCount += 1;}else { // lose
loseCount += 1;}update(enemyHand);
};
main.js
Intr
od
uct
ion
to
Pro
gra
mm
ing
wit
h J
ava
Scr
ipt
じゃんけん
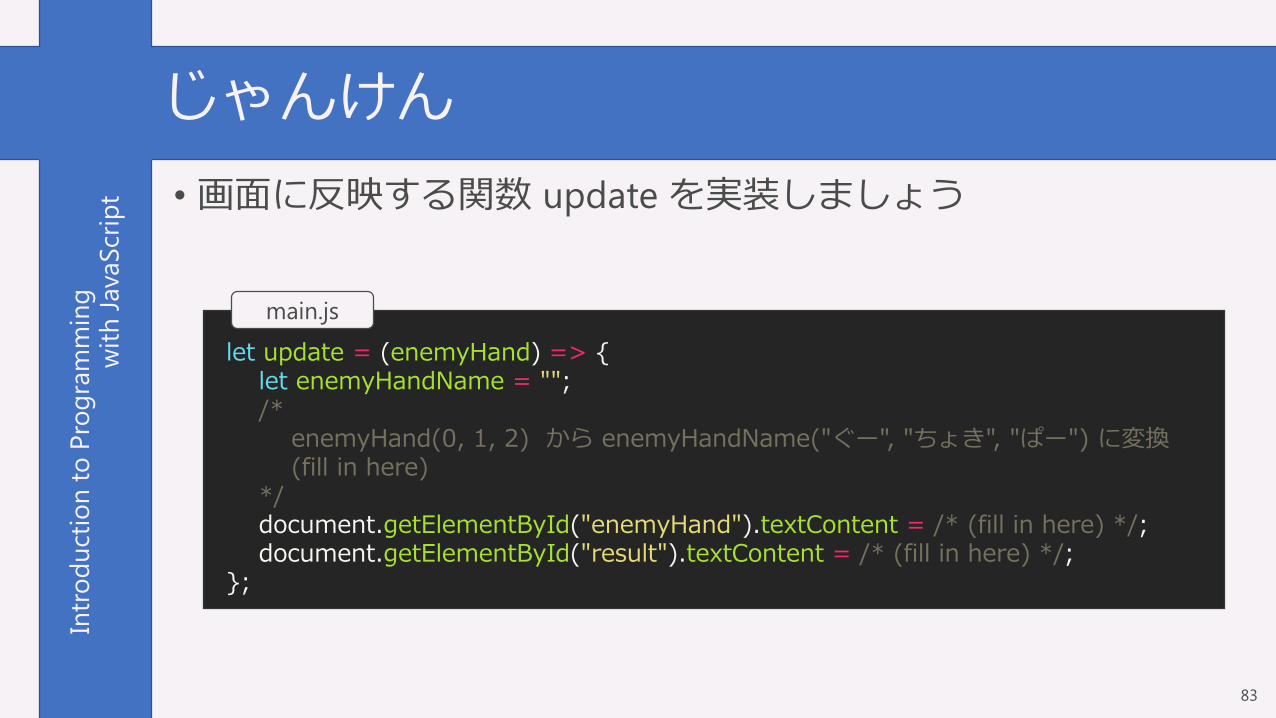
•画面に反映する関数 update を実装しましょう
83
let update = (enemyHand) => {let enemyHandName = "";/*
enemyHand(0, 1, 2) から enemyHandName("ぐー", "ちょき", "ぱー") に変換(fill in here)
*/document.getElementById("enemyHand").textContent = /* (fill in here) */;document.getElementById("result").textContent = /* (fill in here) */;
};
main.js

Intr
od
uct
ion
to
Pro
gra
mm
ing
wit
h J
ava
Scr
ipt
じゃんけん
•画面に反映する関数 update を実装しましょう
84
let update = (enemyHand) => {let enemyHandName = "";if (enemyHand === 0) {
enemyHandName = "ぐー";}else if (enemyHand === 1) {
enemyHandName = "ちょき";}else if (enemyHand === 2) {
enemyHandName = "ぱー";}document.getElementById("enemyHand").textContent = enemyHandName;document.getElementById("result").textContent =
`${winCount}勝 ${loseCount}敗 ${drawCount}分`;};
main.js

Intr
od
uct
ion
to
Pro
gra
mm
ing
wit
h J
ava
Scr
ipt
じゃんけん
•最初にupdate(-1)を呼んで画面を初期化するようにしましょう
85
let drawCount = 0; // 引き分けになった回数let winCount = 0; // 勝利した回数let loseCount = 0; // 敗北した回数
let selectHand = (myHand) => { ... }let update = (enemyHand) => { ... }
document.getElementById("rock").addEventListener("click", (e) => { ... });document.getElementById("scissors").addEventListener("click", (e) => { ... });document.getElementById("paper").addEventListener("click", (e) => { ... });
update(-1); // 追加
main.js

Intr
od
uct
ion
to
Pro
gra
mm
ing
wit
h J
ava
Scr
ipt
じゃんけん
•完成!!お疲れ様です!!
86
Intr
od
uct
ion
to
Pro
gra
mm
ing
wit
h J
ava
Scr
ipt
じゃんけん
•余力があれば改造してみてください- AIを変える
"ぐー", "ちょき", "ぱー" からランダムに選んでいるが「特定の手しか出さない」「絶対に勝つ手を出す」「ローテーション」など
- 前に自分が選んだ手が分かりやすいようにデザインする
- 勝率を出す
- ルールを追加する
「前に出した手は出せない」など
87

Intr
od
uct
ion
to
Pro
gra
mm
ing
wit
h J
ava
Scr
ipt
ファミコンゲーム作れる!?
88http://www.amazon.co.jp/%E3%83%8A%E3%83%A0%E3%82%B3-
%E3%83%9E%E3%82%A4%E3%83%B3%E3%83%89%E3%82%B7%E3%83%BC%E3%82%AB%E3%83%BC/dp/B000068H3D

Intr
od
uct
ion
to
Pro
gra
mm
ing
wit
h J
ava
Scr
ipt
マインドシーカー作れる!?
•タイトル- マインドシーカー
•発売日- 1989年4月18日
•制作会社- ナムコ
•機種- ファミコン
•定価- 6500円+税
89
マインドシーカー

Intr
od
uct
ion
to
Pro
gra
mm
ing
wit
h J
ava
Scr
ipt
ゲーム概要
超能力者養成ソフト
90

Intr
od
uct
ion
to
Pro
gra
mm
ing
wit
h J
ava
Scr
ipt
ゲーム概要
91
念力
予知 透視

Intr
od
uct
ion
to
Pro
gra
mm
ing
wit
h J
ava
Scr
ipt
念力
92
念じてランプを点灯させる

Intr
od
uct
ion
to
Pro
gra
mm
ing
wit
h J
ava
Scr
ipt
透視
93
カードの模様を当てる

Intr
od
uct
ion
to
Pro
gra
mm
ing
wit
h J
ava
Scr
ipt
予知
94
光るランプがどれかを当てる

Intr
od
uct
ion
to
Pro
gra
mm
ing
wit
h J
ava
Scr
ipt
今後の予定
• 5/22(日) 13:00 ~ 16:00- JavaScriptの基礎をマスターする
- CSSでレイアウトを学ぶ
- ゴリラを倒すゲームを作る
• 5/29(日) 13:00 ~ 16:00- 復習回
- atomの便利なプラグイン紹介
- 何かを作ろう
• 6/5(日) 13:00 ~ 16:00- 避けゲーを作る 95


![[A 3]SSJSでも使える!Javascriptでオブジェクト指向プログラミング入門](https://img.pdfslide.tips/doc/110x75/559c70e21a28ab5e708b45d8/a-3ssjsjavascript.jpg)