Embed Size (px)
Citation preview

Oracle Smartview Workshop
Smart View 11.1.2.1
Agenda
1) Smart View Overview 2) Connecting to Planning via Smart View 3) Using Smart View to connect to Web
Forms 4) Tips, Tricks & Hints on Using Smart View
to Connect to Web Forms 5) Smart View Ad-Hoc Reporting 6) Questions?
2
Objectives
Provide an introduction to the
Smart View for Office tool.
Enable Dartmouth team to begin accessing Hyperion Planning, Essbase and data using Smart View.
Enable users to create adhoc reports using Smart View and explore other key features
3

Smart View Basics Brief overview of the features available in Smart View
4
What is Smart View?
5
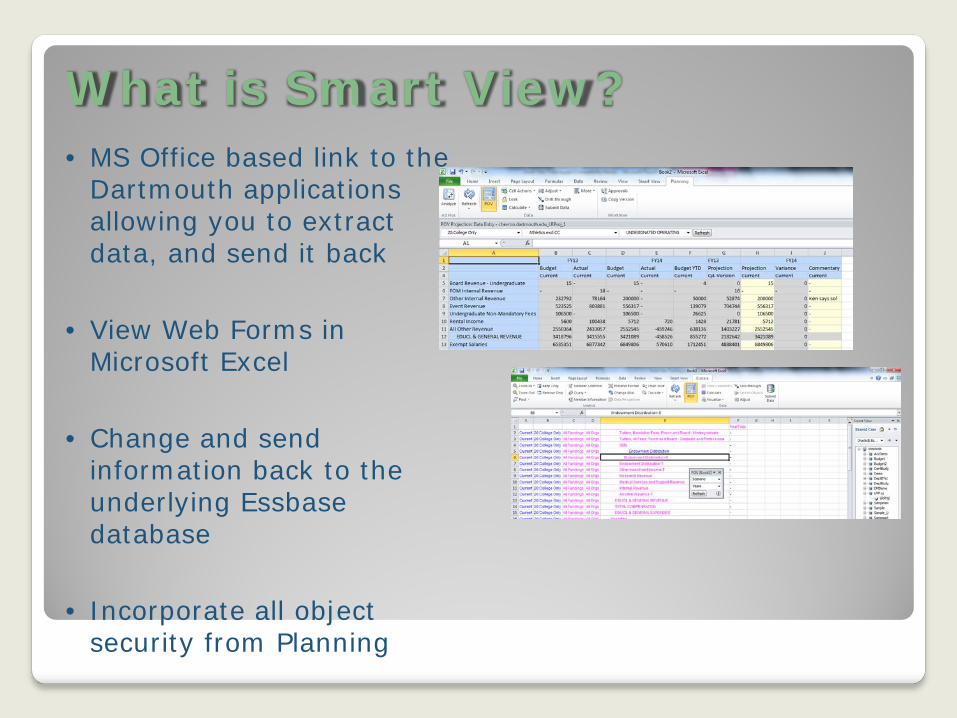
• MS Office based link to the Dartmouth applications allowing you to extract data, and send it back
• View Web Forms in Microsoft Excel
• Change and send
information back to the underlying Essbase database
• Incorporate all object security from Planning
What is Smart View? – continued.
Smart View allows you to work with pre-existing Web Forms in Microsoft Excel ◦ You can view, enter, edit, and send data back into the cubes ◦ You can hide cells you do not need to see/use ◦ You can add formulas (with caveats) ◦ You cannot add additional rows or columns of data—they will be lost
when data is transmitted back into the cubes – HOWEVER you can do using in Ad-Hoc Analysis…
Smart View also has an ad-hoc mode, which can be used to create
pivoted free form reports. Based in Excel, this tool is a powerful way to create custom reports.
We will start with using Smart View to access pre-existing Web Forms…
6
Why Smart View?
Smart View is a powerful tool that enables user’s to define their own reports.
Better, and broader, access to information.
Customizable, and easy to work with (It’s in Excel!)
7
Getting Started Connecting to Hyperion Planning using Smart View
8
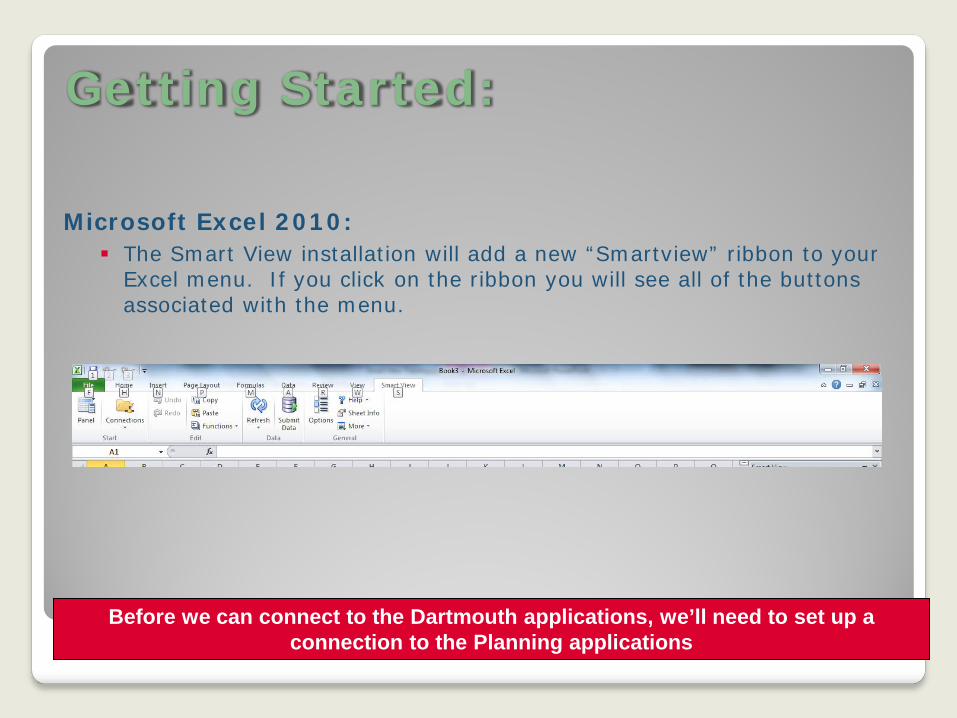
Getting Started:
9
Microsoft Excel 2010: The Smart View installation will add a new “Smartview” ribbon to your
Excel menu. If you click on the ribbon you will see all of the buttons associated with the menu.
Before we can connect to the Dartmouth applications, we’ll need to set up a connection to the Planning applications
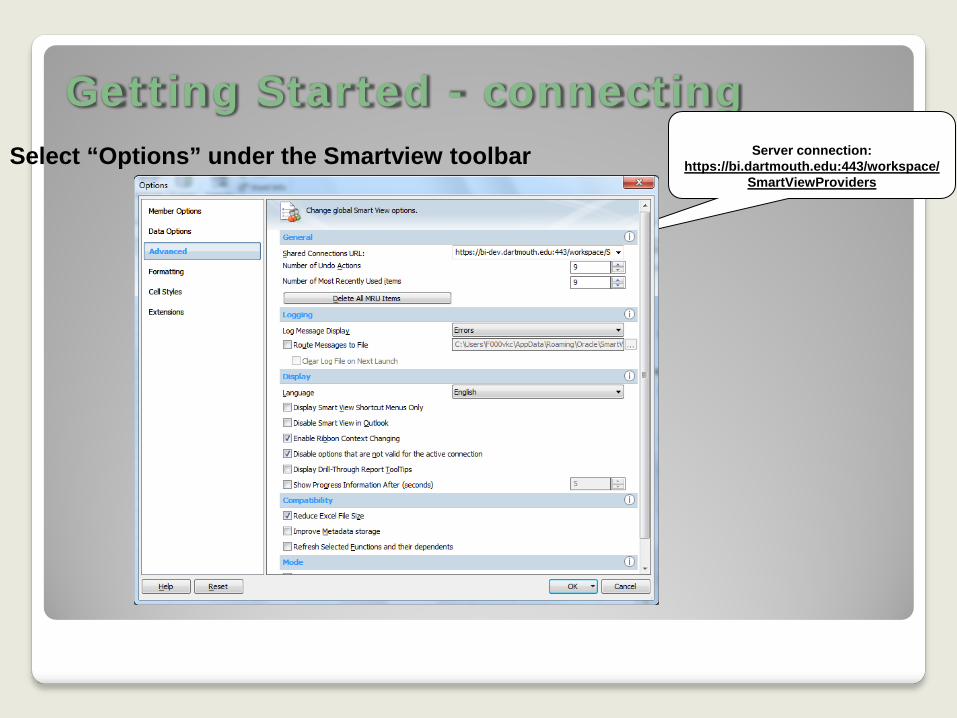
Getting Started - connecting
10
Select “Options” under the Smartview toolbar Server connection: https://bi.dartmouth.edu:443/workspace/
SmartViewProviders
Getting Started - connecting
11
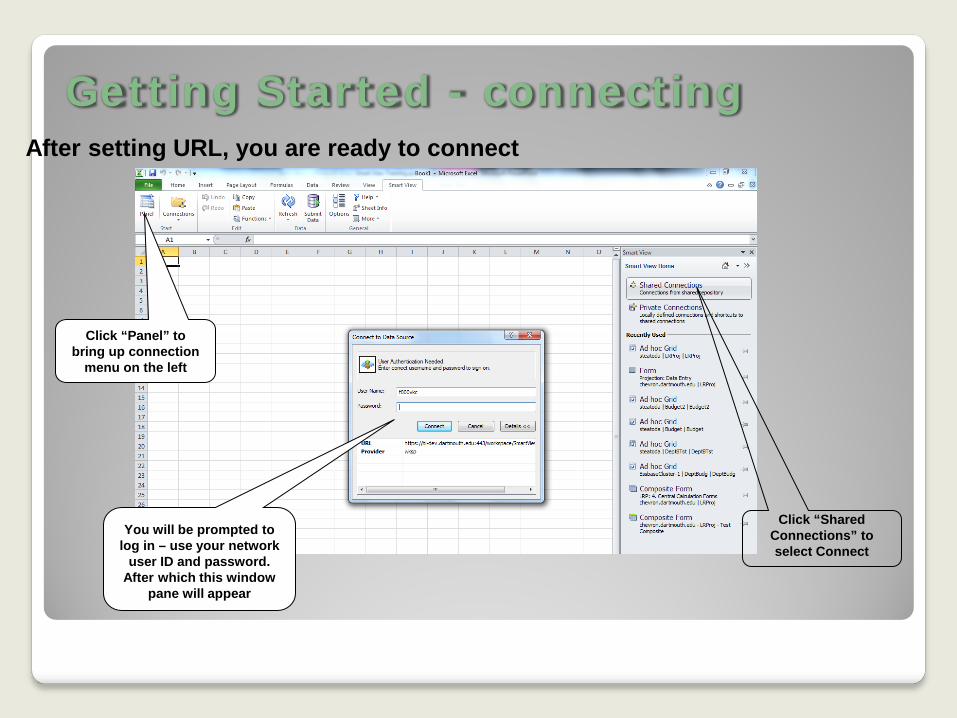
After setting URL, you are ready to connect
Click “Panel” to bring up connection
menu on the left
Click “Shared Connections” to select Connect
You will be prompted to log in – use your network
user ID and password. After which this window
pane will appear
Web Form Review Overview of Web Forms and Changes
12
Hyperion Planning Web Forms in Excel
13
• All Web Forms previously accessed via Planning web are also available in Excel
• Overall functionality is the same as web-based forms
Update Budget, Projections
Upload or save data to database
Roll up plan
• Excel Web Forms allow for ease and flexibility
• Copy paste options available
• Freeze window panes
• Saves and opens just like Excel file

Opening forms in Excel
14
Double-click on the form you wish to
open
Expand “Oracle Hyperion Planning” folders to “Forms”
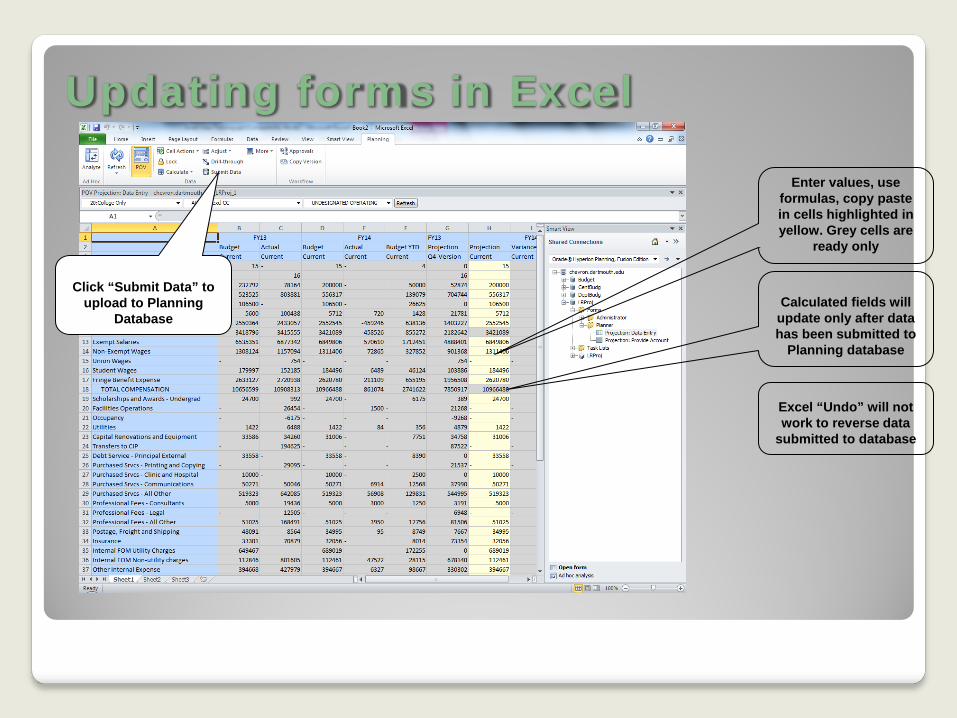
Updating forms in Excel
15
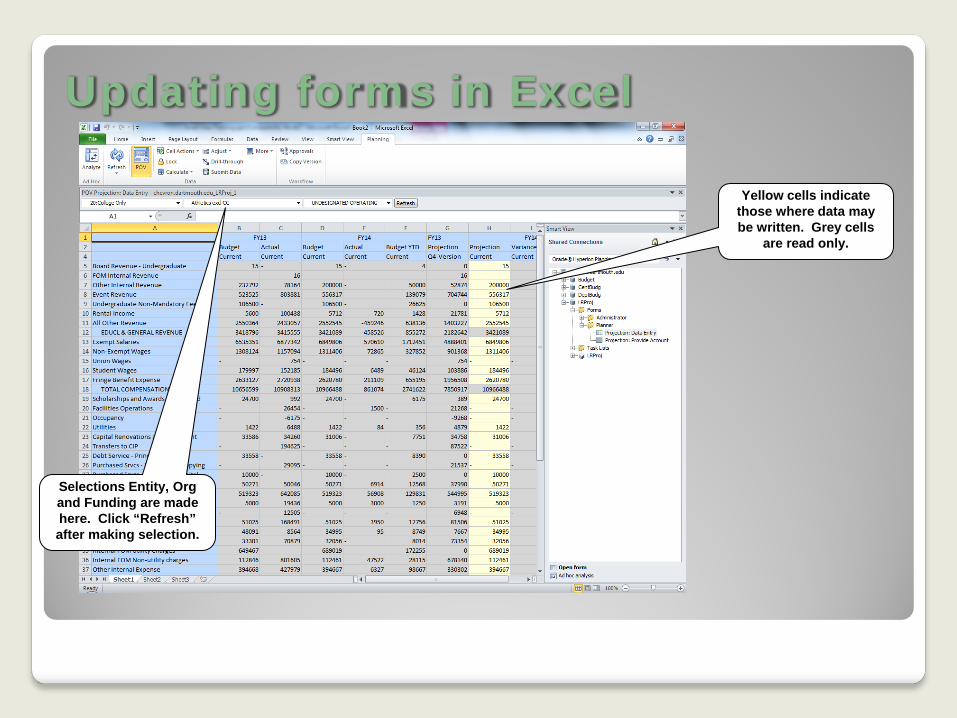
Selections Entity, Org and Funding are made here. Click “Refresh” after making selection.
Yellow cells indicate those where data may be written. Grey cells
are read only.
Updating forms in Excel
16
Enter values, use formulas, copy paste in cells highlighted in yellow. Grey cells are
ready only
Calculated fields will update only after data has been submitted to
Planning database
Click “Submit Data” to upload to Planning
Database
Excel “Undo” will not work to reverse data
submitted to database
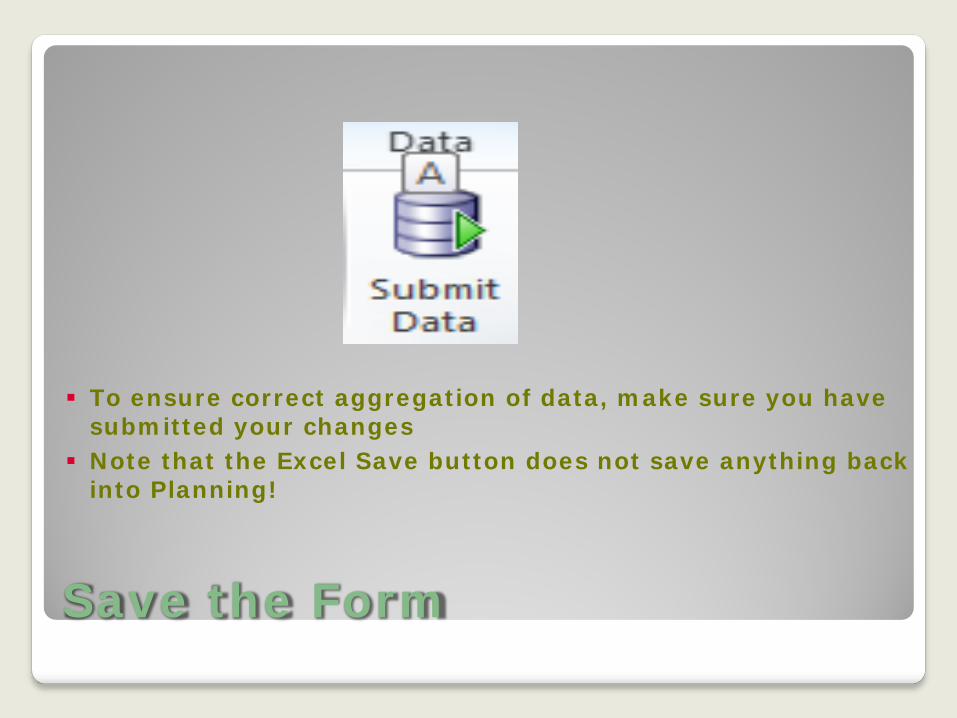
Save the Form 17
To ensure correct aggregation of data, make sure you have
submitted your changes Note that the Excel Save button does not save anything back
into Planning!
#Missing Data
18
You may notice in a Smart View form that you see cells that contain the value “#Missing”
A cell that displays #Missing has no data value in the data form
You can enter a data value by selecting an editable cell and entering the value
You can also eliminate irrelevant data in a cell by selecting the cell with the irrelevant data and replacing the data with #Missing
You can use the Options menu to change #Missing to a blank cell: Options Display Tab Remove value in field labeled #No Data/Missing Click OK
It is important to note that #Missing is different from zero. Zero is a data value, and #Missing indicates lack of a data value for the cell.
Adding Data To Cells in Smart View Forms You can enter data into the yellow cells using the following
methods:
1. Overwrite the data by typing over it with a new value. 2. Copy and Paste: ◦ Select the cell or group of cells that contain the data that you
want to copy ◦ Right-click and select Copy ◦ Select the cell or group of cells to which you want to past the
data ◦ Click Paste
NOTE: If you try to copy and paste using the keyboard
equivalents Ctrl+C and Ctrl+V twice, the value is not copied in the second time.
Using Microsoft Excel Functionality
It is possible to use Excel functions in Smart View Forms Steps: 1. Connect to Planning from Excel 2. Select Form 3. Add Excel formulas(s) 4. Submit Data to Planning 5. Save Spreadsheet locally 6. The Excel calculation will remain on the spreadsheet 7. Disconnect from Planning 8. When you review the Web Form in Planning web, you will
NOT see the calculation, just the data value
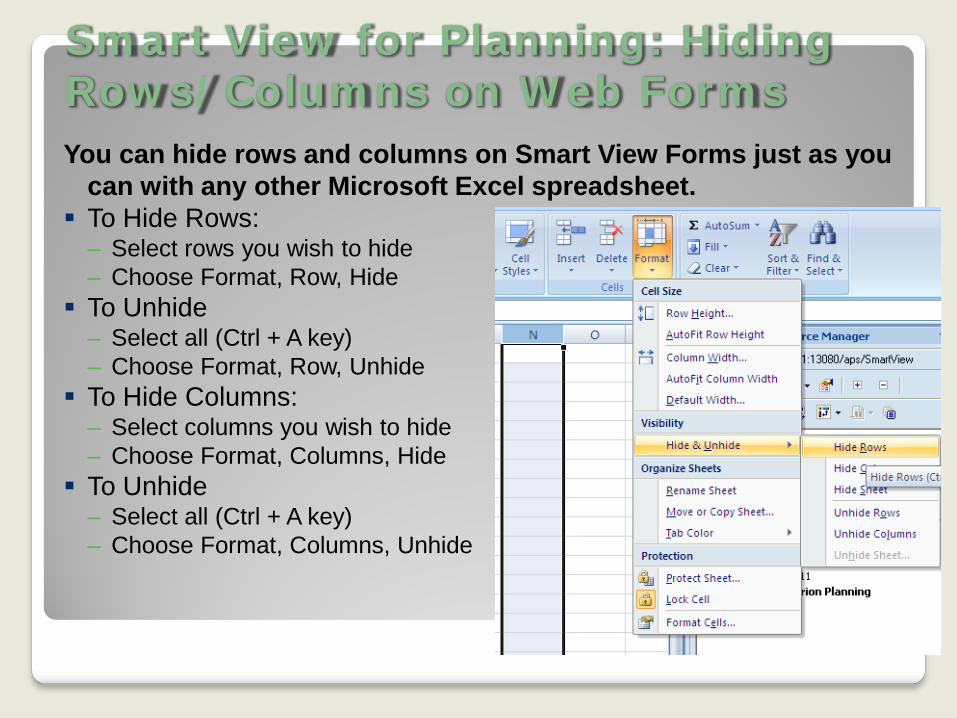
Smart View for Planning: Hiding Rows/Columns on Web Forms
21
You can hide rows and columns on Smart View Forms just as you can with any other Microsoft Excel spreadsheet.
To Hide Rows: – Select rows you wish to hide – Choose Format, Row, Hide
To Unhide – Select all (Ctrl + A key) – Choose Format, Row, Unhide
To Hide Columns: – Select columns you wish to hide – Choose Format, Columns, Hide
To Unhide – Select all (Ctrl + A key) – Choose Format, Columns, Unhide
Caveats to Using Microsoft Excel Functionality
Only download the form once. If you download the form again after adding formulas, the formulas will disappear.
When working in Planning, do not change any values in the Web Form that contains formulas. When you refresh the data in Smart View, the formula will be lost.
Best Practice Recommendation: If you want to use Excel functions, do not edit the Web Form in Planning web. Use Smart View only and submit any data changes back into Planning web.
Saving Excel Spreadsheets Locally
You can select the Excel Save button to save a worksheet to your local drive
You will be prompted to provide a name You will be able to edit data, but these changes will NOT be saved
if you disconnect from Planning. You will need to be connected to Planning to change data.
Best practice recommendation: Open saved files in Excel, connect to Planning, then edit data and submit back into the database.

Questions? 24

Smart View Ad-Hoc Reporting Using Smart View in Microsoft Office for Ad-Hoc Reporting.
25
Smart View Ad-Hoc
Smart View Ad-Hoc Smart View provides ad-hoc query capability to power
users in a native Excel environment Users dynamically access the data and develop their own
queries The query results are stored as Excel documents
Why Use Smart View ad-hoc? Used for open ended business questions Initial retrieval Iterative query path Typically does not leverage Excel formatting Query structure is dynamic; changes until the question is
answered
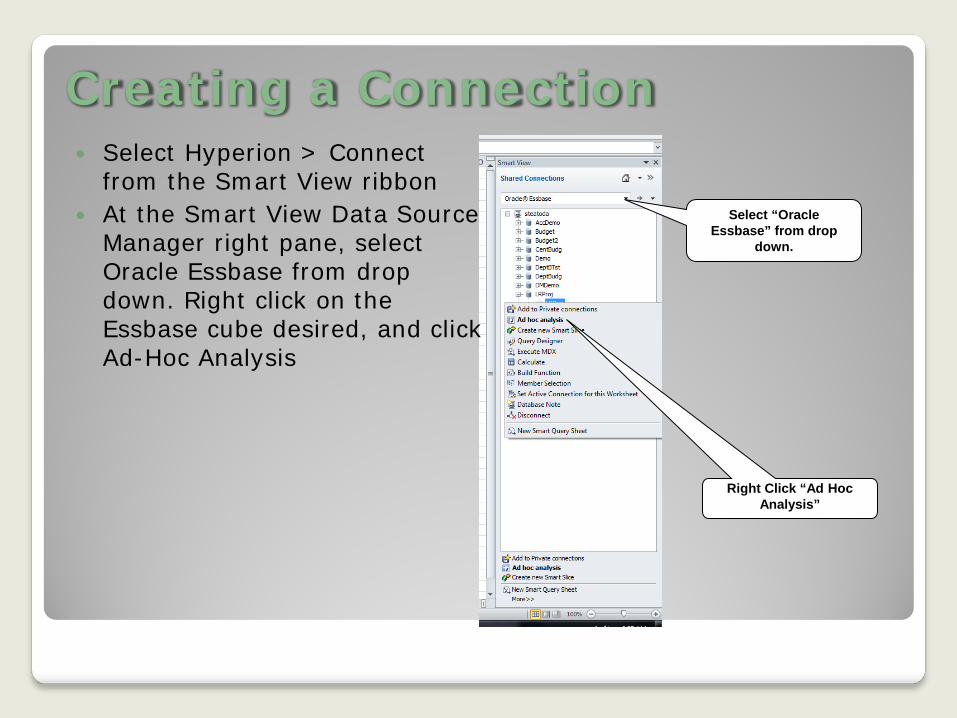
Creating a Connection Select Hyperion > Connect
from the Smart View ribbon At the Smart View Data Source
Manager right pane, select Oracle Essbase from drop down. Right click on the Essbase cube desired, and click Ad-Hoc Analysis
Select “Oracle Essbase” from drop
down.
Right Click “Ad Hoc Analysis”
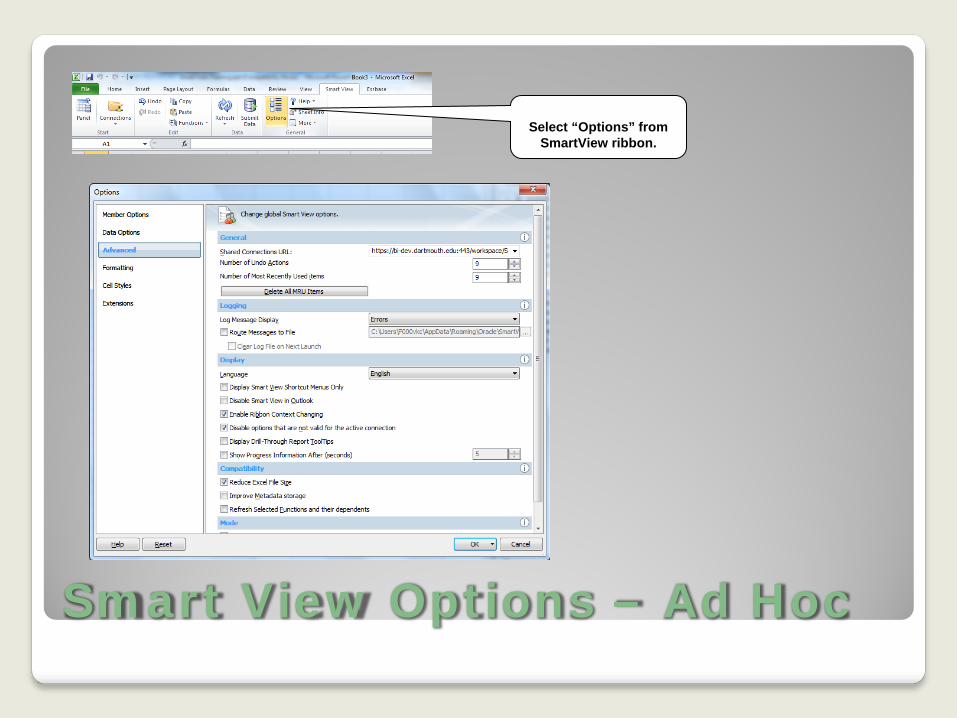
Smart View Options – Ad Hoc
Select “Options” from SmartView ribbon.
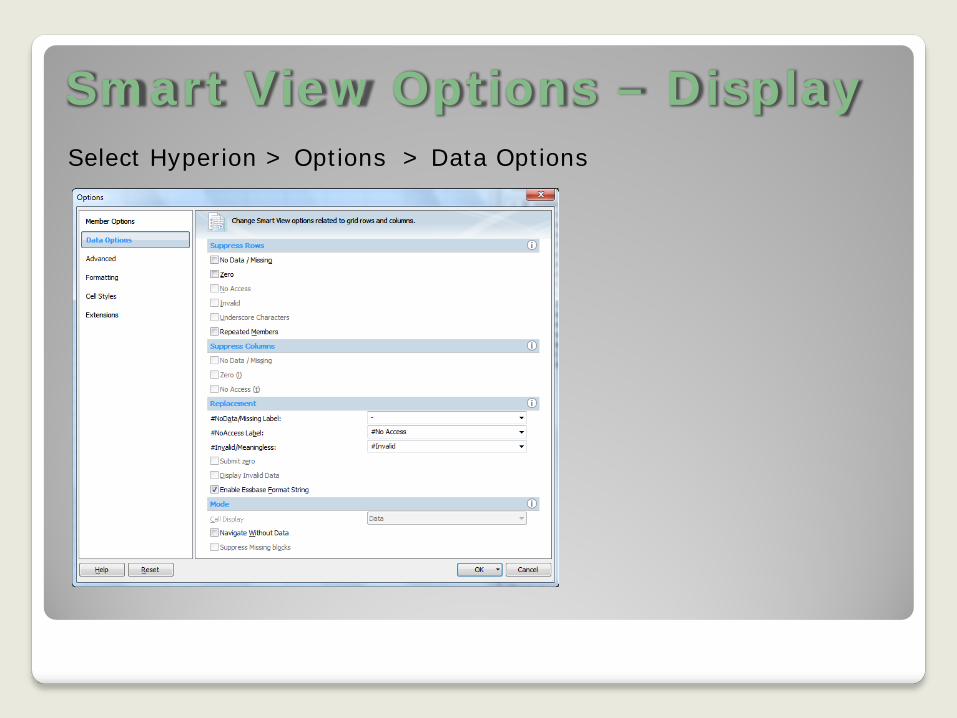
Smart View Options – Display Select Hyperion > Options > Data Options

Smart View Options – Cell Styles Select Hyperion > Options > Cell Styles
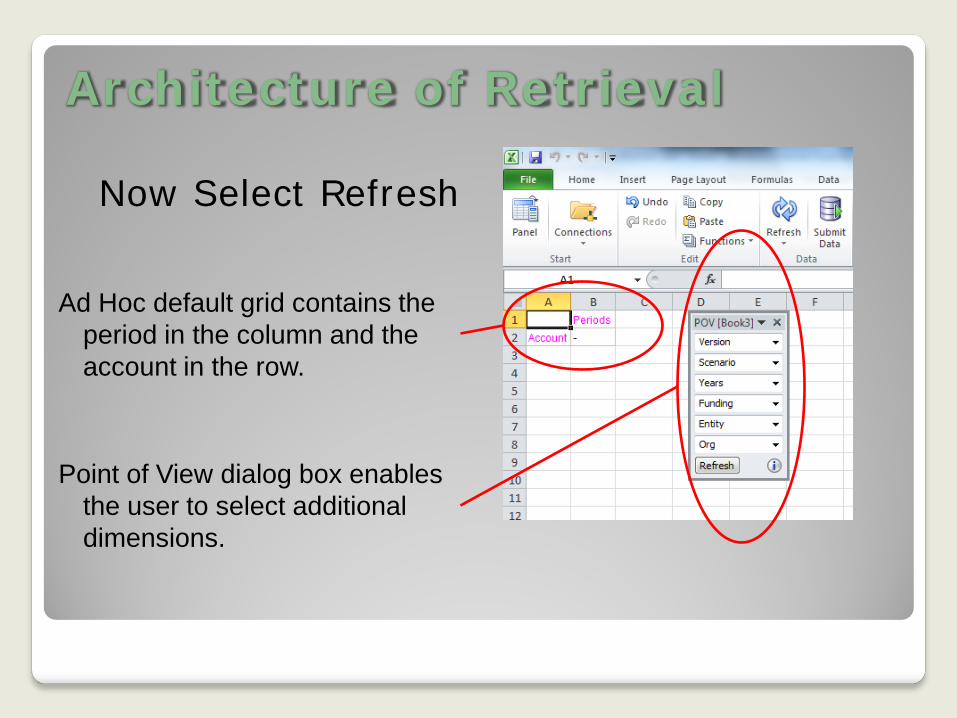
Architecture of Retrieval
Now Select Refresh
Ad Hoc default grid contains the period in the column and the account in the row.
Point of View dialog box enables the user to select additional dimensions.

Dimension placement: 2 methods 1 – Dimensions can be
moved using mouse clicks
Left click and drag moves the dimension from the POV dialog box to the grid
Drop down dimension and click “…” to select member(s).
To Pivot you must select a member of the dimension
You can not Pivot a column or row that only has one dimension
2 – The Pivot feature moves a dimension between rows and columns using the menu, button or right click and drag
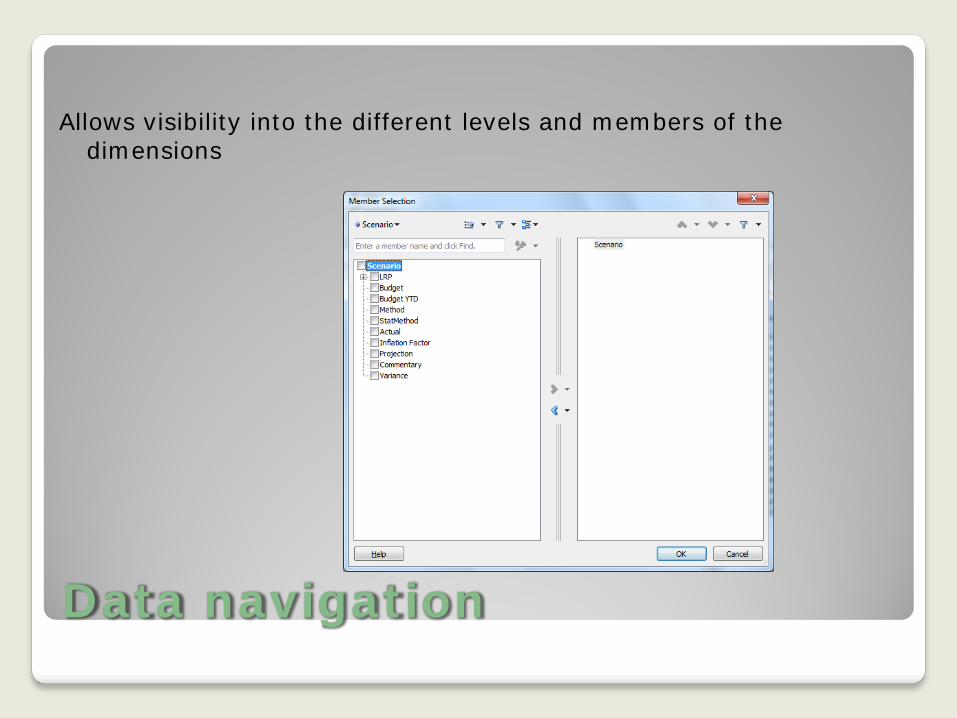
Data navigation
Allows visibility into the different levels and members of the
dimensions
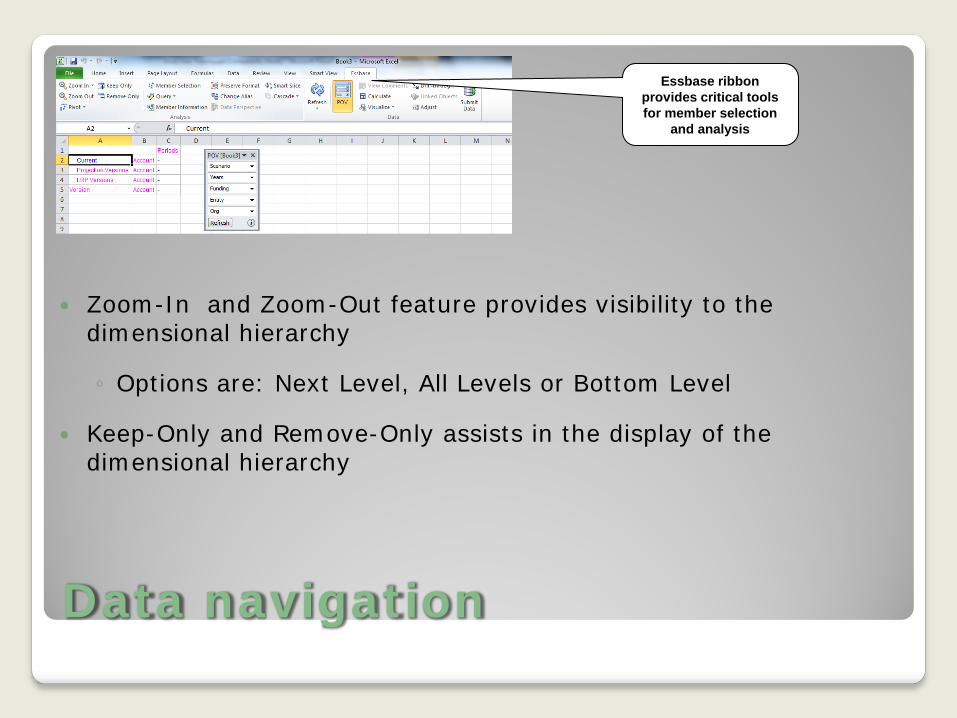
Data navigation
Zoom-In and Zoom-Out feature provides visibility to the dimensional hierarchy
◦ Options are: Next Level, All Levels or Bottom Level
Keep-Only and Remove-Only assists in the display of the dimensional hierarchy
Essbase ribbon provides critical tools for member selection
and analysis
Creating Ad-Hoc Templates
After building a report, save the report as an Excel Doc. ◦ This allows you to return later, and use the same
dimensions in a later report. ◦ Save additional copies to further modify and create new
reports. Everyone sees the same information, so it is possible to generate Reports for multiple users.
You can select the Excel Save button to save a worksheet to your local drive
You will be prompted to provide a name You will be able to edit data, but these changes will NOT be
saved if you disconnect from Planning. You will need to be connected to Planning to change data.
35
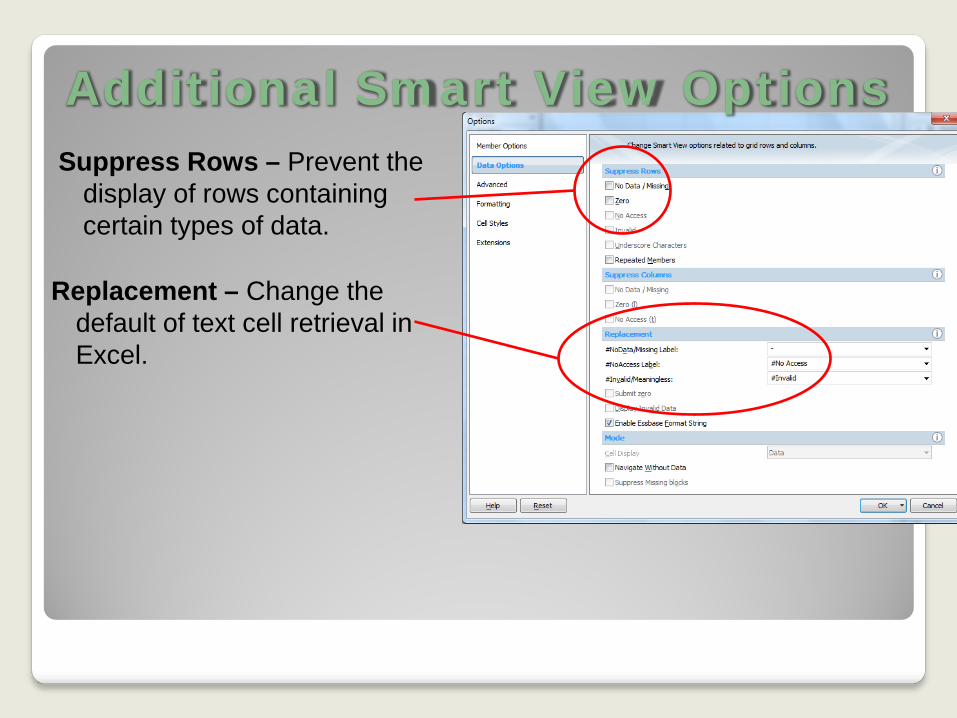
Additional Smart View Options Suppress Rows – Prevent the
display of rows containing certain types of data.
Replacement – Change the default of text cell retrieval in Excel.

Additional Smart View Options
Zoom-In – Controls the Zoom behavior during drill operations.
Indentation – Controls the behavior of all Zoom operations and makes it easier to view the hierarchy.
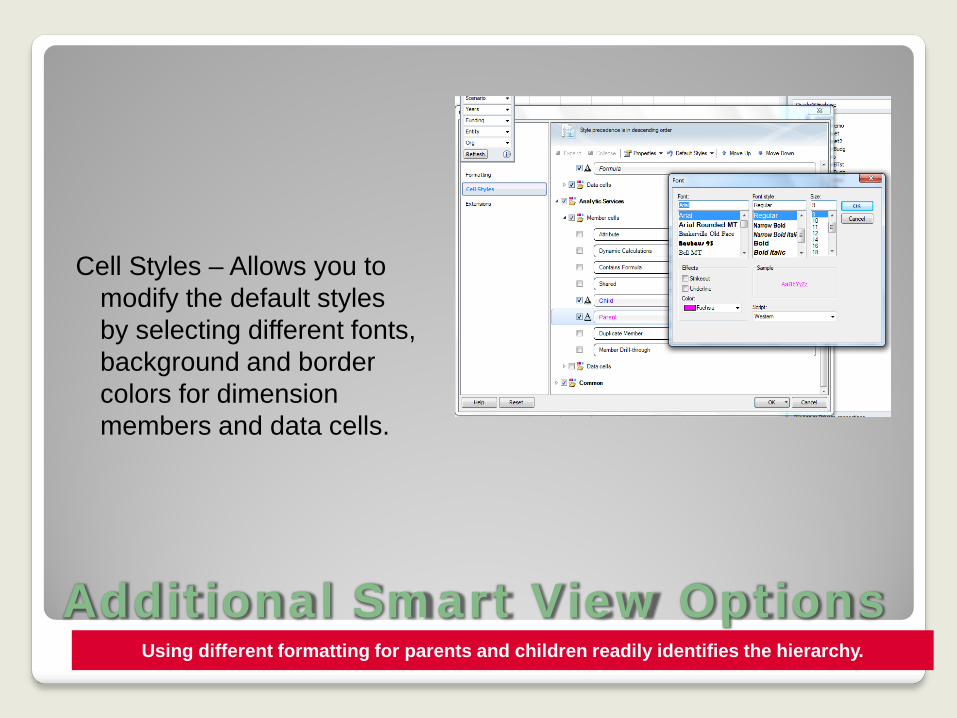
Additional Smart View Options Using different formatting for parents and children readily identifies the hierarchy.
Cell Styles – Allows you to modify the default styles by selecting different fonts, background and border colors for dimension members and data cells.
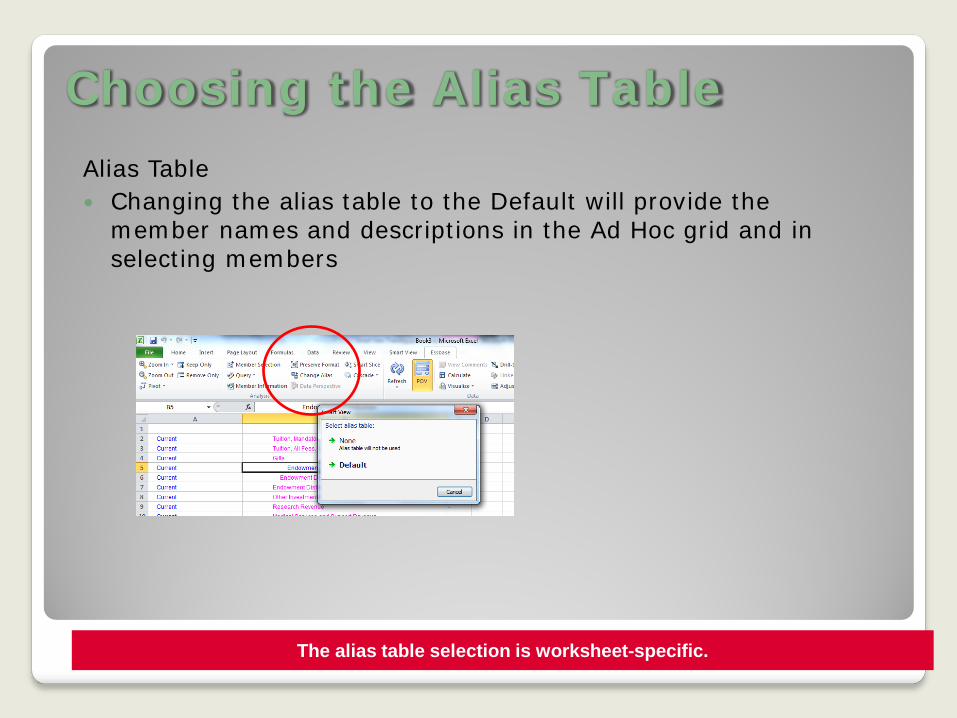
Choosing the Alias Table Alias Table Changing the alias table to the Default will provide the
member names and descriptions in the Ad Hoc grid and in selecting members
The alias table selection is worksheet-specific.
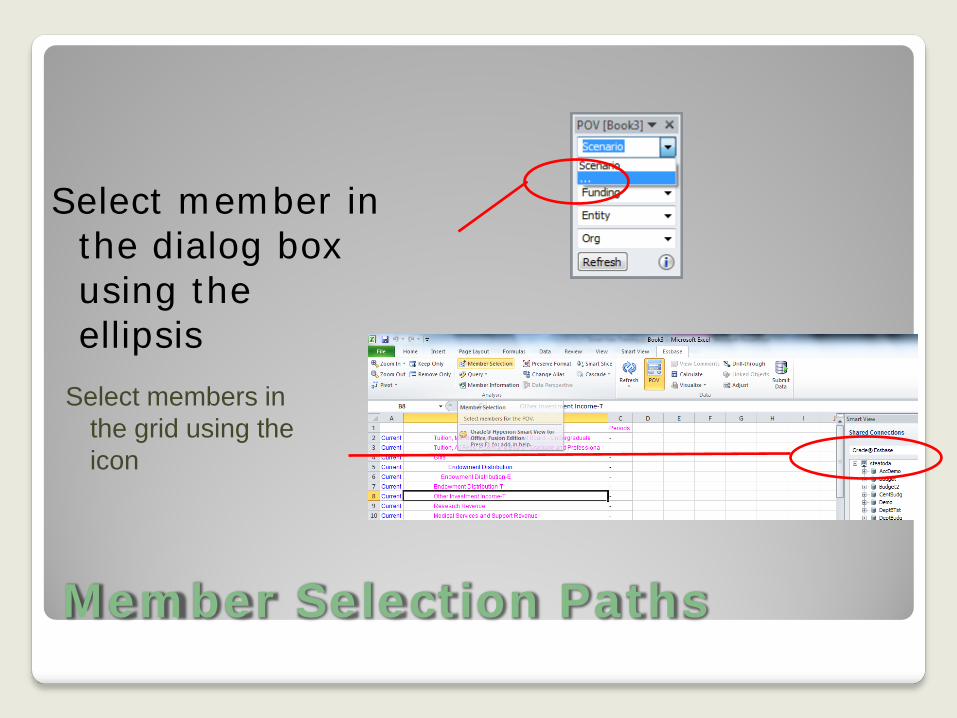
Member Selection Paths
Select member in the dialog box using the ellipsis
Select members in the grid using the icon
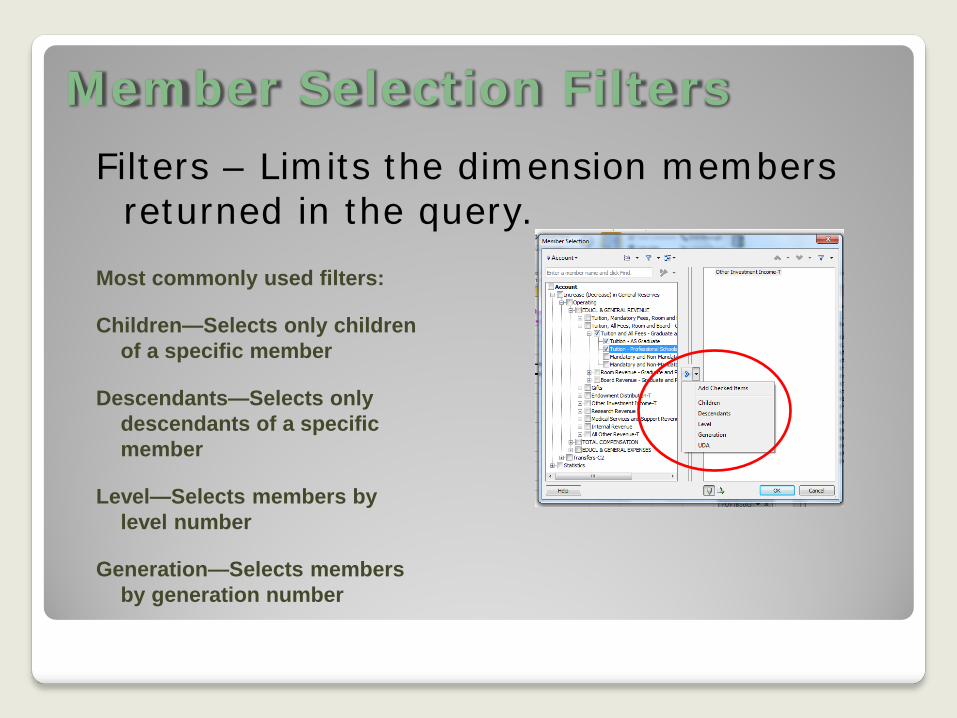
Member Selection Filters Filters – Limits the dimension members
returned in the query. Most commonly used filters:
Children—Selects only children of a specific member
Descendants—Selects only descendants of a specific member
Level—Selects members by level number
Generation—Selects members by generation number
Tips, Tricks & Hints
Smart View Configuration IT needs to install the Smart View add-in on your workstation. If
you already have the add-in installed for Smart View, you do not need it installed a second time. You just need the URL for Smart View access
Working with Excel Workbooks and Smart View Forms: You can use Excel tabs to open multiple forms and keep all forms
together in a single workbook. If you use Smart View ad-hoc, you can have a report on one
worksheet and a Web Form on a second sheet. Note that there are two separate URLs for Smart View ad-hoc and Smart View. You can only be connected to one service at a time. You will need to connect to each service separately in order to use both in a single workbook.
Tips, Tricks & Hints
Working with Smart View Forms:
The Submit function both saves and submits the data back
into Planning; the Excel Save button saves to the local drive only and does not save data back into Planning.
Tips, Tricks & Hints
Working with Excel formulas: If you wish to use Excel formulas in your spreadsheets, only
download the Smart View form once, then refresh as needed to retain the formulas
Excel formulas will not display in Web Forms in Planning web When you save a Smart View form locally and re-open it, if the
cells will contain “0” values, reconnect to Planning and click Refresh and the values will display (and your formulas will stay intact).
If there are two people working on the same Planning Web Form in either Planning or Smart View, make sure you coordinate the use of the form to prevent overriding values and eliminating excel formulas.
Version control: If you have more than one person working on a Smart View form, we recommend that you save the form into a shared folder so that only one version of the form is in play at any one time.