Embed Size (px)
Citation preview
Amazon Rekognition개발자 안내서
Amazon Rekognition 개발자 안내서
Amazon Rekognition: 개발자 안내서Copyright © 2020 Amazon Web Services, Inc. and/or its affiliates. All rights reserved.
Amazon's trademarks and trade dress may not be used in connection with any product or service that is not Amazon's,in any manner that is likely to cause confusion among customers, or in any manner that disparages or discreditsAmazon. All other trademarks not owned by Amazon are the property of their respective owners, who may or may notbe affiliated with, connected to, or sponsored by Amazon.
Amazon Rekognition 개발자 안내서
Table of ContentsAmazon Rekognition란 무엇입니까? ...................................................................................................... 1
Amazon Rekognition 및 HIPAA 자격 ............................................................................................. 2Amazon Rekognition를 처음 사용하십니까? .................................................................................... 3
작동 방식 .......................................................................................................................................... 4분석 유형 .................................................................................................................................. 4
레이블 ............................................................................................................................... 4사용자 지정 레이블 ............................................................................................................. 4얼굴 .................................................................................................................................. 5얼굴 검색 .......................................................................................................................... 5인물 경로 .......................................................................................................................... 5유명 인사 .......................................................................................................................... 5텍스트 감지 ....................................................................................................................... 5안전하지 않은 콘텐츠 .......................................................................................................... 6
이미지 및 비디오 작업 ................................................................................................................. 6Amazon Rekognition Image 작업 .......................................................................................... 6Amazon Rekognition Video 작업 ........................................................................................... 6비스토리지 및 스토리지 기반 작업 ........................................................................................ 6AWS SDK 또는 HTTP를 사용하여 Amazon Rekognition API 작업 호출 ........................................ 7
비스토리지 및 스토리지 API 작업 ................................................................................................. 7비스토리지 작업 ................................................................................................................. 7스토리지 기반 API 작업 ....................................................................................................... 8
모델 버전 관리 ........................................................................................................................... 9시작하기 .......................................................................................................................................... 11
1단계: 계정 설정 ....................................................................................................................... 11AWS에 가입 ..................................................................................................................... 11IAM 사용자 생성 ............................................................................................................... 11다음 단계 ......................................................................................................................... 12
2단계: AWS CLI 및 AWS SDK 설정 ............................................................................................ 12다음 단계 ......................................................................................................................... 13
3단계: AWS CLI 및 AWS SDK API를 사용하여 시작하기 ................................................................ 13AWS CLI 예제 형식 .......................................................................................................... 14다음 단계 ......................................................................................................................... 14
4단계: 콘솔 사용 시작하기 ......................................................................................................... 14연습 1: 객체 및 장면 감지(콘솔) .......................................................................................... 15연습 2: 얼굴 분석(콘솔) ..................................................................................................... 19연습 3: 얼굴 비교(콘솔) ..................................................................................................... 22연습 4: 집계 측정치 보기(콘솔) ........................................................................................... 24
Amazon Rekognition API 프로그래밍 ................................................................................................... 25이미지 작업 .............................................................................................................................. 25
이미지 ............................................................................................................................. 25Amazon S3 버킷 사용하기 ................................................................................................. 26로컬 파일 시스템 사용 ....................................................................................................... 31경계 상자 표시 ................................................................................................................. 40이미지 방향 및 경계 상자 좌표 가져오기 .............................................................................. 44
저장된 비디오 작업 ................................................................................................................... 51분석 유형 ......................................................................................................................... 52Amazon Rekognition VideoAPI 개요 .................................................................................... 52Amazon Rekognition Video 작업 불러오기 ............................................................................ 53Amazon Rekognition Video 구성 ......................................................................................... 57비디오 분석(SDK) ............................................................................................................. 59비디오 분석(AWS CLI) ....................................................................................................... 69자습서: Amazon Rekognition Lambda 함수 생성 .................................................................... 71참조: 비디오 분석 결과 알림 ............................................................................................... 77Amazon Rekognition Video 문제 해결 .................................................................................. 78
iii
Amazon Rekognition 개발자 안내서
스트리밍 비디오 작업 ................................................................................................................ 79스트리밍 비디오에서 얼굴 인식 ........................................................................................... 80Kinesis 스트림 액세스 권한 부여 ......................................................................................... 81스트리밍 비디오 분석 시작 ................................................................................................. 82분석 결과 읽기 ................................................................................................................. 88참조: Kinesis 얼굴 인식 레코드 ........................................................................................... 91스트리밍 비디오 문제 해결 ................................................................................................. 94
오류 처리 ................................................................................................................................. 99오류 구성 요소 ................................................................................................................. 99오류 메시지 및 코드 ........................................................................................................ 100애플리케이션에서의 오류 처리 .......................................................................................... 103
Amazon A2I 및 Amazon Rekognition .......................................................................................... 104FedRAMP와 함께 Amazon Rekognition 사용 ............................................................................... 106
센서, 입력 이미지 및 비디오 모범 사례 ............................................................................................... 109Amazon Rekognition Image 작업 지연 시간 ................................................................................. 109얼굴 비교 입력 이미지에 대한 권장 사항 ..................................................................................... 109카메라 설정 권장 사항(이미지 및 비디오) .................................................................................... 110카메라 설정 권장 사항(저장 및 스트리밍 비디오) .......................................................................... 111카메라 설정 권장 사항(스트리밍 비디오) ..................................................................................... 111
객체 및 장면 감지 ........................................................................................................................... 112이미지에서 레이블 감지 ........................................................................................................... 113
DetectLabels 작업 요청 .................................................................................................... 119DetectLabels 응답 ........................................................................................................... 119
비디오에서 레이블 감지 ........................................................................................................... 123GetLabelDetection 작업 응답 ............................................................................................ 123
사용자 지정 레이블 감지 .......................................................................................................... 124얼굴 감지 및 분석 ........................................................................................................................... 125
얼굴 감지 및 얼굴 비교 개요 ..................................................................................................... 125얼굴 속성에 대한 가이드라인 .................................................................................................... 126이미지에서 얼굴 감지 .............................................................................................................. 127
DetectFaces 작업 요청 ..................................................................................................... 132DetectFaces 작업 응답 ..................................................................................................... 133
이미지에 있는 얼굴 비교 .......................................................................................................... 139CompareFaces 작업 요청 ................................................................................................. 144CompareFaces 작업 응답 ................................................................................................. 145
저장된 비디오에서 얼굴 감지 .................................................................................................... 147GetFaceDetection 작업 응답 ............................................................................................. 149
모음에서 얼굴 검색 ......................................................................................................................... 153모음 관리 ............................................................................................................................... 153모음에서 얼굴 관리 ................................................................................................................. 153IndexFaces 사용 지침 .............................................................................................................. 154
중요 또는 공공 안전 애플리케이션 ..................................................................................... 154사진 공유 및 소셜 미디어 애플리케이션 .............................................................................. 154일반 사용 사례 ................................................................................................................ 154
모음에 있는 얼굴 검색 ............................................................................................................. 154유사성 임계값을 사용하여 얼굴 일치 .................................................................................. 155
공공 안전 관련 사용 사례 ......................................................................................................... 155Amazon Rekognition을 활용한 공공 안전 지원 ..................................................................... 156
모음 만들기 ............................................................................................................................ 156CreateCollection 작업 요청 ............................................................................................... 159CreateCollection 작업 응답 ............................................................................................... 159
모음 나열 ............................................................................................................................... 159ListCollections 작업 요청 .................................................................................................. 162ListCollections 작업 응답 .................................................................................................. 162
모음 설명 ............................................................................................................................... 162DescribeCollection 작업 요청 ............................................................................................ 165DescribeCollection 작업 응답 ............................................................................................ 165
iv
Amazon Rekognition 개발자 안내서
모음 삭제 ............................................................................................................................... 165DeleteCollection 작업 요청 ............................................................................................... 168DeleteCollection 작업 응답 ............................................................................................... 168
모음에 얼굴 추가 ..................................................................................................................... 168얼굴 필터링 .................................................................................................................... 169IndexFaces 작업 요청 ...................................................................................................... 173IndexFaces 작업 응답 ...................................................................................................... 173
모음에 얼굴 나열 ..................................................................................................................... 179ListFaces 작업 요청 ......................................................................................................... 182ListFaces 작업 응답 ......................................................................................................... 182
모음에서 얼굴 삭제 ................................................................................................................. 183DeleteFaces 작업 요청 ..................................................................................................... 185DeleteFaces 작업 응답 ..................................................................................................... 185
얼굴(얼굴 ID) 검색 .................................................................................................................. 186SearchFaces 작업 요청 .................................................................................................... 189SearchFaces 작업 응답 .................................................................................................... 189
얼굴(이미지) 검색 .................................................................................................................... 190SearchFacesByImage 작업 요청 ........................................................................................ 193SearchFacesByImage 작업 응답 ........................................................................................ 193
저장된 비디오에서 얼굴 검색 ................................................................................................... 194GetFaceSearch 작업 응답 ................................................................................................ 197
인물 경로 ....................................................................................................................................... 201GetPersonTracking 작업 응답 ................................................................................................... 203
유명 인사 인식 ................................................................................................................................ 207얼굴 검색과 유명 인사 인식 비교 ............................................................................................... 207이미지 속 유명 인사 인식 ......................................................................................................... 207
RecognizeCelebrities 호출 ................................................................................................ 208RecognizeCelebrities 작업 요청 ......................................................................................... 211RecognizeCelebrities 작업 응답 ......................................................................................... 212
저장된 비디오 속 유명 인사 인식 ............................................................................................... 213GetCelebrityRecognition 작업 응답 ..................................................................................... 216
유명 인사 정보 획득 ................................................................................................................ 218GetCelebrityInfo 호출 ....................................................................................................... 218GetCelebrityInfo 작업 요청 ................................................................................................ 220.................................................................................................................................... 220
비안전 콘텐츠 감지 ......................................................................................................................... 222이미지 및 비디오 조정 API 사용하기 .......................................................................................... 222안전하지 않은 이미지 감지 ....................................................................................................... 223
이미지에서 안전하지 않은 콘텐츠 감지 ............................................................................... 223.................................................................................................................................... 223
DetectModerationLabels 작업 요청 ..................................................................................... 226DetectModerationLabels 작업 응답 ..................................................................................... 227
안전하지 않은 저장된 비디오 감지 ............................................................................................ 227GetContentModeration 작업 응답 ....................................................................................... 230
텍스트 감지 .................................................................................................................................... 232이미지에서 텍스트 감지 ........................................................................................................... 232
DetectText 작업 요청 ....................................................................................................... 235DetectText 작업 응답 ....................................................................................................... 236
보안 .............................................................................................................................................. 243인증 및 액세스 제어 ................................................................................................................ 243
인증 .............................................................................................................................. 243액세스 제어 .................................................................................................................... 244액세스 관리 개요 ............................................................................................................. 244자격 증명 기반 정책(IAM 정책) 사용 ................................................................................... 248Amazon Rekognition API 권한 참조 ................................................................................... 250
모니터링 ................................................................................................................................ 253Rekognition에 CloudWatch 측정치 사용 .............................................................................. 253
v
Amazon Rekognition 개발자 안내서
Rekognition 측정치 액세스 ............................................................................................... 254경보 만들기 .................................................................................................................... 255Rekognition의 CloudWatch 측정치 ..................................................................................... 256
AWS CloudTrail을 사용하여 Amazon Rekognition API 호출 로깅 .................................................... 257CloudTrail의 Amazon Rekognition 정보 .............................................................................. 257예제: Amazon Rekognition 로그 파일 항목 .......................................................................... 258
Amazon VPC 엔드포인트와 함께 Amazon Rekognition 사용 ........................................................... 262Amazon Rekognition용 Amazon VPC 엔드포인트 생성 .......................................................... 263
규정 준수 확인 ........................................................................................................................ 263API 참조 ........................................................................................................................................ 265
Amazon Rekognition Image ...................................................................................................... 265Amazon Rekognition 사용자 지정 레이블 .................................................................................... 265Amazon Rekognition Video 저장된 비디오 .................................................................................. 265Amazon Rekognition Video 스트리밍 비디오 ............................................................................... 266Actions .................................................................................................................................. 266
CompareFaces ............................................................................................................... 268CreateCollection .............................................................................................................. 274CreateProject .................................................................................................................. 277CreateProjectVersion ....................................................................................................... 280CreateStreamProcessor .................................................................................................... 284DeleteCollection .............................................................................................................. 287DeleteFaces ................................................................................................................... 289DeleteStreamProcessor .................................................................................................... 291DescribeCollection ........................................................................................................... 293DescribeProjects ............................................................................................................. 296DescribeProjectVersions ................................................................................................... 299DescribeStreamProcessor ................................................................................................. 303DetectCustomLabels ........................................................................................................ 307DetectFaces ................................................................................................................... 311DetectLabels .................................................................................................................. 315DetectModerationLabels ................................................................................................... 320DetectText ...................................................................................................................... 324GetCelebrityInfo .............................................................................................................. 328GetCelebrityRecognition ................................................................................................... 330GetContentModeration ..................................................................................................... 335GetFaceDetection ............................................................................................................ 339GetFaceSearch ............................................................................................................... 344GetLabelDetection ........................................................................................................... 349GetPersonTracking .......................................................................................................... 353GetTextDetection ............................................................................................................. 358IndexFaces ..................................................................................................................... 362ListCollections ................................................................................................................. 370ListFaces ....................................................................................................................... 373ListStreamProcessors ...................................................................................................... 376RecognizeCelebrities ....................................................................................................... 379SearchFaces .................................................................................................................. 383SearchFacesByImage ...................................................................................................... 386StartCelebrityRecognition .................................................................................................. 391StartContentModeration .................................................................................................... 394StartFaceDetection .......................................................................................................... 398StartFaceSearch ............................................................................................................. 402StartLabelDetection ......................................................................................................... 406StartPersonTracking ........................................................................................................ 410StartProjectVersion .......................................................................................................... 413StartStreamProcessor ...................................................................................................... 416StartTextDetection ........................................................................................................... 418StopProjectVersion .......................................................................................................... 422
vi

Amazon Rekognition 개발자 안내서
StopStreamProcessor ...................................................................................................... 424Data Types ............................................................................................................................ 425
AgeRange ...................................................................................................................... 428Asset ............................................................................................................................. 429Beard ............................................................................................................................ 430BoundingBox .................................................................................................................. 431Celebrity ........................................................................................................................ 433CelebrityDetail ................................................................................................................ 434CelebrityRecognition ........................................................................................................ 436ComparedFace ............................................................................................................... 437ComparedSourceImageFace ............................................................................................. 438CompareFacesMatch ....................................................................................................... 439ContentModerationDetection ............................................................................................. 440CustomLabel .................................................................................................................. 441DetectionFilter ................................................................................................................. 442DetectTextFilters ............................................................................................................. 443Emotion ......................................................................................................................... 444EvaluationResult ............................................................................................................. 445Eyeglasses ..................................................................................................................... 446EyeOpen ........................................................................................................................ 447Face .............................................................................................................................. 448FaceDetail ...................................................................................................................... 450FaceDetection ................................................................................................................. 453FaceMatch ..................................................................................................................... 454FaceRecord .................................................................................................................... 455FaceSearchSettings ......................................................................................................... 456Gender .......................................................................................................................... 457Geometry ....................................................................................................................... 458GroundTruthManifest ....................................................................................................... 459HumanLoopActivationOutput ............................................................................................. 460HumanLoopConfig ........................................................................................................... 461HumanLoopDataAttributes ................................................................................................ 462Image ............................................................................................................................ 463ImageQuality .................................................................................................................. 464Instance ......................................................................................................................... 465KinesisDataStream .......................................................................................................... 466KinesisVideoStream ......................................................................................................... 467Label ............................................................................................................................. 468LabelDetection ................................................................................................................ 469Landmark ....................................................................................................................... 470ModerationLabel .............................................................................................................. 471MouthOpen .................................................................................................................... 472Mustache ....................................................................................................................... 473NotificationChannel .......................................................................................................... 474OutputConfig .................................................................................................................. 475Parent ........................................................................................................................... 476PersonDetail ................................................................................................................... 477PersonDetection .............................................................................................................. 478PersonMatch .................................................................................................................. 479Point ............................................................................................................................. 480Pose ............................................................................................................................. 481ProjectDescription ............................................................................................................ 482ProjectVersionDescription ................................................................................................. 483RegionOfInterest ............................................................................................................. 485S3Object ........................................................................................................................ 486Smile ............................................................................................................................. 487StartTextDetectionFilters ................................................................................................... 488
vii
Amazon Rekognition 개발자 안내서
StreamProcessor ............................................................................................................. 489StreamProcessorInput ...................................................................................................... 490StreamProcessorOutput .................................................................................................... 491StreamProcessorSettings .................................................................................................. 492Summary ....................................................................................................................... 493Sunglasses ..................................................................................................................... 494TestingData .................................................................................................................... 495TestingDataResult ........................................................................................................... 496TextDetection ................................................................................................................. 497TextDetectionResult ......................................................................................................... 499TrainingData ................................................................................................................... 500TrainingDataResult .......................................................................................................... 501UnindexedFace ............................................................................................................... 502Video ............................................................................................................................. 503VideoMetadata ................................................................................................................ 504
제한 .............................................................................................................................................. 506Amazon Rekognition Image ...................................................................................................... 506Amazon Rekognition Video 저장된 비디오 .................................................................................. 506Amazon Rekognition Video 스트리밍 비디오 ............................................................................... 506
문서 기록 ....................................................................................................................................... 507AWS Glossary ................................................................................................................................ 510
viii
Amazon Rekognition 개발자 안내서
Amazon Rekognition란 무엇입니까?Amazon Rekognition은 이미지와 비디오 분석을 애플리케이션에 쉽게 추가할 수 있도록 합니다. AmazonRekognition API에 이미지나 비디오를 제공하면 서비스에서 객체, 사람, 텍스트, 장면 및 활동을 파악할 수 있습니다. 부적절한 콘텐츠를 감지할 수도 있습니다. Amazon Rekognition도 매우 정확한 얼굴 분석, 얼굴 비교및 얼굴 검색 기능을 제공합니다. 사용자 확인, 카탈로그 작성, 인원 계산 및 공공 안전을 포함하여 다양한 사용 사례에서 얼굴을 탐지, 분석, 비교할 수 있습니다.
Amazon Rekognition은 Amazon의 컴퓨터 비전 과학자들이 매일 수십억 개의 이미지와 비디오를 매일 분석할 목적으로 개발하여 성능이 검증되었을 뿐만 아니라 확장성까지 뛰어난 딥 러닝 기술을 기반으로 하고있습니다. 기계 학습 전문 지식이 필요하지 않습니다. Amazon Rekognition에는 Amazon S3에 저장된 모든 이미지 또는 비디오 파일을 신속하게 분석할 수 있는 간편하고 사용하기 쉬운 API가 포함되어 있습니다.Amazon Rekognition은 항상 새로운 데이터를 통해 학습하고 있으며, 저희도 지속적으로 새로운 라벨과 얼굴비교 기능을 서비스에 추가하고 있습니다. 자세한 내용은 Amazon Rekognition FAQ를 참조하십시오.
Amazon Rekognition의 일반적인 사용 사례는 다음과 같습니다.
• 검색 가능한 이미지 및 비디오 라이브러리 – Amazon Rekognition은 이미지와 저장된 비디오를 검색할 수있도록 만들어 이미지 내에 나타나는 객체와 장면을 발견할 수 있습니다.
• 얼굴 기반 사용자 확인 – Amazon Rekognition 기능은 애플리케이션에서 사용자 라이브 이미지와 레퍼런
스 이미지를 비교하여 사용자 자격 증명을 확인할 수 있습니다.
• 감성 및 인구통계학 분석 – Amazon Rekognition은 얼굴 이미지에서 행복, 슬픔 또는 놀람 같은 감정적 표
현과 성별 등 인구통계학 정보를 해석합니다. Amazon Rekognition은 스토어 내 위치 및 유사 시나리오와같은 추세를 주기적으로 보고하기 위해 이미지를 분석하여 감성 및 인구통계학 속성을 Amazon Redshift에 전송합니다. 사람 얼굴의 외양적 모습에만 근거하여 감정 표현을 예측합니다. 이는 사람의 내적 감정 상태를 나타내는 것이 아니며, 인식 결과를 바탕으로 결정을 내려서는 안됩니다.
• 얼굴 검색 – Amazon Rekognition을 통해 얼굴 모음으로 알려진 컨테이너에 저장된 것과 일치하는 얼굴의
이미지, 저장된 비디오 및 스트리밍 비디오를 검색할 수 있습니다. 얼굴 모음은 귀하께서 소유하고 관리하는 얼굴 인덱스입니다. 얼굴을 기반으로 한 사용자 검색은 Amazon Rekognition에서 다음 두 가지 주요 단계가 필요합니다.
1. 얼굴 인덱싱.2. 얼굴 검색.
• 안전하지 않은 콘텐츠 감지 – Amazon Rekognition의 경우 이미지에서 노골적이고 선정적인 성인 콘텐츠
를 감지할 수 있습니다. 개발자는 반환된 메타데이터를 사용하여 사용자의 비즈니스 요구를 기반으로 부적절한 콘텐츠를 필터링할 수 있습니다. 이 API는 안전하지 않은 콘텐츠의 존재를 기반으로 이미지에 플래그를 지정하는 것 뿐만 아니라 신뢰도 점수와 함께 계층 레이블 목록도 반환합니다. 이러한 레이블은 안전하지 않은 콘텐츠의 특정 범주를 나타내어 대량의 사용자 생성 콘텐츠(UGC)의 세분화된 필터링 및 관리가가능합니다. 소셜 및 데이트 사이트, 사진 공유 플랫폼, 블로그 및 포럼, 어린이용 앱, 전자 상거래 사이트,엔터테인먼트 및 온라인 광고 서비스 등이 그 예시 입니다.
• 유명인 인식 – Amazon Rekognition은 이미지와 저장된 비디오에서 유명인을 인식할 수 있습니다.
Amazon Rekognition은 엔터테인먼트와 미디어, 스포츠, 비즈니스, 엔터테인먼트, 미디어 등 다양한 범주에 걸쳐 수천 명의 유명인의 얼굴을 인식할 수 있습니다.
1
Amazon Rekognition 개발자 안내서Amazon Rekognition 및 HIPAA 자격
• 텍스트 감지 – Amazon Rekognition Text in Image를 이용해 이미지에서 텍스트 콘텐츠를 인식하고 추출할 수 있습니다. Text in Image는 많은 스타일이 들어간 글꼴을 포함하여 대부분의 글꼴을 지원합니다. 배너 및 포스터에서 흔히 볼 수 있는 것과 같이 방향이 다른 텍스트와 숫자를 감지합니다. 이미지 공유와 소셜 미디어 활용 분야에서는 같은 키워드가 포함된 이미지 인덱스를 바탕으로 시각적 검색을 활성화할 수있습니다. 미디어 및 엔터테인먼트 활용 분야에서는 광고, 뉴스, 스포츠 스코어, 자막처럼 화면 위 관련된텍스트를 기반으로 영상 목록을 작성할 수 있습니다. 마지막으로, 공공 안전 활용 분야에서는 길거리 카메라로 찍은 이미지에서 자동차 번호판을 바탕으로 차량을 식별할 수 있습니다.
• 사용자 지정 테이블– Amazon Rekognition Custom Labels를 사용하면 비즈니스 요구 사항에 특정한 이미
지의 객체와 장면을 식별할 수 있습니다. 예를 들어, 소셜 미디어 게시글에서 로고를 찾거나 매장에서 제품을 식별하거나 어셈블리 라인에서 기계 부품을 분류하거나 정상적으로 운영되는 공장과 결함이 있는 공장을 구별하거나 비디오에서 애니메이션 캐릭터를 탐지할 수 있습니다. 자세한 내용은 Amazon Rekognition사용자 지정 레이블 개발자 가이드의 Amazon Rekognition Custom Labels란 무엇입니까?를 참조하십시오.
Amazon Rekognition 사용 시 다음과 같은 이점이 있습니다.
• 강력한 이미지 및 비디오 분석을 앱에 통합 – Amazon Rekognition으로 안정적인 이미지 및 비디오 분석을활용하는 데는 컴퓨터 비전이나 딥 러닝에 관한 전문 지식이 필요하지 않습니다. 해당 API를 사용하면 어떤 웹, 모바일 또는 연결된 장치의 애플리케이션에도 쉽고 빠르게 이미지 및 비디오 분석을 통합할 수 있습니다.
• 딥 러닝 기반 이미지 및 비디오 분석 – Amazon Rekognition은 딥 러닝 기술을 사용하여 이미지를 정확하게
분석하고, 이미지의 얼굴을 찾아 비교하며, 이미지와 비디오 내에서 객체와 장면을 감지합니다.
• 확장 가능한 이미지 분석 – Amazon Rekognition을 통해 수백만 개의 이미지를 분석하여 엄청난 양의 시각
적 데이터를 큐레이팅하고 정리할 수 있습니다.
• 다른 AWS 서비스와의 통합 – Amazon Rekognition은 Amazon S3 및 AWS Lambda 같은 다른 AWS 서비
스와 완벽하게 연동되도록 만들어졌습니다. Amazon S3 이벤트에 응답하여 Amazon Rekognition의 API를 Lambda에서 직접 호출할 수 있습니다. Amazon S3 및 Lambda에서 애플리케이션 요구 사항의 수에 반응하여 자동으로 조정되므로 확장 가능하고 저렴하며 안정적인 이미지 분석 애플리케이션을 구축할 수 있습니다. 예를 들어 집에 사람이 도착할 때마다 도어 카메라가 방문객의 사진을 Amazon S3에 업로드 합니다. 이는 Amazon Rekognition API를 사용하는 Lambda 기능을 트리거 하여 방문객을 인식합니다. 데이터를 로드하거나 이동할 필요 없이 Amazon S3에 저장된 이미지에서 직접 분석을 실행할 수 있습니다. AWSIdentity and Access Management(IAM) 지원으로 Amazon Rekognition API 작업에 대한 액세스를 안전하게 제어하기 쉽습니다. IAM을(를) 사용하면 AWS 사용자 및 그룹을 만들고 관리하여 적절한 액세스 권한을개발자와 최종 사용자에게 부여할 수 있습니다.
• 저렴한 비용 – Amazon Rekognition을 사용하면 분석하는 이미지와 비디오 수와 저장하는 얼굴 메타데이
터에 대한 비용만 지불하면 됩니다. 최소 요금이나 사전 약정은 없습니다. 무료로 사용을 시작한 후, 규모확장에 따라 Amazon Rekognition의 계층별 요금 모델을 활용하여 더 많은 비용을 절감하십시오.
Amazon Rekognition 및 HIPAA 자격이것은 HIPAA 적격 서비스입니다. AWS, 미국 HIPAA(Health Insurance Portability and Accountability Act of1996), AWS 서비스를 이용한 보호 대상 건강 정보(PHI)의 처리, 저장, 전송에 대한 자세한 정보는 HIPAA 개요를 확인하십시오.
2
Amazon Rekognition 개발자 안내서Amazon Rekognition를 처음 사용하십니까?
Amazon Rekognition를 처음 사용하십니까?Amazon Rekognition를 처음 사용하시는 경우 다음 단원을 순서대로 읽는 것을 추천드립니다.
1. Amazon Rekognition 작동 방식 (p. 4) – 이 단원에서는 엔드 투 엔드 경험을 만드는 데에 함께 사용하는 다양한 Amazon Rekognition구성 요소를 소개합니다.
2. Amazon Rekognition 시작하기 (p. 11) – 이 단원에서는 계정을 설정하고 Amazon Rekognition API를테스트합니다.
3. 이미지 작업 (p. 25) –이 단원에서는 Amazon S3 버킷에 저장된 이미지와 로컬 파일 시스템에서 로드된이미지에서 Amazon Rekognition을 사용하는 방법에 대한 정보를 다룹니다.
4. 저장된 비디오 작업 (p. 51) – 이 단원에서는 Amazon S3 버킷에 저장된 비디오에서 AmazonRekognition를 사용하는 방법에 대한 정보를 다룹니다.
5. 스트리밍 비디오 작업 (p. 79) – 이 단원에서는 스트리밍 비디오에서 Amazon Rekognition를 사용하는방법에 대한 정보를 다룹니다.
3
Amazon Rekognition 개발자 안내서분석 유형
Amazon Rekognition 작동 방식Amazon Rekognition은 API 세트 2개를 제공합니다. 이미지를 분석할 때에는 Amazon Rekognition Image,비디오를 분석할 때에는 Amazon Rekognition Video를 사용합니다.
두 API 모두 이미지와 비디오를 분석하여 애플리케이션에서 사용할 수 있는 분석 정보를 제공합니다. 예를들어 Amazon Rekognition Image를 사용하여 사진 관리 애플리케이션의 고객 경험을 향상시킬 수 있습니다.고객이 사진을 업로드하면 애플리케이션에서 Amazon Rekognition Image를 사용하여 이미지의 실제 객체또는 얼굴을 감지합니다. 애플리케이션이 Amazon Rekognition Image에서 반환한 정보를 저장하면 사용자는 특정 객체 또는 얼굴이 있는 사진을 자신의 사진 모음에 쿼리할 수 있습니다. 보다 심화된 쿼리도 가능합니다. 예를 들어 사용자는 웃고 있는 얼굴에 대해 쿼리하거나 특정 연령의 얼굴을 쿼리할 수 있습니다.
Amazon Rekognition Video는 저장된 비디오의 인물 경로를 추적하는 데 사용할 수 있습니다. 또는 AmazonRekognition Video를 사용하여 스트리밍 비디오에서 얼굴 설명이 Amazon Rekognition에 이미 저장된 얼굴설명과 일치하는 사람을 검색할 수 있습니다.
Amazon Rekognition API를 통해 딥 러닝 이미지 분석 사용이 쉽습니다. 예를 들어,RecognizeCelebrities (p. 379)는 이미지에서 감지된 최대 100명의 정보를 반환합니다. 여기에는 이미지에서 유명 인사 얼굴이 감지된 부분에 대한 정보와 유명 인사에 대한 추가 정보를 가져올 부분이 포함됩니다.
다음 정보에는 Amazon Rekognition에서 제공하는 분석 유형과 Amazon Rekognition Image 및 AmazonRekognition Video 작업에 대한 개요가 포함됩니다. 또한 비스토리지와 스토리지 작업의 차이도 없어집니다.
주제• 분석 유형 (p. 4)• 이미지 및 비디오 작업 (p. 6)• 비스토리지 및 스토리지 API 작업 (p. 7)• 모델 버전 관리 (p. 9)
분석 유형다음은 Amazon Rekognition Image API 및 Amazon Rekognition Video API가 수행할 수 있는 분석 유형입니다. API에 대한 정보는 이미지 및 비디오 작업 (p. 6) 단원을 참조하십시오.
레이블레이블은 객체(예: 꽃, 나무 또는 테이블), 이벤트(예: 결혼식, 졸업식 또는 생일 파티), 개념(예: 풍경, 저녁, 자연), 활동(예: 차에서 내리기) 중 어느 것이든 지칭할 수 있습니다. Amazon Rekognition은 이미지와 비디오에서 레이블을 감지할 수 있습니다. 그렇지만 활동은 이미지에서 감지되지 않습니다. 자세한 내용은 객체 및 장면 감지 (p. 112) 단원을 참조하십시오.
이미지에서 레이블을 감지하려면 DetectLabels (p. 315)를 사용합니다. 저장된 비디오에서 레이블을 감지하려면 StartLabelDetection (p. 406)을 사용합니다.
사용자 지정 레이블Amazon Rekognition 사용자 지정 레이블은 기계 학습 모델을 교육하여 이미지에서 비즈니스 요구 사항과 관련된 객체와 장면을 식별할 수 있습니다. 예를 들어, 로고를 감지하거나 조립 라인에서 엔지니어링 기계 부품을 감지하도록 모델을 교육할 수 있습니다.
4

Amazon Rekognition 개발자 안내서얼굴
Note
Amazon Rekognition 사용자 지정 레이블에 대한 자세한 내용은 Amazon Rekognition 사용자 지정레이블 개발자 가이드를 참조하십시오.
Amazon Rekognition에서는 기계 학습 모델을 생성, 교육, 평가 및 실행하는 데 사용되는 콘솔을 제공합니다. 자세한 내용은 Amazon Rekognition 사용자 지정 레이블 개발자 가이드의 Amazon Rekognition CustomLabels 시작하기를 참조하십시오. Amazon Rekognition 사용자 지정 레이블 API를 사용하여 모델을 교육하고 실행할 수도 있습니다. 자세한 내용은 Amazon Rekognition 사용자 지정 레이블 개발자 가이드의 AmazonRekognition Custom Labels SDK 시작하기를 참조하십시오.
교육된 모델을 사용하여 이미지를 분석하려면 DetectCustomLabels를 사용합니다.
얼굴Amazon Rekognition은 이미지와 저장된 비디오에서 얼굴을 감지할 수 있습니다. Amazon Rekognition 사용을 통해 이미지의 얼굴 감지 위치에 대한 정보뿐 아니라, 눈의 위치와 같은 얼굴 표식과 행복, 슬픔 같은 감정감지 결과를 가져올 수 있습니다. 원본 이미지의 한 얼굴과 다른 이미지에서 감지된 얼굴도 비교할 수 있습니다. 얼굴에 대한 정보도 저장하여 다중에 검색할 수 있습니다. 자세한 내용은 얼굴 감지 및 분석 (p. 125) 단원을 참조하십시오.
이미지에서 얼굴을 감지하려면 DetectFaces (p. 311)를 사용합니다. 비디오에 저장된 얼굴을 감지하려면StartFaceDetection (p. 398)을 사용합니다.
얼굴 검색Amazon Rekognition은 얼굴을 검색할 수 있습니다. 얼굴 정보는 모음이라고 하는 컨테이너로 인덱싱됩니다.그런 다음 모음의 얼굴 정보는 이미지, 저장된 비디오, 스트리밍 비디오에서 감지된 얼굴과 일치시킬 수 있습니다. 자세한 내용은 모음에서 얼굴 검색 (p. 153) 단원을 참조하십시오.
이미지에서 알려진 얼굴을 감지하려면, DetectFaces (p. 311)를 사용합니다. 저장된 비디오에서 알려진 얼굴을 감지하려면, StartFaceDetection (p. 398)를 사용합니다. 스트리밍 비디오에서 알려진 얼굴을 검색하려면, CreateStreamProcessor (p. 284)를 사용합니다.
인물 경로Amazon Rekognition은 저장된 비디오에서 감지된 인물의 경로를 추적할 수 있습니다. Amazon RekognitionVideo는 비디오에서 탐지된 인물의 경로 추적, 얼굴 세부 정보 및 프레임 내 위치 정보를 제공합니다. 자세한내용은 인물 경로 (p. 201)(을)를 참조하십시오.
저장된 비디오에서 사람을 감지하려면 StartPersonTracking (p. 410)을 사용합니다.
유명 인사Amazon Rekognition은 이미지와 저장된 비디오에서 수천 명의 유명 인사를 인식할 수 있습니다. 이미지에서유명 인사 얼굴이 감지된 부분, 얼굴 표식 및 유명 인사의 얼굴 표정에 대한 정보를 가져올 수 있습니다. 저장된 비디오 전체에 나타나는 유명 인사에 대한 추적 정보를 가져올 수 있습니다. 또한 인식된 유명 인사에 대한 추가 정보를 가져올 수도 있습니다. 자세한 내용은 유명 인사 인식 (p. 207) 단원을 참조하십시오.
이미지에서 유명 인사를 인식하려면 RecognizeCelebrities (p. 379)를 사용합니다. 저장된 비디오에서 유명인사를 인식하려면 StartCelebrityRecognition (p. 391)를 사용합니다.
텍스트 감지Amazon Rekognition Text in Image는 이미지의 텍스트를 감지하여 머신 판독 가능한 텍스트로 변환합니다.자세한 내용은 텍스트 감지 (p. 232) 단원을 참조하십시오.
5
Amazon Rekognition 개발자 안내서안전하지 않은 콘텐츠
이미지에서 텍스트를 감지하려면 DetectText (p. 324)를 사용합니다.
안전하지 않은 콘텐츠Amazon Rekognition의 경우 이미지와 저장된 비디오에서 성인 및 폭력적인 콘텐츠를 분석할 수 있습니다.자세한 내용은 비안전 콘텐츠 감지 (p. 222) 단원을 참조하십시오.
안전하지 않은 이미지를 감지하려면 DetectModerationLabels (p. 320)를 사용합니다. 안전하지 않은 저장된 비디오를 감지하려면 StartContentModeration (p. 394)을 사용합니다.
이미지 및 비디오 작업Amazon Rekognition은 API 세트 2개를 제공합니다. 이미지를 분석할 때에는 Amazon Rekognition Image,비디오를 분석할 때에는 Amazon Rekognition Video를 사용합니다. 다음 주제에서 각 API 세트를 간략하게설명합니다.
Amazon Rekognition Image 및 Amazon Rekognition Video API는 얼굴이나 객체와 같은 다양한 개체를 감지할 수 있습니다. 지원되는 비교 및 감지 유형에 대한 자세한 내용은 분석 유형 (p. 4) 단원을 참조하십시오.
Amazon Rekognition Image 작업Amazon Rekognition 이미지 작업은 동기식으로 수행됩니다. 입력과 응답은 JSON 형식입니다. AmazonRekognition Image 작업은 .jpg 또는 .png 이미지 형식의 입력 이미지를 분석합니다. Amazon RekognitionImage 작업에 전달된 이미지는 Amazon S3 버킷에 저장할 수 있습니다. AWS CLI를 사용하지 않는 경우Base64 인코딩 이미지 바이트를 Amazon Rekognition 작업에 직접 전달할 수도 있습니다. 자세한 내용은 이미지 작업 (p. 25) 단원을 참조하십시오.
Amazon Rekognition Video 작업Amazon Rekognition Video는 Amazon S3 버킷에 저장된 비디오와 Amazon Kinesis Video Streams를 통해스트리밍된 비디오를 분석할 수 있습니다.
Amazon Rekognition Video 비디오 작업은 비동기식으로 수행됩니다. Amazon Rekognition Video 스토리지비디오 작업을 사용하면 원하는 분석 유형에 대한 시작 작업을 호출하여 분석을 시작할 수 있습니다. 예를 들어, 저장된 비디오에서 얼굴을 감지하려면 StartFaceDetection (p. 398)을 호출합니다. 완료되면 AmazonRekognition은 Amazon SNS 주제에 완료 상태를 게시합니다. 분석 작업 결과를 가져오려면 요청한 분석 유형에 대한 가져오기 작업을 호출합니다(예: GetFaceDetection (p. 339)). 자세한 내용은 저장된 비디오 작업 (p. 51) 단원을 참조하십시오.
Amazon Rekognition Video 스트리밍 비디오 작업을 통해 Amazon Rekognition Video 모음에 저장된 얼굴을 검색할 수 있습니다. Amazon Rekognition Video의 경우 Kinesis video stream 분석을 통해 검색 결과를Kinesis data stream에 출력합니다. Amazon Rekognition Video 스트림 프로세서를 만들고 사용하여 비디오분석을 관리합니다. 예를 들어 CreateStreamProcessor (p. 284)를 호출하여 스트림 프로세서를 만들 수 있습니다. 자세한 내용은 스트리밍 비디오 작업 (p. 79) 단원을 참조하십시오.
비스토리지 및 스토리지 기반 작업Amazon Rekognition 작업은 다음과 같은 범주로 그룹화됩니다.
• 비스토리지 API 작업 – 이 작업의 경우 Amazon Rekognition에서 어떤 정보도 유지하지 않습니다. 입력 이미지와 비디오를 제공하고, 이 작업은 분석을 실시하고 결과를 반환하지만 Amazon Rekognition에는 아무것도 저장되지 않습니다. 자세한 내용은 비스토리지 작업 (p. 7) 단원을 참조하십시오.
• 스토리지 기반 API 작업 – Amazon Rekognition 서버는 감지된 얼굴 정보를 모음으로 알려진 컨테이너에저장할 수 있습니다. Amazon Rekognition은 유지되는 얼굴 정보에서 얼굴 일치를 검색하는 데 사용할 수
6
Amazon Rekognition 개발자 안내서AWS SDK 또는 HTTP를 사용하여
Amazon Rekognition API 작업 호출
있는 추가 API 작업을 제공합니다. 자세한 내용은 스토리지 기반 API 작업 (p. 8) 단원을 참조하십시오.
AWS SDK 또는 HTTP를 사용하여 AmazonRekognition API 작업 호출AWS SDK를 사용하거나 HTTP를 사용하여 직접 Amazon Rekognition API 작업을 호출할 수 있습니다. 특별한 이유가 없다면 항상 AWS SDK를 사용해야 합니다. 이 단원의 Java 예제는 AWS SDK를 사용합니다. Java프로젝트 파일은 제공되지 않지만 AWS Toolkit for Eclipse를 사용하여 Java를 사용하는 AWS 애플리케이션을 개발할 수 있습니다.
이 단원의 .NET 예제는 .NET용 AWS SDK을 사용합니다. AWS Toolkit for Visual Studio을 사용하면 .NET을 사용하는 AWS 애플리케이션을 개발할 수 있습니다. 여기에는 애플리케이션 배포 및 서비스 관리를 위한AWS Explorer와 유용한 템플릿이 포함됩니다.
이 안내서의 API 참조 (p. 265)에서는 HTTP를 사용한 Amazon Rekognition 작업 호출을 다룹니다. Java 참조 정보는 AWS SDK for Java를 참조하십시오.
사용 가능한 Amazon Rekognition 서비스 엔드포인트는 AWS 리전 및 엔드포인트에 나와 있습니다.
HTTP를 사용하여 Amazon Rekognition을 호출할 때는 POST HTTP 작업을 사용합니다.
비스토리지 및 스토리지 API 작업Amazon Rekognition은 두 가지 유형의 API 작업을 제공합니다. 즉, Amazon Rekognition에 저장된 정보가없는 비스토리지 작업과 특정 얼굴 정보가 Amazon Rekognition에 저장된 스토리지 작업입니다.
비스토리지 작업Amazon Rekognition은 이미지를 대상으로 다음과 같은 비스토리지 API 작업을 제공합니다.
• DetectLabels (p. 315)• DetectFaces (p. 311)• CompareFaces (p. 268)• DetectModerationLabels (p. 320)• RecognizeCelebrities (p. 379)• DetectText (p. 324)
Amazon Rekognition은 비디오를 대상으로 다음과 같은 비스토리지 API 작업을 제공합니다.
• StartLabelDetection (p. 406)• StartFaceDetection (p. 398)• StartPersonTracking (p. 410)• StartCelebrityRecognition (p. 391)• StartContentModeration (p. 394)
이러한 작업을 비 스토리지 API 작업이라고 하는 이유는 작업을 호출할 때 Amazon Rekognition이 입력 이미지에 관해 발견된 어떤 정보도 유지하지 않기 때문입니다. 다른 모든 Amazon Rekognition API 작업과 마찬가지로 비 스토리지 API 작업은 입력 이미지 바이트를 유지하지 않습니다.
7
Amazon Rekognition 개발자 안내서스토리지 기반 API 작업
다음 예제 시나리오는 애플리케이션에 비 스토리지 API 작업을 통합할 수 있는 경우를 보여 줍니다. 이 시나리오에서는 로컬 이미지 리포지토리가 있다고 가정합니다.
Example 1: 로컬 리포지토리에서 특정 레이블이 포함된 이미지를 찾는 애플리케이션
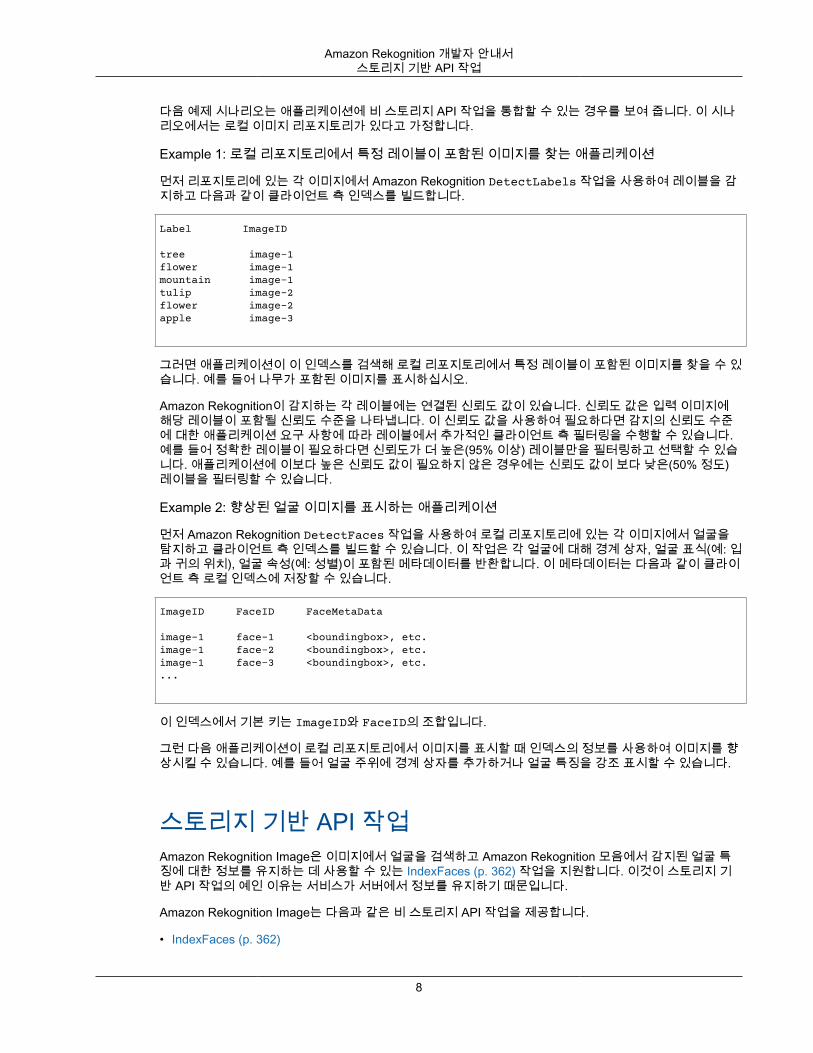
먼저 리포지토리에 있는 각 이미지에서 Amazon Rekognition DetectLabels 작업을 사용하여 레이블을 감지하고 다음과 같이 클라이언트 측 인덱스를 빌드합니다.
Label ImageID
tree image-1flower image-1mountain image-1tulip image-2flower image-2apple image-3
그러면 애플리케이션이 이 인덱스를 검색해 로컬 리포지토리에서 특정 레이블이 포함된 이미지를 찾을 수 있습니다. 예를 들어 나무가 포함된 이미지를 표시하십시오.
Amazon Rekognition이 감지하는 각 레이블에는 연결된 신뢰도 값이 있습니다. 신뢰도 값은 입력 이미지에해당 레이블이 포함될 신뢰도 수준을 나타냅니다. 이 신뢰도 값을 사용하여 필요하다면 감지의 신뢰도 수준에 대한 애플리케이션 요구 사항에 따라 레이블에서 추가적인 클라이언트 측 필터링을 수행할 수 있습니다.예를 들어 정확한 레이블이 필요하다면 신뢰도가 더 높은(95% 이상) 레이블만을 필터링하고 선택할 수 있습니다. 애플리케이션에 이보다 높은 신뢰도 값이 필요하지 않은 경우에는 신뢰도 값이 보다 낮은(50% 정도)레이블을 필터링할 수 있습니다.
Example 2: 향상된 얼굴 이미지를 표시하는 애플리케이션
먼저 Amazon Rekognition DetectFaces 작업을 사용하여 로컬 리포지토리에 있는 각 이미지에서 얼굴을탐지하고 클라이언트 측 인덱스를 빌드할 수 있습니다. 이 작업은 각 얼굴에 대해 경계 상자, 얼굴 표식(예: 입과 귀의 위치), 얼굴 속성(예: 성별)이 포함된 메타데이터를 반환합니다. 이 메타데이터는 다음과 같이 클라이언트 측 로컬 인덱스에 저장할 수 있습니다.
ImageID FaceID FaceMetaData
image-1 face-1 <boundingbox>, etc.image-1 face-2 <boundingbox>, etc.image-1 face-3 <boundingbox>, etc....
이 인덱스에서 기본 키는 ImageID와 FaceID의 조합입니다.
그런 다음 애플리케이션이 로컬 리포지토리에서 이미지를 표시할 때 인덱스의 정보를 사용하여 이미지를 향상시킬 수 있습니다. 예를 들어 얼굴 주위에 경계 상자를 추가하거나 얼굴 특징을 강조 표시할 수 있습니다.
스토리지 기반 API 작업Amazon Rekognition Image은 이미지에서 얼굴을 검색하고 Amazon Rekognition 모음에서 감지된 얼굴 특징에 대한 정보를 유지하는 데 사용할 수 있는 IndexFaces (p. 362) 작업을 지원합니다. 이것이 스토리지 기반 API 작업의 예인 이유는 서비스가 서버에서 정보를 유지하기 때문입니다.
Amazon Rekognition Image는 다음과 같은 비 스토리지 API 작업을 제공합니다.
• IndexFaces (p. 362)
8
Amazon Rekognition 개발자 안내서모델 버전 관리
• ListFaces (p. 373)• SearchFacesByImage (p. 386)• SearchFaces (p. 383)• DeleteFaces (p. 289)• DescribeCollection (p. 293)
Amazon Rekognition Video는 다음과 같은 비 스토리지 API 작업을 제공합니다.
• StartFaceSearch (p. 402)• CreateStreamProcessor (p. 284)
얼굴 정보를 저장하려면 먼저 계정의 AWS 리전 중 하나에서 얼굴 모음을 만들어야 합니다. IndexFaces 작업을 호출할 때 이 얼굴 모음을 지정합니다. 얼굴 모음을 만들고 모든 얼굴의 얼굴 특징 정보를 저장한 후에모음에서 얼굴 일치를 검색할 수 있습니다. 예를 들어 이미지에서 가장 큰 얼굴을 감지하고 모음에서 일치하는 얼굴을 감지하려면 searchFacesByImage.를 호출합니다.
IndexFaces를 통해 모음에 저장된 얼굴 정보는 Amazon Rekognition Video 작업에 액세스할 수 있습니다.예를 들어, StartFaceSearch (p. 402) 호출을 통해 호출하여 기존 모음의 얼굴과 일치하는 사람의 비디오를검색할 수 있습니다.
모음을 만들고 관리하는 방법에 대한 정보는 모음에서 얼굴 검색 (p. 153)를 참조하십시오.
Note
이 서비스는 실제 이미지 바이트를 유지하지 않습니다. 그 대신 기본 감지 알고리즘이 먼저 입력 이미지에서 얼굴을 감지하고 얼굴 특징을 각 얼굴의 특징 벡터로 추출한 다음 데이터베이스에 저장합니다. Amazon Rekognition은 얼굴 일치를 수행할 때 이러한 특징 벡터를 사용합니다.
Example 1: 건물 액세스를 인증하는 애플리케이션
먼저 얼굴을 추출해 검색 가능한 이미지 벡터로 저장하는 IndexFaces 작업을 사용하여 얼굴 모음을 만들어스캔한 배지 이미지를 저장할 수 있습니다. 그런 다음 직원이 건물에 들어오면 직원 얼굴 이미지가 캡처되어SearchFacesByImage 작업으로 전송됩니다. 얼굴 일치에서 충분히 높은 유사성 점수(가령 99%)가 나오면직원을 인증할 수 있습니다.
모델 버전 관리Amazon Rekognition은 딥 러닝 모델을 사용하여 얼굴 감지를 수행하고 모음에서 얼굴을 감지합니다. 그리고계속해서 고객 피드백과 딥 러닝 연구 발전을 토대로 모델 정확도를 개선하고 있습니다. 이러한 개선 사항은모델 업데이트로 전달됩니다. 예를 들어 모델 버전 1.0에서는 IndexFaces (p. 362)가 이미지에서 가장 큰얼굴 15개를 인덱싱할 수 있습니다. 최신 버전의 모델을 통해 IndexFaces는 이미지에서 가장 큰 얼굴 100개를 인덱싱할 수 있습니다.
새 모음을 만들 때 최신 버전의 모델과 연결됩니다. 정확도를 개선하기 위해 모델은 정기적으로 업데이트됩니다.
새 버전의 모델이 릴리스되면 다음 상황이 나타납니다.
• 만든 새 모음은 최신 모델과 연결됩니다. IndexFaces (p. 362)를 사용하여 새 모음에 추가하는 얼굴은 최신 모델을 사용하여 감지됩니다.
• 기존 모음은 모음을 만들 때 사용했던 모델 버전을 계속 사용합니다. 이 모음에 저장된 얼굴 벡터는 최신모델 버전으로 자동 업데이트되지 않습니다.
• 기존 모음에 추가되는 새 얼굴은 이미 모음에 연결된 모델을 사용하여 감지합니다.
9
Amazon Rekognition 개발자 안내서모델 버전 관리
다른 모델 버전과는 호환되지 않습니다. 특히 서로 다른 모델 버전을 사용하는 여러 모음으로 이미지를 인덱싱하는 경우 감지된 동일한 얼굴의 얼굴 식별자는 서로 다릅니다. 동일한 모델과 연결된 여러 모음으로 이미지가 인덱싱되는 경우 얼굴 식별자는 동일합니다.
모음 관리에서 모델 업데이트를 고려하지 않을 경우 애플리케이션이 호환성 문제를 겪을 수 있습니다. 모음작업(예: CreateCollection)의 응답으로 반환된 FaceModelVersion 필드를 사용하여 모음이 사용하는모델의 버전을 확인할 수 있습니다. DescribeCollection (p. 293) 호출을 통해 기존 모음의 모델 버전을 가져올 수도 있습니다. 자세한 내용은 모음 설명 (p. 162) 단원을 참조하십시오.
모음에 있는 기존 얼굴 벡터는 최신 모델 버전으로 자동 업데이트되지 않습니다. Amazon Rekognition은 소스 이미지 바이트를 저장하지 않기 때문에 최신 버전의 모델을 사용하여 이미지를 자동으로 다시 인덱싱할수 없습니다.
기존 모음에 저장된 얼굴에서 최신 모델을 사용하려면 새 모음(CreateCollection (p. 274))을 만들고 소스이미지를 새 모음(Indexfaces)으로 다시 인덱싱합니다. 새 모음의 얼굴 식별자는 이전 모음의 얼굴 식별자와 다르기 때문에 사용 중인 애플리케이션에서 저장한 모든 얼굴 식별자를 업데이트해야 합니다. 이전 모음이 더 이상 필요하지 않으면 DeleteCollection (p. 287)을 사용하여 삭제할 수 있습니다.
상태 비저장 작업(예: DetectFaces (p. 311))은 모델의 최신 버전을 사용합니다.
10
Amazon Rekognition 개발자 안내서1단계: 계정 설정
Amazon Rekognition 시작하기이 단원에서는 Amazon Rekognition 사용 시작과 관련된 주제를 다룹니다. Amazon Rekognition을 처음 사용하는 경우, 먼저 Amazon Rekognition 작동 방식 (p. 4)에 나와 있는 개념과 용어를 검토하는 것이 좋습니다.
주제• 1단계: AWS 계정 설정 및 IAM 사용자 만들기 (p. 11)• 2단계: AWS CLI 및 AWS SDK 설정 (p. 12)• 3단계: AWS CLI 및 AWS SDK API를 사용하여 시작하기 (p. 13)• 4단계: Amazon Rekognition 콘솔 사용 시작하기 (p. 14)
1단계: AWS 계정 설정 및 IAM 사용자 만들기Amazon Rekognition를 처음 사용하는 경우, 먼저 다음 작업을 완료해야 합니다.
1. AWS에 가입 (p. 11)2. IAM 사용자 생성 (p. 11)
AWS에 가입Amazon Web Services(AWS)에 가입하면 Amazon Rekognition을 포함한 AWS의 모든 서비스에 AWS 계정이 자동으로 등록됩니다. 사용한 서비스에 대해서만 청구됩니다.
Amazon Rekognition에서는 사용한 리소스에 대해서만 비용을 지불합니다. AWS를 처음 사용하는 고객인 경우 무료로 Amazon Rekognition을 시작할 수 있습니다. 자세한 내용은 AWS 프리 티어를 참조하십시오.
이미 AWS 계정이 있다면 다음 작업으로 건너뛰십시오. AWS 계정이 없는 경우에는 다음 절차의 단계를 수행하여 계정을 만듭니다.
AWS 계정을 생성하려면
1. https://portal.aws.amazon.com/billing/signup을 엽니다.2. 온라인 지시 사항을 따릅니다.
등록 절차 중 전화를 받고 전화 키패드를 사용하여 확인 코드를 입력하는 과정이 있습니다.
다음 작업에 필요하므로 AWS 계정 ID를 기록합니다.
IAM 사용자 생성Amazon Rekognition 같은 AWS 서비스를 사용하려면 액세스할 때 자격 증명을 제공해야 합니다. 이를 통해서비스가 소유한 리소스에 액세스할 수 있는 권한이 있는지를 확인합니다. 콘솔은 암호를 요구합니다. AWS계정에 대한 액세스 키를 생성하면 AWS CLI 또는 API에 액세스할 수 있습니다. 그러나 AWS 계정용 자격 증명을 사용하여 AWS에 액세스하는 것은 권장되지 않습니다. 그 대신 다음과 같이 하는 것이 좋습니다.
• AWS Identity and Access Management(IAM)를 사용하여 IAM 사용자를 만듭니다.• 관리 권한을 가진 IAM 그룹에 사용자를 추가합니다.
그러면 특정 URL이나 그 IAM 사용자의 자격 증명을 사용하여 AWS에 액세스할 수 있습니다.
11
Amazon Rekognition 개발자 안내서다음 단계
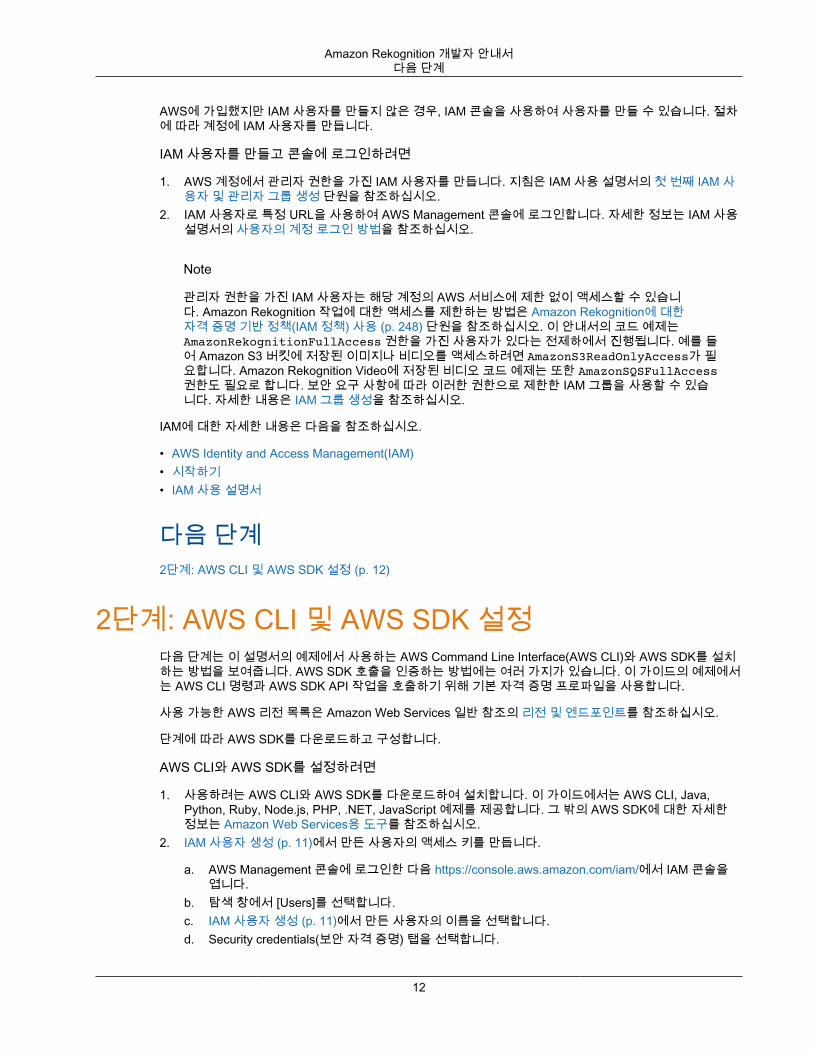
AWS에 가입했지만 IAM 사용자를 만들지 않은 경우, IAM 콘솔을 사용하여 사용자를 만들 수 있습니다. 절차에 따라 계정에 IAM 사용자를 만듭니다.
IAM 사용자를 만들고 콘솔에 로그인하려면
1. AWS 계정에서 관리자 권한을 가진 IAM 사용자를 만듭니다. 지침은 IAM 사용 설명서의 첫 번째 IAM 사용자 및 관리자 그룹 생성 단원을 참조하십시오.
2. IAM 사용자로 특정 URL을 사용하여 AWS Management 콘솔에 로그인합니다. 자세한 정보는 IAM 사용설명서의 사용자의 계정 로그인 방법을 참조하십시오.
Note
관리자 권한을 가진 IAM 사용자는 해당 계정의 AWS 서비스에 제한 없이 액세스할 수 있습니다. Amazon Rekognition 작업에 대한 액세스를 제한하는 방법은 Amazon Rekognition에 대한자격 증명 기반 정책(IAM 정책) 사용 (p. 248) 단원을 참조하십시오. 이 안내서의 코드 예제는AmazonRekognitionFullAccess 권한을 가진 사용자가 있다는 전제하에서 진행됩니다. 예를 들어 Amazon S3 버킷에 저장된 이미지나 비디오를 액세스하려면 AmazonS3ReadOnlyAccess가 필요합니다. Amazon Rekognition Video에 저장된 비디오 코드 예제는 또한 AmazonSQSFullAccess권한도 필요로 합니다. 보안 요구 사항에 따라 이러한 권한으로 제한한 IAM 그룹을 사용할 수 있습니다. 자세한 내용은 IAM 그룹 생성을 참조하십시오.
IAM에 대한 자세한 내용은 다음을 참조하십시오.
• AWS Identity and Access Management(IAM)• 시작하기• IAM 사용 설명서
다음 단계2단계: AWS CLI 및 AWS SDK 설정 (p. 12)
2단계: AWS CLI 및 AWS SDK 설정다음 단계는 이 설명서의 예제에서 사용하는 AWS Command Line Interface(AWS CLI)와 AWS SDK를 설치하는 방법을 보여줍니다. AWS SDK 호출을 인증하는 방법에는 여러 가지가 있습니다. 이 가이드의 예제에서는 AWS CLI 명령과 AWS SDK API 작업을 호출하기 위해 기본 자격 증명 프로파일을 사용합니다.
사용 가능한 AWS 리전 목록은 Amazon Web Services 일반 참조의 리전 및 엔드포인트를 참조하십시오.
단계에 따라 AWS SDK를 다운로드하고 구성합니다.
AWS CLI와 AWS SDK를 설정하려면
1. 사용하려는 AWS CLI와 AWS SDK를 다운로드하여 설치합니다. 이 가이드에서는 AWS CLI, Java,Python, Ruby, Node.js, PHP, .NET, JavaScript 예제를 제공합니다. 그 밖의 AWS SDK에 대한 자세한정보는 Amazon Web Services용 도구를 참조하십시오.
2. IAM 사용자 생성 (p. 11)에서 만든 사용자의 액세스 키를 만듭니다.
a. AWS Management 콘솔에 로그인한 다음 https://console.aws.amazon.com/iam/에서 IAM 콘솔을엽니다.
b. 탐색 창에서 [Users]를 선택합니다.c. IAM 사용자 생성 (p. 11)에서 만든 사용자의 이름을 선택합니다.d. Security credentials(보안 자격 증명) 탭을 선택합니다.
12
Amazon Rekognition 개발자 안내서다음 단계
e. 액세스 키 생성을 선택합니다. 그런 다음 .csv 파일 다운로드를 선택하여 액세스 키 ID 및 보안 액세스 키를 컴퓨터에 CSV 파일로 저장합니다. 안전한 위치에 파일을 저장합니다. 이 대화 상자를 닫은후에는 보안 액세스 키에 다시 액세스할 수 없습니다. CSV 파일을 다운로드한 후 [Close]를 클릭합니다.
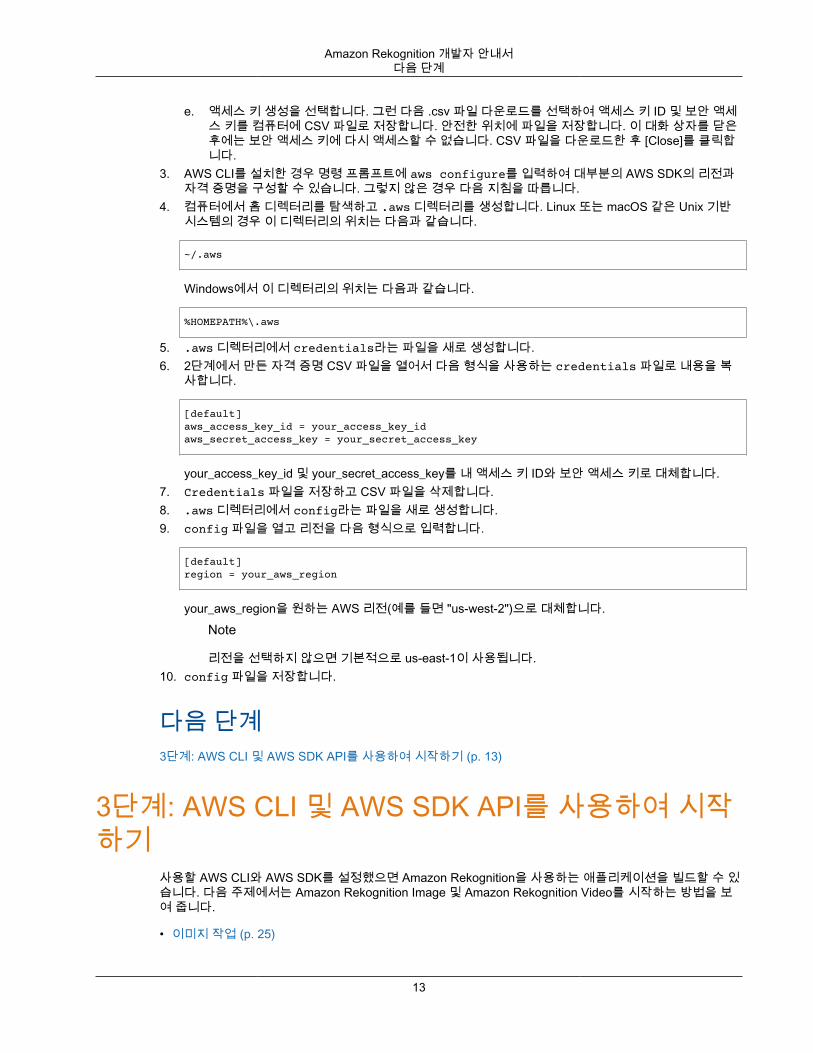
3. AWS CLI를 설치한 경우 명령 프롬프트에 aws configure를 입력하여 대부분의 AWS SDK의 리전과자격 증명을 구성할 수 있습니다. 그렇지 않은 경우 다음 지침을 따릅니다.
4. 컴퓨터에서 홈 디렉터리를 탐색하고 .aws 디렉터리를 생성합니다. Linux 또는 macOS 같은 Unix 기반시스템의 경우 이 디렉터리의 위치는 다음과 같습니다.
~/.aws
Windows에서 이 디렉터리의 위치는 다음과 같습니다.
%HOMEPATH%\.aws
5. .aws 디렉터리에서 credentials라는 파일을 새로 생성합니다.6. 2단계에서 만든 자격 증명 CSV 파일을 열어서 다음 형식을 사용하는 credentials 파일로 내용을 복
사합니다.
[default]aws_access_key_id = your_access_key_idaws_secret_access_key = your_secret_access_key
your_access_key_id 및 your_secret_access_key를 내 액세스 키 ID와 보안 액세스 키로 대체합니다.7. Credentials 파일을 저장하고 CSV 파일을 삭제합니다.8. .aws 디렉터리에서 config라는 파일을 새로 생성합니다.9. config 파일을 열고 리전을 다음 형식으로 입력합니다.
[default]region = your_aws_region
your_aws_region을 원하는 AWS 리전(예를 들면 "us-west-2")으로 대체합니다.
Note
리전을 선택하지 않으면 기본적으로 us-east-1이 사용됩니다.10. config 파일을 저장합니다.
다음 단계3단계: AWS CLI 및 AWS SDK API를 사용하여 시작하기 (p. 13)
3단계: AWS CLI 및 AWS SDK API를 사용하여 시작하기
사용할 AWS CLI와 AWS SDK를 설정했으면 Amazon Rekognition을 사용하는 애플리케이션을 빌드할 수 있습니다. 다음 주제에서는 Amazon Rekognition Image 및 Amazon Rekognition Video를 시작하는 방법을 보여 줍니다.
• 이미지 작업 (p. 25)
13
Amazon Rekognition 개발자 안내서AWS CLI 예제 형식
• 저장된 비디오 작업 (p. 51)• 스트리밍 비디오 작업 (p. 79)
AWS CLI 예제 형식이 안내서의 AWS CLI 예제는 Linux 운영 체제용입니다. Microsoft Windows에서 샘플을 사용하려면 --image 파라미터의 JSON 형식을 변경하고 줄 바꿈을 백슬래시(\)에서 캐럿 기호(^)로 변경해야 합니다.JSON 형식에 대한 자세한 내용은 AWS 명령줄 인터페이스 파라미터 값 지정을 참조하십시오. 다음은Microsoft Windows용 AWS CLI 명령의 예입니다.
aws rekognition detect-labels ^ --image "{\"S3Object\":{\"Bucket\":\"photo-collection\",\"Name\":\"photo.jpg\"}}" ^ --region us-west-2
Microsoft Windows와 Linux에서 모두 작동하는 JSON 간편 버전을 제공할 수도 있습니다.
aws rekognition detect-labels --image "S3Object={Bucket=photo-collection,Name=photo.jpg}" --region us-west-2
자세한 내용은 AWS 명령줄 인터페이스에서 간편 구문 사용을 참조하십시오.
다음 단계4단계: Amazon Rekognition 콘솔 사용 시작하기 (p. 14)
4단계: Amazon Rekognition 콘솔 사용 시작하기이 단원은 이미지 집합에서 객체 및 장면 감지, 얼굴 분석, 얼굴 비교 같은 Amazon Rekognition 기능의 하위집합을 사용하는 방법을 보여 줍니다. 자세한 내용은 Amazon Rekognition 작동 방식 (p. 4) 단원을 참조하십시오. 또한 Amazon Rekognition API 또는 AWS CLI를 사용하여 객체, 장면, 얼굴을 감지하고 얼굴 비교 및감지를 할 수 있습니다. 자세한 내용은 3단계: AWS CLI 및 AWS SDK API를 사용하여 시작하기 (p. 13) 단원을 참조하십시오.
이 단원은 Rekognition 콘솔을 사용하여 Rekognition의 Amazon CloudWatch 측정치 집계를 보는 방법도 보여 줍니다.
주제• 연습 1: 이미지에서 객체 및 장면 감지(콘솔) (p. 15)• 연습 2: 이미지 내 얼굴 분석(콘솔) (p. 19)• 연습 3: 이미지 내 얼굴 비교(콘솔) (p. 22)• 연습 4: 집계 측정치 보기(콘솔) (p. 24)
14
Amazon Rekognition 개발자 안내서연습 1: 객체 및 장면 감지(콘솔)
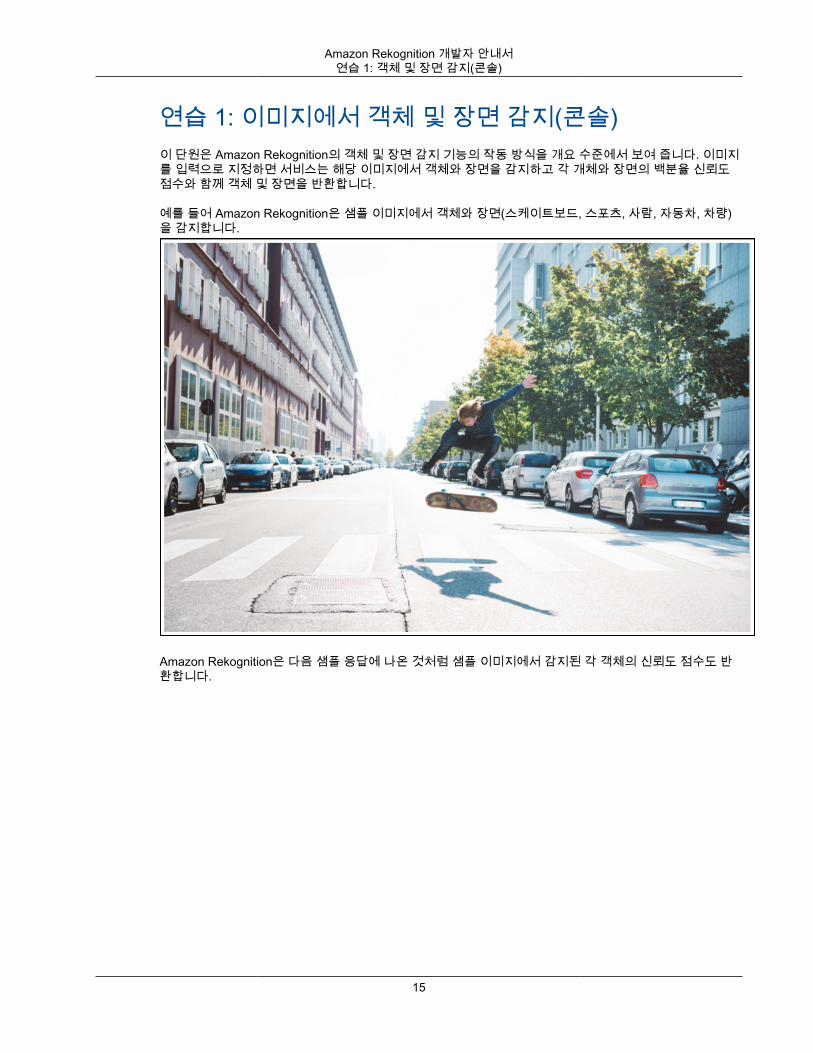
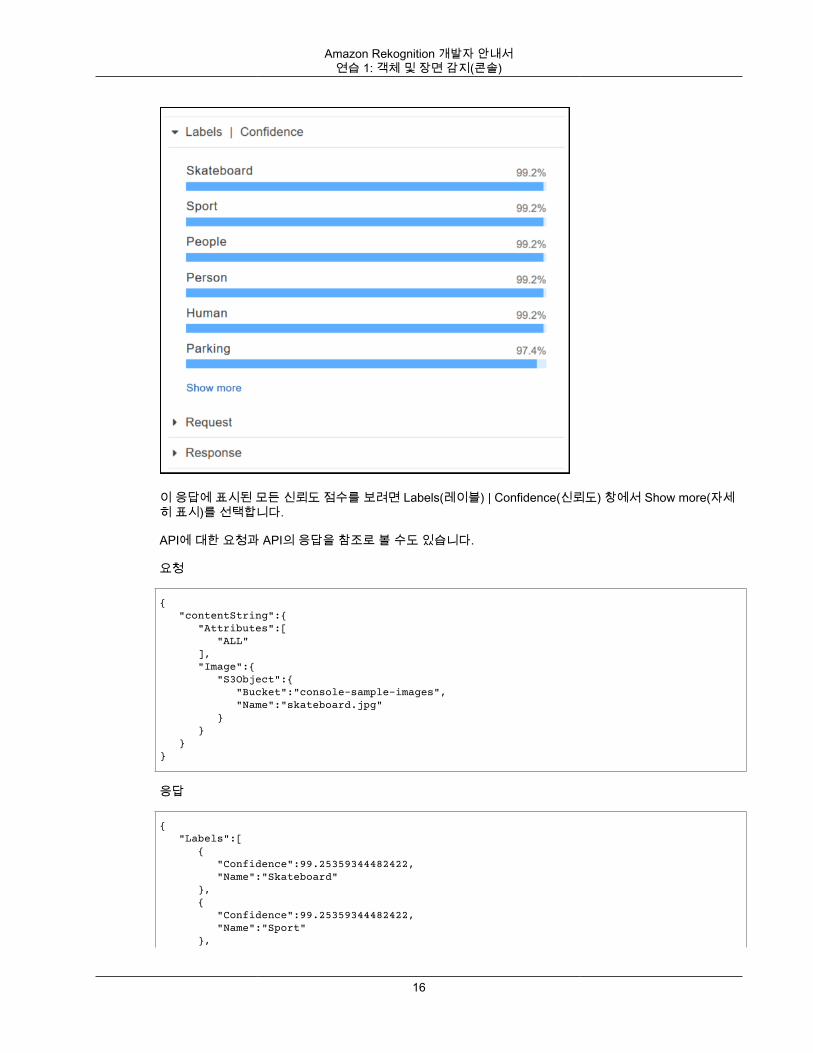
연습 1: 이미지에서 객체 및 장면 감지(콘솔)이 단원은 Amazon Rekognition의 객체 및 장면 감지 기능의 작동 방식을 개요 수준에서 보여 줍니다. 이미지를 입력으로 지정하면 서비스는 해당 이미지에서 객체와 장면을 감지하고 각 개체와 장면의 백분율 신뢰도점수와 함께 객체 및 장면을 반환합니다.
예를 들어 Amazon Rekognition은 샘플 이미지에서 객체와 장면(스케이트보드, 스포츠, 사람, 자동차, 차량)을 감지합니다.
Amazon Rekognition은 다음 샘플 응답에 나온 것처럼 샘플 이미지에서 감지된 각 객체의 신뢰도 점수도 반환합니다.
15
Amazon Rekognition 개발자 안내서연습 1: 객체 및 장면 감지(콘솔)
이 응답에 표시된 모든 신뢰도 점수를 보려면 Labels(레이블) | Confidence(신뢰도) 창에서 Show more(자세히 표시)를 선택합니다.
API에 대한 요청과 API의 응답을 참조로 볼 수도 있습니다.
요청
{ "contentString":{ "Attributes":[ "ALL" ], "Image":{ "S3Object":{ "Bucket":"console-sample-images", "Name":"skateboard.jpg" } } }}
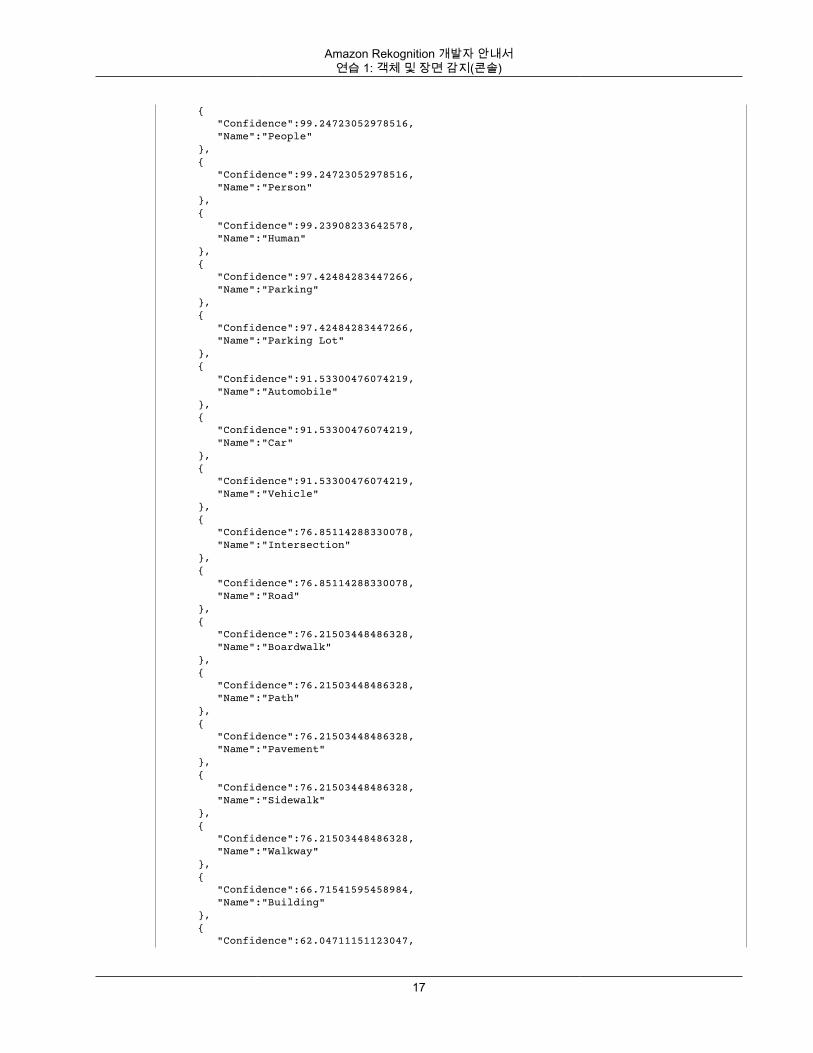
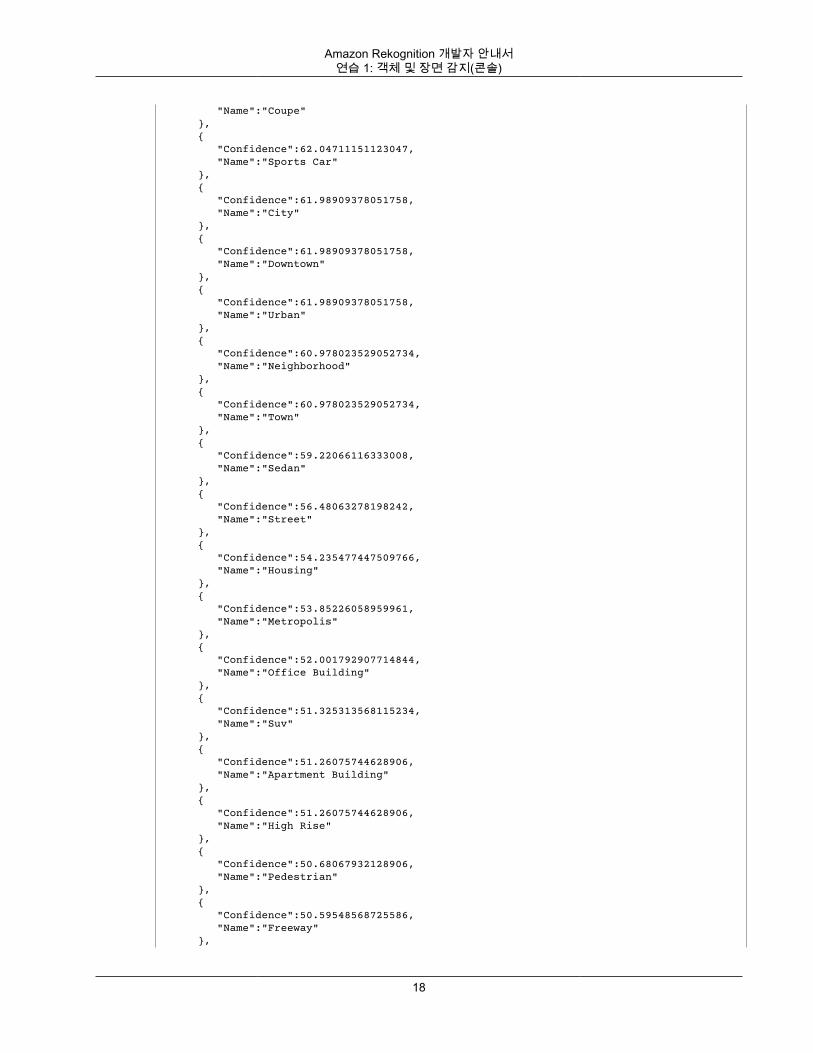
응답
{ "Labels":[ { "Confidence":99.25359344482422, "Name":"Skateboard" }, { "Confidence":99.25359344482422, "Name":"Sport" },
16
Amazon Rekognition 개발자 안내서연습 1: 객체 및 장면 감지(콘솔)
{ "Confidence":99.24723052978516, "Name":"People" }, { "Confidence":99.24723052978516, "Name":"Person" }, { "Confidence":99.23908233642578, "Name":"Human" }, { "Confidence":97.42484283447266, "Name":"Parking" }, { "Confidence":97.42484283447266, "Name":"Parking Lot" }, { "Confidence":91.53300476074219, "Name":"Automobile" }, { "Confidence":91.53300476074219, "Name":"Car" }, { "Confidence":91.53300476074219, "Name":"Vehicle" }, { "Confidence":76.85114288330078, "Name":"Intersection" }, { "Confidence":76.85114288330078, "Name":"Road" }, { "Confidence":76.21503448486328, "Name":"Boardwalk" }, { "Confidence":76.21503448486328, "Name":"Path" }, { "Confidence":76.21503448486328, "Name":"Pavement" }, { "Confidence":76.21503448486328, "Name":"Sidewalk" }, { "Confidence":76.21503448486328, "Name":"Walkway" }, { "Confidence":66.71541595458984, "Name":"Building" }, { "Confidence":62.04711151123047,
17
Amazon Rekognition 개발자 안내서연습 1: 객체 및 장면 감지(콘솔)
"Name":"Coupe" }, { "Confidence":62.04711151123047, "Name":"Sports Car" }, { "Confidence":61.98909378051758, "Name":"City" }, { "Confidence":61.98909378051758, "Name":"Downtown" }, { "Confidence":61.98909378051758, "Name":"Urban" }, { "Confidence":60.978023529052734, "Name":"Neighborhood" }, { "Confidence":60.978023529052734, "Name":"Town" }, { "Confidence":59.22066116333008, "Name":"Sedan" }, { "Confidence":56.48063278198242, "Name":"Street" }, { "Confidence":54.235477447509766, "Name":"Housing" }, { "Confidence":53.85226058959961, "Name":"Metropolis" }, { "Confidence":52.001792907714844, "Name":"Office Building" }, { "Confidence":51.325313568115234, "Name":"Suv" }, { "Confidence":51.26075744628906, "Name":"Apartment Building" }, { "Confidence":51.26075744628906, "Name":"High Rise" }, { "Confidence":50.68067932128906, "Name":"Pedestrian" }, { "Confidence":50.59548568725586, "Name":"Freeway" },
18
Amazon Rekognition 개발자 안내서연습 2: 얼굴 분석(콘솔)
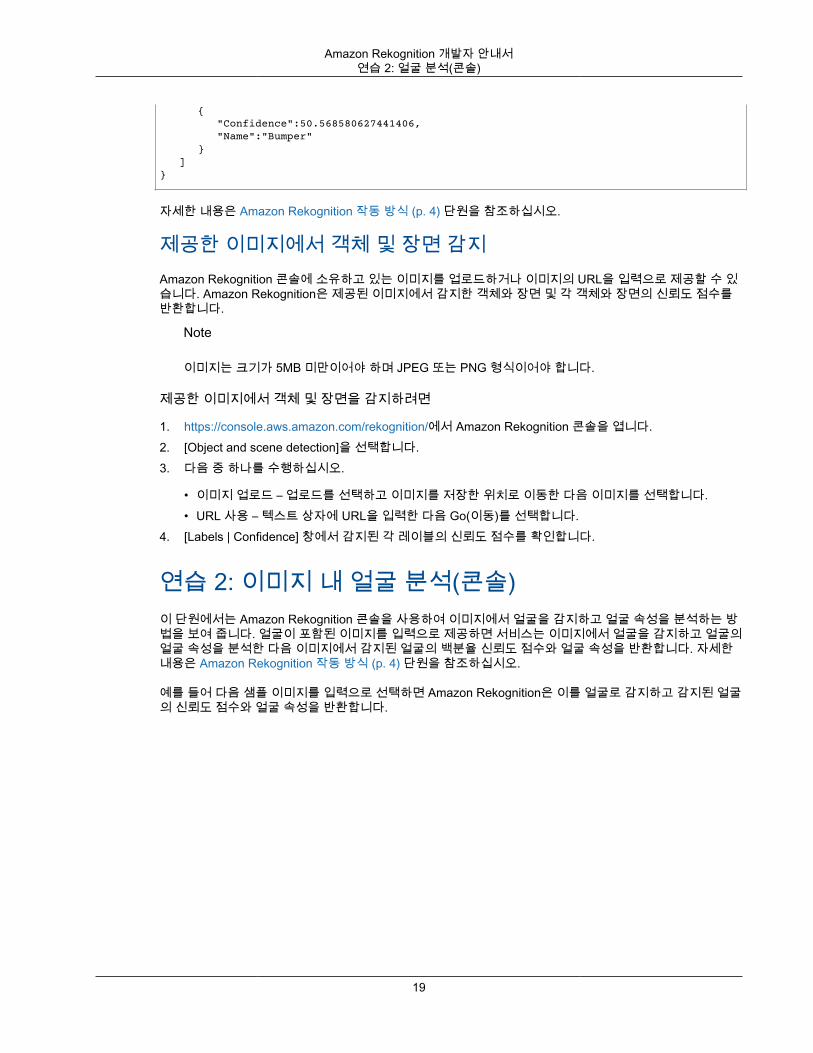
{ "Confidence":50.568580627441406, "Name":"Bumper" } ]}
자세한 내용은 Amazon Rekognition 작동 방식 (p. 4) 단원을 참조하십시오.
제공한 이미지에서 객체 및 장면 감지Amazon Rekognition 콘솔에 소유하고 있는 이미지를 업로드하거나 이미지의 URL을 입력으로 제공할 수 있습니다. Amazon Rekognition은 제공된 이미지에서 감지한 객체와 장면 및 각 객체와 장면의 신뢰도 점수를반환합니다.
Note
이미지는 크기가 5MB 미만이어야 하며 JPEG 또는 PNG 형식이어야 합니다.
제공한 이미지에서 객체 및 장면을 감지하려면
1. https://console.aws.amazon.com/rekognition/에서 Amazon Rekognition 콘솔을 엽니다.2. [Object and scene detection]을 선택합니다.3. 다음 중 하나를 수행하십시오.
• 이미지 업로드 – 업로드를 선택하고 이미지를 저장한 위치로 이동한 다음 이미지를 선택합니다.• URL 사용 – 텍스트 상자에 URL을 입력한 다음 Go(이동)를 선택합니다.
4. [Labels | Confidence] 창에서 감지된 각 레이블의 신뢰도 점수를 확인합니다.
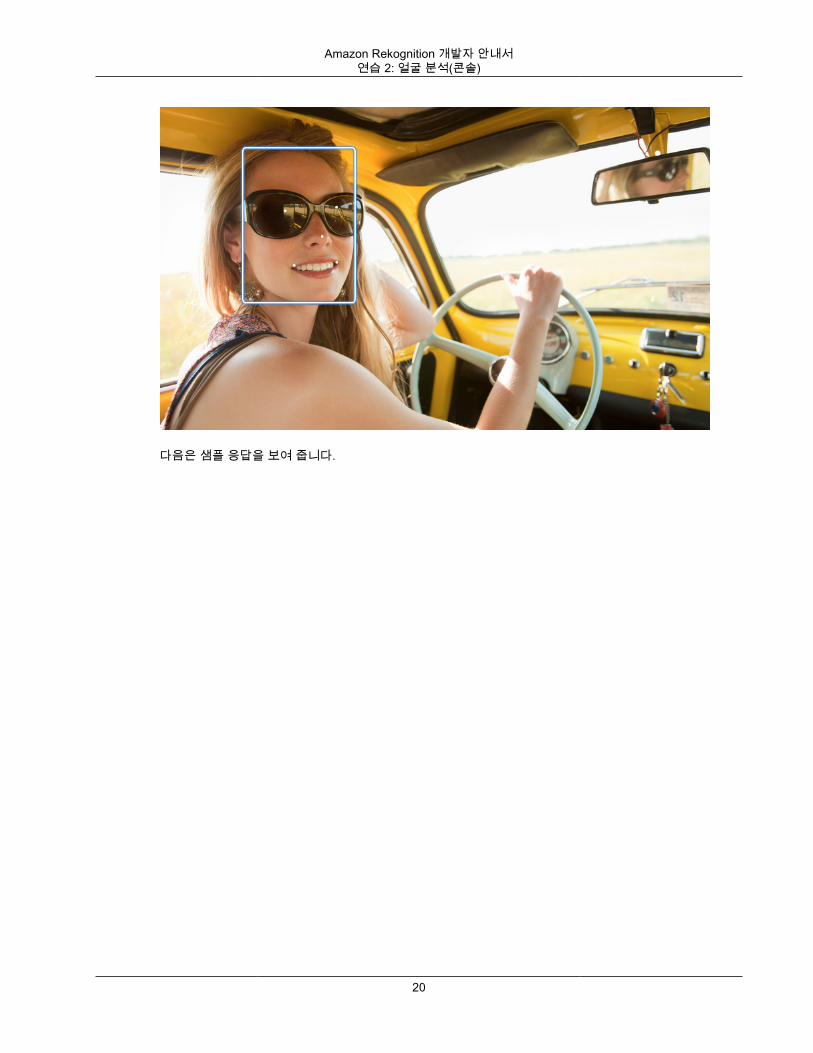
연습 2: 이미지 내 얼굴 분석(콘솔)이 단원에서는 Amazon Rekognition 콘솔을 사용하여 이미지에서 얼굴을 감지하고 얼굴 속성을 분석하는 방법을 보여 줍니다. 얼굴이 포함된 이미지를 입력으로 제공하면 서비스는 이미지에서 얼굴을 감지하고 얼굴의얼굴 속성을 분석한 다음 이미지에서 감지된 얼굴의 백분율 신뢰도 점수와 얼굴 속성을 반환합니다. 자세한내용은 Amazon Rekognition 작동 방식 (p. 4) 단원을 참조하십시오.
예를 들어 다음 샘플 이미지를 입력으로 선택하면 Amazon Rekognition은 이를 얼굴로 감지하고 감지된 얼굴의 신뢰도 점수와 얼굴 속성을 반환합니다.
19
Amazon Rekognition 개발자 안내서연습 2: 얼굴 분석(콘솔)
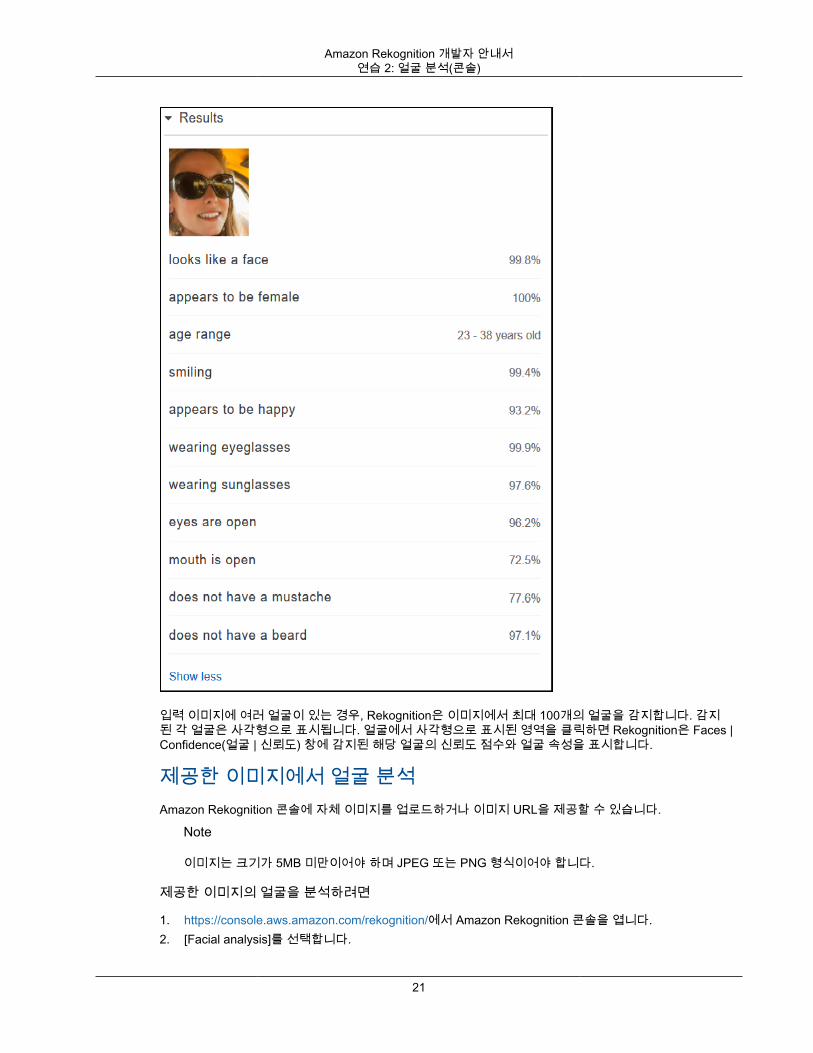
다음은 샘플 응답을 보여 줍니다.
20
Amazon Rekognition 개발자 안내서연습 2: 얼굴 분석(콘솔)
입력 이미지에 여러 얼굴이 있는 경우, Rekognition은 이미지에서 최대 100개의 얼굴을 감지합니다. 감지된 각 얼굴은 사각형으로 표시됩니다. 얼굴에서 사각형으로 표시된 영역을 클릭하면 Rekognition은 Faces |Confidence(얼굴 | 신뢰도) 창에 감지된 해당 얼굴의 신뢰도 점수와 얼굴 속성을 표시합니다.
제공한 이미지에서 얼굴 분석Amazon Rekognition 콘솔에 자체 이미지를 업로드하거나 이미지 URL을 제공할 수 있습니다.
Note
이미지는 크기가 5MB 미만이어야 하며 JPEG 또는 PNG 형식이어야 합니다.
제공한 이미지의 얼굴을 분석하려면
1. https://console.aws.amazon.com/rekognition/에서 Amazon Rekognition 콘솔을 엽니다.2. [Facial analysis]를 선택합니다.
21
Amazon Rekognition 개발자 안내서연습 3: 얼굴 비교(콘솔)
3. 다음 중 하나를 수행하십시오.
• 이미지 업로드 – 업로드를 선택하고 이미지를 저장한 위치로 이동한 다음 이미지를 선택합니다.• URL 사용 – 텍스트 상자에 URL을 입력한 다음 Go(이동)를 선택합니다.
4. [Faces | Confidence] 창에서 감지된 얼굴 중 하나의 신뢰도 점수와 얼굴 속성을 확인합니다.5. 이미지에 여러 얼굴이 있는 경우, 다른 얼굴 중 하나를 선택해 속성과 점수를 봅니다.
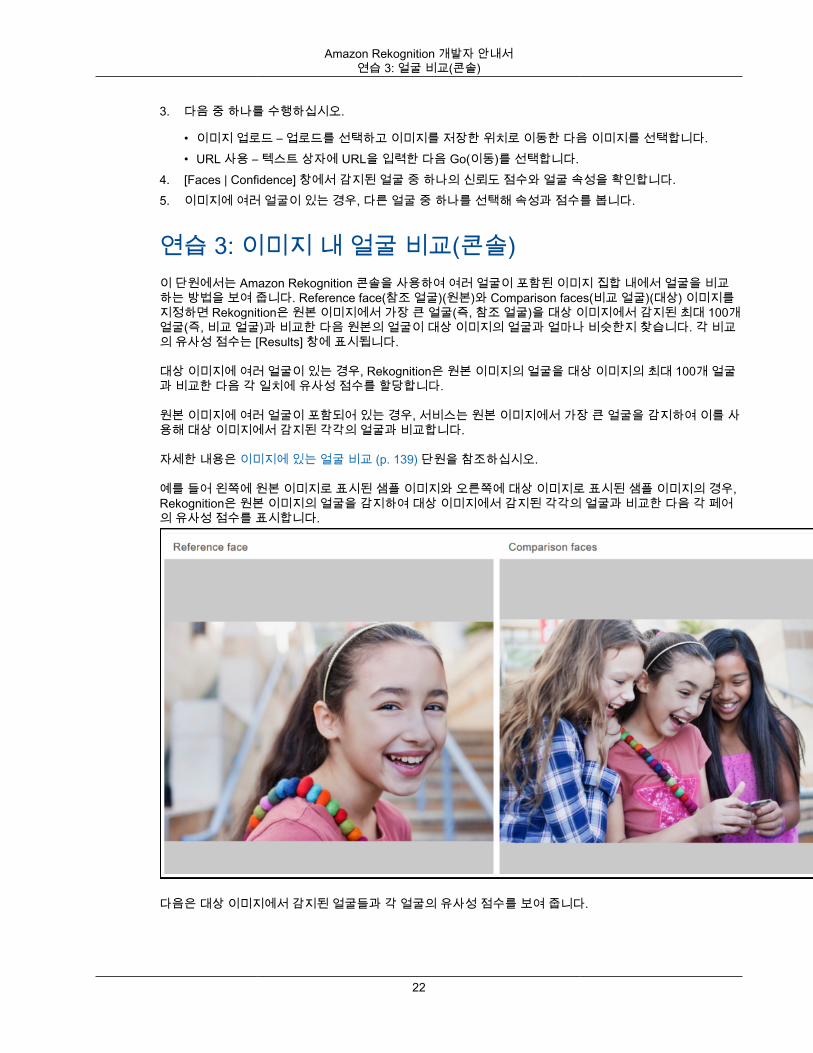
연습 3: 이미지 내 얼굴 비교(콘솔)이 단원에서는 Amazon Rekognition 콘솔을 사용하여 여러 얼굴이 포함된 이미지 집합 내에서 얼굴을 비교하는 방법을 보여 줍니다. Reference face(참조 얼굴)(원본)와 Comparison faces(비교 얼굴)(대상) 이미지를지정하면 Rekognition은 원본 이미지에서 가장 큰 얼굴(즉, 참조 얼굴)을 대상 이미지에서 감지된 최대 100개얼굴(즉, 비교 얼굴)과 비교한 다음 원본의 얼굴이 대상 이미지의 얼굴과 얼마나 비슷한지 찾습니다. 각 비교의 유사성 점수는 [Results] 창에 표시됩니다.
대상 이미지에 여러 얼굴이 있는 경우, Rekognition은 원본 이미지의 얼굴을 대상 이미지의 최대 100개 얼굴과 비교한 다음 각 일치에 유사성 점수를 할당합니다.
원본 이미지에 여러 얼굴이 포함되어 있는 경우, 서비스는 원본 이미지에서 가장 큰 얼굴을 감지하여 이를 사용해 대상 이미지에서 감지된 각각의 얼굴과 비교합니다.
자세한 내용은 이미지에 있는 얼굴 비교 (p. 139) 단원을 참조하십시오.
예를 들어 왼쪽에 원본 이미지로 표시된 샘플 이미지와 오른쪽에 대상 이미지로 표시된 샘플 이미지의 경우,Rekognition은 원본 이미지의 얼굴을 감지하여 대상 이미지에서 감지된 각각의 얼굴과 비교한 다음 각 페어의 유사성 점수를 표시합니다.
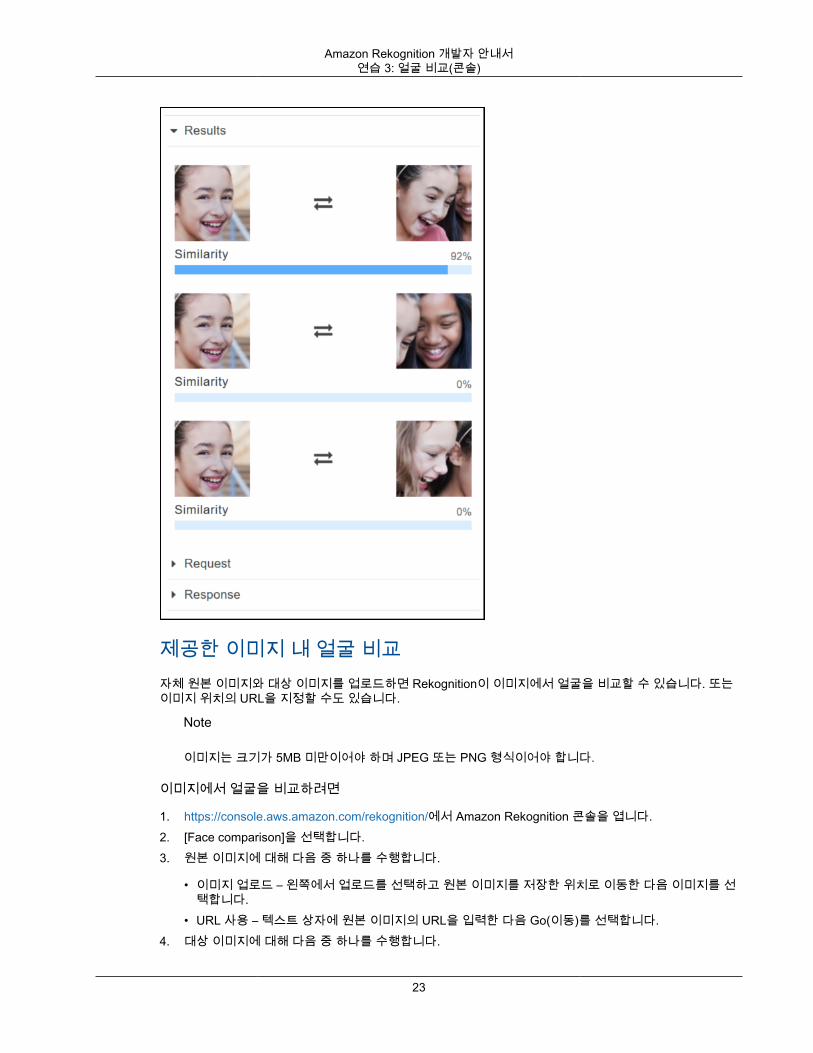
다음은 대상 이미지에서 감지된 얼굴들과 각 얼굴의 유사성 점수를 보여 줍니다.
22
Amazon Rekognition 개발자 안내서연습 3: 얼굴 비교(콘솔)
제공한 이미지 내 얼굴 비교자체 원본 이미지와 대상 이미지를 업로드하면 Rekognition이 이미지에서 얼굴을 비교할 수 있습니다. 또는이미지 위치의 URL을 지정할 수도 있습니다.
Note
이미지는 크기가 5MB 미만이어야 하며 JPEG 또는 PNG 형식이어야 합니다.
이미지에서 얼굴을 비교하려면
1. https://console.aws.amazon.com/rekognition/에서 Amazon Rekognition 콘솔을 엽니다.2. [Face comparison]을 선택합니다.3. 원본 이미지에 대해 다음 중 하나를 수행합니다.
• 이미지 업로드 – 왼쪽에서 업로드를 선택하고 원본 이미지를 저장한 위치로 이동한 다음 이미지를 선택합니다.
• URL 사용 – 텍스트 상자에 원본 이미지의 URL을 입력한 다음 Go(이동)를 선택합니다.4. 대상 이미지에 대해 다음 중 하나를 수행합니다.
23
Amazon Rekognition 개발자 안내서연습 4: 집계 측정치 보기(콘솔)
• 이미지 업로드 – 오른쪽에서 업로드를 선택하고 원본 이미지를 저장한 위치로 이동한 다음 이미지를선택합니다.
• URL 사용 – 텍스트 상자에 원본 이미지의 URL을 입력한 다음 Go(이동)를 선택합니다.5. Rekognition은 원본 이미지에서 가장 큰 얼굴을 대상 이미지의 최대 100개 얼굴과 비교한 다음
Results(결과) 창에 각 쌍의 유사성 점수를 표시합니다.
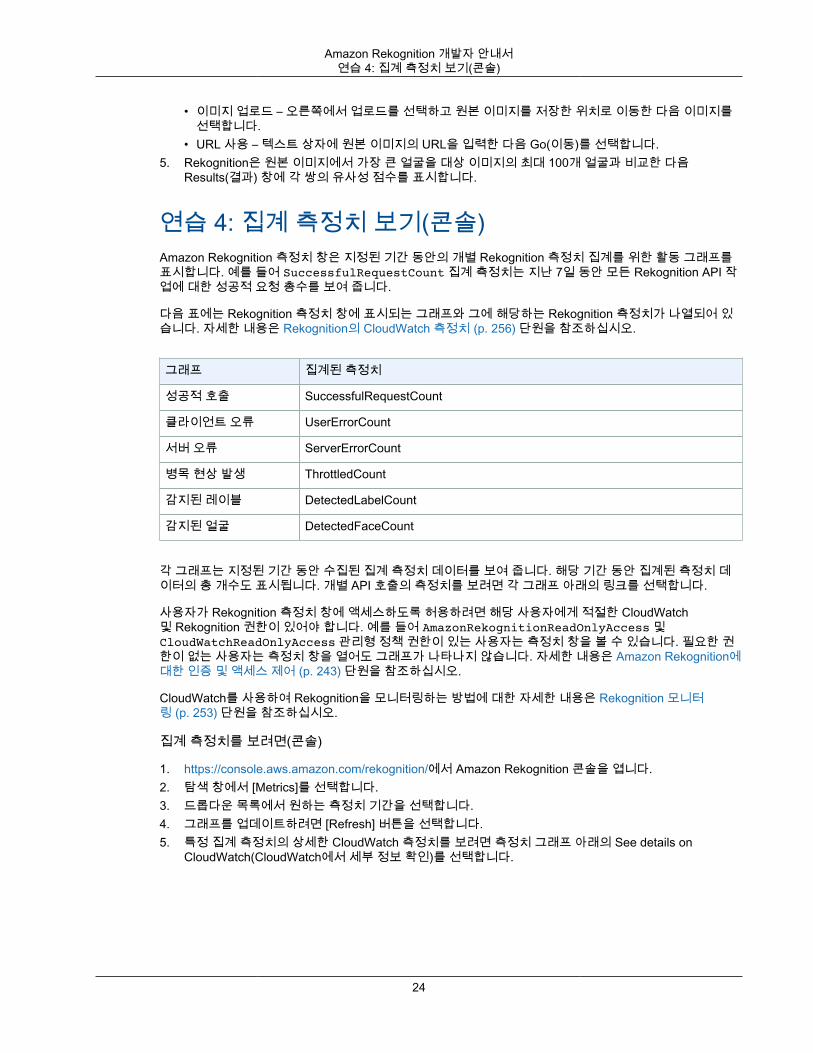
연습 4: 집계 측정치 보기(콘솔)Amazon Rekognition 측정치 창은 지정된 기간 동안의 개별 Rekognition 측정치 집계를 위한 활동 그래프를표시합니다. 예를 들어 SuccessfulRequestCount 집계 측정치는 지난 7일 동안 모든 Rekognition API 작업에 대한 성공적 요청 총수를 보여 줍니다.
다음 표에는 Rekognition 측정치 창에 표시되는 그래프와 그에 해당하는 Rekognition 측정치가 나열되어 있습니다. 자세한 내용은 Rekognition의 CloudWatch 측정치 (p. 256) 단원을 참조하십시오.
그래프 집계된 측정치
성공적 호출 SuccessfulRequestCount
클라이언트 오류 UserErrorCount
서버 오류 ServerErrorCount
병목 현상 발생 ThrottledCount
감지된 레이블 DetectedLabelCount
감지된 얼굴 DetectedFaceCount
각 그래프는 지정된 기간 동안 수집된 집계 측정치 데이터를 보여 줍니다. 해당 기간 동안 집계된 측정치 데이터의 총 개수도 표시됩니다. 개별 API 호출의 측정치를 보려면 각 그래프 아래의 링크를 선택합니다.
사용자가 Rekognition 측정치 창에 액세스하도록 허용하려면 해당 사용자에게 적절한 CloudWatch및 Rekognition 권한이 있어야 합니다. 예를 들어 AmazonRekognitionReadOnlyAccess 및CloudWatchReadOnlyAccess 관리형 정책 권한이 있는 사용자는 측정치 창을 볼 수 있습니다. 필요한 권한이 없는 사용자는 측정치 창을 열어도 그래프가 나타나지 않습니다. 자세한 내용은 Amazon Rekognition에대한 인증 및 액세스 제어 (p. 243) 단원을 참조하십시오.
CloudWatch를 사용하여 Rekognition을 모니터링하는 방법에 대한 자세한 내용은 Rekognition 모니터링 (p. 253) 단원을 참조하십시오.
집계 측정치를 보려면(콘솔)
1. https://console.aws.amazon.com/rekognition/에서 Amazon Rekognition 콘솔을 엽니다.2. 탐색 창에서 [Metrics]를 선택합니다.3. 드롭다운 목록에서 원하는 측정치 기간을 선택합니다.4. 그래프를 업데이트하려면 [Refresh] 버튼을 선택합니다.5. 특정 집계 측정치의 상세한 CloudWatch 측정치를 보려면 측정치 그래프 아래의 See details on
CloudWatch(CloudWatch에서 세부 정보 확인)를 선택합니다.
24

Amazon Rekognition 개발자 안내서이미지 작업
Amazon Rekognition API 프로그래밍사용자는 이미지, 저장된 비디오, 스트리밍 비디오로 Amazon Rekognition API 작업을 사용할 수 있습니다.이 단원에서는 Amazon Rekognition에 액세스하는 코드를 작성하는 방법에 대해 일반적인 정보를 제공합니다. 이 안내서의 다른 단원에서는 얼굴 감지처럼 특정한 유형의 이미지 및 비디오 분석에 대한 정보를 제공합니다.
주제• 이미지 작업 (p. 25)• 저장된 비디오 작업 (p. 51)• 스트리밍 비디오 작업 (p. 79)• 오류 처리 (p. 99)• Amazon Rekognition와 함께 Amazon Augmented AI(프리뷰) 사용 (p. 104)• FedRAMP 권한 부여 서비스로 Amazon Rekognition 사용 (p. 106)
이미지 작업이 단원에서는 Amazon Rekognition Image가 이미지에 대해 수행할 수 있는 분석 유형을 다룹니다.
• 레이블 감지• 얼굴 감지 및 비교• 유명 인사 인식• 이미지 조절• 이미지 속 텍스트 감지
이러한 작업은 Amazon Rekognition Image가 작업에서 발견된 어떠한 정보도 유지하지 않는 비 스토리지API 작업에 의해 수행됩니다. 입력 이미지 바이트는 비 스토리지 API 작업에 의해 유지되지 않습니다. 자세한 내용은 비스토리지 및 스토리지 API 작업 (p. 7) 단원을 참조하십시오.
또한 Amazon Rekognition Image는 나중에 검색할 수 있도록 얼굴 메타데이터를 모음에 저장할 수 있습니다.자세한 내용은 모음에서 얼굴 검색 (p. 153) 단원을 참조하십시오.
이 단원에서는 Amazon Rekognition Image API 작업을 사용하여 Amazon S3 버킷에 저장된 이미지와 로컬파일 시스템에서 로드된 이미지 바이트를 분석합니다. 이 섹션에서는 .jpg 이미지에서 이미지 방향 정보를 가져오는 방법에 대해서도 알아봅니다.
주제• 이미지 (p. 25)• Amazon S3 버킷에 저장된 이미지 분석 (p. 26)• 로컬 파일 시스템에서 불러온 이미지 분석 (p. 31)• 경계 상자 표시 (p. 40)• 이미지 방향 및 경계 상자 좌표 가져오기 (p. 44)
이미지Amazon Rekognition Image 작업은 .jpg 또는 .png 형식의 이미지를 분석할 수 있습니다.
이미지 바이트를 호출의 일부로 Amazon Rekognition Image 작업에 전달하거나 기존 Amazon S3 객체를참조합니다. Amazon S3 버킷에 저장된 이미지를 분석하는 예제는 Amazon S3 버킷에 저장된 이미지 분
25
Amazon Rekognition 개발자 안내서Amazon S3 버킷 사용하기
석 (p. 26) 단원을 참조하십시오. 이미지 바이트를 Amazon Rekognition Image API 작업으로 전달하는 예제는 로컬 파일 시스템에서 불러온 이미지 분석 (p. 31) 단원을 참조하십시오.
HTTP를 사용하여 Amazon Rekognition Image 작업의 일부로 이미지 바이트를 전달하는 경우 이미지 바이트는 base64로 인코딩된 문자열이어야 합니다. AWS SDK를 사용하여 API 작업 호출의 일부로 이미지 바이트를 전달하는 경우 이미지 바이트를 base64로 인코딩해야 하는지 여부는 사용하는 언어에 따라 달라집니다.
다음의 일반적인 AWS SDK는 이미지를 base64로 자동 인코딩하므로 Amazon Rekognition Image API 작업을 호출하기 전에 이미지 바이트를 인코딩할 필요가 없습니다.
• Java• JavaScript• Python• PHP
다른 AWS SDK를 사용하는 경우 Rekognition API 작업을 호출할 때 이미지 형식 오류가 발생하면 이미지 바이트를 Rekognition API 작업에 전달하기 전에 base64로 인코딩하십시오.
AWS CLI를 사용하여 Amazon Rekognition Image 작업을 호출하는 경우 호출의 일부로 이미지 바이트를 전달하는 작업은 지원되지 않습니다. 먼저 이미지를 Amazon S3 버킷에 업로드한 다음 업로드된 이미지를 참조하는 작업을 호출해야 합니다.
Note
이미지 바이트 대신 S3Object에 저장된 이미지를 전달하면 이미지를 base64로 인코딩할 필요가없습니다.
Amazon Rekognition Image 작업에 대한 지연 시간을 최소화하는 방법에 대한 자세한 내용은 AmazonRekognition Image 작업 지연 시간 (p. 109) 단원을 참조하십시오.
이미지 방향 수정여러 Rekognition API 작업에서는 분석된 이미지의 방향이 반환됩니다. 이미지 방향을 알면 이미지 방향을전환하여 표시할 수 있으므로 중요합니다. 얼굴을 분석하는 Rekognition API 작업은 이미지 속의 얼굴 위치에 대한 경계 상자도 반환합니다. 경계 상자를 사용하여 이미지의 얼굴 주위에 상자를 표시할 수 있습니다.반환된 경계 상자 좌표는 이미지 방향의 영향을 받으며 얼굴 주위에 상자를 올바르게 표시하려면 경계 상자좌표를 변환해야 할 수도 있습니다. 자세한 내용은 이미지 방향 및 경계 상자 좌표 가져오기 (p. 44) 단원을 참조하십시오.
Amazon S3 버킷에 저장된 이미지 분석Amazon Rekognition Image는 Amazon S3 버킷에 저장된 이미지 또는 이미지 바이트로 제공된 이미지를 분석할 수 있습니다.
이 주제에서는 DetectLabels (p. 315) API 작업을 사용하여 Amazon S3 버킷에 저장된 이미지(JPEG 또는PNG)에서 객체, 개념, 장면을 감지합니다. the section called “Image” (p. 463) 입력 파라미터를 사용하여Amazon Rekognition Image API 작업에 이미지를 전달합니다. Image에서 S3Object (p. 486) 객체 속성을 지정하여 S3 버킷에 저장된 이미지를 참조합니다. Amazon S3 버킷에 저장된 이미지의 이미지 바이트는base64로 인코딩할 필요가 없습니다. 자세한 내용은 이미지 (p. 25) 단원을 참조하십시오.
S3 객체가 있는 S3 버킷의 리전과 Amazon Rekognition Image 작업에 사용하는 리전이 일치해야 합니다.
DetectLabels에 대한 이 예제 JSON 요청에서는 MyBucket이라는 Amazon S3 버킷에서 소스 이미지(input.jpg)를 불러옵니다.
{ "Image": { "S3Object": {
26
Amazon Rekognition 개발자 안내서Amazon S3 버킷 사용하기
"Bucket": "MyBucket", "Name": "input.jpg" } }, "MaxLabels": 10, "MinConfidence": 75}
다음 예제에서는 다양한 AWS SDK와 AWS CLI를 사용하여 DetectLabels를 호출합니다. DetectLabels작업 응답에 대한 자세한 내용은 DetectLabels 응답 (p. 119) 단원을 참조하십시오.
이미지에서 레이블을 감지하려면
1. 아직 설정하지 않았다면 다음과 같이 하십시오.
a. AmazonRekognitionFullAccess 권한과 AmazonS3ReadOnlyAccess 권한을 가진 IAM 사용자를 만들어 업데이트합니다. 자세한 내용은 1단계: AWS 계정 설정 및 IAM 사용자 만들기 (p. 11)단원을 참조하십시오.
b. AWS CLI와 AWS SDK를 설치하고 구성합니다. 자세한 내용은 2단계: AWS CLI 및 AWS SDK 설정 (p. 12) 단원을 참조하십시오.
2. 나무, 집, 보트 등과 같은 객체가 한 개 이상 있는—이미지를 S3 버킷에—업로드합니다. 이미지는 .jpg 또는 .png 형식이어야 합니다.
지침은 Amazon Simple Storage Service 콘솔 사용 설명서의 Amazon S3로 객체 업로드 단원을 참조하십시오.
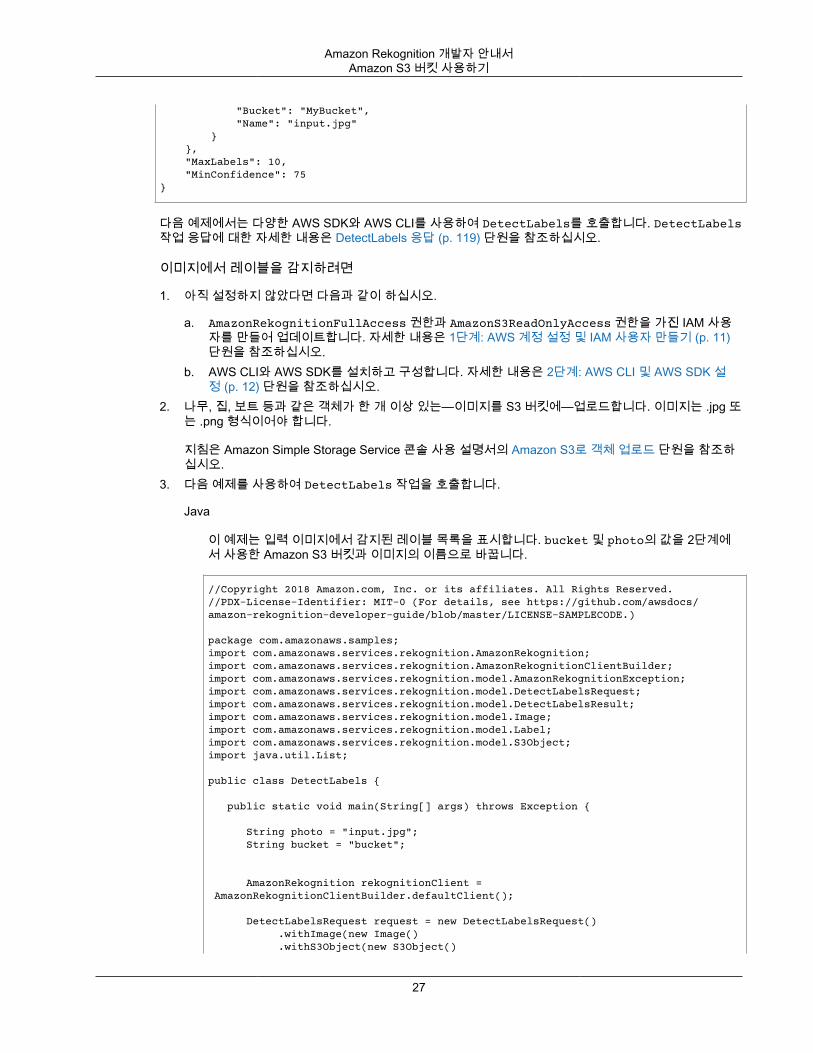
3. 다음 예제를 사용하여 DetectLabels 작업을 호출합니다.
Java
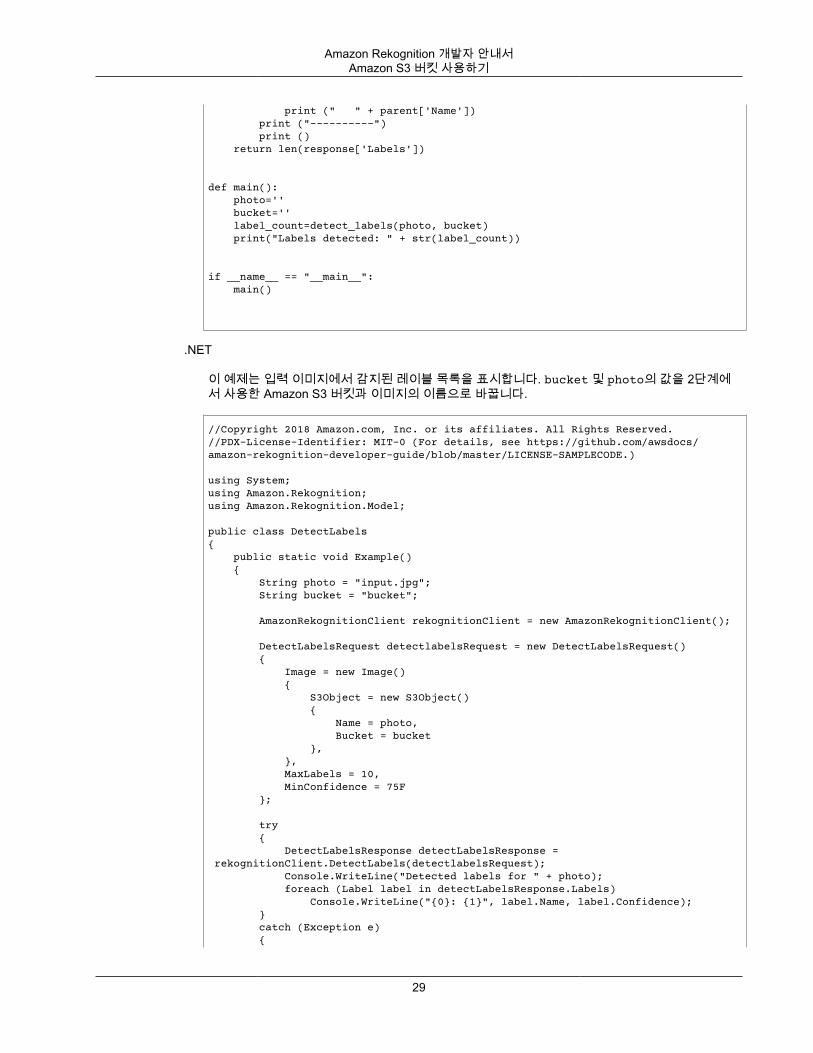
이 예제는 입력 이미지에서 감지된 레이블 목록을 표시합니다. bucket 및 photo의 값을 2단계에서 사용한 Amazon S3 버킷과 이미지의 이름으로 바꿉니다.
//Copyright 2018 Amazon.com, Inc. or its affiliates. All Rights Reserved.//PDX-License-Identifier: MIT-0 (For details, see https://github.com/awsdocs/amazon-rekognition-developer-guide/blob/master/LICENSE-SAMPLECODE.)
package com.amazonaws.samples;import com.amazonaws.services.rekognition.AmazonRekognition;import com.amazonaws.services.rekognition.AmazonRekognitionClientBuilder;import com.amazonaws.services.rekognition.model.AmazonRekognitionException;import com.amazonaws.services.rekognition.model.DetectLabelsRequest;import com.amazonaws.services.rekognition.model.DetectLabelsResult;import com.amazonaws.services.rekognition.model.Image;import com.amazonaws.services.rekognition.model.Label;import com.amazonaws.services.rekognition.model.S3Object;import java.util.List;
public class DetectLabels {
public static void main(String[] args) throws Exception {
String photo = "input.jpg"; String bucket = "bucket";
AmazonRekognition rekognitionClient = AmazonRekognitionClientBuilder.defaultClient();
DetectLabelsRequest request = new DetectLabelsRequest() .withImage(new Image() .withS3Object(new S3Object()
27
Amazon Rekognition 개발자 안내서Amazon S3 버킷 사용하기
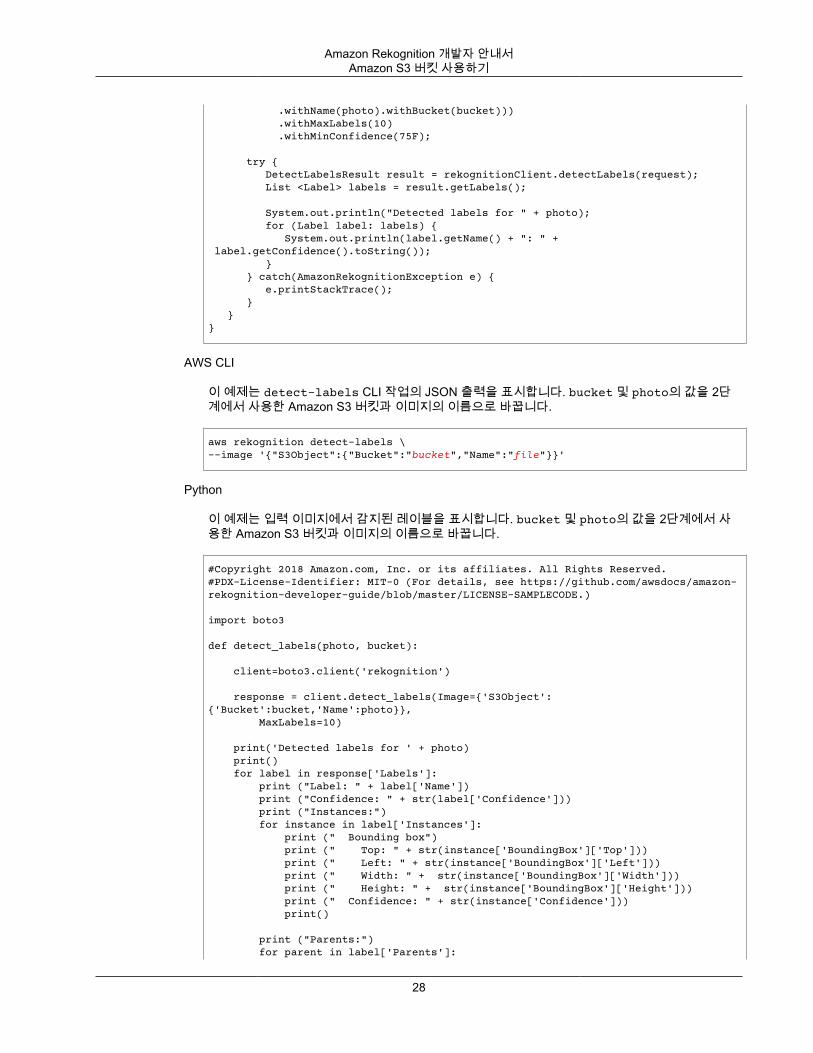
.withName(photo).withBucket(bucket))) .withMaxLabels(10) .withMinConfidence(75F);
try { DetectLabelsResult result = rekognitionClient.detectLabels(request); List <Label> labels = result.getLabels();
System.out.println("Detected labels for " + photo); for (Label label: labels) { System.out.println(label.getName() + ": " + label.getConfidence().toString()); } } catch(AmazonRekognitionException e) { e.printStackTrace(); } }}
AWS CLI
이 예제는 detect-labels CLI 작업의 JSON 출력을 표시합니다. bucket 및 photo의 값을 2단계에서 사용한 Amazon S3 버킷과 이미지의 이름으로 바꿉니다.
aws rekognition detect-labels \--image '{"S3Object":{"Bucket":"bucket","Name":"file"}}'
Python
이 예제는 입력 이미지에서 감지된 레이블을 표시합니다. bucket 및 photo의 값을 2단계에서 사용한 Amazon S3 버킷과 이미지의 이름으로 바꿉니다.
#Copyright 2018 Amazon.com, Inc. or its affiliates. All Rights Reserved.#PDX-License-Identifier: MIT-0 (For details, see https://github.com/awsdocs/amazon-rekognition-developer-guide/blob/master/LICENSE-SAMPLECODE.)
import boto3
def detect_labels(photo, bucket):
client=boto3.client('rekognition')
response = client.detect_labels(Image={'S3Object':{'Bucket':bucket,'Name':photo}}, MaxLabels=10)
print('Detected labels for ' + photo) print() for label in response['Labels']: print ("Label: " + label['Name']) print ("Confidence: " + str(label['Confidence'])) print ("Instances:") for instance in label['Instances']: print (" Bounding box") print (" Top: " + str(instance['BoundingBox']['Top'])) print (" Left: " + str(instance['BoundingBox']['Left'])) print (" Width: " + str(instance['BoundingBox']['Width'])) print (" Height: " + str(instance['BoundingBox']['Height'])) print (" Confidence: " + str(instance['Confidence'])) print()
print ("Parents:") for parent in label['Parents']:
28
Amazon Rekognition 개발자 안내서Amazon S3 버킷 사용하기
print (" " + parent['Name']) print ("----------") print () return len(response['Labels'])
def main(): photo='' bucket='' label_count=detect_labels(photo, bucket) print("Labels detected: " + str(label_count))
if __name__ == "__main__": main()
.NET
이 예제는 입력 이미지에서 감지된 레이블 목록을 표시합니다. bucket 및 photo의 값을 2단계에서 사용한 Amazon S3 버킷과 이미지의 이름으로 바꿉니다.
//Copyright 2018 Amazon.com, Inc. or its affiliates. All Rights Reserved.//PDX-License-Identifier: MIT-0 (For details, see https://github.com/awsdocs/amazon-rekognition-developer-guide/blob/master/LICENSE-SAMPLECODE.)
using System;using Amazon.Rekognition;using Amazon.Rekognition.Model;
public class DetectLabels{ public static void Example() { String photo = "input.jpg"; String bucket = "bucket";
AmazonRekognitionClient rekognitionClient = new AmazonRekognitionClient();
DetectLabelsRequest detectlabelsRequest = new DetectLabelsRequest() { Image = new Image() { S3Object = new S3Object() { Name = photo, Bucket = bucket }, }, MaxLabels = 10, MinConfidence = 75F };
try { DetectLabelsResponse detectLabelsResponse = rekognitionClient.DetectLabels(detectlabelsRequest); Console.WriteLine("Detected labels for " + photo); foreach (Label label in detectLabelsResponse.Labels) Console.WriteLine("{0}: {1}", label.Name, label.Confidence); } catch (Exception e) {
29
Amazon Rekognition 개발자 안내서Amazon S3 버킷 사용하기
Console.WriteLine(e.Message); } }}
Ruby
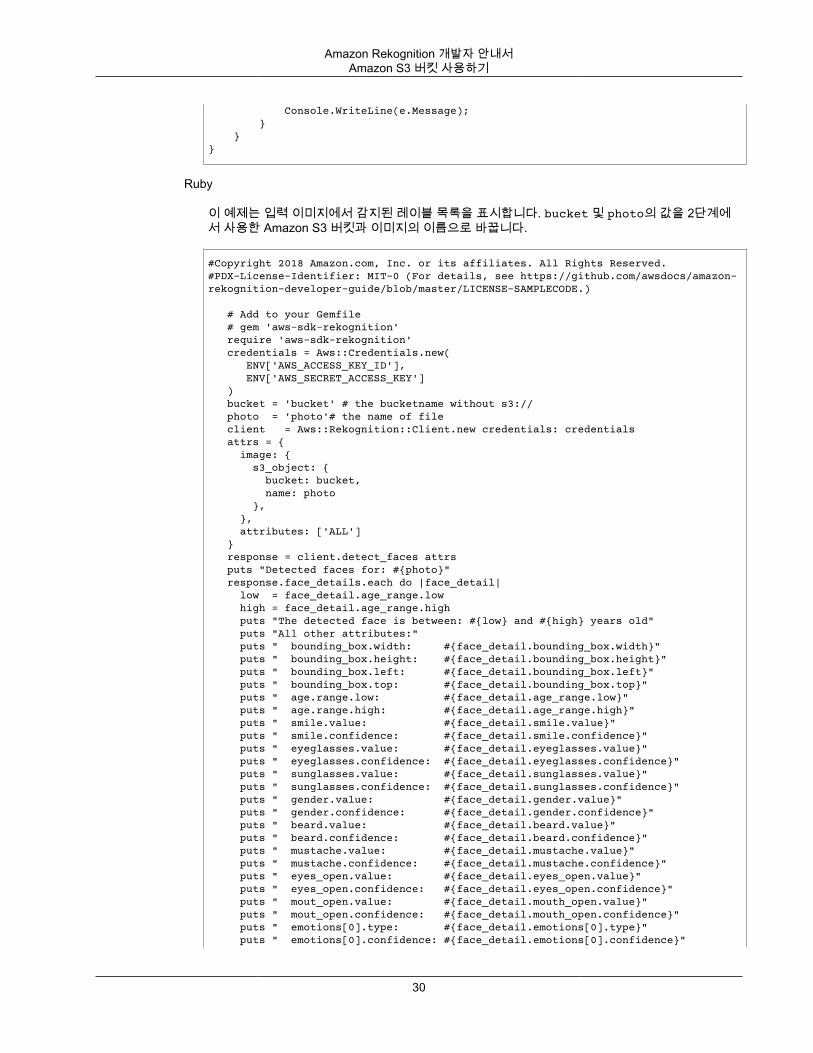
이 예제는 입력 이미지에서 감지된 레이블 목록을 표시합니다. bucket 및 photo의 값을 2단계에서 사용한 Amazon S3 버킷과 이미지의 이름으로 바꿉니다.
#Copyright 2018 Amazon.com, Inc. or its affiliates. All Rights Reserved.#PDX-License-Identifier: MIT-0 (For details, see https://github.com/awsdocs/amazon-rekognition-developer-guide/blob/master/LICENSE-SAMPLECODE.)
# Add to your Gemfile # gem 'aws-sdk-rekognition' require 'aws-sdk-rekognition' credentials = Aws::Credentials.new( ENV['AWS_ACCESS_KEY_ID'], ENV['AWS_SECRET_ACCESS_KEY'] ) bucket = 'bucket' # the bucketname without s3:// photo = 'photo'# the name of file client = Aws::Rekognition::Client.new credentials: credentials attrs = { image: { s3_object: { bucket: bucket, name: photo }, }, attributes: ['ALL'] } response = client.detect_faces attrs puts "Detected faces for: #{photo}" response.face_details.each do |face_detail| low = face_detail.age_range.low high = face_detail.age_range.high puts "The detected face is between: #{low} and #{high} years old" puts "All other attributes:" puts " bounding_box.width: #{face_detail.bounding_box.width}" puts " bounding_box.height: #{face_detail.bounding_box.height}" puts " bounding_box.left: #{face_detail.bounding_box.left}" puts " bounding_box.top: #{face_detail.bounding_box.top}" puts " age.range.low: #{face_detail.age_range.low}" puts " age.range.high: #{face_detail.age_range.high}" puts " smile.value: #{face_detail.smile.value}" puts " smile.confidence: #{face_detail.smile.confidence}" puts " eyeglasses.value: #{face_detail.eyeglasses.value}" puts " eyeglasses.confidence: #{face_detail.eyeglasses.confidence}" puts " sunglasses.value: #{face_detail.sunglasses.value}" puts " sunglasses.confidence: #{face_detail.sunglasses.confidence}" puts " gender.value: #{face_detail.gender.value}" puts " gender.confidence: #{face_detail.gender.confidence}" puts " beard.value: #{face_detail.beard.value}" puts " beard.confidence: #{face_detail.beard.confidence}" puts " mustache.value: #{face_detail.mustache.value}" puts " mustache.confidence: #{face_detail.mustache.confidence}" puts " eyes_open.value: #{face_detail.eyes_open.value}" puts " eyes_open.confidence: #{face_detail.eyes_open.confidence}" puts " mout_open.value: #{face_detail.mouth_open.value}" puts " mout_open.confidence: #{face_detail.mouth_open.confidence}" puts " emotions[0].type: #{face_detail.emotions[0].type}" puts " emotions[0].confidence: #{face_detail.emotions[0].confidence}"
30
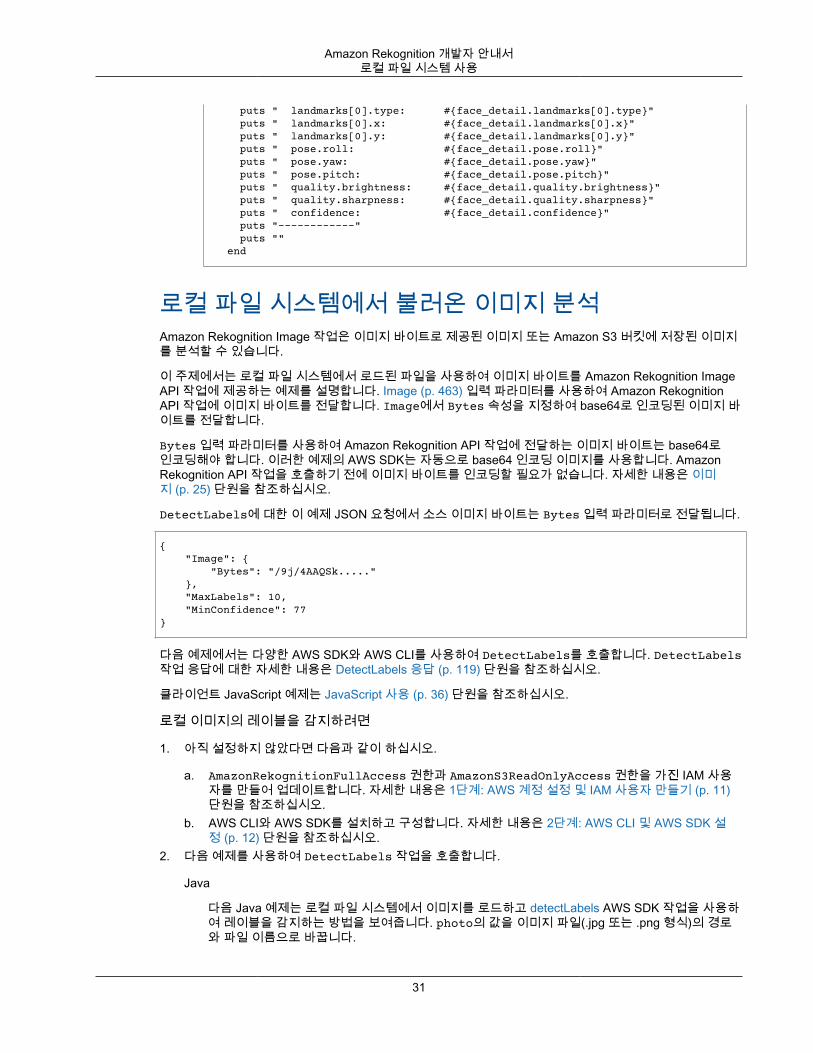
Amazon Rekognition 개발자 안내서로컬 파일 시스템 사용
puts " landmarks[0].type: #{face_detail.landmarks[0].type}" puts " landmarks[0].x: #{face_detail.landmarks[0].x}" puts " landmarks[0].y: #{face_detail.landmarks[0].y}" puts " pose.roll: #{face_detail.pose.roll}" puts " pose.yaw: #{face_detail.pose.yaw}" puts " pose.pitch: #{face_detail.pose.pitch}" puts " quality.brightness: #{face_detail.quality.brightness}" puts " quality.sharpness: #{face_detail.quality.sharpness}" puts " confidence: #{face_detail.confidence}" puts "------------" puts "" end
로컬 파일 시스템에서 불러온 이미지 분석Amazon Rekognition Image 작업은 이미지 바이트로 제공된 이미지 또는 Amazon S3 버킷에 저장된 이미지를 분석할 수 있습니다.
이 주제에서는 로컬 파일 시스템에서 로드된 파일을 사용하여 이미지 바이트를 Amazon Rekognition ImageAPI 작업에 제공하는 예제를 설명합니다. Image (p. 463) 입력 파라미터를 사용하여 Amazon RekognitionAPI 작업에 이미지 바이트를 전달합니다. Image에서 Bytes 속성을 지정하여 base64로 인코딩된 이미지 바이트를 전달합니다.
Bytes 입력 파라미터를 사용하여 Amazon Rekognition API 작업에 전달하는 이미지 바이트는 base64로인코딩해야 합니다. 이러한 예제의 AWS SDK는 자동으로 base64 인코딩 이미지를 사용합니다. AmazonRekognition API 작업을 호출하기 전에 이미지 바이트를 인코딩할 필요가 없습니다. 자세한 내용은 이미지 (p. 25) 단원을 참조하십시오.
DetectLabels에 대한 이 예제 JSON 요청에서 소스 이미지 바이트는 Bytes 입력 파라미터로 전달됩니다.
{ "Image": { "Bytes": "/9j/4AAQSk....." }, "MaxLabels": 10, "MinConfidence": 77}
다음 예제에서는 다양한 AWS SDK와 AWS CLI를 사용하여 DetectLabels를 호출합니다. DetectLabels작업 응답에 대한 자세한 내용은 DetectLabels 응답 (p. 119) 단원을 참조하십시오.
클라이언트 JavaScript 예제는 JavaScript 사용 (p. 36) 단원을 참조하십시오.
로컬 이미지의 레이블을 감지하려면
1. 아직 설정하지 않았다면 다음과 같이 하십시오.
a. AmazonRekognitionFullAccess 권한과 AmazonS3ReadOnlyAccess 권한을 가진 IAM 사용자를 만들어 업데이트합니다. 자세한 내용은 1단계: AWS 계정 설정 및 IAM 사용자 만들기 (p. 11)단원을 참조하십시오.
b. AWS CLI와 AWS SDK를 설치하고 구성합니다. 자세한 내용은 2단계: AWS CLI 및 AWS SDK 설정 (p. 12) 단원을 참조하십시오.
2. 다음 예제를 사용하여 DetectLabels 작업을 호출합니다.
Java
다음 Java 예제는 로컬 파일 시스템에서 이미지를 로드하고 detectLabels AWS SDK 작업을 사용하여 레이블을 감지하는 방법을 보여줍니다. photo의 값을 이미지 파일(.jpg 또는 .png 형식)의 경로와 파일 이름으로 바꿉니다.
31
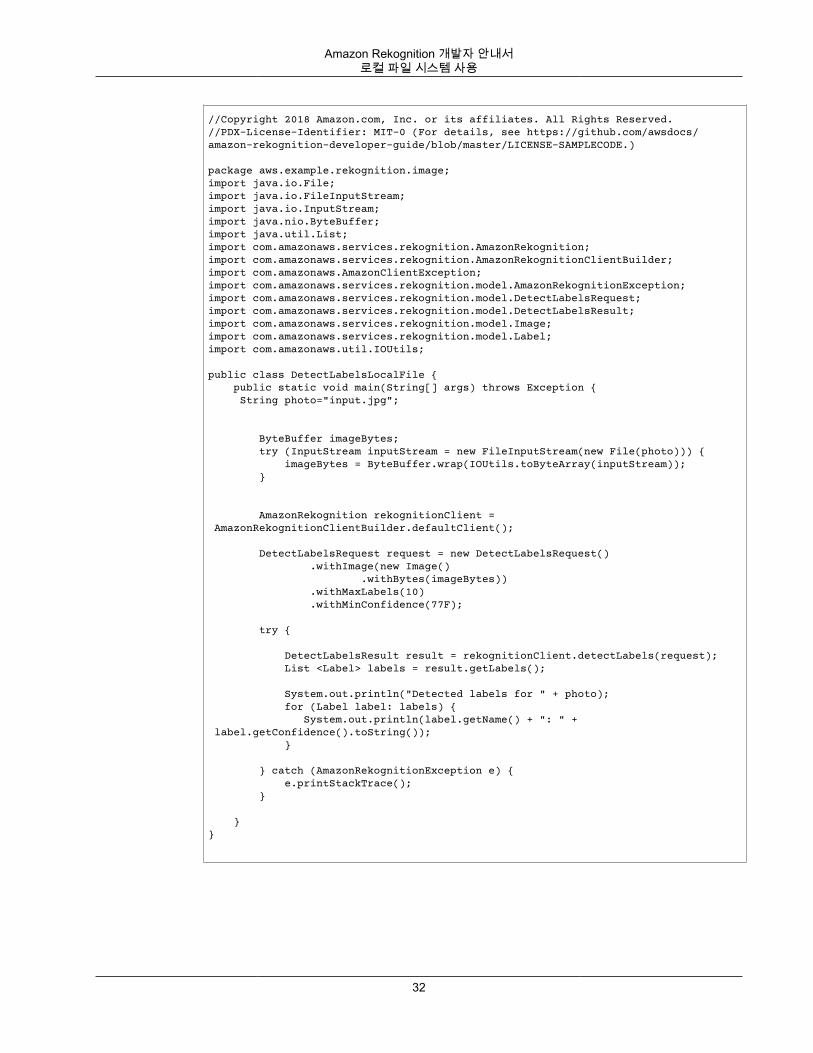
Amazon Rekognition 개발자 안내서로컬 파일 시스템 사용
//Copyright 2018 Amazon.com, Inc. or its affiliates. All Rights Reserved.//PDX-License-Identifier: MIT-0 (For details, see https://github.com/awsdocs/amazon-rekognition-developer-guide/blob/master/LICENSE-SAMPLECODE.)
package aws.example.rekognition.image;import java.io.File;import java.io.FileInputStream;import java.io.InputStream;import java.nio.ByteBuffer;import java.util.List;import com.amazonaws.services.rekognition.AmazonRekognition;import com.amazonaws.services.rekognition.AmazonRekognitionClientBuilder;import com.amazonaws.AmazonClientException;import com.amazonaws.services.rekognition.model.AmazonRekognitionException;import com.amazonaws.services.rekognition.model.DetectLabelsRequest;import com.amazonaws.services.rekognition.model.DetectLabelsResult;import com.amazonaws.services.rekognition.model.Image;import com.amazonaws.services.rekognition.model.Label;import com.amazonaws.util.IOUtils;
public class DetectLabelsLocalFile { public static void main(String[] args) throws Exception { String photo="input.jpg";
ByteBuffer imageBytes; try (InputStream inputStream = new FileInputStream(new File(photo))) { imageBytes = ByteBuffer.wrap(IOUtils.toByteArray(inputStream)); }
AmazonRekognition rekognitionClient = AmazonRekognitionClientBuilder.defaultClient();
DetectLabelsRequest request = new DetectLabelsRequest() .withImage(new Image() .withBytes(imageBytes)) .withMaxLabels(10) .withMinConfidence(77F);
try {
DetectLabelsResult result = rekognitionClient.detectLabels(request); List <Label> labels = result.getLabels();
System.out.println("Detected labels for " + photo); for (Label label: labels) { System.out.println(label.getName() + ": " + label.getConfidence().toString()); }
} catch (AmazonRekognitionException e) { e.printStackTrace(); }
}}
32
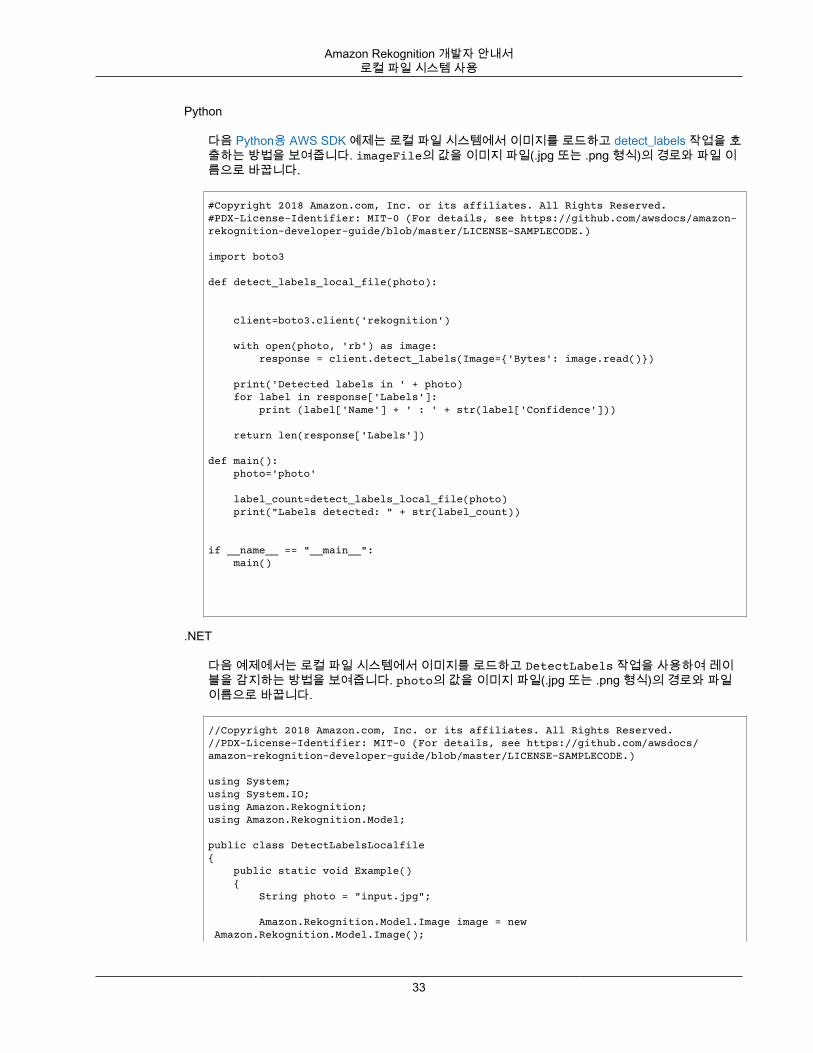
Amazon Rekognition 개발자 안내서로컬 파일 시스템 사용
Python
다음 Python용 AWS SDK 예제는 로컬 파일 시스템에서 이미지를 로드하고 detect_labels 작업을 호출하는 방법을 보여줍니다. imageFile의 값을 이미지 파일(.jpg 또는 .png 형식)의 경로와 파일 이름으로 바꿉니다.
#Copyright 2018 Amazon.com, Inc. or its affiliates. All Rights Reserved.#PDX-License-Identifier: MIT-0 (For details, see https://github.com/awsdocs/amazon-rekognition-developer-guide/blob/master/LICENSE-SAMPLECODE.)
import boto3
def detect_labels_local_file(photo):
client=boto3.client('rekognition') with open(photo, 'rb') as image: response = client.detect_labels(Image={'Bytes': image.read()}) print('Detected labels in ' + photo) for label in response['Labels']: print (label['Name'] + ' : ' + str(label['Confidence']))
return len(response['Labels'])
def main(): photo='photo'
label_count=detect_labels_local_file(photo) print("Labels detected: " + str(label_count))
if __name__ == "__main__": main()
.NET
다음 예제에서는 로컬 파일 시스템에서 이미지를 로드하고 DetectLabels 작업을 사용하여 레이블을 감지하는 방법을 보여줍니다. photo의 값을 이미지 파일(.jpg 또는 .png 형식)의 경로와 파일이름으로 바꿉니다.
//Copyright 2018 Amazon.com, Inc. or its affiliates. All Rights Reserved.//PDX-License-Identifier: MIT-0 (For details, see https://github.com/awsdocs/amazon-rekognition-developer-guide/blob/master/LICENSE-SAMPLECODE.)
using System;using System.IO;using Amazon.Rekognition;using Amazon.Rekognition.Model;
public class DetectLabelsLocalfile{ public static void Example() { String photo = "input.jpg";
Amazon.Rekognition.Model.Image image = new Amazon.Rekognition.Model.Image();
33
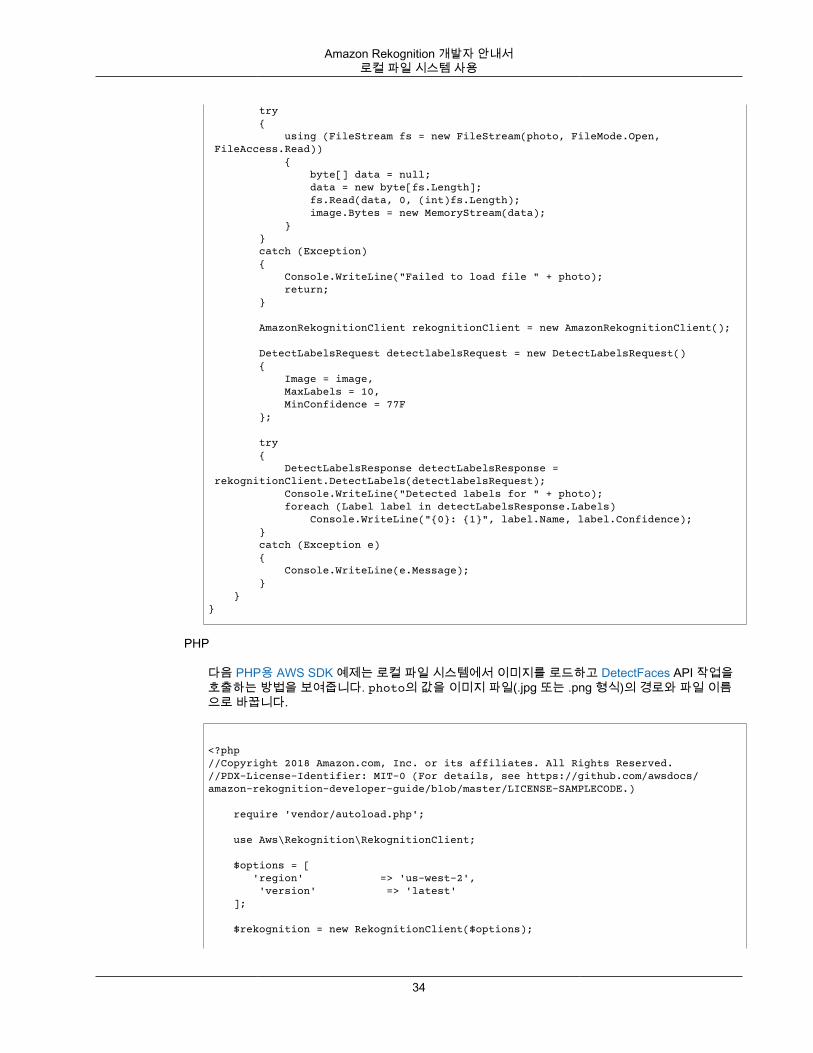
Amazon Rekognition 개발자 안내서로컬 파일 시스템 사용
try { using (FileStream fs = new FileStream(photo, FileMode.Open, FileAccess.Read)) { byte[] data = null; data = new byte[fs.Length]; fs.Read(data, 0, (int)fs.Length); image.Bytes = new MemoryStream(data); } } catch (Exception) { Console.WriteLine("Failed to load file " + photo); return; }
AmazonRekognitionClient rekognitionClient = new AmazonRekognitionClient();
DetectLabelsRequest detectlabelsRequest = new DetectLabelsRequest() { Image = image, MaxLabels = 10, MinConfidence = 77F };
try { DetectLabelsResponse detectLabelsResponse = rekognitionClient.DetectLabels(detectlabelsRequest); Console.WriteLine("Detected labels for " + photo); foreach (Label label in detectLabelsResponse.Labels) Console.WriteLine("{0}: {1}", label.Name, label.Confidence); } catch (Exception e) { Console.WriteLine(e.Message); } }}
PHP
다음 PHP용 AWS SDK 예제는 로컬 파일 시스템에서 이미지를 로드하고 DetectFaces API 작업을호출하는 방법을 보여줍니다. photo의 값을 이미지 파일(.jpg 또는 .png 형식)의 경로와 파일 이름으로 바꿉니다.
<?php//Copyright 2018 Amazon.com, Inc. or its affiliates. All Rights Reserved.//PDX-License-Identifier: MIT-0 (For details, see https://github.com/awsdocs/amazon-rekognition-developer-guide/blob/master/LICENSE-SAMPLECODE.)
require 'vendor/autoload.php';
use Aws\Rekognition\RekognitionClient;
$options = [ 'region' => 'us-west-2', 'version' => 'latest' ];
$rekognition = new RekognitionClient($options);
34
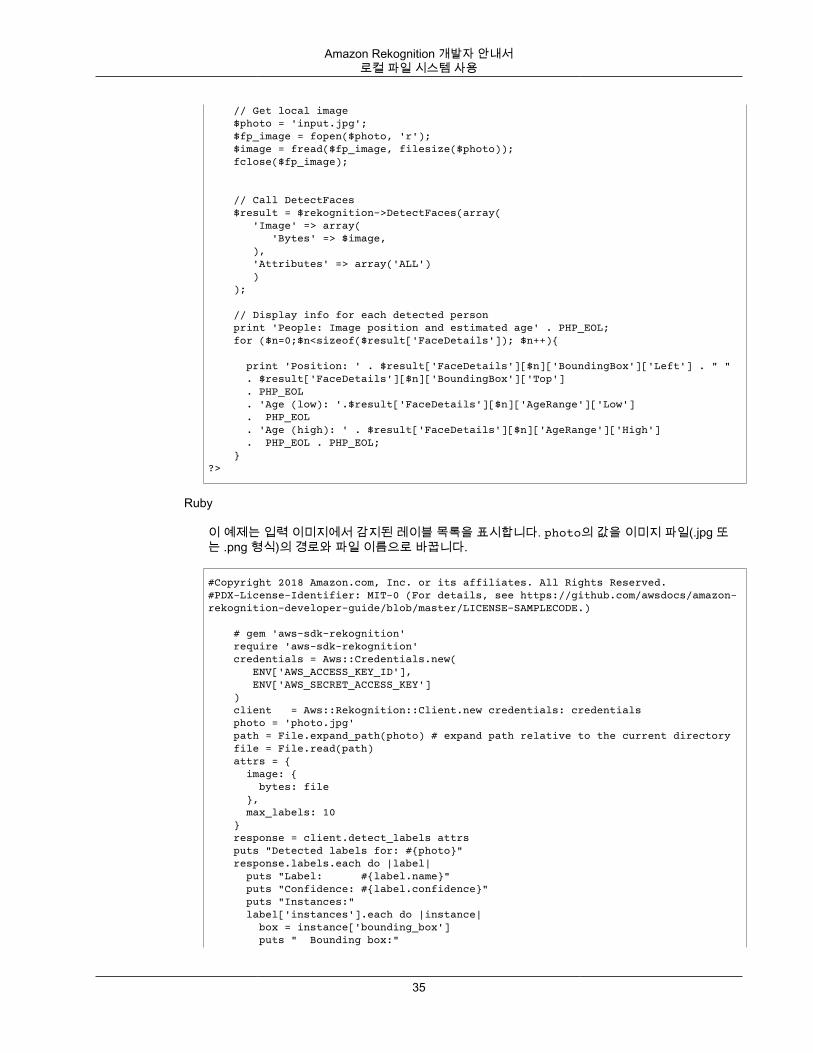
Amazon Rekognition 개발자 안내서로컬 파일 시스템 사용
// Get local image $photo = 'input.jpg'; $fp_image = fopen($photo, 'r'); $image = fread($fp_image, filesize($photo)); fclose($fp_image);
// Call DetectFaces $result = $rekognition->DetectFaces(array( 'Image' => array( 'Bytes' => $image, ), 'Attributes' => array('ALL') ) );
// Display info for each detected person print 'People: Image position and estimated age' . PHP_EOL; for ($n=0;$n<sizeof($result['FaceDetails']); $n++){
print 'Position: ' . $result['FaceDetails'][$n]['BoundingBox']['Left'] . " " . $result['FaceDetails'][$n]['BoundingBox']['Top'] . PHP_EOL . 'Age (low): '.$result['FaceDetails'][$n]['AgeRange']['Low'] . PHP_EOL . 'Age (high): ' . $result['FaceDetails'][$n]['AgeRange']['High'] . PHP_EOL . PHP_EOL; }?>
Ruby
이 예제는 입력 이미지에서 감지된 레이블 목록을 표시합니다. photo의 값을 이미지 파일(.jpg 또는 .png 형식)의 경로와 파일 이름으로 바꿉니다.
#Copyright 2018 Amazon.com, Inc. or its affiliates. All Rights Reserved.#PDX-License-Identifier: MIT-0 (For details, see https://github.com/awsdocs/amazon-rekognition-developer-guide/blob/master/LICENSE-SAMPLECODE.)
# gem 'aws-sdk-rekognition' require 'aws-sdk-rekognition' credentials = Aws::Credentials.new( ENV['AWS_ACCESS_KEY_ID'], ENV['AWS_SECRET_ACCESS_KEY'] ) client = Aws::Rekognition::Client.new credentials: credentials photo = 'photo.jpg' path = File.expand_path(photo) # expand path relative to the current directory file = File.read(path) attrs = { image: { bytes: file }, max_labels: 10 } response = client.detect_labels attrs puts "Detected labels for: #{photo}" response.labels.each do |label| puts "Label: #{label.name}" puts "Confidence: #{label.confidence}" puts "Instances:" label['instances'].each do |instance| box = instance['bounding_box'] puts " Bounding box:"
35
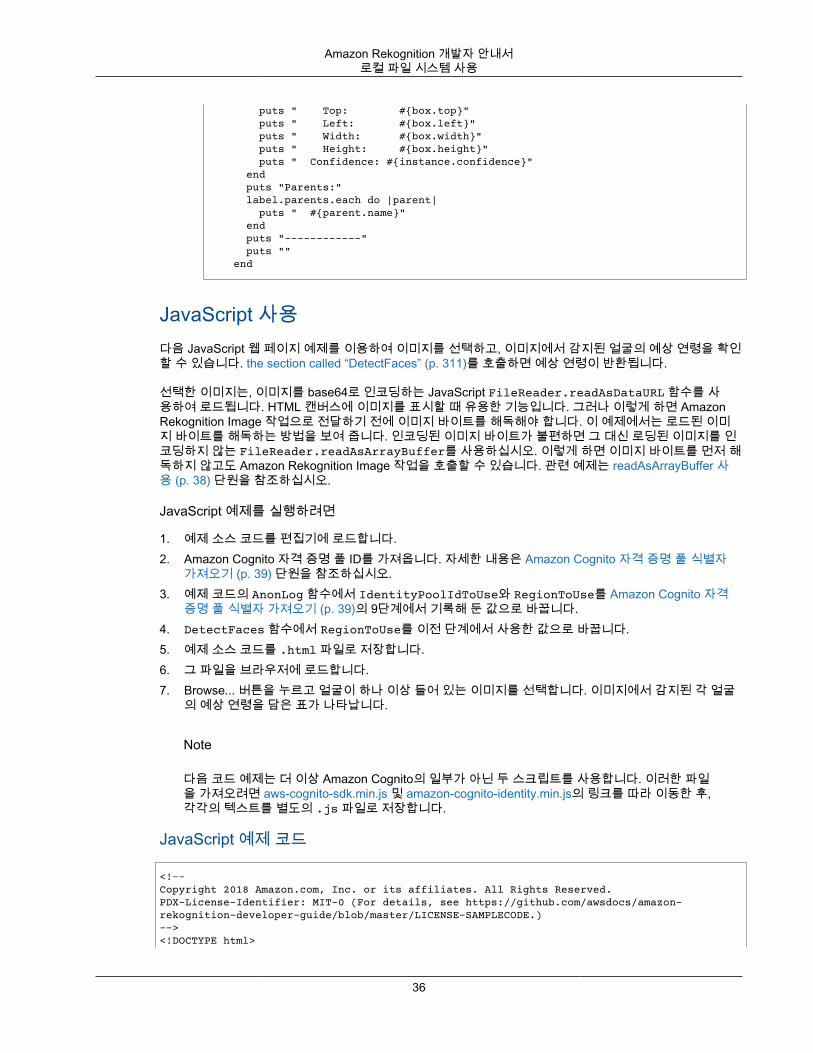
Amazon Rekognition 개발자 안내서로컬 파일 시스템 사용
puts " Top: #{box.top}" puts " Left: #{box.left}" puts " Width: #{box.width}" puts " Height: #{box.height}" puts " Confidence: #{instance.confidence}" end puts "Parents:" label.parents.each do |parent| puts " #{parent.name}" end puts "------------" puts "" end
JavaScript 사용다음 JavaScript 웹 페이지 예제를 이용하여 이미지를 선택하고, 이미지에서 감지된 얼굴의 예상 연령을 확인할 수 있습니다. the section called “DetectFaces” (p. 311)를 호출하면 예상 연령이 반환됩니다.
선택한 이미지는, 이미지를 base64로 인코딩하는 JavaScript FileReader.readAsDataURL 함수를 사용하여 로드됩니다. HTML 캔버스에 이미지를 표시할 때 유용한 기능입니다. 그러나 이렇게 하면 AmazonRekognition Image 작업으로 전달하기 전에 이미지 바이트를 해독해야 합니다. 이 예제에서는 로드된 이미지 바이트를 해독하는 방법을 보여 줍니다. 인코딩된 이미지 바이트가 불편하면 그 대신 로딩된 이미지를 인코딩하지 않는 FileReader.readAsArrayBuffer를 사용하십시오. 이렇게 하면 이미지 바이트를 먼저 해독하지 않고도 Amazon Rekognition Image 작업을 호출할 수 있습니다. 관련 예제는 readAsArrayBuffer 사용 (p. 38) 단원을 참조하십시오.
JavaScript 예제를 실행하려면
1. 예제 소스 코드를 편집기에 로드합니다.2. Amazon Cognito 자격 증명 풀 ID를 가져옵니다. 자세한 내용은 Amazon Cognito 자격 증명 풀 식별자
가져오기 (p. 39) 단원을 참조하십시오.3. 예제 코드의 AnonLog 함수에서 IdentityPoolIdToUse와 RegionToUse를 Amazon Cognito 자격
증명 풀 식별자 가져오기 (p. 39)의 9단계에서 기록해 둔 값으로 바꿉니다.4. DetectFaces 함수에서 RegionToUse를 이전 단계에서 사용한 값으로 바꿉니다.5. 예제 소스 코드를 .html 파일로 저장합니다.6. 그 파일을 브라우저에 로드합니다.7. Browse... 버튼을 누르고 얼굴이 하나 이상 들어 있는 이미지를 선택합니다. 이미지에서 감지된 각 얼굴
의 예상 연령을 담은 표가 나타납니다.
Note
다음 코드 예제는 더 이상 Amazon Cognito의 일부가 아닌 두 스크립트를 사용합니다. 이러한 파일을 가져오려면 aws-cognito-sdk.min.js 및 amazon-cognito-identity.min.js의 링크를 따라 이동한 후,각각의 텍스트를 별도의 .js 파일로 저장합니다.
JavaScript 예제 코드
<!--Copyright 2018 Amazon.com, Inc. or its affiliates. All Rights Reserved.PDX-License-Identifier: MIT-0 (For details, see https://github.com/awsdocs/amazon-rekognition-developer-guide/blob/master/LICENSE-SAMPLECODE.)--><!DOCTYPE html>
36
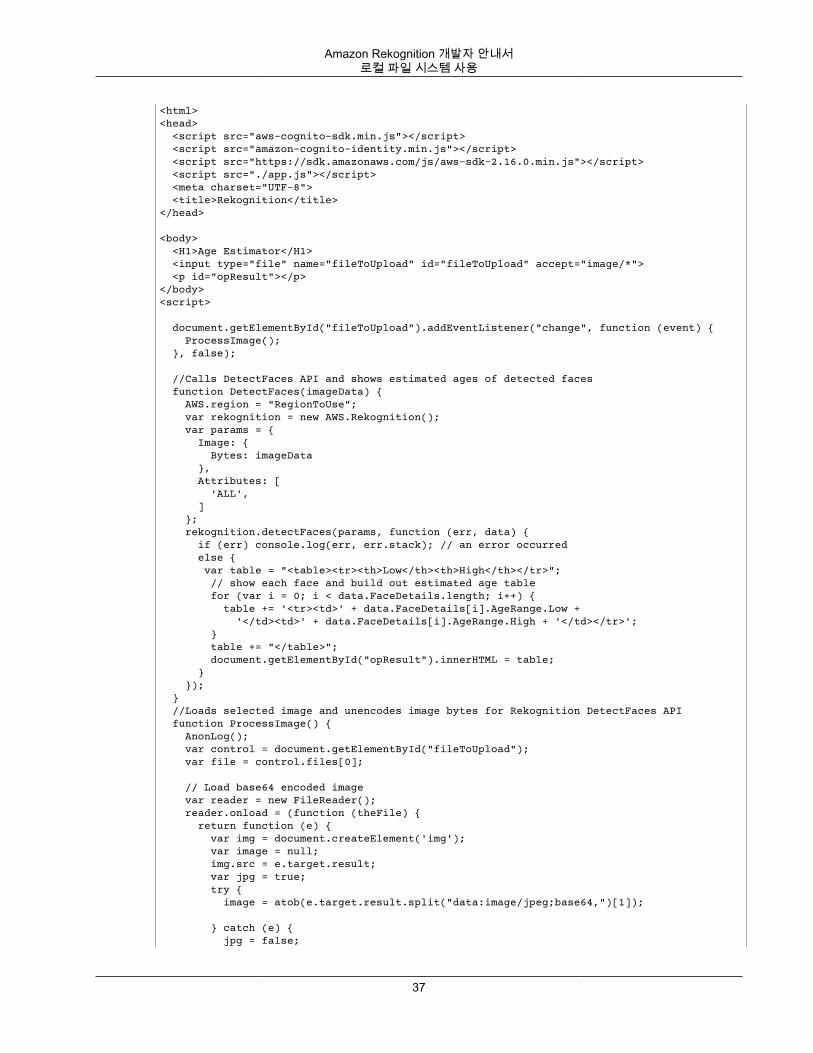
Amazon Rekognition 개발자 안내서로컬 파일 시스템 사용
<html><head> <script src="aws-cognito-sdk.min.js"></script> <script src="amazon-cognito-identity.min.js"></script> <script src="https://sdk.amazonaws.com/js/aws-sdk-2.16.0.min.js"></script> <script src="./app.js"></script> <meta charset="UTF-8"> <title>Rekognition</title></head>
<body> <H1>Age Estimator</H1> <input type="file" name="fileToUpload" id="fileToUpload" accept="image/*"> <p id="opResult"></p></body><script>
document.getElementById("fileToUpload").addEventListener("change", function (event) { ProcessImage(); }, false); //Calls DetectFaces API and shows estimated ages of detected faces function DetectFaces(imageData) { AWS.region = "RegionToUse"; var rekognition = new AWS.Rekognition(); var params = { Image: { Bytes: imageData }, Attributes: [ 'ALL', ] }; rekognition.detectFaces(params, function (err, data) { if (err) console.log(err, err.stack); // an error occurred else { var table = "<table><tr><th>Low</th><th>High</th></tr>"; // show each face and build out estimated age table for (var i = 0; i < data.FaceDetails.length; i++) { table += '<tr><td>' + data.FaceDetails[i].AgeRange.Low + '</td><td>' + data.FaceDetails[i].AgeRange.High + '</td></tr>'; } table += "</table>"; document.getElementById("opResult").innerHTML = table; } }); } //Loads selected image and unencodes image bytes for Rekognition DetectFaces API function ProcessImage() { AnonLog(); var control = document.getElementById("fileToUpload"); var file = control.files[0];
// Load base64 encoded image var reader = new FileReader(); reader.onload = (function (theFile) { return function (e) { var img = document.createElement('img'); var image = null; img.src = e.target.result; var jpg = true; try { image = atob(e.target.result.split("data:image/jpeg;base64,")[1]);
} catch (e) { jpg = false;
37
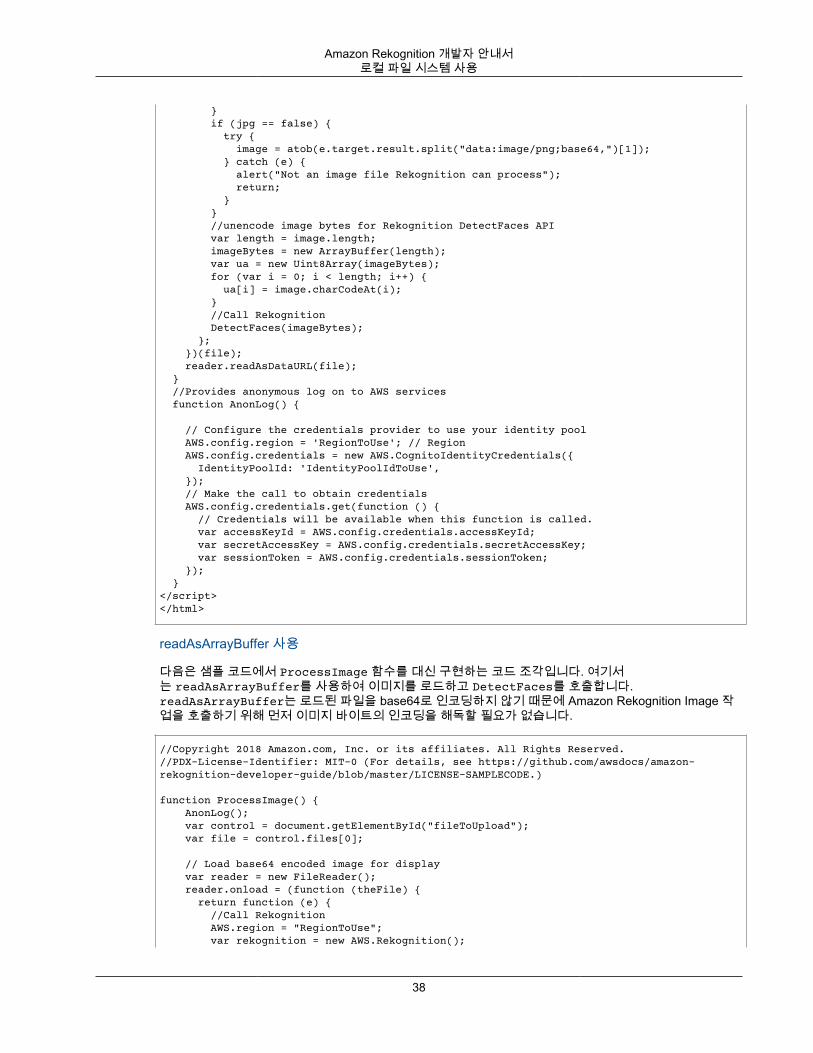
Amazon Rekognition 개발자 안내서로컬 파일 시스템 사용
} if (jpg == false) { try { image = atob(e.target.result.split("data:image/png;base64,")[1]); } catch (e) { alert("Not an image file Rekognition can process"); return; } } //unencode image bytes for Rekognition DetectFaces API var length = image.length; imageBytes = new ArrayBuffer(length); var ua = new Uint8Array(imageBytes); for (var i = 0; i < length; i++) { ua[i] = image.charCodeAt(i); } //Call Rekognition DetectFaces(imageBytes); }; })(file); reader.readAsDataURL(file); } //Provides anonymous log on to AWS services function AnonLog() { // Configure the credentials provider to use your identity pool AWS.config.region = 'RegionToUse'; // Region AWS.config.credentials = new AWS.CognitoIdentityCredentials({ IdentityPoolId: 'IdentityPoolIdToUse', }); // Make the call to obtain credentials AWS.config.credentials.get(function () { // Credentials will be available when this function is called. var accessKeyId = AWS.config.credentials.accessKeyId; var secretAccessKey = AWS.config.credentials.secretAccessKey; var sessionToken = AWS.config.credentials.sessionToken; }); }</script></html>
readAsArrayBuffer 사용
다음은 샘플 코드에서 ProcessImage 함수를 대신 구현하는 코드 조각입니다. 여기서는 readAsArrayBuffer를 사용하여 이미지를 로드하고 DetectFaces를 호출합니다.readAsArrayBuffer는 로드된 파일을 base64로 인코딩하지 않기 때문에 Amazon Rekognition Image 작업을 호출하기 위해 먼저 이미지 바이트의 인코딩을 해독할 필요가 없습니다.
//Copyright 2018 Amazon.com, Inc. or its affiliates. All Rights Reserved.//PDX-License-Identifier: MIT-0 (For details, see https://github.com/awsdocs/amazon-rekognition-developer-guide/blob/master/LICENSE-SAMPLECODE.)
function ProcessImage() { AnonLog(); var control = document.getElementById("fileToUpload"); var file = control.files[0];
// Load base64 encoded image for display var reader = new FileReader(); reader.onload = (function (theFile) { return function (e) { //Call Rekognition AWS.region = "RegionToUse"; var rekognition = new AWS.Rekognition();
38
Amazon Rekognition 개발자 안내서로컬 파일 시스템 사용
var params = { Image: { Bytes: e.target.result }, Attributes: [ 'ALL', ] }; rekognition.detectFaces(params, function (err, data) { if (err) console.log(err, err.stack); // an error occurred else { var table = "<table><tr><th>Low</th><th>High</th></tr>"; // show each face and build out estimated age table for (var i = 0; i < data.FaceDetails.length; i++) { table += '<tr><td>' + data.FaceDetails[i].AgeRange.Low + '</td><td>' + data.FaceDetails[i].AgeRange.High + '</td></tr>'; } table += "</table>"; document.getElementById("opResult").innerHTML = table; } });
}; })(file); reader.readAsArrayBuffer(file); }
Amazon Cognito 자격 증명 풀 식별자 가져오기
간단히 설명하기 위해, 이 예제에서는 익명 Amazon Cognito 자격 증명 풀을 사용하여 Amazon RekognitionImage API에 대한 미인증 액세스 권한을 제공합니다. 이 방법이 현재 상황에 알맞습니다. 예를 들어, 사용자 로그인을 위한 웹 사이트 무료 액세스 권한 또는 평가판 액세스 권한을 미인증 액세스 권한으로 제공할수 있습니다. 미인증 액세스 권한을 제공하려면 Amazon Cognito 사용자 풀을 사용하십시오. 자세한 내용은Amazon Cognito 사용자 풀을 참조하십시오.
다음 절차에서는 인증되지 않은 자격 증명을 사용할 수 있는 자격 증명 풀을 만드는 방법과 예제 코드에 필요한 자격 증명 풀 식별자를 가져오는 방법을 보여 줍니다.
자격 증명 풀 식별자를 가져오려면
1. Amazon Cognito 콘솔을 엽니다.2. [Create new identity pool]을 선택합니다.3. 자격 증명 풀 이름*에 자격 증명 풀의 이름을 입력합니다.4. 인증되지 않은 자격 증명에서 인증되지 않은 자격 증명에 대한 액세스 활성화를 선택합니다.5. [Create Pool]을 선택합니다.6. 세부 정보 보기를 선택하고 인증되지 않은 자격 증명의 역할 이름을 적어 둡니다.7. [Allow]를 선택합니다.8. 플랫폼에서 JavaScript를 선택합니다.9. AWS 자격 증명 얻기에서 코드 조각에 표시된 자격 증명 풀 ID와 리전을 적어 둡니다.10. https://console.aws.amazon.com/iam/에서 IAM 콘솔을 엽니다.11. 탐색 창에서 Roles(역할)를 선택합니다.12. 6단계에서 적어 둔 역할 이름을 선택합니다.13. 권한에서 Attach Policy(정책 연결)를 선택합니다.14. AmazonRekognitionReadOnlyAccess를 선택합니다.15. Attach Policy(정책 연결)를 선택합니다.
39
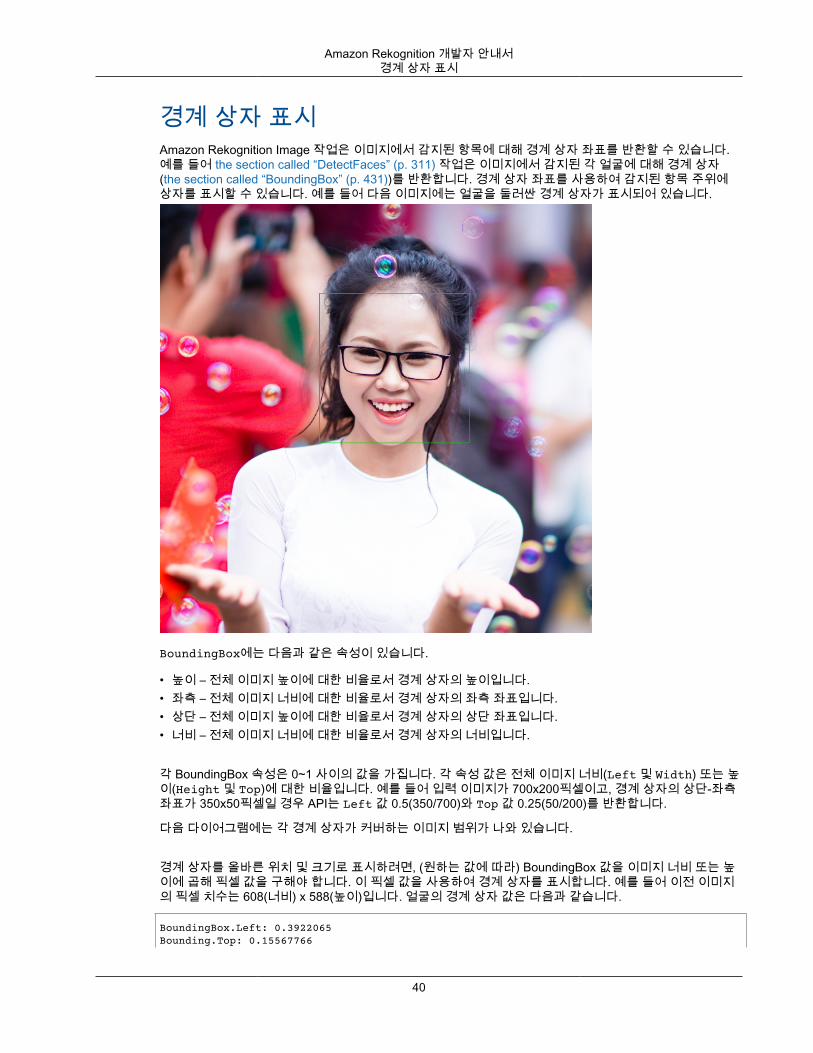
Amazon Rekognition 개발자 안내서경계 상자 표시
경계 상자 표시Amazon Rekognition Image 작업은 이미지에서 감지된 항목에 대해 경계 상자 좌표를 반환할 수 있습니다.예를 들어 the section called “DetectFaces” (p. 311) 작업은 이미지에서 감지된 각 얼굴에 대해 경계 상자(the section called “BoundingBox” (p. 431))를 반환합니다. 경계 상자 좌표를 사용하여 감지된 항목 주위에상자를 표시할 수 있습니다. 예를 들어 다음 이미지에는 얼굴을 둘러싼 경계 상자가 표시되어 있습니다.
BoundingBox에는 다음과 같은 속성이 있습니다.
• 높이 – 전체 이미지 높이에 대한 비율로서 경계 상자의 높이입니다.• 좌측 – 전체 이미지 너비에 대한 비율로서 경계 상자의 좌측 좌표입니다.• 상단 – 전체 이미지 높이에 대한 비율로서 경계 상자의 상단 좌표입니다.• 너비 – 전체 이미지 너비에 대한 비율로서 경계 상자의 너비입니다.
각 BoundingBox 속성은 0~1 사이의 값을 가집니다. 각 속성 값은 전체 이미지 너비(Left 및 Width) 또는 높이(Height 및 Top)에 대한 비율입니다. 예를 들어 입력 이미지가 700x200픽셀이고, 경계 상자의 상단-좌측좌표가 350x50픽셀일 경우 API는 Left 값 0.5(350/700)와 Top 값 0.25(50/200)를 반환합니다.
다음 다이어그램에는 각 경계 상자가 커버하는 이미지 범위가 나와 있습니다.
경계 상자를 올바른 위치 및 크기로 표시하려면, (원하는 값에 따라) BoundingBox 값을 이미지 너비 또는 높이에 곱해 픽셀 값을 구해야 합니다. 이 픽셀 값을 사용하여 경계 상자를 표시합니다. 예를 들어 이전 이미지의 픽셀 치수는 608(너비) x 588(높이)입니다. 얼굴의 경계 상자 값은 다음과 같습니다.
BoundingBox.Left: 0.3922065Bounding.Top: 0.15567766
40
Amazon Rekognition 개발자 안내서경계 상자 표시
BoundingBox.Width: 0.284666BoundingBox.Height: 0.2930403
얼굴 경계 상자의 위치는 다음과 같이 계산됩니다.
Left coordinate = BoundingBox.Left (0.3922065) * image width (608) = 238
Top coordinate = BoundingBox.Top (0.15567766) * image height (588) = 91
Face width = BoundingBox.Width (0.284666) * image width (608) = 173
Face height = BoundingBox.Height (0.2930403) * image height (588) = 172
이들 값을 사용하여 얼굴 주위에 경계 상자를 표시합니다.Note
이미지 방향을 여러 방법으로 설정할 수 있습니다. 애플리케이션이 이미지를 올바르게 표시하기 위해 이미지를 회전해야 할 수 있습니다. 경계 상자 좌표는 이미지의 방향에 영향을 받습니다. 경계 상자를 올바른 위치에 표시하기 위해 좌표를 변환해야 할 수 있습니다. 자세한 내용은 이미지 방향 및경계 상자 좌표 가져오기 (p. 44) 단원을 참조하십시오.
다음 예제는 DetectFaces (p. 311)를 호출하여 감지된 얼굴 주위에 경계 상자를 표시하는 방법을 보여줍니다. 예제에서는 이미지 방향이 0도로 설정된 것으로 가정합니다. 또한 Amazon S3 버킷에서 이미지를 다운로드하는 방법도 보여줍니다.
경계 상자를 표시하는 방법
1. 아직 설정하지 않았다면 다음과 같이 하십시오.
a. AmazonRekognitionFullAccess 권한과 AmazonS3ReadOnlyAccess 권한을 가진 IAM 사용자를 만들어 업데이트합니다. 자세한 내용은 1단계: AWS 계정 설정 및 IAM 사용자 만들기 (p. 11)단원을 참조하십시오.
b. AWS CLI와 AWS SDK를 설치하고 구성합니다. 자세한 내용은 2단계: AWS CLI 및 AWS SDK 설정 (p. 12) 단원을 참조하십시오.
2. 다음 예제를 사용하여 DetectFaces 작업을 호출합니다. bucket의 값을 이미지 파일이 저장된Amazon S3 버킷으로 바꿉니다. photo의 값을 이미지 파일(.jpg 또는 .png 형식)의 파일 이름으로 바꿉니다.
Java
//Loads images, detects faces and draws bounding boxes.Determines exif orientation, if necessary.package com.amazonaws.samples;
//Import the basic graphics classes.import java.awt.*;import java.awt.image.BufferedImage;import java.util.List;import javax.imageio.ImageIO;import javax.swing.*;
import com.amazonaws.services.rekognition.AmazonRekognition;import com.amazonaws.services.rekognition.AmazonRekognitionClientBuilder;
import com.amazonaws.services.rekognition.model.BoundingBox;import com.amazonaws.services.rekognition.model.DetectFacesRequest;import com.amazonaws.services.rekognition.model.DetectFacesResult;import com.amazonaws.services.rekognition.model.FaceDetail;import com.amazonaws.services.rekognition.model.Image;import com.amazonaws.services.rekognition.model.S3Object;import com.amazonaws.services.s3.AmazonS3;
41
Amazon Rekognition 개발자 안내서경계 상자 표시
import com.amazonaws.services.s3.AmazonS3ClientBuilder;import com.amazonaws.services.s3.model.S3ObjectInputStream;
// Calls DetectFaces and displays a bounding box around each detected image.public class DisplayFaces extends JPanel {
/** * */ private static final long serialVersionUID = 1L;
BufferedImage image; static int scale; DetectFacesResult result;
public DisplayFaces(DetectFacesResult facesResult, BufferedImage bufImage) throws Exception { super(); scale = 1; // increase to shrink image size.
result = facesResult; image = bufImage;
} // Draws the bounding box around the detected faces. public void paintComponent(Graphics g) { float left = 0; float top = 0; int height = image.getHeight(this); int width = image.getWidth(this);
Graphics2D g2d = (Graphics2D) g; // Create a Java2D version of g.
// Draw the image. g2d.drawImage(image, 0, 0, width / scale, height / scale, this); g2d.setColor(new Color(0, 212, 0));
// Iterate through faces and display bounding boxes. List<FaceDetail> faceDetails = result.getFaceDetails(); for (FaceDetail face : faceDetails) { BoundingBox box = face.getBoundingBox(); left = width * box.getLeft(); top = height * box.getTop(); g2d.drawRect(Math.round(left / scale), Math.round(top / scale), Math.round((width * box.getWidth()) / scale), Math.round((height * box.getHeight())) / scale); } }
public static void main(String arg[]) throws Exception {
String photo = "photo.png"; String bucket = "bucket"; int height = 0; int width = 0;
// Get the image from an S3 Bucket AmazonS3 s3client = AmazonS3ClientBuilder.defaultClient();
com.amazonaws.services.s3.model.S3Object s3object = s3client.getObject(bucket, photo); S3ObjectInputStream inputStream = s3object.getObjectContent();
42
Amazon Rekognition 개발자 안내서경계 상자 표시
BufferedImage image = ImageIO.read(inputStream); DetectFacesRequest request = new DetectFacesRequest() .withImage(new Image().withS3Object(new S3Object().withName(photo).withBucket(bucket)));
width = image.getWidth(); height = image.getHeight();
// Call DetectFaces AmazonRekognition amazonRekognition = AmazonRekognitionClientBuilder.defaultClient(); DetectFacesResult result = amazonRekognition.detectFaces(request); //Show the bounding box info for each face. List<FaceDetail> faceDetails = result.getFaceDetails(); for (FaceDetail face : faceDetails) {
BoundingBox box = face.getBoundingBox(); float left = width * box.getLeft(); float top = height * box.getTop(); System.out.println("Face:");
System.out.println("Left: " + String.valueOf((int) left)); System.out.println("Top: " + String.valueOf((int) top)); System.out.println("Face Width: " + String.valueOf((int) (width * box.getWidth()))); System.out.println("Face Height: " + String.valueOf((int) (height * box.getHeight()))); System.out.println();
}
// Create frame and panel. JFrame frame = new JFrame("RotateImage"); frame.setDefaultCloseOperation(JFrame.EXIT_ON_CLOSE); DisplayFaces panel = new DisplayFaces(result, image); panel.setPreferredSize(new Dimension(image.getWidth() / scale, image.getHeight() / scale)); frame.setContentPane(panel); frame.pack(); frame.setVisible(true);
}}
Python
import boto3import iofrom PIL import Image, ImageDraw, ExifTags, ImageColor
def show_faces(photo,bucket):
client=boto3.client('rekognition')
# Load image from S3 bucket s3_connection = boto3.resource('s3') s3_object = s3_connection.Object(bucket,photo) s3_response = s3_object.get()
stream = io.BytesIO(s3_response['Body'].read()) image=Image.open(stream)
43
Amazon Rekognition 개발자 안내서이미지 방향 및 경계 상자 좌표 가져오기
#Call DetectFaces response = client.detect_faces(Image={'S3Object': {'Bucket': bucket, 'Name': photo}}, Attributes=['ALL'])
imgWidth, imgHeight = image.size draw = ImageDraw.Draw(image)
# calculate and display bounding boxes for each detected face print('Detected faces for ' + photo) for faceDetail in response['FaceDetails']: print('The detected face is between ' + str(faceDetail['AgeRange']['Low']) + ' and ' + str(faceDetail['AgeRange']['High']) + ' years old') box = faceDetail['BoundingBox'] left = imgWidth * box['Left'] top = imgHeight * box['Top'] width = imgWidth * box['Width'] height = imgHeight * box['Height']
print('Left: ' + '{0:.0f}'.format(left)) print('Top: ' + '{0:.0f}'.format(top)) print('Face Width: ' + "{0:.0f}".format(width)) print('Face Height: ' + "{0:.0f}".format(height))
points = ( (left,top), (left + width, top), (left + width, top + height), (left , top + height), (left, top)
) draw.line(points, fill='#00d400', width=2)
# Alternatively can draw rectangle. However you can't set line width. #draw.rectangle([left,top, left + width, top + height], outline='#00d400')
image.show()
return len(response['FaceDetails'])
def main(): bucket="bucket" photo="photo"
faces_count=show_faces(photo,bucket) print("faces detected: " + str(faces_count))
if __name__ == "__main__": main()
이미지 방향 및 경계 상자 좌표 가져오기Amazon Rekognition Image를 사용하는 애플리케이션은 일반적으로 Amazon Rekognition Image 작업으로 감지된 이미지와 감지된 얼굴 주위의 상자를 표시해야 합니다. 애플리케이션에서 이미지를 올바르게 표시하려면 이미지의 방향을 확인하고 수정해야 합니다. 일부 .jpg 파일의 경우 이미지의 교환 이미지 파일
44
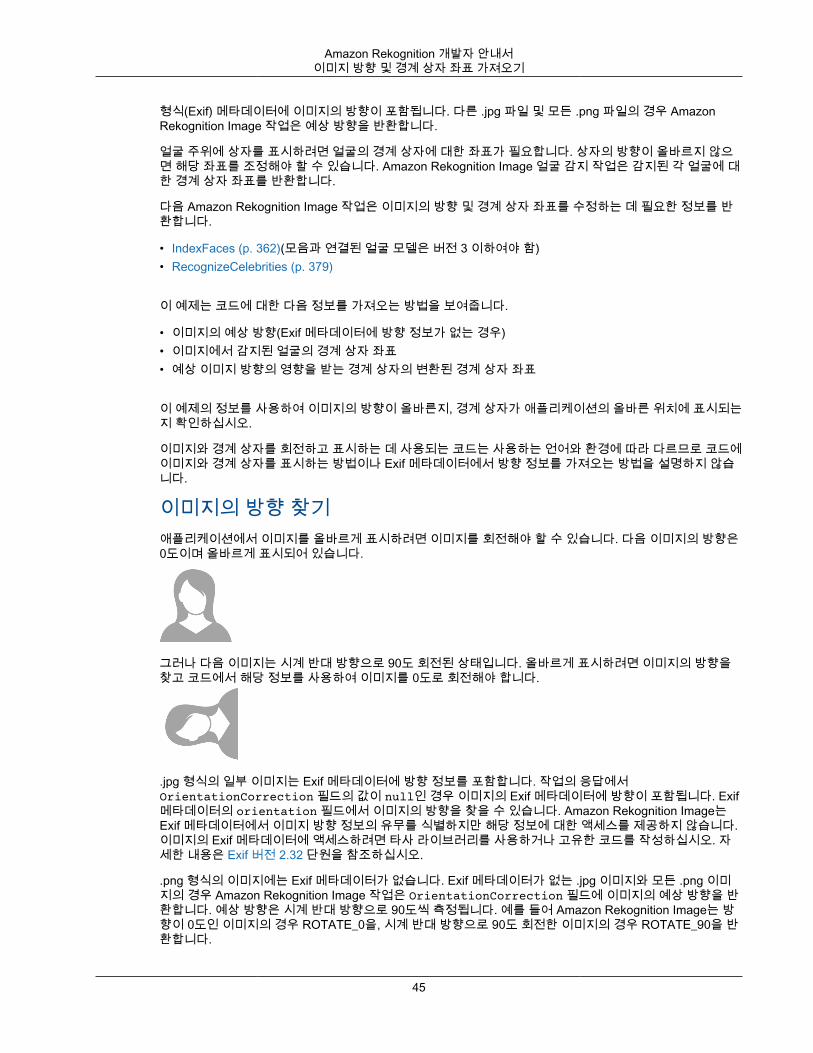
Amazon Rekognition 개발자 안내서이미지 방향 및 경계 상자 좌표 가져오기
형식(Exif) 메타데이터에 이미지의 방향이 포함됩니다. 다른 .jpg 파일 및 모든 .png 파일의 경우 AmazonRekognition Image 작업은 예상 방향을 반환합니다.
얼굴 주위에 상자를 표시하려면 얼굴의 경계 상자에 대한 좌표가 필요합니다. 상자의 방향이 올바르지 않으면 해당 좌표를 조정해야 할 수 있습니다. Amazon Rekognition Image 얼굴 감지 작업은 감지된 각 얼굴에 대한 경계 상자 좌표를 반환합니다.
다음 Amazon Rekognition Image 작업은 이미지의 방향 및 경계 상자 좌표를 수정하는 데 필요한 정보를 반환합니다.
• IndexFaces (p. 362)(모음과 연결된 얼굴 모델은 버전 3 이하여야 함)• RecognizeCelebrities (p. 379)
이 예제는 코드에 대한 다음 정보를 가져오는 방법을 보여줍니다.
• 이미지의 예상 방향(Exif 메타데이터에 방향 정보가 없는 경우)• 이미지에서 감지된 얼굴의 경계 상자 좌표• 예상 이미지 방향의 영향을 받는 경계 상자의 변환된 경계 상자 좌표
이 예제의 정보를 사용하여 이미지의 방향이 올바른지, 경계 상자가 애플리케이션의 올바른 위치에 표시되는지 확인하십시오.
이미지와 경계 상자를 회전하고 표시하는 데 사용되는 코드는 사용하는 언어와 환경에 따라 다르므로 코드에이미지와 경계 상자를 표시하는 방법이나 Exif 메타데이터에서 방향 정보를 가져오는 방법을 설명하지 않습니다.
이미지의 방향 찾기애플리케이션에서 이미지를 올바르게 표시하려면 이미지를 회전해야 할 수 있습니다. 다음 이미지의 방향은0도이며 올바르게 표시되어 있습니다.
그러나 다음 이미지는 시계 반대 방향으로 90도 회전된 상태입니다. 올바르게 표시하려면 이미지의 방향을찾고 코드에서 해당 정보를 사용하여 이미지를 0도로 회전해야 합니다.
.jpg 형식의 일부 이미지는 Exif 메타데이터에 방향 정보를 포함합니다. 작업의 응답에서OrientationCorrection 필드의 값이 null인 경우 이미지의 Exif 메타데이터에 방향이 포함됩니다. Exif메타데이터의 orientation 필드에서 이미지의 방향을 찾을 수 있습니다. Amazon Rekognition Image는Exif 메타데이터에서 이미지 방향 정보의 유무를 식별하지만 해당 정보에 대한 액세스를 제공하지 않습니다.이미지의 Exif 메타데이터에 액세스하려면 타사 라이브러리를 사용하거나 고유한 코드를 작성하십시오. 자세한 내용은 Exif 버전 2.32 단원을 참조하십시오.
.png 형식의 이미지에는 Exif 메타데이터가 없습니다. Exif 메타데이터가 없는 .jpg 이미지와 모든 .png 이미지의 경우 Amazon Rekognition Image 작업은 OrientationCorrection 필드에 이미지의 예상 방향을 반환합니다. 예상 방향은 시계 반대 방향으로 90도씩 측정됩니다. 예를 들어 Amazon Rekognition Image는 방향이 0도인 이미지의 경우 ROTATE_0을, 시계 반대 방향으로 90도 회전한 이미지의 경우 ROTATE_90을 반환합니다.
45
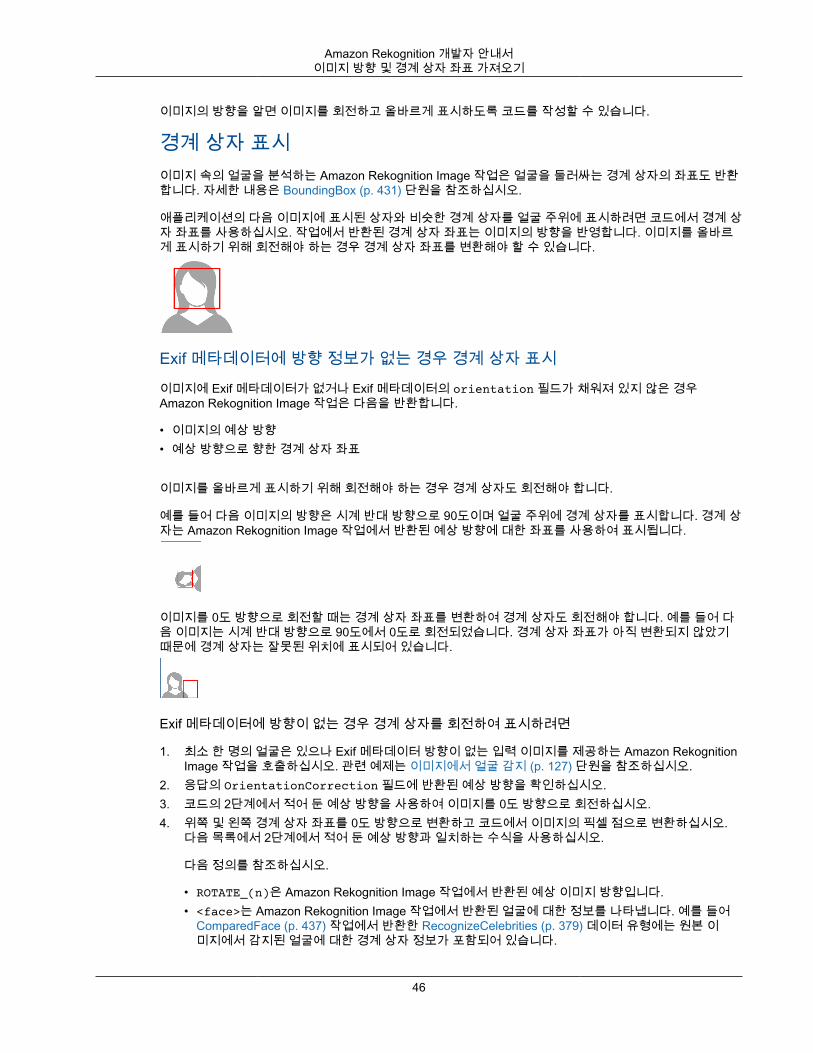
Amazon Rekognition 개발자 안내서이미지 방향 및 경계 상자 좌표 가져오기
이미지의 방향을 알면 이미지를 회전하고 올바르게 표시하도록 코드를 작성할 수 있습니다.
경계 상자 표시이미지 속의 얼굴을 분석하는 Amazon Rekognition Image 작업은 얼굴을 둘러싸는 경계 상자의 좌표도 반환합니다. 자세한 내용은 BoundingBox (p. 431) 단원을 참조하십시오.
애플리케이션의 다음 이미지에 표시된 상자와 비슷한 경계 상자를 얼굴 주위에 표시하려면 코드에서 경계 상자 좌표를 사용하십시오. 작업에서 반환된 경계 상자 좌표는 이미지의 방향을 반영합니다. 이미지를 올바르게 표시하기 위해 회전해야 하는 경우 경계 상자 좌표를 변환해야 할 수 있습니다.
Exif 메타데이터에 방향 정보가 없는 경우 경계 상자 표시
이미지에 Exif 메타데이터가 없거나 Exif 메타데이터의 orientation 필드가 채워져 있지 않은 경우Amazon Rekognition Image 작업은 다음을 반환합니다.
• 이미지의 예상 방향• 예상 방향으로 향한 경계 상자 좌표
이미지를 올바르게 표시하기 위해 회전해야 하는 경우 경계 상자도 회전해야 합니다.
예를 들어 다음 이미지의 방향은 시계 반대 방향으로 90도이며 얼굴 주위에 경계 상자를 표시합니다. 경계 상자는 Amazon Rekognition Image 작업에서 반환된 예상 방향에 대한 좌표를 사용하여 표시됩니다.
이미지를 0도 방향으로 회전할 때는 경계 상자 좌표를 변환하여 경계 상자도 회전해야 합니다. 예를 들어 다음 이미지는 시계 반대 방향으로 90도에서 0도로 회전되었습니다. 경계 상자 좌표가 아직 변환되지 않았기때문에 경계 상자는 잘못된 위치에 표시되어 있습니다.
Exif 메타데이터에 방향이 없는 경우 경계 상자를 회전하여 표시하려면
1. 최소 한 명의 얼굴은 있으나 Exif 메타데이터 방향이 없는 입력 이미지를 제공하는 Amazon RekognitionImage 작업을 호출하십시오. 관련 예제는 이미지에서 얼굴 감지 (p. 127) 단원을 참조하십시오.
2. 응답의 OrientationCorrection 필드에 반환된 예상 방향을 확인하십시오.3. 코드의 2단계에서 적어 둔 예상 방향을 사용하여 이미지를 0도 방향으로 회전하십시오.4. 위쪽 및 왼쪽 경계 상자 좌표를 0도 방향으로 변환하고 코드에서 이미지의 픽셀 점으로 변환하십시오.
다음 목록에서 2단계에서 적어 둔 예상 방향과 일치하는 수식을 사용하십시오.
다음 정의를 참조하십시오.
• ROTATE_(n)은 Amazon Rekognition Image 작업에서 반환된 예상 이미지 방향입니다.• <face>는 Amazon Rekognition Image 작업에서 반환된 얼굴에 대한 정보를 나타냅니다. 예를 들어
ComparedFace (p. 437) 작업에서 반환한 RecognizeCelebrities (p. 379) 데이터 유형에는 원본 이미지에서 감지된 얼굴에 대한 경계 상자 정보가 포함되어 있습니다.
46
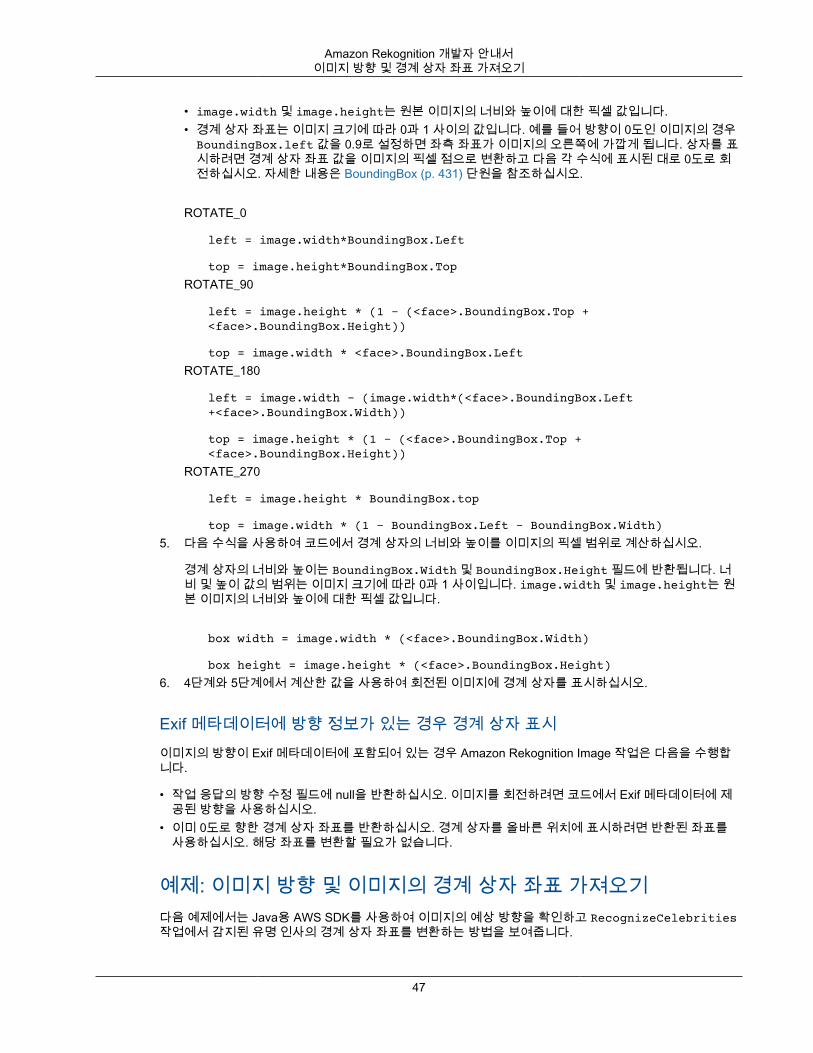
Amazon Rekognition 개발자 안내서이미지 방향 및 경계 상자 좌표 가져오기
• image.width 및 image.height는 원본 이미지의 너비와 높이에 대한 픽셀 값입니다.• 경계 상자 좌표는 이미지 크기에 따라 0과 1 사이의 값입니다. 예를 들어 방향이 0도인 이미지의 경우BoundingBox.left 값을 0.9로 설정하면 좌측 좌표가 이미지의 오른쪽에 가깝게 됩니다. 상자를 표시하려면 경계 상자 좌표 값을 이미지의 픽셀 점으로 변환하고 다음 각 수식에 표시된 대로 0도로 회전하십시오. 자세한 내용은 BoundingBox (p. 431) 단원을 참조하십시오.
ROTATE_0
left = image.width*BoundingBox.Left
top = image.height*BoundingBox.Top
ROTATE_90
left = image.height * (1 - (<face>.BoundingBox.Top +<face>.BoundingBox.Height))
top = image.width * <face>.BoundingBox.Left
ROTATE_180
left = image.width - (image.width*(<face>.BoundingBox.Left+<face>.BoundingBox.Width))
top = image.height * (1 - (<face>.BoundingBox.Top +<face>.BoundingBox.Height))
ROTATE_270
left = image.height * BoundingBox.top
top = image.width * (1 - BoundingBox.Left - BoundingBox.Width)
5. 다음 수식을 사용하여 코드에서 경계 상자의 너비와 높이를 이미지의 픽셀 범위로 계산하십시오.
경계 상자의 너비와 높이는 BoundingBox.Width 및 BoundingBox.Height 필드에 반환됩니다. 너비 및 높이 값의 범위는 이미지 크기에 따라 0과 1 사이입니다. image.width 및 image.height는 원본 이미지의 너비와 높이에 대한 픽셀 값입니다.
box width = image.width * (<face>.BoundingBox.Width)
box height = image.height * (<face>.BoundingBox.Height)
6. 4단계와 5단계에서 계산한 값을 사용하여 회전된 이미지에 경계 상자를 표시하십시오.
Exif 메타데이터에 방향 정보가 있는 경우 경계 상자 표시이미지의 방향이 Exif 메타데이터에 포함되어 있는 경우 Amazon Rekognition Image 작업은 다음을 수행합니다.
• 작업 응답의 방향 수정 필드에 null을 반환하십시오. 이미지를 회전하려면 코드에서 Exif 메타데이터에 제공된 방향을 사용하십시오.
• 이미 0도로 향한 경계 상자 좌표를 반환하십시오. 경계 상자를 올바른 위치에 표시하려면 반환된 좌표를사용하십시오. 해당 좌표를 변환할 필요가 없습니다.
예제: 이미지 방향 및 이미지의 경계 상자 좌표 가져오기다음 예제에서는 Java용 AWS SDK를 사용하여 이미지의 예상 방향을 확인하고 RecognizeCelebrities작업에서 감지된 유명 인사의 경계 상자 좌표를 변환하는 방법을 보여줍니다.
47
Amazon Rekognition 개발자 안내서이미지 방향 및 경계 상자 좌표 가져오기
이 예제는 로컬 파일 시스템에서 이미지를 로드하고 RecognizeCelebrities 작업을 호출하고 이미지의높이와 너비를 결정하며 회전된 이미지에 대한 얼굴의 경계 상자 좌표를 계산합니다. 이 예제에서는 Exif 메타데이터에 저장된 방향 정보를 처리하는 방법을 보여주지 않습니다.
main 함수에서, photo 값을 로컬에 저장된 이미지(.png 또는 .jpg 형식)의 이름과 경로로 바꾸십시오.
Java
//Copyright 2018 Amazon.com, Inc. or its affiliates. All Rights Reserved.//PDX-License-Identifier: MIT-0 (For details, see https://github.com/awsdocs/amazon-rekognition-developer-guide/blob/master/LICENSE-SAMPLECODE.)
package com.amazonaws.samples;import java.awt.image.BufferedImage;import java.io.ByteArrayInputStream;import java.io.ByteArrayOutputStream;import java.io.File;import java.io.FileInputStream;import java.io.InputStream;import java.nio.ByteBuffer;import java.util.List;import javax.imageio.ImageIO;import com.amazonaws.services.rekognition.AmazonRekognition;import com.amazonaws.services.rekognition.AmazonRekognitionClientBuilder;import com.amazonaws.services.rekognition.model.Image;import com.amazonaws.services.rekognition.model.RecognizeCelebritiesRequest;import com.amazonaws.services.rekognition.model.RecognizeCelebritiesResult;import com.amazonaws.util.IOUtils;import com.amazonaws.services.rekognition.model.AmazonRekognitionException;import com.amazonaws.services.rekognition.model.BoundingBox;import com.amazonaws.services.rekognition.model.Celebrity;import com.amazonaws.services.rekognition.model.ComparedFace;
public class RotateImage {
public static void main(String[] args) throws Exception {
String photo = "photo.png";
//Get Rekognition client AmazonRekognition amazonRekognition = AmazonRekognitionClientBuilder.defaultClient();
// Load image ByteBuffer imageBytes=null; BufferedImage image = null;
try (InputStream inputStream = new FileInputStream(new File(photo))) { imageBytes = ByteBuffer.wrap(IOUtils.toByteArray(inputStream));
} catch(Exception e) { System.out.println("Failed to load file " + photo); System.exit(1); }
//Get image width and height InputStream imageBytesStream; imageBytesStream = new ByteArrayInputStream(imageBytes.array());
ByteArrayOutputStream baos = new ByteArrayOutputStream(); image=ImageIO.read(imageBytesStream); ImageIO.write(image, "jpg", baos);
48
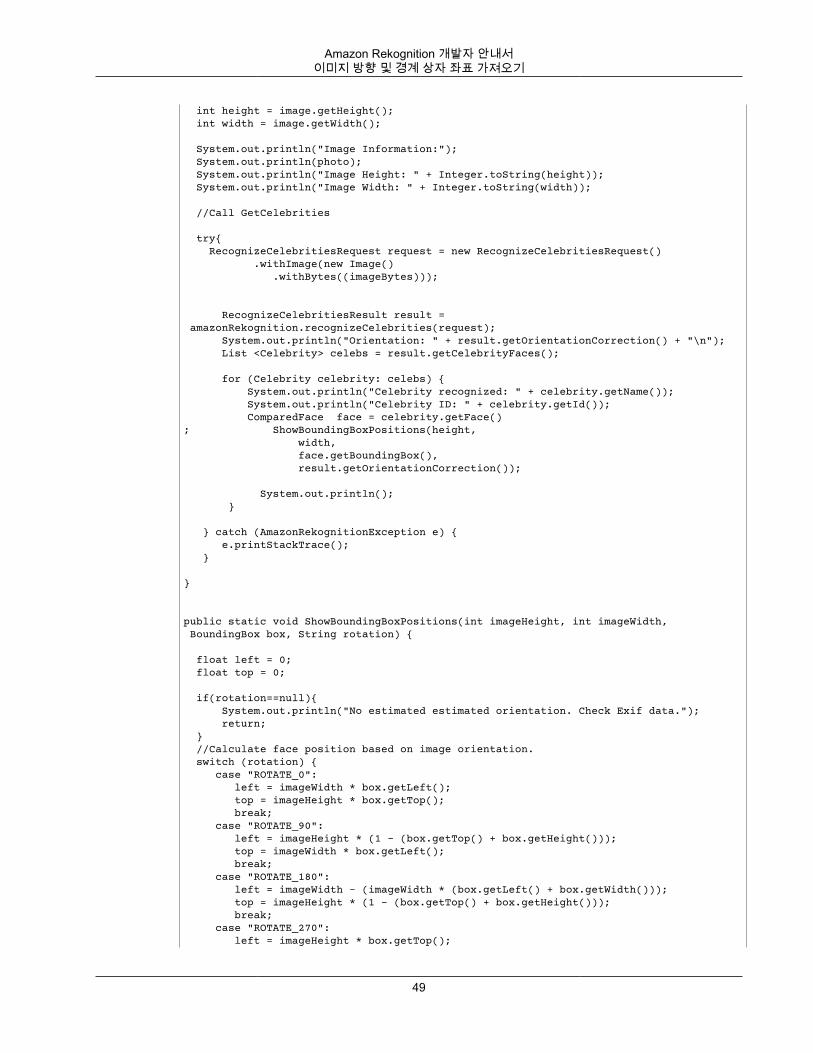
Amazon Rekognition 개발자 안내서이미지 방향 및 경계 상자 좌표 가져오기
int height = image.getHeight(); int width = image.getWidth();
System.out.println("Image Information:"); System.out.println(photo); System.out.println("Image Height: " + Integer.toString(height)); System.out.println("Image Width: " + Integer.toString(width));
//Call GetCelebrities
try{ RecognizeCelebritiesRequest request = new RecognizeCelebritiesRequest() .withImage(new Image() .withBytes((imageBytes)));
RecognizeCelebritiesResult result = amazonRekognition.recognizeCelebrities(request); System.out.println("Orientation: " + result.getOrientationCorrection() + "\n"); List <Celebrity> celebs = result.getCelebrityFaces();
for (Celebrity celebrity: celebs) { System.out.println("Celebrity recognized: " + celebrity.getName()); System.out.println("Celebrity ID: " + celebrity.getId()); ComparedFace face = celebrity.getFace(); ShowBoundingBoxPositions(height, width, face.getBoundingBox(), result.getOrientationCorrection()); System.out.println(); }
} catch (AmazonRekognitionException e) { e.printStackTrace(); }
}
public static void ShowBoundingBoxPositions(int imageHeight, int imageWidth, BoundingBox box, String rotation) {
float left = 0; float top = 0;
if(rotation==null){ System.out.println("No estimated estimated orientation. Check Exif data."); return; } //Calculate face position based on image orientation. switch (rotation) { case "ROTATE_0": left = imageWidth * box.getLeft(); top = imageHeight * box.getTop(); break; case "ROTATE_90": left = imageHeight * (1 - (box.getTop() + box.getHeight())); top = imageWidth * box.getLeft(); break; case "ROTATE_180": left = imageWidth - (imageWidth * (box.getLeft() + box.getWidth())); top = imageHeight * (1 - (box.getTop() + box.getHeight())); break; case "ROTATE_270": left = imageHeight * box.getTop();
49
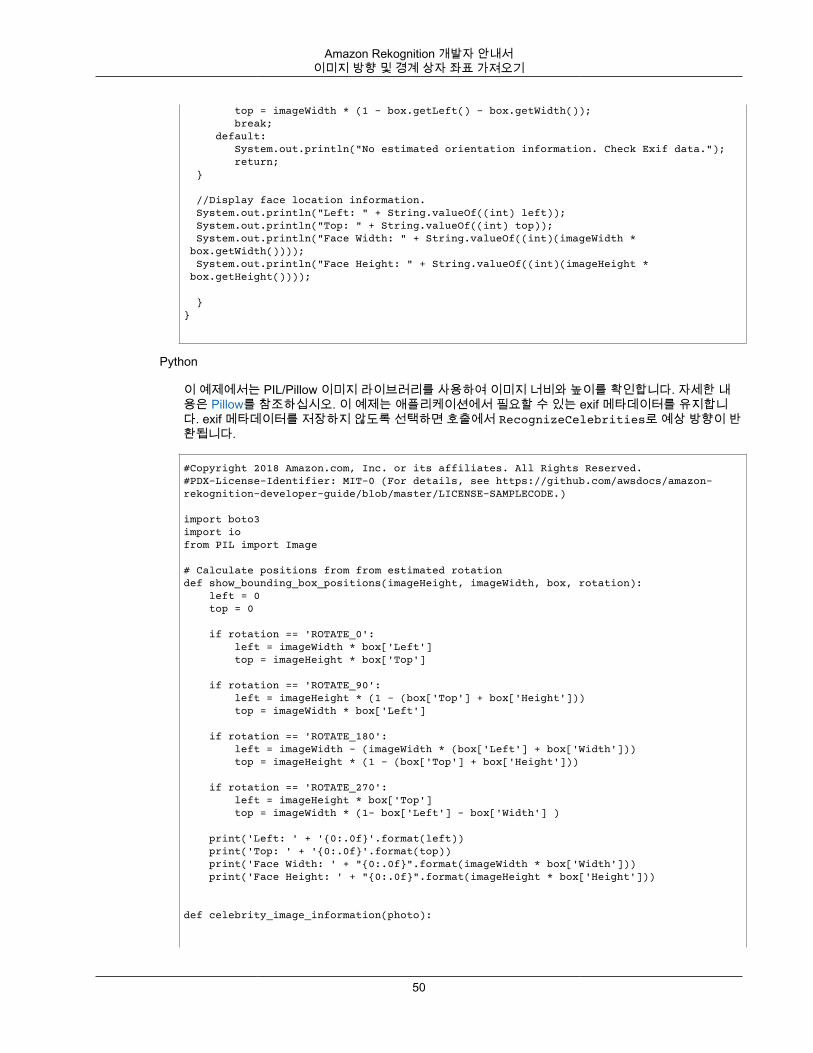
Amazon Rekognition 개발자 안내서이미지 방향 및 경계 상자 좌표 가져오기
top = imageWidth * (1 - box.getLeft() - box.getWidth()); break; default: System.out.println("No estimated orientation information. Check Exif data."); return; }
//Display face location information. System.out.println("Left: " + String.valueOf((int) left)); System.out.println("Top: " + String.valueOf((int) top)); System.out.println("Face Width: " + String.valueOf((int)(imageWidth * box.getWidth()))); System.out.println("Face Height: " + String.valueOf((int)(imageHeight * box.getHeight())));
}}
Python
이 예제에서는 PIL/Pillow 이미지 라이브러리를 사용하여 이미지 너비와 높이를 확인합니다. 자세한 내용은 Pillow를 참조하십시오. 이 예제는 애플리케이션에서 필요할 수 있는 exif 메타데이터를 유지합니다. exif 메타데이터를 저장하지 않도록 선택하면 호출에서 RecognizeCelebrities로 예상 방향이 반환됩니다.
#Copyright 2018 Amazon.com, Inc. or its affiliates. All Rights Reserved.#PDX-License-Identifier: MIT-0 (For details, see https://github.com/awsdocs/amazon-rekognition-developer-guide/blob/master/LICENSE-SAMPLECODE.)
import boto3import iofrom PIL import Image
# Calculate positions from from estimated rotation def show_bounding_box_positions(imageHeight, imageWidth, box, rotation): left = 0 top = 0 if rotation == 'ROTATE_0': left = imageWidth * box['Left'] top = imageHeight * box['Top'] if rotation == 'ROTATE_90': left = imageHeight * (1 - (box['Top'] + box['Height'])) top = imageWidth * box['Left']
if rotation == 'ROTATE_180': left = imageWidth - (imageWidth * (box['Left'] + box['Width'])) top = imageHeight * (1 - (box['Top'] + box['Height']))
if rotation == 'ROTATE_270': left = imageHeight * box['Top'] top = imageWidth * (1- box['Left'] - box['Width'] )
print('Left: ' + '{0:.0f}'.format(left)) print('Top: ' + '{0:.0f}'.format(top)) print('Face Width: ' + "{0:.0f}".format(imageWidth * box['Width'])) print('Face Height: ' + "{0:.0f}".format(imageHeight * box['Height']))
def celebrity_image_information(photo):
50
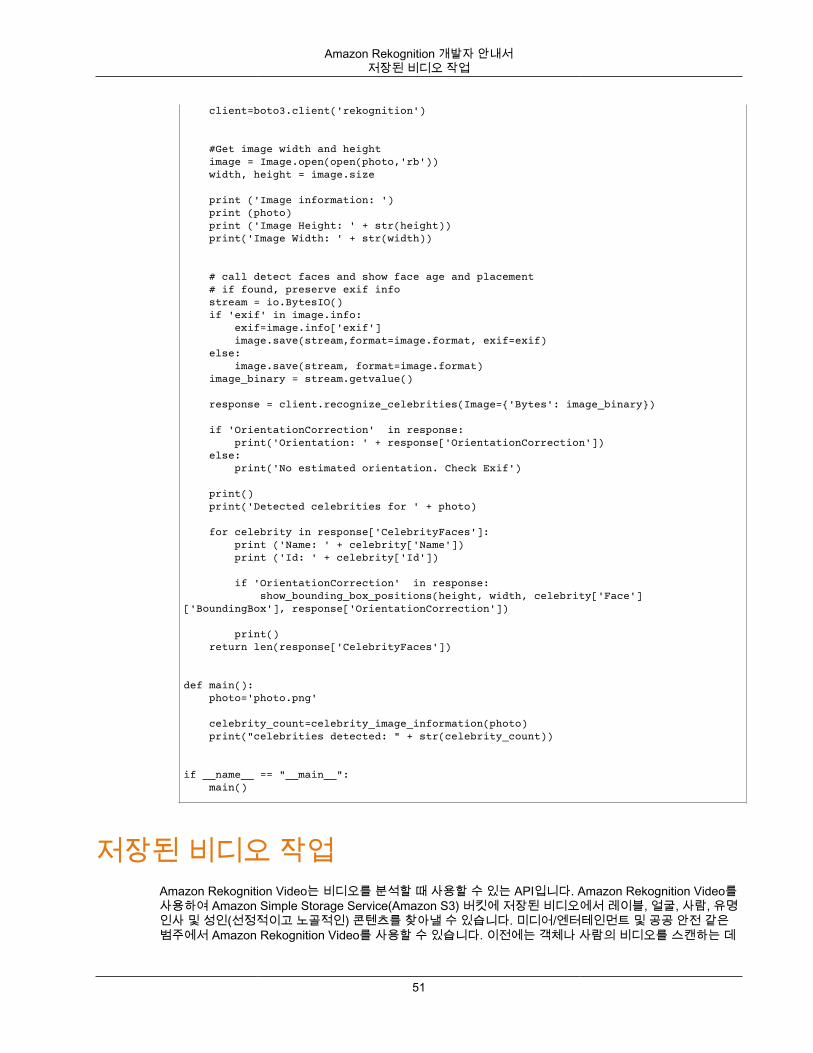
Amazon Rekognition 개발자 안내서저장된 비디오 작업
client=boto3.client('rekognition')
#Get image width and height image = Image.open(open(photo,'rb')) width, height = image.size
print ('Image information: ') print (photo) print ('Image Height: ' + str(height)) print('Image Width: ' + str(width))
# call detect faces and show face age and placement # if found, preserve exif info stream = io.BytesIO() if 'exif' in image.info: exif=image.info['exif'] image.save(stream,format=image.format, exif=exif) else: image.save(stream, format=image.format) image_binary = stream.getvalue() response = client.recognize_celebrities(Image={'Bytes': image_binary})
if 'OrientationCorrection' in response: print('Orientation: ' + response['OrientationCorrection']) else: print('No estimated orientation. Check Exif') print() print('Detected celebrities for ' + photo)
for celebrity in response['CelebrityFaces']: print ('Name: ' + celebrity['Name']) print ('Id: ' + celebrity['Id']) if 'OrientationCorrection' in response: show_bounding_box_positions(height, width, celebrity['Face']['BoundingBox'], response['OrientationCorrection'])
print() return len(response['CelebrityFaces'])
def main(): photo='photo.png'
celebrity_count=celebrity_image_information(photo) print("celebrities detected: " + str(celebrity_count))
if __name__ == "__main__": main()
저장된 비디오 작업Amazon Rekognition Video는 비디오를 분석할 때 사용할 수 있는 API입니다. Amazon Rekognition Video를사용하여 Amazon Simple Storage Service(Amazon S3) 버킷에 저장된 비디오에서 레이블, 얼굴, 사람, 유명인사 및 성인(선정적이고 노골적인) 콘텐츠를 찾아낼 수 있습니다. 미디어/엔터테인먼트 및 공공 안전 같은범주에서 Amazon Rekognition Video를 사용할 수 있습니다. 이전에는 객체나 사람의 비디오를 스캔하는 데
51
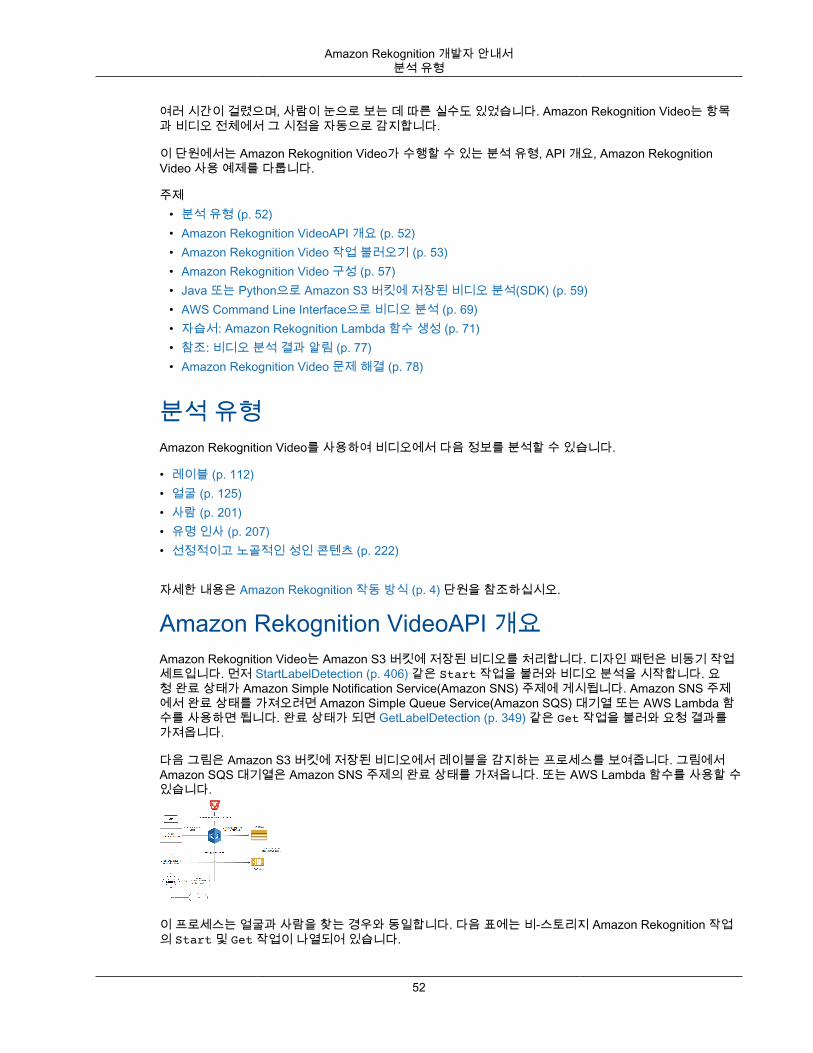
Amazon Rekognition 개발자 안내서분석 유형
여러 시간이 걸렸으며, 사람이 눈으로 보는 데 따른 실수도 있었습니다. Amazon Rekognition Video는 항목과 비디오 전체에서 그 시점을 자동으로 감지합니다.
이 단원에서는 Amazon Rekognition Video가 수행할 수 있는 분석 유형, API 개요, Amazon RekognitionVideo 사용 예제를 다룹니다.
주제• 분석 유형 (p. 52)• Amazon Rekognition VideoAPI 개요 (p. 52)• Amazon Rekognition Video 작업 불러오기 (p. 53)• Amazon Rekognition Video 구성 (p. 57)• Java 또는 Python으로 Amazon S3 버킷에 저장된 비디오 분석(SDK) (p. 59)• AWS Command Line Interface으로 비디오 분석 (p. 69)• 자습서: Amazon Rekognition Lambda 함수 생성 (p. 71)• 참조: 비디오 분석 결과 알림 (p. 77)• Amazon Rekognition Video 문제 해결 (p. 78)
분석 유형Amazon Rekognition Video를 사용하여 비디오에서 다음 정보를 분석할 수 있습니다.
• 레이블 (p. 112)• 얼굴 (p. 125)• 사람 (p. 201)• 유명 인사 (p. 207)• 선정적이고 노골적인 성인 콘텐츠 (p. 222)
자세한 내용은 Amazon Rekognition 작동 방식 (p. 4) 단원을 참조하십시오.
Amazon Rekognition VideoAPI 개요Amazon Rekognition Video는 Amazon S3 버킷에 저장된 비디오를 처리합니다. 디자인 패턴은 비동기 작업세트입니다. 먼저 StartLabelDetection (p. 406) 같은 Start 작업을 불러와 비디오 분석을 시작합니다. 요청 완료 상태가 Amazon Simple Notification Service(Amazon SNS) 주제에 게시됩니다. Amazon SNS 주제에서 완료 상태를 가져오려면 Amazon Simple Queue Service(Amazon SQS) 대기열 또는 AWS Lambda 함수를 사용하면 됩니다. 완료 상태가 되면 GetLabelDetection (p. 349) 같은 Get 작업을 불러와 요청 결과를가져옵니다.
다음 그림은 Amazon S3 버킷에 저장된 비디오에서 레이블을 감지하는 프로세스를 보여줍니다. 그림에서Amazon SQS 대기열은 Amazon SNS 주제의 완료 상태를 가져옵니다. 또는 AWS Lambda 함수를 사용할 수있습니다.
이 프로세스는 얼굴과 사람을 찾는 경우와 동일합니다. 다음 표에는 비-스토리지 Amazon Rekognition 작업의 Start 및 Get 작업이 나열되어 있습니다.
52
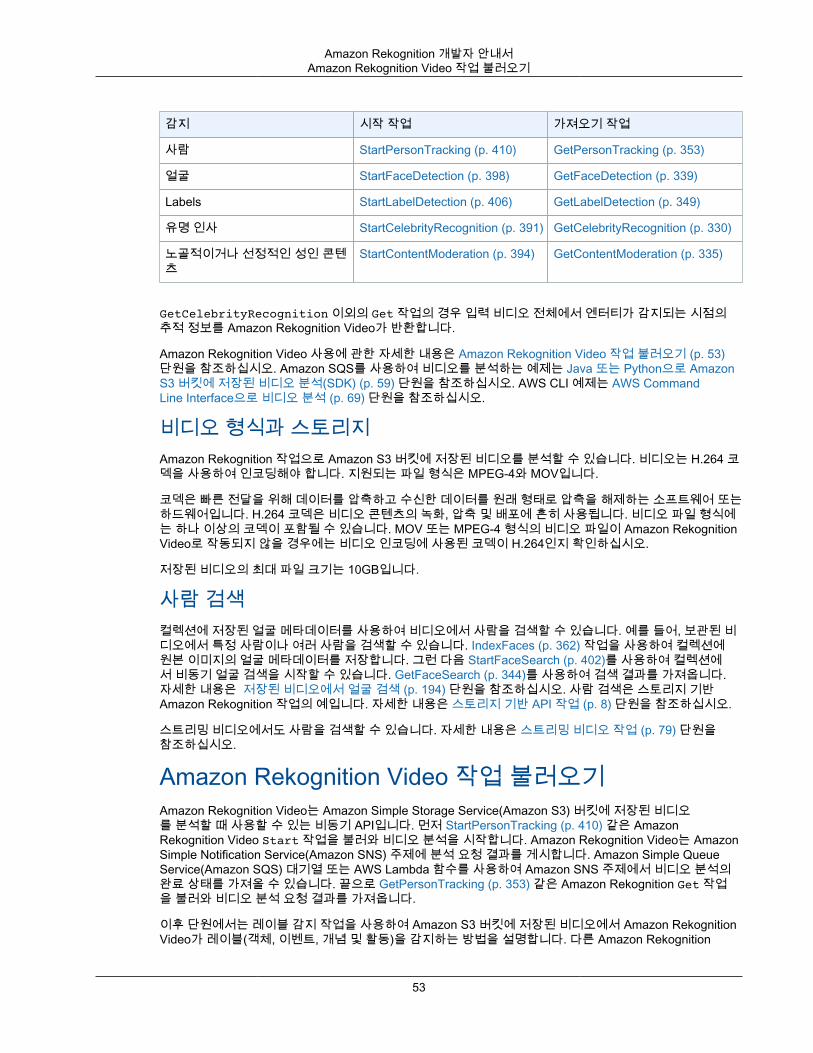
Amazon Rekognition 개발자 안내서Amazon Rekognition Video 작업 불러오기
감지 시작 작업 가져오기 작업
사람 StartPersonTracking (p. 410) GetPersonTracking (p. 353)
얼굴 StartFaceDetection (p. 398) GetFaceDetection (p. 339)
Labels StartLabelDetection (p. 406) GetLabelDetection (p. 349)
유명 인사 StartCelebrityRecognition (p. 391) GetCelebrityRecognition (p. 330)
노골적이거나 선정적인 성인 콘텐츠
StartContentModeration (p. 394) GetContentModeration (p. 335)
GetCelebrityRecognition 이외의 Get 작업의 경우 입력 비디오 전체에서 엔터티가 감지되는 시점의추적 정보를 Amazon Rekognition Video가 반환합니다.
Amazon Rekognition Video 사용에 관한 자세한 내용은 Amazon Rekognition Video 작업 불러오기 (p. 53)단원을 참조하십시오. Amazon SQS를 사용하여 비디오를 분석하는 예제는 Java 또는 Python으로 AmazonS3 버킷에 저장된 비디오 분석(SDK) (p. 59) 단원을 참조하십시오. AWS CLI 예제는 AWS CommandLine Interface으로 비디오 분석 (p. 69) 단원을 참조하십시오.
비디오 형식과 스토리지Amazon Rekognition 작업으로 Amazon S3 버킷에 저장된 비디오를 분석할 수 있습니다. 비디오는 H.264 코덱을 사용하여 인코딩해야 합니다. 지원되는 파일 형식은 MPEG-4와 MOV입니다.
코덱은 빠른 전달을 위해 데이터를 압축하고 수신한 데이터를 원래 형태로 압축을 해제하는 소프트웨어 또는하드웨어입니다. H.264 코덱은 비디오 콘텐츠의 녹화, 압축 및 배포에 흔히 사용됩니다. 비디오 파일 형식에는 하나 이상의 코덱이 포함될 수 있습니다. MOV 또는 MPEG-4 형식의 비디오 파일이 Amazon RekognitionVideo로 작동되지 않을 경우에는 비디오 인코딩에 사용된 코덱이 H.264인지 확인하십시오.
저장된 비디오의 최대 파일 크기는 10GB입니다.
사람 검색컬렉션에 저장된 얼굴 메타데이터를 사용하여 비디오에서 사람을 검색할 수 있습니다. 예를 들어, 보관된 비디오에서 특정 사람이나 여러 사람을 검색할 수 있습니다. IndexFaces (p. 362) 작업을 사용하여 컬렉션에원본 이미지의 얼굴 메타데이터를 저장합니다. 그런 다음 StartFaceSearch (p. 402)를 사용하여 컬렉션에서 비동기 얼굴 검색을 시작할 수 있습니다. GetFaceSearch (p. 344)를 사용하여 검색 결과를 가져옵니다.자세한 내용은 저장된 비디오에서 얼굴 검색 (p. 194) 단원을 참조하십시오. 사람 검색은 스토리지 기반Amazon Rekognition 작업의 예입니다. 자세한 내용은 스토리지 기반 API 작업 (p. 8) 단원을 참조하십시오.
스트리밍 비디오에서도 사람을 검색할 수 있습니다. 자세한 내용은 스트리밍 비디오 작업 (p. 79) 단원을참조하십시오.
Amazon Rekognition Video 작업 불러오기Amazon Rekognition Video는 Amazon Simple Storage Service(Amazon S3) 버킷에 저장된 비디오를 분석할 때 사용할 수 있는 비동기 API입니다. 먼저 StartPersonTracking (p. 410) 같은 AmazonRekognition Video Start 작업을 불러와 비디오 분석을 시작합니다. Amazon Rekognition Video는 AmazonSimple Notification Service(Amazon SNS) 주제에 분석 요청 결과를 게시합니다. Amazon Simple QueueService(Amazon SQS) 대기열 또는 AWS Lambda 함수를 사용하여 Amazon SNS 주제에서 비디오 분석의완료 상태를 가져올 수 있습니다. 끝으로 GetPersonTracking (p. 353) 같은 Amazon Rekognition Get 작업을 불러와 비디오 분석 요청 결과를 가져옵니다.
이후 단원에서는 레이블 감지 작업을 사용하여 Amazon S3 버킷에 저장된 비디오에서 Amazon RekognitionVideo가 레이블(객체, 이벤트, 개념 및 활동)을 감지하는 방법을 설명합니다. 다른 Amazon Rekognition
53
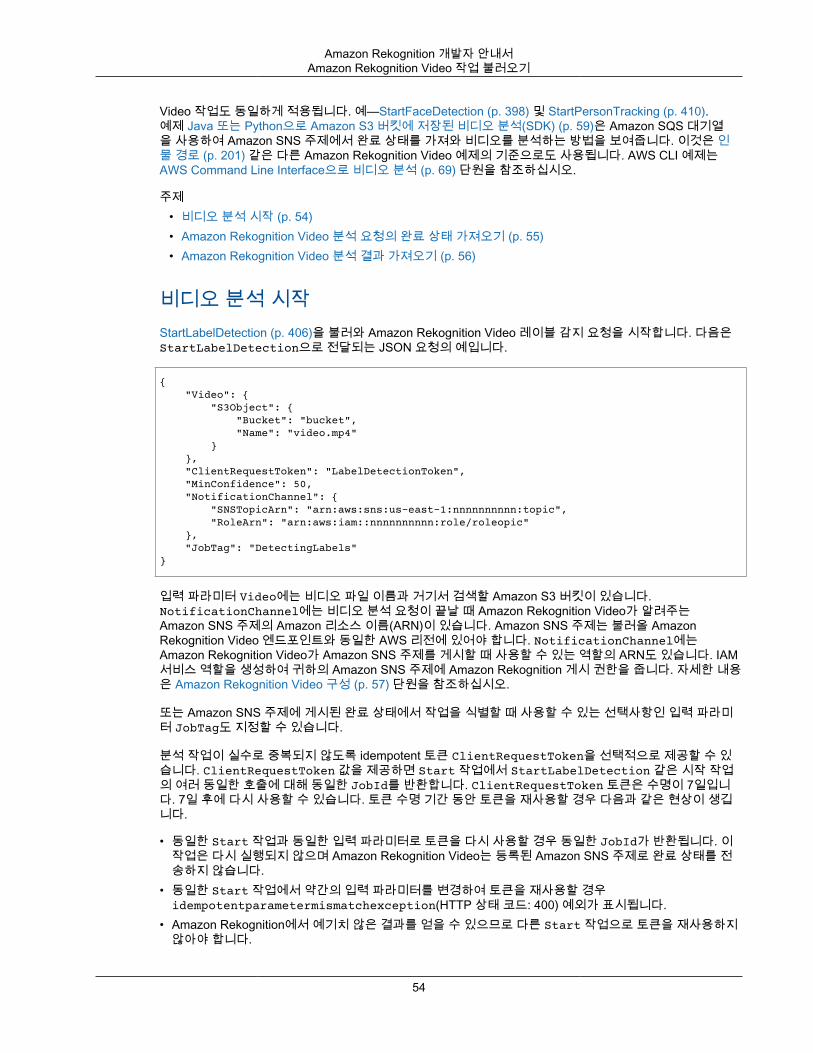
Amazon Rekognition 개발자 안내서Amazon Rekognition Video 작업 불러오기
Video 작업도 동일하게 적용됩니다. 예—StartFaceDetection (p. 398) 및 StartPersonTracking (p. 410).예제 Java 또는 Python으로 Amazon S3 버킷에 저장된 비디오 분석(SDK) (p. 59)은 Amazon SQS 대기열을 사용하여 Amazon SNS 주제에서 완료 상태를 가져와 비디오를 분석하는 방법을 보여줍니다. 이것은 인물 경로 (p. 201) 같은 다른 Amazon Rekognition Video 예제의 기준으로도 사용됩니다. AWS CLI 예제는AWS Command Line Interface으로 비디오 분석 (p. 69) 단원을 참조하십시오.
주제• 비디오 분석 시작 (p. 54)• Amazon Rekognition Video 분석 요청의 완료 상태 가져오기 (p. 55)• Amazon Rekognition Video 분석 결과 가져오기 (p. 56)
비디오 분석 시작StartLabelDetection (p. 406)을 불러와 Amazon Rekognition Video 레이블 감지 요청을 시작합니다. 다음은StartLabelDetection으로 전달되는 JSON 요청의 예입니다.
{ "Video": { "S3Object": { "Bucket": "bucket", "Name": "video.mp4" } }, "ClientRequestToken": "LabelDetectionToken", "MinConfidence": 50, "NotificationChannel": { "SNSTopicArn": "arn:aws:sns:us-east-1:nnnnnnnnnn:topic", "RoleArn": "arn:aws:iam::nnnnnnnnnn:role/roleopic" }, "JobTag": "DetectingLabels"}
입력 파라미터 Video에는 비디오 파일 이름과 거기서 검색할 Amazon S3 버킷이 있습니다.NotificationChannel에는 비디오 분석 요청이 끝날 때 Amazon Rekognition Video가 알려주는Amazon SNS 주제의 Amazon 리소스 이름(ARN)이 있습니다. Amazon SNS 주제는 불러올 AmazonRekognition Video 엔드포인트와 동일한 AWS 리전에 있어야 합니다. NotificationChannel에는Amazon Rekognition Video가 Amazon SNS 주제를 게시할 때 사용할 수 있는 역할의 ARN도 있습니다. IAM서비스 역할을 생성하여 귀하의 Amazon SNS 주제에 Amazon Rekognition 게시 권한을 줍니다. 자세한 내용은 Amazon Rekognition Video 구성 (p. 57) 단원을 참조하십시오.
또는 Amazon SNS 주제에 게시된 완료 상태에서 작업을 식별할 때 사용할 수 있는 선택사항인 입력 파라미터 JobTag도 지정할 수 있습니다.
분석 작업이 실수로 중복되지 않도록 idempotent 토큰 ClientRequestToken을 선택적으로 제공할 수 있습니다. ClientRequestToken 값을 제공하면 Start 작업에서 StartLabelDetection 같은 시작 작업의 여러 동일한 호출에 대해 동일한 JobId를 반환합니다. ClientRequestToken 토큰은 수명이 7일입니다. 7일 후에 다시 사용할 수 있습니다. 토큰 수명 기간 동안 토큰을 재사용할 경우 다음과 같은 현상이 생깁니다.
• 동일한 Start 작업과 동일한 입력 파라미터로 토큰을 다시 사용할 경우 동일한 JobId가 반환됩니다. 이작업은 다시 실행되지 않으며 Amazon Rekognition Video는 등록된 Amazon SNS 주제로 완료 상태를 전송하지 않습니다.
• 동일한 Start 작업에서 약간의 입력 파라미터를 변경하여 토큰을 재사용할 경우idempotentparametermismatchexception(HTTP 상태 코드: 400) 예외가 표시됩니다.
• Amazon Rekognition에서 예기치 않은 결과를 얻을 수 있으므로 다른 Start 작업으로 토큰을 재사용하지않아야 합니다.
54
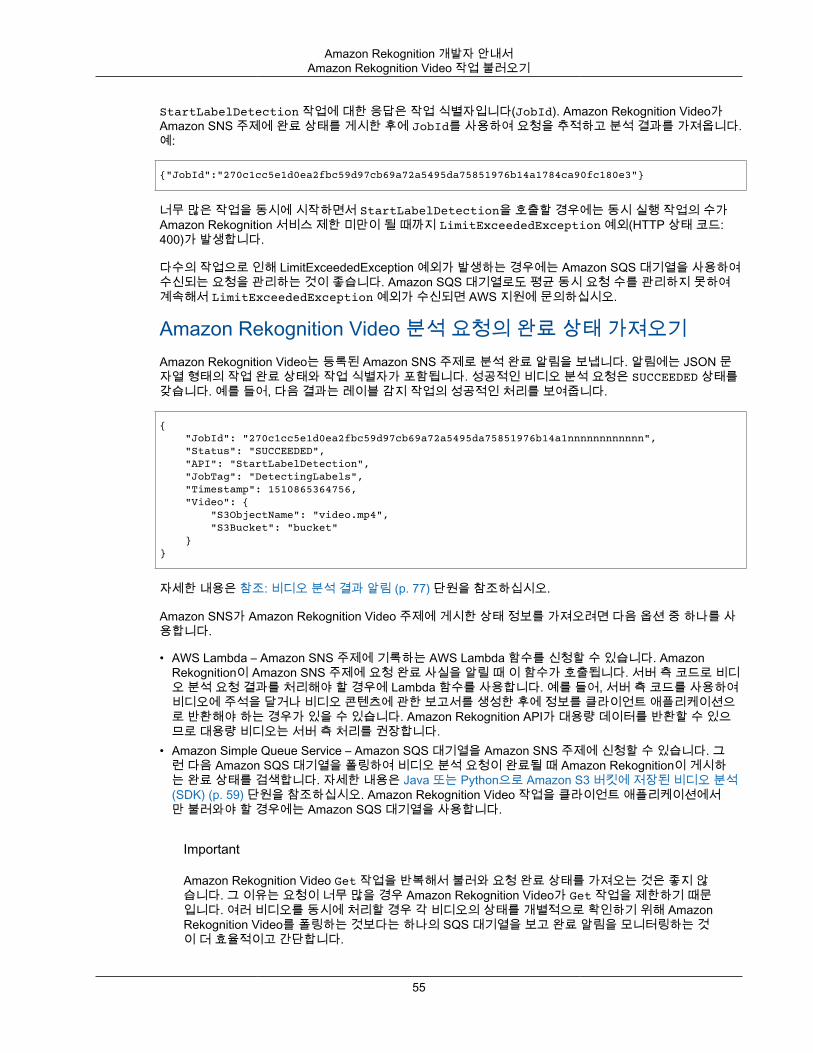
Amazon Rekognition 개발자 안내서Amazon Rekognition Video 작업 불러오기
StartLabelDetection 작업에 대한 응답은 작업 식별자입니다(JobId). Amazon Rekognition Video가Amazon SNS 주제에 완료 상태를 게시한 후에 JobId를 사용하여 요청을 추적하고 분석 결과를 가져옵니다.예:
{"JobId":"270c1cc5e1d0ea2fbc59d97cb69a72a5495da75851976b14a1784ca90fc180e3"}
너무 많은 작업을 동시에 시작하면서 StartLabelDetection을 호출할 경우에는 동시 실행 작업의 수가Amazon Rekognition 서비스 제한 미만이 될 때까지 LimitExceededException 예외(HTTP 상태 코드:400)가 발생합니다.
다수의 작업으로 인해 LimitExceededException 예외가 발생하는 경우에는 Amazon SQS 대기열을 사용하여수신되는 요청을 관리하는 것이 좋습니다. Amazon SQS 대기열로도 평균 동시 요청 수를 관리하지 못하여계속해서 LimitExceededException 예외가 수신되면 AWS 지원에 문의하십시오.
Amazon Rekognition Video 분석 요청의 완료 상태 가져오기Amazon Rekognition Video는 등록된 Amazon SNS 주제로 분석 완료 알림을 보냅니다. 알림에는 JSON 문자열 형태의 작업 완료 상태와 작업 식별자가 포함됩니다. 성공적인 비디오 분석 요청은 SUCCEEDED 상태를갖습니다. 예를 들어, 다음 결과는 레이블 감지 작업의 성공적인 처리를 보여줍니다.
{ "JobId": "270c1cc5e1d0ea2fbc59d97cb69a72a5495da75851976b14a1nnnnnnnnnnnn", "Status": "SUCCEEDED", "API": "StartLabelDetection", "JobTag": "DetectingLabels", "Timestamp": 1510865364756, "Video": { "S3ObjectName": "video.mp4", "S3Bucket": "bucket" }}
자세한 내용은 참조: 비디오 분석 결과 알림 (p. 77) 단원을 참조하십시오.
Amazon SNS가 Amazon Rekognition Video 주제에 게시한 상태 정보를 가져오려면 다음 옵션 중 하나를 사용합니다.
• AWS Lambda – Amazon SNS 주제에 기록하는 AWS Lambda 함수를 신청할 수 있습니다. AmazonRekognition이 Amazon SNS 주제에 요청 완료 사실을 알릴 때 이 함수가 호출됩니다. 서버 측 코드로 비디오 분석 요청 결과를 처리해야 할 경우에 Lambda 함수를 사용합니다. 예를 들어, 서버 측 코드를 사용하여비디오에 주석을 달거나 비디오 콘텐츠에 관한 보고서를 생성한 후에 정보를 클라이언트 애플리케이션으로 반환해야 하는 경우가 있을 수 있습니다. Amazon Rekognition API가 대용량 데이터를 반환할 수 있으므로 대용량 비디오는 서버 측 처리를 권장합니다.
• Amazon Simple Queue Service – Amazon SQS 대기열을 Amazon SNS 주제에 신청할 수 있습니다. 그런 다음 Amazon SQS 대기열을 폴링하여 비디오 분석 요청이 완료될 때 Amazon Rekognition이 게시하는 완료 상태를 검색합니다. 자세한 내용은 Java 또는 Python으로 Amazon S3 버킷에 저장된 비디오 분석(SDK) (p. 59) 단원을 참조하십시오. Amazon Rekognition Video 작업을 클라이언트 애플리케이션에서만 불러와야 할 경우에는 Amazon SQS 대기열을 사용합니다.
Important
Amazon Rekognition Video Get 작업을 반복해서 불러와 요청 완료 상태를 가져오는 것은 좋지 않습니다. 그 이유는 요청이 너무 많을 경우 Amazon Rekognition Video가 Get 작업을 제한하기 때문입니다. 여러 비디오를 동시에 처리할 경우 각 비디오의 상태를 개별적으로 확인하기 위해 AmazonRekognition Video를 폴링하는 것보다는 하나의 SQS 대기열을 보고 완료 알림을 모니터링하는 것이 더 효율적이고 간단합니다.
55
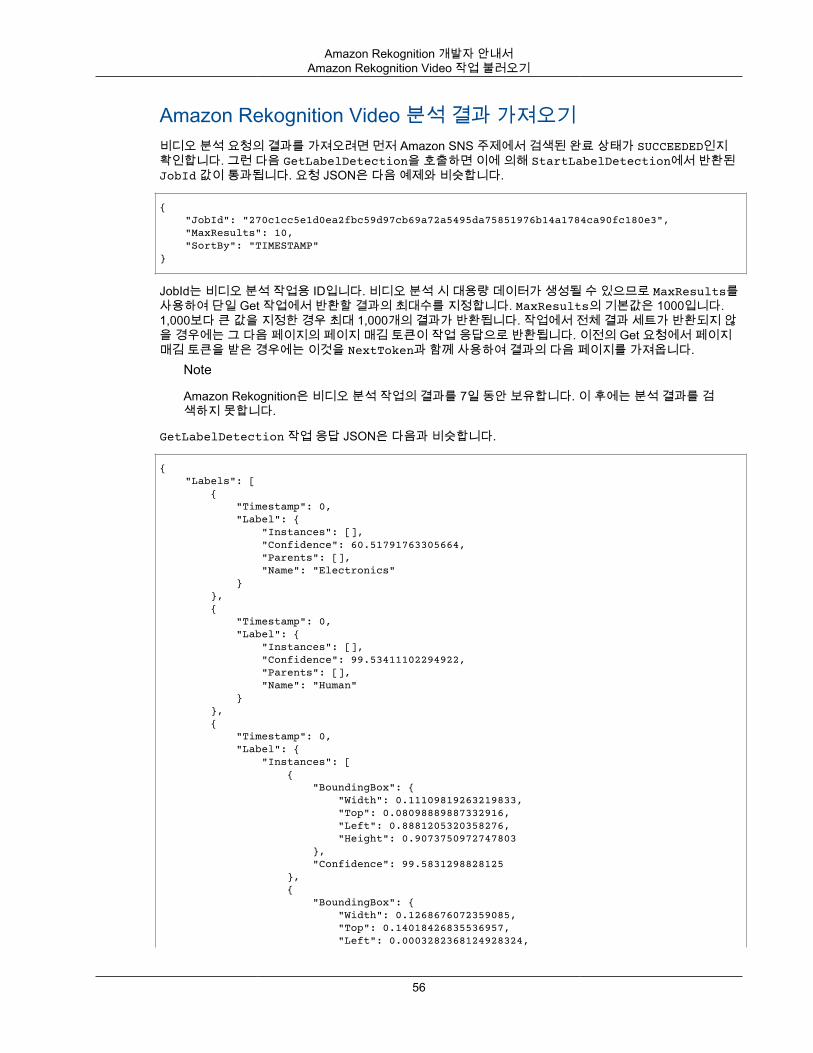
Amazon Rekognition 개발자 안내서Amazon Rekognition Video 작업 불러오기
Amazon Rekognition Video 분석 결과 가져오기비디오 분석 요청의 결과를 가져오려면 먼저 Amazon SNS 주제에서 검색된 완료 상태가 SUCCEEDED인지확인합니다. 그런 다음 GetLabelDetection을 호출하면 이에 의해 StartLabelDetection에서 반환된JobId 값이 통과됩니다. 요청 JSON은 다음 예제와 비슷합니다.
{ "JobId": "270c1cc5e1d0ea2fbc59d97cb69a72a5495da75851976b14a1784ca90fc180e3", "MaxResults": 10, "SortBy": "TIMESTAMP"}
JobId는 비디오 분석 작업용 ID입니다. 비디오 분석 시 대용량 데이터가 생성될 수 있으므로 MaxResults를사용하여 단일 Get 작업에서 반환할 결과의 최대수를 지정합니다. MaxResults의 기본값은 1000입니다.1,000보다 큰 값을 지정한 경우 최대 1,000개의 결과가 반환됩니다. 작업에서 전체 결과 세트가 반환되지 않을 경우에는 그 다음 페이지의 페이지 매김 토큰이 작업 응답으로 반환됩니다. 이전의 Get 요청에서 페이지매김 토큰을 받은 경우에는 이것을 NextToken과 함께 사용하여 결과의 다음 페이지를 가져옵니다.
Note
Amazon Rekognition은 비디오 분석 작업의 결과를 7일 동안 보유합니다. 이 후에는 분석 결과를 검색하지 못합니다.
GetLabelDetection 작업 응답 JSON은 다음과 비슷합니다.
{ "Labels": [ { "Timestamp": 0, "Label": { "Instances": [], "Confidence": 60.51791763305664, "Parents": [], "Name": "Electronics" } }, { "Timestamp": 0, "Label": { "Instances": [], "Confidence": 99.53411102294922, "Parents": [], "Name": "Human" } }, { "Timestamp": 0, "Label": { "Instances": [ { "BoundingBox": { "Width": 0.11109819263219833, "Top": 0.08098889887332916, "Left": 0.8881205320358276, "Height": 0.9073750972747803 }, "Confidence": 99.5831298828125 }, { "BoundingBox": { "Width": 0.1268676072359085, "Top": 0.14018426835536957, "Left": 0.0003282368124928324,
56
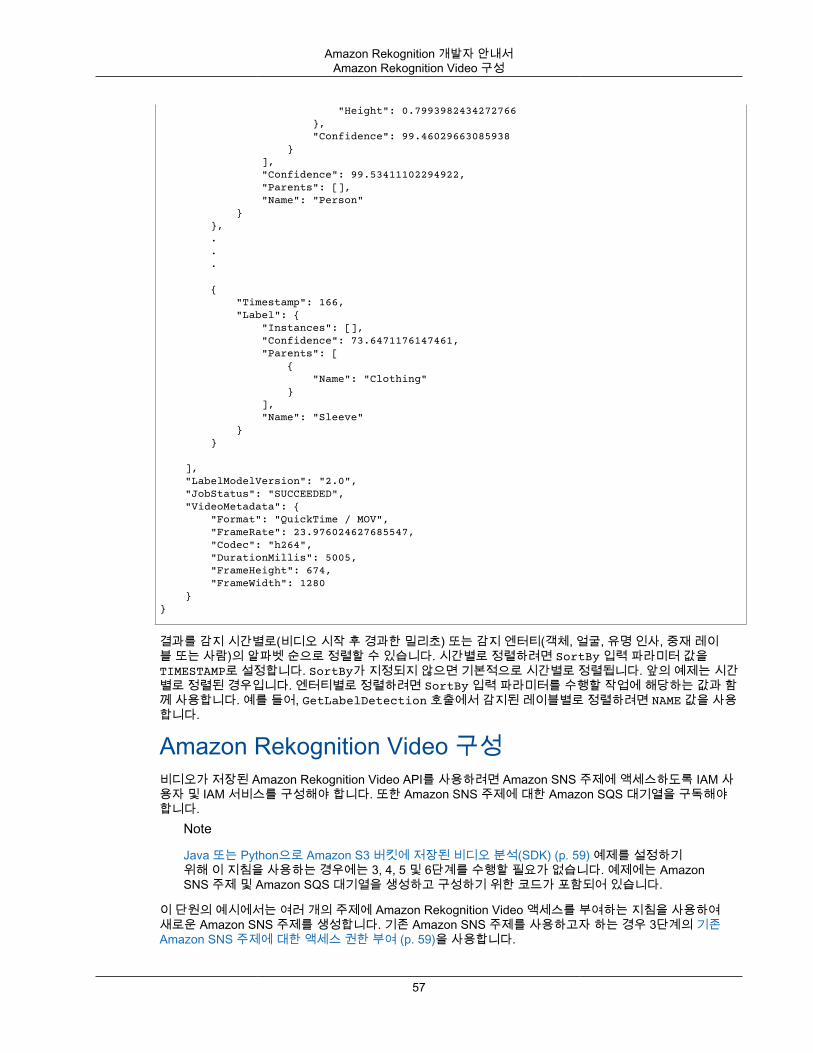
Amazon Rekognition 개발자 안내서Amazon Rekognition Video 구성
"Height": 0.7993982434272766 }, "Confidence": 99.46029663085938 } ], "Confidence": 99.53411102294922, "Parents": [], "Name": "Person" } }, . . .
{ "Timestamp": 166, "Label": { "Instances": [], "Confidence": 73.6471176147461, "Parents": [ { "Name": "Clothing" } ], "Name": "Sleeve" } } ], "LabelModelVersion": "2.0", "JobStatus": "SUCCEEDED", "VideoMetadata": { "Format": "QuickTime / MOV", "FrameRate": 23.976024627685547, "Codec": "h264", "DurationMillis": 5005, "FrameHeight": 674, "FrameWidth": 1280 }}
결과를 감지 시간별로(비디오 시작 후 경과한 밀리초) 또는 감지 엔터티(객체, 얼굴, 유명 인사, 중재 레이블 또는 사람)의 알파벳 순으로 정렬할 수 있습니다. 시간별로 정렬하려면 SortBy 입력 파라미터 값을TIMESTAMP로 설정합니다. SortBy가 지정되지 않으면 기본적으로 시간별로 정렬됩니다. 앞의 예제는 시간별로 정렬된 경우입니다. 엔터티별로 정렬하려면 SortBy 입력 파라미터를 수행할 작업에 해당하는 값과 함께 사용합니다. 예를 들어, GetLabelDetection 호출에서 감지된 레이블별로 정렬하려면 NAME 값을 사용합니다.
Amazon Rekognition Video 구성비디오가 저장된 Amazon Rekognition Video API를 사용하려면 Amazon SNS 주제에 액세스하도록 IAM 사용자 및 IAM 서비스를 구성해야 합니다. 또한 Amazon SNS 주제에 대한 Amazon SQS 대기열을 구독해야합니다.
Note
Java 또는 Python으로 Amazon S3 버킷에 저장된 비디오 분석(SDK) (p. 59) 예제를 설정하기위해 이 지침을 사용하는 경우에는 3, 4, 5 및 6단계를 수행할 필요가 없습니다. 예제에는 AmazonSNS 주제 및 Amazon SQS 대기열을 생성하고 구성하기 위한 코드가 포함되어 있습니다.
이 단원의 예시에서는 여러 개의 주제에 Amazon Rekognition Video 액세스를 부여하는 지침을 사용하여새로운 Amazon SNS 주제를 생성합니다. 기존 Amazon SNS 주제를 사용하고자 하는 경우 3단계의 기존Amazon SNS 주제에 대한 액세스 권한 부여 (p. 59)을 사용합니다.
57
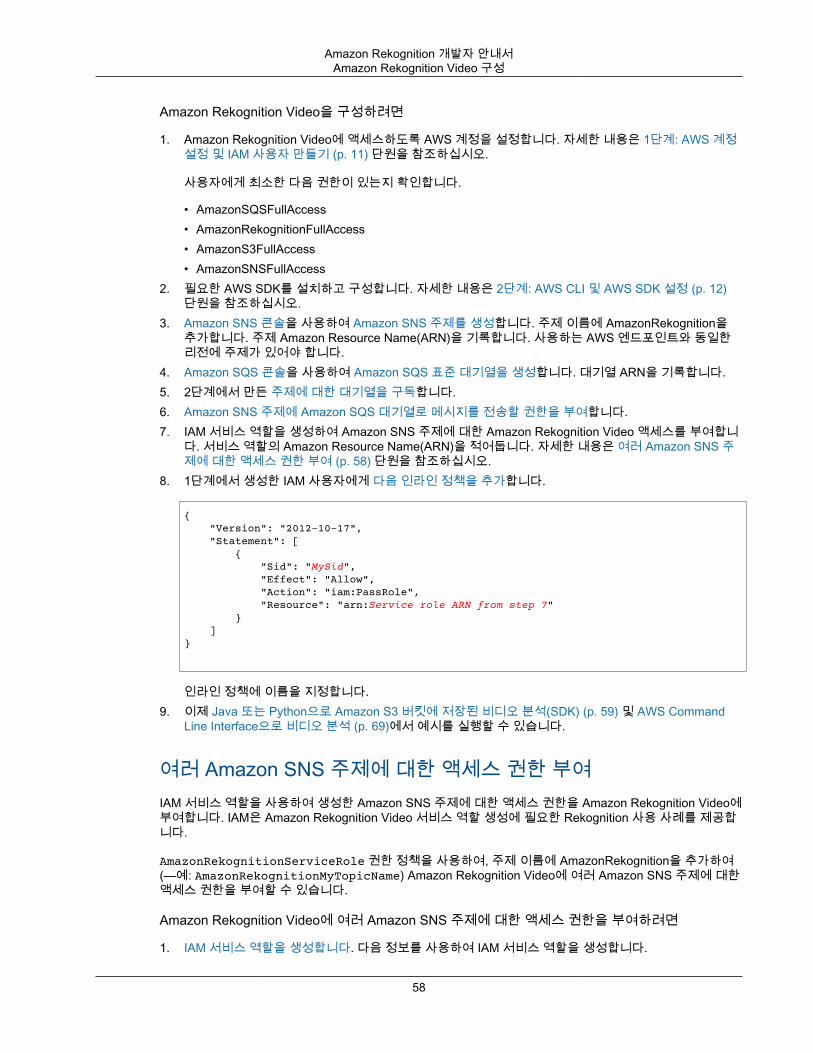
Amazon Rekognition 개발자 안내서Amazon Rekognition Video 구성
Amazon Rekognition Video을 구성하려면
1. Amazon Rekognition Video에 액세스하도록 AWS 계정을 설정합니다. 자세한 내용은 1단계: AWS 계정설정 및 IAM 사용자 만들기 (p. 11) 단원을 참조하십시오.
사용자에게 최소한 다음 권한이 있는지 확인합니다.
• AmazonSQSFullAccess• AmazonRekognitionFullAccess• AmazonS3FullAccess• AmazonSNSFullAccess
2. 필요한 AWS SDK를 설치하고 구성합니다. 자세한 내용은 2단계: AWS CLI 및 AWS SDK 설정 (p. 12)단원을 참조하십시오.
3. Amazon SNS 콘솔을 사용하여 Amazon SNS 주제를 생성합니다. 주제 이름에 AmazonRekognition을추가합니다. 주제 Amazon Resource Name(ARN)을 기록합니다. 사용하는 AWS 엔드포인트와 동일한리전에 주제가 있어야 합니다.
4. Amazon SQS 콘솔을 사용하여 Amazon SQS 표준 대기열을 생성합니다. 대기열 ARN을 기록합니다.5. 2단계에서 만든 주제에 대한 대기열을 구독합니다.6. Amazon SNS 주제에 Amazon SQS 대기열로 메시지를 전송할 권한을 부여합니다.7. IAM 서비스 역할을 생성하여 Amazon SNS 주제에 대한 Amazon Rekognition Video 액세스를 부여합니
다. 서비스 역할의 Amazon Resource Name(ARN)을 적어둡니다. 자세한 내용은 여러 Amazon SNS 주제에 대한 액세스 권한 부여 (p. 58) 단원을 참조하십시오.
8. 1단계에서 생성한 IAM 사용자에게 다음 인라인 정책을 추가합니다.
{ "Version": "2012-10-17", "Statement": [ { "Sid": "MySid", "Effect": "Allow", "Action": "iam:PassRole", "Resource": "arn:Service role ARN from step 7" } ]}
인라인 정책에 이름을 지정합니다.9. 이제 Java 또는 Python으로 Amazon S3 버킷에 저장된 비디오 분석(SDK) (p. 59) 및 AWS Command
Line Interface으로 비디오 분석 (p. 69)에서 예시를 실행할 수 있습니다.
여러 Amazon SNS 주제에 대한 액세스 권한 부여IAM 서비스 역할을 사용하여 생성한 Amazon SNS 주제에 대한 액세스 권한을 Amazon Rekognition Video에부여합니다. IAM은 Amazon Rekognition Video 서비스 역할 생성에 필요한 Rekognition 사용 사례를 제공합니다.
AmazonRekognitionServiceRole 권한 정책을 사용하여, 주제 이름에 AmazonRekognition을 추가하여(—예: AmazonRekognitionMyTopicName) Amazon Rekognition Video에 여러 Amazon SNS 주제에 대한액세스 권한을 부여할 수 있습니다.
Amazon Rekognition Video에 여러 Amazon SNS 주제에 대한 액세스 권한을 부여하려면
1. IAM 서비스 역할을 생성합니다. 다음 정보를 사용하여 IAM 서비스 역할을 생성합니다.
58
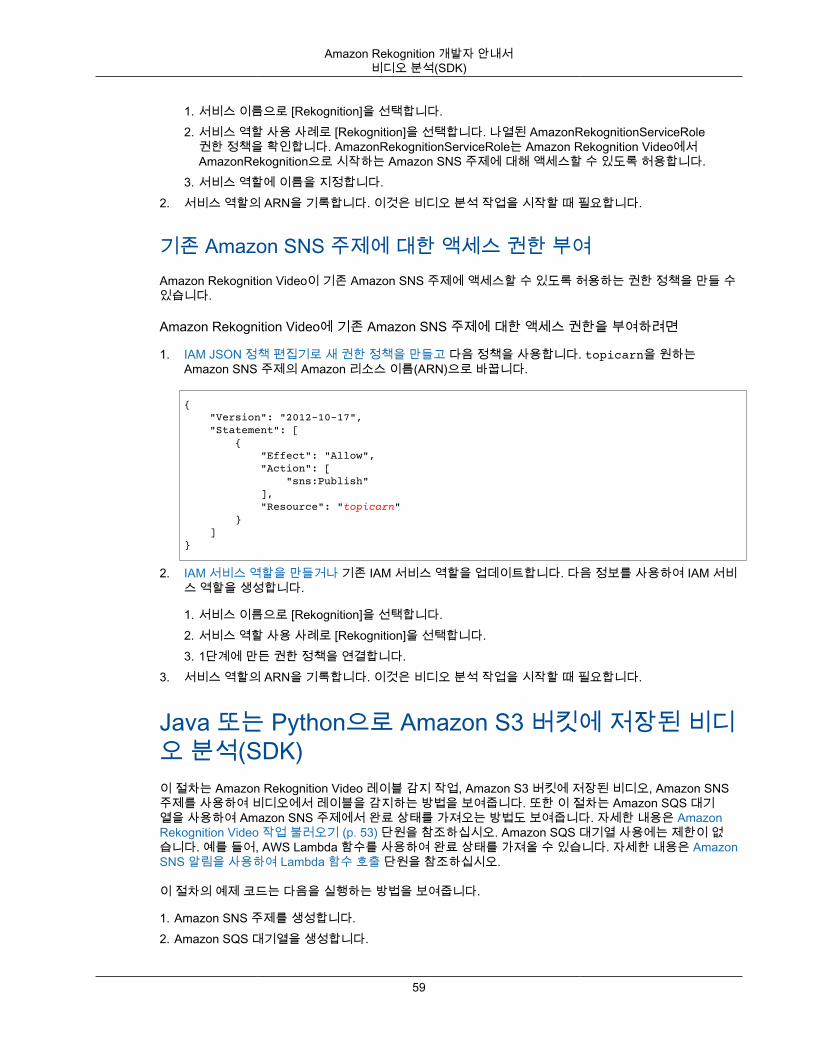
Amazon Rekognition 개발자 안내서비디오 분석(SDK)
1. 서비스 이름으로 [Rekognition]을 선택합니다.2. 서비스 역할 사용 사례로 [Rekognition]을 선택합니다. 나열된 AmazonRekognitionServiceRole
권한 정책을 확인합니다. AmazonRekognitionServiceRole는 Amazon Rekognition Video에서AmazonRekognition으로 시작하는 Amazon SNS 주제에 대해 액세스할 수 있도록 허용합니다.
3. 서비스 역할에 이름을 지정합니다.2. 서비스 역할의 ARN을 기록합니다. 이것은 비디오 분석 작업을 시작할 때 필요합니다.
기존 Amazon SNS 주제에 대한 액세스 권한 부여Amazon Rekognition Video이 기존 Amazon SNS 주제에 액세스할 수 있도록 허용하는 권한 정책을 만들 수있습니다.
Amazon Rekognition Video에 기존 Amazon SNS 주제에 대한 액세스 권한을 부여하려면
1. IAM JSON 정책 편집기로 새 권한 정책을 만들고 다음 정책을 사용합니다. topicarn을 원하는Amazon SNS 주제의 Amazon 리소스 이름(ARN)으로 바꿉니다.
{ "Version": "2012-10-17", "Statement": [ { "Effect": "Allow", "Action": [ "sns:Publish" ], "Resource": "topicarn" } ]}
2. IAM 서비스 역할을 만들거나 기존 IAM 서비스 역할을 업데이트합니다. 다음 정보를 사용하여 IAM 서비스 역할을 생성합니다.
1. 서비스 이름으로 [Rekognition]을 선택합니다.2. 서비스 역할 사용 사례로 [Rekognition]을 선택합니다.3. 1단계에 만든 권한 정책을 연결합니다.
3. 서비스 역할의 ARN을 기록합니다. 이것은 비디오 분석 작업을 시작할 때 필요합니다.
Java 또는 Python으로 Amazon S3 버킷에 저장된 비디오 분석(SDK)이 절차는 Amazon Rekognition Video 레이블 감지 작업, Amazon S3 버킷에 저장된 비디오, Amazon SNS주제를 사용하여 비디오에서 레이블을 감지하는 방법을 보여줍니다. 또한 이 절차는 Amazon SQS 대기열을 사용하여 Amazon SNS 주제에서 완료 상태를 가져오는 방법도 보여줍니다. 자세한 내용은 AmazonRekognition Video 작업 불러오기 (p. 53) 단원을 참조하십시오. Amazon SQS 대기열 사용에는 제한이 없습니다. 예를 들어, AWS Lambda 함수를 사용하여 완료 상태를 가져올 수 있습니다. 자세한 내용은 AmazonSNS 알림을 사용하여 Lambda 함수 호출 단원을 참조하십시오.
이 절차의 예제 코드는 다음을 실행하는 방법을 보여줍니다.
1. Amazon SNS 주제를 생성합니다.2. Amazon SQS 대기열을 생성합니다.
59
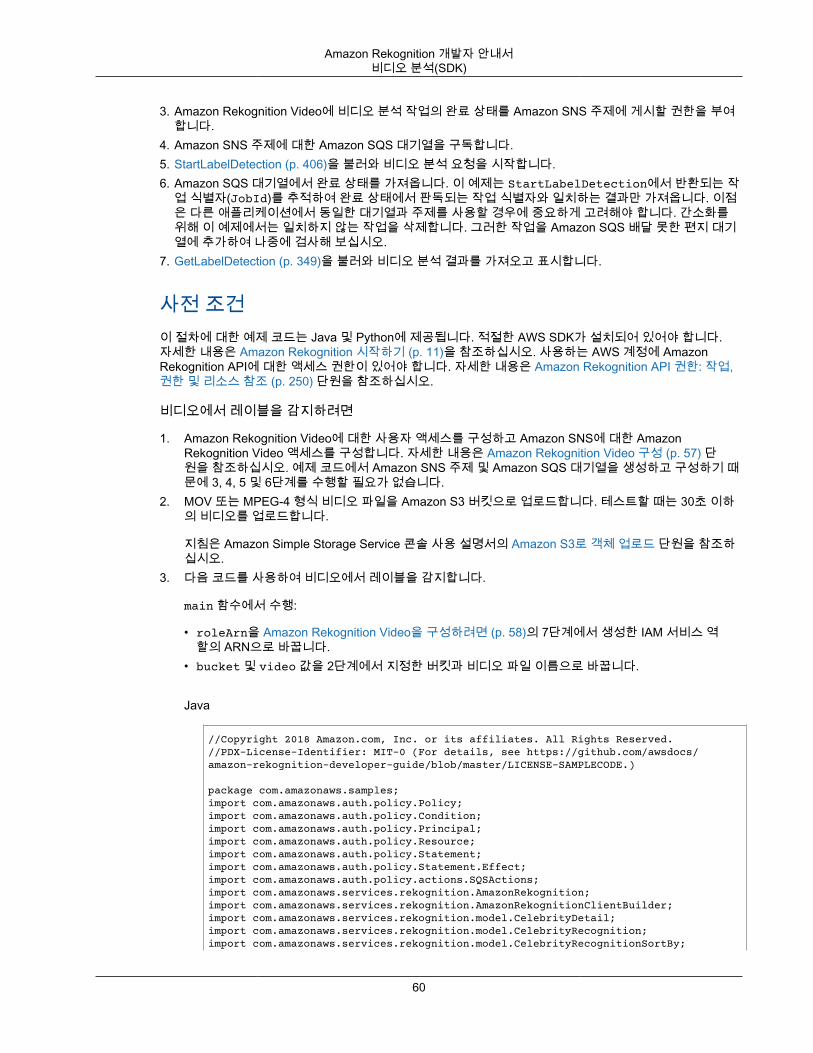
Amazon Rekognition 개발자 안내서비디오 분석(SDK)
3. Amazon Rekognition Video에 비디오 분석 작업의 완료 상태를 Amazon SNS 주제에 게시할 권한을 부여합니다.
4. Amazon SNS 주제에 대한 Amazon SQS 대기열을 구독합니다.5. StartLabelDetection (p. 406)을 불러와 비디오 분석 요청을 시작합니다.6. Amazon SQS 대기열에서 완료 상태를 가져옵니다. 이 예제는 StartLabelDetection에서 반환되는 작
업 식별자(JobId)를 추적하여 완료 상태에서 판독되는 작업 식별자와 일치하는 결과만 가져옵니다. 이점은 다른 애플리케이션에서 동일한 대기열과 주제를 사용할 경우에 중요하게 고려해야 합니다. 간소화를위해 이 예제에서는 일치하지 않는 작업을 삭제합니다. 그러한 작업을 Amazon SQS 배달 못한 편지 대기열에 추가하여 나중에 검사해 보십시오.
7. GetLabelDetection (p. 349)을 불러와 비디오 분석 결과를 가져오고 표시합니다.
사전 조건이 절차에 대한 예제 코드는 Java 및 Python에 제공됩니다. 적절한 AWS SDK가 설치되어 있어야 합니다.자세한 내용은 Amazon Rekognition 시작하기 (p. 11)을 참조하십시오. 사용하는 AWS 계정에 AmazonRekognition API에 대한 액세스 권한이 있어야 합니다. 자세한 내용은 Amazon Rekognition API 권한: 작업,권한 및 리소스 참조 (p. 250) 단원을 참조하십시오.
비디오에서 레이블을 감지하려면
1. Amazon Rekognition Video에 대한 사용자 액세스를 구성하고 Amazon SNS에 대한 AmazonRekognition Video 액세스를 구성합니다. 자세한 내용은 Amazon Rekognition Video 구성 (p. 57) 단원을 참조하십시오. 예제 코드에서 Amazon SNS 주제 및 Amazon SQS 대기열을 생성하고 구성하기 때문에 3, 4, 5 및 6단계를 수행할 필요가 없습니다.
2. MOV 또는 MPEG-4 형식 비디오 파일을 Amazon S3 버킷으로 업로드합니다. 테스트할 때는 30초 이하의 비디오를 업로드합니다.
지침은 Amazon Simple Storage Service 콘솔 사용 설명서의 Amazon S3로 객체 업로드 단원을 참조하십시오.
3. 다음 코드를 사용하여 비디오에서 레이블을 감지합니다.
main 함수에서 수행:
• roleArn을 Amazon Rekognition Video을 구성하려면 (p. 58)의 7단계에서 생성한 IAM 서비스 역할의 ARN으로 바꿉니다.
• bucket 및 video 값을 2단계에서 지정한 버킷과 비디오 파일 이름으로 바꿉니다.
Java
//Copyright 2018 Amazon.com, Inc. or its affiliates. All Rights Reserved.//PDX-License-Identifier: MIT-0 (For details, see https://github.com/awsdocs/amazon-rekognition-developer-guide/blob/master/LICENSE-SAMPLECODE.)
package com.amazonaws.samples;import com.amazonaws.auth.policy.Policy;import com.amazonaws.auth.policy.Condition;import com.amazonaws.auth.policy.Principal;import com.amazonaws.auth.policy.Resource;import com.amazonaws.auth.policy.Statement;import com.amazonaws.auth.policy.Statement.Effect;import com.amazonaws.auth.policy.actions.SQSActions;import com.amazonaws.services.rekognition.AmazonRekognition;import com.amazonaws.services.rekognition.AmazonRekognitionClientBuilder;import com.amazonaws.services.rekognition.model.CelebrityDetail;import com.amazonaws.services.rekognition.model.CelebrityRecognition;import com.amazonaws.services.rekognition.model.CelebrityRecognitionSortBy;
60
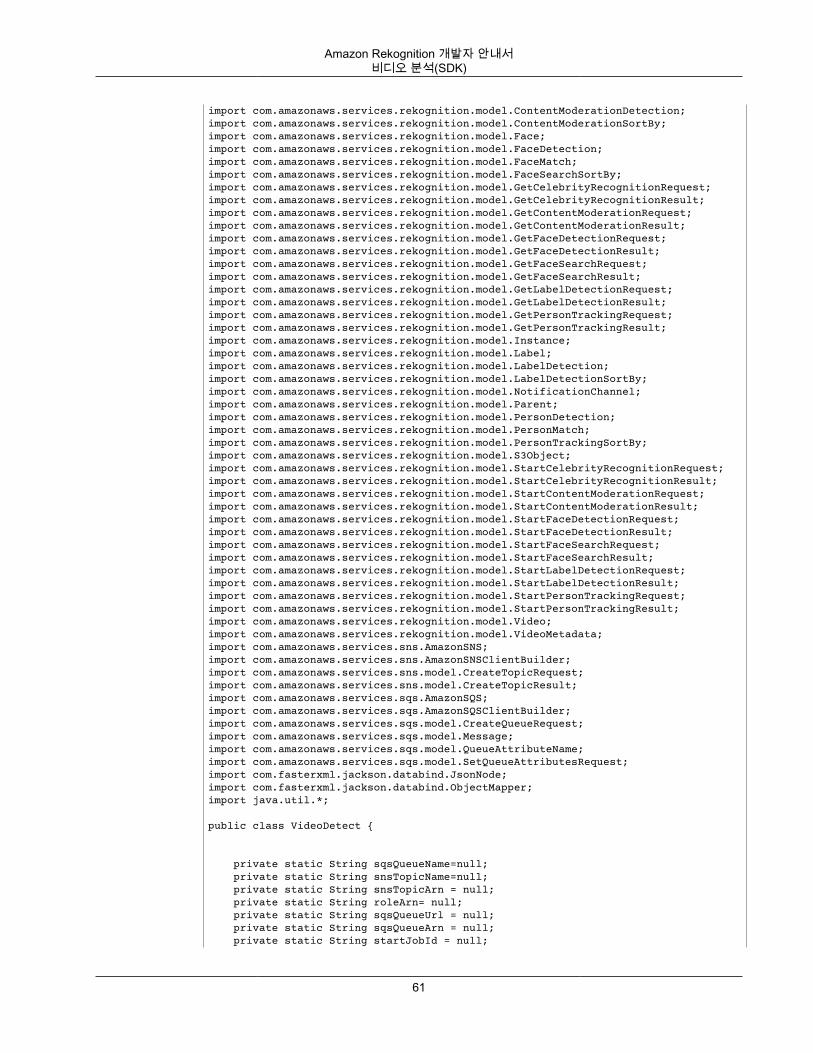
Amazon Rekognition 개발자 안내서비디오 분석(SDK)
import com.amazonaws.services.rekognition.model.ContentModerationDetection;import com.amazonaws.services.rekognition.model.ContentModerationSortBy;import com.amazonaws.services.rekognition.model.Face;import com.amazonaws.services.rekognition.model.FaceDetection;import com.amazonaws.services.rekognition.model.FaceMatch;import com.amazonaws.services.rekognition.model.FaceSearchSortBy;import com.amazonaws.services.rekognition.model.GetCelebrityRecognitionRequest;import com.amazonaws.services.rekognition.model.GetCelebrityRecognitionResult;import com.amazonaws.services.rekognition.model.GetContentModerationRequest;import com.amazonaws.services.rekognition.model.GetContentModerationResult;import com.amazonaws.services.rekognition.model.GetFaceDetectionRequest;import com.amazonaws.services.rekognition.model.GetFaceDetectionResult;import com.amazonaws.services.rekognition.model.GetFaceSearchRequest;import com.amazonaws.services.rekognition.model.GetFaceSearchResult;import com.amazonaws.services.rekognition.model.GetLabelDetectionRequest;import com.amazonaws.services.rekognition.model.GetLabelDetectionResult;import com.amazonaws.services.rekognition.model.GetPersonTrackingRequest;import com.amazonaws.services.rekognition.model.GetPersonTrackingResult;import com.amazonaws.services.rekognition.model.Instance;import com.amazonaws.services.rekognition.model.Label;import com.amazonaws.services.rekognition.model.LabelDetection;import com.amazonaws.services.rekognition.model.LabelDetectionSortBy;import com.amazonaws.services.rekognition.model.NotificationChannel;import com.amazonaws.services.rekognition.model.Parent;import com.amazonaws.services.rekognition.model.PersonDetection;import com.amazonaws.services.rekognition.model.PersonMatch;import com.amazonaws.services.rekognition.model.PersonTrackingSortBy;import com.amazonaws.services.rekognition.model.S3Object;import com.amazonaws.services.rekognition.model.StartCelebrityRecognitionRequest;import com.amazonaws.services.rekognition.model.StartCelebrityRecognitionResult;import com.amazonaws.services.rekognition.model.StartContentModerationRequest;import com.amazonaws.services.rekognition.model.StartContentModerationResult;import com.amazonaws.services.rekognition.model.StartFaceDetectionRequest;import com.amazonaws.services.rekognition.model.StartFaceDetectionResult;import com.amazonaws.services.rekognition.model.StartFaceSearchRequest;import com.amazonaws.services.rekognition.model.StartFaceSearchResult;import com.amazonaws.services.rekognition.model.StartLabelDetectionRequest;import com.amazonaws.services.rekognition.model.StartLabelDetectionResult;import com.amazonaws.services.rekognition.model.StartPersonTrackingRequest;import com.amazonaws.services.rekognition.model.StartPersonTrackingResult;import com.amazonaws.services.rekognition.model.Video;import com.amazonaws.services.rekognition.model.VideoMetadata;import com.amazonaws.services.sns.AmazonSNS;import com.amazonaws.services.sns.AmazonSNSClientBuilder;import com.amazonaws.services.sns.model.CreateTopicRequest;import com.amazonaws.services.sns.model.CreateTopicResult;import com.amazonaws.services.sqs.AmazonSQS;import com.amazonaws.services.sqs.AmazonSQSClientBuilder;import com.amazonaws.services.sqs.model.CreateQueueRequest;import com.amazonaws.services.sqs.model.Message;import com.amazonaws.services.sqs.model.QueueAttributeName;import com.amazonaws.services.sqs.model.SetQueueAttributesRequest;import com.fasterxml.jackson.databind.JsonNode;import com.fasterxml.jackson.databind.ObjectMapper;import java.util.*;
public class VideoDetect { private static String sqsQueueName=null; private static String snsTopicName=null; private static String snsTopicArn = null; private static String roleArn= null; private static String sqsQueueUrl = null; private static String sqsQueueArn = null; private static String startJobId = null;
61
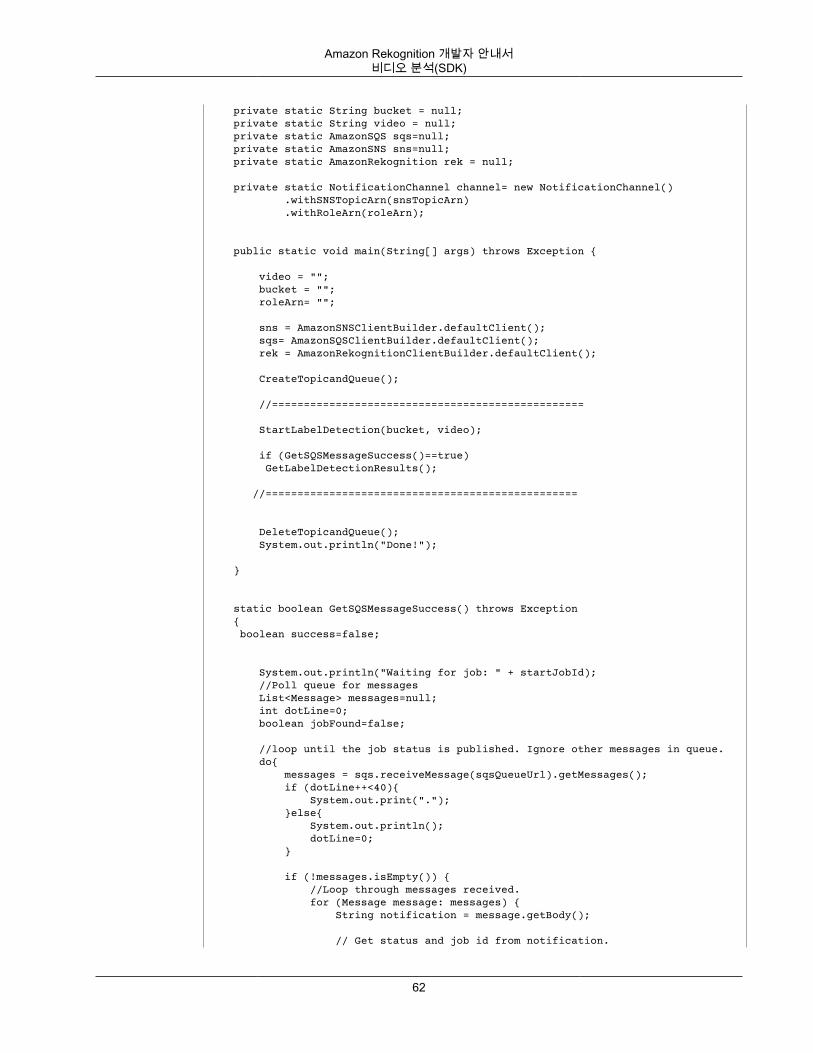
Amazon Rekognition 개발자 안내서비디오 분석(SDK)
private static String bucket = null; private static String video = null; private static AmazonSQS sqs=null; private static AmazonSNS sns=null; private static AmazonRekognition rek = null; private static NotificationChannel channel= new NotificationChannel() .withSNSTopicArn(snsTopicArn) .withRoleArn(roleArn);
public static void main(String[] args) throws Exception { video = ""; bucket = ""; roleArn= "";
sns = AmazonSNSClientBuilder.defaultClient(); sqs= AmazonSQSClientBuilder.defaultClient(); rek = AmazonRekognitionClientBuilder.defaultClient(); CreateTopicandQueue(); //================================================= StartLabelDetection(bucket, video);
if (GetSQSMessageSuccess()==true) GetLabelDetectionResults(); //=================================================
DeleteTopicandQueue(); System.out.println("Done!"); }
static boolean GetSQSMessageSuccess() throws Exception { boolean success=false;
System.out.println("Waiting for job: " + startJobId); //Poll queue for messages List<Message> messages=null; int dotLine=0; boolean jobFound=false;
//loop until the job status is published. Ignore other messages in queue. do{ messages = sqs.receiveMessage(sqsQueueUrl).getMessages(); if (dotLine++<40){ System.out.print("."); }else{ System.out.println(); dotLine=0; }
if (!messages.isEmpty()) { //Loop through messages received. for (Message message: messages) { String notification = message.getBody();
// Get status and job id from notification.
62
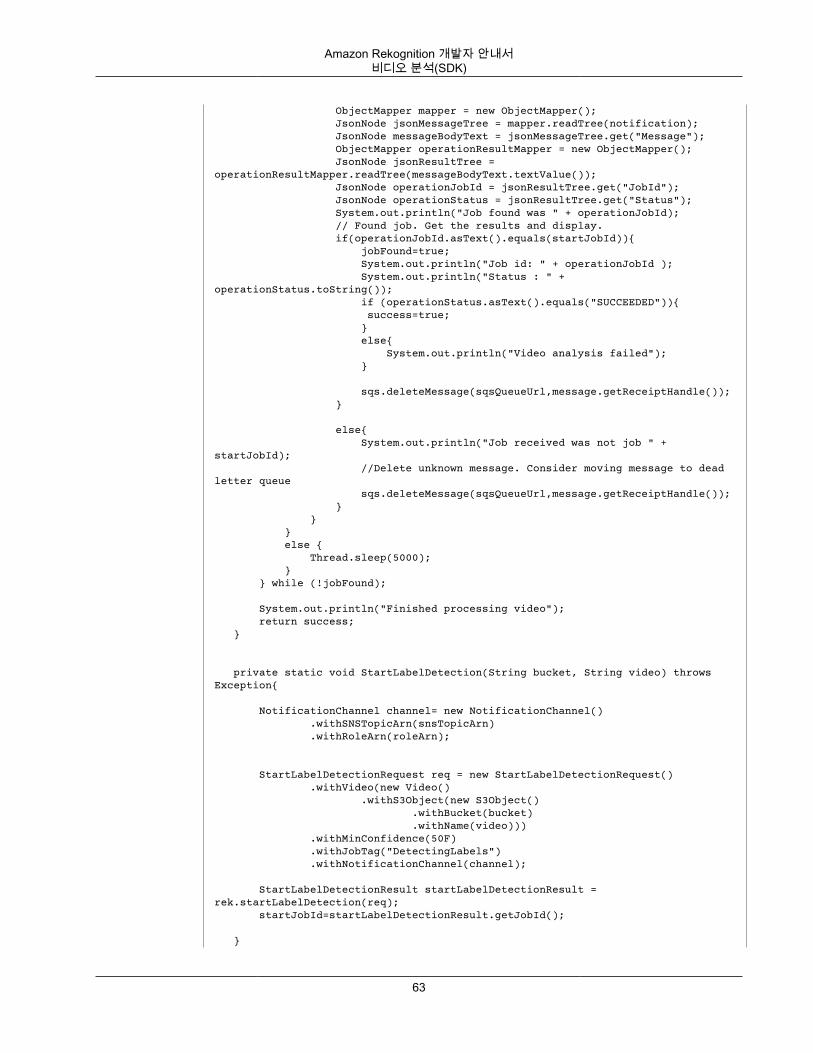
Amazon Rekognition 개발자 안내서비디오 분석(SDK)
ObjectMapper mapper = new ObjectMapper(); JsonNode jsonMessageTree = mapper.readTree(notification); JsonNode messageBodyText = jsonMessageTree.get("Message"); ObjectMapper operationResultMapper = new ObjectMapper(); JsonNode jsonResultTree = operationResultMapper.readTree(messageBodyText.textValue()); JsonNode operationJobId = jsonResultTree.get("JobId"); JsonNode operationStatus = jsonResultTree.get("Status"); System.out.println("Job found was " + operationJobId); // Found job. Get the results and display. if(operationJobId.asText().equals(startJobId)){ jobFound=true; System.out.println("Job id: " + operationJobId ); System.out.println("Status : " + operationStatus.toString()); if (operationStatus.asText().equals("SUCCEEDED")){ success=true; } else{ System.out.println("Video analysis failed"); }
sqs.deleteMessage(sqsQueueUrl,message.getReceiptHandle()); }
else{ System.out.println("Job received was not job " + startJobId); //Delete unknown message. Consider moving message to dead letter queue sqs.deleteMessage(sqsQueueUrl,message.getReceiptHandle()); } } } else { Thread.sleep(5000); } } while (!jobFound);
System.out.println("Finished processing video"); return success; }
private static void StartLabelDetection(String bucket, String video) throws Exception{ NotificationChannel channel= new NotificationChannel() .withSNSTopicArn(snsTopicArn) .withRoleArn(roleArn);
StartLabelDetectionRequest req = new StartLabelDetectionRequest() .withVideo(new Video() .withS3Object(new S3Object() .withBucket(bucket) .withName(video))) .withMinConfidence(50F) .withJobTag("DetectingLabels") .withNotificationChannel(channel);
StartLabelDetectionResult startLabelDetectionResult = rek.startLabelDetection(req); startJobId=startLabelDetectionResult.getJobId(); }
63
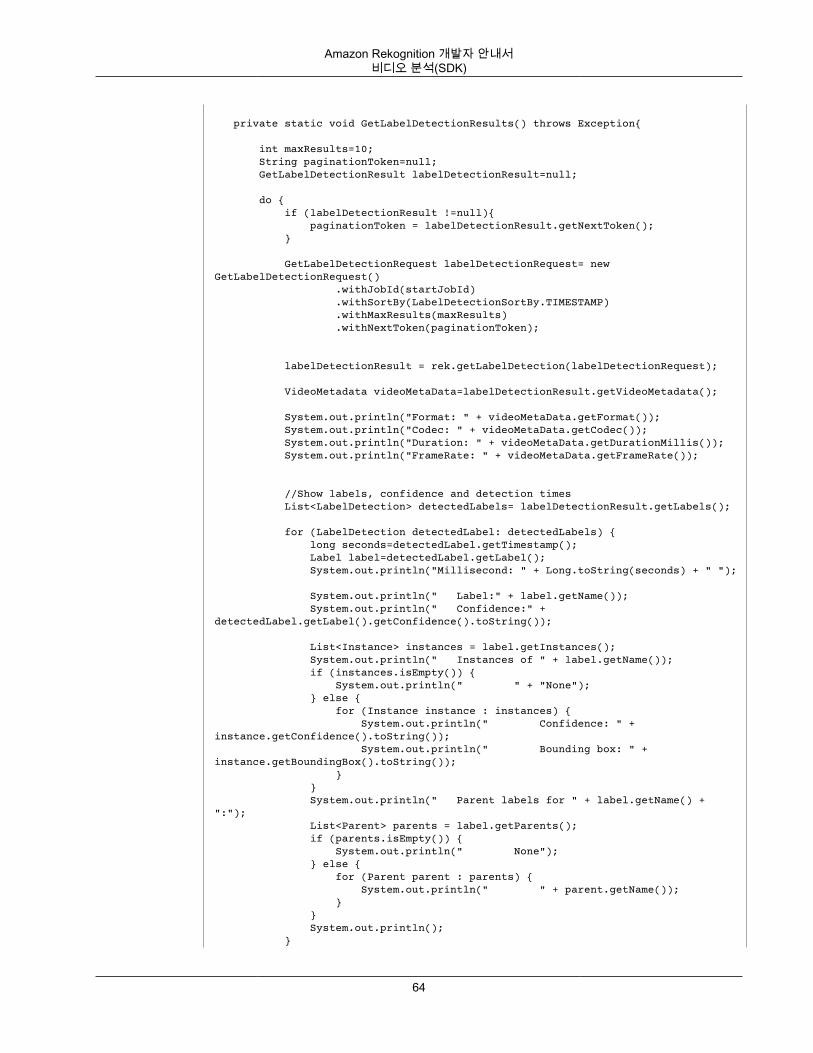
Amazon Rekognition 개발자 안내서비디오 분석(SDK)
private static void GetLabelDetectionResults() throws Exception{
int maxResults=10; String paginationToken=null; GetLabelDetectionResult labelDetectionResult=null;
do { if (labelDetectionResult !=null){ paginationToken = labelDetectionResult.getNextToken(); }
GetLabelDetectionRequest labelDetectionRequest= new GetLabelDetectionRequest() .withJobId(startJobId) .withSortBy(LabelDetectionSortBy.TIMESTAMP) .withMaxResults(maxResults) .withNextToken(paginationToken);
labelDetectionResult = rek.getLabelDetection(labelDetectionRequest);
VideoMetadata videoMetaData=labelDetectionResult.getVideoMetadata();
System.out.println("Format: " + videoMetaData.getFormat()); System.out.println("Codec: " + videoMetaData.getCodec()); System.out.println("Duration: " + videoMetaData.getDurationMillis()); System.out.println("FrameRate: " + videoMetaData.getFrameRate());
//Show labels, confidence and detection times List<LabelDetection> detectedLabels= labelDetectionResult.getLabels();
for (LabelDetection detectedLabel: detectedLabels) { long seconds=detectedLabel.getTimestamp(); Label label=detectedLabel.getLabel(); System.out.println("Millisecond: " + Long.toString(seconds) + " "); System.out.println(" Label:" + label.getName()); System.out.println(" Confidence:" + detectedLabel.getLabel().getConfidence().toString()); List<Instance> instances = label.getInstances(); System.out.println(" Instances of " + label.getName()); if (instances.isEmpty()) { System.out.println(" " + "None"); } else { for (Instance instance : instances) { System.out.println(" Confidence: " + instance.getConfidence().toString()); System.out.println(" Bounding box: " + instance.getBoundingBox().toString()); } } System.out.println(" Parent labels for " + label.getName() + ":"); List<Parent> parents = label.getParents(); if (parents.isEmpty()) { System.out.println(" None"); } else { for (Parent parent : parents) { System.out.println(" " + parent.getName()); } } System.out.println(); }
64
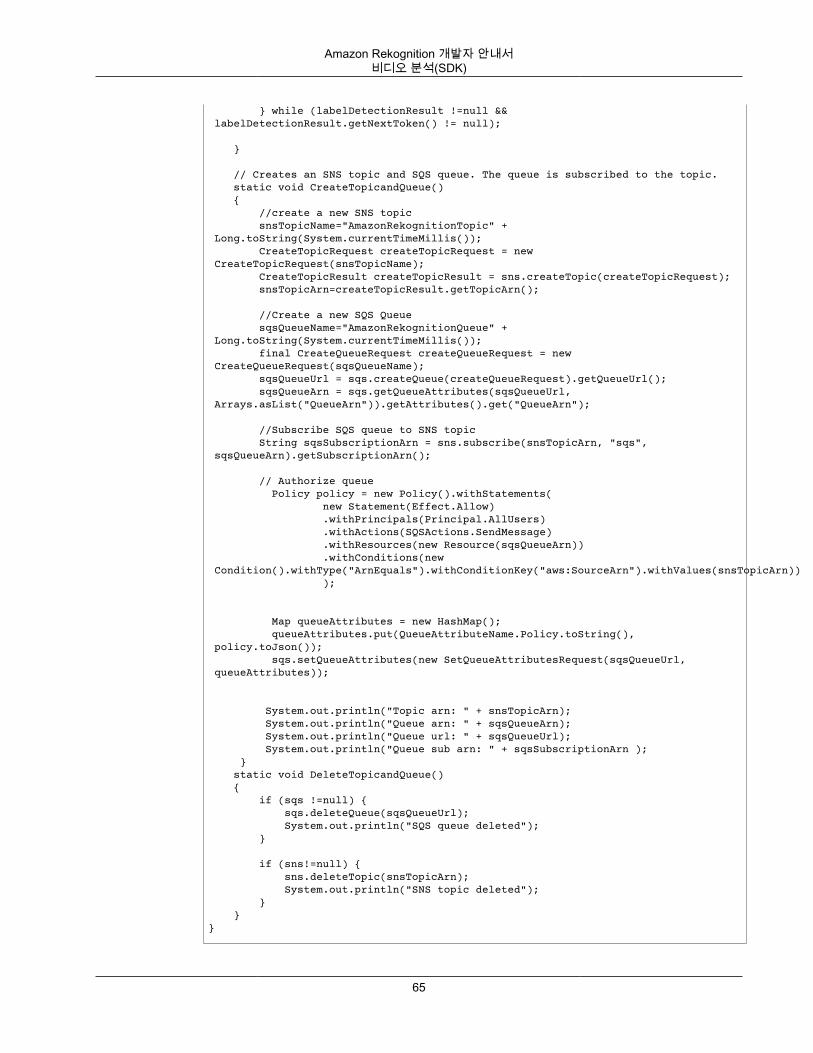
Amazon Rekognition 개발자 안내서비디오 분석(SDK)
} while (labelDetectionResult !=null && labelDetectionResult.getNextToken() != null);
}
// Creates an SNS topic and SQS queue. The queue is subscribed to the topic. static void CreateTopicandQueue() { //create a new SNS topic snsTopicName="AmazonRekognitionTopic" + Long.toString(System.currentTimeMillis()); CreateTopicRequest createTopicRequest = new CreateTopicRequest(snsTopicName); CreateTopicResult createTopicResult = sns.createTopic(createTopicRequest); snsTopicArn=createTopicResult.getTopicArn(); //Create a new SQS Queue sqsQueueName="AmazonRekognitionQueue" + Long.toString(System.currentTimeMillis()); final CreateQueueRequest createQueueRequest = new CreateQueueRequest(sqsQueueName); sqsQueueUrl = sqs.createQueue(createQueueRequest).getQueueUrl(); sqsQueueArn = sqs.getQueueAttributes(sqsQueueUrl, Arrays.asList("QueueArn")).getAttributes().get("QueueArn"); //Subscribe SQS queue to SNS topic String sqsSubscriptionArn = sns.subscribe(snsTopicArn, "sqs", sqsQueueArn).getSubscriptionArn(); // Authorize queue Policy policy = new Policy().withStatements( new Statement(Effect.Allow) .withPrincipals(Principal.AllUsers) .withActions(SQSActions.SendMessage) .withResources(new Resource(sqsQueueArn)) .withConditions(new Condition().withType("ArnEquals").withConditionKey("aws:SourceArn").withValues(snsTopicArn)) );
Map queueAttributes = new HashMap(); queueAttributes.put(QueueAttributeName.Policy.toString(), policy.toJson()); sqs.setQueueAttributes(new SetQueueAttributesRequest(sqsQueueUrl, queueAttributes));
System.out.println("Topic arn: " + snsTopicArn); System.out.println("Queue arn: " + sqsQueueArn); System.out.println("Queue url: " + sqsQueueUrl); System.out.println("Queue sub arn: " + sqsSubscriptionArn ); } static void DeleteTopicandQueue() { if (sqs !=null) { sqs.deleteQueue(sqsQueueUrl); System.out.println("SQS queue deleted"); } if (sns!=null) { sns.deleteTopic(snsTopicArn); System.out.println("SNS topic deleted"); } }}
65
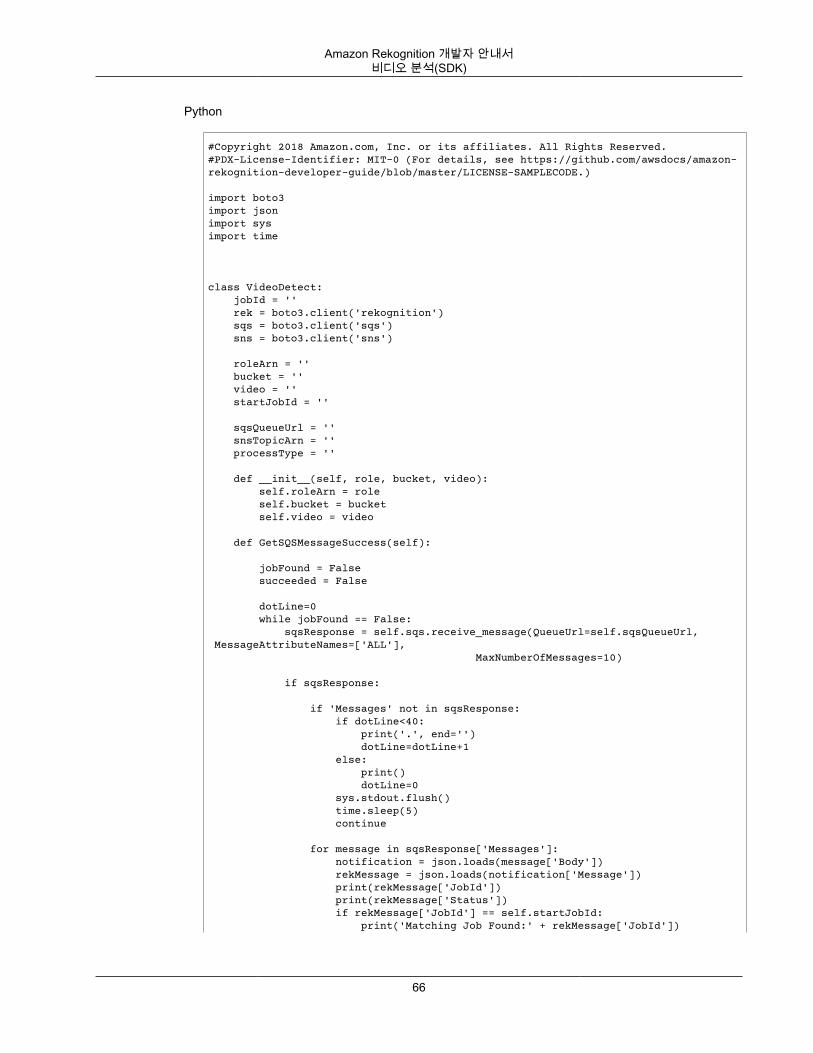
Amazon Rekognition 개발자 안내서비디오 분석(SDK)
Python
#Copyright 2018 Amazon.com, Inc. or its affiliates. All Rights Reserved.#PDX-License-Identifier: MIT-0 (For details, see https://github.com/awsdocs/amazon-rekognition-developer-guide/blob/master/LICENSE-SAMPLECODE.)
import boto3import jsonimport sysimport time
class VideoDetect: jobId = '' rek = boto3.client('rekognition') sqs = boto3.client('sqs') sns = boto3.client('sns') roleArn = '' bucket = '' video = '' startJobId = ''
sqsQueueUrl = '' snsTopicArn = '' processType = ''
def __init__(self, role, bucket, video): self.roleArn = role self.bucket = bucket self.video = video
def GetSQSMessageSuccess(self):
jobFound = False succeeded = False dotLine=0 while jobFound == False: sqsResponse = self.sqs.receive_message(QueueUrl=self.sqsQueueUrl, MessageAttributeNames=['ALL'], MaxNumberOfMessages=10)
if sqsResponse: if 'Messages' not in sqsResponse: if dotLine<40: print('.', end='') dotLine=dotLine+1 else: print() dotLine=0 sys.stdout.flush() time.sleep(5) continue
for message in sqsResponse['Messages']: notification = json.loads(message['Body']) rekMessage = json.loads(notification['Message']) print(rekMessage['JobId']) print(rekMessage['Status']) if rekMessage['JobId'] == self.startJobId: print('Matching Job Found:' + rekMessage['JobId'])
66
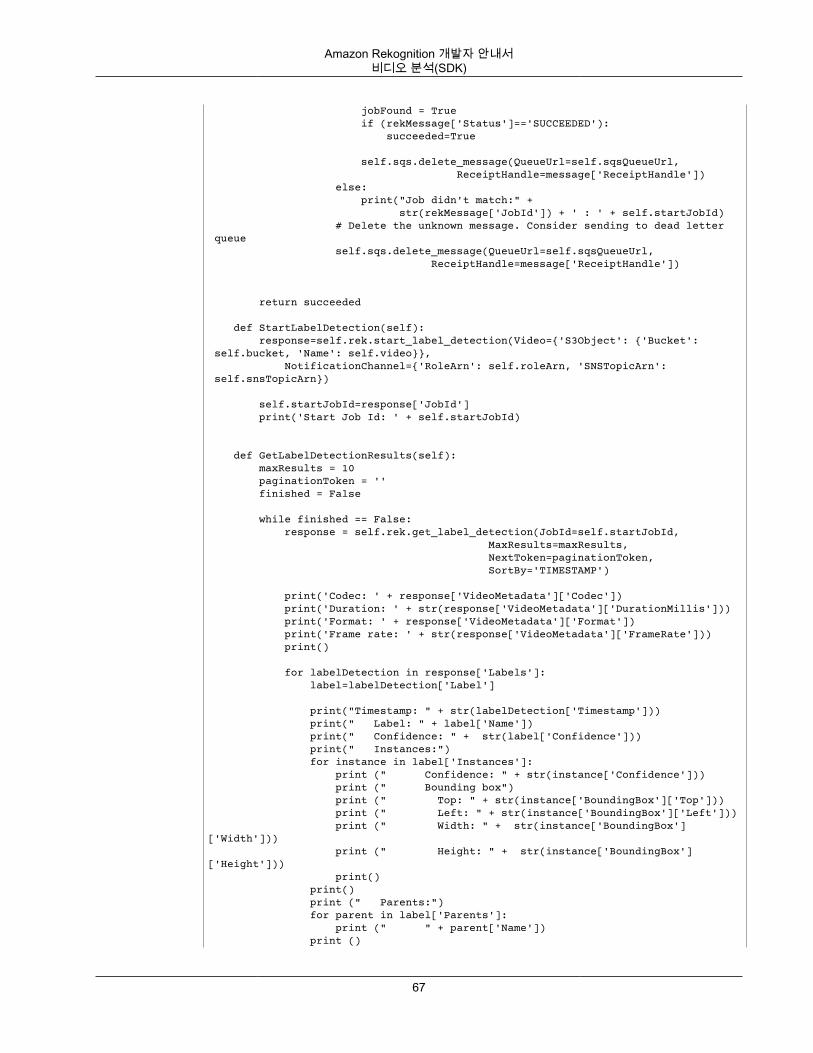
Amazon Rekognition 개발자 안내서비디오 분석(SDK)
jobFound = True if (rekMessage['Status']=='SUCCEEDED'): succeeded=True
self.sqs.delete_message(QueueUrl=self.sqsQueueUrl, ReceiptHandle=message['ReceiptHandle']) else: print("Job didn't match:" + str(rekMessage['JobId']) + ' : ' + self.startJobId) # Delete the unknown message. Consider sending to dead letter queue self.sqs.delete_message(QueueUrl=self.sqsQueueUrl, ReceiptHandle=message['ReceiptHandle'])
return succeeded
def StartLabelDetection(self): response=self.rek.start_label_detection(Video={'S3Object': {'Bucket': self.bucket, 'Name': self.video}}, NotificationChannel={'RoleArn': self.roleArn, 'SNSTopicArn': self.snsTopicArn})
self.startJobId=response['JobId'] print('Start Job Id: ' + self.startJobId)
def GetLabelDetectionResults(self): maxResults = 10 paginationToken = '' finished = False
while finished == False: response = self.rek.get_label_detection(JobId=self.startJobId, MaxResults=maxResults, NextToken=paginationToken, SortBy='TIMESTAMP')
print('Codec: ' + response['VideoMetadata']['Codec']) print('Duration: ' + str(response['VideoMetadata']['DurationMillis'])) print('Format: ' + response['VideoMetadata']['Format']) print('Frame rate: ' + str(response['VideoMetadata']['FrameRate'])) print()
for labelDetection in response['Labels']: label=labelDetection['Label']
print("Timestamp: " + str(labelDetection['Timestamp'])) print(" Label: " + label['Name']) print(" Confidence: " + str(label['Confidence'])) print(" Instances:") for instance in label['Instances']: print (" Confidence: " + str(instance['Confidence'])) print (" Bounding box") print (" Top: " + str(instance['BoundingBox']['Top'])) print (" Left: " + str(instance['BoundingBox']['Left'])) print (" Width: " + str(instance['BoundingBox']['Width'])) print (" Height: " + str(instance['BoundingBox']['Height'])) print() print() print (" Parents:") for parent in label['Parents']: print (" " + parent['Name']) print ()
67
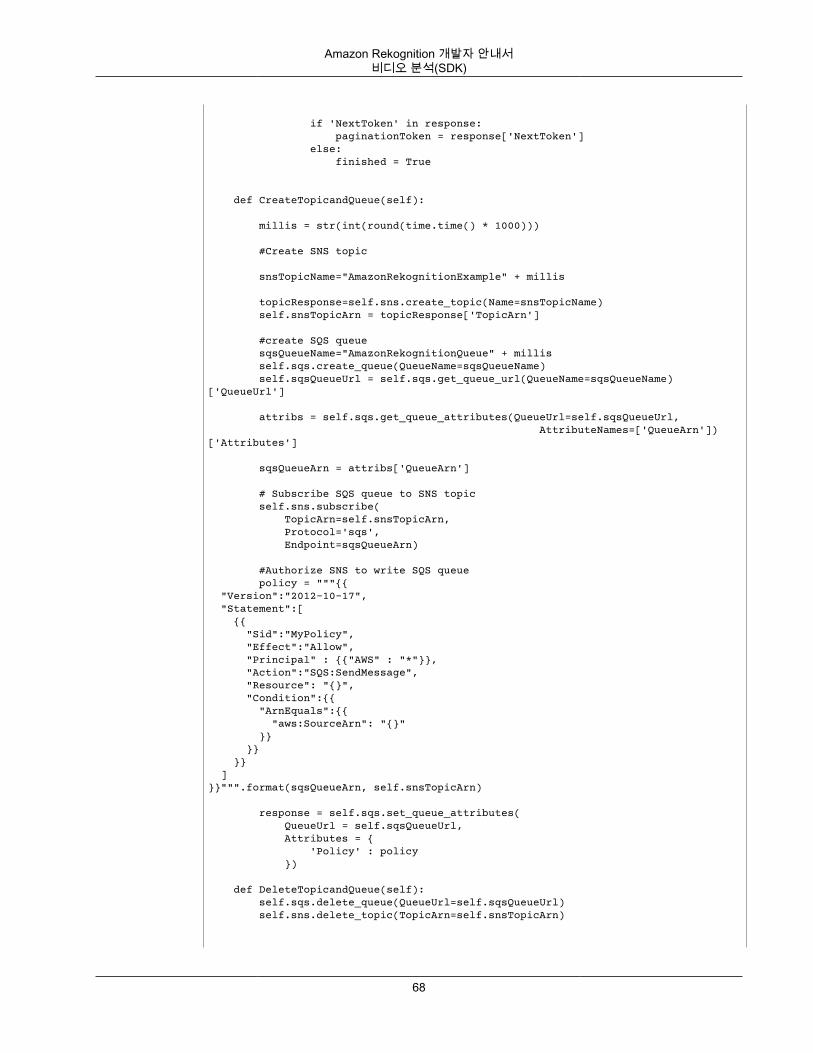
Amazon Rekognition 개발자 안내서비디오 분석(SDK)
if 'NextToken' in response: paginationToken = response['NextToken'] else: finished = True def CreateTopicandQueue(self): millis = str(int(round(time.time() * 1000)))
#Create SNS topic snsTopicName="AmazonRekognitionExample" + millis
topicResponse=self.sns.create_topic(Name=snsTopicName) self.snsTopicArn = topicResponse['TopicArn']
#create SQS queue sqsQueueName="AmazonRekognitionQueue" + millis self.sqs.create_queue(QueueName=sqsQueueName) self.sqsQueueUrl = self.sqs.get_queue_url(QueueName=sqsQueueName)['QueueUrl'] attribs = self.sqs.get_queue_attributes(QueueUrl=self.sqsQueueUrl, AttributeNames=['QueueArn'])['Attributes'] sqsQueueArn = attribs['QueueArn']
# Subscribe SQS queue to SNS topic self.sns.subscribe( TopicArn=self.snsTopicArn, Protocol='sqs', Endpoint=sqsQueueArn)
#Authorize SNS to write SQS queue policy = """{{ "Version":"2012-10-17", "Statement":[ {{ "Sid":"MyPolicy", "Effect":"Allow", "Principal" : {{"AWS" : "*"}}, "Action":"SQS:SendMessage", "Resource": "{}", "Condition":{{ "ArnEquals":{{ "aws:SourceArn": "{}" }} }} }} ]}}""".format(sqsQueueArn, self.snsTopicArn) response = self.sqs.set_queue_attributes( QueueUrl = self.sqsQueueUrl, Attributes = { 'Policy' : policy })
def DeleteTopicandQueue(self): self.sqs.delete_queue(QueueUrl=self.sqsQueueUrl) self.sns.delete_topic(TopicArn=self.snsTopicArn)
68
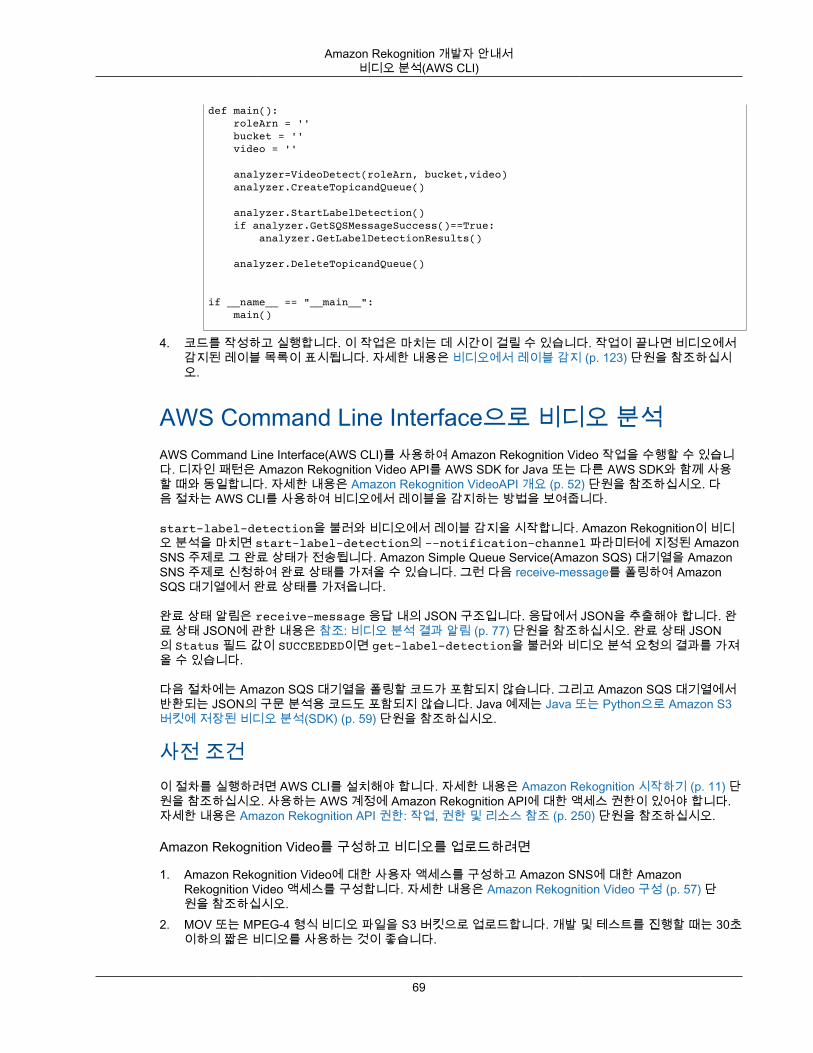
Amazon Rekognition 개발자 안내서비디오 분석(AWS CLI)
def main(): roleArn = '' bucket = '' video = ''
analyzer=VideoDetect(roleArn, bucket,video) analyzer.CreateTopicandQueue()
analyzer.StartLabelDetection() if analyzer.GetSQSMessageSuccess()==True: analyzer.GetLabelDetectionResults() analyzer.DeleteTopicandQueue()
if __name__ == "__main__": main()
4. 코드를 작성하고 실행합니다. 이 작업은 마치는 데 시간이 걸릴 수 있습니다. 작업이 끝나면 비디오에서감지된 레이블 목록이 표시됩니다. 자세한 내용은 비디오에서 레이블 감지 (p. 123) 단원을 참조하십시오.
AWS Command Line Interface으로 비디오 분석AWS Command Line Interface(AWS CLI)를 사용하여 Amazon Rekognition Video 작업을 수행할 수 있습니다. 디자인 패턴은 Amazon Rekognition Video API를 AWS SDK for Java 또는 다른 AWS SDK와 함께 사용할 때와 동일합니다. 자세한 내용은 Amazon Rekognition VideoAPI 개요 (p. 52) 단원을 참조하십시오. 다음 절차는 AWS CLI를 사용하여 비디오에서 레이블을 감지하는 방법을 보여줍니다.
start-label-detection을 불러와 비디오에서 레이블 감지을 시작합니다. Amazon Rekognition이 비디오 분석을 마치면 start-label-detection의 --notification-channel 파라미터에 지정된 AmazonSNS 주제로 그 완료 상태가 전송됩니다. Amazon Simple Queue Service(Amazon SQS) 대기열을 AmazonSNS 주제로 신청하여 완료 상태를 가져올 수 있습니다. 그런 다음 receive-message를 폴링하여 AmazonSQS 대기열에서 완료 상태를 가져옵니다.
완료 상태 알림은 receive-message 응답 내의 JSON 구조입니다. 응답에서 JSON을 추출해야 합니다. 완료 상태 JSON에 관한 내용은 참조: 비디오 분석 결과 알림 (p. 77) 단원을 참조하십시오. 완료 상태 JSON의 Status 필드 값이 SUCCEEDED이면 get-label-detection을 불러와 비디오 분석 요청의 결과를 가져올 수 있습니다.
다음 절차에는 Amazon SQS 대기열을 폴링할 코드가 포함되지 않습니다. 그리고 Amazon SQS 대기열에서반환되는 JSON의 구문 분석용 코드도 포함되지 않습니다. Java 예제는 Java 또는 Python으로 Amazon S3버킷에 저장된 비디오 분석(SDK) (p. 59) 단원을 참조하십시오.
사전 조건이 절차를 실행하려면 AWS CLI를 설치해야 합니다. 자세한 내용은 Amazon Rekognition 시작하기 (p. 11) 단원을 참조하십시오. 사용하는 AWS 계정에 Amazon Rekognition API에 대한 액세스 권한이 있어야 합니다.자세한 내용은 Amazon Rekognition API 권한: 작업, 권한 및 리소스 참조 (p. 250) 단원을 참조하십시오.
Amazon Rekognition Video를 구성하고 비디오를 업로드하려면
1. Amazon Rekognition Video에 대한 사용자 액세스를 구성하고 Amazon SNS에 대한 AmazonRekognition Video 액세스를 구성합니다. 자세한 내용은 Amazon Rekognition Video 구성 (p. 57) 단원을 참조하십시오.
2. MOV 또는 MPEG-4 형식 비디오 파일을 S3 버킷으로 업로드합니다. 개발 및 테스트를 진행할 때는 30초이하의 짧은 비디오를 사용하는 것이 좋습니다.
69
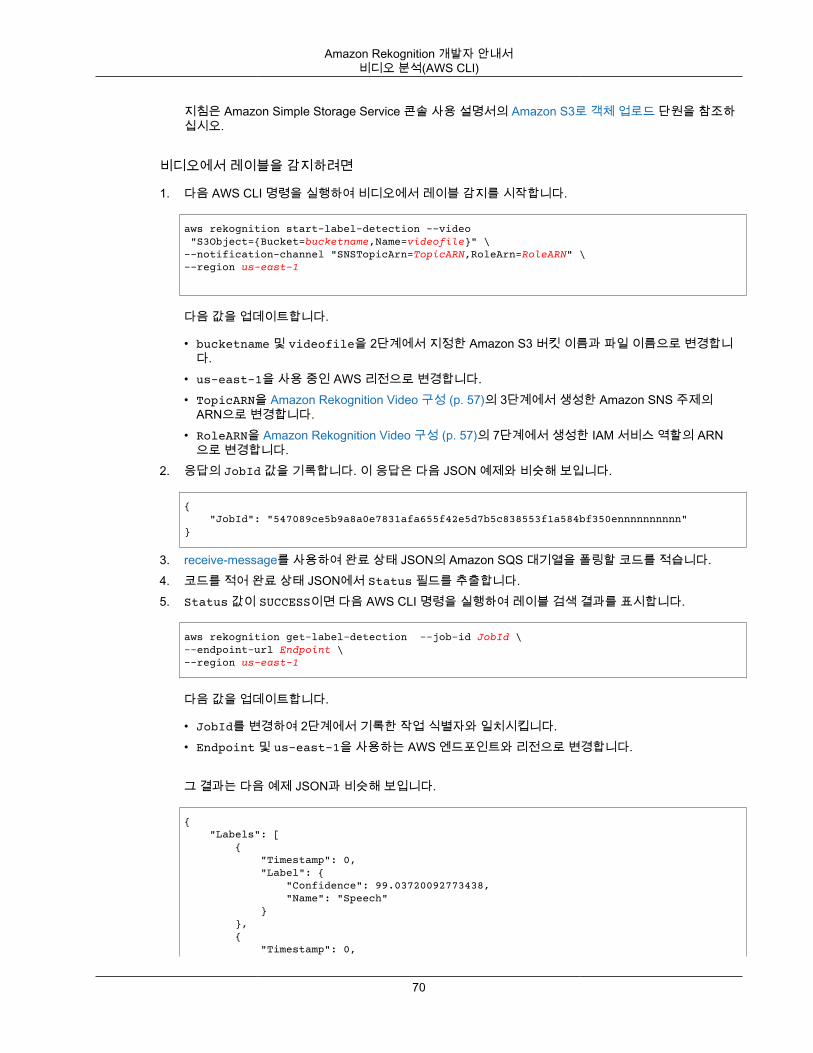
Amazon Rekognition 개발자 안내서비디오 분석(AWS CLI)
지침은 Amazon Simple Storage Service 콘솔 사용 설명서의 Amazon S3로 객체 업로드 단원을 참조하십시오.
비디오에서 레이블을 감지하려면
1. 다음 AWS CLI 명령을 실행하여 비디오에서 레이블 감지를 시작합니다.
aws rekognition start-label-detection --video "S3Object={Bucket=bucketname,Name=videofile}" \--notification-channel "SNSTopicArn=TopicARN,RoleArn=RoleARN" \--region us-east-1
다음 값을 업데이트합니다.
• bucketname 및 videofile을 2단계에서 지정한 Amazon S3 버킷 이름과 파일 이름으로 변경합니다.
• us-east-1을 사용 중인 AWS 리전으로 변경합니다.• TopicARN을 Amazon Rekognition Video 구성 (p. 57)의 3단계에서 생성한 Amazon SNS 주제의
ARN으로 변경합니다.• RoleARN을 Amazon Rekognition Video 구성 (p. 57)의 7단계에서 생성한 IAM 서비스 역할의 ARN
으로 변경합니다.2. 응답의 JobId 값을 기록합니다. 이 응답은 다음 JSON 예제와 비슷해 보입니다.
{ "JobId": "547089ce5b9a8a0e7831afa655f42e5d7b5c838553f1a584bf350ennnnnnnnnn"}
3. receive-message를 사용하여 완료 상태 JSON의 Amazon SQS 대기열을 폴링할 코드를 적습니다.4. 코드를 적어 완료 상태 JSON에서 Status 필드를 추출합니다.5. Status 값이 SUCCESS이면 다음 AWS CLI 명령을 실행하여 레이블 검색 결과를 표시합니다.
aws rekognition get-label-detection --job-id JobId \--endpoint-url Endpoint \--region us-east-1
다음 값을 업데이트합니다.
• JobId를 변경하여 2단계에서 기록한 작업 식별자와 일치시킵니다.• Endpoint 및 us-east-1을 사용하는 AWS 엔드포인트와 리전으로 변경합니다.
그 결과는 다음 예제 JSON과 비슷해 보입니다.
{ "Labels": [ { "Timestamp": 0, "Label": { "Confidence": 99.03720092773438, "Name": "Speech" } }, { "Timestamp": 0,
70

Amazon Rekognition 개발자 안내서자습서: Amazon Rekognition Lambda 함수 생성
"Label": { "Confidence": 71.6698989868164, "Name": "Pumpkin" } }, { "Timestamp": 0, "Label": { "Confidence": 71.6698989868164, "Name": "Squash" } }, { "Timestamp": 0, "Label": { "Confidence": 71.6698989868164, "Name": "Vegetable" } }, .......
자습서: Amazon Rekognition Lambda 함수 생성이 자습서에서는 Java Lambda 함수를 사용하여 레이블 감지를 위해 비디오 분석 작업의 결과를 가져오는 방법을 보여줍니다.
Amazon Rekognition Video 작업에 Lambda 함수를 사용할 수 있습니다. 예를 들어 다음 다이어그램은Amazon S3 버킷에 업로드되면 Lambda 함수를 사용하여 비디오 분석을 자동으로 시작하는 웹 사이트를 보여줍니다. Lambda 함수가 트리거되면 the section called “StartLabelDetection” (p. 406)을 호출하여 업로드된 비디오에서 레이블 감지를 시작합니다. Lambda를 사용하여 Amazon S3 버킷의 이벤트 알림을 처리하는방법에 대한 자세한 내용은 Amazon S3 이벤트에서 AWS Lambda 사용을 참조하십시오.
두 번째 Lambda 함수는 분석 완료 상태가 등록된 Amazon SNS 주제에 전송되면 트리거됩니다. 두 번째Lambda 함수는 the section called “GetLabelDetection” (p. 349)을 호출하여 분석 결과를 가져옵니다. 그러면 결과가 데이터베이스에 저장되어 웹 사이트에 표시될 준비가 됩니다. 이 두 번째 Lambda 함수가 이 자습서의 초점입니다.
이 자습서에서는 Amazon Rekognition Video가 등록된 Amazon SNS 주제로 비디오 분석의 완료 상태를 보내면 Lambda 함수가 트리거됩니다. 그런 다음 the section called “GetLabelDetection” (p. 349)을 호출하여 비디오 분석 결과를 수집합니다. 설명을 위해 이 자습서에서는 레이블 감지 결과를 CloudWatch 로그에 씁니다. 애플리케이션의 Lambda 함수에서 나중에 사용할 수 있도록 분석 결과를 저장해야 합니다. 예를 들어Amazon DynamoDB를 사용하여 분석 결과를 저장할 수 있습니다. 자세한 내용은 DynamoDB 사용 단원을참조하십시오.
다음 절차에서는 이 방법을 보여 줍니다.
• Amazon SNS 주제를 만들고 권한을 설정합니다.• AWS Management 콘솔을 사용하여 Lambda 함수를 만들고 Amazon SNS 주제를 구독합니다.• AWS Management 콘솔을 사용하여 Lambda 함수를 구성합니다.• AWS Toolkit for Eclipse 프로젝트에 샘플 코드를 추가하고 이를 Lambda 함수에 업로드합니다.
71

Amazon Rekognition 개발자 안내서자습서: Amazon Rekognition Lambda 함수 생성
• AWS CLI를 사용하여 Lambda 함수를 테스트합니다.
Note
자습서 전체에서 동일한 AWS 리전을 사용합니다.
사전 조건이 자습서에서는 사용자가 AWS Toolkit for Eclipse를 잘 알고 있는 것으로 가정합니다. 자세한 내용은 AWSToolkit for Eclipse를 참조하십시오.
SNS 주제 생성Amazon Rekognition Video 비디오 분석 작업의 완료 상태는 Amazon SNS 주제에 전송됩니다. 이 절차에서는 Amazon SNS 주제와, Amazon Rekognition Video에 Amazon SNS 주제에 대한 액세스 권한을 부여하는IAM 서비스 역할을 생성합니다. 자세한 내용은 Amazon Rekognition Video 작업 불러오기 (p. 53) 단원을참조하십시오.
Amazon SNS 주제를 생성하려면
1. 아직 생성하지 않았다면 Amazon Rekognition Video에 Amazon SNS 주제에 대한 액세스 권한을 부여할 IAM 서비스 역할을 생성합니다. Amazon 리소스 이름(ARN)을 적어 둡니다. 자세한 내용은 여러Amazon SNS 주제에 대한 액세스 권한 부여 (p. 58) 단원을 참조하십시오.
2. Amazon SNS 콘솔을 사용하여 Amazon SNS 주제를 생성합니다. 주제 이름만 지정하면 됩니다. 주제 이름에 AmazonRekognition을 추가합니다. 주제 ARN을 기록합니다.
Lambda 함수 생성AWS Management 콘솔을 사용하여 Lambda 함수를 생성합니다. 그런 다음 AWS Toolkit for Eclipse 프로젝트를 사용하여 AWS Lambda에 Lambda 함수 패키지를 업로드합니다. AWS Toolkit for Eclipse에 Lambda 함수를 생성할 수도 있습니다. 자세한 내용은 자습서: AWS Lambda 함수 생성, 업로드 및 호출 방법 단원을 참조하십시오.
Lambda 함수를 생성하려면
1. https://console.aws.amazon.com/lambda/의 AWS Management Console에 로그인하고 AWS Lambda콘솔을 엽니다.
2. [Create function]을 선택합니다.3. [Author from scratch]를 선택합니다.4. 함수 이름에 함수의 이름을 입력합니다.5. 런타임에서 Java 8을 선택합니다.6. Choose or create an execution role(실행 역할 선택 또는 생성)을 선택합니다.7. Execution role(실행 역할)에서 Create a new role with basic Lambda permissions(기본 Lambda 권한을
가진 새 역할 생성)를 선택합니다.8. 기본 정보 섹션의 맨 아래에 표시되는 새 역할의 이름을 확인합니다.9. [Create function]을 선택합니다.
Lambda 함수 구성Lambda 함수를 생성한 후 SNS 주제 생성 (p. 72)에서 생성하는 Amazon SNS 주제에 의해 트리거되도록구성합니다. Lambda 함수의 제한 시간 및 메모리 요구 사항도 조정합니다.
72
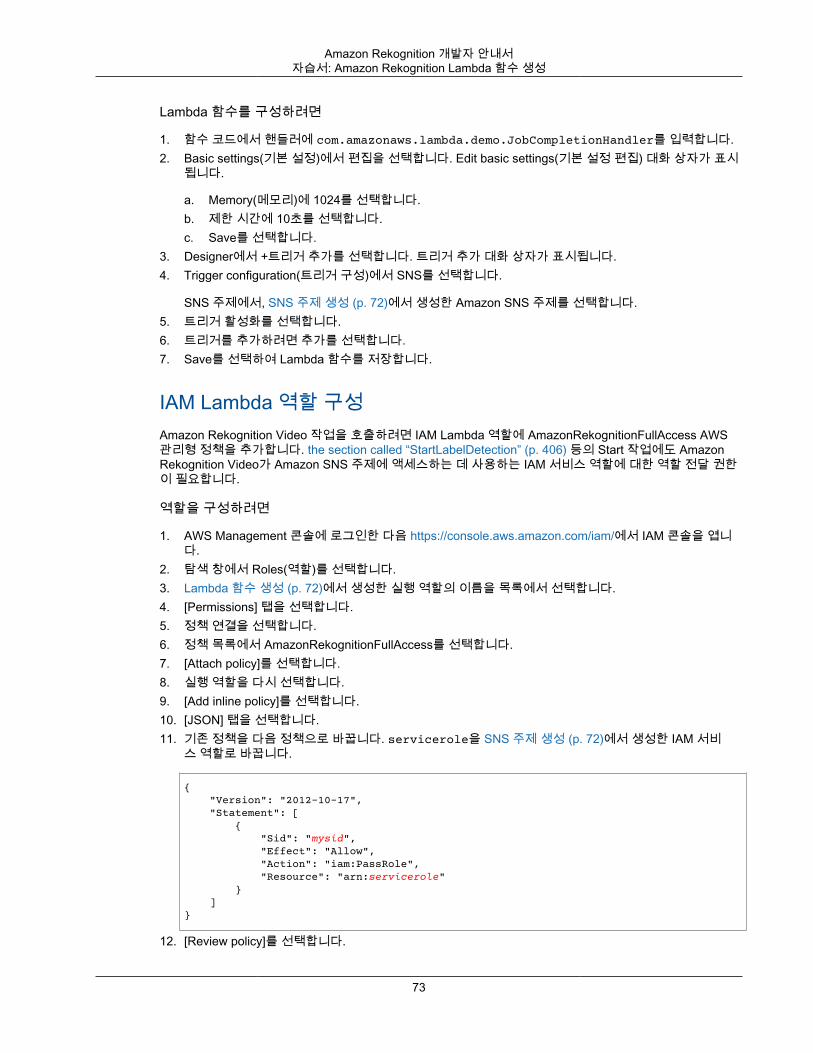
Amazon Rekognition 개발자 안내서자습서: Amazon Rekognition Lambda 함수 생성
Lambda 함수를 구성하려면
1. 함수 코드에서 핸들러에 com.amazonaws.lambda.demo.JobCompletionHandler를 입력합니다.2. Basic settings(기본 설정)에서 편집을 선택합니다. Edit basic settings(기본 설정 편집) 대화 상자가 표시
됩니다.
a. Memory(메모리)에 1024를 선택합니다.b. 제한 시간에 10초를 선택합니다.c. Save를 선택합니다.
3. Designer에서 +트리거 추가를 선택합니다. 트리거 추가 대화 상자가 표시됩니다.4. Trigger configuration(트리거 구성)에서 SNS를 선택합니다.
SNS 주제에서, SNS 주제 생성 (p. 72)에서 생성한 Amazon SNS 주제를 선택합니다.5. 트리거 활성화를 선택합니다.6. 트리거를 추가하려면 추가를 선택합니다.7. Save를 선택하여 Lambda 함수를 저장합니다.
IAM Lambda 역할 구성Amazon Rekognition Video 작업을 호출하려면 IAM Lambda 역할에 AmazonRekognitionFullAccess AWS관리형 정책을 추가합니다. the section called “StartLabelDetection” (p. 406) 등의 Start 작업에도 AmazonRekognition Video가 Amazon SNS 주제에 액세스하는 데 사용하는 IAM 서비스 역할에 대한 역할 전달 권한이 필요합니다.
역할을 구성하려면
1. AWS Management 콘솔에 로그인한 다음 https://console.aws.amazon.com/iam/에서 IAM 콘솔을 엽니다.
2. 탐색 창에서 Roles(역할)를 선택합니다.3. Lambda 함수 생성 (p. 72)에서 생성한 실행 역할의 이름을 목록에서 선택합니다.4. [Permissions] 탭을 선택합니다.5. 정책 연결을 선택합니다.6. 정책 목록에서 AmazonRekognitionFullAccess를 선택합니다.7. [Attach policy]를 선택합니다.8. 실행 역할을 다시 선택합니다.9. [Add inline policy]를 선택합니다.10. [JSON] 탭을 선택합니다.11. 기존 정책을 다음 정책으로 바꿉니다. servicerole을 SNS 주제 생성 (p. 72)에서 생성한 IAM 서비
스 역할로 바꿉니다.
{ "Version": "2012-10-17", "Statement": [ { "Sid": "mysid", "Effect": "Allow", "Action": "iam:PassRole", "Resource": "arn:servicerole" } ]}
12. [Review policy]를 선택합니다.
73
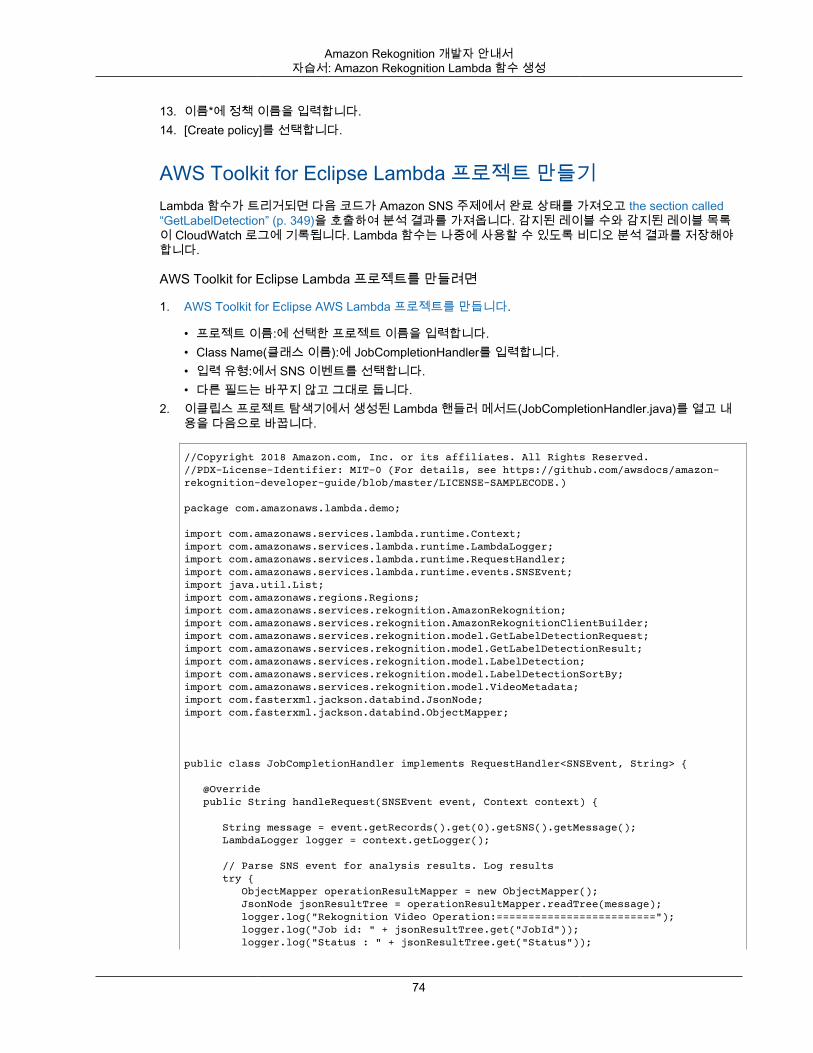
Amazon Rekognition 개발자 안내서자습서: Amazon Rekognition Lambda 함수 생성
13. 이름*에 정책 이름을 입력합니다.14. [Create policy]를 선택합니다.
AWS Toolkit for Eclipse Lambda 프로젝트 만들기Lambda 함수가 트리거되면 다음 코드가 Amazon SNS 주제에서 완료 상태를 가져오고 the section called“GetLabelDetection” (p. 349)을 호출하여 분석 결과를 가져옵니다. 감지된 레이블 수와 감지된 레이블 목록이 CloudWatch 로그에 기록됩니다. Lambda 함수는 나중에 사용할 수 있도록 비디오 분석 결과를 저장해야합니다.
AWS Toolkit for Eclipse Lambda 프로젝트를 만들려면
1. AWS Toolkit for Eclipse AWS Lambda 프로젝트를 만듭니다.
• 프로젝트 이름:에 선택한 프로젝트 이름을 입력합니다.• Class Name(클래스 이름):에 JobCompletionHandler를 입력합니다.• 입력 유형:에서 SNS 이벤트를 선택합니다.• 다른 필드는 바꾸지 않고 그대로 둡니다.
2. 이클립스 프로젝트 탐색기에서 생성된 Lambda 핸들러 메서드(JobCompletionHandler.java)를 열고 내용을 다음으로 바꿉니다.
//Copyright 2018 Amazon.com, Inc. or its affiliates. All Rights Reserved.//PDX-License-Identifier: MIT-0 (For details, see https://github.com/awsdocs/amazon-rekognition-developer-guide/blob/master/LICENSE-SAMPLECODE.)
package com.amazonaws.lambda.demo;
import com.amazonaws.services.lambda.runtime.Context;import com.amazonaws.services.lambda.runtime.LambdaLogger;import com.amazonaws.services.lambda.runtime.RequestHandler;import com.amazonaws.services.lambda.runtime.events.SNSEvent;import java.util.List;import com.amazonaws.regions.Regions;import com.amazonaws.services.rekognition.AmazonRekognition;import com.amazonaws.services.rekognition.AmazonRekognitionClientBuilder;import com.amazonaws.services.rekognition.model.GetLabelDetectionRequest;import com.amazonaws.services.rekognition.model.GetLabelDetectionResult;import com.amazonaws.services.rekognition.model.LabelDetection;import com.amazonaws.services.rekognition.model.LabelDetectionSortBy;import com.amazonaws.services.rekognition.model.VideoMetadata;import com.fasterxml.jackson.databind.JsonNode;import com.fasterxml.jackson.databind.ObjectMapper;
public class JobCompletionHandler implements RequestHandler<SNSEvent, String> {
@Override public String handleRequest(SNSEvent event, Context context) {
String message = event.getRecords().get(0).getSNS().getMessage(); LambdaLogger logger = context.getLogger();
// Parse SNS event for analysis results. Log results try { ObjectMapper operationResultMapper = new ObjectMapper(); JsonNode jsonResultTree = operationResultMapper.readTree(message); logger.log("Rekognition Video Operation:========================="); logger.log("Job id: " + jsonResultTree.get("JobId")); logger.log("Status : " + jsonResultTree.get("Status"));
74
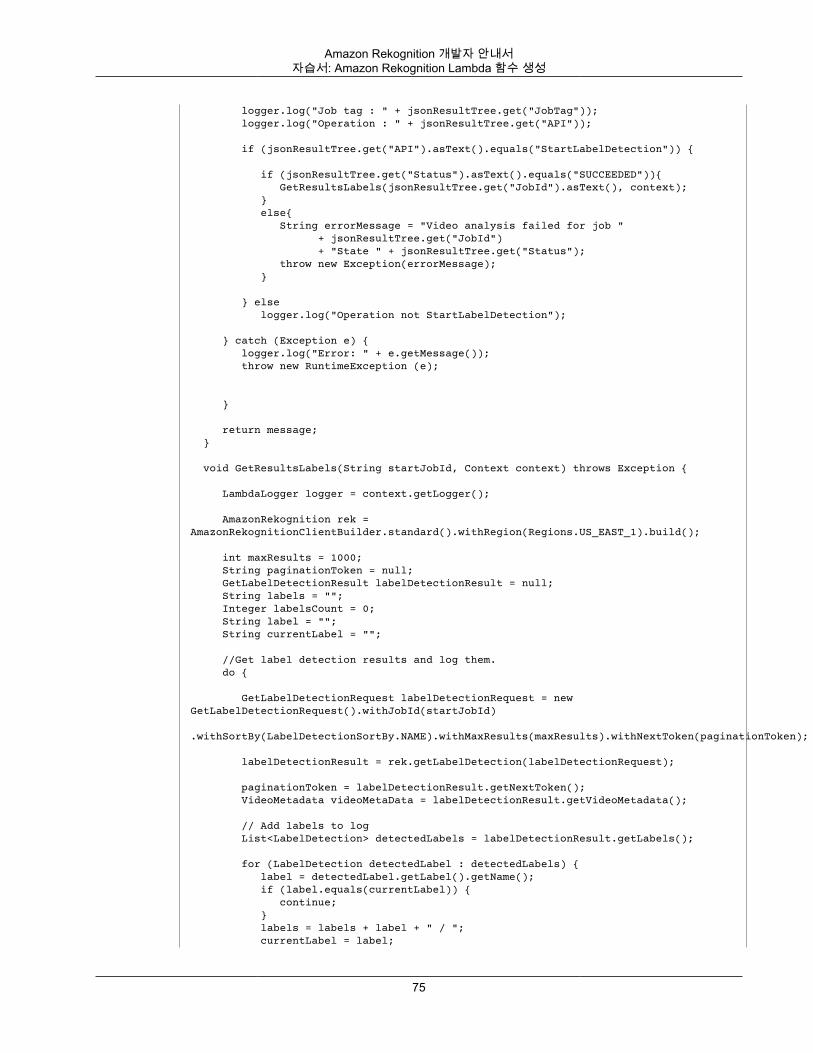
Amazon Rekognition 개발자 안내서자습서: Amazon Rekognition Lambda 함수 생성
logger.log("Job tag : " + jsonResultTree.get("JobTag")); logger.log("Operation : " + jsonResultTree.get("API"));
if (jsonResultTree.get("API").asText().equals("StartLabelDetection")) {
if (jsonResultTree.get("Status").asText().equals("SUCCEEDED")){ GetResultsLabels(jsonResultTree.get("JobId").asText(), context); } else{ String errorMessage = "Video analysis failed for job " + jsonResultTree.get("JobId") + "State " + jsonResultTree.get("Status"); throw new Exception(errorMessage); }
} else logger.log("Operation not StartLabelDetection");
} catch (Exception e) { logger.log("Error: " + e.getMessage()); throw new RuntimeException (e);
}
return message; }
void GetResultsLabels(String startJobId, Context context) throws Exception {
LambdaLogger logger = context.getLogger();
AmazonRekognition rek = AmazonRekognitionClientBuilder.standard().withRegion(Regions.US_EAST_1).build();
int maxResults = 1000; String paginationToken = null; GetLabelDetectionResult labelDetectionResult = null; String labels = ""; Integer labelsCount = 0; String label = ""; String currentLabel = ""; //Get label detection results and log them. do {
GetLabelDetectionRequest labelDetectionRequest = new GetLabelDetectionRequest().withJobId(startJobId) .withSortBy(LabelDetectionSortBy.NAME).withMaxResults(maxResults).withNextToken(paginationToken);
labelDetectionResult = rek.getLabelDetection(labelDetectionRequest); paginationToken = labelDetectionResult.getNextToken(); VideoMetadata videoMetaData = labelDetectionResult.getVideoMetadata();
// Add labels to log List<LabelDetection> detectedLabels = labelDetectionResult.getLabels(); for (LabelDetection detectedLabel : detectedLabels) { label = detectedLabel.getLabel().getName(); if (label.equals(currentLabel)) { continue; } labels = labels + label + " / "; currentLabel = label;
75
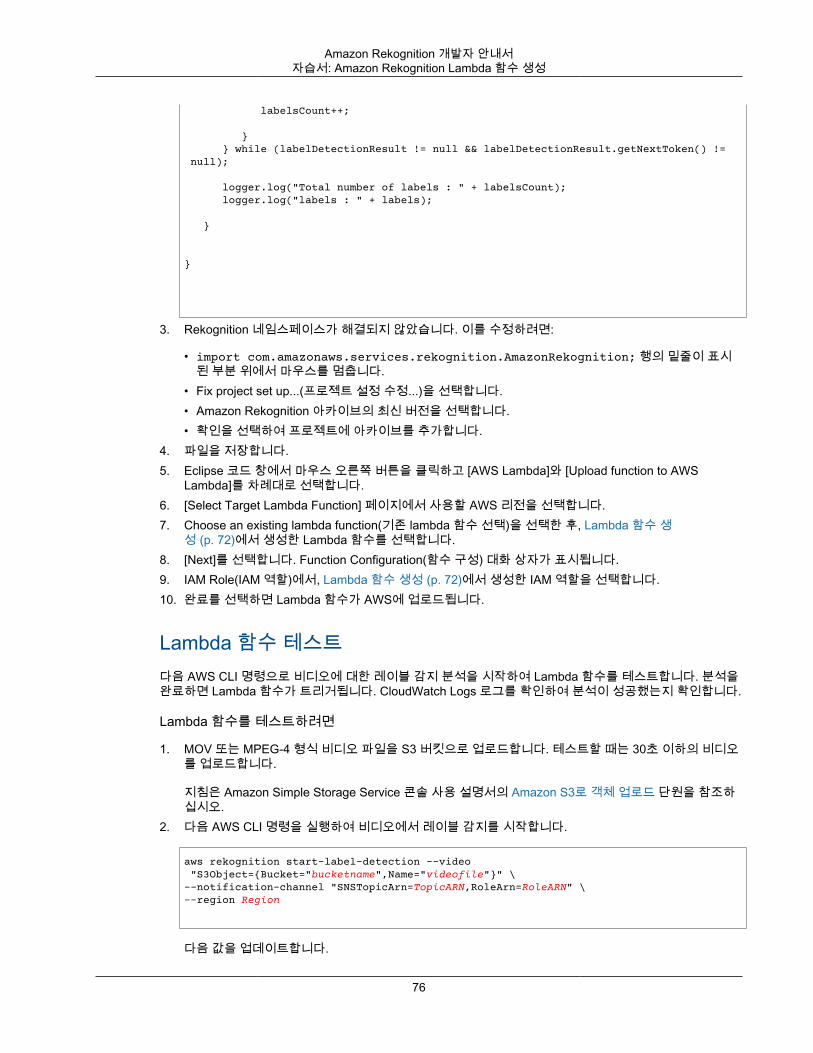
Amazon Rekognition 개발자 안내서자습서: Amazon Rekognition Lambda 함수 생성
labelsCount++;
} } while (labelDetectionResult != null && labelDetectionResult.getNextToken() != null);
logger.log("Total number of labels : " + labelsCount); logger.log("labels : " + labels);
}
}
3. Rekognition 네임스페이스가 해결되지 않았습니다. 이를 수정하려면:
• import com.amazonaws.services.rekognition.AmazonRekognition; 행의 밑줄이 표시된 부분 위에서 마우스를 멈춥니다.
• Fix project set up...(프로젝트 설정 수정...)을 선택합니다.• Amazon Rekognition 아카이브의 최신 버전을 선택합니다.• 확인을 선택하여 프로젝트에 아카이브를 추가합니다.
4. 파일을 저장합니다.5. Eclipse 코드 창에서 마우스 오른쪽 버튼을 클릭하고 [AWS Lambda]와 [Upload function to AWS
Lambda]를 차례대로 선택합니다.6. [Select Target Lambda Function] 페이지에서 사용할 AWS 리전을 선택합니다.7. Choose an existing lambda function(기존 lambda 함수 선택)을 선택한 후, Lambda 함수 생
성 (p. 72)에서 생성한 Lambda 함수를 선택합니다.8. [Next]를 선택합니다. Function Configuration(함수 구성) 대화 상자가 표시됩니다.9. IAM Role(IAM 역할)에서, Lambda 함수 생성 (p. 72)에서 생성한 IAM 역할을 선택합니다.10. 완료를 선택하면 Lambda 함수가 AWS에 업로드됩니다.
Lambda 함수 테스트다음 AWS CLI 명령으로 비디오에 대한 레이블 감지 분석을 시작하여 Lambda 함수를 테스트합니다. 분석을완료하면 Lambda 함수가 트리거됩니다. CloudWatch Logs 로그를 확인하여 분석이 성공했는지 확인합니다.
Lambda 함수를 테스트하려면
1. MOV 또는 MPEG-4 형식 비디오 파일을 S3 버킷으로 업로드합니다. 테스트할 때는 30초 이하의 비디오를 업로드합니다.
지침은 Amazon Simple Storage Service 콘솔 사용 설명서의 Amazon S3로 객체 업로드 단원을 참조하십시오.
2. 다음 AWS CLI 명령을 실행하여 비디오에서 레이블 감지를 시작합니다.
aws rekognition start-label-detection --video "S3Object={Bucket="bucketname",Name="videofile"}" \--notification-channel "SNSTopicArn=TopicARN,RoleArn=RoleARN" \--region Region
다음 값을 업데이트합니다.
76
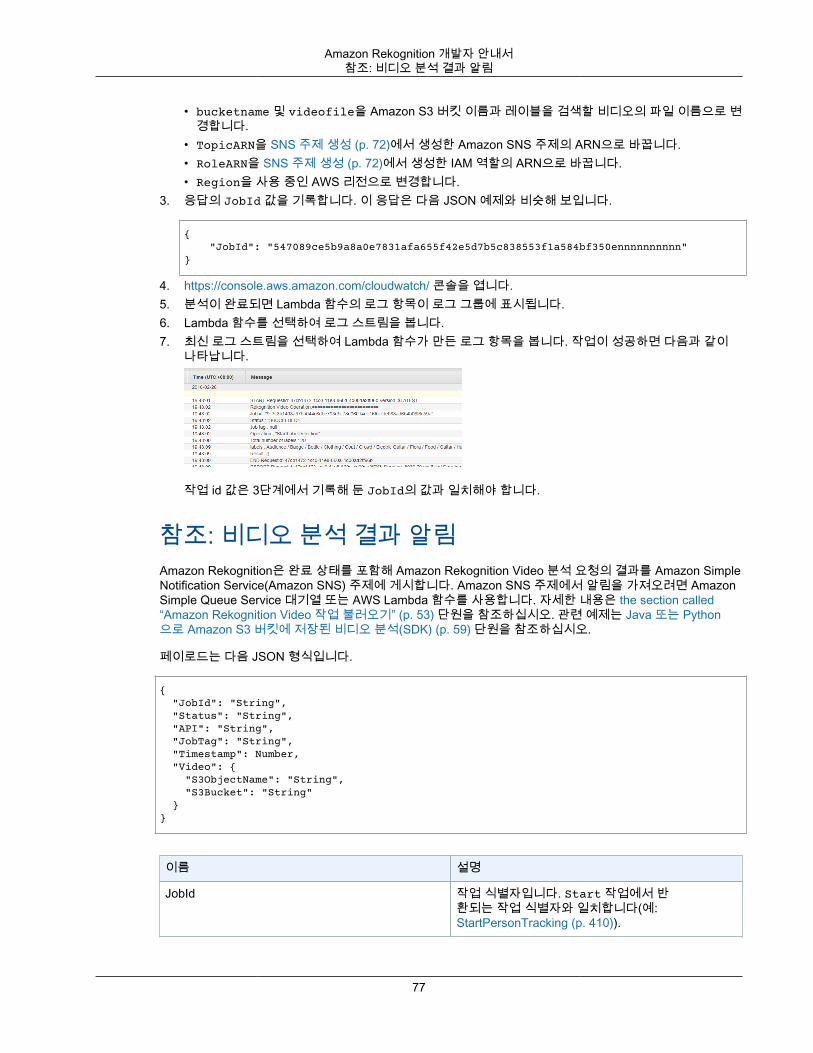
Amazon Rekognition 개발자 안내서참조: 비디오 분석 결과 알림
• bucketname 및 videofile을 Amazon S3 버킷 이름과 레이블을 검색할 비디오의 파일 이름으로 변경합니다.
• TopicARN을 SNS 주제 생성 (p. 72)에서 생성한 Amazon SNS 주제의 ARN으로 바꿉니다.• RoleARN을 SNS 주제 생성 (p. 72)에서 생성한 IAM 역할의 ARN으로 바꿉니다.• Region을 사용 중인 AWS 리전으로 변경합니다.
3. 응답의 JobId 값을 기록합니다. 이 응답은 다음 JSON 예제와 비슷해 보입니다.
{ "JobId": "547089ce5b9a8a0e7831afa655f42e5d7b5c838553f1a584bf350ennnnnnnnnn"}
4. https://console.aws.amazon.com/cloudwatch/ 콘솔을 엽니다.5. 분석이 완료되면 Lambda 함수의 로그 항목이 로그 그룹에 표시됩니다.6. Lambda 함수를 선택하여 로그 스트림을 봅니다.7. 최신 로그 스트림을 선택하여 Lambda 함수가 만든 로그 항목을 봅니다. 작업이 성공하면 다음과 같이
나타납니다.
작업 id 값은 3단계에서 기록해 둔 JobId의 값과 일치해야 합니다.
참조: 비디오 분석 결과 알림Amazon Rekognition은 완료 상태를 포함해 Amazon Rekognition Video 분석 요청의 결과를 Amazon SimpleNotification Service(Amazon SNS) 주제에 게시합니다. Amazon SNS 주제에서 알림을 가져오려면 AmazonSimple Queue Service 대기열 또는 AWS Lambda 함수를 사용합니다. 자세한 내용은 the section called“Amazon Rekognition Video 작업 불러오기” (p. 53) 단원을 참조하십시오. 관련 예제는 Java 또는 Python으로 Amazon S3 버킷에 저장된 비디오 분석(SDK) (p. 59) 단원을 참조하십시오.
페이로드는 다음 JSON 형식입니다.
{ "JobId": "String", "Status": "String", "API": "String", "JobTag": "String", "Timestamp": Number, "Video": { "S3ObjectName": "String", "S3Bucket": "String" }}
이름 설명
JobId 작업 식별자입니다. Start 작업에서 반환되는 작업 식별자와 일치합니다(예:StartPersonTracking (p. 410)).
77
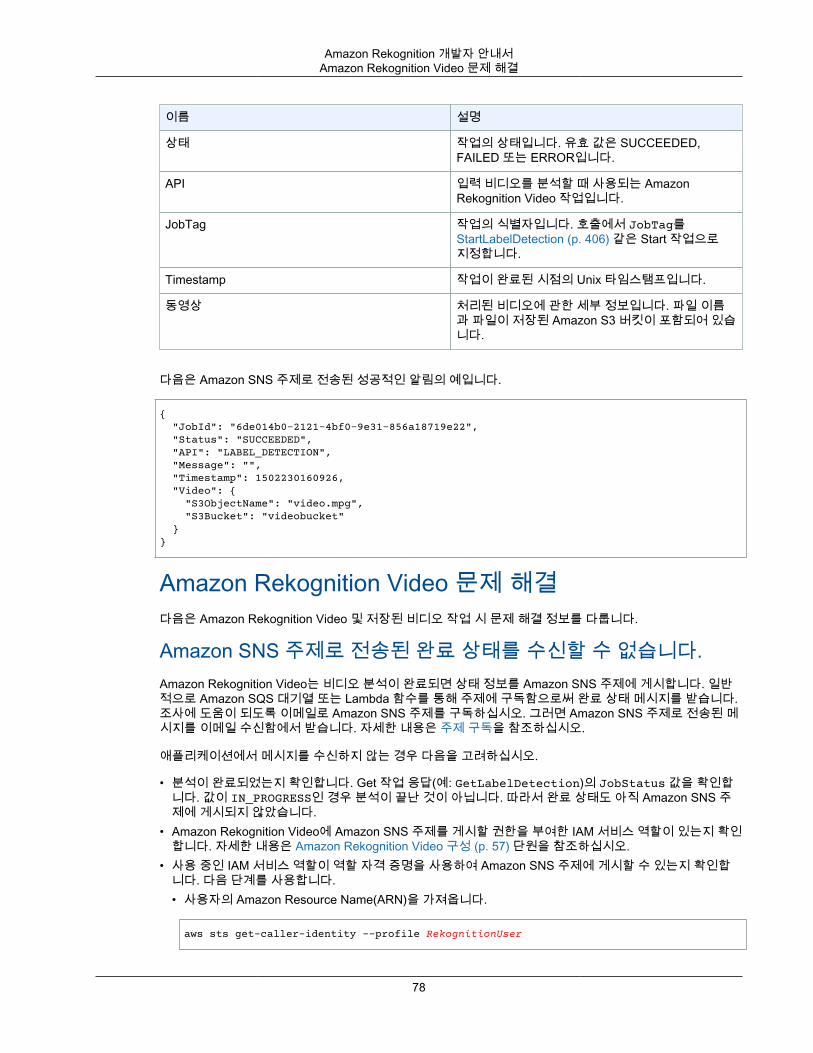
Amazon Rekognition 개발자 안내서Amazon Rekognition Video 문제 해결
이름 설명
상태 작업의 상태입니다. 유효 값은 SUCCEEDED,FAILED 또는 ERROR입니다.
API 입력 비디오를 분석할 때 사용되는 AmazonRekognition Video 작업입니다.
JobTag 작업의 식별자입니다. 호출에서 JobTag를StartLabelDetection (p. 406) 같은 Start 작업으로지정합니다.
Timestamp 작업이 완료된 시점의 Unix 타임스탬프입니다.
동영상 처리된 비디오에 관한 세부 정보입니다. 파일 이름과 파일이 저장된 Amazon S3 버킷이 포함되어 있습니다.
다음은 Amazon SNS 주제로 전송된 성공적인 알림의 예입니다.
{ "JobId": "6de014b0-2121-4bf0-9e31-856a18719e22", "Status": "SUCCEEDED", "API": "LABEL_DETECTION", "Message": "", "Timestamp": 1502230160926, "Video": { "S3ObjectName": "video.mpg", "S3Bucket": "videobucket" }}
Amazon Rekognition Video 문제 해결다음은 Amazon Rekognition Video 및 저장된 비디오 작업 시 문제 해결 정보를 다룹니다.
Amazon SNS 주제로 전송된 완료 상태를 수신할 수 없습니다.Amazon Rekognition Video는 비디오 분석이 완료되면 상태 정보를 Amazon SNS 주제에 게시합니다. 일반적으로 Amazon SQS 대기열 또는 Lambda 함수를 통해 주제에 구독함으로써 완료 상태 메시지를 받습니다.조사에 도움이 되도록 이메일로 Amazon SNS 주제를 구독하십시오. 그러면 Amazon SNS 주제로 전송된 메시지를 이메일 수신함에서 받습니다. 자세한 내용은 주제 구독을 참조하십시오.
애플리케이션에서 메시지를 수신하지 않는 경우 다음을 고려하십시오.
• 분석이 완료되었는지 확인합니다. Get 작업 응답(예: GetLabelDetection)의 JobStatus 값을 확인합니다. 값이 IN_PROGRESS인 경우 분석이 끝난 것이 아닙니다. 따라서 완료 상태도 아직 Amazon SNS 주제에 게시되지 않았습니다.
• Amazon Rekognition Video에 Amazon SNS 주제를 게시할 권한을 부여한 IAM 서비스 역할이 있는지 확인합니다. 자세한 내용은 Amazon Rekognition Video 구성 (p. 57) 단원을 참조하십시오.
• 사용 중인 IAM 서비스 역할이 역할 자격 증명을 사용하여 Amazon SNS 주제에 게시할 수 있는지 확인합니다. 다음 단계를 사용합니다.• 사용자의 Amazon Resource Name(ARN)을 가져옵니다.
aws sts get-caller-identity --profile RekognitionUser
78
Amazon Rekognition 개발자 안내서스트리밍 비디오 작업
• AWS Management Console을 사용하여 사용자 ARN을 역할 신뢰 관계에 추가합니다. 예:
{ "Version": "2012-10-17", "Statement": [ { "Effect": "Allow", "Principal": { "Service": "rekognition.amazonaws.com", "AWS": "arn:User ARN" }, "Action": "sts:AssumeRole", "Condition": {} } ]}
• 역할 수임: aws sts assume-role --role-arn arn:Role ARN --role-session-nameSessionName --profile RekognitionUser
• Amazon SNS 주제에 게시: aws sns publish --topic-arn arn:Topic ARN --message"Hello World!" --region us-east-1 --profile RekognitionUser
AWS CLI 명령이 작동하는 경우 메시지를 수신합니다(이메일로 주제를 구독한 경우 이메일 수신함에서 수신). 메시지를 수신하지 못한 경우:• Amazon Rekognition Video를 구성했는지 확인합니다. 자세한 내용은 Amazon Rekognition Video 구
성 (p. 57) 단원을 참조하십시오.• 이 문제 해결 질문에 대한 기타 팁을 확인합니다.
• 올바른 Amazon SNS 주제를 사용하고 있는지 확인합니다.• IAM 서비스 역할을 사용하여 Amazon Rekognition Video에 단일 Amazon SNS 주제에 대한 액세스
를 제공한 경우 올바른 Amazon SNS 주제에 대한 권한을 부여했는지 확인합니다. 자세한 내용은 기존Amazon SNS 주제에 대한 액세스 권한 부여 (p. 59) 단원을 참조하십시오.
• IAM 서비스 역할을 사용하여 Amazon Rekognition Video에 여러 SNS 주제에 대한 액세스를 제공한 경우 올바른 주제를 사용 중이고, 주제의 이름 앞에 AmazonRekognition이 붙어 있는지 확인합니다. 자세한 내용은 여러 Amazon SNS 주제에 대한 액세스 권한 부여 (p. 58) 단원을 참조하십시오.
• AWS Lambda 함수를 사용하는 경우 Lambda 함수가 올바른 Amazon SNS 주제에 구독되었는지 확인합니다. 자세한 내용은 Amazon SNS 알림을 사용하여 Lambda 함수 호출 단원을 참조하십시오.
• Amazon SNS 주제에 대해 Amazon SQS 대기열을 구독한 경우 Amazon SNS 주제에 Amazon SQS 대기열로 메시지를 전송할 권한이 있는지 확인합니다. 자세한 내용은 Amazon SNS 주제에 Amazon SQS 대기열로 메시지를 전송할 권한 부여 단원을 참조하십시오.
스트리밍 비디오 작업Amazon Rekognition Video를 사용하여 스트리밍 비디오에서 얼굴을 감지하고 인식할 수 있습니다. 일반적인 사용 사례는 비디오 스트림에서 아는 얼굴을 찾아내려고 할 때입니다. Amazon Rekognition Video는Amazon Kinesis Video Streams를 사용해 비디오 스트림을 수신하고 처리합니다. Amazon RekognitionVideo에서 Kinesis data stream으로 분석 결과가 출력되면 클라이언트 애플리케이션에서 읽습니다. AmazonRekognition Video는 스트리밍 비디오 분석을 시작하고 관리하는 데 사용할 수 있는 스트림 프로세서(CreateStreamProcessor (p. 284))를 제공합니다.
Note
Amazon Rekognition Video 스트리밍 API는 미국 동부(버지니아 북부), 미국 서부(오레곤), 아시아태평양(도쿄), EU(프랑크푸르트), EU(아일랜드) 리전에서만 이용 가능합니다.
다음 다이어그램은 Amazon Rekognition Video가 스트리밍 비디오에서 어떻게 얼굴을 감지하고 인식하는지보여줍니다.
79
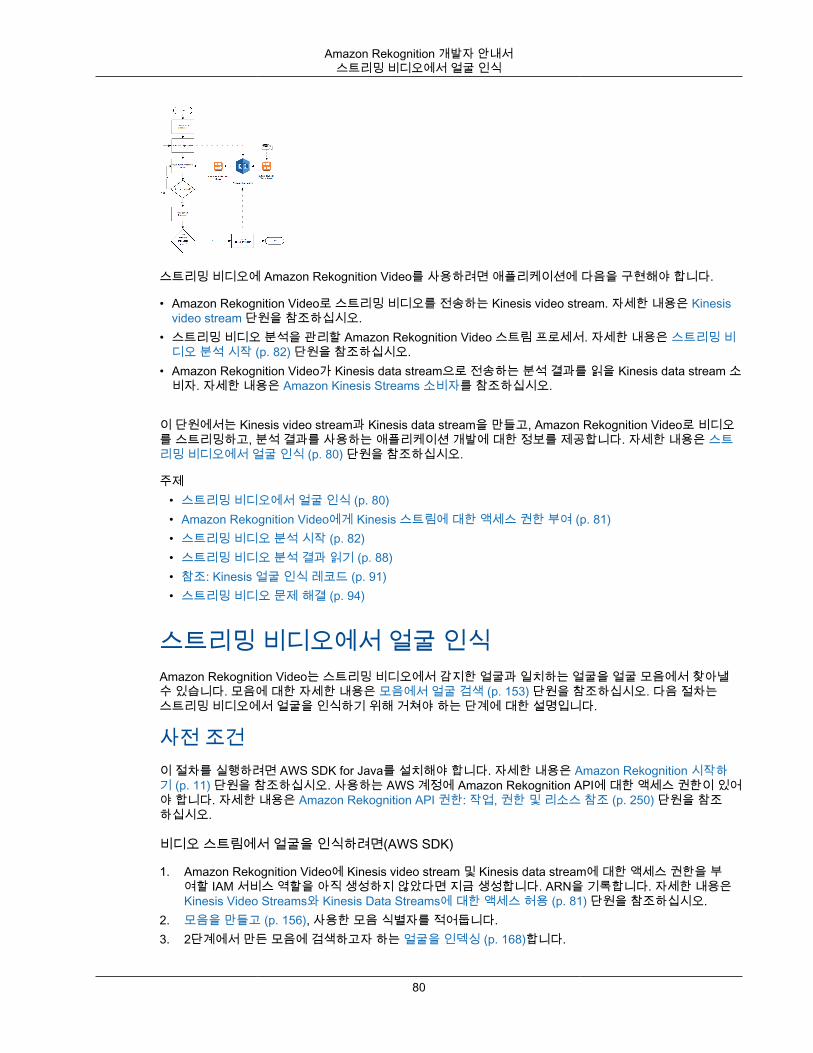
Amazon Rekognition 개발자 안내서스트리밍 비디오에서 얼굴 인식
스트리밍 비디오에 Amazon Rekognition Video를 사용하려면 애플리케이션에 다음을 구현해야 합니다.
• Amazon Rekognition Video로 스트리밍 비디오를 전송하는 Kinesis video stream. 자세한 내용은 Kinesisvideo stream 단원을 참조하십시오.
• 스트리밍 비디오 분석을 관리할 Amazon Rekognition Video 스트림 프로세서. 자세한 내용은 스트리밍 비디오 분석 시작 (p. 82) 단원을 참조하십시오.
• Amazon Rekognition Video가 Kinesis data stream으로 전송하는 분석 결과를 읽을 Kinesis data stream 소비자. 자세한 내용은 Amazon Kinesis Streams 소비자를 참조하십시오.
이 단원에서는 Kinesis video stream과 Kinesis data stream을 만들고, Amazon Rekognition Video로 비디오를 스트리밍하고, 분석 결과를 사용하는 애플리케이션 개발에 대한 정보를 제공합니다. 자세한 내용은 스트리밍 비디오에서 얼굴 인식 (p. 80) 단원을 참조하십시오.
주제• 스트리밍 비디오에서 얼굴 인식 (p. 80)• Amazon Rekognition Video에게 Kinesis 스트림에 대한 액세스 권한 부여 (p. 81)• 스트리밍 비디오 분석 시작 (p. 82)• 스트리밍 비디오 분석 결과 읽기 (p. 88)• 참조: Kinesis 얼굴 인식 레코드 (p. 91)• 스트리밍 비디오 문제 해결 (p. 94)
스트리밍 비디오에서 얼굴 인식Amazon Rekognition Video는 스트리밍 비디오에서 감지한 얼굴과 일치하는 얼굴을 얼굴 모음에서 찾아낼수 있습니다. 모음에 대한 자세한 내용은 모음에서 얼굴 검색 (p. 153) 단원을 참조하십시오. 다음 절차는스트리밍 비디오에서 얼굴을 인식하기 위해 거쳐야 하는 단계에 대한 설명입니다.
사전 조건이 절차를 실행하려면 AWS SDK for Java를 설치해야 합니다. 자세한 내용은 Amazon Rekognition 시작하기 (p. 11) 단원을 참조하십시오. 사용하는 AWS 계정에 Amazon Rekognition API에 대한 액세스 권한이 있어야 합니다. 자세한 내용은 Amazon Rekognition API 권한: 작업, 권한 및 리소스 참조 (p. 250) 단원을 참조하십시오.
비디오 스트림에서 얼굴을 인식하려면(AWS SDK)
1. Amazon Rekognition Video에 Kinesis video stream 및 Kinesis data stream에 대한 액세스 권한을 부여할 IAM 서비스 역할을 아직 생성하지 않았다면 지금 생성합니다. ARN을 기록합니다. 자세한 내용은Kinesis Video Streams와 Kinesis Data Streams에 대한 액세스 허용 (p. 81) 단원을 참조하십시오.
2. 모음을 만들고 (p. 156), 사용한 모음 식별자를 적어둡니다.3. 2단계에서 만든 모음에 검색하고자 하는 얼굴을 인덱싱 (p. 168)합니다.
80
Amazon Rekognition 개발자 안내서Kinesis 스트림 액세스 권한 부여
4. Kinesis video stream을 만들고 스트림의 Amazon 리소스 이름(ARN)을 적어둡니다.5. Kinesis data stream을 만듭니다. 스트림 이름 앞에 AmazonRekognition을 추가하고 스트림의 ARN을 적
어둡니다.6. 스트림 프로세서를 만듭니다 (p. 84). 선택한 이름, Kinesis video stream ARN(4단계), Kinesis data
stream ARN(5단계), 모음 식별자(2단계)를 the section called “CreateStreamProcessor” (p. 284)에 파라미터로 전달합니다.
7. 6단계에 선택한 스트림 프로세서 이름을 사용하여 스트림 프로세서를 시작 (p. )합니다.8. PutMedia 작업을 사용하여 4단계에서 만든 Kinesis video stream으로 소스 비디오를 스트리밍합니다.
자세한 내용은 PutMedia API 예제를 참조하십시오.9. Amazon Rekognition Video의 분석 출력을 사용합니다 (p. 88).
Amazon Rekognition Video에게 Kinesis 스트림에 대한액세스 권한 부여AWS Identity and Access Management(IAM) 서비스 역할을 사용하여 Kinesis video stream에 대한 AmazonRekognition Video 읽기 액세스와 Kinesis data stream에 대한 쓰기 액세스를 허용합니다.
Kinesis Video Streams와 Kinesis Data Streams에 대한 액세스 허용IAM은 Rekognition 서비스 역할 사용 사례를 제공합니다. 이 역할을 AmazonRekognitionServiceRole권한 정책에 사용할 경우 여러 Kinesis data stream에 쓸 수 있고 모든 Kinesis video stream에서읽을 수 있습니다. Amazon Rekognition Video에서 여러 Kinesis data stream에 쓰기 액세스할 수있도록 허용하려면 Kinesis data stream 이름 앞에 AmazonRekognition을 추가하면 됩니다(예:AmazonRekognitionMyDataStreamName).
Amazon Rekognition Video에 Kinesis video stream 및 Kinesis data stream 액세스 권한을 부여하려면
1. IAM 서비스 역할을 생성합니다. 다음 정보를 사용하여 IAM 서비스 역할을 생성합니다.
1. 서비스 이름으로 [Rekognition]을 선택합니다.2. 서비스 역할 사용 사례로 [Rekognition]을 선택합니다.3. AmazonRekognitionServiceRole 권한 정책을 선택합니다. 이 정책은 Amazon Rekognition Video
가 AmazonRekognition으로 시작하는 Kinesis data stream에 대한 쓰기 액세스, 모든 Kinesis videostream에 대한 읽기 액세스를 할 수 있도록 허용합니다.
2. 서비스 역할의 Amazon Resource Name(ARN)을 적어둡니다. 이것은 비디오 분석 작업을 시작할 때 필요합니다.
개별 Kinesis 스트림에 대한 액세스 허용Amazon Rekognition Video가 개별 Kinesis video stream 및 Kinesis data stream에 액세스할 수 있도록 허용하는 권한 정책을 만들 수 있습니다.
Amazon Rekognition Video에 개별 Kinesis video stream 및 Kinesis data stream 액세스 권한을 부여하려면
1. IAM JSON 정책 편집기로 새 권한 정책을 만들고 다음 정책을 사용합니다. data-arn을 원하는 Kinesisdata stream의 ARN으로 바꾸고 video-arn을 원하는 Kinesis video stream의 ARN으로 바꿉니다.
{
81
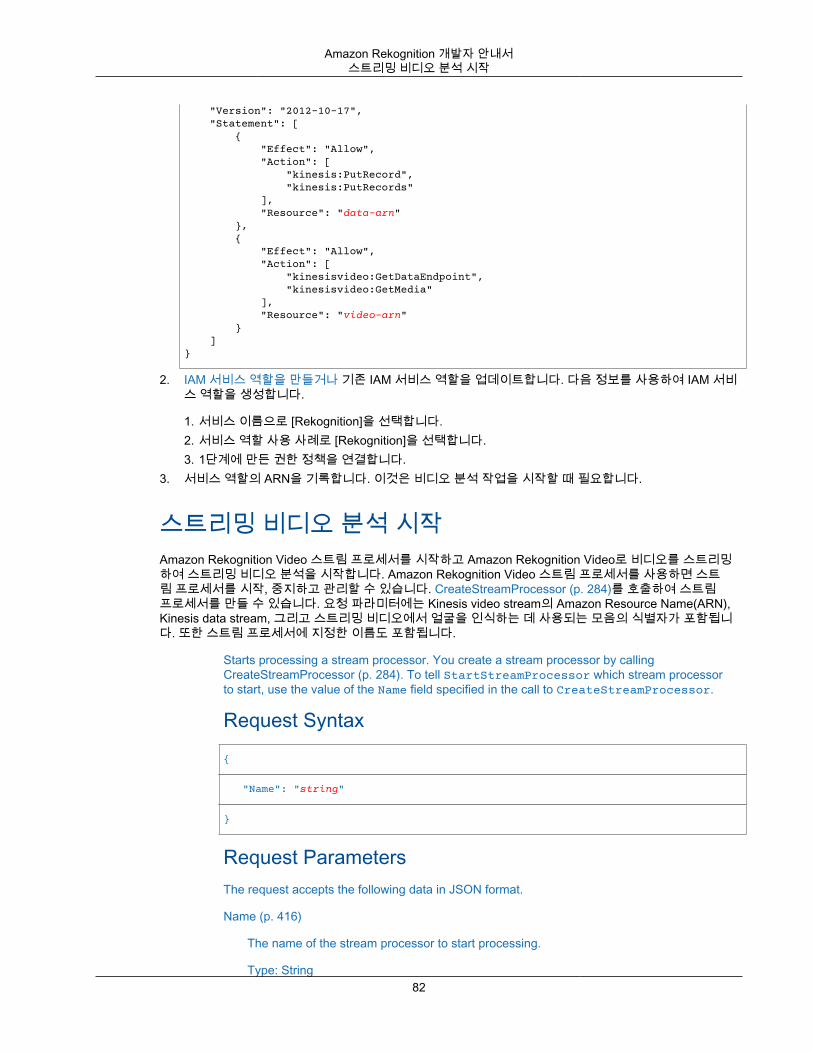
Amazon Rekognition 개발자 안내서스트리밍 비디오 분석 시작
"Version": "2012-10-17", "Statement": [ { "Effect": "Allow", "Action": [ "kinesis:PutRecord", "kinesis:PutRecords" ], "Resource": "data-arn" }, { "Effect": "Allow", "Action": [ "kinesisvideo:GetDataEndpoint", "kinesisvideo:GetMedia" ], "Resource": "video-arn" } ]}
2. IAM 서비스 역할을 만들거나 기존 IAM 서비스 역할을 업데이트합니다. 다음 정보를 사용하여 IAM 서비스 역할을 생성합니다.
1. 서비스 이름으로 [Rekognition]을 선택합니다.2. 서비스 역할 사용 사례로 [Rekognition]을 선택합니다.3. 1단계에 만든 권한 정책을 연결합니다.
3. 서비스 역할의 ARN을 기록합니다. 이것은 비디오 분석 작업을 시작할 때 필요합니다.
스트리밍 비디오 분석 시작Amazon Rekognition Video 스트림 프로세서를 시작하고 Amazon Rekognition Video로 비디오를 스트리밍하여 스트리밍 비디오 분석을 시작합니다. Amazon Rekognition Video 스트림 프로세서를 사용하면 스트림 프로세서를 시작, 중지하고 관리할 수 있습니다. CreateStreamProcessor (p. 284)를 호출하여 스트림프로세서를 만들 수 있습니다. 요청 파라미터에는 Kinesis video stream의 Amazon Resource Name(ARN),Kinesis data stream, 그리고 스트리밍 비디오에서 얼굴을 인식하는 데 사용되는 모음의 식별자가 포함됩니다. 또한 스트림 프로세서에 지정한 이름도 포함됩니다.
Starts processing a stream processor. You create a stream processor by callingCreateStreamProcessor (p. 284). To tell StartStreamProcessor which stream processorto start, use the value of the Name field specified in the call to CreateStreamProcessor.
Request Syntax{
"Name": "string"
}
Request ParametersThe request accepts the following data in JSON format.
Name (p. 416)
The name of the stream processor to start processing.
Type: String82
Amazon Rekognition 개발자 안내서스트리밍 비디오 분석 시작
Length Constraints: Minimum length of 1. Maximum length of 128.
Pattern: [a-zA-Z0-9_.\-]+
Required: YesResponse ElementsIf the action is successful, the service sends back an HTTP 200 response with an empty HTTPbody.
ErrorsAccessDeniedException
You are not authorized to perform the action.
HTTP Status Code: 400InternalServerError
Amazon Rekognition experienced a service issue. Try your call again.
HTTP Status Code: 500InvalidParameterException
Input parameter violated a constraint. Validate your parameter before calling the APIoperation again.
HTTP Status Code: 400ProvisionedThroughputExceededException
The number of requests exceeded your throughput limit. If you want to increase this limit,contact Amazon Rekognition.
HTTP Status Code: 400ResourceInUseException
HTTP Status Code: 400ResourceNotFoundException
The collection specified in the request cannot be found.
HTTP Status Code: 400ThrottlingException
Amazon Rekognition is temporarily unable to process the request. Try your call again.
HTTP Status Code: 500See AlsoFor more information about using this API in one of the language-specific AWS SDKs, see thefollowing:
• AWS Command Line Interface• AWS SDK for .NET
83
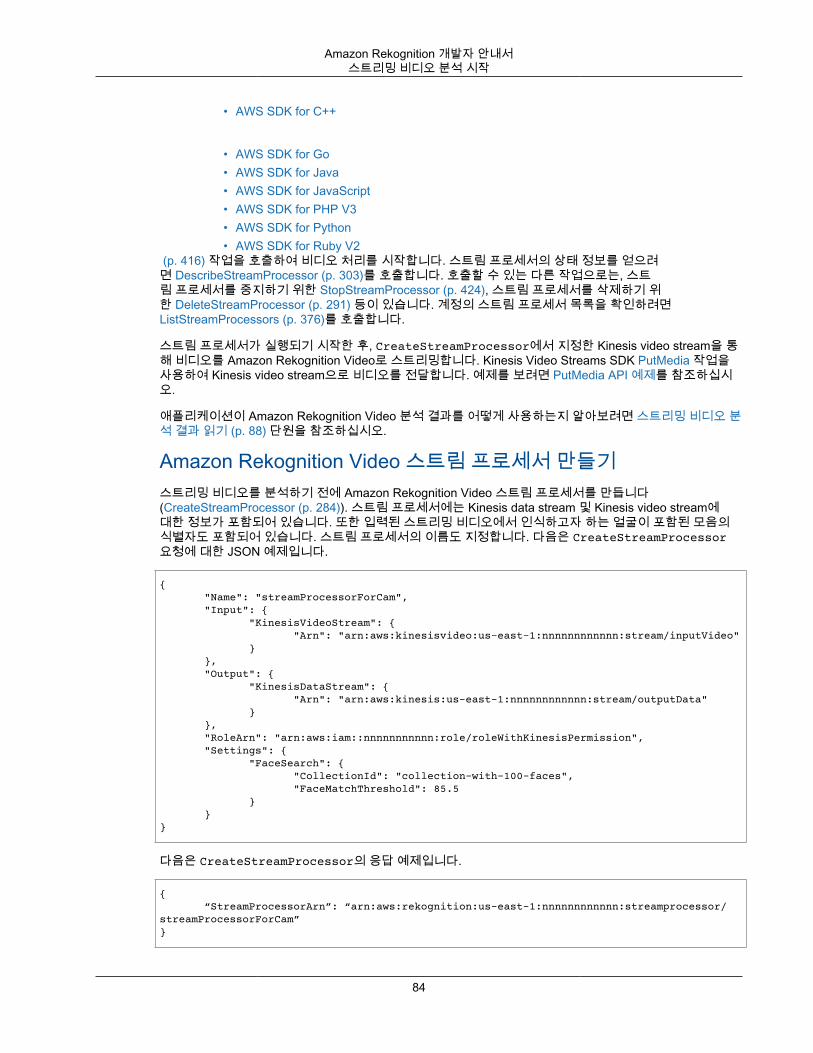
Amazon Rekognition 개발자 안내서스트리밍 비디오 분석 시작
• AWS SDK for C++
• AWS SDK for Go• AWS SDK for Java• AWS SDK for JavaScript• AWS SDK for PHP V3• AWS SDK for Python• AWS SDK for Ruby V2
(p. 416) 작업을 호출하여 비디오 처리를 시작합니다. 스트림 프로세서의 상태 정보를 얻으려면 DescribeStreamProcessor (p. 303)를 호출합니다. 호출할 수 있는 다른 작업으로는, 스트림 프로세서를 중지하기 위한 StopStreamProcessor (p. 424), 스트림 프로세서를 삭제하기 위한 DeleteStreamProcessor (p. 291) 등이 있습니다. 계정의 스트림 프로세서 목록을 확인하려면ListStreamProcessors (p. 376)를 호출합니다.
스트림 프로세서가 실행되기 시작한 후, CreateStreamProcessor에서 지정한 Kinesis video stream을 통해 비디오를 Amazon Rekognition Video로 스트리밍합니다. Kinesis Video Streams SDK PutMedia 작업을사용하여 Kinesis video stream으로 비디오를 전달합니다. 예제를 보려면 PutMedia API 예제를 참조하십시오.
애플리케이션이 Amazon Rekognition Video 분석 결과를 어떻게 사용하는지 알아보려면 스트리밍 비디오 분석 결과 읽기 (p. 88) 단원을 참조하십시오.
Amazon Rekognition Video 스트림 프로세서 만들기스트리밍 비디오를 분석하기 전에 Amazon Rekognition Video 스트림 프로세서를 만듭니다(CreateStreamProcessor (p. 284)). 스트림 프로세서에는 Kinesis data stream 및 Kinesis video stream에대한 정보가 포함되어 있습니다. 또한 입력된 스트리밍 비디오에서 인식하고자 하는 얼굴이 포함된 모음의식별자도 포함되어 있습니다. 스트림 프로세서의 이름도 지정합니다. 다음은 CreateStreamProcessor요청에 대한 JSON 예제입니다.
{ "Name": "streamProcessorForCam", "Input": { "KinesisVideoStream": { "Arn": "arn:aws:kinesisvideo:us-east-1:nnnnnnnnnnnn:stream/inputVideo" } }, "Output": { "KinesisDataStream": { "Arn": "arn:aws:kinesis:us-east-1:nnnnnnnnnnnn:stream/outputData" } }, "RoleArn": "arn:aws:iam::nnnnnnnnnnn:role/roleWithKinesisPermission", "Settings": { "FaceSearch": { "CollectionId": "collection-with-100-faces", "FaceMatchThreshold": 85.5 } }}
다음은 CreateStreamProcessor의 응답 예제입니다.
{ “StreamProcessorArn”: “arn:aws:rekognition:us-east-1:nnnnnnnnnnnn:streamprocessor/streamProcessorForCam”}
84
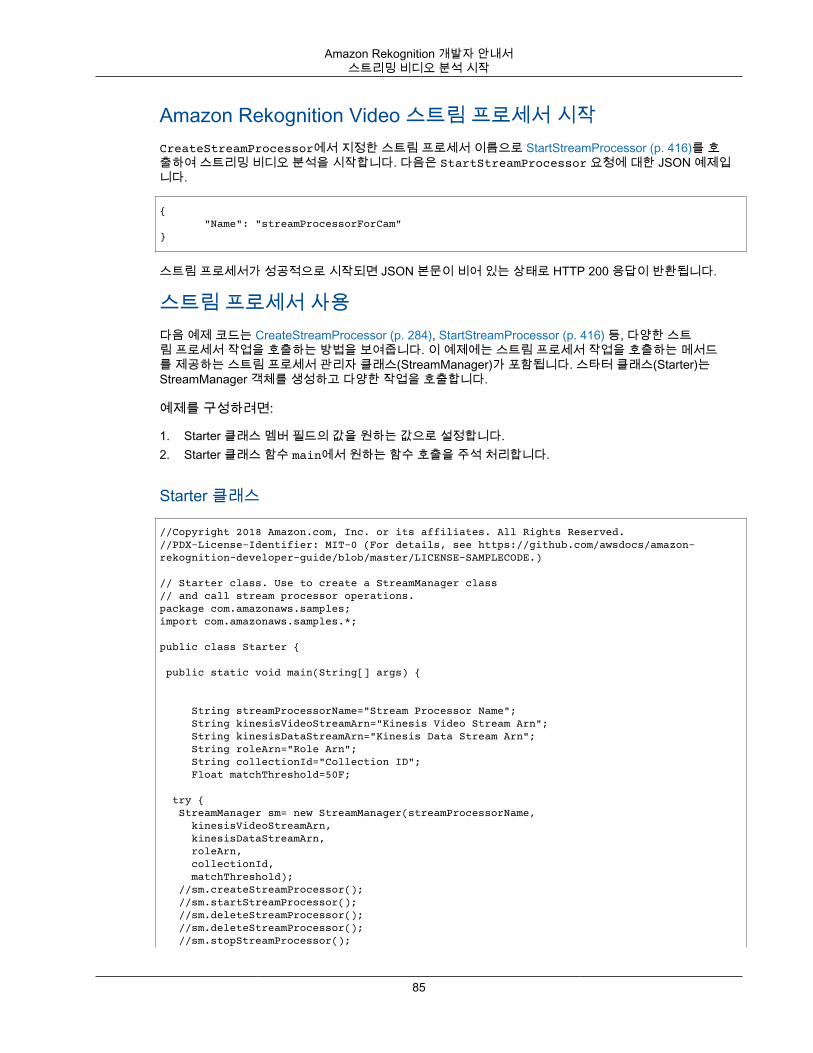
Amazon Rekognition 개발자 안내서스트리밍 비디오 분석 시작
Amazon Rekognition Video 스트림 프로세서 시작CreateStreamProcessor에서 지정한 스트림 프로세서 이름으로 StartStreamProcessor (p. 416)를 호출하여 스트리밍 비디오 분석을 시작합니다. 다음은 StartStreamProcessor 요청에 대한 JSON 예제입니다.
{ "Name": "streamProcessorForCam"}
스트림 프로세서가 성공적으로 시작되면 JSON 본문이 비어 있는 상태로 HTTP 200 응답이 반환됩니다.
스트림 프로세서 사용다음 예제 코드는 CreateStreamProcessor (p. 284), StartStreamProcessor (p. 416) 등, 다양한 스트림 프로세서 작업을 호출하는 방법을 보여줍니다. 이 예제에는 스트림 프로세서 작업을 호출하는 메서드를 제공하는 스트림 프로세서 관리자 클래스(StreamManager)가 포함됩니다. 스타터 클래스(Starter)는StreamManager 객체를 생성하고 다양한 작업을 호출합니다.
예제를 구성하려면:
1. Starter 클래스 멤버 필드의 값을 원하는 값으로 설정합니다.2. Starter 클래스 함수 main에서 원하는 함수 호출을 주석 처리합니다.
Starter 클래스
//Copyright 2018 Amazon.com, Inc. or its affiliates. All Rights Reserved.//PDX-License-Identifier: MIT-0 (For details, see https://github.com/awsdocs/amazon-rekognition-developer-guide/blob/master/LICENSE-SAMPLECODE.)
// Starter class. Use to create a StreamManager class// and call stream processor operations.package com.amazonaws.samples;import com.amazonaws.samples.*;
public class Starter {
public static void main(String[] args) { String streamProcessorName="Stream Processor Name"; String kinesisVideoStreamArn="Kinesis Video Stream Arn"; String kinesisDataStreamArn="Kinesis Data Stream Arn"; String roleArn="Role Arn"; String collectionId="Collection ID"; Float matchThreshold=50F;
try { StreamManager sm= new StreamManager(streamProcessorName, kinesisVideoStreamArn, kinesisDataStreamArn, roleArn, collectionId, matchThreshold); //sm.createStreamProcessor(); //sm.startStreamProcessor(); //sm.deleteStreamProcessor(); //sm.deleteStreamProcessor(); //sm.stopStreamProcessor();
85
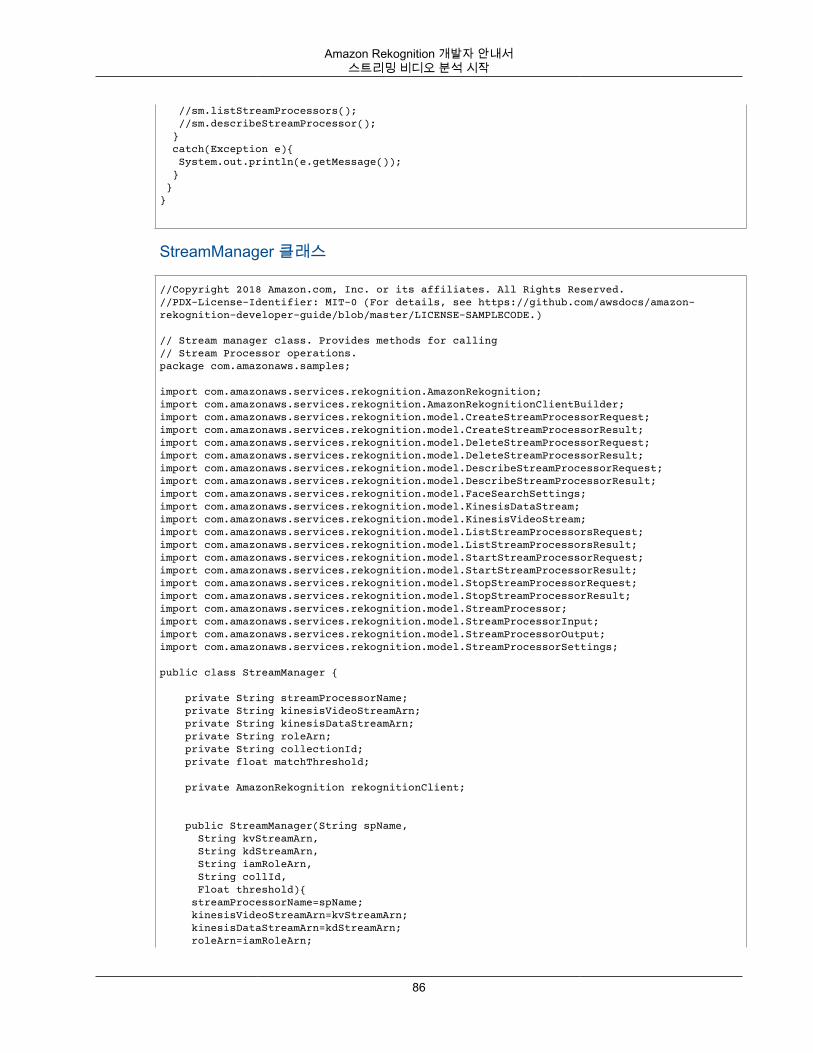
Amazon Rekognition 개발자 안내서스트리밍 비디오 분석 시작
//sm.listStreamProcessors(); //sm.describeStreamProcessor(); } catch(Exception e){ System.out.println(e.getMessage()); } }}
StreamManager 클래스
//Copyright 2018 Amazon.com, Inc. or its affiliates. All Rights Reserved.//PDX-License-Identifier: MIT-0 (For details, see https://github.com/awsdocs/amazon-rekognition-developer-guide/blob/master/LICENSE-SAMPLECODE.)
// Stream manager class. Provides methods for calling// Stream Processor operations.package com.amazonaws.samples;
import com.amazonaws.services.rekognition.AmazonRekognition;import com.amazonaws.services.rekognition.AmazonRekognitionClientBuilder;import com.amazonaws.services.rekognition.model.CreateStreamProcessorRequest;import com.amazonaws.services.rekognition.model.CreateStreamProcessorResult;import com.amazonaws.services.rekognition.model.DeleteStreamProcessorRequest;import com.amazonaws.services.rekognition.model.DeleteStreamProcessorResult;import com.amazonaws.services.rekognition.model.DescribeStreamProcessorRequest;import com.amazonaws.services.rekognition.model.DescribeStreamProcessorResult;import com.amazonaws.services.rekognition.model.FaceSearchSettings;import com.amazonaws.services.rekognition.model.KinesisDataStream;import com.amazonaws.services.rekognition.model.KinesisVideoStream;import com.amazonaws.services.rekognition.model.ListStreamProcessorsRequest;import com.amazonaws.services.rekognition.model.ListStreamProcessorsResult;import com.amazonaws.services.rekognition.model.StartStreamProcessorRequest;import com.amazonaws.services.rekognition.model.StartStreamProcessorResult;import com.amazonaws.services.rekognition.model.StopStreamProcessorRequest;import com.amazonaws.services.rekognition.model.StopStreamProcessorResult;import com.amazonaws.services.rekognition.model.StreamProcessor;import com.amazonaws.services.rekognition.model.StreamProcessorInput;import com.amazonaws.services.rekognition.model.StreamProcessorOutput;import com.amazonaws.services.rekognition.model.StreamProcessorSettings;
public class StreamManager {
private String streamProcessorName; private String kinesisVideoStreamArn; private String kinesisDataStreamArn; private String roleArn; private String collectionId; private float matchThreshold;
private AmazonRekognition rekognitionClient;
public StreamManager(String spName, String kvStreamArn, String kdStreamArn, String iamRoleArn, String collId, Float threshold){ streamProcessorName=spName; kinesisVideoStreamArn=kvStreamArn; kinesisDataStreamArn=kdStreamArn; roleArn=iamRoleArn;
86
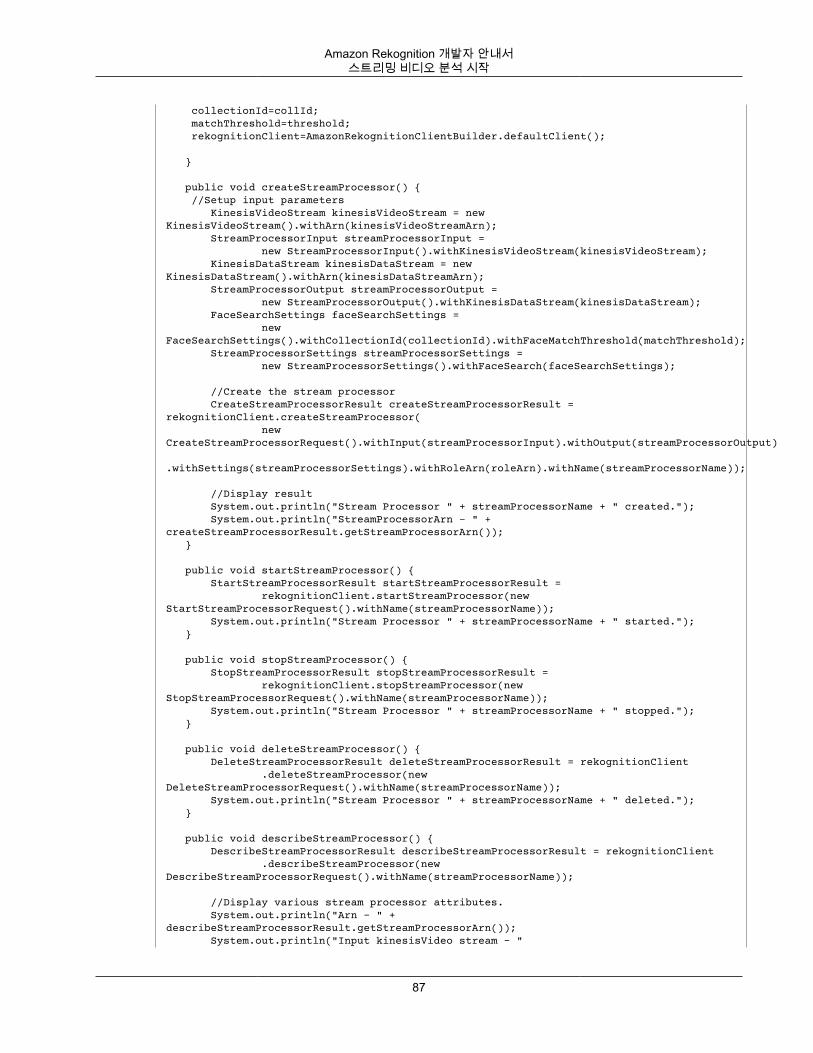
Amazon Rekognition 개발자 안내서스트리밍 비디오 분석 시작
collectionId=collId; matchThreshold=threshold; rekognitionClient=AmazonRekognitionClientBuilder.defaultClient(); } public void createStreamProcessor() { //Setup input parameters KinesisVideoStream kinesisVideoStream = new KinesisVideoStream().withArn(kinesisVideoStreamArn); StreamProcessorInput streamProcessorInput = new StreamProcessorInput().withKinesisVideoStream(kinesisVideoStream); KinesisDataStream kinesisDataStream = new KinesisDataStream().withArn(kinesisDataStreamArn); StreamProcessorOutput streamProcessorOutput = new StreamProcessorOutput().withKinesisDataStream(kinesisDataStream); FaceSearchSettings faceSearchSettings = new FaceSearchSettings().withCollectionId(collectionId).withFaceMatchThreshold(matchThreshold); StreamProcessorSettings streamProcessorSettings = new StreamProcessorSettings().withFaceSearch(faceSearchSettings);
//Create the stream processor CreateStreamProcessorResult createStreamProcessorResult = rekognitionClient.createStreamProcessor( new CreateStreamProcessorRequest().withInput(streamProcessorInput).withOutput(streamProcessorOutput) .withSettings(streamProcessorSettings).withRoleArn(roleArn).withName(streamProcessorName));
//Display result System.out.println("Stream Processor " + streamProcessorName + " created."); System.out.println("StreamProcessorArn - " + createStreamProcessorResult.getStreamProcessorArn()); }
public void startStreamProcessor() { StartStreamProcessorResult startStreamProcessorResult = rekognitionClient.startStreamProcessor(new StartStreamProcessorRequest().withName(streamProcessorName)); System.out.println("Stream Processor " + streamProcessorName + " started."); }
public void stopStreamProcessor() { StopStreamProcessorResult stopStreamProcessorResult = rekognitionClient.stopStreamProcessor(new StopStreamProcessorRequest().withName(streamProcessorName)); System.out.println("Stream Processor " + streamProcessorName + " stopped."); }
public void deleteStreamProcessor() { DeleteStreamProcessorResult deleteStreamProcessorResult = rekognitionClient .deleteStreamProcessor(new DeleteStreamProcessorRequest().withName(streamProcessorName)); System.out.println("Stream Processor " + streamProcessorName + " deleted."); }
public void describeStreamProcessor() { DescribeStreamProcessorResult describeStreamProcessorResult = rekognitionClient .describeStreamProcessor(new DescribeStreamProcessorRequest().withName(streamProcessorName));
//Display various stream processor attributes. System.out.println("Arn - " + describeStreamProcessorResult.getStreamProcessorArn()); System.out.println("Input kinesisVideo stream - "
87
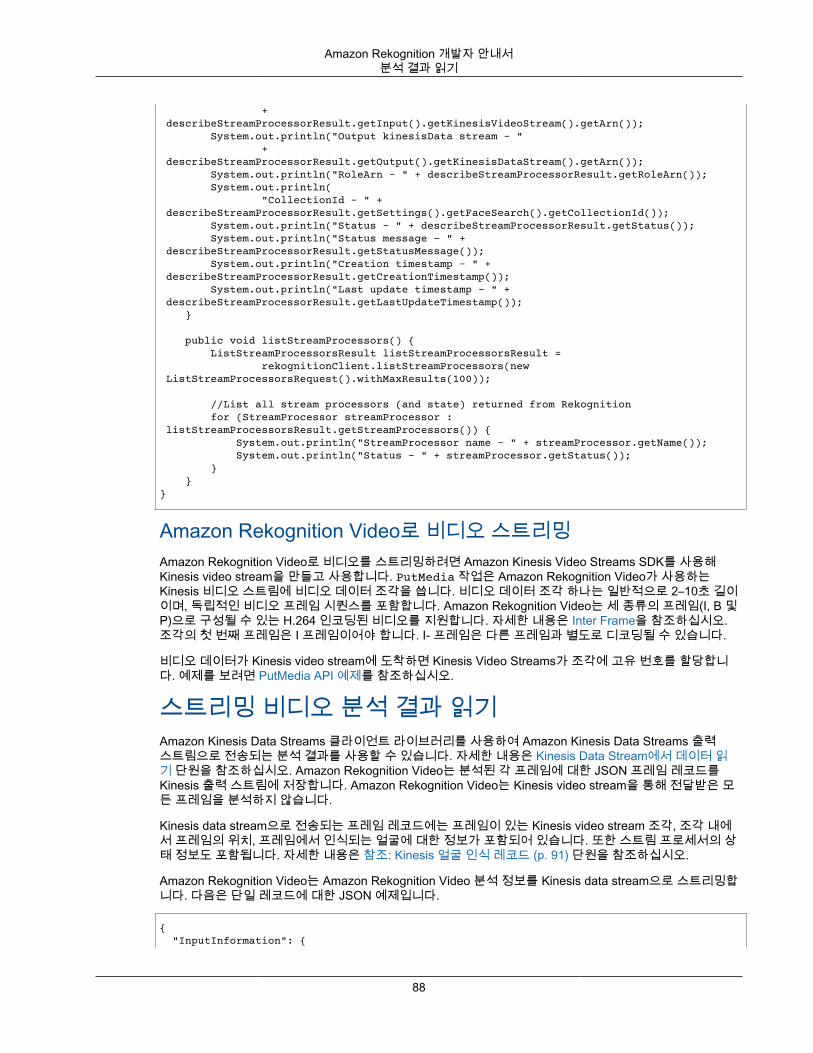
Amazon Rekognition 개발자 안내서분석 결과 읽기
+ describeStreamProcessorResult.getInput().getKinesisVideoStream().getArn()); System.out.println("Output kinesisData stream - " + describeStreamProcessorResult.getOutput().getKinesisDataStream().getArn()); System.out.println("RoleArn - " + describeStreamProcessorResult.getRoleArn()); System.out.println( "CollectionId - " + describeStreamProcessorResult.getSettings().getFaceSearch().getCollectionId()); System.out.println("Status - " + describeStreamProcessorResult.getStatus()); System.out.println("Status message - " + describeStreamProcessorResult.getStatusMessage()); System.out.println("Creation timestamp - " + describeStreamProcessorResult.getCreationTimestamp()); System.out.println("Last update timestamp - " + describeStreamProcessorResult.getLastUpdateTimestamp()); }
public void listStreamProcessors() { ListStreamProcessorsResult listStreamProcessorsResult = rekognitionClient.listStreamProcessors(new ListStreamProcessorsRequest().withMaxResults(100));
//List all stream processors (and state) returned from Rekognition for (StreamProcessor streamProcessor : listStreamProcessorsResult.getStreamProcessors()) { System.out.println("StreamProcessor name - " + streamProcessor.getName()); System.out.println("Status - " + streamProcessor.getStatus()); } }}
Amazon Rekognition Video로 비디오 스트리밍Amazon Rekognition Video로 비디오를 스트리밍하려면 Amazon Kinesis Video Streams SDK를 사용해Kinesis video stream을 만들고 사용합니다. PutMedia 작업은 Amazon Rekognition Video가 사용하는Kinesis 비디오 스트림에 비디오 데이터 조각을 씁니다. 비디오 데이터 조각 하나는 일반적으로 2–10초 길이이며, 독립적인 비디오 프레임 시퀀스를 포함합니다. Amazon Rekognition Video는 세 종류의 프레임(I, B 및P)으로 구성될 수 있는 H.264 인코딩된 비디오를 지원합니다. 자세한 내용은 Inter Frame을 참조하십시오.조각의 첫 번째 프레임은 I 프레임이어야 합니다. I- 프레임은 다른 프레임과 별도로 디코딩될 수 있습니다.
비디오 데이터가 Kinesis video stream에 도착하면 Kinesis Video Streams가 조각에 고유 번호를 할당합니다. 예제를 보려면 PutMedia API 예제를 참조하십시오.
스트리밍 비디오 분석 결과 읽기Amazon Kinesis Data Streams 클라이언트 라이브러리를 사용하여 Amazon Kinesis Data Streams 출력스트림으로 전송되는 분석 결과를 사용할 수 있습니다. 자세한 내용은 Kinesis Data Stream에서 데이터 읽기 단원을 참조하십시오. Amazon Rekognition Video는 분석된 각 프레임에 대한 JSON 프레임 레코드를Kinesis 출력 스트림에 저장합니다. Amazon Rekognition Video는 Kinesis video stream을 통해 전달받은 모든 프레임을 분석하지 않습니다.
Kinesis data stream으로 전송되는 프레임 레코드에는 프레임이 있는 Kinesis video stream 조각, 조각 내에서 프레임의 위치, 프레임에서 인식되는 얼굴에 대한 정보가 포함되어 있습니다. 또한 스트림 프로세서의 상태 정보도 포함됩니다. 자세한 내용은 참조: Kinesis 얼굴 인식 레코드 (p. 91) 단원을 참조하십시오.
Amazon Rekognition Video는 Amazon Rekognition Video 분석 정보를 Kinesis data stream으로 스트리밍합니다. 다음은 단일 레코드에 대한 JSON 예제입니다.
{ "InputInformation": {
88
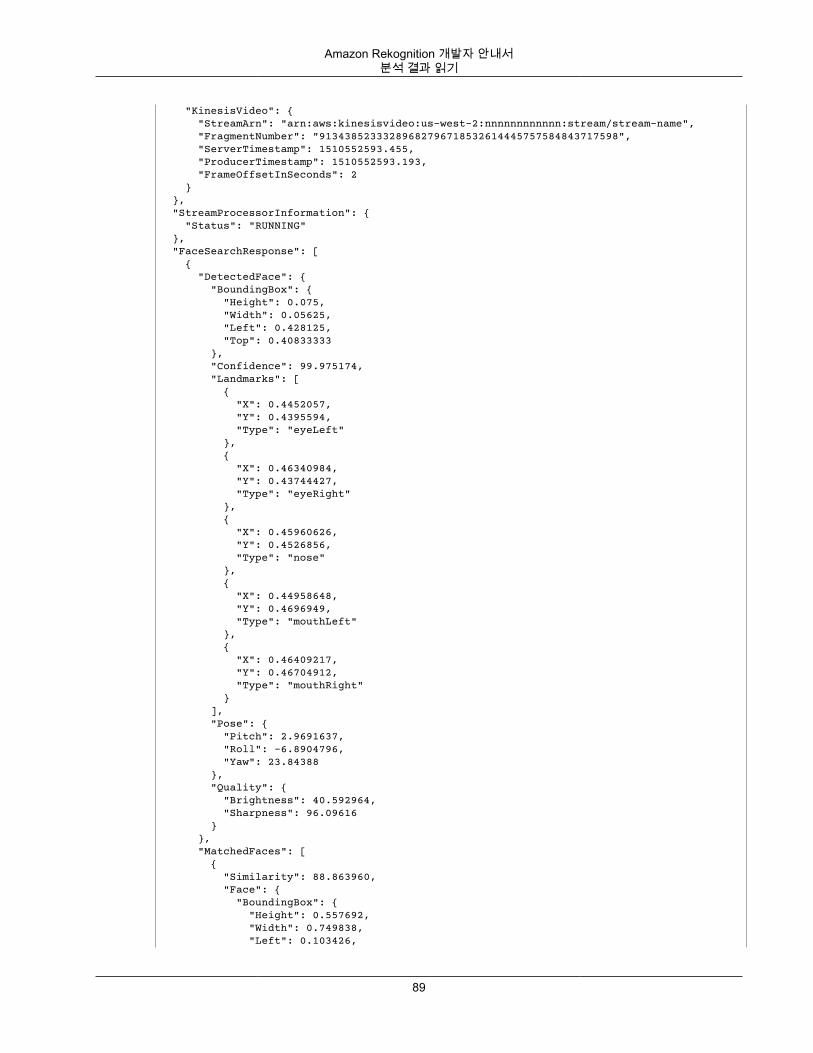
Amazon Rekognition 개발자 안내서분석 결과 읽기
"KinesisVideo": { "StreamArn": "arn:aws:kinesisvideo:us-west-2:nnnnnnnnnnnn:stream/stream-name", "FragmentNumber": "91343852333289682796718532614445757584843717598", "ServerTimestamp": 1510552593.455, "ProducerTimestamp": 1510552593.193, "FrameOffsetInSeconds": 2 } }, "StreamProcessorInformation": { "Status": "RUNNING" }, "FaceSearchResponse": [ { "DetectedFace": { "BoundingBox": { "Height": 0.075, "Width": 0.05625, "Left": 0.428125, "Top": 0.40833333 }, "Confidence": 99.975174, "Landmarks": [ { "X": 0.4452057, "Y": 0.4395594, "Type": "eyeLeft" }, { "X": 0.46340984, "Y": 0.43744427, "Type": "eyeRight" }, { "X": 0.45960626, "Y": 0.4526856, "Type": "nose" }, { "X": 0.44958648, "Y": 0.4696949, "Type": "mouthLeft" }, { "X": 0.46409217, "Y": 0.46704912, "Type": "mouthRight" } ], "Pose": { "Pitch": 2.9691637, "Roll": -6.8904796, "Yaw": 23.84388 }, "Quality": { "Brightness": 40.592964, "Sharpness": 96.09616 } }, "MatchedFaces": [ { "Similarity": 88.863960, "Face": { "BoundingBox": { "Height": 0.557692, "Width": 0.749838, "Left": 0.103426,
89

Amazon Rekognition 개발자 안내서분석 결과 읽기
"Top": 0.206731 }, "FaceId": "ed1b560f-d6af-5158-989a-ff586c931545", "Confidence": 99.999201, "ImageId": "70e09693-2114-57e1-807c-50b6d61fa4dc", "ExternalImageId": "matchedImage.jpeg" } } ] } ]}
JSON 예제에서 다음 사항에 유의하십시오.
• InputInformation – Amazon Rekognition Video로 비디오를 스트리밍하는 데 사용되는 Kinesis videostream 관련 정보입니다. 자세한 내용은 InputInformation (p. 92) 단원을 참조하십시오.
• StreamProcessorInformation – Amazon Rekognition Video 스트림 프로세서의 상태 정보입니다. Status필드에 입력할 수 있는 값은 RUNNING뿐입니다. 자세한 내용은 StreamProcessorInformation (p. 93)단원을 참조하십시오.
• FaceSearchResponse – 스트리밍 비디오에서 입력 모음의 얼굴과 일치하는 얼굴에 대한 정보가 들어 있습니다. FaceSearchResponse (p. 93)에는 분석한 비디오 프레임에서 감지되었던 얼굴, 즉DetectedFace (p. 94) 객체가 포함되어 있습니다. MatchedFaces 배열에는 감지된 얼굴별로 입력 모음에서 발견된 일치하는 얼굴 객체(MatchedFace (p. 94))와 유사성 점수가 나와 있습니다.
Kinesis Video Stream을 Kinesis Data Stream으로 매핑Kinesis video stream 프레임을 Kinesis data stream으로 전송되는 분석 프레임으로 매핑할 수 있습니다. 예를 들어 스트리밍 동영상이 표시되는 도중에도 인식된 사람들의 얼굴 주위로 상자를 표시하는 것이 가능합니다. 경계 상자 좌표는 Kinesis 얼굴 인식 레코드에 포함되어 Kinesis data stream으로 전송됩니다. 경계 상자를 정확하게 표시하려면 Kinesis 얼굴 인식 레코드와 함께 전송된 시간 정보를 원본 Kinesis video stream의해당 프레임과 매핑시켜야 합니다.
Kinesis video stream을 Kinesis data stream에 매핑할 때 사용하는 기법은 라이브 미디어(라이브 스트리밍동영상 등)를 스트리밍하는 경우 또는 아카이브 미디어(저장 동영상)를 스트리밍하는 경우에 따라 달라집니다.
라이브 미디어를 스트리밍하는 경우의 매핑
Kinesis video stream 프레임을 Kinesis data stream 프레임으로 매핑하려면
1. PutMedia 작업의 입력 파라미터 FragmentTimeCodeType을 RELATIVE로 설정합니다.2. PutMedia를 호출하여 라이브 미디어를 Kinesis video stream으로 전송합니다.3. Kinesis data stream에서 Kinesis 얼굴 인식 레코드가 수신되면 KinesisVideo (p. 92) 필드의
ProducerTimestamp 값과 FrameOffsetInSeconds 값을 저장합니다.4. ProducerTimestamp 필드 값과 FrameOffsetInSeconds 필드 값을 합산하여 Kinesis video stream
프레임과 일치하는 타임스탬프를 계산합니다.
아카이브 미디어를 스트리밍하는 경우의 매핑
Kinesis video stream 프레임을 Kinesis data stream 프레임으로 매핑하려면
1. PutMedia를 호출하여 아카이브 미디어를 Kinesis video stream으로 전달합니다.2. PutMedia 작업 응답에서 Acknowledgement 객체가 수신되면 Payload(페이로드) 필드의
FragmentNumber 필드 값을 저장합니다. 여기에서 FragmentNumber는 MKV 클러스터의 조각 수입니다.
90
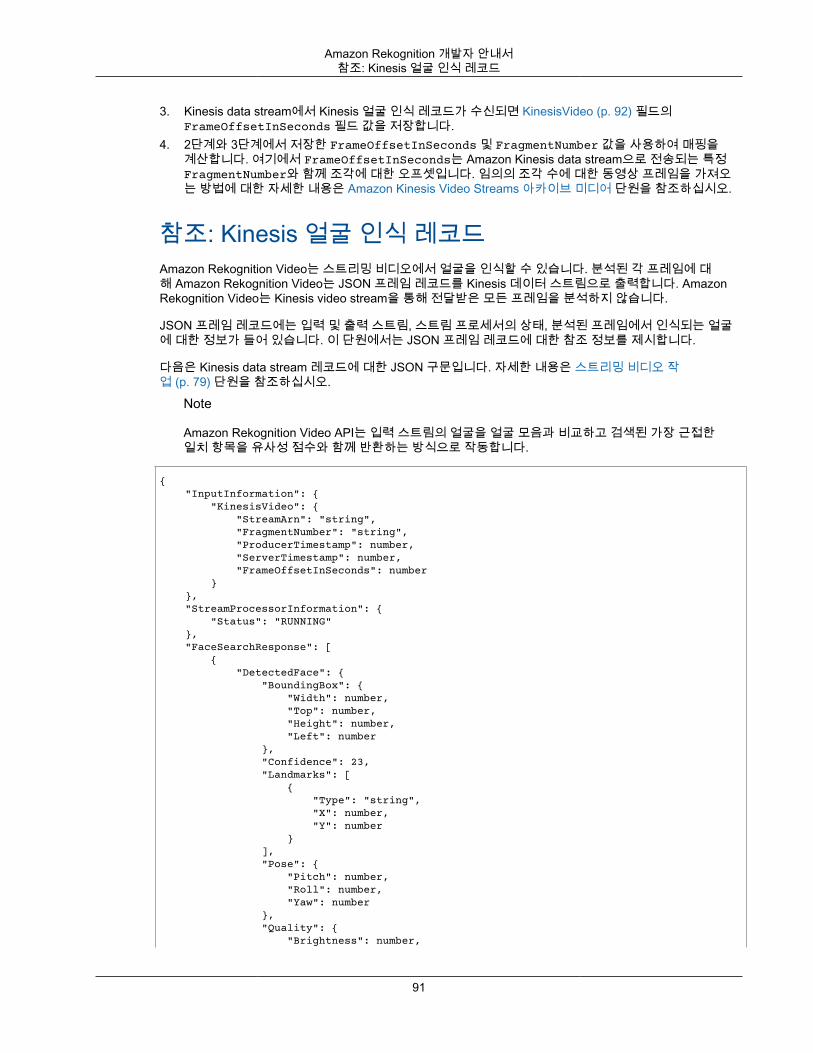
Amazon Rekognition 개발자 안내서참조: Kinesis 얼굴 인식 레코드
3. Kinesis data stream에서 Kinesis 얼굴 인식 레코드가 수신되면 KinesisVideo (p. 92) 필드의FrameOffsetInSeconds 필드 값을 저장합니다.
4. 2단계와 3단계에서 저장한 FrameOffsetInSeconds 및 FragmentNumber 값을 사용하여 매핑을계산합니다. 여기에서 FrameOffsetInSeconds는 Amazon Kinesis data stream으로 전송되는 특정FragmentNumber와 함께 조각에 대한 오프셋입니다. 임의의 조각 수에 대한 동영상 프레임을 가져오는 방법에 대한 자세한 내용은 Amazon Kinesis Video Streams 아카이브 미디어 단원을 참조하십시오.
참조: Kinesis 얼굴 인식 레코드Amazon Rekognition Video는 스트리밍 비디오에서 얼굴을 인식할 수 있습니다. 분석된 각 프레임에 대해 Amazon Rekognition Video는 JSON 프레임 레코드를 Kinesis 데이터 스트림으로 출력합니다. AmazonRekognition Video는 Kinesis video stream을 통해 전달받은 모든 프레임을 분석하지 않습니다.
JSON 프레임 레코드에는 입력 및 출력 스트림, 스트림 프로세서의 상태, 분석된 프레임에서 인식되는 얼굴에 대한 정보가 들어 있습니다. 이 단원에서는 JSON 프레임 레코드에 대한 참조 정보를 제시합니다.
다음은 Kinesis data stream 레코드에 대한 JSON 구문입니다. 자세한 내용은 스트리밍 비디오 작업 (p. 79) 단원을 참조하십시오.
Note
Amazon Rekognition Video API는 입력 스트림의 얼굴을 얼굴 모음과 비교하고 검색된 가장 근접한일치 항목을 유사성 점수와 함께 반환하는 방식으로 작동합니다.
{ "InputInformation": { "KinesisVideo": { "StreamArn": "string", "FragmentNumber": "string", "ProducerTimestamp": number, "ServerTimestamp": number, "FrameOffsetInSeconds": number } }, "StreamProcessorInformation": { "Status": "RUNNING" }, "FaceSearchResponse": [ { "DetectedFace": { "BoundingBox": { "Width": number, "Top": number, "Height": number, "Left": number }, "Confidence": 23, "Landmarks": [ { "Type": "string", "X": number, "Y": number } ], "Pose": { "Pitch": number, "Roll": number, "Yaw": number }, "Quality": { "Brightness": number,
91
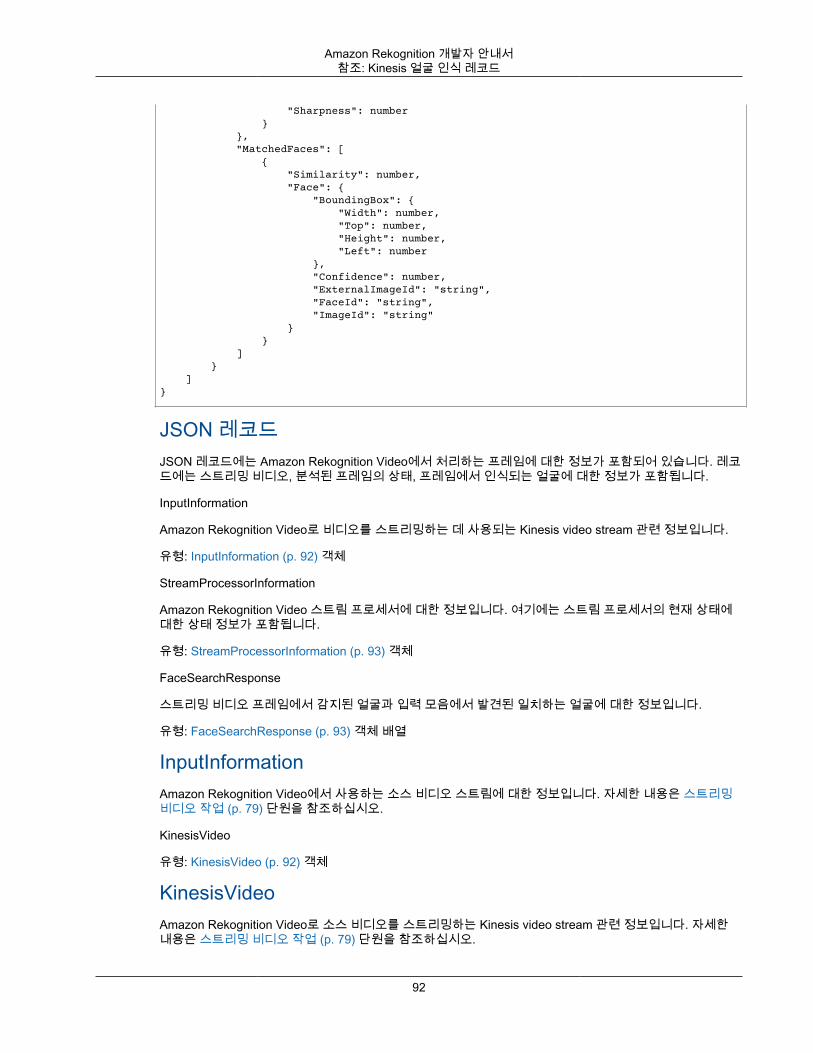
Amazon Rekognition 개발자 안내서참조: Kinesis 얼굴 인식 레코드
"Sharpness": number } }, "MatchedFaces": [ { "Similarity": number, "Face": { "BoundingBox": { "Width": number, "Top": number, "Height": number, "Left": number }, "Confidence": number, "ExternalImageId": "string", "FaceId": "string", "ImageId": "string" } } ] } ]}
JSON 레코드JSON 레코드에는 Amazon Rekognition Video에서 처리하는 프레임에 대한 정보가 포함되어 있습니다. 레코드에는 스트리밍 비디오, 분석된 프레임의 상태, 프레임에서 인식되는 얼굴에 대한 정보가 포함됩니다.
InputInformation
Amazon Rekognition Video로 비디오를 스트리밍하는 데 사용되는 Kinesis video stream 관련 정보입니다.
유형: InputInformation (p. 92) 객체
StreamProcessorInformation
Amazon Rekognition Video 스트림 프로세서에 대한 정보입니다. 여기에는 스트림 프로세서의 현재 상태에대한 상태 정보가 포함됩니다.
유형: StreamProcessorInformation (p. 93) 객체
FaceSearchResponse
스트리밍 비디오 프레임에서 감지된 얼굴과 입력 모음에서 발견된 일치하는 얼굴에 대한 정보입니다.
유형: FaceSearchResponse (p. 93) 객체 배열
InputInformationAmazon Rekognition Video에서 사용하는 소스 비디오 스트림에 대한 정보입니다. 자세한 내용은 스트리밍비디오 작업 (p. 79) 단원을 참조하십시오.
KinesisVideo
유형: KinesisVideo (p. 92) 객체
KinesisVideoAmazon Rekognition Video로 소스 비디오를 스트리밍하는 Kinesis video stream 관련 정보입니다. 자세한내용은 스트리밍 비디오 작업 (p. 79) 단원을 참조하십시오.
92
Amazon Rekognition 개발자 안내서참조: Kinesis 얼굴 인식 레코드
StreamArn
Kinesis video stream의 Amazon 리소스 이름(ARN)입니다.
유형: 문자열
FragmentNumber
이 레코드가 나타내는 프레임이 포함된 스트리밍 비디오 조각입니다.
유형: 문자열
ProducerTimestamp
조각의 생산자 측 Unix 타임스탬프입니다. 자세한 내용은 PutMedia 단원을 참조하십시오.
형식: 숫자
ServerTimestamp
조각의 서버 측 Unix 타임스탬프입니다. 자세한 내용은 PutMedia 단원을 참조하십시오.
형식: 숫자
FrameOffsetInSeconds
조각 내의 프레임 오프셋(초 단위)입니다.
형식: 숫자
StreamProcessorInformation스트림 프로세서에 대한 상태 정보입니다.
상태
스트림 프로세서의 현재 상태입니다. 가능한 값은 RUNNING입니다.
유형: 문자열
FaceSearchResponse스트리밍 비디오 프레임에서 감지된 얼굴과 모음에서 발견된 그것과 일치하는 얼굴에 대한 정보입니다. CreateStreamProcessor (p. 284) 호출에 모음을 지정합니다. 자세한 내용은 스트리밍 비디오 작업 (p. 79) 단원을 참조하십시오.
DetectedFace
분석된 비디오 프레임에서 감지된 얼굴의 세부 정보입니다.
유형: DetectedFace (p. 94) 객체
MatchedFaces
DetectedFace에서 감지된 얼굴과 일치하는 얼굴 모음의 세부 정보 배열입니다.
유형: MatchedFace (p. 94) 객체 배열
93
Amazon Rekognition 개발자 안내서스트리밍 비디오 문제 해결
DetectedFace스트리밍 비디오 프레임에서 감지된 얼굴에 대한 정보입니다. 입력 모음에 들어 있는 일치하는 얼굴은MatchedFace (p. 94) 객체 필드에서 사용할 수 있습니다.
BoundingBox
분석된 비디오 프레임 내에서 감지된 얼굴의 경계 상자 좌표입니다. BoundingBox 객체는 이미지 분석에 사용되는 BoundingBox 객체와 동일한 속성을 가집니다.
유형: BoundingBox (p. 431) 객체
신뢰도
감지된 얼굴이 실제 얼굴일 가능성을 의미하는 Amazon Rekognition Video의 신뢰도 수준입니다(1-100). 1은신뢰도가 가장 낮고, 100은 가장 높습니다.
형식: 숫자
표식
얼굴 표식의 배열입니다.
유형: Landmark (p. 470) 객체 배열
포즈
피치, 롤 및 요로 판단되는 얼굴의 포즈를 나타냅니다.
유형: Pose (p. 481) 객체
화질
얼굴 이미지의 밝기와 선명도를 나타냅니다.
유형: ImageQuality (p. 464) 객체
MatchedFace분석된 비디오 프레임에서 감지된 얼굴과 일치하는 얼굴에 대한 정보입니다.
얼굴
DetectedFace (p. 94) 객체의 얼굴과 일치하는, 입력 모음의 얼굴에 대한 얼굴 일치 정보입니다.
유형: Face (p. 448) 객체
유사성
얼굴이 일치하는 신뢰도 수준입니다(1-100). 1은 신뢰도가 가장 낮고, 100은 가장 높습니다.
형식: 숫자
스트리밍 비디오 문제 해결이 주제에서는 스트리밍 비디오에 Amazon Rekognition Video 사용할 경우의 문제 해결 정보를 제공합니다.
주제
94
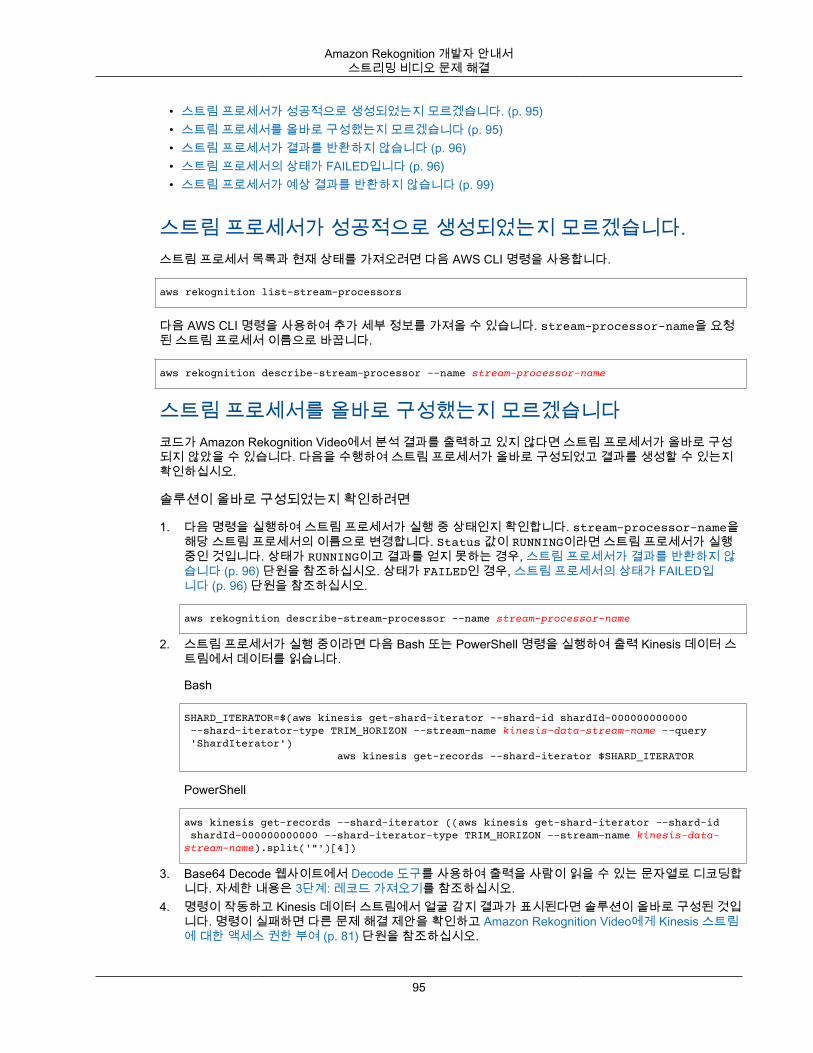
Amazon Rekognition 개발자 안내서스트리밍 비디오 문제 해결
• 스트림 프로세서가 성공적으로 생성되었는지 모르겠습니다. (p. 95)• 스트림 프로세서를 올바로 구성했는지 모르겠습니다 (p. 95)• 스트림 프로세서가 결과를 반환하지 않습니다 (p. 96)• 스트림 프로세서의 상태가 FAILED입니다 (p. 96)• 스트림 프로세서가 예상 결과를 반환하지 않습니다 (p. 99)
스트림 프로세서가 성공적으로 생성되었는지 모르겠습니다.스트림 프로세서 목록과 현재 상태를 가져오려면 다음 AWS CLI 명령을 사용합니다.
aws rekognition list-stream-processors
다음 AWS CLI 명령을 사용하여 추가 세부 정보를 가져올 수 있습니다. stream-processor-name을 요청된 스트림 프로세서 이름으로 바꿉니다.
aws rekognition describe-stream-processor --name stream-processor-name
스트림 프로세서를 올바로 구성했는지 모르겠습니다코드가 Amazon Rekognition Video에서 분석 결과를 출력하고 있지 않다면 스트림 프로세서가 올바로 구성되지 않았을 수 있습니다. 다음을 수행하여 스트림 프로세서가 올바로 구성되었고 결과를 생성할 수 있는지확인하십시오.
솔루션이 올바로 구성되었는지 확인하려면
1. 다음 명령을 실행하여 스트림 프로세서가 실행 중 상태인지 확인합니다. stream-processor-name을해당 스트림 프로세서의 이름으로 변경합니다. Status 값이 RUNNING이라면 스트림 프로세서가 실행중인 것입니다. 상태가 RUNNING이고 결과를 얻지 못하는 경우, 스트림 프로세서가 결과를 반환하지 않습니다 (p. 96) 단원을 참조하십시오. 상태가 FAILED인 경우, 스트림 프로세서의 상태가 FAILED입니다 (p. 96) 단원을 참조하십시오.
aws rekognition describe-stream-processor --name stream-processor-name
2. 스트림 프로세서가 실행 중이라면 다음 Bash 또는 PowerShell 명령을 실행하여 출력 Kinesis 데이터 스트림에서 데이터를 읽습니다.
Bash
SHARD_ITERATOR=$(aws kinesis get-shard-iterator --shard-id shardId-000000000000 --shard-iterator-type TRIM_HORIZON --stream-name kinesis-data-stream-name --query 'ShardIterator') aws kinesis get-records --shard-iterator $SHARD_ITERATOR
PowerShell
aws kinesis get-records --shard-iterator ((aws kinesis get-shard-iterator --shard-id shardId-000000000000 --shard-iterator-type TRIM_HORIZON --stream-name kinesis-data-stream-name).split('"')[4])
3. Base64 Decode 웹사이트에서 Decode 도구를 사용하여 출력을 사람이 읽을 수 있는 문자열로 디코딩합니다. 자세한 내용은 3단계: 레코드 가져오기를 참조하십시오.
4. 명령이 작동하고 Kinesis 데이터 스트림에서 얼굴 감지 결과가 표시된다면 솔루션이 올바로 구성된 것입니다. 명령이 실패하면 다른 문제 해결 제안을 확인하고 Amazon Rekognition Video에게 Kinesis 스트림에 대한 액세스 권한 부여 (p. 81) 단원을 참조하십시오.
95

Amazon Rekognition 개발자 안내서스트리밍 비디오 문제 해결
또는 "kinesis-process-record" AWS Lambda 블루프린트를 사용하여 Kinesis 데이터 스트림의 메시지를CloudWatch에 기록하면 지속적 시각화가 가능합니다. 이 경우, AWS Lambda 및 CloudWatch 추가 요금이발생합니다.
스트림 프로세서가 결과를 반환하지 않습니다스트림 프로세서가 결과를 반환하지 않는 이유에는 몇 가지가 있을 수 있습니다.
이유 1: 스트림 프로세서가 올바로 구성되지 않은 경우스트림 프로세서가 올바로 구성되지 않았을 수 있습니다. 자세한 내용은 스트림 프로세서를 올바로 구성했는지 모르겠습니다 (p. 95) 단원을 참조하십시오.
이유 2: 스트림 프로세서 상태가 RUNNING이 아닌 경우
스트림 프로세서 상태 문제를 해결하려면
1. 다음 AWS CLI 명령을 사용하여 스트림 프로세서의 상태를 확인합니다.
aws rekognition describe-stream-processor --name stream-processor-name
2. Status 값이 STOPPED라면 다음 명령을 사용하여 스트림 프로세서를 시작합니다.
aws rekognition start-stream-processor --name stream-processor-name
3. Status 값이 FAILED라면 스트림 프로세서의 상태가 FAILED입니다 (p. 96) 단원을 참조하십시오.4. Status 값이 STARTING이라면 2분 간 기다린 후 1단계를 반복하여 상태를 확인합니다. 상태 값이 여전
히 STARTING이라면 다음을 수행합니다.
a. 다음 명령을 사용하여 스트림 프로세서를 삭제합니다.
aws rekognition delete-stream-processor --name stream-processor-name
b. 동일한 구성의 새 스트림 프로세서를 생성합니다. 자세한 내용은 스트리밍 비디오 작업 (p. 79)단원을 참조하십시오.
c. 그래도 문제가 계속되면 AWS Support에 문의하십시오.5. Status 값이 RUNNING라면 이유 3: Kinesis 비디오 스트림에 활성 데이터가 없는 경우 (p. 96) 단원
을 참조하십시오.
이유 3: Kinesis 비디오 스트림에 활성 데이터가 없는 경우
Kinesis 비디오 스트림에 활성 데이터가 있는지 확인하려면
1. AWS Management Console에 로그인하고 https://console.aws.amazon.com/kinesisvideo/에서 AmazonKinesis 비디오 스트림 콘솔을 엽니다.
2. Amazon Rekognition 스트림 프로세서의 입력인 Kinesis 비디오 스트림를 선택합니다.3. 미리 보기에 No data on stream(스트림에 데이터 없음)이 표시되는 경우, Amazon Rekognition Video의
입력 스트림에 처리할 데이터가 없는 것입니다.
Kinesis 비디오 스트림를 사용한 비디오 생성에 대한 자세한 내용은 Kinesis Video Streams ProducerLibraries를 참조하십시오.
스트림 프로세서의 상태가 FAILED입니다다음 AWS CLI 명령을 사용하여 스트림 프로세서의 상태를 확인할 수 있습니다.
96
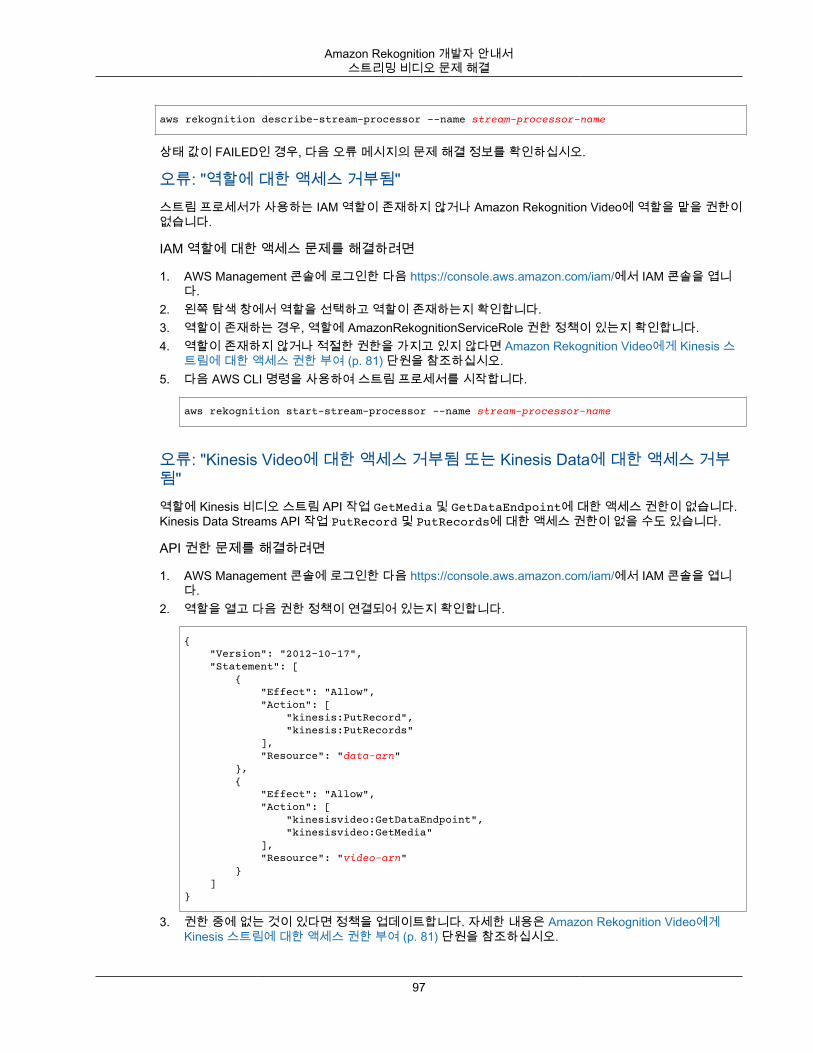
Amazon Rekognition 개발자 안내서스트리밍 비디오 문제 해결
aws rekognition describe-stream-processor --name stream-processor-name
상태 값이 FAILED인 경우, 다음 오류 메시지의 문제 해결 정보를 확인하십시오.
오류: "역할에 대한 액세스 거부됨"스트림 프로세서가 사용하는 IAM 역할이 존재하지 않거나 Amazon Rekognition Video에 역할을 맡을 권한이없습니다.
IAM 역할에 대한 액세스 문제를 해결하려면
1. AWS Management 콘솔에 로그인한 다음 https://console.aws.amazon.com/iam/에서 IAM 콘솔을 엽니다.
2. 왼쪽 탐색 창에서 역할을 선택하고 역할이 존재하는지 확인합니다.3. 역할이 존재하는 경우, 역할에 AmazonRekognitionServiceRole 권한 정책이 있는지 확인합니다.4. 역할이 존재하지 않거나 적절한 권한을 가지고 있지 않다면 Amazon Rekognition Video에게 Kinesis 스
트림에 대한 액세스 권한 부여 (p. 81) 단원을 참조하십시오.5. 다음 AWS CLI 명령을 사용하여 스트림 프로세서를 시작합니다.
aws rekognition start-stream-processor --name stream-processor-name
오류: "Kinesis Video에 대한 액세스 거부됨 또는 Kinesis Data에 대한 액세스 거부됨"역할에 Kinesis 비디오 스트림 API 작업 GetMedia 및 GetDataEndpoint에 대한 액세스 권한이 없습니다.Kinesis Data Streams API 작업 PutRecord 및 PutRecords에 대한 액세스 권한이 없을 수도 있습니다.
API 권한 문제를 해결하려면
1. AWS Management 콘솔에 로그인한 다음 https://console.aws.amazon.com/iam/에서 IAM 콘솔을 엽니다.
2. 역할을 열고 다음 권한 정책이 연결되어 있는지 확인합니다.
{ "Version": "2012-10-17", "Statement": [ { "Effect": "Allow", "Action": [ "kinesis:PutRecord", "kinesis:PutRecords" ], "Resource": "data-arn" }, { "Effect": "Allow", "Action": [ "kinesisvideo:GetDataEndpoint", "kinesisvideo:GetMedia" ], "Resource": "video-arn" } ]}
3. 권한 중에 없는 것이 있다면 정책을 업데이트합니다. 자세한 내용은 Amazon Rekognition Video에게Kinesis 스트림에 대한 액세스 권한 부여 (p. 81) 단원을 참조하십시오.
97
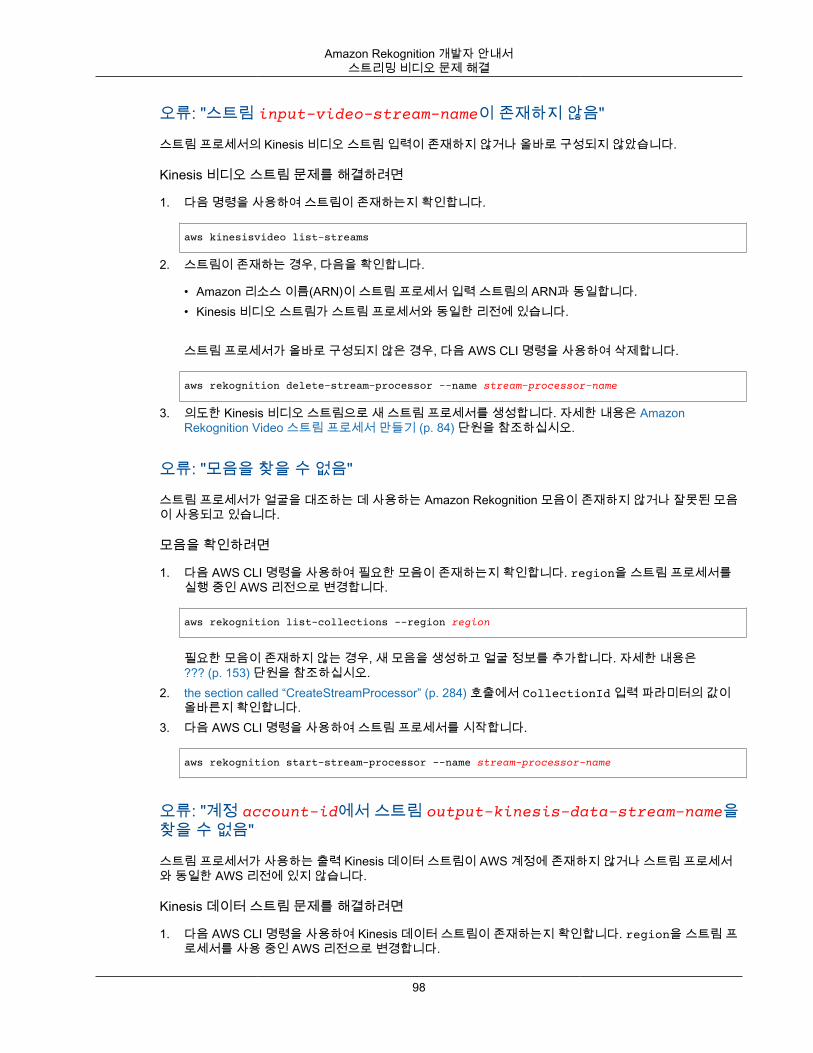
Amazon Rekognition 개발자 안내서스트리밍 비디오 문제 해결
오류: "스트림 input-video-stream-name이 존재하지 않음"
스트림 프로세서의 Kinesis 비디오 스트림 입력이 존재하지 않거나 올바로 구성되지 않았습니다.
Kinesis 비디오 스트림 문제를 해결하려면
1. 다음 명령을 사용하여 스트림이 존재하는지 확인합니다.
aws kinesisvideo list-streams
2. 스트림이 존재하는 경우, 다음을 확인합니다.
• Amazon 리소스 이름(ARN)이 스트림 프로세서 입력 스트림의 ARN과 동일합니다.• Kinesis 비디오 스트림가 스트림 프로세서와 동일한 리전에 있습니다.
스트림 프로세서가 올바로 구성되지 않은 경우, 다음 AWS CLI 명령을 사용하여 삭제합니다.
aws rekognition delete-stream-processor --name stream-processor-name
3. 의도한 Kinesis 비디오 스트림으로 새 스트림 프로세서를 생성합니다. 자세한 내용은 AmazonRekognition Video 스트림 프로세서 만들기 (p. 84) 단원을 참조하십시오.
오류: "모음을 찾을 수 없음"
스트림 프로세서가 얼굴을 대조하는 데 사용하는 Amazon Rekognition 모음이 존재하지 않거나 잘못된 모음이 사용되고 있습니다.
모음을 확인하려면
1. 다음 AWS CLI 명령을 사용하여 필요한 모음이 존재하는지 확인합니다. region을 스트림 프로세서를실행 중인 AWS 리전으로 변경합니다.
aws rekognition list-collections --region region
필요한 모음이 존재하지 않는 경우, 새 모음을 생성하고 얼굴 정보를 추가합니다. 자세한 내용은??? (p. 153) 단원을 참조하십시오.
2. the section called “CreateStreamProcessor” (p. 284) 호출에서 CollectionId 입력 파라미터의 값이올바른지 확인합니다.
3. 다음 AWS CLI 명령을 사용하여 스트림 프로세서를 시작합니다.
aws rekognition start-stream-processor --name stream-processor-name
오류: "계정 account-id에서 스트림 output-kinesis-data-stream-name을찾을 수 없음"
스트림 프로세서가 사용하는 출력 Kinesis 데이터 스트림이 AWS 계정에 존재하지 않거나 스트림 프로세서와 동일한 AWS 리전에 있지 않습니다.
Kinesis 데이터 스트림 문제를 해결하려면
1. 다음 AWS CLI 명령을 사용하여 Kinesis 데이터 스트림이 존재하는지 확인합니다. region을 스트림 프로세서를 사용 중인 AWS 리전으로 변경합니다.
98
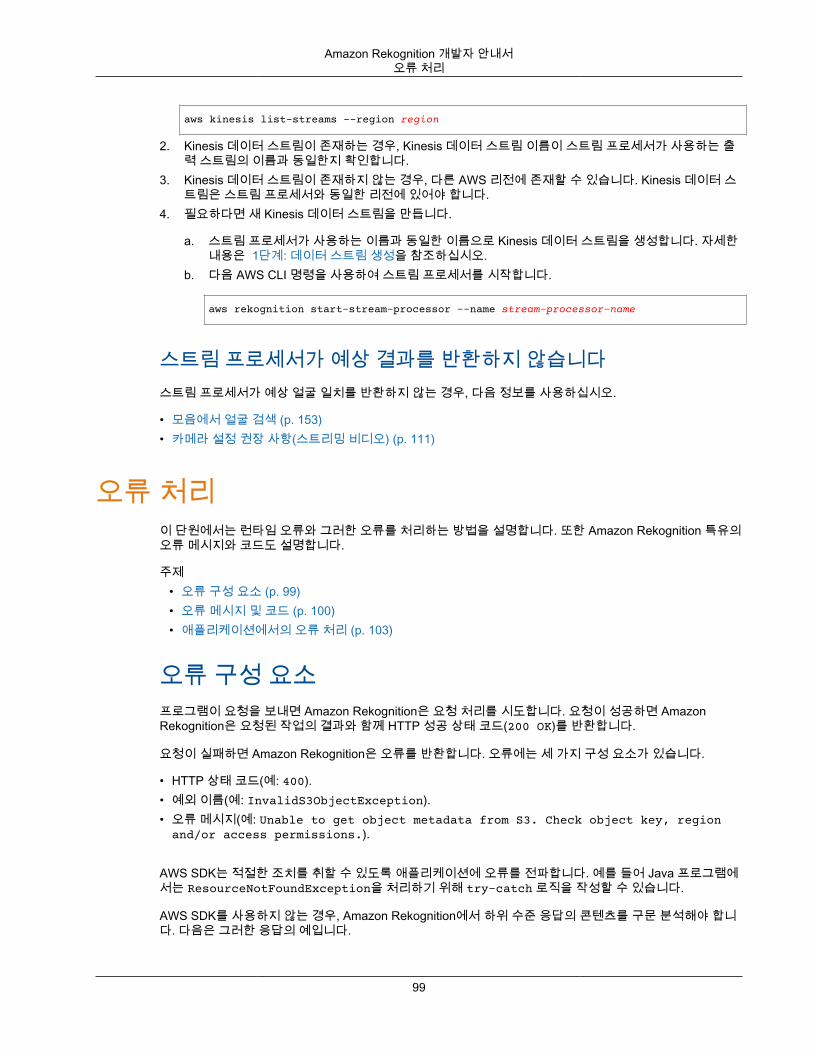
Amazon Rekognition 개발자 안내서오류 처리
aws kinesis list-streams --region region
2. Kinesis 데이터 스트림이 존재하는 경우, Kinesis 데이터 스트림 이름이 스트림 프로세서가 사용하는 출력 스트림의 이름과 동일한지 확인합니다.
3. Kinesis 데이터 스트림이 존재하지 않는 경우, 다른 AWS 리전에 존재할 수 있습니다. Kinesis 데이터 스트림은 스트림 프로세서와 동일한 리전에 있어야 합니다.
4. 필요하다면 새 Kinesis 데이터 스트림을 만듭니다.
a. 스트림 프로세서가 사용하는 이름과 동일한 이름으로 Kinesis 데이터 스트림을 생성합니다. 자세한내용은 1단계: 데이터 스트림 생성을 참조하십시오.
b. 다음 AWS CLI 명령을 사용하여 스트림 프로세서를 시작합니다.
aws rekognition start-stream-processor --name stream-processor-name
스트림 프로세서가 예상 결과를 반환하지 않습니다스트림 프로세서가 예상 얼굴 일치를 반환하지 않는 경우, 다음 정보를 사용하십시오.
• 모음에서 얼굴 검색 (p. 153)• 카메라 설정 권장 사항(스트리밍 비디오) (p. 111)
오류 처리이 단원에서는 런타임 오류와 그러한 오류를 처리하는 방법을 설명합니다. 또한 Amazon Rekognition 특유의오류 메시지와 코드도 설명합니다.
주제• 오류 구성 요소 (p. 99)• 오류 메시지 및 코드 (p. 100)• 애플리케이션에서의 오류 처리 (p. 103)
오류 구성 요소프로그램이 요청을 보내면 Amazon Rekognition은 요청 처리를 시도합니다. 요청이 성공하면 AmazonRekognition은 요청된 작업의 결과와 함께 HTTP 성공 상태 코드(200 OK)를 반환합니다.
요청이 실패하면 Amazon Rekognition은 오류를 반환합니다. 오류에는 세 가지 구성 요소가 있습니다.
• HTTP 상태 코드(예: 400).• 예외 이름(예: InvalidS3ObjectException).• 오류 메시지(예: Unable to get object metadata from S3. Check object key, regionand/or access permissions.).
AWS SDK는 적절한 조치를 취할 수 있도록 애플리케이션에 오류를 전파합니다. 예를 들어 Java 프로그램에서는 ResourceNotFoundException을 처리하기 위해 try-catch 로직을 작성할 수 있습니다.
AWS SDK를 사용하지 않는 경우, Amazon Rekognition에서 하위 수준 응답의 콘텐츠를 구문 분석해야 합니다. 다음은 그러한 응답의 예입니다.
99
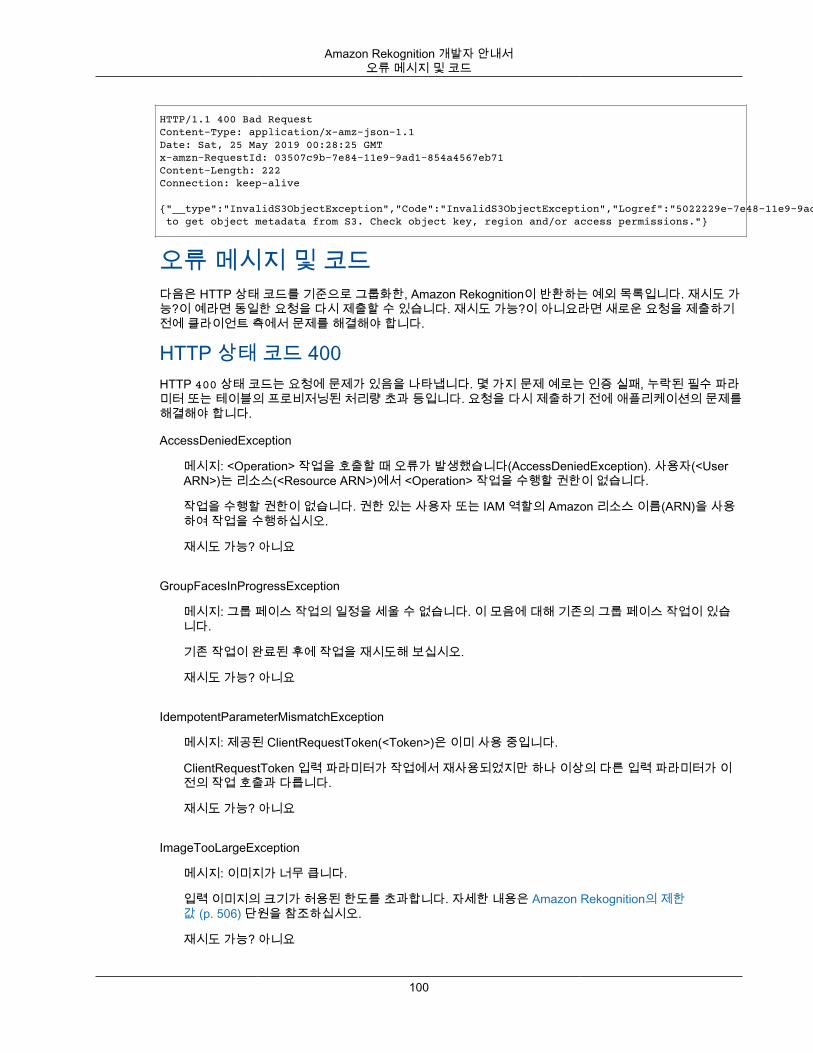
Amazon Rekognition 개발자 안내서오류 메시지 및 코드
HTTP/1.1 400 Bad RequestContent-Type: application/x-amz-json-1.1Date: Sat, 25 May 2019 00:28:25 GMTx-amzn-RequestId: 03507c9b-7e84-11e9-9ad1-854a4567eb71Content-Length: 222Connection: keep-alive
{"__type":"InvalidS3ObjectException","Code":"InvalidS3ObjectException","Logref":"5022229e-7e48-11e9-9ad1-854a4567eb71","Message":"Unable to get object metadata from S3. Check object key, region and/or access permissions."}
오류 메시지 및 코드다음은 HTTP 상태 코드를 기준으로 그룹화한, Amazon Rekognition이 반환하는 예외 목록입니다. 재시도 가능?이 예라면 동일한 요청을 다시 제출할 수 있습니다. 재시도 가능?이 아니요라면 새로운 요청을 제출하기전에 클라이언트 측에서 문제를 해결해야 합니다.
HTTP 상태 코드 400HTTP 400 상태 코드는 요청에 문제가 있음을 나타냅니다. 몇 가지 문제 예로는 인증 실패, 누락된 필수 파라미터 또는 테이블의 프로비저닝된 처리량 초과 등입니다. 요청을 다시 제출하기 전에 애플리케이션의 문제를해결해야 합니다.
AccessDeniedException
메시지: <Operation> 작업을 호출할 때 오류가 발생했습니다(AccessDeniedException). 사용자(<UserARN>)는 리소스(<Resource ARN>)에서 <Operation> 작업을 수행할 권한이 없습니다.
작업을 수행할 권한이 없습니다. 권한 있는 사용자 또는 IAM 역할의 Amazon 리소스 이름(ARN)을 사용하여 작업을 수행하십시오.
재시도 가능? 아니요
GroupFacesInProgressException
메시지: 그룹 페이스 작업의 일정을 세울 수 없습니다. 이 모음에 대해 기존의 그룹 페이스 작업이 있습니다.
기존 작업이 완료된 후에 작업을 재시도해 보십시오.
재시도 가능? 아니요
IdempotentParameterMismatchException
메시지: 제공된 ClientRequestToken(<Token>)은 이미 사용 중입니다.
ClientRequestToken 입력 파라미터가 작업에서 재사용되었지만 하나 이상의 다른 입력 파라미터가 이전의 작업 호출과 다릅니다.
재시도 가능? 아니요
ImageTooLargeException
메시지: 이미지가 너무 큽니다.
입력 이미지의 크기가 허용된 한도를 초과합니다. 자세한 내용은 Amazon Rekognition의 제한값 (p. 506) 단원을 참조하십시오.
재시도 가능? 아니요
100
Amazon Rekognition 개발자 안내서오류 메시지 및 코드
InvalidImageFormatException
메시지: 요청에 잘못된 이미지 형식이 있습니다.
제공된 이미지 형식은 지원되지 않습니다. 지원되는 이미지 형식(.JPEG 및 .PNG)을 사용하십시오. 자세한 내용은 Amazon Rekognition의 제한 값 (p. 506) 단원을 참조하십시오.
재시도 가능? 아니요
InvalidPaginationTokenException
메시지• 잘못된 토큰• 잘못된 매김 토큰
요청의 매김 토큰이 잘못되었습니다. 토큰이 만료되었을 수 있습니다.
재시도 가능? 아니요
InvalidParameterException
메시지: 요청에 잘못된 파라미터가 있습니다.
입력 파라미터가 제약 조건을 위반했습니다. 파라미터를 확인한 다음 API 작업을 다시 호출하십시오.
재시도 가능? 아니요
InvalidS3ObjectException
메시지:• 요청에 잘못된 S3 객체가 있습니다.• S3에서 객체 메타데이터를 가져올 수 없습니다. 객체 키, 리전 및/또는 액세스 권한을 확인하십시오.
Amazon Rekognition이 요청에서 지정된 S3 객체에 액세스할 수 없습니다. 자세한 내용은 S3 액세스 구성: AWS S3 액세스 권한 관리 단원을 참조하십시오. 문제 해결 정보는 Amazon S3 문제 해결을 참조하십시오.
재시도 가능? 아니요
LimitExceededException
메시지:• 스트림 프로세서의 제한이 계정의 한도(<Current Limit>)를 초과했습니다.• 사용자(<User ARN>)를 위한 열린 작업 <Number of Open Jobs>개. 최대 한도: <Maximum Limit>
Amazon Rekognition 서비스 제한이 초과되었습니다. 예를 들어 너무 많은 Amazon Rekognition Video작업을 동시에 시작하면서 StartLabelDetection 등의 작업을 호출할 경우에는 동시 실행 작업의 수가 Amazon Rekognition 서비스 제한 미만이 될 때까지 LimitExceededException 예외(HTTP 상태코드: 400)가 발생합니다.
재시도 가능? 아니요
ProvisionedThroughputExceededException
메시지:• 프로비저닝된 속도가 초과되었습니다.
101
Amazon Rekognition 개발자 안내서오류 메시지 및 코드
• S3 다운로드 한도가 초과되었습니다.
요청의 수가 처리량 한도를 초과했습니다. 자세한 내용은 Amazon Rekognition 서비스 제한 단원을 참조하십시오.
한도 증가를 요청하려면 AWS Support에 문의하십시오.
재시도 가능? 예
ResourceAlreadyExistsException
메시지: 모음의 ID(<Collection Id>)가 이미 존재합니다.
지정된 ID의 모음이 이미 존재합니다.
재시도 가능? 아니요
ResourceInUseException
메시지:• 스트림 프로세서의 이름이 이미 사용 중입니다.• 지정된 리소스가 이미 사용 중입니다.• 프로세서를 스트림 중지에 사용할 수 없습니다.• 스트림 프로세서를 삭제할 수 없습니다.
리소스를 사용할 수 있을 때 다시 시도하십시오.
재시도 가능? 아니요
ResourceNotFoundException
메시지: API 호출에 따라 메시지가 달라집니다.
지정된 리소스가 존재하지 않습니다.
재시도 가능? 아니요
ThrottlingException
메시지: 속도를 줄이십시오. 요청 속도가 급증했습니다.
요청 증가 속도가 너무 빠릅니다. 요청 속도를 줄이고 조금씩 늘리십시오. 백오프를 지수적으로 수행하고 다시 시도하는 것이 좋습니다. 기본적으로 AWS SDK는 자동 재시도 로직과 지수 백오프를 사용합니다. 자세한 내용은 AWS에서의 오류 재시도 및 지수 백오프 단원과 지수 백오프 및 Jitter 단원을 참조하십시오.
재시도 가능? 예
VideoTooLargeException
메시지: 비디오 크기 <Video Size>(바이트)가 최대 한도인 <Max Size>바이트를 초과합니다.
제공된 미디어의 파일 크기 또는 재생 시간이 너무 크거나 깁니다. 자세한 내용은 Amazon Rekognition의 제한 값 (p. 506) 단원을 참조하십시오.
재시도 가능? 아니요
102
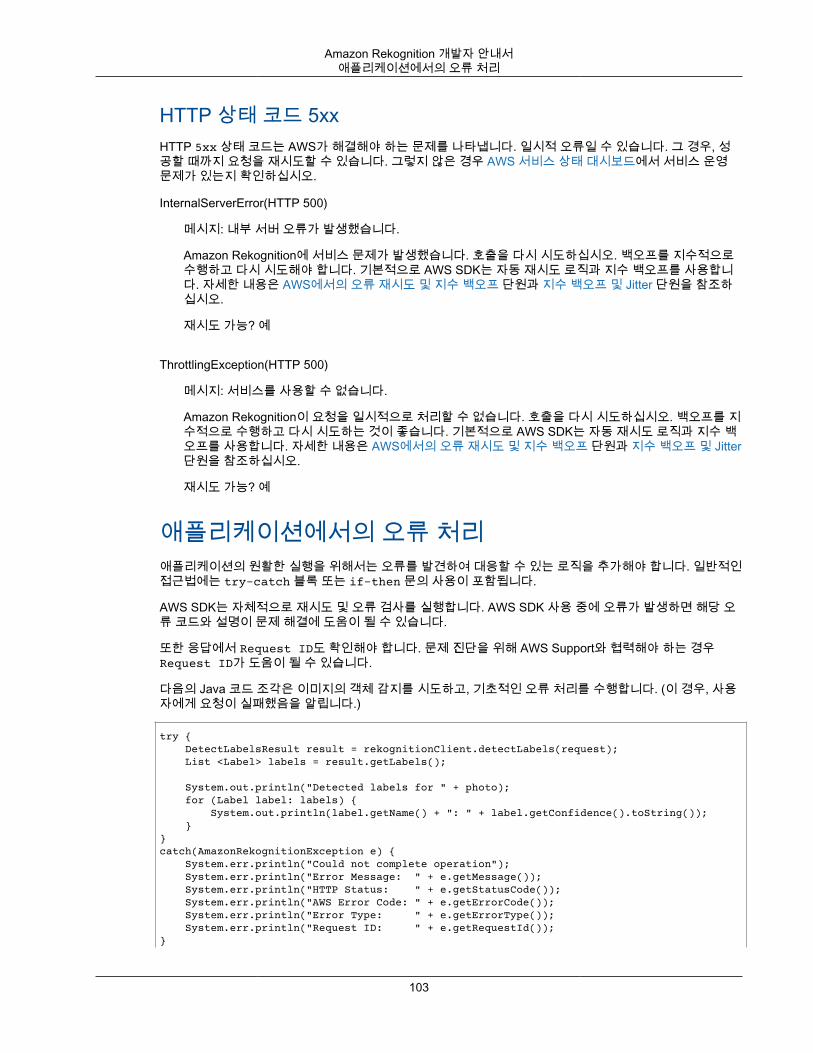
Amazon Rekognition 개발자 안내서애플리케이션에서의 오류 처리
HTTP 상태 코드 5xxHTTP 5xx 상태 코드는 AWS가 해결해야 하는 문제를 나타냅니다. 일시적 오류일 수 있습니다. 그 경우, 성공할 때까지 요청을 재시도할 수 있습니다. 그렇지 않은 경우 AWS 서비스 상태 대시보드에서 서비스 운영문제가 있는지 확인하십시오.
InternalServerError(HTTP 500)
메시지: 내부 서버 오류가 발생했습니다.
Amazon Rekognition에 서비스 문제가 발생했습니다. 호출을 다시 시도하십시오. 백오프를 지수적으로수행하고 다시 시도해야 합니다. 기본적으로 AWS SDK는 자동 재시도 로직과 지수 백오프를 사용합니다. 자세한 내용은 AWS에서의 오류 재시도 및 지수 백오프 단원과 지수 백오프 및 Jitter 단원을 참조하십시오.
재시도 가능? 예
ThrottlingException(HTTP 500)
메시지: 서비스를 사용할 수 없습니다.
Amazon Rekognition이 요청을 일시적으로 처리할 수 없습니다. 호출을 다시 시도하십시오. 백오프를 지수적으로 수행하고 다시 시도하는 것이 좋습니다. 기본적으로 AWS SDK는 자동 재시도 로직과 지수 백오프를 사용합니다. 자세한 내용은 AWS에서의 오류 재시도 및 지수 백오프 단원과 지수 백오프 및 Jitter단원을 참조하십시오.
재시도 가능? 예
애플리케이션에서의 오류 처리애플리케이션의 원활한 실행을 위해서는 오류를 발견하여 대응할 수 있는 로직을 추가해야 합니다. 일반적인접근법에는 try-catch 블록 또는 if-then 문의 사용이 포함됩니다.
AWS SDK는 자체적으로 재시도 및 오류 검사를 실행합니다. AWS SDK 사용 중에 오류가 발생하면 해당 오류 코드와 설명이 문제 해결에 도움이 될 수 있습니다.
또한 응답에서 Request ID도 확인해야 합니다. 문제 진단을 위해 AWS Support와 협력해야 하는 경우Request ID가 도움이 될 수 있습니다.
다음의 Java 코드 조각은 이미지의 객체 감지를 시도하고, 기초적인 오류 처리를 수행합니다. (이 경우, 사용자에게 요청이 실패했음을 알립니다.)
try { DetectLabelsResult result = rekognitionClient.detectLabels(request); List <Label> labels = result.getLabels();
System.out.println("Detected labels for " + photo); for (Label label: labels) { System.out.println(label.getName() + ": " + label.getConfidence().toString()); }} catch(AmazonRekognitionException e) { System.err.println("Could not complete operation"); System.err.println("Error Message: " + e.getMessage()); System.err.println("HTTP Status: " + e.getStatusCode()); System.err.println("AWS Error Code: " + e.getErrorCode()); System.err.println("Error Type: " + e.getErrorType()); System.err.println("Request ID: " + e.getRequestId());}
103
Amazon Rekognition 개발자 안내서Amazon A2I 및 Amazon Rekognition
catch (AmazonClientException ace) { System.err.println("Internal error occurred communicating with Rekognition"); System.out.println("Error Message: " + ace.getMessage());}
이 코드 조각에서 try-catch 구문은 두 가지 상이한 예외를 처리합니다.
• AmazonRekognitionException–이 예외는 클라이언트 요청이 Amazon Rekognition에 올바르게 전송되지만, Amazon Rekognition이 요청을 처리할 수 없고 대신 오류 응답을 반환하는 경우에 발생합니다.
• AmazonClientException–이 예외는 클라이언트가 서비스로부터 응답을 받을 수 없거나 서비스의 응답을 구문 분석할 수 없는 경우에 발생합니다.
Amazon Rekognition와 함께 Amazon AugmentedAI(프리뷰) 사용
Amazon Augmented AI는 프리뷰 버전이 출시 중이기 때문에 변경될 수도 있습니다. 이 도구는 테스트 데이터베이스에만 사용하고 프로덕션 환경에서는 사용하지 않는 것이 좋습니다.
Amazon Augmented AI(Amazon A2I)를 사용하면 기계 학습 예측의 인적 검토에 필요한 워크플로우를 구축할 수 있습니다.
Amazon Rekognition은 Amazon A2I와 직접 통합되어 안전하지 않은 이미지를 감지하는 사용 사례에 대한인적 검토를 쉽게 구현할 수 있습니다. Amazon A2I는 이미지 조정을 위한 인적 검토 워크플로우를 제공합니다. 이를 통해 Amazon Rekognition의 예측을 쉽게 검토할 수 있습니다. 사용 사례에 대한 신뢰도 임계값을정의하고 시간이 지남에 따라 조정할 수 있습니다. Amazon A2I를 이용하면 조직 또는 Amazon MechanicalTurk 내에서 검토자 풀을 사용할 수 있습니다. 품질과 보안 절차 준수를 위해 AWS에서 사전 검열을 거친 공급업체 인력도 이용할 수 있습니다.
다음 단계에서는 Amazon Rekognition와 함께 Amazon A2I를 설정하는 방법을 안내합니다. 먼저, 인적검토를 트리거하는 조건이 있는 Amazon A2I를 사용해 흐름 정의를 생성합니다. 그런 다음 흐름 정의의Amazon 리소스 이름(ARN)을 Amazon Rekognition DetectModerationLabel 작업에 전달합니다.DetectModerationLabel 응답에서 인적 검토가 필요한지 여부를 확인할 수 있습니다. 인적 검토의 결과는 흐름 정의에 의해 설정된 Amazon S3 버킷에서 사용할 수 있습니다.
Amazon A2I에서 DetectModerationLabels 실행(프리뷰)
1. Amazon SageMaker 설명서의 Amazon Augmented AI 시작하기에 나열된 사전 조건을 완료합니다.
또한 Amazon SageMaker 설명서의 Amazon Augmented AI의 권한 및 보안 페이지에 나온 것처럼 IAM권한을 설정해야 합니다.
2. Amazon SageMaker 설명서에서 인적 검토 워크플로우 생성에 대한 지침을 따릅니다.
인적 검토 워크플로우는 이미지 처리를 관리합니다. 여기에는 인적 검토를 트리거하는 조건, 이미지가전송되는 작업 팀, 작업 팀이 사용하는 UI 템플릿 및 작업 팀의 결과가 전송되는 Amazon S3 버킷이 포함됩니다.
CreateFlowDefinition 호출 내에서 HumanLoopRequestSource를 "AWS/Rekognition/DetectModerationLabels/Image/V3"으로 설정해야 합니다. 그런 다음 인적 검토를 트리거하는 조건을 설정하는 방법을 결정해야 합니다.
Amazon Rekognition의 경우, 사용된 ConditionType은 ModerationLabelConfidenceCheck이며, 여기에는 ConditionParameters, ModerationLabelName, ConfidenceLessThan,GreaterThan, EqualTo, GreaterThanOrEqualTo 및 LessThanOrEqualTo가 포함됩니다. 이러한 파라미터를 사용하여 확인할 조정 레이블과 인적 검토를 트리거하는 임계값을 설정할 수 있습니다. 이러한 옵
104

Amazon Rekognition 개발자 안내서Amazon A2I 및 Amazon Rekognition
션 외에도 "And", "Or" 또는 "Not"과 같은 논리 연산자를 사용하여 보다 복잡한 조건을 생성할 수 있습니다. 분석된 모든 이미지를 인적 검토로 보내려면 레이블을 “*”로 설정하고 ConfidenceGreaterThan 파라미터를 0으로 설정합니다.
다음 코드 예제는 CreateFlowDefinition의 부분 호출입니다. "Suggestive"(외설적 콘텐츠) 레이블에서는 98% 미만, "Female Swimwear or Underwear"(여성 수영복 또는 속옷) 레이블에는 95% 이상으로 평가된 경우 인적 검토를 위해 이미지를 보냅니다. 즉, 이미지가 외설적인 것으로 간주되지는 않지만수영복이나 속옷을 착용한 여성이 있는 경우 인적 검토를 통해 이미지를 다시 확인할 수 있습니다.
def create_flow_definition(): ''' Creates a Flow Definition resource
Returns: struct: FlowDefinitionArn ''' humanLoopActivationConditions = json.dumps( { "Conditions": [ { "And": [ { "ConditionType": "ModerationLabelConfidenceCheck", "ConditionParameters": { "ModerationLabelName": "Suggestive", "ConfidenceLessThan": 98 } }, { "ConditionType": "ModerationLabelConfidenceCheck", "ConditionParameters": { "ModerationLabelName": "Female Swimwear Or Underwear", "ConfidenceGreaterThan": 95 } } ] } ] } )
CreateFlowDefinition은 DetectModerationLabels를 호출할 때 다음 단계에서 사용하는FlowDefinitionArn을 반환합니다.
자세한 내용은 Amazon SageMaker API 참조의 CreateFlowDefinition을 참조하십시오.3. 안전하지 않은 이미지 감지 (p. 223)에 나온 것처럼 DetectModerationLabels를 호출할 때
HumanLoopConfig 파라미터를 설정합니다.
a. HumanLoopConfig 파라미터 내에서 FlowDefinitionArn을 2단계에서 생성한 흐름 정의의ARN으로 설정합니다.
b. HumanLoopName을 설정합니다. 이는 지역 내에서 고유해야 하며 소문자여야 합니다.c. (선택 사항) DataAttributes를 사용하여 Amazon Rekognition에 전달한 이미지에 개인 식별 정
보가 없는지 여부를 설정할 수 있습니다. Amazon Mechanical Turk에 정보를 보내려면 이 파라미터를 설정해야 합니다.
다음은 DetectModerationLabels에 대한 호출이 Python의 HumanLoopConfig 집합에서 어떻게 보이는지에 대한 예입니다.
105
Amazon Rekognition 개발자 안내서FedRAMP와 함께 Amazon Rekognition 사용
client.detect_moderation_labels(Image={'S3Object':{'Bucket':Bucket,'Name':photo}}, HumanLoopConfig={'FlowDefinitionArn':string,'HumanLoopName':string})
4. 실행 DetectModerationLabels.
활성화된 HumanLoopConfig로 DetectModerationLabels을 실행하면 AmazonRekognition는 Amazon SageMaker API 작업 StartHumanLoop를 호출합니다. 이 명령은DetectModerationLabels에서 답변을 받고 예제의 흐름 정의 조건에 대해 확인합니다. 검토 조건을 충족하는 경우 HumanLoopArn을 반환합니다. 즉, 흐름 정의에서 설정한 작업 팀의 구성원은 이제 이미지를 검토할 수 있습니다. Amazon Augmented AI 런타임 작업을 호출하면 DescribeHumanLoop는루프의 결과에 대한 정보를 제공합니다. 자세한 내용은 Amazon Augmented AI API 참조 설명서의DescribeHumanLoop를 참조하십시오.
이미지를 검토한 후에는 흐름 정의의 출력 경로에 지정된 버킷에서 결과를 확인할 수 있습니다. 또한 검토가 완료되면 Amazon A2I는 Amazon CloudWatch Events와 함께 통지합니다. 어떤 이벤트를 찾아야하는지 확인하려면 Amazon SageMaker 설명서의 CloudWatch 이벤트를 참조하십시오.
자세한 내용은 Amazon SageMaker 설명서의 Amazon Augmented AI 시작하기를 참조하십시오.
FedRAMP 권한 부여 서비스로 Amazon Rekognition사용
AWS FedRAMP 규정 준수 프로그램에는 Amazon Rekognition가 FedRAMP 권한 부여 서비스로 포함되어있습니다. 연방 또는 상업 고객인 경우 서비스를 사용하여 중요 워크로드를 중간 영향 수준 이하의 데이터로AWS 미국 동부 및 미국 서부에서 처리하고 저장할 수 있습니다. 서비스를 사용하여 중요 워크로드를 AWSGovCloud(미국) 지역의 승인 범위를 높은 영향 수준 이하의 데이터로 처리할 수 있습니다. FedRAMP 규정준수에 대한 자세한 내용은 AWS FedRAMP 규정 준수를 참조하십시오.
FedRAMP 규정을 준수하려면 FIPS(Federal Information Processing Standard) 엔드포인트를 사용할 수있습니다. 이를 통해 중요한 정보로 작업할 때 FIPS 140-2의 검증된 암호화 모듈에 액세스할 수 있습니다.FIPS 엔드포인트에 대한 자세한 내용은 FIPS 140-2 개요를 참조하십시오.
AWS Command Line Interface(AWS CLI) 또는 AWS SDK 중 하나를 사용하여 Amazon Rekognition에서 사용하는 엔드포인트를 지정할 수 있습니다.
Amazon Rekognition에 사용할 수 있는 엔드포인트에 대해서는 Amazon Rekognition 지역 및 엔드포인트를참조하십시오.
다음은 Amazon Rekognition 개발자 안내서의 컬렉션 나열 (p. 159) 주제에 있는 예입니다. AmazonRekognition가 액세스되는 지역 및 FIPS 엔드포인트를 지정하도록 수정됩니다.
Java
Java의 경우 Amazon Rekognition 클라이언트를 구성할 때 withEndpointConfiguration 메서드를사용합니다. 다음 예에서는 미국 동부(버지니아 북부) 지역에서 FIPS 엔드포인트를 사용하는 컬렉션을보여줍니다.
//Copyright 2019 Amazon.com, Inc. or its affiliates. All Rights Reserved.//PDX-License-Identifier: MIT-0 (For details, see https://github.com/awsdocs/amazon-rekognition-developer-guide/blob/master/LICENSE-SAMPLECODE.)
package aws.example.rekognition.image;
106

Amazon Rekognition 개발자 안내서FedRAMP와 함께 Amazon Rekognition 사용
import java.util.List;
import com.amazonaws.services.rekognition.AmazonRekognition;import com.amazonaws.services.rekognition.AmazonRekognitionClientBuilder;import com.amazonaws.services.rekognition.model.ListCollectionsRequest;import com.amazonaws.services.rekognition.model.ListCollectionsResult;
public class ListCollections {
public static void main(String[] args) throws Exception {
AmazonRekognition amazonRekognition = AmazonRekognitionClientBuilder.standard() .withEndpointConfiguration(new AwsClientBuilder.EndpointConfiguration("https://rekognition-fips.us-east-1.amazonaws.com","us-east-1")) .build();
System.out.println("Listing collections"); int limit = 10; ListCollectionsResult listCollectionsResult = null; String paginationToken = null; do { if (listCollectionsResult != null) { paginationToken = listCollectionsResult.getNextToken(); } ListCollectionsRequest listCollectionsRequest = new ListCollectionsRequest() .withMaxResults(limit) .withNextToken(paginationToken); listCollectionsResult=amazonRekognition.listCollections(listCollectionsRequest); List < String > collectionIds = listCollectionsResult.getCollectionIds(); for (String resultId: collectionIds) { System.out.println(resultId); } } while (listCollectionsResult != null && listCollectionsResult.getNextToken() != null); } }
AWS CLI
AWS CLI의 경우 --endpoint-url 인수를 사용하여 Amazon Rekognition가 액세스되는 엔드포인트를 지정합니다. 다음 예에서는 미국 동부(오하이오) 지역에서 FIPS 엔드포인트를 사용하는 컬렉션을 보여줍니다.
aws rekognition list-collections --endpoint-url https://rekognition-fips.us-east-2.amazonaws.com --region us-east-2
Python
Python의 경우 boto3.client 함수에서 endpoint_url 인수를 사용합니다. 지정하려는 엔드포인트로 설정합니다. 다음 예에서는 미국 서부(오레곤) 지역에서 FIPS 엔드포인트를 사용하는 컬렉션을 보여줍니다.
#Copyright 2018 Amazon.com, Inc. or its affiliates. All Rights Reserved.#PDX-License-Identifier: MIT-0 (For details, see https://github.com/awsdocs/amazon-rekognition-developer-guide/blob/master/LICENSE-SAMPLECODE.)
107
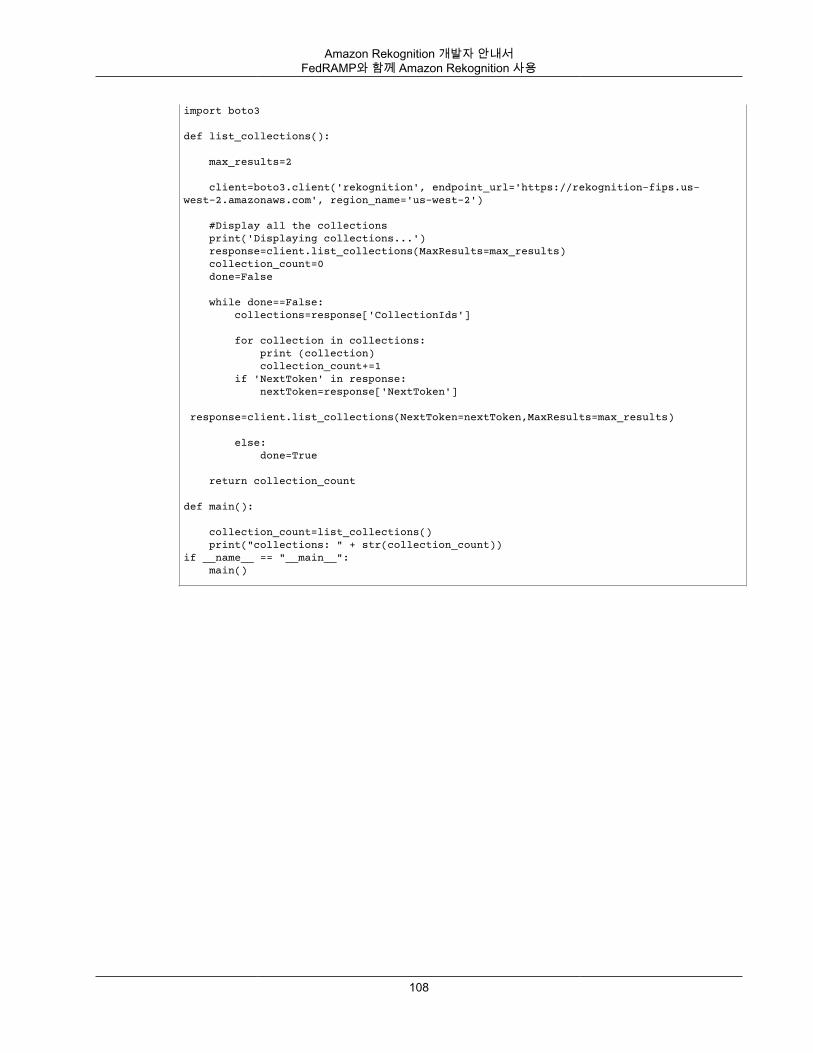
Amazon Rekognition 개발자 안내서FedRAMP와 함께 Amazon Rekognition 사용
import boto3
def list_collections():
max_results=2 client=boto3.client('rekognition', endpoint_url='https://rekognition-fips.us-west-2.amazonaws.com', region_name='us-west-2')
#Display all the collections print('Displaying collections...') response=client.list_collections(MaxResults=max_results) collection_count=0 done=False while done==False: collections=response['CollectionIds']
for collection in collections: print (collection) collection_count+=1 if 'NextToken' in response: nextToken=response['NextToken'] response=client.list_collections(NextToken=nextToken,MaxResults=max_results) else: done=True
return collection_count
def main():
collection_count=list_collections() print("collections: " + str(collection_count))if __name__ == "__main__": main()
108
Amazon Rekognition 개발자 안내서Amazon Rekognition Image 작업 지연 시간
센서, 입력 이미지 및 비디오 모범 사례
이 단원에는 Amazon Rekognition 사용에 대한 모범 사례 정보가 포함되어 있습니다.
주제• Amazon Rekognition Image 작업 지연 시간 (p. 109)• 얼굴 비교 입력 이미지에 대한 권장 사항 (p. 109)• 카메라 설정 권장 사항(이미지 및 비디오) (p. 110)• 카메라 설정 권장 사항(저장 및 스트리밍 비디오) (p. 111)• 카메라 설정 권장 사항(스트리밍 비디오) (p. 111)
Amazon Rekognition Image 작업 지연 시간Amazon Rekognition Image 작업에 대한 지연 시간을 최소화하려면 다음을 고려하십시오.
• 이미지가 포함된 Amazon S3 버킷의 리전과 Amazon Rekognition Image API 작업에 사용하는 리전이 일치해야 합니다.
• 이미지 바이트로 Amazon Rekognition Image 작업을 호출하는 것이 이미지를 Amazon S3 버킷에 업로드한 다음 Amazon Rekognition Image 작업에서 업로드된 이미지를 참조하는 것보다 더 빠릅니다. 거의 실시간으로 처리하기 위해 이미지를 Amazon Rekognition Image에 업로드하는 경우 이 접근 방식을 고려하십시오. 예를 들어 IP 카메라에서 업로드한 이미지 또는 웹 포털을 통해 업로드한 이미지입니다.
• 이미지가 Amazon S3 버킷에 이미 있는 경우, Amazon Rekognition Image 작업에서 해당 이미지를 참조하는 것이 이미지 바이트를 일일이 전달하는 것보다 더 빠를 것입니다.
얼굴 비교 입력 이미지에 대한 권장 사항얼굴 비교 작업에 사용되는 모델은 다양한 포즈, 얼굴 표정, 연령 범위, 회전, 조명 조건 및 크기로 작동하도록설계되었습니다. CompareFaces (p. 268)용 레퍼런스 사진을 선택할 때 또는 IndexFaces (p. 362) 사용을통해 얼굴을 모음에 추가할 때는 다음 가이드라인을 따르는 것이 좋습니다.
• 얼굴이 권장 각도 범위 이내인 이미지를 사용합니다. 피치는 아래로 30도 미만이고 위로 45도 미만이어야합니다. 요는 양쪽 방향으로 45도 미만이어야 합니다. 롤에는 제한이 없습니다.
• 두 눈이 잘 보이는 얼굴 이미지를 사용합니다.
• IndexFaces를 사용하여 모음을 생성할 때 특정 개인에 대해 피치 및 요(권장 각도 이내)가 다른 여러 개의 이미지를 사용합니다. — 정면 이미지, 얼굴을 왼쪽으로 돌린 이미지(요 45도 이내), 얼굴을 오른쪽으로돌린 이미지(요 45도 이내), 얼굴을 아래로 기울인 이미지(피치 30도 이내), 얼굴을 위로 젖힌 이미지(피치45도 이내) 등 개인당 최소 5개의 이미지를 인덱싱하는 것이 좋습니다. 같은 사람에 속하는 얼굴 인스턴스를 추적하려면, 인덱싱되는 이미지에 얼굴이 하나뿐인 경우 외부 이미지 ID 속성을 사용할 것을 고려하십시오. 예를 들어 John_Doe_1.jpg, … John_Doe_5.jpg의 외부 이미지 ID를 포함하여 John Doe의 이미지 5개를 추적할 수 있습니다.
109
Amazon Rekognition 개발자 안내서카메라 설정 권장 사항(이미지 및 비디오)
• 가려진 부분이 없고 화면을 꽉 채우지 않은 상태의 얼굴 이미지를 사용합니다. 이미지에 사람의 머리와 어깨가 포함되어 있어야 합니다. 얼굴 경계 상자로 자른 상태여서는 안 됩니다.
• 머리띠, 마스크 등 얼굴을 가리는 아이템을 피합니다.
• 얼굴이 이미지의 많은 부분을 차지하는 이미지를 사용합니다. 얼굴이 이미지의 더 많은 부분을 차지하는이미지가 보다 높은 정확도로 일치됩니다.
• 이미지의 해상도가 충분히 커야 합니다. Amazon Rekognition은 최대 1920x1080 픽셀의 이미지 해상도에서 50x50 픽셀만큼 작은 사이즈의 얼굴을 인식할 수 있습니다. 이미지 해상도가 높을수록 최소 얼굴 크기를 크게 지정해야 합니다. 최소 크기보다 큰 얼굴은 보다 정확한 얼굴 비교 결과 세트를 제공합니다.
• 색상 이미지를 사용합니다.
• 그림자 같이 불균일한 조명이 아니라 얼굴에 균일한 조명을 비춘 이미지를 사용합니다.
• 배경과 충분한 대비를 보이는 이미지를 사용합니다. 고대비 흑백 배경이 효과적입니다.
• 높은 정확도가 요구되는 애플리케이션에서는 입을 다물고 미소를 전혀 또는 거의 짓지 않은 중립적인 표정의 얼굴 이미지를 사용합니다.
• 밝고 선명한 이미지를 사용합니다. 피사 인물 및 카메라의 움직임 때문에 흐려질 수 있는 이미지는 가능한한 사용하지 않아야 합니다. DetectFaces (p. 311)는 얼굴의 밝기와 선명도를 측정하는 데 사용할 수 있습니다.
• 최근의 얼굴 이미지를 인덱싱해야 합니다.
카메라 설정 권장 사항(이미지 및 비디오)다음은 얼굴 비교 입력 이미지에 대한 권장 사항 (p. 109)에 추가되는 권장 사항입니다.
• 이미지 해상도 – 이미지 해상도에는 최소 요구 사항이 없지만, 최대 1920x1080 픽셀의 이미지 해상도에서얼굴 해상도가 50x50 픽셀 이상이어야 합니다. 이미지 해상도가 높을수록 최소 얼굴 크기를 크게 지정해야합니다.
Note
위 권장 사항은 카메라의 기반 해상도를 기준으로 합니다. 저해상도 이미지에서 고해상도 이미지를 생성하면 얼굴 검색에 필요한 결과를 얻을 수 없습니다(이미지 업샘플링 과정에서 생성되는 아티팩트 때문).
• 카메라 각도 – 카메라 각도에는 피치, 롤, 요 등 세 가지 측정치가 있습니다.• 피치 – 카메라가 아래를 향할 경우 30도 미만, 위를 향할 때는 45도 미만의 피치를 권장합니다.• 롤 – 해당 항목에는 최소 요구 사항이 없습니다. Amazon Rekognition의 경우 모든 범위의 롤을 처리할
수 있습니다.• 요 – 각 방향에서 45도 미만의 요를 권장합니다.
카메라가 포착하는 축에서 얼굴 각도는 현장을 향하는 카메라 각도와 현장에서 피사 인물의 머리가 향하는 방향의 조합입니다. 예를 들어 카메라가 30도 아래를 향하고 있고 사람이 머리를 30도 숙이고 있을 경우 카메라를 통해 포착되는 실제 얼굴 피치는 60도입니다. 이 경우에는 Amazon Rekognition이 얼굴을 인
110
Amazon Rekognition 개발자 안내서카메라 설정 권장 사항(저장 및 스트리밍 비디오)
식할 수 없습니다. 일반적으로 사람들이 30도 이하의 전체 피치(얼굴과 카메라의 조합)로 카메라를 바라본다는 가정 하에 카메라 각도를 설정하는 것이 좋습니다.
• 카메라 줌 – 이 카메라 설정은 권장 최소 얼굴 해상도 50x50 픽셀을 충족해야 합니다. 원하는 얼굴이50x50 픽셀 이상의 해상도가 되도록 카메라 줌 설정을 사용하는 것이 좋습니다.
• 카메라 높이 – 권장 카메라 피치는 해당 파라미터를 활성화합니다.
카메라 설정 권장 사항(저장 및 스트리밍 비디오)다음은 카메라 설정 권장 사항(이미지 및 비디오) (p. 110)에 추가되는 권장 사항입니다.
• 코덱은 h.264를 사용해야 합니다.• 권장 프레임 속도는 30fps입니다. (5fps보다 작아서는 안 됩니다.)• 권장 인코더 비트레이트는 3Mbps입니다. (1.5Mbps보다 작아서는 안 됩니다.)• 프레임 속도 vs. 프레임 해상도 – 인코더 비트레이트가 제약 조건일 경우, 더 우수한 얼굴 검색 결과를 얻
기 위해 프레임 속도보다는 프레임 해상도를 높이는 것이 좋습니다. 그러면 지정된 비트레이트 내에서Amazon Rekognition 사용을 통해 가장 좋은 품질의 프레임을 얻을 수 있습니다. 그러나 단점이 있습니다. 낮은 프레임 속도로 인해 카메라가 빠른 움직임을 놓치게 됩니다. 주어진 설정에서 이들 두 파라미터의 상반 관계를 이해하는 것이 중요합니다. 예를 들어 최대 가능 비트레이트가 1.5Mbps일 경우, 카메라는1080p @ 5fps 또는 720p @ 15fps를 캡쳐할 수 있습니다. 권장 얼굴 해상도인 50x50 픽셀이 충족되는 한,둘 사이에서의 선택은 애플리케이션에 따라 달라집니다.
카메라 설정 권장 사항(스트리밍 비디오)다음은 카메라 설정 권장 사항(저장 및 스트리밍 비디오) (p. 111)에 추가되는 권장 사항입니다.
스트리밍 애플리케이션에서 추가 제약 사항은 인터넷 대역폭입니다. 라이브 비디오의 경우, AmazonRekognition은 Amazon Kinesis Video Streams만 입력으로 수락합니다. 인코더 비트레이트와 가용 네트워크 대역폭 사이의 의존 관계를 이해해야 합니다. 적어도 가용 대역폭이 카메라가 라이브 스트림을 인코딩하는 데 사용하는 비트레이트를 지원해야 합니다. 그러면 카메라가 무엇을 캡처하든 Amazon Kinesis VideoStreams를 통해 재생될 수 있습니다. 가용 대역폭이 인코더 비트레이트보다 낮은 경우 Amazon KinesisVideo Streams가 네트워크 대역폭을 기준으로 비트를 드롭합니다. 그러면 비디오 품질이 낮아집니다.
일반적인 스트리밍 설정에서는 여러 대의 카메라가 스트림을 중계하는 네트워크 허브에 연결됩니다. 이 경우 허브에 연결된 모든 카메라에서 전송되는 스트림의 누적 합계를 네트워크 대역폭이 수용해야 합니다. 예를 들어 허브에 1.5Mbps로 인코딩하는 카메라 5대가 연결된 경우, 가용 네트워크 대역폭은 최소 7.5Mbps여야 합니다. 패킷 드롭을 방지하려면, 카메라와 허브 사이의 드롭된 연결로 인한 지터까지 수용하도록 네트워크 대역폭을 7.5Mbps 이상으로 유지하는 것이 좋습니다. 실제 값은 내부 네트워크의 안정성에 따라 달라질수 있습니다.
111
Amazon Rekognition 개발자 안내서
객체 및 장면 감지이 단원에서는 Amazon Rekognition Image 및 Amazon Rekognition Video를 통해 이미지와 비디오에서의 레이블 감지에 대한 정보를 다룹니다.
레이블 또는 태그는 콘텐츠를 기반으로 이미지나 비디오에서 발견되는 객체, 장면 또는 개념을 가리킵니다.예를 들면 열대 지역 해변에 있는 사람을 찍은 사진에는 사람, 물, 모래, 야자수 및 수영복(객체), 해변(장면),야외(개념) 같은 레이블이 포함될 수 있습니다. Amazon Rekognition Video도 스키 타기나 자전거 타기와 같은 활동을 감지합니다. Amazon Rekognition Image는 이미지에서 활동을 감지하지 않습니다.
Amazon Rekognition Image 및 Amazon Rekognition Video는 인물, 차량, 가구, 의류, 애완동물 등 일반적 객체 레이블에 대해 경계 상자를 반환할 수 있습니다. 경계 상자 정보는 이보다 일반적이지 않은 객체 레이블에대해서는 반환되지 않습니다. 경계 상자를 사용하여 이미지에서 객체의 정확한 위치를 찾거나, 감지된 객체의 인스턴스 수를 계산하거나, 경계 상자 치수를 사용하여 객체의 크기를 측정할 수 있습니다.
Amazon Rekognition Image 및 Amazon Rekognition Video는 상위 레이블의 계층적 분류를 사용하여 레이블을 범주화합니다. 예를 들어 도로를 횡단하는 사람이 보행자로 감지될 수 있습니다. 보행자의 부모 레이블은인물입니다. 응답에서 두 레이블이 모두 반환됩니다. 모든 상위 레이블이 반환되고, 지정된 레이블이 부모 및기타 상위 레이블의 목록을 포함합니다. 예를 들어, 존재할 경우 조부모 및 증조부모 레이블이 포함됩니다.부모 레이블을 사용하여 관련된 레이블의 그룹을 만들고 하나 이상의 이미지에서 비슷한 레이블을 쿼리하도록 허용할 수 있습니다. 예를 들어 모든 차량을 쿼리하면 한 이미지에서 자동차가 반환되고 다른 이미지에서오토바이가 반환될 수 있습니다.
Amazon Rekognition Image 및 Amazon Rekognition Video는 이미지 또는 저장된 비디오에서 레이블을 감지하는 데 사용되는 레이블 감지 모델의 버전을 반환합니다.
예를 들어, 다음 이미지에서 Amazon Rekognition Image가 사람의 유무, 스케이트보드, 주차된 자동차 등 다양한 정보를 감지할 수 있습니다. 또한 Amazon Rekognition Image는 감지된 사람과 자동차 및 바퀴와 같은 다른 감지된 객체에 대해 경계 상자를 반환합니다. Amazon Rekognition Video 및 Amazon RekognitionImage는 Amazon Rekognition이 감지된 각 레이블의 정확도 면에서 얼마나 큰 신뢰도를 갖는지에 대한 백분율 점수도 제공합니다.
112
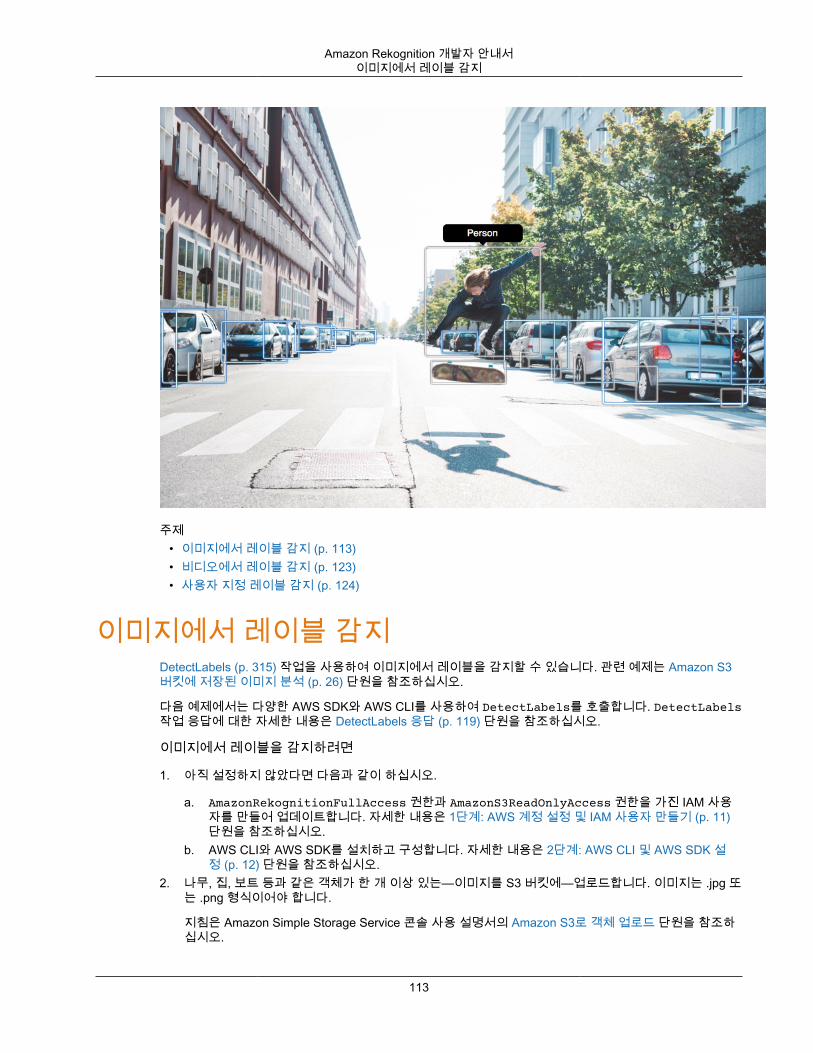
Amazon Rekognition 개발자 안내서이미지에서 레이블 감지
주제• 이미지에서 레이블 감지 (p. 113)• 비디오에서 레이블 감지 (p. 123)• 사용자 지정 레이블 감지 (p. 124)
이미지에서 레이블 감지DetectLabels (p. 315) 작업을 사용하여 이미지에서 레이블을 감지할 수 있습니다. 관련 예제는 Amazon S3버킷에 저장된 이미지 분석 (p. 26) 단원을 참조하십시오.
다음 예제에서는 다양한 AWS SDK와 AWS CLI를 사용하여 DetectLabels를 호출합니다. DetectLabels작업 응답에 대한 자세한 내용은 DetectLabels 응답 (p. 119) 단원을 참조하십시오.
이미지에서 레이블을 감지하려면
1. 아직 설정하지 않았다면 다음과 같이 하십시오.
a. AmazonRekognitionFullAccess 권한과 AmazonS3ReadOnlyAccess 권한을 가진 IAM 사용자를 만들어 업데이트합니다. 자세한 내용은 1단계: AWS 계정 설정 및 IAM 사용자 만들기 (p. 11)단원을 참조하십시오.
b. AWS CLI와 AWS SDK를 설치하고 구성합니다. 자세한 내용은 2단계: AWS CLI 및 AWS SDK 설정 (p. 12) 단원을 참조하십시오.
2. 나무, 집, 보트 등과 같은 객체가 한 개 이상 있는—이미지를 S3 버킷에—업로드합니다. 이미지는 .jpg 또는 .png 형식이어야 합니다.
지침은 Amazon Simple Storage Service 콘솔 사용 설명서의 Amazon S3로 객체 업로드 단원을 참조하십시오.
113

Amazon Rekognition 개발자 안내서이미지에서 레이블 감지
3. 다음 예제를 사용하여 DetectLabels 작업을 호출합니다.
Java
이 예제는 입력 이미지에서 감지된 레이블 목록을 표시합니다. bucket 및 photo의 값을 2단계에서 사용한 Amazon S3 버킷과 이미지의 이름으로 바꿉니다.
package com.amazonaws.samples;import java.util.List;
import com.amazonaws.services.rekognition.model.BoundingBox;import com.amazonaws.services.rekognition.model.DetectLabelsRequest;import com.amazonaws.services.rekognition.model.DetectLabelsResult;import com.amazonaws.services.rekognition.model.Image;import com.amazonaws.services.rekognition.model.Instance;import com.amazonaws.services.rekognition.model.Label;import com.amazonaws.services.rekognition.model.Parent;import com.amazonaws.services.rekognition.model.S3Object;import com.amazonaws.services.rekognition.AmazonRekognition;import com.amazonaws.services.rekognition.AmazonRekognitionClientBuilder;import com.amazonaws.services.rekognition.model.AmazonRekognitionException;
public class DetectLabels {
public static void main(String[] args) throws Exception {
String photo = "photo"; String bucket = "bucket";
AmazonRekognition rekognitionClient = AmazonRekognitionClientBuilder.defaultClient();
DetectLabelsRequest request = new DetectLabelsRequest() .withImage(new Image().withS3Object(new S3Object().withName(photo).withBucket(bucket))) .withMaxLabels(10).withMinConfidence(75F);
try { DetectLabelsResult result = rekognitionClient.detectLabels(request); List<Label> labels = result.getLabels();
System.out.println("Detected labels for " + photo + "\n"); for (Label label : labels) { System.out.println("Label: " + label.getName()); System.out.println("Confidence: " + label.getConfidence().toString() + "\n");
List<Instance> instances = label.getInstances(); System.out.println("Instances of " + label.getName()); if (instances.isEmpty()) { System.out.println(" " + "None"); } else { for (Instance instance : instances) { System.out.println(" Confidence: " + instance.getConfidence().toString()); System.out.println(" Bounding box: " + instance.getBoundingBox().toString()); } } System.out.println("Parent labels for " + label.getName() + ":"); List<Parent> parents = label.getParents(); if (parents.isEmpty()) { System.out.println(" None");
114

Amazon Rekognition 개발자 안내서이미지에서 레이블 감지
} else { for (Parent parent : parents) { System.out.println(" " + parent.getName()); } } System.out.println("--------------------"); System.out.println(); } } catch (AmazonRekognitionException e) { e.printStackTrace(); } }}
AWS CLI
이 예제는 detect-labels CLI 작업의 JSON 출력을 표시합니다. bucket 및 photo의 값을 2단계에서 사용한 Amazon S3 버킷과 이미지의 이름으로 바꿉니다.
aws rekognition detect-labels \--image '{"S3Object":{"Bucket":"bucket","Name":"file"}}'
Python
이 예제는 입력 이미지에서 감지된 레이블을 표시합니다. main 함수에서, bucket 및 photo 값을2단계에서 사용한 Amazon S3 버킷과 이미지의 이름으로 바꿉니다.
#Copyright 2018 Amazon.com, Inc. or its affiliates. All Rights Reserved.#PDX-License-Identifier: MIT-0 (For details, see https://github.com/awsdocs/amazon-rekognition-developer-guide/blob/master/LICENSE-SAMPLECODE.)
import boto3
def detect_labels(photo, bucket):
client=boto3.client('rekognition')
response = client.detect_labels(Image={'S3Object':{'Bucket':bucket,'Name':photo}}, MaxLabels=10)
print('Detected labels for ' + photo) print() for label in response['Labels']: print ("Label: " + label['Name']) print ("Confidence: " + str(label['Confidence'])) print ("Instances:") for instance in label['Instances']: print (" Bounding box") print (" Top: " + str(instance['BoundingBox']['Top'])) print (" Left: " + str(instance['BoundingBox']['Left'])) print (" Width: " + str(instance['BoundingBox']['Width'])) print (" Height: " + str(instance['BoundingBox']['Height'])) print (" Confidence: " + str(instance['Confidence'])) print()
print ("Parents:") for parent in label['Parents']: print (" " + parent['Name']) print ("----------") print () return len(response['Labels'])
115
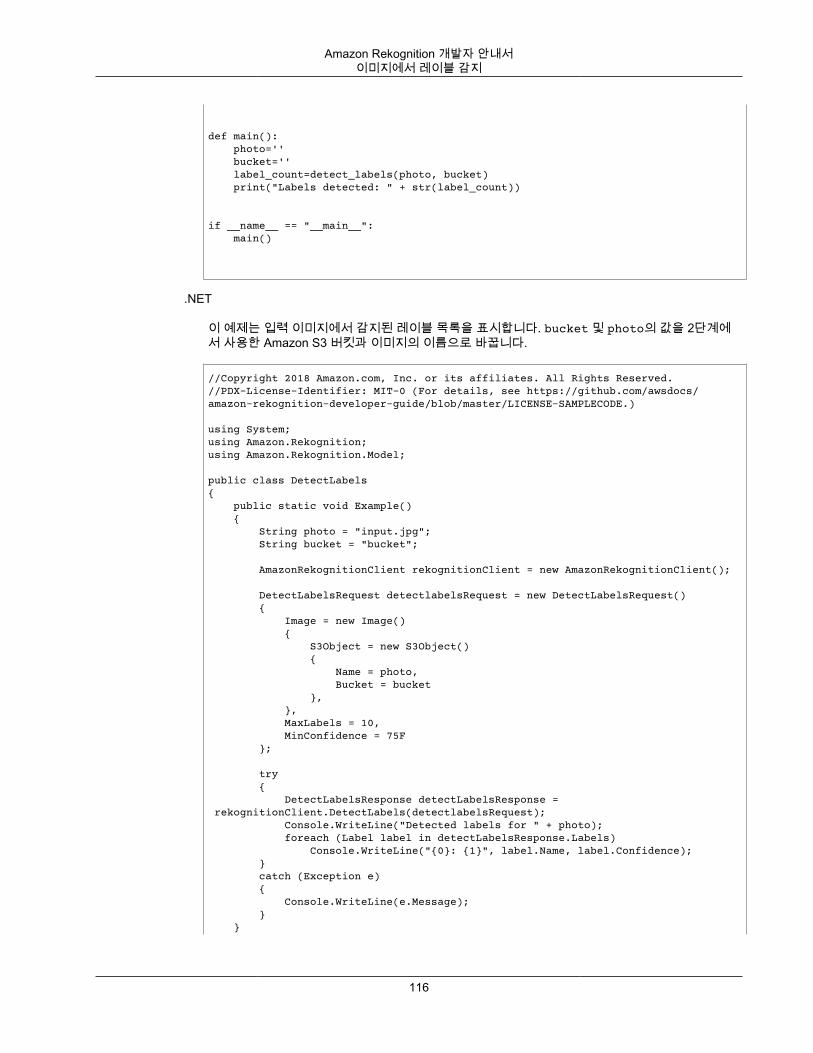
Amazon Rekognition 개발자 안내서이미지에서 레이블 감지
def main(): photo='' bucket='' label_count=detect_labels(photo, bucket) print("Labels detected: " + str(label_count))
if __name__ == "__main__": main()
.NET
이 예제는 입력 이미지에서 감지된 레이블 목록을 표시합니다. bucket 및 photo의 값을 2단계에서 사용한 Amazon S3 버킷과 이미지의 이름으로 바꿉니다.
//Copyright 2018 Amazon.com, Inc. or its affiliates. All Rights Reserved.//PDX-License-Identifier: MIT-0 (For details, see https://github.com/awsdocs/amazon-rekognition-developer-guide/blob/master/LICENSE-SAMPLECODE.)
using System;using Amazon.Rekognition;using Amazon.Rekognition.Model;
public class DetectLabels{ public static void Example() { String photo = "input.jpg"; String bucket = "bucket";
AmazonRekognitionClient rekognitionClient = new AmazonRekognitionClient();
DetectLabelsRequest detectlabelsRequest = new DetectLabelsRequest() { Image = new Image() { S3Object = new S3Object() { Name = photo, Bucket = bucket }, }, MaxLabels = 10, MinConfidence = 75F };
try { DetectLabelsResponse detectLabelsResponse = rekognitionClient.DetectLabels(detectlabelsRequest); Console.WriteLine("Detected labels for " + photo); foreach (Label label in detectLabelsResponse.Labels) Console.WriteLine("{0}: {1}", label.Name, label.Confidence); } catch (Exception e) { Console.WriteLine(e.Message); } }
116
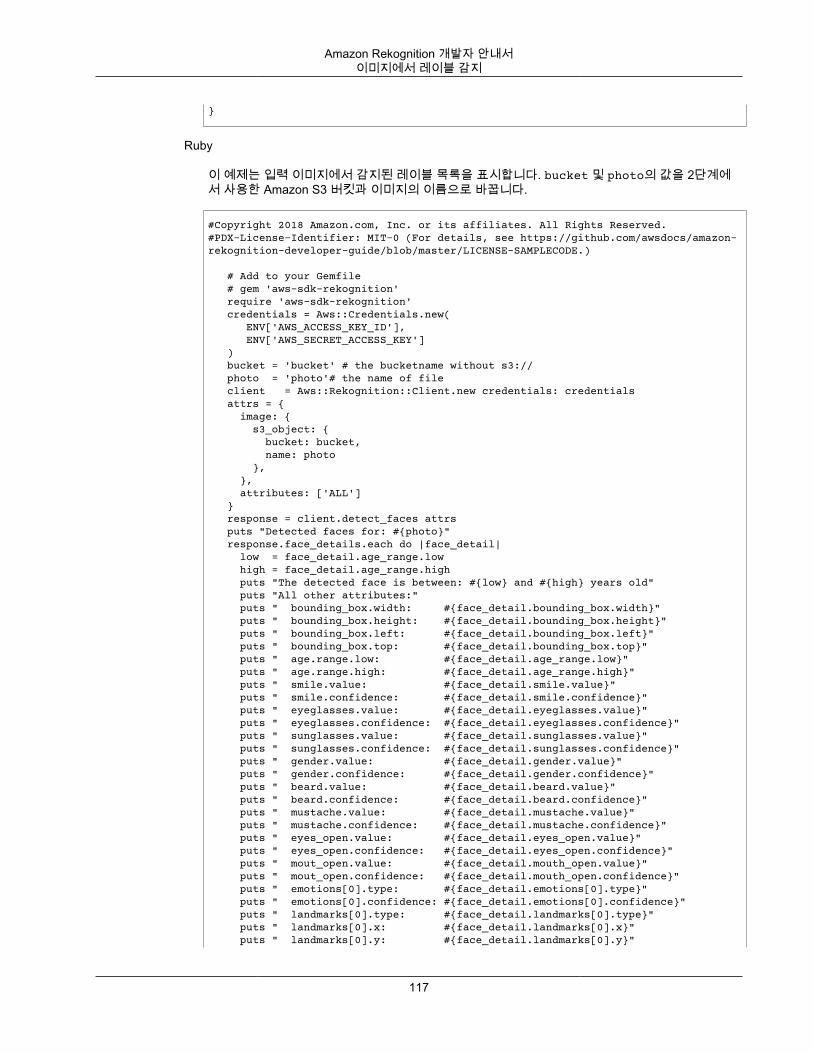
Amazon Rekognition 개발자 안내서이미지에서 레이블 감지
}
Ruby
이 예제는 입력 이미지에서 감지된 레이블 목록을 표시합니다. bucket 및 photo의 값을 2단계에서 사용한 Amazon S3 버킷과 이미지의 이름으로 바꿉니다.
#Copyright 2018 Amazon.com, Inc. or its affiliates. All Rights Reserved.#PDX-License-Identifier: MIT-0 (For details, see https://github.com/awsdocs/amazon-rekognition-developer-guide/blob/master/LICENSE-SAMPLECODE.)
# Add to your Gemfile # gem 'aws-sdk-rekognition' require 'aws-sdk-rekognition' credentials = Aws::Credentials.new( ENV['AWS_ACCESS_KEY_ID'], ENV['AWS_SECRET_ACCESS_KEY'] ) bucket = 'bucket' # the bucketname without s3:// photo = 'photo'# the name of file client = Aws::Rekognition::Client.new credentials: credentials attrs = { image: { s3_object: { bucket: bucket, name: photo }, }, attributes: ['ALL'] } response = client.detect_faces attrs puts "Detected faces for: #{photo}" response.face_details.each do |face_detail| low = face_detail.age_range.low high = face_detail.age_range.high puts "The detected face is between: #{low} and #{high} years old" puts "All other attributes:" puts " bounding_box.width: #{face_detail.bounding_box.width}" puts " bounding_box.height: #{face_detail.bounding_box.height}" puts " bounding_box.left: #{face_detail.bounding_box.left}" puts " bounding_box.top: #{face_detail.bounding_box.top}" puts " age.range.low: #{face_detail.age_range.low}" puts " age.range.high: #{face_detail.age_range.high}" puts " smile.value: #{face_detail.smile.value}" puts " smile.confidence: #{face_detail.smile.confidence}" puts " eyeglasses.value: #{face_detail.eyeglasses.value}" puts " eyeglasses.confidence: #{face_detail.eyeglasses.confidence}" puts " sunglasses.value: #{face_detail.sunglasses.value}" puts " sunglasses.confidence: #{face_detail.sunglasses.confidence}" puts " gender.value: #{face_detail.gender.value}" puts " gender.confidence: #{face_detail.gender.confidence}" puts " beard.value: #{face_detail.beard.value}" puts " beard.confidence: #{face_detail.beard.confidence}" puts " mustache.value: #{face_detail.mustache.value}" puts " mustache.confidence: #{face_detail.mustache.confidence}" puts " eyes_open.value: #{face_detail.eyes_open.value}" puts " eyes_open.confidence: #{face_detail.eyes_open.confidence}" puts " mout_open.value: #{face_detail.mouth_open.value}" puts " mout_open.confidence: #{face_detail.mouth_open.confidence}" puts " emotions[0].type: #{face_detail.emotions[0].type}" puts " emotions[0].confidence: #{face_detail.emotions[0].confidence}" puts " landmarks[0].type: #{face_detail.landmarks[0].type}" puts " landmarks[0].x: #{face_detail.landmarks[0].x}" puts " landmarks[0].y: #{face_detail.landmarks[0].y}"
117
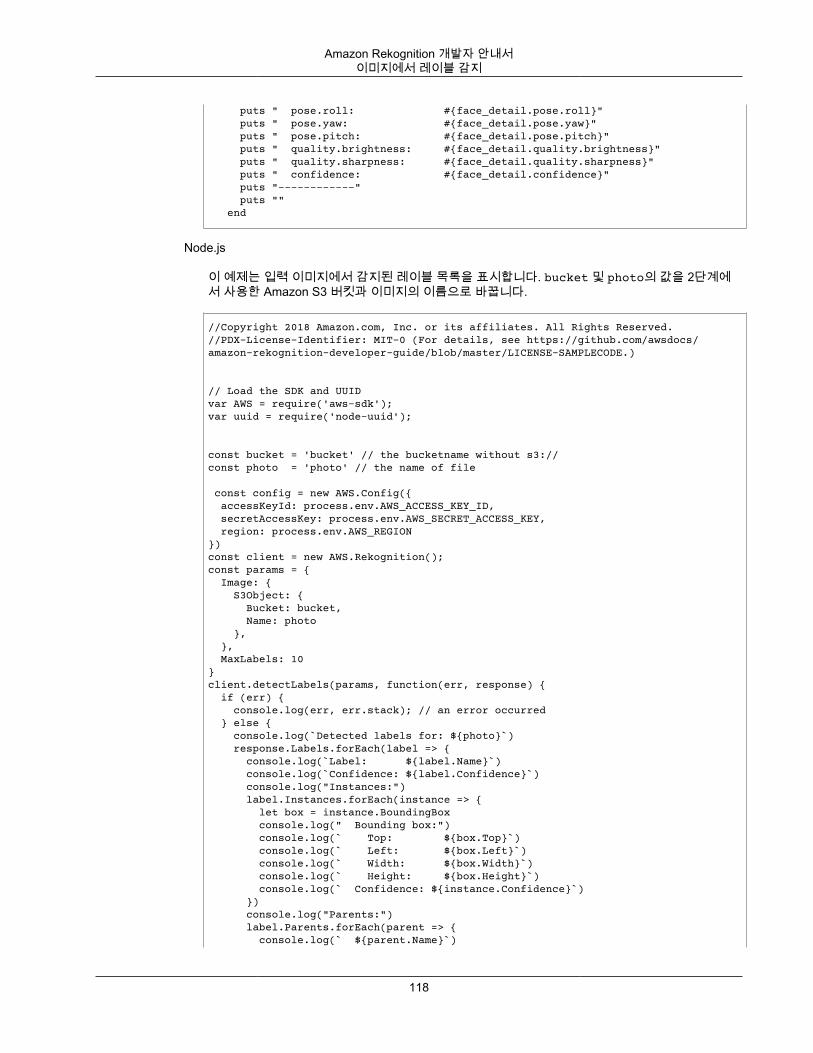
Amazon Rekognition 개발자 안내서이미지에서 레이블 감지
puts " pose.roll: #{face_detail.pose.roll}" puts " pose.yaw: #{face_detail.pose.yaw}" puts " pose.pitch: #{face_detail.pose.pitch}" puts " quality.brightness: #{face_detail.quality.brightness}" puts " quality.sharpness: #{face_detail.quality.sharpness}" puts " confidence: #{face_detail.confidence}" puts "------------" puts "" end
Node.js
이 예제는 입력 이미지에서 감지된 레이블 목록을 표시합니다. bucket 및 photo의 값을 2단계에서 사용한 Amazon S3 버킷과 이미지의 이름으로 바꿉니다.
//Copyright 2018 Amazon.com, Inc. or its affiliates. All Rights Reserved.//PDX-License-Identifier: MIT-0 (For details, see https://github.com/awsdocs/amazon-rekognition-developer-guide/blob/master/LICENSE-SAMPLECODE.)
// Load the SDK and UUIDvar AWS = require('aws-sdk');var uuid = require('node-uuid');
const bucket = 'bucket' // the bucketname without s3://const photo = 'photo' // the name of file
const config = new AWS.Config({ accessKeyId: process.env.AWS_ACCESS_KEY_ID, secretAccessKey: process.env.AWS_SECRET_ACCESS_KEY, region: process.env.AWS_REGION}) const client = new AWS.Rekognition();const params = { Image: { S3Object: { Bucket: bucket, Name: photo }, }, MaxLabels: 10}client.detectLabels(params, function(err, response) { if (err) { console.log(err, err.stack); // an error occurred } else { console.log(`Detected labels for: ${photo}`) response.Labels.forEach(label => { console.log(`Label: ${label.Name}`) console.log(`Confidence: ${label.Confidence}`) console.log("Instances:") label.Instances.forEach(instance => { let box = instance.BoundingBox console.log(" Bounding box:") console.log(` Top: ${box.Top}`) console.log(` Left: ${box.Left}`) console.log(` Width: ${box.Width}`) console.log(` Height: ${box.Height}`) console.log(` Confidence: ${instance.Confidence}`) }) console.log("Parents:") label.Parents.forEach(parent => { console.log(` ${parent.Name}`)
118
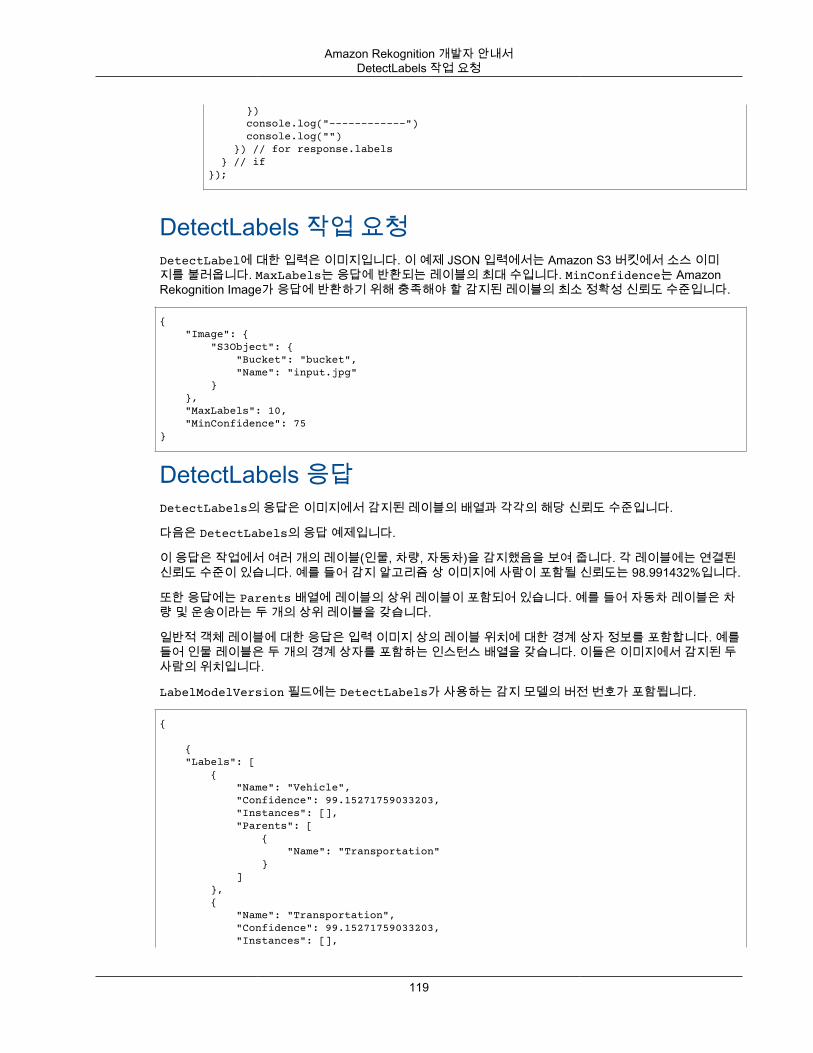
Amazon Rekognition 개발자 안내서DetectLabels 작업 요청
}) console.log("------------") console.log("") }) // for response.labels } // if});
DetectLabels 작업 요청DetectLabel에 대한 입력은 이미지입니다. 이 예제 JSON 입력에서는 Amazon S3 버킷에서 소스 이미지를 불러옵니다. MaxLabels는 응답에 반환되는 레이블의 최대 수입니다. MinConfidence는 AmazonRekognition Image가 응답에 반환하기 위해 충족해야 할 감지된 레이블의 최소 정확성 신뢰도 수준입니다.
{ "Image": { "S3Object": { "Bucket": "bucket", "Name": "input.jpg" } }, "MaxLabels": 10, "MinConfidence": 75}
DetectLabels 응답DetectLabels의 응답은 이미지에서 감지된 레이블의 배열과 각각의 해당 신뢰도 수준입니다.
다음은 DetectLabels의 응답 예제입니다.
이 응답은 작업에서 여러 개의 레이블(인물, 차량, 자동차)을 감지했음을 보여 줍니다. 각 레이블에는 연결된신뢰도 수준이 있습니다. 예를 들어 감지 알고리즘 상 이미지에 사람이 포함될 신뢰도는 98.991432%입니다.
또한 응답에는 Parents 배열에 레이블의 상위 레이블이 포함되어 있습니다. 예를 들어 자동차 레이블은 차량 및 운송이라는 두 개의 상위 레이블을 갖습니다.
일반적 객체 레이블에 대한 응답은 입력 이미지 상의 레이블 위치에 대한 경계 상자 정보를 포함합니다. 예를들어 인물 레이블은 두 개의 경계 상자를 포함하는 인스턴스 배열을 갖습니다. 이들은 이미지에서 감지된 두사람의 위치입니다.
LabelModelVersion 필드에는 DetectLabels가 사용하는 감지 모델의 버전 번호가 포함됩니다.
{ { "Labels": [ { "Name": "Vehicle", "Confidence": 99.15271759033203, "Instances": [], "Parents": [ { "Name": "Transportation" } ] }, { "Name": "Transportation", "Confidence": 99.15271759033203, "Instances": [],
119
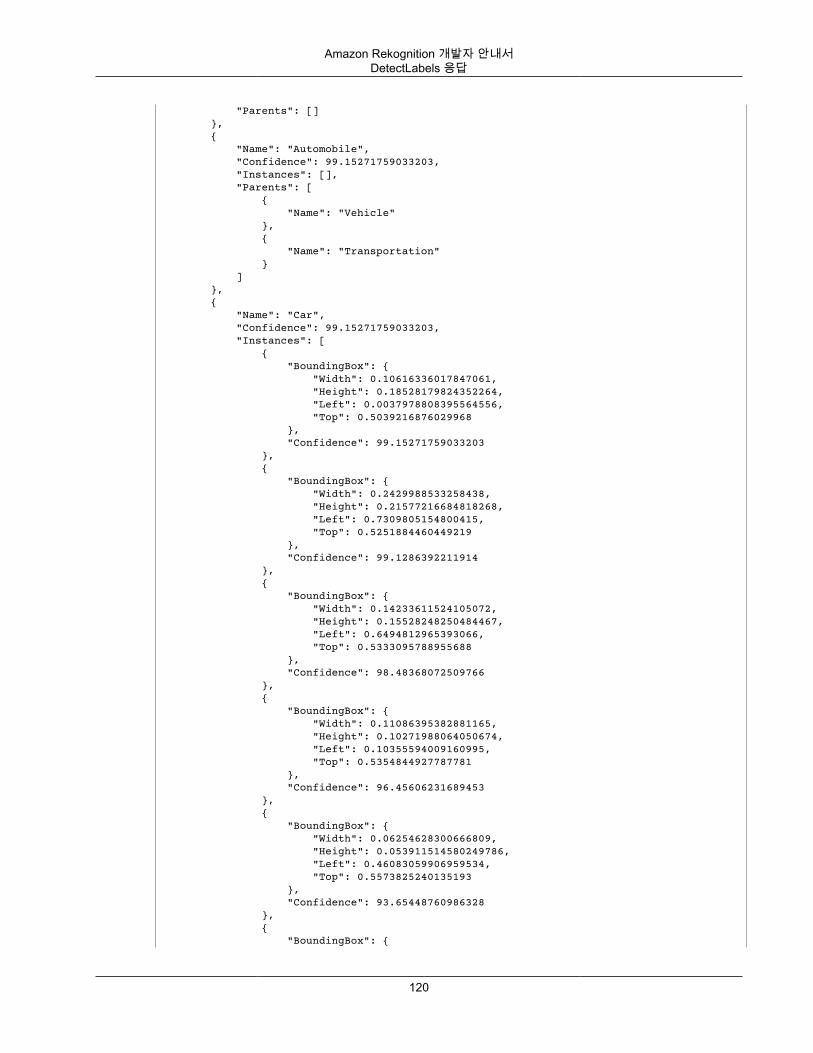
Amazon Rekognition 개발자 안내서DetectLabels 응답
"Parents": [] }, { "Name": "Automobile", "Confidence": 99.15271759033203, "Instances": [], "Parents": [ { "Name": "Vehicle" }, { "Name": "Transportation" } ] }, { "Name": "Car", "Confidence": 99.15271759033203, "Instances": [ { "BoundingBox": { "Width": 0.10616336017847061, "Height": 0.18528179824352264, "Left": 0.0037978808395564556, "Top": 0.5039216876029968 }, "Confidence": 99.15271759033203 }, { "BoundingBox": { "Width": 0.2429988533258438, "Height": 0.21577216684818268, "Left": 0.7309805154800415, "Top": 0.5251884460449219 }, "Confidence": 99.1286392211914 }, { "BoundingBox": { "Width": 0.14233611524105072, "Height": 0.15528248250484467, "Left": 0.6494812965393066, "Top": 0.5333095788955688 }, "Confidence": 98.48368072509766 }, { "BoundingBox": { "Width": 0.11086395382881165, "Height": 0.10271988064050674, "Left": 0.10355594009160995, "Top": 0.5354844927787781 }, "Confidence": 96.45606231689453 }, { "BoundingBox": { "Width": 0.06254628300666809, "Height": 0.053911514580249786, "Left": 0.46083059906959534, "Top": 0.5573825240135193 }, "Confidence": 93.65448760986328 }, { "BoundingBox": {
120
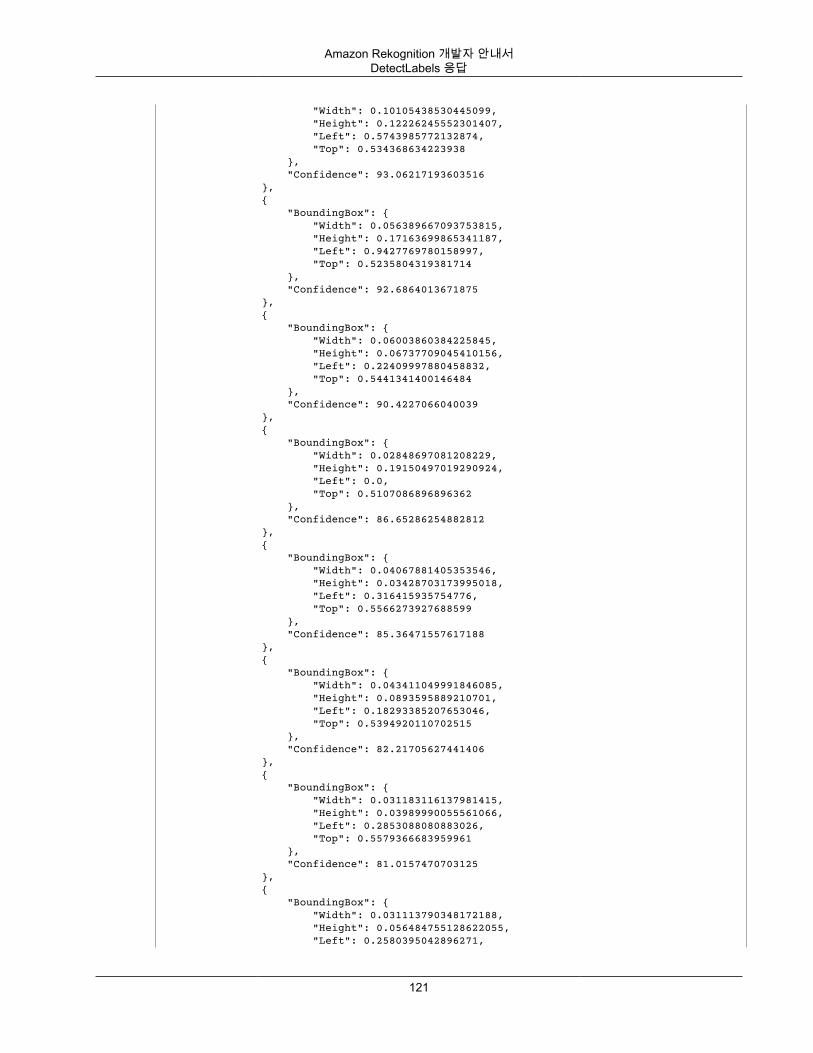
Amazon Rekognition 개발자 안내서DetectLabels 응답
"Width": 0.10105438530445099, "Height": 0.12226245552301407, "Left": 0.5743985772132874, "Top": 0.534368634223938 }, "Confidence": 93.06217193603516 }, { "BoundingBox": { "Width": 0.056389667093753815, "Height": 0.17163699865341187, "Left": 0.9427769780158997, "Top": 0.5235804319381714 }, "Confidence": 92.6864013671875 }, { "BoundingBox": { "Width": 0.06003860384225845, "Height": 0.06737709045410156, "Left": 0.22409997880458832, "Top": 0.5441341400146484 }, "Confidence": 90.4227066040039 }, { "BoundingBox": { "Width": 0.02848697081208229, "Height": 0.19150497019290924, "Left": 0.0, "Top": 0.5107086896896362 }, "Confidence": 86.65286254882812 }, { "BoundingBox": { "Width": 0.04067881405353546, "Height": 0.03428703173995018, "Left": 0.316415935754776, "Top": 0.5566273927688599 }, "Confidence": 85.36471557617188 }, { "BoundingBox": { "Width": 0.043411049991846085, "Height": 0.0893595889210701, "Left": 0.18293385207653046, "Top": 0.5394920110702515 }, "Confidence": 82.21705627441406 }, { "BoundingBox": { "Width": 0.031183116137981415, "Height": 0.03989990055561066, "Left": 0.2853088080883026, "Top": 0.5579366683959961 }, "Confidence": 81.0157470703125 }, { "BoundingBox": { "Width": 0.031113790348172188, "Height": 0.056484755128622055, "Left": 0.2580395042896271,
121
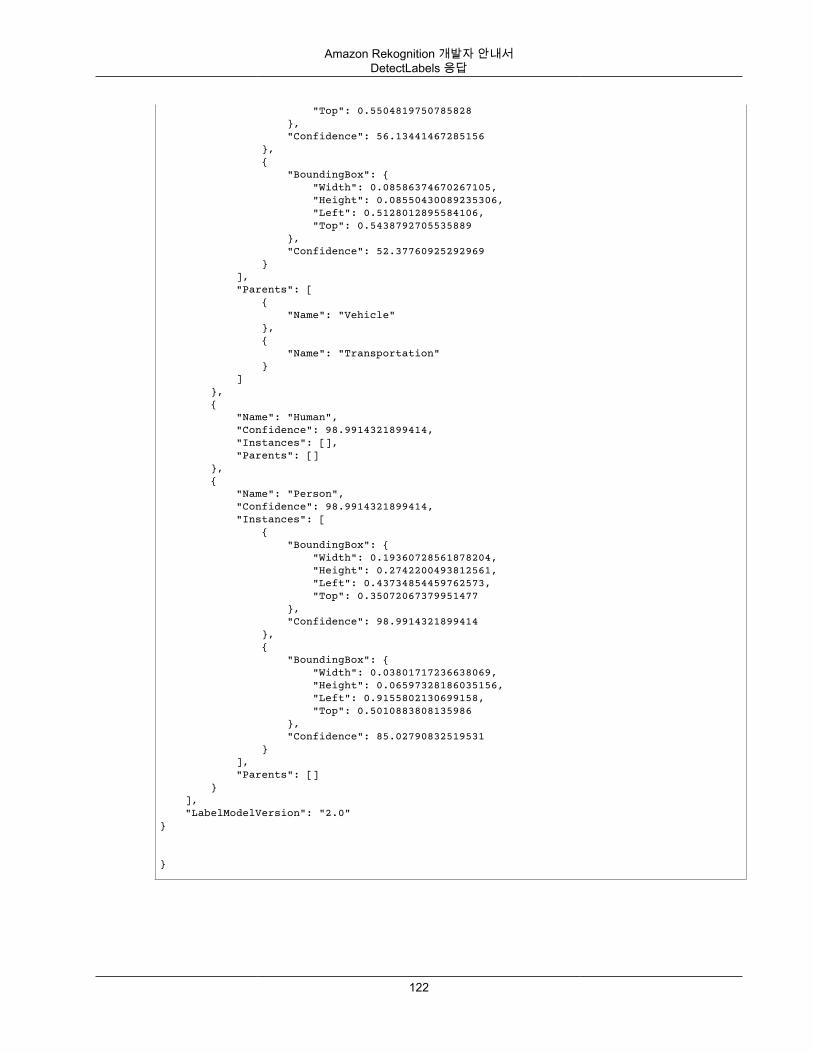
Amazon Rekognition 개발자 안내서DetectLabels 응답
"Top": 0.5504819750785828 }, "Confidence": 56.13441467285156 }, { "BoundingBox": { "Width": 0.08586374670267105, "Height": 0.08550430089235306, "Left": 0.5128012895584106, "Top": 0.5438792705535889 }, "Confidence": 52.37760925292969 } ], "Parents": [ { "Name": "Vehicle" }, { "Name": "Transportation" } ] }, { "Name": "Human", "Confidence": 98.9914321899414, "Instances": [], "Parents": [] }, { "Name": "Person", "Confidence": 98.9914321899414, "Instances": [ { "BoundingBox": { "Width": 0.19360728561878204, "Height": 0.2742200493812561, "Left": 0.43734854459762573, "Top": 0.35072067379951477 }, "Confidence": 98.9914321899414 }, { "BoundingBox": { "Width": 0.03801717236638069, "Height": 0.06597328186035156, "Left": 0.9155802130699158, "Top": 0.5010883808135986 }, "Confidence": 85.02790832519531 } ], "Parents": [] } ], "LabelModelVersion": "2.0"}
}
122
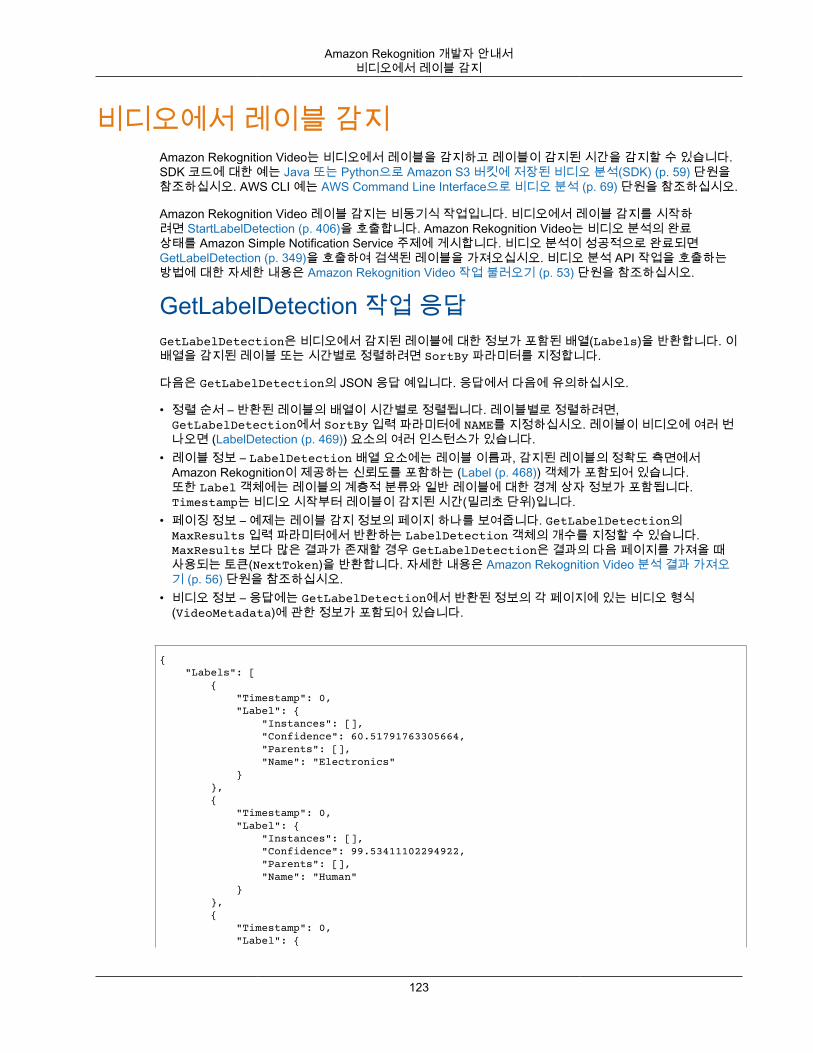
Amazon Rekognition 개발자 안내서비디오에서 레이블 감지
비디오에서 레이블 감지Amazon Rekognition Video는 비디오에서 레이블을 감지하고 레이블이 감지된 시간을 감지할 수 있습니다.SDK 코드에 대한 예는 Java 또는 Python으로 Amazon S3 버킷에 저장된 비디오 분석(SDK) (p. 59) 단원을참조하십시오. AWS CLI 예는 AWS Command Line Interface으로 비디오 분석 (p. 69) 단원을 참조하십시오.
Amazon Rekognition Video 레이블 감지는 비동기식 작업입니다. 비디오에서 레이블 감지를 시작하려면 StartLabelDetection (p. 406)을 호출합니다. Amazon Rekognition Video는 비디오 분석의 완료상태를 Amazon Simple Notification Service 주제에 게시합니다. 비디오 분석이 성공적으로 완료되면GetLabelDetection (p. 349)을 호출하여 검색된 레이블을 가져오십시오. 비디오 분석 API 작업을 호출하는방법에 대한 자세한 내용은 Amazon Rekognition Video 작업 불러오기 (p. 53) 단원을 참조하십시오.
GetLabelDetection 작업 응답GetLabelDetection은 비디오에서 감지된 레이블에 대한 정보가 포함된 배열(Labels)을 반환합니다. 이배열을 감지된 레이블 또는 시간별로 정렬하려면 SortBy 파라미터를 지정합니다.
다음은 GetLabelDetection의 JSON 응답 예입니다. 응답에서 다음에 유의하십시오.
• 정렬 순서 – 반환된 레이블의 배열이 시간별로 정렬됩니다. 레이블별로 정렬하려면,GetLabelDetection에서 SortBy 입력 파라미터에 NAME를 지정하십시오. 레이블이 비디오에 여러 번나오면 (LabelDetection (p. 469)) 요소의 여러 인스턴스가 있습니다.
• 레이블 정보 – LabelDetection 배열 요소에는 레이블 이름과, 감지된 레이블의 정확도 측면에서Amazon Rekognition이 제공하는 신뢰도를 포함하는 (Label (p. 468)) 객체가 포함되어 있습니다.또한 Label 객체에는 레이블의 계층적 분류와 일반 레이블에 대한 경계 상자 정보가 포함됩니다.Timestamp는 비디오 시작부터 레이블이 감지된 시간(밀리초 단위)입니다.
• 페이징 정보 – 예제는 레이블 감지 정보의 페이지 하나를 보여줍니다. GetLabelDetection의MaxResults 입력 파라미터에서 반환하는 LabelDetection 객체의 개수를 지정할 수 있습니다.MaxResults 보다 많은 결과가 존재할 경우 GetLabelDetection은 결과의 다음 페이지를 가져올 때사용되는 토큰(NextToken)을 반환합니다. 자세한 내용은 Amazon Rekognition Video 분석 결과 가져오기 (p. 56) 단원을 참조하십시오.
• 비디오 정보 – 응답에는 GetLabelDetection에서 반환된 정보의 각 페이지에 있는 비디오 형식(VideoMetadata)에 관한 정보가 포함되어 있습니다.
{ "Labels": [ { "Timestamp": 0, "Label": { "Instances": [], "Confidence": 60.51791763305664, "Parents": [], "Name": "Electronics" } }, { "Timestamp": 0, "Label": { "Instances": [], "Confidence": 99.53411102294922, "Parents": [], "Name": "Human" } }, { "Timestamp": 0, "Label": {
123
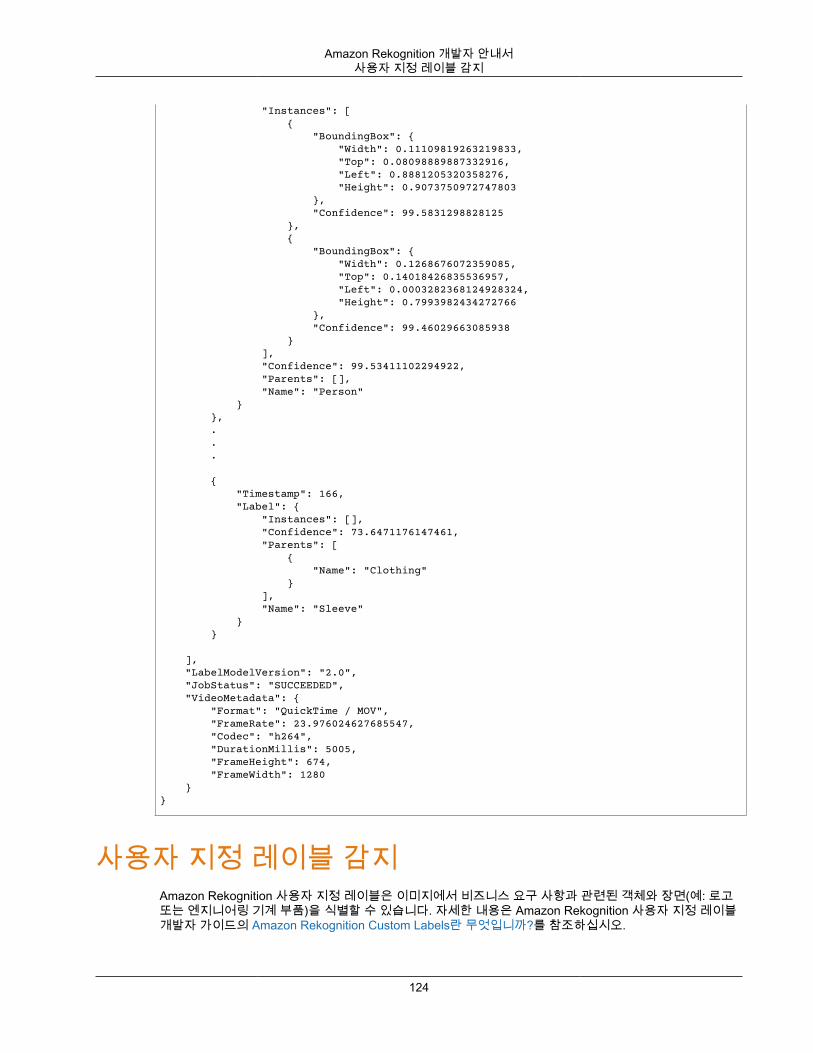
Amazon Rekognition 개발자 안내서사용자 지정 레이블 감지
"Instances": [ { "BoundingBox": { "Width": 0.11109819263219833, "Top": 0.08098889887332916, "Left": 0.8881205320358276, "Height": 0.9073750972747803 }, "Confidence": 99.5831298828125 }, { "BoundingBox": { "Width": 0.1268676072359085, "Top": 0.14018426835536957, "Left": 0.0003282368124928324, "Height": 0.7993982434272766 }, "Confidence": 99.46029663085938 } ], "Confidence": 99.53411102294922, "Parents": [], "Name": "Person" } }, . . .
{ "Timestamp": 166, "Label": { "Instances": [], "Confidence": 73.6471176147461, "Parents": [ { "Name": "Clothing" } ], "Name": "Sleeve" } } ], "LabelModelVersion": "2.0", "JobStatus": "SUCCEEDED", "VideoMetadata": { "Format": "QuickTime / MOV", "FrameRate": 23.976024627685547, "Codec": "h264", "DurationMillis": 5005, "FrameHeight": 674, "FrameWidth": 1280 }}
사용자 지정 레이블 감지Amazon Rekognition 사용자 지정 레이블은 이미지에서 비즈니스 요구 사항과 관련된 객체와 장면(예: 로고또는 엔지니어링 기계 부품)을 식별할 수 있습니다. 자세한 내용은 Amazon Rekognition 사용자 지정 레이블개발자 가이드의 Amazon Rekognition Custom Labels란 무엇입니까?를 참조하십시오.
124
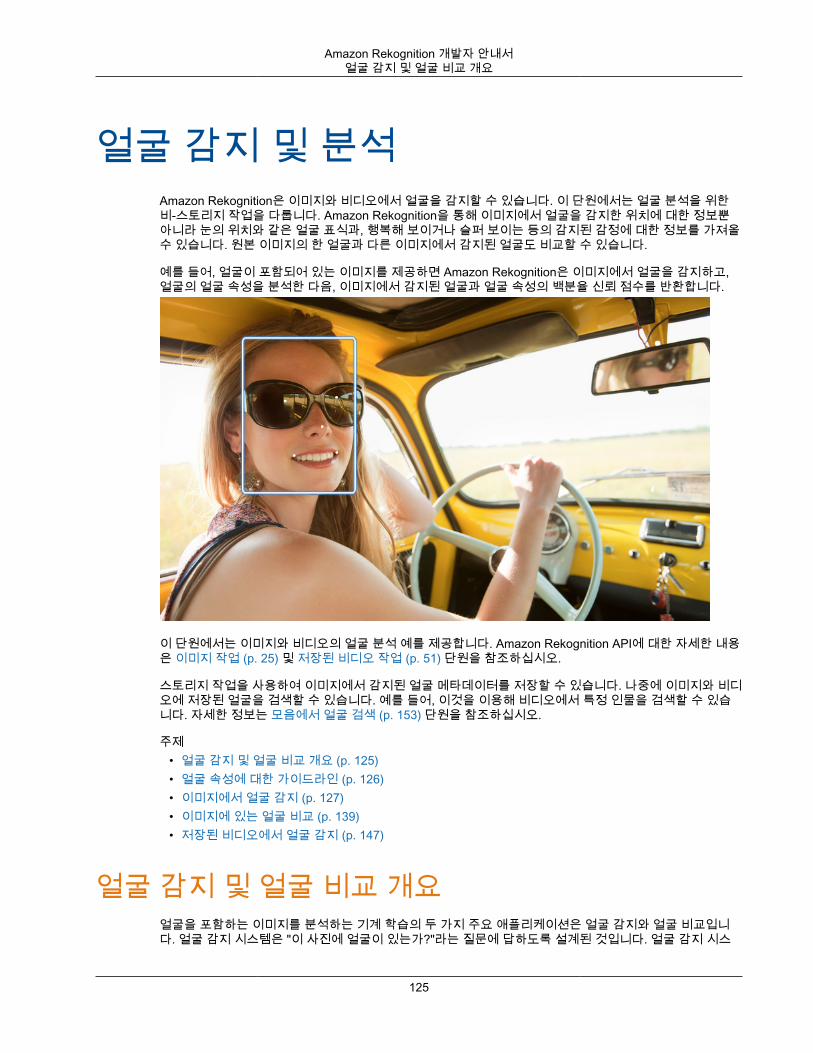
Amazon Rekognition 개발자 안내서얼굴 감지 및 얼굴 비교 개요
얼굴 감지 및 분석Amazon Rekognition은 이미지와 비디오에서 얼굴을 감지할 수 있습니다. 이 단원에서는 얼굴 분석을 위한비-스토리지 작업을 다룹니다. Amazon Rekognition을 통해 이미지에서 얼굴을 감지한 위치에 대한 정보뿐아니라 눈의 위치와 같은 얼굴 표식과, 행복해 보이거나 슬퍼 보이는 등의 감지된 감정에 대한 정보를 가져올수 있습니다. 원본 이미지의 한 얼굴과 다른 이미지에서 감지된 얼굴도 비교할 수 있습니다.
예를 들어, 얼굴이 포함되어 있는 이미지를 제공하면 Amazon Rekognition은 이미지에서 얼굴을 감지하고,얼굴의 얼굴 속성을 분석한 다음, 이미지에서 감지된 얼굴과 얼굴 속성의 백분율 신뢰 점수를 반환합니다.
이 단원에서는 이미지와 비디오의 얼굴 분석 예를 제공합니다. Amazon Rekognition API에 대한 자세한 내용은 이미지 작업 (p. 25) 및 저장된 비디오 작업 (p. 51) 단원을 참조하십시오.
스토리지 작업을 사용하여 이미지에서 감지된 얼굴 메타데이터를 저장할 수 있습니다. 나중에 이미지와 비디오에 저장된 얼굴을 검색할 수 있습니다. 예를 들어, 이것을 이용해 비디오에서 특정 인물을 검색할 수 있습니다. 자세한 정보는 모음에서 얼굴 검색 (p. 153) 단원을 참조하십시오.
주제• 얼굴 감지 및 얼굴 비교 개요 (p. 125)• 얼굴 속성에 대한 가이드라인 (p. 126)• 이미지에서 얼굴 감지 (p. 127)• 이미지에 있는 얼굴 비교 (p. 139)• 저장된 비디오에서 얼굴 감지 (p. 147)
얼굴 감지 및 얼굴 비교 개요얼굴을 포함하는 이미지를 분석하는 기계 학습의 두 가지 주요 애플리케이션은 얼굴 감지와 얼굴 비교입니다. 얼굴 감지 시스템은 "이 사진에 얼굴이 있는가?"라는 질문에 답하도록 설계된 것입니다. 얼굴 감지 시스
125
Amazon Rekognition 개발자 안내서얼굴 속성에 대한 가이드라인
템은 스틸 이미지 또는 비디오 프레임에서 얼굴의 존재, 위치, 스케일 및 (가능할 경우) 방향을 판단합니다.이 시스템은 성별, 연령, 앞머리와 같은 속성과 상관없이 얼굴의 존재를 감지하도록 설계되었습니다.
얼굴 비교 시스템은 "이미지 안의 얼굴이 다른 이미지의 얼굴과 일치하는가?"라는 질문에 답하도록 설계된것입니다. 얼굴 비교 시스템은 특정 얼굴의 이미지가 제공된 데이터베이스의 다른 얼굴과 일치하는지 예측합니다. 얼굴 비교 시스템은 표정, 안면 털, 연령과 상관없이 얼굴을 비교하고 가능한 일치를 예측하도록 설계되었습니다.
얼굴 감지 시스템과 얼굴 비교 시스템은 모두 확률 또는 신뢰도 점수 형태로 예측의 신뢰도 수준에 대한 추정치를 제공할 수 있습니다. 예를 들어 얼굴 감지 시스템이 한 이미지 영역이 얼굴이라는 것을 신뢰도 점수90%로 예측하고 다른 이미지 영역이 얼굴이라는 것을 신뢰도 점수 60%로 예측할 수 있습니다. 신뢰도 점수가 높은 영역이 얼굴을 포함할 확률이 높습니다. 얼굴 감지 시스템이 적절하게 얼굴을 감지하지 못하거나 실제 얼굴에 대한 낮은 신뢰도의 예측을 제공할 경우 이를 감지 누락 또는 미검이라고 합니다. 얼굴 감지 시스템이 높은 신뢰도에서 얼굴의 존재를 잘못 예측할 경우 이를 오경보 또는 오탐이라고 합니다. 마찬가지로, 얼굴 비교 시스템이 같은 사람의 두 얼굴을 일치시키지 못할 수 있으며(감지 누락/미검) 다른 사람의 두 얼굴을같은 사람이라고 잘못 예측할 수 있습니다(오경보/오탐).
신뢰도 점수는 얼굴 감지 및 비교 시스템의 중요 구성 요소입니다. 이들 시스템은 예측에서 해당하는 신뢰도로 이미지에 얼굴이 존재하는지 또는 다른 이미지의 얼굴과 일치하는지 여부를 예측합니다. 이러한 시스템의 사용자는 애플리케이션을 설계하고 시스템 출력에 기반하여 의사 결정을 수립할 때 시스템이 제공하는 신뢰도 점수/유사성 임계값을 고려해야 합니다. 예를 들어 얼굴이 비슷한 가족을 식별하는 데 사용되는 사진 애플리케이션에서, 신뢰도가 80%로 설정된 경우 애플리케이션은 예측이 80% 신뢰도에 도달하면 일치를 반환하고 이 수준에 미달하는 일치는 반환하지 않습니다. 이 사용 사례에서는 감지 누락 또는 오경보에 따른위험이 낮으므로 이 임계값이 허용될 수 있습니다. 하지만, 감지 누락 또는 오경보에 따른 위험이 높은 사용사례에서는 시스템이 더 높은 신뢰도를 사용해야 합니다. 매우 정확한 얼굴 일치가 중요한 시나리오의 경우99% 신뢰도/유사성 임계값을 사용해야 합니다. 권장 신뢰도 임계값에 대한 자세한 내용은 모음에서 얼굴 검색 (p. 153) 단원을 참조하십시오.
얼굴 속성에 대한 가이드라인Amazon Rekognition은 감지한 각 얼굴에 대해 경계 상자, 속성, 감정, 랜드마크, 품질 및 포즈를 반환합니다.각 속성 또는 감정에는 값과 신뢰도 점수가 있습니다. 예를 들어 특정 얼굴이 신뢰도 점수 85%에서 성별이‘여성’으로, 신뢰도 점수 90%에서 ‘행복’이란 감정을 갖는 것으로 예측될 수 있습니다.
성별 이분법(남성/여성) 예측은 특정 이미지에서 얼굴의 외양적 모습을 기반으로 합니다. 이는 사람의 성 정체성을 나타내지 않으므로 그러한 결정을 내리는 데 Amazon Rekognition을 사용하지 않아야 합니다. 개인의권리, 프라이버시 또는 서비스 이용에 영향을 미칠 수 있는 결정을 내리는 데에는 성별 이분법 예측을 사용하지 않는 것이 좋습니다.
마찬가지로, 이미지에서 사람 얼굴의 외양적 모습에만 근거하여 감정 표현을 예측합니다. 이는 사람 내면의실제 감정 상태를 나타내지 않으므로 그러한 결정을 내리는 데 Amazon Rekognition을 사용하지 않아야 합니다. 예를 들어 사진에서 행복한 얼굴을 하고 있는 것처럼 꾸민 사람이 행복해 보일 수는 있지만 행복한 감정을 느끼고 있지 않을 수도 있습니다.
분류 정확도가 이미지 내 인물에 부정적 영향을 미칠 수 있는 사용 사례에서는 99% 이상의 임계값을 사용하는 것이 좋습니다. 유일한 예외는 연령 범위입니다. Amazon Rekognition은 해당 인물의 연령 상한 및 하한을추정합니다. 이 경우 연령 범위가 넓을수록 해당 예측의 신뢰도는 낮아집니다. 대략적 계산으로, 연령 범위의중간 값을 사용하여 감지된 얼굴의 나이를 추정해야 합니다. (실제 나이가 반드시 이 숫자와 일치하는 것은아닙니다.)
이러한 속성을 가장 잘 사용하는 방법 중 하나는 집계를 생성하는 것입니다. 예를 들어, 미소, 포즈, 선명도 같은 속성은 소셜 미디어 애플리케이션에서 자동으로 '최상의 프로필 사진'을 선택하는 데 사용될 수 있습니다.또 하나의 일반 사용 사례는 예측된 성별 및 연령 속성을 사용하여 광범위한 표본에서 익명으로 인구통계를추정하는 것입니다(예: 행사 또는 소매점에서 시행).
126

Amazon Rekognition 개발자 안내서이미지에서 얼굴 감지
이미지에서 얼굴 감지Amazon Rekognition Image는 입력 이미지에서 눈, 코, 입 등 주요 얼굴 특징을 찾아 얼굴을 감지하는DetectFaces (p. 311) 작업을 제공합니다. Amazon Rekognition Image는 이미지에서 가장 큰 얼굴 100개를감지합니다.
입력 이미지를 이미지 바이트 배열(base64 인코딩 이미지 바이트)로 제공하거나 Amazon S3 객체를 지정할수 있습니다. 이 절차에서는 S3 버킷에 이미지(JPEG 또는 PNG)를 업로드하고 객체 키 이름을 지정합니다.
이미지에서 얼굴을 감지하려면
1. 아직 설정하지 않았다면 다음과 같이 하십시오.
a. AmazonRekognitionFullAccess 권한과 AmazonS3ReadOnlyAccess 권한을 가진 IAM 사용자를 만들어 업데이트합니다. 자세한 내용은 1단계: AWS 계정 설정 및 IAM 사용자 만들기 (p. 11)단원을 참조하십시오.
b. AWS CLI와 AWS SDK를 설치하고 구성합니다. 자세한 내용은 2단계: AWS CLI 및 AWS SDK 설정 (p. 12) 단원을 참조하십시오.
2. 한 개 이상의 얼굴이 포함된 이미지를 S3 버킷에 업로드합니다.
지침은 Amazon Simple Storage Service 콘솔 사용 설명서의 Amazon S3로 객체 업로드 단원을 참조하십시오.
3. 다음 예제를 사용하여 DetectFaces를 호출합니다.
Java
이 예제에서는 감지된 얼굴의 추정 연령 범위를 표시하고 감지된 모든 얼굴 속성의 JSON을 나열합니다. photo의 값을 이미지 파일 이름으로 변경합니다. bucket의 값을 이미지가 저장된 AmazonS3 버킷으로 변경합니다.
//Copyright 2018 Amazon.com, Inc. or its affiliates. All Rights Reserved.//PDX-License-Identifier: MIT-0 (For details, see https://github.com/awsdocs/amazon-rekognition-developer-guide/blob/master/LICENSE-SAMPLECODE.)
package aws.example.rekognition.image;
import com.amazonaws.services.rekognition.AmazonRekognition;import com.amazonaws.services.rekognition.AmazonRekognitionClientBuilder;import com.amazonaws.services.rekognition.model.AmazonRekognitionException;import com.amazonaws.services.rekognition.model.Image;import com.amazonaws.services.rekognition.model.S3Object;import com.amazonaws.services.rekognition.model.AgeRange;import com.amazonaws.services.rekognition.model.Attribute;import com.amazonaws.services.rekognition.model.DetectFacesRequest;import com.amazonaws.services.rekognition.model.DetectFacesResult;import com.amazonaws.services.rekognition.model.FaceDetail;import com.fasterxml.jackson.databind.ObjectMapper;import java.util.List;
public class DetectFaces { public static void main(String[] args) throws Exception {
String photo = "input.jpg"; String bucket = "bucket";
AmazonRekognition rekognitionClient = AmazonRekognitionClientBuilder.defaultClient();
127
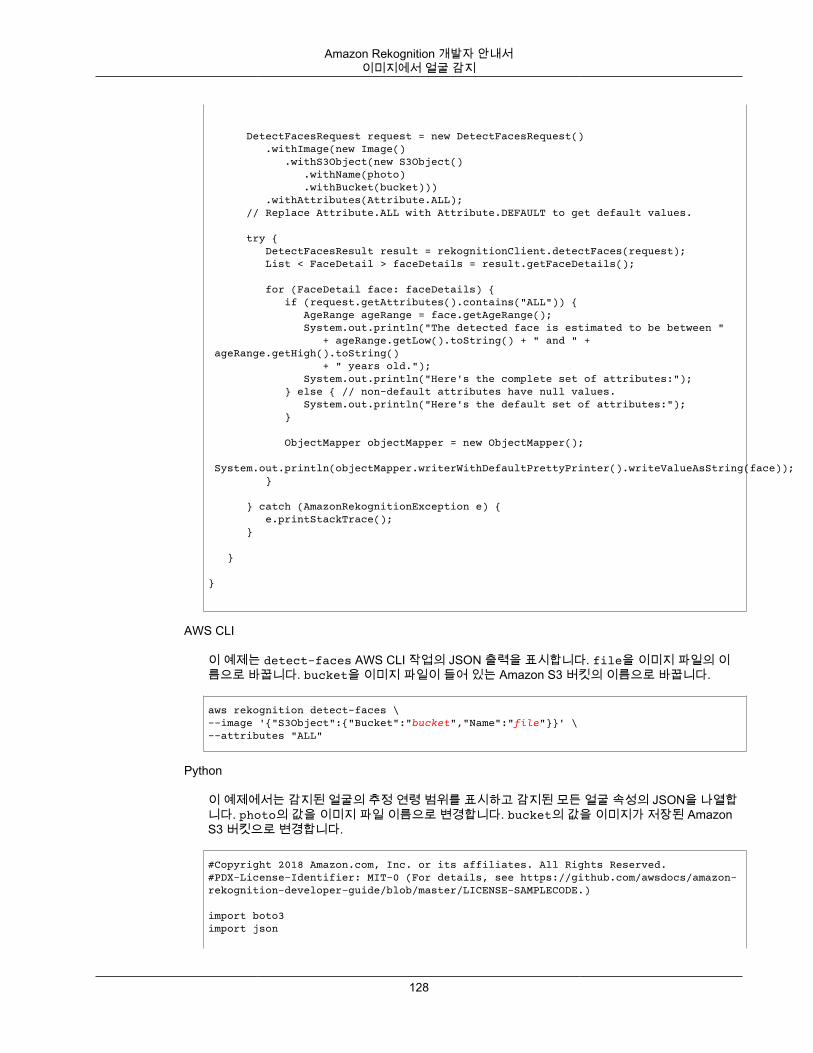
Amazon Rekognition 개발자 안내서이미지에서 얼굴 감지
DetectFacesRequest request = new DetectFacesRequest() .withImage(new Image() .withS3Object(new S3Object() .withName(photo) .withBucket(bucket))) .withAttributes(Attribute.ALL); // Replace Attribute.ALL with Attribute.DEFAULT to get default values.
try { DetectFacesResult result = rekognitionClient.detectFaces(request); List < FaceDetail > faceDetails = result.getFaceDetails();
for (FaceDetail face: faceDetails) { if (request.getAttributes().contains("ALL")) { AgeRange ageRange = face.getAgeRange(); System.out.println("The detected face is estimated to be between " + ageRange.getLow().toString() + " and " + ageRange.getHigh().toString() + " years old."); System.out.println("Here's the complete set of attributes:"); } else { // non-default attributes have null values. System.out.println("Here's the default set of attributes:"); }
ObjectMapper objectMapper = new ObjectMapper(); System.out.println(objectMapper.writerWithDefaultPrettyPrinter().writeValueAsString(face)); }
} catch (AmazonRekognitionException e) { e.printStackTrace(); }
}
}
AWS CLI
이 예제는 detect-faces AWS CLI 작업의 JSON 출력을 표시합니다. file을 이미지 파일의 이름으로 바꿉니다. bucket을 이미지 파일이 들어 있는 Amazon S3 버킷의 이름으로 바꿉니다.
aws rekognition detect-faces \--image '{"S3Object":{"Bucket":"bucket","Name":"file"}}' \--attributes "ALL"
Python
이 예제에서는 감지된 얼굴의 추정 연령 범위를 표시하고 감지된 모든 얼굴 속성의 JSON을 나열합니다. photo의 값을 이미지 파일 이름으로 변경합니다. bucket의 값을 이미지가 저장된 AmazonS3 버킷으로 변경합니다.
#Copyright 2018 Amazon.com, Inc. or its affiliates. All Rights Reserved.#PDX-License-Identifier: MIT-0 (For details, see https://github.com/awsdocs/amazon-rekognition-developer-guide/blob/master/LICENSE-SAMPLECODE.)
import boto3import json
128
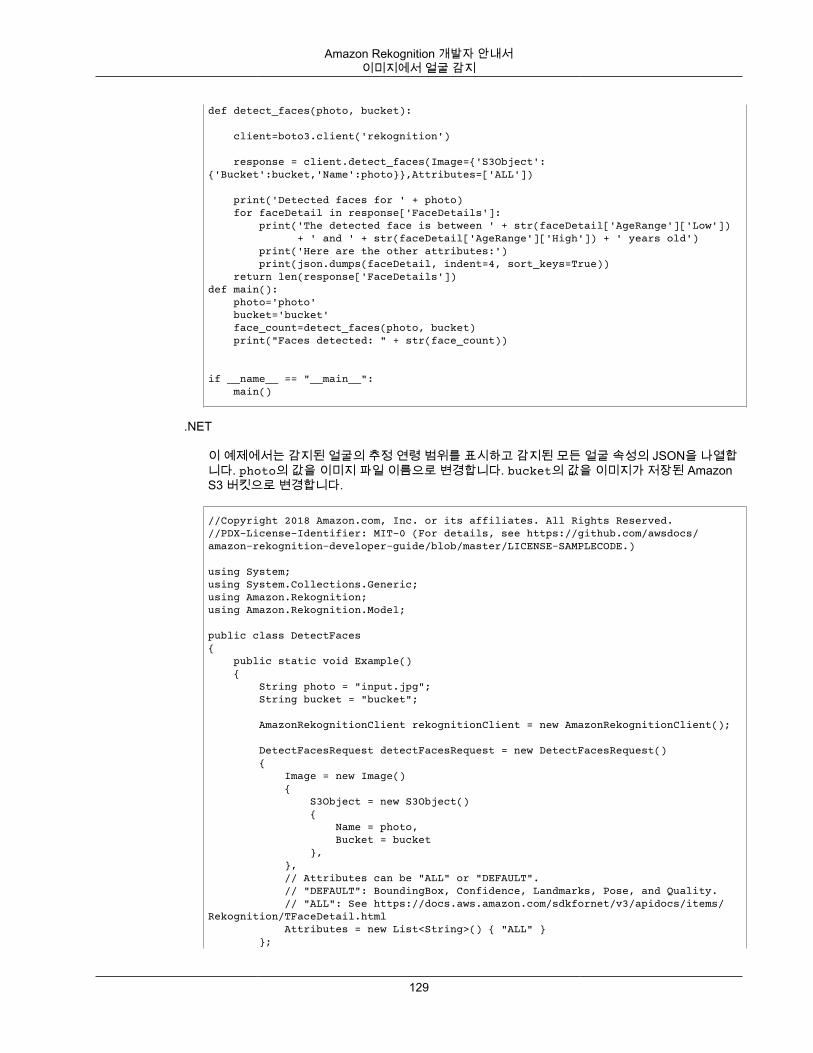
Amazon Rekognition 개발자 안내서이미지에서 얼굴 감지
def detect_faces(photo, bucket):
client=boto3.client('rekognition')
response = client.detect_faces(Image={'S3Object':{'Bucket':bucket,'Name':photo}},Attributes=['ALL'])
print('Detected faces for ' + photo) for faceDetail in response['FaceDetails']: print('The detected face is between ' + str(faceDetail['AgeRange']['Low']) + ' and ' + str(faceDetail['AgeRange']['High']) + ' years old') print('Here are the other attributes:') print(json.dumps(faceDetail, indent=4, sort_keys=True)) return len(response['FaceDetails'])def main(): photo='photo' bucket='bucket' face_count=detect_faces(photo, bucket) print("Faces detected: " + str(face_count))
if __name__ == "__main__": main()
.NET
이 예제에서는 감지된 얼굴의 추정 연령 범위를 표시하고 감지된 모든 얼굴 속성의 JSON을 나열합니다. photo의 값을 이미지 파일 이름으로 변경합니다. bucket의 값을 이미지가 저장된 AmazonS3 버킷으로 변경합니다.
//Copyright 2018 Amazon.com, Inc. or its affiliates. All Rights Reserved.//PDX-License-Identifier: MIT-0 (For details, see https://github.com/awsdocs/amazon-rekognition-developer-guide/blob/master/LICENSE-SAMPLECODE.)
using System;using System.Collections.Generic;using Amazon.Rekognition;using Amazon.Rekognition.Model;
public class DetectFaces{ public static void Example() { String photo = "input.jpg"; String bucket = "bucket";
AmazonRekognitionClient rekognitionClient = new AmazonRekognitionClient();
DetectFacesRequest detectFacesRequest = new DetectFacesRequest() { Image = new Image() { S3Object = new S3Object() { Name = photo, Bucket = bucket }, }, // Attributes can be "ALL" or "DEFAULT". // "DEFAULT": BoundingBox, Confidence, Landmarks, Pose, and Quality. // "ALL": See https://docs.aws.amazon.com/sdkfornet/v3/apidocs/items/Rekognition/TFaceDetail.html Attributes = new List<String>() { "ALL" } };
129
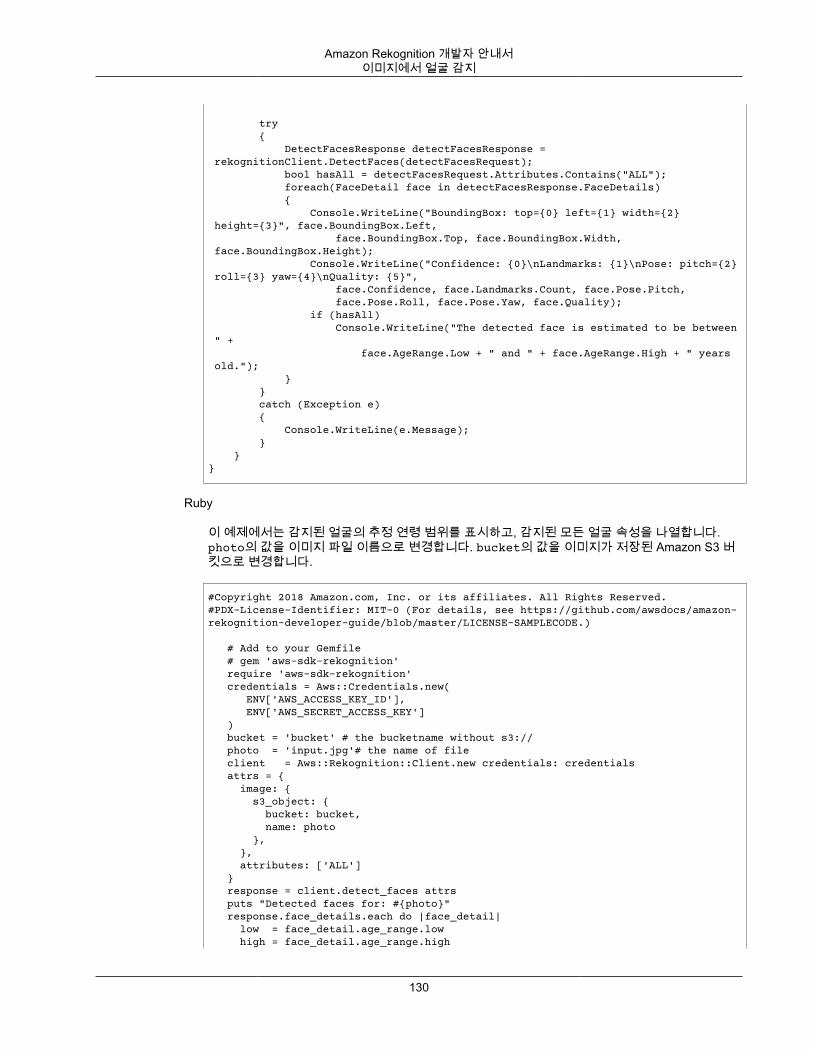
Amazon Rekognition 개발자 안내서이미지에서 얼굴 감지
try { DetectFacesResponse detectFacesResponse = rekognitionClient.DetectFaces(detectFacesRequest); bool hasAll = detectFacesRequest.Attributes.Contains("ALL"); foreach(FaceDetail face in detectFacesResponse.FaceDetails) { Console.WriteLine("BoundingBox: top={0} left={1} width={2} height={3}", face.BoundingBox.Left, face.BoundingBox.Top, face.BoundingBox.Width, face.BoundingBox.Height); Console.WriteLine("Confidence: {0}\nLandmarks: {1}\nPose: pitch={2} roll={3} yaw={4}\nQuality: {5}", face.Confidence, face.Landmarks.Count, face.Pose.Pitch, face.Pose.Roll, face.Pose.Yaw, face.Quality); if (hasAll) Console.WriteLine("The detected face is estimated to be between " + face.AgeRange.Low + " and " + face.AgeRange.High + " years old."); } } catch (Exception e) { Console.WriteLine(e.Message); } }}
Ruby
이 예제에서는 감지된 얼굴의 추정 연령 범위를 표시하고, 감지된 모든 얼굴 속성을 나열합니다.photo의 값을 이미지 파일 이름으로 변경합니다. bucket의 값을 이미지가 저장된 Amazon S3 버킷으로 변경합니다.
#Copyright 2018 Amazon.com, Inc. or its affiliates. All Rights Reserved.#PDX-License-Identifier: MIT-0 (For details, see https://github.com/awsdocs/amazon-rekognition-developer-guide/blob/master/LICENSE-SAMPLECODE.)
# Add to your Gemfile # gem 'aws-sdk-rekognition' require 'aws-sdk-rekognition' credentials = Aws::Credentials.new( ENV['AWS_ACCESS_KEY_ID'], ENV['AWS_SECRET_ACCESS_KEY'] ) bucket = 'bucket' # the bucketname without s3:// photo = 'input.jpg'# the name of file client = Aws::Rekognition::Client.new credentials: credentials attrs = { image: { s3_object: { bucket: bucket, name: photo }, }, attributes: ['ALL'] } response = client.detect_faces attrs puts "Detected faces for: #{photo}" response.face_details.each do |face_detail| low = face_detail.age_range.low high = face_detail.age_range.high
130
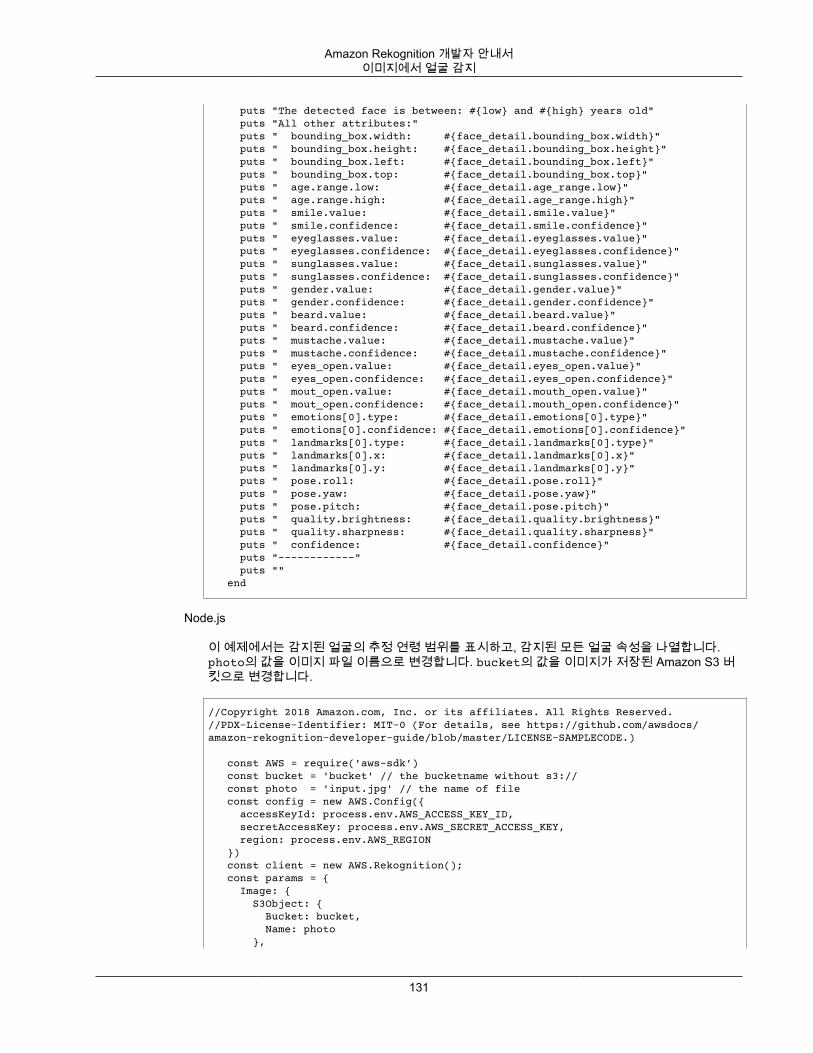
Amazon Rekognition 개발자 안내서이미지에서 얼굴 감지
puts "The detected face is between: #{low} and #{high} years old" puts "All other attributes:" puts " bounding_box.width: #{face_detail.bounding_box.width}" puts " bounding_box.height: #{face_detail.bounding_box.height}" puts " bounding_box.left: #{face_detail.bounding_box.left}" puts " bounding_box.top: #{face_detail.bounding_box.top}" puts " age.range.low: #{face_detail.age_range.low}" puts " age.range.high: #{face_detail.age_range.high}" puts " smile.value: #{face_detail.smile.value}" puts " smile.confidence: #{face_detail.smile.confidence}" puts " eyeglasses.value: #{face_detail.eyeglasses.value}" puts " eyeglasses.confidence: #{face_detail.eyeglasses.confidence}" puts " sunglasses.value: #{face_detail.sunglasses.value}" puts " sunglasses.confidence: #{face_detail.sunglasses.confidence}" puts " gender.value: #{face_detail.gender.value}" puts " gender.confidence: #{face_detail.gender.confidence}" puts " beard.value: #{face_detail.beard.value}" puts " beard.confidence: #{face_detail.beard.confidence}" puts " mustache.value: #{face_detail.mustache.value}" puts " mustache.confidence: #{face_detail.mustache.confidence}" puts " eyes_open.value: #{face_detail.eyes_open.value}" puts " eyes_open.confidence: #{face_detail.eyes_open.confidence}" puts " mout_open.value: #{face_detail.mouth_open.value}" puts " mout_open.confidence: #{face_detail.mouth_open.confidence}" puts " emotions[0].type: #{face_detail.emotions[0].type}" puts " emotions[0].confidence: #{face_detail.emotions[0].confidence}" puts " landmarks[0].type: #{face_detail.landmarks[0].type}" puts " landmarks[0].x: #{face_detail.landmarks[0].x}" puts " landmarks[0].y: #{face_detail.landmarks[0].y}" puts " pose.roll: #{face_detail.pose.roll}" puts " pose.yaw: #{face_detail.pose.yaw}" puts " pose.pitch: #{face_detail.pose.pitch}" puts " quality.brightness: #{face_detail.quality.brightness}" puts " quality.sharpness: #{face_detail.quality.sharpness}" puts " confidence: #{face_detail.confidence}" puts "------------" puts "" end
Node.js
이 예제에서는 감지된 얼굴의 추정 연령 범위를 표시하고, 감지된 모든 얼굴 속성을 나열합니다.photo의 값을 이미지 파일 이름으로 변경합니다. bucket의 값을 이미지가 저장된 Amazon S3 버킷으로 변경합니다.
//Copyright 2018 Amazon.com, Inc. or its affiliates. All Rights Reserved.//PDX-License-Identifier: MIT-0 (For details, see https://github.com/awsdocs/amazon-rekognition-developer-guide/blob/master/LICENSE-SAMPLECODE.)
const AWS = require('aws-sdk') const bucket = 'bucket' // the bucketname without s3:// const photo = 'input.jpg' // the name of file const config = new AWS.Config({ accessKeyId: process.env.AWS_ACCESS_KEY_ID, secretAccessKey: process.env.AWS_SECRET_ACCESS_KEY, region: process.env.AWS_REGION }) const client = new AWS.Rekognition(); const params = { Image: { S3Object: { Bucket: bucket, Name: photo },
131
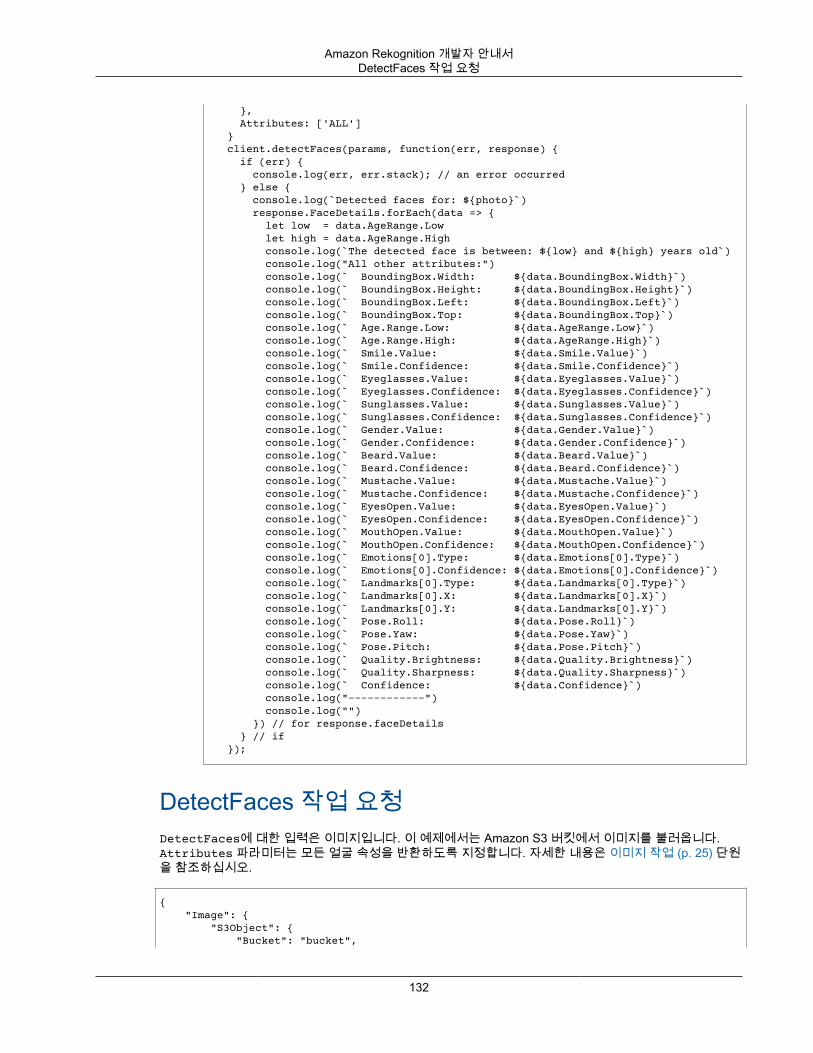
Amazon Rekognition 개발자 안내서DetectFaces 작업 요청
}, Attributes: ['ALL'] } client.detectFaces(params, function(err, response) { if (err) { console.log(err, err.stack); // an error occurred } else { console.log(`Detected faces for: ${photo}`) response.FaceDetails.forEach(data => { let low = data.AgeRange.Low let high = data.AgeRange.High console.log(`The detected face is between: ${low} and ${high} years old`) console.log("All other attributes:") console.log(` BoundingBox.Width: ${data.BoundingBox.Width}`) console.log(` BoundingBox.Height: ${data.BoundingBox.Height}`) console.log(` BoundingBox.Left: ${data.BoundingBox.Left}`) console.log(` BoundingBox.Top: ${data.BoundingBox.Top}`) console.log(` Age.Range.Low: ${data.AgeRange.Low}`) console.log(` Age.Range.High: ${data.AgeRange.High}`) console.log(` Smile.Value: ${data.Smile.Value}`) console.log(` Smile.Confidence: ${data.Smile.Confidence}`) console.log(` Eyeglasses.Value: ${data.Eyeglasses.Value}`) console.log(` Eyeglasses.Confidence: ${data.Eyeglasses.Confidence}`) console.log(` Sunglasses.Value: ${data.Sunglasses.Value}`) console.log(` Sunglasses.Confidence: ${data.Sunglasses.Confidence}`) console.log(` Gender.Value: ${data.Gender.Value}`) console.log(` Gender.Confidence: ${data.Gender.Confidence}`) console.log(` Beard.Value: ${data.Beard.Value}`) console.log(` Beard.Confidence: ${data.Beard.Confidence}`) console.log(` Mustache.Value: ${data.Mustache.Value}`) console.log(` Mustache.Confidence: ${data.Mustache.Confidence}`) console.log(` EyesOpen.Value: ${data.EyesOpen.Value}`) console.log(` EyesOpen.Confidence: ${data.EyesOpen.Confidence}`) console.log(` MouthOpen.Value: ${data.MouthOpen.Value}`) console.log(` MouthOpen.Confidence: ${data.MouthOpen.Confidence}`) console.log(` Emotions[0].Type: ${data.Emotions[0].Type}`) console.log(` Emotions[0].Confidence: ${data.Emotions[0].Confidence}`) console.log(` Landmarks[0].Type: ${data.Landmarks[0].Type}`) console.log(` Landmarks[0].X: ${data.Landmarks[0].X}`) console.log(` Landmarks[0].Y: ${data.Landmarks[0].Y}`) console.log(` Pose.Roll: ${data.Pose.Roll}`) console.log(` Pose.Yaw: ${data.Pose.Yaw}`) console.log(` Pose.Pitch: ${data.Pose.Pitch}`) console.log(` Quality.Brightness: ${data.Quality.Brightness}`) console.log(` Quality.Sharpness: ${data.Quality.Sharpness}`) console.log(` Confidence: ${data.Confidence}`) console.log("------------") console.log("") }) // for response.faceDetails } // if });
DetectFaces 작업 요청DetectFaces에 대한 입력은 이미지입니다. 이 예제에서는 Amazon S3 버킷에서 이미지를 불러옵니다.Attributes 파라미터는 모든 얼굴 속성을 반환하도록 지정합니다. 자세한 내용은 이미지 작업 (p. 25) 단원을 참조하십시오.
{ "Image": { "S3Object": { "Bucket": "bucket",
132
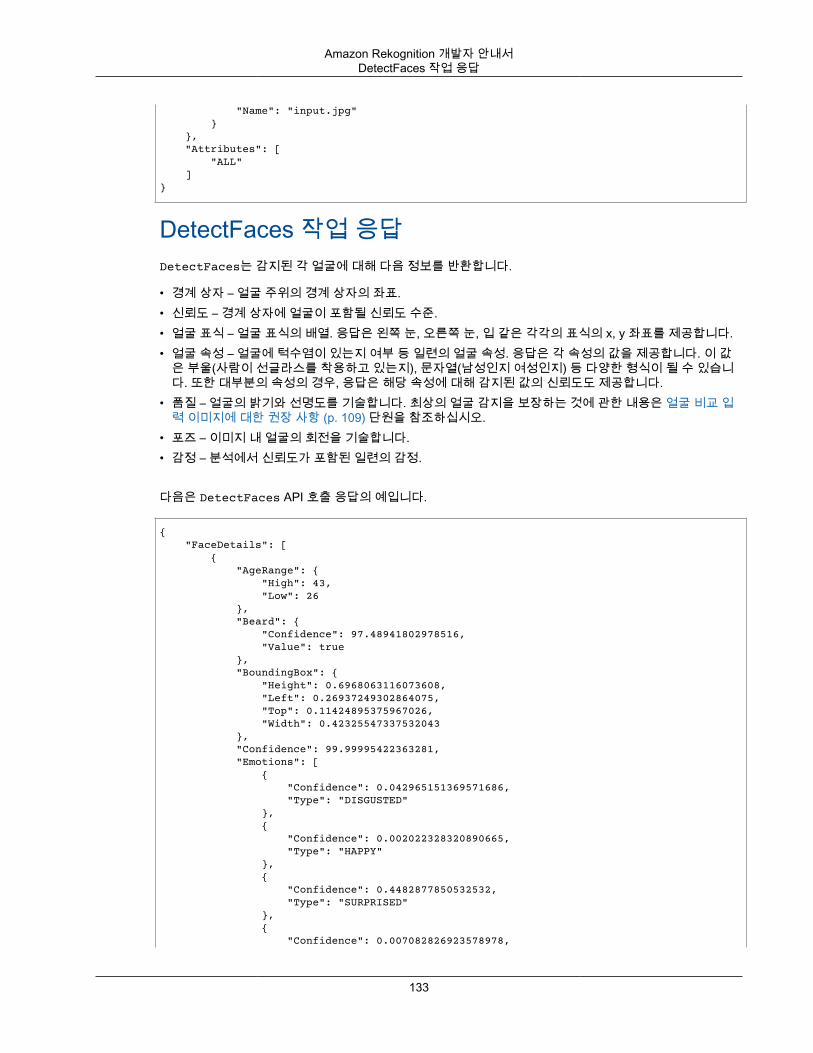
Amazon Rekognition 개발자 안내서DetectFaces 작업 응답
"Name": "input.jpg" } }, "Attributes": [ "ALL" ]}
DetectFaces 작업 응답DetectFaces는 감지된 각 얼굴에 대해 다음 정보를 반환합니다.
• 경계 상자 – 얼굴 주위의 경계 상자의 좌표.• 신뢰도 – 경계 상자에 얼굴이 포함될 신뢰도 수준.• 얼굴 표식 – 얼굴 표식의 배열. 응답은 왼쪽 눈, 오른쪽 눈, 입 같은 각각의 표식의 x, y 좌표를 제공합니다.• 얼굴 속성 – 얼굴에 턱수염이 있는지 여부 등 일련의 얼굴 속성. 응답은 각 속성의 값을 제공합니다. 이 값
은 부울(사람이 선글라스를 착용하고 있는지), 문자열(남성인지 여성인지) 등 다양한 형식이 될 수 있습니다. 또한 대부분의 속성의 경우, 응답은 해당 속성에 대해 감지된 값의 신뢰도도 제공합니다.
• 품질 – 얼굴의 밝기와 선명도를 기술합니다. 최상의 얼굴 감지을 보장하는 것에 관한 내용은 얼굴 비교 입력 이미지에 대한 권장 사항 (p. 109) 단원을 참조하십시오.
• 포즈 – 이미지 내 얼굴의 회전을 기술합니다.• 감정 – 분석에서 신뢰도가 포함된 일련의 감정.
다음은 DetectFaces API 호출 응답의 예입니다.
{ "FaceDetails": [ { "AgeRange": { "High": 43, "Low": 26 }, "Beard": { "Confidence": 97.48941802978516, "Value": true }, "BoundingBox": { "Height": 0.6968063116073608, "Left": 0.26937249302864075, "Top": 0.11424895375967026, "Width": 0.42325547337532043 }, "Confidence": 99.99995422363281, "Emotions": [ { "Confidence": 0.042965151369571686, "Type": "DISGUSTED" }, { "Confidence": 0.002022328320890665, "Type": "HAPPY" }, { "Confidence": 0.4482877850532532, "Type": "SURPRISED" }, { "Confidence": 0.007082826923578978,
133
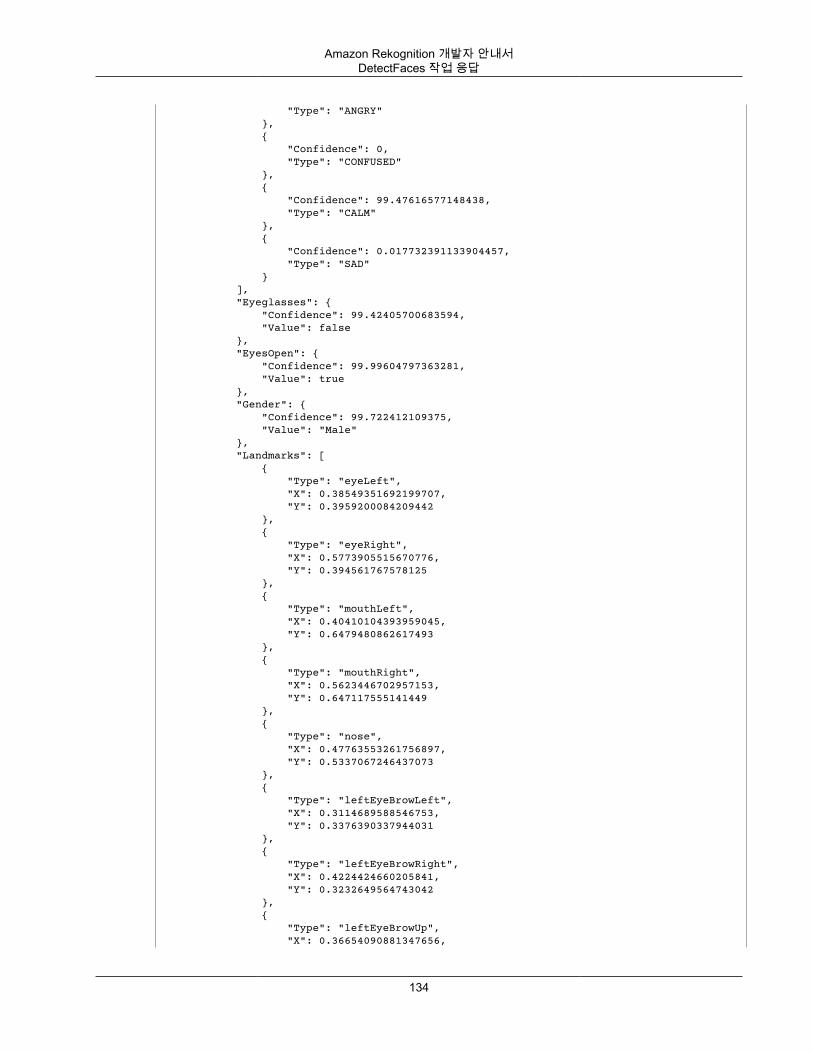
Amazon Rekognition 개발자 안내서DetectFaces 작업 응답
"Type": "ANGRY" }, { "Confidence": 0, "Type": "CONFUSED" }, { "Confidence": 99.47616577148438, "Type": "CALM" }, { "Confidence": 0.017732391133904457, "Type": "SAD" } ], "Eyeglasses": { "Confidence": 99.42405700683594, "Value": false }, "EyesOpen": { "Confidence": 99.99604797363281, "Value": true }, "Gender": { "Confidence": 99.722412109375, "Value": "Male" }, "Landmarks": [ { "Type": "eyeLeft", "X": 0.38549351692199707, "Y": 0.3959200084209442 }, { "Type": "eyeRight", "X": 0.5773905515670776, "Y": 0.394561767578125 }, { "Type": "mouthLeft", "X": 0.40410104393959045, "Y": 0.6479480862617493 }, { "Type": "mouthRight", "X": 0.5623446702957153, "Y": 0.647117555141449 }, { "Type": "nose", "X": 0.47763553261756897, "Y": 0.5337067246437073 }, { "Type": "leftEyeBrowLeft", "X": 0.3114689588546753, "Y": 0.3376390337944031 }, { "Type": "leftEyeBrowRight", "X": 0.4224424660205841, "Y": 0.3232649564743042 }, { "Type": "leftEyeBrowUp", "X": 0.36654090881347656,
134
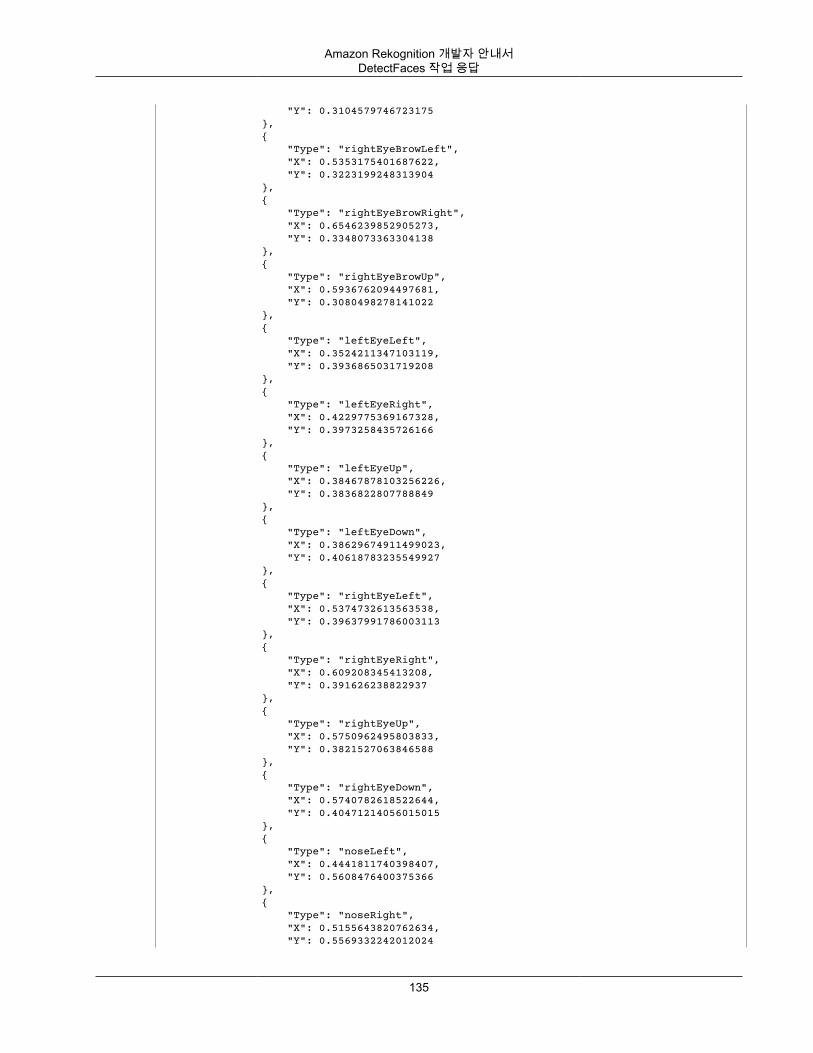
Amazon Rekognition 개발자 안내서DetectFaces 작업 응답
"Y": 0.3104579746723175 }, { "Type": "rightEyeBrowLeft", "X": 0.5353175401687622, "Y": 0.3223199248313904 }, { "Type": "rightEyeBrowRight", "X": 0.6546239852905273, "Y": 0.3348073363304138 }, { "Type": "rightEyeBrowUp", "X": 0.5936762094497681, "Y": 0.3080498278141022 }, { "Type": "leftEyeLeft", "X": 0.3524211347103119, "Y": 0.3936865031719208 }, { "Type": "leftEyeRight", "X": 0.4229775369167328, "Y": 0.3973258435726166 }, { "Type": "leftEyeUp", "X": 0.38467878103256226, "Y": 0.3836822807788849 }, { "Type": "leftEyeDown", "X": 0.38629674911499023, "Y": 0.40618783235549927 }, { "Type": "rightEyeLeft", "X": 0.5374732613563538, "Y": 0.39637991786003113 }, { "Type": "rightEyeRight", "X": 0.609208345413208, "Y": 0.391626238822937 }, { "Type": "rightEyeUp", "X": 0.5750962495803833, "Y": 0.3821527063846588 }, { "Type": "rightEyeDown", "X": 0.5740782618522644, "Y": 0.40471214056015015 }, { "Type": "noseLeft", "X": 0.4441811740398407, "Y": 0.5608476400375366 }, { "Type": "noseRight", "X": 0.5155643820762634, "Y": 0.5569332242012024
135
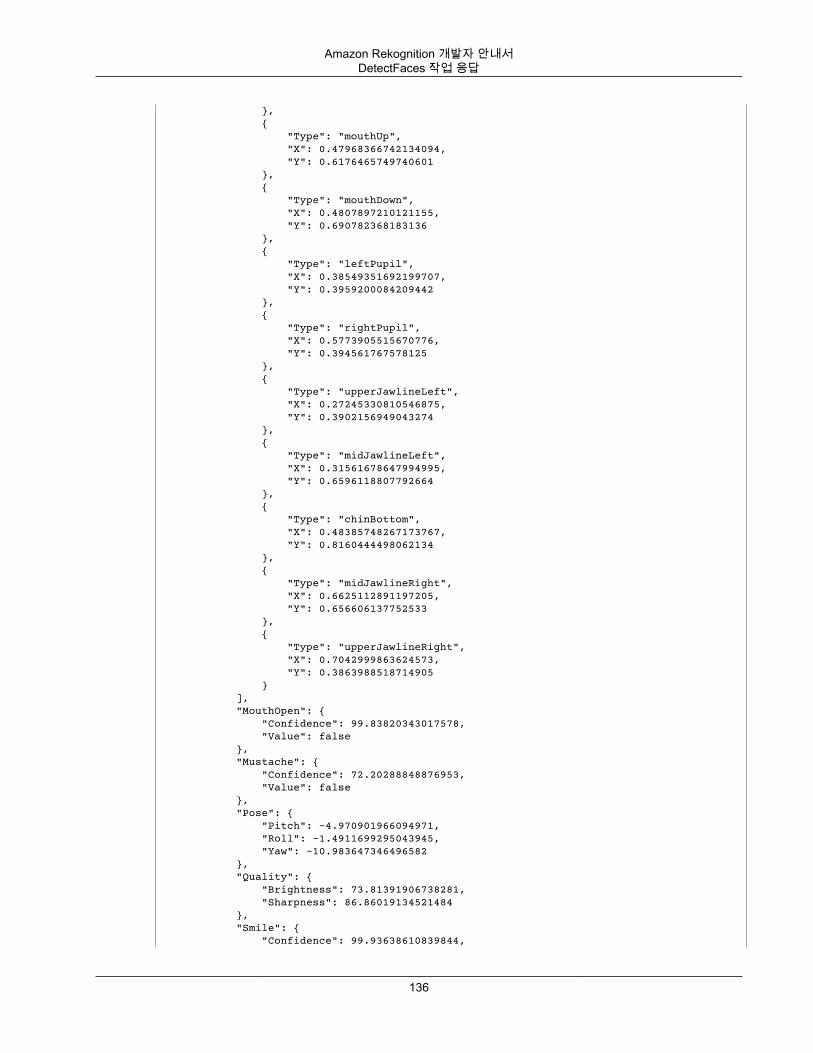
Amazon Rekognition 개발자 안내서DetectFaces 작업 응답
}, { "Type": "mouthUp", "X": 0.47968366742134094, "Y": 0.6176465749740601 }, { "Type": "mouthDown", "X": 0.4807897210121155, "Y": 0.690782368183136 }, { "Type": "leftPupil", "X": 0.38549351692199707, "Y": 0.3959200084209442 }, { "Type": "rightPupil", "X": 0.5773905515670776, "Y": 0.394561767578125 }, { "Type": "upperJawlineLeft", "X": 0.27245330810546875, "Y": 0.3902156949043274 }, { "Type": "midJawlineLeft", "X": 0.31561678647994995, "Y": 0.6596118807792664 }, { "Type": "chinBottom", "X": 0.48385748267173767, "Y": 0.8160444498062134 }, { "Type": "midJawlineRight", "X": 0.6625112891197205, "Y": 0.656606137752533 }, { "Type": "upperJawlineRight", "X": 0.7042999863624573, "Y": 0.3863988518714905 } ], "MouthOpen": { "Confidence": 99.83820343017578, "Value": false }, "Mustache": { "Confidence": 72.20288848876953, "Value": false }, "Pose": { "Pitch": -4.970901966094971, "Roll": -1.4911699295043945, "Yaw": -10.983647346496582 }, "Quality": { "Brightness": 73.81391906738281, "Sharpness": 86.86019134521484 }, "Smile": { "Confidence": 99.93638610839844,
136
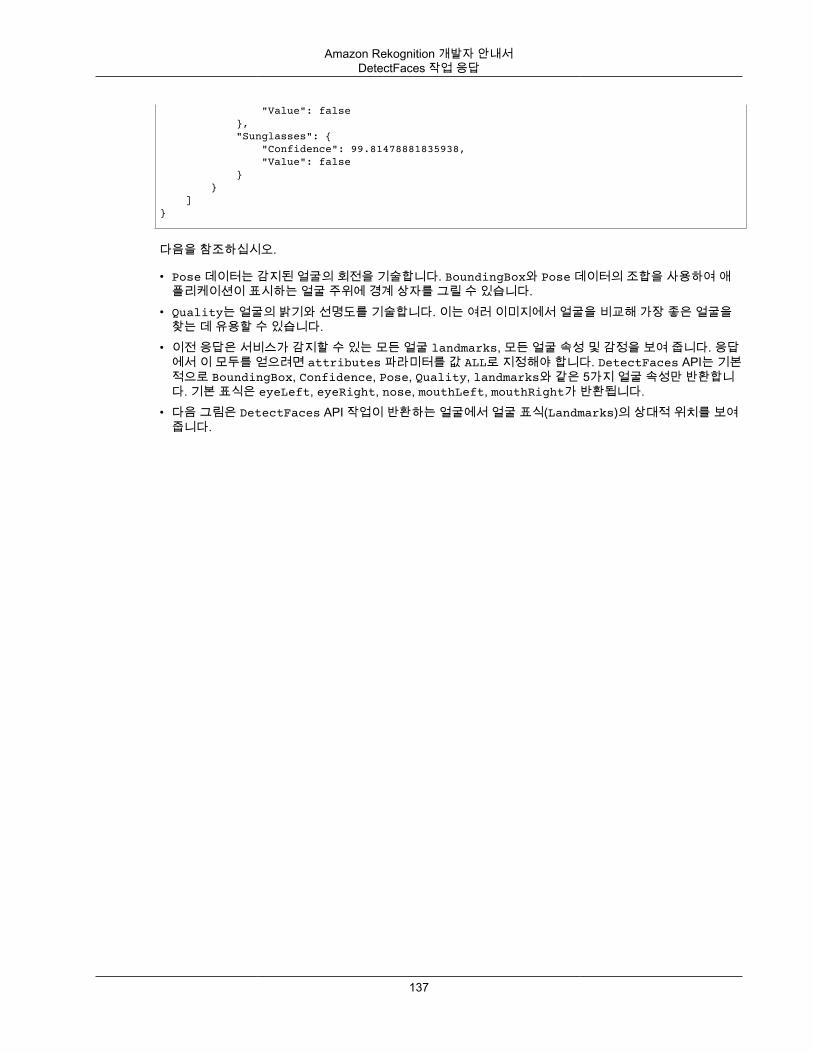
Amazon Rekognition 개발자 안내서DetectFaces 작업 응답
"Value": false }, "Sunglasses": { "Confidence": 99.81478881835938, "Value": false } } ]}
다음을 참조하십시오.
• Pose 데이터는 감지된 얼굴의 회전을 기술합니다. BoundingBox와 Pose 데이터의 조합을 사용하여 애플리케이션이 표시하는 얼굴 주위에 경계 상자를 그릴 수 있습니다.
• Quality는 얼굴의 밝기와 선명도를 기술합니다. 이는 여러 이미지에서 얼굴을 비교해 가장 좋은 얼굴을찾는 데 유용할 수 있습니다.
• 이전 응답은 서비스가 감지할 수 있는 모든 얼굴 landmarks, 모든 얼굴 속성 및 감정을 보여 줍니다. 응답에서 이 모두를 얻으려면 attributes 파라미터를 값 ALL로 지정해야 합니다. DetectFaces API는 기본적으로 BoundingBox, Confidence, Pose, Quality, landmarks와 같은 5가지 얼굴 속성만 반환합니다. 기본 표식은 eyeLeft, eyeRight, nose, mouthLeft, mouthRight가 반환됩니다.
• 다음 그림은 DetectFaces API 작업이 반환하는 얼굴에서 얼굴 표식(Landmarks)의 상대적 위치를 보여줍니다.
137
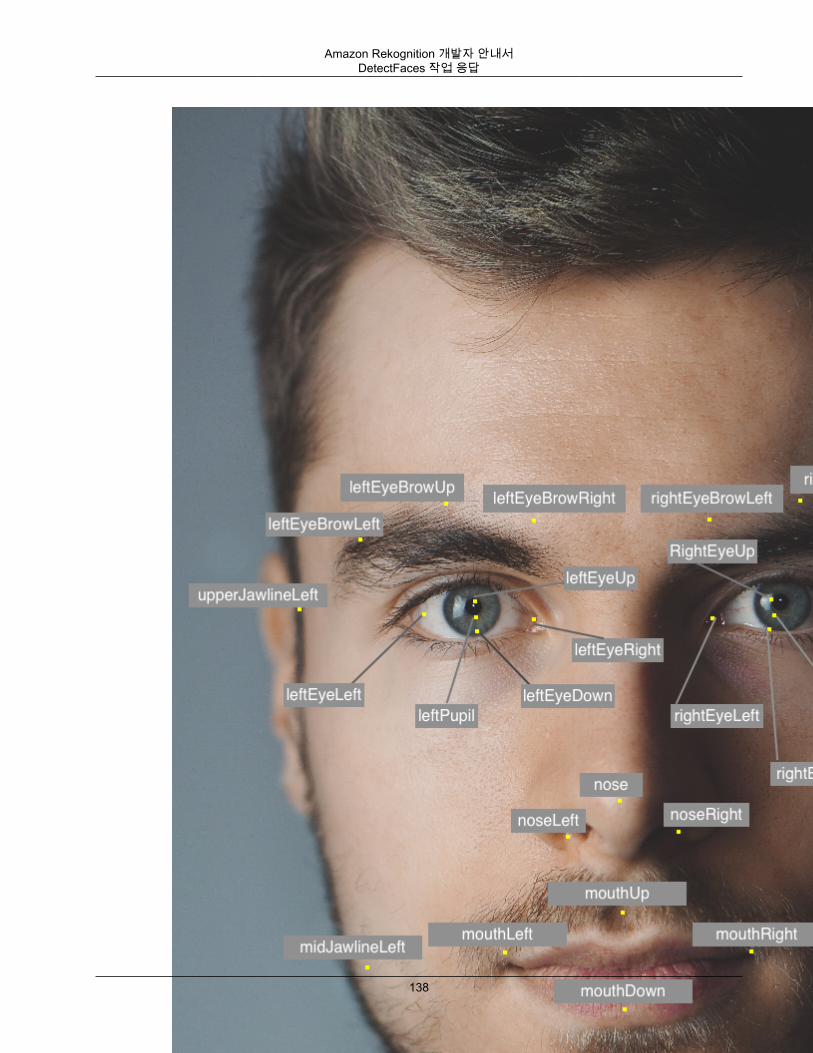
Amazon Rekognition 개발자 안내서DetectFaces 작업 응답
138
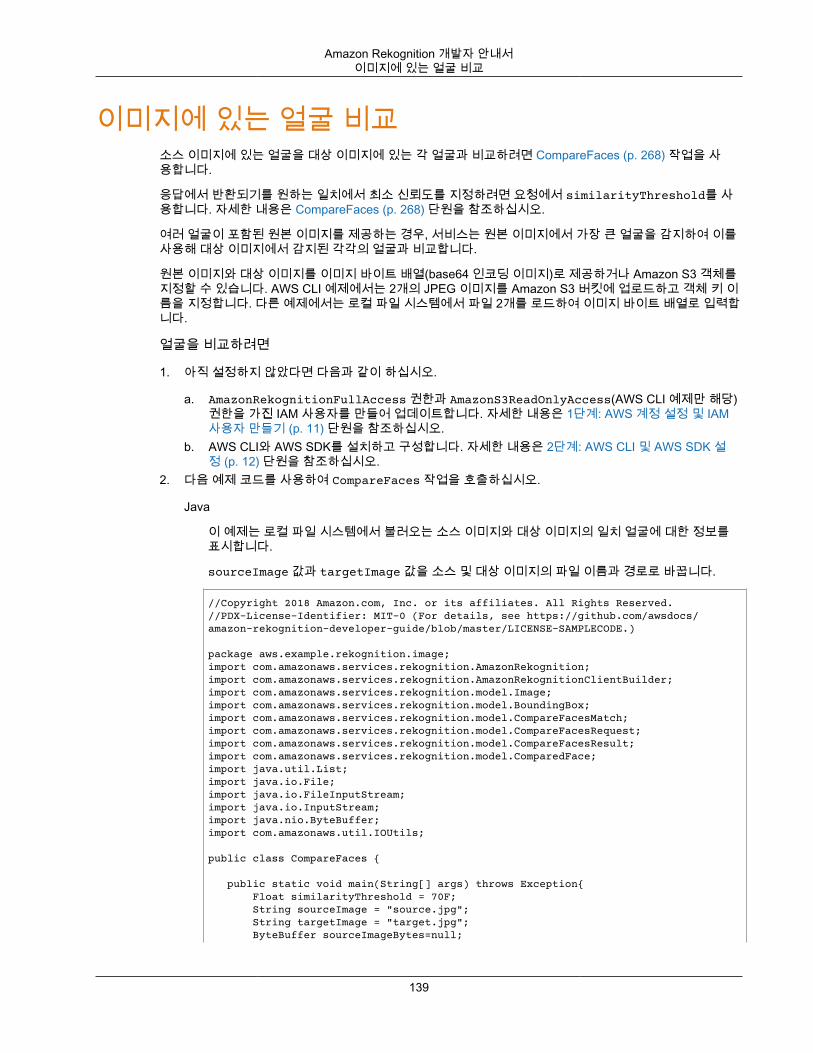
Amazon Rekognition 개발자 안내서이미지에 있는 얼굴 비교
이미지에 있는 얼굴 비교소스 이미지에 있는 얼굴을 대상 이미지에 있는 각 얼굴과 비교하려면 CompareFaces (p. 268) 작업을 사용합니다.
응답에서 반환되기를 원하는 일치에서 최소 신뢰도를 지정하려면 요청에서 similarityThreshold를 사용합니다. 자세한 내용은 CompareFaces (p. 268) 단원을 참조하십시오.
여러 얼굴이 포함된 원본 이미지를 제공하는 경우, 서비스는 원본 이미지에서 가장 큰 얼굴을 감지하여 이를사용해 대상 이미지에서 감지된 각각의 얼굴과 비교합니다.
원본 이미지와 대상 이미지를 이미지 바이트 배열(base64 인코딩 이미지)로 제공하거나 Amazon S3 객체를지정할 수 있습니다. AWS CLI 예제에서는 2개의 JPEG 이미지를 Amazon S3 버킷에 업로드하고 객체 키 이름을 지정합니다. 다른 예제에서는 로컬 파일 시스템에서 파일 2개를 로드하여 이미지 바이트 배열로 입력합니다.
얼굴을 비교하려면
1. 아직 설정하지 않았다면 다음과 같이 하십시오.
a. AmazonRekognitionFullAccess 권한과 AmazonS3ReadOnlyAccess(AWS CLI 예제만 해당)권한을 가진 IAM 사용자를 만들어 업데이트합니다. 자세한 내용은 1단계: AWS 계정 설정 및 IAM사용자 만들기 (p. 11) 단원을 참조하십시오.
b. AWS CLI와 AWS SDK를 설치하고 구성합니다. 자세한 내용은 2단계: AWS CLI 및 AWS SDK 설정 (p. 12) 단원을 참조하십시오.
2. 다음 예제 코드를 사용하여 CompareFaces 작업을 호출하십시오.
Java
이 예제는 로컬 파일 시스템에서 불러오는 소스 이미지와 대상 이미지의 일치 얼굴에 대한 정보를표시합니다.
sourceImage 값과 targetImage 값을 소스 및 대상 이미지의 파일 이름과 경로로 바꿉니다.
//Copyright 2018 Amazon.com, Inc. or its affiliates. All Rights Reserved.//PDX-License-Identifier: MIT-0 (For details, see https://github.com/awsdocs/amazon-rekognition-developer-guide/blob/master/LICENSE-SAMPLECODE.)
package aws.example.rekognition.image;import com.amazonaws.services.rekognition.AmazonRekognition;import com.amazonaws.services.rekognition.AmazonRekognitionClientBuilder;import com.amazonaws.services.rekognition.model.Image;import com.amazonaws.services.rekognition.model.BoundingBox;import com.amazonaws.services.rekognition.model.CompareFacesMatch;import com.amazonaws.services.rekognition.model.CompareFacesRequest;import com.amazonaws.services.rekognition.model.CompareFacesResult;import com.amazonaws.services.rekognition.model.ComparedFace;import java.util.List;import java.io.File;import java.io.FileInputStream;import java.io.InputStream;import java.nio.ByteBuffer;import com.amazonaws.util.IOUtils;
public class CompareFaces {
public static void main(String[] args) throws Exception{ Float similarityThreshold = 70F; String sourceImage = "source.jpg"; String targetImage = "target.jpg"; ByteBuffer sourceImageBytes=null;
139
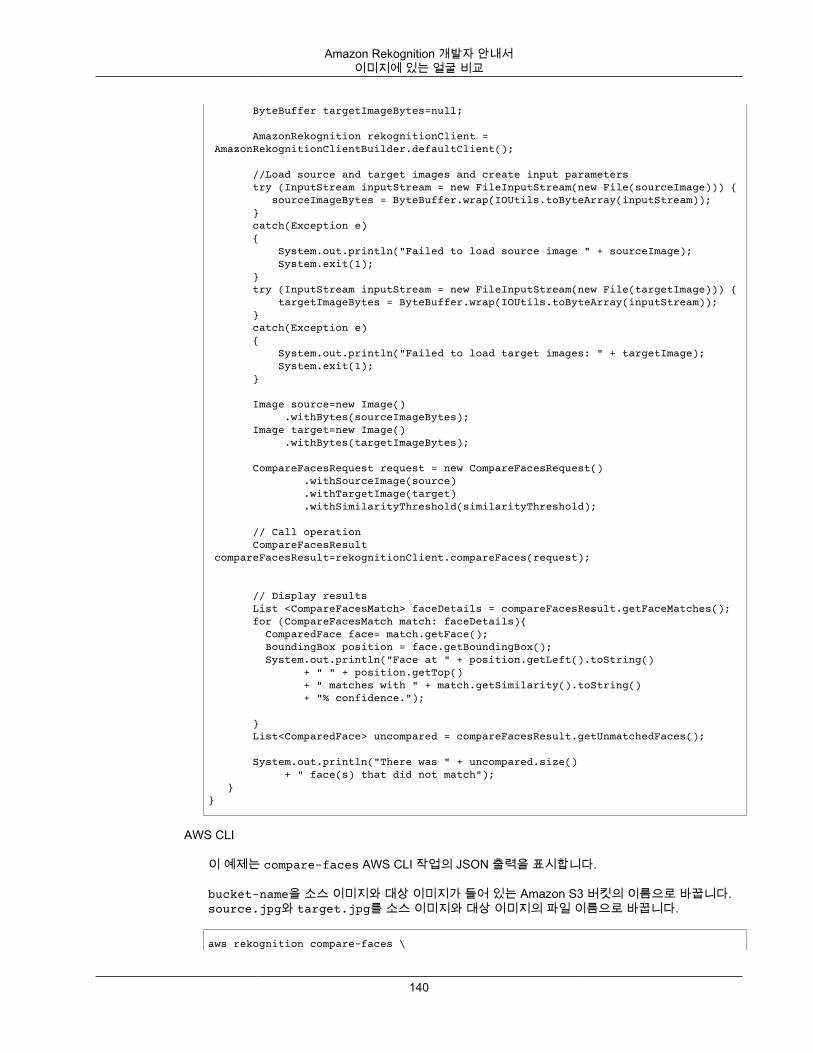
Amazon Rekognition 개발자 안내서이미지에 있는 얼굴 비교
ByteBuffer targetImageBytes=null;
AmazonRekognition rekognitionClient = AmazonRekognitionClientBuilder.defaultClient();
//Load source and target images and create input parameters try (InputStream inputStream = new FileInputStream(new File(sourceImage))) { sourceImageBytes = ByteBuffer.wrap(IOUtils.toByteArray(inputStream)); } catch(Exception e) { System.out.println("Failed to load source image " + sourceImage); System.exit(1); } try (InputStream inputStream = new FileInputStream(new File(targetImage))) { targetImageBytes = ByteBuffer.wrap(IOUtils.toByteArray(inputStream)); } catch(Exception e) { System.out.println("Failed to load target images: " + targetImage); System.exit(1); }
Image source=new Image() .withBytes(sourceImageBytes); Image target=new Image() .withBytes(targetImageBytes);
CompareFacesRequest request = new CompareFacesRequest() .withSourceImage(source) .withTargetImage(target) .withSimilarityThreshold(similarityThreshold);
// Call operation CompareFacesResult compareFacesResult=rekognitionClient.compareFaces(request);
// Display results List <CompareFacesMatch> faceDetails = compareFacesResult.getFaceMatches(); for (CompareFacesMatch match: faceDetails){ ComparedFace face= match.getFace(); BoundingBox position = face.getBoundingBox(); System.out.println("Face at " + position.getLeft().toString() + " " + position.getTop() + " matches with " + match.getSimilarity().toString() + "% confidence.");
} List<ComparedFace> uncompared = compareFacesResult.getUnmatchedFaces();
System.out.println("There was " + uncompared.size() + " face(s) that did not match"); }}
AWS CLI
이 예제는 compare-faces AWS CLI 작업의 JSON 출력을 표시합니다.
bucket-name을 소스 이미지와 대상 이미지가 들어 있는 Amazon S3 버킷의 이름으로 바꿉니다.source.jpg와 target.jpg를 소스 이미지와 대상 이미지의 파일 이름으로 바꿉니다.
aws rekognition compare-faces \
140
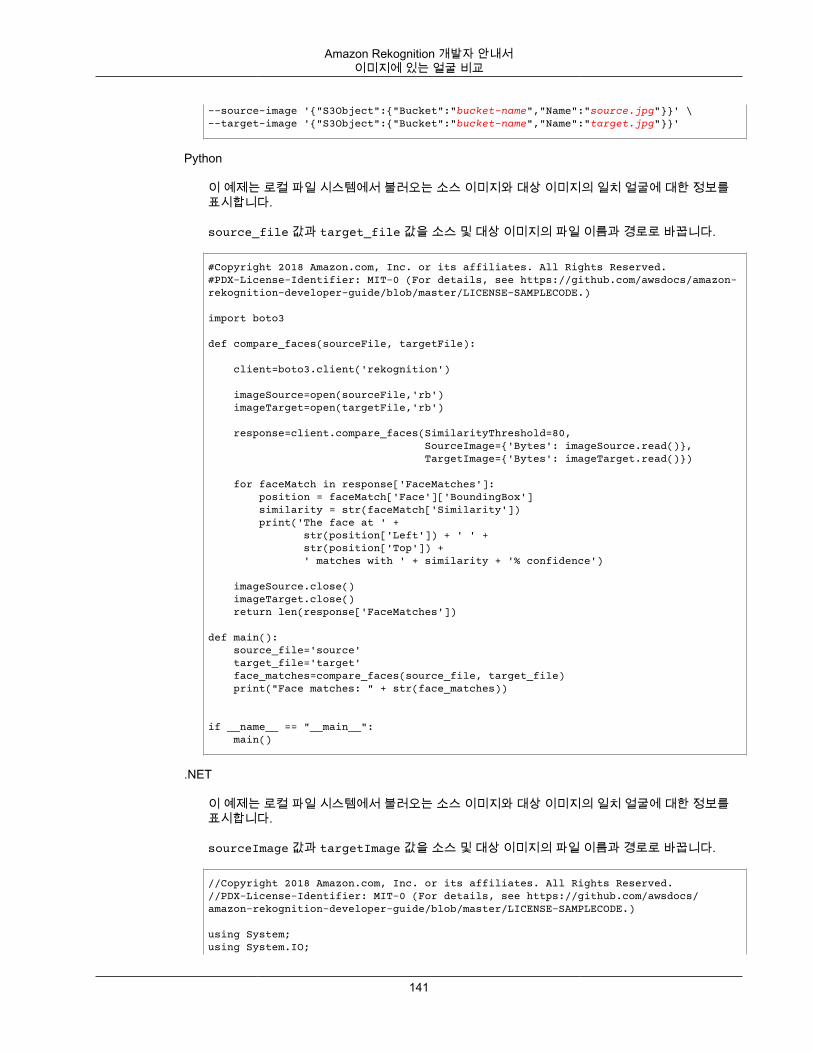
Amazon Rekognition 개발자 안내서이미지에 있는 얼굴 비교
--source-image '{"S3Object":{"Bucket":"bucket-name","Name":"source.jpg"}}' \--target-image '{"S3Object":{"Bucket":"bucket-name","Name":"target.jpg"}}'
Python
이 예제는 로컬 파일 시스템에서 불러오는 소스 이미지와 대상 이미지의 일치 얼굴에 대한 정보를표시합니다.
source_file 값과 target_file 값을 소스 및 대상 이미지의 파일 이름과 경로로 바꿉니다.
#Copyright 2018 Amazon.com, Inc. or its affiliates. All Rights Reserved.#PDX-License-Identifier: MIT-0 (For details, see https://github.com/awsdocs/amazon-rekognition-developer-guide/blob/master/LICENSE-SAMPLECODE.)
import boto3
def compare_faces(sourceFile, targetFile):
client=boto3.client('rekognition') imageSource=open(sourceFile,'rb') imageTarget=open(targetFile,'rb')
response=client.compare_faces(SimilarityThreshold=80, SourceImage={'Bytes': imageSource.read()}, TargetImage={'Bytes': imageTarget.read()}) for faceMatch in response['FaceMatches']: position = faceMatch['Face']['BoundingBox'] similarity = str(faceMatch['Similarity']) print('The face at ' + str(position['Left']) + ' ' + str(position['Top']) + ' matches with ' + similarity + '% confidence')
imageSource.close() imageTarget.close() return len(response['FaceMatches'])
def main(): source_file='source' target_file='target' face_matches=compare_faces(source_file, target_file) print("Face matches: " + str(face_matches))
if __name__ == "__main__": main()
.NET
이 예제는 로컬 파일 시스템에서 불러오는 소스 이미지와 대상 이미지의 일치 얼굴에 대한 정보를표시합니다.
sourceImage 값과 targetImage 값을 소스 및 대상 이미지의 파일 이름과 경로로 바꿉니다.
//Copyright 2018 Amazon.com, Inc. or its affiliates. All Rights Reserved.//PDX-License-Identifier: MIT-0 (For details, see https://github.com/awsdocs/amazon-rekognition-developer-guide/blob/master/LICENSE-SAMPLECODE.)
using System;using System.IO;
141
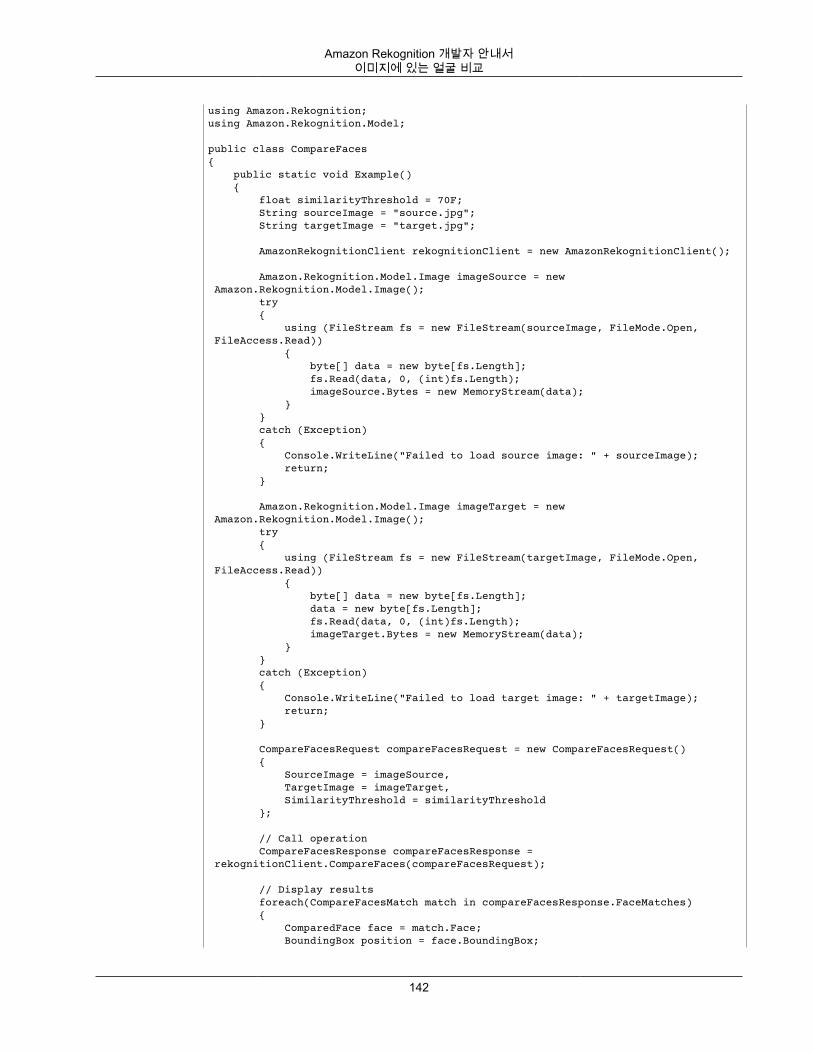
Amazon Rekognition 개발자 안내서이미지에 있는 얼굴 비교
using Amazon.Rekognition;using Amazon.Rekognition.Model;
public class CompareFaces{ public static void Example() { float similarityThreshold = 70F; String sourceImage = "source.jpg"; String targetImage = "target.jpg";
AmazonRekognitionClient rekognitionClient = new AmazonRekognitionClient();
Amazon.Rekognition.Model.Image imageSource = new Amazon.Rekognition.Model.Image(); try { using (FileStream fs = new FileStream(sourceImage, FileMode.Open, FileAccess.Read)) { byte[] data = new byte[fs.Length]; fs.Read(data, 0, (int)fs.Length); imageSource.Bytes = new MemoryStream(data); } } catch (Exception) { Console.WriteLine("Failed to load source image: " + sourceImage); return; }
Amazon.Rekognition.Model.Image imageTarget = new Amazon.Rekognition.Model.Image(); try { using (FileStream fs = new FileStream(targetImage, FileMode.Open, FileAccess.Read)) { byte[] data = new byte[fs.Length]; data = new byte[fs.Length]; fs.Read(data, 0, (int)fs.Length); imageTarget.Bytes = new MemoryStream(data); } } catch (Exception) { Console.WriteLine("Failed to load target image: " + targetImage); return; }
CompareFacesRequest compareFacesRequest = new CompareFacesRequest() { SourceImage = imageSource, TargetImage = imageTarget, SimilarityThreshold = similarityThreshold };
// Call operation CompareFacesResponse compareFacesResponse = rekognitionClient.CompareFaces(compareFacesRequest);
// Display results foreach(CompareFacesMatch match in compareFacesResponse.FaceMatches) { ComparedFace face = match.Face; BoundingBox position = face.BoundingBox;
142
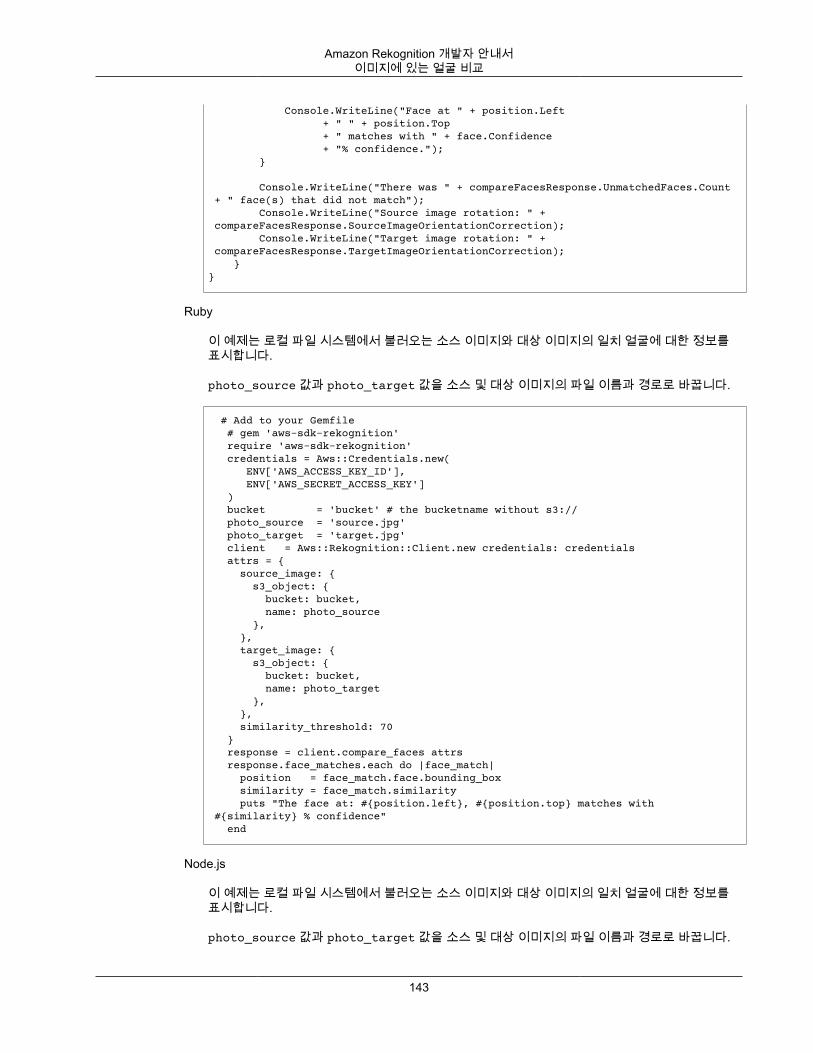
Amazon Rekognition 개발자 안내서이미지에 있는 얼굴 비교
Console.WriteLine("Face at " + position.Left + " " + position.Top + " matches with " + face.Confidence + "% confidence."); }
Console.WriteLine("There was " + compareFacesResponse.UnmatchedFaces.Count + " face(s) that did not match"); Console.WriteLine("Source image rotation: " + compareFacesResponse.SourceImageOrientationCorrection); Console.WriteLine("Target image rotation: " + compareFacesResponse.TargetImageOrientationCorrection); }}
Ruby
이 예제는 로컬 파일 시스템에서 불러오는 소스 이미지와 대상 이미지의 일치 얼굴에 대한 정보를표시합니다.
photo_source 값과 photo_target 값을 소스 및 대상 이미지의 파일 이름과 경로로 바꿉니다.
# Add to your Gemfile # gem 'aws-sdk-rekognition' require 'aws-sdk-rekognition' credentials = Aws::Credentials.new( ENV['AWS_ACCESS_KEY_ID'], ENV['AWS_SECRET_ACCESS_KEY'] ) bucket = 'bucket' # the bucketname without s3:// photo_source = 'source.jpg' photo_target = 'target.jpg' client = Aws::Rekognition::Client.new credentials: credentials attrs = { source_image: { s3_object: { bucket: bucket, name: photo_source }, }, target_image: { s3_object: { bucket: bucket, name: photo_target }, }, similarity_threshold: 70 } response = client.compare_faces attrs response.face_matches.each do |face_match| position = face_match.face.bounding_box similarity = face_match.similarity puts "The face at: #{position.left}, #{position.top} matches with #{similarity} % confidence" end
Node.js
이 예제는 로컬 파일 시스템에서 불러오는 소스 이미지와 대상 이미지의 일치 얼굴에 대한 정보를표시합니다.
photo_source 값과 photo_target 값을 소스 및 대상 이미지의 파일 이름과 경로로 바꿉니다.
143
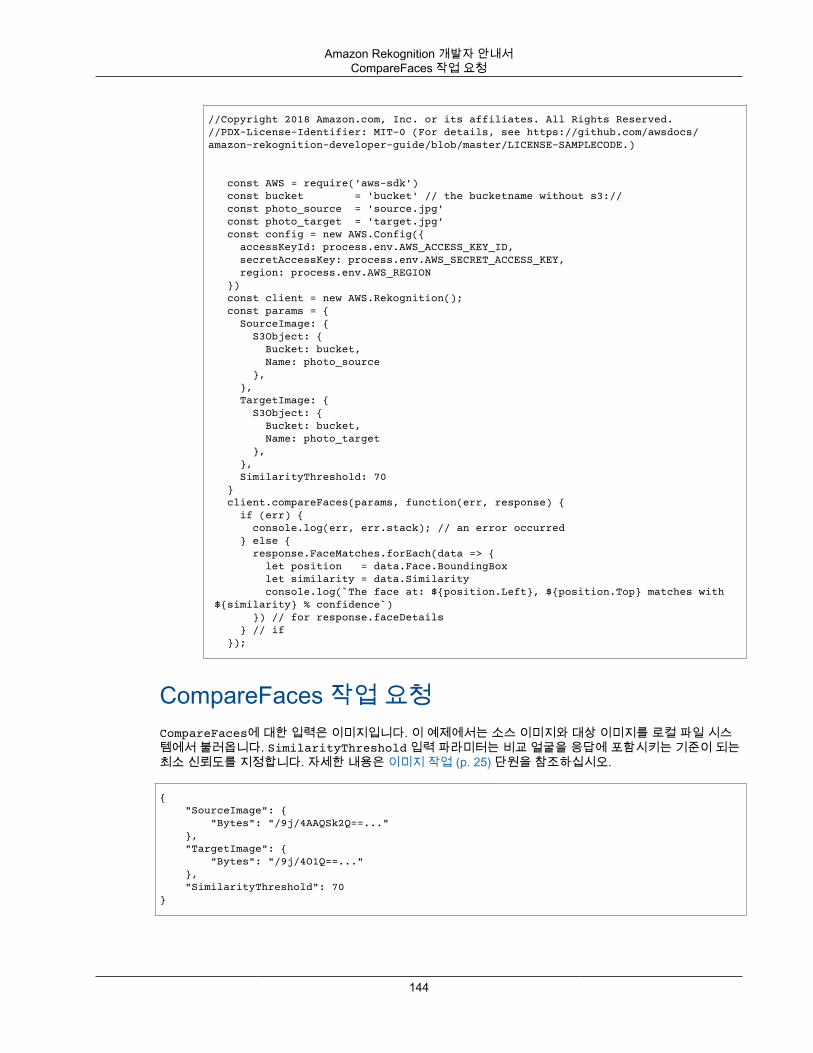
Amazon Rekognition 개발자 안내서CompareFaces 작업 요청
//Copyright 2018 Amazon.com, Inc. or its affiliates. All Rights Reserved.//PDX-License-Identifier: MIT-0 (For details, see https://github.com/awsdocs/amazon-rekognition-developer-guide/blob/master/LICENSE-SAMPLECODE.)
const AWS = require('aws-sdk') const bucket = 'bucket' // the bucketname without s3:// const photo_source = 'source.jpg' const photo_target = 'target.jpg' const config = new AWS.Config({ accessKeyId: process.env.AWS_ACCESS_KEY_ID, secretAccessKey: process.env.AWS_SECRET_ACCESS_KEY, region: process.env.AWS_REGION }) const client = new AWS.Rekognition(); const params = { SourceImage: { S3Object: { Bucket: bucket, Name: photo_source }, }, TargetImage: { S3Object: { Bucket: bucket, Name: photo_target }, }, SimilarityThreshold: 70 } client.compareFaces(params, function(err, response) { if (err) { console.log(err, err.stack); // an error occurred } else { response.FaceMatches.forEach(data => { let position = data.Face.BoundingBox let similarity = data.Similarity console.log(`The face at: ${position.Left}, ${position.Top} matches with ${similarity} % confidence`) }) // for response.faceDetails } // if });
CompareFaces 작업 요청CompareFaces에 대한 입력은 이미지입니다. 이 예제에서는 소스 이미지와 대상 이미지를 로컬 파일 시스템에서 불러옵니다. SimilarityThreshold 입력 파라미터는 비교 얼굴을 응답에 포함시키는 기준이 되는최소 신뢰도를 지정합니다. 자세한 내용은 이미지 작업 (p. 25) 단원을 참조하십시오.
{ "SourceImage": { "Bytes": "/9j/4AAQSk2Q==..." }, "TargetImage": { "Bytes": "/9j/4O1Q==..." }, "SimilarityThreshold": 70}
144
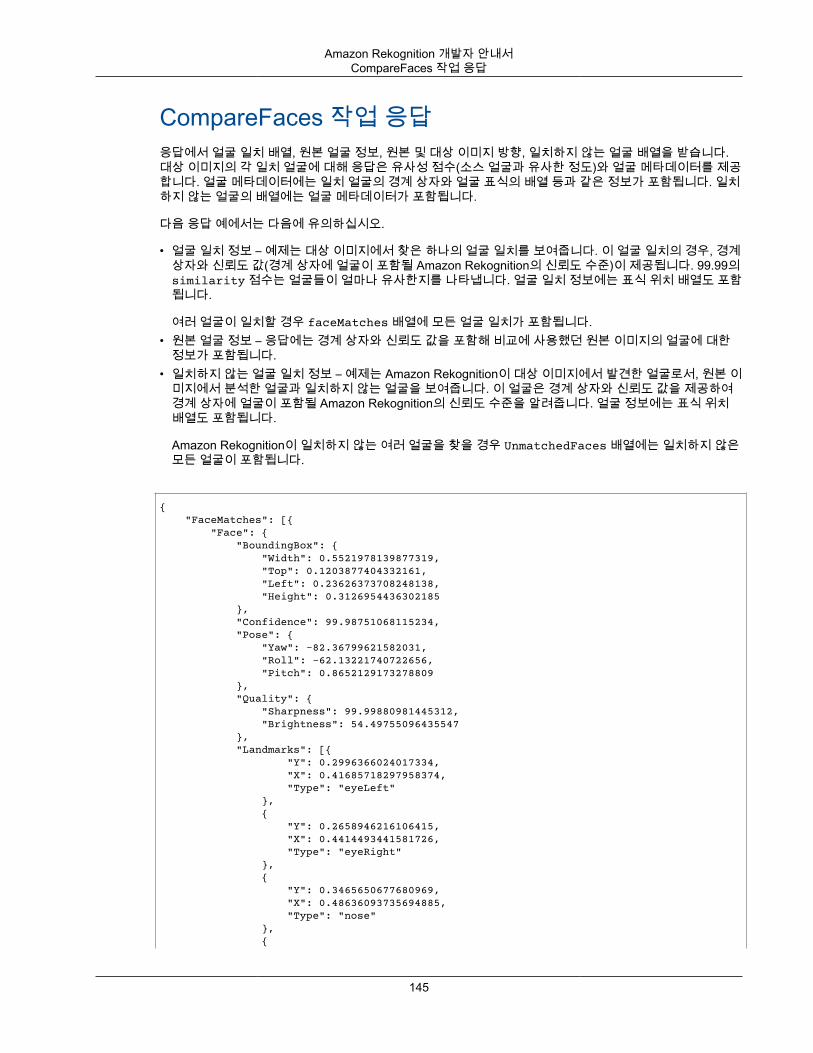
Amazon Rekognition 개발자 안내서CompareFaces 작업 응답
CompareFaces 작업 응답응답에서 얼굴 일치 배열, 원본 얼굴 정보, 원본 및 대상 이미지 방향, 일치하지 않는 얼굴 배열을 받습니다.대상 이미지의 각 일치 얼굴에 대해 응답은 유사성 점수(소스 얼굴과 유사한 정도)와 얼굴 메타데이터를 제공합니다. 얼굴 메타데이터에는 일치 얼굴의 경계 상자와 얼굴 표식의 배열 등과 같은 정보가 포함됩니다. 일치하지 않는 얼굴의 배열에는 얼굴 메타데이터가 포함됩니다.
다음 응답 예에서는 다음에 유의하십시오.
• 얼굴 일치 정보 – 예제는 대상 이미지에서 찾은 하나의 얼굴 일치를 보여줍니다. 이 얼굴 일치의 경우, 경계상자와 신뢰도 값(경계 상자에 얼굴이 포함될 Amazon Rekognition의 신뢰도 수준)이 제공됩니다. 99.99의similarity 점수는 얼굴들이 얼마나 유사한지를 나타냅니다. 얼굴 일치 정보에는 표식 위치 배열도 포함됩니다.
여러 얼굴이 일치할 경우 faceMatches 배열에 모든 얼굴 일치가 포함됩니다.• 원본 얼굴 정보 – 응답에는 경계 상자와 신뢰도 값을 포함해 비교에 사용했던 원본 이미지의 얼굴에 대한
정보가 포함됩니다.• 일치하지 않는 얼굴 일치 정보 – 예제는 Amazon Rekognition이 대상 이미지에서 발견한 얼굴로서, 원본 이
미지에서 분석한 얼굴과 일치하지 않는 얼굴을 보여줍니다. 이 얼굴은 경계 상자와 신뢰도 값을 제공하여경계 상자에 얼굴이 포함될 Amazon Rekognition의 신뢰도 수준을 알려줍니다. 얼굴 정보에는 표식 위치배열도 포함됩니다.
Amazon Rekognition이 일치하지 않는 여러 얼굴을 찾을 경우 UnmatchedFaces 배열에는 일치하지 않은모든 얼굴이 포함됩니다.
{ "FaceMatches": [{ "Face": { "BoundingBox": { "Width": 0.5521978139877319, "Top": 0.1203877404332161, "Left": 0.23626373708248138, "Height": 0.3126954436302185 }, "Confidence": 99.98751068115234, "Pose": { "Yaw": -82.36799621582031, "Roll": -62.13221740722656, "Pitch": 0.8652129173278809 }, "Quality": { "Sharpness": 99.99880981445312, "Brightness": 54.49755096435547 }, "Landmarks": [{ "Y": 0.2996366024017334, "X": 0.41685718297958374, "Type": "eyeLeft" }, { "Y": 0.2658946216106415, "X": 0.4414493441581726, "Type": "eyeRight" }, { "Y": 0.3465650677680969, "X": 0.48636093735694885, "Type": "nose" }, {
145

Amazon Rekognition 개발자 안내서CompareFaces 작업 응답
"Y": 0.30935320258140564, "X": 0.6251809000968933, "Type": "mouthLeft" }, { "Y": 0.26942989230155945, "X": 0.6454493403434753, "Type": "mouthRight" } ] }, "Similarity": 100.0 }], "SourceImageOrientationCorrection": "ROTATE_90", "TargetImageOrientationCorrection": "ROTATE_90", "UnmatchedFaces": [{ "BoundingBox": { "Width": 0.4890109896659851, "Top": 0.6566604375839233, "Left": 0.10989011079072952, "Height": 0.278298944234848 }, "Confidence": 99.99992370605469, "Pose": { "Yaw": 51.51519012451172, "Roll": -110.32493591308594, "Pitch": -2.322134017944336 }, "Quality": { "Sharpness": 99.99671173095703, "Brightness": 57.23163986206055 }, "Landmarks": [{ "Y": 0.8288310766220093, "X": 0.3133862614631653, "Type": "eyeLeft" }, { "Y": 0.7632885575294495, "X": 0.28091415762901306, "Type": "eyeRight" }, { "Y": 0.7417283654212952, "X": 0.3631140887737274, "Type": "nose" }, { "Y": 0.8081989884376526, "X": 0.48565614223480225, "Type": "mouthLeft" }, { "Y": 0.7548204660415649, "X": 0.46090251207351685, "Type": "mouthRight" } ] }], "SourceImageFace": { "BoundingBox": { "Width": 0.5521978139877319, "Top": 0.1203877404332161, "Left": 0.23626373708248138, "Height": 0.3126954436302185 },
146
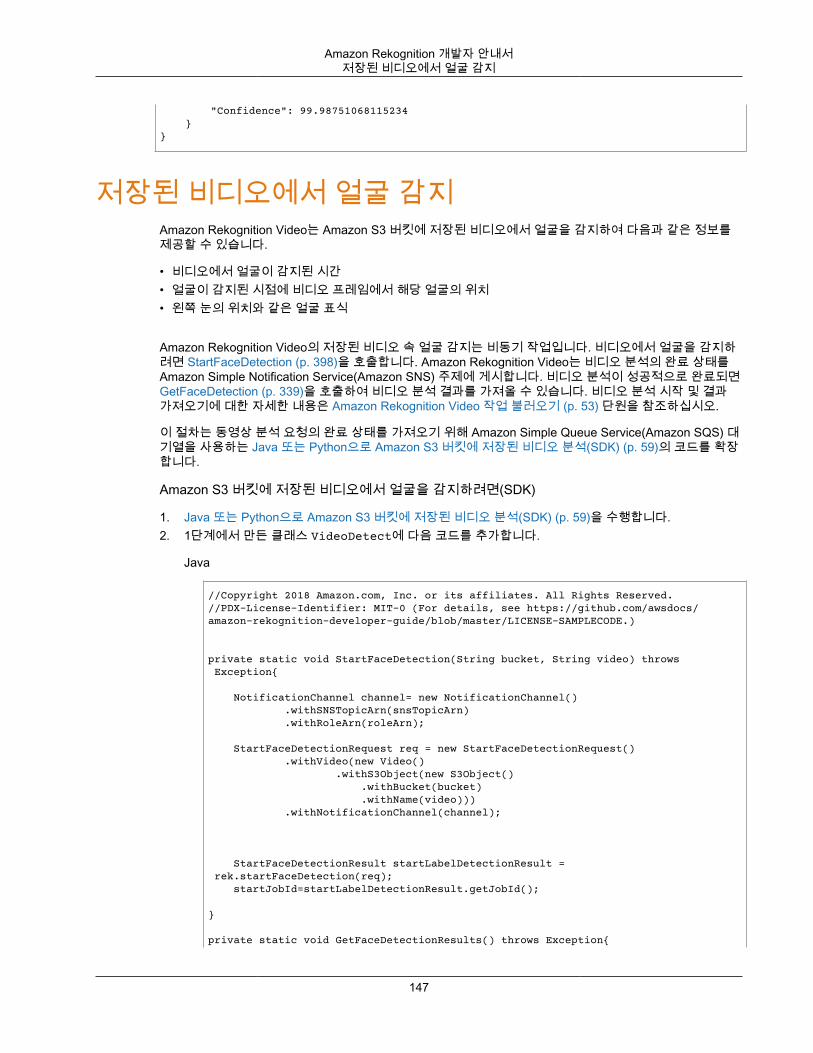
Amazon Rekognition 개발자 안내서저장된 비디오에서 얼굴 감지
"Confidence": 99.98751068115234 }}
저장된 비디오에서 얼굴 감지Amazon Rekognition Video는 Amazon S3 버킷에 저장된 비디오에서 얼굴을 감지하여 다음과 같은 정보를제공할 수 있습니다.
• 비디오에서 얼굴이 감지된 시간• 얼굴이 감지된 시점에 비디오 프레임에서 해당 얼굴의 위치• 왼쪽 눈의 위치와 같은 얼굴 표식
Amazon Rekognition Video의 저장된 비디오 속 얼굴 감지는 비동기 작업입니다. 비디오에서 얼굴을 감지하려면 StartFaceDetection (p. 398)을 호출합니다. Amazon Rekognition Video는 비디오 분석의 완료 상태를Amazon Simple Notification Service(Amazon SNS) 주제에 게시합니다. 비디오 분석이 성공적으로 완료되면GetFaceDetection (p. 339)을 호출하여 비디오 분석 결과를 가져올 수 있습니다. 비디오 분석 시작 및 결과가져오기에 대한 자세한 내용은 Amazon Rekognition Video 작업 불러오기 (p. 53) 단원을 참조하십시오.
이 절차는 동영상 분석 요청의 완료 상태를 가져오기 위해 Amazon Simple Queue Service(Amazon SQS) 대기열을 사용하는 Java 또는 Python으로 Amazon S3 버킷에 저장된 비디오 분석(SDK) (p. 59)의 코드를 확장합니다.
Amazon S3 버킷에 저장된 비디오에서 얼굴을 감지하려면(SDK)
1. Java 또는 Python으로 Amazon S3 버킷에 저장된 비디오 분석(SDK) (p. 59)을 수행합니다.2. 1단계에서 만든 클래스 VideoDetect에 다음 코드를 추가합니다.
Java
//Copyright 2018 Amazon.com, Inc. or its affiliates. All Rights Reserved.//PDX-License-Identifier: MIT-0 (For details, see https://github.com/awsdocs/amazon-rekognition-developer-guide/blob/master/LICENSE-SAMPLECODE.)
private static void StartFaceDetection(String bucket, String video) throws Exception{ NotificationChannel channel= new NotificationChannel() .withSNSTopicArn(snsTopicArn) .withRoleArn(roleArn); StartFaceDetectionRequest req = new StartFaceDetectionRequest() .withVideo(new Video() .withS3Object(new S3Object() .withBucket(bucket) .withName(video))) .withNotificationChannel(channel); StartFaceDetectionResult startLabelDetectionResult = rek.startFaceDetection(req); startJobId=startLabelDetectionResult.getJobId(); }
private static void GetFaceDetectionResults() throws Exception{
147
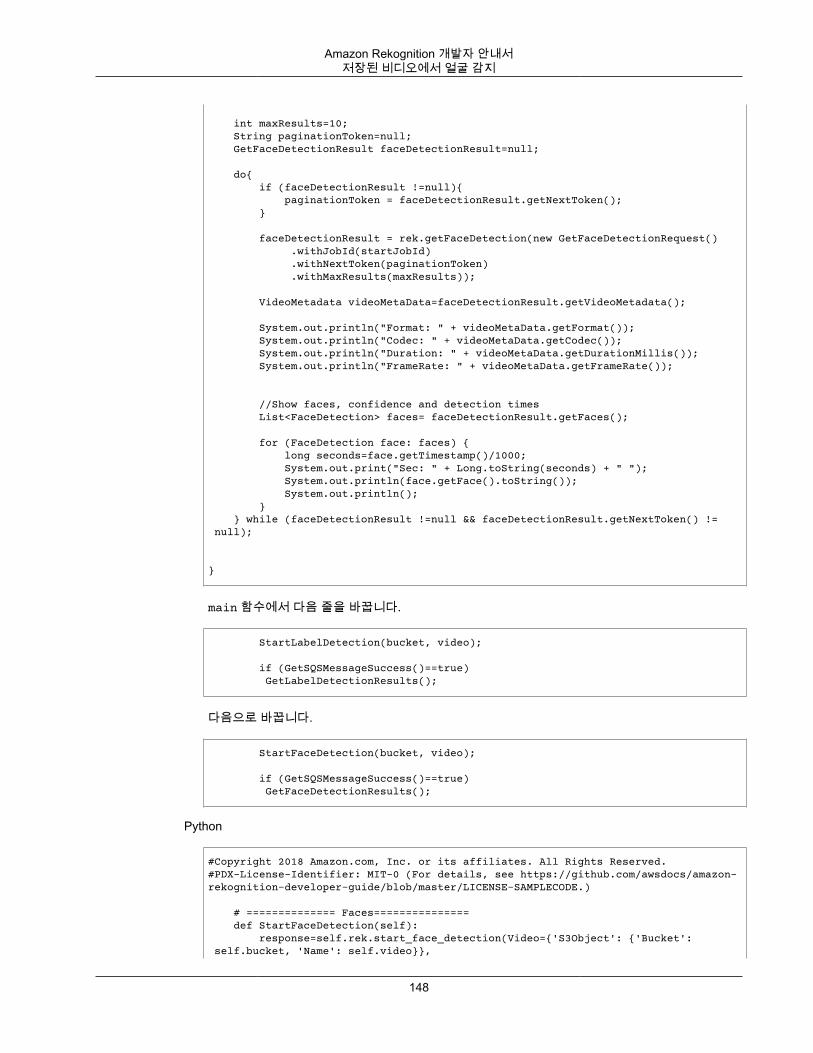
Amazon Rekognition 개발자 안내서저장된 비디오에서 얼굴 감지
int maxResults=10; String paginationToken=null; GetFaceDetectionResult faceDetectionResult=null; do{ if (faceDetectionResult !=null){ paginationToken = faceDetectionResult.getNextToken(); } faceDetectionResult = rek.getFaceDetection(new GetFaceDetectionRequest() .withJobId(startJobId) .withNextToken(paginationToken) .withMaxResults(maxResults)); VideoMetadata videoMetaData=faceDetectionResult.getVideoMetadata(); System.out.println("Format: " + videoMetaData.getFormat()); System.out.println("Codec: " + videoMetaData.getCodec()); System.out.println("Duration: " + videoMetaData.getDurationMillis()); System.out.println("FrameRate: " + videoMetaData.getFrameRate()); //Show faces, confidence and detection times List<FaceDetection> faces= faceDetectionResult.getFaces(); for (FaceDetection face: faces) { long seconds=face.getTimestamp()/1000; System.out.print("Sec: " + Long.toString(seconds) + " "); System.out.println(face.getFace().toString()); System.out.println(); } } while (faceDetectionResult !=null && faceDetectionResult.getNextToken() != null); }
main 함수에서 다음 줄을 바꿉니다.
StartLabelDetection(bucket, video);
if (GetSQSMessageSuccess()==true) GetLabelDetectionResults();
다음으로 바꿉니다.
StartFaceDetection(bucket, video);
if (GetSQSMessageSuccess()==true) GetFaceDetectionResults();
Python
#Copyright 2018 Amazon.com, Inc. or its affiliates. All Rights Reserved.#PDX-License-Identifier: MIT-0 (For details, see https://github.com/awsdocs/amazon-rekognition-developer-guide/blob/master/LICENSE-SAMPLECODE.)
# ============== Faces=============== def StartFaceDetection(self): response=self.rek.start_face_detection(Video={'S3Object': {'Bucket': self.bucket, 'Name': self.video}},
148

Amazon Rekognition 개발자 안내서GetFaceDetection 작업 응답
NotificationChannel={'RoleArn': self.roleArn, 'SNSTopicArn': self.snsTopicArn})
self.startJobId=response['JobId'] print('Start Job Id: ' + self.startJobId)
def GetFaceDetectionResults(self): maxResults = 10 paginationToken = '' finished = False
while finished == False: response = self.rek.get_face_detection(JobId=self.startJobId, MaxResults=maxResults, NextToken=paginationToken)
print('Codec: ' + response['VideoMetadata']['Codec']) print('Duration: ' + str(response['VideoMetadata']['DurationMillis'])) print('Format: ' + response['VideoMetadata']['Format']) print('Frame rate: ' + str(response['VideoMetadata']['FrameRate'])) print()
for faceDetection in response['Faces']: print('Face: ' + str(faceDetection['Face'])) print('Confidence: ' + str(faceDetection['Face']['Confidence'])) print('Timestamp: ' + str(faceDetection['Timestamp'])) print()
if 'NextToken' in response: paginationToken = response['NextToken'] else: finished = True
main 함수에서 다음 줄을 바꿉니다.
analyzer.StartLabelDetection() if analyzer.GetSQSMessageSuccess()==True: analyzer.GetLabelDetectionResults()
다음으로 바꿉니다.
analyzer.StartFaceDetection() if analyzer.GetSQSMessageSuccess()==True: analyzer.GetFaceDetectionResults()
Note
Java 또는 Python으로 Amazon S3 버킷에 저장된 비디오 분석(SDK) (p. 59) 이외에 비디오 예제를 이미 실행한 경우, 바꿀 함수 이름이 다릅니다.
3. 코드를 실행합니다. 비디오에서 감지된 얼굴에 관한 정보가 표시됩니다.
GetFaceDetection 작업 응답GetFaceDetection은 비디오에서 감지된 얼굴에 대한 정보가 포함된 배열(Faces)을 반환합니다. 배열 요소 FaceDetection (p. 453)은 비디오에서 얼굴이 감지될 때마다 존재합니다. 배열 요소는 비디오 시작 후 시간별로(밀리초) 정렬되어 반환됩니다.
다음 예제는 GetFaceDetection의 부분 JSON 응답입니다. 응답에서 다음에 유의하십시오.
149
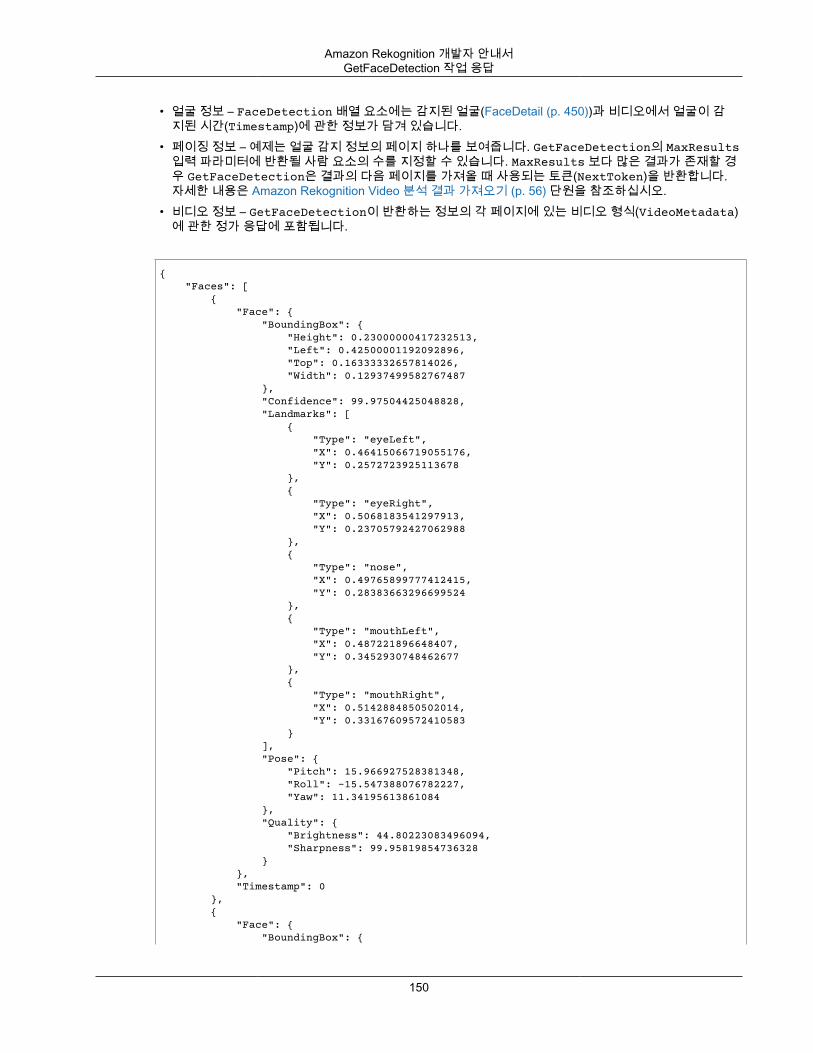
Amazon Rekognition 개발자 안내서GetFaceDetection 작업 응답
• 얼굴 정보 – FaceDetection 배열 요소에는 감지된 얼굴(FaceDetail (p. 450))과 비디오에서 얼굴이 감지된 시간(Timestamp)에 관한 정보가 담겨 있습니다.
• 페이징 정보 – 예제는 얼굴 감지 정보의 페이지 하나를 보여줍니다. GetFaceDetection의 MaxResults입력 파라미터에 반환될 사람 요소의 수를 지정할 수 있습니다. MaxResults 보다 많은 결과가 존재할 경우 GetFaceDetection은 결과의 다음 페이지를 가져올 때 사용되는 토큰(NextToken)을 반환합니다.자세한 내용은 Amazon Rekognition Video 분석 결과 가져오기 (p. 56) 단원을 참조하십시오.
• 비디오 정보 – GetFaceDetection이 반환하는 정보의 각 페이지에 있는 비디오 형식(VideoMetadata)에 관한 정가 응답에 포함됩니다.
{ "Faces": [ { "Face": { "BoundingBox": { "Height": 0.23000000417232513, "Left": 0.42500001192092896, "Top": 0.16333332657814026, "Width": 0.12937499582767487 }, "Confidence": 99.97504425048828, "Landmarks": [ { "Type": "eyeLeft", "X": 0.46415066719055176, "Y": 0.2572723925113678 }, { "Type": "eyeRight", "X": 0.5068183541297913, "Y": 0.23705792427062988 }, { "Type": "nose", "X": 0.49765899777412415, "Y": 0.28383663296699524 }, { "Type": "mouthLeft", "X": 0.487221896648407, "Y": 0.3452930748462677 }, { "Type": "mouthRight", "X": 0.5142884850502014, "Y": 0.33167609572410583 } ], "Pose": { "Pitch": 15.966927528381348, "Roll": -15.547388076782227, "Yaw": 11.34195613861084 }, "Quality": { "Brightness": 44.80223083496094, "Sharpness": 99.95819854736328 } }, "Timestamp": 0 }, { "Face": { "BoundingBox": {
150
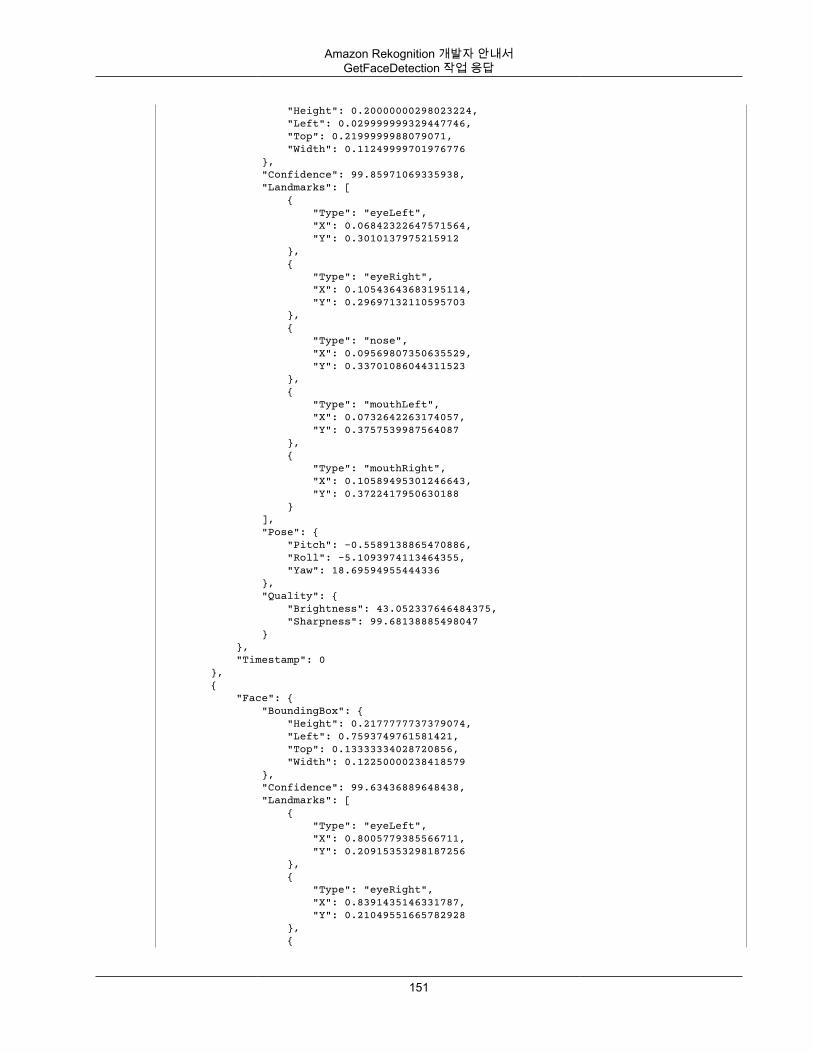
Amazon Rekognition 개발자 안내서GetFaceDetection 작업 응답
"Height": 0.20000000298023224, "Left": 0.029999999329447746, "Top": 0.2199999988079071, "Width": 0.11249999701976776 }, "Confidence": 99.85971069335938, "Landmarks": [ { "Type": "eyeLeft", "X": 0.06842322647571564, "Y": 0.3010137975215912 }, { "Type": "eyeRight", "X": 0.10543643683195114, "Y": 0.29697132110595703 }, { "Type": "nose", "X": 0.09569807350635529, "Y": 0.33701086044311523 }, { "Type": "mouthLeft", "X": 0.0732642263174057, "Y": 0.3757539987564087 }, { "Type": "mouthRight", "X": 0.10589495301246643, "Y": 0.3722417950630188 } ], "Pose": { "Pitch": -0.5589138865470886, "Roll": -5.1093974113464355, "Yaw": 18.69594955444336 }, "Quality": { "Brightness": 43.052337646484375, "Sharpness": 99.68138885498047 } }, "Timestamp": 0 }, { "Face": { "BoundingBox": { "Height": 0.2177777737379074, "Left": 0.7593749761581421, "Top": 0.13333334028720856, "Width": 0.12250000238418579 }, "Confidence": 99.63436889648438, "Landmarks": [ { "Type": "eyeLeft", "X": 0.8005779385566711, "Y": 0.20915353298187256 }, { "Type": "eyeRight", "X": 0.8391435146331787, "Y": 0.21049551665782928 }, {
151
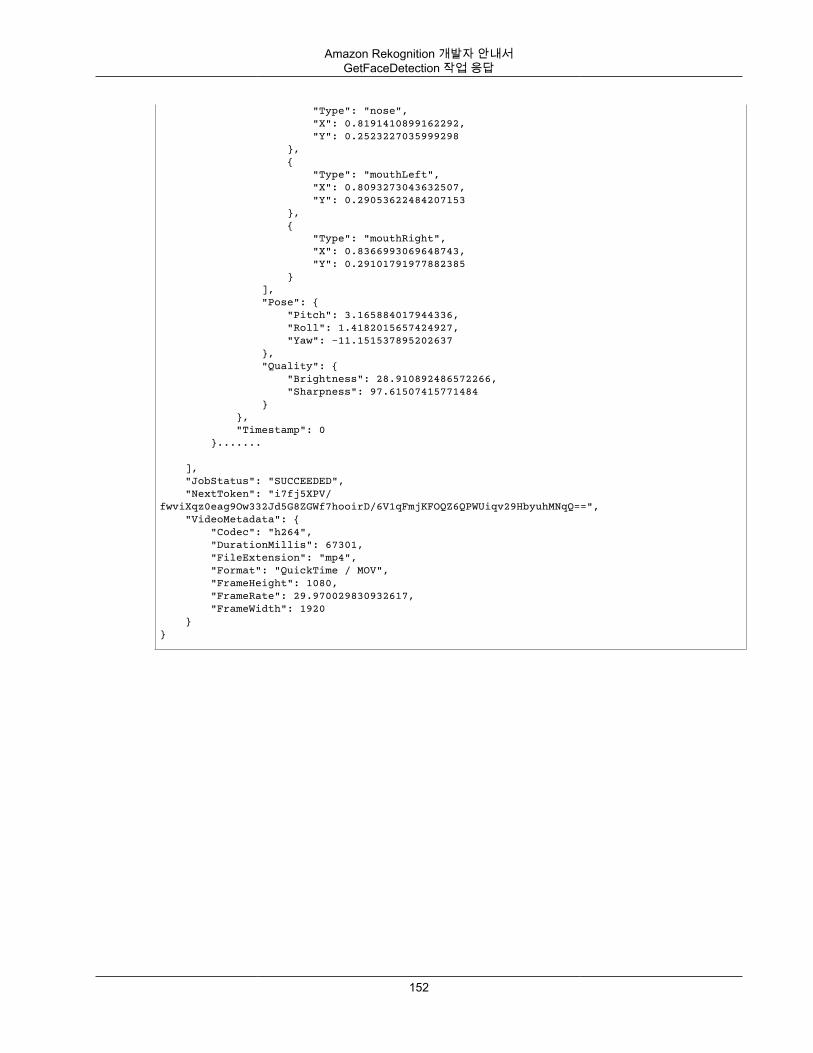
Amazon Rekognition 개발자 안내서GetFaceDetection 작업 응답
"Type": "nose", "X": 0.8191410899162292, "Y": 0.2523227035999298 }, { "Type": "mouthLeft", "X": 0.8093273043632507, "Y": 0.29053622484207153 }, { "Type": "mouthRight", "X": 0.8366993069648743, "Y": 0.29101791977882385 } ], "Pose": { "Pitch": 3.165884017944336, "Roll": 1.4182015657424927, "Yaw": -11.151537895202637 }, "Quality": { "Brightness": 28.910892486572266, "Sharpness": 97.61507415771484 } }, "Timestamp": 0 }.......
], "JobStatus": "SUCCEEDED", "NextToken": "i7fj5XPV/fwviXqz0eag9Ow332Jd5G8ZGWf7hooirD/6V1qFmjKFOQZ6QPWUiqv29HbyuhMNqQ==", "VideoMetadata": { "Codec": "h264", "DurationMillis": 67301, "FileExtension": "mp4", "Format": "QuickTime / MOV", "FrameHeight": 1080, "FrameRate": 29.970029830932617, "FrameWidth": 1920 }}
152
Amazon Rekognition 개발자 안내서모음 관리
모음에서 얼굴 검색Amazon Rekognition은 모음으로 알려진 서버 측 컨테이너에 감지된 얼굴에 대한 정보를 저장할 수 있습니다. 그런 다음 모음에 저장된 얼굴 정보를 사용하여 이미지, 저장된 비디오, 스트리밍 비디오에서 알려진 얼굴을 검색할 수 있습니다. Amazon Rekognition의 경우 IndexFaces (p. 362) 작업을 지원합니다. 이 작업을사용하여 이미지에서 얼굴을 감지하고, 감지된 얼굴 특징에 대한 정보를 모음으로 유지할 수 있습니다. 이것이 스토리지 기반 API 작업의 예인 이유는 서비스가 서버에서 정보를 유지하기 때문입니다.
얼굴 정보를 저장하려면 먼저 계정의 AWS 리전 중 하나에서 (CreateCollection (p. 274)) 얼굴 모음을 만들어야 합니다. IndexFaces 작업을 호출할 때 이 얼굴 모음을 지정합니다. 얼굴 모음을 만들고 모든 얼굴의 얼굴 특징 정보를 저장한 후에 모음에서 얼굴 일치를 검색할 수 있습니다. 이미지에서 얼굴을 검색하려면, SearchFacesByImage (p. 386)를 호출합니다. 저장된 비디오에서 얼굴을 검색하려면, StartFaceSearch (p. 402)를 호출합니다. 스트리밍 비디오에서 얼굴을 검색하려면,CreateStreamProcessor (p. 284)를 호출합니다.
Note
이 서비스는 실제 이미지 바이트를 유지하지 않습니다. 그 대신 기본 감지 알고리즘이 먼저 입력이미지에서 얼굴을 감지하고 얼굴 특징을 각 얼굴의 특징 벡터로 추출한 다음 모음에 저장합니다.Amazon Rekognition은 얼굴 일치를 수행할 때 이러한 특징 벡터를 사용합니다.
여러 가지 일반적인 사용자 시나리오를 위한 자습서 모음. 예를 들어 IndexFaces 작업을 사용하여 얼굴 모음을 만들어 스캔한 배지 이미지를 저장할 수 있습니다. 직원이 건물에 들어오면 직원 얼굴 이미지가 캡처되어 SearchFacesByImage 작업으로 전송됩니다. 얼굴 일치에서 충분히 높은 유사성 점수(가령 99%)가 나오면 직원을 인증할 수 있습니다.
모음 관리얼굴 모음은 기본 Amazon Rekognition 리소스이며, 생성되는 각각의 얼굴 모음에는 고유의 Amazon 리소스이름(ARN)이 있습니다. 계정의 특정 AWS 리전에서 각각의 얼굴 모음을 만듭니다. 모음을 만들면, 최신 버전의 얼굴 감지 모델에 연결됩니다. 자세한 내용은 모델 버전 관리 (p. 9) 단원을 참조하십시오.
모음에 대해 다음 관리 작업을 수행할 수 있습니다.
• the section called “CreateCollection” (p. 274)을 사용하여 모음을 만듭니다. 자세한 내용은 모음 만들기 (p. 156) 단원을 참조하십시오.
• the section called “ListCollections” (p. 370)를 사용하여 사용 가능 모음을 조회합니다. 자세한 내용은 모음 나열 (p. 159) 단원을 참조하십시오.
• the section called “DescribeCollection” (p. 293)을 사용하여 모음을 설명합니다. 자세한 내용은 모음 설명 (p. 162) 단원을 참조하십시오.
• the section called “DeleteCollection” (p. 287)을 사용하여 모음을 삭제합니다. 자세한 내용은 모음 삭제 (p. 165) 단원을 참조하십시오.
모음에서 얼굴 관리얼굴 모음을 만든 후 모음에 얼굴을 저장할 수 있습니다. Amazon Rekognition은 모음의 얼굴을 관리하기 위해 다음 작업을 제공합니다.
• the section called “IndexFaces” (p. 362) 작업은 입력 이미지(JPEG 또는 PNG)에서 얼굴을 감지하여 지정된 얼굴 모음에 추가합니다. 이미지에서 감지된 각 얼굴에 대해 고유한 얼굴 ID가 반환됩니다. 얼굴을 유지한 후 얼굴 모음에서 얼굴 일치를 검색할 수 있습니다. 자세한 내용은 모음에 얼굴 추가 (p. 168) 단원을 참조하십시오.
153
Amazon Rekognition 개발자 안내서IndexFaces 사용 지침
• the section called “ListFaces” (p. 373) 작업은 모음의 얼굴을 나열합니다. 자세한 내용은 모음에 얼굴 추가 (p. 168) 단원을 참조하십시오.
• the section called “DeleteFaces” (p. 289) 작업은 모음에서 얼굴을 삭제합니다. 자세한 내용은 모음에서얼굴 삭제 (p. 183) 단원을 참조하십시오.
IndexFaces 사용 지침다음은 일반적인 시나리오에서 IndexFaces를 사용하기 위한 지침입니다.
중요 또는 공공 안전 애플리케이션• 각 이미지에 얼굴이 하나씩만 포함된 이미지를 사용하여 IndexFaces (p. 362)를 호출하고 반환된 얼굴
ID를 이미지 내 인물의 식별자와 연결합니다.• 인덱싱 전에 DetectFaces (p. 311)를 사용하여 이미지에 얼굴이 하나뿐인지 확인할 수 있습니다. 얼굴이
여러 개 감지된 경우 검토 후 얼굴이 하나만 있는 이미지를 다시 제출합니다. 이는 잘못하여 복수의 얼굴을인덱싱하고 같은 사람에 연결하는 것을 방지합니다.
사진 공유 및 소셜 미디어 애플리케이션• 가족 앨범과 같은 사용 사례에서는 여러 얼굴이 포함된 이미지에 대한 제한 없이 IndexFaces를 호출해야
합니다. 이런 경우, 모든 사진에서 각 개인을 식별하고 해당 정보를 사용하여 사진 안의 사람들에 따라 사진을 그룹화해야 합니다.
일반 사용 사례• 같은 사람의 여러 이미지, 특히 다양한 얼굴 속성(얼굴 포즈, 앞머리 등)을 가진 이미지를 인덱싱합니다.• 실패한 일치를 올바른 얼굴 식별자로 인덱싱하여 이후의 얼굴 일치 기능을 개선할 수 있도록 검토 프로세
스를 포함시킵니다.• 이미지 품질에 대한 자세한 내용은 얼굴 비교 입력 이미지에 대한 권장 사항 (p. 109) 단원을 참조하십시오.
모음에 있는 얼굴 검색얼굴 모음을 만들고 얼굴을 저장한 후 얼굴 모음에서 얼굴 일치를 검색할 수 있습니다. Amazon Rekognition에서는 다음과 일치하는 얼굴을 모음에서 검색할 수 있습니다.
• 제공된 얼굴 ID(the section called “SearchFaces” (p. 383)). 자세한 내용은 얼굴 ID를 사용하여 얼굴 검색 (p. 186) 단원을 참조하십시오.
• 제공된 이미지에서 가장 큰 얼굴(the section called “SearchFacesByImage” (p. 386)). 자세한 내용은 이미지를 사용하여 얼굴 검색 (p. 190) 단원을 참조하십시오.
• 저장된 비디오의 얼굴. 자세한 내용은 저장된 비디오에서 얼굴 검색 (p. 194) 단원을 참조하십시오.• 스트리밍 비디오의 얼굴. 자세한 내용은 스트리밍 비디오 작업 (p. 79) 단원을 참조하십시오.
CompareFaces 작업과 얼굴 검색 작업은 다음과 같은 차이가 있습니다.
• CompareFaces 작업은 원본 이미지의 얼굴과 대상 이미지의 얼굴을 비교합니다. 이 비교의 범위는 대상이미지에서 감지된 얼굴로 제한됩니다. 자세한 내용은 이미지에 있는 얼굴 비교 (p. 139) 단원을 참조하십시오.
154
Amazon Rekognition 개발자 안내서유사성 임계값을 사용하여 얼굴 일치
• SearchFaces와 SearchFacesByImage는 (FaceId 또는 입력 이미지에 의해 식별된) 얼굴을 주어진 얼굴 모음의 모든 얼굴과 비교합니다. 따라서 이 검색의 범위가 훨씬 큽니다. 또한 얼굴 모음에 이미 저장된얼굴들은 얼굴 특징 정보가 유지되기 때문에 일치하는 얼굴을 여러 번 검색할 수 있습니다.
유사성 임계값을 사용하여 얼굴 일치유사성 임계값을 입력 파라미터로 제공하여 모든 검색 작업(CompareFaces (p. 268),SearchFaces (p. 383), SearchFacesByImage (p. 386))의 결과를 제어할 수 있습니다.
SearchFaces, SearchFacesByImage, FaceMatchThreshold에 대한 유사성 임계값 입력 속성은일치하는 얼굴의 유사성에 따라 반환되는 결과 수를 제어합니다. (이 속성은 CompareFaces에 대해SimilarityThreshold입니다.) Similarity 응답 속성 값이 임계값보다 낮은 응답은 반환되지 않습니다. 이 임계값은 일치 결과에 포함된 가양성의 수를 결정할 수 있기 때문에 사용 사례에 맞게 보정하기 위해중요합니다. 이 값은 검색 결과의 회수를 제어합니다.—임계값이 낮을수록 회수가 많아집니다.
모든 기계 학습 시스템은 확률론적입니다. 사용 사례에 따라 적절한 유사성 임계값을 설정할 때에는 본인의판단을 활용해야 합니다. 예를 들어 비슷하게 생긴 가족을 식별하는 포토 앱을 만들려는 경우 임계값을 낮게(예:80%) 선택할 수 있습니다. 반면, 많은 법 집행 사용 사례의 경우, 실수로 잘못 식별되는 경우를 줄이기 위해 99% 이상의 높은 임계값을 사용하는 것이 좋습니다.
FaceMatchThreshold 외에, 실수로 잘못 식별되는 경우를 줄이기 위한 수단으로 Similarity 응답 속성을 사용할 수 있습니다. 예를 들어 낮은 임계값(80%)을 사용하기로 선택하여 더 많은 결과를 반환할 수 있습니다. 그런 다음 응답 속성Similarity(유사성의 정도 %)를 사용하여 선택 범위를 좁히고 해당 애플리케이션에서 올바른 응답을 필터링할 수 있습니다. 다시 유사성을 높이면(예: 99% 이상) 잘못된 식별이 줄어들 것입니다.
공공 안전 관련 사용 사례공공 안전과 관련된 사용 사례에서 얼굴 감지 및 비교 시스템을 배포하는 경우 센서, 입력 이미지 및 비디오모범 사례 (p. 109) 및 IndexFaces 사용 지침 (p. 154)에 나열된 권장 사항 이외에 다음 모범 사례를 따라야합니다. 첫째, 오류 및 오탐을 줄이기 위해 99% 이상의 신뢰도 임계값을 사용해야 합니다. 둘째, 인간 검토자가 얼굴 감지 또는 비교 시스템이 제공한 결과를 확인해야 하며, 인간에 의한 추가 검토 없이 시스템 출력에기반하여 의사 결정을 하면 안 됩니다. 얼굴 감지 및 비교 시스템은 검토 범위를 좁혀 인간 작업자가 신속하게 검토하고 옵션을 고려할 수 있게 해주는 도구로 사용해야 합니다. 셋째, 가능할 경우 최종 사용자 및 피사인물에게 이러한 시스템의 사용을 고지하고, 사용에 대한 동의를 얻고, 최종 사용자 및 피사 인물이 시스템개선을 위한 피드백을 제공할 수 있는 메커니즘을 제공하는 등 이러한 사용 사례에서 얼굴 감지 및 비교 시스템을 투명하게 사용해야 합니다.
법 집행을 위해 얼굴 비교 기능을 사용할 경우 99% 이상의 신뢰도 임계값을 사용해야 하며 얼굴 비교 소프트웨어가 제공한 예측 결과만을 기반으로 결정을 내려서는 안 됩니다. 반드시 인간 검토자가 얼굴 비교 소프트웨어의 예측 내용을 확인하고 개인 권리 침해가 발생하지 않는지 확인해야 합니다.
예를 들어 범죄 조사 시 용의자를 식별하기 위한 방법으로 법 집행을 위해 얼굴 비교 시스템을 사용할 경우개인에 대한 심문 또는 구금 결정을 내리기 전에 법 집행관이 일치 용의자를 직접 검토해야 합니다. 얼굴 비교 일치 결과는 항상 다른 결정적인 증거와 함께 고려되어야 하며 조치를 취할 때 유일한 결정 요인으로 사용되어서는 안 됩니다. 하지만 얼굴 비교가 법 집행과 무관한 상황에서 사용될 경우(예: 전화를 잠금 해제하거나 보안 시스템이 적용된 개인 건물에 액세스하기 위해 피고용인의 ID를 인증하는 경우) 개인의 권리 침해가발생하지 않으므로 이러한 결정을 내릴 때 직접적인 확인이 필요하지 않습니다.
공공 안전과 관련된 사용 사례에서 얼굴 감지 또는 얼굴 비교 시스템을 사용하려는 경우 앞서 언급한 모범 사례를 사용해야 합니다. 또한 얼굴 비교 사용에 대해 발표된 리소스를 참고해야 합니다. 여기에는 미 법무부법무지원국에서 제공하는 Face Recognition Policy Development Template For Use In Criminal Intelligenceand Investigative Activities(범죄 정보 및 수사 활동에 활용하기 위한 얼굴 인식 정책 개발 템플릿)가 포함됩니다. 이 템플릿은 다양한 얼굴 비교 및 생체 인식 관련 리소스를 제공하며, 법 집행 및 공공 안전 기관에 관계법을 준수하고 프라이버시 침해 위험을 낮추며 책임 및 감독을 확립하는 얼굴 비교 정책을 개발하기 위한 프
155
Amazon Rekognition 개발자 안내서Amazon Rekognition을 활용한 공공 안전 지원
레임워크를 제공하도록 고안되었습니다. 추가 리소스로는 미 통신정보관리청의 Best Privacy Practices forCommercial Use of Facial Recognition(얼굴 인식의 상업적 활용을 위한 개인정보보호 모범 사례)과 미 연방통상위원회의 Best Practices for Common Uses of Facial Recognition(얼굴 인식의 일반적 사용을 위한 모범 사례)가 포함됩니다. 향후 다른 리소스가 개발 및 공개될 수 있으므로 이 중요한 주제에 지속적으로 관심을 기울여야 합니다.
AWS 서비스를 사용하는 고객은 모든 관계법을 준수해야 하며, AWS 서비스를 다른 사람의 권리를 침해하거나 다른 사람에게 피해를 줄 수 있는 방식으로 사용할 수 없습니다. 이는 공공 안전을 위한 AWS 서비스를 불법적으로 특정 개인을 차별하거나 개인의 정당한 프로세스, 프라이버시 또는 시민적 자유를 침해하는 방식으로 사용할 수 없다는 의미입니다. 필요에 따라 적절한 법률 조언을 받아 사용 사례에 대한 법적 요건 등을 검토해야 합니다.
Amazon Rekognition을 활용한 공공 안전 지원Amazon Rekognition의 경우 미아 찾기, 인신매매 단속 또는 범죄 예방과 같은 공공 안전 및 법 집행 시나리오에서 도움이 될 수 있습니다. 공공 안전 및 법 집행 시나리오에서 다음을 고려하십시오.
• 가능성 있는 일치 인물을 찾기 위한 첫 단계로 Amazon Rekognition을 사용합니다. Amazon Rekognition얼굴 작업의 응답을 통해 빠르게 향후 고려할 잠재적인 일치 세트를 얻을 수 있습니다.
• 인간의 분석을 필요로 하는 시나리오에서 자동화된 결정을 위해 Amazon Rekognition 응답을 사용하지 않습니다. 범죄자를 판단하는 것이 그 예입니다. 인간의 검토에 의한 응답을 얻고 이 정보를 활용하여 향후결정을 알립니다.
• 매우 정확한 얼굴 유사성 일치가 필요한 시나리오의 경우 99% 유사성 임계값을 사용합니다. 빌딩 액세스인증을 예로 들 수 있습니다.
• 법 집행을 위한 사용 시나리오 등 시민의 권리를 고려해야 할 경우 99% 이상의 신뢰도 임계값을 사용하고개인의 권리를 침해하지 않도록 얼굴 비교 예측 내용에 대한 인간의 검토를 도입해야 합니다.
• 대규모의 잠재적 일치 세트를 통해 이점을 얻게 되는 시나리오의 경우 99% 미만의 유사성 임계값을 사용합니다. 실종된 사람을 찾는 것을 예로 들 수 있습니다. 필요한 경우 유사성 응답 속성을 사용하여 잠재적일치가 인식하고자 하는 사람과 어느 정도로 유사한지 판단할 수 있습니다.
• Amazon Rekognition에서 반환하는 오탐 얼굴 일치에 대한 계획을 마련합니다. 예를 들어IndexFaces (p. 362) 작업을 사용하여 인덱스를 빌드할 때 동일한 사람의 여러 이미지를 사용하여 일치를 개선시킵니다. 자세한 내용은 IndexFaces 사용 지침 (p. 154) 단원을 참조하십시오.
다른 사용 사례에서는(예: 소셜 미디어), 최선의 판단을 통해 Amazon Rekognition 결과에 인간의 검토가 필요한지 여부를 평가하는 것이 좋습니다. 또한 애플리케이션 요구 사항에 따라 유사성 임계값이 낮아질 수 있습니다.
모음 만들기CreateCollection (p. 274) 작업을 사용하여 모음을 만들 수 있습니다.
자세한 내용은 모음 관리 (p. 153) 단원을 참조하십시오.
모음을 만들려면(SDK)
1. 아직 설정하지 않았다면 다음과 같이 하십시오.
a. AmazonRekognitionFullAccess 권한이 있는 IAM 사용자를 만들거나 업데이트합니다. 자세한내용은 1단계: AWS 계정 설정 및 IAM 사용자 만들기 (p. 11) 단원을 참조하십시오.
b. AWS CLI와 AWS SDK를 설치하고 구성합니다. 자세한 내용은 2단계: AWS CLI 및 AWS SDK 설정 (p. 12) 단원을 참조하십시오.
2. 다음 예제를 사용하여 CreateCollection 작업을 호출합니다.
156
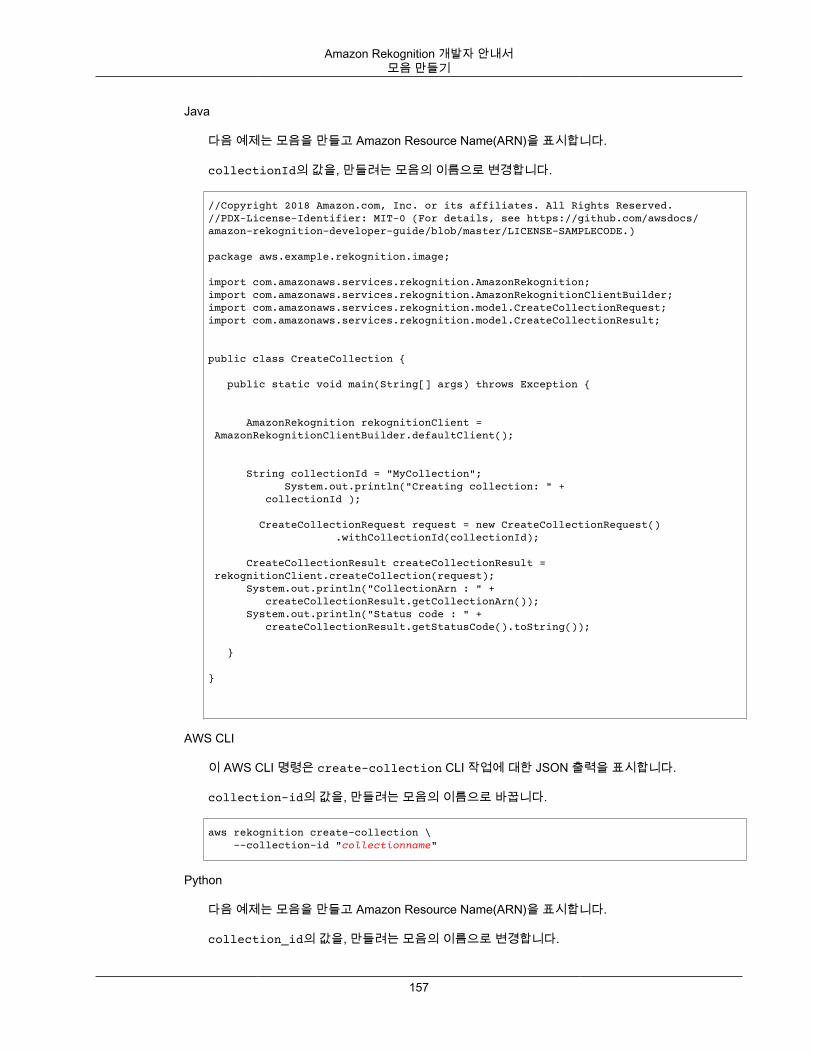
Amazon Rekognition 개발자 안내서모음 만들기
Java
다음 예제는 모음을 만들고 Amazon Resource Name(ARN)을 표시합니다.
collectionId의 값을, 만들려는 모음의 이름으로 변경합니다.
//Copyright 2018 Amazon.com, Inc. or its affiliates. All Rights Reserved.//PDX-License-Identifier: MIT-0 (For details, see https://github.com/awsdocs/amazon-rekognition-developer-guide/blob/master/LICENSE-SAMPLECODE.)
package aws.example.rekognition.image;
import com.amazonaws.services.rekognition.AmazonRekognition;import com.amazonaws.services.rekognition.AmazonRekognitionClientBuilder;import com.amazonaws.services.rekognition.model.CreateCollectionRequest;import com.amazonaws.services.rekognition.model.CreateCollectionResult;
public class CreateCollection {
public static void main(String[] args) throws Exception {
AmazonRekognition rekognitionClient = AmazonRekognitionClientBuilder.defaultClient();
String collectionId = "MyCollection"; System.out.println("Creating collection: " + collectionId ); CreateCollectionRequest request = new CreateCollectionRequest() .withCollectionId(collectionId); CreateCollectionResult createCollectionResult = rekognitionClient.createCollection(request); System.out.println("CollectionArn : " + createCollectionResult.getCollectionArn()); System.out.println("Status code : " + createCollectionResult.getStatusCode().toString());
}
}
AWS CLI
이 AWS CLI 명령은 create-collection CLI 작업에 대한 JSON 출력을 표시합니다.
collection-id의 값을, 만들려는 모음의 이름으로 바꿉니다.
aws rekognition create-collection \ --collection-id "collectionname"
Python
다음 예제는 모음을 만들고 Amazon Resource Name(ARN)을 표시합니다.
collection_id의 값을, 만들려는 모음의 이름으로 변경합니다.
157
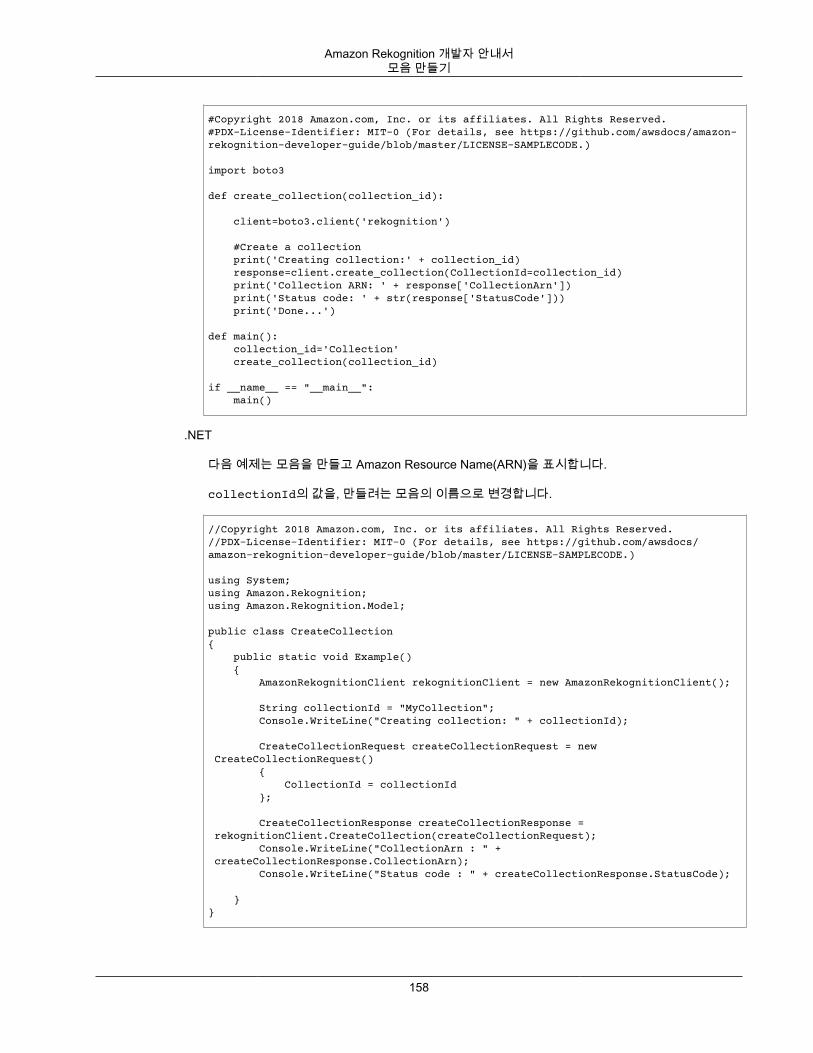
Amazon Rekognition 개발자 안내서모음 만들기
#Copyright 2018 Amazon.com, Inc. or its affiliates. All Rights Reserved.#PDX-License-Identifier: MIT-0 (For details, see https://github.com/awsdocs/amazon-rekognition-developer-guide/blob/master/LICENSE-SAMPLECODE.)
import boto3
def create_collection(collection_id):
client=boto3.client('rekognition')
#Create a collection print('Creating collection:' + collection_id) response=client.create_collection(CollectionId=collection_id) print('Collection ARN: ' + response['CollectionArn']) print('Status code: ' + str(response['StatusCode'])) print('Done...') def main(): collection_id='Collection' create_collection(collection_id)
if __name__ == "__main__": main()
.NET
다음 예제는 모음을 만들고 Amazon Resource Name(ARN)을 표시합니다.
collectionId의 값을, 만들려는 모음의 이름으로 변경합니다.
//Copyright 2018 Amazon.com, Inc. or its affiliates. All Rights Reserved.//PDX-License-Identifier: MIT-0 (For details, see https://github.com/awsdocs/amazon-rekognition-developer-guide/blob/master/LICENSE-SAMPLECODE.)
using System;using Amazon.Rekognition;using Amazon.Rekognition.Model;
public class CreateCollection{ public static void Example() { AmazonRekognitionClient rekognitionClient = new AmazonRekognitionClient();
String collectionId = "MyCollection"; Console.WriteLine("Creating collection: " + collectionId);
CreateCollectionRequest createCollectionRequest = new CreateCollectionRequest() { CollectionId = collectionId };
CreateCollectionResponse createCollectionResponse = rekognitionClient.CreateCollection(createCollectionRequest); Console.WriteLine("CollectionArn : " + createCollectionResponse.CollectionArn); Console.WriteLine("Status code : " + createCollectionResponse.StatusCode);
}}
158
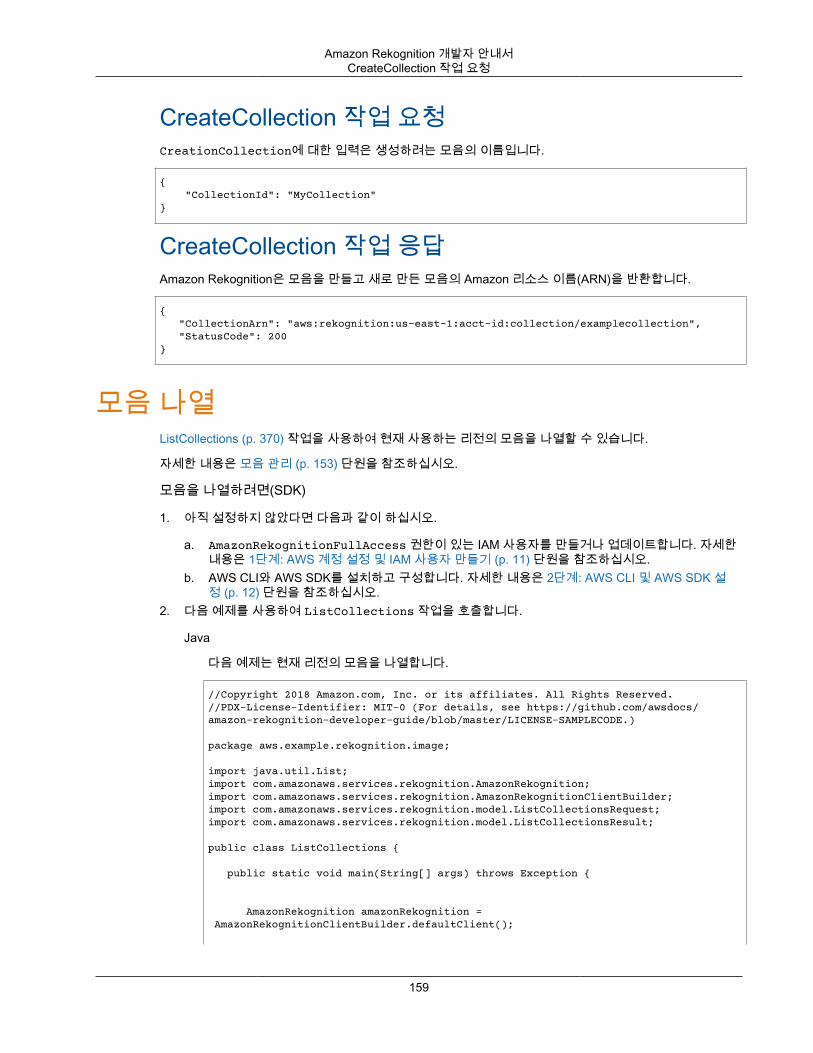
Amazon Rekognition 개발자 안내서CreateCollection 작업 요청
CreateCollection 작업 요청CreationCollection에 대한 입력은 생성하려는 모음의 이름입니다.
{ "CollectionId": "MyCollection"}
CreateCollection 작업 응답Amazon Rekognition은 모음을 만들고 새로 만든 모음의 Amazon 리소스 이름(ARN)을 반환합니다.
{ "CollectionArn": "aws:rekognition:us-east-1:acct-id:collection/examplecollection", "StatusCode": 200}
모음 나열ListCollections (p. 370) 작업을 사용하여 현재 사용하는 리전의 모음을 나열할 수 있습니다.
자세한 내용은 모음 관리 (p. 153) 단원을 참조하십시오.
모음을 나열하려면(SDK)
1. 아직 설정하지 않았다면 다음과 같이 하십시오.
a. AmazonRekognitionFullAccess 권한이 있는 IAM 사용자를 만들거나 업데이트합니다. 자세한내용은 1단계: AWS 계정 설정 및 IAM 사용자 만들기 (p. 11) 단원을 참조하십시오.
b. AWS CLI와 AWS SDK를 설치하고 구성합니다. 자세한 내용은 2단계: AWS CLI 및 AWS SDK 설정 (p. 12) 단원을 참조하십시오.
2. 다음 예제를 사용하여 ListCollections 작업을 호출합니다.
Java
다음 예제는 현재 리전의 모음을 나열합니다.
//Copyright 2018 Amazon.com, Inc. or its affiliates. All Rights Reserved.//PDX-License-Identifier: MIT-0 (For details, see https://github.com/awsdocs/amazon-rekognition-developer-guide/blob/master/LICENSE-SAMPLECODE.)
package aws.example.rekognition.image;
import java.util.List;import com.amazonaws.services.rekognition.AmazonRekognition;import com.amazonaws.services.rekognition.AmazonRekognitionClientBuilder;import com.amazonaws.services.rekognition.model.ListCollectionsRequest;import com.amazonaws.services.rekognition.model.ListCollectionsResult;
public class ListCollections {
public static void main(String[] args) throws Exception {
AmazonRekognition amazonRekognition = AmazonRekognitionClientBuilder.defaultClient();
159
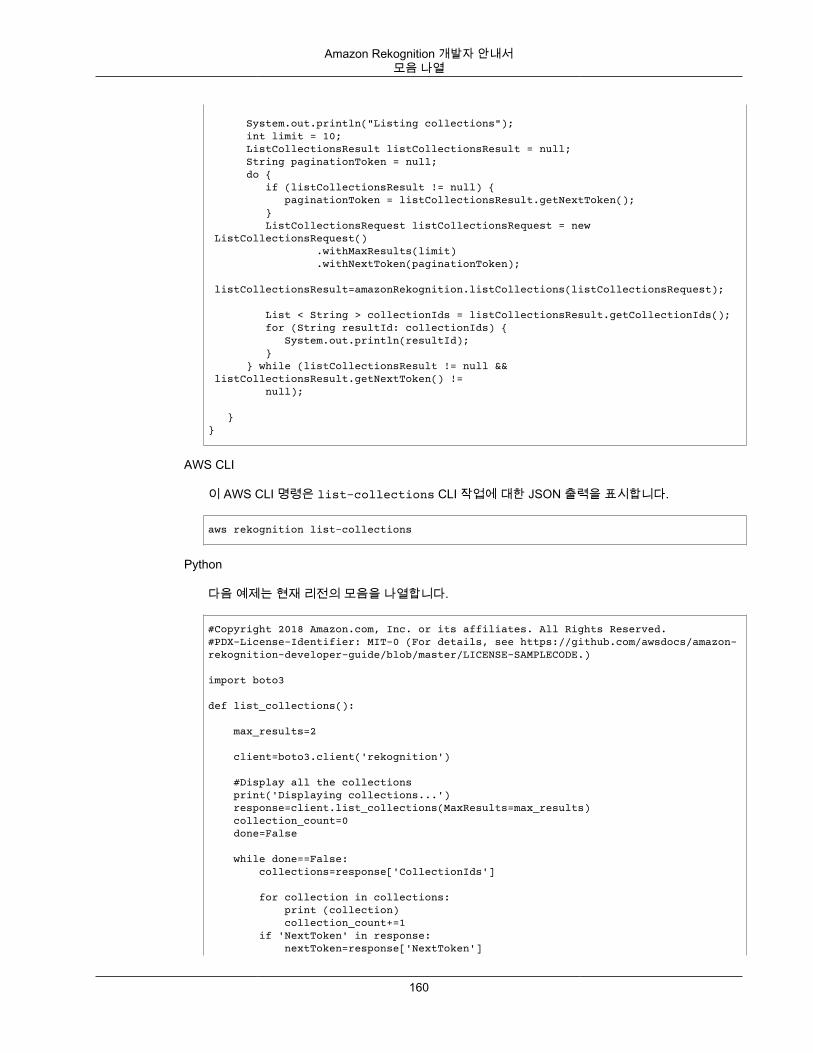
Amazon Rekognition 개발자 안내서모음 나열
System.out.println("Listing collections"); int limit = 10; ListCollectionsResult listCollectionsResult = null; String paginationToken = null; do { if (listCollectionsResult != null) { paginationToken = listCollectionsResult.getNextToken(); } ListCollectionsRequest listCollectionsRequest = new ListCollectionsRequest() .withMaxResults(limit) .withNextToken(paginationToken); listCollectionsResult=amazonRekognition.listCollections(listCollectionsRequest); List < String > collectionIds = listCollectionsResult.getCollectionIds(); for (String resultId: collectionIds) { System.out.println(resultId); } } while (listCollectionsResult != null && listCollectionsResult.getNextToken() != null); } }
AWS CLI
이 AWS CLI 명령은 list-collections CLI 작업에 대한 JSON 출력을 표시합니다.
aws rekognition list-collections
Python
다음 예제는 현재 리전의 모음을 나열합니다.
#Copyright 2018 Amazon.com, Inc. or its affiliates. All Rights Reserved.#PDX-License-Identifier: MIT-0 (For details, see https://github.com/awsdocs/amazon-rekognition-developer-guide/blob/master/LICENSE-SAMPLECODE.)
import boto3
def list_collections():
max_results=2 client=boto3.client('rekognition')
#Display all the collections print('Displaying collections...') response=client.list_collections(MaxResults=max_results) collection_count=0 done=False while done==False: collections=response['CollectionIds']
for collection in collections: print (collection) collection_count+=1 if 'NextToken' in response: nextToken=response['NextToken']
160

Amazon Rekognition 개발자 안내서모음 나열
response=client.list_collections(NextToken=nextToken,MaxResults=max_results) else: done=True
return collection_count
def main():
collection_count=list_collections() print("collections: " + str(collection_count))if __name__ == "__main__": main()
.NET
다음 예제는 현재 리전의 모음을 나열합니다.
//Copyright 2018 Amazon.com, Inc. or its affiliates. All Rights Reserved.//PDX-License-Identifier: MIT-0 (For details, see https://github.com/awsdocs/amazon-rekognition-developer-guide/blob/master/LICENSE-SAMPLECODE.)
using System;using Amazon.Rekognition;using Amazon.Rekognition.Model;
public class ListCollections{ public static void Example() { AmazonRekognitionClient rekognitionClient = new AmazonRekognitionClient();
Console.WriteLine("Listing collections"); int limit = 10;
ListCollectionsResponse listCollectionsResponse = null; String paginationToken = null; do { if (listCollectionsResponse != null) paginationToken = listCollectionsResponse.NextToken;
ListCollectionsRequest listCollectionsRequest = new ListCollectionsRequest() { MaxResults = limit, NextToken = paginationToken };
listCollectionsResponse = rekognitionClient.ListCollections(listCollectionsRequest);
foreach (String resultId in listCollectionsResponse.CollectionIds) Console.WriteLine(resultId); } while (listCollectionsResponse != null && listCollectionsResponse.NextToken != null); }}
161
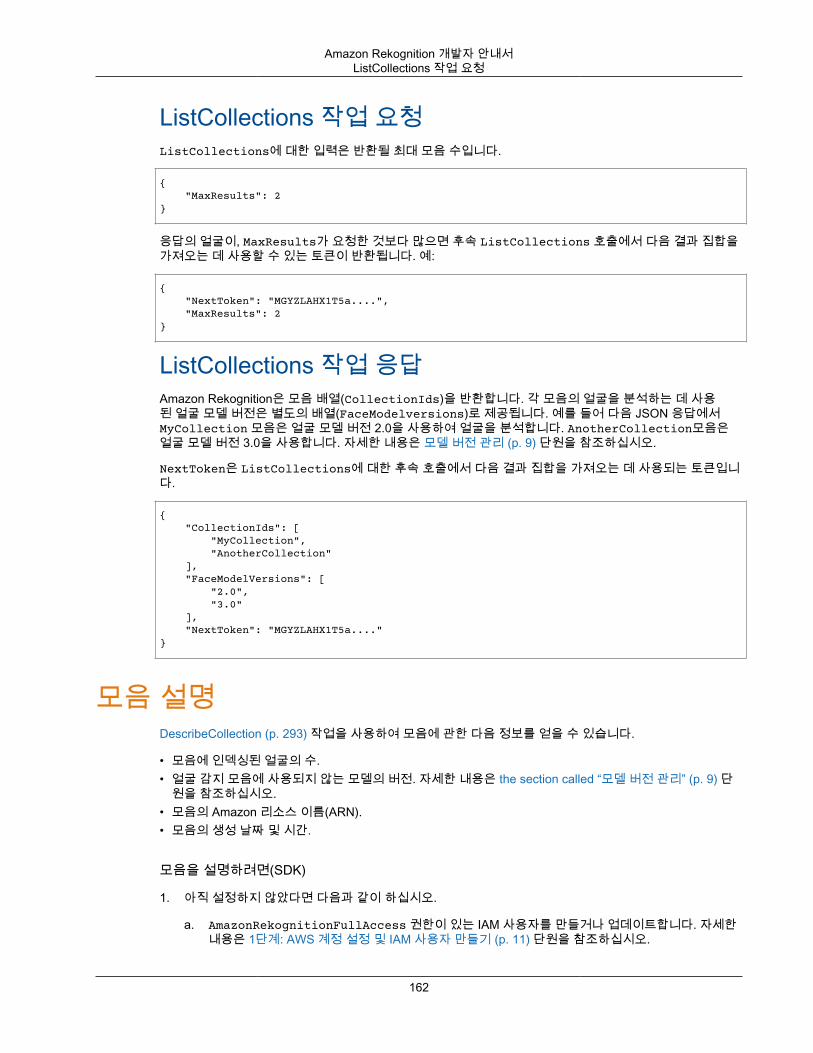
Amazon Rekognition 개발자 안내서ListCollections 작업 요청
ListCollections 작업 요청ListCollections에 대한 입력은 반환될 최대 모음 수입니다.
{ "MaxResults": 2}
응답의 얼굴이, MaxResults가 요청한 것보다 많으면 후속 ListCollections 호출에서 다음 결과 집합을가져오는 데 사용할 수 있는 토큰이 반환됩니다. 예:
{ "NextToken": "MGYZLAHX1T5a....", "MaxResults": 2}
ListCollections 작업 응답Amazon Rekognition은 모음 배열(CollectionIds)을 반환합니다. 각 모음의 얼굴을 분석하는 데 사용된 얼굴 모델 버전은 별도의 배열(FaceModelversions)로 제공됩니다. 예를 들어 다음 JSON 응답에서MyCollection 모음은 얼굴 모델 버전 2.0을 사용하여 얼굴을 분석합니다. AnotherCollection모음은얼굴 모델 버전 3.0을 사용합니다. 자세한 내용은 모델 버전 관리 (p. 9) 단원을 참조하십시오.
NextToken은 ListCollections에 대한 후속 호출에서 다음 결과 집합을 가져오는 데 사용되는 토큰입니다.
{ "CollectionIds": [ "MyCollection", "AnotherCollection" ], "FaceModelVersions": [ "2.0", "3.0" ], "NextToken": "MGYZLAHX1T5a...."}
모음 설명DescribeCollection (p. 293) 작업을 사용하여 모음에 관한 다음 정보를 얻을 수 있습니다.
• 모음에 인덱싱된 얼굴의 수.• 얼굴 감지 모음에 사용되지 않는 모델의 버전. 자세한 내용은 the section called “모델 버전 관리” (p. 9) 단
원을 참조하십시오.• 모음의 Amazon 리소스 이름(ARN).• 모음의 생성 날짜 및 시간.
모음을 설명하려면(SDK)
1. 아직 설정하지 않았다면 다음과 같이 하십시오.
a. AmazonRekognitionFullAccess 권한이 있는 IAM 사용자를 만들거나 업데이트합니다. 자세한내용은 1단계: AWS 계정 설정 및 IAM 사용자 만들기 (p. 11) 단원을 참조하십시오.
162
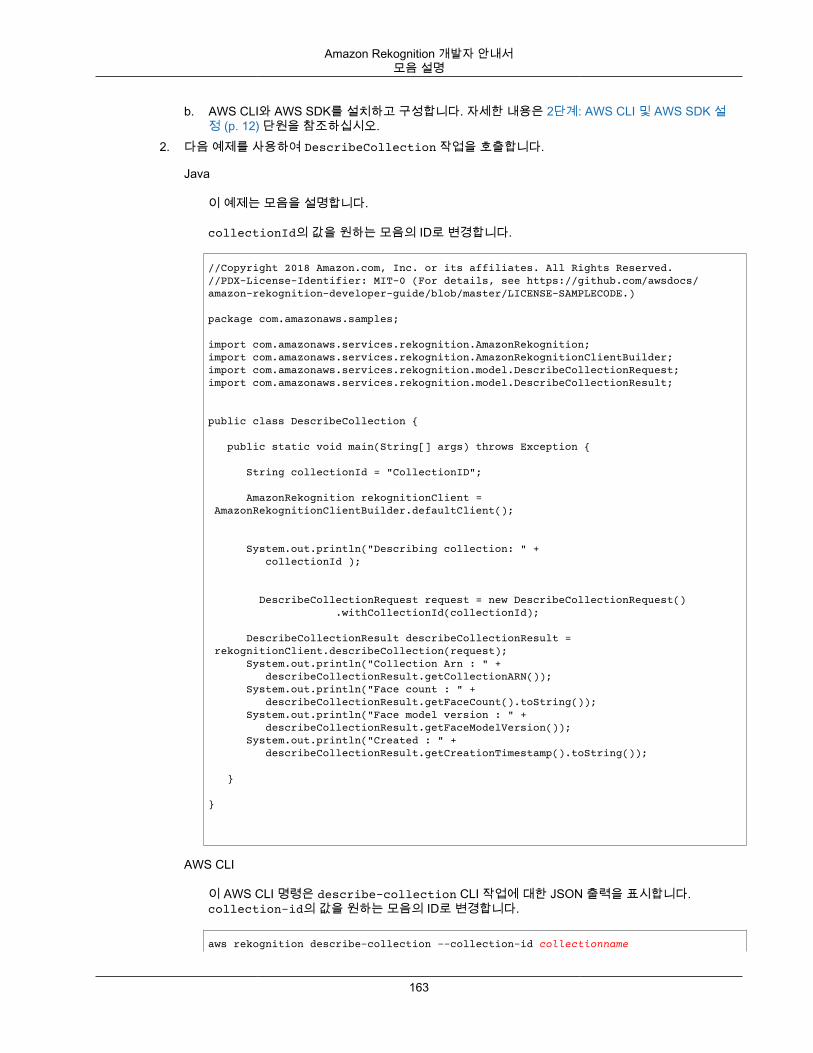
Amazon Rekognition 개발자 안내서모음 설명
b. AWS CLI와 AWS SDK를 설치하고 구성합니다. 자세한 내용은 2단계: AWS CLI 및 AWS SDK 설정 (p. 12) 단원을 참조하십시오.
2. 다음 예제를 사용하여 DescribeCollection 작업을 호출합니다.
Java
이 예제는 모음을 설명합니다.
collectionId의 값을 원하는 모음의 ID로 변경합니다.
//Copyright 2018 Amazon.com, Inc. or its affiliates. All Rights Reserved.//PDX-License-Identifier: MIT-0 (For details, see https://github.com/awsdocs/amazon-rekognition-developer-guide/blob/master/LICENSE-SAMPLECODE.)
package com.amazonaws.samples;
import com.amazonaws.services.rekognition.AmazonRekognition;import com.amazonaws.services.rekognition.AmazonRekognitionClientBuilder;import com.amazonaws.services.rekognition.model.DescribeCollectionRequest;import com.amazonaws.services.rekognition.model.DescribeCollectionResult;
public class DescribeCollection {
public static void main(String[] args) throws Exception {
String collectionId = "CollectionID"; AmazonRekognition rekognitionClient = AmazonRekognitionClientBuilder.defaultClient();
System.out.println("Describing collection: " + collectionId ); DescribeCollectionRequest request = new DescribeCollectionRequest() .withCollectionId(collectionId); DescribeCollectionResult describeCollectionResult = rekognitionClient.describeCollection(request); System.out.println("Collection Arn : " + describeCollectionResult.getCollectionARN()); System.out.println("Face count : " + describeCollectionResult.getFaceCount().toString()); System.out.println("Face model version : " + describeCollectionResult.getFaceModelVersion()); System.out.println("Created : " + describeCollectionResult.getCreationTimestamp().toString());
}
}
AWS CLI
이 AWS CLI 명령은 describe-collection CLI 작업에 대한 JSON 출력을 표시합니다.collection-id의 값을 원하는 모음의 ID로 변경합니다.
aws rekognition describe-collection --collection-id collectionname
163

Amazon Rekognition 개발자 안내서모음 설명
Python
이 예제는 모음을 설명합니다.
collection_id의 값을 원하는 모음의 ID로 변경합니다.
#Copyright 2018 Amazon.com, Inc. or its affiliates. All Rights Reserved.#PDX-License-Identifier: MIT-0 (For details, see https://github.com/awsdocs/amazon-rekognition-developer-guide/blob/master/LICENSE-SAMPLECODE.)
import boto3from botocore.exceptions import ClientError
def describe_collection(collection_id):
print('Attempting to describe collection ' + collection_id) client=boto3.client('rekognition')
try: response=client.describe_collection(CollectionId=collection_id) print("Collection Arn: " + response['CollectionARN']) print("Face Count: " + str(response['FaceCount'])) print("Face Model Version: " + response['FaceModelVersion']) print("Timestamp: " + str(response['CreationTimestamp']))
except ClientError as e: if e.response['Error']['Code'] == 'ResourceNotFoundException': print ('The collection ' + collection_id + ' was not found ') else: print ('Error other than Not Found occurred: ' + e.response['Error']['Message']) print('Done...')
def main(): collection_id='MyCollection' describe_collection(collection_id)
if __name__ == "__main__": main()
.NET
이 예제는 모음을 설명합니다.
collectionId의 값을 원하는 모음의 ID로 변경합니다.
//Copyright 2018 Amazon.com, Inc. or its affiliates. All Rights Reserved.//PDX-License-Identifier: MIT-0 (For details, see https://github.com/awsdocs/amazon-rekognition-developer-guide/blob/master/LICENSE-SAMPLECODE.)
using System;using Amazon.Rekognition;using Amazon.Rekognition.Model;
public class DescribeCollection{ public static void Example()
164

Amazon Rekognition 개발자 안내서DescribeCollection 작업 요청
{ AmazonRekognitionClient rekognitionClient = new AmazonRekognitionClient();
String collectionId = "CollectionID"; Console.WriteLine("Describing collection: " + collectionId);
DescribeCollectionRequest describeCollectionRequest = new DescribeCollectionRequest() { CollectionId = collectionId };
DescribeCollectionResponse describeCollectionResponse = rekognitionClient.DescribeCollection(describeCollectionRequest); Console.WriteLine("Collection ARN: " + describeCollectionResponse.CollectionARN); Console.WriteLine("Face count: " + describeCollectionResponse.FaceCount); Console.WriteLine("Face model version: " + describeCollectionResponse.FaceModelVersion); Console.WriteLine("Created: " + describeCollectionResponse.CreationTimestamp); }}
DescribeCollection 작업 요청DescribeCollection에 대한 입력은 원하는 모음의 ID입니다. 다음 JSON 예제를 참조하십시오.
{ "CollectionId": "MyCollection"}
DescribeCollection 작업 응답응답에는 다음이 포함됩니다.
• 모음에 인덱싱된 얼굴의 수, FaceCount.• 얼굴 감지에 사용되는 얼굴 모델의 버전, FaceModelVersion.• 모음의 Amazon 리소스 이름, CollectionARN.• 모음의 생성 날짜 및 시간, CreationTimestamp. CreationTimestamp의 값은 밀리초인데 모음 생성
까지의 Unix epoch 시간 때문입니다. Unix epoch 시간은 1970년 1월 1일, 목요일 00:00:00 협정 세계시(UTC)입니다. 자세한 내용은 Unix Time을 참조하십시오.
{ "CollectionARN": "arn:aws:rekognition:us-east-1:nnnnnnnnnnnn:collection/MyCollection", "CreationTimestamp": 1.533422155042E9, "FaceCount": 200, "FaceModelVersion": "1.0"}
모음 삭제DeleteCollection (p. 287) 작업을 사용하여 모음을 삭제할 수 있습니다.
165
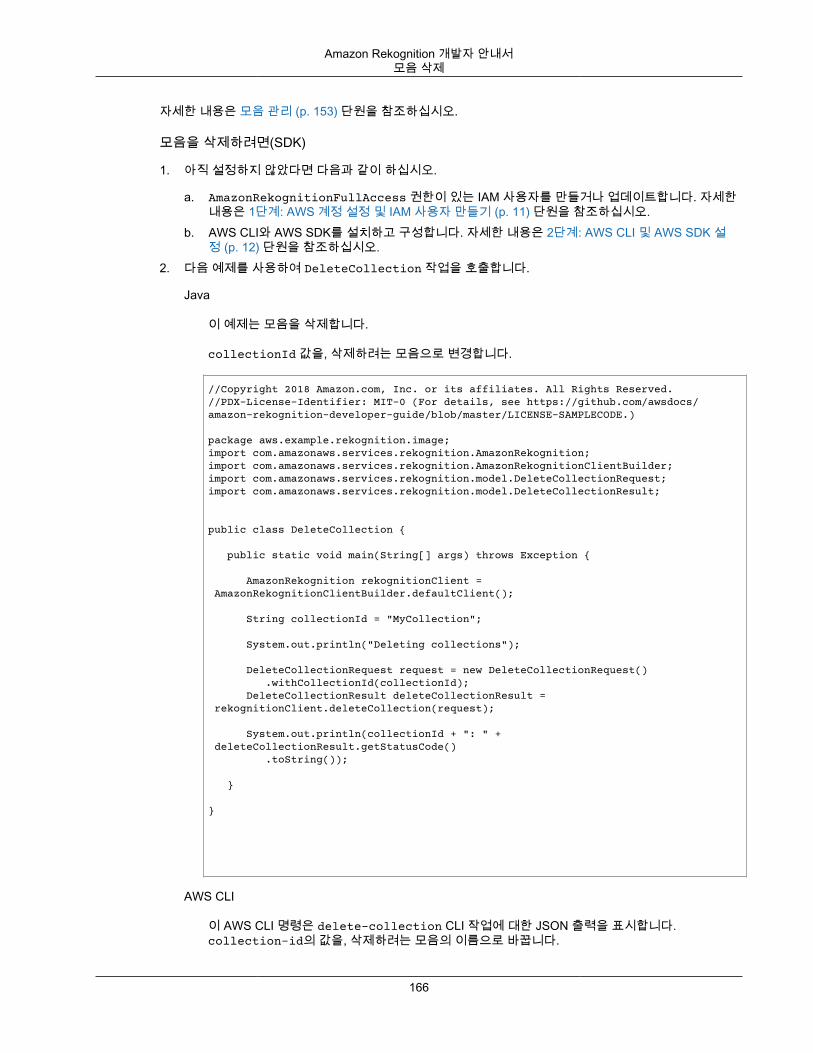
Amazon Rekognition 개발자 안내서모음 삭제
자세한 내용은 모음 관리 (p. 153) 단원을 참조하십시오.
모음을 삭제하려면(SDK)
1. 아직 설정하지 않았다면 다음과 같이 하십시오.
a. AmazonRekognitionFullAccess 권한이 있는 IAM 사용자를 만들거나 업데이트합니다. 자세한내용은 1단계: AWS 계정 설정 및 IAM 사용자 만들기 (p. 11) 단원을 참조하십시오.
b. AWS CLI와 AWS SDK를 설치하고 구성합니다. 자세한 내용은 2단계: AWS CLI 및 AWS SDK 설정 (p. 12) 단원을 참조하십시오.
2. 다음 예제를 사용하여 DeleteCollection 작업을 호출합니다.
Java
이 예제는 모음을 삭제합니다.
collectionId 값을, 삭제하려는 모음으로 변경합니다.
//Copyright 2018 Amazon.com, Inc. or its affiliates. All Rights Reserved.//PDX-License-Identifier: MIT-0 (For details, see https://github.com/awsdocs/amazon-rekognition-developer-guide/blob/master/LICENSE-SAMPLECODE.)
package aws.example.rekognition.image;import com.amazonaws.services.rekognition.AmazonRekognition;import com.amazonaws.services.rekognition.AmazonRekognitionClientBuilder;import com.amazonaws.services.rekognition.model.DeleteCollectionRequest;import com.amazonaws.services.rekognition.model.DeleteCollectionResult;
public class DeleteCollection {
public static void main(String[] args) throws Exception {
AmazonRekognition rekognitionClient = AmazonRekognitionClientBuilder.defaultClient();
String collectionId = "MyCollection";
System.out.println("Deleting collections"); DeleteCollectionRequest request = new DeleteCollectionRequest() .withCollectionId(collectionId); DeleteCollectionResult deleteCollectionResult = rekognitionClient.deleteCollection(request); System.out.println(collectionId + ": " + deleteCollectionResult.getStatusCode() .toString());
}
}
AWS CLI
이 AWS CLI 명령은 delete-collection CLI 작업에 대한 JSON 출력을 표시합니다.collection-id의 값을, 삭제하려는 모음의 이름으로 바꿉니다.
166
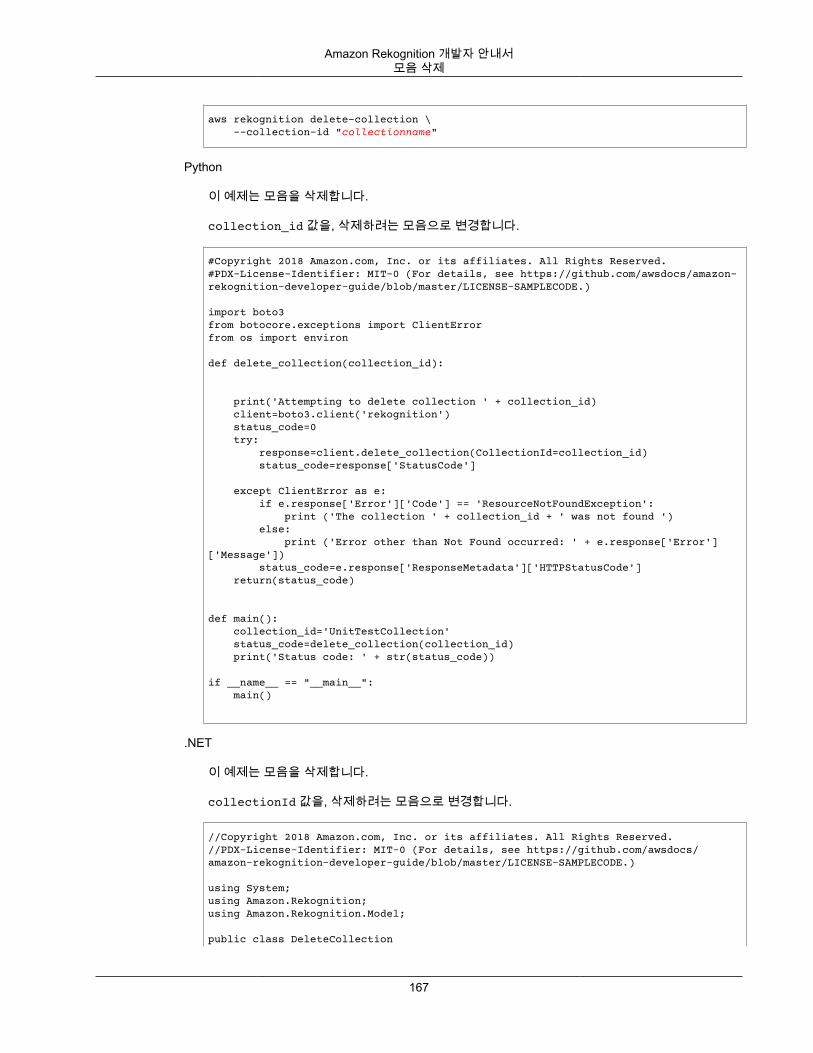
Amazon Rekognition 개발자 안내서모음 삭제
aws rekognition delete-collection \ --collection-id "collectionname"
Python
이 예제는 모음을 삭제합니다.
collection_id 값을, 삭제하려는 모음으로 변경합니다.
#Copyright 2018 Amazon.com, Inc. or its affiliates. All Rights Reserved.#PDX-License-Identifier: MIT-0 (For details, see https://github.com/awsdocs/amazon-rekognition-developer-guide/blob/master/LICENSE-SAMPLECODE.)
import boto3from botocore.exceptions import ClientErrorfrom os import environ
def delete_collection(collection_id):
print('Attempting to delete collection ' + collection_id) client=boto3.client('rekognition') status_code=0 try: response=client.delete_collection(CollectionId=collection_id) status_code=response['StatusCode'] except ClientError as e: if e.response['Error']['Code'] == 'ResourceNotFoundException': print ('The collection ' + collection_id + ' was not found ') else: print ('Error other than Not Found occurred: ' + e.response['Error']['Message']) status_code=e.response['ResponseMetadata']['HTTPStatusCode'] return(status_code)
def main(): collection_id='UnitTestCollection' status_code=delete_collection(collection_id) print('Status code: ' + str(status_code))
if __name__ == "__main__": main()
.NET
이 예제는 모음을 삭제합니다.
collectionId 값을, 삭제하려는 모음으로 변경합니다.
//Copyright 2018 Amazon.com, Inc. or its affiliates. All Rights Reserved.//PDX-License-Identifier: MIT-0 (For details, see https://github.com/awsdocs/amazon-rekognition-developer-guide/blob/master/LICENSE-SAMPLECODE.)
using System;using Amazon.Rekognition;using Amazon.Rekognition.Model;
public class DeleteCollection
167

Amazon Rekognition 개발자 안내서DeleteCollection 작업 요청
{ public static void Example() { AmazonRekognitionClient rekognitionClient = new AmazonRekognitionClient();
String collectionId = "MyCollection"; Console.WriteLine("Deleting collection: " + collectionId);
DeleteCollectionRequest deleteCollectionRequest = new DeleteCollectionRequest() { CollectionId = collectionId };
DeleteCollectionResponse deleteCollectionResponse = rekognitionClient.DeleteCollection(deleteCollectionRequest); Console.WriteLine(collectionId + ": " + deleteCollectionResponse.StatusCode); }}
DeleteCollection 작업 요청DeleteCollection에 대한 입력은 삭제할 모음의 ID입니다. 다음 JSON 예제를 참조하십시오.
{ "CollectionId": "MyCollection"}
DeleteCollection 작업 응답DeleteCollection 응답에는 작업의 성공 또는 실패를 나타내는 HTTP 상태 코드가 들어 있습니다. 모음이 성공적으로 삭제되면 200이 반환됩니다.
{"StatusCode":200}
모음에 얼굴 추가IndexFaces (p. 362) 작업을 사용하여 이미지에서 얼굴을 감지하고 모음에 추가할 수 있습니다. AmazonRekognition은 감지된 각 얼굴에서 얼굴 특징을 추출하여 데이터베이스에 이 특징 정보를 저장합니다. 또한이 명령은 감지된 각 얼굴의 메타데이터를 지정된 얼굴 모음에 저장합니다. Amazon Rekognition은 실제 이미지 바이트를 저장하지 않습니다.
인덱싱에 적합한 얼굴 제공에 대한 자세한 내용은 얼굴 비교 입력 이미지에 대한 권장 사항 (p. 109) 단원을참조하십시오.
IndexFaces 작업은 각 얼굴에 대해 다음의 정보를 유지합니다.
• 다차원 얼굴 특징 – IndexFaces는 얼굴 분석을 사용하여 얼굴 특징에 대한 다차원 정보를 추출하고, 이정보를 얼굴 모음에 저장합니다. 이 정보를 직접 액세스할 수는 없습니다. 이 정보는 Amazon Rekognition이 얼굴 모음에서 얼굴 일치를 검색할 때 사용합니다.
• 메타데이터 – 각 얼굴의 메타데이터에는 경계 상자, 신뢰도 수준(경계 상자에 얼굴이 포함될 신뢰도 수준),
Amazon Rekognition이 할당한 ID(얼굴 ID 및 이미지 ID), 요청 내 외부 이미지 ID(제공한 경우)가 포함됩니
168
Amazon Rekognition 개발자 안내서얼굴 필터링
다. 이 정보는 IndexFaces API 호출에 대한 응답으로 반환됩니다. 관련 예제는 다음 응답 예의 face 요소를 참조하십시오.
이 서비스는 다음 API 호출에 대한 응답으로 이 메타데이터를 반환합니다.
• the section called “ListFaces” (p. 373)
• 얼굴 검색 작업 – the section called “SearchFaces” (p. 383) 및 the section called“SearchFacesByImage” (p. 386)에 대한 응답은 일치하는 얼굴의 일치 신뢰도와 함께 일치한 얼굴의이 메타데이터를 반환합니다.
IndexFaces에서 인덱스를 생성하는 얼굴 수는 입력 모음과 연결된 얼굴 감지 모델의 버전에 따라 다릅니다. 자세한 내용은 모델 버전 관리 (p. 9)를 참조하십시오.
인덱싱된 얼굴에 대한 정보는 the section called “FaceRecord” (p. 455) 객체의 배열로 반환됩니다.
감지된 이미지와 인덱싱된 얼굴을 연결해야 합니다. 예를 들어 이미지와 이미지의 얼굴에서 클라이언트 측인덱스를 유지해야 합니다. 얼굴을 이미지와 연결하려면, ExternalImageId 요청 파라미터에서 이미지 ID를 지정합니다. 이미지 ID는 만드는 파일 이름이나 다른 ID일 수 있습니다.
이 API는 얼굴 모음에서 유지하는 위의 정보 외에, 모음에 유지되지 않는 얼굴 세부 정보도 반환합니다. 다음예제 응답에서 faceDetail 요소를 참조하십시오.
Note
DetectFaces는 동일한 정보를 반환하므로 같은 이미지에 대해 DetectFaces와 IndexFaces를모두 호출할 필요는 없습니다.
얼굴 필터링IndexFaces 작업을 통해 이미지에서 인덱싱된 얼굴을 필터링할 수 있습니다. IndexFaces를 통해 최대 얼굴 수를 인덱스로 지정하거나, 고화질로 감지된 얼굴만 인덱싱하도록 선택할 수 있습니다.
MaxFaces 입력 파라미터를 사용하여 IndexFaces로 인덱싱되는 최대 얼굴 수를 지정할 수 있습니다. 이는이미지에서 가장 큰 얼굴을 인덱싱하고자 하며 작은 얼굴(예: 배경에 서 있는 사람들의 얼굴)은 인덱싱하지않고자 할 때 유용합니다.
기본적으로 IndexFaces는 얼굴을 필터링하는 데 사용되는 화질 막대를 선택합니다. QualityFilter 입력 파라미터를 사용하여 화질 막대를 명시적으로 설정할 수 있습니다. 값은 다음과 같습니다.
• AUTO — Amazon Rekognition는 얼굴을 필터링하는 데 사용되는 화질 막대를 선택합니다(기본값).• LOW — 가장 낮은 화질의 얼굴을 제외한 모든 얼굴이 인덱싱됩니다.• MEDIUM
• HIGH — 가장 높은 화질의 얼굴만 인덱싱됩니다.• NONE - 화질에 따라 얼굴이 필터링되지 않습니다.
IndexFaces는 다음과 같은 이유로 얼굴을 필터링합니다.
• 얼굴이 이미지 크기와 비교하여 너무 작습니다.• 얼굴이 너무 흐릿합니다.• 이미지가 너무 어둡습니다.• 얼굴이 극단적인 포즈입니다.• 얼굴에는 얼굴 검색에 적합한 세부 정보가 충분하지 않습니다.
169

Amazon Rekognition 개발자 안내서얼굴 필터링
Note
화질 필터링을 사용하려면 얼굴 모델 버전 3 이상과 연결된 모음이 필요합니다. 모음과 연결된 얼굴모델 버전을 가져오려면 the section called “DescribeCollection” (p. 293)을 호출합니다.
IndexFaces로 인덱싱되지 않은 얼굴에 대한 정보는 the section called “UnindexedFace” (p. 502) 객체의배열로 반환됩니다. Reasons 배열에는 얼굴이 인덱싱되지 않은 이유 목록이 포함되어 있습니다. 예를 들어MaxFaces로 지정된 얼굴 수가 이미 감지되었으므로 EXCEEDS_MAX_FACES 값은 인덱싱되지 않은 얼굴입니다.
자세한 내용은 모음에서 얼굴 관리 (p. 153) 단원을 참조하십시오.
모음에 얼굴을 추가하려면(SDK)
1. 아직 설정하지 않았다면 다음과 같이 하십시오.
a. AmazonRekognitionFullAccess 권한과 AmazonS3ReadOnlyAccess 권한을 가진 IAM 사용자를 만들어 업데이트합니다. 자세한 내용은 1단계: AWS 계정 설정 및 IAM 사용자 만들기 (p. 11)단원을 참조하십시오.
b. AWS CLI와 AWS SDK를 설치하고 구성합니다. 자세한 내용은 2단계: AWS CLI 및 AWS SDK 설정 (p. 12) 단원을 참조하십시오.
2. (하나 이상의 얼굴이 있는) 이미지를 Amazon S3 버킷에 업로드합니다.
지침은 Amazon Simple Storage Service 콘솔 사용 설명서의 Amazon S3로 객체 업로드 단원을 참조하십시오.
3. 다음 예제를 사용하여 IndexFaces 작업을 호출합니다.
Java
이 예제는 모음에 추가된 얼굴의 얼굴 식별자를 표시합니다.
collectionId의 값을, 얼굴을 추가하려는 모음의 이름으로 변경합니다. bucket 및 photo의 값을 2단계에서 사용한 Amazon S3 버킷과 이미지의 이름으로 바꿉니다. .withMaxFaces(1) 파라미터는 인덱싱되는 얼굴 수를 1로 제한합니다. 요구에 맞게 값을 제거하거나 변경합니다.
//Copyright 2018 Amazon.com, Inc. or its affiliates. All Rights Reserved.//PDX-License-Identifier: MIT-0 (For details, see https://github.com/awsdocs/amazon-rekognition-developer-guide/blob/master/LICENSE-SAMPLECODE.)
package aws.example.rekognition.image;
import com.amazonaws.services.rekognition.AmazonRekognition;import com.amazonaws.services.rekognition.AmazonRekognitionClientBuilder;import com.amazonaws.services.rekognition.model.FaceRecord;import com.amazonaws.services.rekognition.model.Image;import com.amazonaws.services.rekognition.model.IndexFacesRequest;import com.amazonaws.services.rekognition.model.IndexFacesResult;import com.amazonaws.services.rekognition.model.QualityFilter;import com.amazonaws.services.rekognition.model.S3Object;import com.amazonaws.services.rekognition.model.UnindexedFace;import java.util.List;
public class AddFacesToCollection { public static final String collectionId = "MyCollection"; public static final String bucket = "bucket"; public static final String photo = "input.jpg";
public static void main(String[] args) throws Exception {
AmazonRekognition rekognitionClient = AmazonRekognitionClientBuilder.defaultClient();
170
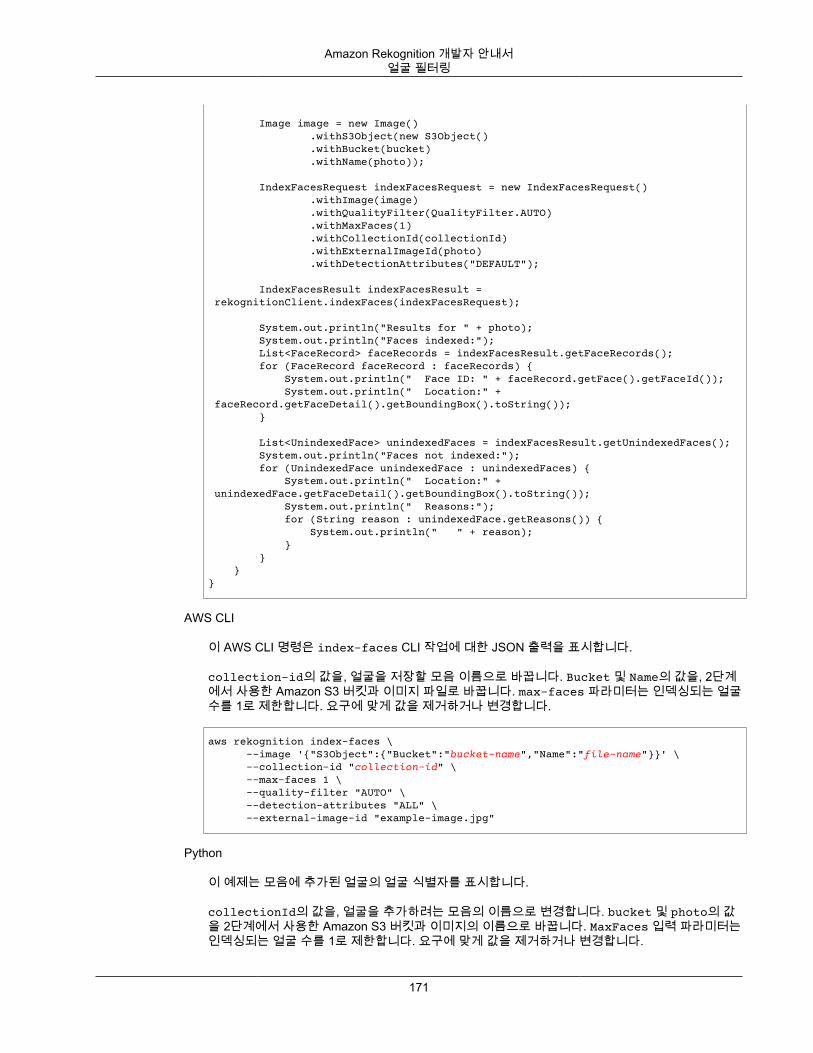
Amazon Rekognition 개발자 안내서얼굴 필터링
Image image = new Image() .withS3Object(new S3Object() .withBucket(bucket) .withName(photo)); IndexFacesRequest indexFacesRequest = new IndexFacesRequest() .withImage(image) .withQualityFilter(QualityFilter.AUTO) .withMaxFaces(1) .withCollectionId(collectionId) .withExternalImageId(photo) .withDetectionAttributes("DEFAULT");
IndexFacesResult indexFacesResult = rekognitionClient.indexFaces(indexFacesRequest); System.out.println("Results for " + photo); System.out.println("Faces indexed:"); List<FaceRecord> faceRecords = indexFacesResult.getFaceRecords(); for (FaceRecord faceRecord : faceRecords) { System.out.println(" Face ID: " + faceRecord.getFace().getFaceId()); System.out.println(" Location:" + faceRecord.getFaceDetail().getBoundingBox().toString()); } List<UnindexedFace> unindexedFaces = indexFacesResult.getUnindexedFaces(); System.out.println("Faces not indexed:"); for (UnindexedFace unindexedFace : unindexedFaces) { System.out.println(" Location:" + unindexedFace.getFaceDetail().getBoundingBox().toString()); System.out.println(" Reasons:"); for (String reason : unindexedFace.getReasons()) { System.out.println(" " + reason); } } }}
AWS CLI
이 AWS CLI 명령은 index-faces CLI 작업에 대한 JSON 출력을 표시합니다.
collection-id의 값을, 얼굴을 저장할 모음 이름으로 바꿉니다. Bucket 및 Name의 값을, 2단계에서 사용한 Amazon S3 버킷과 이미지 파일로 바꿉니다. max-faces 파라미터는 인덱싱되는 얼굴수를 1로 제한합니다. 요구에 맞게 값을 제거하거나 변경합니다.
aws rekognition index-faces \ --image '{"S3Object":{"Bucket":"bucket-name","Name":"file-name"}}' \ --collection-id "collection-id" \ --max-faces 1 \ --quality-filter "AUTO" \ --detection-attributes "ALL" \ --external-image-id "example-image.jpg"
Python
이 예제는 모음에 추가된 얼굴의 얼굴 식별자를 표시합니다.
collectionId의 값을, 얼굴을 추가하려는 모음의 이름으로 변경합니다. bucket 및 photo의 값을 2단계에서 사용한 Amazon S3 버킷과 이미지의 이름으로 바꿉니다. MaxFaces 입력 파라미터는인덱싱되는 얼굴 수를 1로 제한합니다. 요구에 맞게 값을 제거하거나 변경합니다.
171
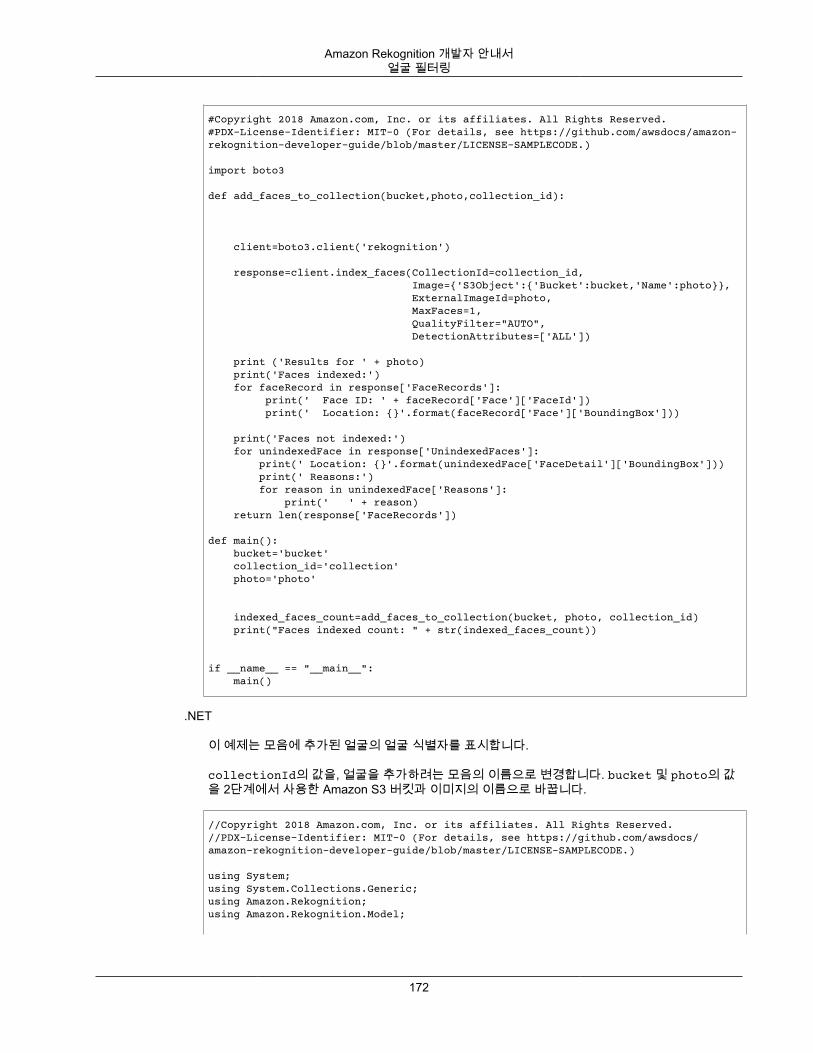
Amazon Rekognition 개발자 안내서얼굴 필터링
#Copyright 2018 Amazon.com, Inc. or its affiliates. All Rights Reserved.#PDX-License-Identifier: MIT-0 (For details, see https://github.com/awsdocs/amazon-rekognition-developer-guide/blob/master/LICENSE-SAMPLECODE.)
import boto3
def add_faces_to_collection(bucket,photo,collection_id):
client=boto3.client('rekognition')
response=client.index_faces(CollectionId=collection_id, Image={'S3Object':{'Bucket':bucket,'Name':photo}}, ExternalImageId=photo, MaxFaces=1, QualityFilter="AUTO", DetectionAttributes=['ALL'])
print ('Results for ' + photo) print('Faces indexed:') for faceRecord in response['FaceRecords']: print(' Face ID: ' + faceRecord['Face']['FaceId']) print(' Location: {}'.format(faceRecord['Face']['BoundingBox']))
print('Faces not indexed:') for unindexedFace in response['UnindexedFaces']: print(' Location: {}'.format(unindexedFace['FaceDetail']['BoundingBox'])) print(' Reasons:') for reason in unindexedFace['Reasons']: print(' ' + reason) return len(response['FaceRecords'])
def main(): bucket='bucket' collection_id='collection' photo='photo' indexed_faces_count=add_faces_to_collection(bucket, photo, collection_id) print("Faces indexed count: " + str(indexed_faces_count))
if __name__ == "__main__": main()
.NET
이 예제는 모음에 추가된 얼굴의 얼굴 식별자를 표시합니다.
collectionId의 값을, 얼굴을 추가하려는 모음의 이름으로 변경합니다. bucket 및 photo의 값을 2단계에서 사용한 Amazon S3 버킷과 이미지의 이름으로 바꿉니다.
//Copyright 2018 Amazon.com, Inc. or its affiliates. All Rights Reserved.//PDX-License-Identifier: MIT-0 (For details, see https://github.com/awsdocs/amazon-rekognition-developer-guide/blob/master/LICENSE-SAMPLECODE.)
using System;using System.Collections.Generic;using Amazon.Rekognition;using Amazon.Rekognition.Model;
172
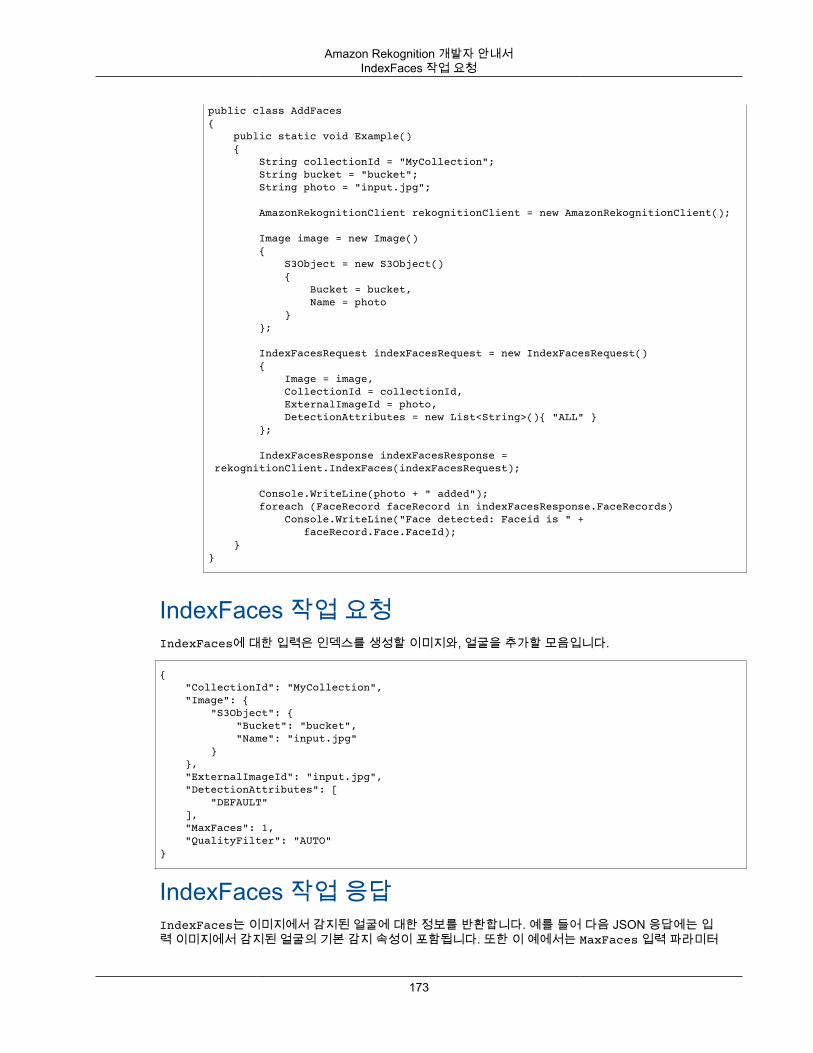
Amazon Rekognition 개발자 안내서IndexFaces 작업 요청
public class AddFaces{ public static void Example() { String collectionId = "MyCollection"; String bucket = "bucket"; String photo = "input.jpg";
AmazonRekognitionClient rekognitionClient = new AmazonRekognitionClient();
Image image = new Image() { S3Object = new S3Object() { Bucket = bucket, Name = photo } };
IndexFacesRequest indexFacesRequest = new IndexFacesRequest() { Image = image, CollectionId = collectionId, ExternalImageId = photo, DetectionAttributes = new List<String>(){ "ALL" } };
IndexFacesResponse indexFacesResponse = rekognitionClient.IndexFaces(indexFacesRequest);
Console.WriteLine(photo + " added"); foreach (FaceRecord faceRecord in indexFacesResponse.FaceRecords) Console.WriteLine("Face detected: Faceid is " + faceRecord.Face.FaceId); }}
IndexFaces 작업 요청IndexFaces에 대한 입력은 인덱스를 생성할 이미지와, 얼굴을 추가할 모음입니다.
{ "CollectionId": "MyCollection", "Image": { "S3Object": { "Bucket": "bucket", "Name": "input.jpg" } }, "ExternalImageId": "input.jpg", "DetectionAttributes": [ "DEFAULT" ], "MaxFaces": 1, "QualityFilter": "AUTO"}
IndexFaces 작업 응답IndexFaces는 이미지에서 감지된 얼굴에 대한 정보를 반환합니다. 예를 들어 다음 JSON 응답에는 입력 이미지에서 감지된 얼굴의 기본 감지 속성이 포함됩니다. 또한 이 예에서는 MaxFaces 입력 파라미터
173
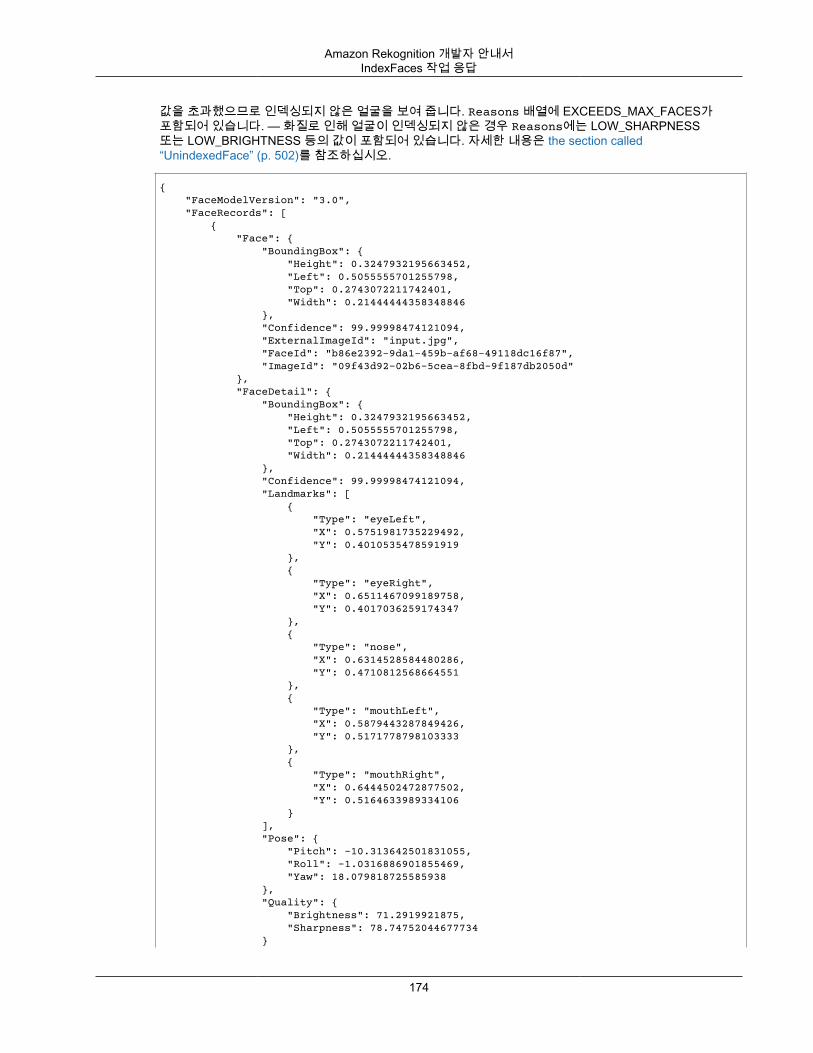
Amazon Rekognition 개발자 안내서IndexFaces 작업 응답
값을 초과했으므로 인덱싱되지 않은 얼굴을 보여 줍니다. Reasons 배열에 EXCEEDS_MAX_FACES가포함되어 있습니다. — 화질로 인해 얼굴이 인덱싱되지 않은 경우 Reasons에는 LOW_SHARPNESS또는 LOW_BRIGHTNESS 등의 값이 포함되어 있습니다. 자세한 내용은 the section called“UnindexedFace” (p. 502)를 참조하십시오.
{ "FaceModelVersion": "3.0", "FaceRecords": [ { "Face": { "BoundingBox": { "Height": 0.3247932195663452, "Left": 0.5055555701255798, "Top": 0.2743072211742401, "Width": 0.21444444358348846 }, "Confidence": 99.99998474121094, "ExternalImageId": "input.jpg", "FaceId": "b86e2392-9da1-459b-af68-49118dc16f87", "ImageId": "09f43d92-02b6-5cea-8fbd-9f187db2050d" }, "FaceDetail": { "BoundingBox": { "Height": 0.3247932195663452, "Left": 0.5055555701255798, "Top": 0.2743072211742401, "Width": 0.21444444358348846 }, "Confidence": 99.99998474121094, "Landmarks": [ { "Type": "eyeLeft", "X": 0.5751981735229492, "Y": 0.4010535478591919 }, { "Type": "eyeRight", "X": 0.6511467099189758, "Y": 0.4017036259174347 }, { "Type": "nose", "X": 0.6314528584480286, "Y": 0.4710812568664551 }, { "Type": "mouthLeft", "X": 0.5879443287849426, "Y": 0.5171778798103333 }, { "Type": "mouthRight", "X": 0.6444502472877502, "Y": 0.5164633989334106 } ], "Pose": { "Pitch": -10.313642501831055, "Roll": -1.0316886901855469, "Yaw": 18.079818725585938 }, "Quality": { "Brightness": 71.2919921875, "Sharpness": 78.74752044677734 }
174
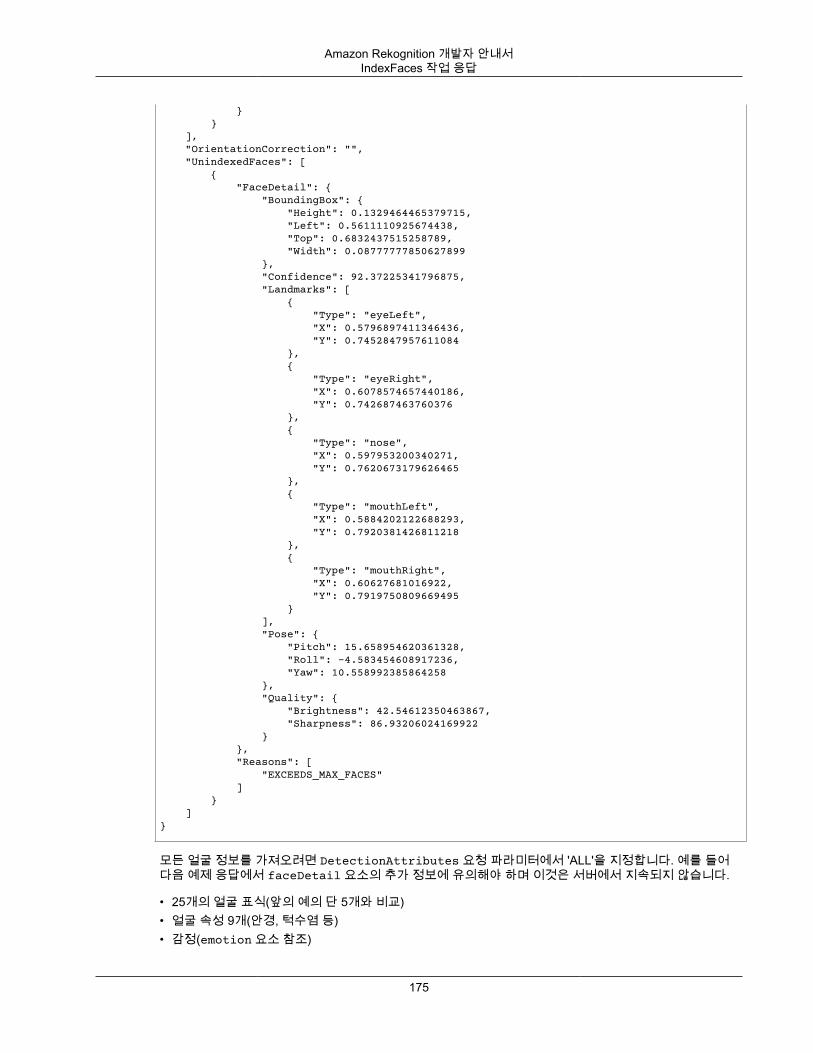
Amazon Rekognition 개발자 안내서IndexFaces 작업 응답
} } ], "OrientationCorrection": "", "UnindexedFaces": [ { "FaceDetail": { "BoundingBox": { "Height": 0.1329464465379715, "Left": 0.5611110925674438, "Top": 0.6832437515258789, "Width": 0.08777777850627899 }, "Confidence": 92.37225341796875, "Landmarks": [ { "Type": "eyeLeft", "X": 0.5796897411346436, "Y": 0.7452847957611084 }, { "Type": "eyeRight", "X": 0.6078574657440186, "Y": 0.742687463760376 }, { "Type": "nose", "X": 0.597953200340271, "Y": 0.7620673179626465 }, { "Type": "mouthLeft", "X": 0.5884202122688293, "Y": 0.7920381426811218 }, { "Type": "mouthRight", "X": 0.60627681016922, "Y": 0.7919750809669495 } ], "Pose": { "Pitch": 15.658954620361328, "Roll": -4.583454608917236, "Yaw": 10.558992385864258 }, "Quality": { "Brightness": 42.54612350463867, "Sharpness": 86.93206024169922 } }, "Reasons": [ "EXCEEDS_MAX_FACES" ] } ]}
모든 얼굴 정보를 가져오려면 DetectionAttributes 요청 파라미터에서 'ALL'을 지정합니다. 예를 들어다음 예제 응답에서 faceDetail 요소의 추가 정보에 유의해야 하며 이것은 서버에서 지속되지 않습니다.
• 25개의 얼굴 표식(앞의 예의 단 5개와 비교)• 얼굴 속성 9개(안경, 턱수염 등)• 감정(emotion 요소 참조)
175
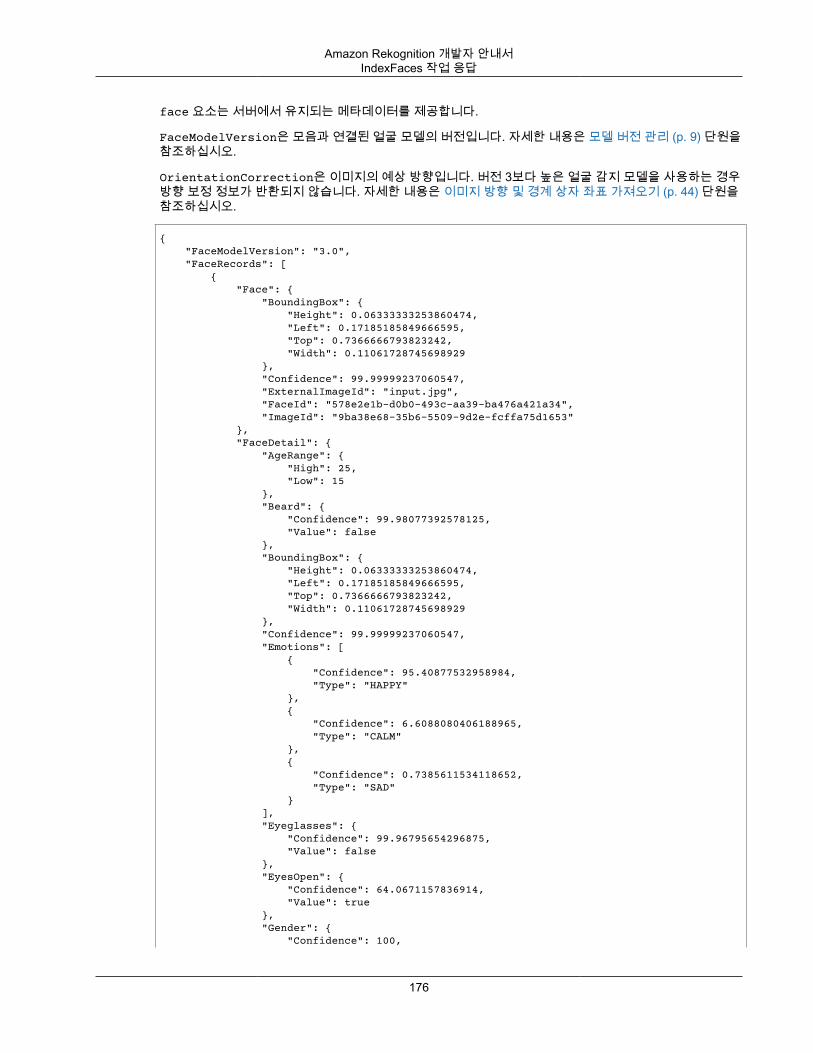
Amazon Rekognition 개발자 안내서IndexFaces 작업 응답
face 요소는 서버에서 유지되는 메타데이터를 제공합니다.
FaceModelVersion은 모음과 연결된 얼굴 모델의 버전입니다. 자세한 내용은 모델 버전 관리 (p. 9) 단원을참조하십시오.
OrientationCorrection은 이미지의 예상 방향입니다. 버전 3보다 높은 얼굴 감지 모델을 사용하는 경우방향 보정 정보가 반환되지 않습니다. 자세한 내용은 이미지 방향 및 경계 상자 좌표 가져오기 (p. 44) 단원을참조하십시오.
{ "FaceModelVersion": "3.0", "FaceRecords": [ { "Face": { "BoundingBox": { "Height": 0.06333333253860474, "Left": 0.17185185849666595, "Top": 0.7366666793823242, "Width": 0.11061728745698929 }, "Confidence": 99.99999237060547, "ExternalImageId": "input.jpg", "FaceId": "578e2e1b-d0b0-493c-aa39-ba476a421a34", "ImageId": "9ba38e68-35b6-5509-9d2e-fcffa75d1653" }, "FaceDetail": { "AgeRange": { "High": 25, "Low": 15 }, "Beard": { "Confidence": 99.98077392578125, "Value": false }, "BoundingBox": { "Height": 0.06333333253860474, "Left": 0.17185185849666595, "Top": 0.7366666793823242, "Width": 0.11061728745698929 }, "Confidence": 99.99999237060547, "Emotions": [ { "Confidence": 95.40877532958984, "Type": "HAPPY" }, { "Confidence": 6.6088080406188965, "Type": "CALM" }, { "Confidence": 0.7385611534118652, "Type": "SAD" } ], "Eyeglasses": { "Confidence": 99.96795654296875, "Value": false }, "EyesOpen": { "Confidence": 64.0671157836914, "Value": true }, "Gender": { "Confidence": 100,
176
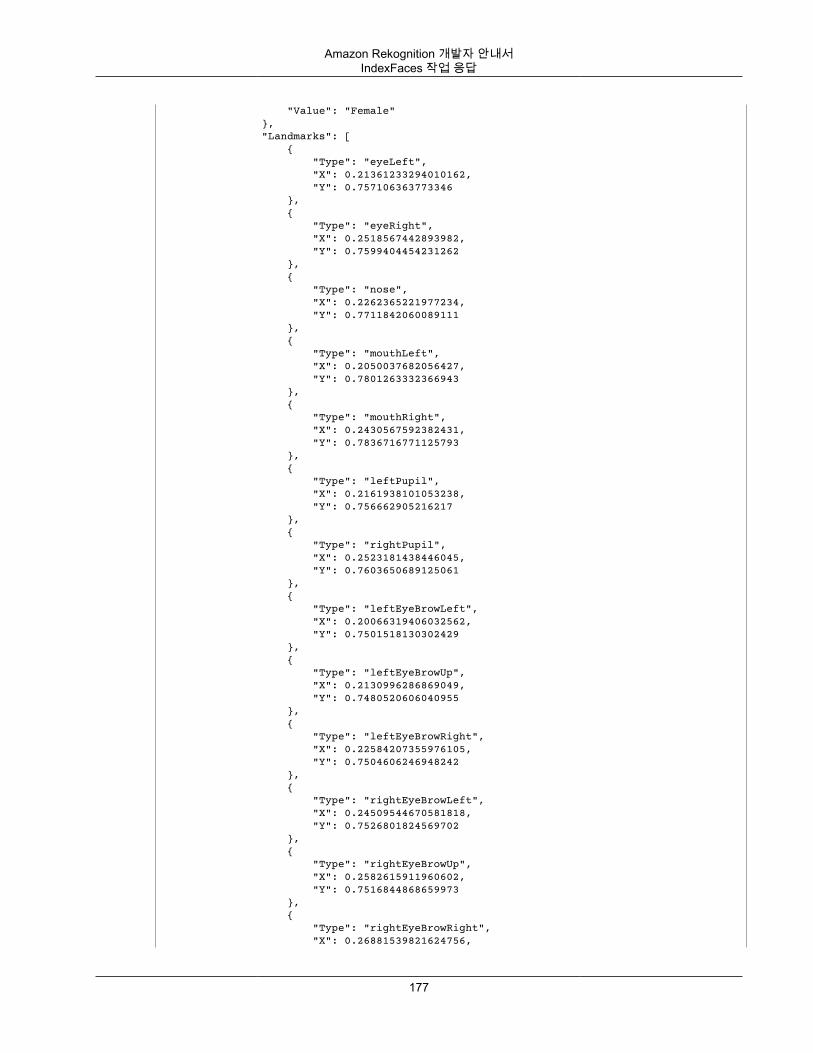
Amazon Rekognition 개발자 안내서IndexFaces 작업 응답
"Value": "Female" }, "Landmarks": [ { "Type": "eyeLeft", "X": 0.21361233294010162, "Y": 0.757106363773346 }, { "Type": "eyeRight", "X": 0.2518567442893982, "Y": 0.7599404454231262 }, { "Type": "nose", "X": 0.2262365221977234, "Y": 0.7711842060089111 }, { "Type": "mouthLeft", "X": 0.2050037682056427, "Y": 0.7801263332366943 }, { "Type": "mouthRight", "X": 0.2430567592382431, "Y": 0.7836716771125793 }, { "Type": "leftPupil", "X": 0.2161938101053238, "Y": 0.756662905216217 }, { "Type": "rightPupil", "X": 0.2523181438446045, "Y": 0.7603650689125061 }, { "Type": "leftEyeBrowLeft", "X": 0.20066319406032562, "Y": 0.7501518130302429 }, { "Type": "leftEyeBrowUp", "X": 0.2130996286869049, "Y": 0.7480520606040955 }, { "Type": "leftEyeBrowRight", "X": 0.22584207355976105, "Y": 0.7504606246948242 }, { "Type": "rightEyeBrowLeft", "X": 0.24509544670581818, "Y": 0.7526801824569702 }, { "Type": "rightEyeBrowUp", "X": 0.2582615911960602, "Y": 0.7516844868659973 }, { "Type": "rightEyeBrowRight", "X": 0.26881539821624756,
177
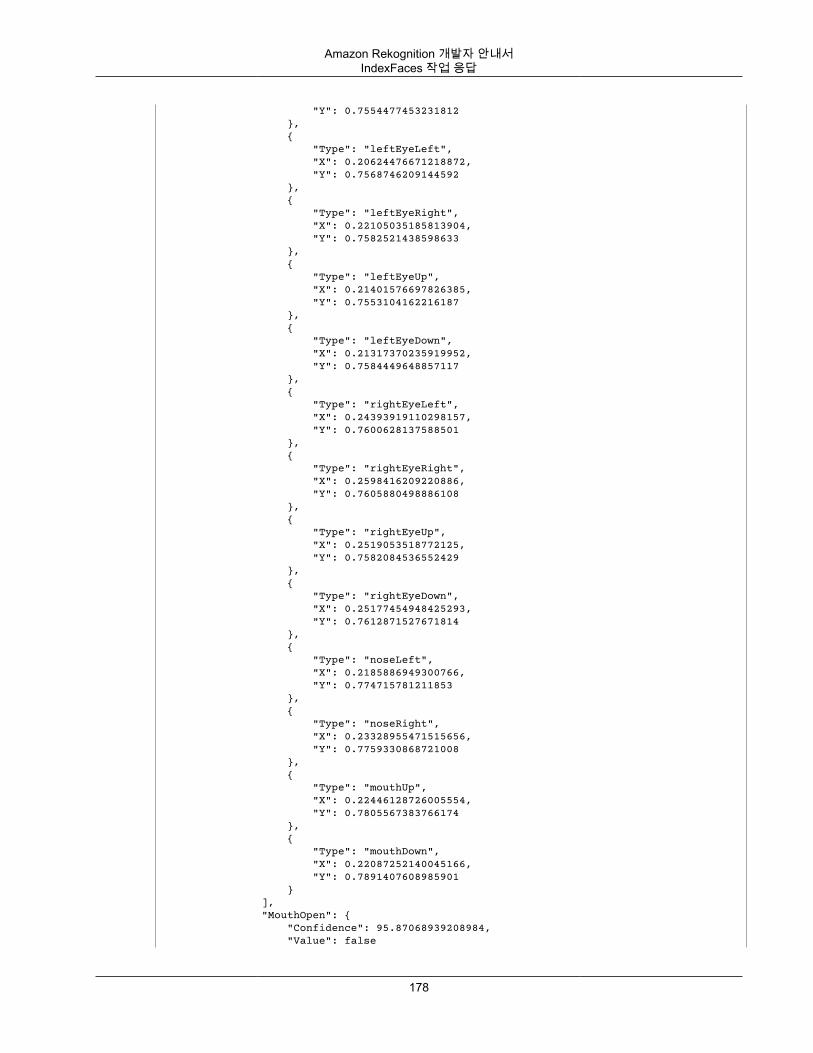
Amazon Rekognition 개발자 안내서IndexFaces 작업 응답
"Y": 0.7554477453231812 }, { "Type": "leftEyeLeft", "X": 0.20624476671218872, "Y": 0.7568746209144592 }, { "Type": "leftEyeRight", "X": 0.22105035185813904, "Y": 0.7582521438598633 }, { "Type": "leftEyeUp", "X": 0.21401576697826385, "Y": 0.7553104162216187 }, { "Type": "leftEyeDown", "X": 0.21317370235919952, "Y": 0.7584449648857117 }, { "Type": "rightEyeLeft", "X": 0.24393919110298157, "Y": 0.7600628137588501 }, { "Type": "rightEyeRight", "X": 0.2598416209220886, "Y": 0.7605880498886108 }, { "Type": "rightEyeUp", "X": 0.2519053518772125, "Y": 0.7582084536552429 }, { "Type": "rightEyeDown", "X": 0.25177454948425293, "Y": 0.7612871527671814 }, { "Type": "noseLeft", "X": 0.2185886949300766, "Y": 0.774715781211853 }, { "Type": "noseRight", "X": 0.23328955471515656, "Y": 0.7759330868721008 }, { "Type": "mouthUp", "X": 0.22446128726005554, "Y": 0.7805567383766174 }, { "Type": "mouthDown", "X": 0.22087252140045166, "Y": 0.7891407608985901 } ], "MouthOpen": { "Confidence": 95.87068939208984, "Value": false
178
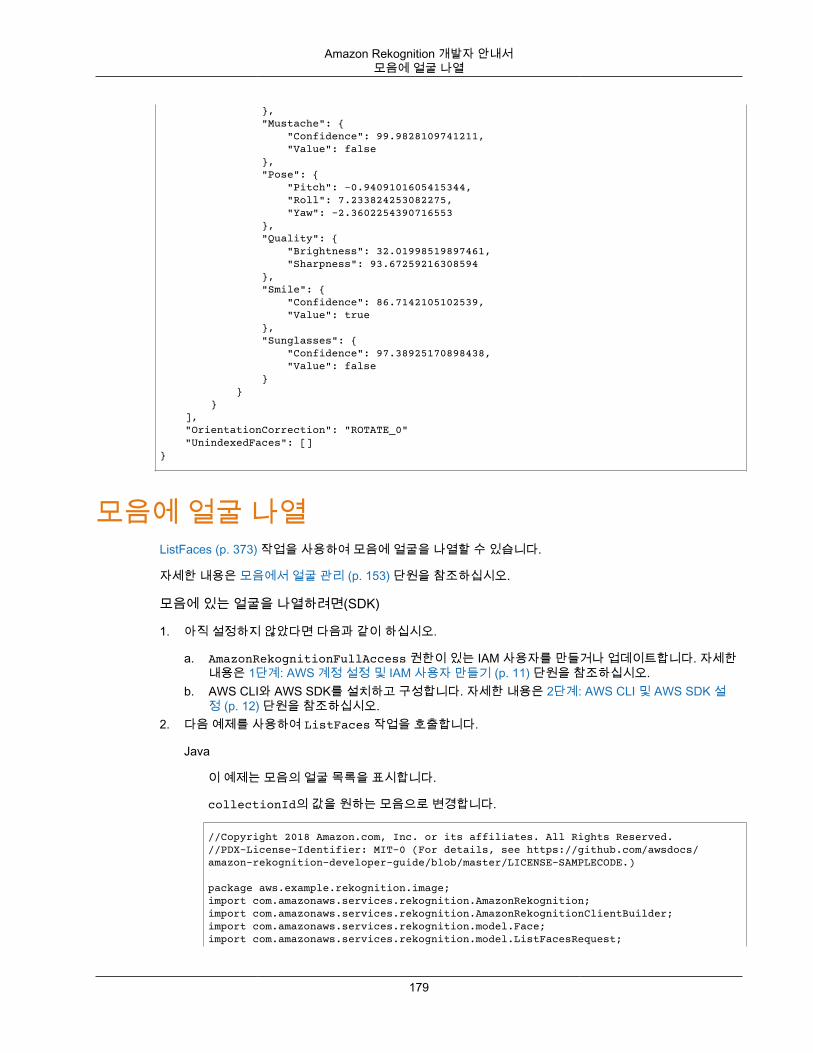
Amazon Rekognition 개발자 안내서모음에 얼굴 나열
}, "Mustache": { "Confidence": 99.9828109741211, "Value": false }, "Pose": { "Pitch": -0.9409101605415344, "Roll": 7.233824253082275, "Yaw": -2.3602254390716553 }, "Quality": { "Brightness": 32.01998519897461, "Sharpness": 93.67259216308594 }, "Smile": { "Confidence": 86.7142105102539, "Value": true }, "Sunglasses": { "Confidence": 97.38925170898438, "Value": false } } } ], "OrientationCorrection": "ROTATE_0" "UnindexedFaces": []}
모음에 얼굴 나열ListFaces (p. 373) 작업을 사용하여 모음에 얼굴을 나열할 수 있습니다.
자세한 내용은 모음에서 얼굴 관리 (p. 153) 단원을 참조하십시오.
모음에 있는 얼굴을 나열하려면(SDK)
1. 아직 설정하지 않았다면 다음과 같이 하십시오.
a. AmazonRekognitionFullAccess 권한이 있는 IAM 사용자를 만들거나 업데이트합니다. 자세한내용은 1단계: AWS 계정 설정 및 IAM 사용자 만들기 (p. 11) 단원을 참조하십시오.
b. AWS CLI와 AWS SDK를 설치하고 구성합니다. 자세한 내용은 2단계: AWS CLI 및 AWS SDK 설정 (p. 12) 단원을 참조하십시오.
2. 다음 예제를 사용하여 ListFaces 작업을 호출합니다.
Java
이 예제는 모음의 얼굴 목록을 표시합니다.
collectionId의 값을 원하는 모음으로 변경합니다.
//Copyright 2018 Amazon.com, Inc. or its affiliates. All Rights Reserved.//PDX-License-Identifier: MIT-0 (For details, see https://github.com/awsdocs/amazon-rekognition-developer-guide/blob/master/LICENSE-SAMPLECODE.)
package aws.example.rekognition.image;import com.amazonaws.services.rekognition.AmazonRekognition;import com.amazonaws.services.rekognition.AmazonRekognitionClientBuilder;import com.amazonaws.services.rekognition.model.Face;import com.amazonaws.services.rekognition.model.ListFacesRequest;
179
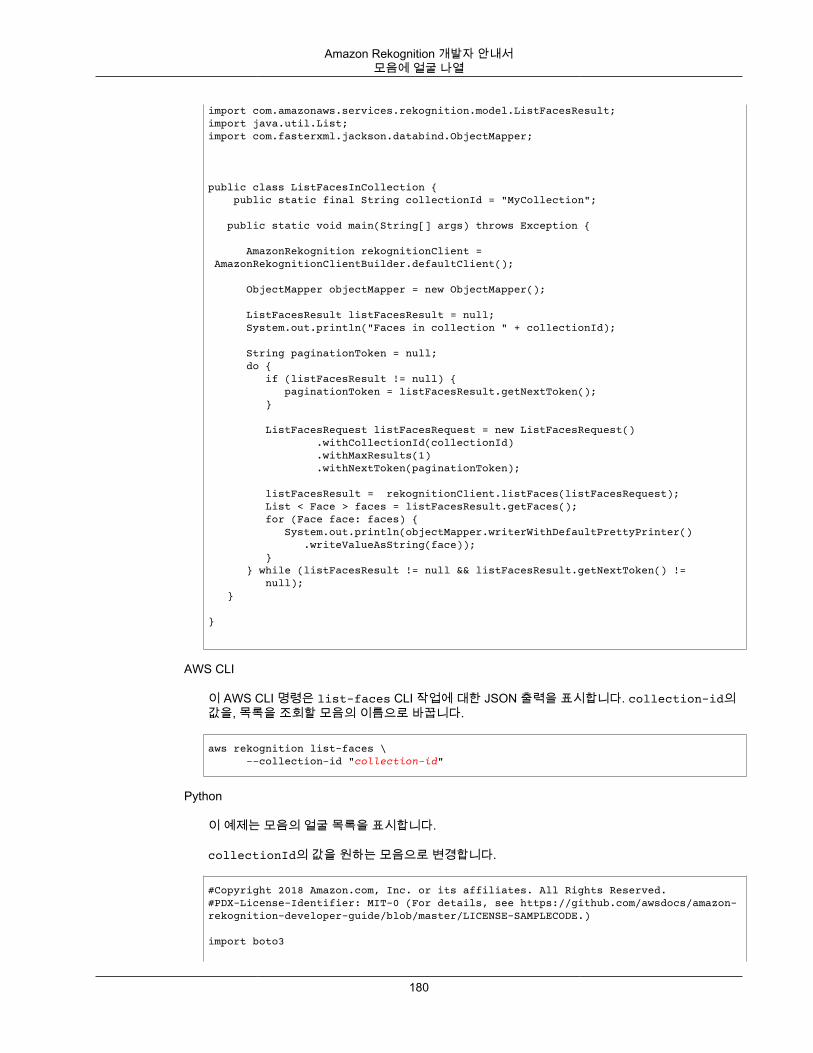
Amazon Rekognition 개발자 안내서모음에 얼굴 나열
import com.amazonaws.services.rekognition.model.ListFacesResult;import java.util.List;import com.fasterxml.jackson.databind.ObjectMapper;
public class ListFacesInCollection { public static final String collectionId = "MyCollection";
public static void main(String[] args) throws Exception { AmazonRekognition rekognitionClient = AmazonRekognitionClientBuilder.defaultClient();
ObjectMapper objectMapper = new ObjectMapper();
ListFacesResult listFacesResult = null; System.out.println("Faces in collection " + collectionId);
String paginationToken = null; do { if (listFacesResult != null) { paginationToken = listFacesResult.getNextToken(); } ListFacesRequest listFacesRequest = new ListFacesRequest() .withCollectionId(collectionId) .withMaxResults(1) .withNextToken(paginationToken); listFacesResult = rekognitionClient.listFaces(listFacesRequest); List < Face > faces = listFacesResult.getFaces(); for (Face face: faces) { System.out.println(objectMapper.writerWithDefaultPrettyPrinter() .writeValueAsString(face)); } } while (listFacesResult != null && listFacesResult.getNextToken() != null); }
}
AWS CLI
이 AWS CLI 명령은 list-faces CLI 작업에 대한 JSON 출력을 표시합니다. collection-id의값을, 목록을 조회할 모음의 이름으로 바꿉니다.
aws rekognition list-faces \ --collection-id "collection-id"
Python
이 예제는 모음의 얼굴 목록을 표시합니다.
collectionId의 값을 원하는 모음으로 변경합니다.
#Copyright 2018 Amazon.com, Inc. or its affiliates. All Rights Reserved.#PDX-License-Identifier: MIT-0 (For details, see https://github.com/awsdocs/amazon-rekognition-developer-guide/blob/master/LICENSE-SAMPLECODE.)
import boto3
180
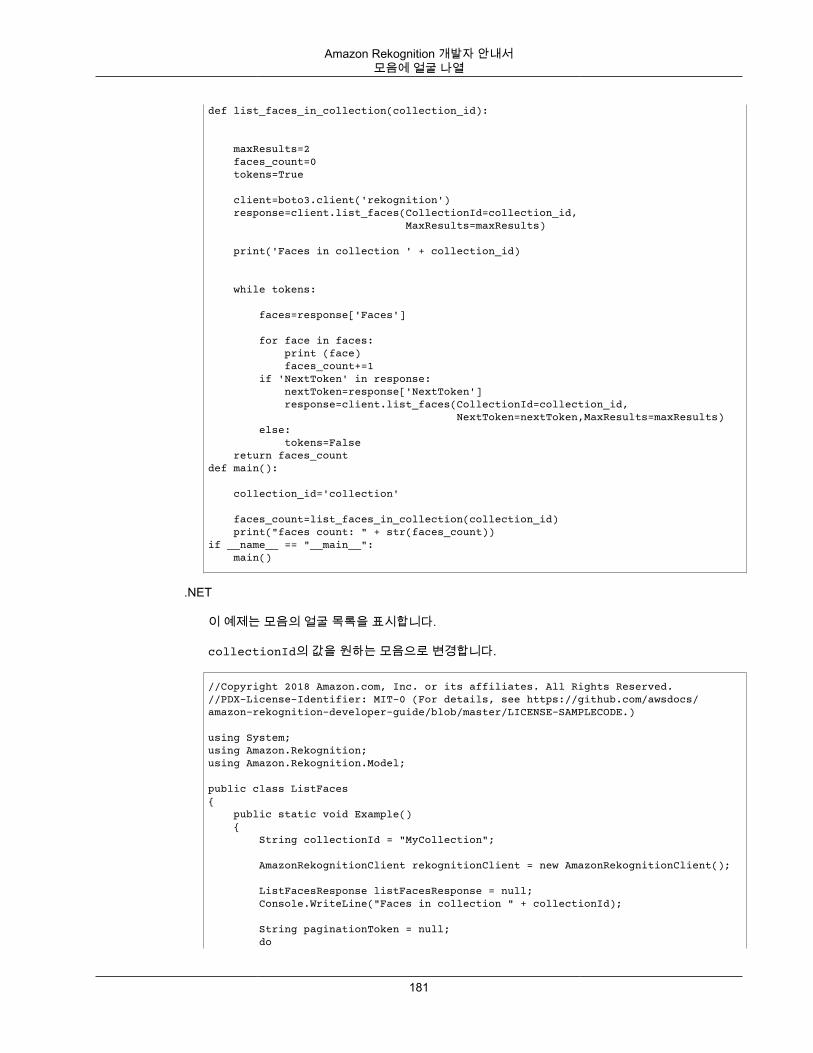
Amazon Rekognition 개발자 안내서모음에 얼굴 나열
def list_faces_in_collection(collection_id):
maxResults=2 faces_count=0 tokens=True
client=boto3.client('rekognition') response=client.list_faces(CollectionId=collection_id, MaxResults=maxResults)
print('Faces in collection ' + collection_id)
while tokens:
faces=response['Faces']
for face in faces: print (face) faces_count+=1 if 'NextToken' in response: nextToken=response['NextToken'] response=client.list_faces(CollectionId=collection_id, NextToken=nextToken,MaxResults=maxResults) else: tokens=False return faces_count def main():
collection_id='collection'
faces_count=list_faces_in_collection(collection_id) print("faces count: " + str(faces_count))if __name__ == "__main__": main()
.NET
이 예제는 모음의 얼굴 목록을 표시합니다.
collectionId의 값을 원하는 모음으로 변경합니다.
//Copyright 2018 Amazon.com, Inc. or its affiliates. All Rights Reserved.//PDX-License-Identifier: MIT-0 (For details, see https://github.com/awsdocs/amazon-rekognition-developer-guide/blob/master/LICENSE-SAMPLECODE.)
using System;using Amazon.Rekognition;using Amazon.Rekognition.Model;
public class ListFaces{ public static void Example() { String collectionId = "MyCollection";
AmazonRekognitionClient rekognitionClient = new AmazonRekognitionClient();
ListFacesResponse listFacesResponse = null; Console.WriteLine("Faces in collection " + collectionId);
String paginationToken = null; do
181
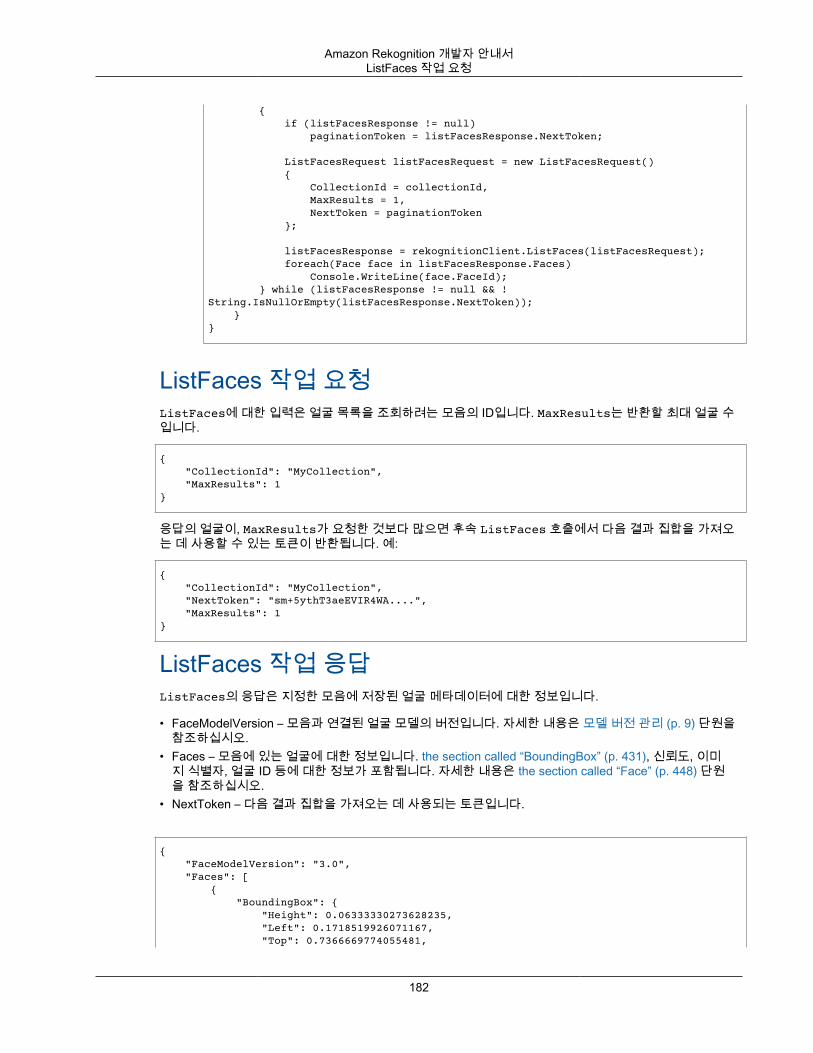
Amazon Rekognition 개발자 안내서ListFaces 작업 요청
{ if (listFacesResponse != null) paginationToken = listFacesResponse.NextToken;
ListFacesRequest listFacesRequest = new ListFacesRequest() { CollectionId = collectionId, MaxResults = 1, NextToken = paginationToken };
listFacesResponse = rekognitionClient.ListFaces(listFacesRequest); foreach(Face face in listFacesResponse.Faces) Console.WriteLine(face.FaceId); } while (listFacesResponse != null && !String.IsNullOrEmpty(listFacesResponse.NextToken)); }}
ListFaces 작업 요청ListFaces에 대한 입력은 얼굴 목록을 조회하려는 모음의 ID입니다. MaxResults는 반환할 최대 얼굴 수입니다.
{ "CollectionId": "MyCollection", "MaxResults": 1}
응답의 얼굴이, MaxResults가 요청한 것보다 많으면 후속 ListFaces 호출에서 다음 결과 집합을 가져오는 데 사용할 수 있는 토큰이 반환됩니다. 예:
{ "CollectionId": "MyCollection", "NextToken": "sm+5ythT3aeEVIR4WA....", "MaxResults": 1}
ListFaces 작업 응답ListFaces의 응답은 지정한 모음에 저장된 얼굴 메타데이터에 대한 정보입니다.
• FaceModelVersion – 모음과 연결된 얼굴 모델의 버전입니다. 자세한 내용은 모델 버전 관리 (p. 9) 단원을참조하십시오.
• Faces – 모음에 있는 얼굴에 대한 정보입니다. the section called “BoundingBox” (p. 431), 신뢰도, 이미지 식별자, 얼굴 ID 등에 대한 정보가 포함됩니다. 자세한 내용은 the section called “Face” (p. 448) 단원을 참조하십시오.
• NextToken – 다음 결과 집합을 가져오는 데 사용되는 토큰입니다.
{ "FaceModelVersion": "3.0", "Faces": [ { "BoundingBox": { "Height": 0.06333330273628235, "Left": 0.1718519926071167, "Top": 0.7366669774055481,
182
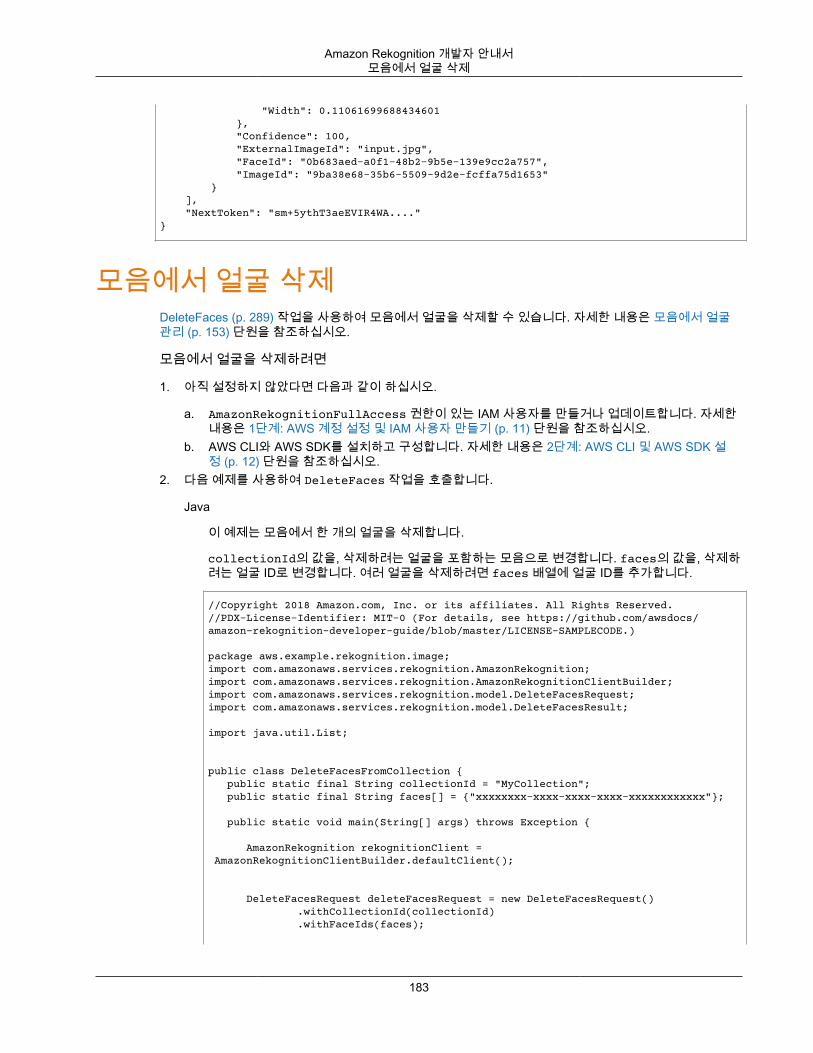
Amazon Rekognition 개발자 안내서모음에서 얼굴 삭제
"Width": 0.11061699688434601 }, "Confidence": 100, "ExternalImageId": "input.jpg", "FaceId": "0b683aed-a0f1-48b2-9b5e-139e9cc2a757", "ImageId": "9ba38e68-35b6-5509-9d2e-fcffa75d1653" } ], "NextToken": "sm+5ythT3aeEVIR4WA...."}
모음에서 얼굴 삭제DeleteFaces (p. 289) 작업을 사용하여 모음에서 얼굴을 삭제할 수 있습니다. 자세한 내용은 모음에서 얼굴관리 (p. 153) 단원을 참조하십시오.
모음에서 얼굴을 삭제하려면
1. 아직 설정하지 않았다면 다음과 같이 하십시오.
a. AmazonRekognitionFullAccess 권한이 있는 IAM 사용자를 만들거나 업데이트합니다. 자세한내용은 1단계: AWS 계정 설정 및 IAM 사용자 만들기 (p. 11) 단원을 참조하십시오.
b. AWS CLI와 AWS SDK를 설치하고 구성합니다. 자세한 내용은 2단계: AWS CLI 및 AWS SDK 설정 (p. 12) 단원을 참조하십시오.
2. 다음 예제를 사용하여 DeleteFaces 작업을 호출합니다.
Java
이 예제는 모음에서 한 개의 얼굴을 삭제합니다.
collectionId의 값을, 삭제하려는 얼굴을 포함하는 모음으로 변경합니다. faces의 값을, 삭제하려는 얼굴 ID로 변경합니다. 여러 얼굴을 삭제하려면 faces 배열에 얼굴 ID를 추가합니다.
//Copyright 2018 Amazon.com, Inc. or its affiliates. All Rights Reserved.//PDX-License-Identifier: MIT-0 (For details, see https://github.com/awsdocs/amazon-rekognition-developer-guide/blob/master/LICENSE-SAMPLECODE.)
package aws.example.rekognition.image;import com.amazonaws.services.rekognition.AmazonRekognition;import com.amazonaws.services.rekognition.AmazonRekognitionClientBuilder;import com.amazonaws.services.rekognition.model.DeleteFacesRequest;import com.amazonaws.services.rekognition.model.DeleteFacesResult;
import java.util.List;
public class DeleteFacesFromCollection { public static final String collectionId = "MyCollection"; public static final String faces[] = {"xxxxxxxx-xxxx-xxxx-xxxx-xxxxxxxxxxxx"};
public static void main(String[] args) throws Exception { AmazonRekognition rekognitionClient = AmazonRekognitionClientBuilder.defaultClient(); DeleteFacesRequest deleteFacesRequest = new DeleteFacesRequest() .withCollectionId(collectionId) .withFaceIds(faces);
183
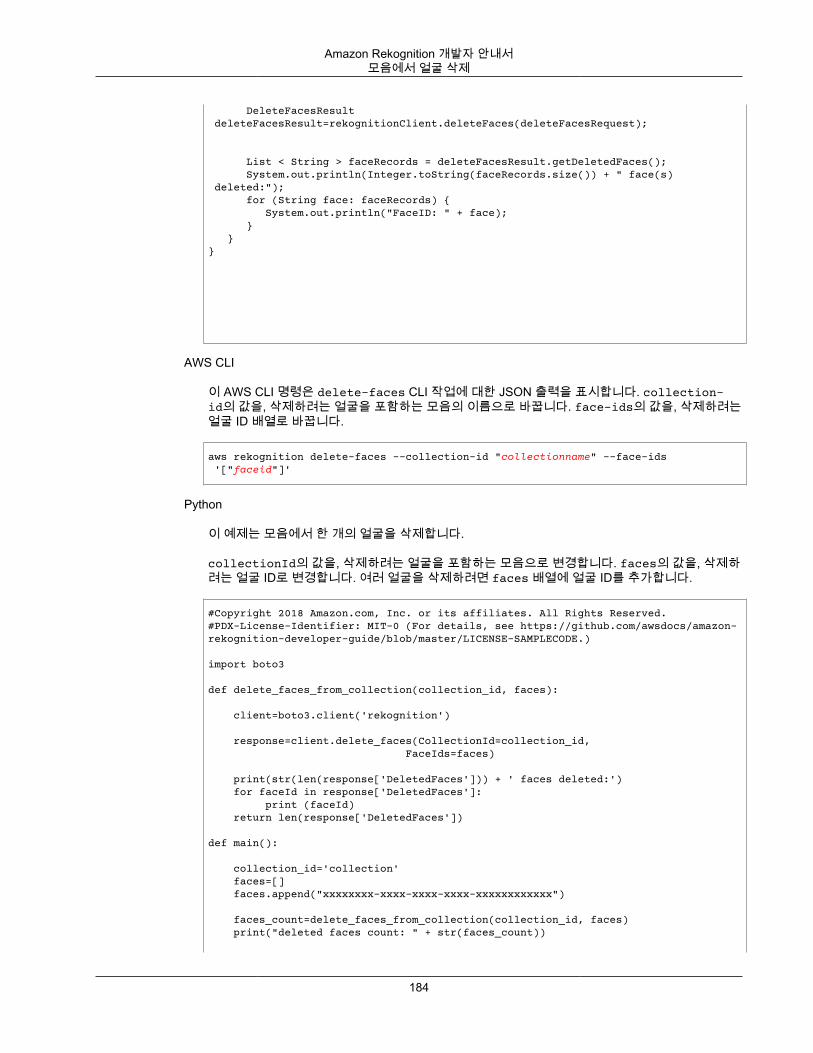
Amazon Rekognition 개발자 안내서모음에서 얼굴 삭제
DeleteFacesResult deleteFacesResult=rekognitionClient.deleteFaces(deleteFacesRequest); List < String > faceRecords = deleteFacesResult.getDeletedFaces(); System.out.println(Integer.toString(faceRecords.size()) + " face(s) deleted:"); for (String face: faceRecords) { System.out.println("FaceID: " + face); } }}
AWS CLI
이 AWS CLI 명령은 delete-faces CLI 작업에 대한 JSON 출력을 표시합니다. collection-id의 값을, 삭제하려는 얼굴을 포함하는 모음의 이름으로 바꿉니다. face-ids의 값을, 삭제하려는얼굴 ID 배열로 바꿉니다.
aws rekognition delete-faces --collection-id "collectionname" --face-ids '["faceid"]'
Python
이 예제는 모음에서 한 개의 얼굴을 삭제합니다.
collectionId의 값을, 삭제하려는 얼굴을 포함하는 모음으로 변경합니다. faces의 값을, 삭제하려는 얼굴 ID로 변경합니다. 여러 얼굴을 삭제하려면 faces 배열에 얼굴 ID를 추가합니다.
#Copyright 2018 Amazon.com, Inc. or its affiliates. All Rights Reserved.#PDX-License-Identifier: MIT-0 (For details, see https://github.com/awsdocs/amazon-rekognition-developer-guide/blob/master/LICENSE-SAMPLECODE.)
import boto3
def delete_faces_from_collection(collection_id, faces):
client=boto3.client('rekognition')
response=client.delete_faces(CollectionId=collection_id, FaceIds=faces) print(str(len(response['DeletedFaces'])) + ' faces deleted:') for faceId in response['DeletedFaces']: print (faceId) return len(response['DeletedFaces'])
def main():
collection_id='collection' faces=[] faces.append("xxxxxxxx-xxxx-xxxx-xxxx-xxxxxxxxxxxx")
faces_count=delete_faces_from_collection(collection_id, faces) print("deleted faces count: " + str(faces_count))
184
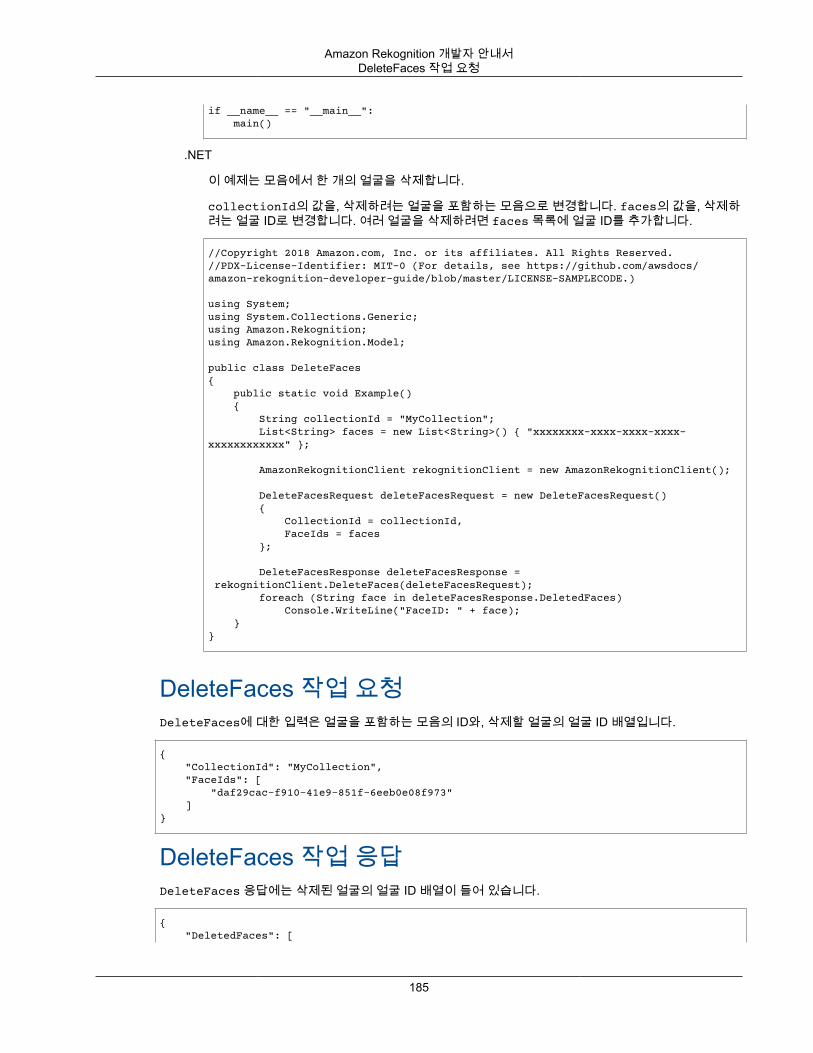
Amazon Rekognition 개발자 안내서DeleteFaces 작업 요청
if __name__ == "__main__": main()
.NET
이 예제는 모음에서 한 개의 얼굴을 삭제합니다.
collectionId의 값을, 삭제하려는 얼굴을 포함하는 모음으로 변경합니다. faces의 값을, 삭제하려는 얼굴 ID로 변경합니다. 여러 얼굴을 삭제하려면 faces 목록에 얼굴 ID를 추가합니다.
//Copyright 2018 Amazon.com, Inc. or its affiliates. All Rights Reserved.//PDX-License-Identifier: MIT-0 (For details, see https://github.com/awsdocs/amazon-rekognition-developer-guide/blob/master/LICENSE-SAMPLECODE.)
using System;using System.Collections.Generic;using Amazon.Rekognition;using Amazon.Rekognition.Model;
public class DeleteFaces{ public static void Example() { String collectionId = "MyCollection"; List<String> faces = new List<String>() { "xxxxxxxx-xxxx-xxxx-xxxx-xxxxxxxxxxxx" };
AmazonRekognitionClient rekognitionClient = new AmazonRekognitionClient();
DeleteFacesRequest deleteFacesRequest = new DeleteFacesRequest() { CollectionId = collectionId, FaceIds = faces };
DeleteFacesResponse deleteFacesResponse = rekognitionClient.DeleteFaces(deleteFacesRequest); foreach (String face in deleteFacesResponse.DeletedFaces) Console.WriteLine("FaceID: " + face); }}
DeleteFaces 작업 요청DeleteFaces에 대한 입력은 얼굴을 포함하는 모음의 ID와, 삭제할 얼굴의 얼굴 ID 배열입니다.
{ "CollectionId": "MyCollection", "FaceIds": [ "daf29cac-f910-41e9-851f-6eeb0e08f973" ]}
DeleteFaces 작업 응답DeleteFaces 응답에는 삭제된 얼굴의 얼굴 ID 배열이 들어 있습니다.
{ "DeletedFaces": [
185

Amazon Rekognition 개발자 안내서얼굴(얼굴 ID) 검색
"daf29cac-f910-41e9-851f-6eeb0e08f973" ]}
얼굴 ID를 사용하여 얼굴 검색SearchFaces (p. 383) 작업을 사용하여 제공된 얼굴 ID와 일치하는 모음에서 얼굴을 검색할 수 있습니다.
얼굴이 감지되고 모음에 추가되면 IndexFaces (p. 362) 작업 응답에서 얼굴 ID가 반환됩니다. 자세한 내용은 모음에서 얼굴 관리 (p. 153) 단원을 참조하십시오.
얼굴 ID(SDK)를 사용하여 모음에서 얼굴을 검색하려면
1. 아직 설정하지 않았다면 다음과 같이 하십시오.
a. AmazonRekognitionFullAccess 권한이 있는 IAM 사용자를 만들거나 업데이트합니다. 자세한내용은 1단계: AWS 계정 설정 및 IAM 사용자 만들기 (p. 11) 단원을 참조하십시오.
b. AWS CLI와 AWS SDK를 설치하고 구성합니다. 자세한 내용은 2단계: AWS CLI 및 AWS SDK 설정 (p. 12) 단원을 참조하십시오.
2. 다음 예제를 사용하여 SearchFaces 작업을 호출합니다.
Java
이 예제는 ID로 식별한 얼굴과 일치하는 얼굴에 대한 정보를 표시합니다.
collectionID의 값을, 원하는 얼굴이 있는 모음으로 변경합니다. faceId의 값을, 찾으려는 얼굴의 식별자로 변경합니다.
//Copyright 2018 Amazon.com, Inc. or its affiliates. All Rights Reserved.//PDX-License-Identifier: MIT-0 (For details, see https://github.com/awsdocs/amazon-rekognition-developer-guide/blob/master/LICENSE-SAMPLECODE.)
package aws.example.rekognition.image;import com.amazonaws.services.rekognition.AmazonRekognition;import com.amazonaws.services.rekognition.AmazonRekognitionClientBuilder;import com.fasterxml.jackson.databind.ObjectMapper;import com.amazonaws.services.rekognition.model.FaceMatch;import com.amazonaws.services.rekognition.model.SearchFacesRequest;import com.amazonaws.services.rekognition.model.SearchFacesResult;import java.util.List;
public class SearchFaceMatchingIdCollection { public static final String collectionId = "MyCollection"; public static final String faceId = "xxxxxxxx-xxxx-xxxx-xxxx-xxxxxxxxxxxx"; public static void main(String[] args) throws Exception { AmazonRekognition rekognitionClient = AmazonRekognitionClientBuilder.defaultClient(); ObjectMapper objectMapper = new ObjectMapper(); // Search collection for faces matching the face id. SearchFacesRequest searchFacesRequest = new SearchFacesRequest() .withCollectionId(collectionId) .withFaceId(faceId) .withFaceMatchThreshold(70F) .withMaxFaces(2);
186

Amazon Rekognition 개발자 안내서얼굴(얼굴 ID) 검색
SearchFacesResult searchFacesByIdResult = rekognitionClient.searchFaces(searchFacesRequest);
System.out.println("Face matching faceId " + faceId); List < FaceMatch > faceImageMatches = searchFacesByIdResult.getFaceMatches(); for (FaceMatch face: faceImageMatches) { System.out.println(objectMapper.writerWithDefaultPrettyPrinter() .writeValueAsString(face)); System.out.println(); } }
}
예제 코드를 실행합니다. 일치하는 얼굴에 대한 정보가 표시됩니다.AWS CLI
이 AWS CLI 명령은 search-faces CLI 작업에 대한 JSON 출력을 표시합니다. 검색하려는 얼굴식별자로 face-id 값을 바꾸고, 검색하려는 모음으로 collection-id를 바꿉니다.
aws rekognition search-faces \ --face-id face-id \ --collection-id "collection-id"
Python
이 예제는 ID로 식별한 얼굴과 일치하는 얼굴에 대한 정보를 표시합니다.
collectionID의 값을, 원하는 얼굴이 있는 모음으로 변경합니다. faceId의 값을, 찾으려는 얼굴의 식별자로 변경합니다.
#Copyright 2018 Amazon.com, Inc. or its affiliates. All Rights Reserved.#PDX-License-Identifier: MIT-0 (For details, see https://github.com/awsdocs/amazon-rekognition-developer-guide/blob/master/LICENSE-SAMPLECODE.)
import boto3
def search_face_in_collection(face_id,collection_id): threshold = 90 max_faces=2 client=boto3.client('rekognition')
response=client.search_faces(CollectionId=collection_id, FaceId=face_id, FaceMatchThreshold=threshold, MaxFaces=max_faces)
face_matches=response['FaceMatches'] print ('Matching faces') for match in face_matches: print ('FaceId:' + match['Face']['FaceId']) print ('Similarity: ' + "{:.2f}".format(match['Similarity']) + "%") print return len(face_matches)
def main():
187
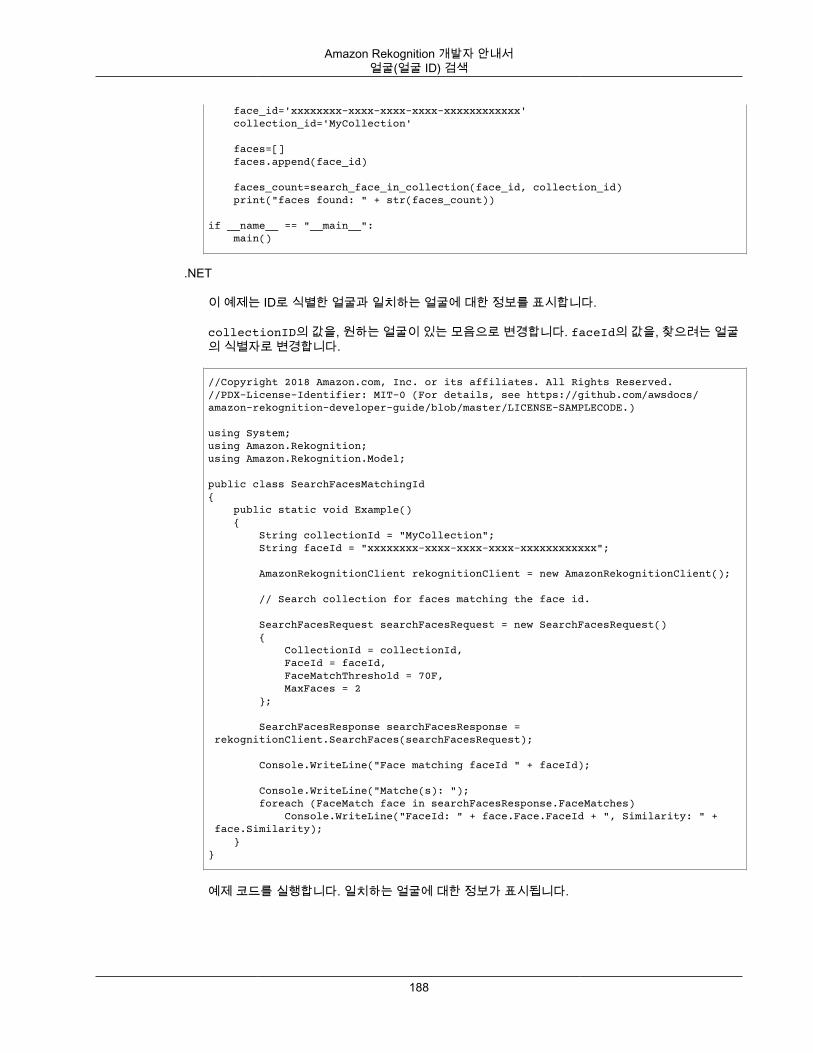
Amazon Rekognition 개발자 안내서얼굴(얼굴 ID) 검색
face_id='xxxxxxxx-xxxx-xxxx-xxxx-xxxxxxxxxxxx' collection_id='MyCollection' faces=[] faces.append(face_id)
faces_count=search_face_in_collection(face_id, collection_id) print("faces found: " + str(faces_count))
if __name__ == "__main__": main()
.NET
이 예제는 ID로 식별한 얼굴과 일치하는 얼굴에 대한 정보를 표시합니다.
collectionID의 값을, 원하는 얼굴이 있는 모음으로 변경합니다. faceId의 값을, 찾으려는 얼굴의 식별자로 변경합니다.
//Copyright 2018 Amazon.com, Inc. or its affiliates. All Rights Reserved.//PDX-License-Identifier: MIT-0 (For details, see https://github.com/awsdocs/amazon-rekognition-developer-guide/blob/master/LICENSE-SAMPLECODE.)
using System;using Amazon.Rekognition;using Amazon.Rekognition.Model;
public class SearchFacesMatchingId{ public static void Example() { String collectionId = "MyCollection"; String faceId = "xxxxxxxx-xxxx-xxxx-xxxx-xxxxxxxxxxxx";
AmazonRekognitionClient rekognitionClient = new AmazonRekognitionClient();
// Search collection for faces matching the face id.
SearchFacesRequest searchFacesRequest = new SearchFacesRequest() { CollectionId = collectionId, FaceId = faceId, FaceMatchThreshold = 70F, MaxFaces = 2 };
SearchFacesResponse searchFacesResponse = rekognitionClient.SearchFaces(searchFacesRequest);
Console.WriteLine("Face matching faceId " + faceId);
Console.WriteLine("Matche(s): "); foreach (FaceMatch face in searchFacesResponse.FaceMatches) Console.WriteLine("FaceId: " + face.Face.FaceId + ", Similarity: " + face.Similarity); }}
예제 코드를 실행합니다. 일치하는 얼굴에 대한 정보가 표시됩니다.
188
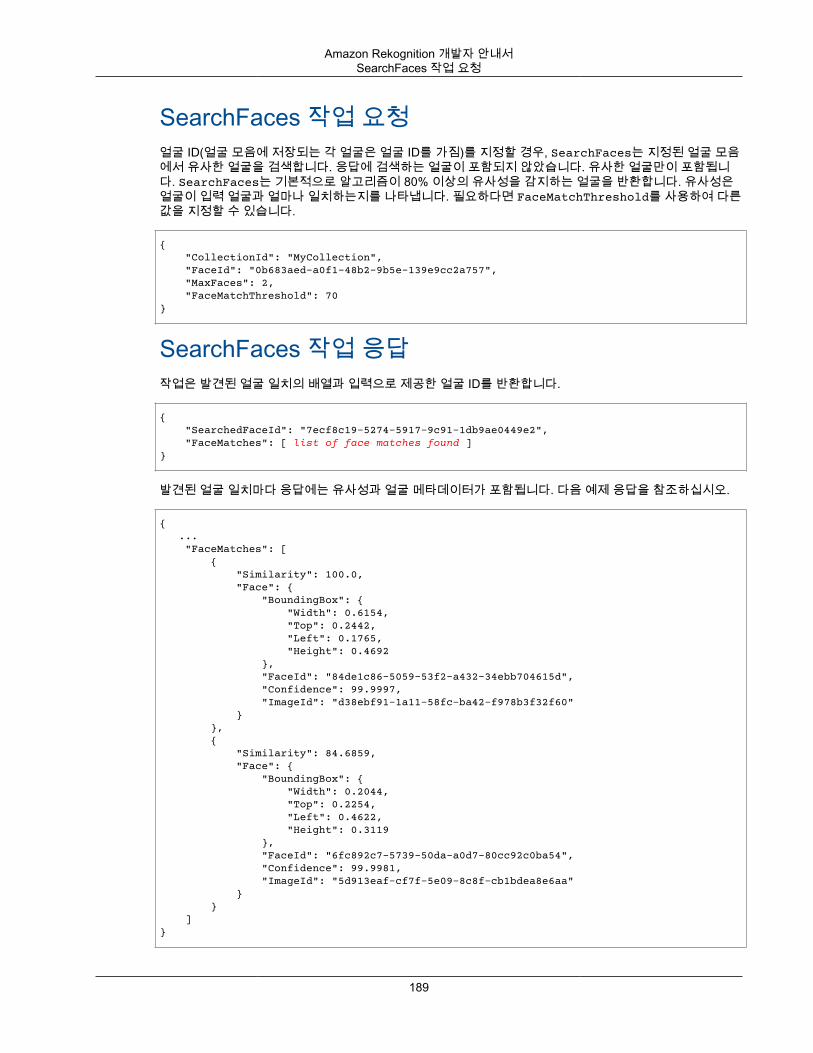
Amazon Rekognition 개발자 안내서SearchFaces 작업 요청
SearchFaces 작업 요청얼굴 ID(얼굴 모음에 저장되는 각 얼굴은 얼굴 ID를 가짐)를 지정할 경우, SearchFaces는 지정된 얼굴 모음에서 유사한 얼굴을 검색합니다. 응답에 검색하는 얼굴이 포함되지 않았습니다. 유사한 얼굴만이 포함됩니다. SearchFaces는 기본적으로 알고리즘이 80% 이상의 유사성을 감지하는 얼굴을 반환합니다. 유사성은얼굴이 입력 얼굴과 얼마나 일치하는지를 나타냅니다. 필요하다면 FaceMatchThreshold를 사용하여 다른값을 지정할 수 있습니다.
{ "CollectionId": "MyCollection", "FaceId": "0b683aed-a0f1-48b2-9b5e-139e9cc2a757", "MaxFaces": 2, "FaceMatchThreshold": 70}
SearchFaces 작업 응답작업은 발견된 얼굴 일치의 배열과 입력으로 제공한 얼굴 ID를 반환합니다.
{ "SearchedFaceId": "7ecf8c19-5274-5917-9c91-1db9ae0449e2", "FaceMatches": [ list of face matches found ]}
발견된 얼굴 일치마다 응답에는 유사성과 얼굴 메타데이터가 포함됩니다. 다음 예제 응답을 참조하십시오.
{ ... "FaceMatches": [ { "Similarity": 100.0, "Face": { "BoundingBox": { "Width": 0.6154, "Top": 0.2442, "Left": 0.1765, "Height": 0.4692 }, "FaceId": "84de1c86-5059-53f2-a432-34ebb704615d", "Confidence": 99.9997, "ImageId": "d38ebf91-1a11-58fc-ba42-f978b3f32f60" } }, { "Similarity": 84.6859, "Face": { "BoundingBox": { "Width": 0.2044, "Top": 0.2254, "Left": 0.4622, "Height": 0.3119 }, "FaceId": "6fc892c7-5739-50da-a0d7-80cc92c0ba54", "Confidence": 99.9981, "ImageId": "5d913eaf-cf7f-5e09-8c8f-cb1bdea8e6aa" } } ]}
189
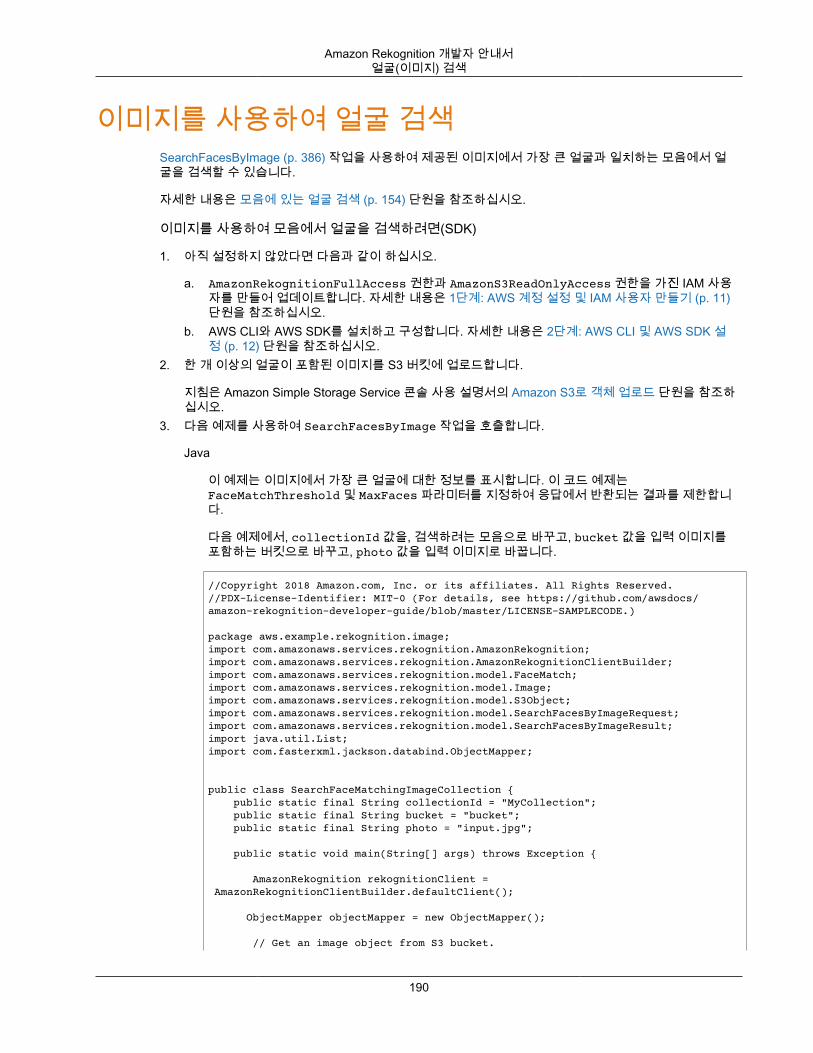
Amazon Rekognition 개발자 안내서얼굴(이미지) 검색
이미지를 사용하여 얼굴 검색SearchFacesByImage (p. 386) 작업을 사용하여 제공된 이미지에서 가장 큰 얼굴과 일치하는 모음에서 얼굴을 검색할 수 있습니다.
자세한 내용은 모음에 있는 얼굴 검색 (p. 154) 단원을 참조하십시오.
이미지를 사용하여 모음에서 얼굴을 검색하려면(SDK)
1. 아직 설정하지 않았다면 다음과 같이 하십시오.
a. AmazonRekognitionFullAccess 권한과 AmazonS3ReadOnlyAccess 권한을 가진 IAM 사용자를 만들어 업데이트합니다. 자세한 내용은 1단계: AWS 계정 설정 및 IAM 사용자 만들기 (p. 11)단원을 참조하십시오.
b. AWS CLI와 AWS SDK를 설치하고 구성합니다. 자세한 내용은 2단계: AWS CLI 및 AWS SDK 설정 (p. 12) 단원을 참조하십시오.
2. 한 개 이상의 얼굴이 포함된 이미지를 S3 버킷에 업로드합니다.
지침은 Amazon Simple Storage Service 콘솔 사용 설명서의 Amazon S3로 객체 업로드 단원을 참조하십시오.
3. 다음 예제를 사용하여 SearchFacesByImage 작업을 호출합니다.
Java
이 예제는 이미지에서 가장 큰 얼굴에 대한 정보를 표시합니다. 이 코드 예제는FaceMatchThreshold 및 MaxFaces 파라미터를 지정하여 응답에서 반환되는 결과를 제한합니다.
다음 예제에서, collectionId 값을, 검색하려는 모음으로 바꾸고, bucket 값을 입력 이미지를포함하는 버킷으로 바꾸고, photo 값을 입력 이미지로 바꿉니다.
//Copyright 2018 Amazon.com, Inc. or its affiliates. All Rights Reserved.//PDX-License-Identifier: MIT-0 (For details, see https://github.com/awsdocs/amazon-rekognition-developer-guide/blob/master/LICENSE-SAMPLECODE.)
package aws.example.rekognition.image;import com.amazonaws.services.rekognition.AmazonRekognition;import com.amazonaws.services.rekognition.AmazonRekognitionClientBuilder;import com.amazonaws.services.rekognition.model.FaceMatch;import com.amazonaws.services.rekognition.model.Image;import com.amazonaws.services.rekognition.model.S3Object;import com.amazonaws.services.rekognition.model.SearchFacesByImageRequest;import com.amazonaws.services.rekognition.model.SearchFacesByImageResult;import java.util.List;import com.fasterxml.jackson.databind.ObjectMapper;
public class SearchFaceMatchingImageCollection { public static final String collectionId = "MyCollection"; public static final String bucket = "bucket"; public static final String photo = "input.jpg"; public static void main(String[] args) throws Exception {
AmazonRekognition rekognitionClient = AmazonRekognitionClientBuilder.defaultClient(); ObjectMapper objectMapper = new ObjectMapper(); // Get an image object from S3 bucket.
190
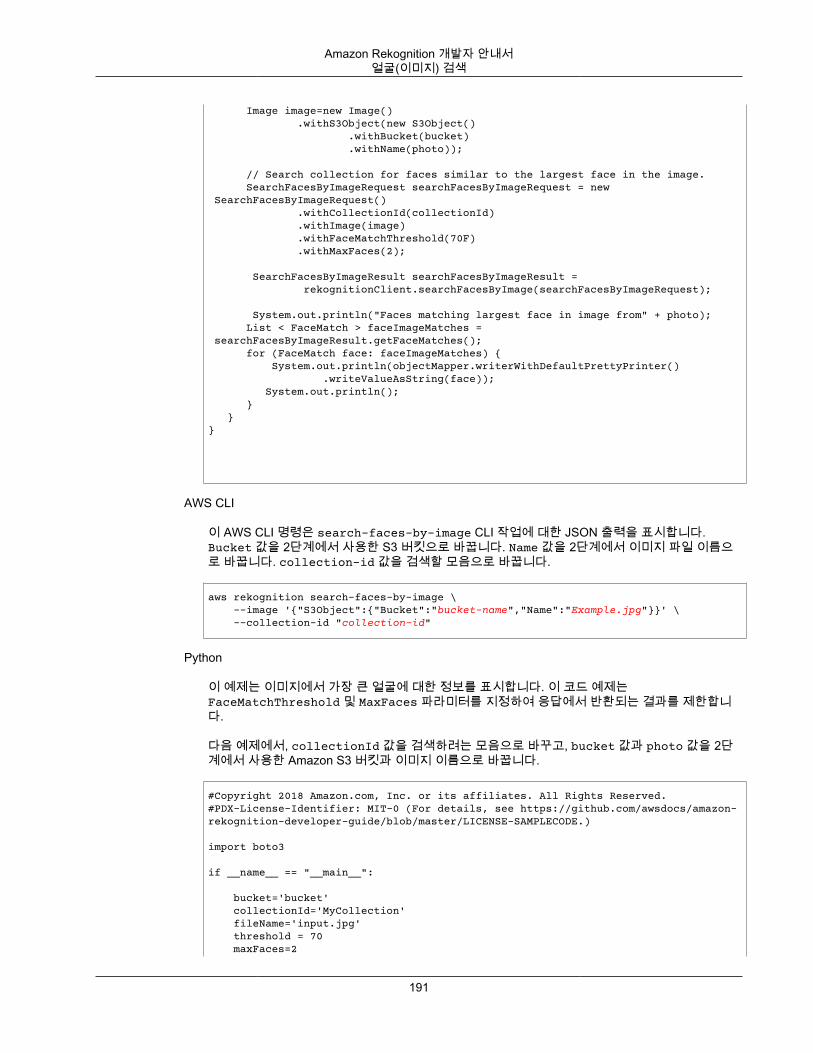
Amazon Rekognition 개발자 안내서얼굴(이미지) 검색
Image image=new Image() .withS3Object(new S3Object() .withBucket(bucket) .withName(photo)); // Search collection for faces similar to the largest face in the image. SearchFacesByImageRequest searchFacesByImageRequest = new SearchFacesByImageRequest() .withCollectionId(collectionId) .withImage(image) .withFaceMatchThreshold(70F) .withMaxFaces(2); SearchFacesByImageResult searchFacesByImageResult = rekognitionClient.searchFacesByImage(searchFacesByImageRequest);
System.out.println("Faces matching largest face in image from" + photo); List < FaceMatch > faceImageMatches = searchFacesByImageResult.getFaceMatches(); for (FaceMatch face: faceImageMatches) { System.out.println(objectMapper.writerWithDefaultPrettyPrinter() .writeValueAsString(face)); System.out.println(); } }}
AWS CLI
이 AWS CLI 명령은 search-faces-by-image CLI 작업에 대한 JSON 출력을 표시합니다.Bucket 값을 2단계에서 사용한 S3 버킷으로 바꿉니다. Name 값을 2단계에서 이미지 파일 이름으로 바꿉니다. collection-id 값을 검색할 모음으로 바꿉니다.
aws rekognition search-faces-by-image \ --image '{"S3Object":{"Bucket":"bucket-name","Name":"Example.jpg"}}' \ --collection-id "collection-id"
Python
이 예제는 이미지에서 가장 큰 얼굴에 대한 정보를 표시합니다. 이 코드 예제는FaceMatchThreshold 및 MaxFaces 파라미터를 지정하여 응답에서 반환되는 결과를 제한합니다.
다음 예제에서, collectionId 값을 검색하려는 모음으로 바꾸고, bucket 값과 photo 값을 2단계에서 사용한 Amazon S3 버킷과 이미지 이름으로 바꿉니다.
#Copyright 2018 Amazon.com, Inc. or its affiliates. All Rights Reserved.#PDX-License-Identifier: MIT-0 (For details, see https://github.com/awsdocs/amazon-rekognition-developer-guide/blob/master/LICENSE-SAMPLECODE.)
import boto3
if __name__ == "__main__":
bucket='bucket' collectionId='MyCollection' fileName='input.jpg' threshold = 70 maxFaces=2
191
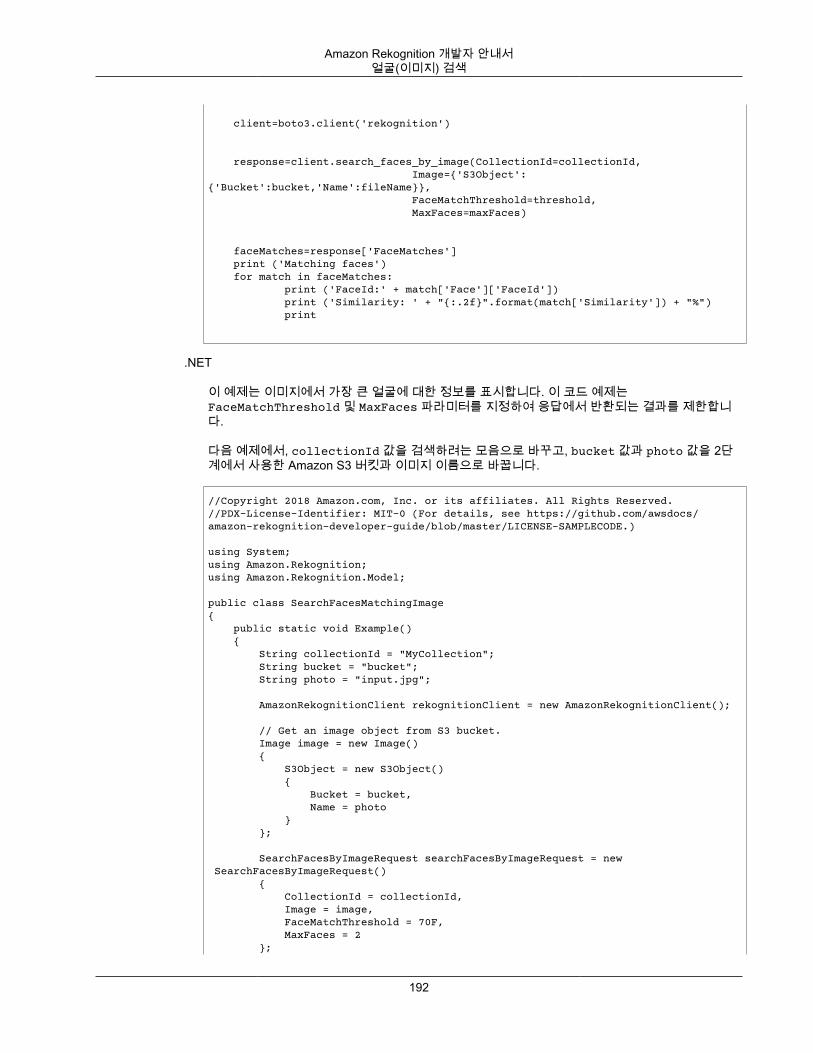
Amazon Rekognition 개발자 안내서얼굴(이미지) 검색
client=boto3.client('rekognition')
response=client.search_faces_by_image(CollectionId=collectionId, Image={'S3Object':{'Bucket':bucket,'Name':fileName}}, FaceMatchThreshold=threshold, MaxFaces=maxFaces)
faceMatches=response['FaceMatches'] print ('Matching faces') for match in faceMatches: print ('FaceId:' + match['Face']['FaceId']) print ('Similarity: ' + "{:.2f}".format(match['Similarity']) + "%") print
.NET
이 예제는 이미지에서 가장 큰 얼굴에 대한 정보를 표시합니다. 이 코드 예제는FaceMatchThreshold 및 MaxFaces 파라미터를 지정하여 응답에서 반환되는 결과를 제한합니다.
다음 예제에서, collectionId 값을 검색하려는 모음으로 바꾸고, bucket 값과 photo 값을 2단계에서 사용한 Amazon S3 버킷과 이미지 이름으로 바꿉니다.
//Copyright 2018 Amazon.com, Inc. or its affiliates. All Rights Reserved.//PDX-License-Identifier: MIT-0 (For details, see https://github.com/awsdocs/amazon-rekognition-developer-guide/blob/master/LICENSE-SAMPLECODE.)
using System;using Amazon.Rekognition;using Amazon.Rekognition.Model;
public class SearchFacesMatchingImage{ public static void Example() { String collectionId = "MyCollection"; String bucket = "bucket"; String photo = "input.jpg";
AmazonRekognitionClient rekognitionClient = new AmazonRekognitionClient();
// Get an image object from S3 bucket. Image image = new Image() { S3Object = new S3Object() { Bucket = bucket, Name = photo } };
SearchFacesByImageRequest searchFacesByImageRequest = new SearchFacesByImageRequest() { CollectionId = collectionId, Image = image, FaceMatchThreshold = 70F, MaxFaces = 2 };
192

Amazon Rekognition 개발자 안내서SearchFacesByImage 작업 요청
SearchFacesByImageResponse searchFacesByImageResponse = rekognitionClient.SearchFacesByImage(searchFacesByImageRequest);
Console.WriteLine("Faces matching largest face in image from " + photo); foreach (FaceMatch face in searchFacesByImageResponse.FaceMatches) Console.WriteLine("FaceId: " + face.Face.FaceId + ", Similarity: " + face.Similarity); }}
SearchFacesByImage 작업 요청SearchFacesImageByImage에 대한 입력 파라미터는 검색할 모음과 소스 이미지 위치입니다. 이 예제에서 소스 이미지는 Amazon S3 버킷(S3Object)에 저장되어 있습니다. 또한 반환할 최대 얼굴 수(Maxfaces)와, 반환할 얼굴에 대해 일치해야 할 최소 신뢰도(FaceMatchThreshold)를 지정합니다.
{ "CollectionId": "MyCollection", "Image": { "S3Object": { "Bucket": "bucket", "Name": "input.jpg" } }, "MaxFaces": 2, "FaceMatchThreshold": 70}
SearchFacesByImage 작업 응답입력 이미지(.jpeg 또는 .png)가 주어진 경우, 작업은 먼저 입력 이미지에서 얼굴을 감지한 다음 지정된 얼굴모음에서 유사한 얼굴을 감지합니다.
Note
입력 이미지에서 여러 얼굴이 감지되는 경우, 서비스는 감지된 가장 큰 얼굴을 얼굴 모음 감지에 사용합니다.
이 작업은 찾아낸 일치 얼굴의 배열과, 입력 얼굴에 대한 정보를 반환합니다. 경계 상자 등과 같은 정보와 신뢰도 값을 포함합니다. 신뢰도는 경계 상자의 얼굴 포함 기준이 되는 신뢰도 수준입니다.
SearchFacesByImage는 기본적으로 알고리즘이 80% 이상의 유사성을 감지하는 얼굴을 반환합니다. 유사성은 얼굴이 입력 얼굴과 얼마나 일치하는지를 나타냅니다. 필요하다면 FaceMatchThreshold를 사용하여다른 값을 지정할 수 있습니다. 발견된 얼굴 일치마다 응답에는 유사성과 얼굴 메타데이터가 포함됩니다. 다음 예제 응답을 참조하십시오.
{ "FaceMatches": [ { "Face": { "BoundingBox": { "Height": 0.06333330273628235, "Left": 0.1718519926071167, "Top": 0.7366669774055481, "Width": 0.11061699688434601 }, "Confidence": 100, "ExternalImageId": "input.jpg", "FaceId": "578e2e1b-d0b0-493c-aa39-ba476a421a34",
193
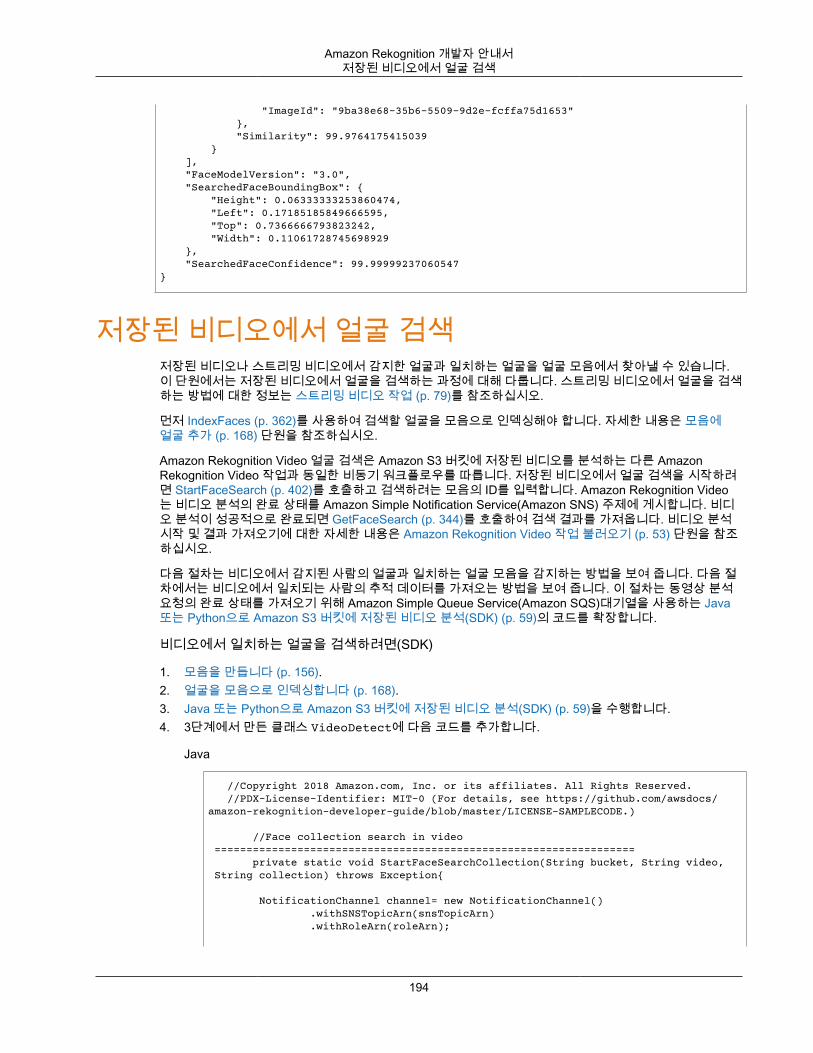
Amazon Rekognition 개발자 안내서저장된 비디오에서 얼굴 검색
"ImageId": "9ba38e68-35b6-5509-9d2e-fcffa75d1653" }, "Similarity": 99.9764175415039 } ], "FaceModelVersion": "3.0", "SearchedFaceBoundingBox": { "Height": 0.06333333253860474, "Left": 0.17185185849666595, "Top": 0.7366666793823242, "Width": 0.11061728745698929 }, "SearchedFaceConfidence": 99.99999237060547}
저장된 비디오에서 얼굴 검색저장된 비디오나 스트리밍 비디오에서 감지한 얼굴과 일치하는 얼굴을 얼굴 모음에서 찾아낼 수 있습니다.이 단원에서는 저장된 비디오에서 얼굴을 검색하는 과정에 대해 다룹니다. 스트리밍 비디오에서 얼굴을 검색하는 방법에 대한 정보는 스트리밍 비디오 작업 (p. 79)를 참조하십시오.
먼저 IndexFaces (p. 362)를 사용하여 검색할 얼굴을 모음으로 인덱싱해야 합니다. 자세한 내용은 모음에얼굴 추가 (p. 168) 단원을 참조하십시오.
Amazon Rekognition Video 얼굴 검색은 Amazon S3 버킷에 저장된 비디오를 분석하는 다른 AmazonRekognition Video 작업과 동일한 비동기 워크플로우를 따릅니다. 저장된 비디오에서 얼굴 검색을 시작하려면 StartFaceSearch (p. 402)를 호출하고 검색하려는 모음의 ID를 입력합니다. Amazon Rekognition Video는 비디오 분석의 완료 상태를 Amazon Simple Notification Service(Amazon SNS) 주제에 게시합니다. 비디오 분석이 성공적으로 완료되면 GetFaceSearch (p. 344)를 호출하여 검색 결과를 가져옵니다. 비디오 분석시작 및 결과 가져오기에 대한 자세한 내용은 Amazon Rekognition Video 작업 불러오기 (p. 53) 단원을 참조하십시오.
다음 절차는 비디오에서 감지된 사람의 얼굴과 일치하는 얼굴 모음을 감지하는 방법을 보여 줍니다. 다음 절차에서는 비디오에서 일치되는 사람의 추적 데이터를 가져오는 방법을 보여 줍니다. 이 절차는 동영상 분석요청의 완료 상태를 가져오기 위해 Amazon Simple Queue Service(Amazon SQS)대기열을 사용하는 Java또는 Python으로 Amazon S3 버킷에 저장된 비디오 분석(SDK) (p. 59)의 코드를 확장합니다.
비디오에서 일치하는 얼굴을 검색하려면(SDK)
1. 모음을 만듭니다 (p. 156).2. 얼굴을 모음으로 인덱싱합니다 (p. 168).3. Java 또는 Python으로 Amazon S3 버킷에 저장된 비디오 분석(SDK) (p. 59)을 수행합니다.4. 3단계에서 만든 클래스 VideoDetect에 다음 코드를 추가합니다.
Java
//Copyright 2018 Amazon.com, Inc. or its affiliates. All Rights Reserved. //PDX-License-Identifier: MIT-0 (For details, see https://github.com/awsdocs/amazon-rekognition-developer-guide/blob/master/LICENSE-SAMPLECODE.)
//Face collection search in video ================================================================== private static void StartFaceSearchCollection(String bucket, String video, String collection) throws Exception{
NotificationChannel channel= new NotificationChannel() .withSNSTopicArn(snsTopicArn) .withRoleArn(roleArn);
194
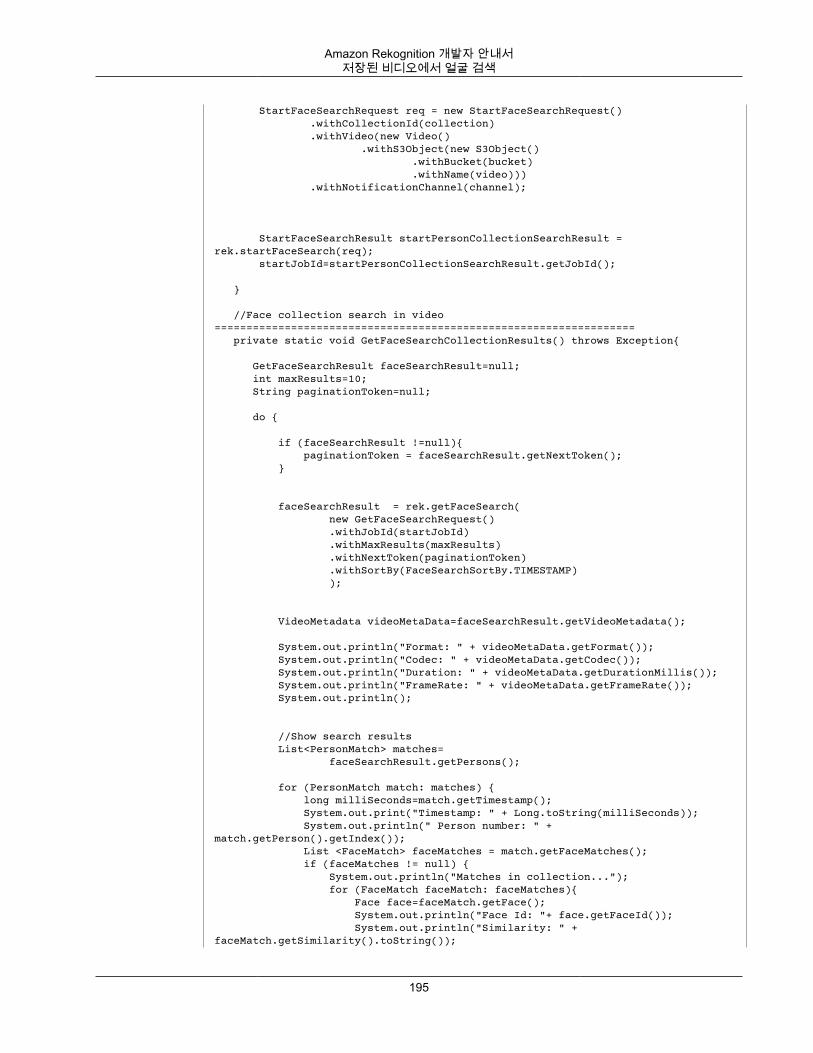
Amazon Rekognition 개발자 안내서저장된 비디오에서 얼굴 검색
StartFaceSearchRequest req = new StartFaceSearchRequest() .withCollectionId(collection) .withVideo(new Video() .withS3Object(new S3Object() .withBucket(bucket) .withName(video))) .withNotificationChannel(channel);
StartFaceSearchResult startPersonCollectionSearchResult = rek.startFaceSearch(req); startJobId=startPersonCollectionSearchResult.getJobId();
}
//Face collection search in video ================================================================== private static void GetFaceSearchCollectionResults() throws Exception{
GetFaceSearchResult faceSearchResult=null; int maxResults=10; String paginationToken=null;
do {
if (faceSearchResult !=null){ paginationToken = faceSearchResult.getNextToken(); }
faceSearchResult = rek.getFaceSearch( new GetFaceSearchRequest() .withJobId(startJobId) .withMaxResults(maxResults) .withNextToken(paginationToken) .withSortBy(FaceSearchSortBy.TIMESTAMP) );
VideoMetadata videoMetaData=faceSearchResult.getVideoMetadata();
System.out.println("Format: " + videoMetaData.getFormat()); System.out.println("Codec: " + videoMetaData.getCodec()); System.out.println("Duration: " + videoMetaData.getDurationMillis()); System.out.println("FrameRate: " + videoMetaData.getFrameRate()); System.out.println();
//Show search results List<PersonMatch> matches= faceSearchResult.getPersons();
for (PersonMatch match: matches) { long milliSeconds=match.getTimestamp(); System.out.print("Timestamp: " + Long.toString(milliSeconds)); System.out.println(" Person number: " + match.getPerson().getIndex()); List <FaceMatch> faceMatches = match.getFaceMatches(); if (faceMatches != null) { System.out.println("Matches in collection..."); for (FaceMatch faceMatch: faceMatches){ Face face=faceMatch.getFace(); System.out.println("Face Id: "+ face.getFaceId()); System.out.println("Similarity: " + faceMatch.getSimilarity().toString());
195
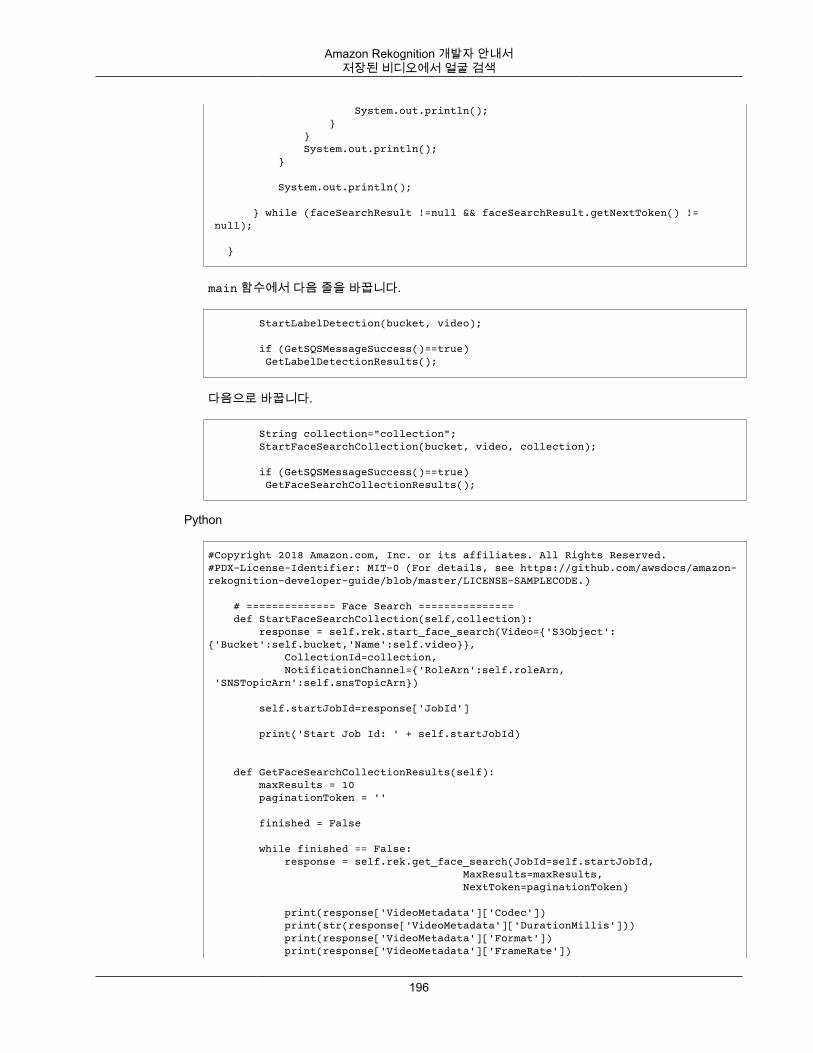
Amazon Rekognition 개발자 안내서저장된 비디오에서 얼굴 검색
System.out.println(); } } System.out.println(); }
System.out.println();
} while (faceSearchResult !=null && faceSearchResult.getNextToken() != null);
}
main 함수에서 다음 줄을 바꿉니다.
StartLabelDetection(bucket, video);
if (GetSQSMessageSuccess()==true) GetLabelDetectionResults();
다음으로 바꿉니다.
String collection="collection"; StartFaceSearchCollection(bucket, video, collection);
if (GetSQSMessageSuccess()==true) GetFaceSearchCollectionResults();
Python
#Copyright 2018 Amazon.com, Inc. or its affiliates. All Rights Reserved.#PDX-License-Identifier: MIT-0 (For details, see https://github.com/awsdocs/amazon-rekognition-developer-guide/blob/master/LICENSE-SAMPLECODE.)
# ============== Face Search =============== def StartFaceSearchCollection(self,collection): response = self.rek.start_face_search(Video={'S3Object':{'Bucket':self.bucket,'Name':self.video}}, CollectionId=collection, NotificationChannel={'RoleArn':self.roleArn, 'SNSTopicArn':self.snsTopicArn}) self.startJobId=response['JobId'] print('Start Job Id: ' + self.startJobId)
def GetFaceSearchCollectionResults(self): maxResults = 10 paginationToken = ''
finished = False
while finished == False: response = self.rek.get_face_search(JobId=self.startJobId, MaxResults=maxResults, NextToken=paginationToken)
print(response['VideoMetadata']['Codec']) print(str(response['VideoMetadata']['DurationMillis'])) print(response['VideoMetadata']['Format']) print(response['VideoMetadata']['FrameRate'])
196
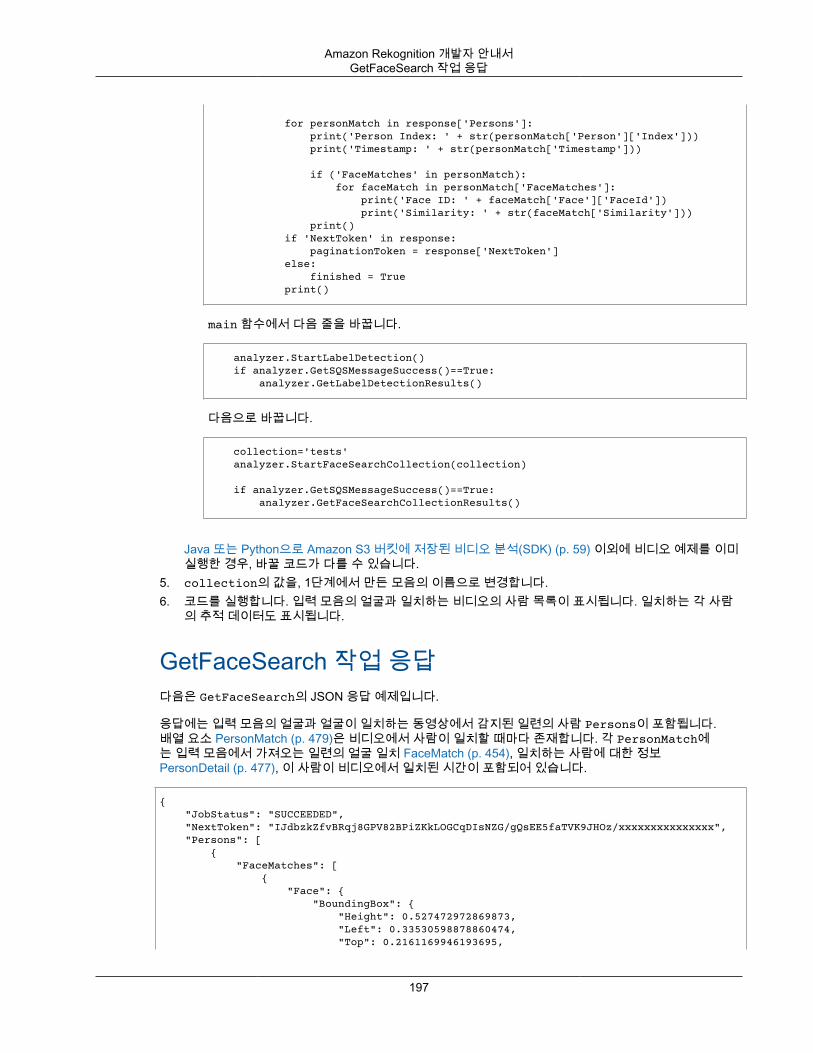
Amazon Rekognition 개발자 안내서GetFaceSearch 작업 응답
for personMatch in response['Persons']: print('Person Index: ' + str(personMatch['Person']['Index'])) print('Timestamp: ' + str(personMatch['Timestamp']))
if ('FaceMatches' in personMatch): for faceMatch in personMatch['FaceMatches']: print('Face ID: ' + faceMatch['Face']['FaceId']) print('Similarity: ' + str(faceMatch['Similarity'])) print() if 'NextToken' in response: paginationToken = response['NextToken'] else: finished = True print()
main 함수에서 다음 줄을 바꿉니다.
analyzer.StartLabelDetection() if analyzer.GetSQSMessageSuccess()==True: analyzer.GetLabelDetectionResults()
다음으로 바꿉니다.
collection='tests' analyzer.StartFaceSearchCollection(collection) if analyzer.GetSQSMessageSuccess()==True: analyzer.GetFaceSearchCollectionResults()
Java 또는 Python으로 Amazon S3 버킷에 저장된 비디오 분석(SDK) (p. 59) 이외에 비디오 예제를 이미실행한 경우, 바꿀 코드가 다를 수 있습니다.
5. collection의 값을, 1단계에서 만든 모음의 이름으로 변경합니다.6. 코드를 실행합니다. 입력 모음의 얼굴과 일치하는 비디오의 사람 목록이 표시됩니다. 일치하는 각 사람
의 추적 데이터도 표시됩니다.
GetFaceSearch 작업 응답다음은 GetFaceSearch의 JSON 응답 예제입니다.
응답에는 입력 모음의 얼굴과 얼굴이 일치하는 동영상에서 감지된 일련의 사람 Persons이 포함됩니다.배열 요소 PersonMatch (p. 479)은 비디오에서 사람이 일치할 때마다 존재합니다. 각 PersonMatch에는 입력 모음에서 가져오는 일련의 얼굴 일치 FaceMatch (p. 454), 일치하는 사람에 대한 정보PersonDetail (p. 477), 이 사람이 비디오에서 일치된 시간이 포함되어 있습니다.
{ "JobStatus": "SUCCEEDED", "NextToken": "IJdbzkZfvBRqj8GPV82BPiZKkLOGCqDIsNZG/gQsEE5faTVK9JHOz/xxxxxxxxxxxxxxx", "Persons": [ { "FaceMatches": [ { "Face": { "BoundingBox": { "Height": 0.527472972869873, "Left": 0.33530598878860474, "Top": 0.2161169946193695,
197
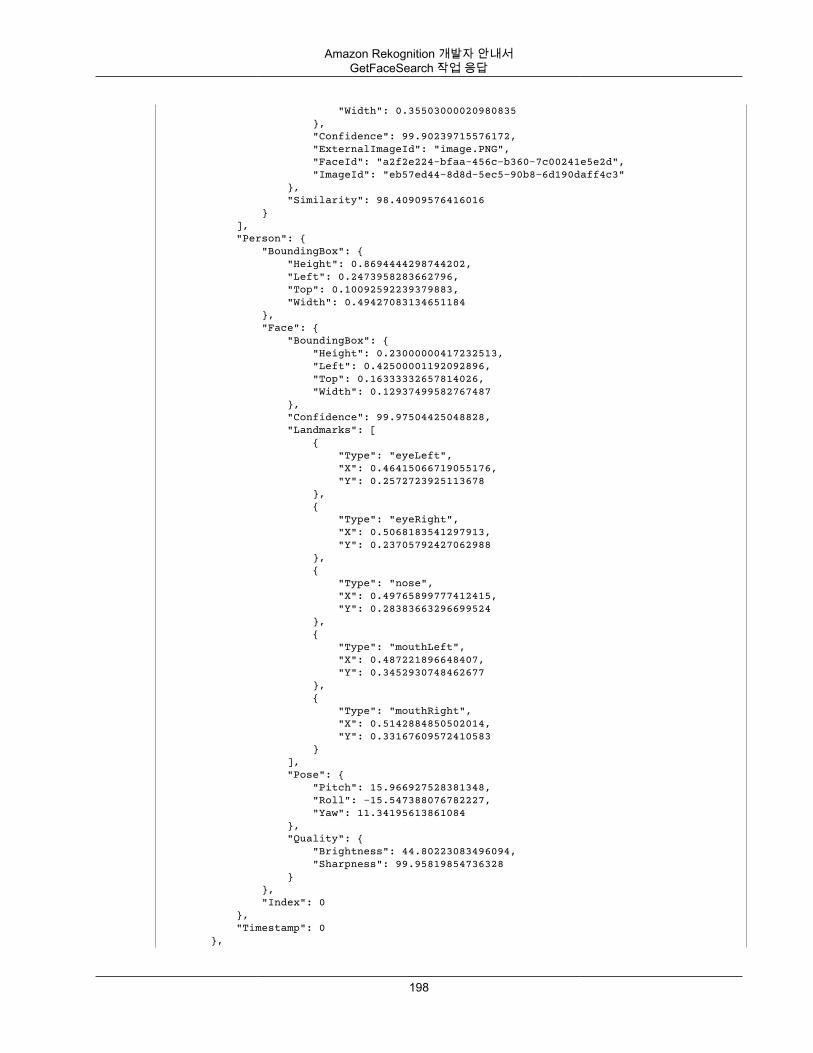
Amazon Rekognition 개발자 안내서GetFaceSearch 작업 응답
"Width": 0.35503000020980835 }, "Confidence": 99.90239715576172, "ExternalImageId": "image.PNG", "FaceId": "a2f2e224-bfaa-456c-b360-7c00241e5e2d", "ImageId": "eb57ed44-8d8d-5ec5-90b8-6d190daff4c3" }, "Similarity": 98.40909576416016 } ], "Person": { "BoundingBox": { "Height": 0.8694444298744202, "Left": 0.2473958283662796, "Top": 0.10092592239379883, "Width": 0.49427083134651184 }, "Face": { "BoundingBox": { "Height": 0.23000000417232513, "Left": 0.42500001192092896, "Top": 0.16333332657814026, "Width": 0.12937499582767487 }, "Confidence": 99.97504425048828, "Landmarks": [ { "Type": "eyeLeft", "X": 0.46415066719055176, "Y": 0.2572723925113678 }, { "Type": "eyeRight", "X": 0.5068183541297913, "Y": 0.23705792427062988 }, { "Type": "nose", "X": 0.49765899777412415, "Y": 0.28383663296699524 }, { "Type": "mouthLeft", "X": 0.487221896648407, "Y": 0.3452930748462677 }, { "Type": "mouthRight", "X": 0.5142884850502014, "Y": 0.33167609572410583 } ], "Pose": { "Pitch": 15.966927528381348, "Roll": -15.547388076782227, "Yaw": 11.34195613861084 }, "Quality": { "Brightness": 44.80223083496094, "Sharpness": 99.95819854736328 } }, "Index": 0 }, "Timestamp": 0 },
198
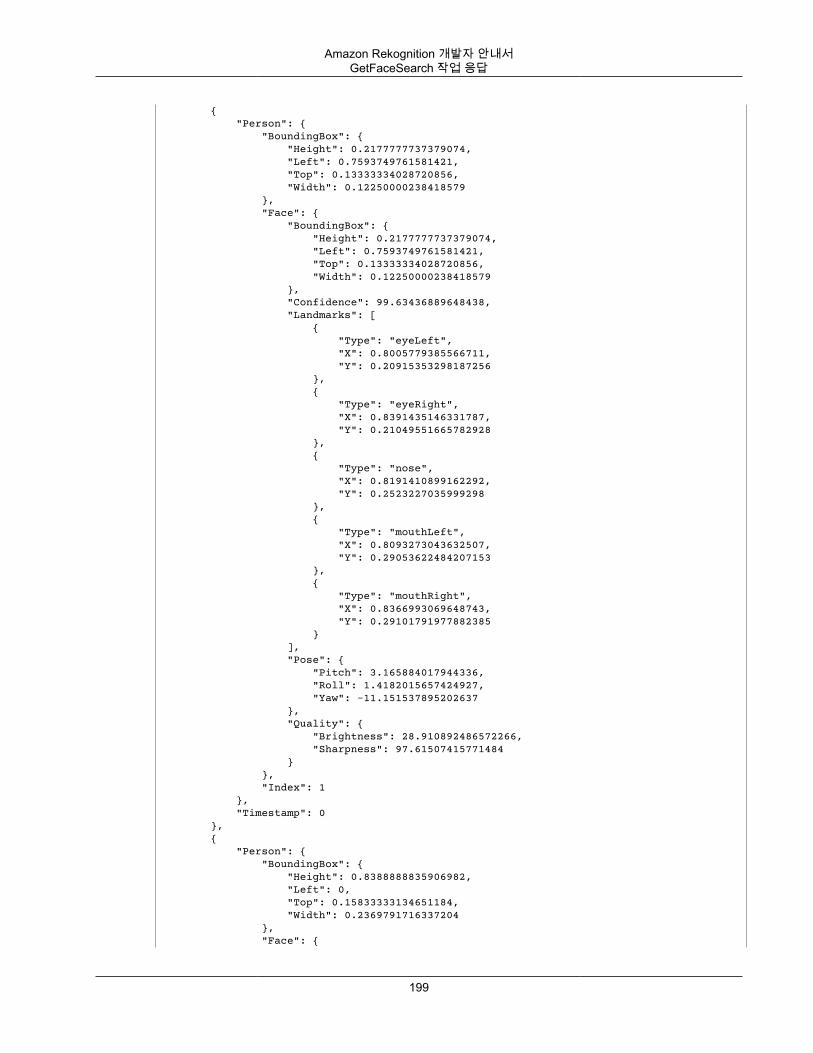
Amazon Rekognition 개발자 안내서GetFaceSearch 작업 응답
{ "Person": { "BoundingBox": { "Height": 0.2177777737379074, "Left": 0.7593749761581421, "Top": 0.13333334028720856, "Width": 0.12250000238418579 }, "Face": { "BoundingBox": { "Height": 0.2177777737379074, "Left": 0.7593749761581421, "Top": 0.13333334028720856, "Width": 0.12250000238418579 }, "Confidence": 99.63436889648438, "Landmarks": [ { "Type": "eyeLeft", "X": 0.8005779385566711, "Y": 0.20915353298187256 }, { "Type": "eyeRight", "X": 0.8391435146331787, "Y": 0.21049551665782928 }, { "Type": "nose", "X": 0.8191410899162292, "Y": 0.2523227035999298 }, { "Type": "mouthLeft", "X": 0.8093273043632507, "Y": 0.29053622484207153 }, { "Type": "mouthRight", "X": 0.8366993069648743, "Y": 0.29101791977882385 } ], "Pose": { "Pitch": 3.165884017944336, "Roll": 1.4182015657424927, "Yaw": -11.151537895202637 }, "Quality": { "Brightness": 28.910892486572266, "Sharpness": 97.61507415771484 } }, "Index": 1 }, "Timestamp": 0 }, { "Person": { "BoundingBox": { "Height": 0.8388888835906982, "Left": 0, "Top": 0.15833333134651184, "Width": 0.2369791716337204 }, "Face": {
199
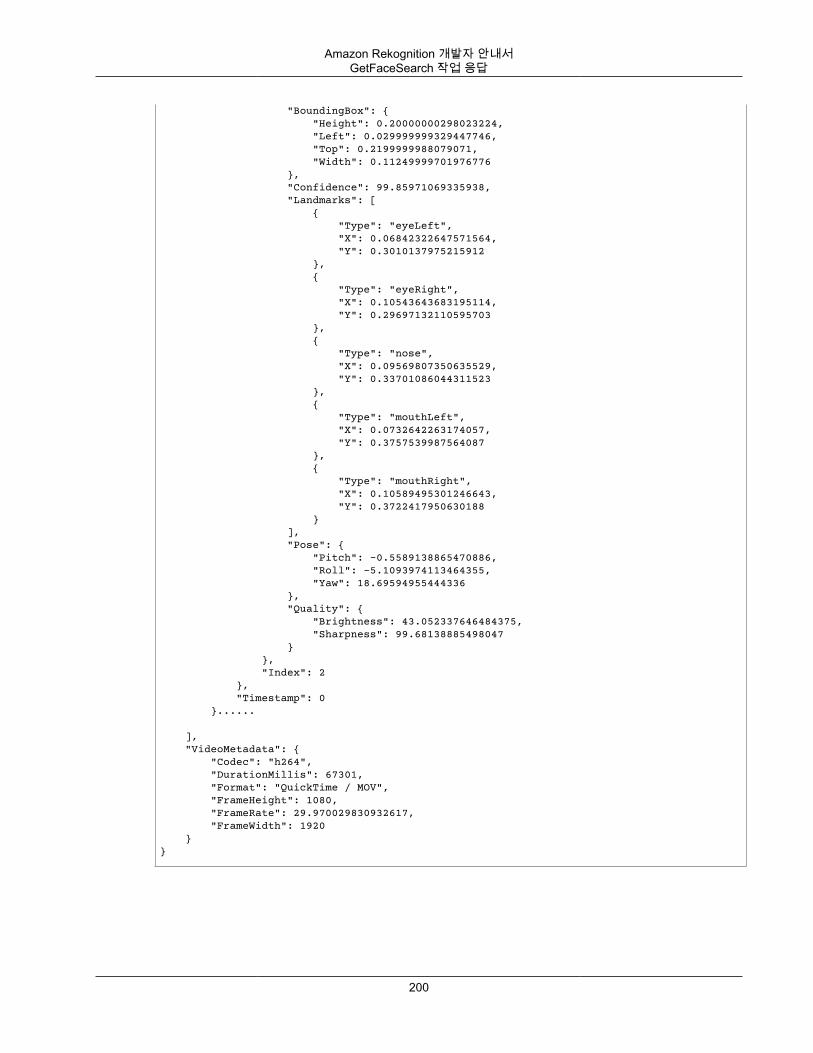
Amazon Rekognition 개발자 안내서GetFaceSearch 작업 응답
"BoundingBox": { "Height": 0.20000000298023224, "Left": 0.029999999329447746, "Top": 0.2199999988079071, "Width": 0.11249999701976776 }, "Confidence": 99.85971069335938, "Landmarks": [ { "Type": "eyeLeft", "X": 0.06842322647571564, "Y": 0.3010137975215912 }, { "Type": "eyeRight", "X": 0.10543643683195114, "Y": 0.29697132110595703 }, { "Type": "nose", "X": 0.09569807350635529, "Y": 0.33701086044311523 }, { "Type": "mouthLeft", "X": 0.0732642263174057, "Y": 0.3757539987564087 }, { "Type": "mouthRight", "X": 0.10589495301246643, "Y": 0.3722417950630188 } ], "Pose": { "Pitch": -0.5589138865470886, "Roll": -5.1093974113464355, "Yaw": 18.69594955444336 }, "Quality": { "Brightness": 43.052337646484375, "Sharpness": 99.68138885498047 } }, "Index": 2 }, "Timestamp": 0 }......
], "VideoMetadata": { "Codec": "h264", "DurationMillis": 67301, "Format": "QuickTime / MOV", "FrameHeight": 1080, "FrameRate": 29.970029830932617, "FrameWidth": 1920 }}
200
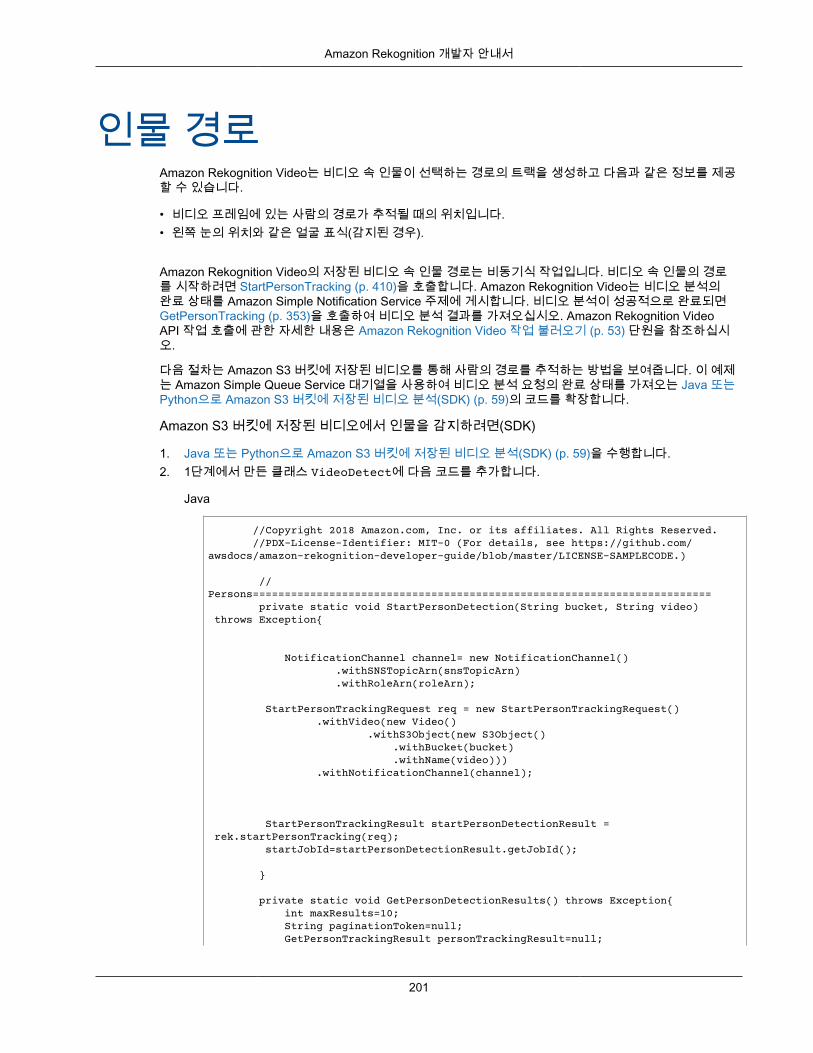
Amazon Rekognition 개발자 안내서
인물 경로Amazon Rekognition Video는 비디오 속 인물이 선택하는 경로의 트랙을 생성하고 다음과 같은 정보를 제공할 수 있습니다.
• 비디오 프레임에 있는 사람의 경로가 추적될 때의 위치입니다.• 왼쪽 눈의 위치와 같은 얼굴 표식(감지된 경우).
Amazon Rekognition Video의 저장된 비디오 속 인물 경로는 비동기식 작업입니다. 비디오 속 인물의 경로를 시작하려면 StartPersonTracking (p. 410)을 호출합니다. Amazon Rekognition Video는 비디오 분석의완료 상태를 Amazon Simple Notification Service 주제에 게시합니다. 비디오 분석이 성공적으로 완료되면GetPersonTracking (p. 353)을 호출하여 비디오 분석 결과를 가져오십시오. Amazon Rekognition VideoAPI 작업 호출에 관한 자세한 내용은 Amazon Rekognition Video 작업 불러오기 (p. 53) 단원을 참조하십시오.
다음 절차는 Amazon S3 버킷에 저장된 비디오를 통해 사람의 경로를 추적하는 방법을 보여줍니다. 이 예제는 Amazon Simple Queue Service 대기열을 사용하여 비디오 분석 요청의 완료 상태를 가져오는 Java 또는Python으로 Amazon S3 버킷에 저장된 비디오 분석(SDK) (p. 59)의 코드를 확장합니다.
Amazon S3 버킷에 저장된 비디오에서 인물을 감지하려면(SDK)
1. Java 또는 Python으로 Amazon S3 버킷에 저장된 비디오 분석(SDK) (p. 59)을 수행합니다.2. 1단계에서 만든 클래스 VideoDetect에 다음 코드를 추가합니다.
Java
//Copyright 2018 Amazon.com, Inc. or its affiliates. All Rights Reserved. //PDX-License-Identifier: MIT-0 (For details, see https://github.com/awsdocs/amazon-rekognition-developer-guide/blob/master/LICENSE-SAMPLECODE.)
//Persons======================================================================== private static void StartPersonDetection(String bucket, String video) throws Exception{ NotificationChannel channel= new NotificationChannel() .withSNSTopicArn(snsTopicArn) .withRoleArn(roleArn); StartPersonTrackingRequest req = new StartPersonTrackingRequest() .withVideo(new Video() .withS3Object(new S3Object() .withBucket(bucket) .withName(video))) .withNotificationChannel(channel); StartPersonTrackingResult startPersonDetectionResult = rek.startPersonTracking(req); startJobId=startPersonDetectionResult.getJobId(); } private static void GetPersonDetectionResults() throws Exception{ int maxResults=10; String paginationToken=null; GetPersonTrackingResult personTrackingResult=null;
201

Amazon Rekognition 개발자 안내서
do{ if (personTrackingResult !=null){ paginationToken = personTrackingResult.getNextToken(); } personTrackingResult = rek.getPersonTracking(new GetPersonTrackingRequest() .withJobId(startJobId) .withNextToken(paginationToken) .withSortBy(PersonTrackingSortBy.TIMESTAMP) .withMaxResults(maxResults)); VideoMetadata videoMetaData=personTrackingResult.getVideoMetadata(); System.out.println("Format: " + videoMetaData.getFormat()); System.out.println("Codec: " + videoMetaData.getCodec()); System.out.println("Duration: " + videoMetaData.getDurationMillis()); System.out.println("FrameRate: " + videoMetaData.getFrameRate()); //Show persons, confidence and detection times List<PersonDetection> detectedPersons= personTrackingResult.getPersons(); for (PersonDetection detectedPerson: detectedPersons) { long seconds=detectedPerson.getTimestamp()/1000; System.out.print("Sec: " + Long.toString(seconds) + " "); System.out.println("Person Identifier: " + detectedPerson.getPerson().getIndex()); System.out.println(); } } while (personTrackingResult !=null && personTrackingResult.getNextToken() != null); }
main 함수에서 다음 줄을 바꿉니다.
StartLabelDetection(bucket, video);
if (GetSQSMessageSuccess()==true) GetLabelDetectionResults();
다음으로 바꿉니다.
StartPersonDetection(bucket, video);
if (GetSQSMessageSuccess()==true) GetPersonDetectionResults();
Python
#Copyright 2018 Amazon.com, Inc. or its affiliates. All Rights Reserved.#PDX-License-Identifier: MIT-0 (For details, see https://github.com/awsdocs/amazon-rekognition-developer-guide/blob/master/LICENSE-SAMPLECODE.)
# ============== People pathing =============== def StartPersonPathing(self):
202
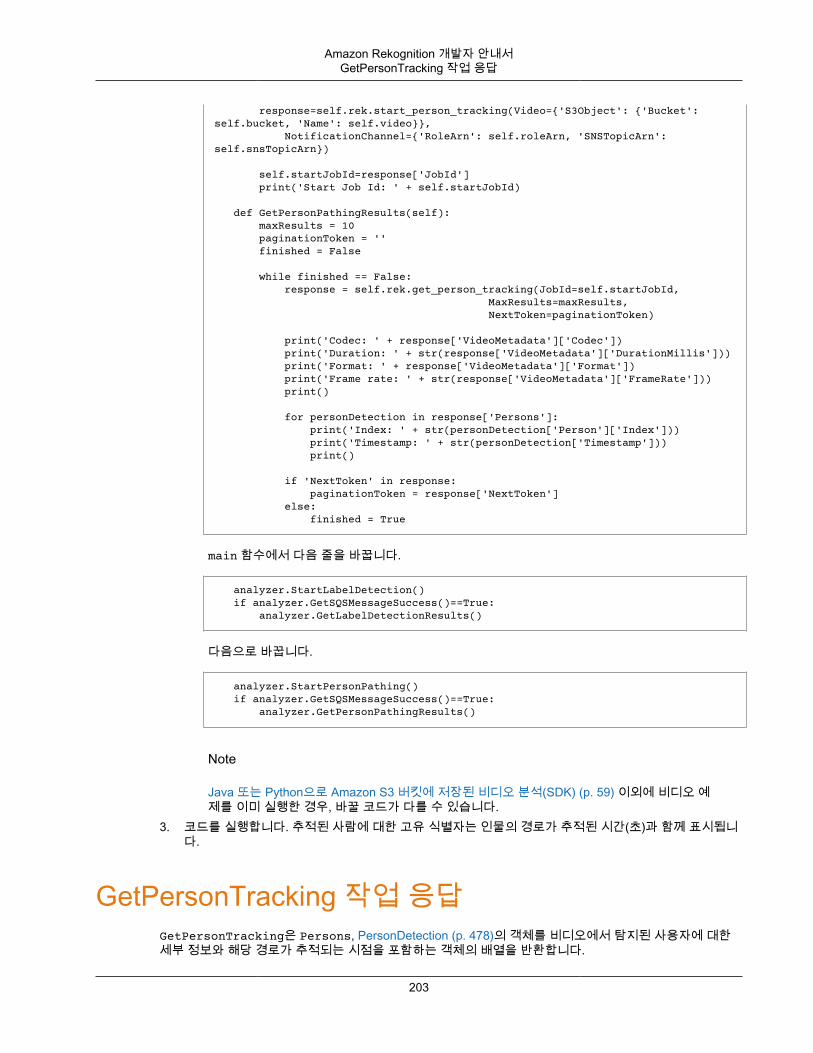
Amazon Rekognition 개발자 안내서GetPersonTracking 작업 응답
response=self.rek.start_person_tracking(Video={'S3Object': {'Bucket': self.bucket, 'Name': self.video}}, NotificationChannel={'RoleArn': self.roleArn, 'SNSTopicArn': self.snsTopicArn})
self.startJobId=response['JobId'] print('Start Job Id: ' + self.startJobId) def GetPersonPathingResults(self): maxResults = 10 paginationToken = '' finished = False
while finished == False: response = self.rek.get_person_tracking(JobId=self.startJobId, MaxResults=maxResults, NextToken=paginationToken)
print('Codec: ' + response['VideoMetadata']['Codec']) print('Duration: ' + str(response['VideoMetadata']['DurationMillis'])) print('Format: ' + response['VideoMetadata']['Format']) print('Frame rate: ' + str(response['VideoMetadata']['FrameRate'])) print()
for personDetection in response['Persons']: print('Index: ' + str(personDetection['Person']['Index'])) print('Timestamp: ' + str(personDetection['Timestamp'])) print()
if 'NextToken' in response: paginationToken = response['NextToken'] else: finished = True
main 함수에서 다음 줄을 바꿉니다.
analyzer.StartLabelDetection() if analyzer.GetSQSMessageSuccess()==True: analyzer.GetLabelDetectionResults()
다음으로 바꿉니다.
analyzer.StartPersonPathing() if analyzer.GetSQSMessageSuccess()==True: analyzer.GetPersonPathingResults()
Note
Java 또는 Python으로 Amazon S3 버킷에 저장된 비디오 분석(SDK) (p. 59) 이외에 비디오 예제를 이미 실행한 경우, 바꿀 코드가 다를 수 있습니다.
3. 코드를 실행합니다. 추적된 사람에 대한 고유 식별자는 인물의 경로가 추적된 시간(초)과 함께 표시됩니다.
GetPersonTracking 작업 응답GetPersonTracking은 Persons, PersonDetection (p. 478)의 객체를 비디오에서 탐지된 사용자에 대한세부 정보와 해당 경로가 추적되는 시점을 포함하는 객체의 배열을 반환합니다.
203
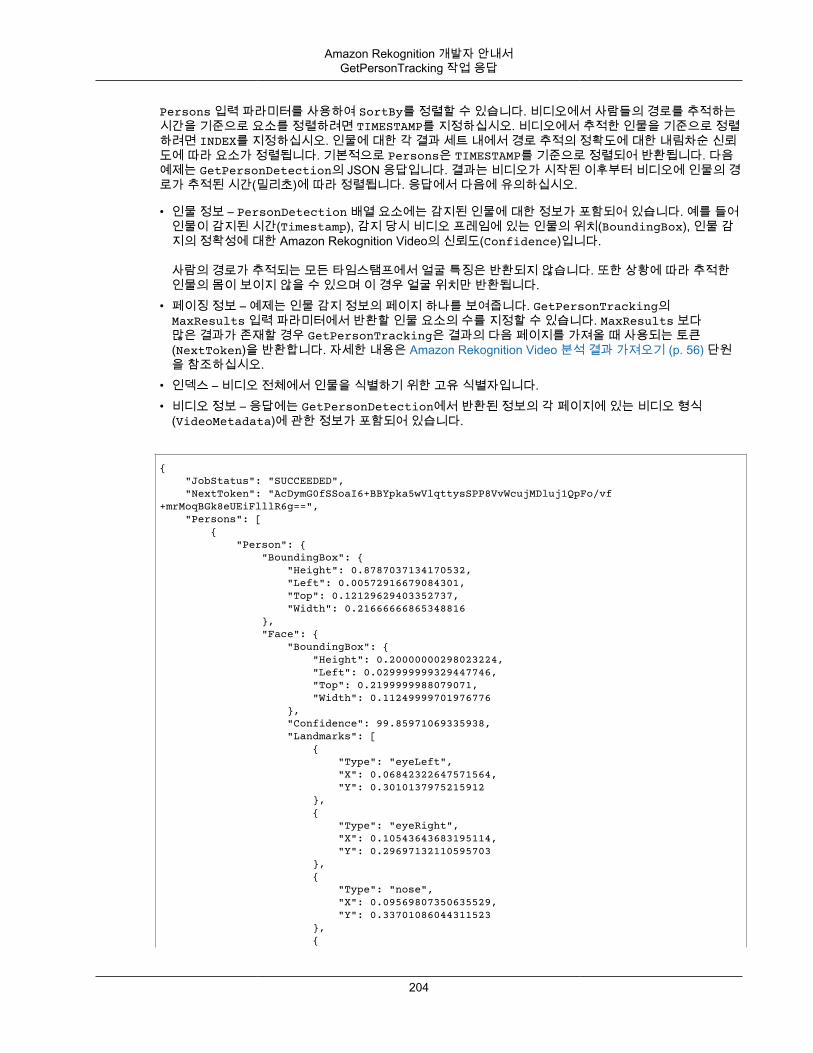
Amazon Rekognition 개발자 안내서GetPersonTracking 작업 응답
Persons 입력 파라미터를 사용하여 SortBy를 정렬할 수 있습니다. 비디오에서 사람들의 경로를 추적하는시간을 기준으로 요소를 정렬하려면 TIMESTAMP를 지정하십시오. 비디오에서 추적한 인물을 기준으로 정렬하려면 INDEX를 지정하십시오. 인물에 대한 각 결과 세트 내에서 경로 추적의 정확도에 대한 내림차순 신뢰도에 따라 요소가 정렬됩니다. 기본적으로 Persons은 TIMESTAMP를 기준으로 정렬되어 반환됩니다. 다음예제는 GetPersonDetection의 JSON 응답입니다. 결과는 비디오가 시작된 이후부터 비디오에 인물의 경로가 추적된 시간(밀리초)에 따라 정렬됩니다. 응답에서 다음에 유의하십시오.
• 인물 정보 – PersonDetection 배열 요소에는 감지된 인물에 대한 정보가 포함되어 있습니다. 예를 들어인물이 감지된 시간(Timestamp), 감지 당시 비디오 프레임에 있는 인물의 위치(BoundingBox), 인물 감지의 정확성에 대한 Amazon Rekognition Video의 신뢰도(Confidence)입니다.
사람의 경로가 추적되는 모든 타임스탬프에서 얼굴 특징은 반환되지 않습니다. 또한 상황에 따라 추적한인물의 몸이 보이지 않을 수 있으며 이 경우 얼굴 위치만 반환됩니다.
• 페이징 정보 – 예제는 인물 감지 정보의 페이지 하나를 보여줍니다. GetPersonTracking의MaxResults 입력 파라미터에서 반환할 인물 요소의 수를 지정할 수 있습니다. MaxResults 보다많은 결과가 존재할 경우 GetPersonTracking은 결과의 다음 페이지를 가져올 때 사용되는 토큰(NextToken)을 반환합니다. 자세한 내용은 Amazon Rekognition Video 분석 결과 가져오기 (p. 56) 단원을 참조하십시오.
• 인덱스 – 비디오 전체에서 인물을 식별하기 위한 고유 식별자입니다.• 비디오 정보 – 응답에는 GetPersonDetection에서 반환된 정보의 각 페이지에 있는 비디오 형식
(VideoMetadata)에 관한 정보가 포함되어 있습니다.
{ "JobStatus": "SUCCEEDED", "NextToken": "AcDymG0fSSoaI6+BBYpka5wVlqttysSPP8VvWcujMDluj1QpFo/vf+mrMoqBGk8eUEiFlllR6g==", "Persons": [ { "Person": { "BoundingBox": { "Height": 0.8787037134170532, "Left": 0.00572916679084301, "Top": 0.12129629403352737, "Width": 0.21666666865348816 }, "Face": { "BoundingBox": { "Height": 0.20000000298023224, "Left": 0.029999999329447746, "Top": 0.2199999988079071, "Width": 0.11249999701976776 }, "Confidence": 99.85971069335938, "Landmarks": [ { "Type": "eyeLeft", "X": 0.06842322647571564, "Y": 0.3010137975215912 }, { "Type": "eyeRight", "X": 0.10543643683195114, "Y": 0.29697132110595703 }, { "Type": "nose", "X": 0.09569807350635529, "Y": 0.33701086044311523 }, {
204
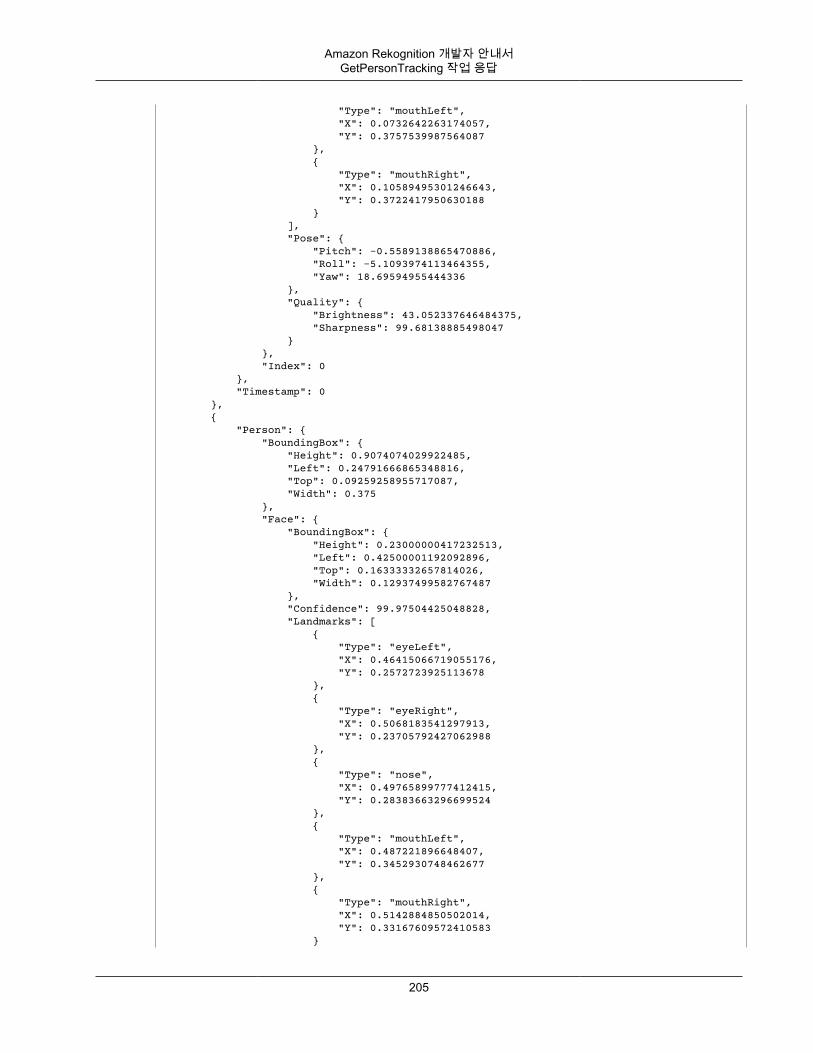
Amazon Rekognition 개발자 안내서GetPersonTracking 작업 응답
"Type": "mouthLeft", "X": 0.0732642263174057, "Y": 0.3757539987564087 }, { "Type": "mouthRight", "X": 0.10589495301246643, "Y": 0.3722417950630188 } ], "Pose": { "Pitch": -0.5589138865470886, "Roll": -5.1093974113464355, "Yaw": 18.69594955444336 }, "Quality": { "Brightness": 43.052337646484375, "Sharpness": 99.68138885498047 } }, "Index": 0 }, "Timestamp": 0 }, { "Person": { "BoundingBox": { "Height": 0.9074074029922485, "Left": 0.24791666865348816, "Top": 0.09259258955717087, "Width": 0.375 }, "Face": { "BoundingBox": { "Height": 0.23000000417232513, "Left": 0.42500001192092896, "Top": 0.16333332657814026, "Width": 0.12937499582767487 }, "Confidence": 99.97504425048828, "Landmarks": [ { "Type": "eyeLeft", "X": 0.46415066719055176, "Y": 0.2572723925113678 }, { "Type": "eyeRight", "X": 0.5068183541297913, "Y": 0.23705792427062988 }, { "Type": "nose", "X": 0.49765899777412415, "Y": 0.28383663296699524 }, { "Type": "mouthLeft", "X": 0.487221896648407, "Y": 0.3452930748462677 }, { "Type": "mouthRight", "X": 0.5142884850502014, "Y": 0.33167609572410583 }
205
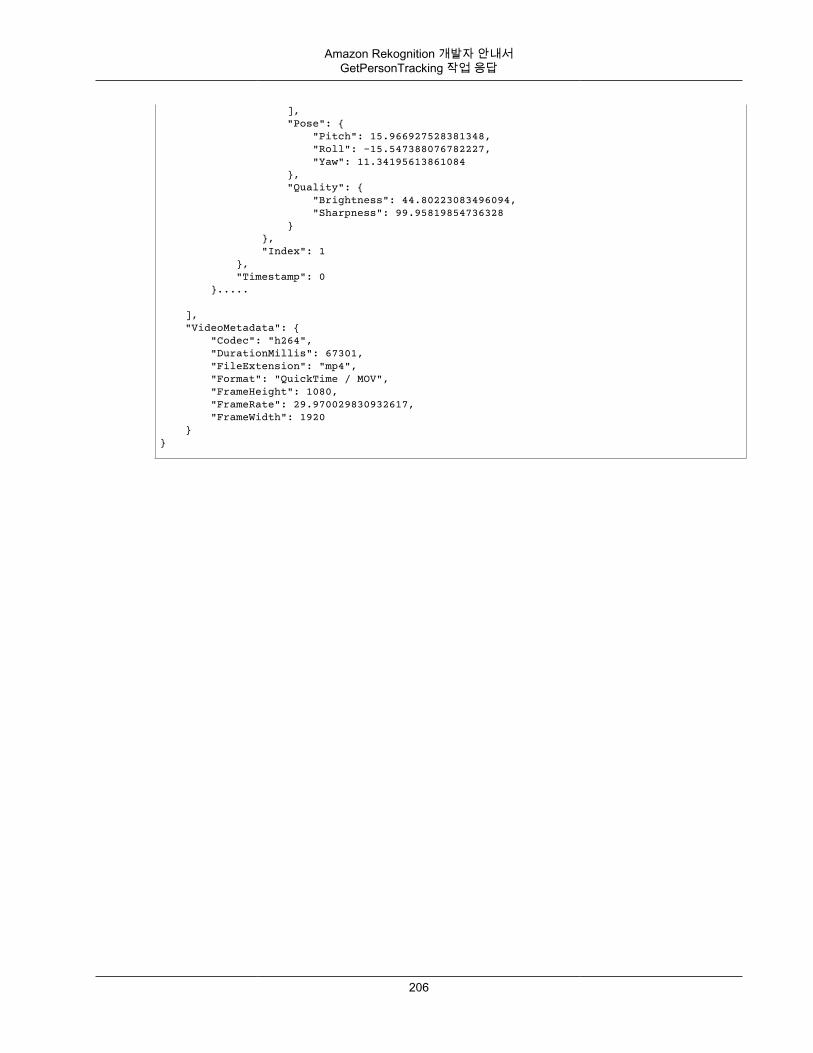
Amazon Rekognition 개발자 안내서GetPersonTracking 작업 응답
], "Pose": { "Pitch": 15.966927528381348, "Roll": -15.547388076782227, "Yaw": 11.34195613861084 }, "Quality": { "Brightness": 44.80223083496094, "Sharpness": 99.95819854736328 } }, "Index": 1 }, "Timestamp": 0 }.....
], "VideoMetadata": { "Codec": "h264", "DurationMillis": 67301, "FileExtension": "mp4", "Format": "QuickTime / MOV", "FrameHeight": 1080, "FrameRate": 29.970029830932617, "FrameWidth": 1920 }}
206
Amazon Rekognition 개발자 안내서얼굴 검색과 유명 인사 인식 비교
유명 인사 인식Amazon Rekognition은 엔터테인먼트와 미디어, 스포츠, 재계, 정계 등 다양한 범주에 걸쳐 수천 명의 유명인사 얼굴을 인식할 수 있습니다. Amazon Rekognition은 이미지와 저장된 비디오에서 유명 인사를 인식할수 있습니다. 인식된 유명 인사에 대한 추가 정보를 얻을 수도 있습니다.
Amazon Rekognition 유명 인사 인식 API는 각기 다른 설정, 메이크업 및 기타 조건 속에서 가급적 많은 유명인사를 감지하기 위해 조정됩니다. 사회, 미디어 및 엔터테인먼트 고객이 유명 인사 인식을 사용하는 앱을 빌드합니다. 예를 들어 유명 인사의 닮은꼴을 식별하는 엔터테인먼트 앱 또는 자동화된 화면 태깅의 일부분으로 유명 인사를 식별하는 앱이 있습니다. Amazon Rekognition 유명 인사 인식은 이미지 또는 비디오 속에 알려진 유명 인사가 있을 수 있을 것으로 예상하는 사용 사례에서만 사용됩니다. 유명 인사가 아닌 얼굴의 인식에 대한 내용은 모음에서 얼굴 검색 (p. 153) 단원을 참조하십시오.
주제• 얼굴 검색과 유명 인사 인식 비교 (p. 207)• 이미지 속 유명 인사 인식 (p. 207)• 저장된 비디오 속 유명 인사 인식 (p. 213)• 유명 인사에 대한 정보 얻기 (p. 218)
Note
유명 인사 인식 API는 입력 이미지의 얼굴을 유명 인사의 얼굴 모음과 비교하고 검색된 가장 근접한일치 항목을 유사성 점수와 함께 반환하는 방식으로 작동합니다.
얼굴 검색과 유명 인사 인식 비교Amazon Rekognition은 유명 인사 인식 기능과 얼굴 인식 기능을 모두 제공합니다. 이들 기능은 사용 사례 및모범 사례에서 몇 가지 중요한 차이가 있습니다.
유명 인사 인식은 스포츠, 미디어, 정치 및 비즈니스 분야에서 수십만 명의 유명 인사를 인식할 수 있도록 미리 학습되어 있습니다. 또한 유명 인사의 얼굴뿐 아니라 다양한 분장(예: 분장하지 않은 Johnny Depp, “가위손”으로 분장한 Johnny Depp, “잭 스패로”로 분장한 Johnny Depp)도 검색하도록 설계되어 있습니다. 이 기능은 대량의 이미지 또는 비디오를 검색하여 특정 유명 인사가 포함되어 있을 수 있는 소량의 이미지 또는 비디오를 식별하도록 설계되었으며 유명 인사가 아닌 사람들의 얼굴에서 일치를 검색하는 데 사용하기 위한 것이 아닙니다. 유명 인사 일치의 정확도가 중요한 상황에서는 인간 작업자가 이 기능을 통해 간추려진 콘텐츠를 검토하여 적절한 인간의 판단을 통해 높은 정확도를 확보하는 것이 좋습니다. 유명 인사 인식은 시민적 자유를 침해할 수 있는 방식으로 사용해서는 안 됩니다.
이와 달리, 얼굴 인식은 유명 인사뿐 아니라 모든 개인을 대상으로 신원 확인 또는 검색하기 위한 자체 얼굴벡터로 자체 얼굴 모음을 생성할 수 있는 보다 범용적인 기능입니다. 얼굴 인식은 건물 출입 승인, 공공 안전,소셜 미디어와 같은 애플리케이션에 사용될 수 있습니다. 이러한 사용 사례 모두에서 모범 사례, 적절한 신뢰도(공공 안전 사용 사례의 경우 99%), 일치의 정확도가 중요한 상황에서는 인간 작업자에 의한 검토를 사용하는 것이 좋습니다.
자세한 내용은 모음에서 얼굴 검색 (p. 153) 단원을 참조하십시오.
이미지 속 유명 인사 인식이미지 속 유명 인사를 인식하고, 인식한 유명 인사에 대한 추가 정보를 얻으려면RecognizeCelebrities (p. 379) 비 스토리지 API 작업을 사용하십시오. 예를 들어 정보 수집 타이밍이 중요한 소셜 미디어 또는 뉴스 및 엔터테인먼트 업계에서 RecognizeCelebrities 작업을 사용하여 한 이미지에서 무려 100명의 유명 인사를 식별하고 유명 인사 웹 페이지의 링크를 반환할 수 있습니다(해당하는 경우).
207

Amazon Rekognition 개발자 안내서RecognizeCelebrities 호출
Amazon Rekognition의 경우 유명 인사가 감지된 이미지를 기억하지 않습니다. 애플리케이션에서 이 정보를저장해야 합니다.
RecognizeCelebrities에서 반환한 유명 인사에 대한 추가 정보를 저장하지 않은 상태에서 정보 수집을위해 이미지를 다시 분석하지 않으려면 GetCelebrityInfo (p. 328)를 사용합니다. GetCelebrityInfo를호출하려면 Amazon Rekognition이 각 유명 인사에게 할당하는 고유한 식별자가 필요합니다. 식별자는 이미지에서 인식된 각 유명 인사에 대한 RecognizeCelebrities 응답의 일부로 반환됩니다.
유명 인사 인식을 위해 처리할 이미지 모음이 많은 경우, AWS Batch를 사용해 백그라운드에서 일괄적으로RecognizeCelebrities에 대한 호출을 처리하는 방법을 고려하십시오. 모음에 새 이미지를 추가하면, 이미지가 S3 버킷에 업로드될 때 AWS Lambda 함수를 사용해 RecognizeCelebrities를 호출하여 유명 인사를 인식할 수 있습니다.
RecognizeCelebrities 호출입력 이미지는 AWS Command Line Interface(AWS CLI) 또는 AWS SDK를 사용하여 이미지 바이트 배열(base64 인코딩된 이미지 바이트) 또는 Amazon S3 객체로 제공할 수 있습니다. AWS CLI 절차에서는 .jpg또는 .png 형식으로 이미지를 S3 버킷에 업로드합니다. AWS SDK for Java 절차에서는 로컬 파일 시스템에서 가져온 이미지를 사용합니다. 입력 이미지 권장 사항에 대한 자세한 내용은 이미지 작업 (p. 25) 단원을 참조하십시오.
이 절차를 실행하려면 에서 한 명 이상의 유명 인사 얼굴이 포함된 이미지 파일이 필요합니다.
이미지에서 유명 인사를 인식하려면
1. 아직 설정하지 않았다면 다음과 같이 하십시오.
a. AmazonRekognitionFullAccess 권한과 AmazonS3ReadOnlyAccess 권한을 가진 IAM 사용자를 만들어 업데이트합니다. 자세한 내용은 1단계: AWS 계정 설정 및 IAM 사용자 만들기 (p. 11)단원을 참조하십시오.
b. AWS CLI와 AWS SDK를 설치하고 구성합니다. 자세한 내용은 2단계: AWS CLI 및 AWS SDK 설정 (p. 12) 단원을 참조하십시오.
2. 다음 예제를 사용하여 RecognizeCelebrities 작업을 호출합니다.
Java
이 예제는 이미지에서 감지된 유명 인사에 대한 정보를 표시합니다.
photo의 값을, 하나 이상의 유명 인사 얼굴을 포함하는 이미지 파일의 경로와 파일 이름으로 변경합니다.
//Copyright 2018 Amazon.com, Inc. or its affiliates. All Rights Reserved.//PDX-License-Identifier: MIT-0 (For details, see https://github.com/awsdocs/amazon-rekognition-developer-guide/blob/master/LICENSE-SAMPLECODE.)
package aws.example.rekognition.image;import com.amazonaws.services.rekognition.AmazonRekognition;import com.amazonaws.services.rekognition.AmazonRekognitionClientBuilder;import com.amazonaws.services.rekognition.model.Image;import com.amazonaws.services.rekognition.model.BoundingBox;import com.amazonaws.services.rekognition.model.Celebrity;import com.amazonaws.services.rekognition.model.RecognizeCelebritiesRequest;import com.amazonaws.services.rekognition.model.RecognizeCelebritiesResult;import java.io.File;import java.io.FileInputStream;import java.io.InputStream;import java.nio.ByteBuffer;import com.amazonaws.util.IOUtils;import java.util.List;
208
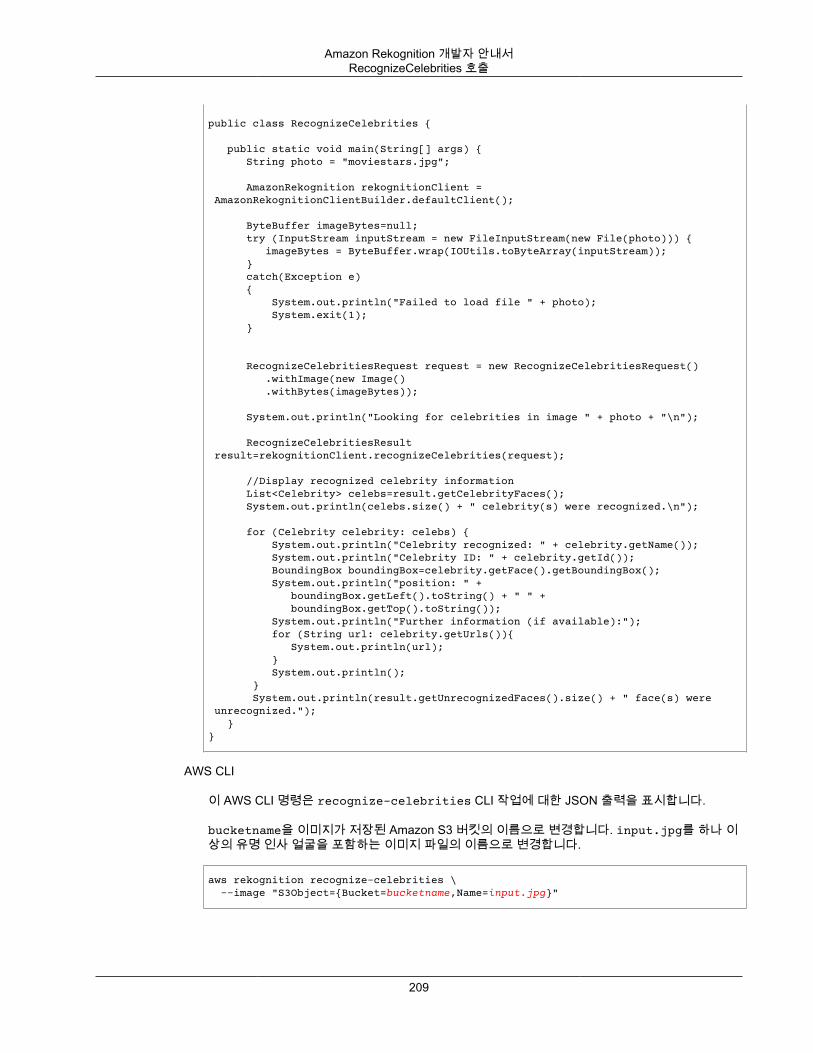
Amazon Rekognition 개발자 안내서RecognizeCelebrities 호출
public class RecognizeCelebrities {
public static void main(String[] args) { String photo = "moviestars.jpg";
AmazonRekognition rekognitionClient = AmazonRekognitionClientBuilder.defaultClient();
ByteBuffer imageBytes=null; try (InputStream inputStream = new FileInputStream(new File(photo))) { imageBytes = ByteBuffer.wrap(IOUtils.toByteArray(inputStream)); } catch(Exception e) { System.out.println("Failed to load file " + photo); System.exit(1); }
RecognizeCelebritiesRequest request = new RecognizeCelebritiesRequest() .withImage(new Image() .withBytes(imageBytes));
System.out.println("Looking for celebrities in image " + photo + "\n");
RecognizeCelebritiesResult result=rekognitionClient.recognizeCelebrities(request);
//Display recognized celebrity information List<Celebrity> celebs=result.getCelebrityFaces(); System.out.println(celebs.size() + " celebrity(s) were recognized.\n");
for (Celebrity celebrity: celebs) { System.out.println("Celebrity recognized: " + celebrity.getName()); System.out.println("Celebrity ID: " + celebrity.getId()); BoundingBox boundingBox=celebrity.getFace().getBoundingBox(); System.out.println("position: " + boundingBox.getLeft().toString() + " " + boundingBox.getTop().toString()); System.out.println("Further information (if available):"); for (String url: celebrity.getUrls()){ System.out.println(url); } System.out.println(); } System.out.println(result.getUnrecognizedFaces().size() + " face(s) were unrecognized."); }}
AWS CLI
이 AWS CLI 명령은 recognize-celebrities CLI 작업에 대한 JSON 출력을 표시합니다.
bucketname을 이미지가 저장된 Amazon S3 버킷의 이름으로 변경합니다. input.jpg를 하나 이상의 유명 인사 얼굴을 포함하는 이미지 파일의 이름으로 변경합니다.
aws rekognition recognize-celebrities \ --image "S3Object={Bucket=bucketname,Name=input.jpg}"
209
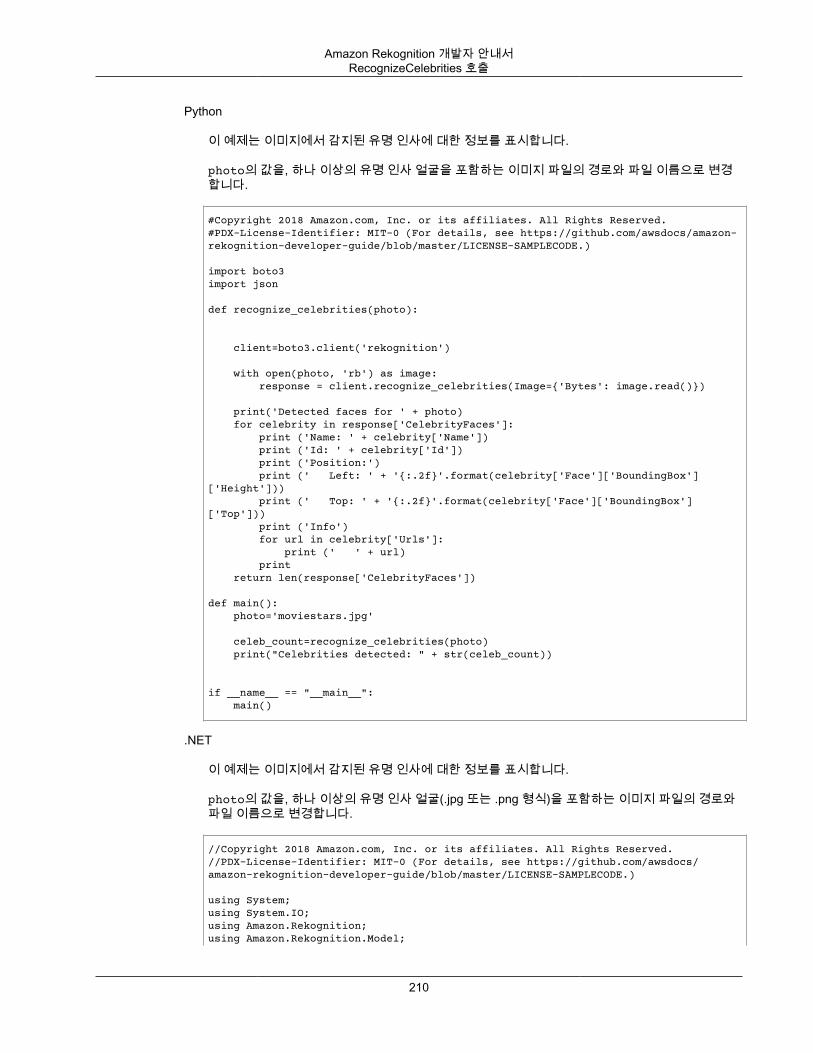
Amazon Rekognition 개발자 안내서RecognizeCelebrities 호출
Python
이 예제는 이미지에서 감지된 유명 인사에 대한 정보를 표시합니다.
photo의 값을, 하나 이상의 유명 인사 얼굴을 포함하는 이미지 파일의 경로와 파일 이름으로 변경합니다.
#Copyright 2018 Amazon.com, Inc. or its affiliates. All Rights Reserved.#PDX-License-Identifier: MIT-0 (For details, see https://github.com/awsdocs/amazon-rekognition-developer-guide/blob/master/LICENSE-SAMPLECODE.)
import boto3import json
def recognize_celebrities(photo):
client=boto3.client('rekognition')
with open(photo, 'rb') as image: response = client.recognize_celebrities(Image={'Bytes': image.read()})
print('Detected faces for ' + photo) for celebrity in response['CelebrityFaces']: print ('Name: ' + celebrity['Name']) print ('Id: ' + celebrity['Id']) print ('Position:') print (' Left: ' + '{:.2f}'.format(celebrity['Face']['BoundingBox']['Height'])) print (' Top: ' + '{:.2f}'.format(celebrity['Face']['BoundingBox']['Top'])) print ('Info') for url in celebrity['Urls']: print (' ' + url) print return len(response['CelebrityFaces'])
def main(): photo='moviestars.jpg'
celeb_count=recognize_celebrities(photo) print("Celebrities detected: " + str(celeb_count))
if __name__ == "__main__": main()
.NET
이 예제는 이미지에서 감지된 유명 인사에 대한 정보를 표시합니다.
photo의 값을, 하나 이상의 유명 인사 얼굴(.jpg 또는 .png 형식)을 포함하는 이미지 파일의 경로와파일 이름으로 변경합니다.
//Copyright 2018 Amazon.com, Inc. or its affiliates. All Rights Reserved.//PDX-License-Identifier: MIT-0 (For details, see https://github.com/awsdocs/amazon-rekognition-developer-guide/blob/master/LICENSE-SAMPLECODE.)
using System;using System.IO;using Amazon.Rekognition;using Amazon.Rekognition.Model;
210
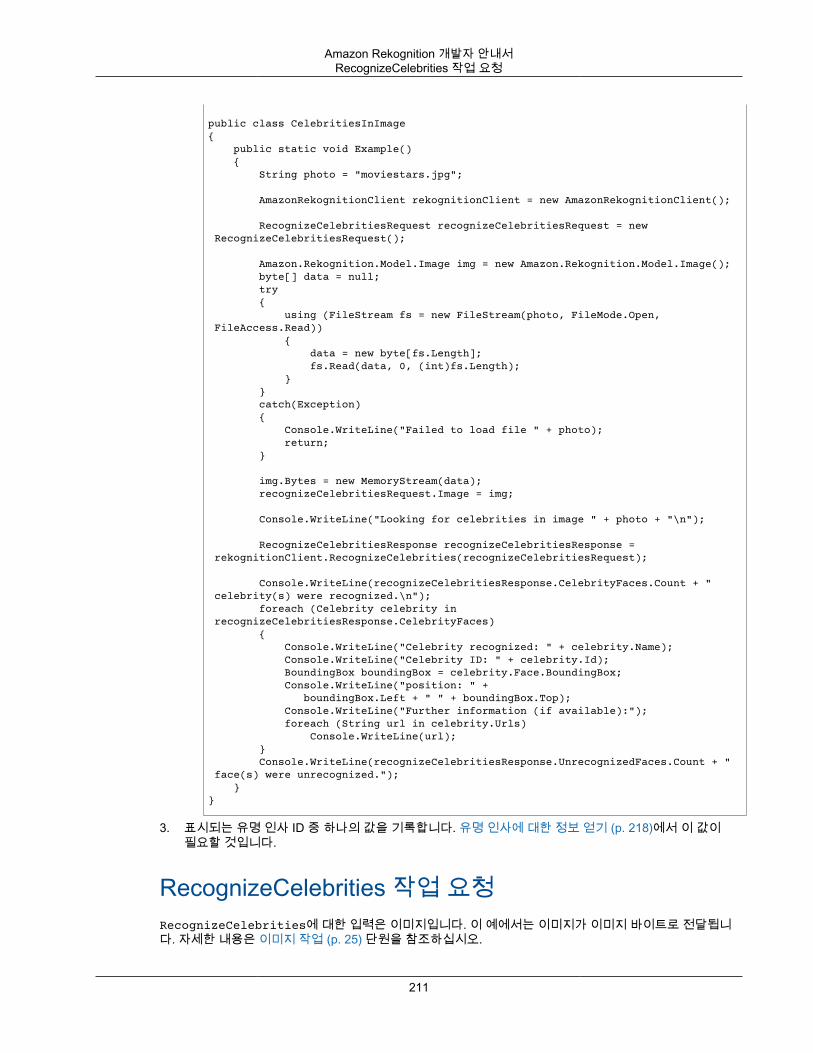
Amazon Rekognition 개발자 안내서RecognizeCelebrities 작업 요청
public class CelebritiesInImage{ public static void Example() { String photo = "moviestars.jpg";
AmazonRekognitionClient rekognitionClient = new AmazonRekognitionClient();
RecognizeCelebritiesRequest recognizeCelebritiesRequest = new RecognizeCelebritiesRequest();
Amazon.Rekognition.Model.Image img = new Amazon.Rekognition.Model.Image(); byte[] data = null; try { using (FileStream fs = new FileStream(photo, FileMode.Open, FileAccess.Read)) { data = new byte[fs.Length]; fs.Read(data, 0, (int)fs.Length); } } catch(Exception) { Console.WriteLine("Failed to load file " + photo); return; }
img.Bytes = new MemoryStream(data); recognizeCelebritiesRequest.Image = img;
Console.WriteLine("Looking for celebrities in image " + photo + "\n");
RecognizeCelebritiesResponse recognizeCelebritiesResponse = rekognitionClient.RecognizeCelebrities(recognizeCelebritiesRequest);
Console.WriteLine(recognizeCelebritiesResponse.CelebrityFaces.Count + " celebrity(s) were recognized.\n"); foreach (Celebrity celebrity in recognizeCelebritiesResponse.CelebrityFaces) { Console.WriteLine("Celebrity recognized: " + celebrity.Name); Console.WriteLine("Celebrity ID: " + celebrity.Id); BoundingBox boundingBox = celebrity.Face.BoundingBox; Console.WriteLine("position: " + boundingBox.Left + " " + boundingBox.Top); Console.WriteLine("Further information (if available):"); foreach (String url in celebrity.Urls) Console.WriteLine(url); } Console.WriteLine(recognizeCelebritiesResponse.UnrecognizedFaces.Count + " face(s) were unrecognized."); }}
3. 표시되는 유명 인사 ID 중 하나의 값을 기록합니다. 유명 인사에 대한 정보 얻기 (p. 218)에서 이 값이필요할 것입니다.
RecognizeCelebrities 작업 요청RecognizeCelebrities에 대한 입력은 이미지입니다. 이 예에서는 이미지가 이미지 바이트로 전달됩니다. 자세한 내용은 이미지 작업 (p. 25) 단원을 참조하십시오.
211
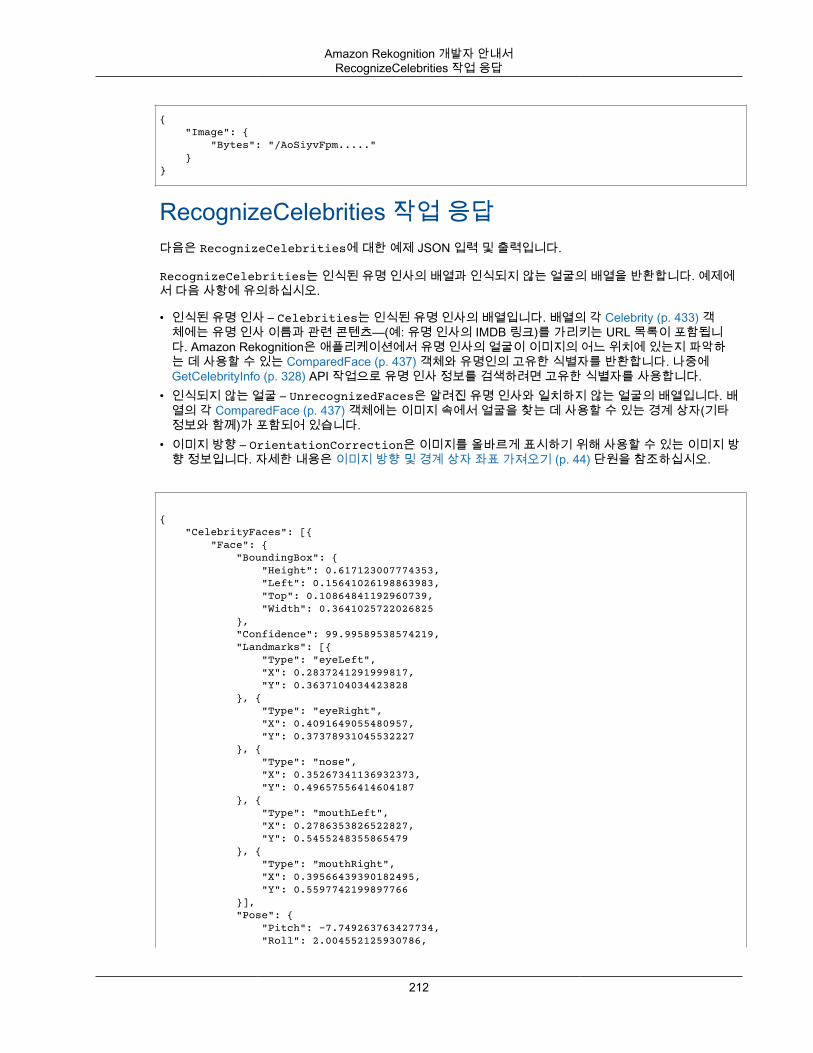
Amazon Rekognition 개발자 안내서RecognizeCelebrities 작업 응답
{ "Image": { "Bytes": "/AoSiyvFpm....." }}
RecognizeCelebrities 작업 응답다음은 RecognizeCelebrities에 대한 예제 JSON 입력 및 출력입니다.
RecognizeCelebrities는 인식된 유명 인사의 배열과 인식되지 않는 얼굴의 배열을 반환합니다. 예제에서 다음 사항에 유의하십시오.
• 인식된 유명 인사 – Celebrities는 인식된 유명 인사의 배열입니다. 배열의 각 Celebrity (p. 433) 객체에는 유명 인사 이름과 관련 콘텐츠—(예: 유명 인사의 IMDB 링크)를 가리키는 URL 목록이 포함됩니다. Amazon Rekognition은 애플리케이션에서 유명 인사의 얼굴이 이미지의 어느 위치에 있는지 파악하는 데 사용할 수 있는 ComparedFace (p. 437) 객체와 유명인의 고유한 식별자를 반환합니다. 나중에GetCelebrityInfo (p. 328) API 작업으로 유명 인사 정보를 검색하려면 고유한 식별자를 사용합니다.
• 인식되지 않는 얼굴 – UnrecognizedFaces은 알려진 유명 인사와 일치하지 않는 얼굴의 배열입니다. 배열의 각 ComparedFace (p. 437) 객체에는 이미지 속에서 얼굴을 찾는 데 사용할 수 있는 경계 상자(기타정보와 함께)가 포함되어 있습니다.
• 이미지 방향 – OrientationCorrection은 이미지를 올바르게 표시하기 위해 사용할 수 있는 이미지 방향 정보입니다. 자세한 내용은 이미지 방향 및 경계 상자 좌표 가져오기 (p. 44) 단원을 참조하십시오.
{ "CelebrityFaces": [{ "Face": { "BoundingBox": { "Height": 0.617123007774353, "Left": 0.15641026198863983, "Top": 0.10864841192960739, "Width": 0.3641025722026825 }, "Confidence": 99.99589538574219, "Landmarks": [{ "Type": "eyeLeft", "X": 0.2837241291999817, "Y": 0.3637104034423828 }, { "Type": "eyeRight", "X": 0.4091649055480957, "Y": 0.37378931045532227 }, { "Type": "nose", "X": 0.35267341136932373, "Y": 0.49657556414604187 }, { "Type": "mouthLeft", "X": 0.2786353826522827, "Y": 0.5455248355865479 }, { "Type": "mouthRight", "X": 0.39566439390182495, "Y": 0.5597742199897766 }], "Pose": { "Pitch": -7.749263763427734, "Roll": 2.004552125930786,
212
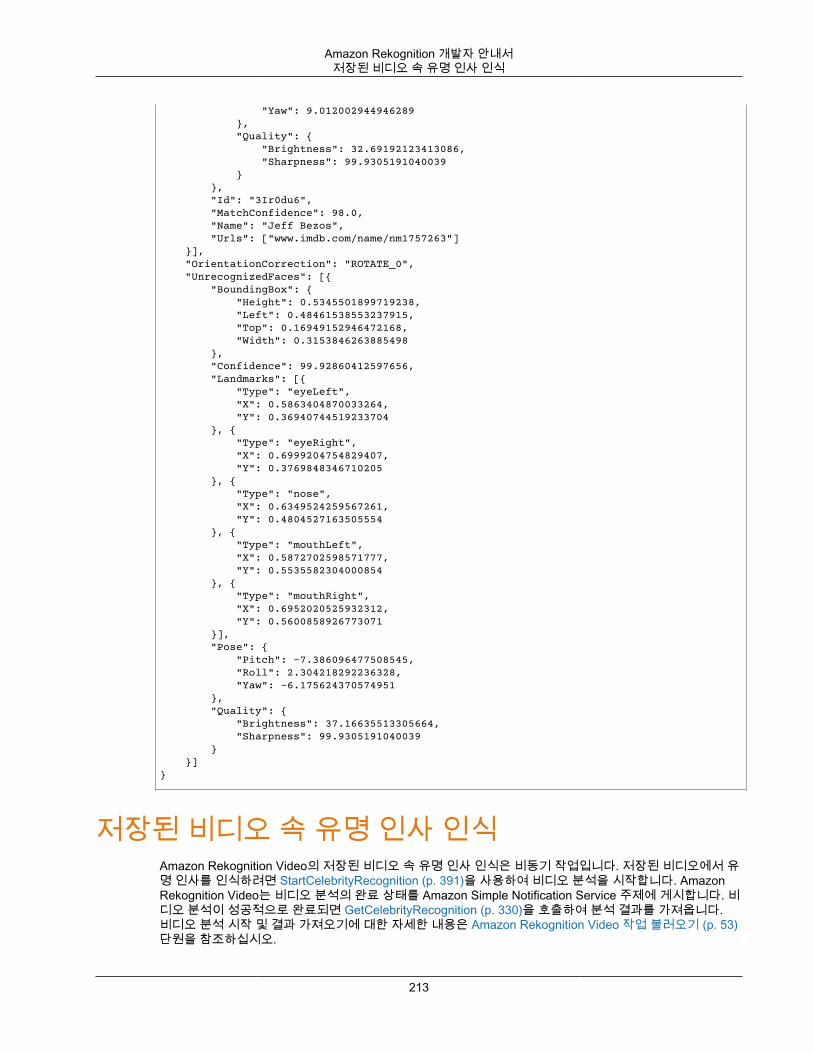
Amazon Rekognition 개발자 안내서저장된 비디오 속 유명 인사 인식
"Yaw": 9.012002944946289 }, "Quality": { "Brightness": 32.69192123413086, "Sharpness": 99.9305191040039 } }, "Id": "3Ir0du6", "MatchConfidence": 98.0, "Name": "Jeff Bezos", "Urls": ["www.imdb.com/name/nm1757263"] }], "OrientationCorrection": "ROTATE_0", "UnrecognizedFaces": [{ "BoundingBox": { "Height": 0.5345501899719238, "Left": 0.48461538553237915, "Top": 0.16949152946472168, "Width": 0.3153846263885498 }, "Confidence": 99.92860412597656, "Landmarks": [{ "Type": "eyeLeft", "X": 0.5863404870033264, "Y": 0.36940744519233704 }, { "Type": "eyeRight", "X": 0.6999204754829407, "Y": 0.3769848346710205 }, { "Type": "nose", "X": 0.6349524259567261, "Y": 0.4804527163505554 }, { "Type": "mouthLeft", "X": 0.5872702598571777, "Y": 0.5535582304000854 }, { "Type": "mouthRight", "X": 0.6952020525932312, "Y": 0.5600858926773071 }], "Pose": { "Pitch": -7.386096477508545, "Roll": 2.304218292236328, "Yaw": -6.175624370574951 }, "Quality": { "Brightness": 37.16635513305664, "Sharpness": 99.9305191040039 } }]}
저장된 비디오 속 유명 인사 인식Amazon Rekognition Video의 저장된 비디오 속 유명 인사 인식은 비동기 작업입니다. 저장된 비디오에서 유명 인사를 인식하려면 StartCelebrityRecognition (p. 391)을 사용하여 비디오 분석을 시작합니다. AmazonRekognition Video는 비디오 분석의 완료 상태를 Amazon Simple Notification Service 주제에 게시합니다. 비디오 분석이 성공적으로 완료되면 GetCelebrityRecognition (p. 330)을 호출하여 분석 결과를 가져옵니다.비디오 분석 시작 및 결과 가져오기에 대한 자세한 내용은 Amazon Rekognition Video 작업 불러오기 (p. 53)단원을 참조하십시오.
213
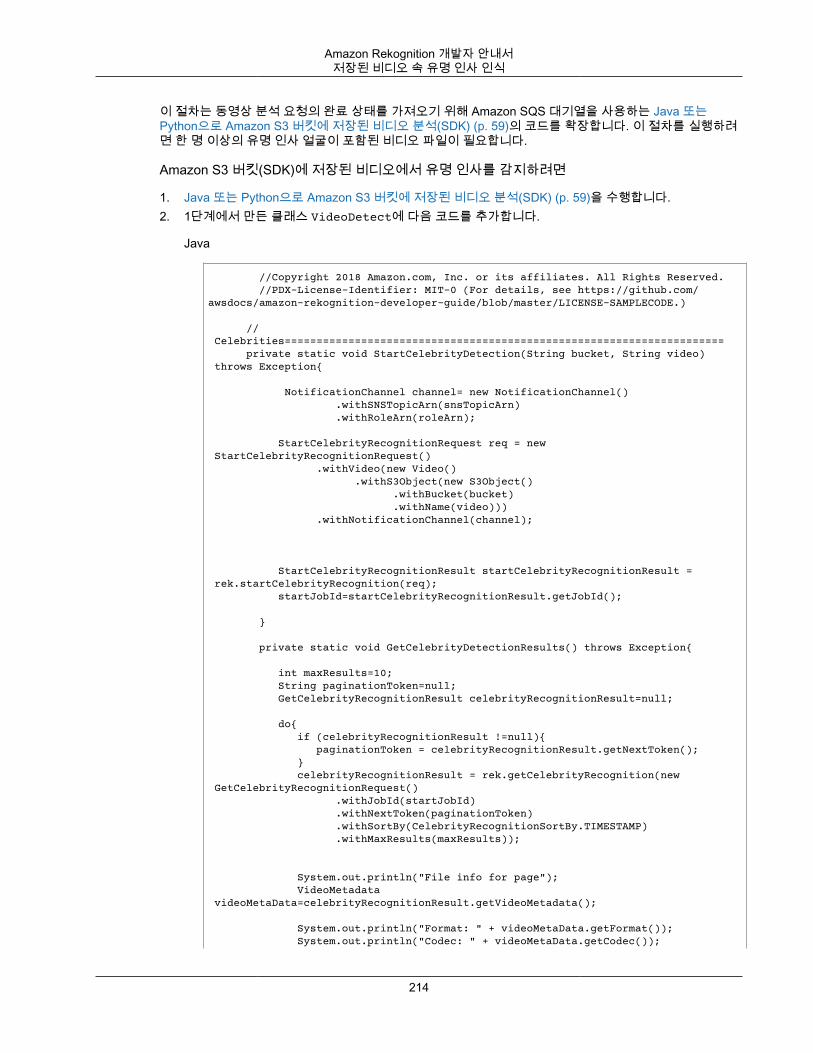
Amazon Rekognition 개발자 안내서저장된 비디오 속 유명 인사 인식
이 절차는 동영상 분석 요청의 완료 상태를 가져오기 위해 Amazon SQS 대기열을 사용하는 Java 또는Python으로 Amazon S3 버킷에 저장된 비디오 분석(SDK) (p. 59)의 코드를 확장합니다. 이 절차를 실행하려면 한 명 이상의 유명 인사 얼굴이 포함된 비디오 파일이 필요합니다.
Amazon S3 버킷(SDK)에 저장된 비디오에서 유명 인사를 감지하려면
1. Java 또는 Python으로 Amazon S3 버킷에 저장된 비디오 분석(SDK) (p. 59)을 수행합니다.2. 1단계에서 만든 클래스 VideoDetect에 다음 코드를 추가합니다.
Java
//Copyright 2018 Amazon.com, Inc. or its affiliates. All Rights Reserved. //PDX-License-Identifier: MIT-0 (For details, see https://github.com/awsdocs/amazon-rekognition-developer-guide/blob/master/LICENSE-SAMPLECODE.)
// Celebrities===================================================================== private static void StartCelebrityDetection(String bucket, String video) throws Exception{ NotificationChannel channel= new NotificationChannel() .withSNSTopicArn(snsTopicArn) .withRoleArn(roleArn); StartCelebrityRecognitionRequest req = new StartCelebrityRecognitionRequest() .withVideo(new Video() .withS3Object(new S3Object() .withBucket(bucket) .withName(video))) .withNotificationChannel(channel); StartCelebrityRecognitionResult startCelebrityRecognitionResult = rek.startCelebrityRecognition(req); startJobId=startCelebrityRecognitionResult.getJobId(); } private static void GetCelebrityDetectionResults() throws Exception{ int maxResults=10; String paginationToken=null; GetCelebrityRecognitionResult celebrityRecognitionResult=null; do{ if (celebrityRecognitionResult !=null){ paginationToken = celebrityRecognitionResult.getNextToken(); } celebrityRecognitionResult = rek.getCelebrityRecognition(new GetCelebrityRecognitionRequest() .withJobId(startJobId) .withNextToken(paginationToken) .withSortBy(CelebrityRecognitionSortBy.TIMESTAMP) .withMaxResults(maxResults)); System.out.println("File info for page"); VideoMetadata videoMetaData=celebrityRecognitionResult.getVideoMetadata(); System.out.println("Format: " + videoMetaData.getFormat()); System.out.println("Codec: " + videoMetaData.getCodec());
214
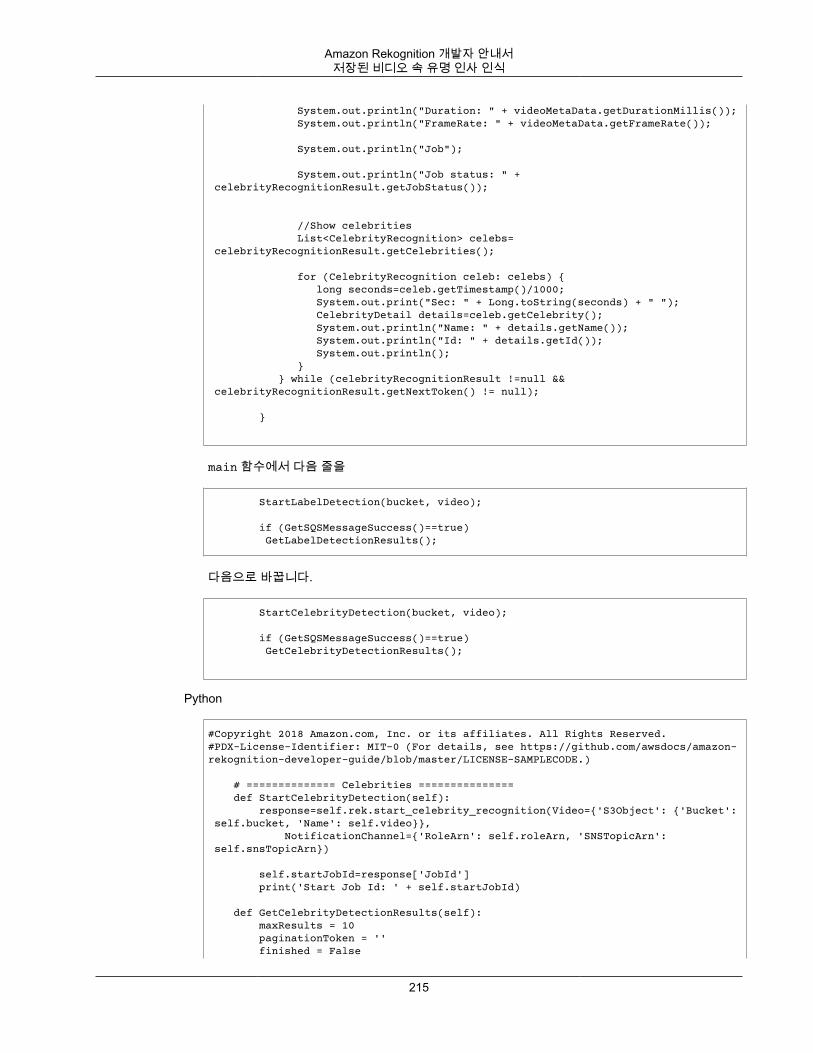
Amazon Rekognition 개발자 안내서저장된 비디오 속 유명 인사 인식
System.out.println("Duration: " + videoMetaData.getDurationMillis()); System.out.println("FrameRate: " + videoMetaData.getFrameRate()); System.out.println("Job"); System.out.println("Job status: " + celebrityRecognitionResult.getJobStatus()); //Show celebrities List<CelebrityRecognition> celebs= celebrityRecognitionResult.getCelebrities(); for (CelebrityRecognition celeb: celebs) { long seconds=celeb.getTimestamp()/1000; System.out.print("Sec: " + Long.toString(seconds) + " "); CelebrityDetail details=celeb.getCelebrity(); System.out.println("Name: " + details.getName()); System.out.println("Id: " + details.getId()); System.out.println(); } } while (celebrityRecognitionResult !=null && celebrityRecognitionResult.getNextToken() != null); }
main 함수에서 다음 줄을
StartLabelDetection(bucket, video);
if (GetSQSMessageSuccess()==true) GetLabelDetectionResults();
다음으로 바꿉니다.
StartCelebrityDetection(bucket, video);
if (GetSQSMessageSuccess()==true) GetCelebrityDetectionResults();
Python
#Copyright 2018 Amazon.com, Inc. or its affiliates. All Rights Reserved.#PDX-License-Identifier: MIT-0 (For details, see https://github.com/awsdocs/amazon-rekognition-developer-guide/blob/master/LICENSE-SAMPLECODE.)
# ============== Celebrities =============== def StartCelebrityDetection(self): response=self.rek.start_celebrity_recognition(Video={'S3Object': {'Bucket': self.bucket, 'Name': self.video}}, NotificationChannel={'RoleArn': self.roleArn, 'SNSTopicArn': self.snsTopicArn})
self.startJobId=response['JobId'] print('Start Job Id: ' + self.startJobId)
def GetCelebrityDetectionResults(self): maxResults = 10 paginationToken = '' finished = False
215
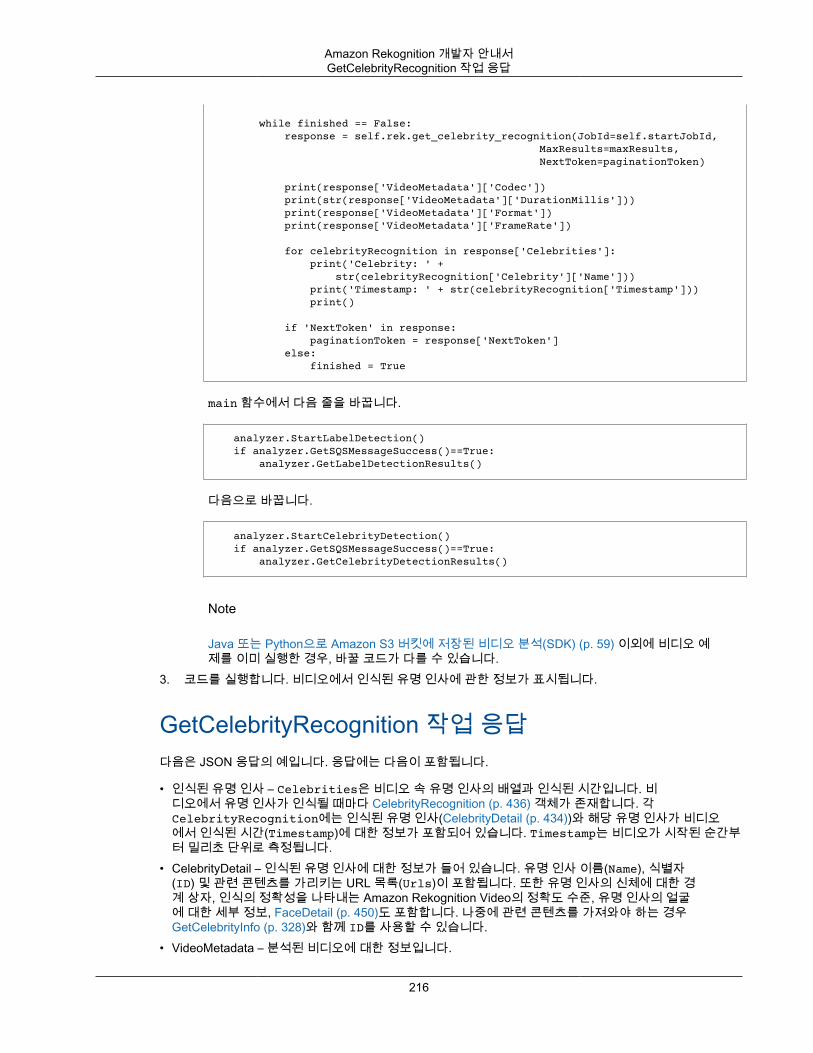
Amazon Rekognition 개발자 안내서GetCelebrityRecognition 작업 응답
while finished == False: response = self.rek.get_celebrity_recognition(JobId=self.startJobId, MaxResults=maxResults, NextToken=paginationToken)
print(response['VideoMetadata']['Codec']) print(str(response['VideoMetadata']['DurationMillis'])) print(response['VideoMetadata']['Format']) print(response['VideoMetadata']['FrameRate'])
for celebrityRecognition in response['Celebrities']: print('Celebrity: ' + str(celebrityRecognition['Celebrity']['Name'])) print('Timestamp: ' + str(celebrityRecognition['Timestamp'])) print()
if 'NextToken' in response: paginationToken = response['NextToken'] else: finished = True
main 함수에서 다음 줄을 바꿉니다.
analyzer.StartLabelDetection() if analyzer.GetSQSMessageSuccess()==True: analyzer.GetLabelDetectionResults()
다음으로 바꿉니다.
analyzer.StartCelebrityDetection() if analyzer.GetSQSMessageSuccess()==True: analyzer.GetCelebrityDetectionResults()
Note
Java 또는 Python으로 Amazon S3 버킷에 저장된 비디오 분석(SDK) (p. 59) 이외에 비디오 예제를 이미 실행한 경우, 바꿀 코드가 다를 수 있습니다.
3. 코드를 실행합니다. 비디오에서 인식된 유명 인사에 관한 정보가 표시됩니다.
GetCelebrityRecognition 작업 응답다음은 JSON 응답의 예입니다. 응답에는 다음이 포함됩니다.
• 인식된 유명 인사 – Celebrities은 비디오 속 유명 인사의 배열과 인식된 시간입니다. 비디오에서 유명 인사가 인식될 때마다 CelebrityRecognition (p. 436) 객체가 존재합니다. 각CelebrityRecognition에는 인식된 유명 인사(CelebrityDetail (p. 434))와 해당 유명 인사가 비디오에서 인식된 시간(Timestamp)에 대한 정보가 포함되어 있습니다. Timestamp는 비디오가 시작된 순간부터 밀리초 단위로 측정됩니다.
• CelebrityDetail – 인식된 유명 인사에 대한 정보가 들어 있습니다. 유명 인사 이름(Name), 식별자(ID) 및 관련 콘텐츠를 가리키는 URL 목록(Urls)이 포함됩니다. 또한 유명 인사의 신체에 대한 경계 상자, 인식의 정확성을 나타내는 Amazon Rekognition Video의 정확도 수준, 유명 인사의 얼굴에 대한 세부 정보, FaceDetail (p. 450)도 포함합니다. 나중에 관련 콘텐츠를 가져와야 하는 경우GetCelebrityInfo (p. 328)와 함께 ID를 사용할 수 있습니다.
• VideoMetadata – 분석된 비디오에 대한 정보입니다.
216
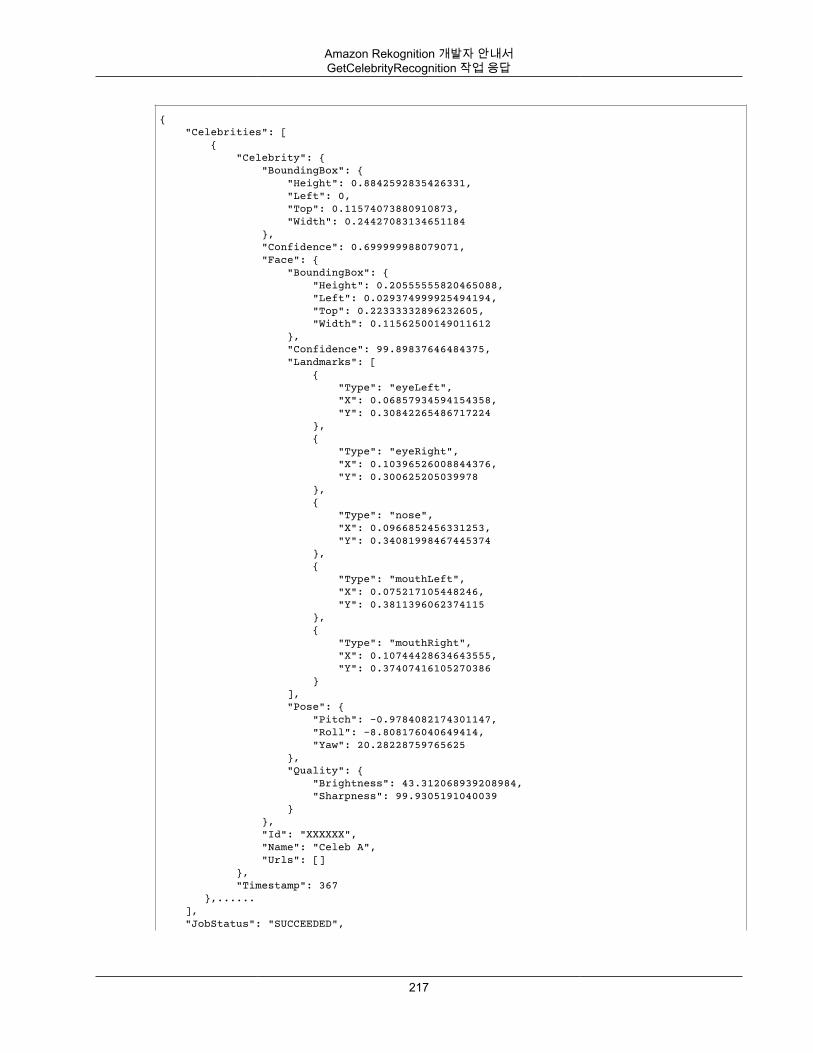
Amazon Rekognition 개발자 안내서GetCelebrityRecognition 작업 응답
{ "Celebrities": [ { "Celebrity": { "BoundingBox": { "Height": 0.8842592835426331, "Left": 0, "Top": 0.11574073880910873, "Width": 0.24427083134651184 }, "Confidence": 0.699999988079071, "Face": { "BoundingBox": { "Height": 0.20555555820465088, "Left": 0.029374999925494194, "Top": 0.22333332896232605, "Width": 0.11562500149011612 }, "Confidence": 99.89837646484375, "Landmarks": [ { "Type": "eyeLeft", "X": 0.06857934594154358, "Y": 0.30842265486717224 }, { "Type": "eyeRight", "X": 0.10396526008844376, "Y": 0.300625205039978 }, { "Type": "nose", "X": 0.0966852456331253, "Y": 0.34081998467445374 }, { "Type": "mouthLeft", "X": 0.075217105448246, "Y": 0.3811396062374115 }, { "Type": "mouthRight", "X": 0.10744428634643555, "Y": 0.37407416105270386 } ], "Pose": { "Pitch": -0.9784082174301147, "Roll": -8.808176040649414, "Yaw": 20.28228759765625 }, "Quality": { "Brightness": 43.312068939208984, "Sharpness": 99.9305191040039 } }, "Id": "XXXXXX", "Name": "Celeb A", "Urls": [] }, "Timestamp": 367 },...... ], "JobStatus": "SUCCEEDED",
217
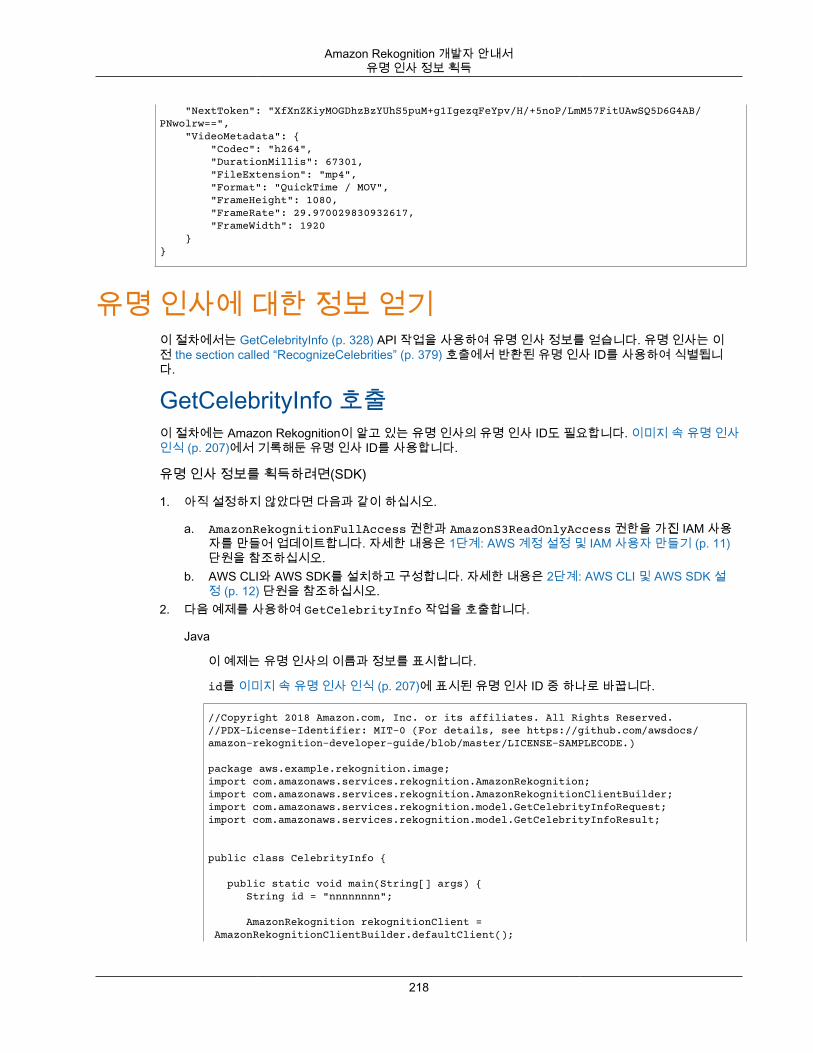
Amazon Rekognition 개발자 안내서유명 인사 정보 획득
"NextToken": "XfXnZKiyMOGDhzBzYUhS5puM+g1IgezqFeYpv/H/+5noP/LmM57FitUAwSQ5D6G4AB/PNwolrw==", "VideoMetadata": { "Codec": "h264", "DurationMillis": 67301, "FileExtension": "mp4", "Format": "QuickTime / MOV", "FrameHeight": 1080, "FrameRate": 29.970029830932617, "FrameWidth": 1920 }}
유명 인사에 대한 정보 얻기이 절차에서는 GetCelebrityInfo (p. 328) API 작업을 사용하여 유명 인사 정보를 얻습니다. 유명 인사는 이전 the section called “RecognizeCelebrities” (p. 379) 호출에서 반환된 유명 인사 ID를 사용하여 식별됩니다.
GetCelebrityInfo 호출이 절차에는 Amazon Rekognition이 알고 있는 유명 인사의 유명 인사 ID도 필요합니다. 이미지 속 유명 인사인식 (p. 207)에서 기록해둔 유명 인사 ID를 사용합니다.
유명 인사 정보를 획득하려면(SDK)
1. 아직 설정하지 않았다면 다음과 같이 하십시오.
a. AmazonRekognitionFullAccess 권한과 AmazonS3ReadOnlyAccess 권한을 가진 IAM 사용자를 만들어 업데이트합니다. 자세한 내용은 1단계: AWS 계정 설정 및 IAM 사용자 만들기 (p. 11)단원을 참조하십시오.
b. AWS CLI와 AWS SDK를 설치하고 구성합니다. 자세한 내용은 2단계: AWS CLI 및 AWS SDK 설정 (p. 12) 단원을 참조하십시오.
2. 다음 예제를 사용하여 GetCelebrityInfo 작업을 호출합니다.
Java
이 예제는 유명 인사의 이름과 정보를 표시합니다.
id를 이미지 속 유명 인사 인식 (p. 207)에 표시된 유명 인사 ID 중 하나로 바꿉니다.
//Copyright 2018 Amazon.com, Inc. or its affiliates. All Rights Reserved.//PDX-License-Identifier: MIT-0 (For details, see https://github.com/awsdocs/amazon-rekognition-developer-guide/blob/master/LICENSE-SAMPLECODE.)
package aws.example.rekognition.image;import com.amazonaws.services.rekognition.AmazonRekognition;import com.amazonaws.services.rekognition.AmazonRekognitionClientBuilder;import com.amazonaws.services.rekognition.model.GetCelebrityInfoRequest;import com.amazonaws.services.rekognition.model.GetCelebrityInfoResult;
public class CelebrityInfo {
public static void main(String[] args) { String id = "nnnnnnnn";
AmazonRekognition rekognitionClient = AmazonRekognitionClientBuilder.defaultClient();
218
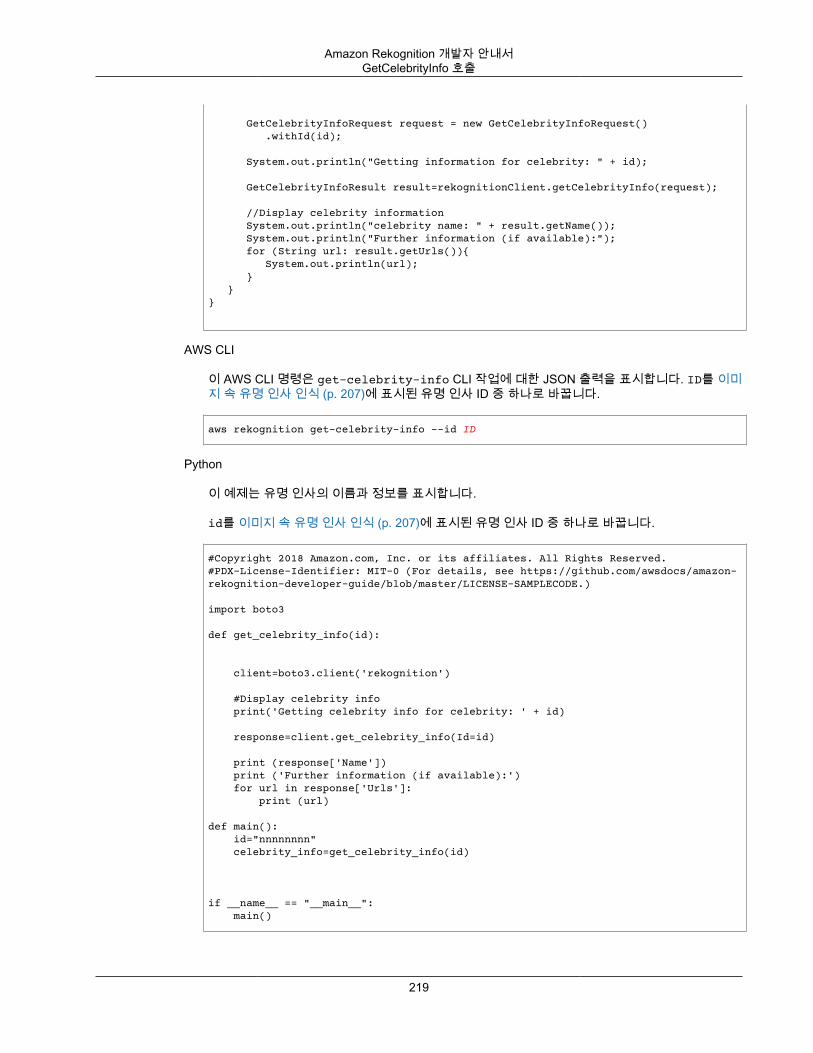
Amazon Rekognition 개발자 안내서GetCelebrityInfo 호출
GetCelebrityInfoRequest request = new GetCelebrityInfoRequest() .withId(id);
System.out.println("Getting information for celebrity: " + id);
GetCelebrityInfoResult result=rekognitionClient.getCelebrityInfo(request);
//Display celebrity information System.out.println("celebrity name: " + result.getName()); System.out.println("Further information (if available):"); for (String url: result.getUrls()){ System.out.println(url); } }}
AWS CLI
이 AWS CLI 명령은 get-celebrity-info CLI 작업에 대한 JSON 출력을 표시합니다. ID를 이미지 속 유명 인사 인식 (p. 207)에 표시된 유명 인사 ID 중 하나로 바꿉니다.
aws rekognition get-celebrity-info --id ID
Python
이 예제는 유명 인사의 이름과 정보를 표시합니다.
id를 이미지 속 유명 인사 인식 (p. 207)에 표시된 유명 인사 ID 중 하나로 바꿉니다.
#Copyright 2018 Amazon.com, Inc. or its affiliates. All Rights Reserved.#PDX-License-Identifier: MIT-0 (For details, see https://github.com/awsdocs/amazon-rekognition-developer-guide/blob/master/LICENSE-SAMPLECODE.)
import boto3
def get_celebrity_info(id):
client=boto3.client('rekognition')
#Display celebrity info print('Getting celebrity info for celebrity: ' + id) response=client.get_celebrity_info(Id=id)
print (response['Name']) print ('Further information (if available):') for url in response['Urls']: print (url)
def main(): id="nnnnnnnn" celebrity_info=get_celebrity_info(id)
if __name__ == "__main__": main()
219
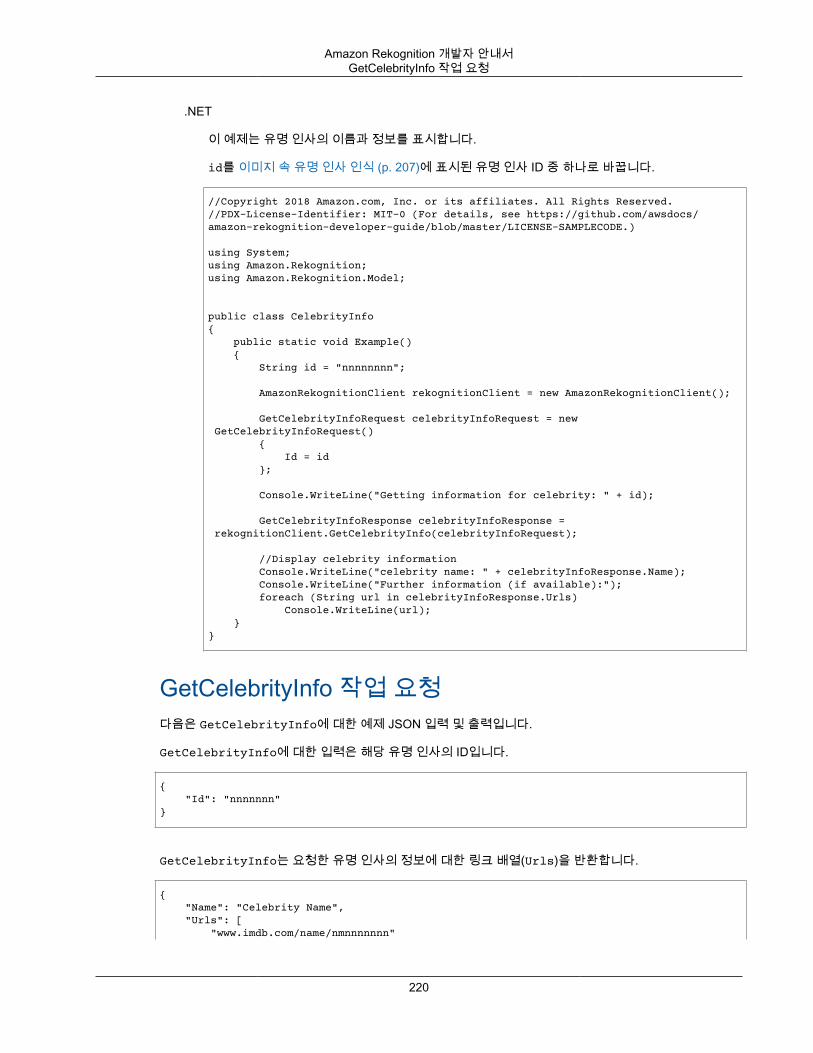
Amazon Rekognition 개발자 안내서GetCelebrityInfo 작업 요청
.NET
이 예제는 유명 인사의 이름과 정보를 표시합니다.
id를 이미지 속 유명 인사 인식 (p. 207)에 표시된 유명 인사 ID 중 하나로 바꿉니다.
//Copyright 2018 Amazon.com, Inc. or its affiliates. All Rights Reserved.//PDX-License-Identifier: MIT-0 (For details, see https://github.com/awsdocs/amazon-rekognition-developer-guide/blob/master/LICENSE-SAMPLECODE.)
using System;using Amazon.Rekognition;using Amazon.Rekognition.Model;
public class CelebrityInfo{ public static void Example() { String id = "nnnnnnnn";
AmazonRekognitionClient rekognitionClient = new AmazonRekognitionClient();
GetCelebrityInfoRequest celebrityInfoRequest = new GetCelebrityInfoRequest() { Id = id };
Console.WriteLine("Getting information for celebrity: " + id);
GetCelebrityInfoResponse celebrityInfoResponse = rekognitionClient.GetCelebrityInfo(celebrityInfoRequest);
//Display celebrity information Console.WriteLine("celebrity name: " + celebrityInfoResponse.Name); Console.WriteLine("Further information (if available):"); foreach (String url in celebrityInfoResponse.Urls) Console.WriteLine(url); }}
GetCelebrityInfo 작업 요청다음은 GetCelebrityInfo에 대한 예제 JSON 입력 및 출력입니다.
GetCelebrityInfo에 대한 입력은 해당 유명 인사의 ID입니다.
{ "Id": "nnnnnnn"}
GetCelebrityInfo는 요청한 유명 인사의 정보에 대한 링크 배열(Urls)을 반환합니다.
{ "Name": "Celebrity Name", "Urls": [ "www.imdb.com/name/nmnnnnnnn"
220
Amazon Rekognition 개발자 안내서
]}
221

Amazon Rekognition 개발자 안내서이미지 및 비디오 조정 API 사용하기
비안전 콘텐츠 감지Amazon Rekognition을 사용하여 이미지 및 저장된 비디오가 안전하지 못한 콘텐츠, 즉 성인 콘텐츠나 폭력적인 콘텐츠를 포함하고 있는지 확인할 수 있습니다.
소셜 미디어, 온라인 마켓플레이스 및 전문적인 미디어와 같은 다양한 사용 사례에서 이미지 및 비디오 조정API를 사용할 수 있습니다. Amazon Rekognition을 사용하여 안전하지 못한 콘텐츠를 감지하고, 콘텐츠 리뷰인력을 줄일 수 있습니다.
이미지 및 비디오 조정 API 사용하기Amazon Rekognition Image API에서는 DetectModerationLabels (p. 320) 작업을 통해 이미지에서 안전하지 않은 콘텐츠를 감지합니다. Amazon Rekognition Video API에서 StartContentModeration (p. 394) 및GetContentModeration (p. 335) 기능을 사용하여 안전하지 않은 콘텐츠를 비동기 적으로 감지할 수 있습니다.
Amazon Rekognition은 계층적 분류를 사용하여 노골적이고 선정적인 콘텐츠의 범주를 레이블 지정합니다.각 최상위 범주에는 다수의 2단계 범주가 있습니다.
최상위 카테고리 2단계 범주
나체
남성 나체 그래픽
여성 나체 그래픽
성행위
나체 묘사 또는 성행위 묘사
노골적인 나체
성인용 완구
여성 수영복 또는 속옷
남성 수영복 또는 속옷
부분적 누드
선정적
노출이 심한 의상
그래픽적 폭력 및 고어
물리적 폭력
무기를 이용한 폭력
무기
폭력
자해
야윈 신체시각적으로 불편한 콘텐츠
시체
222
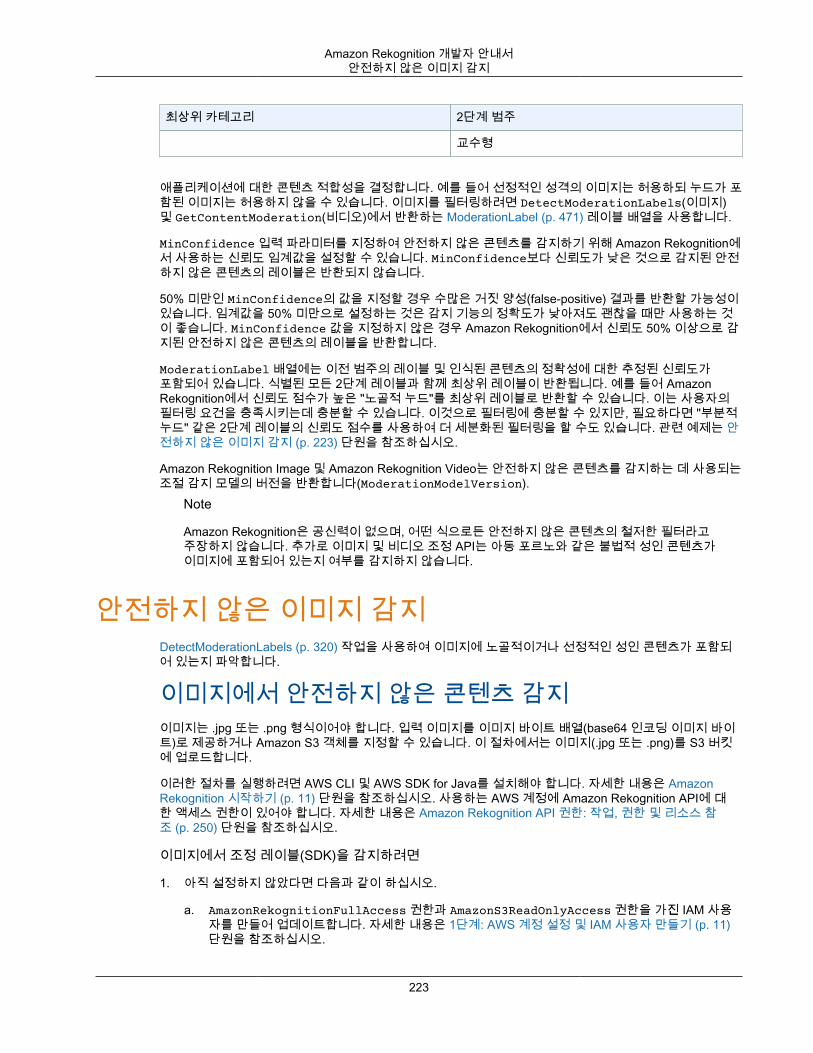
Amazon Rekognition 개발자 안내서안전하지 않은 이미지 감지
최상위 카테고리 2단계 범주
교수형
애플리케이션에 대한 콘텐츠 적합성을 결정합니다. 예를 들어 선정적인 성격의 이미지는 허용하되 누드가 포함된 이미지는 허용하지 않을 수 있습니다. 이미지를 필터링하려면 DetectModerationLabels(이미지)및 GetContentModeration(비디오)에서 반환하는 ModerationLabel (p. 471) 레이블 배열을 사용합니다.
MinConfidence 입력 파라미터를 지정하여 안전하지 않은 콘텐츠를 감지하기 위해 Amazon Rekognition에서 사용하는 신뢰도 임계값을 설정할 수 있습니다. MinConfidence보다 신뢰도가 낮은 것으로 감지된 안전하지 않은 콘텐츠의 레이블은 반환되지 않습니다.
50% 미만인 MinConfidence의 값을 지정할 경우 수많은 거짓 양성(false-positive) 결과를 반환할 가능성이있습니다. 임계값을 50% 미만으로 설정하는 것은 감지 기능의 정확도가 낮아져도 괜찮을 때만 사용하는 것이 좋습니다. MinConfidence 값을 지정하지 않은 경우 Amazon Rekognition에서 신뢰도 50% 이상으로 감지된 안전하지 않은 콘텐츠의 레이블을 반환합니다.
ModerationLabel 배열에는 이전 범주의 레이블 및 인식된 콘텐츠의 정확성에 대한 추정된 신뢰도가포함되어 있습니다. 식별된 모든 2단계 레이블과 함께 최상위 레이블이 반환됩니다. 예를 들어 AmazonRekognition에서 신뢰도 점수가 높은 "노골적 누드"를 최상위 레이블로 반환할 수 있습니다. 이는 사용자의필터링 요건을 충족시키는데 충분할 수 있습니다. 이것으로 필터링에 충분할 수 있지만, 필요하다면 "부분적누드" 같은 2단계 레이블의 신뢰도 점수를 사용하여 더 세분화된 필터링을 할 수도 있습니다. 관련 예제는 안전하지 않은 이미지 감지 (p. 223) 단원을 참조하십시오.
Amazon Rekognition Image 및 Amazon Rekognition Video는 안전하지 않은 콘텐츠를 감지하는 데 사용되는조절 감지 모델의 버전을 반환합니다(ModerationModelVersion).
Note
Amazon Rekognition은 공신력이 없으며, 어떤 식으로든 안전하지 않은 콘텐츠의 철저한 필터라고주장하지 않습니다. 추가로 이미지 및 비디오 조정 API는 아동 포르노와 같은 불법적 성인 콘텐츠가이미지에 포함되어 있는지 여부를 감지하지 않습니다.
안전하지 않은 이미지 감지DetectModerationLabels (p. 320) 작업을 사용하여 이미지에 노골적이거나 선정적인 성인 콘텐츠가 포함되어 있는지 파악합니다.
이미지에서 안전하지 않은 콘텐츠 감지이미지는 .jpg 또는 .png 형식이어야 합니다. 입력 이미지를 이미지 바이트 배열(base64 인코딩 이미지 바이트)로 제공하거나 Amazon S3 객체를 지정할 수 있습니다. 이 절차에서는 이미지(.jpg 또는 .png)를 S3 버킷에 업로드합니다.
이러한 절차를 실행하려면 AWS CLI 및 AWS SDK for Java를 설치해야 합니다. 자세한 내용은 AmazonRekognition 시작하기 (p. 11) 단원을 참조하십시오. 사용하는 AWS 계정에 Amazon Rekognition API에 대한 액세스 권한이 있어야 합니다. 자세한 내용은 Amazon Rekognition API 권한: 작업, 권한 및 리소스 참조 (p. 250) 단원을 참조하십시오.
이미지에서 조정 레이블(SDK)을 감지하려면
1. 아직 설정하지 않았다면 다음과 같이 하십시오.
a. AmazonRekognitionFullAccess 권한과 AmazonS3ReadOnlyAccess 권한을 가진 IAM 사용자를 만들어 업데이트합니다. 자세한 내용은 1단계: AWS 계정 설정 및 IAM 사용자 만들기 (p. 11)단원을 참조하십시오.
223
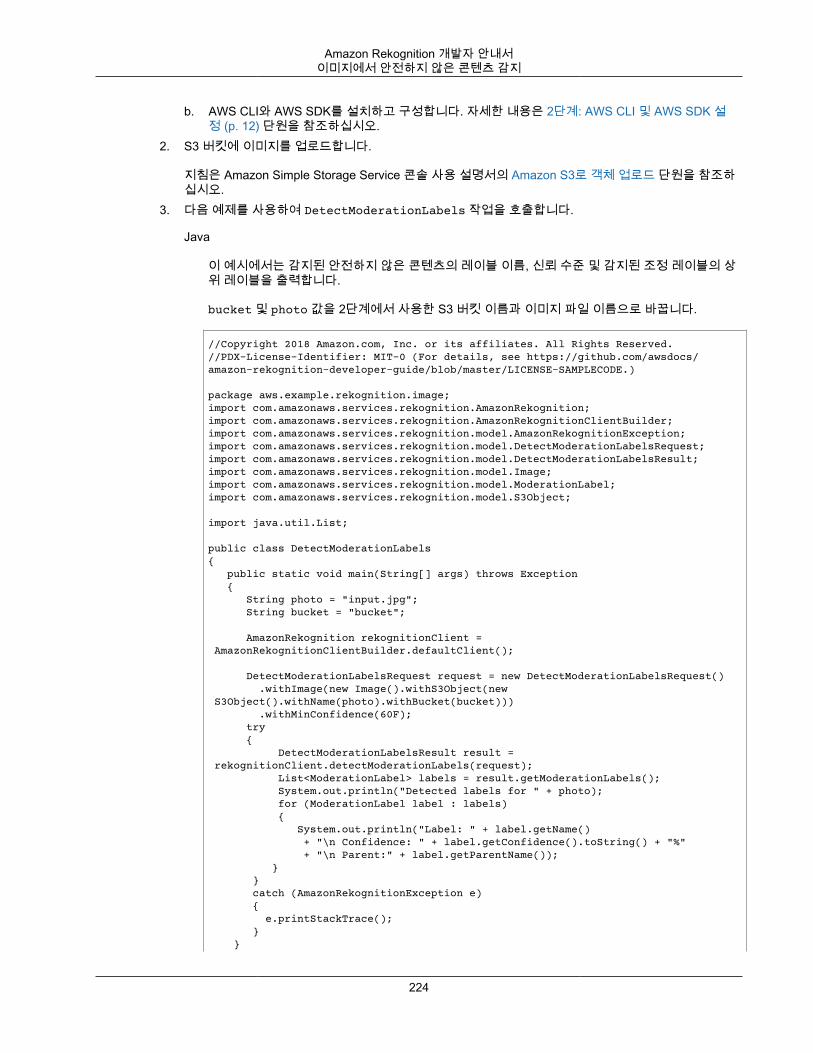
Amazon Rekognition 개발자 안내서이미지에서 안전하지 않은 콘텐츠 감지
b. AWS CLI와 AWS SDK를 설치하고 구성합니다. 자세한 내용은 2단계: AWS CLI 및 AWS SDK 설정 (p. 12) 단원을 참조하십시오.
2. S3 버킷에 이미지를 업로드합니다.
지침은 Amazon Simple Storage Service 콘솔 사용 설명서의 Amazon S3로 객체 업로드 단원을 참조하십시오.
3. 다음 예제를 사용하여 DetectModerationLabels 작업을 호출합니다.
Java
이 예시에서는 감지된 안전하지 않은 콘텐츠의 레이블 이름, 신뢰 수준 및 감지된 조정 레이블의 상위 레이블을 출력합니다.
bucket 및 photo 값을 2단계에서 사용한 S3 버킷 이름과 이미지 파일 이름으로 바꿉니다.
//Copyright 2018 Amazon.com, Inc. or its affiliates. All Rights Reserved.//PDX-License-Identifier: MIT-0 (For details, see https://github.com/awsdocs/amazon-rekognition-developer-guide/blob/master/LICENSE-SAMPLECODE.)
package aws.example.rekognition.image;import com.amazonaws.services.rekognition.AmazonRekognition;import com.amazonaws.services.rekognition.AmazonRekognitionClientBuilder;import com.amazonaws.services.rekognition.model.AmazonRekognitionException;import com.amazonaws.services.rekognition.model.DetectModerationLabelsRequest;import com.amazonaws.services.rekognition.model.DetectModerationLabelsResult;import com.amazonaws.services.rekognition.model.Image;import com.amazonaws.services.rekognition.model.ModerationLabel;import com.amazonaws.services.rekognition.model.S3Object;
import java.util.List;
public class DetectModerationLabels{ public static void main(String[] args) throws Exception { String photo = "input.jpg"; String bucket = "bucket"; AmazonRekognition rekognitionClient = AmazonRekognitionClientBuilder.defaultClient(); DetectModerationLabelsRequest request = new DetectModerationLabelsRequest() .withImage(new Image().withS3Object(new S3Object().withName(photo).withBucket(bucket))) .withMinConfidence(60F); try { DetectModerationLabelsResult result = rekognitionClient.detectModerationLabels(request); List<ModerationLabel> labels = result.getModerationLabels(); System.out.println("Detected labels for " + photo); for (ModerationLabel label : labels) { System.out.println("Label: " + label.getName() + "\n Confidence: " + label.getConfidence().toString() + "%" + "\n Parent:" + label.getParentName()); } } catch (AmazonRekognitionException e) { e.printStackTrace(); } }
224
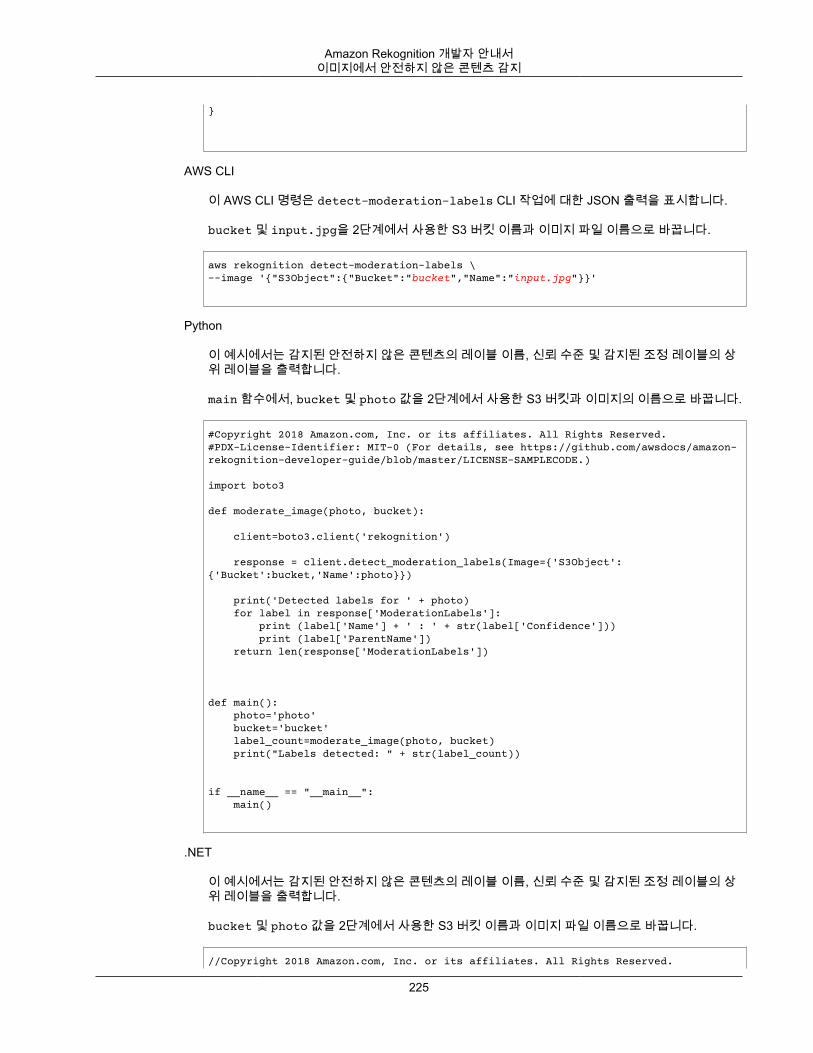
Amazon Rekognition 개발자 안내서이미지에서 안전하지 않은 콘텐츠 감지
}
AWS CLI
이 AWS CLI 명령은 detect-moderation-labels CLI 작업에 대한 JSON 출력을 표시합니다.
bucket 및 input.jpg을 2단계에서 사용한 S3 버킷 이름과 이미지 파일 이름으로 바꿉니다.
aws rekognition detect-moderation-labels \--image '{"S3Object":{"Bucket":"bucket","Name":"input.jpg"}}'
Python
이 예시에서는 감지된 안전하지 않은 콘텐츠의 레이블 이름, 신뢰 수준 및 감지된 조정 레이블의 상위 레이블을 출력합니다.
main 함수에서, bucket 및 photo 값을 2단계에서 사용한 S3 버킷과 이미지의 이름으로 바꿉니다.
#Copyright 2018 Amazon.com, Inc. or its affiliates. All Rights Reserved.#PDX-License-Identifier: MIT-0 (For details, see https://github.com/awsdocs/amazon-rekognition-developer-guide/blob/master/LICENSE-SAMPLECODE.)
import boto3
def moderate_image(photo, bucket):
client=boto3.client('rekognition')
response = client.detect_moderation_labels(Image={'S3Object':{'Bucket':bucket,'Name':photo}})
print('Detected labels for ' + photo) for label in response['ModerationLabels']: print (label['Name'] + ' : ' + str(label['Confidence'])) print (label['ParentName']) return len(response['ModerationLabels'])
def main(): photo='photo' bucket='bucket' label_count=moderate_image(photo, bucket) print("Labels detected: " + str(label_count))
if __name__ == "__main__": main()
.NET
이 예시에서는 감지된 안전하지 않은 콘텐츠의 레이블 이름, 신뢰 수준 및 감지된 조정 레이블의 상위 레이블을 출력합니다.
bucket 및 photo 값을 2단계에서 사용한 S3 버킷 이름과 이미지 파일 이름으로 바꿉니다.
//Copyright 2018 Amazon.com, Inc. or its affiliates. All Rights Reserved.
225
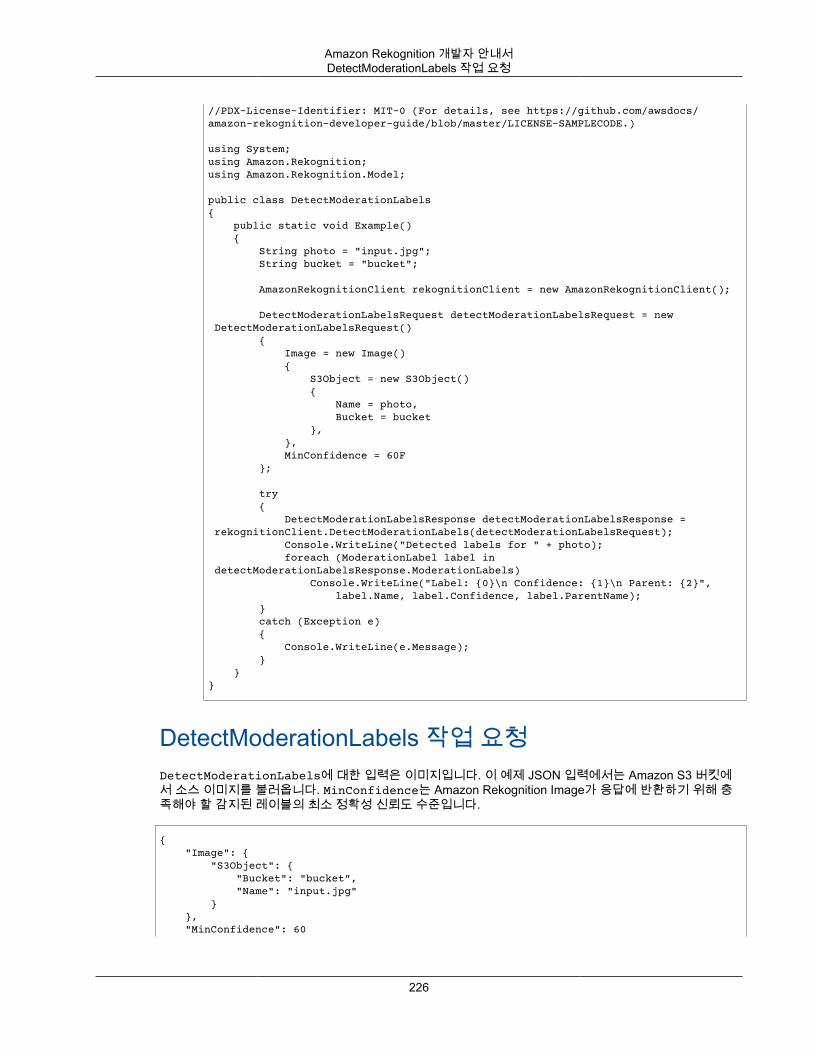
Amazon Rekognition 개발자 안내서DetectModerationLabels 작업 요청
//PDX-License-Identifier: MIT-0 (For details, see https://github.com/awsdocs/amazon-rekognition-developer-guide/blob/master/LICENSE-SAMPLECODE.)
using System;using Amazon.Rekognition;using Amazon.Rekognition.Model;
public class DetectModerationLabels{ public static void Example() { String photo = "input.jpg"; String bucket = "bucket";
AmazonRekognitionClient rekognitionClient = new AmazonRekognitionClient();
DetectModerationLabelsRequest detectModerationLabelsRequest = new DetectModerationLabelsRequest() { Image = new Image() { S3Object = new S3Object() { Name = photo, Bucket = bucket }, }, MinConfidence = 60F };
try { DetectModerationLabelsResponse detectModerationLabelsResponse = rekognitionClient.DetectModerationLabels(detectModerationLabelsRequest); Console.WriteLine("Detected labels for " + photo); foreach (ModerationLabel label in detectModerationLabelsResponse.ModerationLabels) Console.WriteLine("Label: {0}\n Confidence: {1}\n Parent: {2}", label.Name, label.Confidence, label.ParentName); } catch (Exception e) { Console.WriteLine(e.Message); } }}
DetectModerationLabels 작업 요청DetectModerationLabels에 대한 입력은 이미지입니다. 이 예제 JSON 입력에서는 Amazon S3 버킷에서 소스 이미지를 불러옵니다. MinConfidence는 Amazon Rekognition Image가 응답에 반환하기 위해 충족해야 할 감지된 레이블의 최소 정확성 신뢰도 수준입니다.
{ "Image": { "S3Object": { "Bucket": "bucket", "Name": "input.jpg" } }, "MinConfidence": 60
226
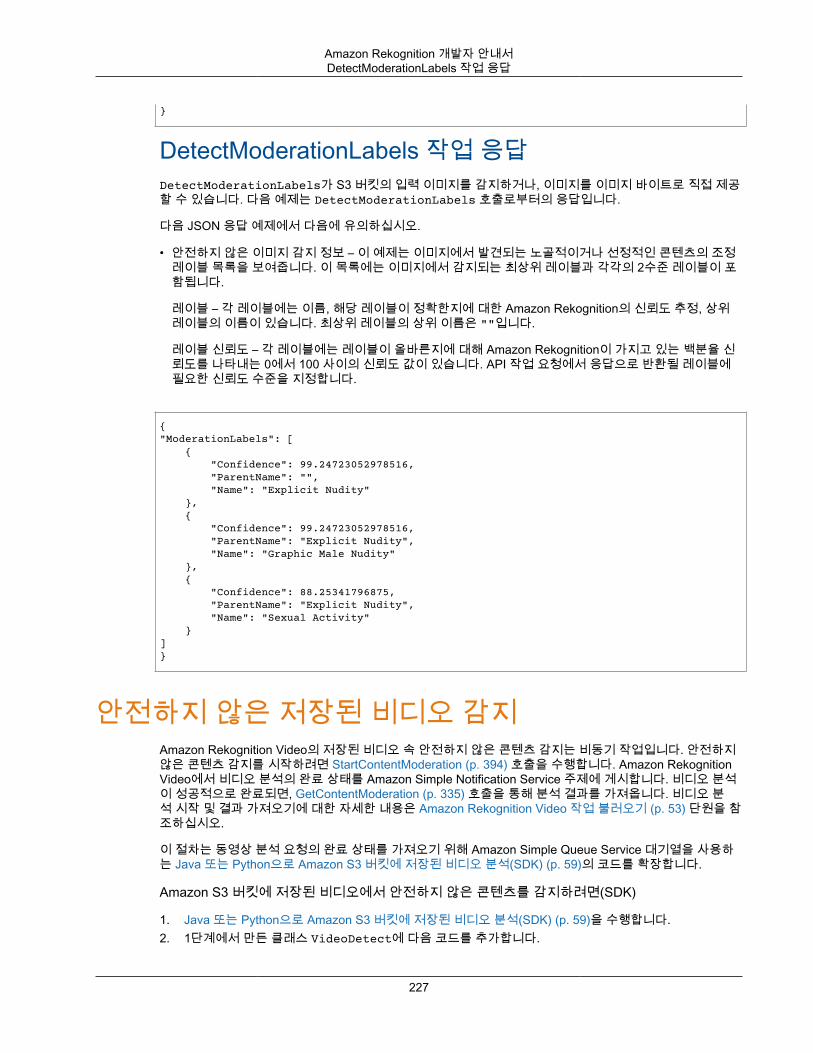
Amazon Rekognition 개발자 안내서DetectModerationLabels 작업 응답
}
DetectModerationLabels 작업 응답DetectModerationLabels가 S3 버킷의 입력 이미지를 감지하거나, 이미지를 이미지 바이트로 직접 제공할 수 있습니다. 다음 예제는 DetectModerationLabels 호출로부터의 응답입니다.
다음 JSON 응답 예제에서 다음에 유의하십시오.
• 안전하지 않은 이미지 감지 정보 – 이 예제는 이미지에서 발견되는 노골적이거나 선정적인 콘텐츠의 조정레이블 목록을 보여줍니다. 이 목록에는 이미지에서 감지되는 최상위 레이블과 각각의 2수준 레이블이 포함됩니다.
레이블 – 각 레이블에는 이름, 해당 레이블이 정확한지에 대한 Amazon Rekognition의 신뢰도 추정, 상위레이블의 이름이 있습니다. 최상위 레이블의 상위 이름은 ""입니다.
레이블 신뢰도 – 각 레이블에는 레이블이 올바른지에 대해 Amazon Rekognition이 가지고 있는 백분율 신뢰도를 나타내는 0에서 100 사이의 신뢰도 값이 있습니다. API 작업 요청에서 응답으로 반환될 레이블에필요한 신뢰도 수준을 지정합니다.
{"ModerationLabels": [ { "Confidence": 99.24723052978516, "ParentName": "", "Name": "Explicit Nudity" }, { "Confidence": 99.24723052978516, "ParentName": "Explicit Nudity", "Name": "Graphic Male Nudity" }, { "Confidence": 88.25341796875, "ParentName": "Explicit Nudity", "Name": "Sexual Activity" }]}
안전하지 않은 저장된 비디오 감지Amazon Rekognition Video의 저장된 비디오 속 안전하지 않은 콘텐츠 감지는 비동기 작업입니다. 안전하지않은 콘텐츠 감지를 시작하려면 StartContentModeration (p. 394) 호출을 수행합니다. Amazon RekognitionVideo에서 비디오 분석의 완료 상태를 Amazon Simple Notification Service 주제에 게시합니다. 비디오 분석이 성공적으로 완료되면, GetContentModeration (p. 335) 호출을 통해 분석 결과를 가져옵니다. 비디오 분석 시작 및 결과 가져오기에 대한 자세한 내용은 Amazon Rekognition Video 작업 불러오기 (p. 53) 단원을 참조하십시오.
이 절차는 동영상 분석 요청의 완료 상태를 가져오기 위해 Amazon Simple Queue Service 대기열을 사용하는 Java 또는 Python으로 Amazon S3 버킷에 저장된 비디오 분석(SDK) (p. 59)의 코드를 확장합니다.
Amazon S3 버킷에 저장된 비디오에서 안전하지 않은 콘텐츠를 감지하려면(SDK)
1. Java 또는 Python으로 Amazon S3 버킷에 저장된 비디오 분석(SDK) (p. 59)을 수행합니다.2. 1단계에서 만든 클래스 VideoDetect에 다음 코드를 추가합니다.
227
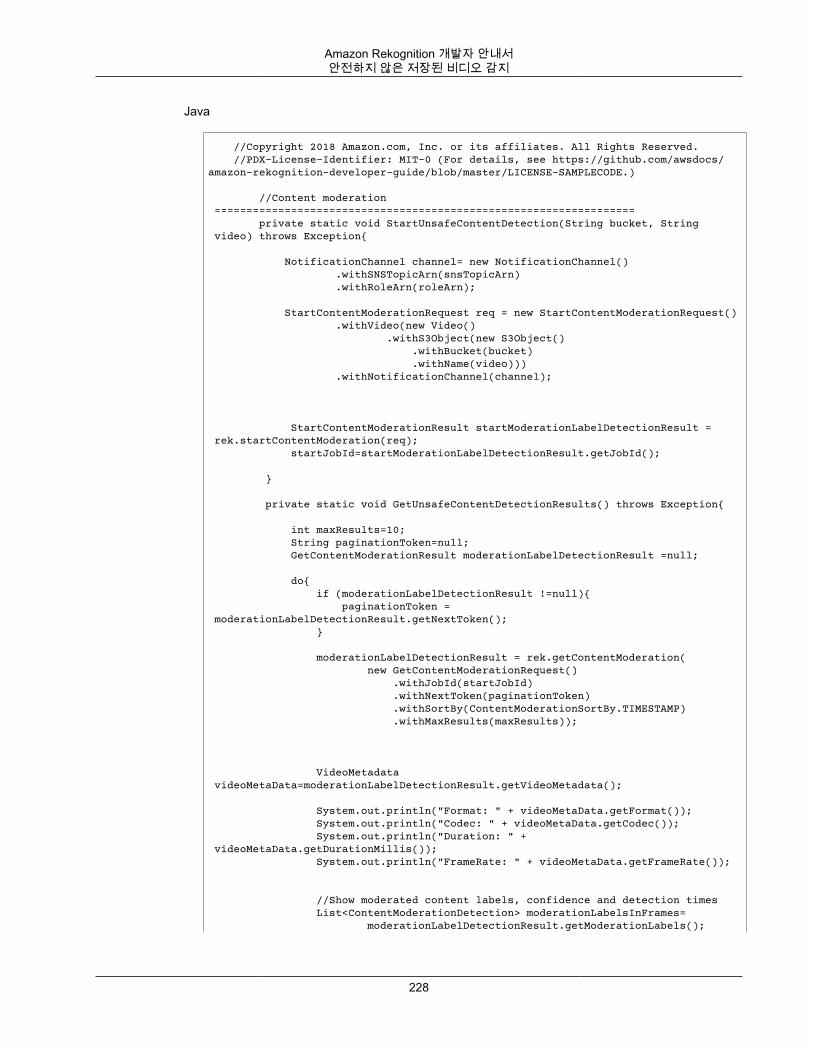
Amazon Rekognition 개발자 안내서안전하지 않은 저장된 비디오 감지
Java
//Copyright 2018 Amazon.com, Inc. or its affiliates. All Rights Reserved. //PDX-License-Identifier: MIT-0 (For details, see https://github.com/awsdocs/amazon-rekognition-developer-guide/blob/master/LICENSE-SAMPLECODE.)
//Content moderation ================================================================== private static void StartUnsafeContentDetection(String bucket, String video) throws Exception{ NotificationChannel channel= new NotificationChannel() .withSNSTopicArn(snsTopicArn) .withRoleArn(roleArn); StartContentModerationRequest req = new StartContentModerationRequest() .withVideo(new Video() .withS3Object(new S3Object() .withBucket(bucket) .withName(video))) .withNotificationChannel(channel); StartContentModerationResult startModerationLabelDetectionResult = rek.startContentModeration(req); startJobId=startModerationLabelDetectionResult.getJobId(); } private static void GetUnsafeContentDetectionResults() throws Exception{ int maxResults=10; String paginationToken=null; GetContentModerationResult moderationLabelDetectionResult =null; do{ if (moderationLabelDetectionResult !=null){ paginationToken = moderationLabelDetectionResult.getNextToken(); } moderationLabelDetectionResult = rek.getContentModeration( new GetContentModerationRequest() .withJobId(startJobId) .withNextToken(paginationToken) .withSortBy(ContentModerationSortBy.TIMESTAMP) .withMaxResults(maxResults)); VideoMetadata videoMetaData=moderationLabelDetectionResult.getVideoMetadata(); System.out.println("Format: " + videoMetaData.getFormat()); System.out.println("Codec: " + videoMetaData.getCodec()); System.out.println("Duration: " + videoMetaData.getDurationMillis()); System.out.println("FrameRate: " + videoMetaData.getFrameRate()); //Show moderated content labels, confidence and detection times List<ContentModerationDetection> moderationLabelsInFrames= moderationLabelDetectionResult.getModerationLabels();
228
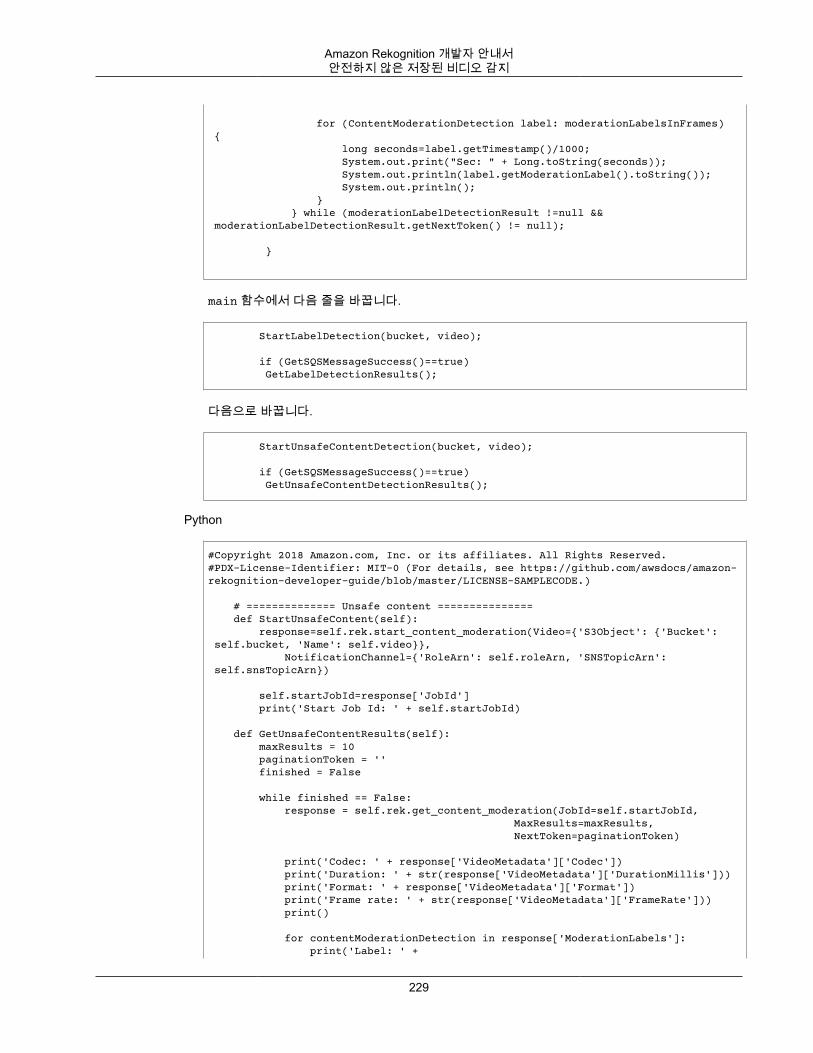
Amazon Rekognition 개발자 안내서안전하지 않은 저장된 비디오 감지
for (ContentModerationDetection label: moderationLabelsInFrames) { long seconds=label.getTimestamp()/1000; System.out.print("Sec: " + Long.toString(seconds)); System.out.println(label.getModerationLabel().toString()); System.out.println(); } } while (moderationLabelDetectionResult !=null && moderationLabelDetectionResult.getNextToken() != null); }
main 함수에서 다음 줄을 바꿉니다.
StartLabelDetection(bucket, video);
if (GetSQSMessageSuccess()==true) GetLabelDetectionResults();
다음으로 바꿉니다.
StartUnsafeContentDetection(bucket, video);
if (GetSQSMessageSuccess()==true) GetUnsafeContentDetectionResults();
Python
#Copyright 2018 Amazon.com, Inc. or its affiliates. All Rights Reserved.#PDX-License-Identifier: MIT-0 (For details, see https://github.com/awsdocs/amazon-rekognition-developer-guide/blob/master/LICENSE-SAMPLECODE.)
# ============== Unsafe content =============== def StartUnsafeContent(self): response=self.rek.start_content_moderation(Video={'S3Object': {'Bucket': self.bucket, 'Name': self.video}}, NotificationChannel={'RoleArn': self.roleArn, 'SNSTopicArn': self.snsTopicArn})
self.startJobId=response['JobId'] print('Start Job Id: ' + self.startJobId)
def GetUnsafeContentResults(self): maxResults = 10 paginationToken = '' finished = False
while finished == False: response = self.rek.get_content_moderation(JobId=self.startJobId, MaxResults=maxResults, NextToken=paginationToken)
print('Codec: ' + response['VideoMetadata']['Codec']) print('Duration: ' + str(response['VideoMetadata']['DurationMillis'])) print('Format: ' + response['VideoMetadata']['Format']) print('Frame rate: ' + str(response['VideoMetadata']['FrameRate'])) print()
for contentModerationDetection in response['ModerationLabels']: print('Label: ' +
229
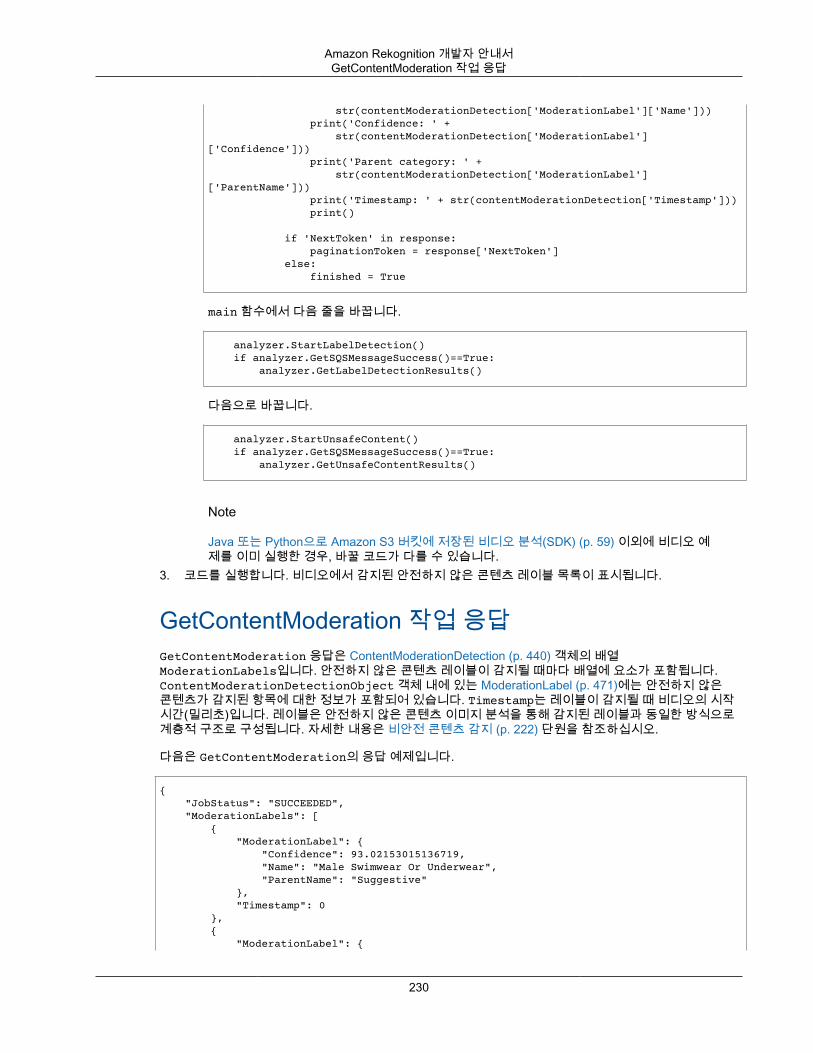
Amazon Rekognition 개발자 안내서GetContentModeration 작업 응답
str(contentModerationDetection['ModerationLabel']['Name'])) print('Confidence: ' + str(contentModerationDetection['ModerationLabel']['Confidence'])) print('Parent category: ' + str(contentModerationDetection['ModerationLabel']['ParentName'])) print('Timestamp: ' + str(contentModerationDetection['Timestamp'])) print()
if 'NextToken' in response: paginationToken = response['NextToken'] else: finished = True
main 함수에서 다음 줄을 바꿉니다.
analyzer.StartLabelDetection() if analyzer.GetSQSMessageSuccess()==True: analyzer.GetLabelDetectionResults()
다음으로 바꿉니다.
analyzer.StartUnsafeContent() if analyzer.GetSQSMessageSuccess()==True: analyzer.GetUnsafeContentResults()
Note
Java 또는 Python으로 Amazon S3 버킷에 저장된 비디오 분석(SDK) (p. 59) 이외에 비디오 예제를 이미 실행한 경우, 바꿀 코드가 다를 수 있습니다.
3. 코드를 실행합니다. 비디오에서 감지된 안전하지 않은 콘텐츠 레이블 목록이 표시됩니다.
GetContentModeration 작업 응답GetContentModeration 응답은 ContentModerationDetection (p. 440) 객체의 배열ModerationLabels입니다. 안전하지 않은 콘텐츠 레이블이 감지될 때마다 배열에 요소가 포함됩니다.ContentModerationDetectionObject 객체 내에 있는 ModerationLabel (p. 471)에는 안전하지 않은콘텐츠가 감지된 항목에 대한 정보가 포함되어 있습니다. Timestamp는 레이블이 감지될 때 비디오의 시작시간(밀리초)입니다. 레이블은 안전하지 않은 콘텐츠 이미지 분석을 통해 감지된 레이블과 동일한 방식으로계층적 구조로 구성됩니다. 자세한 내용은 비안전 콘텐츠 감지 (p. 222) 단원을 참조하십시오.
다음은 GetContentModeration의 응답 예제입니다.
{ "JobStatus": "SUCCEEDED", "ModerationLabels": [ { "ModerationLabel": { "Confidence": 93.02153015136719, "Name": "Male Swimwear Or Underwear", "ParentName": "Suggestive" }, "Timestamp": 0 }, { "ModerationLabel": {
230
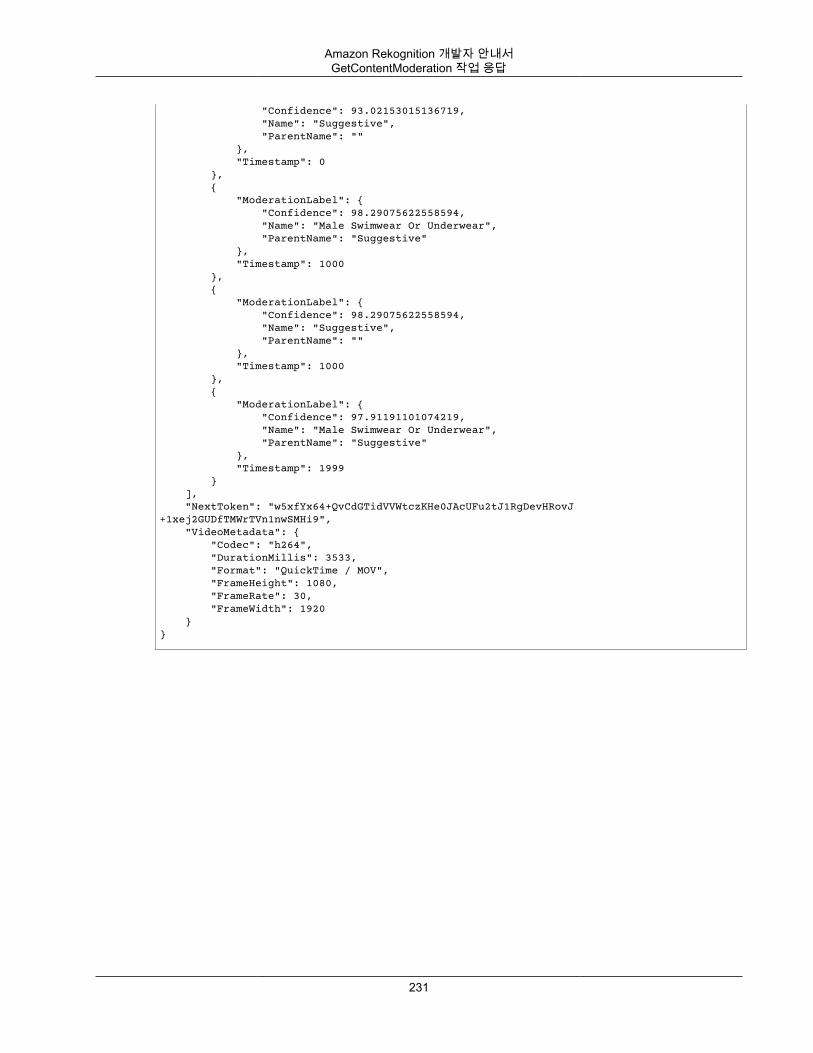
Amazon Rekognition 개발자 안내서GetContentModeration 작업 응답
"Confidence": 93.02153015136719, "Name": "Suggestive", "ParentName": "" }, "Timestamp": 0 }, { "ModerationLabel": { "Confidence": 98.29075622558594, "Name": "Male Swimwear Or Underwear", "ParentName": "Suggestive" }, "Timestamp": 1000 }, { "ModerationLabel": { "Confidence": 98.29075622558594, "Name": "Suggestive", "ParentName": "" }, "Timestamp": 1000 }, { "ModerationLabel": { "Confidence": 97.91191101074219, "Name": "Male Swimwear Or Underwear", "ParentName": "Suggestive" }, "Timestamp": 1999 } ], "NextToken": "w5xfYx64+QvCdGTidVVWtczKHe0JAcUFu2tJ1RgDevHRovJ+1xej2GUDfTMWrTVn1nwSMHi9", "VideoMetadata": { "Codec": "h264", "DurationMillis": 3533, "Format": "QuickTime / MOV", "FrameHeight": 1080, "FrameRate": 30, "FrameWidth": 1920 }}
231
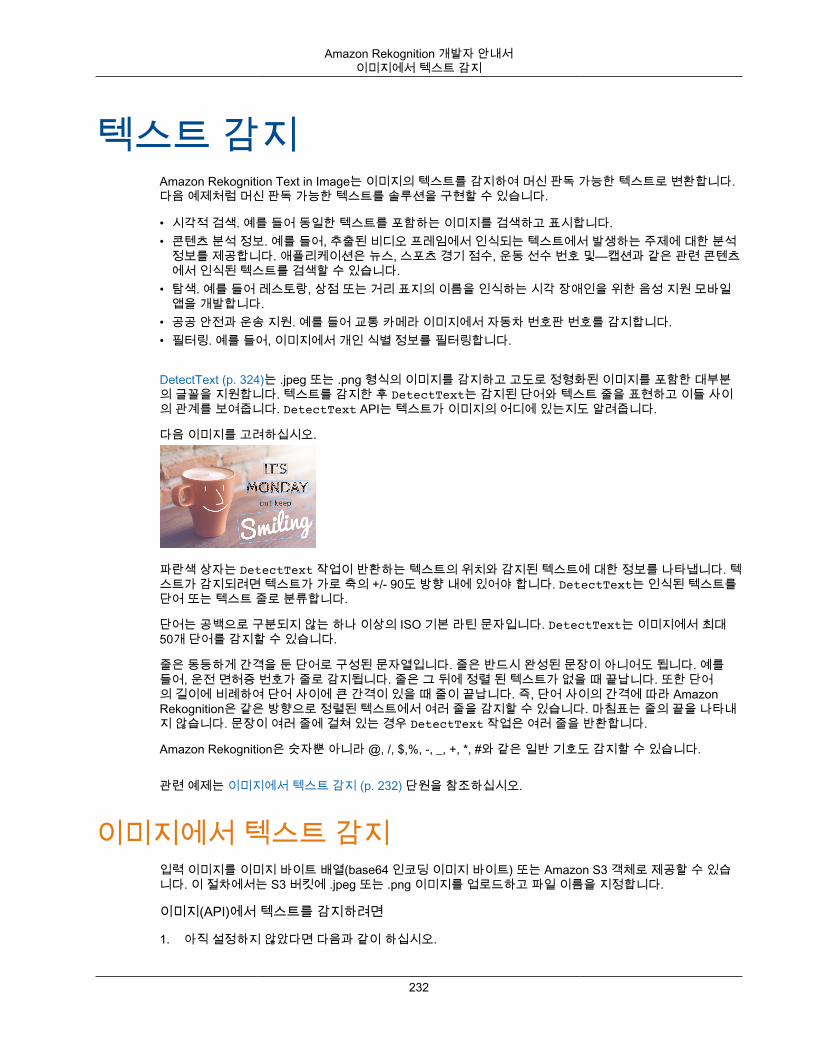
Amazon Rekognition 개발자 안내서이미지에서 텍스트 감지
텍스트 감지Amazon Rekognition Text in Image는 이미지의 텍스트를 감지하여 머신 판독 가능한 텍스트로 변환합니다.다음 예제처럼 머신 판독 가능한 텍스트를 솔루션을 구현할 수 있습니다.
• 시각적 검색. 예를 들어 동일한 텍스트를 포함하는 이미지를 검색하고 표시합니다.• 콘텐츠 분석 정보. 예를 들어, 추출된 비디오 프레임에서 인식되는 텍스트에서 발생하는 주제에 대한 분석
정보를 제공합니다. 애플리케이션은 뉴스, 스포츠 경기 점수, 운동 선수 번호 및—캡션과 같은 관련 콘텐츠에서 인식된 텍스트를 검색할 수 있습니다.
• 탐색. 예를 들어 레스토랑, 상점 또는 거리 표지의 이름을 인식하는 시각 장애인을 위한 음성 지원 모바일앱을 개발합니다.
• 공공 안전과 운송 지원. 예를 들어 교통 카메라 이미지에서 자동차 번호판 번호를 감지합니다.• 필터링. 예를 들어, 이미지에서 개인 식별 정보를 필터링합니다.
DetectText (p. 324)는 .jpeg 또는 .png 형식의 이미지를 감지하고 고도로 정형화된 이미지를 포함한 대부분의 글꼴을 지원합니다. 텍스트를 감지한 후 DetectText는 감지된 단어와 텍스트 줄을 표현하고 이들 사이의 관계를 보여줍니다. DetectText API는 텍스트가 이미지의 어디에 있는지도 알려줍니다.
다음 이미지를 고려하십시오.
파란색 상자는 DetectText 작업이 반환하는 텍스트의 위치와 감지된 텍스트에 대한 정보를 나타냅니다. 텍스트가 감지되려면 텍스트가 가로 축의 +/- 90도 방향 내에 있어야 합니다. DetectText는 인식된 텍스트를단어 또는 텍스트 줄로 분류합니다.
단어는 공백으로 구분되지 않는 하나 이상의 ISO 기본 라틴 문자입니다. DetectText는 이미지에서 최대50개 단어를 감지할 수 있습니다.
줄은 동등하게 간격을 둔 단어로 구성된 문자열입니다. 줄은 반드시 완성된 문장이 아니어도 됩니다. 예를들어, 운전 면허증 번호가 줄로 감지됩니다. 줄은 그 뒤에 정렬 된 텍스트가 없을 때 끝납니다. 또한 단어의 길이에 비례하여 단어 사이에 큰 간격이 있을 때 줄이 끝납니다. 즉, 단어 사이의 간격에 따라 AmazonRekognition은 같은 방향으로 정렬된 텍스트에서 여러 줄을 감지할 수 있습니다. 마침표는 줄의 끝을 나타내지 않습니다. 문장이 여러 줄에 걸쳐 있는 경우 DetectText 작업은 여러 줄을 반환합니다.
Amazon Rekognition은 숫자뿐 아니라 @, /, $,%, -, _, +, *, #와 같은 일반 기호도 감지할 수 있습니다.
관련 예제는 이미지에서 텍스트 감지 (p. 232) 단원을 참조하십시오.
이미지에서 텍스트 감지입력 이미지를 이미지 바이트 배열(base64 인코딩 이미지 바이트) 또는 Amazon S3 객체로 제공할 수 있습니다. 이 절차에서는 S3 버킷에 .jpeg 또는 .png 이미지를 업로드하고 파일 이름을 지정합니다.
이미지(API)에서 텍스트를 감지하려면
1. 아직 설정하지 않았다면 다음과 같이 하십시오.
232

Amazon Rekognition 개발자 안내서이미지에서 텍스트 감지
a. AmazonRekognitionFullAccess 권한과 AmazonS3ReadOnlyAccess 권한을 가진 IAM 사용자를 만들어 업데이트합니다. 자세한 내용은 1단계: AWS 계정 설정 및 IAM 사용자 만들기 (p. 11)단원을 참조하십시오.
b. AWS CLI와 AWS SDK를 설치하고 구성합니다. 자세한 내용은 2단계: AWS CLI 및 AWS SDK 설정 (p. 12) 단원을 참조하십시오.
2. 텍스트를 포함하는 이미지를 S3 버킷에 업로드합니다.
지침은 Amazon Simple Storage Service 콘솔 사용 설명서의 Amazon S3로 객체 업로드 단원을 참조하십시오.
3. 다음 예제를 사용하여 DetectText 작업을 호출합니다.
Java
다음 예제 코드는 감지된 줄과, 이미지에서 감지되었던 단어를 표시합니다.
bucket 및 photo의 값을 2단계에서 사용한 Amazon S3 버킷과 이미지의 이름으로 바꿉니다.
//Copyright 2018 Amazon.com, Inc. or its affiliates. All Rights Reserved.//PDX-License-Identifier: MIT-0 (For details, see https://github.com/awsdocs/amazon-rekognition-developer-guide/blob/master/LICENSE-SAMPLECODE.)
package aws.example.rekognition.image;import com.amazonaws.services.rekognition.AmazonRekognition;import com.amazonaws.services.rekognition.AmazonRekognitionClientBuilder;import com.amazonaws.services.rekognition.model.AmazonRekognitionException;import com.amazonaws.services.rekognition.model.Image;import com.amazonaws.services.rekognition.model.S3Object;import com.amazonaws.services.rekognition.model.DetectTextRequest;import com.amazonaws.services.rekognition.model.DetectTextResult;import com.amazonaws.services.rekognition.model.TextDetection;import java.util.List;
public class DetectText {
public static void main(String[] args) throws Exception { String photo = "inputtext.jpg"; String bucket = "bucket";
AmazonRekognition rekognitionClient = AmazonRekognitionClientBuilder.defaultClient();
DetectTextRequest request = new DetectTextRequest() .withImage(new Image() .withS3Object(new S3Object() .withName(photo) .withBucket(bucket)));
try { DetectTextResult result = rekognitionClient.detectText(request); List<TextDetection> textDetections = result.getTextDetections();
System.out.println("Detected lines and words for " + photo); for (TextDetection text: textDetections) { System.out.println("Detected: " + text.getDetectedText());
233
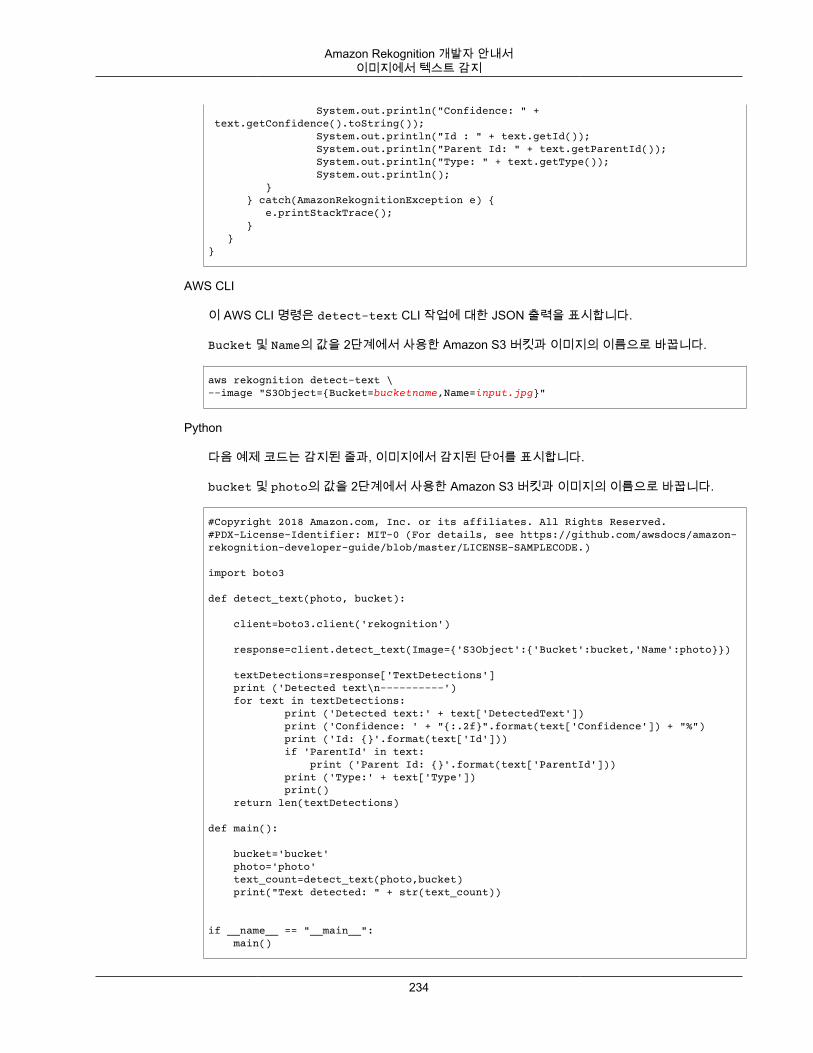
Amazon Rekognition 개발자 안내서이미지에서 텍스트 감지
System.out.println("Confidence: " + text.getConfidence().toString()); System.out.println("Id : " + text.getId()); System.out.println("Parent Id: " + text.getParentId()); System.out.println("Type: " + text.getType()); System.out.println(); } } catch(AmazonRekognitionException e) { e.printStackTrace(); } }}
AWS CLI
이 AWS CLI 명령은 detect-text CLI 작업에 대한 JSON 출력을 표시합니다.
Bucket 및 Name의 값을 2단계에서 사용한 Amazon S3 버킷과 이미지의 이름으로 바꿉니다.
aws rekognition detect-text \--image "S3Object={Bucket=bucketname,Name=input.jpg}"
Python
다음 예제 코드는 감지된 줄과, 이미지에서 감지된 단어를 표시합니다.
bucket 및 photo의 값을 2단계에서 사용한 Amazon S3 버킷과 이미지의 이름으로 바꿉니다.
#Copyright 2018 Amazon.com, Inc. or its affiliates. All Rights Reserved.#PDX-License-Identifier: MIT-0 (For details, see https://github.com/awsdocs/amazon-rekognition-developer-guide/blob/master/LICENSE-SAMPLECODE.)
import boto3
def detect_text(photo, bucket):
client=boto3.client('rekognition')
response=client.detect_text(Image={'S3Object':{'Bucket':bucket,'Name':photo}}) textDetections=response['TextDetections'] print ('Detected text\n----------') for text in textDetections: print ('Detected text:' + text['DetectedText']) print ('Confidence: ' + "{:.2f}".format(text['Confidence']) + "%") print ('Id: {}'.format(text['Id'])) if 'ParentId' in text: print ('Parent Id: {}'.format(text['ParentId'])) print ('Type:' + text['Type']) print() return len(textDetections)
def main():
bucket='bucket' photo='photo' text_count=detect_text(photo,bucket) print("Text detected: " + str(text_count))
if __name__ == "__main__": main()
234

Amazon Rekognition 개발자 안내서DetectText 작업 요청
.NET
다음 예제 코드는 감지된 줄과, 이미지에서 감지된 단어를 표시합니다.
bucket 및 photo의 값을 2단계에서 사용한 Amazon S3 버킷과 이미지의 이름으로 바꿉니다.
//Copyright 2018 Amazon.com, Inc. or its affiliates. All Rights Reserved.//PDX-License-Identifier: MIT-0 (For details, see https://github.com/awsdocs/amazon-rekognition-developer-guide/blob/master/LICENSE-SAMPLECODE.)
using System;using Amazon.Rekognition;using Amazon.Rekognition.Model;
public class DetectText{ public static void Example() { String photo = "input.jpg"; String bucket = "bucket";
AmazonRekognitionClient rekognitionClient = new AmazonRekognitionClient();
DetectTextRequest detectTextRequest = new DetectTextRequest() { Image = new Image() { S3Object = new S3Object() { Name = photo, Bucket = bucket } } };
try { DetectTextResponse detectTextResponse = rekognitionClient.DetectText(detectTextRequest); Console.WriteLine("Detected lines and words for " + photo); foreach (TextDetection text in detectTextResponse.TextDetections) { Console.WriteLine("Detected: " + text.DetectedText); Console.WriteLine("Confidence: " + text.Confidence); Console.WriteLine("Id : " + text.Id); Console.WriteLine("Parent Id: " + text.ParentId); Console.WriteLine("Type: " + text.Type); } } catch (Exception e) { Console.WriteLine(e.Message); } }}
DetectText 작업 요청DetectText 작업에서는 입력 이미지를 base64로 인코딩된 바이트 배열 또는 Amazon S3 버킷에 저장된이미지로 제공합니다. 다음 예제 JSON 요청은 Amazon S3 버킷에서 불러온 이미지를 표시합니다.
235
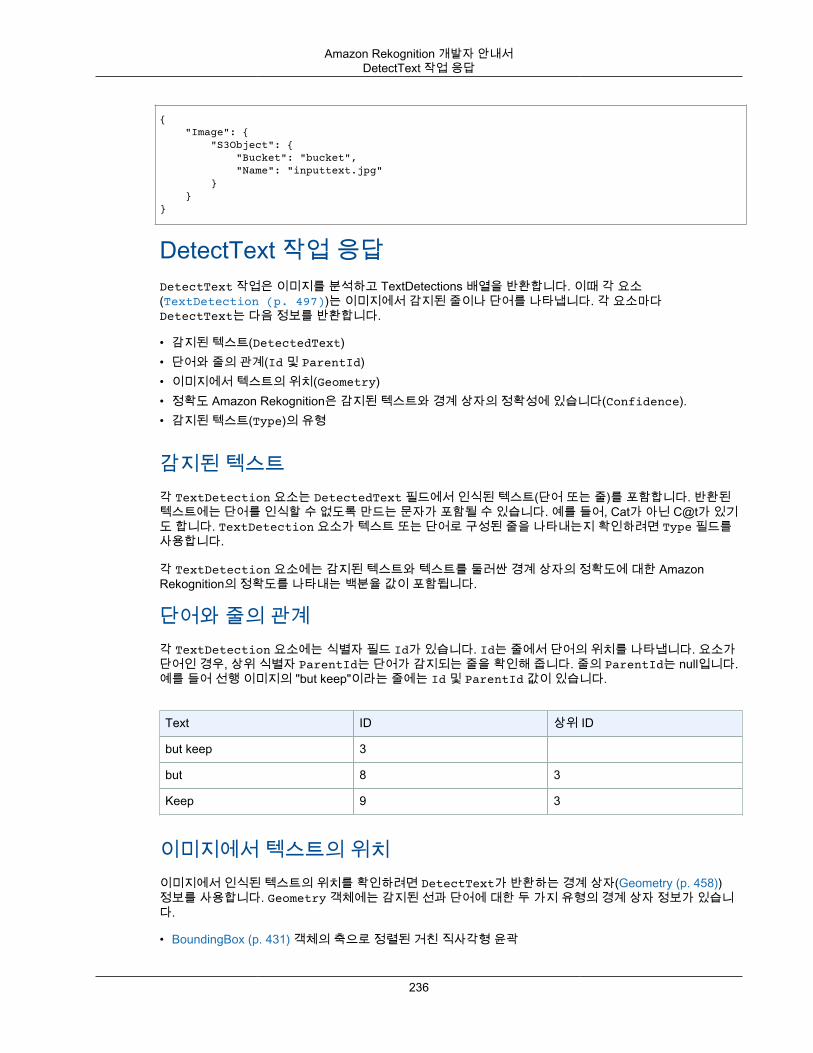
Amazon Rekognition 개발자 안내서DetectText 작업 응답
{ "Image": { "S3Object": { "Bucket": "bucket", "Name": "inputtext.jpg" } }}
DetectText 작업 응답DetectText 작업은 이미지를 분석하고 TextDetections 배열을 반환합니다. 이때 각 요소(TextDetection (p. 497))는 이미지에서 감지된 줄이나 단어를 나타냅니다. 각 요소마다DetectText는 다음 정보를 반환합니다.
• 감지된 텍스트(DetectedText)• 단어와 줄의 관계(Id 및 ParentId)• 이미지에서 텍스트의 위치(Geometry)• 정확도 Amazon Rekognition은 감지된 텍스트와 경계 상자의 정확성에 있습니다(Confidence).• 감지된 텍스트(Type)의 유형
감지된 텍스트각 TextDetection 요소는 DetectedText 필드에서 인식된 텍스트(단어 또는 줄)를 포함합니다. 반환된텍스트에는 단어를 인식할 수 없도록 만드는 문자가 포함될 수 있습니다. 예를 들어, Cat가 아닌 C@t가 있기도 합니다. TextDetection 요소가 텍스트 또는 단어로 구성된 줄을 나타내는지 확인하려면 Type 필드를사용합니다.
각 TextDetection 요소에는 감지된 텍스트와 텍스트를 둘러싼 경계 상자의 정확도에 대한 AmazonRekognition의 정확도를 나타내는 백분율 값이 포함됩니다.
단어와 줄의 관계각 TextDetection 요소에는 식별자 필드 Id가 있습니다. Id는 줄에서 단어의 위치를 나타냅니다. 요소가단어인 경우, 상위 식별자 ParentId는 단어가 감지되는 줄을 확인해 줍니다. 줄의 ParentId는 null입니다.예를 들어 선행 이미지의 "but keep"이라는 줄에는 Id 및 ParentId 값이 있습니다.
Text ID 상위 ID
but keep 3
but 8 3
Keep 9 3
이미지에서 텍스트의 위치이미지에서 인식된 텍스트의 위치를 확인하려면 DetectText가 반환하는 경계 상자(Geometry (p. 458))정보를 사용합니다. Geometry 객체에는 감지된 선과 단어에 대한 두 가지 유형의 경계 상자 정보가 있습니다.
• BoundingBox (p. 431) 객체의 축으로 정렬된 거친 직사각형 윤곽
236
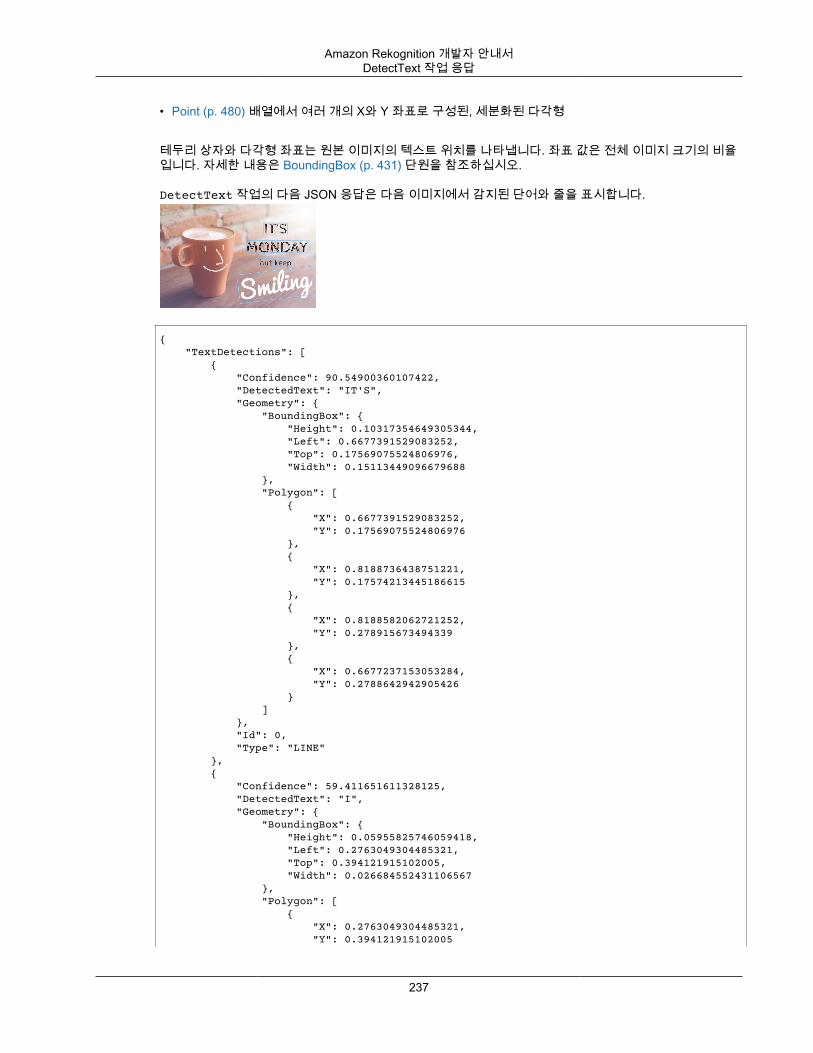
Amazon Rekognition 개발자 안내서DetectText 작업 응답
• Point (p. 480) 배열에서 여러 개의 X와 Y 좌표로 구성된, 세분화된 다각형
테두리 상자와 다각형 좌표는 원본 이미지의 텍스트 위치를 나타냅니다. 좌표 값은 전체 이미지 크기의 비율입니다. 자세한 내용은 BoundingBox (p. 431) 단원을 참조하십시오.
DetectText 작업의 다음 JSON 응답은 다음 이미지에서 감지된 단어와 줄을 표시합니다.
{ "TextDetections": [ { "Confidence": 90.54900360107422, "DetectedText": "IT'S", "Geometry": { "BoundingBox": { "Height": 0.10317354649305344, "Left": 0.6677391529083252, "Top": 0.17569075524806976, "Width": 0.15113449096679688 }, "Polygon": [ { "X": 0.6677391529083252, "Y": 0.17569075524806976 }, { "X": 0.8188736438751221, "Y": 0.17574213445186615 }, { "X": 0.8188582062721252, "Y": 0.278915673494339 }, { "X": 0.6677237153053284, "Y": 0.2788642942905426 } ] }, "Id": 0, "Type": "LINE" }, { "Confidence": 59.411651611328125, "DetectedText": "I", "Geometry": { "BoundingBox": { "Height": 0.05955825746059418, "Left": 0.2763049304485321, "Top": 0.394121915102005, "Width": 0.026684552431106567 }, "Polygon": [ { "X": 0.2763049304485321, "Y": 0.394121915102005
237
Amazon Rekognition 개발자 안내서DetectText 작업 응답
}, { "X": 0.30298948287963867, "Y": 0.3932435214519501 }, { "X": 0.30385109782218933, "Y": 0.45280176401138306 }, { "X": 0.27716654539108276, "Y": 0.453680157661438 } ] }, "Id": 1, "Type": "LINE" }, { "Confidence": 92.76634979248047, "DetectedText": "MONDAY", "Geometry": { "BoundingBox": { "Height": 0.11997425556182861, "Left": 0.5545867085456848, "Top": 0.34920141100883484, "Width": 0.39841532707214355 }, "Polygon": [ { "X": 0.5545867085456848, "Y": 0.34920141100883484 }, { "X": 0.9530020356178284, "Y": 0.3471102714538574 }, { "X": 0.9532787799835205, "Y": 0.46708452701568604 }, { "X": 0.554863452911377, "Y": 0.46917566657066345 } ] }, "Id": 2, "Type": "LINE" }, { "Confidence": 96.7636489868164, "DetectedText": "but keep", "Geometry": { "BoundingBox": { "Height": 0.0756164938211441, "Left": 0.634815514087677, "Top": 0.5181083083152771, "Width": 0.20877975225448608 }, "Polygon": [ { "X": 0.634815514087677, "Y": 0.5181083083152771 }, {
238
Amazon Rekognition 개발자 안내서DetectText 작업 응답
"X": 0.8435952663421631, "Y": 0.52589350938797 }, { "X": 0.8423560857772827, "Y": 0.6015099883079529 }, { "X": 0.6335763335227966, "Y": 0.59372478723526 } ] }, "Id": 3, "Type": "LINE" }, { "Confidence": 99.47185516357422, "DetectedText": "Smiling", "Geometry": { "BoundingBox": { "Height": 0.2814019024372101, "Left": 0.48475268483161926, "Top": 0.6823741793632507, "Width": 0.47539761662483215 }, "Polygon": [ { "X": 0.48475268483161926, "Y": 0.6823741793632507 }, { "X": 0.9601503014564514, "Y": 0.587857186794281 }, { "X": 0.9847385287284851, "Y": 0.8692590594291687 }, { "X": 0.5093409419059753, "Y": 0.9637760519981384 } ] }, "Id": 4, "Type": "LINE" }, { "Confidence": 90.54900360107422, "DetectedText": "IT'S", "Geometry": { "BoundingBox": { "Height": 0.10387301445007324, "Left": 0.6685508489608765, "Top": 0.17597118020057678, "Width": 0.14985692501068115 }, "Polygon": [ { "X": 0.6677391529083252, "Y": 0.17569075524806976 }, { "X": 0.8188736438751221, "Y": 0.17574213445186615
239
Amazon Rekognition 개발자 안내서DetectText 작업 응답
}, { "X": 0.8188582062721252, "Y": 0.278915673494339 }, { "X": 0.6677237153053284, "Y": 0.2788642942905426 } ] }, "Id": 5, "ParentId": 0, "Type": "WORD" }, { "Confidence": 92.76634979248047, "DetectedText": "MONDAY", "Geometry": { "BoundingBox": { "Height": 0.11929994821548462, "Left": 0.5540683269500732, "Top": 0.34858056902885437, "Width": 0.3998897075653076 }, "Polygon": [ { "X": 0.5545867085456848, "Y": 0.34920141100883484 }, { "X": 0.9530020356178284, "Y": 0.3471102714538574 }, { "X": 0.9532787799835205, "Y": 0.46708452701568604 }, { "X": 0.554863452911377, "Y": 0.46917566657066345 } ] }, "Id": 7, "ParentId": 2, "Type": "WORD" }, { "Confidence": 59.411651611328125, "DetectedText": "I", "Geometry": { "BoundingBox": { "Height": 0.05981886386871338, "Left": 0.2779299318790436, "Top": 0.3935416042804718, "Width": 0.02624112367630005 }, "Polygon": [ { "X": 0.2763049304485321, "Y": 0.394121915102005 }, { "X": 0.30298948287963867, "Y": 0.3932435214519501
240
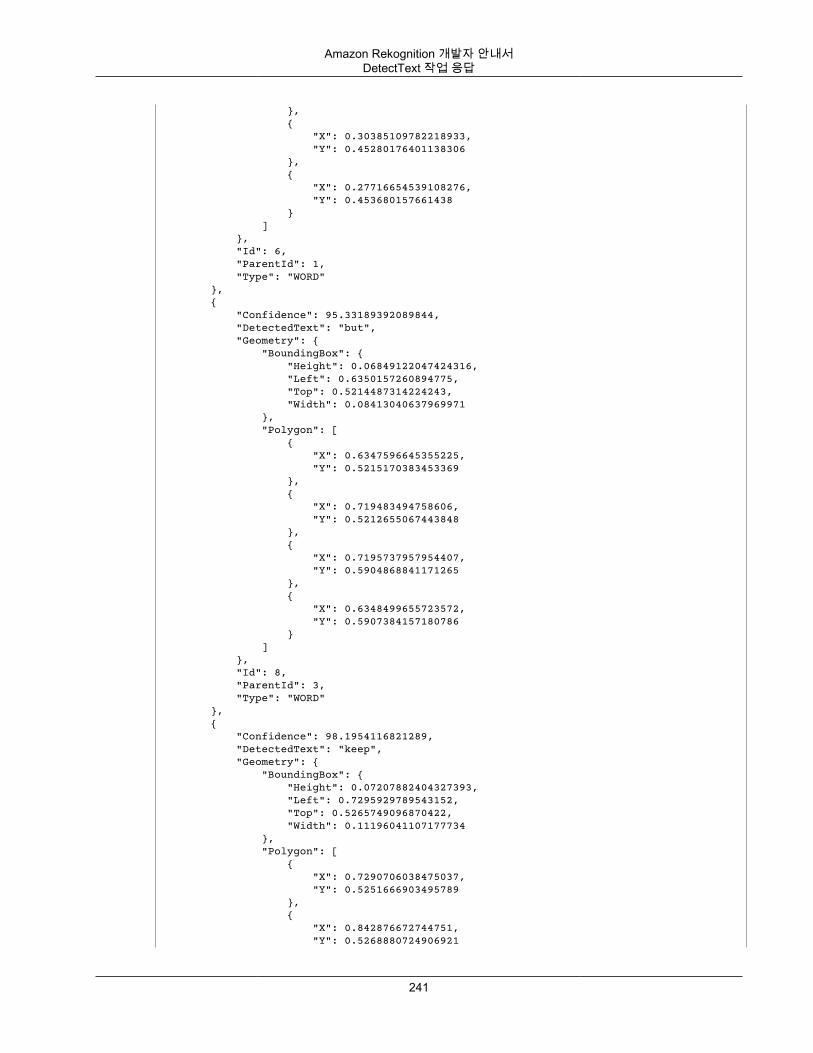
Amazon Rekognition 개발자 안내서DetectText 작업 응답
}, { "X": 0.30385109782218933, "Y": 0.45280176401138306 }, { "X": 0.27716654539108276, "Y": 0.453680157661438 } ] }, "Id": 6, "ParentId": 1, "Type": "WORD" }, { "Confidence": 95.33189392089844, "DetectedText": "but", "Geometry": { "BoundingBox": { "Height": 0.06849122047424316, "Left": 0.6350157260894775, "Top": 0.5214487314224243, "Width": 0.08413040637969971 }, "Polygon": [ { "X": 0.6347596645355225, "Y": 0.5215170383453369 }, { "X": 0.719483494758606, "Y": 0.5212655067443848 }, { "X": 0.7195737957954407, "Y": 0.5904868841171265 }, { "X": 0.6348499655723572, "Y": 0.5907384157180786 } ] }, "Id": 8, "ParentId": 3, "Type": "WORD" }, { "Confidence": 98.1954116821289, "DetectedText": "keep", "Geometry": { "BoundingBox": { "Height": 0.07207882404327393, "Left": 0.7295929789543152, "Top": 0.5265749096870422, "Width": 0.11196041107177734 }, "Polygon": [ { "X": 0.7290706038475037, "Y": 0.5251666903495789 }, { "X": 0.842876672744751, "Y": 0.5268880724906921
241
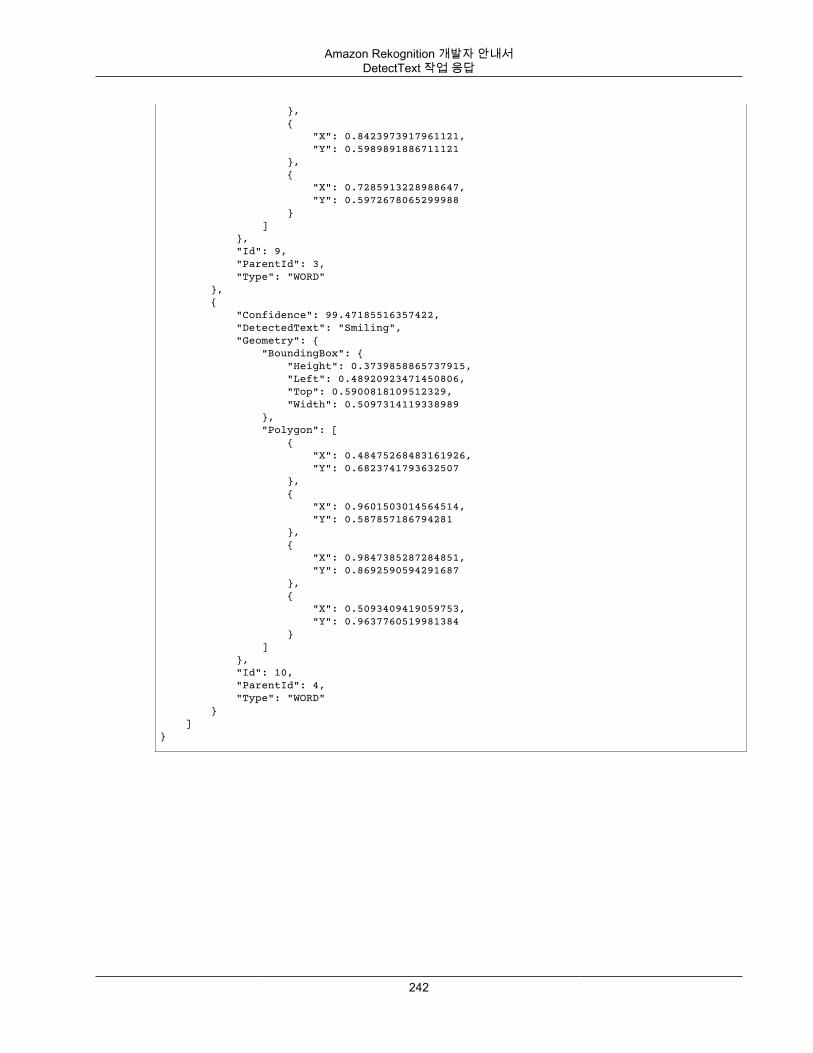
Amazon Rekognition 개발자 안내서DetectText 작업 응답
}, { "X": 0.8423973917961121, "Y": 0.5989891886711121 }, { "X": 0.7285913228988647, "Y": 0.5972678065299988 } ] }, "Id": 9, "ParentId": 3, "Type": "WORD" }, { "Confidence": 99.47185516357422, "DetectedText": "Smiling", "Geometry": { "BoundingBox": { "Height": 0.3739858865737915, "Left": 0.48920923471450806, "Top": 0.5900818109512329, "Width": 0.5097314119338989 }, "Polygon": [ { "X": 0.48475268483161926, "Y": 0.6823741793632507 }, { "X": 0.9601503014564514, "Y": 0.587857186794281 }, { "X": 0.9847385287284851, "Y": 0.8692590594291687 }, { "X": 0.5093409419059753, "Y": 0.9637760519981384 } ] }, "Id": 10, "ParentId": 4, "Type": "WORD" } ]}
242
Amazon Rekognition 개발자 안내서인증 및 액세스 제어
Amazon Rekognition 보안AWS에서 클라우드 보안을 가장 중요하게 생각합니다. AWS 고객은 보안에 가장 보안에 민감한 조직의 요구사항에 부합하도록 구축된 데이터 센터 및 네트워크 아키텍처의 혜택을 누릴 수 있습니다.
다음 주제에서 Amazon Rekognition 리소스 보안 방법에 대해 알아보십시오.
주제• Amazon Rekognition에 대한 인증 및 액세스 제어 (p. 243)• Rekognition 모니터링 (p. 253)• AWS CloudTrail을 사용하여 Amazon Rekognition API 호출 로깅 (p. 257)• Amazon VPC 엔드포인트와 함께 Amazon Rekognition 사용 (p. 262)• Amazon Rekognition 규정 준수 확인 (p. 263)
Amazon Rekognition에 대한 인증 및 액세스 제어Amazon Rekognition에 액세스하려면 자격 증명이 필요합니다. 이러한 자격 증명에는 AWS 리소스(예:Amazon Rekognition collection)에 액세스할 수 있는 권한이 있어야 합니다. 다음 단원에서는 AWS Identityand Access Management(IAM) 및 Amazon Rekognition를 사용하여 리소스에 대한 액세스를 보호할 수 있는방법에 대한 세부 정보를 제공합니다.
• 인증 (p. 243)• 액세스 제어 (p. 244)
인증다음과 같은 ID 유형으로 AWS에 액세스할 수 있습니다.
• AWS 계정 루트 사용자 – AWS 계정을 처음 생성할 때는 해당 계정의 모든 AWS 서비스 및 리소스에 대한완전한 액세스 권한이 있는 SSO(Single Sign-In) ID로 시작합니다. 이 자격 증명은 AWS 계정 루트 사용자라고 하며, 계정을 생성할 때 사용한 이메일 주소와 암호로 로그인하여 액세스합니다. 일상적인 작업은물론 관리 작업에도 루트 사용자를 사용하지 않는 것이 좋습니다. 대신 IAM 사용자를 처음 생성할 때만 루트 사용자를 사용하는 모범 사례를 준수하십시오. 그런 다음 루트 사용자 자격 증명을 안전하게 보관해 두고 몇 가지 계정 및 서비스 관리 작업을 수행할 때만 해당 자격 증명을 사용합니다.
• IAM 사용자 – IAM 사용자는 특정 사용자 지정 권한(예: Amazon Rekognition에서 a collection을 생성할 권한)이 있는 AWS 계정 내 자격 증명입니다. IAM 사용자 이름과 암호를 사용하여 AWS Management 콘솔,AWS 토론 포럼 또는 AWS Support Center 같은 보안 AWS 웹 페이지에 로그인할 수 있습니다.
사용자 이름과 암호 외에도 각 사용자에 대해 액세스 키를 생성할 수 있습니다. 여러 SDK 중 하나를 통해또는 AWS Command Line Interface(CLI)를 사용하여 AWS 제품에 프로그래밍 방식으로 액세스할 때 이러한 키를 사용할 수 있습니다. SDK 및 CLI 도구는 액세스 키를 사용하여 암호화 방식으로 요청에 서명합니다. AWS 도구를 사용하지 않는 경우 요청에 직접 서명해야 합니다. Amazon Rekognition supports는 인바운드 API 요청을 인증하기 위한 프로토콜인 서명 버전 4를 지원합니다. 요청 인증에 대한 자세한 내용은AWS General Reference의 서명 버전 4 서명 프로세스 단원을 참조하십시오.
243
Amazon Rekognition 개발자 안내서액세스 제어
• IAM 역할 – IAM 역할은 특정 권한을 가진 계정에서 생성할 수 있는 IAM 자격 증명입니다. IAM 역할은
AWS에서 자격 증명으로 할 수 있는 것과 할 수 없는 것을 결정하는 권한 정책을 포함하는 AWS 자격 증명이라는 점에서 IAM 사용자와 유사합니다. 그러나 역할은 한 사람과만 연관되지 않고 해당 역할이 필요한사람이라면 누구든지 맡을 수 있어야 합니다. 또한 역할에는 그와 연관된 암호 또는 액세스 키와 같은 표준장기 자격 증명이 없습니다. 대신에 역할을 수임한 사람에게는 해당 역할 세션을 위한 임시 보안 자격 증명이 제공됩니다. 임시 자격 증명이 있는 IAM 역할은 다음과 같은 상황에서 유용합니다.
• 연합된 사용자 액세스 – IAM 사용자를 생성하는 대신 AWS Directory Service의 기존 ID, 엔터프라이
즈 사용자 디렉터리 또는 웹 ID 공급자를 사용할 수 있습니다. 이 사용자를 연합된 사용자라고 합니다.AWS에서는 ID 공급자를 통해 액세스가 요청되면 연합된 사용자에게 역할을 할당합니다. 연합된 사용자에 대한 자세한 내용은 IAM 사용 설명서의 연합된 사용자 및 역할을 참조하십시오.
• AWS 서비스 액세스 – 서비스 역할은 서비스가 사용자를 대신하여 사용자 계정에서 작업을 수행하기 위
해 수임하는 IAM 역할입니다. 일부 AWS 서비스 환경을 설정할 때 서비스에서 맡을 역할을 정의해야 합니다. 이 서비스 역할에는 서비스가 AWS 리소스에 액세스하는 데 필요한 모든 권한이 포함되어야 합니다. 서비스 역할은 서비스마다 다르지만 해당 서비스에 대한 문서화된 요구 사항을 충족하는 한 대부분의 경우 권한을 선택할 수 있습니다. 서비스 역할은 해당 계정 내 액세스 권한만 제공하며 다른 계정의서비스에 대한 액세스 권한을 부여하는 데 사용될 수 없습니다. IAM 내에서 서비스 역할을 생성, 수정 및삭제할 수 있습니다. 예를 들어 Amazon Redshift에서 사용자 대신 Amazon S3 버킷에 액세스하도록 허용하는 역할을 생성한 후 해당 버킷에 있는 데이터를 Amazon Redshift 클러스터로 로드할 수 있습니다.자세한 내용은 IAM 사용 설명서의 AWS 서비스에 대한 권한을 위임할 역할 생성을 참조하십시오.
• Amazon EC2에서 실행 중인 애플리케이션 – IAM 역할을 사용하여 EC2 인스턴스에서 실행되고 AWS
CLI 또는 AWS API 요청을 수행하는 애플리케이션의 임시 자격 증명을 관리할 수 있습니다. 이는 EC2인스턴스 내에 액세스 키를 저장할 때 권장되는 방법입니다. EC2 인스턴스에 AWS 역할을 할당하고 해당 역할을 모든 애플리케이션에서 사용할 수 있도록 하려면 인스턴스에 연결된 인스턴스 프로파일을 생성합니다. 인스턴스 프로파일에는 역할이 포함되어 있으며 EC2 인스턴스에서 실행되는 프로그램이 임시 자격 증명을 얻을 수 있습니다. 자세한 내용은 IAM 사용 설명서의 IAM 역할을 사용하여 Amazon EC2인스턴스에서 실행되는 애플리케이션에 권한 부여를 참조하십시오.
액세스 제어요청을 인증하는 데 유효한 자격 증명이 있더라도 권한이 없다면 Amazon Rekognition 리소스를 생성하거나액세스할 수 없습니다. 예를 들어 Amazon Rekognition collection을 생성할 권한이 있어야 합니다.
다음 단원에서는 Amazon Rekognition에 대한 권한을 관리하는 방법에 대해 설명합니다. 먼저 개요를 읽어보면 도움이 됩니다.
• Amazon Rekognition 리소스에 대한 액세스 권한 관리 개요 (p. 244)• Amazon Rekognition에 대한 자격 증명 기반 정책(IAM 정책) 사용 (p. 248)• Amazon Rekognition API 권한: 작업, 권한 및 리소스 참조 (p. 250)
Amazon Rekognition 리소스에 대한 액세스 권한 관리개요모든 AWS 리소스는 AWS 계정의 소유이고, 리소스 생성 또는 리소스 액세스 권한은 권한 정책에 따라 결정됩니다. 계정 관리자는 IAM 자격 증명(즉, 사용자, 그룹, 역할)에 권한 정책을 연결할 수 있고, 일부 서비스(예:AWS Lambda)에서는 리소스에 대한 권한 정책 연결도 지원합니다.
244
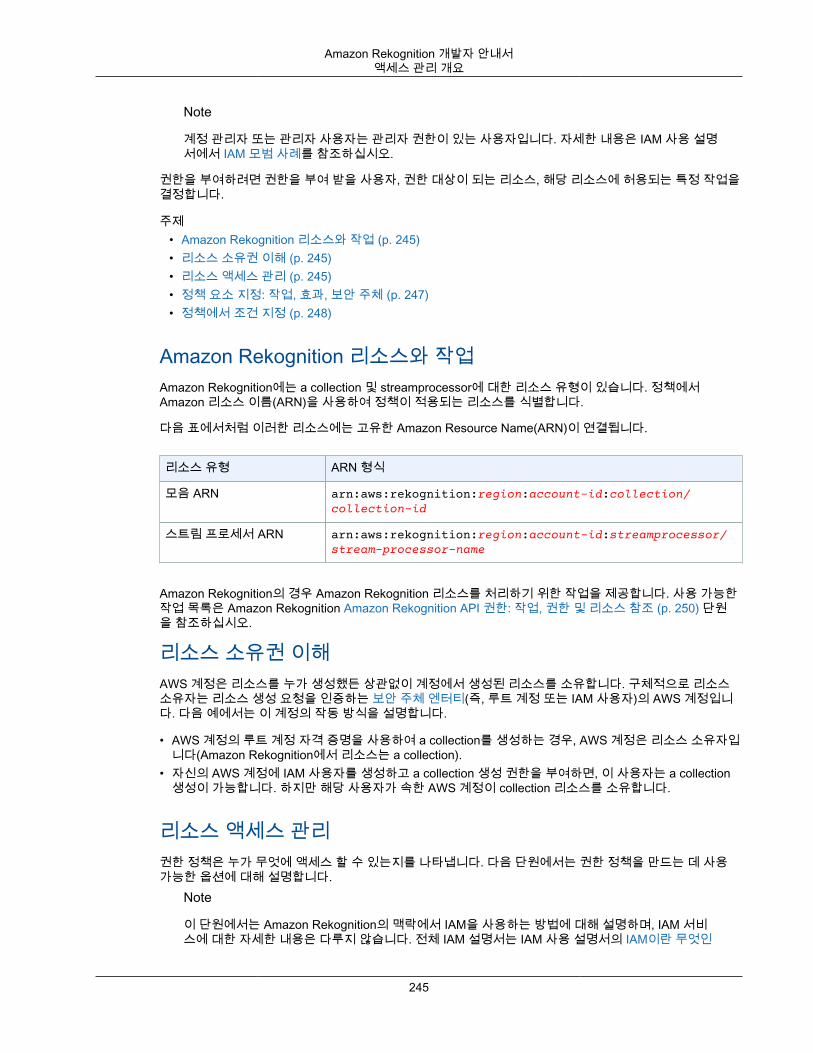
Amazon Rekognition 개발자 안내서액세스 관리 개요
Note
계정 관리자 또는 관리자 사용자는 관리자 권한이 있는 사용자입니다. 자세한 내용은 IAM 사용 설명서에서 IAM 모범 사례를 참조하십시오.
권한을 부여하려면 권한을 부여 받을 사용자, 권한 대상이 되는 리소스, 해당 리소스에 허용되는 특정 작업을결정합니다.
주제• Amazon Rekognition 리소스와 작업 (p. 245)• 리소스 소유권 이해 (p. 245)• 리소스 액세스 관리 (p. 245)• 정책 요소 지정: 작업, 효과, 보안 주체 (p. 247)• 정책에서 조건 지정 (p. 248)
Amazon Rekognition 리소스와 작업Amazon Rekognition에는 a collection 및 streamprocessor에 대한 리소스 유형이 있습니다. 정책에서Amazon 리소스 이름(ARN)을 사용하여 정책이 적용되는 리소스를 식별합니다.
다음 표에서처럼 이러한 리소스에는 고유한 Amazon Resource Name(ARN)이 연결됩니다.
리소스 유형 ARN 형식
모음 ARN arn:aws:rekognition:region:account-id:collection/collection-id
스트림 프로세서 ARN arn:aws:rekognition:region:account-id:streamprocessor/stream-processor-name
Amazon Rekognition의 경우 Amazon Rekognition 리소스를 처리하기 위한 작업을 제공합니다. 사용 가능한작업 목록은 Amazon Rekognition Amazon Rekognition API 권한: 작업, 권한 및 리소스 참조 (p. 250) 단원을 참조하십시오.
리소스 소유권 이해AWS 계정은 리소스를 누가 생성했든 상관없이 계정에서 생성된 리소스를 소유합니다. 구체적으로 리소스소유자는 리소스 생성 요청을 인증하는 보안 주체 엔터티(즉, 루트 계정 또는 IAM 사용자)의 AWS 계정입니다. 다음 예에서는 이 계정의 작동 방식을 설명합니다.
• AWS 계정의 루트 계정 자격 증명을 사용하여 a collection를 생성하는 경우, AWS 계정은 리소스 소유자입니다(Amazon Rekognition에서 리소스는 a collection).
• 자신의 AWS 계정에 IAM 사용자를 생성하고 a collection 생성 권한을 부여하면, 이 사용자는 a collection생성이 가능합니다. 하지만 해당 사용자가 속한 AWS 계정이 collection 리소스를 소유합니다.
리소스 액세스 관리권한 정책은 누가 무엇에 액세스 할 수 있는지를 나타냅니다. 다음 단원에서는 권한 정책을 만드는 데 사용가능한 옵션에 대해 설명합니다.
Note
이 단원에서는 Amazon Rekognition의 맥락에서 IAM을 사용하는 방법에 대해 설명하며, IAM 서비스에 대한 자세한 내용은 다루지 않습니다. 전체 IAM 설명서는 IAM 사용 설명서의 IAM이란 무엇인
245
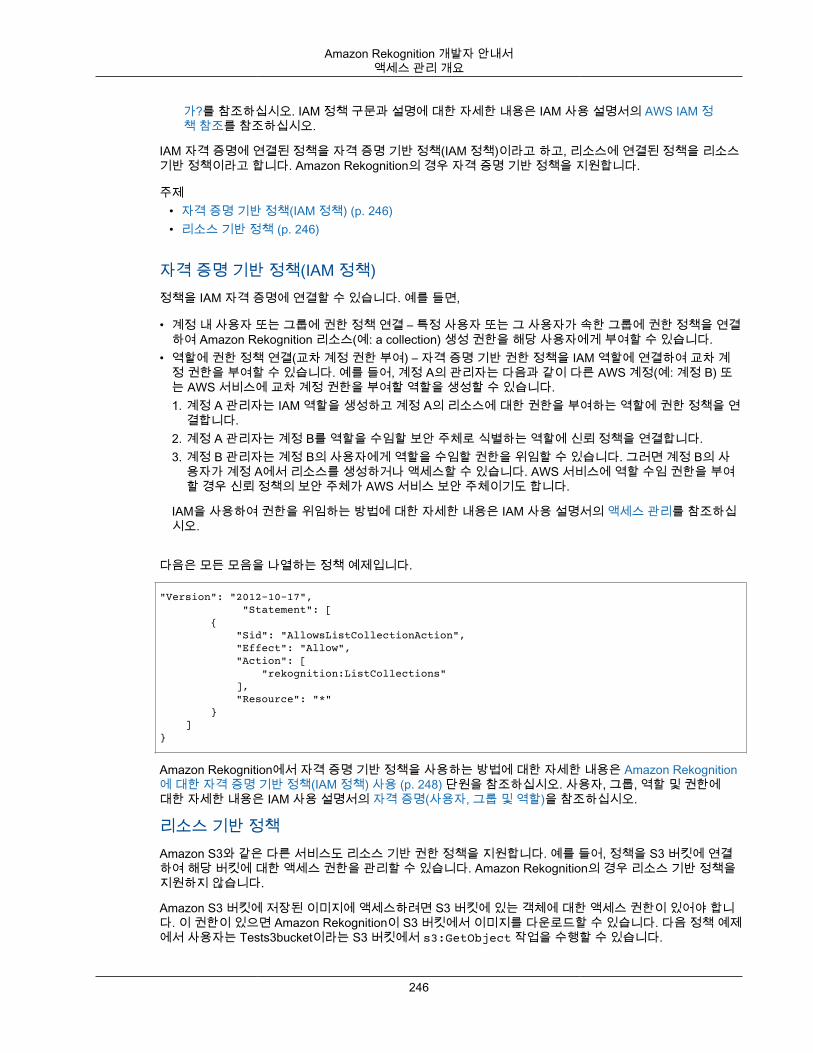
Amazon Rekognition 개발자 안내서액세스 관리 개요
가?를 참조하십시오. IAM 정책 구문과 설명에 대한 자세한 내용은 IAM 사용 설명서의 AWS IAM 정책 참조를 참조하십시오.
IAM 자격 증명에 연결된 정책을 자격 증명 기반 정책(IAM 정책)이라고 하고, 리소스에 연결된 정책을 리소스기반 정책이라고 합니다. Amazon Rekognition의 경우 자격 증명 기반 정책을 지원합니다.
주제• 자격 증명 기반 정책(IAM 정책) (p. 246)• 리소스 기반 정책 (p. 246)
자격 증명 기반 정책(IAM 정책)정책을 IAM 자격 증명에 연결할 수 있습니다. 예를 들면,
• 계정 내 사용자 또는 그룹에 권한 정책 연결 – 특정 사용자 또는 그 사용자가 속한 그룹에 권한 정책을 연결하여 Amazon Rekognition 리소스(예: a collection) 생성 권한을 해당 사용자에게 부여할 수 있습니다.
• 역할에 권한 정책 연결(교차 계정 권한 부여) – 자격 증명 기반 권한 정책을 IAM 역할에 연결하여 교차 계정 권한을 부여할 수 있습니다. 예를 들어, 계정 A의 관리자는 다음과 같이 다른 AWS 계정(예: 계정 B) 또는 AWS 서비스에 교차 계정 권한을 부여할 역할을 생성할 수 있습니다.1. 계정 A 관리자는 IAM 역할을 생성하고 계정 A의 리소스에 대한 권한을 부여하는 역할에 권한 정책을 연
결합니다.2. 계정 A 관리자는 계정 B를 역할을 수임할 보안 주체로 식별하는 역할에 신뢰 정책을 연결합니다.3. 계정 B 관리자는 계정 B의 사용자에게 역할을 수임할 권한을 위임할 수 있습니다. 그러면 계정 B의 사
용자가 계정 A에서 리소스를 생성하거나 액세스할 수 있습니다. AWS 서비스에 역할 수임 권한을 부여할 경우 신뢰 정책의 보안 주체가 AWS 서비스 보안 주체이기도 합니다.
IAM을 사용하여 권한을 위임하는 방법에 대한 자세한 내용은 IAM 사용 설명서의 액세스 관리를 참조하십시오.
다음은 모든 모음을 나열하는 정책 예제입니다.
"Version": "2012-10-17", "Statement": [ { "Sid": "AllowsListCollectionAction", "Effect": "Allow", "Action": [ "rekognition:ListCollections" ], "Resource": "*" } ]}
Amazon Rekognition에서 자격 증명 기반 정책을 사용하는 방법에 대한 자세한 내용은 Amazon Rekognition에 대한 자격 증명 기반 정책(IAM 정책) 사용 (p. 248) 단원을 참조하십시오. 사용자, 그룹, 역할 및 권한에대한 자세한 내용은 IAM 사용 설명서의 자격 증명(사용자, 그룹 및 역할)을 참조하십시오.
리소스 기반 정책Amazon S3와 같은 다른 서비스도 리소스 기반 권한 정책을 지원합니다. 예를 들어, 정책을 S3 버킷에 연결하여 해당 버킷에 대한 액세스 권한을 관리할 수 있습니다. Amazon Rekognition의 경우 리소스 기반 정책을지원하지 않습니다.
Amazon S3 버킷에 저장된 이미지에 액세스하려면 S3 버킷에 있는 객체에 대한 액세스 권한이 있어야 합니다. 이 권한이 있으면 Amazon Rekognition이 S3 버킷에서 이미지를 다운로드할 수 있습니다. 다음 정책 예제에서 사용자는 Tests3bucket이라는 S3 버킷에서 s3:GetObject 작업을 수행할 수 있습니다.
246
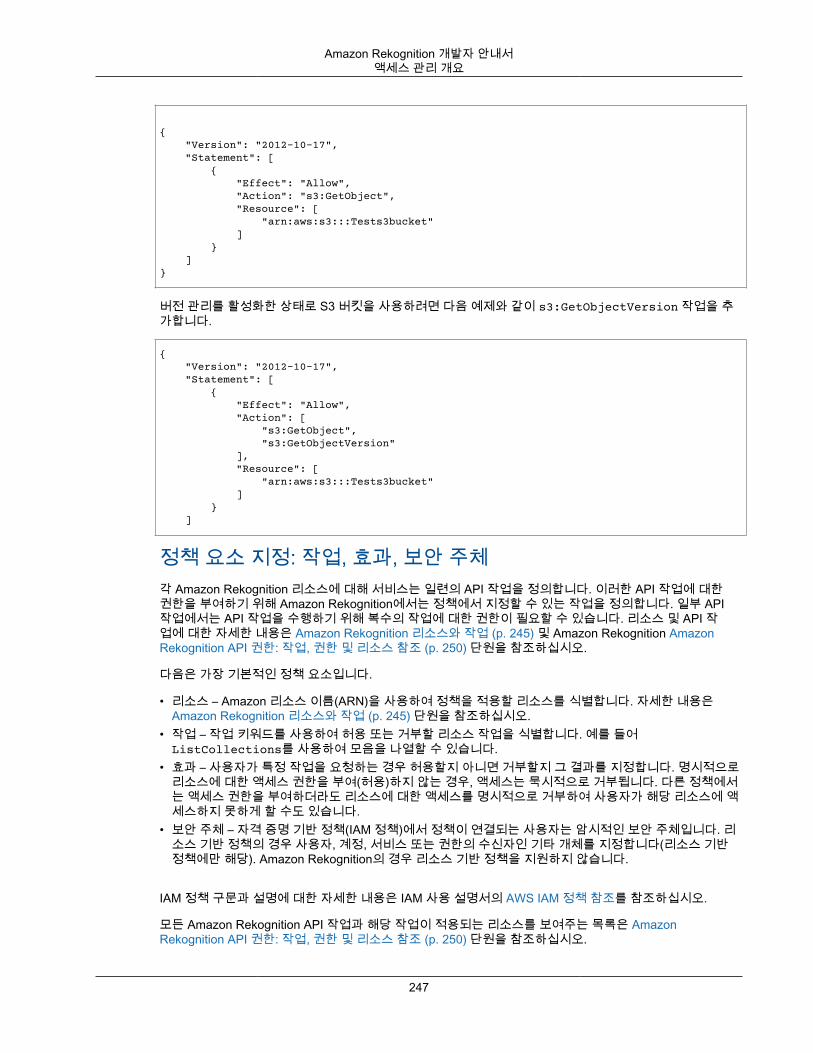
Amazon Rekognition 개발자 안내서액세스 관리 개요
{ "Version": "2012-10-17", "Statement": [ { "Effect": "Allow", "Action": "s3:GetObject", "Resource": [ "arn:aws:s3:::Tests3bucket" ] } ]}
버전 관리를 활성화한 상태로 S3 버킷을 사용하려면 다음 예제와 같이 s3:GetObjectVersion 작업을 추가합니다.
{ "Version": "2012-10-17", "Statement": [ { "Effect": "Allow", "Action": [ "s3:GetObject", "s3:GetObjectVersion" ], "Resource": [ "arn:aws:s3:::Tests3bucket" ] } ]
정책 요소 지정: 작업, 효과, 보안 주체각 Amazon Rekognition 리소스에 대해 서비스는 일련의 API 작업을 정의합니다. 이러한 API 작업에 대한권한을 부여하기 위해 Amazon Rekognition에서는 정책에서 지정할 수 있는 작업을 정의합니다. 일부 API작업에서는 API 작업을 수행하기 위해 복수의 작업에 대한 권한이 필요할 수 있습니다. 리소스 및 API 작업에 대한 자세한 내용은 Amazon Rekognition 리소스와 작업 (p. 245) 및 Amazon Rekognition AmazonRekognition API 권한: 작업, 권한 및 리소스 참조 (p. 250) 단원을 참조하십시오.
다음은 가장 기본적인 정책 요소입니다.
• 리소스 – Amazon 리소스 이름(ARN)을 사용하여 정책을 적용할 리소스를 식별합니다. 자세한 내용은Amazon Rekognition 리소스와 작업 (p. 245) 단원을 참조하십시오.
• 작업 – 작업 키워드를 사용하여 허용 또는 거부할 리소스 작업을 식별합니다. 예를 들어ListCollections를 사용하여 모음을 나열할 수 있습니다.
• 효과 – 사용자가 특정 작업을 요청하는 경우 허용할지 아니면 거부할지 그 결과를 지정합니다. 명시적으로리소스에 대한 액세스 권한을 부여(허용)하지 않는 경우, 액세스는 묵시적으로 거부됩니다. 다른 정책에서는 액세스 권한을 부여하더라도 리소스에 대한 액세스를 명시적으로 거부하여 사용자가 해당 리소스에 액세스하지 못하게 할 수도 있습니다.
• 보안 주체 – 자격 증명 기반 정책(IAM 정책)에서 정책이 연결되는 사용자는 암시적인 보안 주체입니다. 리소스 기반 정책의 경우 사용자, 계정, 서비스 또는 권한의 수신자인 기타 개체를 지정합니다(리소스 기반정책에만 해당). Amazon Rekognition의 경우 리소스 기반 정책을 지원하지 않습니다.
IAM 정책 구문과 설명에 대한 자세한 내용은 IAM 사용 설명서의 AWS IAM 정책 참조를 참조하십시오.
모든 Amazon Rekognition API 작업과 해당 작업이 적용되는 리소스를 보여주는 목록은 AmazonRekognition API 권한: 작업, 권한 및 리소스 참조 (p. 250) 단원을 참조하십시오.
247
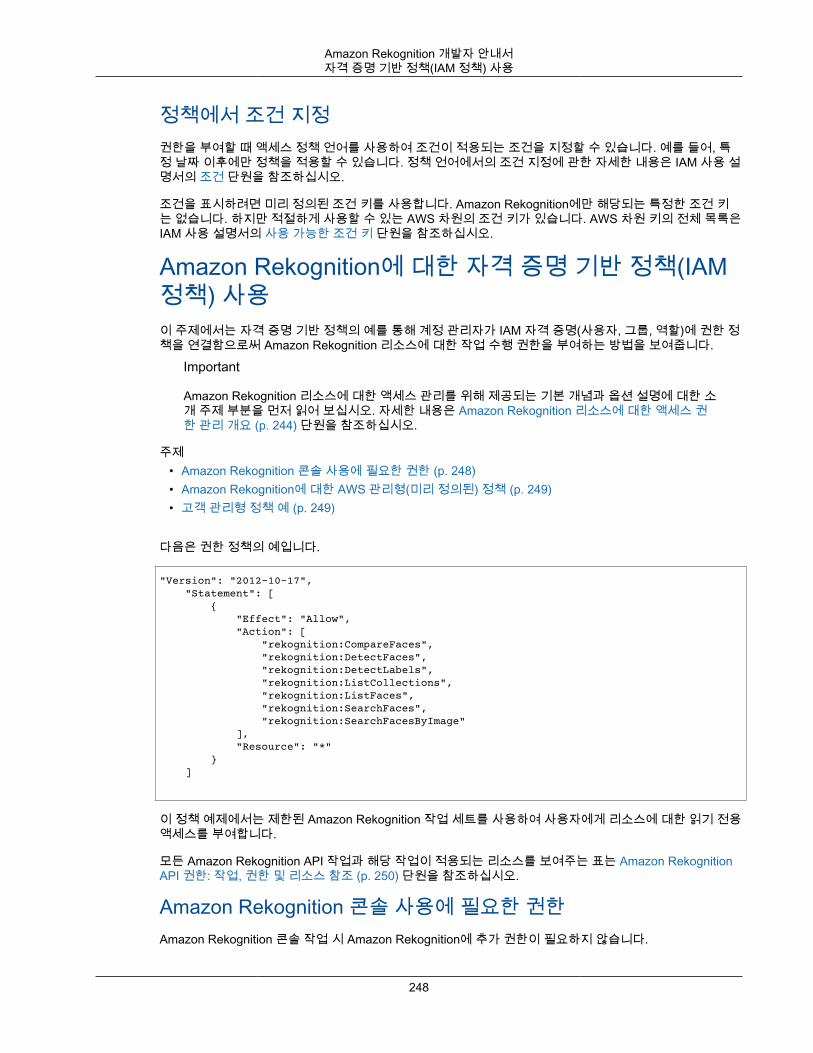
Amazon Rekognition 개발자 안내서자격 증명 기반 정책(IAM 정책) 사용
정책에서 조건 지정권한을 부여할 때 액세스 정책 언어를 사용하여 조건이 적용되는 조건을 지정할 수 있습니다. 예를 들어, 특정 날짜 이후에만 정책을 적용할 수 있습니다. 정책 언어에서의 조건 지정에 관한 자세한 내용은 IAM 사용 설명서의 조건 단원을 참조하십시오.
조건을 표시하려면 미리 정의된 조건 키를 사용합니다. Amazon Rekognition에만 해당되는 특정한 조건 키는 없습니다. 하지만 적절하게 사용할 수 있는 AWS 차원의 조건 키가 있습니다. AWS 차원 키의 전체 목록은IAM 사용 설명서의 사용 가능한 조건 키 단원을 참조하십시오.
Amazon Rekognition에 대한 자격 증명 기반 정책(IAM정책) 사용이 주제에서는 자격 증명 기반 정책의 예를 통해 계정 관리자가 IAM 자격 증명(사용자, 그룹, 역할)에 권한 정책을 연결함으로써 Amazon Rekognition 리소스에 대한 작업 수행 권한을 부여하는 방법을 보여줍니다.
Important
Amazon Rekognition 리소스에 대한 액세스 관리를 위해 제공되는 기본 개념과 옵션 설명에 대한 소개 주제 부분을 먼저 읽어 보십시오. 자세한 내용은 Amazon Rekognition 리소스에 대한 액세스 권한 관리 개요 (p. 244) 단원을 참조하십시오.
주제• Amazon Rekognition 콘솔 사용에 필요한 권한 (p. 248)• Amazon Rekognition에 대한 AWS 관리형(미리 정의된) 정책 (p. 249)• 고객 관리형 정책 예 (p. 249)
다음은 권한 정책의 예입니다.
"Version": "2012-10-17", "Statement": [ { "Effect": "Allow", "Action": [ "rekognition:CompareFaces", "rekognition:DetectFaces", "rekognition:DetectLabels", "rekognition:ListCollections", "rekognition:ListFaces", "rekognition:SearchFaces", "rekognition:SearchFacesByImage" ], "Resource": "*" } ]
이 정책 예제에서는 제한된 Amazon Rekognition 작업 세트를 사용하여 사용자에게 리소스에 대한 읽기 전용액세스를 부여합니다.
모든 Amazon Rekognition API 작업과 해당 작업이 적용되는 리소스를 보여주는 표는 Amazon RekognitionAPI 권한: 작업, 권한 및 리소스 참조 (p. 250) 단원을 참조하십시오.
Amazon Rekognition 콘솔 사용에 필요한 권한Amazon Rekognition 콘솔 작업 시 Amazon Rekognition에 추가 권한이 필요하지 않습니다.
248
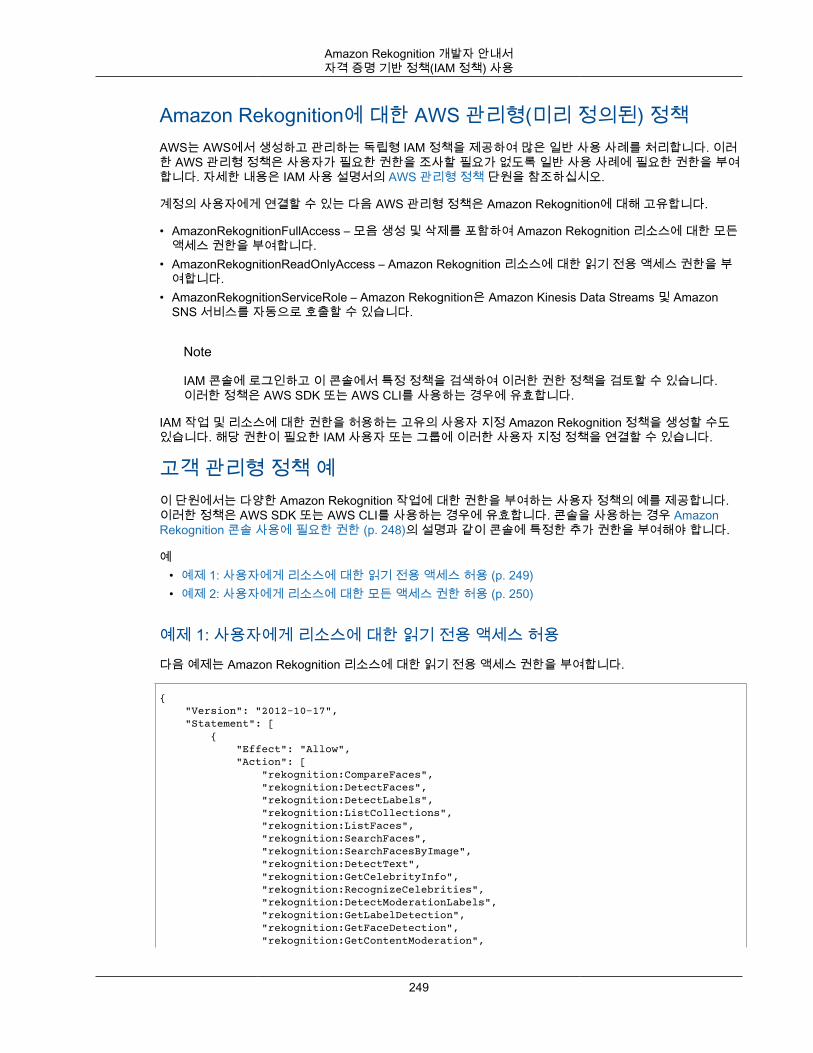
Amazon Rekognition 개발자 안내서자격 증명 기반 정책(IAM 정책) 사용
Amazon Rekognition에 대한 AWS 관리형(미리 정의된) 정책AWS는 AWS에서 생성하고 관리하는 독립형 IAM 정책을 제공하여 많은 일반 사용 사례를 처리합니다. 이러한 AWS 관리형 정책은 사용자가 필요한 권한을 조사할 필요가 없도록 일반 사용 사례에 필요한 권한을 부여합니다. 자세한 내용은 IAM 사용 설명서의 AWS 관리형 정책 단원을 참조하십시오.
계정의 사용자에게 연결할 수 있는 다음 AWS 관리형 정책은 Amazon Rekognition에 대해 고유합니다.
• AmazonRekognitionFullAccess – 모음 생성 및 삭제를 포함하여 Amazon Rekognition 리소스에 대한 모든액세스 권한을 부여합니다.
• AmazonRekognitionReadOnlyAccess – Amazon Rekognition 리소스에 대한 읽기 전용 액세스 권한을 부여합니다.
• AmazonRekognitionServiceRole – Amazon Rekognition은 Amazon Kinesis Data Streams 및 AmazonSNS 서비스를 자동으로 호출할 수 있습니다.
Note
IAM 콘솔에 로그인하고 이 콘솔에서 특정 정책을 검색하여 이러한 권한 정책을 검토할 수 있습니다.이러한 정책은 AWS SDK 또는 AWS CLI를 사용하는 경우에 유효합니다.
IAM 작업 및 리소스에 대한 권한을 허용하는 고유의 사용자 지정 Amazon Rekognition 정책을 생성할 수도있습니다. 해당 권한이 필요한 IAM 사용자 또는 그룹에 이러한 사용자 지정 정책을 연결할 수 있습니다.
고객 관리형 정책 예이 단원에서는 다양한 Amazon Rekognition 작업에 대한 권한을 부여하는 사용자 정책의 예를 제공합니다.이러한 정책은 AWS SDK 또는 AWS CLI를 사용하는 경우에 유효합니다. 콘솔을 사용하는 경우 AmazonRekognition 콘솔 사용에 필요한 권한 (p. 248)의 설명과 같이 콘솔에 특정한 추가 권한을 부여해야 합니다.
예• 예제 1: 사용자에게 리소스에 대한 읽기 전용 액세스 허용 (p. 249)• 예제 2: 사용자에게 리소스에 대한 모든 액세스 권한 허용 (p. 250)
예제 1: 사용자에게 리소스에 대한 읽기 전용 액세스 허용
다음 예제는 Amazon Rekognition 리소스에 대한 읽기 전용 액세스 권한을 부여합니다.
{ "Version": "2012-10-17", "Statement": [ { "Effect": "Allow", "Action": [ "rekognition:CompareFaces", "rekognition:DetectFaces", "rekognition:DetectLabels", "rekognition:ListCollections", "rekognition:ListFaces", "rekognition:SearchFaces", "rekognition:SearchFacesByImage", "rekognition:DetectText", "rekognition:GetCelebrityInfo", "rekognition:RecognizeCelebrities", "rekognition:DetectModerationLabels", "rekognition:GetLabelDetection", "rekognition:GetFaceDetection", "rekognition:GetContentModeration",
249
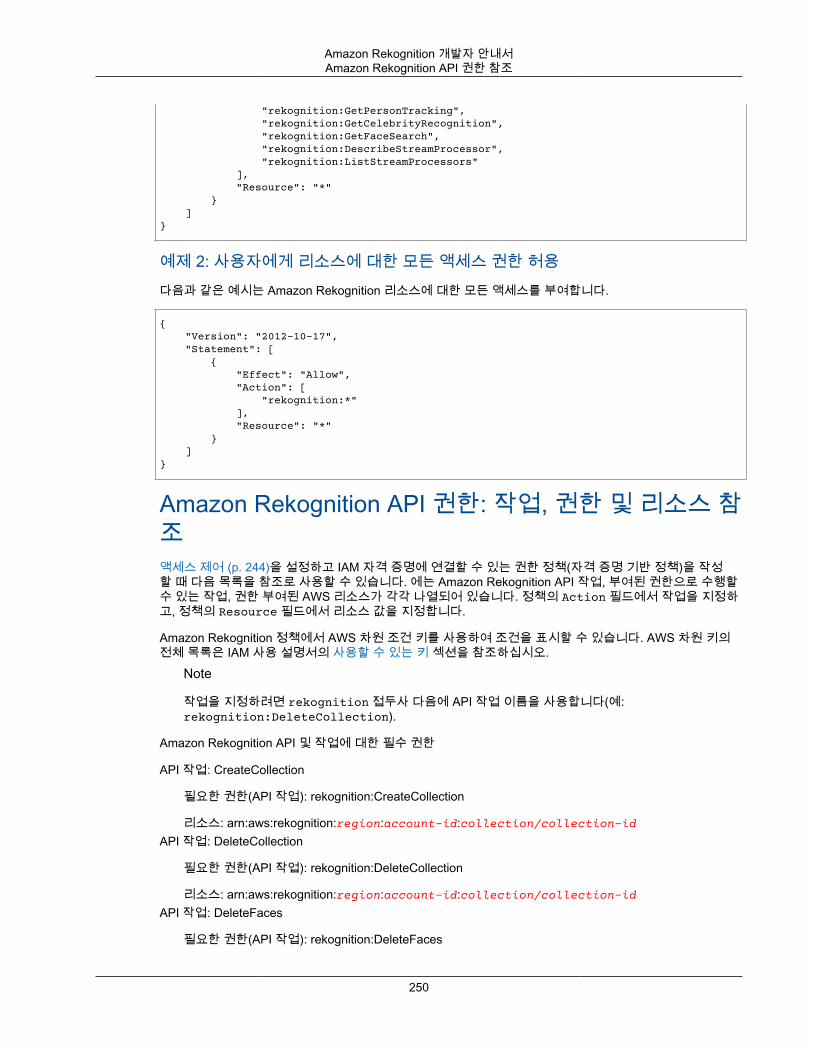
Amazon Rekognition 개발자 안내서Amazon Rekognition API 권한 참조
"rekognition:GetPersonTracking", "rekognition:GetCelebrityRecognition", "rekognition:GetFaceSearch", "rekognition:DescribeStreamProcessor", "rekognition:ListStreamProcessors" ], "Resource": "*" } ]}
예제 2: 사용자에게 리소스에 대한 모든 액세스 권한 허용다음과 같은 예시는 Amazon Rekognition 리소스에 대한 모든 액세스를 부여합니다.
{ "Version": "2012-10-17", "Statement": [ { "Effect": "Allow", "Action": [ "rekognition:*" ], "Resource": "*" } ]}
Amazon Rekognition API 권한: 작업, 권한 및 리소스 참조액세스 제어 (p. 244)을 설정하고 IAM 자격 증명에 연결할 수 있는 권한 정책(자격 증명 기반 정책)을 작성할 때 다음 목록을 참조로 사용할 수 있습니다. 에는 Amazon Rekognition API 작업, 부여된 권한으로 수행할수 있는 작업, 권한 부여된 AWS 리소스가 각각 나열되어 있습니다. 정책의 Action 필드에서 작업을 지정하고, 정책의 Resource 필드에서 리소스 값을 지정합니다.
Amazon Rekognition 정책에서 AWS 차원 조건 키를 사용하여 조건을 표시할 수 있습니다. AWS 차원 키의전체 목록은 IAM 사용 설명서의 사용할 수 있는 키 섹션을 참조하십시오.
Note
작업을 지정하려면 rekognition 접두사 다음에 API 작업 이름을 사용합니다(예:rekognition:DeleteCollection).
Amazon Rekognition API 및 작업에 대한 필수 권한
API 작업: CreateCollection
필요한 권한(API 작업): rekognition:CreateCollection
리소스: arn:aws:rekognition:region:account-id:collection/collection-idAPI 작업: DeleteCollection
필요한 권한(API 작업): rekognition:DeleteCollection
리소스: arn:aws:rekognition:region:account-id:collection/collection-idAPI 작업: DeleteFaces
필요한 권한(API 작업): rekognition:DeleteFaces
250
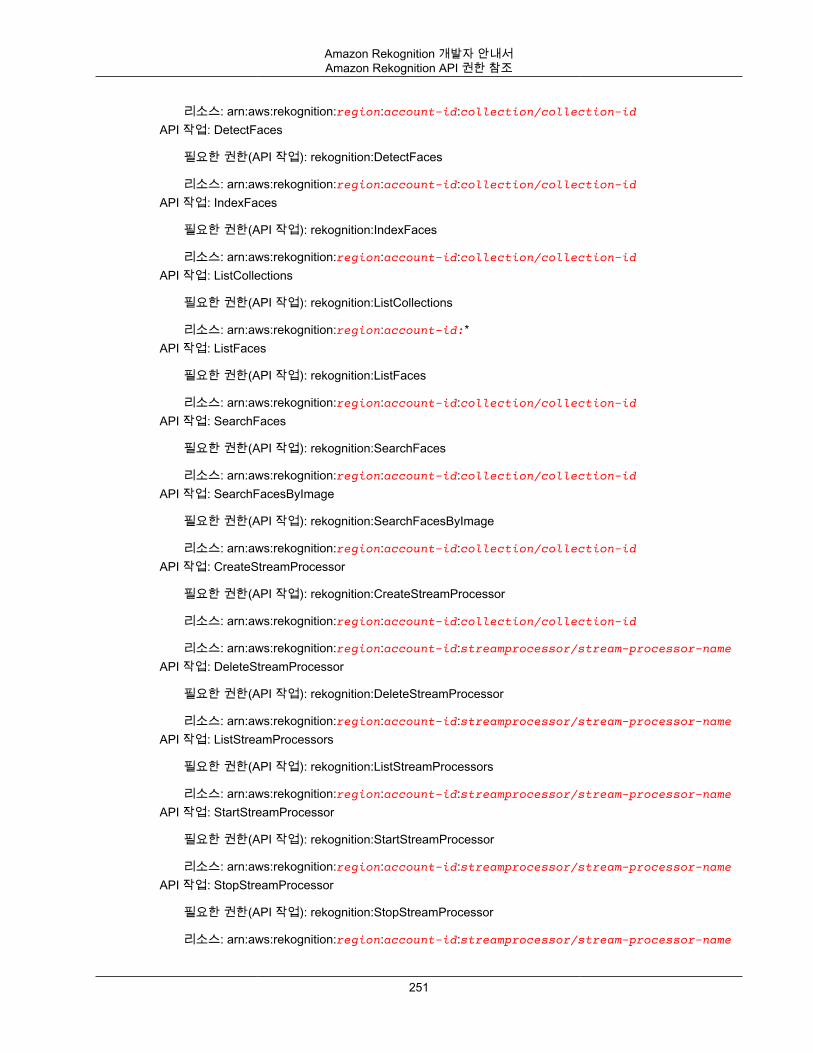
Amazon Rekognition 개발자 안내서Amazon Rekognition API 권한 참조
리소스: arn:aws:rekognition:region:account-id:collection/collection-idAPI 작업: DetectFaces
필요한 권한(API 작업): rekognition:DetectFaces
리소스: arn:aws:rekognition:region:account-id:collection/collection-idAPI 작업: IndexFaces
필요한 권한(API 작업): rekognition:IndexFaces
리소스: arn:aws:rekognition:region:account-id:collection/collection-idAPI 작업: ListCollections
필요한 권한(API 작업): rekognition:ListCollections
리소스: arn:aws:rekognition:region:account-id:*API 작업: ListFaces
필요한 권한(API 작업): rekognition:ListFaces
리소스: arn:aws:rekognition:region:account-id:collection/collection-idAPI 작업: SearchFaces
필요한 권한(API 작업): rekognition:SearchFaces
리소스: arn:aws:rekognition:region:account-id:collection/collection-idAPI 작업: SearchFacesByImage
필요한 권한(API 작업): rekognition:SearchFacesByImage
리소스: arn:aws:rekognition:region:account-id:collection/collection-idAPI 작업: CreateStreamProcessor
필요한 권한(API 작업): rekognition:CreateStreamProcessor
리소스: arn:aws:rekognition:region:account-id:collection/collection-id
리소스: arn:aws:rekognition:region:account-id:streamprocessor/stream-processor-nameAPI 작업: DeleteStreamProcessor
필요한 권한(API 작업): rekognition:DeleteStreamProcessor
리소스: arn:aws:rekognition:region:account-id:streamprocessor/stream-processor-nameAPI 작업: ListStreamProcessors
필요한 권한(API 작업): rekognition:ListStreamProcessors
리소스: arn:aws:rekognition:region:account-id:streamprocessor/stream-processor-nameAPI 작업: StartStreamProcessor
필요한 권한(API 작업): rekognition:StartStreamProcessor
리소스: arn:aws:rekognition:region:account-id:streamprocessor/stream-processor-nameAPI 작업: StopStreamProcessor
필요한 권한(API 작업): rekognition:StopStreamProcessor
리소스: arn:aws:rekognition:region:account-id:streamprocessor/stream-processor-name
251
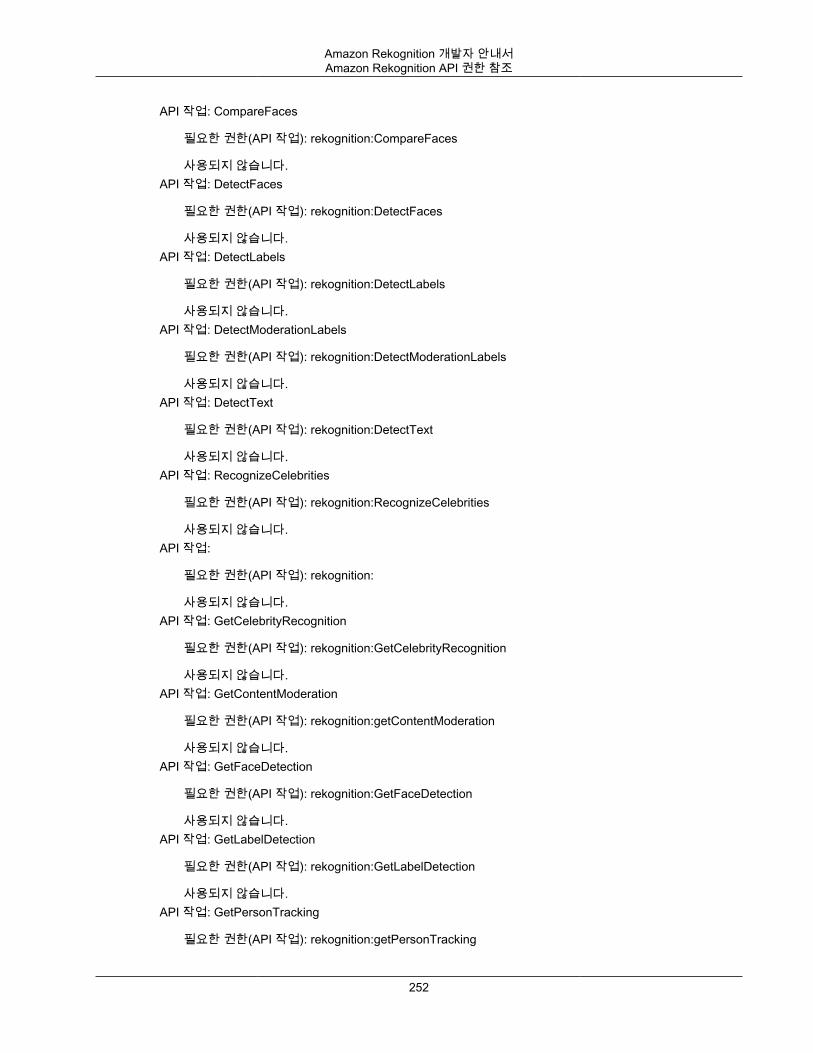
Amazon Rekognition 개발자 안내서Amazon Rekognition API 권한 참조
API 작업: CompareFaces
필요한 권한(API 작업): rekognition:CompareFaces
사용되지 않습니다.API 작업: DetectFaces
필요한 권한(API 작업): rekognition:DetectFaces
사용되지 않습니다.API 작업: DetectLabels
필요한 권한(API 작업): rekognition:DetectLabels
사용되지 않습니다.API 작업: DetectModerationLabels
필요한 권한(API 작업): rekognition:DetectModerationLabels
사용되지 않습니다.API 작업: DetectText
필요한 권한(API 작업): rekognition:DetectText
사용되지 않습니다.API 작업: RecognizeCelebrities
필요한 권한(API 작업): rekognition:RecognizeCelebrities
사용되지 않습니다.API 작업:
필요한 권한(API 작업): rekognition:
사용되지 않습니다.API 작업: GetCelebrityRecognition
필요한 권한(API 작업): rekognition:GetCelebrityRecognition
사용되지 않습니다.API 작업: GetContentModeration
필요한 권한(API 작업): rekognition:getContentModeration
사용되지 않습니다.API 작업: GetFaceDetection
필요한 권한(API 작업): rekognition:GetFaceDetection
사용되지 않습니다.API 작업: GetLabelDetection
필요한 권한(API 작업): rekognition:GetLabelDetection
사용되지 않습니다.API 작업: GetPersonTracking
필요한 권한(API 작업): rekognition:getPersonTracking
252
Amazon Rekognition 개발자 안내서모니터링
사용되지 않습니다.API 작업: StartCelebrityRecognition
필요한 권한(API 작업): rekognition:StartCelebrityRecognition
사용되지 않습니다.API 작업: StartContentModeration
필요한 권한(API 작업): rekognition:StartContentModeration
사용되지 않습니다.API 작업: StartFaceDetection
필요한 권한(API 작업): rekognition:StartFaceDetection
사용되지 않습니다.API 작업: StartFaceSearch
필요한 권한(API 작업): rekognition:StartFaceSearch
사용되지 않습니다.API 작업: StartLabelDetection
필요한 권한(API 작업): rekognition:StartLabelDetection
사용되지 않습니다.API 작업: StartPersonTracking
필요한 권한(API 작업): rekognition:StartPersonTracking
사용되지 않습니다.
Rekognition 모니터링CloudWatch를 사용하면 개별 Rekognition 작업에 대한 측정치 또는 계정에 대한 전역 Rekognition 측정치를가져올 수 있습니다. 측정치를 사용하여 Rekognition 기반 솔루션의 상태를 추적하고 하나 이상의 측정치가정의된 임계값을 벗어날 때 통보하도록 경보를 설정할 수 있습니다. 예를 들어 발생한 서버 오류 수에 대한측정치나 감지된 얼굴 수에 대한 측정치를 볼 수 있습니다. 또한 특정 Rekognition 작업이 성공한 횟수에 대한 측정치도 볼 수 있습니다. 측정치를 보려면 Amazon CloudWatch, Amazon AWS Command Line Interface또는 CloudWatch API를 사용할 수 있습니다.
또한 Rekognition 콘솔을 사용하여 선택한 기간 동안 집계된 측정치를 볼 수 있습니다. 자세한 내용은 연습 4:집계 측정치 보기(콘솔) (p. 24) 단원을 참조하십시오.
Rekognition에 CloudWatch 측정치 사용측정치를 사용하려면 다음 정보를 지정해야 합니다.
• 측정치 차원 또는 차원 없음. 차원은 지표를 고유하게 식별하는 데 도움이 되는 이름-값 페어입니다.Rekognition에는 작업이라는 하나의 차원이 있습니다. 이는 특정 작업에 대한 측정치를 제공합니다. 차원을 지정하지 않으면 측정치의 범위가 계정 내의 모든 Rekognition 작업으로 지정됩니다.
• UserErrorCount와 같은 지표 이름.
AWS Management 콘솔, AWS CLI 또는 CloudWatch API를 사용하여 Rekognition의 모니터링 데이터를 가져올 수 있습니다. Amazon AWS 소프트웨어 개발 키트(SDK) 또는 CloudWatch API 도구 중 하나를 통해
253
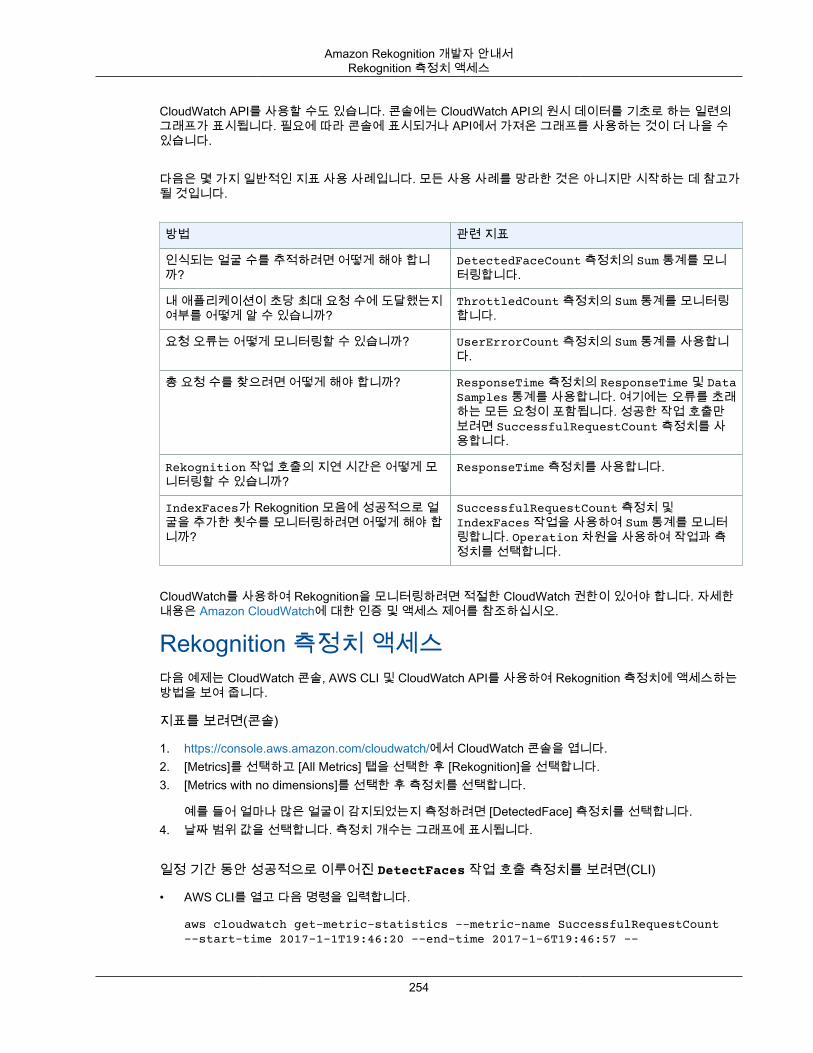
Amazon Rekognition 개발자 안내서Rekognition 측정치 액세스
CloudWatch API를 사용할 수도 있습니다. 콘솔에는 CloudWatch API의 원시 데이터를 기초로 하는 일련의그래프가 표시됩니다. 필요에 따라 콘솔에 표시되거나 API에서 가져온 그래프를 사용하는 것이 더 나을 수있습니다.
다음은 몇 가지 일반적인 지표 사용 사례입니다. 모든 사용 사례를 망라한 것은 아니지만 시작하는 데 참고가될 것입니다.
방법 관련 지표
인식되는 얼굴 수를 추적하려면 어떻게 해야 합니까?
DetectedFaceCount 측정치의 Sum 통계를 모니터링합니다.
내 애플리케이션이 초당 최대 요청 수에 도달했는지여부를 어떻게 알 수 있습니까?
ThrottledCount 측정치의 Sum 통계를 모니터링합니다.
요청 오류는 어떻게 모니터링할 수 있습니까? UserErrorCount 측정치의 Sum 통계를 사용합니다.
총 요청 수를 찾으려면 어떻게 해야 합니까? ResponseTime 측정치의 ResponseTime 및 DataSamples 통계를 사용합니다. 여기에는 오류를 초래하는 모든 요청이 포함됩니다. 성공한 작업 호출만보려면 SuccessfulRequestCount 측정치를 사용합니다.
Rekognition 작업 호출의 지연 시간은 어떻게 모니터링할 수 있습니까?
ResponseTime 측정치를 사용합니다.
IndexFaces가 Rekognition 모음에 성공적으로 얼굴을 추가한 횟수를 모니터링하려면 어떻게 해야 합니까?
SuccessfulRequestCount 측정치 및IndexFaces 작업을 사용하여 Sum 통계를 모니터링합니다. Operation 차원을 사용하여 작업과 측정치를 선택합니다.
CloudWatch를 사용하여 Rekognition을 모니터링하려면 적절한 CloudWatch 권한이 있어야 합니다. 자세한내용은 Amazon CloudWatch에 대한 인증 및 액세스 제어를 참조하십시오.
Rekognition 측정치 액세스다음 예제는 CloudWatch 콘솔, AWS CLI 및 CloudWatch API를 사용하여 Rekognition 측정치에 액세스하는방법을 보여 줍니다.
지표를 보려면(콘솔)
1. https://console.aws.amazon.com/cloudwatch/에서 CloudWatch 콘솔을 엽니다.2. [Metrics]를 선택하고 [All Metrics] 탭을 선택한 후 [Rekognition]을 선택합니다.3. [Metrics with no dimensions]를 선택한 후 측정치를 선택합니다.
예를 들어 얼마나 많은 얼굴이 감지되었는지 측정하려면 [DetectedFace] 측정치를 선택합니다.4. 날짜 범위 값을 선택합니다. 측정치 개수는 그래프에 표시됩니다.
일정 기간 동안 성공적으로 이루어진 DetectFaces 작업 호출 측정치를 보려면(CLI)
• AWS CLI를 열고 다음 명령을 입력합니다.
aws cloudwatch get-metric-statistics --metric-name SuccessfulRequestCount--start-time 2017-1-1T19:46:20 --end-time 2017-1-6T19:46:57 --
254
Amazon Rekognition 개발자 안내서경보 만들기
period 3600 --namespace AWS/Rekognition --statistics Sum --dimensionsName=Operation,Value=DetectFaces --region us-west-2
이 예제는 일정 기간 동안 성공적으로 이루어진 DetectFaces 작업 호출을 보여 줍니다. 자세한 내용은get-metrics-statistics를 참조하십시오.
측정치에 액세스하려면(CloudWatch API)
• GetMetricStatistics을 호출합니다. 자세한 내용은 Amazon CloudWatch API Reference 단원을 참조하십시오.
경보 만들기경보가 상태를 변경하면 Amazon Simple Notification Service(Amazon SNS) 메시지를 보내는 CloudWatch경보를 만들 수 있습니다. 경보는 지정한 기간에 단일 메트릭을 감시하고 여러 기간에 지정된 임계값에 대한메트릭 값을 기준으로 작업을 하나 이상 수행합니다. 이 작업은 Amazon SNS 주제나 Auto Scaling 정책으로전송되는 알림입니다.
경보는 지속적인 상태 변경에 대해서만 작업을 호출합니다. CloudWatch 경보는 단순히 특정 상태에 있다고해서 작업을 호출하지 않습니다. 상태가 변경되어 지정된 기간 수 동안 유지되어야 합니다.
경보를 설정하려면(콘솔)
1. AWS Management 콘솔에 로그인한 다음 https://console.aws.amazon.com/cloudwatch/에서CloudWatch 콘솔을 엽니다.
2. [Create Alarm]을 선택합니다. 그러면 [Create Alarm Wizard]가 시작됩니다.3. [Metrics with no dimensions] 측정치 목록에서 [Rekognition Metrics]를 선택한 후 측정치를 선택합니다.
예를 들어 감지된 얼굴의 최대 수에 대한 경보를 설정하려면 [DetectedFaceCount]를 선택합니다.4. [Time Range] 영역에서 호출한 얼굴 감지 작업이 포함된 날짜 범위 값을 선택합니다. [Next(다음)]를 선
택합니다.5. [Name]과 [Description]을 입력합니다. [Whenever]에서 [>=]를 선택하고 원하는 최대값을 입력합니다.6. 경보 상태에 도달하면 CloudWatch에서 이메일을 보내도록 하려면 이 경보가 발생할 경우 항상:에서 상
태가 ALARM입니다.를 선택합니다. 기존 Amazon SNS 주제에 경보를 전송하려면 다음 주소로 알림 전송:에서 기존 SNS 주제를 선택합니다. 새 이메일 구독 목록에 이름과 이메일 주소를 설정하려면 주제 생성을 선택합니다. 나중에 경보를 설정하는 데 사용할 수 있도록 CloudWatch가 목록을 저장하고 필드에표시합니다.
Note
주제 생성을 사용하여 새 Amazon SNS 주제를 만드는 경우, 의도한 수신자가 알림을 받기 전에이메일 주소를 확인해야 합니다. Amazon SNS는 경보가 경보 상태에 진입할 때만 이메일을 전송합니다. 이러한 경보 상태 변경이 이메일 주소 확인 전에 발생할 경우, 의도된 수신자는 알림을 받지 못합니다.
7. [Alarm Preview] 단원에서 경보를 미리 봅니다. [Create Alarm]을 선택합니다.
경보를 설정하려면(AWS CLI)
• AWS CLI를 열고 다음 명령을 입력합니다. alarm-actions 파라미터의 값을 변경하면 이전에 만든Amazon SNS 주제를 참조할 수 있습니다.
aws cloudwatch put-metric-alarm --alarm-name UserErrors --alarm-description"Alarm when more than 10 user errors occur" --metric-name UserErrorCount --namespace AWS/Rekognition --statistic Average --period 300 --threshold 10
255
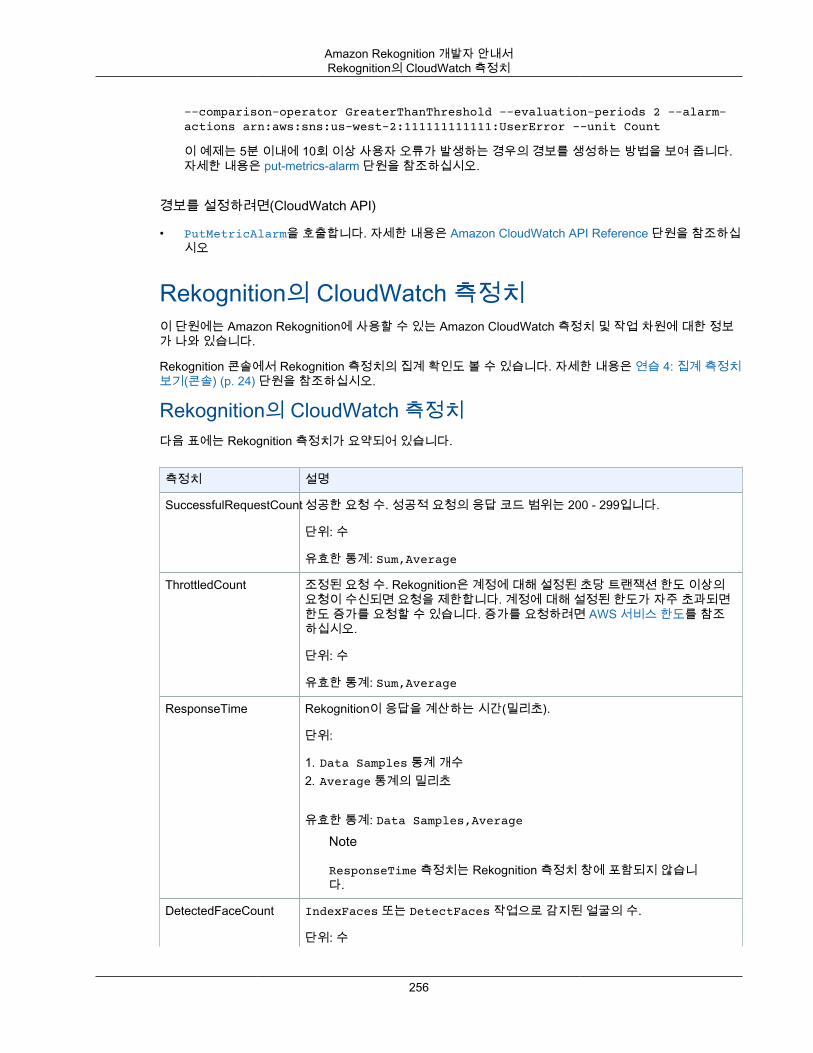
Amazon Rekognition 개발자 안내서Rekognition의 CloudWatch 측정치
--comparison-operator GreaterThanThreshold --evaluation-periods 2 --alarm-actions arn:aws:sns:us-west-2:111111111111:UserError --unit Count
이 예제는 5분 이내에 10회 이상 사용자 오류가 발생하는 경우의 경보를 생성하는 방법을 보여 줍니다.자세한 내용은 put-metrics-alarm 단원을 참조하십시오.
경보를 설정하려면(CloudWatch API)
• PutMetricAlarm을 호출합니다. 자세한 내용은 Amazon CloudWatch API Reference 단원을 참조하십시오
Rekognition의 CloudWatch 측정치이 단원에는 Amazon Rekognition에 사용할 수 있는 Amazon CloudWatch 측정치 및 작업 차원에 대한 정보가 나와 있습니다.
Rekognition 콘솔에서 Rekognition 측정치의 집계 확인도 볼 수 있습니다. 자세한 내용은 연습 4: 집계 측정치보기(콘솔) (p. 24) 단원을 참조하십시오.
Rekognition의 CloudWatch 측정치다음 표에는 Rekognition 측정치가 요약되어 있습니다.
측정치 설명
SuccessfulRequestCount 성공한 요청 수. 성공적 요청의 응답 코드 범위는 200 - 299입니다.
단위: 수
유효한 통계: Sum,Average
ThrottledCount 조정된 요청 수. Rekognition은 계정에 대해 설정된 초당 트랜잭션 한도 이상의요청이 수신되면 요청을 제한합니다. 계정에 대해 설정된 한도가 자주 초과되면한도 증가를 요청할 수 있습니다. 증가를 요청하려면 AWS 서비스 한도를 참조하십시오.
단위: 수
유효한 통계: Sum,Average
ResponseTime Rekognition이 응답을 계산하는 시간(밀리초).
단위:
1. Data Samples 통계 개수2. Average 통계의 밀리초
유효한 통계: Data Samples,Average
Note
ResponseTime 측정치는 Rekognition 측정치 창에 포함되지 않습니다.
DetectedFaceCount IndexFaces 또는 DetectFaces 작업으로 감지된 얼굴의 수.
단위: 수
256
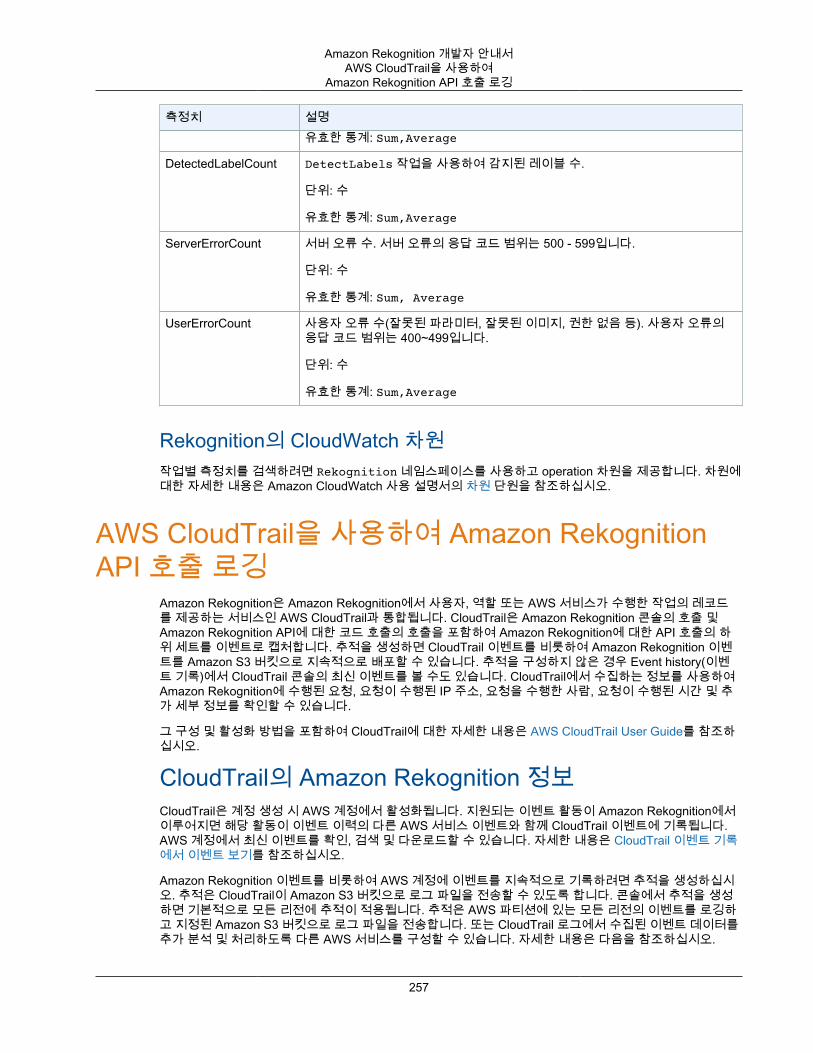
Amazon Rekognition 개발자 안내서AWS CloudTrail을 사용하여
Amazon Rekognition API 호출 로깅
측정치 설명유효한 통계: Sum,Average
DetectedLabelCount DetectLabels 작업을 사용하여 감지된 레이블 수.
단위: 수
유효한 통계: Sum,Average
ServerErrorCount 서버 오류 수. 서버 오류의 응답 코드 범위는 500 - 599입니다.
단위: 수
유효한 통계: Sum, Average
UserErrorCount 사용자 오류 수(잘못된 파라미터, 잘못된 이미지, 권한 없음 등). 사용자 오류의응답 코드 범위는 400~499입니다.
단위: 수
유효한 통계: Sum,Average
Rekognition의 CloudWatch 차원작업별 측정치를 검색하려면 Rekognition 네임스페이스를 사용하고 operation 차원을 제공합니다. 차원에대한 자세한 내용은 Amazon CloudWatch 사용 설명서의 차원 단원을 참조하십시오.
AWS CloudTrail을 사용하여 Amazon RekognitionAPI 호출 로깅
Amazon Rekognition은 Amazon Rekognition에서 사용자, 역할 또는 AWS 서비스가 수행한 작업의 레코드를 제공하는 서비스인 AWS CloudTrail과 통합됩니다. CloudTrail은 Amazon Rekognition 콘솔의 호출 및Amazon Rekognition API에 대한 코드 호출의 호출을 포함하여 Amazon Rekognition에 대한 API 호출의 하위 세트를 이벤트로 캡처합니다. 추적을 생성하면 CloudTrail 이벤트를 비롯하여 Amazon Rekognition 이벤트를 Amazon S3 버킷으로 지속적으로 배포할 수 있습니다. 추적을 구성하지 않은 경우 Event history(이벤트 기록)에서 CloudTrail 콘솔의 최신 이벤트를 볼 수도 있습니다. CloudTrail에서 수집하는 정보를 사용하여Amazon Rekognition에 수행된 요청, 요청이 수행된 IP 주소, 요청을 수행한 사람, 요청이 수행된 시간 및 추가 세부 정보를 확인할 수 있습니다.
그 구성 및 활성화 방법을 포함하여 CloudTrail에 대한 자세한 내용은 AWS CloudTrail User Guide를 참조하십시오.
CloudTrail의 Amazon Rekognition 정보CloudTrail은 계정 생성 시 AWS 계정에서 활성화됩니다. 지원되는 이벤트 활동이 Amazon Rekognition에서이루어지면 해당 활동이 이벤트 이력의 다른 AWS 서비스 이벤트와 함께 CloudTrail 이벤트에 기록됩니다.AWS 계정에서 최신 이벤트를 확인, 검색 및 다운로드할 수 있습니다. 자세한 내용은 CloudTrail 이벤트 기록에서 이벤트 보기를 참조하십시오.
Amazon Rekognition 이벤트를 비롯하여 AWS 계정에 이벤트를 지속적으로 기록하려면 추적을 생성하십시오. 추적은 CloudTrail이 Amazon S3 버킷으로 로그 파일을 전송할 수 있도록 합니다. 콘솔에서 추적을 생성하면 기본적으로 모든 리전에 추적이 적용됩니다. 추적은 AWS 파티션에 있는 모든 리전의 이벤트를 로깅하고 지정된 Amazon S3 버킷으로 로그 파일을 전송합니다. 또는 CloudTrail 로그에서 수집된 이벤트 데이터를추가 분석 및 처리하도록 다른 AWS 서비스를 구성할 수 있습니다. 자세한 내용은 다음을 참조하십시오.
257
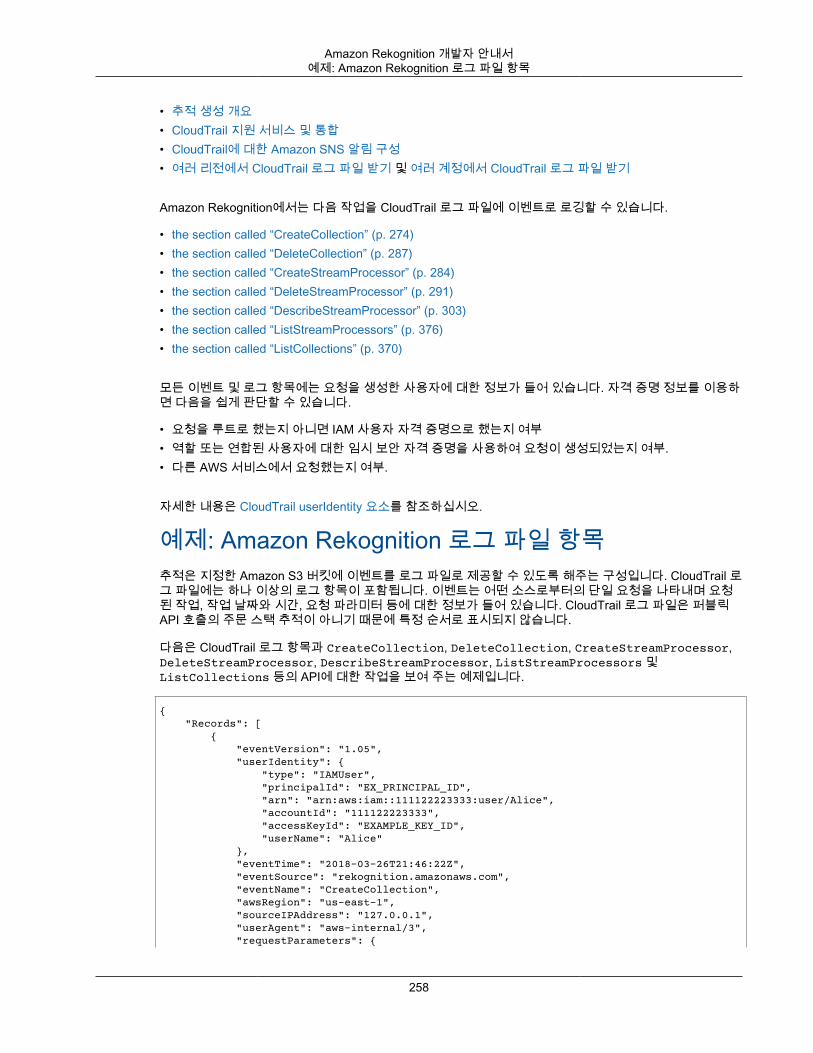
Amazon Rekognition 개발자 안내서예제: Amazon Rekognition 로그 파일 항목
• 추적 생성 개요• CloudTrail 지원 서비스 및 통합• CloudTrail에 대한 Amazon SNS 알림 구성• 여러 리전에서 CloudTrail 로그 파일 받기 및 여러 계정에서 CloudTrail 로그 파일 받기
Amazon Rekognition에서는 다음 작업을 CloudTrail 로그 파일에 이벤트로 로깅할 수 있습니다.
• the section called “CreateCollection” (p. 274)• the section called “DeleteCollection” (p. 287)• the section called “CreateStreamProcessor” (p. 284)• the section called “DeleteStreamProcessor” (p. 291)• the section called “DescribeStreamProcessor” (p. 303)• the section called “ListStreamProcessors” (p. 376)• the section called “ListCollections” (p. 370)
모든 이벤트 및 로그 항목에는 요청을 생성한 사용자에 대한 정보가 들어 있습니다. 자격 증명 정보를 이용하면 다음을 쉽게 판단할 수 있습니다.
• 요청을 루트로 했는지 아니면 IAM 사용자 자격 증명으로 했는지 여부• 역할 또는 연합된 사용자에 대한 임시 보안 자격 증명을 사용하여 요청이 생성되었는지 여부.• 다른 AWS 서비스에서 요청했는지 여부.
자세한 내용은 CloudTrail userIdentity 요소를 참조하십시오.
예제: Amazon Rekognition 로그 파일 항목추적은 지정한 Amazon S3 버킷에 이벤트를 로그 파일로 제공할 수 있도록 해주는 구성입니다. CloudTrail 로그 파일에는 하나 이상의 로그 항목이 포함됩니다. 이벤트는 어떤 소스로부터의 단일 요청을 나타내며 요청된 작업, 작업 날짜와 시간, 요청 파라미터 등에 대한 정보가 들어 있습니다. CloudTrail 로그 파일은 퍼블릭API 호출의 주문 스택 추적이 아니기 때문에 특정 순서로 표시되지 않습니다.
다음은 CloudTrail 로그 항목과 CreateCollection, DeleteCollection, CreateStreamProcessor,DeleteStreamProcessor, DescribeStreamProcessor, ListStreamProcessors 및ListCollections 등의 API에 대한 작업을 보여 주는 예제입니다.
{ "Records": [ { "eventVersion": "1.05", "userIdentity": { "type": "IAMUser", "principalId": "EX_PRINCIPAL_ID", "arn": "arn:aws:iam::111122223333:user/Alice", "accountId": "111122223333", "accessKeyId": "EXAMPLE_KEY_ID", "userName": "Alice" }, "eventTime": "2018-03-26T21:46:22Z", "eventSource": "rekognition.amazonaws.com", "eventName": "CreateCollection", "awsRegion": "us-east-1", "sourceIPAddress": "127.0.0.1", "userAgent": "aws-internal/3", "requestParameters": {
258
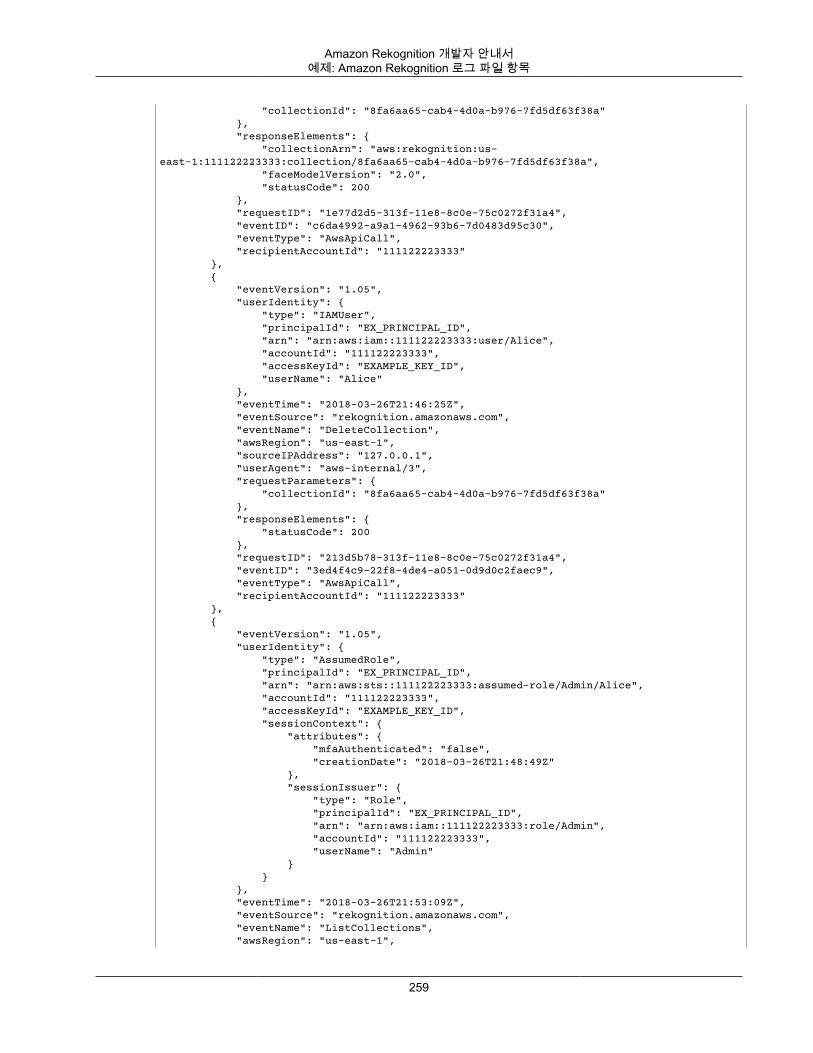
Amazon Rekognition 개발자 안내서예제: Amazon Rekognition 로그 파일 항목
"collectionId": "8fa6aa65-cab4-4d0a-b976-7fd5df63f38a" }, "responseElements": { "collectionArn": "aws:rekognition:us-east-1:111122223333:collection/8fa6aa65-cab4-4d0a-b976-7fd5df63f38a", "faceModelVersion": "2.0", "statusCode": 200 }, "requestID": "1e77d2d5-313f-11e8-8c0e-75c0272f31a4", "eventID": "c6da4992-a9a1-4962-93b6-7d0483d95c30", "eventType": "AwsApiCall", "recipientAccountId": "111122223333" }, { "eventVersion": "1.05", "userIdentity": { "type": "IAMUser", "principalId": "EX_PRINCIPAL_ID", "arn": "arn:aws:iam::111122223333:user/Alice", "accountId": "111122223333", "accessKeyId": "EXAMPLE_KEY_ID", "userName": "Alice" }, "eventTime": "2018-03-26T21:46:25Z", "eventSource": "rekognition.amazonaws.com", "eventName": "DeleteCollection", "awsRegion": "us-east-1", "sourceIPAddress": "127.0.0.1", "userAgent": "aws-internal/3", "requestParameters": { "collectionId": "8fa6aa65-cab4-4d0a-b976-7fd5df63f38a" }, "responseElements": { "statusCode": 200 }, "requestID": "213d5b78-313f-11e8-8c0e-75c0272f31a4", "eventID": "3ed4f4c9-22f8-4de4-a051-0d9d0c2faec9", "eventType": "AwsApiCall", "recipientAccountId": "111122223333" }, { "eventVersion": "1.05", "userIdentity": { "type": "AssumedRole", "principalId": "EX_PRINCIPAL_ID", "arn": "arn:aws:sts::111122223333:assumed-role/Admin/Alice", "accountId": "111122223333", "accessKeyId": "EXAMPLE_KEY_ID", "sessionContext": { "attributes": { "mfaAuthenticated": "false", "creationDate": "2018-03-26T21:48:49Z" }, "sessionIssuer": { "type": "Role", "principalId": "EX_PRINCIPAL_ID", "arn": "arn:aws:iam::111122223333:role/Admin", "accountId": "111122223333", "userName": "Admin" } } }, "eventTime": "2018-03-26T21:53:09Z", "eventSource": "rekognition.amazonaws.com", "eventName": "ListCollections", "awsRegion": "us-east-1",
259
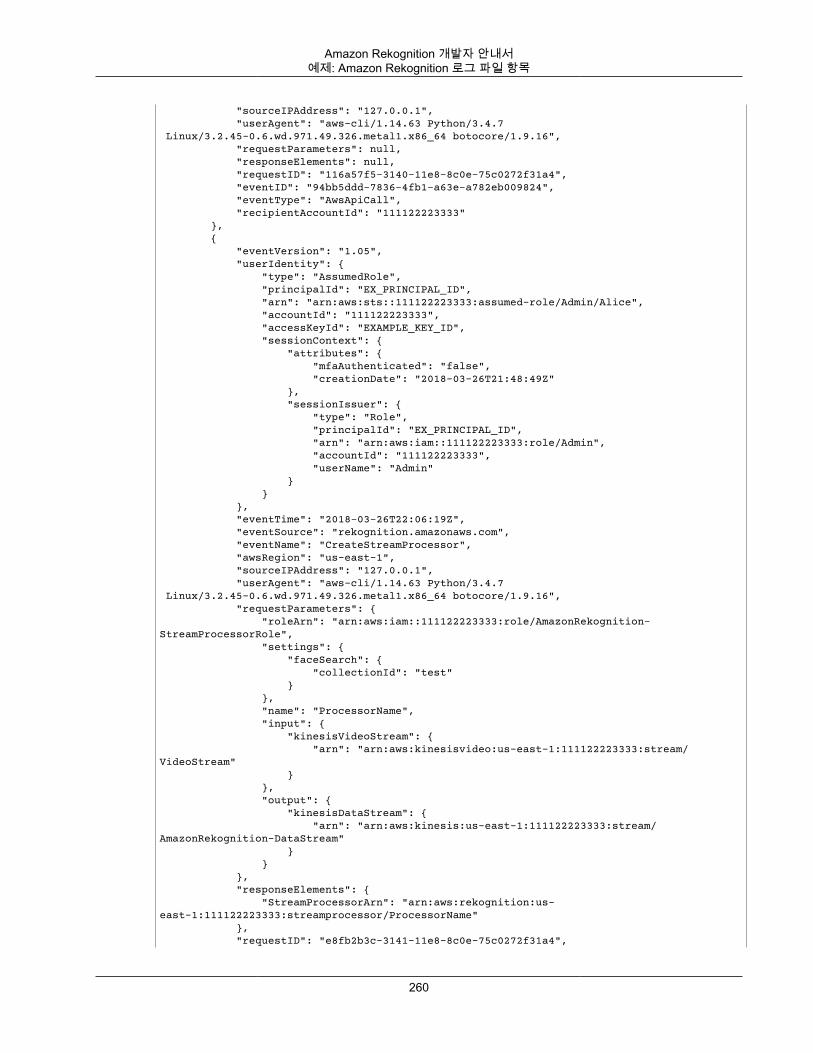
Amazon Rekognition 개발자 안내서예제: Amazon Rekognition 로그 파일 항목
"sourceIPAddress": "127.0.0.1", "userAgent": "aws-cli/1.14.63 Python/3.4.7 Linux/3.2.45-0.6.wd.971.49.326.metal1.x86_64 botocore/1.9.16", "requestParameters": null, "responseElements": null, "requestID": "116a57f5-3140-11e8-8c0e-75c0272f31a4", "eventID": "94bb5ddd-7836-4fb1-a63e-a782eb009824", "eventType": "AwsApiCall", "recipientAccountId": "111122223333" }, { "eventVersion": "1.05", "userIdentity": { "type": "AssumedRole", "principalId": "EX_PRINCIPAL_ID", "arn": "arn:aws:sts::111122223333:assumed-role/Admin/Alice", "accountId": "111122223333", "accessKeyId": "EXAMPLE_KEY_ID", "sessionContext": { "attributes": { "mfaAuthenticated": "false", "creationDate": "2018-03-26T21:48:49Z" }, "sessionIssuer": { "type": "Role", "principalId": "EX_PRINCIPAL_ID", "arn": "arn:aws:iam::111122223333:role/Admin", "accountId": "111122223333", "userName": "Admin" } } }, "eventTime": "2018-03-26T22:06:19Z", "eventSource": "rekognition.amazonaws.com", "eventName": "CreateStreamProcessor", "awsRegion": "us-east-1", "sourceIPAddress": "127.0.0.1", "userAgent": "aws-cli/1.14.63 Python/3.4.7 Linux/3.2.45-0.6.wd.971.49.326.metal1.x86_64 botocore/1.9.16", "requestParameters": { "roleArn": "arn:aws:iam::111122223333:role/AmazonRekognition-StreamProcessorRole", "settings": { "faceSearch": { "collectionId": "test" } }, "name": "ProcessorName", "input": { "kinesisVideoStream": { "arn": "arn:aws:kinesisvideo:us-east-1:111122223333:stream/VideoStream" } }, "output": { "kinesisDataStream": { "arn": "arn:aws:kinesis:us-east-1:111122223333:stream/AmazonRekognition-DataStream" } } }, "responseElements": { "StreamProcessorArn": "arn:aws:rekognition:us-east-1:111122223333:streamprocessor/ProcessorName" }, "requestID": "e8fb2b3c-3141-11e8-8c0e-75c0272f31a4",
260
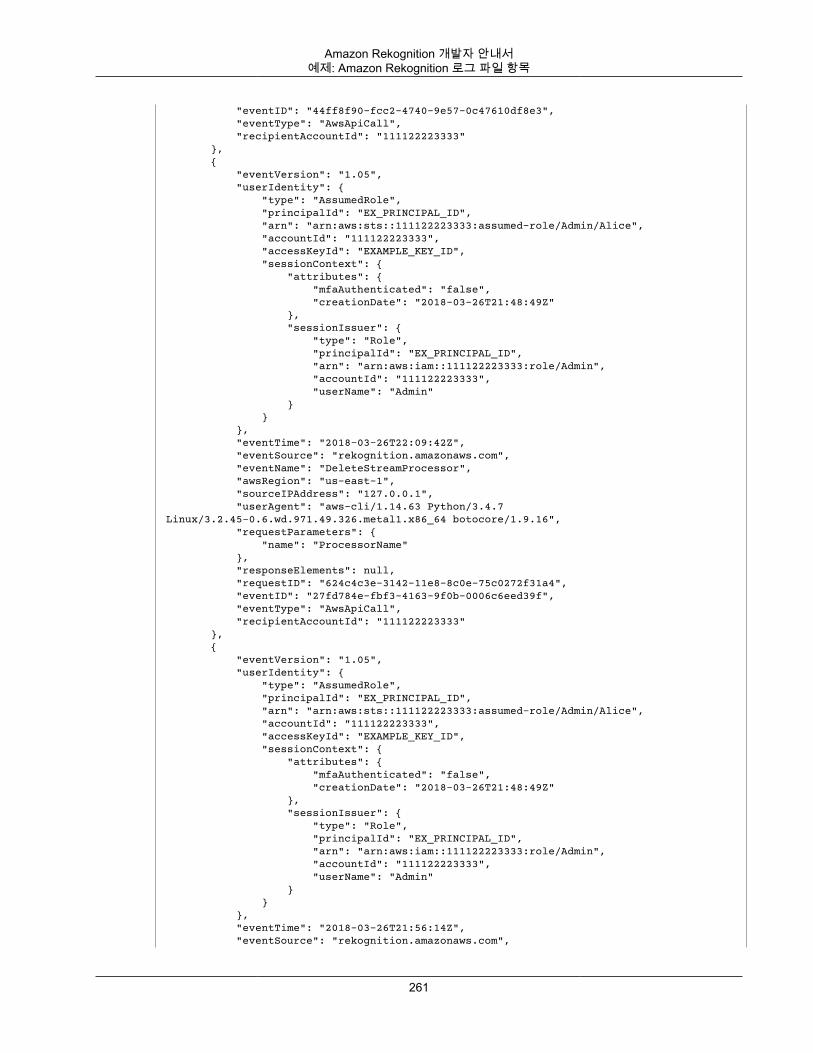
Amazon Rekognition 개발자 안내서예제: Amazon Rekognition 로그 파일 항목
"eventID": "44ff8f90-fcc2-4740-9e57-0c47610df8e3", "eventType": "AwsApiCall", "recipientAccountId": "111122223333" }, { "eventVersion": "1.05", "userIdentity": { "type": "AssumedRole", "principalId": "EX_PRINCIPAL_ID", "arn": "arn:aws:sts::111122223333:assumed-role/Admin/Alice", "accountId": "111122223333", "accessKeyId": "EXAMPLE_KEY_ID", "sessionContext": { "attributes": { "mfaAuthenticated": "false", "creationDate": "2018-03-26T21:48:49Z" }, "sessionIssuer": { "type": "Role", "principalId": "EX_PRINCIPAL_ID", "arn": "arn:aws:iam::111122223333:role/Admin", "accountId": "111122223333", "userName": "Admin" } } }, "eventTime": "2018-03-26T22:09:42Z", "eventSource": "rekognition.amazonaws.com", "eventName": "DeleteStreamProcessor", "awsRegion": "us-east-1", "sourceIPAddress": "127.0.0.1", "userAgent": "aws-cli/1.14.63 Python/3.4.7 Linux/3.2.45-0.6.wd.971.49.326.metal1.x86_64 botocore/1.9.16", "requestParameters": { "name": "ProcessorName" }, "responseElements": null, "requestID": "624c4c3e-3142-11e8-8c0e-75c0272f31a4", "eventID": "27fd784e-fbf3-4163-9f0b-0006c6eed39f", "eventType": "AwsApiCall", "recipientAccountId": "111122223333" }, { "eventVersion": "1.05", "userIdentity": { "type": "AssumedRole", "principalId": "EX_PRINCIPAL_ID", "arn": "arn:aws:sts::111122223333:assumed-role/Admin/Alice", "accountId": "111122223333", "accessKeyId": "EXAMPLE_KEY_ID", "sessionContext": { "attributes": { "mfaAuthenticated": "false", "creationDate": "2018-03-26T21:48:49Z" }, "sessionIssuer": { "type": "Role", "principalId": "EX_PRINCIPAL_ID", "arn": "arn:aws:iam::111122223333:role/Admin", "accountId": "111122223333", "userName": "Admin" } } }, "eventTime": "2018-03-26T21:56:14Z", "eventSource": "rekognition.amazonaws.com",
261
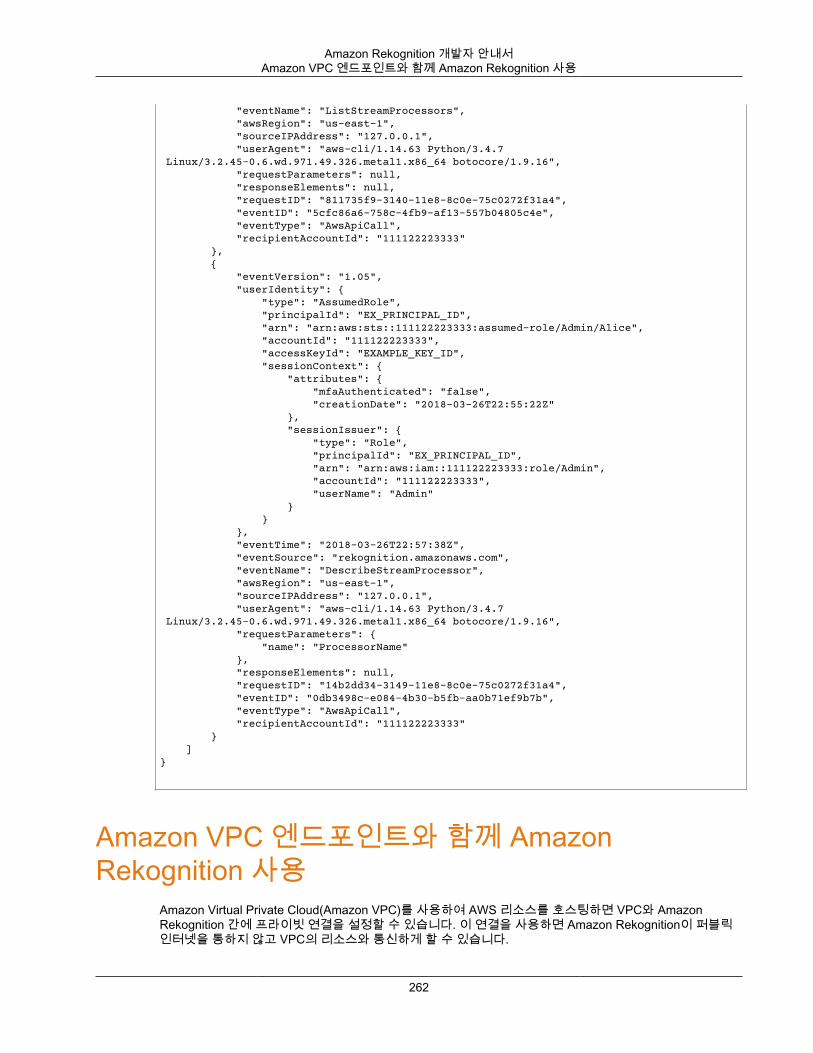
Amazon Rekognition 개발자 안내서Amazon VPC 엔드포인트와 함께 Amazon Rekognition 사용
"eventName": "ListStreamProcessors", "awsRegion": "us-east-1", "sourceIPAddress": "127.0.0.1", "userAgent": "aws-cli/1.14.63 Python/3.4.7 Linux/3.2.45-0.6.wd.971.49.326.metal1.x86_64 botocore/1.9.16", "requestParameters": null, "responseElements": null, "requestID": "811735f9-3140-11e8-8c0e-75c0272f31a4", "eventID": "5cfc86a6-758c-4fb9-af13-557b04805c4e", "eventType": "AwsApiCall", "recipientAccountId": "111122223333" }, { "eventVersion": "1.05", "userIdentity": { "type": "AssumedRole", "principalId": "EX_PRINCIPAL_ID", "arn": "arn:aws:sts::111122223333:assumed-role/Admin/Alice", "accountId": "111122223333", "accessKeyId": "EXAMPLE_KEY_ID", "sessionContext": { "attributes": { "mfaAuthenticated": "false", "creationDate": "2018-03-26T22:55:22Z" }, "sessionIssuer": { "type": "Role", "principalId": "EX_PRINCIPAL_ID", "arn": "arn:aws:iam::111122223333:role/Admin", "accountId": "111122223333", "userName": "Admin" } } }, "eventTime": "2018-03-26T22:57:38Z", "eventSource": "rekognition.amazonaws.com", "eventName": "DescribeStreamProcessor", "awsRegion": "us-east-1", "sourceIPAddress": "127.0.0.1", "userAgent": "aws-cli/1.14.63 Python/3.4.7 Linux/3.2.45-0.6.wd.971.49.326.metal1.x86_64 botocore/1.9.16", "requestParameters": { "name": "ProcessorName" }, "responseElements": null, "requestID": "14b2dd34-3149-11e8-8c0e-75c0272f31a4", "eventID": "0db3498c-e084-4b30-b5fb-aa0b71ef9b7b", "eventType": "AwsApiCall", "recipientAccountId": "111122223333" } ]}
Amazon VPC 엔드포인트와 함께 AmazonRekognition 사용
Amazon Virtual Private Cloud(Amazon VPC)를 사용하여 AWS 리소스를 호스팅하면 VPC와 AmazonRekognition 간에 프라이빗 연결을 설정할 수 있습니다. 이 연결을 사용하면 Amazon Rekognition이 퍼블릭인터넷을 통하지 않고 VPC의 리소스와 통신하게 할 수 있습니다.
262

Amazon Rekognition 개발자 안내서Amazon Rekognition용 Amazon VPC 엔드포인트 생성
Amazon VPC는 사용자가 정의한 가상 네트워크에서 AWS 리소스를 시작할 때 사용할 수 있는 AWS 서비스입니다. VPC가 있으면 IP 주소 범위, 서브넷, 라우팅 테이블, 네트워크 게이트웨이 등 네트워크 설정을 제어할 수 있습니다. VPC 엔드포인트를 통해 AWS 네트워크는 VPC와 AWS 서비스 간의 라우팅을 처리합니다.
VPC를 Amazon Rekognition에 연결하려면 Amazon Rekognition를 위한 인터페이스 VPC 엔드포인트를 정의하십시오. 인터페이스 엔드포인트는 지원 AWS 서비스로 전달되는 트래픽에 대한 진입점 역할을 하는 프라이빗 IP 주소를 포함하는 탄력적 네트워크 인터페이스입니다. 이 엔드포인트를 이용하면 인터넷 게이트웨이, NAT(네트워크 주소 변환) 인스턴스 또는 VPN 연결 없이도 Amazon Rekognition—에 안정적이고 확장 가능하게 연결됩니다. 자세한 내용은 Amazon VPC 사용 설명서의 Amazon VPC란 무엇입니까?를 참조하십시오.
인터페이스 VPC 엔드포인트는 AWS PrivateLink에 의해 활성화됩니다. 이 AWS 기술은 프라이빗 IP 주소와함께 탄력적 네트워크 인터페이스를 사용하여 AWS 서비스 간 프라이빗 통신을 가능하게 합니다. 자세한 내용은 AWS PrivateLink를 참조하십시오.
Amazon Rekognition용 Amazon VPC 엔드포인트 생성두 가지 유형의 Amazon VPC 엔드포인트를 생성하여 Amazon Rekognition에서 사용할 수 있습니다.
• Amazon Rekognition 작업에서 사용할 VPC 엔드포인트. 이것은 대부분의 사용자에게 가장 적합한 유형의VPC 엔드포인트입니다.
• 미국 연방 정보 처리 표준(FIPS) Publication 140-2 US 정부 표준을 준수하는 엔드포인트를 갖춘 AmazonRekognition 작업을 위한 VPC 엔드포인트. 자세한 내용은 AWS GovCloud(미국) 리전의 엔드포인트를 참조하십시오.
VPC에서 Amazon Rekognition를 사용하여 시작하려면 Amazon VPC 콘솔을 사용하여 Amazon Rekognition를 위한 인터페이스 VPC 엔드포인트를 생성합니다. 지침은 [Creating an Interface Endpoint]에서 "콘솔을 사용하여 AWS 서비스에 대한 인터페이스 엔드포인트를 생성하려면" 절차를 참조하십시오. 다음 절차 단계를참고하십시오.
• 3단계 –[Service category]에서 [AWS services]를 선택합니다.• 4단계 –[Service Name]에서 다음 옵션 중 하나를 선택합니다.
• com.amazonaws.region.rekognition – Amazon Rekognition 작업을 위한 VPC 엔드포인트를 생성합니다.
• com.amazonaws.region.rekognition-fips – 미국 연방 정보 처리 표준(FIPS) Publication 140-2 US 정부표준을 준수하는 엔드포인트를 갖춘 Amazon Rekognition 작업을 위한 VPC 엔드포인트를 생성합니다.
자세한 내용은 Amazon VPC 사용 설명서의 시작하기를 참조하십시오.
Amazon Rekognition 규정 준수 확인타사 감사자는 여러 AWS 규정 준수 프로그램의 일환으로 Amazon Rekognition의 보안 및 규정 준수를 평가합니다. 여기에는 SOC, PCI, FedRAMP, HIPAA 등이 포함됩니다.
특정 규정 준수 프로그램 범위에 속하는 AWS 제품의 목록은 규정 준수 프로그램 제공 범위 내 AWS 제품을참조하십시오. 일반 정보는 AWS 규정 준수 프로그램을 참조하십시오.
AWS Artifact를 사용하여 타사 감사 보고서를 다운로드할 수 있습니다. 자세한 내용은 AWS 아티팩트의 보고서 다운로드를 참조하십시오.
Amazon Rekognition 사용 시 규정 준수 책임은 데이터의 민감도, 회사의 규정 준수 목표 및 관련 법률과 규정에 따라 결정됩니다. AWS에서는 규정 준수를 지원할 다음과 같은 리소스를 제공합니다.
• 보안 및 규정 준수 빠른 시작 안내서 – 이 배포 안내서에서는 아키텍처 고려 사항에 대해 설명하고 보안 및규정 준수에 중점을 둔 기본 AWS 환경을 배포하기 위한 단계를 제공합니다.
263
Amazon Rekognition 개발자 안내서규정 준수 확인
• HIPAA 보안 및 규정 준수 기술 백서 설계 – 이 백서는 기업에서 AWS를 사용하여 HIPAA를 준수하는 애플리케이션을 만드는 방법을 설명합니다.
• AWS 규정 준수 리소스 – 이 워크북 및 안내서는 귀사의 산업 및 위치에 적용될 수 있습니다.• AWS Config – 이 AWS 제품으로 리소스 구성이 내부 관행, 업계 지침 및 규정을 준수하는 정도를 평가할
수 있습니다.• AWS Security Hub – 이 AWS 제품으로 보안 업계 표준 및 모범 사례 규정 준수 여부를 확인하는 데 도움이
되는 AWS 내 보안 상태에 대한 포괄적인 관점을 제공합니다.
264
Amazon Rekognition 개발자 안내서Amazon Rekognition Image
API 참조이 단원에서는 Amazon Rekognition API 작업에 대한 설명서를 제공합니다.
Amazon Rekognition Image• the section called “CompareFaces” (p. 268)• the section called “CreateCollection” (p. 274)• the section called “DeleteCollection” (p. 287)• the section called “DeleteFaces” (p. 289)• the section called “DescribeCollection” (p. 293)• the section called “DetectFaces” (p. 311)• the section called “DetectLabels” (p. 315)• the section called “DetectModerationLabels” (p. 320)• the section called “DetectText” (p. 324)• the section called “GetCelebrityInfo” (p. 328)• the section called “IndexFaces” (p. 362)• the section called “ListCollections” (p. 370)• the section called “ListFaces” (p. 373)• the section called “RecognizeCelebrities” (p. 379)• the section called “SearchFaces” (p. 383)• the section called “SearchFacesByImage” (p. 386)
Amazon Rekognition 사용자 지정 레이블• the section called “CreateProject” (p. 277)• the section called “CreateProjectVersion” (p. 280)• the section called “DescribeProjects” (p. 296)• the section called “DescribeProjectVersions” (p. 299)• the section called “DetectCustomLabels” (p. 307)• the section called “StartProjectVersion” (p. 413)• the section called “StopProjectVersion” (p. 422)
Amazon Rekognition Video 저장된 비디오• the section called “GetCelebrityRecognition” (p. 330)• the section called “GetContentModeration” (p. 335)• the section called “GetFaceDetection” (p. 339)• the section called “GetFaceSearch” (p. 344)• the section called “GetLabelDetection” (p. 349)• the section called “GetPersonTracking” (p. 353)
265
Amazon Rekognition 개발자 안내서Amazon Rekognition Video 스트리밍 비디오
• the section called “StartCelebrityRecognition” (p. 391)• the section called “StartContentModeration” (p. 394)• the section called “StartFaceDetection” (p. 398)• the section called “StartFaceSearch” (p. 402)• the section called “StartLabelDetection” (p. 406)• the section called “StartPersonTracking” (p. 410)
Amazon Rekognition Video 스트리밍 비디오• the section called “CreateStreamProcessor” (p. 284)• the section called “DeleteStreamProcessor” (p. 291)• the section called “DescribeStreamProcessor” (p. 303)• the section called “ListStreamProcessors” (p. 376)• the section called “StartStreamProcessor” (p. 416)• the section called “StopStreamProcessor” (p. 424)
주제
• Actions (p. 266)• Data Types (p. 425)
ActionsThe following actions are supported:
• CompareFaces (p. 268)• CreateCollection (p. 274)• CreateProject (p. 277)• CreateProjectVersion (p. 280)• CreateStreamProcessor (p. 284)• DeleteCollection (p. 287)• DeleteFaces (p. 289)• DeleteStreamProcessor (p. 291)• DescribeCollection (p. 293)• DescribeProjects (p. 296)• DescribeProjectVersions (p. 299)• DescribeStreamProcessor (p. 303)• DetectCustomLabels (p. 307)• DetectFaces (p. 311)• DetectLabels (p. 315)• DetectModerationLabels (p. 320)• DetectText (p. 324)• GetCelebrityInfo (p. 328)• GetCelebrityRecognition (p. 330)• GetContentModeration (p. 335)
266
Amazon Rekognition 개발자 안내서Actions
• GetFaceDetection (p. 339)• GetFaceSearch (p. 344)• GetLabelDetection (p. 349)• GetPersonTracking (p. 353)• GetTextDetection (p. 358)• IndexFaces (p. 362)• ListCollections (p. 370)• ListFaces (p. 373)• ListStreamProcessors (p. 376)• RecognizeCelebrities (p. 379)• SearchFaces (p. 383)• SearchFacesByImage (p. 386)• StartCelebrityRecognition (p. 391)• StartContentModeration (p. 394)• StartFaceDetection (p. 398)• StartFaceSearch (p. 402)• StartLabelDetection (p. 406)• StartPersonTracking (p. 410)• StartProjectVersion (p. 413)• StartStreamProcessor (p. 416)• StartTextDetection (p. 418)• StopProjectVersion (p. 422)• StopStreamProcessor (p. 424)
267
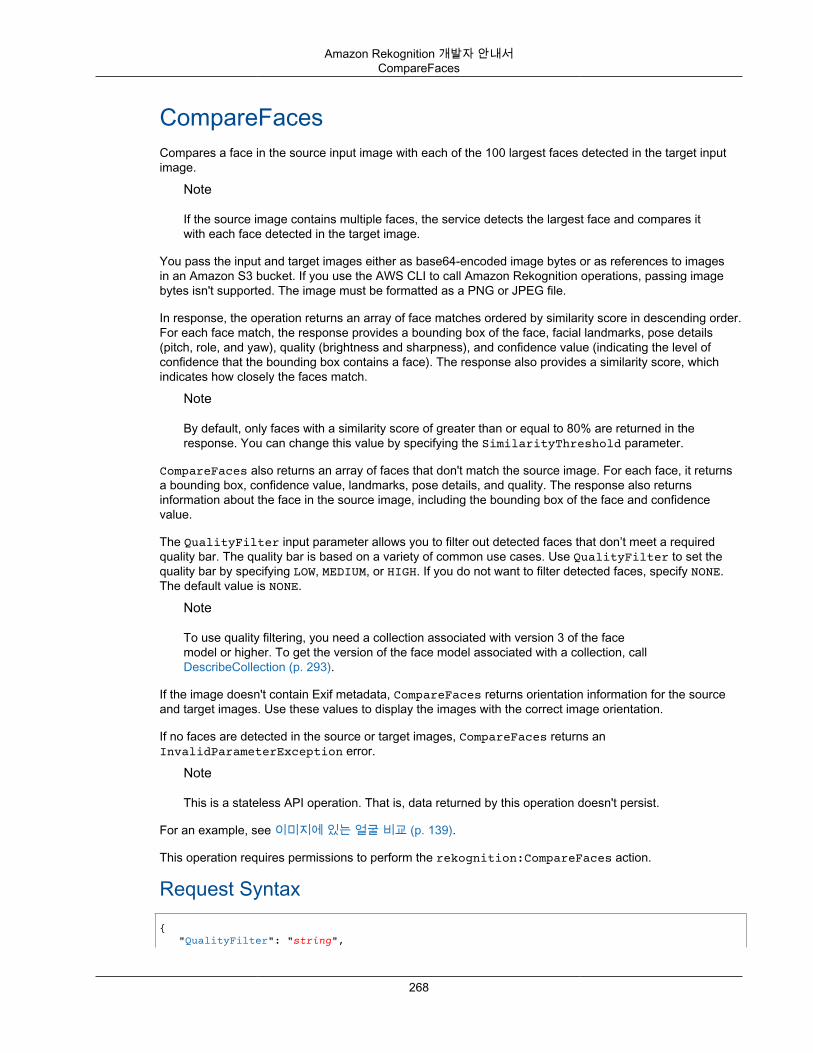
Amazon Rekognition 개발자 안내서CompareFaces
CompareFacesCompares a face in the source input image with each of the 100 largest faces detected in the target inputimage.
Note
If the source image contains multiple faces, the service detects the largest face and compares itwith each face detected in the target image.
You pass the input and target images either as base64-encoded image bytes or as references to imagesin an Amazon S3 bucket. If you use the AWS CLI to call Amazon Rekognition operations, passing imagebytes isn't supported. The image must be formatted as a PNG or JPEG file.
In response, the operation returns an array of face matches ordered by similarity score in descending order.For each face match, the response provides a bounding box of the face, facial landmarks, pose details(pitch, role, and yaw), quality (brightness and sharpness), and confidence value (indicating the level ofconfidence that the bounding box contains a face). The response also provides a similarity score, whichindicates how closely the faces match.
Note
By default, only faces with a similarity score of greater than or equal to 80% are returned in theresponse. You can change this value by specifying the SimilarityThreshold parameter.
CompareFaces also returns an array of faces that don't match the source image. For each face, it returnsa bounding box, confidence value, landmarks, pose details, and quality. The response also returnsinformation about the face in the source image, including the bounding box of the face and confidencevalue.
The QualityFilter input parameter allows you to filter out detected faces that don’t meet a requiredquality bar. The quality bar is based on a variety of common use cases. Use QualityFilter to set thequality bar by specifying LOW, MEDIUM, or HIGH. If you do not want to filter detected faces, specify NONE.The default value is NONE.
Note
To use quality filtering, you need a collection associated with version 3 of the facemodel or higher. To get the version of the face model associated with a collection, callDescribeCollection (p. 293).
If the image doesn't contain Exif metadata, CompareFaces returns orientation information for the sourceand target images. Use these values to display the images with the correct image orientation.
If no faces are detected in the source or target images, CompareFaces returns anInvalidParameterException error.
Note
This is a stateless API operation. That is, data returned by this operation doesn't persist.
For an example, see 이미지에 있는 얼굴 비교 (p. 139).
This operation requires permissions to perform the rekognition:CompareFaces action.
Request Syntax
{ "QualityFilter": "string",
268
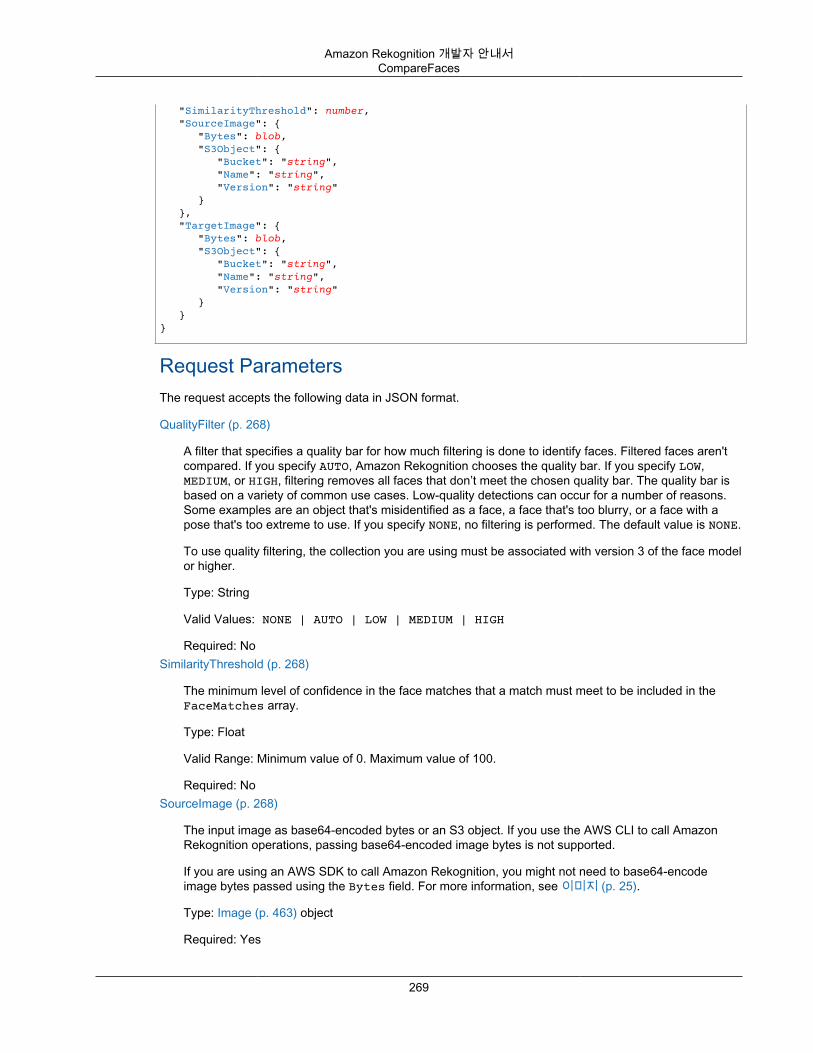
Amazon Rekognition 개발자 안내서CompareFaces
"SimilarityThreshold": number, "SourceImage": { "Bytes": blob, "S3Object": { "Bucket": "string", "Name": "string", "Version": "string" } }, "TargetImage": { "Bytes": blob, "S3Object": { "Bucket": "string", "Name": "string", "Version": "string" } }}
Request ParametersThe request accepts the following data in JSON format.
QualityFilter (p. 268)
A filter that specifies a quality bar for how much filtering is done to identify faces. Filtered faces aren'tcompared. If you specify AUTO, Amazon Rekognition chooses the quality bar. If you specify LOW,MEDIUM, or HIGH, filtering removes all faces that don’t meet the chosen quality bar. The quality bar isbased on a variety of common use cases. Low-quality detections can occur for a number of reasons.Some examples are an object that's misidentified as a face, a face that's too blurry, or a face with apose that's too extreme to use. If you specify NONE, no filtering is performed. The default value is NONE.
To use quality filtering, the collection you are using must be associated with version 3 of the face modelor higher.
Type: String
Valid Values: NONE | AUTO | LOW | MEDIUM | HIGH
Required: NoSimilarityThreshold (p. 268)
The minimum level of confidence in the face matches that a match must meet to be included in theFaceMatches array.
Type: Float
Valid Range: Minimum value of 0. Maximum value of 100.
Required: NoSourceImage (p. 268)
The input image as base64-encoded bytes or an S3 object. If you use the AWS CLI to call AmazonRekognition operations, passing base64-encoded image bytes is not supported.
If you are using an AWS SDK to call Amazon Rekognition, you might not need to base64-encodeimage bytes passed using the Bytes field. For more information, see 이미지 (p. 25).
Type: Image (p. 463) object
Required: Yes
269
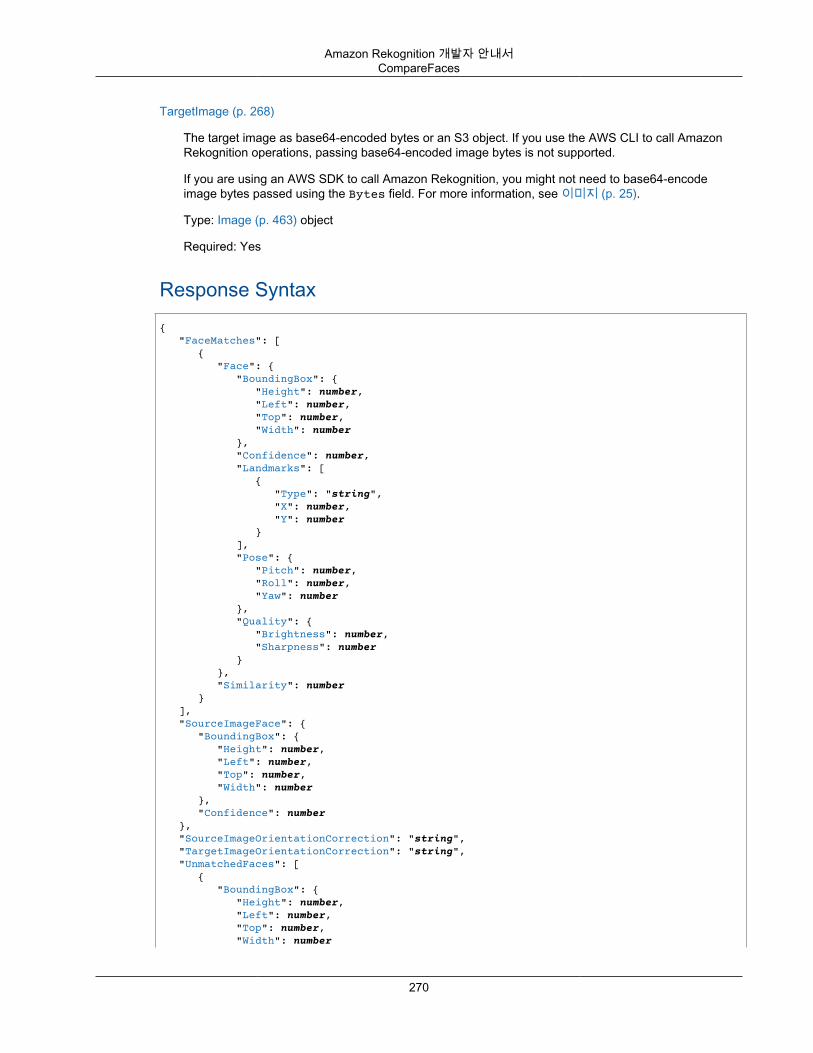
Amazon Rekognition 개발자 안내서CompareFaces
TargetImage (p. 268)
The target image as base64-encoded bytes or an S3 object. If you use the AWS CLI to call AmazonRekognition operations, passing base64-encoded image bytes is not supported.
If you are using an AWS SDK to call Amazon Rekognition, you might not need to base64-encodeimage bytes passed using the Bytes field. For more information, see 이미지 (p. 25).
Type: Image (p. 463) object
Required: Yes
Response Syntax{ "FaceMatches": [ { "Face": { "BoundingBox": { "Height": number, "Left": number, "Top": number, "Width": number }, "Confidence": number, "Landmarks": [ { "Type": "string", "X": number, "Y": number } ], "Pose": { "Pitch": number, "Roll": number, "Yaw": number }, "Quality": { "Brightness": number, "Sharpness": number } }, "Similarity": number } ], "SourceImageFace": { "BoundingBox": { "Height": number, "Left": number, "Top": number, "Width": number }, "Confidence": number }, "SourceImageOrientationCorrection": "string", "TargetImageOrientationCorrection": "string", "UnmatchedFaces": [ { "BoundingBox": { "Height": number, "Left": number, "Top": number, "Width": number
270
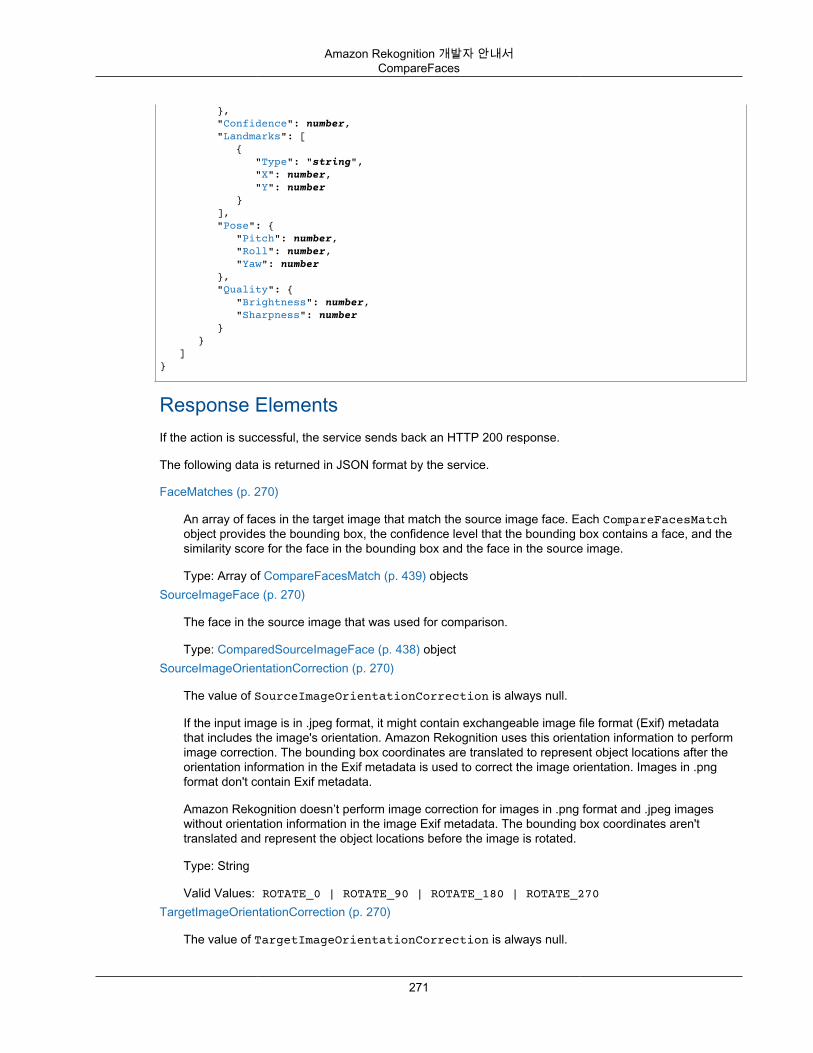
Amazon Rekognition 개발자 안내서CompareFaces
}, "Confidence": number, "Landmarks": [ { "Type": "string", "X": number, "Y": number } ], "Pose": { "Pitch": number, "Roll": number, "Yaw": number }, "Quality": { "Brightness": number, "Sharpness": number } } ]}
Response ElementsIf the action is successful, the service sends back an HTTP 200 response.
The following data is returned in JSON format by the service.
FaceMatches (p. 270)
An array of faces in the target image that match the source image face. Each CompareFacesMatchobject provides the bounding box, the confidence level that the bounding box contains a face, and thesimilarity score for the face in the bounding box and the face in the source image.
Type: Array of CompareFacesMatch (p. 439) objectsSourceImageFace (p. 270)
The face in the source image that was used for comparison.
Type: ComparedSourceImageFace (p. 438) objectSourceImageOrientationCorrection (p. 270)
The value of SourceImageOrientationCorrection is always null.
If the input image is in .jpeg format, it might contain exchangeable image file format (Exif) metadatathat includes the image's orientation. Amazon Rekognition uses this orientation information to performimage correction. The bounding box coordinates are translated to represent object locations after theorientation information in the Exif metadata is used to correct the image orientation. Images in .pngformat don't contain Exif metadata.
Amazon Rekognition doesn’t perform image correction for images in .png format and .jpeg imageswithout orientation information in the image Exif metadata. The bounding box coordinates aren'ttranslated and represent the object locations before the image is rotated.
Type: String
Valid Values: ROTATE_0 | ROTATE_90 | ROTATE_180 | ROTATE_270TargetImageOrientationCorrection (p. 270)
The value of TargetImageOrientationCorrection is always null.
271
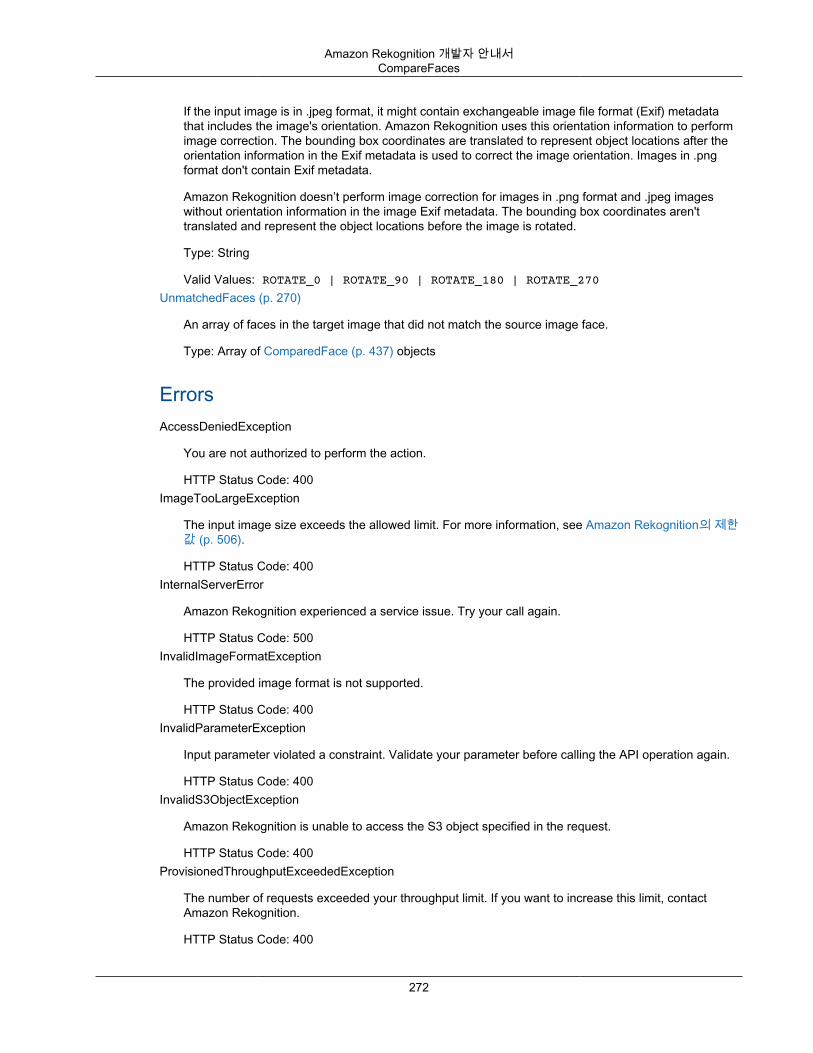
Amazon Rekognition 개발자 안내서CompareFaces
If the input image is in .jpeg format, it might contain exchangeable image file format (Exif) metadatathat includes the image's orientation. Amazon Rekognition uses this orientation information to performimage correction. The bounding box coordinates are translated to represent object locations after theorientation information in the Exif metadata is used to correct the image orientation. Images in .pngformat don't contain Exif metadata.
Amazon Rekognition doesn’t perform image correction for images in .png format and .jpeg imageswithout orientation information in the image Exif metadata. The bounding box coordinates aren'ttranslated and represent the object locations before the image is rotated.
Type: String
Valid Values: ROTATE_0 | ROTATE_90 | ROTATE_180 | ROTATE_270UnmatchedFaces (p. 270)
An array of faces in the target image that did not match the source image face.
Type: Array of ComparedFace (p. 437) objects
ErrorsAccessDeniedException
You are not authorized to perform the action.
HTTP Status Code: 400ImageTooLargeException
The input image size exceeds the allowed limit. For more information, see Amazon Rekognition의 제한값 (p. 506).
HTTP Status Code: 400InternalServerError
Amazon Rekognition experienced a service issue. Try your call again.
HTTP Status Code: 500InvalidImageFormatException
The provided image format is not supported.
HTTP Status Code: 400InvalidParameterException
Input parameter violated a constraint. Validate your parameter before calling the API operation again.
HTTP Status Code: 400InvalidS3ObjectException
Amazon Rekognition is unable to access the S3 object specified in the request.
HTTP Status Code: 400ProvisionedThroughputExceededException
The number of requests exceeded your throughput limit. If you want to increase this limit, contactAmazon Rekognition.
HTTP Status Code: 400
272
Amazon Rekognition 개발자 안내서CompareFaces
ThrottlingException
Amazon Rekognition is temporarily unable to process the request. Try your call again.
HTTP Status Code: 500
See AlsoFor more information about using this API in one of the language-specific AWS SDKs, see the following:
• AWS Command Line Interface• AWS SDK for .NET• AWS SDK for C++• AWS SDK for Go• AWS SDK for Java• AWS SDK for JavaScript• AWS SDK for PHP V3• AWS SDK for Python• AWS SDK for Ruby V2
273
Amazon Rekognition 개발자 안내서CreateCollection
CreateCollectionCreates a collection in an AWS Region. You can add faces to the collection using the IndexFaces (p. 362)operation.
For example, you might create collections, one for each of your application users. A user can then indexfaces using the IndexFaces operation and persist results in a specific collection. Then, a user can searchthe collection for faces in the user-specific container.
When you create a collection, it is associated with the latest version of the face model version.Note
Collection names are case-sensitive.
This operation requires permissions to perform the rekognition:CreateCollection action.
Request Syntax{ "CollectionId": "string"}
Request ParametersThe request accepts the following data in JSON format.
CollectionId (p. 274)
ID for the collection that you are creating.
Type: String
Length Constraints: Minimum length of 1. Maximum length of 255.
Pattern: [a-zA-Z0-9_.\-]+
Required: Yes
Response Syntax{ "CollectionArn": "string", "FaceModelVersion": "string", "StatusCode": number}
Response ElementsIf the action is successful, the service sends back an HTTP 200 response.
The following data is returned in JSON format by the service.
CollectionArn (p. 274)
Amazon Resource Name (ARN) of the collection. You can use this to manage permissions on yourresources.
274
Amazon Rekognition 개발자 안내서CreateCollection
Type: StringFaceModelVersion (p. 274)
Version number of the face detection model associated with the collection you are creating.
Type: StringStatusCode (p. 274)
HTTP status code indicating the result of the operation.
Type: Integer
Valid Range: Minimum value of 0.
ErrorsAccessDeniedException
You are not authorized to perform the action.
HTTP Status Code: 400InternalServerError
Amazon Rekognition experienced a service issue. Try your call again.
HTTP Status Code: 500InvalidParameterException
Input parameter violated a constraint. Validate your parameter before calling the API operation again.
HTTP Status Code: 400ProvisionedThroughputExceededException
The number of requests exceeded your throughput limit. If you want to increase this limit, contactAmazon Rekognition.
HTTP Status Code: 400ResourceAlreadyExistsException
A collection with the specified ID already exists.
HTTP Status Code: 400ThrottlingException
Amazon Rekognition is temporarily unable to process the request. Try your call again.
HTTP Status Code: 500
See AlsoFor more information about using this API in one of the language-specific AWS SDKs, see the following:
• AWS Command Line Interface• AWS SDK for .NET• AWS SDK for C++• AWS SDK for Go
275
Amazon Rekognition 개발자 안내서CreateCollection
• AWS SDK for Java• AWS SDK for JavaScript• AWS SDK for PHP V3• AWS SDK for Python• AWS SDK for Ruby V2
276
Amazon Rekognition 개발자 안내서CreateProject
CreateProjectCreates a new Amazon Rekognition Custom Labels project. A project is a logical grouping of resources(images, Labels, models) and operations (training, evaluation and detection).
This operation requires permissions to perform the rekognition:CreateProject action.
Request Syntax
{ "ProjectName": "string"}
Request ParametersThe request accepts the following data in JSON format.
ProjectName (p. 277)
The name of the project to create.
Type: String
Length Constraints: Minimum length of 1. Maximum length of 255.
Pattern: [a-zA-Z0-9_.\-]+
Required: Yes
Response Syntax
{ "ProjectArn": "string"}
Response ElementsIf the action is successful, the service sends back an HTTP 200 response.
The following data is returned in JSON format by the service.
ProjectArn (p. 277)
The Amazon Resource Name (ARN) of the new project. You can use the ARN to configure IAM accessto the project.
Type: String
Length Constraints: Minimum length of 20. Maximum length of 2048.
Pattern: (^arn:[a-z\d-]+:rekognition:[a-z\d-]+:\d{12}:project\/[a-zA-Z0-9_.\-]{1,255}\/[0-9]+$)
277
Amazon Rekognition 개발자 안내서CreateProject
ErrorsAccessDeniedException
You are not authorized to perform the action.
HTTP Status Code: 400InternalServerError
Amazon Rekognition experienced a service issue. Try your call again.
HTTP Status Code: 500InvalidParameterException
Input parameter violated a constraint. Validate your parameter before calling the API operation again.
HTTP Status Code: 400LimitExceededException
An Amazon Rekognition service limit was exceeded. For example, if you start too many AmazonRekognition Video jobs concurrently, calls to start operations (StartLabelDetection, for example)will raise a LimitExceededException exception (HTTP status code: 400) until the number ofconcurrently running jobs is below the Amazon Rekognition service limit.
HTTP Status Code: 400ProvisionedThroughputExceededException
The number of requests exceeded your throughput limit. If you want to increase this limit, contactAmazon Rekognition.
HTTP Status Code: 400ResourceInUseException
HTTP Status Code: 400ThrottlingException
Amazon Rekognition is temporarily unable to process the request. Try your call again.
HTTP Status Code: 500
See AlsoFor more information about using this API in one of the language-specific AWS SDKs, see the following:
• AWS Command Line Interface• AWS SDK for .NET• AWS SDK for C++• AWS SDK for Go• AWS SDK for Java• AWS SDK for JavaScript• AWS SDK for PHP V3• AWS SDK for Python• AWS SDK for Ruby V2
278

Amazon Rekognition 개발자 안내서CreateProject
279
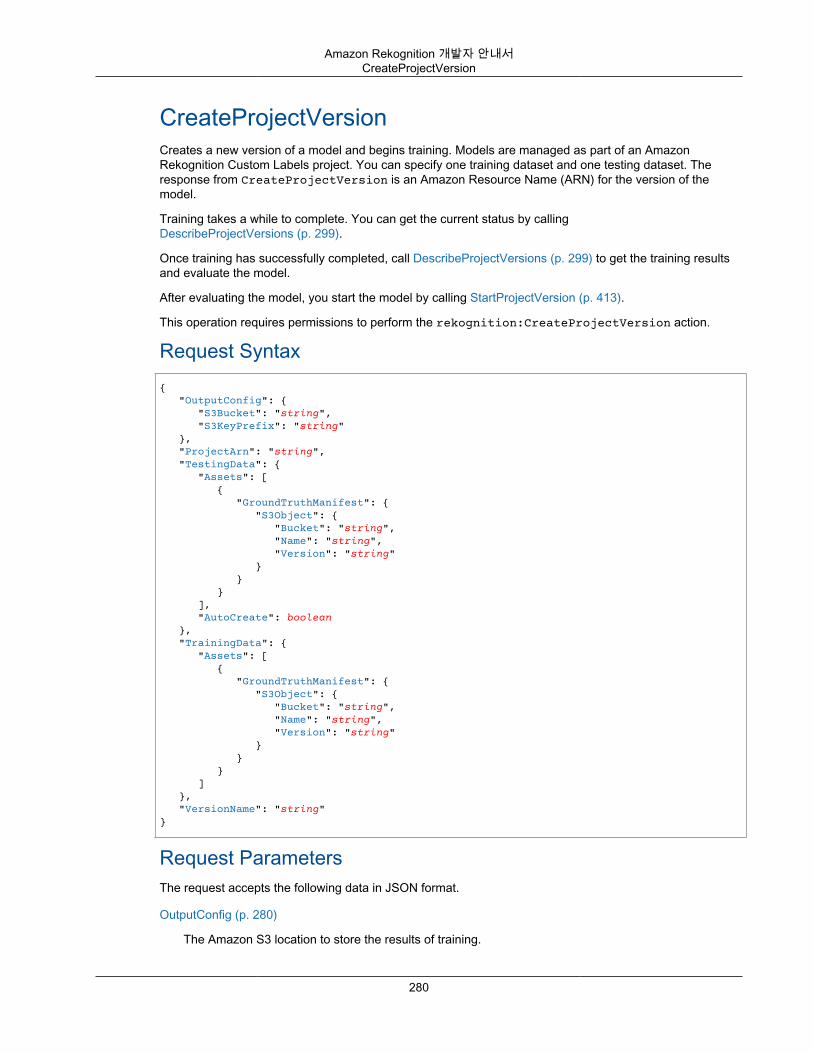
Amazon Rekognition 개발자 안내서CreateProjectVersion
CreateProjectVersionCreates a new version of a model and begins training. Models are managed as part of an AmazonRekognition Custom Labels project. You can specify one training dataset and one testing dataset. Theresponse from CreateProjectVersion is an Amazon Resource Name (ARN) for the version of themodel.
Training takes a while to complete. You can get the current status by callingDescribeProjectVersions (p. 299).
Once training has successfully completed, call DescribeProjectVersions (p. 299) to get the training resultsand evaluate the model.
After evaluating the model, you start the model by calling StartProjectVersion (p. 413).
This operation requires permissions to perform the rekognition:CreateProjectVersion action.
Request Syntax{ "OutputConfig": { "S3Bucket": "string", "S3KeyPrefix": "string" }, "ProjectArn": "string", "TestingData": { "Assets": [ { "GroundTruthManifest": { "S3Object": { "Bucket": "string", "Name": "string", "Version": "string" } } } ], "AutoCreate": boolean }, "TrainingData": { "Assets": [ { "GroundTruthManifest": { "S3Object": { "Bucket": "string", "Name": "string", "Version": "string" } } } ] }, "VersionName": "string"}
Request ParametersThe request accepts the following data in JSON format.
OutputConfig (p. 280)
The Amazon S3 location to store the results of training.
280
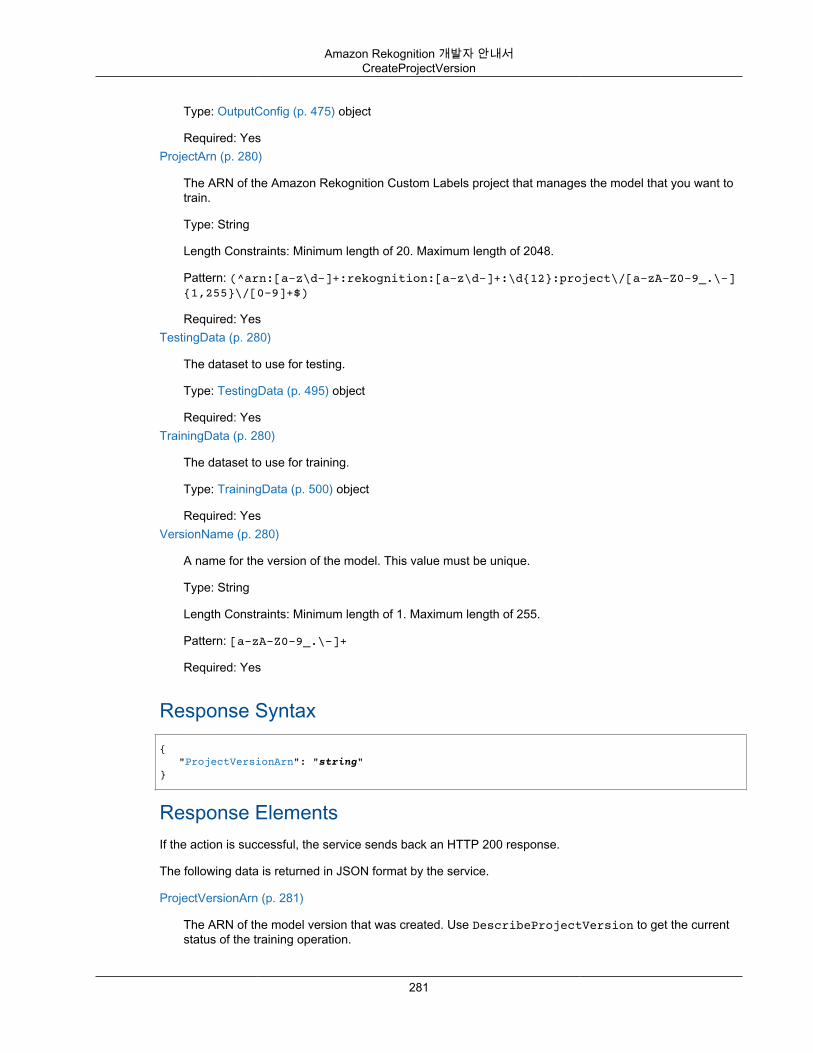
Amazon Rekognition 개발자 안내서CreateProjectVersion
Type: OutputConfig (p. 475) object
Required: YesProjectArn (p. 280)
The ARN of the Amazon Rekognition Custom Labels project that manages the model that you want totrain.
Type: String
Length Constraints: Minimum length of 20. Maximum length of 2048.
Pattern: (^arn:[a-z\d-]+:rekognition:[a-z\d-]+:\d{12}:project\/[a-zA-Z0-9_.\-]{1,255}\/[0-9]+$)
Required: YesTestingData (p. 280)
The dataset to use for testing.
Type: TestingData (p. 495) object
Required: YesTrainingData (p. 280)
The dataset to use for training.
Type: TrainingData (p. 500) object
Required: YesVersionName (p. 280)
A name for the version of the model. This value must be unique.
Type: String
Length Constraints: Minimum length of 1. Maximum length of 255.
Pattern: [a-zA-Z0-9_.\-]+
Required: Yes
Response Syntax{ "ProjectVersionArn": "string"}
Response ElementsIf the action is successful, the service sends back an HTTP 200 response.
The following data is returned in JSON format by the service.
ProjectVersionArn (p. 281)
The ARN of the model version that was created. Use DescribeProjectVersion to get the currentstatus of the training operation.
281
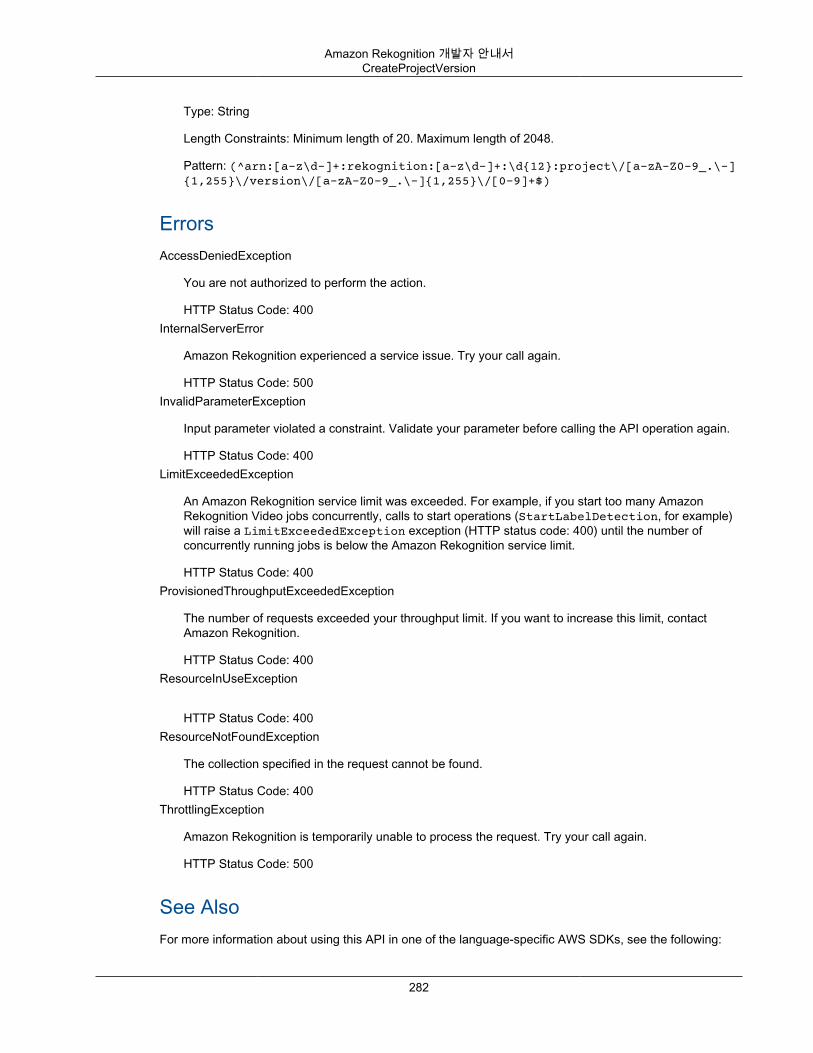
Amazon Rekognition 개발자 안내서CreateProjectVersion
Type: String
Length Constraints: Minimum length of 20. Maximum length of 2048.
Pattern: (^arn:[a-z\d-]+:rekognition:[a-z\d-]+:\d{12}:project\/[a-zA-Z0-9_.\-]{1,255}\/version\/[a-zA-Z0-9_.\-]{1,255}\/[0-9]+$)
ErrorsAccessDeniedException
You are not authorized to perform the action.
HTTP Status Code: 400InternalServerError
Amazon Rekognition experienced a service issue. Try your call again.
HTTP Status Code: 500InvalidParameterException
Input parameter violated a constraint. Validate your parameter before calling the API operation again.
HTTP Status Code: 400LimitExceededException
An Amazon Rekognition service limit was exceeded. For example, if you start too many AmazonRekognition Video jobs concurrently, calls to start operations (StartLabelDetection, for example)will raise a LimitExceededException exception (HTTP status code: 400) until the number ofconcurrently running jobs is below the Amazon Rekognition service limit.
HTTP Status Code: 400ProvisionedThroughputExceededException
The number of requests exceeded your throughput limit. If you want to increase this limit, contactAmazon Rekognition.
HTTP Status Code: 400ResourceInUseException
HTTP Status Code: 400ResourceNotFoundException
The collection specified in the request cannot be found.
HTTP Status Code: 400ThrottlingException
Amazon Rekognition is temporarily unable to process the request. Try your call again.
HTTP Status Code: 500
See AlsoFor more information about using this API in one of the language-specific AWS SDKs, see the following:
282
Amazon Rekognition 개발자 안내서CreateProjectVersion
• AWS Command Line Interface• AWS SDK for .NET• AWS SDK for C++• AWS SDK for Go• AWS SDK for Java• AWS SDK for JavaScript• AWS SDK for PHP V3• AWS SDK for Python• AWS SDK for Ruby V2
283
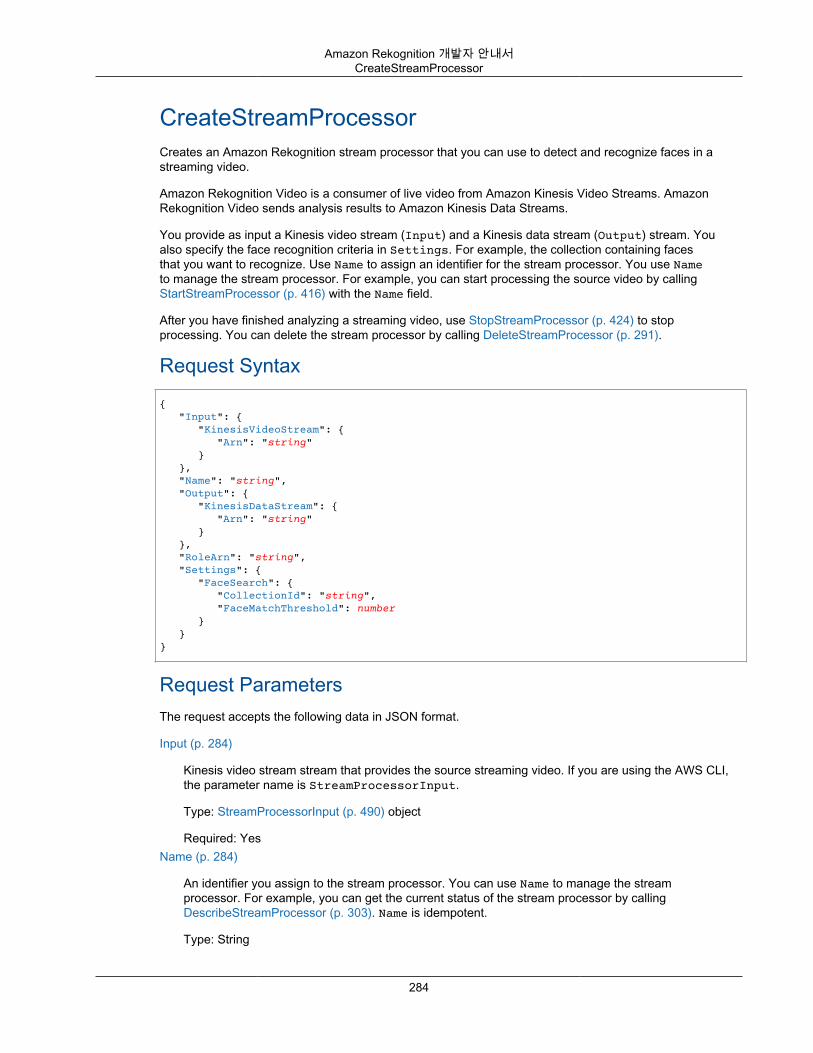
Amazon Rekognition 개발자 안내서CreateStreamProcessor
CreateStreamProcessorCreates an Amazon Rekognition stream processor that you can use to detect and recognize faces in astreaming video.
Amazon Rekognition Video is a consumer of live video from Amazon Kinesis Video Streams. AmazonRekognition Video sends analysis results to Amazon Kinesis Data Streams.
You provide as input a Kinesis video stream (Input) and a Kinesis data stream (Output) stream. Youalso specify the face recognition criteria in Settings. For example, the collection containing facesthat you want to recognize. Use Name to assign an identifier for the stream processor. You use Nameto manage the stream processor. For example, you can start processing the source video by callingStartStreamProcessor (p. 416) with the Name field.
After you have finished analyzing a streaming video, use StopStreamProcessor (p. 424) to stopprocessing. You can delete the stream processor by calling DeleteStreamProcessor (p. 291).
Request Syntax{ "Input": { "KinesisVideoStream": { "Arn": "string" } }, "Name": "string", "Output": { "KinesisDataStream": { "Arn": "string" } }, "RoleArn": "string", "Settings": { "FaceSearch": { "CollectionId": "string", "FaceMatchThreshold": number } }}
Request ParametersThe request accepts the following data in JSON format.
Input (p. 284)
Kinesis video stream stream that provides the source streaming video. If you are using the AWS CLI,the parameter name is StreamProcessorInput.
Type: StreamProcessorInput (p. 490) object
Required: YesName (p. 284)
An identifier you assign to the stream processor. You can use Name to manage the streamprocessor. For example, you can get the current status of the stream processor by callingDescribeStreamProcessor (p. 303). Name is idempotent.
Type: String
284
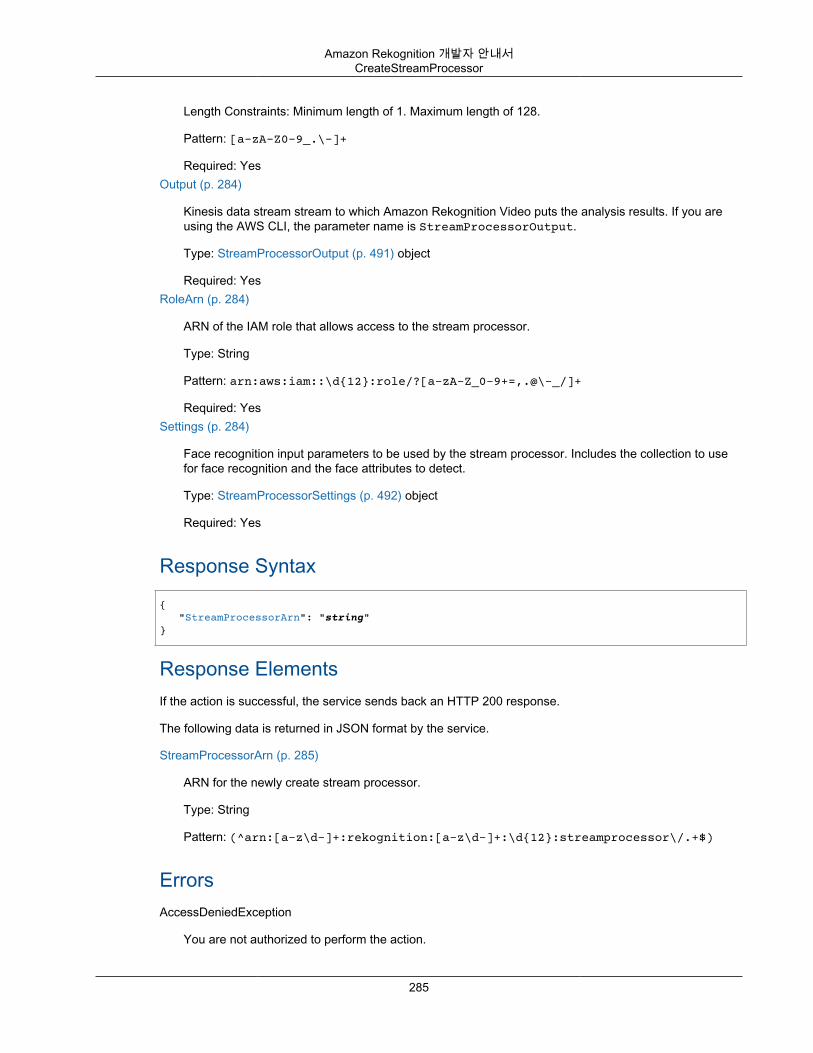
Amazon Rekognition 개발자 안내서CreateStreamProcessor
Length Constraints: Minimum length of 1. Maximum length of 128.
Pattern: [a-zA-Z0-9_.\-]+
Required: YesOutput (p. 284)
Kinesis data stream stream to which Amazon Rekognition Video puts the analysis results. If you areusing the AWS CLI, the parameter name is StreamProcessorOutput.
Type: StreamProcessorOutput (p. 491) object
Required: YesRoleArn (p. 284)
ARN of the IAM role that allows access to the stream processor.
Type: String
Pattern: arn:aws:iam::\d{12}:role/?[a-zA-Z_0-9+=,.@\-_/]+
Required: YesSettings (p. 284)
Face recognition input parameters to be used by the stream processor. Includes the collection to usefor face recognition and the face attributes to detect.
Type: StreamProcessorSettings (p. 492) object
Required: Yes
Response Syntax{ "StreamProcessorArn": "string"}
Response ElementsIf the action is successful, the service sends back an HTTP 200 response.
The following data is returned in JSON format by the service.
StreamProcessorArn (p. 285)
ARN for the newly create stream processor.
Type: String
Pattern: (^arn:[a-z\d-]+:rekognition:[a-z\d-]+:\d{12}:streamprocessor\/.+$)
ErrorsAccessDeniedException
You are not authorized to perform the action.
285

Amazon Rekognition 개발자 안내서CreateStreamProcessor
HTTP Status Code: 400InternalServerError
Amazon Rekognition experienced a service issue. Try your call again.
HTTP Status Code: 500InvalidParameterException
Input parameter violated a constraint. Validate your parameter before calling the API operation again.
HTTP Status Code: 400LimitExceededException
An Amazon Rekognition service limit was exceeded. For example, if you start too many AmazonRekognition Video jobs concurrently, calls to start operations (StartLabelDetection, for example)will raise a LimitExceededException exception (HTTP status code: 400) until the number ofconcurrently running jobs is below the Amazon Rekognition service limit.
HTTP Status Code: 400ProvisionedThroughputExceededException
The number of requests exceeded your throughput limit. If you want to increase this limit, contactAmazon Rekognition.
HTTP Status Code: 400ResourceInUseException
HTTP Status Code: 400ThrottlingException
Amazon Rekognition is temporarily unable to process the request. Try your call again.
HTTP Status Code: 500
See AlsoFor more information about using this API in one of the language-specific AWS SDKs, see the following:
• AWS Command Line Interface• AWS SDK for .NET• AWS SDK for C++• AWS SDK for Go• AWS SDK for Java• AWS SDK for JavaScript• AWS SDK for PHP V3• AWS SDK for Python• AWS SDK for Ruby V2
286

Amazon Rekognition 개발자 안내서DeleteCollection
DeleteCollectionDeletes the specified collection. Note that this operation removes all faces in the collection. For an example,see 모음 삭제 (p. 165).
This operation requires permissions to perform the rekognition:DeleteCollection action.
Request Syntax{ "CollectionId": "string"}
Request ParametersThe request accepts the following data in JSON format.
CollectionId (p. 287)
ID of the collection to delete.
Type: String
Length Constraints: Minimum length of 1. Maximum length of 255.
Pattern: [a-zA-Z0-9_.\-]+
Required: Yes
Response Syntax{ "StatusCode": number}
Response ElementsIf the action is successful, the service sends back an HTTP 200 response.
The following data is returned in JSON format by the service.
StatusCode (p. 287)
HTTP status code that indicates the result of the operation.
Type: Integer
Valid Range: Minimum value of 0.
ErrorsAccessDeniedException
You are not authorized to perform the action.
287
Amazon Rekognition 개발자 안내서DeleteCollection
HTTP Status Code: 400InternalServerError
Amazon Rekognition experienced a service issue. Try your call again.
HTTP Status Code: 500InvalidParameterException
Input parameter violated a constraint. Validate your parameter before calling the API operation again.
HTTP Status Code: 400ProvisionedThroughputExceededException
The number of requests exceeded your throughput limit. If you want to increase this limit, contactAmazon Rekognition.
HTTP Status Code: 400ResourceNotFoundException
The collection specified in the request cannot be found.
HTTP Status Code: 400ThrottlingException
Amazon Rekognition is temporarily unable to process the request. Try your call again.
HTTP Status Code: 500
See AlsoFor more information about using this API in one of the language-specific AWS SDKs, see the following:
• AWS Command Line Interface• AWS SDK for .NET• AWS SDK for C++• AWS SDK for Go• AWS SDK for Java• AWS SDK for JavaScript• AWS SDK for PHP V3• AWS SDK for Python• AWS SDK for Ruby V2
288

Amazon Rekognition 개발자 안내서DeleteFaces
DeleteFacesDeletes faces from a collection. You specify a collection ID and an array of face IDs to remove from thecollection.
This operation requires permissions to perform the rekognition:DeleteFaces action.
Request Syntax{ "CollectionId": "string", "FaceIds": [ "string" ]}
Request ParametersThe request accepts the following data in JSON format.
CollectionId (p. 289)
Collection from which to remove the specific faces.
Type: String
Length Constraints: Minimum length of 1. Maximum length of 255.
Pattern: [a-zA-Z0-9_.\-]+
Required: YesFaceIds (p. 289)
An array of face IDs to delete.
Type: Array of strings
Array Members: Minimum number of 1 item. Maximum number of 4096 items.
Pattern: [0-9a-f]{8}-[0-9a-f]{4}-[0-9a-f]{4}-[0-9a-f]{4}-[0-9a-f]{12}
Required: Yes
Response Syntax{ "DeletedFaces": [ "string" ]}
Response ElementsIf the action is successful, the service sends back an HTTP 200 response.
The following data is returned in JSON format by the service.
DeletedFaces (p. 289)
An array of strings (face IDs) of the faces that were deleted.
289
Amazon Rekognition 개발자 안내서DeleteFaces
Type: Array of strings
Array Members: Minimum number of 1 item. Maximum number of 4096 items.
Pattern: [0-9a-f]{8}-[0-9a-f]{4}-[0-9a-f]{4}-[0-9a-f]{4}-[0-9a-f]{12}
ErrorsAccessDeniedException
You are not authorized to perform the action.
HTTP Status Code: 400InternalServerError
Amazon Rekognition experienced a service issue. Try your call again.
HTTP Status Code: 500InvalidParameterException
Input parameter violated a constraint. Validate your parameter before calling the API operation again.
HTTP Status Code: 400ProvisionedThroughputExceededException
The number of requests exceeded your throughput limit. If you want to increase this limit, contactAmazon Rekognition.
HTTP Status Code: 400ResourceNotFoundException
The collection specified in the request cannot be found.
HTTP Status Code: 400ThrottlingException
Amazon Rekognition is temporarily unable to process the request. Try your call again.
HTTP Status Code: 500
See AlsoFor more information about using this API in one of the language-specific AWS SDKs, see the following:
• AWS Command Line Interface• AWS SDK for .NET• AWS SDK for C++• AWS SDK for Go• AWS SDK for Java• AWS SDK for JavaScript• AWS SDK for PHP V3• AWS SDK for Python• AWS SDK for Ruby V2
290
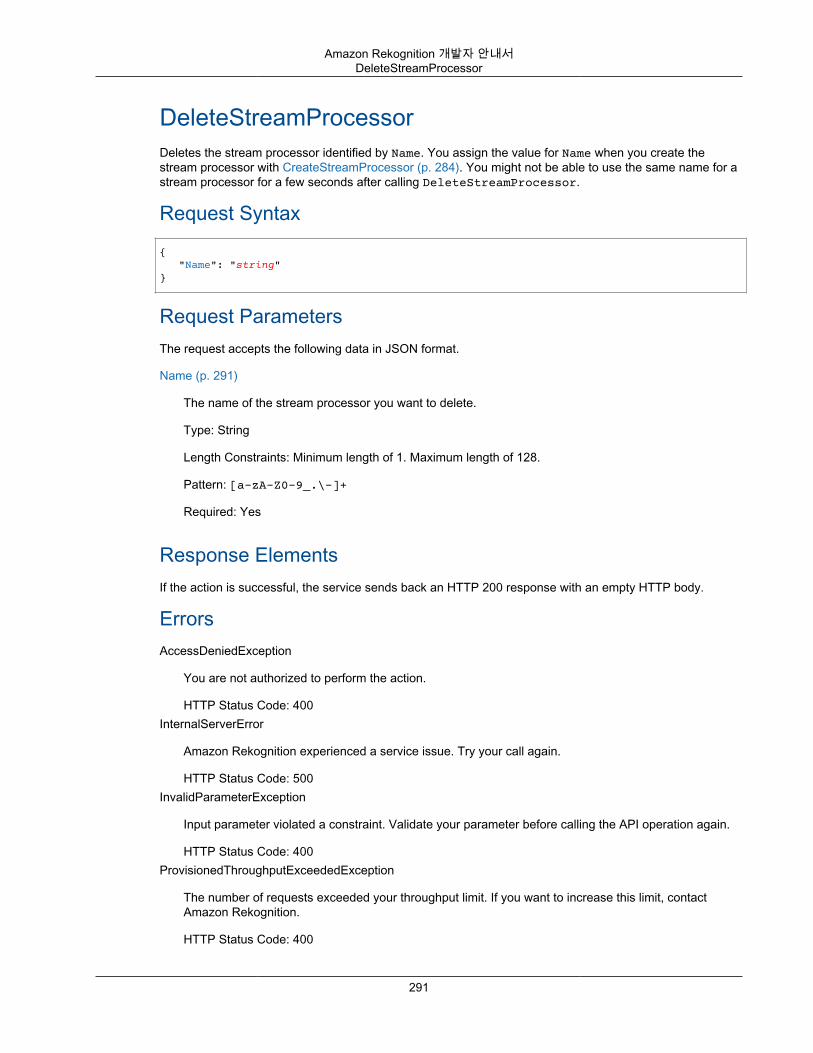
Amazon Rekognition 개발자 안내서DeleteStreamProcessor
DeleteStreamProcessorDeletes the stream processor identified by Name. You assign the value for Name when you create thestream processor with CreateStreamProcessor (p. 284). You might not be able to use the same name for astream processor for a few seconds after calling DeleteStreamProcessor.
Request Syntax
{ "Name": "string"}
Request ParametersThe request accepts the following data in JSON format.
Name (p. 291)
The name of the stream processor you want to delete.
Type: String
Length Constraints: Minimum length of 1. Maximum length of 128.
Pattern: [a-zA-Z0-9_.\-]+
Required: Yes
Response ElementsIf the action is successful, the service sends back an HTTP 200 response with an empty HTTP body.
ErrorsAccessDeniedException
You are not authorized to perform the action.
HTTP Status Code: 400InternalServerError
Amazon Rekognition experienced a service issue. Try your call again.
HTTP Status Code: 500InvalidParameterException
Input parameter violated a constraint. Validate your parameter before calling the API operation again.
HTTP Status Code: 400ProvisionedThroughputExceededException
The number of requests exceeded your throughput limit. If you want to increase this limit, contactAmazon Rekognition.
HTTP Status Code: 400
291
Amazon Rekognition 개발자 안내서DeleteStreamProcessor
ResourceInUseException
HTTP Status Code: 400ResourceNotFoundException
The collection specified in the request cannot be found.
HTTP Status Code: 400ThrottlingException
Amazon Rekognition is temporarily unable to process the request. Try your call again.
HTTP Status Code: 500
See AlsoFor more information about using this API in one of the language-specific AWS SDKs, see the following:
• AWS Command Line Interface• AWS SDK for .NET• AWS SDK for C++• AWS SDK for Go• AWS SDK for Java• AWS SDK for JavaScript• AWS SDK for PHP V3• AWS SDK for Python• AWS SDK for Ruby V2
292
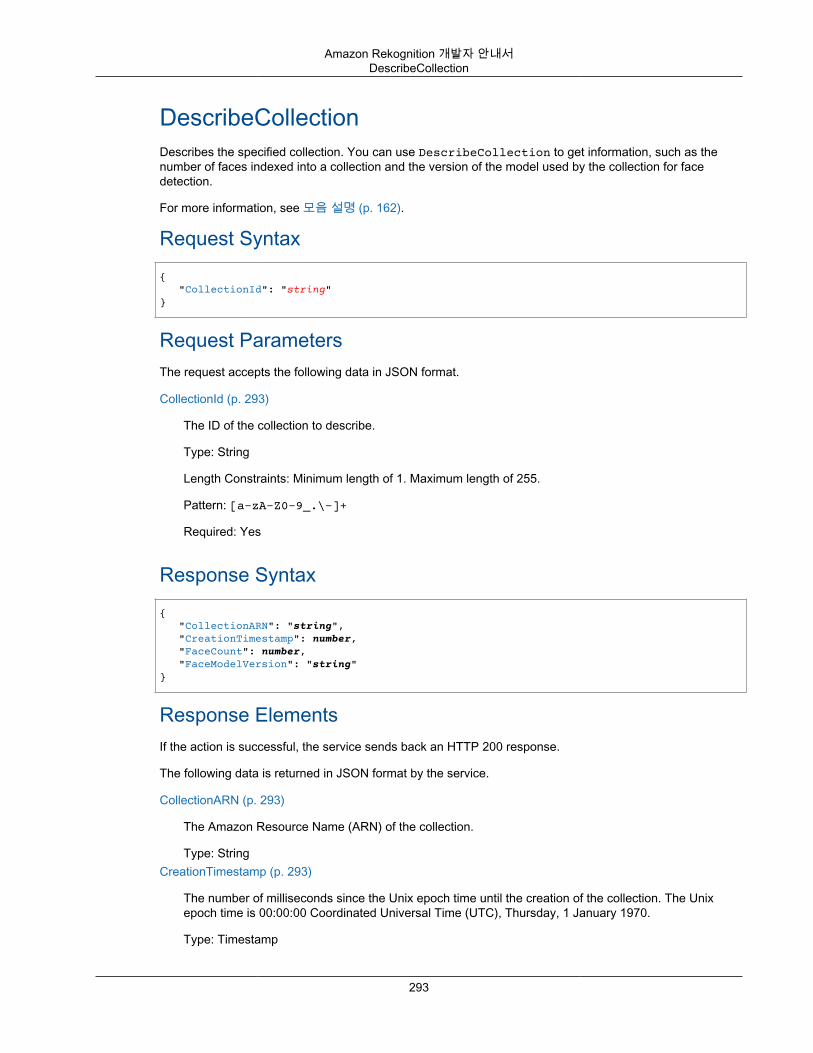
Amazon Rekognition 개발자 안내서DescribeCollection
DescribeCollectionDescribes the specified collection. You can use DescribeCollection to get information, such as thenumber of faces indexed into a collection and the version of the model used by the collection for facedetection.
For more information, see 모음 설명 (p. 162).
Request Syntax{ "CollectionId": "string"}
Request ParametersThe request accepts the following data in JSON format.
CollectionId (p. 293)
The ID of the collection to describe.
Type: String
Length Constraints: Minimum length of 1. Maximum length of 255.
Pattern: [a-zA-Z0-9_.\-]+
Required: Yes
Response Syntax{ "CollectionARN": "string", "CreationTimestamp": number, "FaceCount": number, "FaceModelVersion": "string"}
Response ElementsIf the action is successful, the service sends back an HTTP 200 response.
The following data is returned in JSON format by the service.
CollectionARN (p. 293)
The Amazon Resource Name (ARN) of the collection.
Type: StringCreationTimestamp (p. 293)
The number of milliseconds since the Unix epoch time until the creation of the collection. The Unixepoch time is 00:00:00 Coordinated Universal Time (UTC), Thursday, 1 January 1970.
Type: Timestamp
293
Amazon Rekognition 개발자 안내서DescribeCollection
FaceCount (p. 293)
The number of faces that are indexed into the collection. To index faces into a collection, useIndexFaces (p. 362).
Type: Long
Valid Range: Minimum value of 0.FaceModelVersion (p. 293)
The version of the face model that's used by the collection for face detection.
For more information, see 모델 버전 관리 (p. 9).
Type: String
ErrorsAccessDeniedException
You are not authorized to perform the action.
HTTP Status Code: 400InternalServerError
Amazon Rekognition experienced a service issue. Try your call again.
HTTP Status Code: 500InvalidParameterException
Input parameter violated a constraint. Validate your parameter before calling the API operation again.
HTTP Status Code: 400ProvisionedThroughputExceededException
The number of requests exceeded your throughput limit. If you want to increase this limit, contactAmazon Rekognition.
HTTP Status Code: 400ResourceNotFoundException
The collection specified in the request cannot be found.
HTTP Status Code: 400ThrottlingException
Amazon Rekognition is temporarily unable to process the request. Try your call again.
HTTP Status Code: 500
See AlsoFor more information about using this API in one of the language-specific AWS SDKs, see the following:
• AWS Command Line Interface• AWS SDK for .NET
294

Amazon Rekognition 개발자 안내서DescribeCollection
• AWS SDK for C++• AWS SDK for Go• AWS SDK for Java• AWS SDK for JavaScript• AWS SDK for PHP V3• AWS SDK for Python• AWS SDK for Ruby V2
295
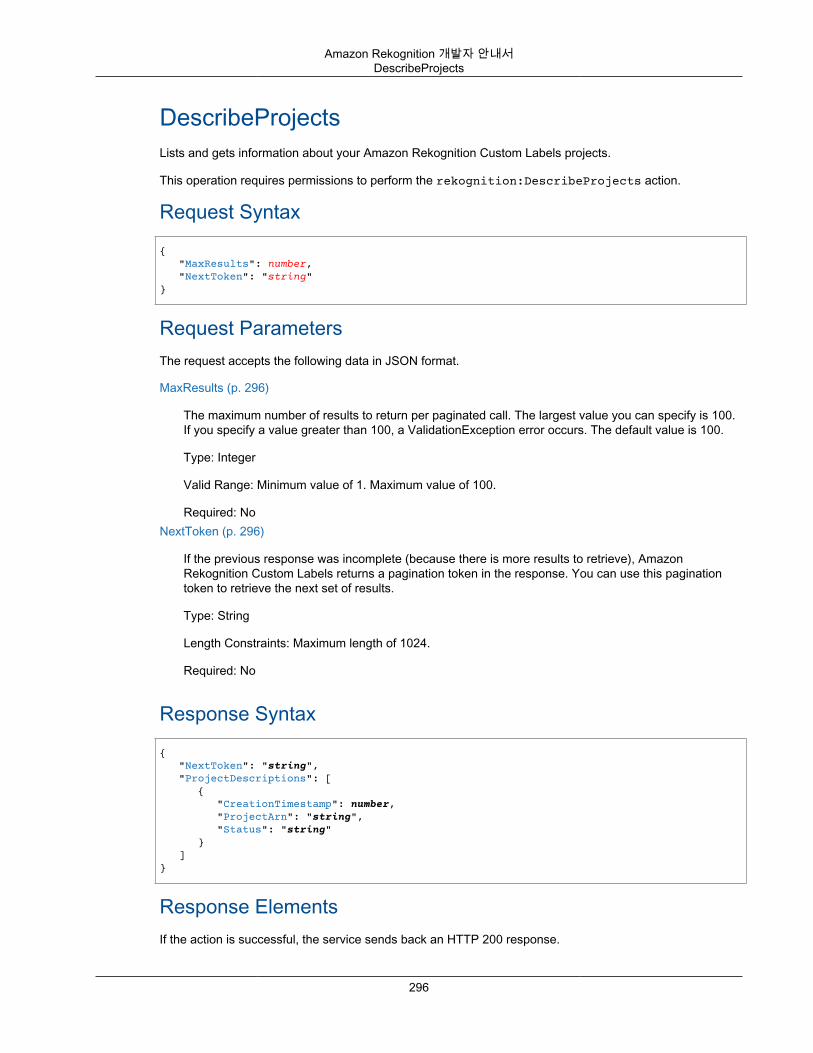
Amazon Rekognition 개발자 안내서DescribeProjects
DescribeProjectsLists and gets information about your Amazon Rekognition Custom Labels projects.
This operation requires permissions to perform the rekognition:DescribeProjects action.
Request Syntax
{ "MaxResults": number, "NextToken": "string"}
Request ParametersThe request accepts the following data in JSON format.
MaxResults (p. 296)
The maximum number of results to return per paginated call. The largest value you can specify is 100.If you specify a value greater than 100, a ValidationException error occurs. The default value is 100.
Type: Integer
Valid Range: Minimum value of 1. Maximum value of 100.
Required: NoNextToken (p. 296)
If the previous response was incomplete (because there is more results to retrieve), AmazonRekognition Custom Labels returns a pagination token in the response. You can use this paginationtoken to retrieve the next set of results.
Type: String
Length Constraints: Maximum length of 1024.
Required: No
Response Syntax
{ "NextToken": "string", "ProjectDescriptions": [ { "CreationTimestamp": number, "ProjectArn": "string", "Status": "string" } ]}
Response ElementsIf the action is successful, the service sends back an HTTP 200 response.
296

Amazon Rekognition 개발자 안내서DescribeProjects
The following data is returned in JSON format by the service.
NextToken (p. 296)
If the previous response was incomplete (because there is more results to retrieve), AmazonRekognition Custom Labels returns a pagination token in the response. You can use this paginationtoken to retrieve the next set of results.
Type: String
Length Constraints: Maximum length of 1024.ProjectDescriptions (p. 296)
A list of project descriptions. The list is sorted by the date and time the projects are created.
Type: Array of ProjectDescription (p. 482) objects
ErrorsAccessDeniedException
You are not authorized to perform the action.
HTTP Status Code: 400InternalServerError
Amazon Rekognition experienced a service issue. Try your call again.
HTTP Status Code: 500InvalidPaginationTokenException
Pagination token in the request is not valid.
HTTP Status Code: 400InvalidParameterException
Input parameter violated a constraint. Validate your parameter before calling the API operation again.
HTTP Status Code: 400ProvisionedThroughputExceededException
The number of requests exceeded your throughput limit. If you want to increase this limit, contactAmazon Rekognition.
HTTP Status Code: 400ThrottlingException
Amazon Rekognition is temporarily unable to process the request. Try your call again.
HTTP Status Code: 500
See AlsoFor more information about using this API in one of the language-specific AWS SDKs, see the following:
• AWS Command Line Interface• AWS SDK for .NET
297
Amazon Rekognition 개발자 안내서DescribeProjects
• AWS SDK for C++• AWS SDK for Go• AWS SDK for Java• AWS SDK for JavaScript• AWS SDK for PHP V3• AWS SDK for Python• AWS SDK for Ruby V2
298
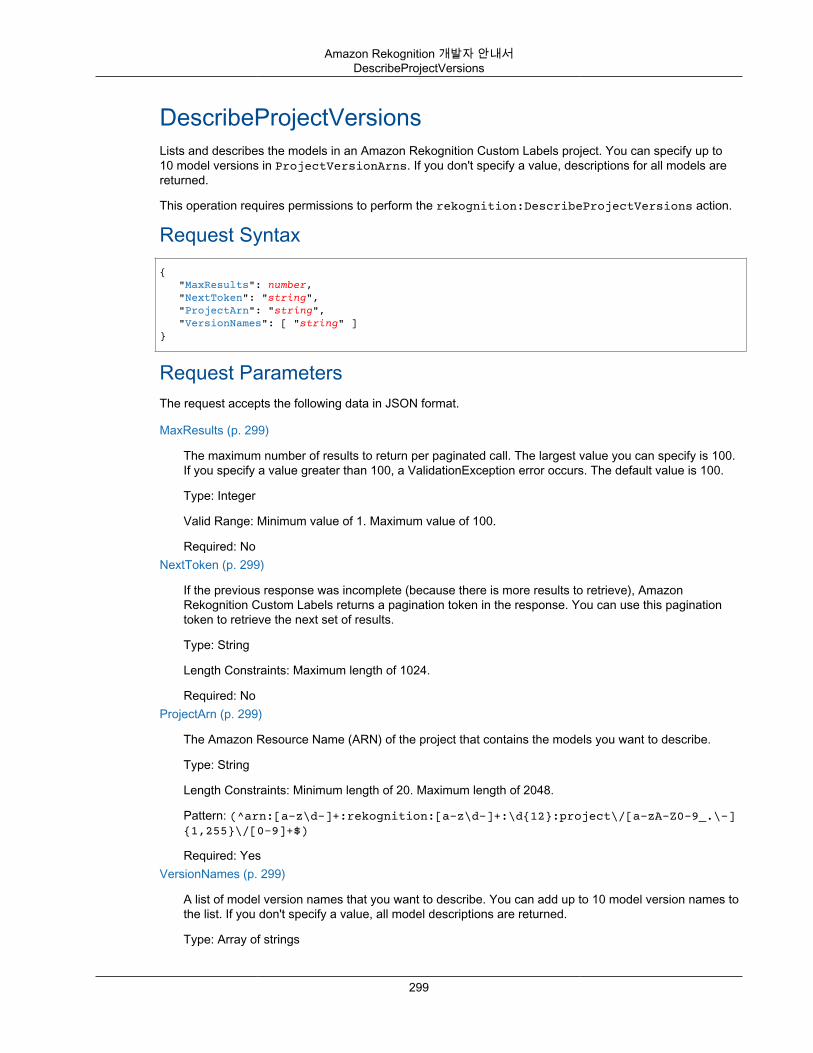
Amazon Rekognition 개발자 안내서DescribeProjectVersions
DescribeProjectVersionsLists and describes the models in an Amazon Rekognition Custom Labels project. You can specify up to10 model versions in ProjectVersionArns. If you don't specify a value, descriptions for all models arereturned.
This operation requires permissions to perform the rekognition:DescribeProjectVersions action.
Request Syntax{ "MaxResults": number, "NextToken": "string", "ProjectArn": "string", "VersionNames": [ "string" ]}
Request ParametersThe request accepts the following data in JSON format.
MaxResults (p. 299)
The maximum number of results to return per paginated call. The largest value you can specify is 100.If you specify a value greater than 100, a ValidationException error occurs. The default value is 100.
Type: Integer
Valid Range: Minimum value of 1. Maximum value of 100.
Required: NoNextToken (p. 299)
If the previous response was incomplete (because there is more results to retrieve), AmazonRekognition Custom Labels returns a pagination token in the response. You can use this paginationtoken to retrieve the next set of results.
Type: String
Length Constraints: Maximum length of 1024.
Required: NoProjectArn (p. 299)
The Amazon Resource Name (ARN) of the project that contains the models you want to describe.
Type: String
Length Constraints: Minimum length of 20. Maximum length of 2048.
Pattern: (^arn:[a-z\d-]+:rekognition:[a-z\d-]+:\d{12}:project\/[a-zA-Z0-9_.\-]{1,255}\/[0-9]+$)
Required: YesVersionNames (p. 299)
A list of model version names that you want to describe. You can add up to 10 model version names tothe list. If you don't specify a value, all model descriptions are returned.
Type: Array of strings
299
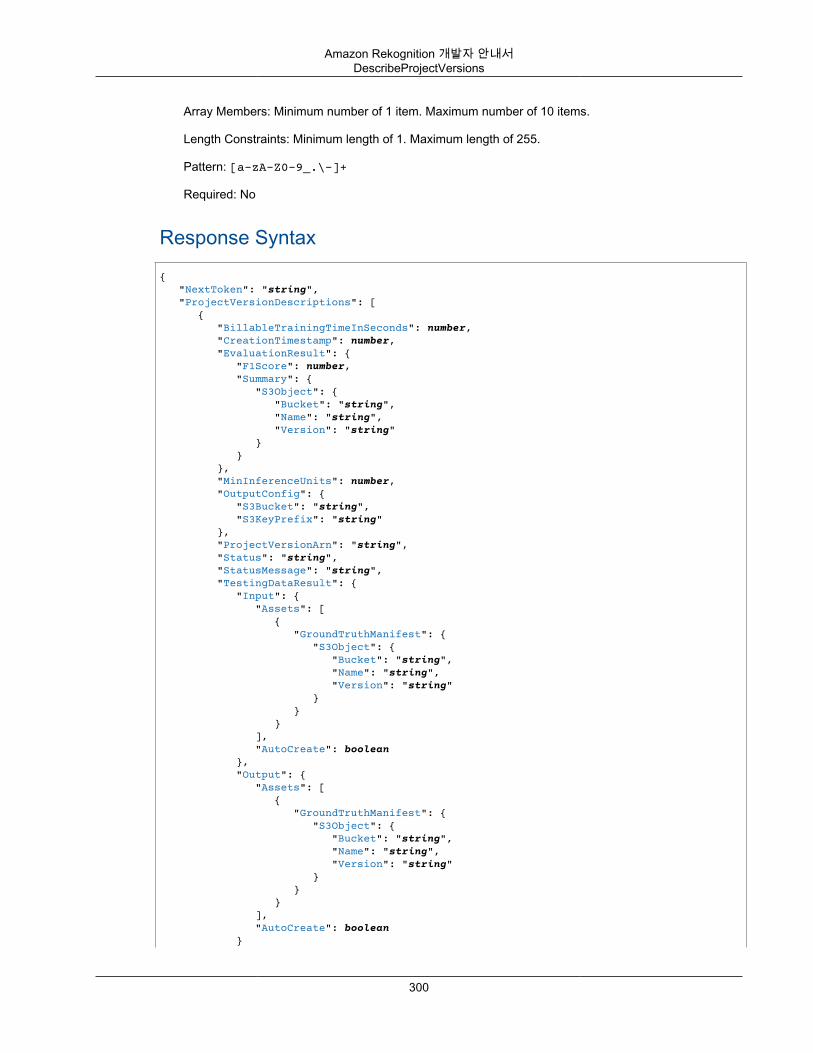
Amazon Rekognition 개발자 안내서DescribeProjectVersions
Array Members: Minimum number of 1 item. Maximum number of 10 items.
Length Constraints: Minimum length of 1. Maximum length of 255.
Pattern: [a-zA-Z0-9_.\-]+
Required: No
Response Syntax
{ "NextToken": "string", "ProjectVersionDescriptions": [ { "BillableTrainingTimeInSeconds": number, "CreationTimestamp": number, "EvaluationResult": { "F1Score": number, "Summary": { "S3Object": { "Bucket": "string", "Name": "string", "Version": "string" } } }, "MinInferenceUnits": number, "OutputConfig": { "S3Bucket": "string", "S3KeyPrefix": "string" }, "ProjectVersionArn": "string", "Status": "string", "StatusMessage": "string", "TestingDataResult": { "Input": { "Assets": [ { "GroundTruthManifest": { "S3Object": { "Bucket": "string", "Name": "string", "Version": "string" } } } ], "AutoCreate": boolean }, "Output": { "Assets": [ { "GroundTruthManifest": { "S3Object": { "Bucket": "string", "Name": "string", "Version": "string" } } } ], "AutoCreate": boolean }
300
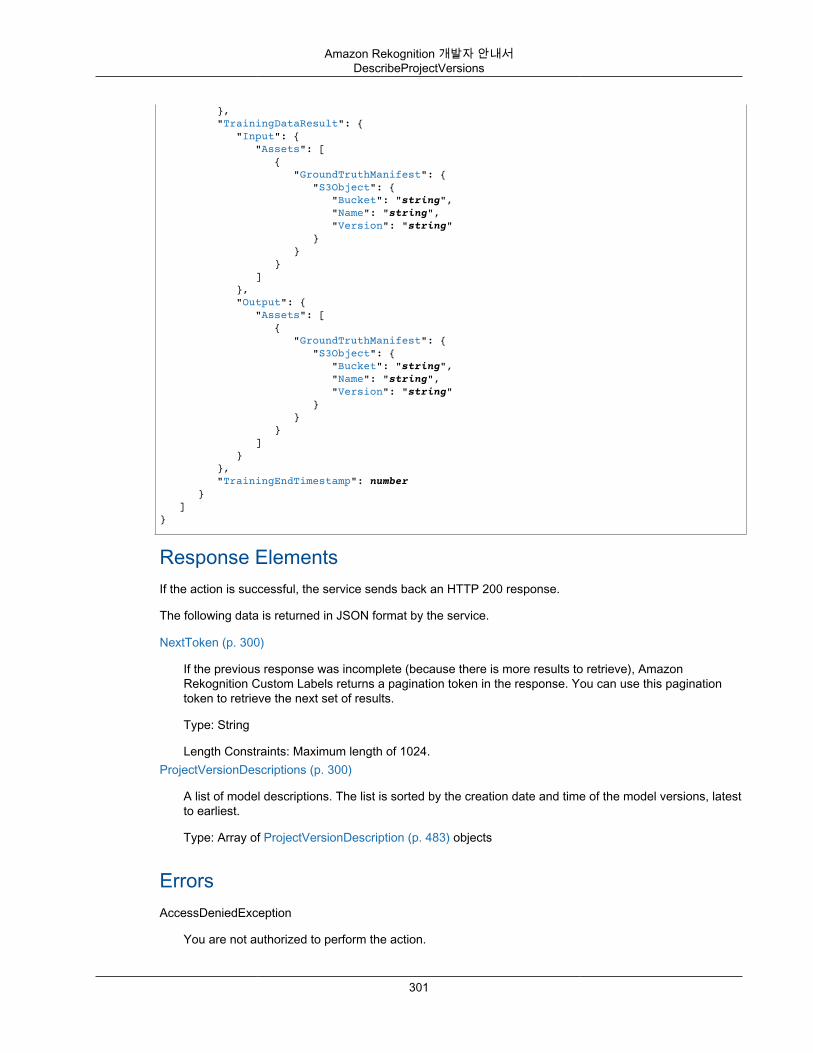
Amazon Rekognition 개발자 안내서DescribeProjectVersions
}, "TrainingDataResult": { "Input": { "Assets": [ { "GroundTruthManifest": { "S3Object": { "Bucket": "string", "Name": "string", "Version": "string" } } } ] }, "Output": { "Assets": [ { "GroundTruthManifest": { "S3Object": { "Bucket": "string", "Name": "string", "Version": "string" } } } ] } }, "TrainingEndTimestamp": number } ]}
Response ElementsIf the action is successful, the service sends back an HTTP 200 response.
The following data is returned in JSON format by the service.
NextToken (p. 300)
If the previous response was incomplete (because there is more results to retrieve), AmazonRekognition Custom Labels returns a pagination token in the response. You can use this paginationtoken to retrieve the next set of results.
Type: String
Length Constraints: Maximum length of 1024.ProjectVersionDescriptions (p. 300)
A list of model descriptions. The list is sorted by the creation date and time of the model versions, latestto earliest.
Type: Array of ProjectVersionDescription (p. 483) objects
ErrorsAccessDeniedException
You are not authorized to perform the action.
301
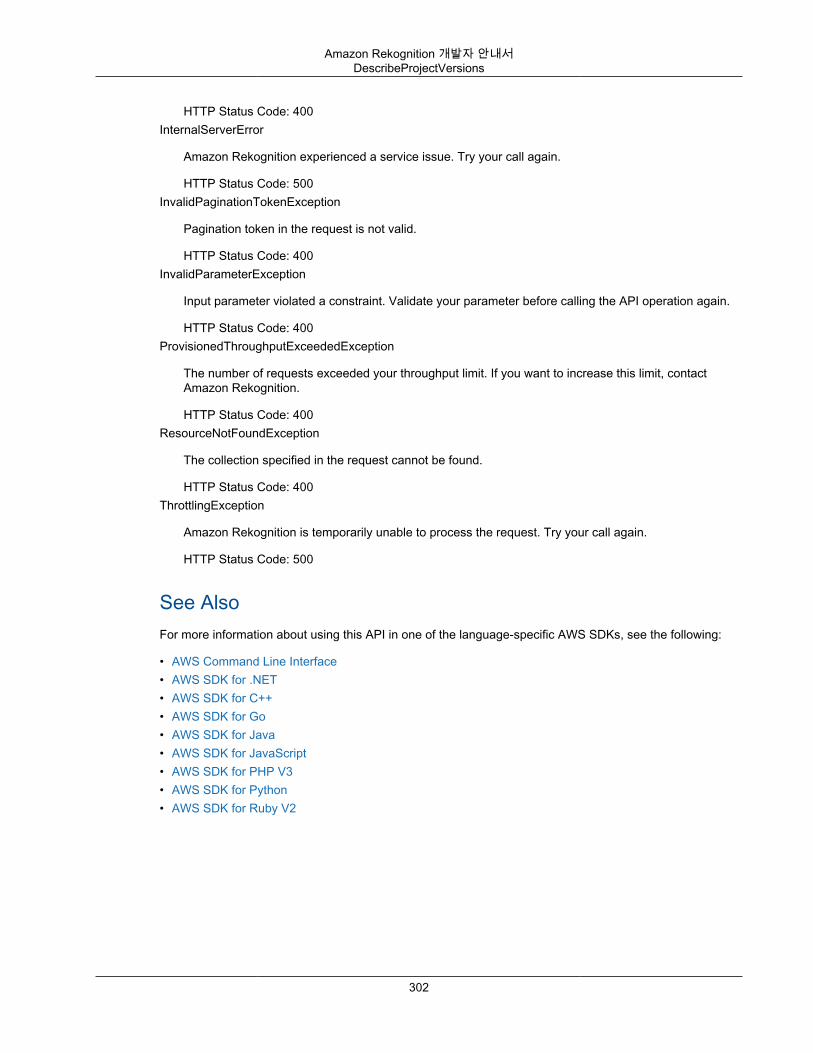
Amazon Rekognition 개발자 안내서DescribeProjectVersions
HTTP Status Code: 400InternalServerError
Amazon Rekognition experienced a service issue. Try your call again.
HTTP Status Code: 500InvalidPaginationTokenException
Pagination token in the request is not valid.
HTTP Status Code: 400InvalidParameterException
Input parameter violated a constraint. Validate your parameter before calling the API operation again.
HTTP Status Code: 400ProvisionedThroughputExceededException
The number of requests exceeded your throughput limit. If you want to increase this limit, contactAmazon Rekognition.
HTTP Status Code: 400ResourceNotFoundException
The collection specified in the request cannot be found.
HTTP Status Code: 400ThrottlingException
Amazon Rekognition is temporarily unable to process the request. Try your call again.
HTTP Status Code: 500
See AlsoFor more information about using this API in one of the language-specific AWS SDKs, see the following:
• AWS Command Line Interface• AWS SDK for .NET• AWS SDK for C++• AWS SDK for Go• AWS SDK for Java• AWS SDK for JavaScript• AWS SDK for PHP V3• AWS SDK for Python• AWS SDK for Ruby V2
302
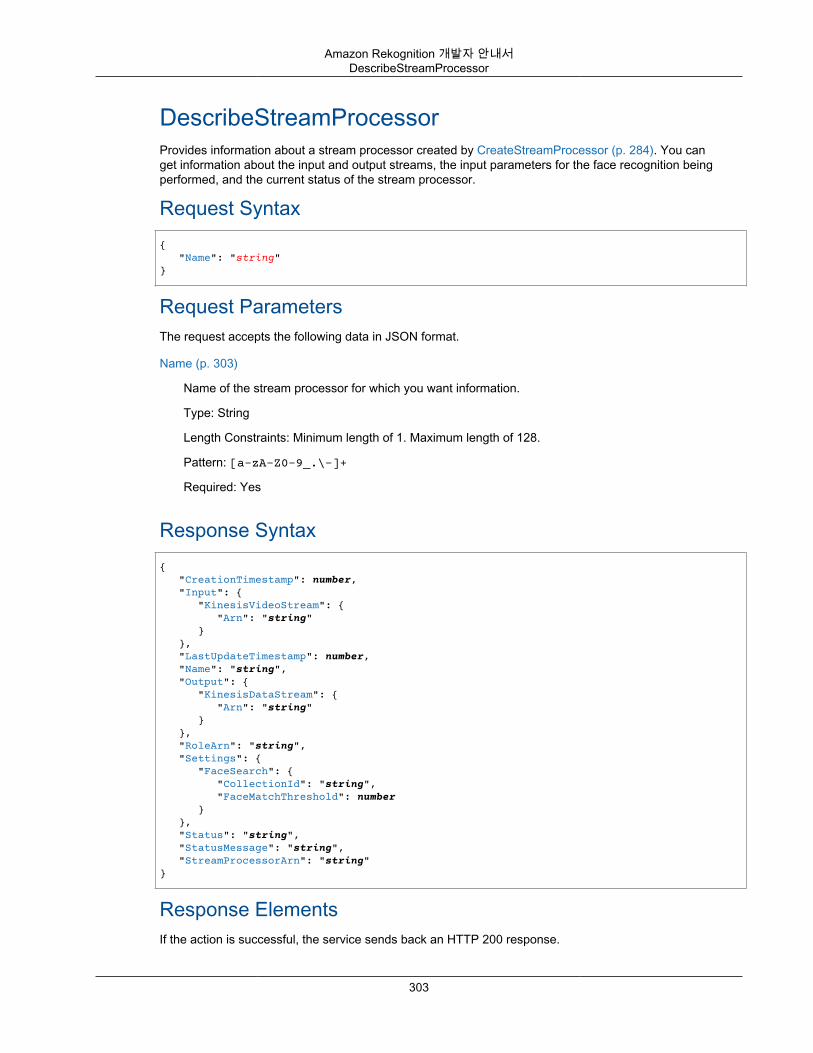
Amazon Rekognition 개발자 안내서DescribeStreamProcessor
DescribeStreamProcessorProvides information about a stream processor created by CreateStreamProcessor (p. 284). You canget information about the input and output streams, the input parameters for the face recognition beingperformed, and the current status of the stream processor.
Request Syntax{ "Name": "string"}
Request ParametersThe request accepts the following data in JSON format.
Name (p. 303)
Name of the stream processor for which you want information.
Type: String
Length Constraints: Minimum length of 1. Maximum length of 128.
Pattern: [a-zA-Z0-9_.\-]+
Required: Yes
Response Syntax{ "CreationTimestamp": number, "Input": { "KinesisVideoStream": { "Arn": "string" } }, "LastUpdateTimestamp": number, "Name": "string", "Output": { "KinesisDataStream": { "Arn": "string" } }, "RoleArn": "string", "Settings": { "FaceSearch": { "CollectionId": "string", "FaceMatchThreshold": number } }, "Status": "string", "StatusMessage": "string", "StreamProcessorArn": "string"}
Response ElementsIf the action is successful, the service sends back an HTTP 200 response.
303
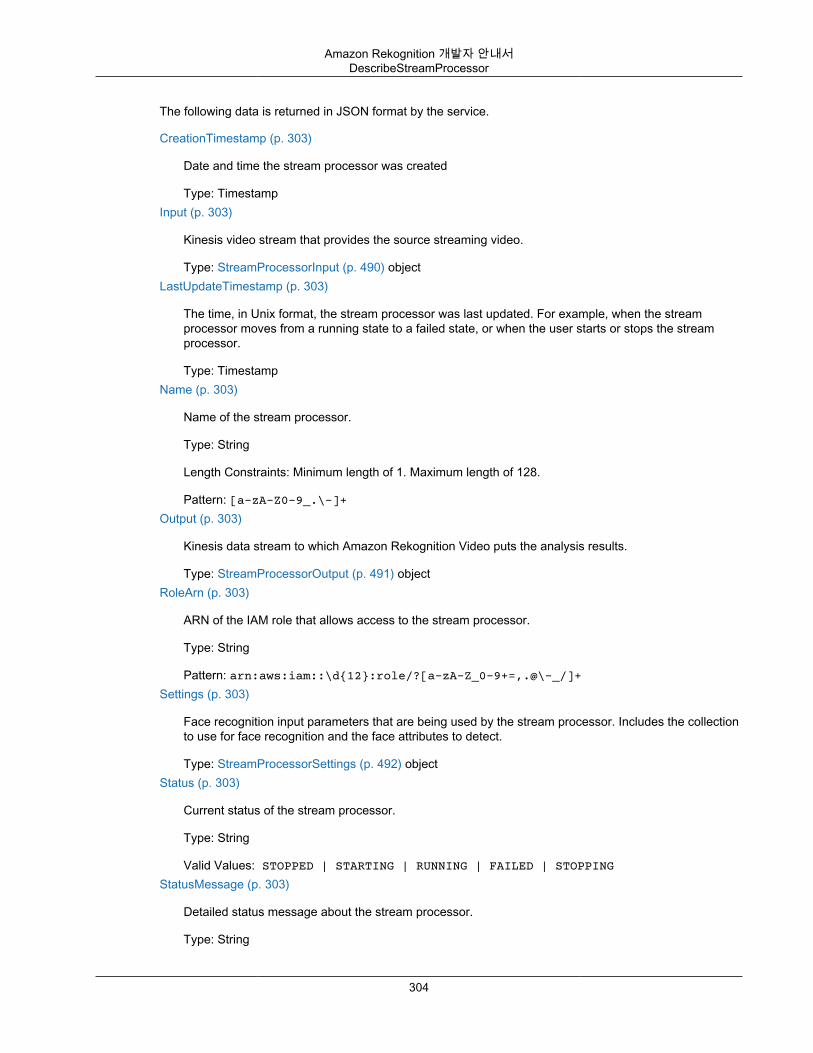
Amazon Rekognition 개발자 안내서DescribeStreamProcessor
The following data is returned in JSON format by the service.
CreationTimestamp (p. 303)
Date and time the stream processor was created
Type: TimestampInput (p. 303)
Kinesis video stream that provides the source streaming video.
Type: StreamProcessorInput (p. 490) objectLastUpdateTimestamp (p. 303)
The time, in Unix format, the stream processor was last updated. For example, when the streamprocessor moves from a running state to a failed state, or when the user starts or stops the streamprocessor.
Type: TimestampName (p. 303)
Name of the stream processor.
Type: String
Length Constraints: Minimum length of 1. Maximum length of 128.
Pattern: [a-zA-Z0-9_.\-]+Output (p. 303)
Kinesis data stream to which Amazon Rekognition Video puts the analysis results.
Type: StreamProcessorOutput (p. 491) objectRoleArn (p. 303)
ARN of the IAM role that allows access to the stream processor.
Type: String
Pattern: arn:aws:iam::\d{12}:role/?[a-zA-Z_0-9+=,.@\-_/]+Settings (p. 303)
Face recognition input parameters that are being used by the stream processor. Includes the collectionto use for face recognition and the face attributes to detect.
Type: StreamProcessorSettings (p. 492) objectStatus (p. 303)
Current status of the stream processor.
Type: String
Valid Values: STOPPED | STARTING | RUNNING | FAILED | STOPPINGStatusMessage (p. 303)
Detailed status message about the stream processor.
Type: String
304
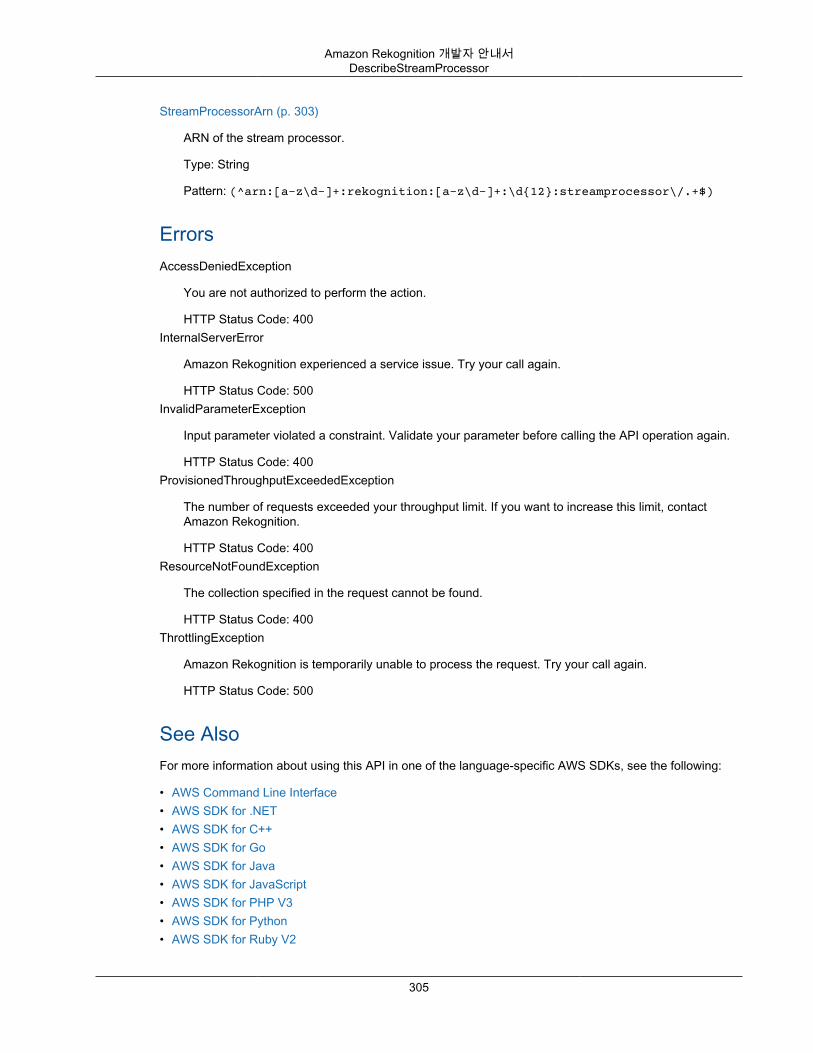
Amazon Rekognition 개발자 안내서DescribeStreamProcessor
StreamProcessorArn (p. 303)
ARN of the stream processor.
Type: String
Pattern: (^arn:[a-z\d-]+:rekognition:[a-z\d-]+:\d{12}:streamprocessor\/.+$)
ErrorsAccessDeniedException
You are not authorized to perform the action.
HTTP Status Code: 400InternalServerError
Amazon Rekognition experienced a service issue. Try your call again.
HTTP Status Code: 500InvalidParameterException
Input parameter violated a constraint. Validate your parameter before calling the API operation again.
HTTP Status Code: 400ProvisionedThroughputExceededException
The number of requests exceeded your throughput limit. If you want to increase this limit, contactAmazon Rekognition.
HTTP Status Code: 400ResourceNotFoundException
The collection specified in the request cannot be found.
HTTP Status Code: 400ThrottlingException
Amazon Rekognition is temporarily unable to process the request. Try your call again.
HTTP Status Code: 500
See AlsoFor more information about using this API in one of the language-specific AWS SDKs, see the following:
• AWS Command Line Interface• AWS SDK for .NET• AWS SDK for C++• AWS SDK for Go• AWS SDK for Java• AWS SDK for JavaScript• AWS SDK for PHP V3• AWS SDK for Python• AWS SDK for Ruby V2
305
Amazon Rekognition 개발자 안내서DescribeStreamProcessor
306
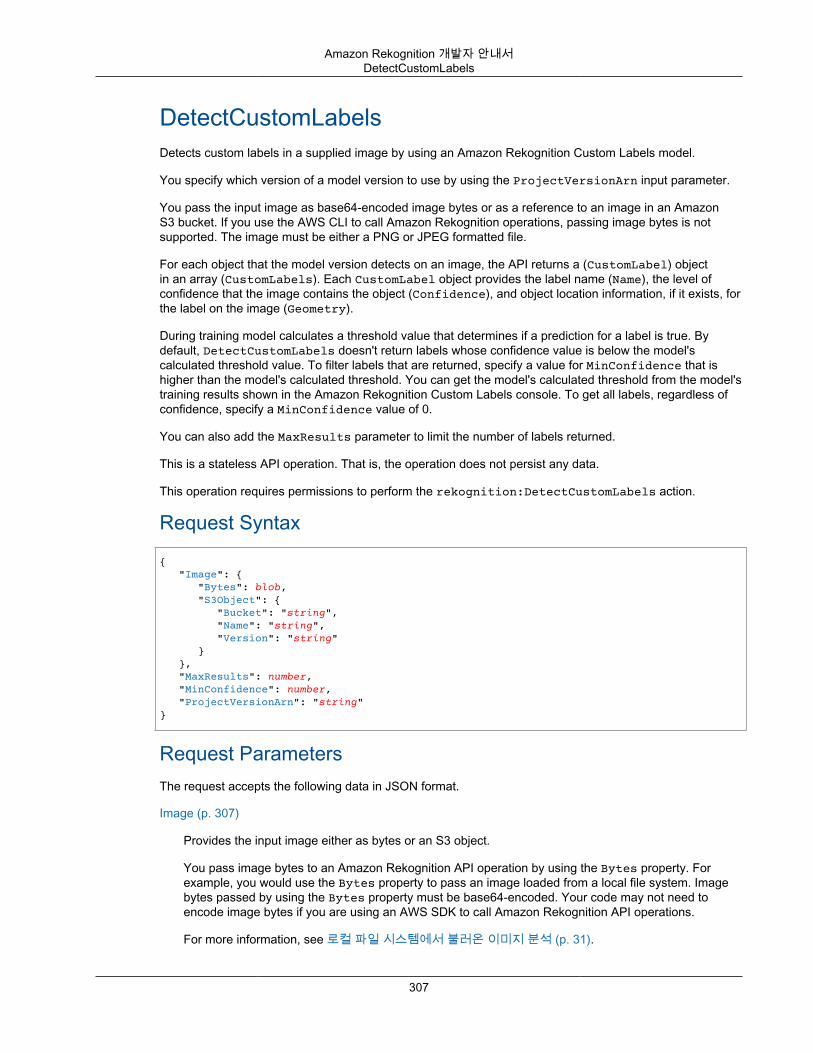
Amazon Rekognition 개발자 안내서DetectCustomLabels
DetectCustomLabelsDetects custom labels in a supplied image by using an Amazon Rekognition Custom Labels model.
You specify which version of a model version to use by using the ProjectVersionArn input parameter.
You pass the input image as base64-encoded image bytes or as a reference to an image in an AmazonS3 bucket. If you use the AWS CLI to call Amazon Rekognition operations, passing image bytes is notsupported. The image must be either a PNG or JPEG formatted file.
For each object that the model version detects on an image, the API returns a (CustomLabel) objectin an array (CustomLabels). Each CustomLabel object provides the label name (Name), the level ofconfidence that the image contains the object (Confidence), and object location information, if it exists, forthe label on the image (Geometry).
During training model calculates a threshold value that determines if a prediction for a label is true. Bydefault, DetectCustomLabels doesn't return labels whose confidence value is below the model'scalculated threshold value. To filter labels that are returned, specify a value for MinConfidence that ishigher than the model's calculated threshold. You can get the model's calculated threshold from the model'straining results shown in the Amazon Rekognition Custom Labels console. To get all labels, regardless ofconfidence, specify a MinConfidence value of 0.
You can also add the MaxResults parameter to limit the number of labels returned.
This is a stateless API operation. That is, the operation does not persist any data.
This operation requires permissions to perform the rekognition:DetectCustomLabels action.
Request Syntax
{ "Image": { "Bytes": blob, "S3Object": { "Bucket": "string", "Name": "string", "Version": "string" } }, "MaxResults": number, "MinConfidence": number, "ProjectVersionArn": "string"}
Request ParametersThe request accepts the following data in JSON format.
Image (p. 307)
Provides the input image either as bytes or an S3 object.
You pass image bytes to an Amazon Rekognition API operation by using the Bytes property. Forexample, you would use the Bytes property to pass an image loaded from a local file system. Imagebytes passed by using the Bytes property must be base64-encoded. Your code may not need toencode image bytes if you are using an AWS SDK to call Amazon Rekognition API operations.
For more information, see 로컬 파일 시스템에서 불러온 이미지 분석 (p. 31).
307
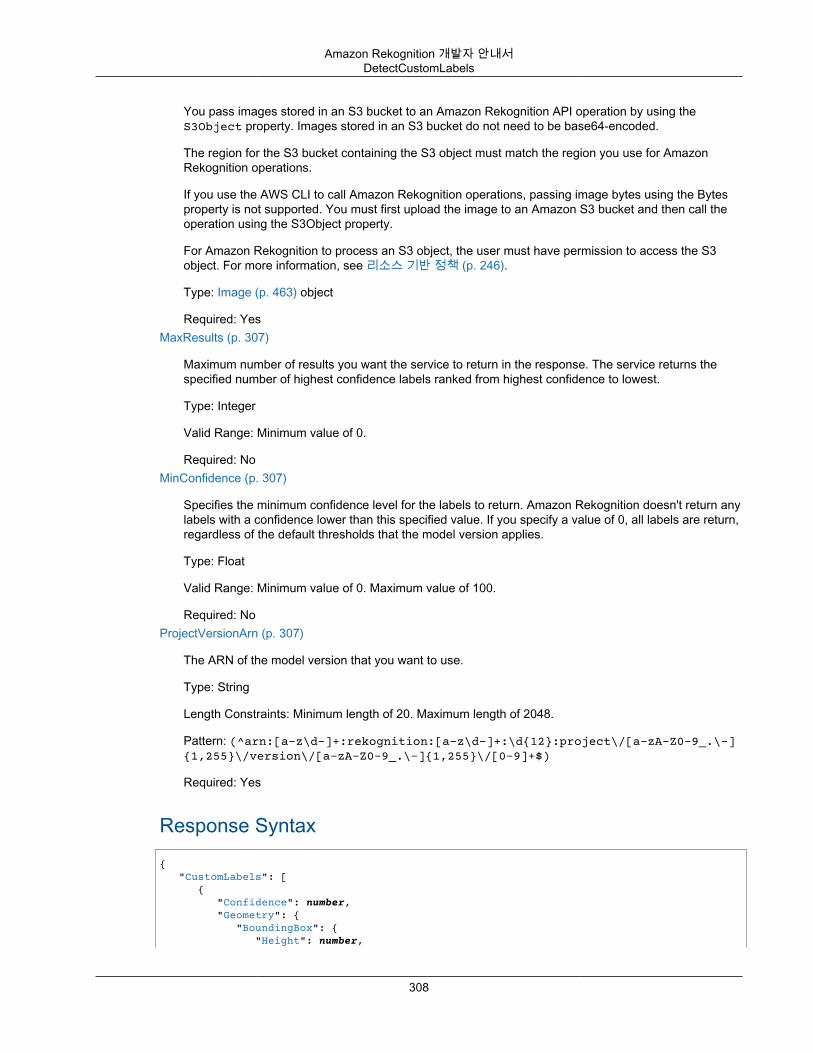
Amazon Rekognition 개발자 안내서DetectCustomLabels
You pass images stored in an S3 bucket to an Amazon Rekognition API operation by using theS3Object property. Images stored in an S3 bucket do not need to be base64-encoded.
The region for the S3 bucket containing the S3 object must match the region you use for AmazonRekognition operations.
If you use the AWS CLI to call Amazon Rekognition operations, passing image bytes using the Bytesproperty is not supported. You must first upload the image to an Amazon S3 bucket and then call theoperation using the S3Object property.
For Amazon Rekognition to process an S3 object, the user must have permission to access the S3object. For more information, see 리소스 기반 정책 (p. 246).
Type: Image (p. 463) object
Required: YesMaxResults (p. 307)
Maximum number of results you want the service to return in the response. The service returns thespecified number of highest confidence labels ranked from highest confidence to lowest.
Type: Integer
Valid Range: Minimum value of 0.
Required: NoMinConfidence (p. 307)
Specifies the minimum confidence level for the labels to return. Amazon Rekognition doesn't return anylabels with a confidence lower than this specified value. If you specify a value of 0, all labels are return,regardless of the default thresholds that the model version applies.
Type: Float
Valid Range: Minimum value of 0. Maximum value of 100.
Required: NoProjectVersionArn (p. 307)
The ARN of the model version that you want to use.
Type: String
Length Constraints: Minimum length of 20. Maximum length of 2048.
Pattern: (^arn:[a-z\d-]+:rekognition:[a-z\d-]+:\d{12}:project\/[a-zA-Z0-9_.\-]{1,255}\/version\/[a-zA-Z0-9_.\-]{1,255}\/[0-9]+$)
Required: Yes
Response Syntax{ "CustomLabels": [ { "Confidence": number, "Geometry": { "BoundingBox": { "Height": number,
308
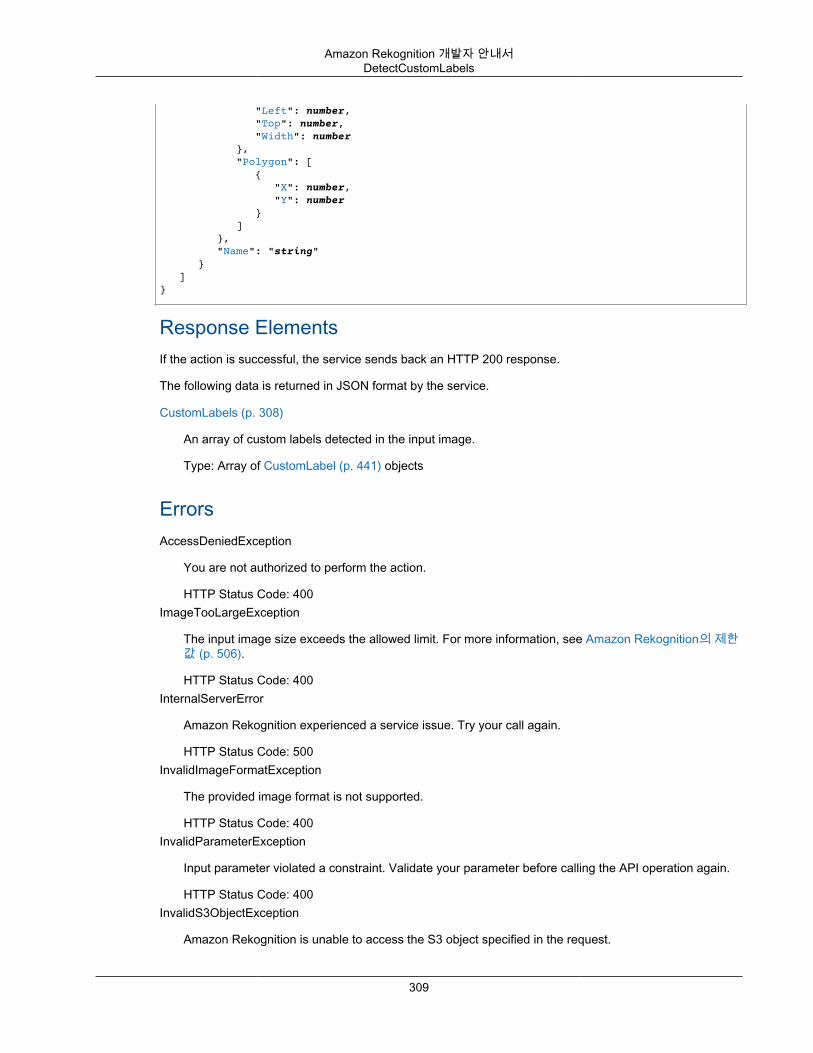
Amazon Rekognition 개발자 안내서DetectCustomLabels
"Left": number, "Top": number, "Width": number }, "Polygon": [ { "X": number, "Y": number } ] }, "Name": "string" } ]}
Response ElementsIf the action is successful, the service sends back an HTTP 200 response.
The following data is returned in JSON format by the service.
CustomLabels (p. 308)
An array of custom labels detected in the input image.
Type: Array of CustomLabel (p. 441) objects
ErrorsAccessDeniedException
You are not authorized to perform the action.
HTTP Status Code: 400ImageTooLargeException
The input image size exceeds the allowed limit. For more information, see Amazon Rekognition의 제한값 (p. 506).
HTTP Status Code: 400InternalServerError
Amazon Rekognition experienced a service issue. Try your call again.
HTTP Status Code: 500InvalidImageFormatException
The provided image format is not supported.
HTTP Status Code: 400InvalidParameterException
Input parameter violated a constraint. Validate your parameter before calling the API operation again.
HTTP Status Code: 400InvalidS3ObjectException
Amazon Rekognition is unable to access the S3 object specified in the request.
309
Amazon Rekognition 개발자 안내서DetectCustomLabels
HTTP Status Code: 400LimitExceededException
An Amazon Rekognition service limit was exceeded. For example, if you start too many AmazonRekognition Video jobs concurrently, calls to start operations (StartLabelDetection, for example)will raise a LimitExceededException exception (HTTP status code: 400) until the number ofconcurrently running jobs is below the Amazon Rekognition service limit.
HTTP Status Code: 400ProvisionedThroughputExceededException
The number of requests exceeded your throughput limit. If you want to increase this limit, contactAmazon Rekognition.
HTTP Status Code: 400ResourceNotFoundException
The collection specified in the request cannot be found.
HTTP Status Code: 400ResourceNotReadyException
The requested resource isn't ready. For example, this exception occurs when you callDetectCustomLabels with a model version that isn't deployed.
HTTP Status Code: 400ThrottlingException
Amazon Rekognition is temporarily unable to process the request. Try your call again.
HTTP Status Code: 500
See AlsoFor more information about using this API in one of the language-specific AWS SDKs, see the following:
• AWS Command Line Interface• AWS SDK for .NET• AWS SDK for C++• AWS SDK for Go• AWS SDK for Java• AWS SDK for JavaScript• AWS SDK for PHP V3• AWS SDK for Python• AWS SDK for Ruby V2
310
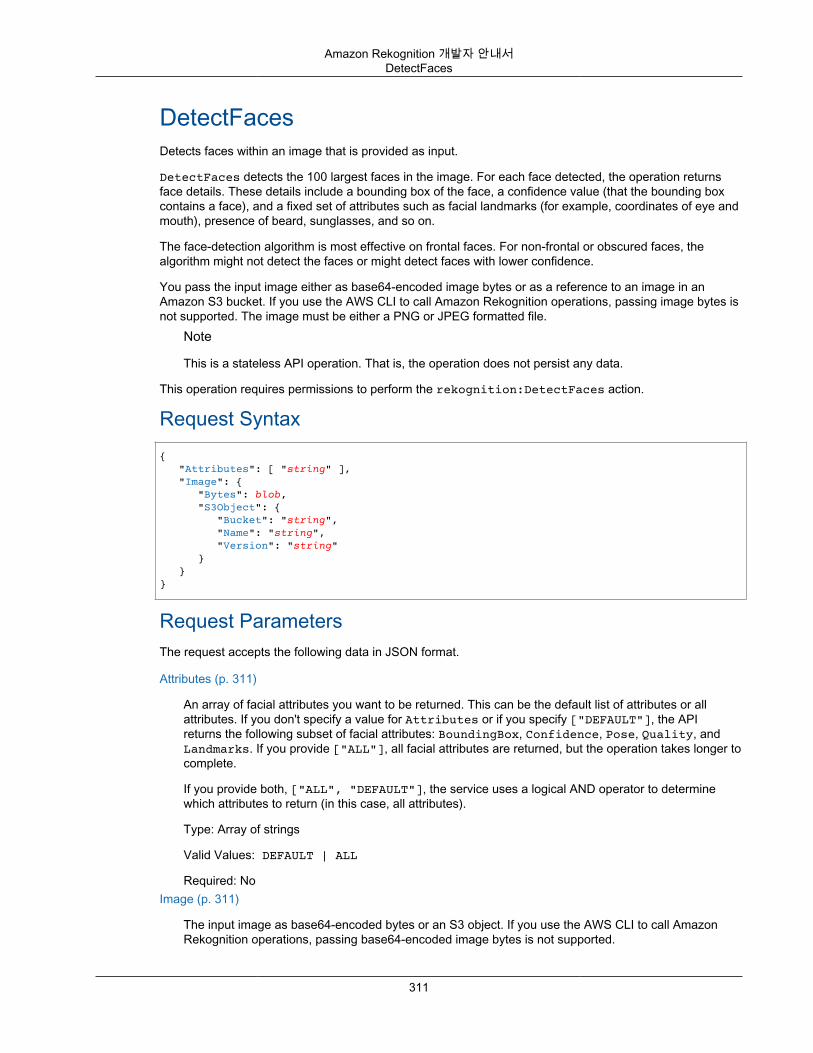
Amazon Rekognition 개발자 안내서DetectFaces
DetectFacesDetects faces within an image that is provided as input.
DetectFaces detects the 100 largest faces in the image. For each face detected, the operation returnsface details. These details include a bounding box of the face, a confidence value (that the bounding boxcontains a face), and a fixed set of attributes such as facial landmarks (for example, coordinates of eye andmouth), presence of beard, sunglasses, and so on.
The face-detection algorithm is most effective on frontal faces. For non-frontal or obscured faces, thealgorithm might not detect the faces or might detect faces with lower confidence.
You pass the input image either as base64-encoded image bytes or as a reference to an image in anAmazon S3 bucket. If you use the AWS CLI to call Amazon Rekognition operations, passing image bytes isnot supported. The image must be either a PNG or JPEG formatted file.
Note
This is a stateless API operation. That is, the operation does not persist any data.
This operation requires permissions to perform the rekognition:DetectFaces action.
Request Syntax{ "Attributes": [ "string" ], "Image": { "Bytes": blob, "S3Object": { "Bucket": "string", "Name": "string", "Version": "string" } }}
Request ParametersThe request accepts the following data in JSON format.
Attributes (p. 311)
An array of facial attributes you want to be returned. This can be the default list of attributes or allattributes. If you don't specify a value for Attributes or if you specify ["DEFAULT"], the APIreturns the following subset of facial attributes: BoundingBox, Confidence, Pose, Quality, andLandmarks. If you provide ["ALL"], all facial attributes are returned, but the operation takes longer tocomplete.
If you provide both, ["ALL", "DEFAULT"], the service uses a logical AND operator to determinewhich attributes to return (in this case, all attributes).
Type: Array of strings
Valid Values: DEFAULT | ALL
Required: NoImage (p. 311)
The input image as base64-encoded bytes or an S3 object. If you use the AWS CLI to call AmazonRekognition operations, passing base64-encoded image bytes is not supported.
311
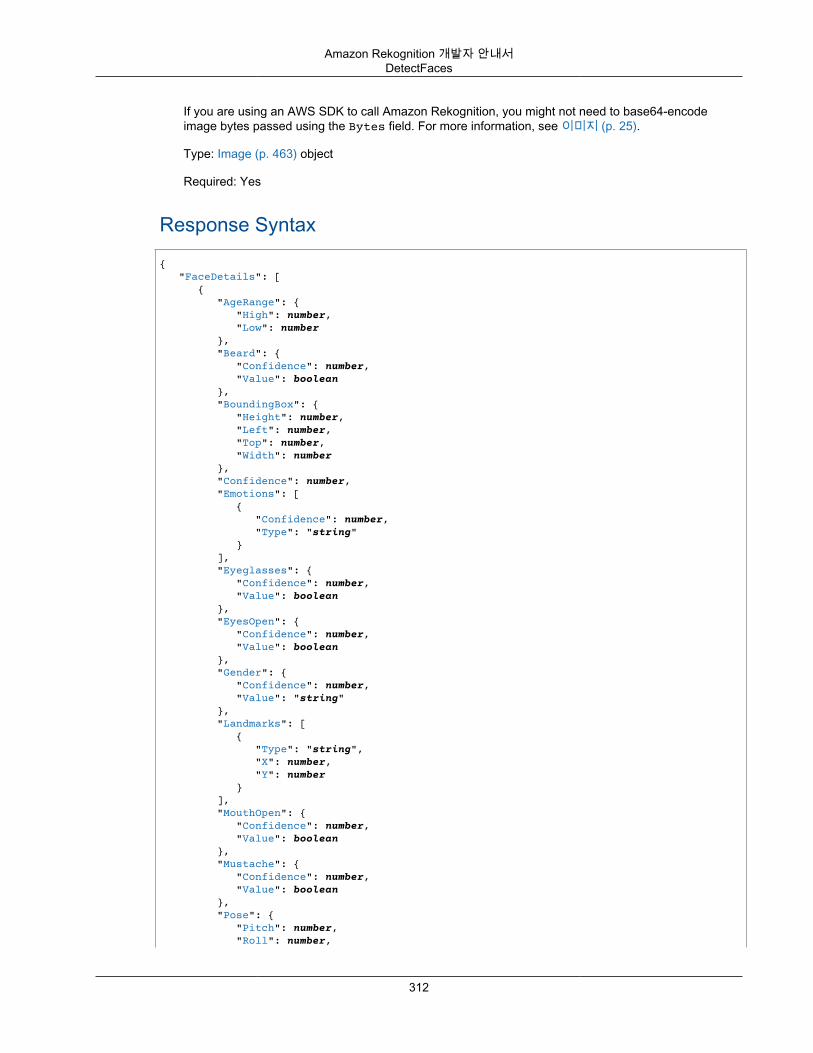
Amazon Rekognition 개발자 안내서DetectFaces
If you are using an AWS SDK to call Amazon Rekognition, you might not need to base64-encodeimage bytes passed using the Bytes field. For more information, see 이미지 (p. 25).
Type: Image (p. 463) object
Required: Yes
Response Syntax
{ "FaceDetails": [ { "AgeRange": { "High": number, "Low": number }, "Beard": { "Confidence": number, "Value": boolean }, "BoundingBox": { "Height": number, "Left": number, "Top": number, "Width": number }, "Confidence": number, "Emotions": [ { "Confidence": number, "Type": "string" } ], "Eyeglasses": { "Confidence": number, "Value": boolean }, "EyesOpen": { "Confidence": number, "Value": boolean }, "Gender": { "Confidence": number, "Value": "string" }, "Landmarks": [ { "Type": "string", "X": number, "Y": number } ], "MouthOpen": { "Confidence": number, "Value": boolean }, "Mustache": { "Confidence": number, "Value": boolean }, "Pose": { "Pitch": number, "Roll": number,
312
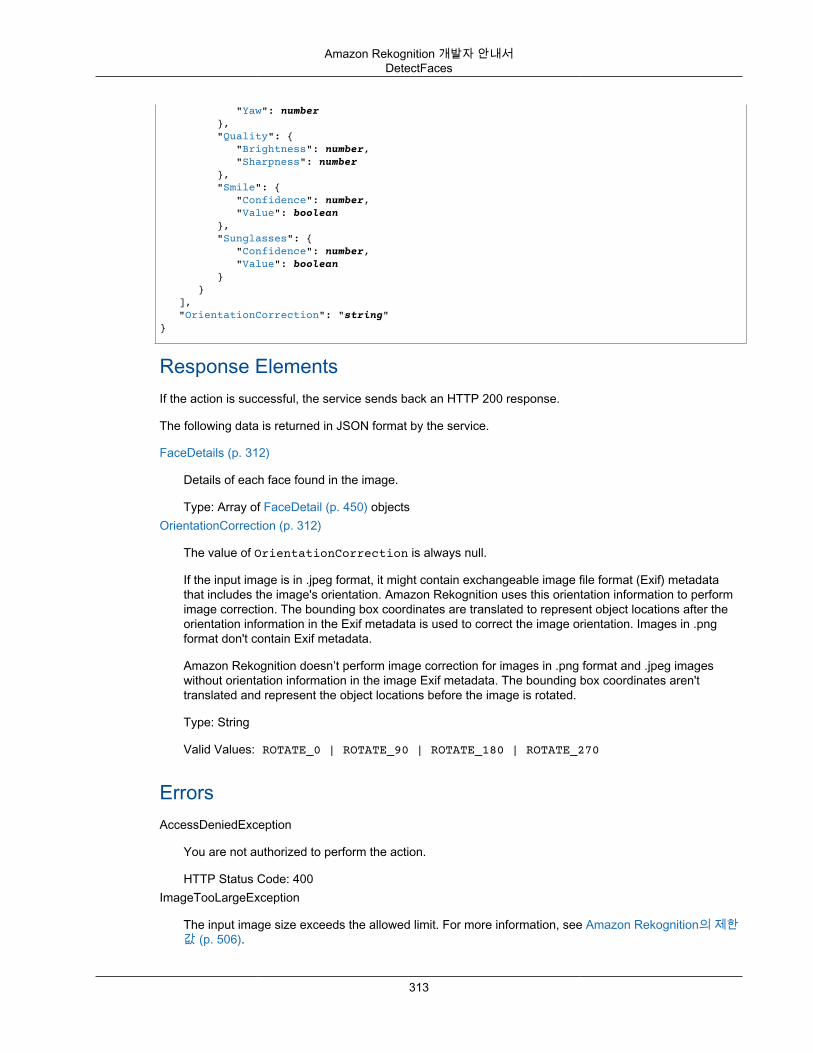
Amazon Rekognition 개발자 안내서DetectFaces
"Yaw": number }, "Quality": { "Brightness": number, "Sharpness": number }, "Smile": { "Confidence": number, "Value": boolean }, "Sunglasses": { "Confidence": number, "Value": boolean } } ], "OrientationCorrection": "string"}
Response ElementsIf the action is successful, the service sends back an HTTP 200 response.
The following data is returned in JSON format by the service.
FaceDetails (p. 312)
Details of each face found in the image.
Type: Array of FaceDetail (p. 450) objectsOrientationCorrection (p. 312)
The value of OrientationCorrection is always null.
If the input image is in .jpeg format, it might contain exchangeable image file format (Exif) metadatathat includes the image's orientation. Amazon Rekognition uses this orientation information to performimage correction. The bounding box coordinates are translated to represent object locations after theorientation information in the Exif metadata is used to correct the image orientation. Images in .pngformat don't contain Exif metadata.
Amazon Rekognition doesn’t perform image correction for images in .png format and .jpeg imageswithout orientation information in the image Exif metadata. The bounding box coordinates aren'ttranslated and represent the object locations before the image is rotated.
Type: String
Valid Values: ROTATE_0 | ROTATE_90 | ROTATE_180 | ROTATE_270
ErrorsAccessDeniedException
You are not authorized to perform the action.
HTTP Status Code: 400ImageTooLargeException
The input image size exceeds the allowed limit. For more information, see Amazon Rekognition의 제한값 (p. 506).
313
Amazon Rekognition 개발자 안내서DetectFaces
HTTP Status Code: 400InternalServerError
Amazon Rekognition experienced a service issue. Try your call again.
HTTP Status Code: 500InvalidImageFormatException
The provided image format is not supported.
HTTP Status Code: 400InvalidParameterException
Input parameter violated a constraint. Validate your parameter before calling the API operation again.
HTTP Status Code: 400InvalidS3ObjectException
Amazon Rekognition is unable to access the S3 object specified in the request.
HTTP Status Code: 400ProvisionedThroughputExceededException
The number of requests exceeded your throughput limit. If you want to increase this limit, contactAmazon Rekognition.
HTTP Status Code: 400ThrottlingException
Amazon Rekognition is temporarily unable to process the request. Try your call again.
HTTP Status Code: 500
See AlsoFor more information about using this API in one of the language-specific AWS SDKs, see the following:
• AWS Command Line Interface• AWS SDK for .NET• AWS SDK for C++• AWS SDK for Go• AWS SDK for Java• AWS SDK for JavaScript• AWS SDK for PHP V3• AWS SDK for Python• AWS SDK for Ruby V2
314
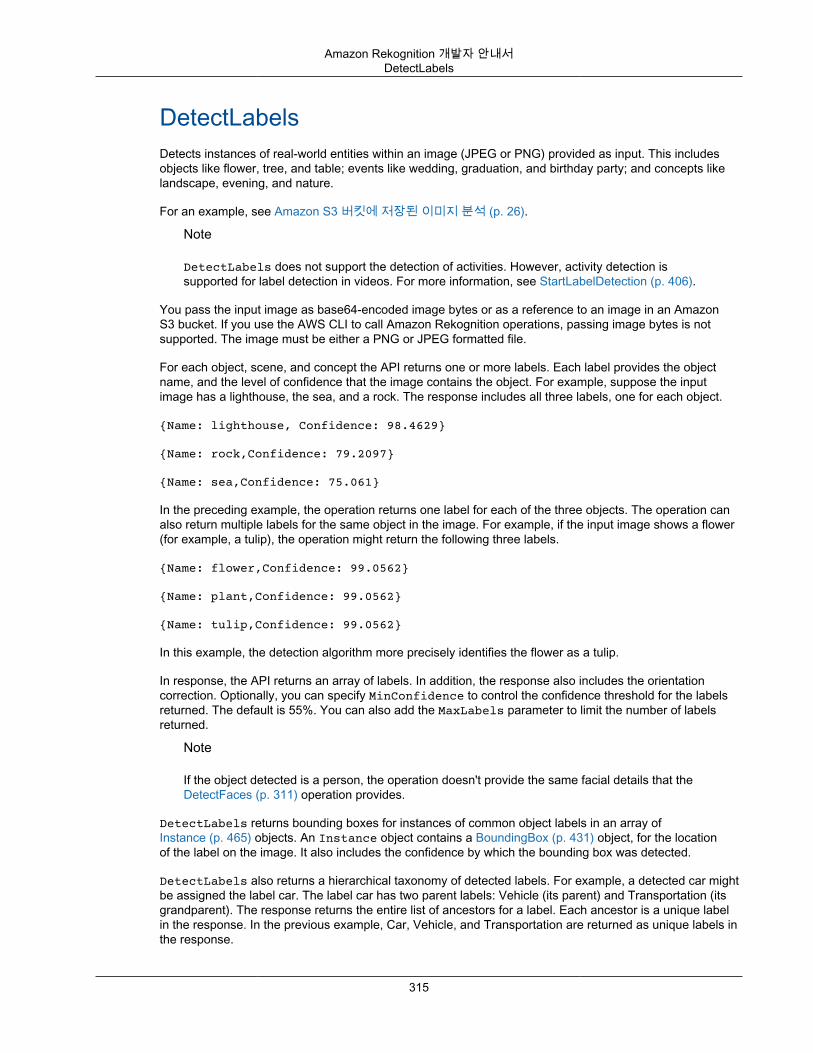
Amazon Rekognition 개발자 안내서DetectLabels
DetectLabelsDetects instances of real-world entities within an image (JPEG or PNG) provided as input. This includesobjects like flower, tree, and table; events like wedding, graduation, and birthday party; and concepts likelandscape, evening, and nature.
For an example, see Amazon S3 버킷에 저장된 이미지 분석 (p. 26).
Note
DetectLabels does not support the detection of activities. However, activity detection issupported for label detection in videos. For more information, see StartLabelDetection (p. 406).
You pass the input image as base64-encoded image bytes or as a reference to an image in an AmazonS3 bucket. If you use the AWS CLI to call Amazon Rekognition operations, passing image bytes is notsupported. The image must be either a PNG or JPEG formatted file.
For each object, scene, and concept the API returns one or more labels. Each label provides the objectname, and the level of confidence that the image contains the object. For example, suppose the inputimage has a lighthouse, the sea, and a rock. The response includes all three labels, one for each object.
{Name: lighthouse, Confidence: 98.4629}
{Name: rock,Confidence: 79.2097}
{Name: sea,Confidence: 75.061}
In the preceding example, the operation returns one label for each of the three objects. The operation canalso return multiple labels for the same object in the image. For example, if the input image shows a flower(for example, a tulip), the operation might return the following three labels.
{Name: flower,Confidence: 99.0562}
{Name: plant,Confidence: 99.0562}
{Name: tulip,Confidence: 99.0562}
In this example, the detection algorithm more precisely identifies the flower as a tulip.
In response, the API returns an array of labels. In addition, the response also includes the orientationcorrection. Optionally, you can specify MinConfidence to control the confidence threshold for the labelsreturned. The default is 55%. You can also add the MaxLabels parameter to limit the number of labelsreturned.
Note
If the object detected is a person, the operation doesn't provide the same facial details that theDetectFaces (p. 311) operation provides.
DetectLabels returns bounding boxes for instances of common object labels in an array ofInstance (p. 465) objects. An Instance object contains a BoundingBox (p. 431) object, for the locationof the label on the image. It also includes the confidence by which the bounding box was detected.
DetectLabels also returns a hierarchical taxonomy of detected labels. For example, a detected car mightbe assigned the label car. The label car has two parent labels: Vehicle (its parent) and Transportation (itsgrandparent). The response returns the entire list of ancestors for a label. Each ancestor is a unique labelin the response. In the previous example, Car, Vehicle, and Transportation are returned as unique labels inthe response.
315
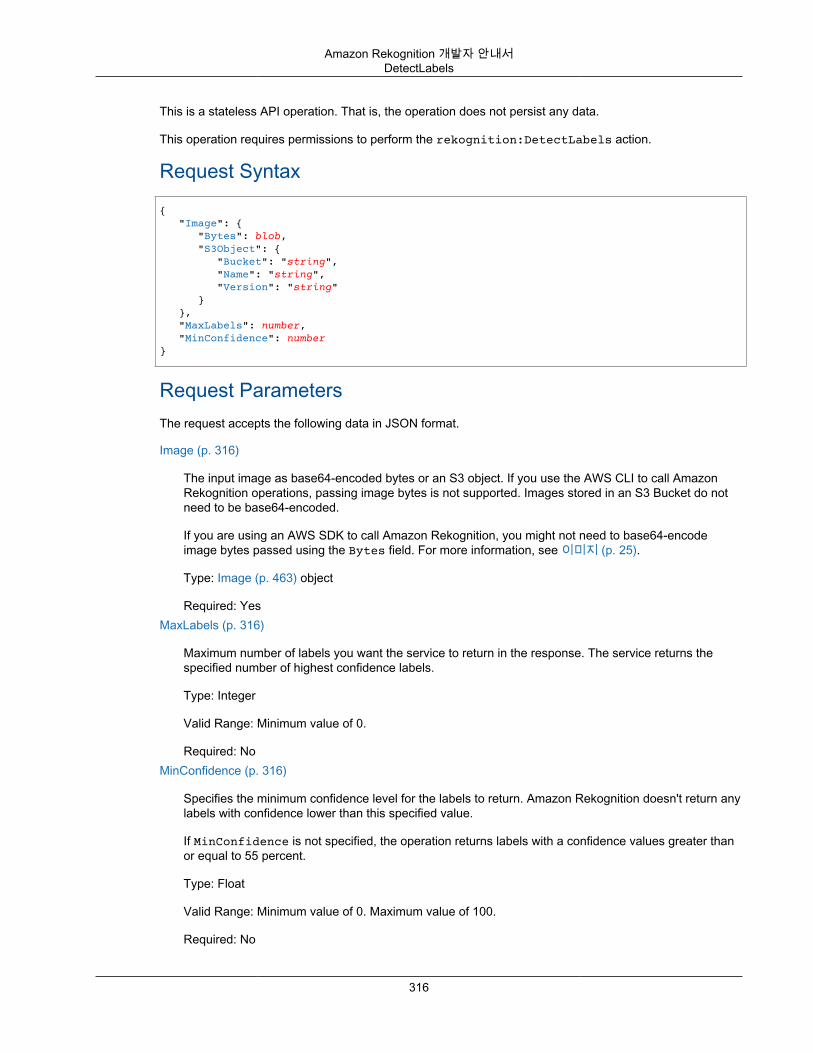
Amazon Rekognition 개발자 안내서DetectLabels
This is a stateless API operation. That is, the operation does not persist any data.
This operation requires permissions to perform the rekognition:DetectLabels action.
Request Syntax
{ "Image": { "Bytes": blob, "S3Object": { "Bucket": "string", "Name": "string", "Version": "string" } }, "MaxLabels": number, "MinConfidence": number}
Request ParametersThe request accepts the following data in JSON format.
Image (p. 316)
The input image as base64-encoded bytes or an S3 object. If you use the AWS CLI to call AmazonRekognition operations, passing image bytes is not supported. Images stored in an S3 Bucket do notneed to be base64-encoded.
If you are using an AWS SDK to call Amazon Rekognition, you might not need to base64-encodeimage bytes passed using the Bytes field. For more information, see 이미지 (p. 25).
Type: Image (p. 463) object
Required: YesMaxLabels (p. 316)
Maximum number of labels you want the service to return in the response. The service returns thespecified number of highest confidence labels.
Type: Integer
Valid Range: Minimum value of 0.
Required: NoMinConfidence (p. 316)
Specifies the minimum confidence level for the labels to return. Amazon Rekognition doesn't return anylabels with confidence lower than this specified value.
If MinConfidence is not specified, the operation returns labels with a confidence values greater thanor equal to 55 percent.
Type: Float
Valid Range: Minimum value of 0. Maximum value of 100.
Required: No
316
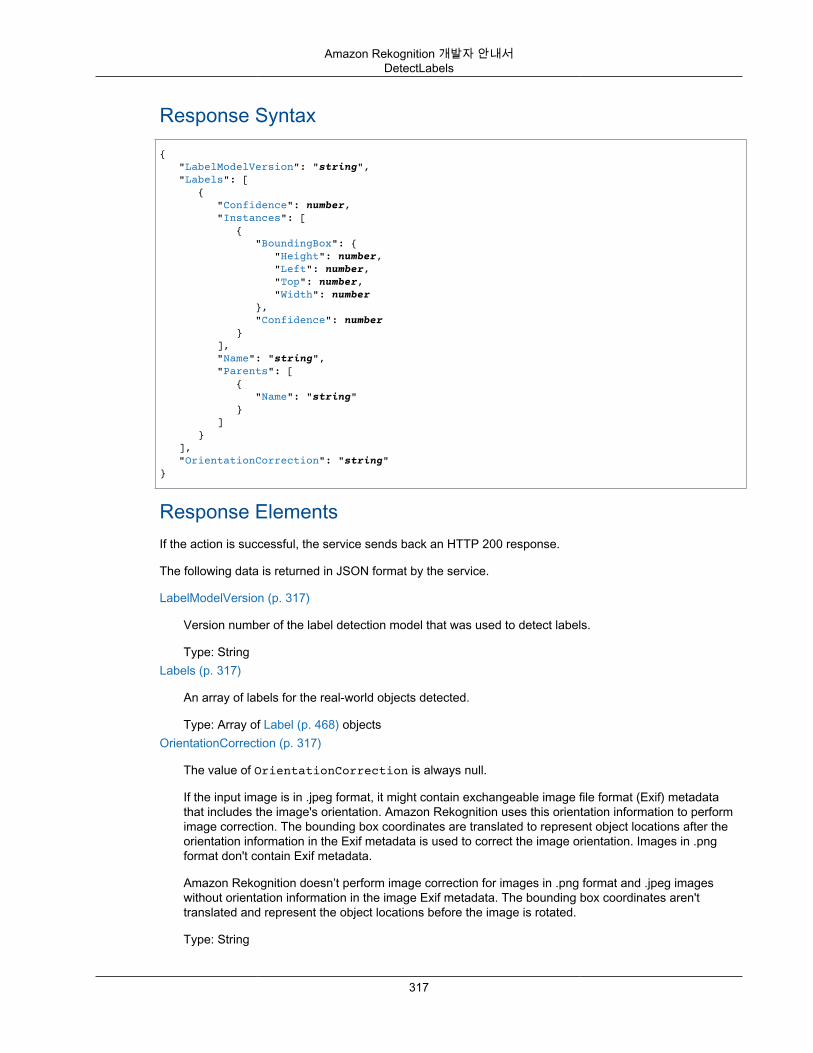
Amazon Rekognition 개발자 안내서DetectLabels
Response Syntax{ "LabelModelVersion": "string", "Labels": [ { "Confidence": number, "Instances": [ { "BoundingBox": { "Height": number, "Left": number, "Top": number, "Width": number }, "Confidence": number } ], "Name": "string", "Parents": [ { "Name": "string" } ] } ], "OrientationCorrection": "string"}
Response ElementsIf the action is successful, the service sends back an HTTP 200 response.
The following data is returned in JSON format by the service.
LabelModelVersion (p. 317)
Version number of the label detection model that was used to detect labels.
Type: StringLabels (p. 317)
An array of labels for the real-world objects detected.
Type: Array of Label (p. 468) objectsOrientationCorrection (p. 317)
The value of OrientationCorrection is always null.
If the input image is in .jpeg format, it might contain exchangeable image file format (Exif) metadatathat includes the image's orientation. Amazon Rekognition uses this orientation information to performimage correction. The bounding box coordinates are translated to represent object locations after theorientation information in the Exif metadata is used to correct the image orientation. Images in .pngformat don't contain Exif metadata.
Amazon Rekognition doesn’t perform image correction for images in .png format and .jpeg imageswithout orientation information in the image Exif metadata. The bounding box coordinates aren'ttranslated and represent the object locations before the image is rotated.
Type: String
317

Amazon Rekognition 개발자 안내서DetectLabels
Valid Values: ROTATE_0 | ROTATE_90 | ROTATE_180 | ROTATE_270
ErrorsAccessDeniedException
You are not authorized to perform the action.
HTTP Status Code: 400ImageTooLargeException
The input image size exceeds the allowed limit. For more information, see Amazon Rekognition의 제한값 (p. 506).
HTTP Status Code: 400InternalServerError
Amazon Rekognition experienced a service issue. Try your call again.
HTTP Status Code: 500InvalidImageFormatException
The provided image format is not supported.
HTTP Status Code: 400InvalidParameterException
Input parameter violated a constraint. Validate your parameter before calling the API operation again.
HTTP Status Code: 400InvalidS3ObjectException
Amazon Rekognition is unable to access the S3 object specified in the request.
HTTP Status Code: 400ProvisionedThroughputExceededException
The number of requests exceeded your throughput limit. If you want to increase this limit, contactAmazon Rekognition.
HTTP Status Code: 400ThrottlingException
Amazon Rekognition is temporarily unable to process the request. Try your call again.
HTTP Status Code: 500
See AlsoFor more information about using this API in one of the language-specific AWS SDKs, see the following:
• AWS Command Line Interface• AWS SDK for .NET• AWS SDK for C++• AWS SDK for Go
318
Amazon Rekognition 개발자 안내서DetectLabels
• AWS SDK for Java• AWS SDK for JavaScript• AWS SDK for PHP V3• AWS SDK for Python• AWS SDK for Ruby V2
319
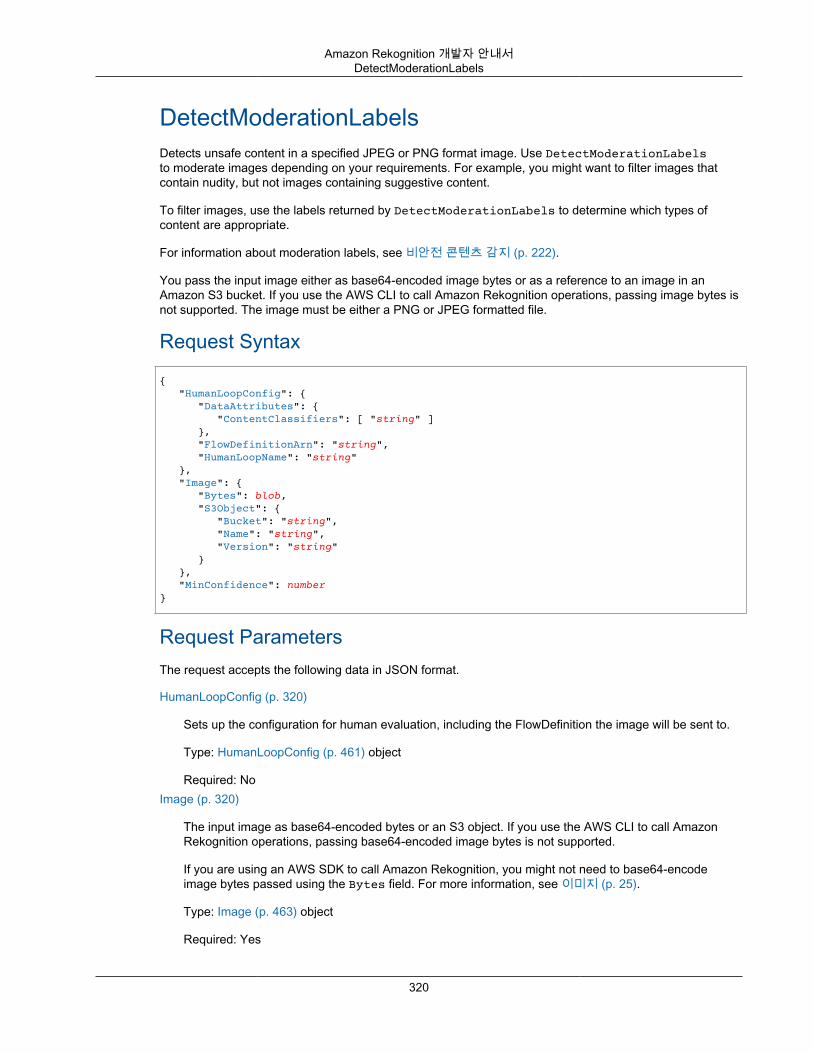
Amazon Rekognition 개발자 안내서DetectModerationLabels
DetectModerationLabelsDetects unsafe content in a specified JPEG or PNG format image. Use DetectModerationLabelsto moderate images depending on your requirements. For example, you might want to filter images thatcontain nudity, but not images containing suggestive content.
To filter images, use the labels returned by DetectModerationLabels to determine which types ofcontent are appropriate.
For information about moderation labels, see 비안전 콘텐츠 감지 (p. 222).
You pass the input image either as base64-encoded image bytes or as a reference to an image in anAmazon S3 bucket. If you use the AWS CLI to call Amazon Rekognition operations, passing image bytes isnot supported. The image must be either a PNG or JPEG formatted file.
Request Syntax
{ "HumanLoopConfig": { "DataAttributes": { "ContentClassifiers": [ "string" ] }, "FlowDefinitionArn": "string", "HumanLoopName": "string" }, "Image": { "Bytes": blob, "S3Object": { "Bucket": "string", "Name": "string", "Version": "string" } }, "MinConfidence": number}
Request ParametersThe request accepts the following data in JSON format.
HumanLoopConfig (p. 320)
Sets up the configuration for human evaluation, including the FlowDefinition the image will be sent to.
Type: HumanLoopConfig (p. 461) object
Required: NoImage (p. 320)
The input image as base64-encoded bytes or an S3 object. If you use the AWS CLI to call AmazonRekognition operations, passing base64-encoded image bytes is not supported.
If you are using an AWS SDK to call Amazon Rekognition, you might not need to base64-encodeimage bytes passed using the Bytes field. For more information, see 이미지 (p. 25).
Type: Image (p. 463) object
Required: Yes
320
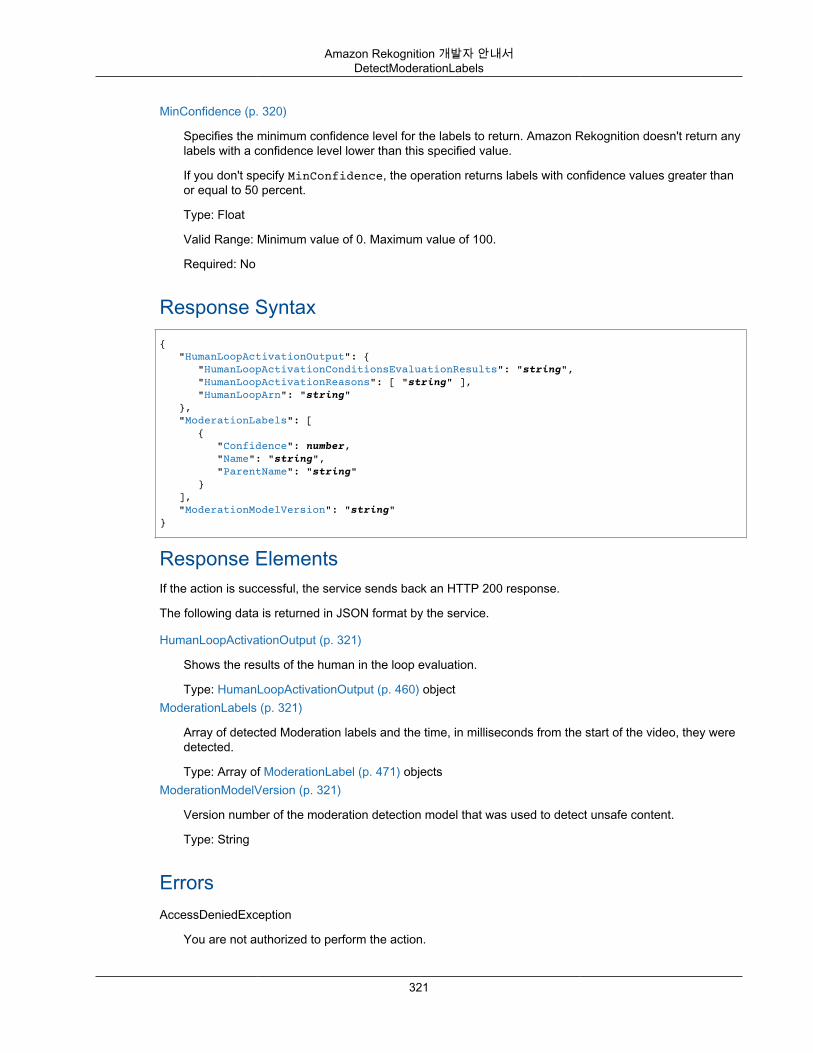
Amazon Rekognition 개발자 안내서DetectModerationLabels
MinConfidence (p. 320)
Specifies the minimum confidence level for the labels to return. Amazon Rekognition doesn't return anylabels with a confidence level lower than this specified value.
If you don't specify MinConfidence, the operation returns labels with confidence values greater thanor equal to 50 percent.
Type: Float
Valid Range: Minimum value of 0. Maximum value of 100.
Required: No
Response Syntax{ "HumanLoopActivationOutput": { "HumanLoopActivationConditionsEvaluationResults": "string", "HumanLoopActivationReasons": [ "string" ], "HumanLoopArn": "string" }, "ModerationLabels": [ { "Confidence": number, "Name": "string", "ParentName": "string" } ], "ModerationModelVersion": "string"}
Response ElementsIf the action is successful, the service sends back an HTTP 200 response.
The following data is returned in JSON format by the service.
HumanLoopActivationOutput (p. 321)
Shows the results of the human in the loop evaluation.
Type: HumanLoopActivationOutput (p. 460) objectModerationLabels (p. 321)
Array of detected Moderation labels and the time, in milliseconds from the start of the video, they weredetected.
Type: Array of ModerationLabel (p. 471) objectsModerationModelVersion (p. 321)
Version number of the moderation detection model that was used to detect unsafe content.
Type: String
ErrorsAccessDeniedException
You are not authorized to perform the action.
321
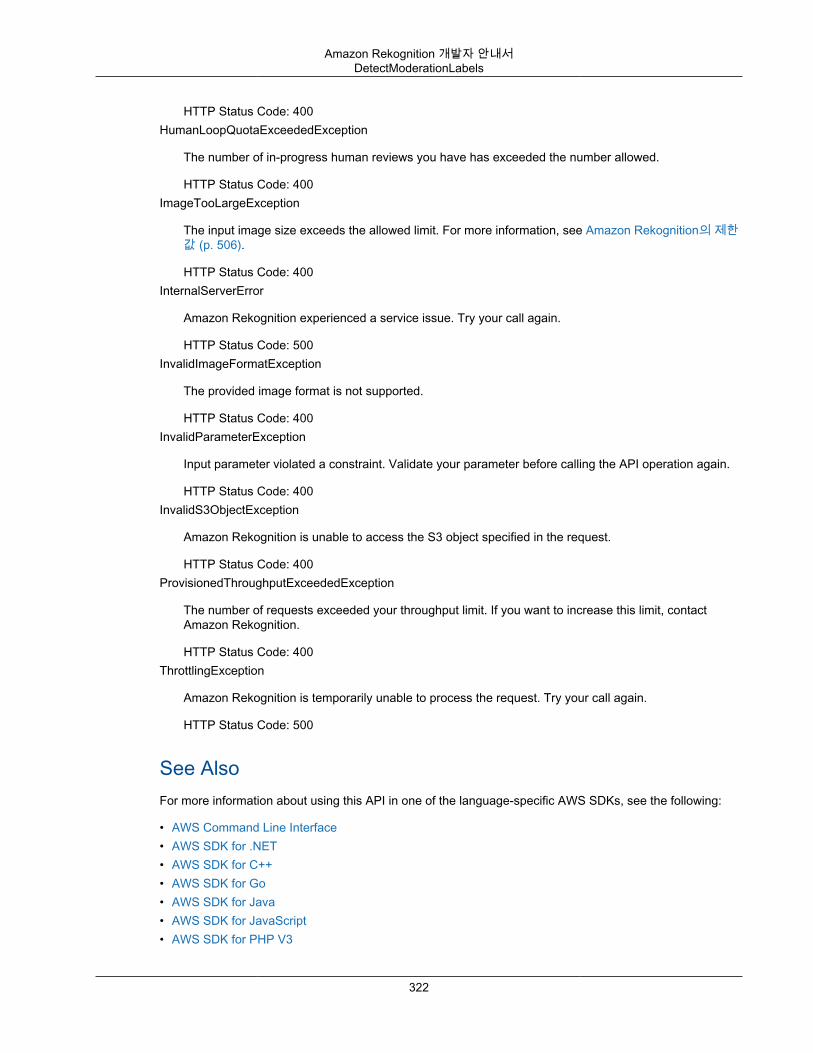
Amazon Rekognition 개발자 안내서DetectModerationLabels
HTTP Status Code: 400HumanLoopQuotaExceededException
The number of in-progress human reviews you have has exceeded the number allowed.
HTTP Status Code: 400ImageTooLargeException
The input image size exceeds the allowed limit. For more information, see Amazon Rekognition의 제한값 (p. 506).
HTTP Status Code: 400InternalServerError
Amazon Rekognition experienced a service issue. Try your call again.
HTTP Status Code: 500InvalidImageFormatException
The provided image format is not supported.
HTTP Status Code: 400InvalidParameterException
Input parameter violated a constraint. Validate your parameter before calling the API operation again.
HTTP Status Code: 400InvalidS3ObjectException
Amazon Rekognition is unable to access the S3 object specified in the request.
HTTP Status Code: 400ProvisionedThroughputExceededException
The number of requests exceeded your throughput limit. If you want to increase this limit, contactAmazon Rekognition.
HTTP Status Code: 400ThrottlingException
Amazon Rekognition is temporarily unable to process the request. Try your call again.
HTTP Status Code: 500
See AlsoFor more information about using this API in one of the language-specific AWS SDKs, see the following:
• AWS Command Line Interface• AWS SDK for .NET• AWS SDK for C++• AWS SDK for Go• AWS SDK for Java• AWS SDK for JavaScript• AWS SDK for PHP V3
322

Amazon Rekognition 개발자 안내서DetectModerationLabels
• AWS SDK for Python• AWS SDK for Ruby V2
323
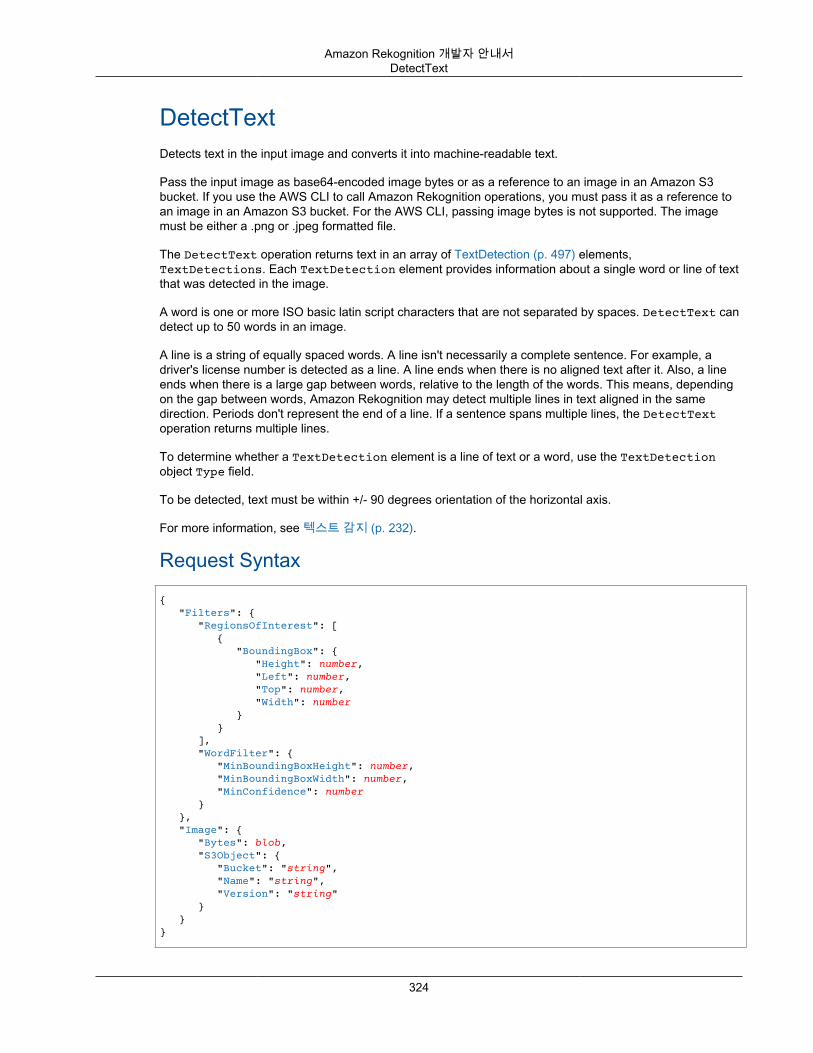
Amazon Rekognition 개발자 안내서DetectText
DetectTextDetects text in the input image and converts it into machine-readable text.
Pass the input image as base64-encoded image bytes or as a reference to an image in an Amazon S3bucket. If you use the AWS CLI to call Amazon Rekognition operations, you must pass it as a reference toan image in an Amazon S3 bucket. For the AWS CLI, passing image bytes is not supported. The imagemust be either a .png or .jpeg formatted file.
The DetectText operation returns text in an array of TextDetection (p. 497) elements,TextDetections. Each TextDetection element provides information about a single word or line of textthat was detected in the image.
A word is one or more ISO basic latin script characters that are not separated by spaces. DetectText candetect up to 50 words in an image.
A line is a string of equally spaced words. A line isn't necessarily a complete sentence. For example, adriver's license number is detected as a line. A line ends when there is no aligned text after it. Also, a lineends when there is a large gap between words, relative to the length of the words. This means, dependingon the gap between words, Amazon Rekognition may detect multiple lines in text aligned in the samedirection. Periods don't represent the end of a line. If a sentence spans multiple lines, the DetectTextoperation returns multiple lines.
To determine whether a TextDetection element is a line of text or a word, use the TextDetectionobject Type field.
To be detected, text must be within +/- 90 degrees orientation of the horizontal axis.
For more information, see 텍스트 감지 (p. 232).
Request Syntax
{ "Filters": { "RegionsOfInterest": [ { "BoundingBox": { "Height": number, "Left": number, "Top": number, "Width": number } } ], "WordFilter": { "MinBoundingBoxHeight": number, "MinBoundingBoxWidth": number, "MinConfidence": number } }, "Image": { "Bytes": blob, "S3Object": { "Bucket": "string", "Name": "string", "Version": "string" } }}
324

Amazon Rekognition 개발자 안내서DetectText
Request ParametersThe request accepts the following data in JSON format.
Filters (p. 324)
Optional parameters that let you set the criteria that the text must meet to be included in your response.
Type: DetectTextFilters (p. 443) object
Required: NoImage (p. 324)
The input image as base64-encoded bytes or an Amazon S3 object. If you use the AWS CLI to callAmazon Rekognition operations, you can't pass image bytes.
If you are using an AWS SDK to call Amazon Rekognition, you might not need to base64-encodeimage bytes passed using the Bytes field. For more information, see 이미지 (p. 25).
Type: Image (p. 463) object
Required: Yes
Response Syntax{ "TextDetections": [ { "Confidence": number, "DetectedText": "string", "Geometry": { "BoundingBox": { "Height": number, "Left": number, "Top": number, "Width": number }, "Polygon": [ { "X": number, "Y": number } ] }, "Id": number, "ParentId": number, "Type": "string" } ], "TextModelVersion": "string"}
Response ElementsIf the action is successful, the service sends back an HTTP 200 response.
The following data is returned in JSON format by the service.
TextDetections (p. 325)
An array of text that was detected in the input image.
325
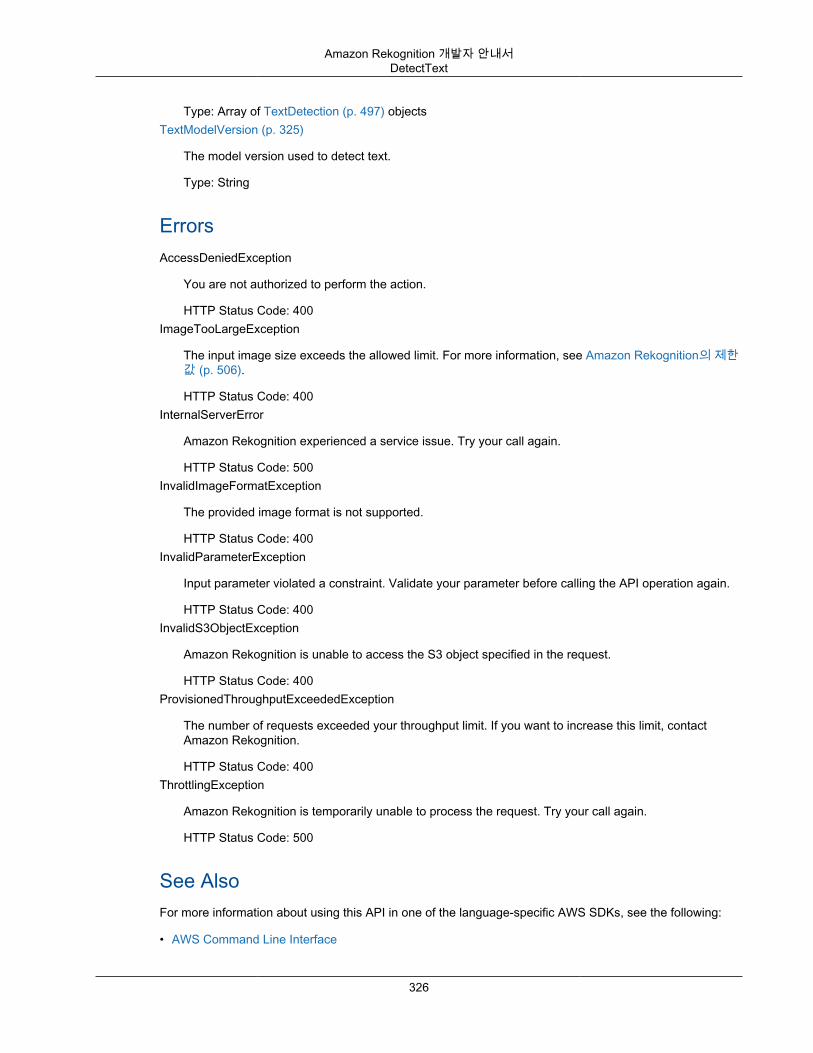
Amazon Rekognition 개발자 안내서DetectText
Type: Array of TextDetection (p. 497) objectsTextModelVersion (p. 325)
The model version used to detect text.
Type: String
ErrorsAccessDeniedException
You are not authorized to perform the action.
HTTP Status Code: 400ImageTooLargeException
The input image size exceeds the allowed limit. For more information, see Amazon Rekognition의 제한값 (p. 506).
HTTP Status Code: 400InternalServerError
Amazon Rekognition experienced a service issue. Try your call again.
HTTP Status Code: 500InvalidImageFormatException
The provided image format is not supported.
HTTP Status Code: 400InvalidParameterException
Input parameter violated a constraint. Validate your parameter before calling the API operation again.
HTTP Status Code: 400InvalidS3ObjectException
Amazon Rekognition is unable to access the S3 object specified in the request.
HTTP Status Code: 400ProvisionedThroughputExceededException
The number of requests exceeded your throughput limit. If you want to increase this limit, contactAmazon Rekognition.
HTTP Status Code: 400ThrottlingException
Amazon Rekognition is temporarily unable to process the request. Try your call again.
HTTP Status Code: 500
See AlsoFor more information about using this API in one of the language-specific AWS SDKs, see the following:
• AWS Command Line Interface
326
Amazon Rekognition 개발자 안내서DetectText
• AWS SDK for .NET• AWS SDK for C++• AWS SDK for Go• AWS SDK for Java• AWS SDK for JavaScript• AWS SDK for PHP V3• AWS SDK for Python• AWS SDK for Ruby V2
327
Amazon Rekognition 개발자 안내서GetCelebrityInfo
GetCelebrityInfoGets the name and additional information about a celebrity based on his or her Amazon Rekognition ID.The additional information is returned as an array of URLs. If there is no additional information about thecelebrity, this list is empty.
For more information, see 유명 인사에 대한 정보 얻기 (p. 218).
This operation requires permissions to perform the rekognition:GetCelebrityInfo action.
Request Syntax
{ "Id": "string"}
Request ParametersThe request accepts the following data in JSON format.
Id (p. 328)
The ID for the celebrity. You get the celebrity ID from a call to the RecognizeCelebrities (p. 379)operation, which recognizes celebrities in an image.
Type: String
Pattern: [0-9A-Za-z]*
Required: Yes
Response Syntax
{ "Name": "string", "Urls": [ "string" ]}
Response ElementsIf the action is successful, the service sends back an HTTP 200 response.
The following data is returned in JSON format by the service.
Name (p. 328)
The name of the celebrity.
Type: StringUrls (p. 328)
An array of URLs pointing to additional celebrity information.
Type: Array of strings
328
Amazon Rekognition 개발자 안내서GetCelebrityInfo
ErrorsAccessDeniedException
You are not authorized to perform the action.
HTTP Status Code: 400InternalServerError
Amazon Rekognition experienced a service issue. Try your call again.
HTTP Status Code: 500InvalidParameterException
Input parameter violated a constraint. Validate your parameter before calling the API operation again.
HTTP Status Code: 400ProvisionedThroughputExceededException
The number of requests exceeded your throughput limit. If you want to increase this limit, contactAmazon Rekognition.
HTTP Status Code: 400ResourceNotFoundException
The collection specified in the request cannot be found.
HTTP Status Code: 400ThrottlingException
Amazon Rekognition is temporarily unable to process the request. Try your call again.
HTTP Status Code: 500
See AlsoFor more information about using this API in one of the language-specific AWS SDKs, see the following:
• AWS Command Line Interface• AWS SDK for .NET• AWS SDK for C++• AWS SDK for Go• AWS SDK for Java• AWS SDK for JavaScript• AWS SDK for PHP V3• AWS SDK for Python• AWS SDK for Ruby V2
329
Amazon Rekognition 개발자 안내서GetCelebrityRecognition
GetCelebrityRecognitionGets the celebrity recognition results for a Amazon Rekognition Video analysis started byStartCelebrityRecognition (p. 391).
Celebrity recognition in a video is an asynchronous operation. Analysis is started by a call toStartCelebrityRecognition (p. 391) which returns a job identifier (JobId). When the celebrity recognitionoperation finishes, Amazon Rekognition Video publishes a completion status to the Amazon SimpleNotification Service topic registered in the initial call to StartCelebrityRecognition. To get the resultsof the celebrity recognition analysis, first check that the status value published to the Amazon SNS topic isSUCCEEDED. If so, call GetCelebrityDetection and pass the job identifier (JobId) from the initial callto StartCelebrityDetection.
For more information, see 저장된 비디오 작업 (p. 51).
GetCelebrityRecognition returns detected celebrities and the time(s) they are detected in an array(Celebrities) of CelebrityRecognition (p. 436) objects. Each CelebrityRecognition containsinformation about the celebrity in a CelebrityDetail (p. 434) object and the time, Timestamp, the celebritywas detected.
Note
GetCelebrityRecognition only returns the default facial attributes (BoundingBox,Confidence, Landmarks, Pose, and Quality). The other facial attributes listed in theFace object of the following response syntax are not returned. For more information, seeFaceDetail (p. 450).
By default, the Celebrities array is sorted by time (milliseconds from the start of the video). You canalso sort the array by celebrity by specifying the value ID in the SortBy input parameter.
The CelebrityDetail object includes the celebrity identifer and additional information urls. If you don'tstore the additional information urls, you can get them later by calling GetCelebrityInfo (p. 328) with thecelebrity identifer.
No information is returned for faces not recognized as celebrities.
Use MaxResults parameter to limit the number of labels returned. If there are more results than specifiedin MaxResults, the value of NextToken in the operation response contains a pagination token forgetting the next set of results. To get the next page of results, call GetCelebrityDetection andpopulate the NextToken request parameter with the token value returned from the previous call toGetCelebrityRecognition.
Request Syntax{ "JobId": "string", "MaxResults": number, "NextToken": "string", "SortBy": "string"}
Request ParametersThe request accepts the following data in JSON format.
JobId (p. 330)
Job identifier for the required celebrity recognition analysis. You can get the job identifer from a call toStartCelebrityRecognition.
330
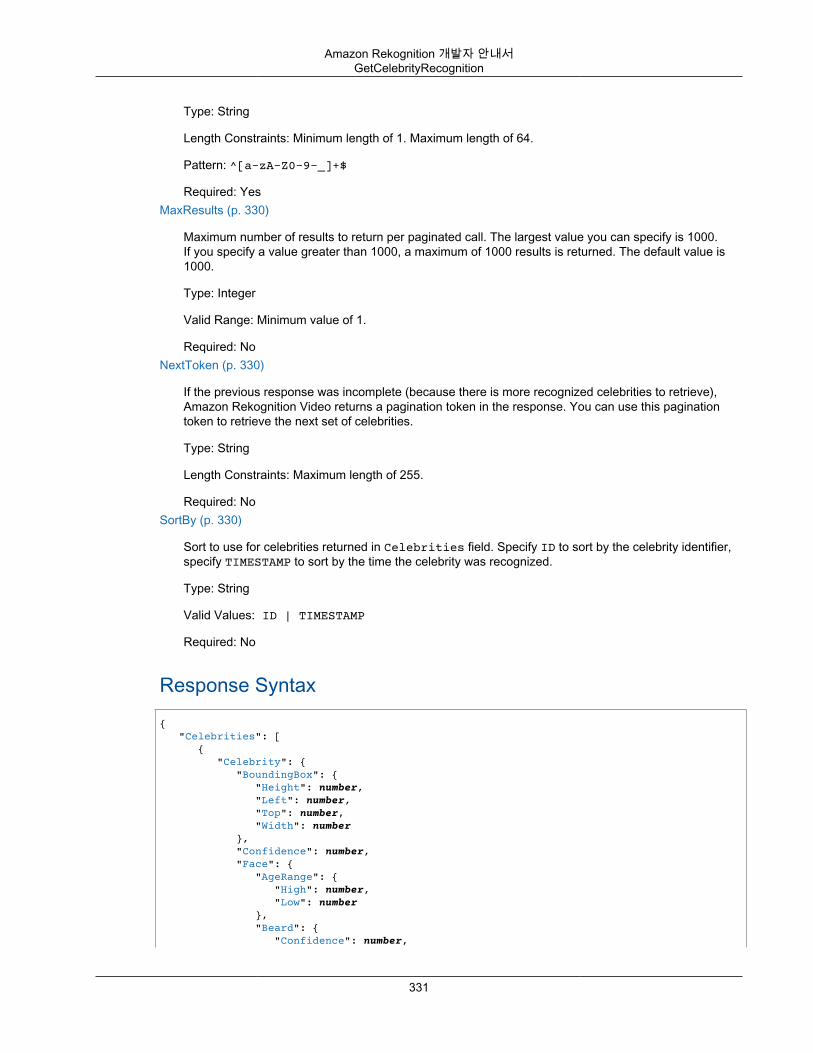
Amazon Rekognition 개발자 안내서GetCelebrityRecognition
Type: String
Length Constraints: Minimum length of 1. Maximum length of 64.
Pattern: ^[a-zA-Z0-9-_]+$
Required: YesMaxResults (p. 330)
Maximum number of results to return per paginated call. The largest value you can specify is 1000.If you specify a value greater than 1000, a maximum of 1000 results is returned. The default value is1000.
Type: Integer
Valid Range: Minimum value of 1.
Required: NoNextToken (p. 330)
If the previous response was incomplete (because there is more recognized celebrities to retrieve),Amazon Rekognition Video returns a pagination token in the response. You can use this paginationtoken to retrieve the next set of celebrities.
Type: String
Length Constraints: Maximum length of 255.
Required: NoSortBy (p. 330)
Sort to use for celebrities returned in Celebrities field. Specify ID to sort by the celebrity identifier,specify TIMESTAMP to sort by the time the celebrity was recognized.
Type: String
Valid Values: ID | TIMESTAMP
Required: No
Response Syntax{ "Celebrities": [ { "Celebrity": { "BoundingBox": { "Height": number, "Left": number, "Top": number, "Width": number }, "Confidence": number, "Face": { "AgeRange": { "High": number, "Low": number }, "Beard": { "Confidence": number,
331
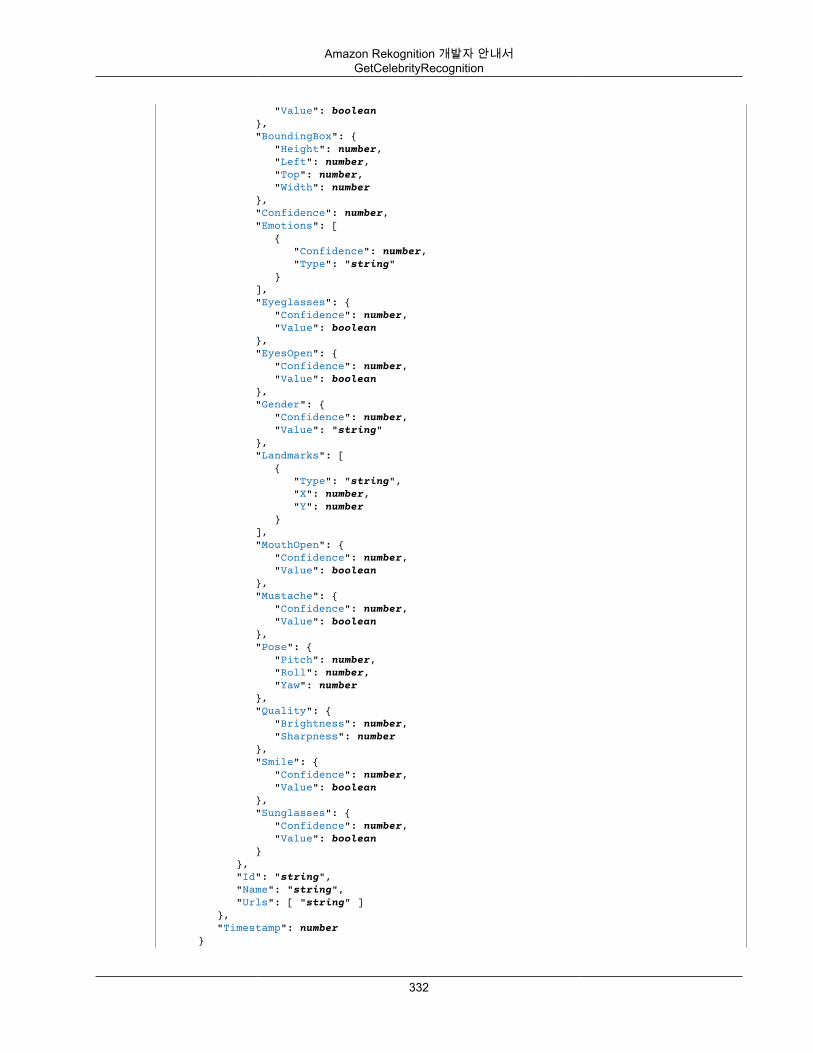
Amazon Rekognition 개발자 안내서GetCelebrityRecognition
"Value": boolean }, "BoundingBox": { "Height": number, "Left": number, "Top": number, "Width": number }, "Confidence": number, "Emotions": [ { "Confidence": number, "Type": "string" } ], "Eyeglasses": { "Confidence": number, "Value": boolean }, "EyesOpen": { "Confidence": number, "Value": boolean }, "Gender": { "Confidence": number, "Value": "string" }, "Landmarks": [ { "Type": "string", "X": number, "Y": number } ], "MouthOpen": { "Confidence": number, "Value": boolean }, "Mustache": { "Confidence": number, "Value": boolean }, "Pose": { "Pitch": number, "Roll": number, "Yaw": number }, "Quality": { "Brightness": number, "Sharpness": number }, "Smile": { "Confidence": number, "Value": boolean }, "Sunglasses": { "Confidence": number, "Value": boolean } }, "Id": "string", "Name": "string", "Urls": [ "string" ] }, "Timestamp": number }
332
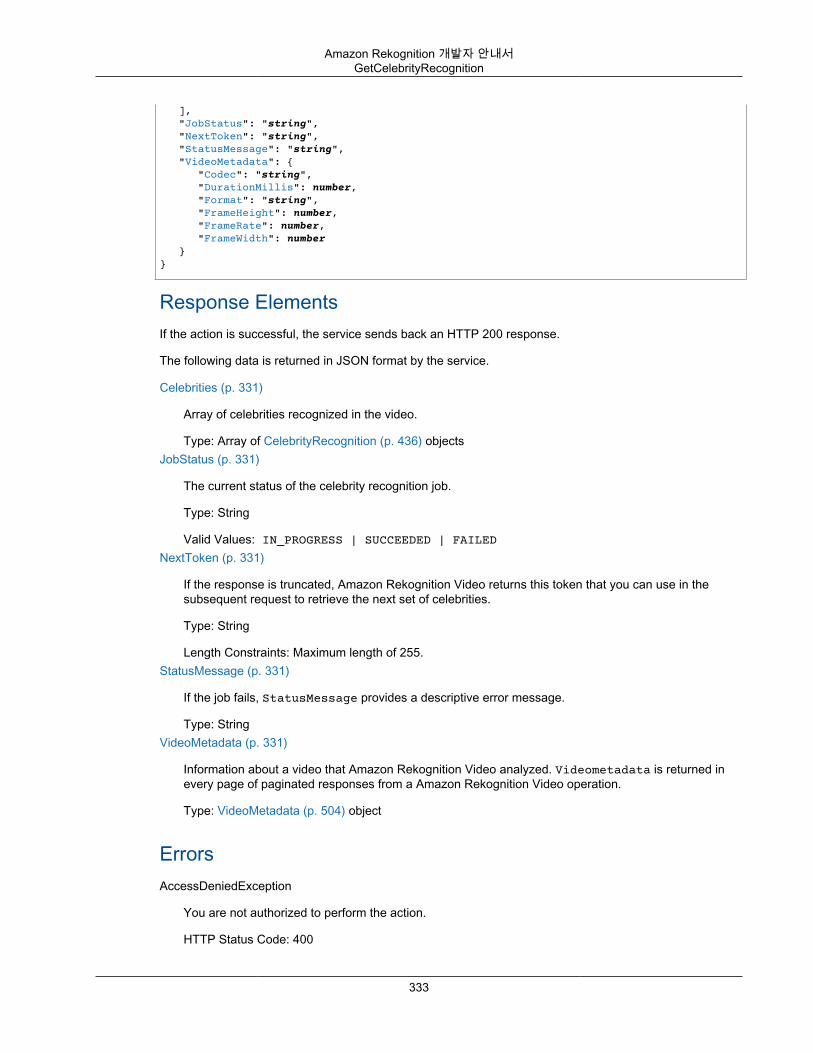
Amazon Rekognition 개발자 안내서GetCelebrityRecognition
], "JobStatus": "string", "NextToken": "string", "StatusMessage": "string", "VideoMetadata": { "Codec": "string", "DurationMillis": number, "Format": "string", "FrameHeight": number, "FrameRate": number, "FrameWidth": number }}
Response ElementsIf the action is successful, the service sends back an HTTP 200 response.
The following data is returned in JSON format by the service.
Celebrities (p. 331)
Array of celebrities recognized in the video.
Type: Array of CelebrityRecognition (p. 436) objectsJobStatus (p. 331)
The current status of the celebrity recognition job.
Type: String
Valid Values: IN_PROGRESS | SUCCEEDED | FAILEDNextToken (p. 331)
If the response is truncated, Amazon Rekognition Video returns this token that you can use in thesubsequent request to retrieve the next set of celebrities.
Type: String
Length Constraints: Maximum length of 255.StatusMessage (p. 331)
If the job fails, StatusMessage provides a descriptive error message.
Type: StringVideoMetadata (p. 331)
Information about a video that Amazon Rekognition Video analyzed. Videometadata is returned inevery page of paginated responses from a Amazon Rekognition Video operation.
Type: VideoMetadata (p. 504) object
ErrorsAccessDeniedException
You are not authorized to perform the action.
HTTP Status Code: 400
333
Amazon Rekognition 개발자 안내서GetCelebrityRecognition
InternalServerError
Amazon Rekognition experienced a service issue. Try your call again.
HTTP Status Code: 500InvalidPaginationTokenException
Pagination token in the request is not valid.
HTTP Status Code: 400InvalidParameterException
Input parameter violated a constraint. Validate your parameter before calling the API operation again.
HTTP Status Code: 400ProvisionedThroughputExceededException
The number of requests exceeded your throughput limit. If you want to increase this limit, contactAmazon Rekognition.
HTTP Status Code: 400ResourceNotFoundException
The collection specified in the request cannot be found.
HTTP Status Code: 400ThrottlingException
Amazon Rekognition is temporarily unable to process the request. Try your call again.
HTTP Status Code: 500
See AlsoFor more information about using this API in one of the language-specific AWS SDKs, see the following:
• AWS Command Line Interface• AWS SDK for .NET• AWS SDK for C++• AWS SDK for Go• AWS SDK for Java• AWS SDK for JavaScript• AWS SDK for PHP V3• AWS SDK for Python• AWS SDK for Ruby V2
334
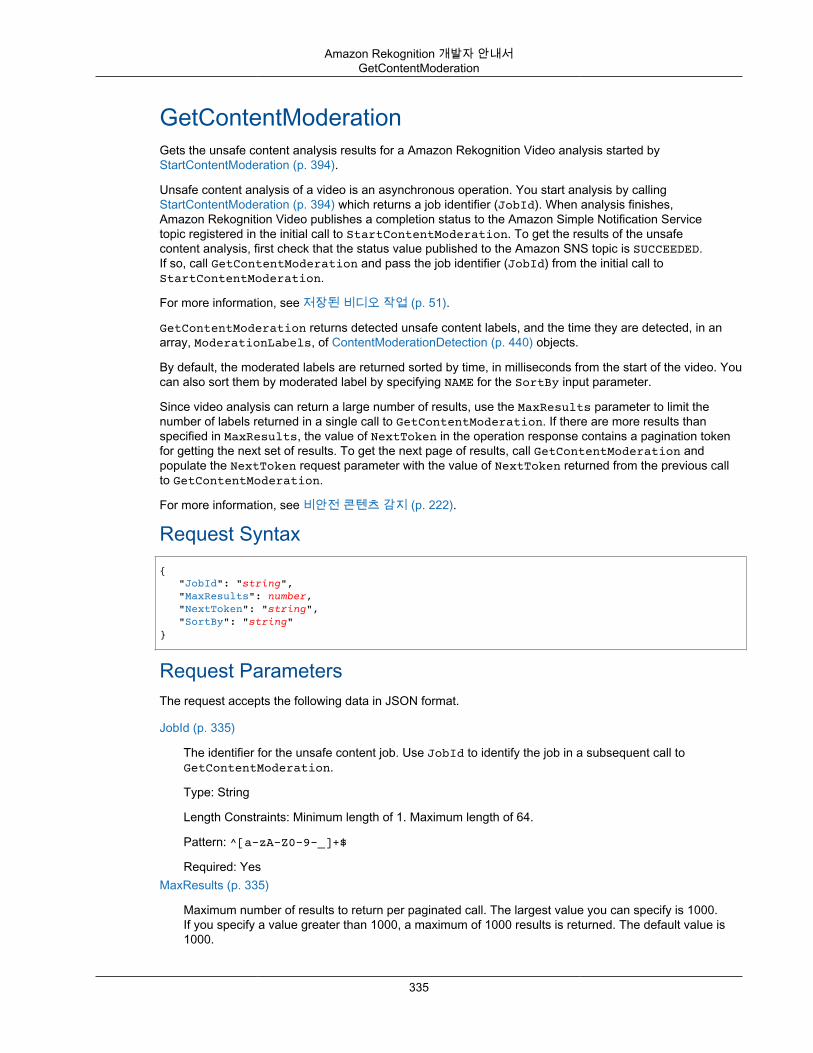
Amazon Rekognition 개발자 안내서GetContentModeration
GetContentModerationGets the unsafe content analysis results for a Amazon Rekognition Video analysis started byStartContentModeration (p. 394).
Unsafe content analysis of a video is an asynchronous operation. You start analysis by callingStartContentModeration (p. 394) which returns a job identifier (JobId). When analysis finishes,Amazon Rekognition Video publishes a completion status to the Amazon Simple Notification Servicetopic registered in the initial call to StartContentModeration. To get the results of the unsafecontent analysis, first check that the status value published to the Amazon SNS topic is SUCCEEDED.If so, call GetContentModeration and pass the job identifier (JobId) from the initial call toStartContentModeration.
For more information, see 저장된 비디오 작업 (p. 51).
GetContentModeration returns detected unsafe content labels, and the time they are detected, in anarray, ModerationLabels, of ContentModerationDetection (p. 440) objects.
By default, the moderated labels are returned sorted by time, in milliseconds from the start of the video. Youcan also sort them by moderated label by specifying NAME for the SortBy input parameter.
Since video analysis can return a large number of results, use the MaxResults parameter to limit thenumber of labels returned in a single call to GetContentModeration. If there are more results thanspecified in MaxResults, the value of NextToken in the operation response contains a pagination tokenfor getting the next set of results. To get the next page of results, call GetContentModeration andpopulate the NextToken request parameter with the value of NextToken returned from the previous callto GetContentModeration.
For more information, see 비안전 콘텐츠 감지 (p. 222).
Request Syntax{ "JobId": "string", "MaxResults": number, "NextToken": "string", "SortBy": "string"}
Request ParametersThe request accepts the following data in JSON format.
JobId (p. 335)
The identifier for the unsafe content job. Use JobId to identify the job in a subsequent call toGetContentModeration.
Type: String
Length Constraints: Minimum length of 1. Maximum length of 64.
Pattern: ^[a-zA-Z0-9-_]+$
Required: YesMaxResults (p. 335)
Maximum number of results to return per paginated call. The largest value you can specify is 1000.If you specify a value greater than 1000, a maximum of 1000 results is returned. The default value is1000.
335
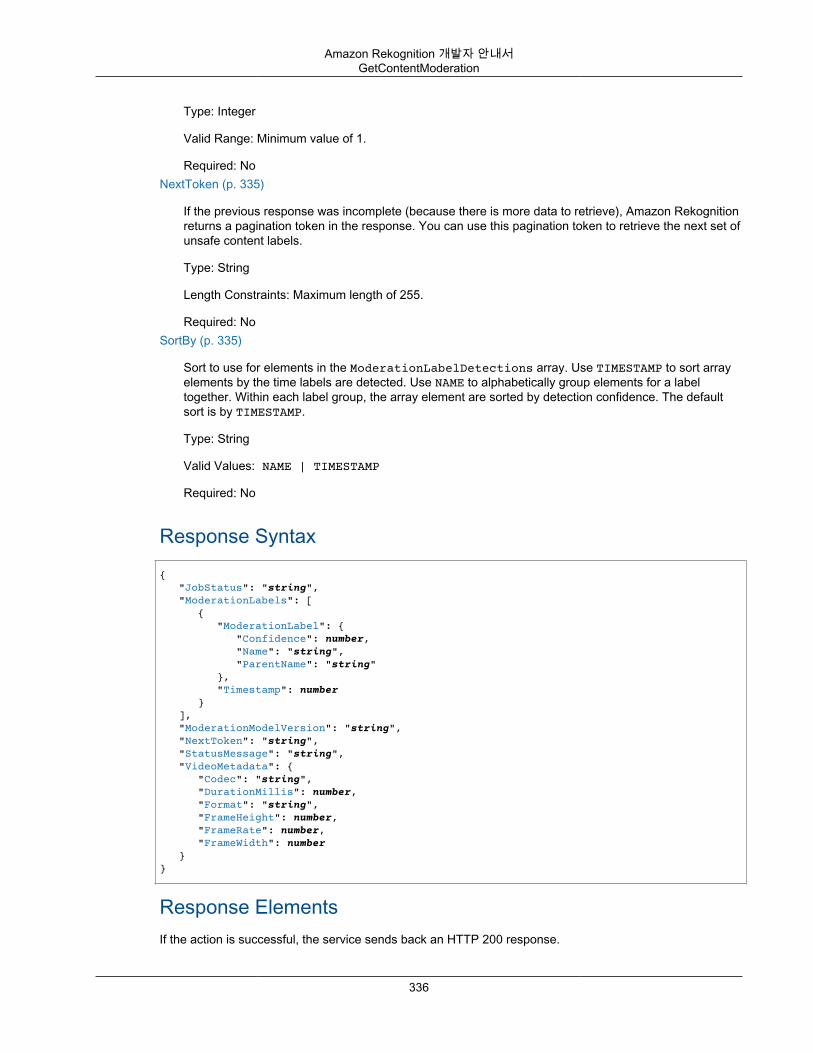
Amazon Rekognition 개발자 안내서GetContentModeration
Type: Integer
Valid Range: Minimum value of 1.
Required: NoNextToken (p. 335)
If the previous response was incomplete (because there is more data to retrieve), Amazon Rekognitionreturns a pagination token in the response. You can use this pagination token to retrieve the next set ofunsafe content labels.
Type: String
Length Constraints: Maximum length of 255.
Required: NoSortBy (p. 335)
Sort to use for elements in the ModerationLabelDetections array. Use TIMESTAMP to sort arrayelements by the time labels are detected. Use NAME to alphabetically group elements for a labeltogether. Within each label group, the array element are sorted by detection confidence. The defaultsort is by TIMESTAMP.
Type: String
Valid Values: NAME | TIMESTAMP
Required: No
Response Syntax{ "JobStatus": "string", "ModerationLabels": [ { "ModerationLabel": { "Confidence": number, "Name": "string", "ParentName": "string" }, "Timestamp": number } ], "ModerationModelVersion": "string", "NextToken": "string", "StatusMessage": "string", "VideoMetadata": { "Codec": "string", "DurationMillis": number, "Format": "string", "FrameHeight": number, "FrameRate": number, "FrameWidth": number }}
Response ElementsIf the action is successful, the service sends back an HTTP 200 response.
336

Amazon Rekognition 개발자 안내서GetContentModeration
The following data is returned in JSON format by the service.
JobStatus (p. 336)
The current status of the unsafe content analysis job.
Type: String
Valid Values: IN_PROGRESS | SUCCEEDED | FAILEDModerationLabels (p. 336)
The detected unsafe content labels and the time(s) they were detected.
Type: Array of ContentModerationDetection (p. 440) objectsModerationModelVersion (p. 336)
Version number of the moderation detection model that was used to detect unsafe content.
Type: StringNextToken (p. 336)
If the response is truncated, Amazon Rekognition Video returns this token that you can use in thesubsequent request to retrieve the next set of unsafe content labels.
Type: String
Length Constraints: Maximum length of 255.StatusMessage (p. 336)
If the job fails, StatusMessage provides a descriptive error message.
Type: StringVideoMetadata (p. 336)
Information about a video that Amazon Rekognition analyzed. Videometadata is returned in everypage of paginated responses from GetContentModeration.
Type: VideoMetadata (p. 504) object
ErrorsAccessDeniedException
You are not authorized to perform the action.
HTTP Status Code: 400InternalServerError
Amazon Rekognition experienced a service issue. Try your call again.
HTTP Status Code: 500InvalidPaginationTokenException
Pagination token in the request is not valid.
HTTP Status Code: 400InvalidParameterException
Input parameter violated a constraint. Validate your parameter before calling the API operation again.
337
Amazon Rekognition 개발자 안내서GetContentModeration
HTTP Status Code: 400ProvisionedThroughputExceededException
The number of requests exceeded your throughput limit. If you want to increase this limit, contactAmazon Rekognition.
HTTP Status Code: 400ResourceNotFoundException
The collection specified in the request cannot be found.
HTTP Status Code: 400ThrottlingException
Amazon Rekognition is temporarily unable to process the request. Try your call again.
HTTP Status Code: 500
See AlsoFor more information about using this API in one of the language-specific AWS SDKs, see the following:
• AWS Command Line Interface• AWS SDK for .NET• AWS SDK for C++• AWS SDK for Go• AWS SDK for Java• AWS SDK for JavaScript• AWS SDK for PHP V3• AWS SDK for Python• AWS SDK for Ruby V2
338
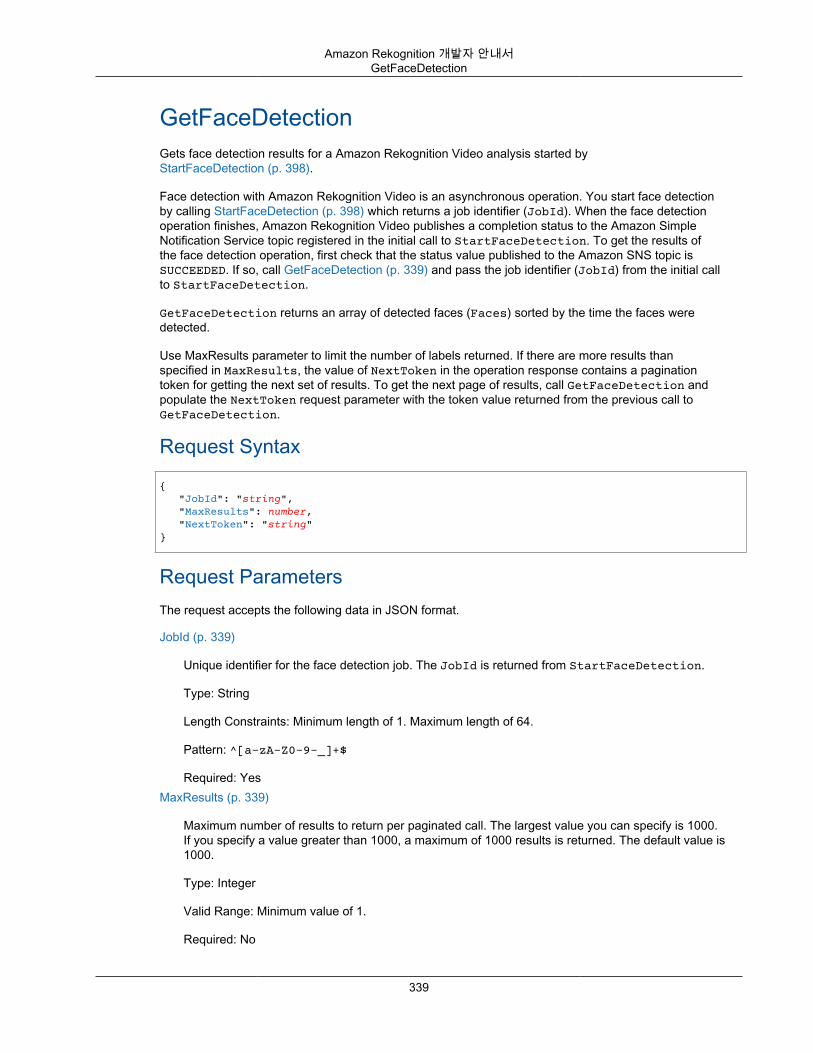
Amazon Rekognition 개발자 안내서GetFaceDetection
GetFaceDetectionGets face detection results for a Amazon Rekognition Video analysis started byStartFaceDetection (p. 398).
Face detection with Amazon Rekognition Video is an asynchronous operation. You start face detectionby calling StartFaceDetection (p. 398) which returns a job identifier (JobId). When the face detectionoperation finishes, Amazon Rekognition Video publishes a completion status to the Amazon SimpleNotification Service topic registered in the initial call to StartFaceDetection. To get the results ofthe face detection operation, first check that the status value published to the Amazon SNS topic isSUCCEEDED. If so, call GetFaceDetection (p. 339) and pass the job identifier (JobId) from the initial callto StartFaceDetection.
GetFaceDetection returns an array of detected faces (Faces) sorted by the time the faces weredetected.
Use MaxResults parameter to limit the number of labels returned. If there are more results thanspecified in MaxResults, the value of NextToken in the operation response contains a paginationtoken for getting the next set of results. To get the next page of results, call GetFaceDetection andpopulate the NextToken request parameter with the token value returned from the previous call toGetFaceDetection.
Request Syntax
{ "JobId": "string", "MaxResults": number, "NextToken": "string"}
Request ParametersThe request accepts the following data in JSON format.
JobId (p. 339)
Unique identifier for the face detection job. The JobId is returned from StartFaceDetection.
Type: String
Length Constraints: Minimum length of 1. Maximum length of 64.
Pattern: ^[a-zA-Z0-9-_]+$
Required: YesMaxResults (p. 339)
Maximum number of results to return per paginated call. The largest value you can specify is 1000.If you specify a value greater than 1000, a maximum of 1000 results is returned. The default value is1000.
Type: Integer
Valid Range: Minimum value of 1.
Required: No
339
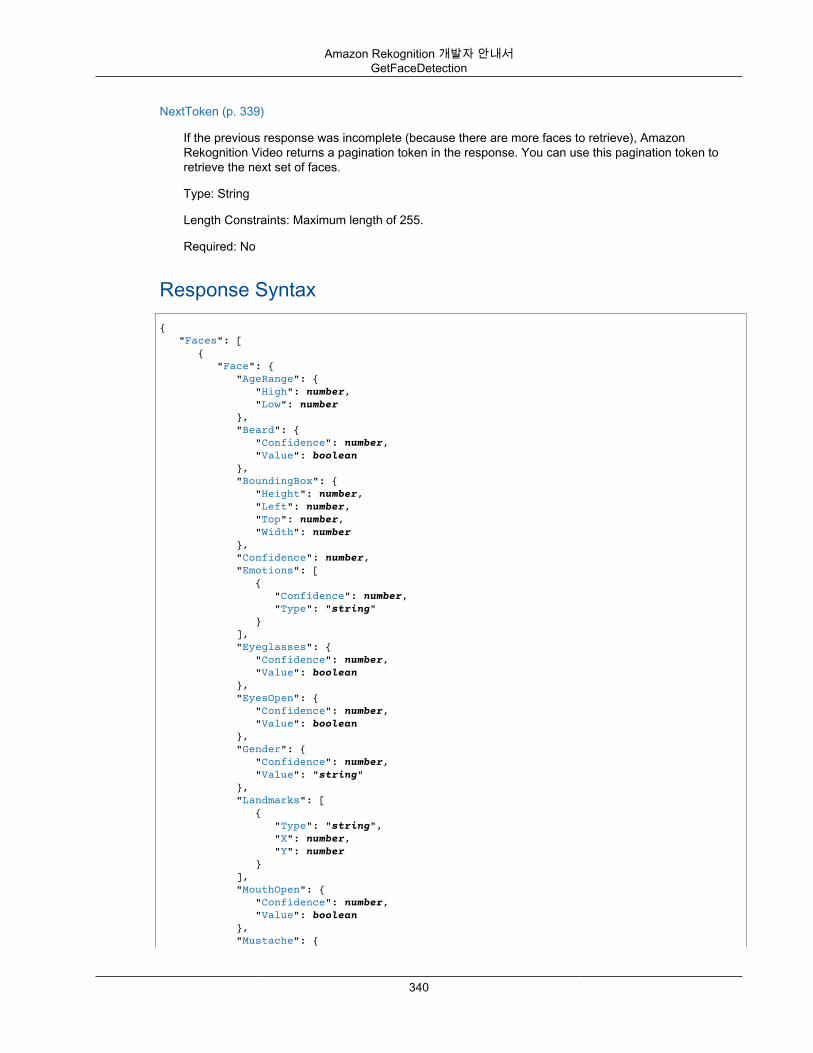
Amazon Rekognition 개발자 안내서GetFaceDetection
NextToken (p. 339)
If the previous response was incomplete (because there are more faces to retrieve), AmazonRekognition Video returns a pagination token in the response. You can use this pagination token toretrieve the next set of faces.
Type: String
Length Constraints: Maximum length of 255.
Required: No
Response Syntax{ "Faces": [ { "Face": { "AgeRange": { "High": number, "Low": number }, "Beard": { "Confidence": number, "Value": boolean }, "BoundingBox": { "Height": number, "Left": number, "Top": number, "Width": number }, "Confidence": number, "Emotions": [ { "Confidence": number, "Type": "string" } ], "Eyeglasses": { "Confidence": number, "Value": boolean }, "EyesOpen": { "Confidence": number, "Value": boolean }, "Gender": { "Confidence": number, "Value": "string" }, "Landmarks": [ { "Type": "string", "X": number, "Y": number } ], "MouthOpen": { "Confidence": number, "Value": boolean }, "Mustache": {
340
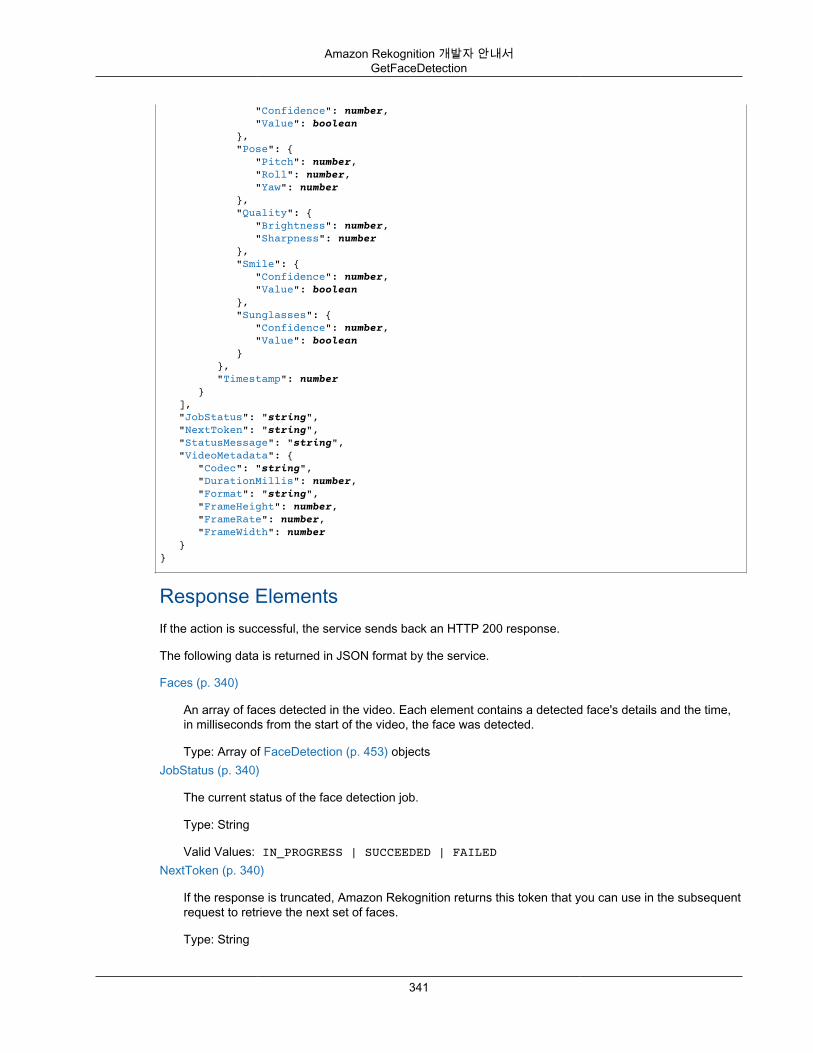
Amazon Rekognition 개발자 안내서GetFaceDetection
"Confidence": number, "Value": boolean }, "Pose": { "Pitch": number, "Roll": number, "Yaw": number }, "Quality": { "Brightness": number, "Sharpness": number }, "Smile": { "Confidence": number, "Value": boolean }, "Sunglasses": { "Confidence": number, "Value": boolean } }, "Timestamp": number } ], "JobStatus": "string", "NextToken": "string", "StatusMessage": "string", "VideoMetadata": { "Codec": "string", "DurationMillis": number, "Format": "string", "FrameHeight": number, "FrameRate": number, "FrameWidth": number }}
Response ElementsIf the action is successful, the service sends back an HTTP 200 response.
The following data is returned in JSON format by the service.
Faces (p. 340)
An array of faces detected in the video. Each element contains a detected face's details and the time,in milliseconds from the start of the video, the face was detected.
Type: Array of FaceDetection (p. 453) objectsJobStatus (p. 340)
The current status of the face detection job.
Type: String
Valid Values: IN_PROGRESS | SUCCEEDED | FAILEDNextToken (p. 340)
If the response is truncated, Amazon Rekognition returns this token that you can use in the subsequentrequest to retrieve the next set of faces.
Type: String
341
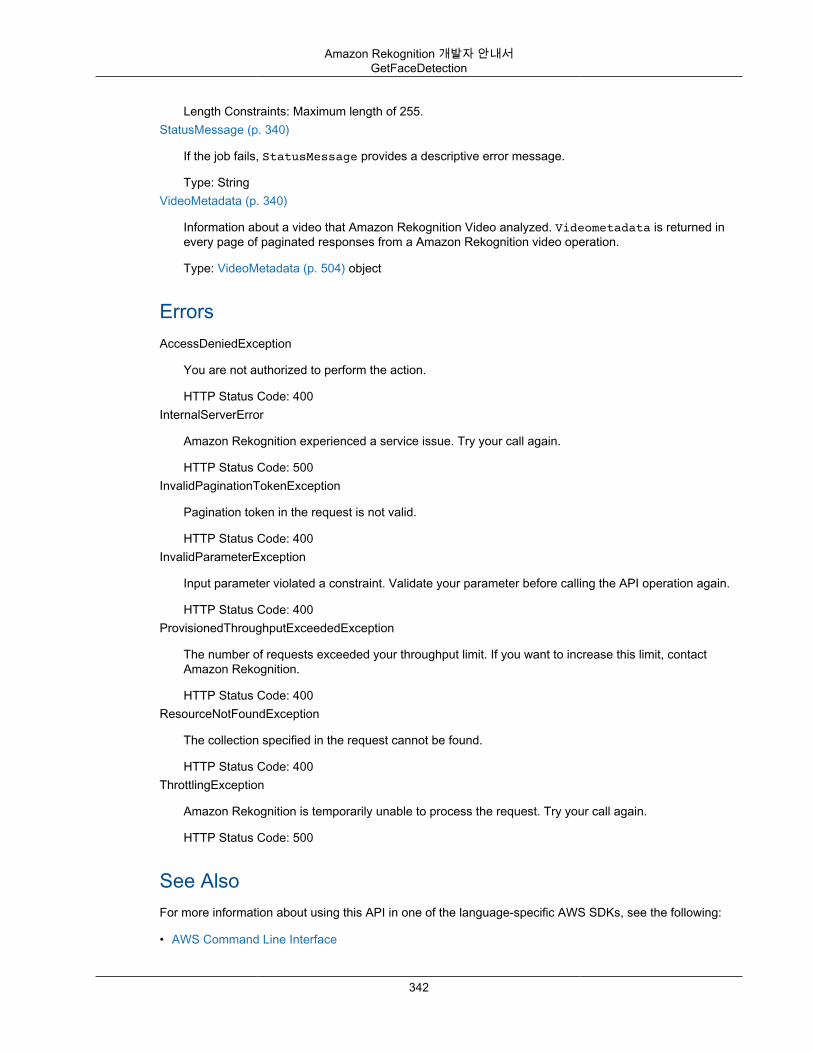
Amazon Rekognition 개발자 안내서GetFaceDetection
Length Constraints: Maximum length of 255.StatusMessage (p. 340)
If the job fails, StatusMessage provides a descriptive error message.
Type: StringVideoMetadata (p. 340)
Information about a video that Amazon Rekognition Video analyzed. Videometadata is returned inevery page of paginated responses from a Amazon Rekognition video operation.
Type: VideoMetadata (p. 504) object
ErrorsAccessDeniedException
You are not authorized to perform the action.
HTTP Status Code: 400InternalServerError
Amazon Rekognition experienced a service issue. Try your call again.
HTTP Status Code: 500InvalidPaginationTokenException
Pagination token in the request is not valid.
HTTP Status Code: 400InvalidParameterException
Input parameter violated a constraint. Validate your parameter before calling the API operation again.
HTTP Status Code: 400ProvisionedThroughputExceededException
The number of requests exceeded your throughput limit. If you want to increase this limit, contactAmazon Rekognition.
HTTP Status Code: 400ResourceNotFoundException
The collection specified in the request cannot be found.
HTTP Status Code: 400ThrottlingException
Amazon Rekognition is temporarily unable to process the request. Try your call again.
HTTP Status Code: 500
See AlsoFor more information about using this API in one of the language-specific AWS SDKs, see the following:
• AWS Command Line Interface
342

Amazon Rekognition 개발자 안내서GetFaceDetection
• AWS SDK for .NET• AWS SDK for C++• AWS SDK for Go• AWS SDK for Java• AWS SDK for JavaScript• AWS SDK for PHP V3• AWS SDK for Python• AWS SDK for Ruby V2
343
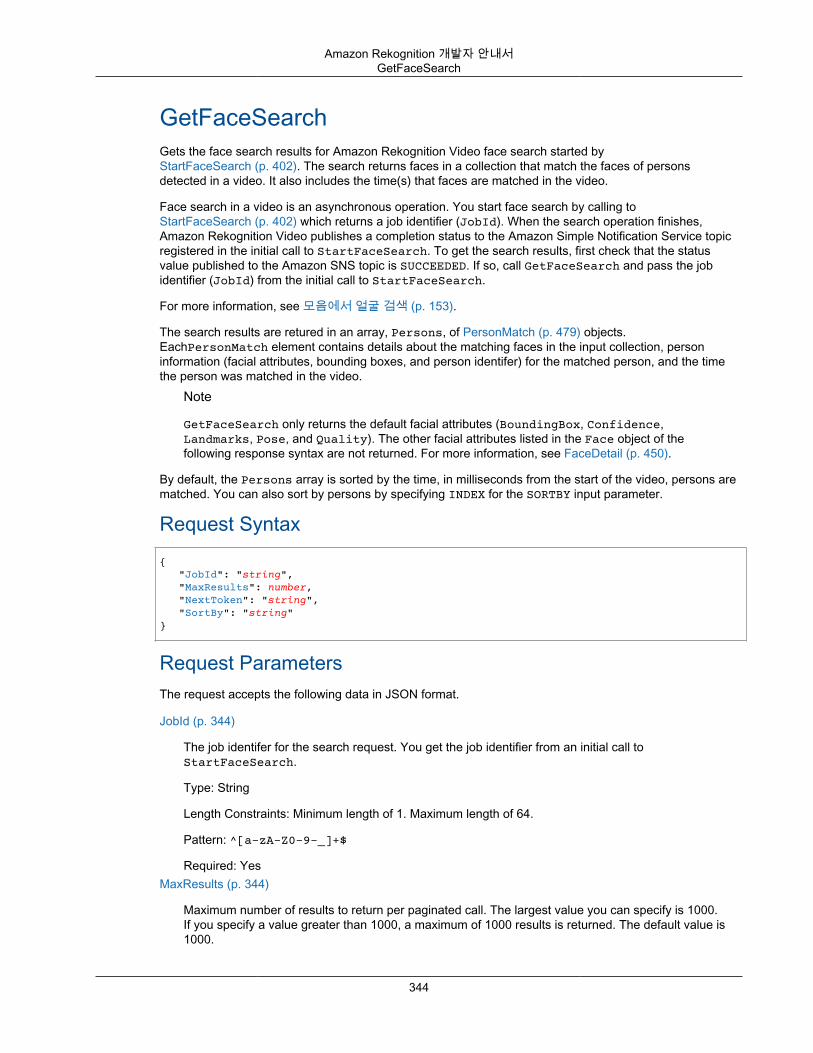
Amazon Rekognition 개발자 안내서GetFaceSearch
GetFaceSearchGets the face search results for Amazon Rekognition Video face search started byStartFaceSearch (p. 402). The search returns faces in a collection that match the faces of personsdetected in a video. It also includes the time(s) that faces are matched in the video.
Face search in a video is an asynchronous operation. You start face search by calling toStartFaceSearch (p. 402) which returns a job identifier (JobId). When the search operation finishes,Amazon Rekognition Video publishes a completion status to the Amazon Simple Notification Service topicregistered in the initial call to StartFaceSearch. To get the search results, first check that the statusvalue published to the Amazon SNS topic is SUCCEEDED. If so, call GetFaceSearch and pass the jobidentifier (JobId) from the initial call to StartFaceSearch.
For more information, see 모음에서 얼굴 검색 (p. 153).
The search results are retured in an array, Persons, of PersonMatch (p. 479) objects.EachPersonMatch element contains details about the matching faces in the input collection, personinformation (facial attributes, bounding boxes, and person identifer) for the matched person, and the timethe person was matched in the video.
Note
GetFaceSearch only returns the default facial attributes (BoundingBox, Confidence,Landmarks, Pose, and Quality). The other facial attributes listed in the Face object of thefollowing response syntax are not returned. For more information, see FaceDetail (p. 450).
By default, the Persons array is sorted by the time, in milliseconds from the start of the video, persons arematched. You can also sort by persons by specifying INDEX for the SORTBY input parameter.
Request Syntax{ "JobId": "string", "MaxResults": number, "NextToken": "string", "SortBy": "string"}
Request ParametersThe request accepts the following data in JSON format.
JobId (p. 344)
The job identifer for the search request. You get the job identifier from an initial call toStartFaceSearch.
Type: String
Length Constraints: Minimum length of 1. Maximum length of 64.
Pattern: ^[a-zA-Z0-9-_]+$
Required: YesMaxResults (p. 344)
Maximum number of results to return per paginated call. The largest value you can specify is 1000.If you specify a value greater than 1000, a maximum of 1000 results is returned. The default value is1000.
344
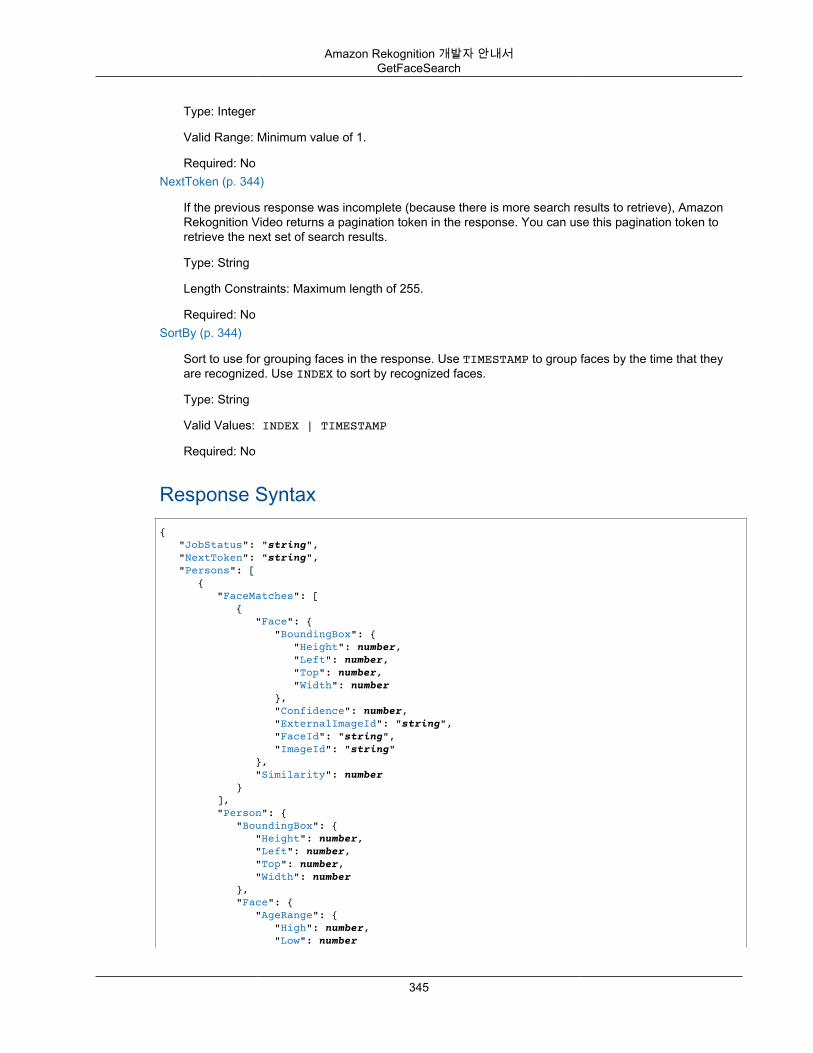
Amazon Rekognition 개발자 안내서GetFaceSearch
Type: Integer
Valid Range: Minimum value of 1.
Required: NoNextToken (p. 344)
If the previous response was incomplete (because there is more search results to retrieve), AmazonRekognition Video returns a pagination token in the response. You can use this pagination token toretrieve the next set of search results.
Type: String
Length Constraints: Maximum length of 255.
Required: NoSortBy (p. 344)
Sort to use for grouping faces in the response. Use TIMESTAMP to group faces by the time that theyare recognized. Use INDEX to sort by recognized faces.
Type: String
Valid Values: INDEX | TIMESTAMP
Required: No
Response Syntax{ "JobStatus": "string", "NextToken": "string", "Persons": [ { "FaceMatches": [ { "Face": { "BoundingBox": { "Height": number, "Left": number, "Top": number, "Width": number }, "Confidence": number, "ExternalImageId": "string", "FaceId": "string", "ImageId": "string" }, "Similarity": number } ], "Person": { "BoundingBox": { "Height": number, "Left": number, "Top": number, "Width": number }, "Face": { "AgeRange": { "High": number, "Low": number
345

Amazon Rekognition 개발자 안내서GetFaceSearch
}, "Beard": { "Confidence": number, "Value": boolean }, "BoundingBox": { "Height": number, "Left": number, "Top": number, "Width": number }, "Confidence": number, "Emotions": [ { "Confidence": number, "Type": "string" } ], "Eyeglasses": { "Confidence": number, "Value": boolean }, "EyesOpen": { "Confidence": number, "Value": boolean }, "Gender": { "Confidence": number, "Value": "string" }, "Landmarks": [ { "Type": "string", "X": number, "Y": number } ], "MouthOpen": { "Confidence": number, "Value": boolean }, "Mustache": { "Confidence": number, "Value": boolean }, "Pose": { "Pitch": number, "Roll": number, "Yaw": number }, "Quality": { "Brightness": number, "Sharpness": number }, "Smile": { "Confidence": number, "Value": boolean }, "Sunglasses": { "Confidence": number, "Value": boolean } }, "Index": number }, "Timestamp": number
346
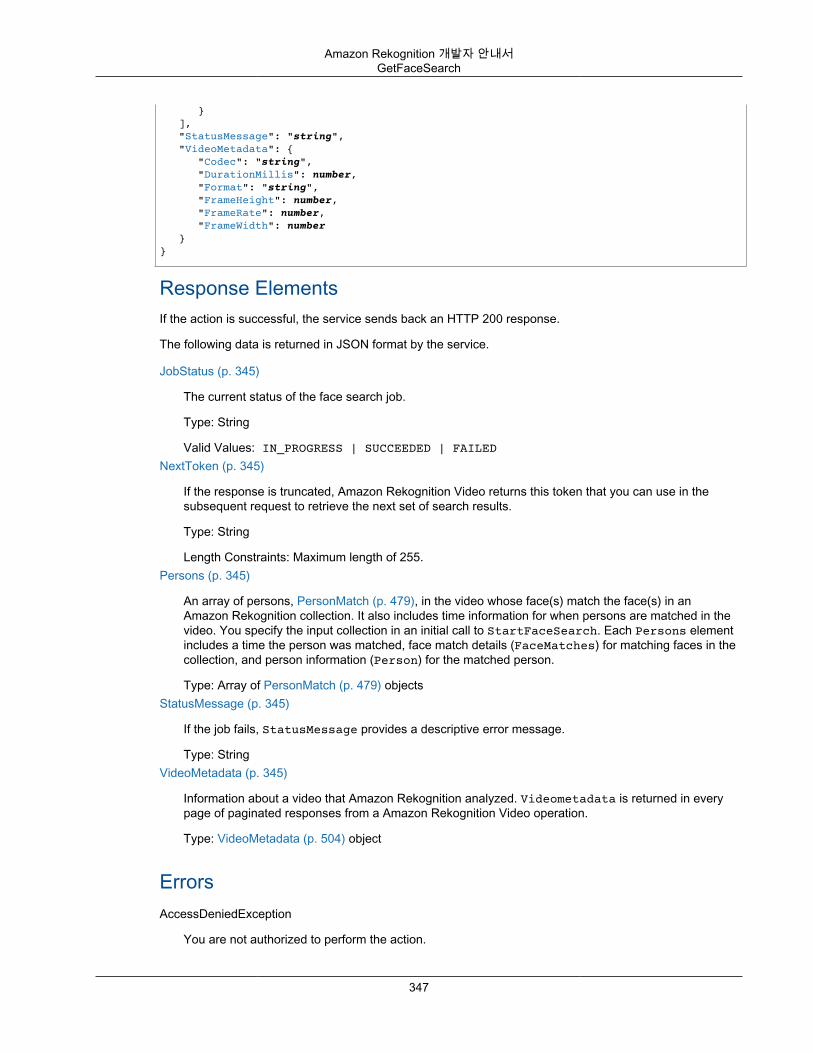
Amazon Rekognition 개발자 안내서GetFaceSearch
} ], "StatusMessage": "string", "VideoMetadata": { "Codec": "string", "DurationMillis": number, "Format": "string", "FrameHeight": number, "FrameRate": number, "FrameWidth": number }}
Response ElementsIf the action is successful, the service sends back an HTTP 200 response.
The following data is returned in JSON format by the service.
JobStatus (p. 345)
The current status of the face search job.
Type: String
Valid Values: IN_PROGRESS | SUCCEEDED | FAILEDNextToken (p. 345)
If the response is truncated, Amazon Rekognition Video returns this token that you can use in thesubsequent request to retrieve the next set of search results.
Type: String
Length Constraints: Maximum length of 255.Persons (p. 345)
An array of persons, PersonMatch (p. 479), in the video whose face(s) match the face(s) in anAmazon Rekognition collection. It also includes time information for when persons are matched in thevideo. You specify the input collection in an initial call to StartFaceSearch. Each Persons elementincludes a time the person was matched, face match details (FaceMatches) for matching faces in thecollection, and person information (Person) for the matched person.
Type: Array of PersonMatch (p. 479) objectsStatusMessage (p. 345)
If the job fails, StatusMessage provides a descriptive error message.
Type: StringVideoMetadata (p. 345)
Information about a video that Amazon Rekognition analyzed. Videometadata is returned in everypage of paginated responses from a Amazon Rekognition Video operation.
Type: VideoMetadata (p. 504) object
ErrorsAccessDeniedException
You are not authorized to perform the action.
347
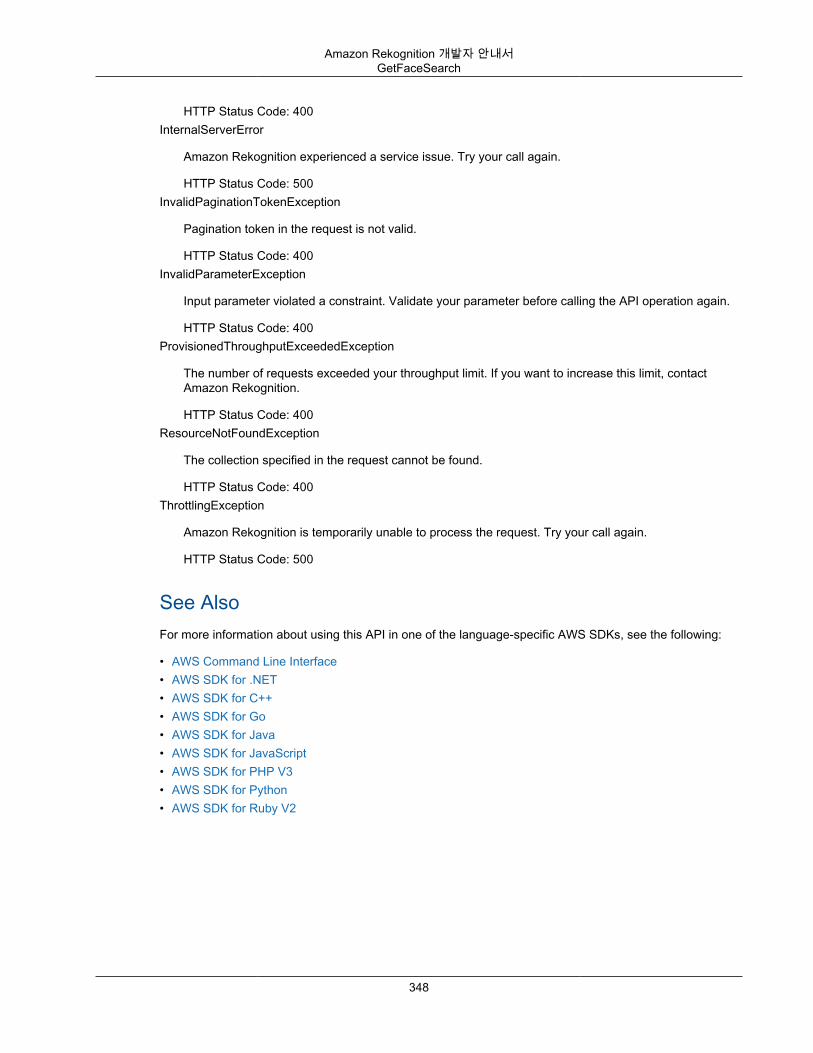
Amazon Rekognition 개발자 안내서GetFaceSearch
HTTP Status Code: 400InternalServerError
Amazon Rekognition experienced a service issue. Try your call again.
HTTP Status Code: 500InvalidPaginationTokenException
Pagination token in the request is not valid.
HTTP Status Code: 400InvalidParameterException
Input parameter violated a constraint. Validate your parameter before calling the API operation again.
HTTP Status Code: 400ProvisionedThroughputExceededException
The number of requests exceeded your throughput limit. If you want to increase this limit, contactAmazon Rekognition.
HTTP Status Code: 400ResourceNotFoundException
The collection specified in the request cannot be found.
HTTP Status Code: 400ThrottlingException
Amazon Rekognition is temporarily unable to process the request. Try your call again.
HTTP Status Code: 500
See AlsoFor more information about using this API in one of the language-specific AWS SDKs, see the following:
• AWS Command Line Interface• AWS SDK for .NET• AWS SDK for C++• AWS SDK for Go• AWS SDK for Java• AWS SDK for JavaScript• AWS SDK for PHP V3• AWS SDK for Python• AWS SDK for Ruby V2
348
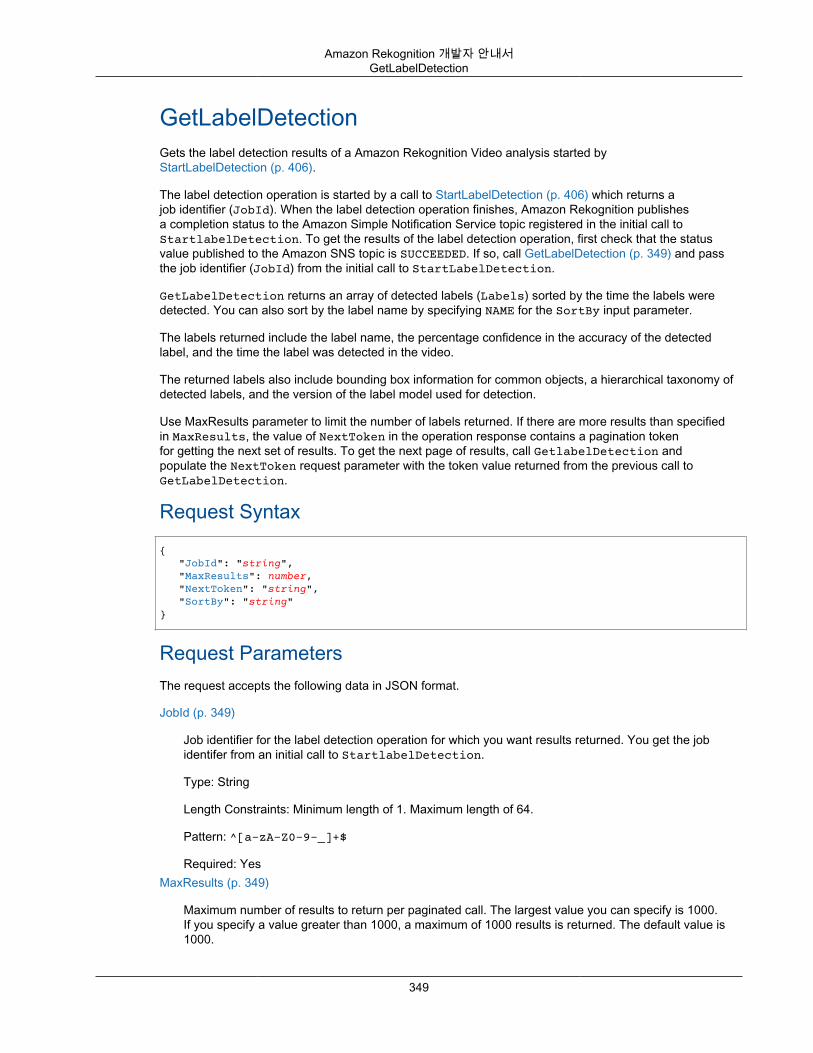
Amazon Rekognition 개발자 안내서GetLabelDetection
GetLabelDetectionGets the label detection results of a Amazon Rekognition Video analysis started byStartLabelDetection (p. 406).
The label detection operation is started by a call to StartLabelDetection (p. 406) which returns ajob identifier (JobId). When the label detection operation finishes, Amazon Rekognition publishesa completion status to the Amazon Simple Notification Service topic registered in the initial call toStartlabelDetection. To get the results of the label detection operation, first check that the statusvalue published to the Amazon SNS topic is SUCCEEDED. If so, call GetLabelDetection (p. 349) and passthe job identifier (JobId) from the initial call to StartLabelDetection.
GetLabelDetection returns an array of detected labels (Labels) sorted by the time the labels weredetected. You can also sort by the label name by specifying NAME for the SortBy input parameter.
The labels returned include the label name, the percentage confidence in the accuracy of the detectedlabel, and the time the label was detected in the video.
The returned labels also include bounding box information for common objects, a hierarchical taxonomy ofdetected labels, and the version of the label model used for detection.
Use MaxResults parameter to limit the number of labels returned. If there are more results than specifiedin MaxResults, the value of NextToken in the operation response contains a pagination tokenfor getting the next set of results. To get the next page of results, call GetlabelDetection andpopulate the NextToken request parameter with the token value returned from the previous call toGetLabelDetection.
Request Syntax
{ "JobId": "string", "MaxResults": number, "NextToken": "string", "SortBy": "string"}
Request ParametersThe request accepts the following data in JSON format.
JobId (p. 349)
Job identifier for the label detection operation for which you want results returned. You get the jobidentifer from an initial call to StartlabelDetection.
Type: String
Length Constraints: Minimum length of 1. Maximum length of 64.
Pattern: ^[a-zA-Z0-9-_]+$
Required: YesMaxResults (p. 349)
Maximum number of results to return per paginated call. The largest value you can specify is 1000.If you specify a value greater than 1000, a maximum of 1000 results is returned. The default value is1000.
349
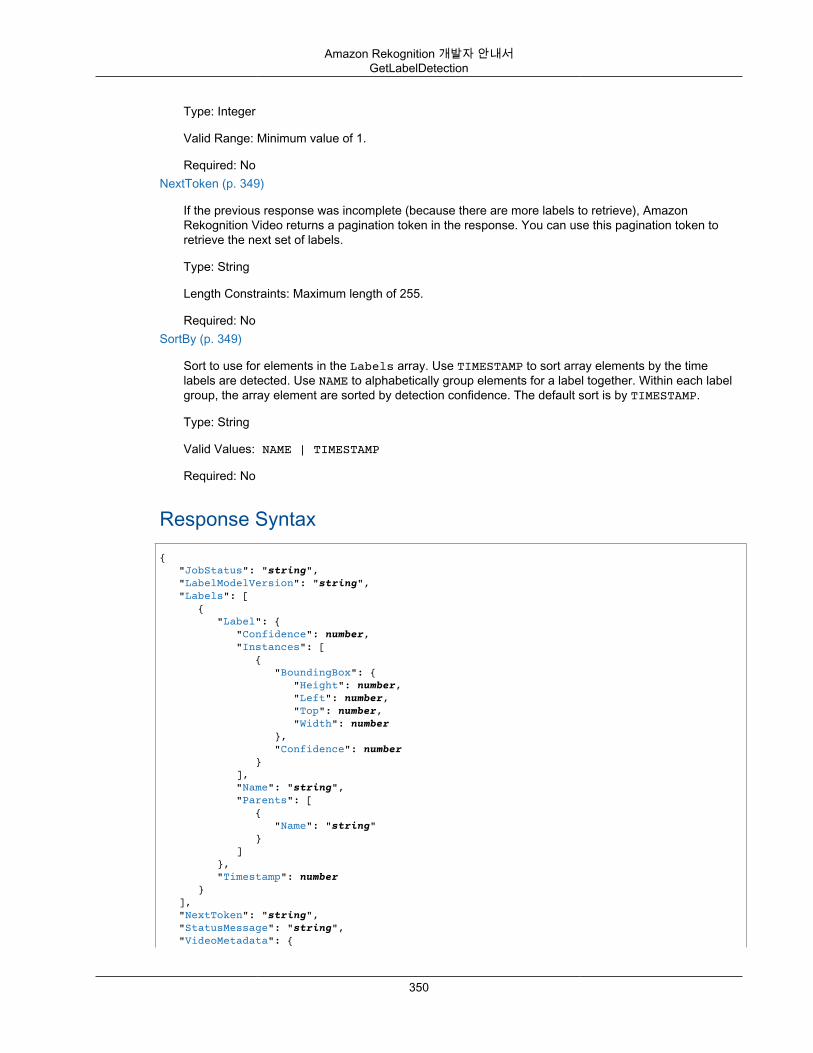
Amazon Rekognition 개발자 안내서GetLabelDetection
Type: Integer
Valid Range: Minimum value of 1.
Required: NoNextToken (p. 349)
If the previous response was incomplete (because there are more labels to retrieve), AmazonRekognition Video returns a pagination token in the response. You can use this pagination token toretrieve the next set of labels.
Type: String
Length Constraints: Maximum length of 255.
Required: NoSortBy (p. 349)
Sort to use for elements in the Labels array. Use TIMESTAMP to sort array elements by the timelabels are detected. Use NAME to alphabetically group elements for a label together. Within each labelgroup, the array element are sorted by detection confidence. The default sort is by TIMESTAMP.
Type: String
Valid Values: NAME | TIMESTAMP
Required: No
Response Syntax{ "JobStatus": "string", "LabelModelVersion": "string", "Labels": [ { "Label": { "Confidence": number, "Instances": [ { "BoundingBox": { "Height": number, "Left": number, "Top": number, "Width": number }, "Confidence": number } ], "Name": "string", "Parents": [ { "Name": "string" } ] }, "Timestamp": number } ], "NextToken": "string", "StatusMessage": "string", "VideoMetadata": {
350
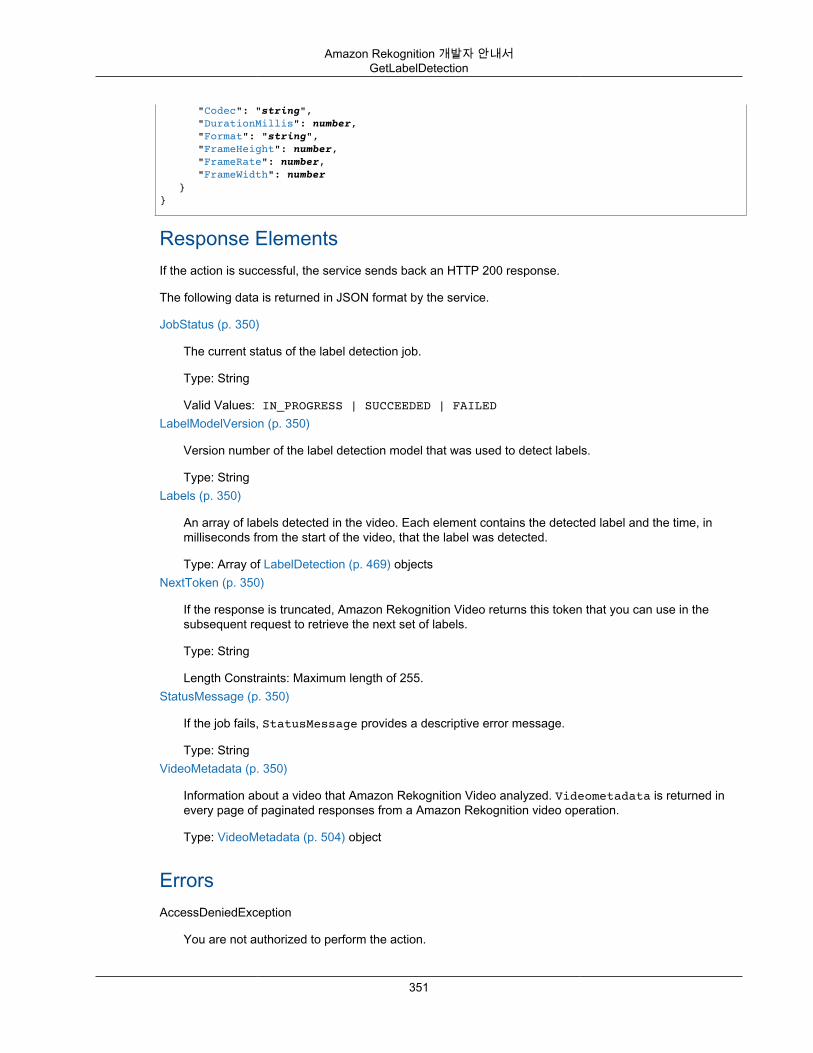
Amazon Rekognition 개발자 안내서GetLabelDetection
"Codec": "string", "DurationMillis": number, "Format": "string", "FrameHeight": number, "FrameRate": number, "FrameWidth": number }}
Response ElementsIf the action is successful, the service sends back an HTTP 200 response.
The following data is returned in JSON format by the service.
JobStatus (p. 350)
The current status of the label detection job.
Type: String
Valid Values: IN_PROGRESS | SUCCEEDED | FAILEDLabelModelVersion (p. 350)
Version number of the label detection model that was used to detect labels.
Type: StringLabels (p. 350)
An array of labels detected in the video. Each element contains the detected label and the time, inmilliseconds from the start of the video, that the label was detected.
Type: Array of LabelDetection (p. 469) objectsNextToken (p. 350)
If the response is truncated, Amazon Rekognition Video returns this token that you can use in thesubsequent request to retrieve the next set of labels.
Type: String
Length Constraints: Maximum length of 255.StatusMessage (p. 350)
If the job fails, StatusMessage provides a descriptive error message.
Type: StringVideoMetadata (p. 350)
Information about a video that Amazon Rekognition Video analyzed. Videometadata is returned inevery page of paginated responses from a Amazon Rekognition video operation.
Type: VideoMetadata (p. 504) object
ErrorsAccessDeniedException
You are not authorized to perform the action.
351
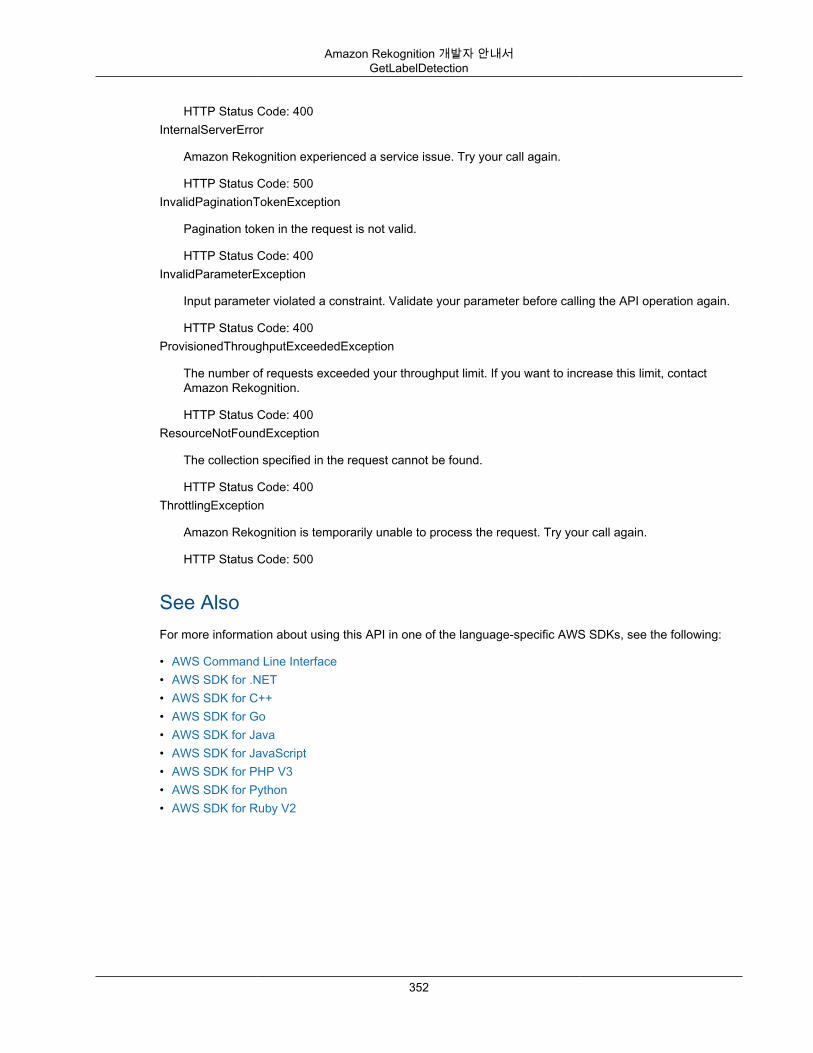
Amazon Rekognition 개발자 안내서GetLabelDetection
HTTP Status Code: 400InternalServerError
Amazon Rekognition experienced a service issue. Try your call again.
HTTP Status Code: 500InvalidPaginationTokenException
Pagination token in the request is not valid.
HTTP Status Code: 400InvalidParameterException
Input parameter violated a constraint. Validate your parameter before calling the API operation again.
HTTP Status Code: 400ProvisionedThroughputExceededException
The number of requests exceeded your throughput limit. If you want to increase this limit, contactAmazon Rekognition.
HTTP Status Code: 400ResourceNotFoundException
The collection specified in the request cannot be found.
HTTP Status Code: 400ThrottlingException
Amazon Rekognition is temporarily unable to process the request. Try your call again.
HTTP Status Code: 500
See AlsoFor more information about using this API in one of the language-specific AWS SDKs, see the following:
• AWS Command Line Interface• AWS SDK for .NET• AWS SDK for C++• AWS SDK for Go• AWS SDK for Java• AWS SDK for JavaScript• AWS SDK for PHP V3• AWS SDK for Python• AWS SDK for Ruby V2
352
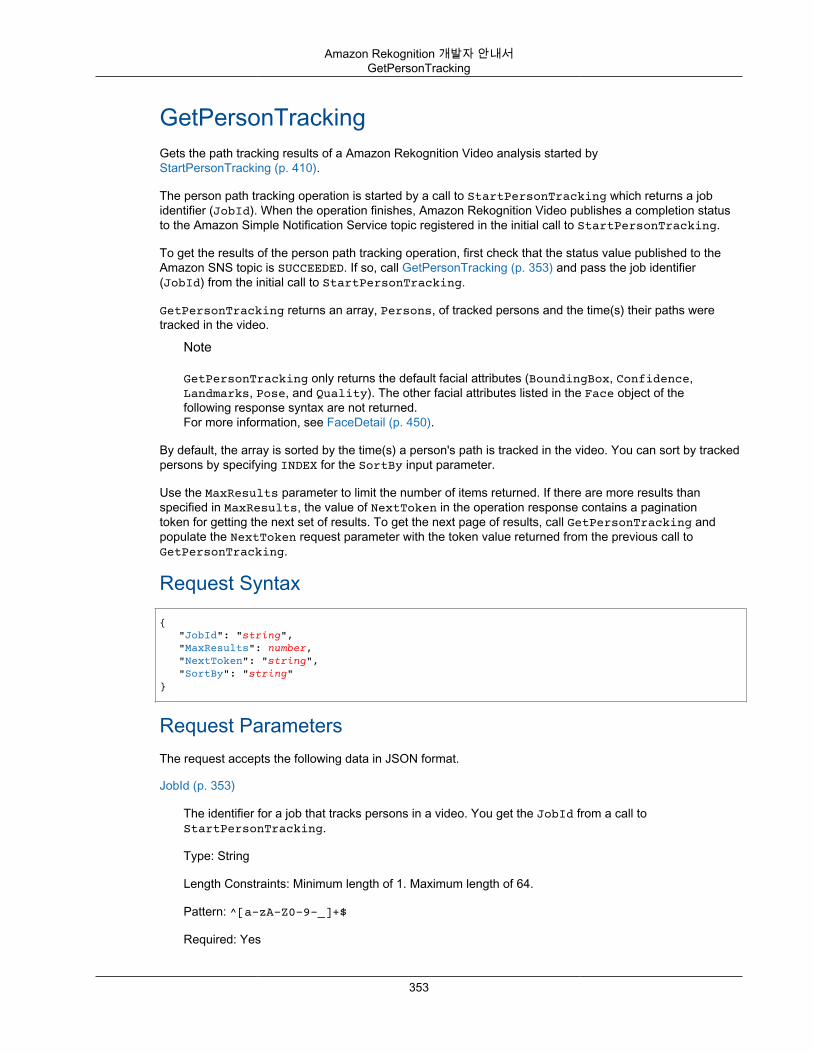
Amazon Rekognition 개발자 안내서GetPersonTracking
GetPersonTrackingGets the path tracking results of a Amazon Rekognition Video analysis started byStartPersonTracking (p. 410).
The person path tracking operation is started by a call to StartPersonTracking which returns a jobidentifier (JobId). When the operation finishes, Amazon Rekognition Video publishes a completion statusto the Amazon Simple Notification Service topic registered in the initial call to StartPersonTracking.
To get the results of the person path tracking operation, first check that the status value published to theAmazon SNS topic is SUCCEEDED. If so, call GetPersonTracking (p. 353) and pass the job identifier(JobId) from the initial call to StartPersonTracking.
GetPersonTracking returns an array, Persons, of tracked persons and the time(s) their paths weretracked in the video.
Note
GetPersonTracking only returns the default facial attributes (BoundingBox, Confidence,Landmarks, Pose, and Quality). The other facial attributes listed in the Face object of thefollowing response syntax are not returned.For more information, see FaceDetail (p. 450).
By default, the array is sorted by the time(s) a person's path is tracked in the video. You can sort by trackedpersons by specifying INDEX for the SortBy input parameter.
Use the MaxResults parameter to limit the number of items returned. If there are more results thanspecified in MaxResults, the value of NextToken in the operation response contains a paginationtoken for getting the next set of results. To get the next page of results, call GetPersonTracking andpopulate the NextToken request parameter with the token value returned from the previous call toGetPersonTracking.
Request Syntax
{ "JobId": "string", "MaxResults": number, "NextToken": "string", "SortBy": "string"}
Request ParametersThe request accepts the following data in JSON format.
JobId (p. 353)
The identifier for a job that tracks persons in a video. You get the JobId from a call toStartPersonTracking.
Type: String
Length Constraints: Minimum length of 1. Maximum length of 64.
Pattern: ^[a-zA-Z0-9-_]+$
Required: Yes
353
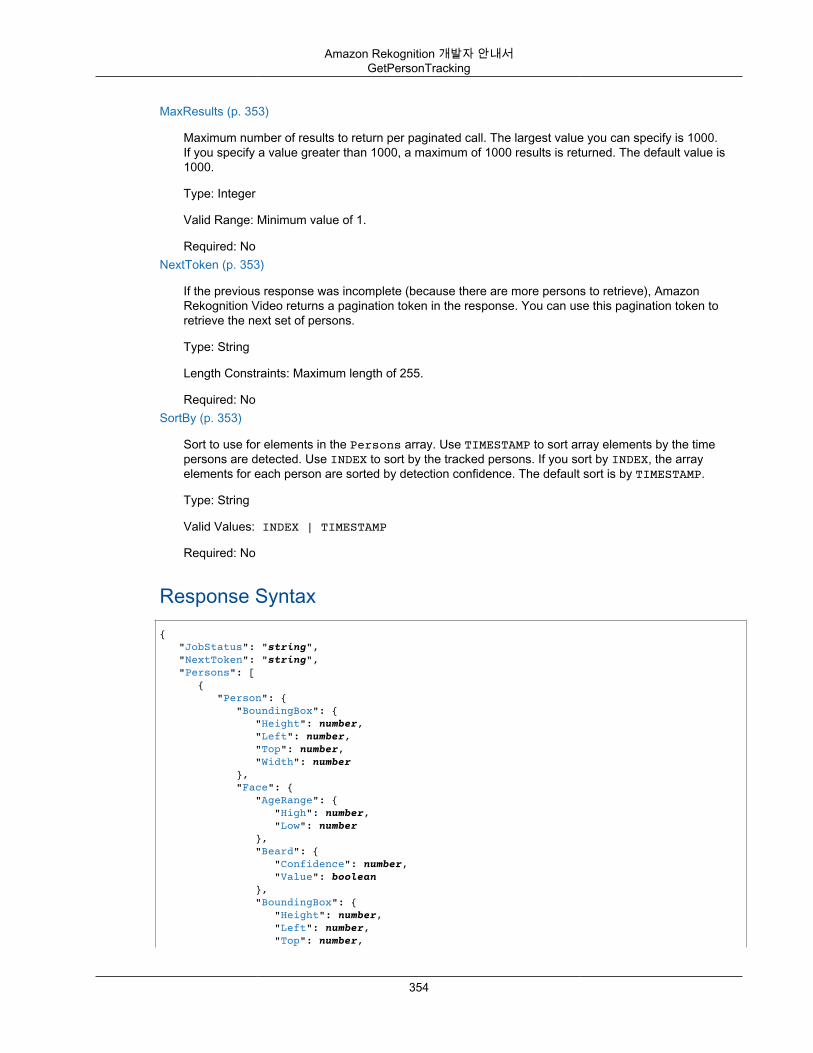
Amazon Rekognition 개발자 안내서GetPersonTracking
MaxResults (p. 353)
Maximum number of results to return per paginated call. The largest value you can specify is 1000.If you specify a value greater than 1000, a maximum of 1000 results is returned. The default value is1000.
Type: Integer
Valid Range: Minimum value of 1.
Required: NoNextToken (p. 353)
If the previous response was incomplete (because there are more persons to retrieve), AmazonRekognition Video returns a pagination token in the response. You can use this pagination token toretrieve the next set of persons.
Type: String
Length Constraints: Maximum length of 255.
Required: NoSortBy (p. 353)
Sort to use for elements in the Persons array. Use TIMESTAMP to sort array elements by the timepersons are detected. Use INDEX to sort by the tracked persons. If you sort by INDEX, the arrayelements for each person are sorted by detection confidence. The default sort is by TIMESTAMP.
Type: String
Valid Values: INDEX | TIMESTAMP
Required: No
Response Syntax{ "JobStatus": "string", "NextToken": "string", "Persons": [ { "Person": { "BoundingBox": { "Height": number, "Left": number, "Top": number, "Width": number }, "Face": { "AgeRange": { "High": number, "Low": number }, "Beard": { "Confidence": number, "Value": boolean }, "BoundingBox": { "Height": number, "Left": number, "Top": number,
354
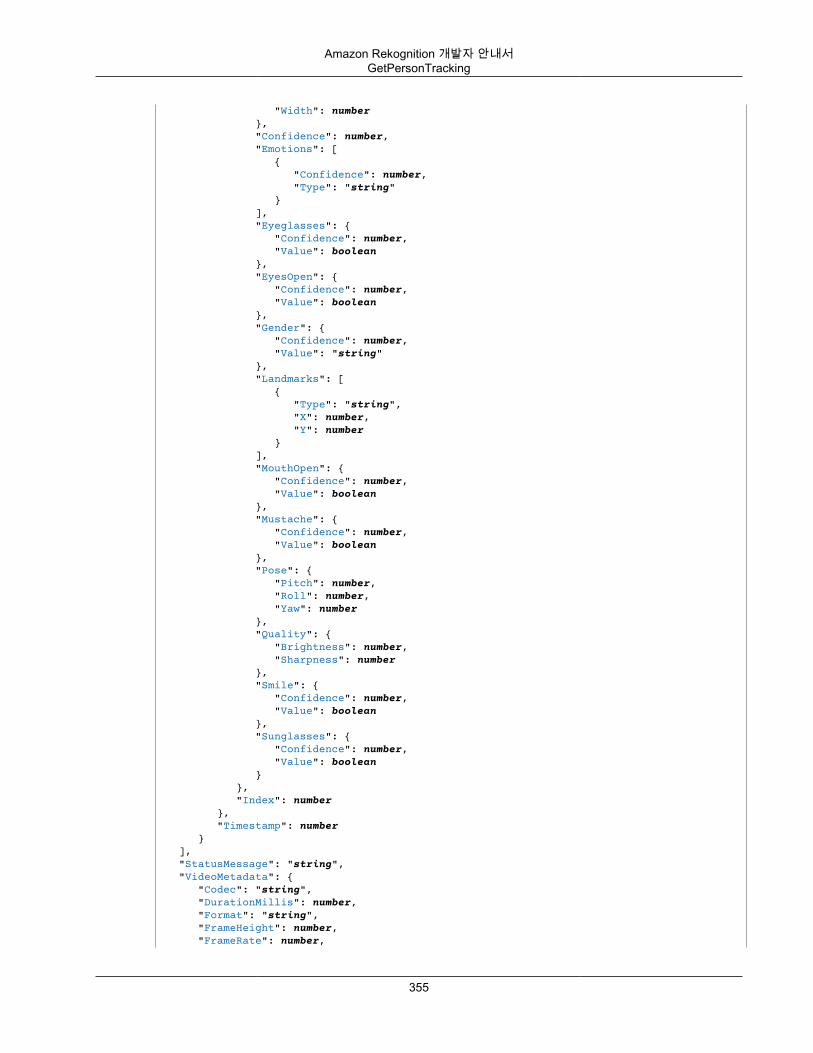
Amazon Rekognition 개발자 안내서GetPersonTracking
"Width": number }, "Confidence": number, "Emotions": [ { "Confidence": number, "Type": "string" } ], "Eyeglasses": { "Confidence": number, "Value": boolean }, "EyesOpen": { "Confidence": number, "Value": boolean }, "Gender": { "Confidence": number, "Value": "string" }, "Landmarks": [ { "Type": "string", "X": number, "Y": number } ], "MouthOpen": { "Confidence": number, "Value": boolean }, "Mustache": { "Confidence": number, "Value": boolean }, "Pose": { "Pitch": number, "Roll": number, "Yaw": number }, "Quality": { "Brightness": number, "Sharpness": number }, "Smile": { "Confidence": number, "Value": boolean }, "Sunglasses": { "Confidence": number, "Value": boolean } }, "Index": number }, "Timestamp": number } ], "StatusMessage": "string", "VideoMetadata": { "Codec": "string", "DurationMillis": number, "Format": "string", "FrameHeight": number, "FrameRate": number,
355
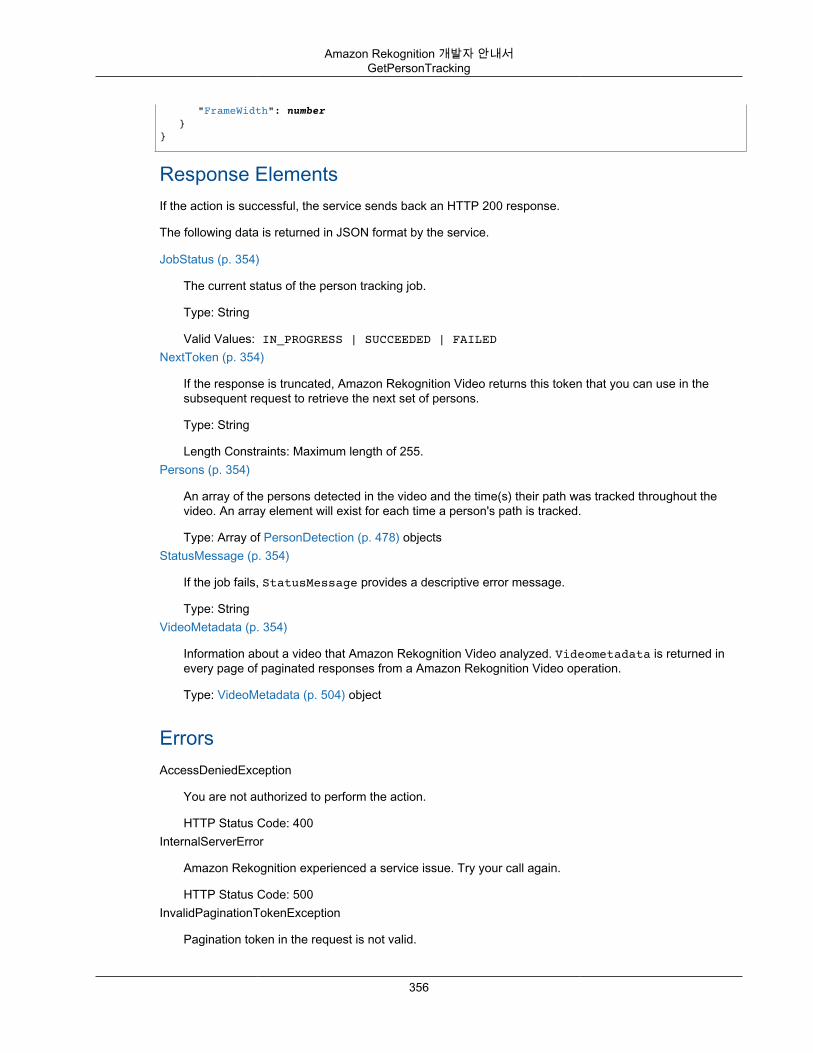
Amazon Rekognition 개발자 안내서GetPersonTracking
"FrameWidth": number }}
Response ElementsIf the action is successful, the service sends back an HTTP 200 response.
The following data is returned in JSON format by the service.
JobStatus (p. 354)
The current status of the person tracking job.
Type: String
Valid Values: IN_PROGRESS | SUCCEEDED | FAILEDNextToken (p. 354)
If the response is truncated, Amazon Rekognition Video returns this token that you can use in thesubsequent request to retrieve the next set of persons.
Type: String
Length Constraints: Maximum length of 255.Persons (p. 354)
An array of the persons detected in the video and the time(s) their path was tracked throughout thevideo. An array element will exist for each time a person's path is tracked.
Type: Array of PersonDetection (p. 478) objectsStatusMessage (p. 354)
If the job fails, StatusMessage provides a descriptive error message.
Type: StringVideoMetadata (p. 354)
Information about a video that Amazon Rekognition Video analyzed. Videometadata is returned inevery page of paginated responses from a Amazon Rekognition Video operation.
Type: VideoMetadata (p. 504) object
ErrorsAccessDeniedException
You are not authorized to perform the action.
HTTP Status Code: 400InternalServerError
Amazon Rekognition experienced a service issue. Try your call again.
HTTP Status Code: 500InvalidPaginationTokenException
Pagination token in the request is not valid.
356
Amazon Rekognition 개발자 안내서GetPersonTracking
HTTP Status Code: 400InvalidParameterException
Input parameter violated a constraint. Validate your parameter before calling the API operation again.
HTTP Status Code: 400ProvisionedThroughputExceededException
The number of requests exceeded your throughput limit. If you want to increase this limit, contactAmazon Rekognition.
HTTP Status Code: 400ResourceNotFoundException
The collection specified in the request cannot be found.
HTTP Status Code: 400ThrottlingException
Amazon Rekognition is temporarily unable to process the request. Try your call again.
HTTP Status Code: 500
See AlsoFor more information about using this API in one of the language-specific AWS SDKs, see the following:
• AWS Command Line Interface• AWS SDK for .NET• AWS SDK for C++• AWS SDK for Go• AWS SDK for Java• AWS SDK for JavaScript• AWS SDK for PHP V3• AWS SDK for Python• AWS SDK for Ruby V2
357
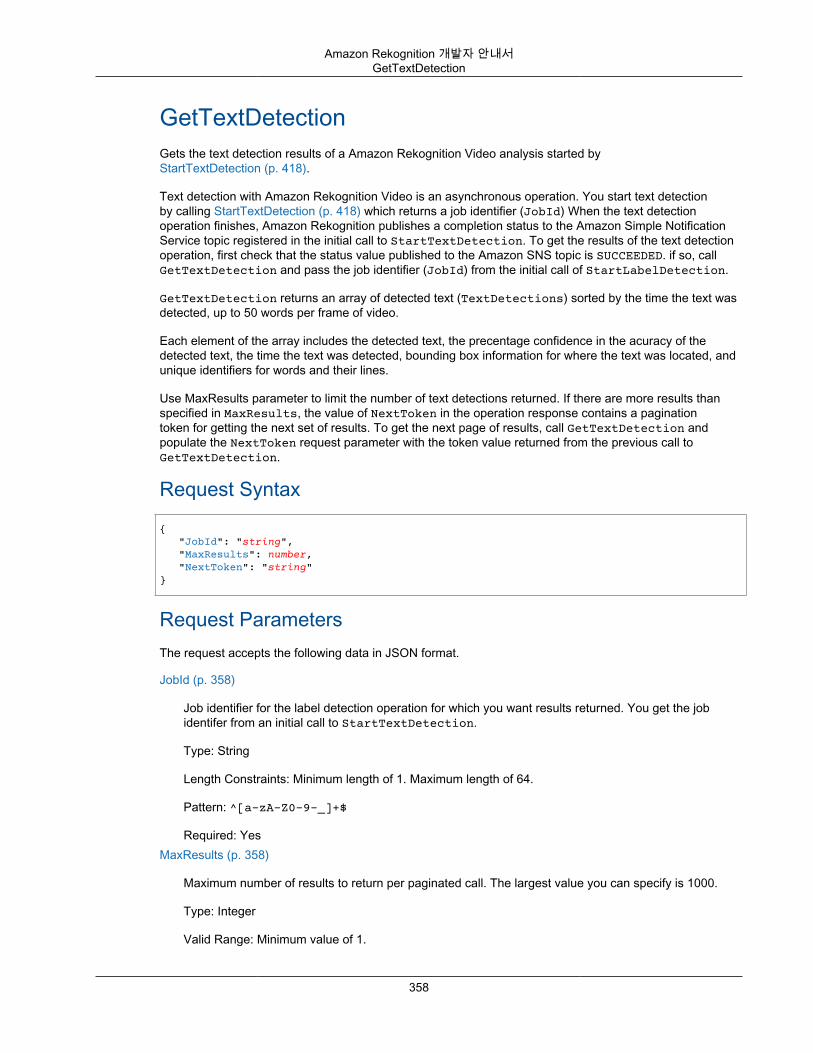
Amazon Rekognition 개발자 안내서GetTextDetection
GetTextDetectionGets the text detection results of a Amazon Rekognition Video analysis started byStartTextDetection (p. 418).
Text detection with Amazon Rekognition Video is an asynchronous operation. You start text detectionby calling StartTextDetection (p. 418) which returns a job identifier (JobId) When the text detectionoperation finishes, Amazon Rekognition publishes a completion status to the Amazon Simple NotificationService topic registered in the initial call to StartTextDetection. To get the results of the text detectionoperation, first check that the status value published to the Amazon SNS topic is SUCCEEDED. if so, callGetTextDetection and pass the job identifier (JobId) from the initial call of StartLabelDetection.
GetTextDetection returns an array of detected text (TextDetections) sorted by the time the text wasdetected, up to 50 words per frame of video.
Each element of the array includes the detected text, the precentage confidence in the acuracy of thedetected text, the time the text was detected, bounding box information for where the text was located, andunique identifiers for words and their lines.
Use MaxResults parameter to limit the number of text detections returned. If there are more results thanspecified in MaxResults, the value of NextToken in the operation response contains a paginationtoken for getting the next set of results. To get the next page of results, call GetTextDetection andpopulate the NextToken request parameter with the token value returned from the previous call toGetTextDetection.
Request Syntax
{ "JobId": "string", "MaxResults": number, "NextToken": "string"}
Request ParametersThe request accepts the following data in JSON format.
JobId (p. 358)
Job identifier for the label detection operation for which you want results returned. You get the jobidentifer from an initial call to StartTextDetection.
Type: String
Length Constraints: Minimum length of 1. Maximum length of 64.
Pattern: ^[a-zA-Z0-9-_]+$
Required: YesMaxResults (p. 358)
Maximum number of results to return per paginated call. The largest value you can specify is 1000.
Type: Integer
Valid Range: Minimum value of 1.
358
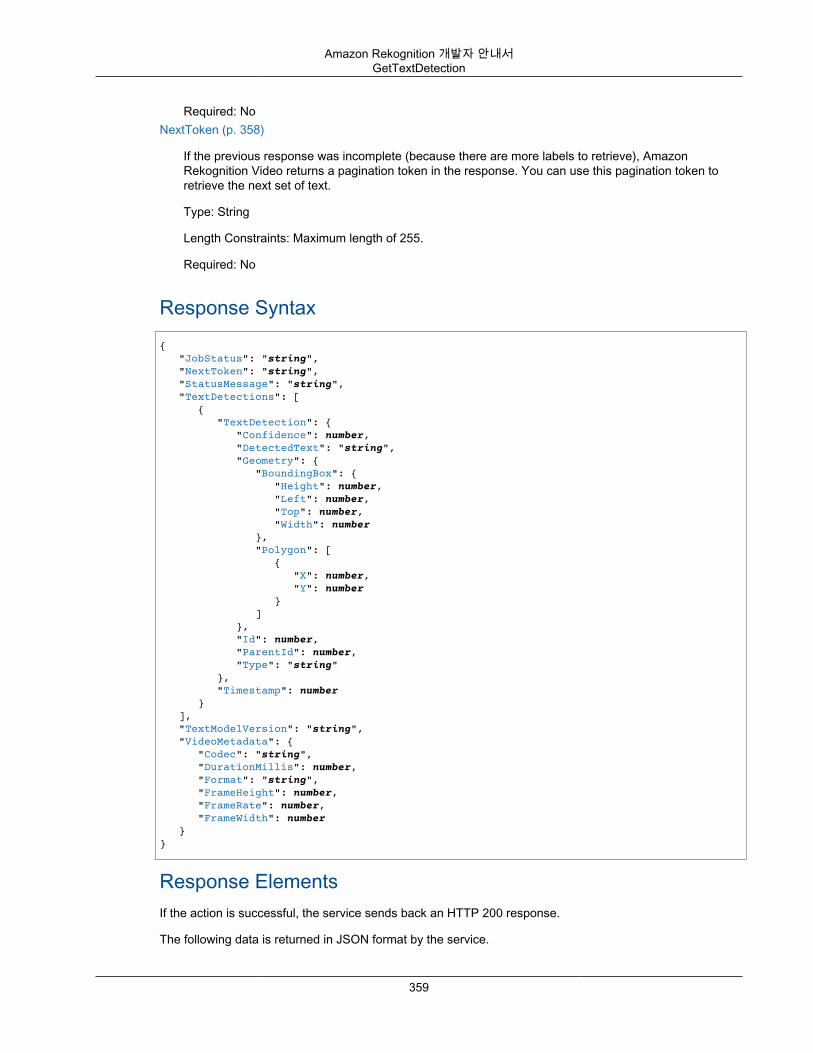
Amazon Rekognition 개발자 안내서GetTextDetection
Required: NoNextToken (p. 358)
If the previous response was incomplete (because there are more labels to retrieve), AmazonRekognition Video returns a pagination token in the response. You can use this pagination token toretrieve the next set of text.
Type: String
Length Constraints: Maximum length of 255.
Required: No
Response Syntax{ "JobStatus": "string", "NextToken": "string", "StatusMessage": "string", "TextDetections": [ { "TextDetection": { "Confidence": number, "DetectedText": "string", "Geometry": { "BoundingBox": { "Height": number, "Left": number, "Top": number, "Width": number }, "Polygon": [ { "X": number, "Y": number } ] }, "Id": number, "ParentId": number, "Type": "string" }, "Timestamp": number } ], "TextModelVersion": "string", "VideoMetadata": { "Codec": "string", "DurationMillis": number, "Format": "string", "FrameHeight": number, "FrameRate": number, "FrameWidth": number }}
Response ElementsIf the action is successful, the service sends back an HTTP 200 response.
The following data is returned in JSON format by the service.
359
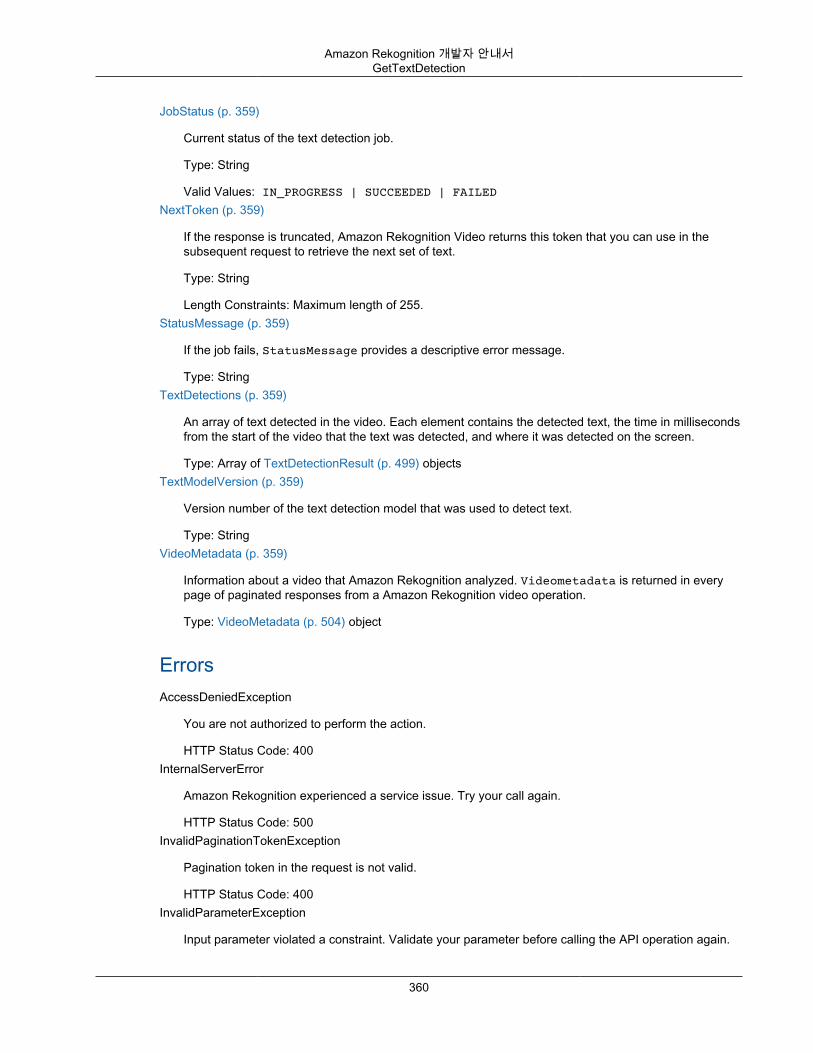
Amazon Rekognition 개발자 안내서GetTextDetection
JobStatus (p. 359)
Current status of the text detection job.
Type: String
Valid Values: IN_PROGRESS | SUCCEEDED | FAILEDNextToken (p. 359)
If the response is truncated, Amazon Rekognition Video returns this token that you can use in thesubsequent request to retrieve the next set of text.
Type: String
Length Constraints: Maximum length of 255.StatusMessage (p. 359)
If the job fails, StatusMessage provides a descriptive error message.
Type: StringTextDetections (p. 359)
An array of text detected in the video. Each element contains the detected text, the time in millisecondsfrom the start of the video that the text was detected, and where it was detected on the screen.
Type: Array of TextDetectionResult (p. 499) objectsTextModelVersion (p. 359)
Version number of the text detection model that was used to detect text.
Type: StringVideoMetadata (p. 359)
Information about a video that Amazon Rekognition analyzed. Videometadata is returned in everypage of paginated responses from a Amazon Rekognition video operation.
Type: VideoMetadata (p. 504) object
ErrorsAccessDeniedException
You are not authorized to perform the action.
HTTP Status Code: 400InternalServerError
Amazon Rekognition experienced a service issue. Try your call again.
HTTP Status Code: 500InvalidPaginationTokenException
Pagination token in the request is not valid.
HTTP Status Code: 400InvalidParameterException
Input parameter violated a constraint. Validate your parameter before calling the API operation again.
360
Amazon Rekognition 개발자 안내서GetTextDetection
HTTP Status Code: 400ProvisionedThroughputExceededException
The number of requests exceeded your throughput limit. If you want to increase this limit, contactAmazon Rekognition.
HTTP Status Code: 400ResourceNotFoundException
The collection specified in the request cannot be found.
HTTP Status Code: 400ThrottlingException
Amazon Rekognition is temporarily unable to process the request. Try your call again.
HTTP Status Code: 500
See AlsoFor more information about using this API in one of the language-specific AWS SDKs, see the following:
• AWS Command Line Interface• AWS SDK for .NET• AWS SDK for C++• AWS SDK for Go• AWS SDK for Java• AWS SDK for JavaScript• AWS SDK for PHP V3• AWS SDK for Python• AWS SDK for Ruby V2
361
Amazon Rekognition 개발자 안내서IndexFaces
IndexFacesDetects faces in the input image and adds them to the specified collection.
Amazon Rekognition doesn't save the actual faces that are detected. Instead, the underlying detectionalgorithm first detects the faces in the input image. For each face, the algorithm extracts facial featuresinto a feature vector, and stores it in the backend database. Amazon Rekognition uses featurevectors when it performs face match and search operations using the SearchFaces (p. 383) andSearchFacesByImage (p. 386) operations.
For more information, see 모음에 얼굴 추가 (p. 168).
To get the number of faces in a collection, call DescribeCollection (p. 293).
If you're using version 1.0 of the face detection model, IndexFaces indexes the 15 largest faces in theinput image. Later versions of the face detection model index the 100 largest faces in the input image.
If you're using version 4 or later of the face model, image orientation information is not returned in theOrientationCorrection field.
To determine which version of the model you're using, call DescribeCollection (p. 293) and supply thecollection ID. You can also get the model version from the value of FaceModelVersion in the responsefrom IndexFaces
For more information, see 모델 버전 관리 (p. 9).
If you provide the optional ExternalImageID for the input image you provided, Amazon Rekognitionassociates this ID with all faces that it detects. When you call the ListFaces (p. 373) operation, theresponse returns the external ID. You can use this external image ID to create a client-side index toassociate the faces with each image. You can then use the index to find all faces in an image.
You can specify the maximum number of faces to index with the MaxFaces input parameter. This is usefulwhen you want to index the largest faces in an image and don't want to index smaller faces, such as thosebelonging to people standing in the background.
The QualityFilter input parameter allows you to filter out detected faces that don’t meet a requiredquality bar. The quality bar is based on a variety of common use cases. By default, IndexFaceschooses the quality bar that's used to filter faces. You can also explicitly choose the quality bar. UseQualityFilter, to set the quality bar by specifying LOW, MEDIUM, or HIGH. If you do not want to filterdetected faces, specify NONE.
Note
To use quality filtering, you need a collection associated with version 3 of the face model or higher.To get the version of the face model associated with a collection, call DescribeCollection (p. 293).
Information about faces detected in an image, but not indexed, is returned in an array ofUnindexedFace (p. 502) objects, UnindexedFaces. Faces aren't indexed for reasons such as:
• The number of faces detected exceeds the value of the MaxFaces request parameter.• The face is too small compared to the image dimensions.• The face is too blurry.• The image is too dark.• The face has an extreme pose.• The face doesn’t have enough detail to be suitable for face search.
In response, the IndexFaces operation returns an array of metadata for all detected faces,FaceRecords. This includes:
362
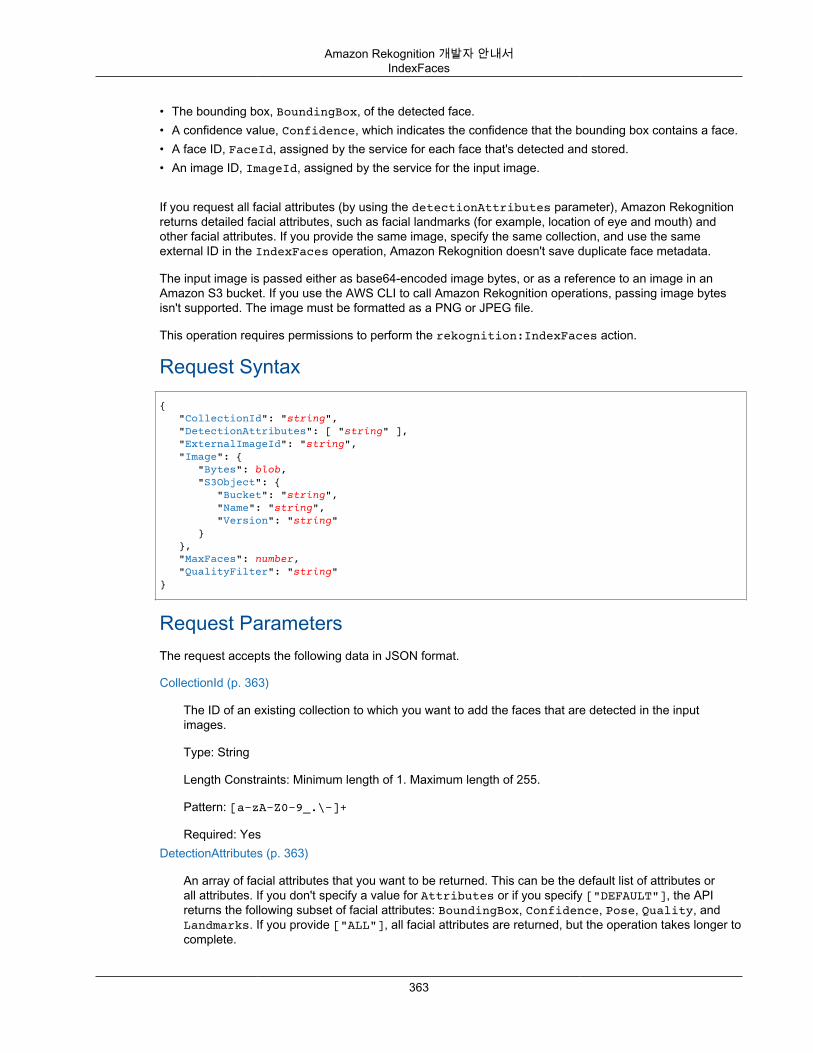
Amazon Rekognition 개발자 안내서IndexFaces
• The bounding box, BoundingBox, of the detected face.• A confidence value, Confidence, which indicates the confidence that the bounding box contains a face.• A face ID, FaceId, assigned by the service for each face that's detected and stored.• An image ID, ImageId, assigned by the service for the input image.
If you request all facial attributes (by using the detectionAttributes parameter), Amazon Rekognitionreturns detailed facial attributes, such as facial landmarks (for example, location of eye and mouth) andother facial attributes. If you provide the same image, specify the same collection, and use the sameexternal ID in the IndexFaces operation, Amazon Rekognition doesn't save duplicate face metadata.
The input image is passed either as base64-encoded image bytes, or as a reference to an image in anAmazon S3 bucket. If you use the AWS CLI to call Amazon Rekognition operations, passing image bytesisn't supported. The image must be formatted as a PNG or JPEG file.
This operation requires permissions to perform the rekognition:IndexFaces action.
Request Syntax
{ "CollectionId": "string", "DetectionAttributes": [ "string" ], "ExternalImageId": "string", "Image": { "Bytes": blob, "S3Object": { "Bucket": "string", "Name": "string", "Version": "string" } }, "MaxFaces": number, "QualityFilter": "string"}
Request ParametersThe request accepts the following data in JSON format.
CollectionId (p. 363)
The ID of an existing collection to which you want to add the faces that are detected in the inputimages.
Type: String
Length Constraints: Minimum length of 1. Maximum length of 255.
Pattern: [a-zA-Z0-9_.\-]+
Required: YesDetectionAttributes (p. 363)
An array of facial attributes that you want to be returned. This can be the default list of attributes orall attributes. If you don't specify a value for Attributes or if you specify ["DEFAULT"], the APIreturns the following subset of facial attributes: BoundingBox, Confidence, Pose, Quality, andLandmarks. If you provide ["ALL"], all facial attributes are returned, but the operation takes longer tocomplete.
363
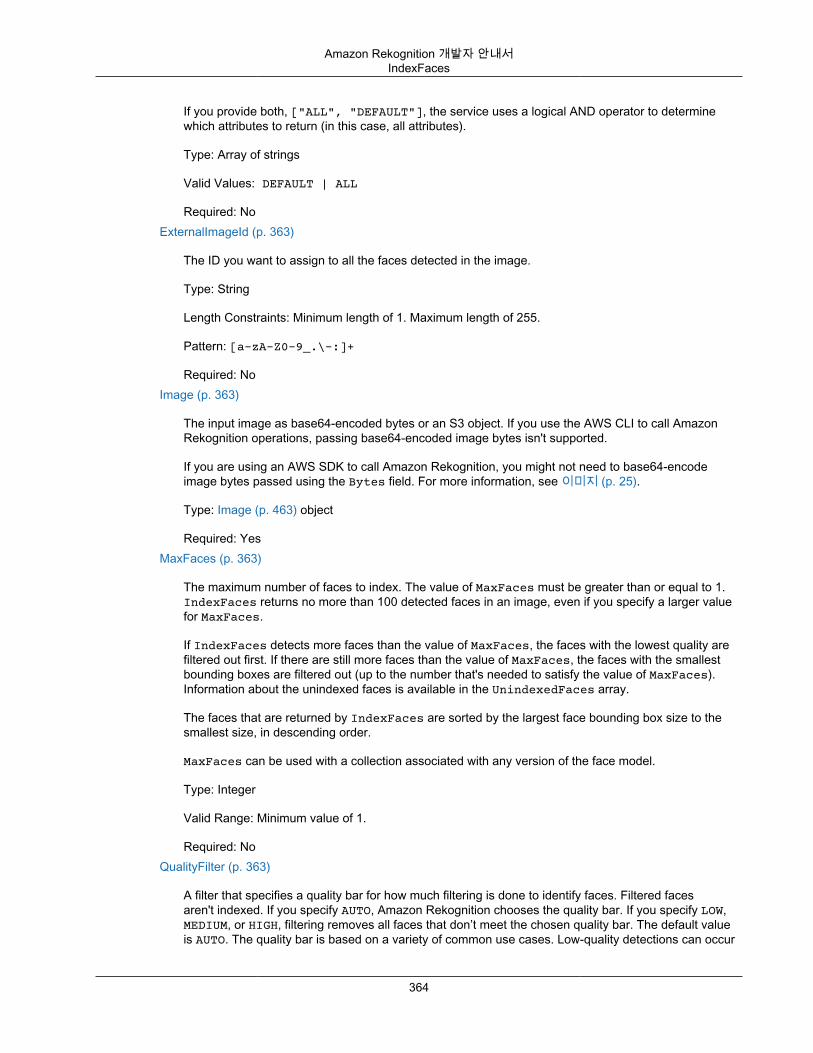
Amazon Rekognition 개발자 안내서IndexFaces
If you provide both, ["ALL", "DEFAULT"], the service uses a logical AND operator to determinewhich attributes to return (in this case, all attributes).
Type: Array of strings
Valid Values: DEFAULT | ALL
Required: NoExternalImageId (p. 363)
The ID you want to assign to all the faces detected in the image.
Type: String
Length Constraints: Minimum length of 1. Maximum length of 255.
Pattern: [a-zA-Z0-9_.\-:]+
Required: NoImage (p. 363)
The input image as base64-encoded bytes or an S3 object. If you use the AWS CLI to call AmazonRekognition operations, passing base64-encoded image bytes isn't supported.
If you are using an AWS SDK to call Amazon Rekognition, you might not need to base64-encodeimage bytes passed using the Bytes field. For more information, see 이미지 (p. 25).
Type: Image (p. 463) object
Required: YesMaxFaces (p. 363)
The maximum number of faces to index. The value of MaxFaces must be greater than or equal to 1.IndexFaces returns no more than 100 detected faces in an image, even if you specify a larger valuefor MaxFaces.
If IndexFaces detects more faces than the value of MaxFaces, the faces with the lowest quality arefiltered out first. If there are still more faces than the value of MaxFaces, the faces with the smallestbounding boxes are filtered out (up to the number that's needed to satisfy the value of MaxFaces).Information about the unindexed faces is available in the UnindexedFaces array.
The faces that are returned by IndexFaces are sorted by the largest face bounding box size to thesmallest size, in descending order.
MaxFaces can be used with a collection associated with any version of the face model.
Type: Integer
Valid Range: Minimum value of 1.
Required: NoQualityFilter (p. 363)
A filter that specifies a quality bar for how much filtering is done to identify faces. Filtered facesaren't indexed. If you specify AUTO, Amazon Rekognition chooses the quality bar. If you specify LOW,MEDIUM, or HIGH, filtering removes all faces that don’t meet the chosen quality bar. The default valueis AUTO. The quality bar is based on a variety of common use cases. Low-quality detections can occur
364
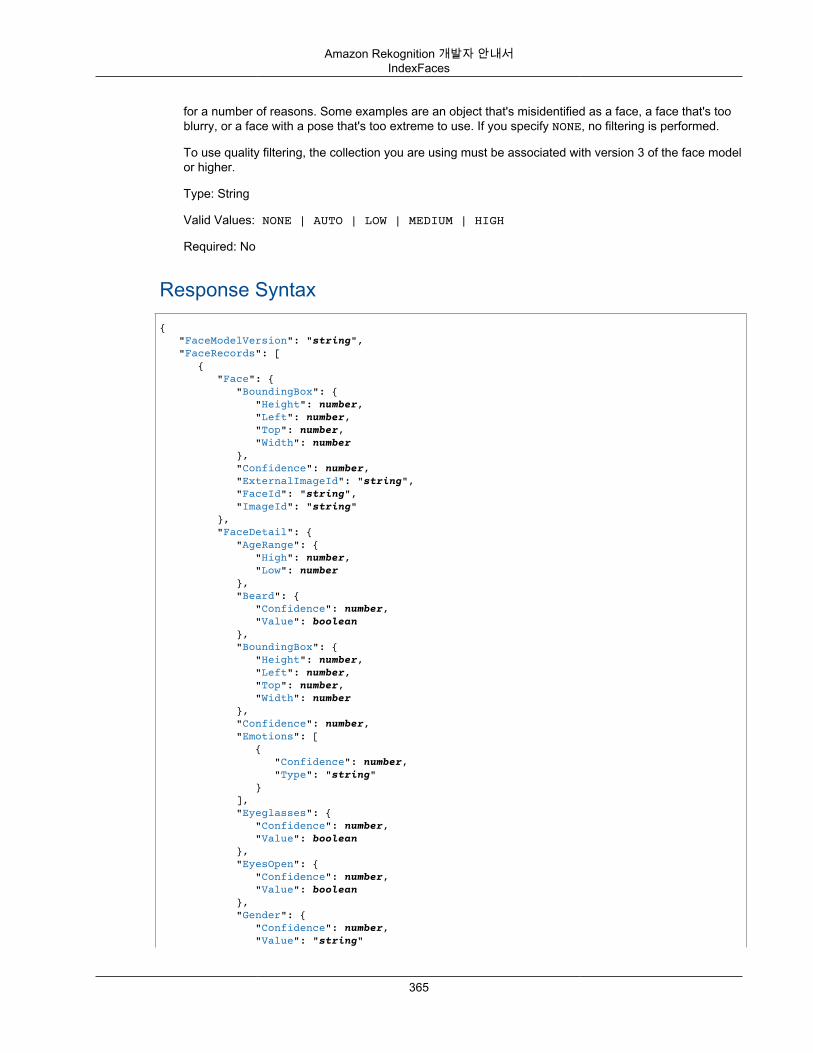
Amazon Rekognition 개발자 안내서IndexFaces
for a number of reasons. Some examples are an object that's misidentified as a face, a face that's tooblurry, or a face with a pose that's too extreme to use. If you specify NONE, no filtering is performed.
To use quality filtering, the collection you are using must be associated with version 3 of the face modelor higher.
Type: String
Valid Values: NONE | AUTO | LOW | MEDIUM | HIGH
Required: No
Response Syntax{ "FaceModelVersion": "string", "FaceRecords": [ { "Face": { "BoundingBox": { "Height": number, "Left": number, "Top": number, "Width": number }, "Confidence": number, "ExternalImageId": "string", "FaceId": "string", "ImageId": "string" }, "FaceDetail": { "AgeRange": { "High": number, "Low": number }, "Beard": { "Confidence": number, "Value": boolean }, "BoundingBox": { "Height": number, "Left": number, "Top": number, "Width": number }, "Confidence": number, "Emotions": [ { "Confidence": number, "Type": "string" } ], "Eyeglasses": { "Confidence": number, "Value": boolean }, "EyesOpen": { "Confidence": number, "Value": boolean }, "Gender": { "Confidence": number, "Value": "string"
365
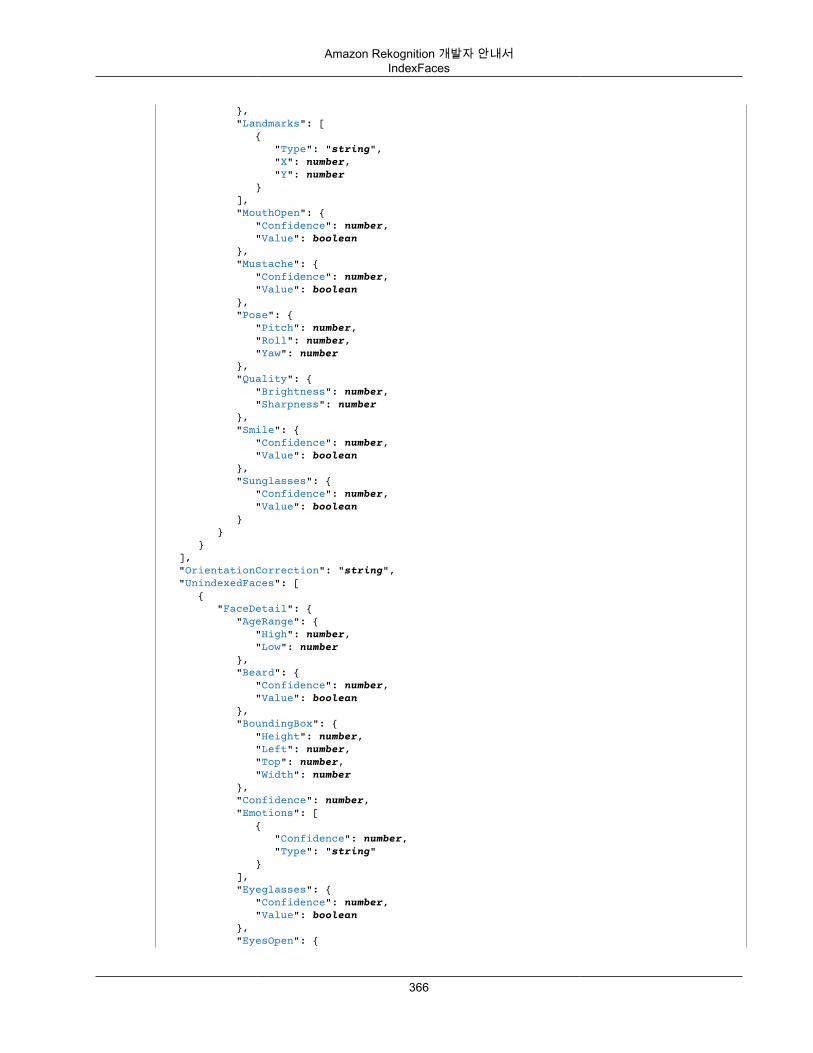
Amazon Rekognition 개발자 안내서IndexFaces
}, "Landmarks": [ { "Type": "string", "X": number, "Y": number } ], "MouthOpen": { "Confidence": number, "Value": boolean }, "Mustache": { "Confidence": number, "Value": boolean }, "Pose": { "Pitch": number, "Roll": number, "Yaw": number }, "Quality": { "Brightness": number, "Sharpness": number }, "Smile": { "Confidence": number, "Value": boolean }, "Sunglasses": { "Confidence": number, "Value": boolean } } } ], "OrientationCorrection": "string", "UnindexedFaces": [ { "FaceDetail": { "AgeRange": { "High": number, "Low": number }, "Beard": { "Confidence": number, "Value": boolean }, "BoundingBox": { "Height": number, "Left": number, "Top": number, "Width": number }, "Confidence": number, "Emotions": [ { "Confidence": number, "Type": "string" } ], "Eyeglasses": { "Confidence": number, "Value": boolean }, "EyesOpen": {
366

Amazon Rekognition 개발자 안내서IndexFaces
"Confidence": number, "Value": boolean }, "Gender": { "Confidence": number, "Value": "string" }, "Landmarks": [ { "Type": "string", "X": number, "Y": number } ], "MouthOpen": { "Confidence": number, "Value": boolean }, "Mustache": { "Confidence": number, "Value": boolean }, "Pose": { "Pitch": number, "Roll": number, "Yaw": number }, "Quality": { "Brightness": number, "Sharpness": number }, "Smile": { "Confidence": number, "Value": boolean }, "Sunglasses": { "Confidence": number, "Value": boolean } }, "Reasons": [ "string" ] } ]}
Response ElementsIf the action is successful, the service sends back an HTTP 200 response.
The following data is returned in JSON format by the service.
FaceModelVersion (p. 365)
The version number of the face detection model that's associated with the input collection(CollectionId).
Type: StringFaceRecords (p. 365)
An array of faces detected and added to the collection. For more information, see 모음에서 얼굴 관리 (p. 153).
Type: Array of FaceRecord (p. 455) objects
367
Amazon Rekognition 개발자 안내서IndexFaces
OrientationCorrection (p. 365)
If your collection is associated with a face detection model that's later than version 3.0, the value ofOrientationCorrection is always null and no orientation information is returned.
If your collection is associated with a face detection model that's version 3.0 or earlier, the followingapplies:• If the input image is in .jpeg format, it might contain exchangeable image file format (Exif) metadata
that includes the image's orientation. Amazon Rekognition uses this orientation information toperform image correction - the bounding box coordinates are translated to represent object locationsafter the orientation information in the Exif metadata is used to correct the image orientation. Imagesin .png format don't contain Exif metadata. The value of OrientationCorrection is null.
• If the image doesn't contain orientation information in its Exif metadata, Amazon Rekognitionreturns an estimated orientation (ROTATE_0, ROTATE_90, ROTATE_180, ROTATE_270). AmazonRekognition doesn’t perform image correction for images. The bounding box coordinates aren'ttranslated and represent the object locations before the image is rotated.
Bounding box information is returned in the FaceRecords array. You can get the version of the facedetection model by calling DescribeCollection (p. 293).
Type: String
Valid Values: ROTATE_0 | ROTATE_90 | ROTATE_180 | ROTATE_270UnindexedFaces (p. 365)
An array of faces that were detected in the image but weren't indexed. They weren't indexed becausethe quality filter identified them as low quality, or the MaxFaces request parameter filtered them out. Touse the quality filter, you specify the QualityFilter request parameter.
Type: Array of UnindexedFace (p. 502) objects
ErrorsAccessDeniedException
You are not authorized to perform the action.
HTTP Status Code: 400ImageTooLargeException
The input image size exceeds the allowed limit. For more information, see Amazon Rekognition의 제한값 (p. 506).
HTTP Status Code: 400InternalServerError
Amazon Rekognition experienced a service issue. Try your call again.
HTTP Status Code: 500InvalidImageFormatException
The provided image format is not supported.
HTTP Status Code: 400InvalidParameterException
Input parameter violated a constraint. Validate your parameter before calling the API operation again.
368
Amazon Rekognition 개발자 안내서IndexFaces
HTTP Status Code: 400InvalidS3ObjectException
Amazon Rekognition is unable to access the S3 object specified in the request.
HTTP Status Code: 400ProvisionedThroughputExceededException
The number of requests exceeded your throughput limit. If you want to increase this limit, contactAmazon Rekognition.
HTTP Status Code: 400ResourceNotFoundException
The collection specified in the request cannot be found.
HTTP Status Code: 400ThrottlingException
Amazon Rekognition is temporarily unable to process the request. Try your call again.
HTTP Status Code: 500
See AlsoFor more information about using this API in one of the language-specific AWS SDKs, see the following:
• AWS Command Line Interface• AWS SDK for .NET• AWS SDK for C++• AWS SDK for Go• AWS SDK for Java• AWS SDK for JavaScript• AWS SDK for PHP V3• AWS SDK for Python• AWS SDK for Ruby V2
369
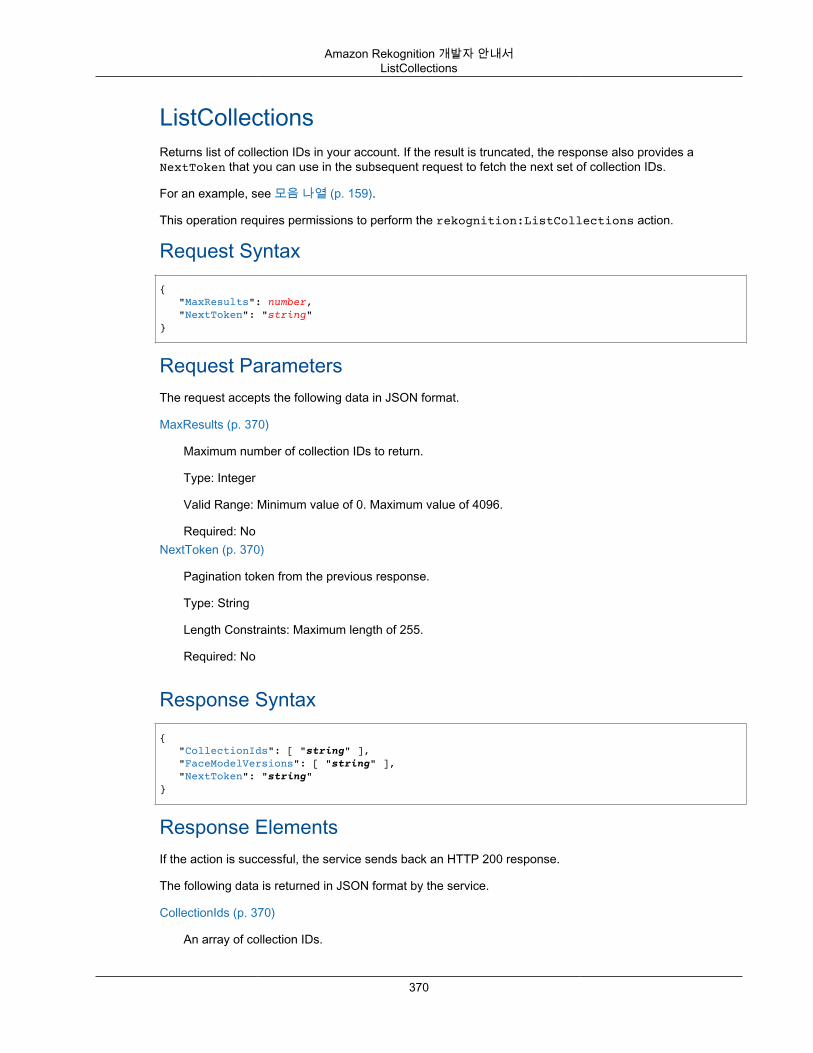
Amazon Rekognition 개발자 안내서ListCollections
ListCollectionsReturns list of collection IDs in your account. If the result is truncated, the response also provides aNextToken that you can use in the subsequent request to fetch the next set of collection IDs.
For an example, see 모음 나열 (p. 159).
This operation requires permissions to perform the rekognition:ListCollections action.
Request Syntax{ "MaxResults": number, "NextToken": "string"}
Request ParametersThe request accepts the following data in JSON format.
MaxResults (p. 370)
Maximum number of collection IDs to return.
Type: Integer
Valid Range: Minimum value of 0. Maximum value of 4096.
Required: NoNextToken (p. 370)
Pagination token from the previous response.
Type: String
Length Constraints: Maximum length of 255.
Required: No
Response Syntax{ "CollectionIds": [ "string" ], "FaceModelVersions": [ "string" ], "NextToken": "string"}
Response ElementsIf the action is successful, the service sends back an HTTP 200 response.
The following data is returned in JSON format by the service.
CollectionIds (p. 370)
An array of collection IDs.
370
Amazon Rekognition 개발자 안내서ListCollections
Type: Array of strings
Length Constraints: Minimum length of 1. Maximum length of 255.
Pattern: [a-zA-Z0-9_.\-]+FaceModelVersions (p. 370)
Version numbers of the face detection models associated with the collections in the arrayCollectionIds. For example, the value of FaceModelVersions[2] is the version number for theface detection model used by the collection in CollectionId[2].
Type: Array of stringsNextToken (p. 370)
If the result is truncated, the response provides a NextToken that you can use in the subsequentrequest to fetch the next set of collection IDs.
Type: String
Length Constraints: Maximum length of 255.
ErrorsAccessDeniedException
You are not authorized to perform the action.
HTTP Status Code: 400InternalServerError
Amazon Rekognition experienced a service issue. Try your call again.
HTTP Status Code: 500InvalidPaginationTokenException
Pagination token in the request is not valid.
HTTP Status Code: 400InvalidParameterException
Input parameter violated a constraint. Validate your parameter before calling the API operation again.
HTTP Status Code: 400ProvisionedThroughputExceededException
The number of requests exceeded your throughput limit. If you want to increase this limit, contactAmazon Rekognition.
HTTP Status Code: 400ResourceNotFoundException
The collection specified in the request cannot be found.
HTTP Status Code: 400ThrottlingException
Amazon Rekognition is temporarily unable to process the request. Try your call again.
371
Amazon Rekognition 개발자 안내서ListCollections
HTTP Status Code: 500
See AlsoFor more information about using this API in one of the language-specific AWS SDKs, see the following:
• AWS Command Line Interface• AWS SDK for .NET• AWS SDK for C++• AWS SDK for Go• AWS SDK for Java• AWS SDK for JavaScript• AWS SDK for PHP V3• AWS SDK for Python• AWS SDK for Ruby V2
372
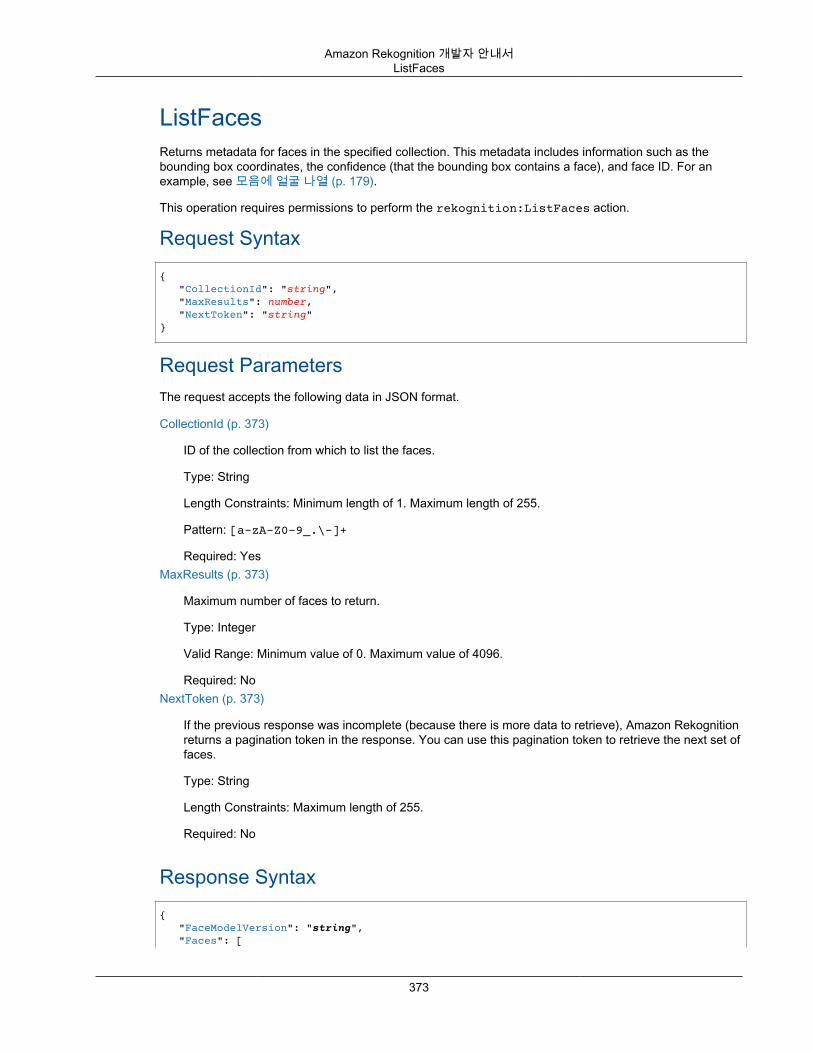
Amazon Rekognition 개발자 안내서ListFaces
ListFacesReturns metadata for faces in the specified collection. This metadata includes information such as thebounding box coordinates, the confidence (that the bounding box contains a face), and face ID. For anexample, see 모음에 얼굴 나열 (p. 179).
This operation requires permissions to perform the rekognition:ListFaces action.
Request Syntax{ "CollectionId": "string", "MaxResults": number, "NextToken": "string"}
Request ParametersThe request accepts the following data in JSON format.
CollectionId (p. 373)
ID of the collection from which to list the faces.
Type: String
Length Constraints: Minimum length of 1. Maximum length of 255.
Pattern: [a-zA-Z0-9_.\-]+
Required: YesMaxResults (p. 373)
Maximum number of faces to return.
Type: Integer
Valid Range: Minimum value of 0. Maximum value of 4096.
Required: NoNextToken (p. 373)
If the previous response was incomplete (because there is more data to retrieve), Amazon Rekognitionreturns a pagination token in the response. You can use this pagination token to retrieve the next set offaces.
Type: String
Length Constraints: Maximum length of 255.
Required: No
Response Syntax{ "FaceModelVersion": "string", "Faces": [
373
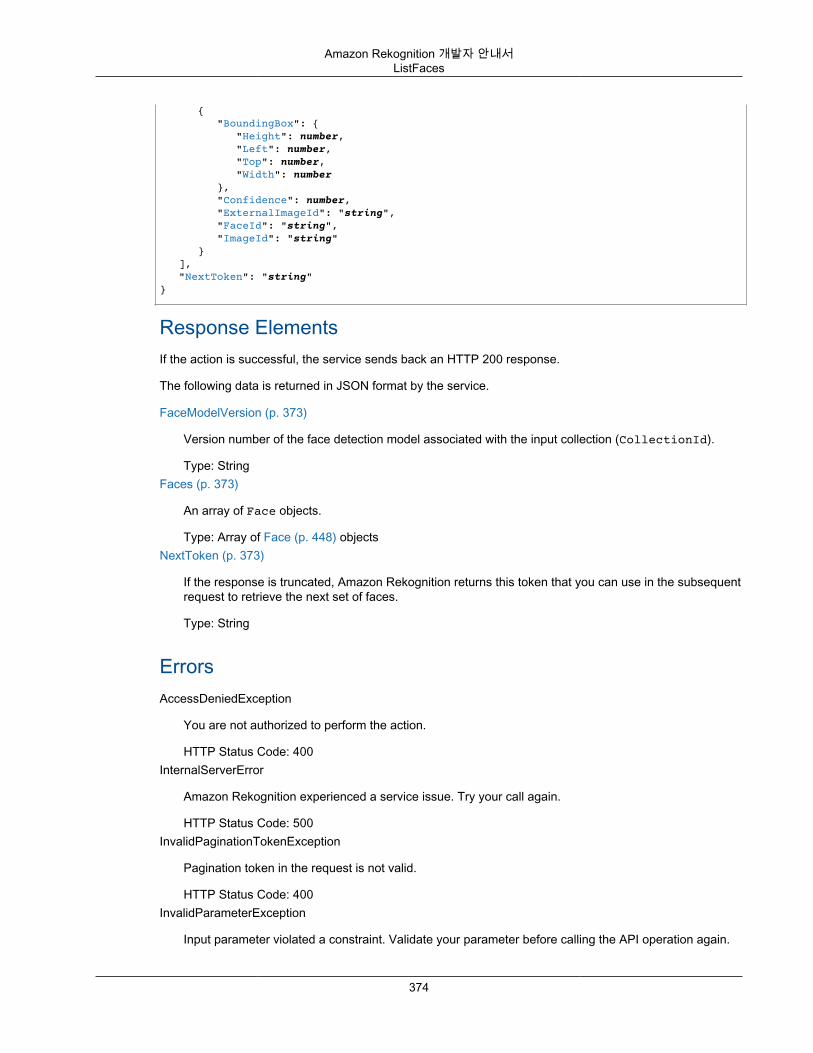
Amazon Rekognition 개발자 안내서ListFaces
{ "BoundingBox": { "Height": number, "Left": number, "Top": number, "Width": number }, "Confidence": number, "ExternalImageId": "string", "FaceId": "string", "ImageId": "string" } ], "NextToken": "string"}
Response ElementsIf the action is successful, the service sends back an HTTP 200 response.
The following data is returned in JSON format by the service.
FaceModelVersion (p. 373)
Version number of the face detection model associated with the input collection (CollectionId).
Type: StringFaces (p. 373)
An array of Face objects.
Type: Array of Face (p. 448) objectsNextToken (p. 373)
If the response is truncated, Amazon Rekognition returns this token that you can use in the subsequentrequest to retrieve the next set of faces.
Type: String
ErrorsAccessDeniedException
You are not authorized to perform the action.
HTTP Status Code: 400InternalServerError
Amazon Rekognition experienced a service issue. Try your call again.
HTTP Status Code: 500InvalidPaginationTokenException
Pagination token in the request is not valid.
HTTP Status Code: 400InvalidParameterException
Input parameter violated a constraint. Validate your parameter before calling the API operation again.
374

Amazon Rekognition 개발자 안내서ListFaces
HTTP Status Code: 400ProvisionedThroughputExceededException
The number of requests exceeded your throughput limit. If you want to increase this limit, contactAmazon Rekognition.
HTTP Status Code: 400ResourceNotFoundException
The collection specified in the request cannot be found.
HTTP Status Code: 400ThrottlingException
Amazon Rekognition is temporarily unable to process the request. Try your call again.
HTTP Status Code: 500
See AlsoFor more information about using this API in one of the language-specific AWS SDKs, see the following:
• AWS Command Line Interface• AWS SDK for .NET• AWS SDK for C++• AWS SDK for Go• AWS SDK for Java• AWS SDK for JavaScript• AWS SDK for PHP V3• AWS SDK for Python• AWS SDK for Ruby V2
375
Amazon Rekognition 개발자 안내서ListStreamProcessors
ListStreamProcessorsGets a list of stream processors that you have created with CreateStreamProcessor (p. 284).
Request Syntax
{ "MaxResults": number, "NextToken": "string"}
Request ParametersThe request accepts the following data in JSON format.
MaxResults (p. 376)
Maximum number of stream processors you want Amazon Rekognition Video to return in the response.The default is 1000.
Type: Integer
Valid Range: Minimum value of 1.
Required: NoNextToken (p. 376)
If the previous response was incomplete (because there are more stream processors to retrieve),Amazon Rekognition Video returns a pagination token in the response. You can use this paginationtoken to retrieve the next set of stream processors.
Type: String
Length Constraints: Maximum length of 255.
Required: No
Response Syntax
{ "NextToken": "string", "StreamProcessors": [ { "Name": "string", "Status": "string" } ]}
Response ElementsIf the action is successful, the service sends back an HTTP 200 response.
The following data is returned in JSON format by the service.
376
Amazon Rekognition 개발자 안내서ListStreamProcessors
NextToken (p. 376)
If the response is truncated, Amazon Rekognition Video returns this token that you can use in thesubsequent request to retrieve the next set of stream processors.
Type: String
Length Constraints: Maximum length of 255.StreamProcessors (p. 376)
List of stream processors that you have created.
Type: Array of StreamProcessor (p. 489) objects
ErrorsAccessDeniedException
You are not authorized to perform the action.
HTTP Status Code: 400InternalServerError
Amazon Rekognition experienced a service issue. Try your call again.
HTTP Status Code: 500InvalidPaginationTokenException
Pagination token in the request is not valid.
HTTP Status Code: 400InvalidParameterException
Input parameter violated a constraint. Validate your parameter before calling the API operation again.
HTTP Status Code: 400ProvisionedThroughputExceededException
The number of requests exceeded your throughput limit. If you want to increase this limit, contactAmazon Rekognition.
HTTP Status Code: 400ThrottlingException
Amazon Rekognition is temporarily unable to process the request. Try your call again.
HTTP Status Code: 500
See AlsoFor more information about using this API in one of the language-specific AWS SDKs, see the following:
• AWS Command Line Interface• AWS SDK for .NET• AWS SDK for C++• AWS SDK for Go
377
Amazon Rekognition 개발자 안내서ListStreamProcessors
• AWS SDK for Java• AWS SDK for JavaScript• AWS SDK for PHP V3• AWS SDK for Python• AWS SDK for Ruby V2
378
Amazon Rekognition 개발자 안내서RecognizeCelebrities
RecognizeCelebritiesReturns an array of celebrities recognized in the input image. For more information, see 유명 인사 인식 (p. 207).
RecognizeCelebrities returns the 100 largest faces in the image. It lists recognized celebritiesin the CelebrityFaces array and unrecognized faces in the UnrecognizedFaces array.RecognizeCelebrities doesn't return celebrities whose faces aren't among the largest 100 faces in theimage.
For each celebrity recognized, RecognizeCelebrities returns a Celebrity object. The Celebrityobject contains the celebrity name, ID, URL links to additional information, match confidence, and aComparedFace object that you can use to locate the celebrity's face on the image.
Amazon Rekognition doesn't retain information about which images a celebrity has been recognizedin. Your application must store this information and use the Celebrity ID property as a uniqueidentifier for the celebrity. If you don't store the celebrity name or additional information URLsreturned by RecognizeCelebrities, you will need the ID to identify the celebrity in a call to theGetCelebrityInfo (p. 328) operation.
You pass the input image either as base64-encoded image bytes or as a reference to an image in anAmazon S3 bucket. If you use the AWS CLI to call Amazon Rekognition operations, passing image bytes isnot supported. The image must be either a PNG or JPEG formatted file.
For an example, see 이미지 속 유명 인사 인식 (p. 207).
This operation requires permissions to perform the rekognition:RecognizeCelebrities operation.
Request Syntax
{ "Image": { "Bytes": blob, "S3Object": { "Bucket": "string", "Name": "string", "Version": "string" } }}
Request ParametersThe request accepts the following data in JSON format.
Image (p. 379)
The input image as base64-encoded bytes or an S3 object. If you use the AWS CLI to call AmazonRekognition operations, passing base64-encoded image bytes is not supported.
If you are using an AWS SDK to call Amazon Rekognition, you might not need to base64-encodeimage bytes passed using the Bytes field. For more information, see 이미지 (p. 25).
Type: Image (p. 463) object
Required: Yes
379
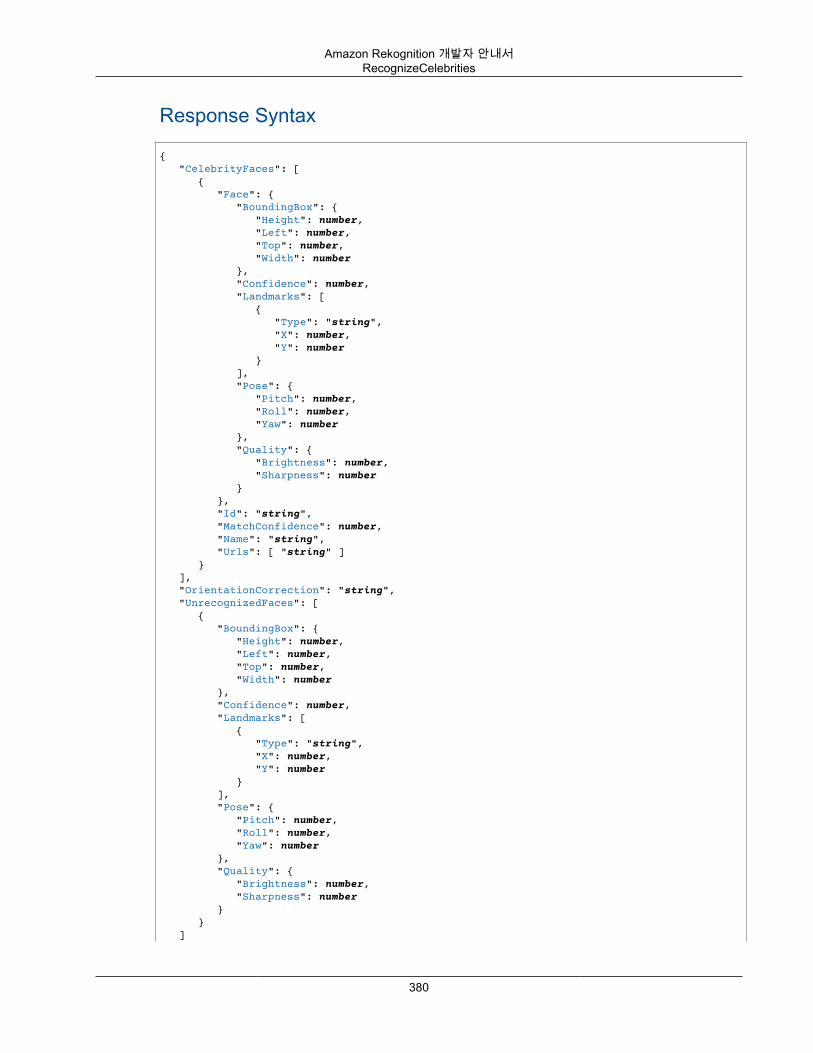
Amazon Rekognition 개발자 안내서RecognizeCelebrities
Response Syntax
{ "CelebrityFaces": [ { "Face": { "BoundingBox": { "Height": number, "Left": number, "Top": number, "Width": number }, "Confidence": number, "Landmarks": [ { "Type": "string", "X": number, "Y": number } ], "Pose": { "Pitch": number, "Roll": number, "Yaw": number }, "Quality": { "Brightness": number, "Sharpness": number } }, "Id": "string", "MatchConfidence": number, "Name": "string", "Urls": [ "string" ] } ], "OrientationCorrection": "string", "UnrecognizedFaces": [ { "BoundingBox": { "Height": number, "Left": number, "Top": number, "Width": number }, "Confidence": number, "Landmarks": [ { "Type": "string", "X": number, "Y": number } ], "Pose": { "Pitch": number, "Roll": number, "Yaw": number }, "Quality": { "Brightness": number, "Sharpness": number } } ]
380
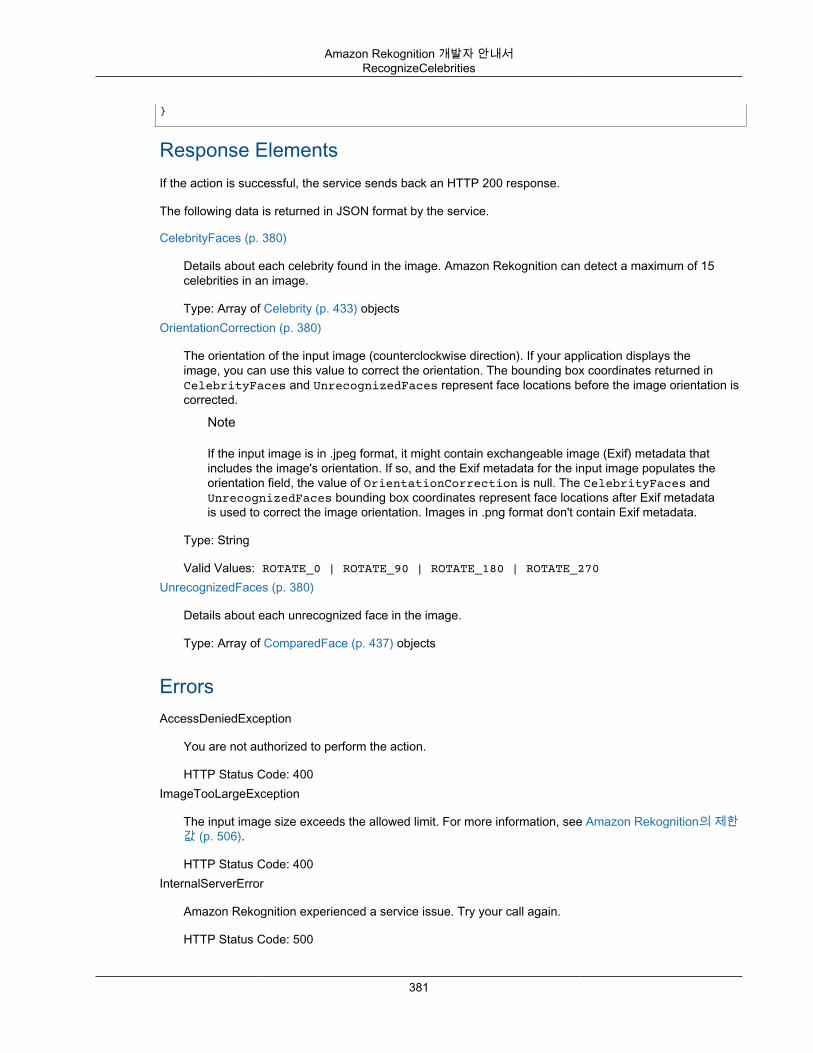
Amazon Rekognition 개발자 안내서RecognizeCelebrities
}
Response ElementsIf the action is successful, the service sends back an HTTP 200 response.
The following data is returned in JSON format by the service.
CelebrityFaces (p. 380)
Details about each celebrity found in the image. Amazon Rekognition can detect a maximum of 15celebrities in an image.
Type: Array of Celebrity (p. 433) objectsOrientationCorrection (p. 380)
The orientation of the input image (counterclockwise direction). If your application displays theimage, you can use this value to correct the orientation. The bounding box coordinates returned inCelebrityFaces and UnrecognizedFaces represent face locations before the image orientation iscorrected.
Note
If the input image is in .jpeg format, it might contain exchangeable image (Exif) metadata thatincludes the image's orientation. If so, and the Exif metadata for the input image populates theorientation field, the value of OrientationCorrection is null. The CelebrityFaces andUnrecognizedFaces bounding box coordinates represent face locations after Exif metadatais used to correct the image orientation. Images in .png format don't contain Exif metadata.
Type: String
Valid Values: ROTATE_0 | ROTATE_90 | ROTATE_180 | ROTATE_270UnrecognizedFaces (p. 380)
Details about each unrecognized face in the image.
Type: Array of ComparedFace (p. 437) objects
ErrorsAccessDeniedException
You are not authorized to perform the action.
HTTP Status Code: 400ImageTooLargeException
The input image size exceeds the allowed limit. For more information, see Amazon Rekognition의 제한값 (p. 506).
HTTP Status Code: 400InternalServerError
Amazon Rekognition experienced a service issue. Try your call again.
HTTP Status Code: 500
381
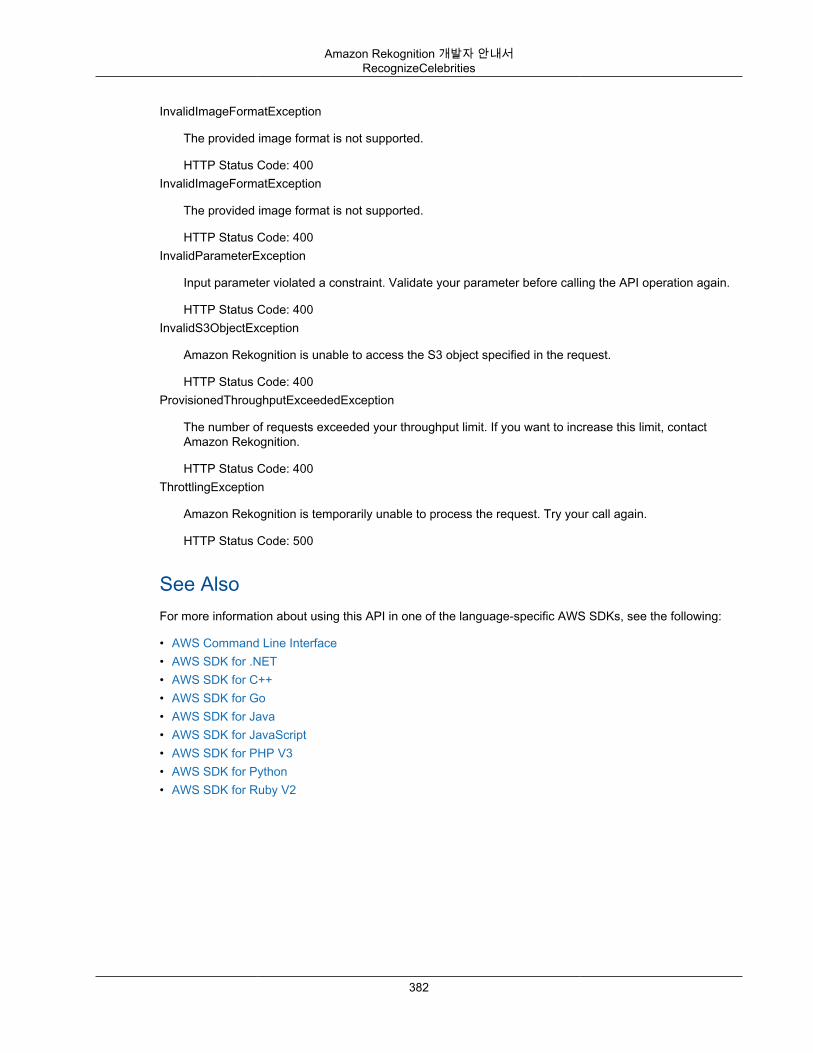
Amazon Rekognition 개발자 안내서RecognizeCelebrities
InvalidImageFormatException
The provided image format is not supported.
HTTP Status Code: 400InvalidImageFormatException
The provided image format is not supported.
HTTP Status Code: 400InvalidParameterException
Input parameter violated a constraint. Validate your parameter before calling the API operation again.
HTTP Status Code: 400InvalidS3ObjectException
Amazon Rekognition is unable to access the S3 object specified in the request.
HTTP Status Code: 400ProvisionedThroughputExceededException
The number of requests exceeded your throughput limit. If you want to increase this limit, contactAmazon Rekognition.
HTTP Status Code: 400ThrottlingException
Amazon Rekognition is temporarily unable to process the request. Try your call again.
HTTP Status Code: 500
See AlsoFor more information about using this API in one of the language-specific AWS SDKs, see the following:
• AWS Command Line Interface• AWS SDK for .NET• AWS SDK for C++• AWS SDK for Go• AWS SDK for Java• AWS SDK for JavaScript• AWS SDK for PHP V3• AWS SDK for Python• AWS SDK for Ruby V2
382
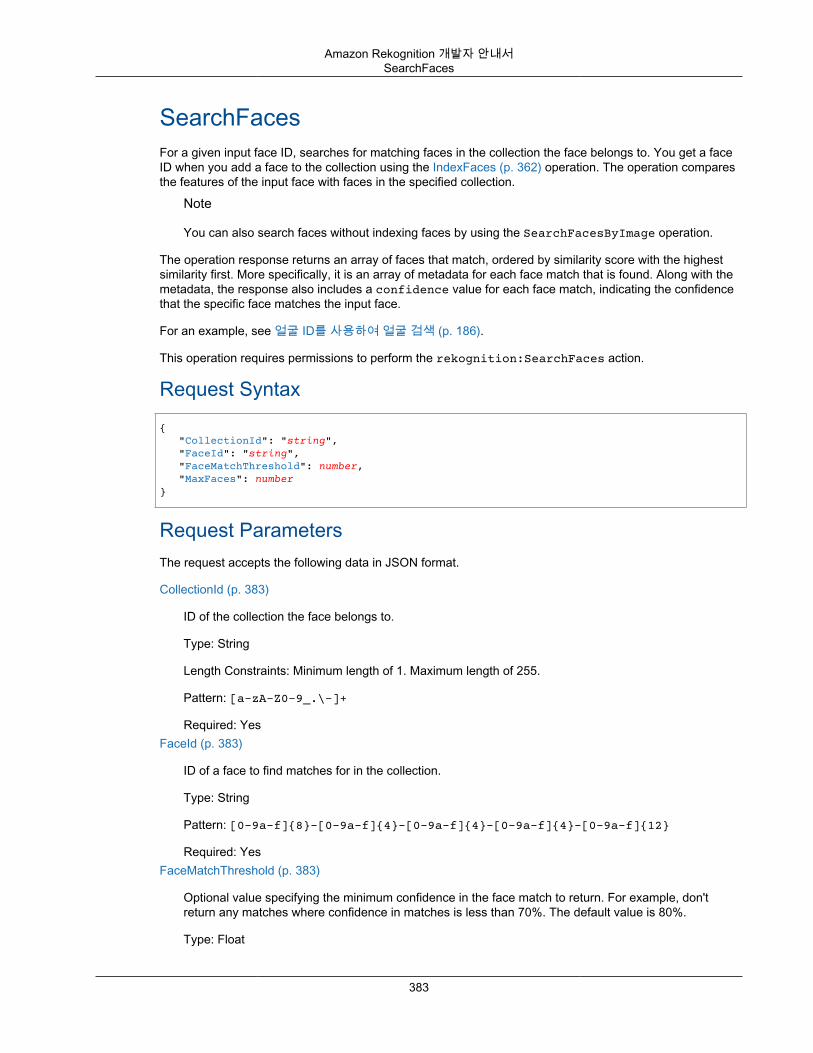
Amazon Rekognition 개발자 안내서SearchFaces
SearchFacesFor a given input face ID, searches for matching faces in the collection the face belongs to. You get a faceID when you add a face to the collection using the IndexFaces (p. 362) operation. The operation comparesthe features of the input face with faces in the specified collection.
Note
You can also search faces without indexing faces by using the SearchFacesByImage operation.
The operation response returns an array of faces that match, ordered by similarity score with the highestsimilarity first. More specifically, it is an array of metadata for each face match that is found. Along with themetadata, the response also includes a confidence value for each face match, indicating the confidencethat the specific face matches the input face.
For an example, see 얼굴 ID를 사용하여 얼굴 검색 (p. 186).
This operation requires permissions to perform the rekognition:SearchFaces action.
Request Syntax{ "CollectionId": "string", "FaceId": "string", "FaceMatchThreshold": number, "MaxFaces": number}
Request ParametersThe request accepts the following data in JSON format.
CollectionId (p. 383)
ID of the collection the face belongs to.
Type: String
Length Constraints: Minimum length of 1. Maximum length of 255.
Pattern: [a-zA-Z0-9_.\-]+
Required: YesFaceId (p. 383)
ID of a face to find matches for in the collection.
Type: String
Pattern: [0-9a-f]{8}-[0-9a-f]{4}-[0-9a-f]{4}-[0-9a-f]{4}-[0-9a-f]{12}
Required: YesFaceMatchThreshold (p. 383)
Optional value specifying the minimum confidence in the face match to return. For example, don'treturn any matches where confidence in matches is less than 70%. The default value is 80%.
Type: Float
383
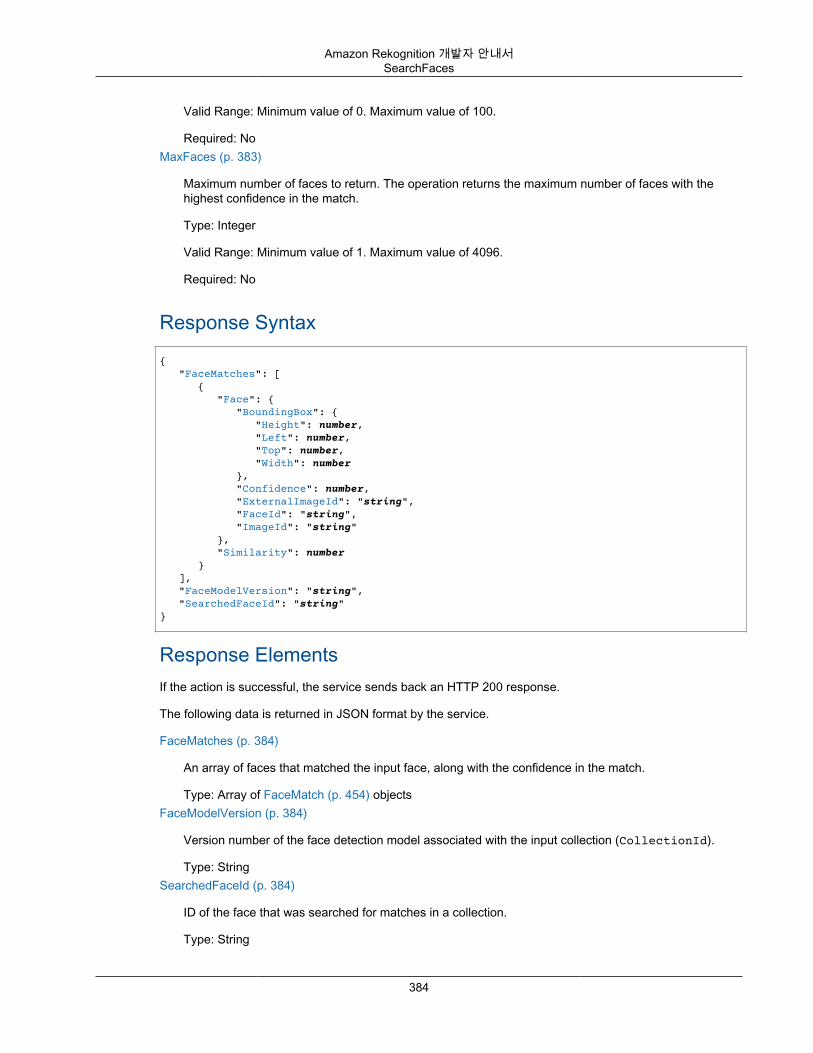
Amazon Rekognition 개발자 안내서SearchFaces
Valid Range: Minimum value of 0. Maximum value of 100.
Required: NoMaxFaces (p. 383)
Maximum number of faces to return. The operation returns the maximum number of faces with thehighest confidence in the match.
Type: Integer
Valid Range: Minimum value of 1. Maximum value of 4096.
Required: No
Response Syntax{ "FaceMatches": [ { "Face": { "BoundingBox": { "Height": number, "Left": number, "Top": number, "Width": number }, "Confidence": number, "ExternalImageId": "string", "FaceId": "string", "ImageId": "string" }, "Similarity": number } ], "FaceModelVersion": "string", "SearchedFaceId": "string"}
Response ElementsIf the action is successful, the service sends back an HTTP 200 response.
The following data is returned in JSON format by the service.
FaceMatches (p. 384)
An array of faces that matched the input face, along with the confidence in the match.
Type: Array of FaceMatch (p. 454) objectsFaceModelVersion (p. 384)
Version number of the face detection model associated with the input collection (CollectionId).
Type: StringSearchedFaceId (p. 384)
ID of the face that was searched for matches in a collection.
Type: String
384
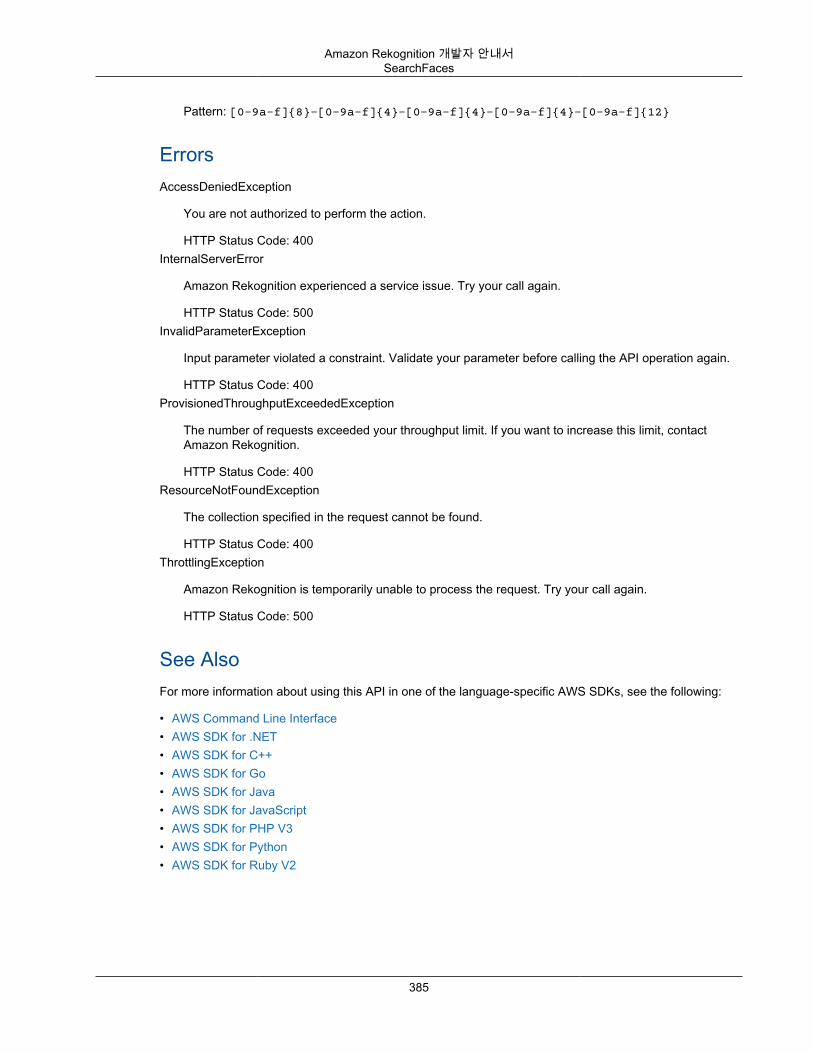
Amazon Rekognition 개발자 안내서SearchFaces
Pattern: [0-9a-f]{8}-[0-9a-f]{4}-[0-9a-f]{4}-[0-9a-f]{4}-[0-9a-f]{12}
ErrorsAccessDeniedException
You are not authorized to perform the action.
HTTP Status Code: 400InternalServerError
Amazon Rekognition experienced a service issue. Try your call again.
HTTP Status Code: 500InvalidParameterException
Input parameter violated a constraint. Validate your parameter before calling the API operation again.
HTTP Status Code: 400ProvisionedThroughputExceededException
The number of requests exceeded your throughput limit. If you want to increase this limit, contactAmazon Rekognition.
HTTP Status Code: 400ResourceNotFoundException
The collection specified in the request cannot be found.
HTTP Status Code: 400ThrottlingException
Amazon Rekognition is temporarily unable to process the request. Try your call again.
HTTP Status Code: 500
See AlsoFor more information about using this API in one of the language-specific AWS SDKs, see the following:
• AWS Command Line Interface• AWS SDK for .NET• AWS SDK for C++• AWS SDK for Go• AWS SDK for Java• AWS SDK for JavaScript• AWS SDK for PHP V3• AWS SDK for Python• AWS SDK for Ruby V2
385
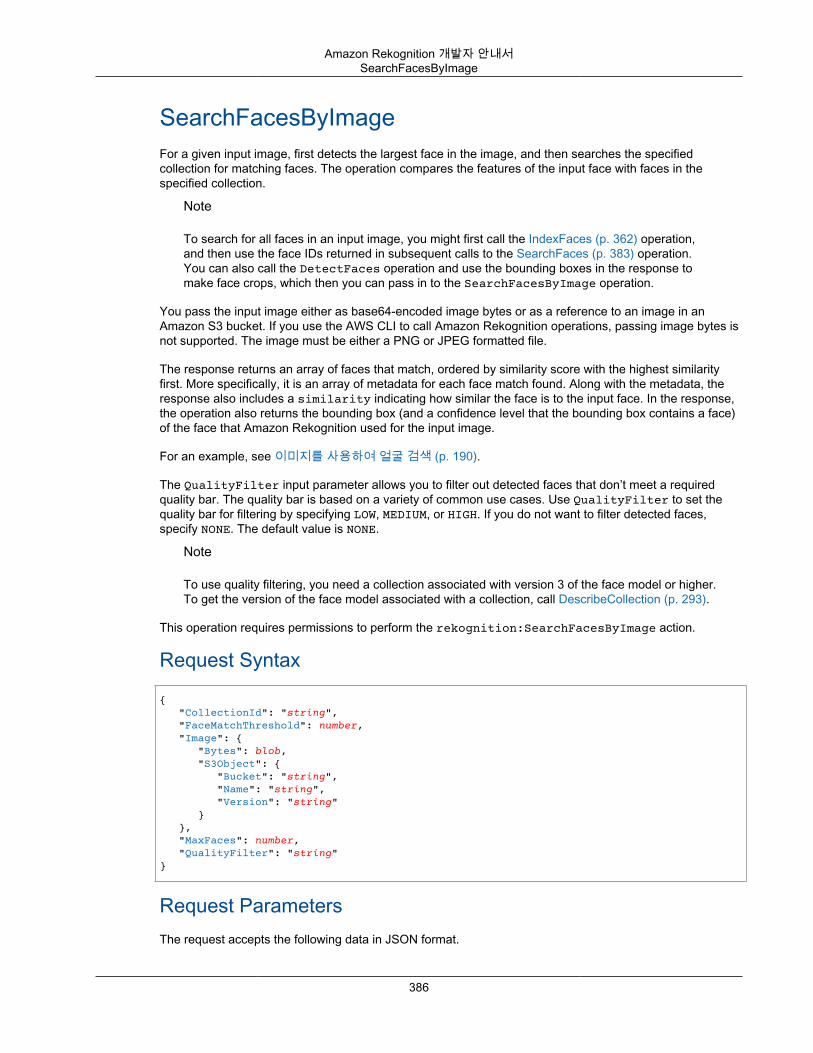
Amazon Rekognition 개발자 안내서SearchFacesByImage
SearchFacesByImageFor a given input image, first detects the largest face in the image, and then searches the specifiedcollection for matching faces. The operation compares the features of the input face with faces in thespecified collection.
Note
To search for all faces in an input image, you might first call the IndexFaces (p. 362) operation,and then use the face IDs returned in subsequent calls to the SearchFaces (p. 383) operation.You can also call the DetectFaces operation and use the bounding boxes in the response tomake face crops, which then you can pass in to the SearchFacesByImage operation.
You pass the input image either as base64-encoded image bytes or as a reference to an image in anAmazon S3 bucket. If you use the AWS CLI to call Amazon Rekognition operations, passing image bytes isnot supported. The image must be either a PNG or JPEG formatted file.
The response returns an array of faces that match, ordered by similarity score with the highest similarityfirst. More specifically, it is an array of metadata for each face match found. Along with the metadata, theresponse also includes a similarity indicating how similar the face is to the input face. In the response,the operation also returns the bounding box (and a confidence level that the bounding box contains a face)of the face that Amazon Rekognition used for the input image.
For an example, see 이미지를 사용하여 얼굴 검색 (p. 190).
The QualityFilter input parameter allows you to filter out detected faces that don’t meet a requiredquality bar. The quality bar is based on a variety of common use cases. Use QualityFilter to set thequality bar for filtering by specifying LOW, MEDIUM, or HIGH. If you do not want to filter detected faces,specify NONE. The default value is NONE.
Note
To use quality filtering, you need a collection associated with version 3 of the face model or higher.To get the version of the face model associated with a collection, call DescribeCollection (p. 293).
This operation requires permissions to perform the rekognition:SearchFacesByImage action.
Request Syntax
{ "CollectionId": "string", "FaceMatchThreshold": number, "Image": { "Bytes": blob, "S3Object": { "Bucket": "string", "Name": "string", "Version": "string" } }, "MaxFaces": number, "QualityFilter": "string"}
Request ParametersThe request accepts the following data in JSON format.
386
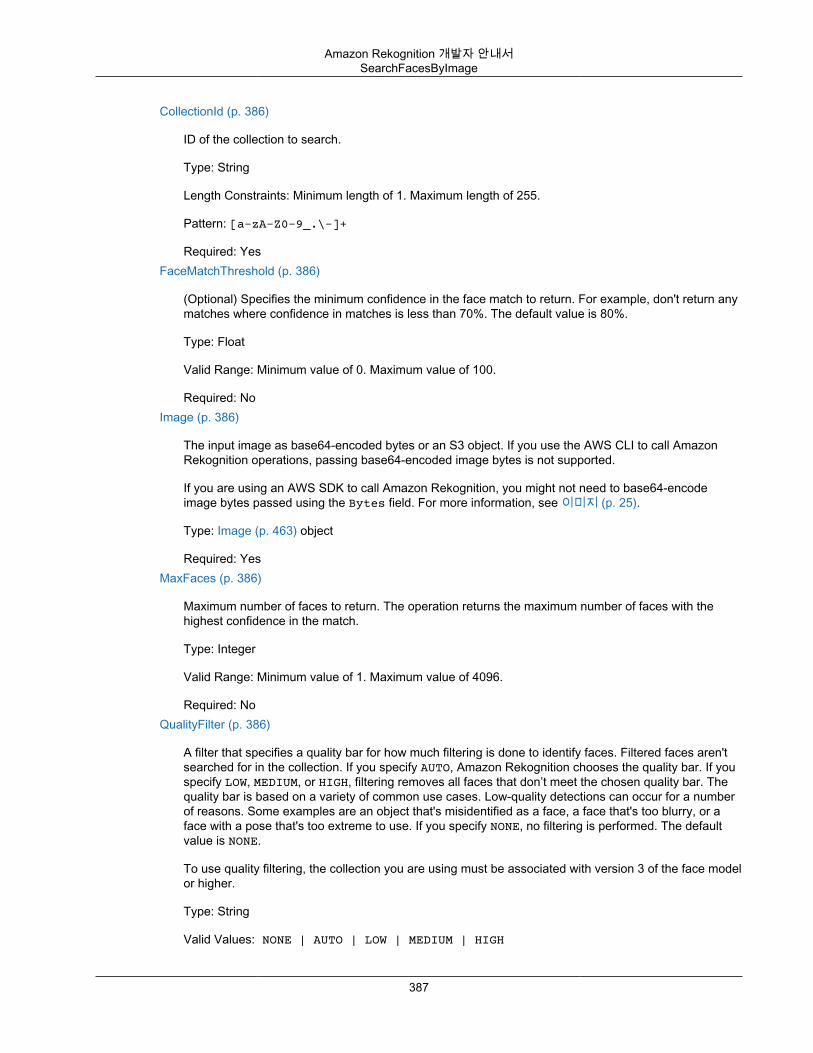
Amazon Rekognition 개발자 안내서SearchFacesByImage
CollectionId (p. 386)
ID of the collection to search.
Type: String
Length Constraints: Minimum length of 1. Maximum length of 255.
Pattern: [a-zA-Z0-9_.\-]+
Required: YesFaceMatchThreshold (p. 386)
(Optional) Specifies the minimum confidence in the face match to return. For example, don't return anymatches where confidence in matches is less than 70%. The default value is 80%.
Type: Float
Valid Range: Minimum value of 0. Maximum value of 100.
Required: NoImage (p. 386)
The input image as base64-encoded bytes or an S3 object. If you use the AWS CLI to call AmazonRekognition operations, passing base64-encoded image bytes is not supported.
If you are using an AWS SDK to call Amazon Rekognition, you might not need to base64-encodeimage bytes passed using the Bytes field. For more information, see 이미지 (p. 25).
Type: Image (p. 463) object
Required: YesMaxFaces (p. 386)
Maximum number of faces to return. The operation returns the maximum number of faces with thehighest confidence in the match.
Type: Integer
Valid Range: Minimum value of 1. Maximum value of 4096.
Required: NoQualityFilter (p. 386)
A filter that specifies a quality bar for how much filtering is done to identify faces. Filtered faces aren'tsearched for in the collection. If you specify AUTO, Amazon Rekognition chooses the quality bar. If youspecify LOW, MEDIUM, or HIGH, filtering removes all faces that don’t meet the chosen quality bar. Thequality bar is based on a variety of common use cases. Low-quality detections can occur for a numberof reasons. Some examples are an object that's misidentified as a face, a face that's too blurry, or aface with a pose that's too extreme to use. If you specify NONE, no filtering is performed. The defaultvalue is NONE.
To use quality filtering, the collection you are using must be associated with version 3 of the face modelor higher.
Type: String
Valid Values: NONE | AUTO | LOW | MEDIUM | HIGH
387
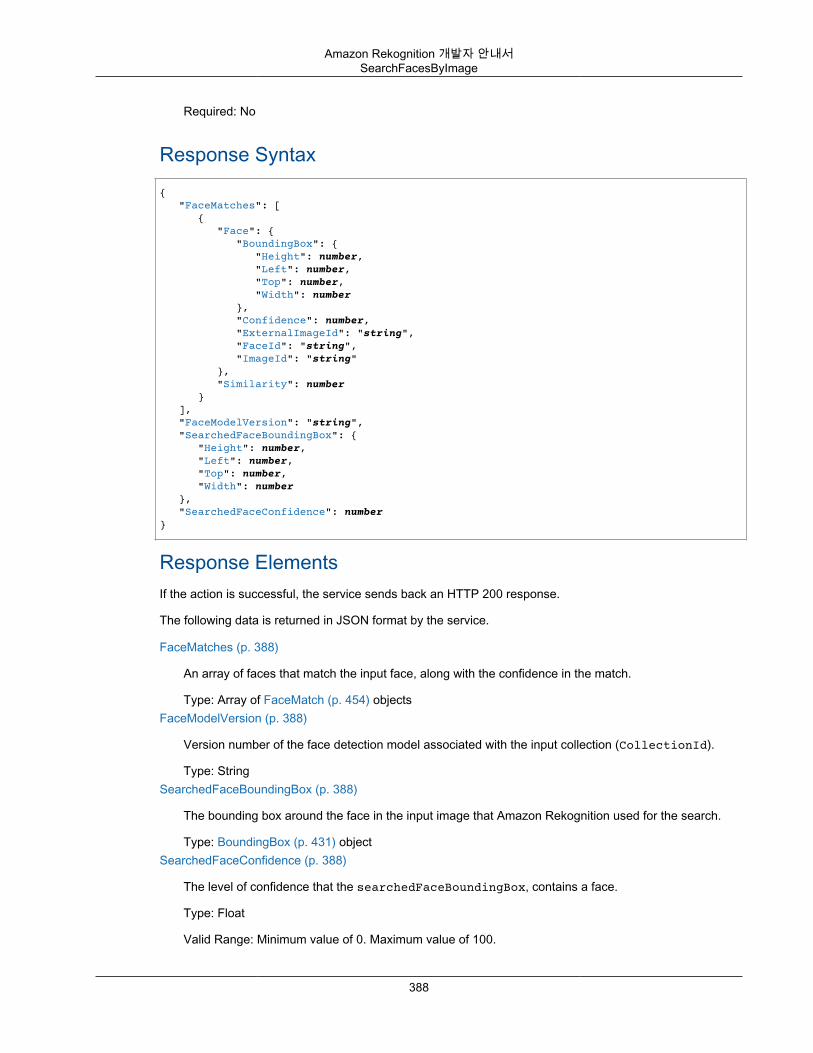
Amazon Rekognition 개발자 안내서SearchFacesByImage
Required: No
Response Syntax{ "FaceMatches": [ { "Face": { "BoundingBox": { "Height": number, "Left": number, "Top": number, "Width": number }, "Confidence": number, "ExternalImageId": "string", "FaceId": "string", "ImageId": "string" }, "Similarity": number } ], "FaceModelVersion": "string", "SearchedFaceBoundingBox": { "Height": number, "Left": number, "Top": number, "Width": number }, "SearchedFaceConfidence": number}
Response ElementsIf the action is successful, the service sends back an HTTP 200 response.
The following data is returned in JSON format by the service.
FaceMatches (p. 388)
An array of faces that match the input face, along with the confidence in the match.
Type: Array of FaceMatch (p. 454) objectsFaceModelVersion (p. 388)
Version number of the face detection model associated with the input collection (CollectionId).
Type: StringSearchedFaceBoundingBox (p. 388)
The bounding box around the face in the input image that Amazon Rekognition used for the search.
Type: BoundingBox (p. 431) objectSearchedFaceConfidence (p. 388)
The level of confidence that the searchedFaceBoundingBox, contains a face.
Type: Float
Valid Range: Minimum value of 0. Maximum value of 100.
388
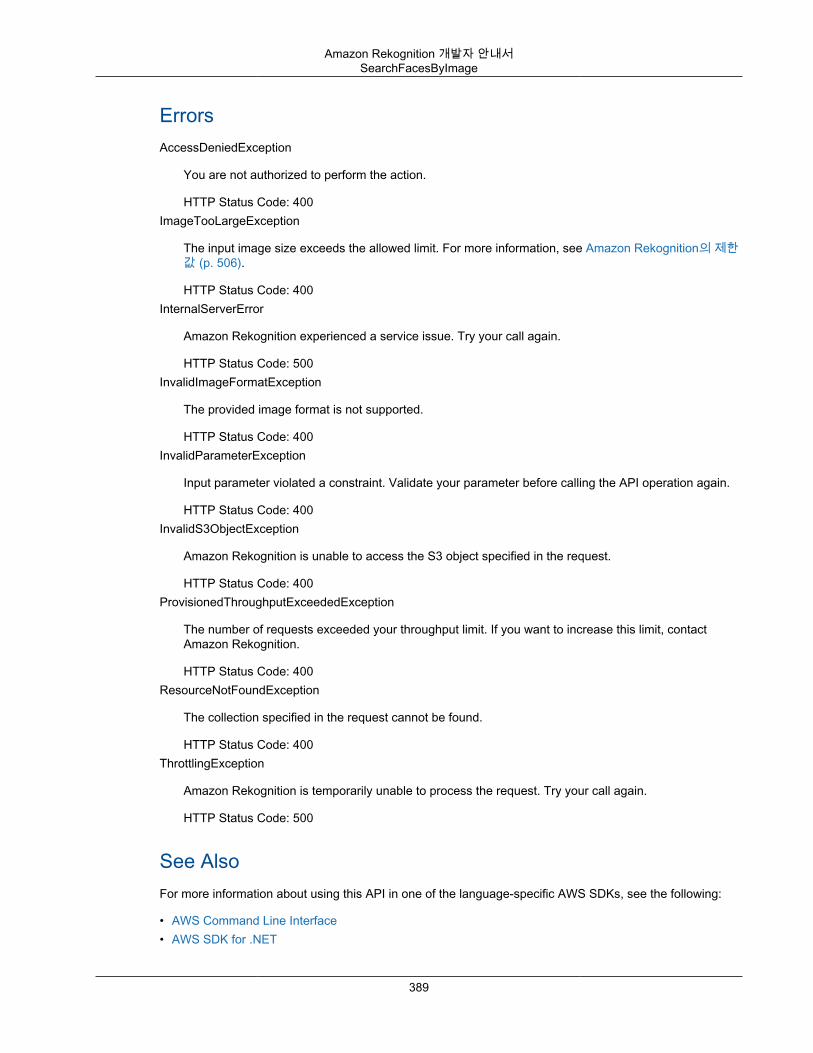
Amazon Rekognition 개발자 안내서SearchFacesByImage
ErrorsAccessDeniedException
You are not authorized to perform the action.
HTTP Status Code: 400ImageTooLargeException
The input image size exceeds the allowed limit. For more information, see Amazon Rekognition의 제한값 (p. 506).
HTTP Status Code: 400InternalServerError
Amazon Rekognition experienced a service issue. Try your call again.
HTTP Status Code: 500InvalidImageFormatException
The provided image format is not supported.
HTTP Status Code: 400InvalidParameterException
Input parameter violated a constraint. Validate your parameter before calling the API operation again.
HTTP Status Code: 400InvalidS3ObjectException
Amazon Rekognition is unable to access the S3 object specified in the request.
HTTP Status Code: 400ProvisionedThroughputExceededException
The number of requests exceeded your throughput limit. If you want to increase this limit, contactAmazon Rekognition.
HTTP Status Code: 400ResourceNotFoundException
The collection specified in the request cannot be found.
HTTP Status Code: 400ThrottlingException
Amazon Rekognition is temporarily unable to process the request. Try your call again.
HTTP Status Code: 500
See AlsoFor more information about using this API in one of the language-specific AWS SDKs, see the following:
• AWS Command Line Interface• AWS SDK for .NET
389

Amazon Rekognition 개발자 안내서SearchFacesByImage
• AWS SDK for C++• AWS SDK for Go• AWS SDK for Java• AWS SDK for JavaScript• AWS SDK for PHP V3• AWS SDK for Python• AWS SDK for Ruby V2
390
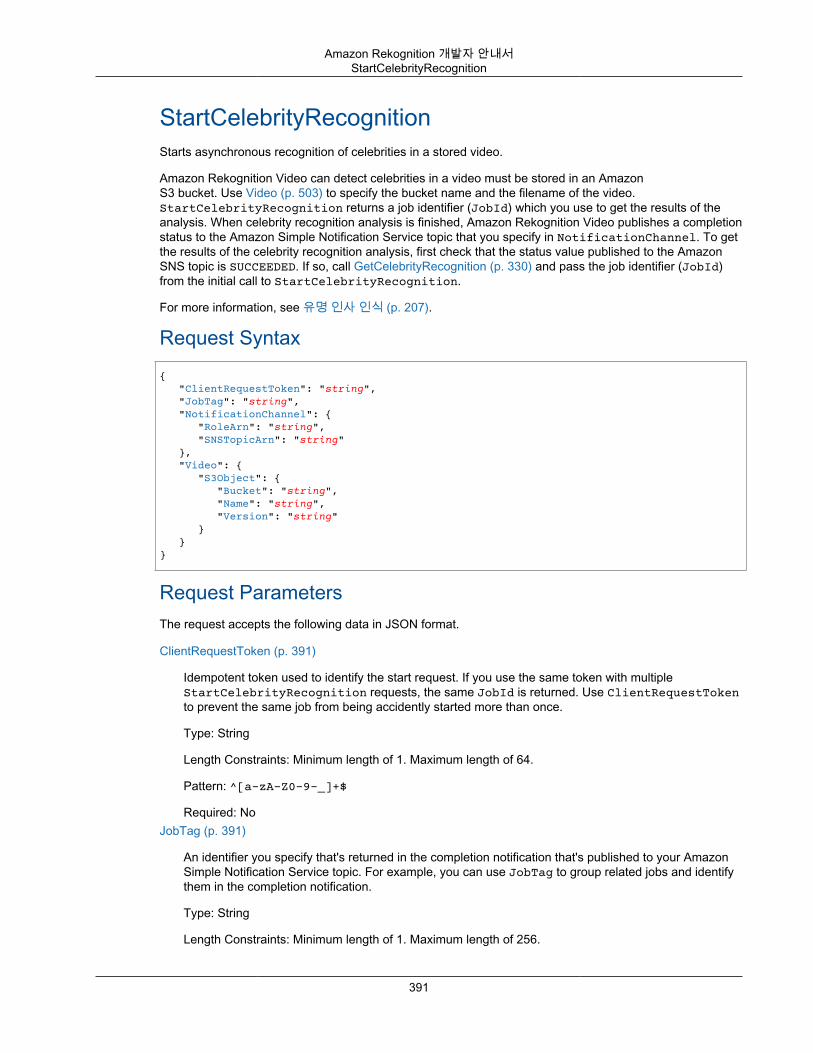
Amazon Rekognition 개발자 안내서StartCelebrityRecognition
StartCelebrityRecognitionStarts asynchronous recognition of celebrities in a stored video.
Amazon Rekognition Video can detect celebrities in a video must be stored in an AmazonS3 bucket. Use Video (p. 503) to specify the bucket name and the filename of the video.StartCelebrityRecognition returns a job identifier (JobId) which you use to get the results of theanalysis. When celebrity recognition analysis is finished, Amazon Rekognition Video publishes a completionstatus to the Amazon Simple Notification Service topic that you specify in NotificationChannel. To getthe results of the celebrity recognition analysis, first check that the status value published to the AmazonSNS topic is SUCCEEDED. If so, call GetCelebrityRecognition (p. 330) and pass the job identifier (JobId)from the initial call to StartCelebrityRecognition.
For more information, see 유명 인사 인식 (p. 207).
Request Syntax{ "ClientRequestToken": "string", "JobTag": "string", "NotificationChannel": { "RoleArn": "string", "SNSTopicArn": "string" }, "Video": { "S3Object": { "Bucket": "string", "Name": "string", "Version": "string" } }}
Request ParametersThe request accepts the following data in JSON format.
ClientRequestToken (p. 391)
Idempotent token used to identify the start request. If you use the same token with multipleStartCelebrityRecognition requests, the same JobId is returned. Use ClientRequestTokento prevent the same job from being accidently started more than once.
Type: String
Length Constraints: Minimum length of 1. Maximum length of 64.
Pattern: ^[a-zA-Z0-9-_]+$
Required: NoJobTag (p. 391)
An identifier you specify that's returned in the completion notification that's published to your AmazonSimple Notification Service topic. For example, you can use JobTag to group related jobs and identifythem in the completion notification.
Type: String
Length Constraints: Minimum length of 1. Maximum length of 256.
391
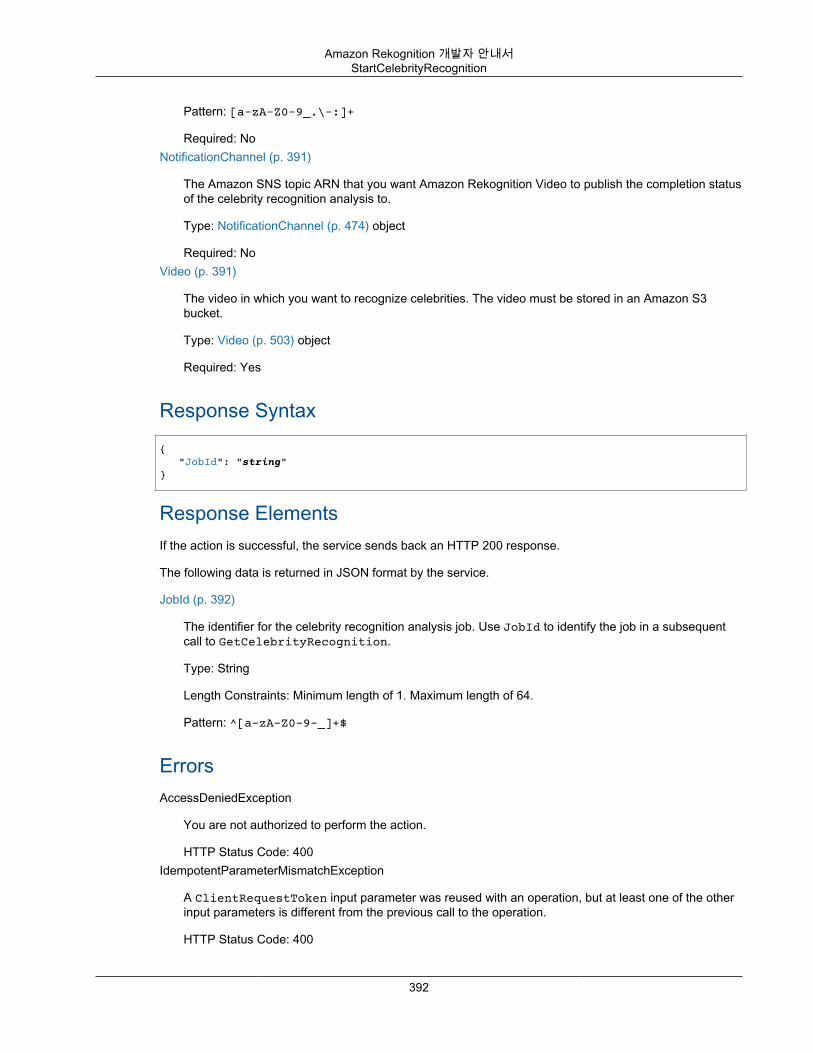
Amazon Rekognition 개발자 안내서StartCelebrityRecognition
Pattern: [a-zA-Z0-9_.\-:]+
Required: NoNotificationChannel (p. 391)
The Amazon SNS topic ARN that you want Amazon Rekognition Video to publish the completion statusof the celebrity recognition analysis to.
Type: NotificationChannel (p. 474) object
Required: NoVideo (p. 391)
The video in which you want to recognize celebrities. The video must be stored in an Amazon S3bucket.
Type: Video (p. 503) object
Required: Yes
Response Syntax{ "JobId": "string"}
Response ElementsIf the action is successful, the service sends back an HTTP 200 response.
The following data is returned in JSON format by the service.
JobId (p. 392)
The identifier for the celebrity recognition analysis job. Use JobId to identify the job in a subsequentcall to GetCelebrityRecognition.
Type: String
Length Constraints: Minimum length of 1. Maximum length of 64.
Pattern: ^[a-zA-Z0-9-_]+$
ErrorsAccessDeniedException
You are not authorized to perform the action.
HTTP Status Code: 400IdempotentParameterMismatchException
A ClientRequestToken input parameter was reused with an operation, but at least one of the otherinput parameters is different from the previous call to the operation.
HTTP Status Code: 400
392

Amazon Rekognition 개발자 안내서StartCelebrityRecognition
InternalServerError
Amazon Rekognition experienced a service issue. Try your call again.
HTTP Status Code: 500InvalidParameterException
Input parameter violated a constraint. Validate your parameter before calling the API operation again.
HTTP Status Code: 400InvalidS3ObjectException
Amazon Rekognition is unable to access the S3 object specified in the request.
HTTP Status Code: 400LimitExceededException
An Amazon Rekognition service limit was exceeded. For example, if you start too many AmazonRekognition Video jobs concurrently, calls to start operations (StartLabelDetection, for example)will raise a LimitExceededException exception (HTTP status code: 400) until the number ofconcurrently running jobs is below the Amazon Rekognition service limit.
HTTP Status Code: 400ProvisionedThroughputExceededException
The number of requests exceeded your throughput limit. If you want to increase this limit, contactAmazon Rekognition.
HTTP Status Code: 400ThrottlingException
Amazon Rekognition is temporarily unable to process the request. Try your call again.
HTTP Status Code: 500VideoTooLargeException
The file size or duration of the supplied media is too large. The maximum file size is 10GB. Themaximum duration is 6 hours.
HTTP Status Code: 400
See AlsoFor more information about using this API in one of the language-specific AWS SDKs, see the following:
• AWS Command Line Interface• AWS SDK for .NET• AWS SDK for C++• AWS SDK for Go• AWS SDK for Java• AWS SDK for JavaScript• AWS SDK for PHP V3• AWS SDK for Python• AWS SDK for Ruby V2
393

Amazon Rekognition 개발자 안내서StartContentModeration
StartContentModerationStarts asynchronous detection of unsafe content in a stored video.
Amazon Rekognition Video can moderate content in a video stored in an Amazon S3 bucket. UseVideo (p. 503) to specify the bucket name and the filename of the video. StartContentModerationreturns a job identifier (JobId) which you use to get the results of the analysis. When unsafe contentanalysis is finished, Amazon Rekognition Video publishes a completion status to the Amazon SimpleNotification Service topic that you specify in NotificationChannel.
To get the results of the unsafe content analysis, first check that the status value published to the AmazonSNS topic is SUCCEEDED. If so, call GetContentModeration (p. 335) and pass the job identifier (JobId) fromthe initial call to StartContentModeration.
For more information, see 비안전 콘텐츠 감지 (p. 222).
Request Syntax{ "ClientRequestToken": "string", "JobTag": "string", "MinConfidence": number, "NotificationChannel": { "RoleArn": "string", "SNSTopicArn": "string" }, "Video": { "S3Object": { "Bucket": "string", "Name": "string", "Version": "string" } }}
Request ParametersThe request accepts the following data in JSON format.
ClientRequestToken (p. 394)
Idempotent token used to identify the start request. If you use the same token with multipleStartContentModeration requests, the same JobId is returned. Use ClientRequestToken toprevent the same job from being accidently started more than once.
Type: String
Length Constraints: Minimum length of 1. Maximum length of 64.
Pattern: ^[a-zA-Z0-9-_]+$
Required: NoJobTag (p. 394)
An identifier you specify that's returned in the completion notification that's published to your AmazonSimple Notification Service topic. For example, you can use JobTag to group related jobs and identifythem in the completion notification.
Type: String
394
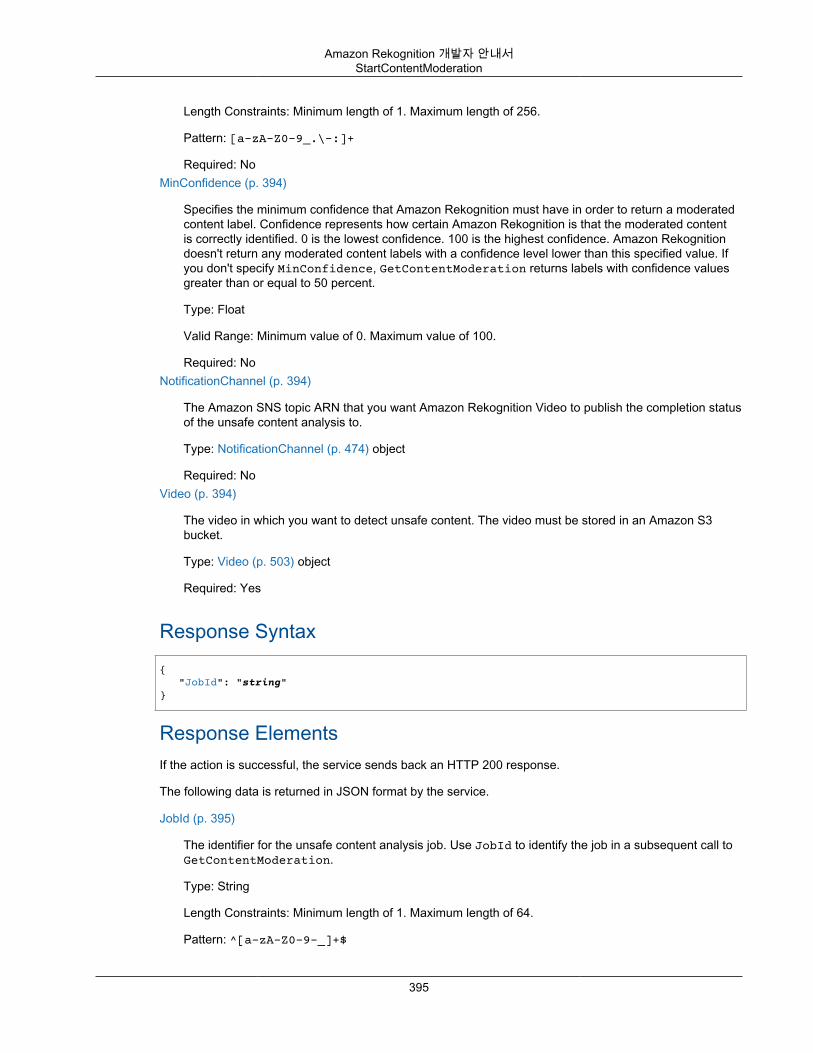
Amazon Rekognition 개발자 안내서StartContentModeration
Length Constraints: Minimum length of 1. Maximum length of 256.
Pattern: [a-zA-Z0-9_.\-:]+
Required: NoMinConfidence (p. 394)
Specifies the minimum confidence that Amazon Rekognition must have in order to return a moderatedcontent label. Confidence represents how certain Amazon Rekognition is that the moderated contentis correctly identified. 0 is the lowest confidence. 100 is the highest confidence. Amazon Rekognitiondoesn't return any moderated content labels with a confidence level lower than this specified value. Ifyou don't specify MinConfidence, GetContentModeration returns labels with confidence valuesgreater than or equal to 50 percent.
Type: Float
Valid Range: Minimum value of 0. Maximum value of 100.
Required: NoNotificationChannel (p. 394)
The Amazon SNS topic ARN that you want Amazon Rekognition Video to publish the completion statusof the unsafe content analysis to.
Type: NotificationChannel (p. 474) object
Required: NoVideo (p. 394)
The video in which you want to detect unsafe content. The video must be stored in an Amazon S3bucket.
Type: Video (p. 503) object
Required: Yes
Response Syntax{ "JobId": "string"}
Response ElementsIf the action is successful, the service sends back an HTTP 200 response.
The following data is returned in JSON format by the service.
JobId (p. 395)
The identifier for the unsafe content analysis job. Use JobId to identify the job in a subsequent call toGetContentModeration.
Type: String
Length Constraints: Minimum length of 1. Maximum length of 64.
Pattern: ^[a-zA-Z0-9-_]+$
395
Amazon Rekognition 개발자 안내서StartContentModeration
ErrorsAccessDeniedException
You are not authorized to perform the action.
HTTP Status Code: 400IdempotentParameterMismatchException
A ClientRequestToken input parameter was reused with an operation, but at least one of the otherinput parameters is different from the previous call to the operation.
HTTP Status Code: 400InternalServerError
Amazon Rekognition experienced a service issue. Try your call again.
HTTP Status Code: 500InvalidParameterException
Input parameter violated a constraint. Validate your parameter before calling the API operation again.
HTTP Status Code: 400InvalidS3ObjectException
Amazon Rekognition is unable to access the S3 object specified in the request.
HTTP Status Code: 400LimitExceededException
An Amazon Rekognition service limit was exceeded. For example, if you start too many AmazonRekognition Video jobs concurrently, calls to start operations (StartLabelDetection, for example)will raise a LimitExceededException exception (HTTP status code: 400) until the number ofconcurrently running jobs is below the Amazon Rekognition service limit.
HTTP Status Code: 400ProvisionedThroughputExceededException
The number of requests exceeded your throughput limit. If you want to increase this limit, contactAmazon Rekognition.
HTTP Status Code: 400ThrottlingException
Amazon Rekognition is temporarily unable to process the request. Try your call again.
HTTP Status Code: 500VideoTooLargeException
The file size or duration of the supplied media is too large. The maximum file size is 10GB. Themaximum duration is 6 hours.
HTTP Status Code: 400
See AlsoFor more information about using this API in one of the language-specific AWS SDKs, see the following:
396
Amazon Rekognition 개발자 안내서StartContentModeration
• AWS Command Line Interface• AWS SDK for .NET• AWS SDK for C++• AWS SDK for Go• AWS SDK for Java• AWS SDK for JavaScript• AWS SDK for PHP V3• AWS SDK for Python• AWS SDK for Ruby V2
397

Amazon Rekognition 개발자 안내서StartFaceDetection
StartFaceDetectionStarts asynchronous detection of faces in a stored video.
Amazon Rekognition Video can detect faces in a video stored in an Amazon S3 bucket. UseVideo (p. 503) to specify the bucket name and the filename of the video. StartFaceDetectionreturns a job identifier (JobId) that you use to get the results of the operation. When face detection isfinished, Amazon Rekognition Video publishes a completion status to the Amazon Simple NotificationService topic that you specify in NotificationChannel. To get the results of the face detectionoperation, first check that the status value published to the Amazon SNS topic is SUCCEEDED.If so, call GetFaceDetection (p. 339) and pass the job identifier (JobId) from the initial call toStartFaceDetection.
For more information, see 저장된 비디오에서 얼굴 감지 (p. 147).
Request Syntax{ "ClientRequestToken": "string", "FaceAttributes": "string", "JobTag": "string", "NotificationChannel": { "RoleArn": "string", "SNSTopicArn": "string" }, "Video": { "S3Object": { "Bucket": "string", "Name": "string", "Version": "string" } }}
Request ParametersThe request accepts the following data in JSON format.
ClientRequestToken (p. 398)
Idempotent token used to identify the start request. If you use the same token with multipleStartFaceDetection requests, the same JobId is returned. Use ClientRequestToken toprevent the same job from being accidently started more than once.
Type: String
Length Constraints: Minimum length of 1. Maximum length of 64.
Pattern: ^[a-zA-Z0-9-_]+$
Required: NoFaceAttributes (p. 398)
The face attributes you want returned.
DEFAULT - The following subset of facial attributes are returned: BoundingBox, Confidence, Pose,Quality and Landmarks.
ALL - All facial attributes are returned.
398
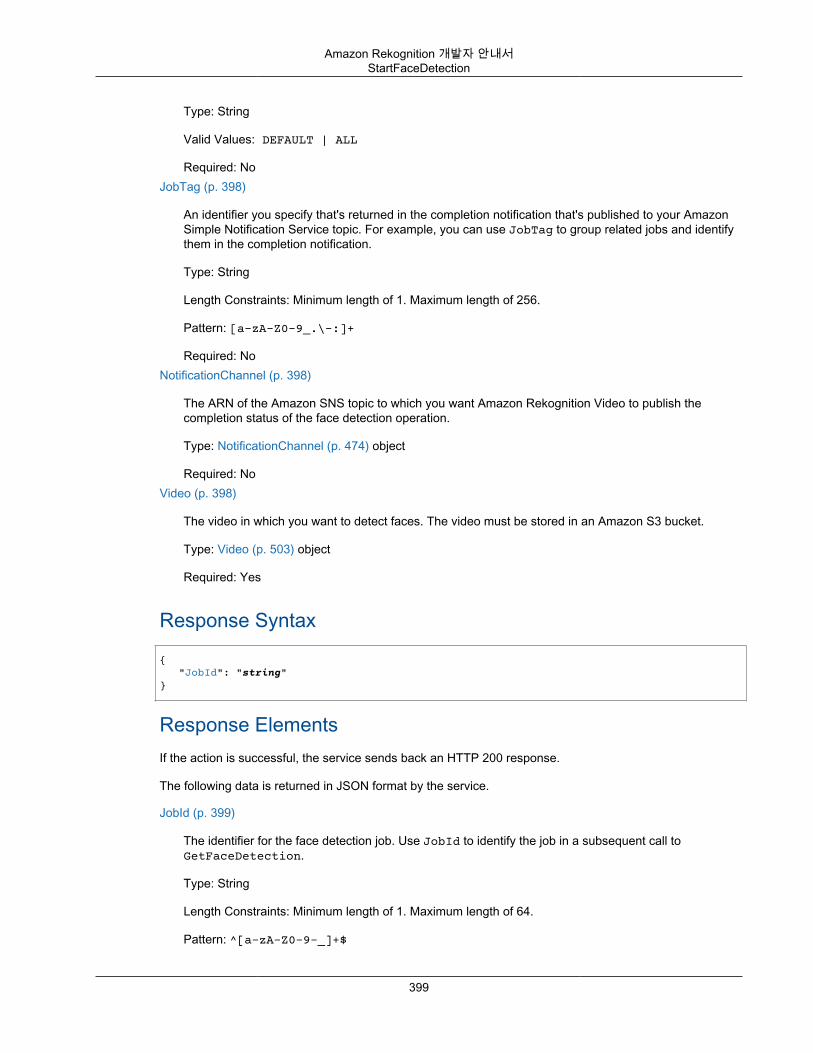
Amazon Rekognition 개발자 안내서StartFaceDetection
Type: String
Valid Values: DEFAULT | ALL
Required: NoJobTag (p. 398)
An identifier you specify that's returned in the completion notification that's published to your AmazonSimple Notification Service topic. For example, you can use JobTag to group related jobs and identifythem in the completion notification.
Type: String
Length Constraints: Minimum length of 1. Maximum length of 256.
Pattern: [a-zA-Z0-9_.\-:]+
Required: NoNotificationChannel (p. 398)
The ARN of the Amazon SNS topic to which you want Amazon Rekognition Video to publish thecompletion status of the face detection operation.
Type: NotificationChannel (p. 474) object
Required: NoVideo (p. 398)
The video in which you want to detect faces. The video must be stored in an Amazon S3 bucket.
Type: Video (p. 503) object
Required: Yes
Response Syntax
{ "JobId": "string"}
Response ElementsIf the action is successful, the service sends back an HTTP 200 response.
The following data is returned in JSON format by the service.
JobId (p. 399)
The identifier for the face detection job. Use JobId to identify the job in a subsequent call toGetFaceDetection.
Type: String
Length Constraints: Minimum length of 1. Maximum length of 64.
Pattern: ^[a-zA-Z0-9-_]+$
399
Amazon Rekognition 개발자 안내서StartFaceDetection
ErrorsAccessDeniedException
You are not authorized to perform the action.
HTTP Status Code: 400IdempotentParameterMismatchException
A ClientRequestToken input parameter was reused with an operation, but at least one of the otherinput parameters is different from the previous call to the operation.
HTTP Status Code: 400InternalServerError
Amazon Rekognition experienced a service issue. Try your call again.
HTTP Status Code: 500InvalidParameterException
Input parameter violated a constraint. Validate your parameter before calling the API operation again.
HTTP Status Code: 400InvalidS3ObjectException
Amazon Rekognition is unable to access the S3 object specified in the request.
HTTP Status Code: 400LimitExceededException
An Amazon Rekognition service limit was exceeded. For example, if you start too many AmazonRekognition Video jobs concurrently, calls to start operations (StartLabelDetection, for example)will raise a LimitExceededException exception (HTTP status code: 400) until the number ofconcurrently running jobs is below the Amazon Rekognition service limit.
HTTP Status Code: 400ProvisionedThroughputExceededException
The number of requests exceeded your throughput limit. If you want to increase this limit, contactAmazon Rekognition.
HTTP Status Code: 400ThrottlingException
Amazon Rekognition is temporarily unable to process the request. Try your call again.
HTTP Status Code: 500VideoTooLargeException
The file size or duration of the supplied media is too large. The maximum file size is 10GB. Themaximum duration is 6 hours.
HTTP Status Code: 400
See AlsoFor more information about using this API in one of the language-specific AWS SDKs, see the following:
400

Amazon Rekognition 개발자 안내서StartFaceDetection
• AWS Command Line Interface• AWS SDK for .NET• AWS SDK for C++• AWS SDK for Go• AWS SDK for Java• AWS SDK for JavaScript• AWS SDK for PHP V3• AWS SDK for Python• AWS SDK for Ruby V2
401
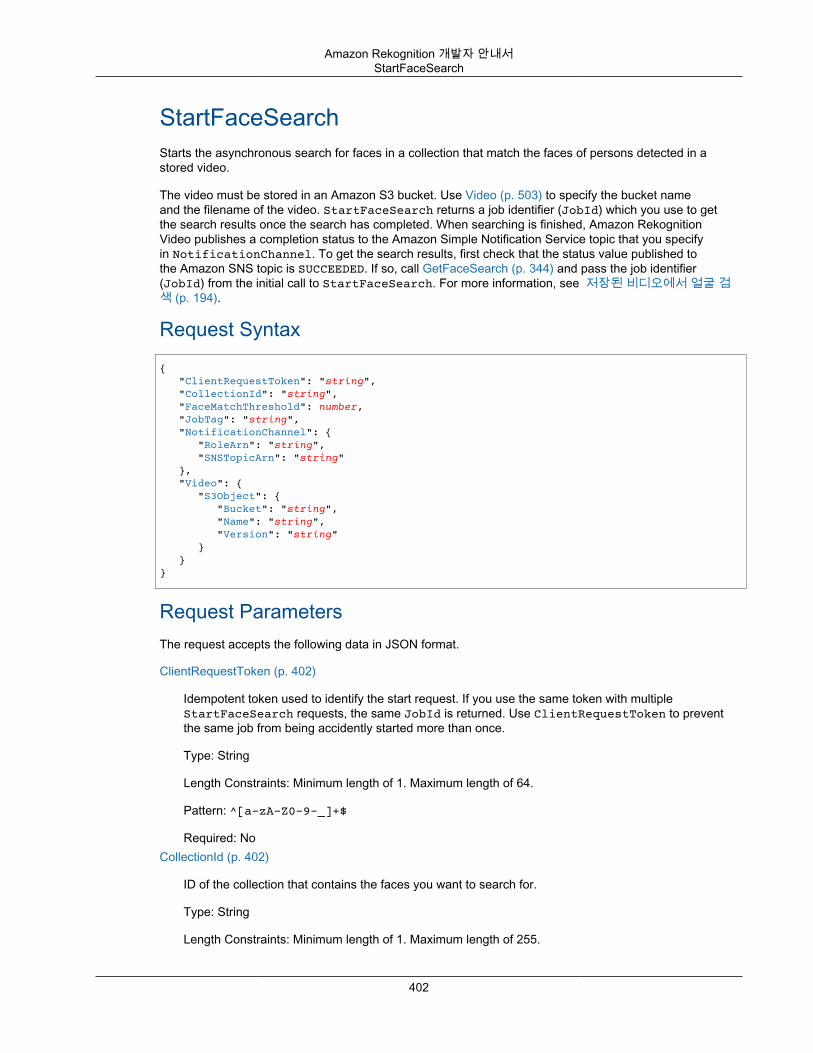
Amazon Rekognition 개발자 안내서StartFaceSearch
StartFaceSearchStarts the asynchronous search for faces in a collection that match the faces of persons detected in astored video.
The video must be stored in an Amazon S3 bucket. Use Video (p. 503) to specify the bucket nameand the filename of the video. StartFaceSearch returns a job identifier (JobId) which you use to getthe search results once the search has completed. When searching is finished, Amazon RekognitionVideo publishes a completion status to the Amazon Simple Notification Service topic that you specifyin NotificationChannel. To get the search results, first check that the status value published tothe Amazon SNS topic is SUCCEEDED. If so, call GetFaceSearch (p. 344) and pass the job identifier(JobId) from the initial call to StartFaceSearch. For more information, see 저장된 비디오에서 얼굴 검색 (p. 194).
Request Syntax
{ "ClientRequestToken": "string", "CollectionId": "string", "FaceMatchThreshold": number, "JobTag": "string", "NotificationChannel": { "RoleArn": "string", "SNSTopicArn": "string" }, "Video": { "S3Object": { "Bucket": "string", "Name": "string", "Version": "string" } }}
Request ParametersThe request accepts the following data in JSON format.
ClientRequestToken (p. 402)
Idempotent token used to identify the start request. If you use the same token with multipleStartFaceSearch requests, the same JobId is returned. Use ClientRequestToken to preventthe same job from being accidently started more than once.
Type: String
Length Constraints: Minimum length of 1. Maximum length of 64.
Pattern: ^[a-zA-Z0-9-_]+$
Required: NoCollectionId (p. 402)
ID of the collection that contains the faces you want to search for.
Type: String
Length Constraints: Minimum length of 1. Maximum length of 255.
402
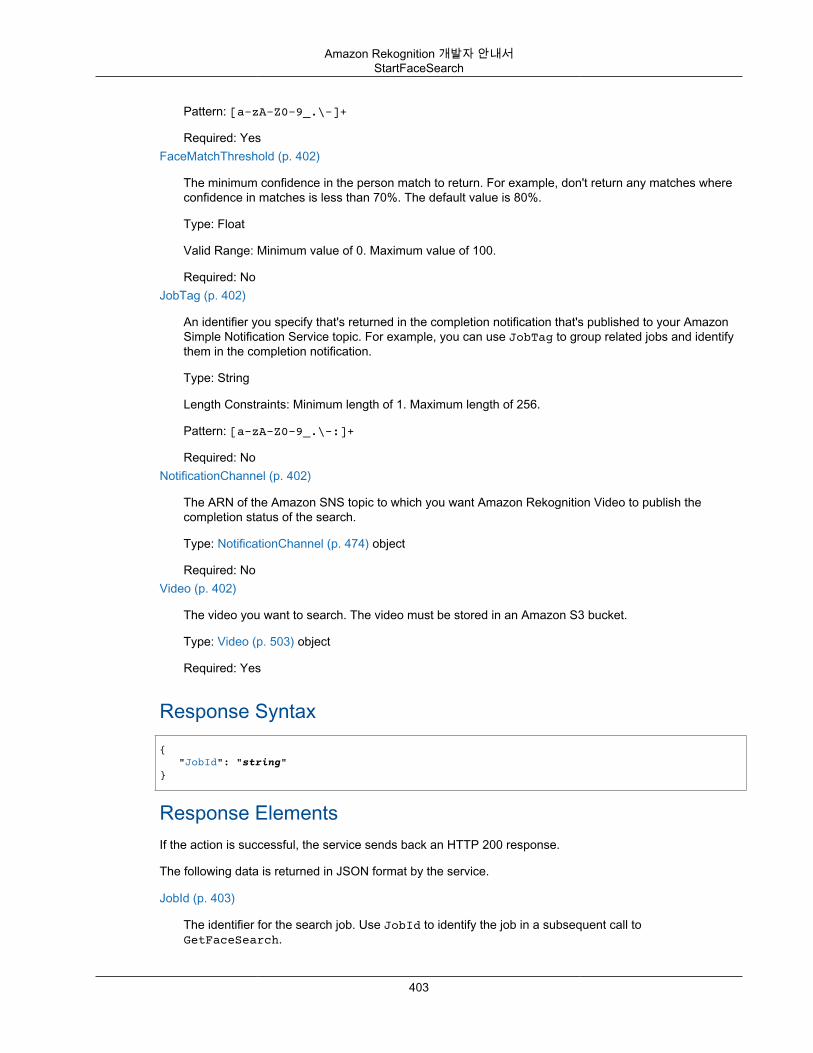
Amazon Rekognition 개발자 안내서StartFaceSearch
Pattern: [a-zA-Z0-9_.\-]+
Required: YesFaceMatchThreshold (p. 402)
The minimum confidence in the person match to return. For example, don't return any matches whereconfidence in matches is less than 70%. The default value is 80%.
Type: Float
Valid Range: Minimum value of 0. Maximum value of 100.
Required: NoJobTag (p. 402)
An identifier you specify that's returned in the completion notification that's published to your AmazonSimple Notification Service topic. For example, you can use JobTag to group related jobs and identifythem in the completion notification.
Type: String
Length Constraints: Minimum length of 1. Maximum length of 256.
Pattern: [a-zA-Z0-9_.\-:]+
Required: NoNotificationChannel (p. 402)
The ARN of the Amazon SNS topic to which you want Amazon Rekognition Video to publish thecompletion status of the search.
Type: NotificationChannel (p. 474) object
Required: NoVideo (p. 402)
The video you want to search. The video must be stored in an Amazon S3 bucket.
Type: Video (p. 503) object
Required: Yes
Response Syntax{ "JobId": "string"}
Response ElementsIf the action is successful, the service sends back an HTTP 200 response.
The following data is returned in JSON format by the service.
JobId (p. 403)
The identifier for the search job. Use JobId to identify the job in a subsequent call toGetFaceSearch.
403
Amazon Rekognition 개발자 안내서StartFaceSearch
Type: String
Length Constraints: Minimum length of 1. Maximum length of 64.
Pattern: ^[a-zA-Z0-9-_]+$
ErrorsAccessDeniedException
You are not authorized to perform the action.
HTTP Status Code: 400IdempotentParameterMismatchException
A ClientRequestToken input parameter was reused with an operation, but at least one of the otherinput parameters is different from the previous call to the operation.
HTTP Status Code: 400InternalServerError
Amazon Rekognition experienced a service issue. Try your call again.
HTTP Status Code: 500InvalidParameterException
Input parameter violated a constraint. Validate your parameter before calling the API operation again.
HTTP Status Code: 400InvalidS3ObjectException
Amazon Rekognition is unable to access the S3 object specified in the request.
HTTP Status Code: 400LimitExceededException
An Amazon Rekognition service limit was exceeded. For example, if you start too many AmazonRekognition Video jobs concurrently, calls to start operations (StartLabelDetection, for example)will raise a LimitExceededException exception (HTTP status code: 400) until the number ofconcurrently running jobs is below the Amazon Rekognition service limit.
HTTP Status Code: 400ProvisionedThroughputExceededException
The number of requests exceeded your throughput limit. If you want to increase this limit, contactAmazon Rekognition.
HTTP Status Code: 400ResourceNotFoundException
The collection specified in the request cannot be found.
HTTP Status Code: 400ThrottlingException
Amazon Rekognition is temporarily unable to process the request. Try your call again.
HTTP Status Code: 500
404
Amazon Rekognition 개발자 안내서StartFaceSearch
VideoTooLargeException
The file size or duration of the supplied media is too large. The maximum file size is 10GB. Themaximum duration is 6 hours.
HTTP Status Code: 400
See AlsoFor more information about using this API in one of the language-specific AWS SDKs, see the following:
• AWS Command Line Interface• AWS SDK for .NET• AWS SDK for C++• AWS SDK for Go• AWS SDK for Java• AWS SDK for JavaScript• AWS SDK for PHP V3• AWS SDK for Python• AWS SDK for Ruby V2
405
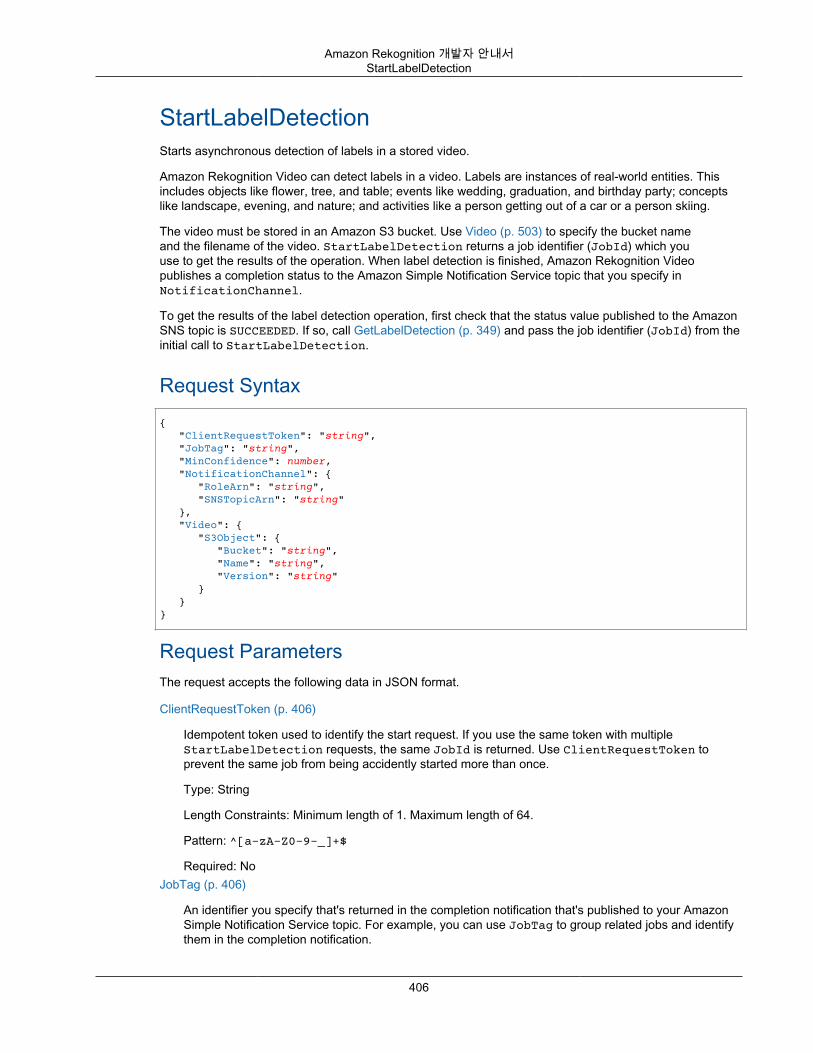
Amazon Rekognition 개발자 안내서StartLabelDetection
StartLabelDetectionStarts asynchronous detection of labels in a stored video.
Amazon Rekognition Video can detect labels in a video. Labels are instances of real-world entities. Thisincludes objects like flower, tree, and table; events like wedding, graduation, and birthday party; conceptslike landscape, evening, and nature; and activities like a person getting out of a car or a person skiing.
The video must be stored in an Amazon S3 bucket. Use Video (p. 503) to specify the bucket nameand the filename of the video. StartLabelDetection returns a job identifier (JobId) which youuse to get the results of the operation. When label detection is finished, Amazon Rekognition Videopublishes a completion status to the Amazon Simple Notification Service topic that you specify inNotificationChannel.
To get the results of the label detection operation, first check that the status value published to the AmazonSNS topic is SUCCEEDED. If so, call GetLabelDetection (p. 349) and pass the job identifier (JobId) from theinitial call to StartLabelDetection.
Request Syntax{ "ClientRequestToken": "string", "JobTag": "string", "MinConfidence": number, "NotificationChannel": { "RoleArn": "string", "SNSTopicArn": "string" }, "Video": { "S3Object": { "Bucket": "string", "Name": "string", "Version": "string" } }}
Request ParametersThe request accepts the following data in JSON format.
ClientRequestToken (p. 406)
Idempotent token used to identify the start request. If you use the same token with multipleStartLabelDetection requests, the same JobId is returned. Use ClientRequestToken toprevent the same job from being accidently started more than once.
Type: String
Length Constraints: Minimum length of 1. Maximum length of 64.
Pattern: ^[a-zA-Z0-9-_]+$
Required: NoJobTag (p. 406)
An identifier you specify that's returned in the completion notification that's published to your AmazonSimple Notification Service topic. For example, you can use JobTag to group related jobs and identifythem in the completion notification.
406
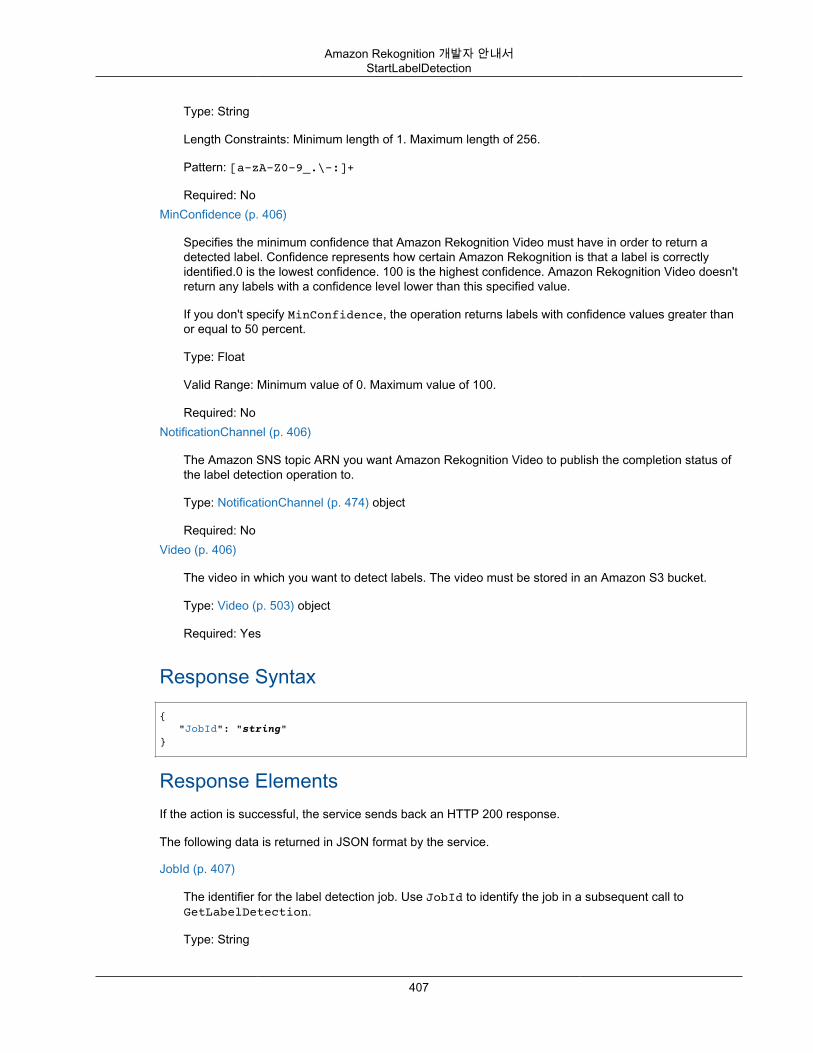
Amazon Rekognition 개발자 안내서StartLabelDetection
Type: String
Length Constraints: Minimum length of 1. Maximum length of 256.
Pattern: [a-zA-Z0-9_.\-:]+
Required: NoMinConfidence (p. 406)
Specifies the minimum confidence that Amazon Rekognition Video must have in order to return adetected label. Confidence represents how certain Amazon Rekognition is that a label is correctlyidentified.0 is the lowest confidence. 100 is the highest confidence. Amazon Rekognition Video doesn'treturn any labels with a confidence level lower than this specified value.
If you don't specify MinConfidence, the operation returns labels with confidence values greater thanor equal to 50 percent.
Type: Float
Valid Range: Minimum value of 0. Maximum value of 100.
Required: NoNotificationChannel (p. 406)
The Amazon SNS topic ARN you want Amazon Rekognition Video to publish the completion status ofthe label detection operation to.
Type: NotificationChannel (p. 474) object
Required: NoVideo (p. 406)
The video in which you want to detect labels. The video must be stored in an Amazon S3 bucket.
Type: Video (p. 503) object
Required: Yes
Response Syntax
{ "JobId": "string"}
Response ElementsIf the action is successful, the service sends back an HTTP 200 response.
The following data is returned in JSON format by the service.
JobId (p. 407)
The identifier for the label detection job. Use JobId to identify the job in a subsequent call toGetLabelDetection.
Type: String
407

Amazon Rekognition 개발자 안내서StartLabelDetection
Length Constraints: Minimum length of 1. Maximum length of 64.
Pattern: ^[a-zA-Z0-9-_]+$
ErrorsAccessDeniedException
You are not authorized to perform the action.
HTTP Status Code: 400IdempotentParameterMismatchException
A ClientRequestToken input parameter was reused with an operation, but at least one of the otherinput parameters is different from the previous call to the operation.
HTTP Status Code: 400InternalServerError
Amazon Rekognition experienced a service issue. Try your call again.
HTTP Status Code: 500InvalidParameterException
Input parameter violated a constraint. Validate your parameter before calling the API operation again.
HTTP Status Code: 400InvalidS3ObjectException
Amazon Rekognition is unable to access the S3 object specified in the request.
HTTP Status Code: 400LimitExceededException
An Amazon Rekognition service limit was exceeded. For example, if you start too many AmazonRekognition Video jobs concurrently, calls to start operations (StartLabelDetection, for example)will raise a LimitExceededException exception (HTTP status code: 400) until the number ofconcurrently running jobs is below the Amazon Rekognition service limit.
HTTP Status Code: 400ProvisionedThroughputExceededException
The number of requests exceeded your throughput limit. If you want to increase this limit, contactAmazon Rekognition.
HTTP Status Code: 400ThrottlingException
Amazon Rekognition is temporarily unable to process the request. Try your call again.
HTTP Status Code: 500VideoTooLargeException
The file size or duration of the supplied media is too large. The maximum file size is 10GB. Themaximum duration is 6 hours.
HTTP Status Code: 400
408
Amazon Rekognition 개발자 안내서StartLabelDetection
See AlsoFor more information about using this API in one of the language-specific AWS SDKs, see the following:
• AWS Command Line Interface• AWS SDK for .NET• AWS SDK for C++• AWS SDK for Go• AWS SDK for Java• AWS SDK for JavaScript• AWS SDK for PHP V3• AWS SDK for Python• AWS SDK for Ruby V2
409
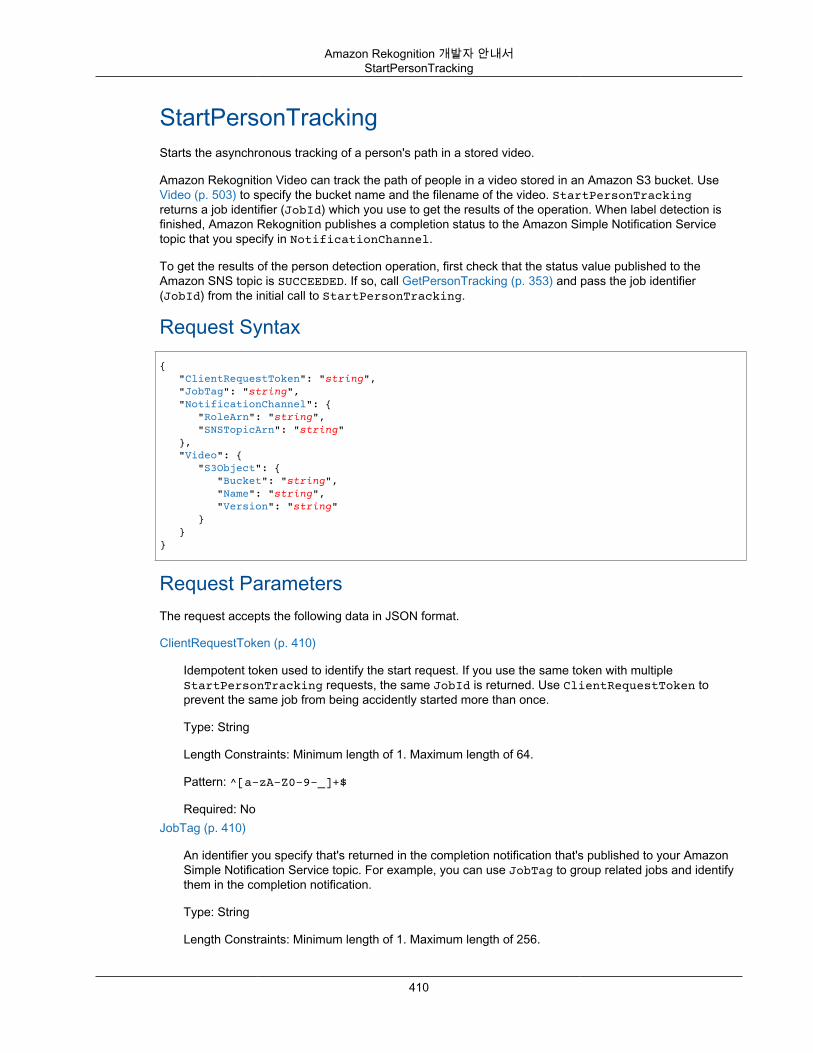
Amazon Rekognition 개발자 안내서StartPersonTracking
StartPersonTrackingStarts the asynchronous tracking of a person's path in a stored video.
Amazon Rekognition Video can track the path of people in a video stored in an Amazon S3 bucket. UseVideo (p. 503) to specify the bucket name and the filename of the video. StartPersonTrackingreturns a job identifier (JobId) which you use to get the results of the operation. When label detection isfinished, Amazon Rekognition publishes a completion status to the Amazon Simple Notification Servicetopic that you specify in NotificationChannel.
To get the results of the person detection operation, first check that the status value published to theAmazon SNS topic is SUCCEEDED. If so, call GetPersonTracking (p. 353) and pass the job identifier(JobId) from the initial call to StartPersonTracking.
Request Syntax
{ "ClientRequestToken": "string", "JobTag": "string", "NotificationChannel": { "RoleArn": "string", "SNSTopicArn": "string" }, "Video": { "S3Object": { "Bucket": "string", "Name": "string", "Version": "string" } }}
Request ParametersThe request accepts the following data in JSON format.
ClientRequestToken (p. 410)
Idempotent token used to identify the start request. If you use the same token with multipleStartPersonTracking requests, the same JobId is returned. Use ClientRequestToken toprevent the same job from being accidently started more than once.
Type: String
Length Constraints: Minimum length of 1. Maximum length of 64.
Pattern: ^[a-zA-Z0-9-_]+$
Required: NoJobTag (p. 410)
An identifier you specify that's returned in the completion notification that's published to your AmazonSimple Notification Service topic. For example, you can use JobTag to group related jobs and identifythem in the completion notification.
Type: String
Length Constraints: Minimum length of 1. Maximum length of 256.
410
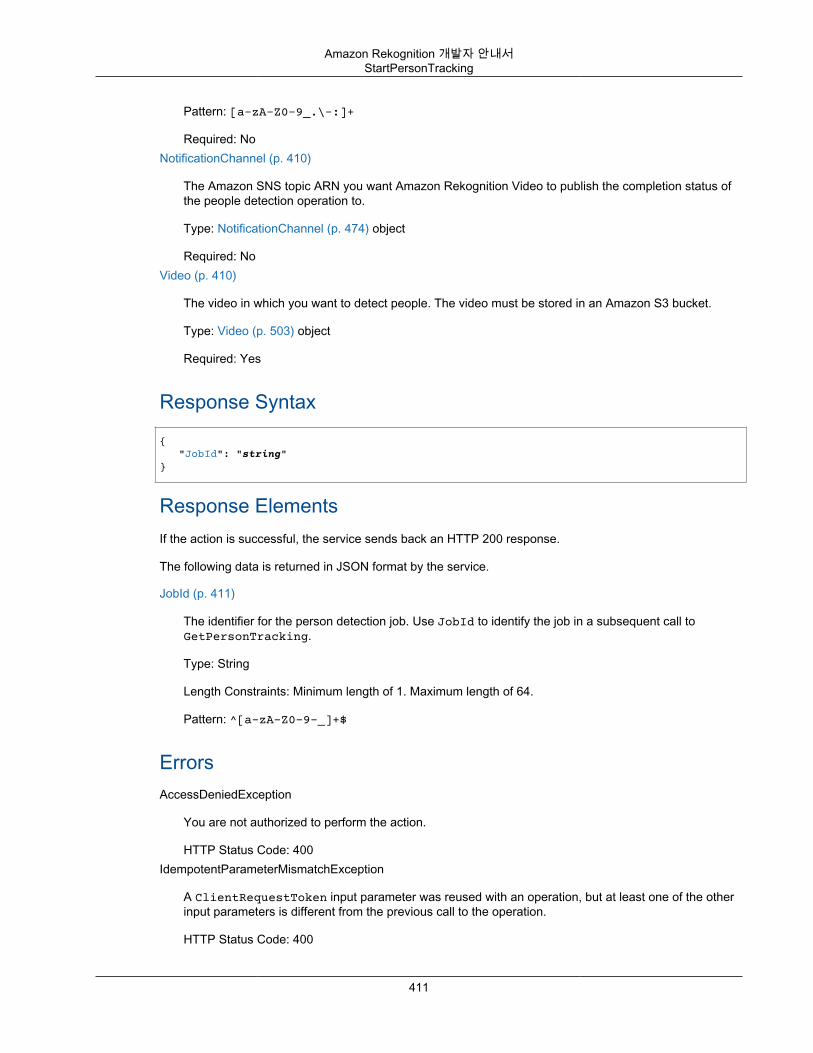
Amazon Rekognition 개발자 안내서StartPersonTracking
Pattern: [a-zA-Z0-9_.\-:]+
Required: NoNotificationChannel (p. 410)
The Amazon SNS topic ARN you want Amazon Rekognition Video to publish the completion status ofthe people detection operation to.
Type: NotificationChannel (p. 474) object
Required: NoVideo (p. 410)
The video in which you want to detect people. The video must be stored in an Amazon S3 bucket.
Type: Video (p. 503) object
Required: Yes
Response Syntax
{ "JobId": "string"}
Response ElementsIf the action is successful, the service sends back an HTTP 200 response.
The following data is returned in JSON format by the service.
JobId (p. 411)
The identifier for the person detection job. Use JobId to identify the job in a subsequent call toGetPersonTracking.
Type: String
Length Constraints: Minimum length of 1. Maximum length of 64.
Pattern: ^[a-zA-Z0-9-_]+$
ErrorsAccessDeniedException
You are not authorized to perform the action.
HTTP Status Code: 400IdempotentParameterMismatchException
A ClientRequestToken input parameter was reused with an operation, but at least one of the otherinput parameters is different from the previous call to the operation.
HTTP Status Code: 400
411
Amazon Rekognition 개발자 안내서StartPersonTracking
InternalServerError
Amazon Rekognition experienced a service issue. Try your call again.
HTTP Status Code: 500InvalidParameterException
Input parameter violated a constraint. Validate your parameter before calling the API operation again.
HTTP Status Code: 400InvalidS3ObjectException
Amazon Rekognition is unable to access the S3 object specified in the request.
HTTP Status Code: 400LimitExceededException
An Amazon Rekognition service limit was exceeded. For example, if you start too many AmazonRekognition Video jobs concurrently, calls to start operations (StartLabelDetection, for example)will raise a LimitExceededException exception (HTTP status code: 400) until the number ofconcurrently running jobs is below the Amazon Rekognition service limit.
HTTP Status Code: 400ProvisionedThroughputExceededException
The number of requests exceeded your throughput limit. If you want to increase this limit, contactAmazon Rekognition.
HTTP Status Code: 400ThrottlingException
Amazon Rekognition is temporarily unable to process the request. Try your call again.
HTTP Status Code: 500VideoTooLargeException
The file size or duration of the supplied media is too large. The maximum file size is 10GB. Themaximum duration is 6 hours.
HTTP Status Code: 400
See AlsoFor more information about using this API in one of the language-specific AWS SDKs, see the following:
• AWS Command Line Interface• AWS SDK for .NET• AWS SDK for C++• AWS SDK for Go• AWS SDK for Java• AWS SDK for JavaScript• AWS SDK for PHP V3• AWS SDK for Python• AWS SDK for Ruby V2
412
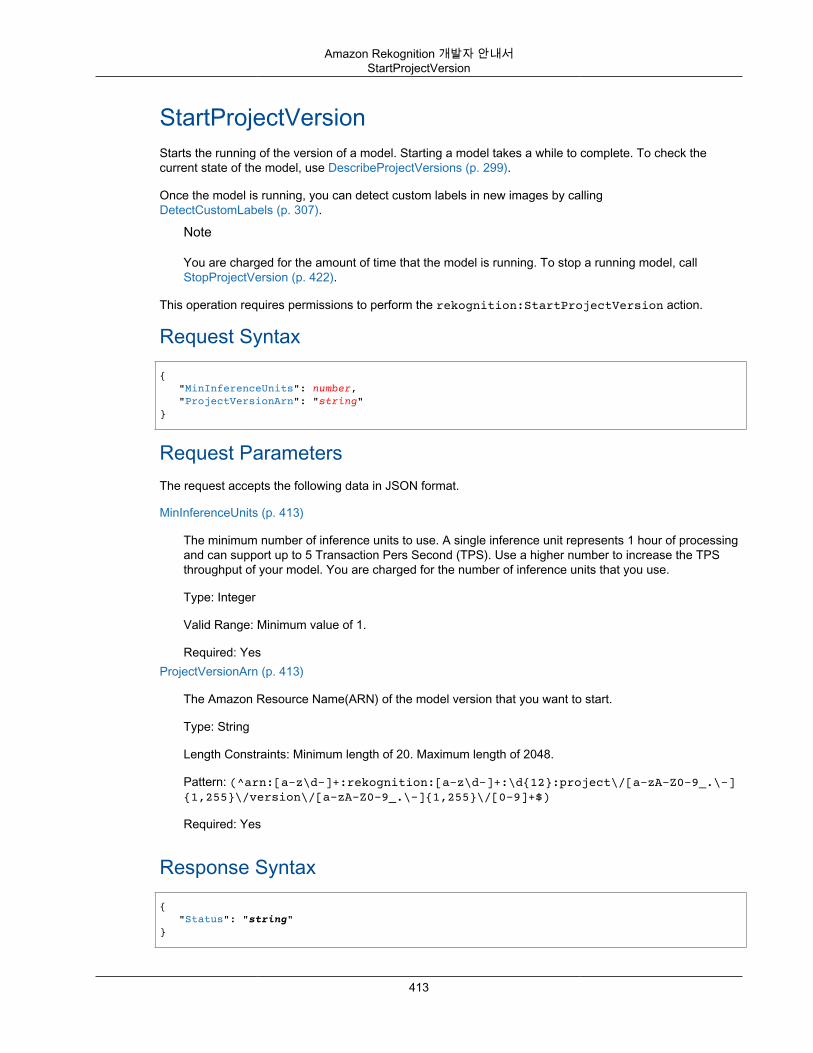
Amazon Rekognition 개발자 안내서StartProjectVersion
StartProjectVersionStarts the running of the version of a model. Starting a model takes a while to complete. To check thecurrent state of the model, use DescribeProjectVersions (p. 299).
Once the model is running, you can detect custom labels in new images by callingDetectCustomLabels (p. 307).
Note
You are charged for the amount of time that the model is running. To stop a running model, callStopProjectVersion (p. 422).
This operation requires permissions to perform the rekognition:StartProjectVersion action.
Request Syntax
{ "MinInferenceUnits": number, "ProjectVersionArn": "string"}
Request ParametersThe request accepts the following data in JSON format.
MinInferenceUnits (p. 413)
The minimum number of inference units to use. A single inference unit represents 1 hour of processingand can support up to 5 Transaction Pers Second (TPS). Use a higher number to increase the TPSthroughput of your model. You are charged for the number of inference units that you use.
Type: Integer
Valid Range: Minimum value of 1.
Required: YesProjectVersionArn (p. 413)
The Amazon Resource Name(ARN) of the model version that you want to start.
Type: String
Length Constraints: Minimum length of 20. Maximum length of 2048.
Pattern: (^arn:[a-z\d-]+:rekognition:[a-z\d-]+:\d{12}:project\/[a-zA-Z0-9_.\-]{1,255}\/version\/[a-zA-Z0-9_.\-]{1,255}\/[0-9]+$)
Required: Yes
Response Syntax
{ "Status": "string"}
413
Amazon Rekognition 개발자 안내서StartProjectVersion
Response ElementsIf the action is successful, the service sends back an HTTP 200 response.
The following data is returned in JSON format by the service.
Status (p. 413)
The current running status of the model.
Type: String
Valid Values: TRAINING_IN_PROGRESS | TRAINING_COMPLETED | TRAINING_FAILED |STARTING | RUNNING | FAILED | STOPPING | STOPPED | DELETING
ErrorsAccessDeniedException
You are not authorized to perform the action.
HTTP Status Code: 400InternalServerError
Amazon Rekognition experienced a service issue. Try your call again.
HTTP Status Code: 500InvalidParameterException
Input parameter violated a constraint. Validate your parameter before calling the API operation again.
HTTP Status Code: 400LimitExceededException
An Amazon Rekognition service limit was exceeded. For example, if you start too many AmazonRekognition Video jobs concurrently, calls to start operations (StartLabelDetection, for example)will raise a LimitExceededException exception (HTTP status code: 400) until the number ofconcurrently running jobs is below the Amazon Rekognition service limit.
HTTP Status Code: 400ProvisionedThroughputExceededException
The number of requests exceeded your throughput limit. If you want to increase this limit, contactAmazon Rekognition.
HTTP Status Code: 400ResourceInUseException
HTTP Status Code: 400ResourceNotFoundException
The collection specified in the request cannot be found.
HTTP Status Code: 400ThrottlingException
Amazon Rekognition is temporarily unable to process the request. Try your call again.
414
Amazon Rekognition 개발자 안내서StartProjectVersion
HTTP Status Code: 500
See AlsoFor more information about using this API in one of the language-specific AWS SDKs, see the following:
• AWS Command Line Interface• AWS SDK for .NET• AWS SDK for C++• AWS SDK for Go• AWS SDK for Java• AWS SDK for JavaScript• AWS SDK for PHP V3• AWS SDK for Python• AWS SDK for Ruby V2
415

Amazon Rekognition 개발자 안내서StartStreamProcessor
StartStreamProcessorStarts processing a stream processor. You create a stream processor by callingCreateStreamProcessor (p. 284). To tell StartStreamProcessor which stream processor to start, usethe value of the Name field specified in the call to CreateStreamProcessor.
Request Syntax
{ "Name": "string"}
Request ParametersThe request accepts the following data in JSON format.
Name (p. 416)
The name of the stream processor to start processing.
Type: String
Length Constraints: Minimum length of 1. Maximum length of 128.
Pattern: [a-zA-Z0-9_.\-]+
Required: Yes
Response ElementsIf the action is successful, the service sends back an HTTP 200 response with an empty HTTP body.
ErrorsAccessDeniedException
You are not authorized to perform the action.
HTTP Status Code: 400InternalServerError
Amazon Rekognition experienced a service issue. Try your call again.
HTTP Status Code: 500InvalidParameterException
Input parameter violated a constraint. Validate your parameter before calling the API operation again.
HTTP Status Code: 400ProvisionedThroughputExceededException
The number of requests exceeded your throughput limit. If you want to increase this limit, contactAmazon Rekognition.
HTTP Status Code: 400
416

Amazon Rekognition 개발자 안내서StartStreamProcessor
ResourceInUseException
HTTP Status Code: 400ResourceNotFoundException
The collection specified in the request cannot be found.
HTTP Status Code: 400ThrottlingException
Amazon Rekognition is temporarily unable to process the request. Try your call again.
HTTP Status Code: 500
See AlsoFor more information about using this API in one of the language-specific AWS SDKs, see the following:
• AWS Command Line Interface• AWS SDK for .NET• AWS SDK for C++• AWS SDK for Go• AWS SDK for Java• AWS SDK for JavaScript• AWS SDK for PHP V3• AWS SDK for Python• AWS SDK for Ruby V2
417
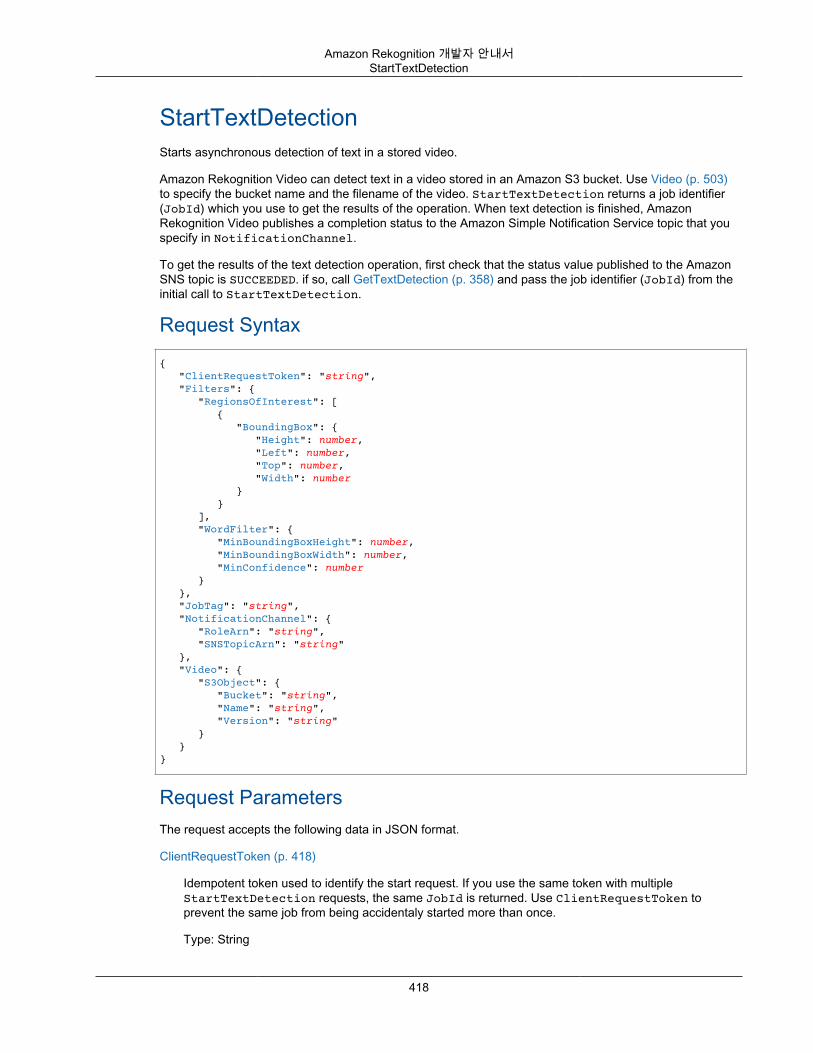
Amazon Rekognition 개발자 안내서StartTextDetection
StartTextDetectionStarts asynchronous detection of text in a stored video.
Amazon Rekognition Video can detect text in a video stored in an Amazon S3 bucket. Use Video (p. 503)to specify the bucket name and the filename of the video. StartTextDetection returns a job identifier(JobId) which you use to get the results of the operation. When text detection is finished, AmazonRekognition Video publishes a completion status to the Amazon Simple Notification Service topic that youspecify in NotificationChannel.
To get the results of the text detection operation, first check that the status value published to the AmazonSNS topic is SUCCEEDED. if so, call GetTextDetection (p. 358) and pass the job identifier (JobId) from theinitial call to StartTextDetection.
Request Syntax{ "ClientRequestToken": "string", "Filters": { "RegionsOfInterest": [ { "BoundingBox": { "Height": number, "Left": number, "Top": number, "Width": number } } ], "WordFilter": { "MinBoundingBoxHeight": number, "MinBoundingBoxWidth": number, "MinConfidence": number } }, "JobTag": "string", "NotificationChannel": { "RoleArn": "string", "SNSTopicArn": "string" }, "Video": { "S3Object": { "Bucket": "string", "Name": "string", "Version": "string" } }}
Request ParametersThe request accepts the following data in JSON format.
ClientRequestToken (p. 418)
Idempotent token used to identify the start request. If you use the same token with multipleStartTextDetection requests, the same JobId is returned. Use ClientRequestToken toprevent the same job from being accidentaly started more than once.
Type: String
418
Amazon Rekognition 개발자 안내서StartTextDetection
Length Constraints: Minimum length of 1. Maximum length of 64.
Pattern: ^[a-zA-Z0-9-_]+$
Required: NoFilters (p. 418)
Optional parameters that let you set criteria the text must meet to be included in your response.
Type: StartTextDetectionFilters (p. 488) object
Required: NoJobTag (p. 418)
An identifier returned in the completion status published by your Amazon Simple Notification Servicetopic. For example, you can use JobTag to group related jobs and identify them in the completionnotification.
Type: String
Length Constraints: Minimum length of 1. Maximum length of 256.
Pattern: [a-zA-Z0-9_.\-:]+
Required: NoNotificationChannel (p. 418)
The Amazon Simple Notification Service topic to which Amazon Rekognition publishes the completionstatus of a video analysis operation. For more information, see Amazon Rekognition Video 작업 불러오기 (p. 53).
Type: NotificationChannel (p. 474) object
Required: NoVideo (p. 418)
Video file stored in an Amazon S3 bucket. Amazon Rekognition video start operations such asStartLabelDetection (p. 406) use Video to specify a video for analysis. The supported file formatsare .mp4, .mov and .avi.
Type: Video (p. 503) object
Required: Yes
Response Syntax
{ "JobId": "string"}
Response ElementsIf the action is successful, the service sends back an HTTP 200 response.
The following data is returned in JSON format by the service.
419
Amazon Rekognition 개발자 안내서StartTextDetection
JobId (p. 419)
Identifier for the text detection job. Use JobId to identify the job in a subsequent call toGetTextDetection.
Type: String
Length Constraints: Minimum length of 1. Maximum length of 64.
Pattern: ^[a-zA-Z0-9-_]+$
ErrorsAccessDeniedException
You are not authorized to perform the action.
HTTP Status Code: 400IdempotentParameterMismatchException
A ClientRequestToken input parameter was reused with an operation, but at least one of the otherinput parameters is different from the previous call to the operation.
HTTP Status Code: 400InternalServerError
Amazon Rekognition experienced a service issue. Try your call again.
HTTP Status Code: 500InvalidParameterException
Input parameter violated a constraint. Validate your parameter before calling the API operation again.
HTTP Status Code: 400InvalidS3ObjectException
Amazon Rekognition is unable to access the S3 object specified in the request.
HTTP Status Code: 400LimitExceededException
An Amazon Rekognition service limit was exceeded. For example, if you start too many AmazonRekognition Video jobs concurrently, calls to start operations (StartLabelDetection, for example)will raise a LimitExceededException exception (HTTP status code: 400) until the number ofconcurrently running jobs is below the Amazon Rekognition service limit.
HTTP Status Code: 400ProvisionedThroughputExceededException
The number of requests exceeded your throughput limit. If you want to increase this limit, contactAmazon Rekognition.
HTTP Status Code: 400ThrottlingException
Amazon Rekognition is temporarily unable to process the request. Try your call again.
HTTP Status Code: 500
420
Amazon Rekognition 개발자 안내서StartTextDetection
VideoTooLargeException
The file size or duration of the supplied media is too large. The maximum file size is 10GB. Themaximum duration is 6 hours.
HTTP Status Code: 400
See AlsoFor more information about using this API in one of the language-specific AWS SDKs, see the following:
• AWS Command Line Interface• AWS SDK for .NET• AWS SDK for C++• AWS SDK for Go• AWS SDK for Java• AWS SDK for JavaScript• AWS SDK for PHP V3• AWS SDK for Python• AWS SDK for Ruby V2
421
Amazon Rekognition 개발자 안내서StopProjectVersion
StopProjectVersionStops a running model. The operation might take a while to complete. To check the current status, callDescribeProjectVersions (p. 299).
Request Syntax{ "ProjectVersionArn": "string"}
Request ParametersThe request accepts the following data in JSON format.
ProjectVersionArn (p. 422)
The Amazon Resource Name (ARN) of the model version that you want to delete.
This operation requires permissions to perform the rekognition:StopProjectVersion action.
Type: String
Length Constraints: Minimum length of 20. Maximum length of 2048.
Pattern: (^arn:[a-z\d-]+:rekognition:[a-z\d-]+:\d{12}:project\/[a-zA-Z0-9_.\-]{1,255}\/version\/[a-zA-Z0-9_.\-]{1,255}\/[0-9]+$)
Required: Yes
Response Syntax{ "Status": "string"}
Response ElementsIf the action is successful, the service sends back an HTTP 200 response.
The following data is returned in JSON format by the service.
Status (p. 422)
The current status of the stop operation.
Type: String
Valid Values: TRAINING_IN_PROGRESS | TRAINING_COMPLETED | TRAINING_FAILED |STARTING | RUNNING | FAILED | STOPPING | STOPPED | DELETING
ErrorsAccessDeniedException
You are not authorized to perform the action.
422
Amazon Rekognition 개발자 안내서StopProjectVersion
HTTP Status Code: 400InternalServerError
Amazon Rekognition experienced a service issue. Try your call again.
HTTP Status Code: 500InvalidParameterException
Input parameter violated a constraint. Validate your parameter before calling the API operation again.
HTTP Status Code: 400ProvisionedThroughputExceededException
The number of requests exceeded your throughput limit. If you want to increase this limit, contactAmazon Rekognition.
HTTP Status Code: 400ResourceInUseException
HTTP Status Code: 400ResourceNotFoundException
The collection specified in the request cannot be found.
HTTP Status Code: 400ThrottlingException
Amazon Rekognition is temporarily unable to process the request. Try your call again.
HTTP Status Code: 500
See AlsoFor more information about using this API in one of the language-specific AWS SDKs, see the following:
• AWS Command Line Interface• AWS SDK for .NET• AWS SDK for C++• AWS SDK for Go• AWS SDK for Java• AWS SDK for JavaScript• AWS SDK for PHP V3• AWS SDK for Python• AWS SDK for Ruby V2
423
Amazon Rekognition 개발자 안내서StopStreamProcessor
StopStreamProcessorStops a running stream processor that was created by CreateStreamProcessor (p. 284).
Request Syntax{ "Name": "string"}
Request ParametersThe request accepts the following data in JSON format.
Name (p. 424)
The name of a stream processor created by CreateStreamProcessor (p. 284).
Type: String
Length Constraints: Minimum length of 1. Maximum length of 128.
Pattern: [a-zA-Z0-9_.\-]+
Required: Yes
Response ElementsIf the action is successful, the service sends back an HTTP 200 response with an empty HTTP body.
ErrorsAccessDeniedException
You are not authorized to perform the action.
HTTP Status Code: 400InternalServerError
Amazon Rekognition experienced a service issue. Try your call again.
HTTP Status Code: 500InvalidParameterException
Input parameter violated a constraint. Validate your parameter before calling the API operation again.
HTTP Status Code: 400ProvisionedThroughputExceededException
The number of requests exceeded your throughput limit. If you want to increase this limit, contactAmazon Rekognition.
HTTP Status Code: 400ResourceInUseException
424
Amazon Rekognition 개발자 안내서Data Types
HTTP Status Code: 400ResourceNotFoundException
The collection specified in the request cannot be found.
HTTP Status Code: 400ThrottlingException
Amazon Rekognition is temporarily unable to process the request. Try your call again.
HTTP Status Code: 500
See AlsoFor more information about using this API in one of the language-specific AWS SDKs, see the following:
• AWS Command Line Interface• AWS SDK for .NET• AWS SDK for C++• AWS SDK for Go• AWS SDK for Java• AWS SDK for JavaScript• AWS SDK for PHP V3• AWS SDK for Python• AWS SDK for Ruby V2
Data TypesThe following data types are supported:
• AgeRange (p. 428)• Asset (p. 429)• Beard (p. 430)• BoundingBox (p. 431)• Celebrity (p. 433)• CelebrityDetail (p. 434)• CelebrityRecognition (p. 436)• ComparedFace (p. 437)• ComparedSourceImageFace (p. 438)• CompareFacesMatch (p. 439)• ContentModerationDetection (p. 440)• CustomLabel (p. 441)• DetectionFilter (p. 442)• DetectTextFilters (p. 443)• Emotion (p. 444)• EvaluationResult (p. 445)• Eyeglasses (p. 446)• EyeOpen (p. 447)
425
Amazon Rekognition 개발자 안내서Data Types
• Face (p. 448)• FaceDetail (p. 450)• FaceDetection (p. 453)• FaceMatch (p. 454)• FaceRecord (p. 455)• FaceSearchSettings (p. 456)• Gender (p. 457)• Geometry (p. 458)• GroundTruthManifest (p. 459)• HumanLoopActivationOutput (p. 460)• HumanLoopConfig (p. 461)• HumanLoopDataAttributes (p. 462)• Image (p. 463)• ImageQuality (p. 464)• Instance (p. 465)• KinesisDataStream (p. 466)• KinesisVideoStream (p. 467)• Label (p. 468)• LabelDetection (p. 469)• Landmark (p. 470)• ModerationLabel (p. 471)• MouthOpen (p. 472)• Mustache (p. 473)• NotificationChannel (p. 474)• OutputConfig (p. 475)• Parent (p. 476)• PersonDetail (p. 477)• PersonDetection (p. 478)• PersonMatch (p. 479)• Point (p. 480)• Pose (p. 481)• ProjectDescription (p. 482)• ProjectVersionDescription (p. 483)• RegionOfInterest (p. 485)• S3Object (p. 486)• Smile (p. 487)• StartTextDetectionFilters (p. 488)• StreamProcessor (p. 489)• StreamProcessorInput (p. 490)• StreamProcessorOutput (p. 491)• StreamProcessorSettings (p. 492)• Summary (p. 493)• Sunglasses (p. 494)• TestingData (p. 495)• TestingDataResult (p. 496)• TextDetection (p. 497)
426

Amazon Rekognition 개발자 안내서Data Types
• TextDetectionResult (p. 499)• TrainingData (p. 500)• TrainingDataResult (p. 501)• UnindexedFace (p. 502)• Video (p. 503)• VideoMetadata (p. 504)
427
Amazon Rekognition 개발자 안내서AgeRange
AgeRangeStructure containing the estimated age range, in years, for a face.
Amazon Rekognition estimates an age range for faces detected in the input image. Estimated age rangescan overlap. A face of a 5-year-old might have an estimated range of 4-6, while the face of a 6-year-oldmight have an estimated range of 4-8.
ContentsHigh
The highest estimated age.
Type: Integer
Valid Range: Minimum value of 0.
Required: NoLow
The lowest estimated age.
Type: Integer
Valid Range: Minimum value of 0.
Required: No
See AlsoFor more information about using this API in one of the language-specific AWS SDKs, see the following:
• AWS SDK for C++• AWS SDK for Go• AWS SDK for Java• AWS SDK for Ruby V2
428
Amazon Rekognition 개발자 안내서Asset
AssetAssets are the images that you use to train and evaluate a model version. Assets are referenced bySagemaker GroundTruth manifest files.
ContentsGroundTruthManifest
The S3 bucket that contains the Ground Truth manifest file.
Type: GroundTruthManifest (p. 459) object
Required: No
See AlsoFor more information about using this API in one of the language-specific AWS SDKs, see the following:
• AWS SDK for C++• AWS SDK for Go• AWS SDK for Java• AWS SDK for Ruby V2
429

Amazon Rekognition 개발자 안내서Beard
BeardIndicates whether or not the face has a beard, and the confidence level in the determination.
ContentsConfidence
Level of confidence in the determination.
Type: Float
Valid Range: Minimum value of 0. Maximum value of 100.
Required: NoValue
Boolean value that indicates whether the face has beard or not.
Type: Boolean
Required: No
See AlsoFor more information about using this API in one of the language-specific AWS SDKs, see the following:
• AWS SDK for C++• AWS SDK for Go• AWS SDK for Java• AWS SDK for Ruby V2
430
Amazon Rekognition 개발자 안내서BoundingBox
BoundingBoxIdentifies the bounding box around the label, face, or text. The left (x-coordinate) and top (y-coordinate)are coordinates representing the top and left sides of the bounding box. Note that the upper-left corner ofthe image is the origin (0,0).
The top and left values returned are ratios of the overall image size. For example, if the input image is700x200 pixels, and the top-left coordinate of the bounding box is 350x50 pixels, the API returns a leftvalue of 0.5 (350/700) and a top value of 0.25 (50/200).
The width and height values represent the dimensions of the bounding box as a ratio of the overallimage dimension. For example, if the input image is 700x200 pixels, and the bounding box width is 70pixels, the width returned is 0.1.
Note
The bounding box coordinates can have negative values. For example, if Amazon Rekognition isable to detect a face that is at the image edge and is only partially visible, the service can returncoordinates that are outside the image bounds and, depending on the image edge, you might getnegative values or values greater than 1 for the left or top values.
ContentsHeight
Height of the bounding box as a ratio of the overall image height.
Type: Float
Required: NoLeft
Left coordinate of the bounding box as a ratio of overall image width.
Type: Float
Required: NoTop
Top coordinate of the bounding box as a ratio of overall image height.
Type: Float
Required: NoWidth
Width of the bounding box as a ratio of the overall image width.
Type: Float
Required: No
See AlsoFor more information about using this API in one of the language-specific AWS SDKs, see the following:
• AWS SDK for C++
431
Amazon Rekognition 개발자 안내서BoundingBox
• AWS SDK for Go• AWS SDK for Java• AWS SDK for Ruby V2
432
Amazon Rekognition 개발자 안내서Celebrity
CelebrityProvides information about a celebrity recognized by the RecognizeCelebrities (p. 379) operation.
ContentsFace
Provides information about the celebrity's face, such as its location on the image.
Type: ComparedFace (p. 437) object
Required: NoId
A unique identifier for the celebrity.
Type: String
Pattern: [0-9A-Za-z]*
Required: NoMatchConfidence
The confidence, in percentage, that Amazon Rekognition has that the recognized face is the celebrity.
Type: Float
Valid Range: Minimum value of 0. Maximum value of 100.
Required: NoName
The name of the celebrity.
Type: String
Required: NoUrls
An array of URLs pointing to additional information about the celebrity. If there is no additionalinformation about the celebrity, this list is empty.
Type: Array of strings
Required: No
See AlsoFor more information about using this API in one of the language-specific AWS SDKs, see the following:
• AWS SDK for C++• AWS SDK for Go• AWS SDK for Java• AWS SDK for Ruby V2
433
Amazon Rekognition 개발자 안내서CelebrityDetail
CelebrityDetailInformation about a recognized celebrity.
ContentsBoundingBox
Bounding box around the body of a celebrity.
Type: BoundingBox (p. 431) object
Required: NoConfidence
The confidence, in percentage, that Amazon Rekognition has that the recognized face is the celebrity.
Type: Float
Valid Range: Minimum value of 0. Maximum value of 100.
Required: NoFace
Face details for the recognized celebrity.
Type: FaceDetail (p. 450) object
Required: NoId
The unique identifier for the celebrity.
Type: String
Pattern: [0-9A-Za-z]*
Required: NoName
The name of the celebrity.
Type: String
Required: NoUrls
An array of URLs pointing to additional celebrity information.
Type: Array of strings
Required: No
See AlsoFor more information about using this API in one of the language-specific AWS SDKs, see the following:
• AWS SDK for C++
434

Amazon Rekognition 개발자 안내서CelebrityDetail
• AWS SDK for Go• AWS SDK for Java• AWS SDK for Ruby V2
435
Amazon Rekognition 개발자 안내서CelebrityRecognition
CelebrityRecognitionInformation about a detected celebrity and the time the celebrity was detected in a stored video. For moreinformation, see GetCelebrityRecognition (p. 330).
ContentsCelebrity
Information about a recognized celebrity.
Type: CelebrityDetail (p. 434) object
Required: NoTimestamp
The time, in milliseconds from the start of the video, that the celebrity was recognized.
Type: Long
Required: No
See AlsoFor more information about using this API in one of the language-specific AWS SDKs, see the following:
• AWS SDK for C++• AWS SDK for Go• AWS SDK for Java• AWS SDK for Ruby V2
436
Amazon Rekognition 개발자 안내서ComparedFace
ComparedFaceProvides face metadata for target image faces that are analyzed by CompareFaces andRecognizeCelebrities.
ContentsBoundingBox
Bounding box of the face.
Type: BoundingBox (p. 431) object
Required: NoConfidence
Level of confidence that what the bounding box contains is a face.
Type: Float
Valid Range: Minimum value of 0. Maximum value of 100.
Required: NoLandmarks
An array of facial landmarks.
Type: Array of Landmark (p. 470) objects
Required: NoPose
Indicates the pose of the face as determined by its pitch, roll, and yaw.
Type: Pose (p. 481) object
Required: NoQuality
Identifies face image brightness and sharpness.
Type: ImageQuality (p. 464) object
Required: No
See AlsoFor more information about using this API in one of the language-specific AWS SDKs, see the following:
• AWS SDK for C++• AWS SDK for Go• AWS SDK for Java• AWS SDK for Ruby V2
437

Amazon Rekognition 개발자 안내서ComparedSourceImageFace
ComparedSourceImageFaceType that describes the face Amazon Rekognition chose to compare with the faces in the target. Thiscontains a bounding box for the selected face and confidence level that the bounding box contains a face.Note that Amazon Rekognition selects the largest face in the source image for this comparison.
ContentsBoundingBox
Bounding box of the face.
Type: BoundingBox (p. 431) object
Required: NoConfidence
Confidence level that the selected bounding box contains a face.
Type: Float
Valid Range: Minimum value of 0. Maximum value of 100.
Required: No
See AlsoFor more information about using this API in one of the language-specific AWS SDKs, see the following:
• AWS SDK for C++• AWS SDK for Go• AWS SDK for Java• AWS SDK for Ruby V2
438
Amazon Rekognition 개발자 안내서CompareFacesMatch
CompareFacesMatchProvides information about a face in a target image that matches the source image face analyzed byCompareFaces. The Face property contains the bounding box of the face in the target image. TheSimilarity property is the confidence that the source image face matches the face in the bounding box.
ContentsFace
Provides face metadata (bounding box and confidence that the bounding box actually contains a face).
Type: ComparedFace (p. 437) object
Required: NoSimilarity
Level of confidence that the faces match.
Type: Float
Valid Range: Minimum value of 0. Maximum value of 100.
Required: No
See AlsoFor more information about using this API in one of the language-specific AWS SDKs, see the following:
• AWS SDK for C++• AWS SDK for Go• AWS SDK for Java• AWS SDK for Ruby V2
439
Amazon Rekognition 개발자 안내서ContentModerationDetection
ContentModerationDetectionInformation about an unsafe content label detection in a stored video.
ContentsModerationLabel
The unsafe content label detected by in the stored video.
Type: ModerationLabel (p. 471) object
Required: NoTimestamp
Time, in milliseconds from the beginning of the video, that the unsafe content label was detected.
Type: Long
Required: No
See AlsoFor more information about using this API in one of the language-specific AWS SDKs, see the following:
• AWS SDK for C++• AWS SDK for Go• AWS SDK for Java• AWS SDK for Ruby V2
440
Amazon Rekognition 개발자 안내서CustomLabel
CustomLabelA custom label detected in an image by a call to DetectCustomLabels (p. 307).
ContentsConfidence
The confidence that the model has in the detection of the custom label. The range is 0-100. A highervalue indicates a higher confidence.
Type: Float
Valid Range: Minimum value of 0. Maximum value of 100.
Required: NoGeometry
The location of the detected object on the image that corresponds to the custom label. Includes an axisaligned coarse bounding box surrounding the object and a finer grain polygon for more accurate spatialinformation.
Type: Geometry (p. 458) object
Required: NoName
The name of the custom label.
Type: String
Required: No
See AlsoFor more information about using this API in one of the language-specific AWS SDKs, see the following:
• AWS SDK for C++• AWS SDK for Go• AWS SDK for Java• AWS SDK for Ruby V2
441
Amazon Rekognition 개발자 안내서DetectionFilter
DetectionFilterA set of parameters that allow you to filter out certain results from your returned results.
ContentsMinBoundingBoxHeight
Sets the minimum height of the word bounding box. Words with bounding box heights lesser than thisvalue will be excluded from the result. Value is relative to the video frame height.
Type: Float
Valid Range: Minimum value of 0. Maximum value of 1.
Required: NoMinBoundingBoxWidth
Sets the minimum width of the word bounding box. Words with bounding boxes widths lesser than thisvalue will be excluded from the result. Value is relative to the video frame width.
Type: Float
Valid Range: Minimum value of 0. Maximum value of 1.
Required: NoMinConfidence
Sets confidence of word detection. Words with detection confidence below this will be excluded fromthe result. Values should be between 0.5 and 1 as Text in Video will not return any result below 0.5.
Type: Float
Valid Range: Minimum value of 0. Maximum value of 100.
Required: No
See AlsoFor more information about using this API in one of the language-specific AWS SDKs, see the following:
• AWS SDK for C++• AWS SDK for Go• AWS SDK for Java• AWS SDK for Ruby V2
442
Amazon Rekognition 개발자 안내서DetectTextFilters
DetectTextFiltersA set of optional parameters that you can use to set the criteria that the text must meet to beincluded in your response. WordFilter looks at a word’s height, width, and minimum confidence.RegionOfInterest lets you set a specific region of the image to look for text in.
ContentsRegionsOfInterest
A Filter focusing on a certain area of the image. Uses a BoundingBox object to set the region of theimage.
Type: Array of RegionOfInterest (p. 485) objects
Array Members: Minimum number of 0 items. Maximum number of 10 items.
Required: NoWordFilter
A set of parameters that allow you to filter out certain results from your returned results.
Type: DetectionFilter (p. 442) object
Required: No
See AlsoFor more information about using this API in one of the language-specific AWS SDKs, see the following:
• AWS SDK for C++• AWS SDK for Go• AWS SDK for Java• AWS SDK for Ruby V2
443
Amazon Rekognition 개발자 안내서Emotion
EmotionThe emotions that appear to be expressed on the face, and the confidence level in the determination. TheAPI is only making a determination of the physical appearance of a person's face. It is not a determinationof the person’s internal emotional state and should not be used in such a way. For example, a personpretending to have a sad face might not be sad emotionally.
ContentsConfidence
Level of confidence in the determination.
Type: Float
Valid Range: Minimum value of 0. Maximum value of 100.
Required: NoType
Type of emotion detected.
Type: String
Valid Values: HAPPY | SAD | ANGRY | CONFUSED | DISGUSTED | SURPRISED | CALM |UNKNOWN | FEAR
Required: No
See AlsoFor more information about using this API in one of the language-specific AWS SDKs, see the following:
• AWS SDK for C++• AWS SDK for Go• AWS SDK for Java• AWS SDK for Ruby V2
444

Amazon Rekognition 개발자 안내서EvaluationResult
EvaluationResultThe evaluation results for the training of a model.
ContentsF1Score
The F1 score for the evaluation of all labels. The F1 score metric evaluates the overall precision andrecall performance of the model as a single value. A higher value indicates better precision and recallperformance. A lower score indicates that precision, recall, or both are performing poorly.
Type: Float
Required: NoSummary
The S3 bucket that contains the training summary.
Type: Summary (p. 493) object
Required: No
See AlsoFor more information about using this API in one of the language-specific AWS SDKs, see the following:
• AWS SDK for C++• AWS SDK for Go• AWS SDK for Java• AWS SDK for Ruby V2
445

Amazon Rekognition 개발자 안내서Eyeglasses
EyeglassesIndicates whether or not the face is wearing eye glasses, and the confidence level in the determination.
ContentsConfidence
Level of confidence in the determination.
Type: Float
Valid Range: Minimum value of 0. Maximum value of 100.
Required: NoValue
Boolean value that indicates whether the face is wearing eye glasses or not.
Type: Boolean
Required: No
See AlsoFor more information about using this API in one of the language-specific AWS SDKs, see the following:
• AWS SDK for C++• AWS SDK for Go• AWS SDK for Java• AWS SDK for Ruby V2
446
Amazon Rekognition 개발자 안내서EyeOpen
EyeOpenIndicates whether or not the eyes on the face are open, and the confidence level in the determination.
ContentsConfidence
Level of confidence in the determination.
Type: Float
Valid Range: Minimum value of 0. Maximum value of 100.
Required: NoValue
Boolean value that indicates whether the eyes on the face are open.
Type: Boolean
Required: No
See AlsoFor more information about using this API in one of the language-specific AWS SDKs, see the following:
• AWS SDK for C++• AWS SDK for Go• AWS SDK for Java• AWS SDK for Ruby V2
447
Amazon Rekognition 개발자 안내서Face
FaceDescribes the face properties such as the bounding box, face ID, image ID of the input image, and externalimage ID that you assigned.
ContentsBoundingBox
Bounding box of the face.
Type: BoundingBox (p. 431) object
Required: NoConfidence
Confidence level that the bounding box contains a face (and not a different object such as a tree).
Type: Float
Valid Range: Minimum value of 0. Maximum value of 100.
Required: NoExternalImageId
Identifier that you assign to all the faces in the input image.
Type: String
Length Constraints: Minimum length of 1. Maximum length of 255.
Pattern: [a-zA-Z0-9_.\-:]+
Required: NoFaceId
Unique identifier that Amazon Rekognition assigns to the face.
Type: String
Pattern: [0-9a-f]{8}-[0-9a-f]{4}-[0-9a-f]{4}-[0-9a-f]{4}-[0-9a-f]{12}
Required: NoImageId
Unique identifier that Amazon Rekognition assigns to the input image.
Type: String
Pattern: [0-9a-f]{8}-[0-9a-f]{4}-[0-9a-f]{4}-[0-9a-f]{4}-[0-9a-f]{12}
Required: No
See AlsoFor more information about using this API in one of the language-specific AWS SDKs, see the following:
• AWS SDK for C++
448
Amazon Rekognition 개발자 안내서Face
• AWS SDK for Go• AWS SDK for Java• AWS SDK for Ruby V2
449
Amazon Rekognition 개발자 안내서FaceDetail
FaceDetailStructure containing attributes of the face that the algorithm detected.
A FaceDetail object contains either the default facial attributes or all facial attributes. The defaultattributes are BoundingBox, Confidence, Landmarks, Pose, and Quality.
GetFaceDetection (p. 339) is the only Amazon Rekognition Video stored video operation that can returna FaceDetail object with all attributes. To specify which attributes to return, use the FaceAttributesinput parameter for StartFaceDetection (p. 398). The following Amazon Rekognition Video operationsreturn only the default attributes. The corresponding Start operations don't have a FaceAttributes inputparameter.
• GetCelebrityRecognition• GetPersonTracking• GetFaceSearch
The Amazon Rekognition Image DetectFaces (p. 311) and IndexFaces (p. 362) operations can returnall facial attributes. To specify which attributes to return, use the Attributes input parameter forDetectFaces. For IndexFaces, use the DetectAttributes input parameter.
ContentsAgeRange
The estimated age range, in years, for the face. Low represents the lowest estimated age and Highrepresents the highest estimated age.
Type: AgeRange (p. 428) object
Required: NoBeard
Indicates whether or not the face has a beard, and the confidence level in the determination.
Type: Beard (p. 430) object
Required: NoBoundingBox
Bounding box of the face. Default attribute.
Type: BoundingBox (p. 431) object
Required: NoConfidence
Confidence level that the bounding box contains a face (and not a different object such as a tree).Default attribute.
Type: Float
Valid Range: Minimum value of 0. Maximum value of 100.
Required: No
450

Amazon Rekognition 개발자 안내서FaceDetail
Emotions
The emotions that appear to be expressed on the face, and the confidence level in the determination.The API is only making a determination of the physical appearance of a person's face. It is not adetermination of the person’s internal emotional state and should not be used in such a way. Forexample, a person pretending to have a sad face might not be sad emotionally.
Type: Array of Emotion (p. 444) objects
Required: NoEyeglasses
Indicates whether or not the face is wearing eye glasses, and the confidence level in the determination.
Type: Eyeglasses (p. 446) object
Required: NoEyesOpen
Indicates whether or not the eyes on the face are open, and the confidence level in the determination.
Type: EyeOpen (p. 447) object
Required: NoGender
The predicted gender of a detected face.
Type: Gender (p. 457) object
Required: NoLandmarks
Indicates the location of landmarks on the face. Default attribute.
Type: Array of Landmark (p. 470) objects
Required: NoMouthOpen
Indicates whether or not the mouth on the face is open, and the confidence level in the determination.
Type: MouthOpen (p. 472) object
Required: NoMustache
Indicates whether or not the face has a mustache, and the confidence level in the determination.
Type: Mustache (p. 473) object
Required: NoPose
Indicates the pose of the face as determined by its pitch, roll, and yaw. Default attribute.
Type: Pose (p. 481) object
Required: No
451
Amazon Rekognition 개발자 안내서FaceDetail
Quality
Identifies image brightness and sharpness. Default attribute.
Type: ImageQuality (p. 464) object
Required: NoSmile
Indicates whether or not the face is smiling, and the confidence level in the determination.
Type: Smile (p. 487) object
Required: NoSunglasses
Indicates whether or not the face is wearing sunglasses, and the confidence level in the determination.
Type: Sunglasses (p. 494) object
Required: No
See AlsoFor more information about using this API in one of the language-specific AWS SDKs, see the following:
• AWS SDK for C++• AWS SDK for Go• AWS SDK for Java• AWS SDK for Ruby V2
452
Amazon Rekognition 개발자 안내서FaceDetection
FaceDetectionInformation about a face detected in a video analysis request and the time the face was detected in thevideo.
ContentsFace
The face properties for the detected face.
Type: FaceDetail (p. 450) object
Required: NoTimestamp
Time, in milliseconds from the start of the video, that the face was detected.
Type: Long
Required: No
See AlsoFor more information about using this API in one of the language-specific AWS SDKs, see the following:
• AWS SDK for C++• AWS SDK for Go• AWS SDK for Java• AWS SDK for Ruby V2
453

Amazon Rekognition 개발자 안내서FaceMatch
FaceMatchProvides face metadata. In addition, it also provides the confidence in the match of this face with the inputface.
ContentsFace
Describes the face properties such as the bounding box, face ID, image ID of the source image, andexternal image ID that you assigned.
Type: Face (p. 448) object
Required: NoSimilarity
Confidence in the match of this face with the input face.
Type: Float
Valid Range: Minimum value of 0. Maximum value of 100.
Required: No
See AlsoFor more information about using this API in one of the language-specific AWS SDKs, see the following:
• AWS SDK for C++• AWS SDK for Go• AWS SDK for Java• AWS SDK for Ruby V2
454
Amazon Rekognition 개발자 안내서FaceRecord
FaceRecordObject containing both the face metadata (stored in the backend database), and facial attributes that aredetected but aren't stored in the database.
ContentsFace
Describes the face properties such as the bounding box, face ID, image ID of the input image, andexternal image ID that you assigned.
Type: Face (p. 448) object
Required: NoFaceDetail
Structure containing attributes of the face that the algorithm detected.
Type: FaceDetail (p. 450) object
Required: No
See AlsoFor more information about using this API in one of the language-specific AWS SDKs, see the following:
• AWS SDK for C++• AWS SDK for Go• AWS SDK for Java• AWS SDK for Ruby V2
455

Amazon Rekognition 개발자 안내서FaceSearchSettings
FaceSearchSettingsInput face recognition parameters for an Amazon Rekognition stream processor.FaceRecognitionSettings is a request parameter for CreateStreamProcessor (p. 284).
ContentsCollectionId
The ID of a collection that contains faces that you want to search for.
Type: String
Length Constraints: Minimum length of 1. Maximum length of 255.
Pattern: [a-zA-Z0-9_.\-]+
Required: NoFaceMatchThreshold
Minimum face match confidence score that must be met to return a result for a recognized face. Defaultis 80. 0 is the lowest confidence. 100 is the highest confidence.
Type: Float
Valid Range: Minimum value of 0. Maximum value of 100.
Required: No
See AlsoFor more information about using this API in one of the language-specific AWS SDKs, see the following:
• AWS SDK for C++• AWS SDK for Go• AWS SDK for Java• AWS SDK for Ruby V2
456
Amazon Rekognition 개발자 안내서Gender
GenderThe predicted gender of a detected face.
Amazon Rekognition makes gender binary (male/female) predictions based on the physical appearance ofa face in a particular image. This kind of prediction is not designed to categorize a person’s gender identity,and you shouldn't use Amazon Rekognition to make such a determination. For example, a male actorwearing a long-haired wig and earrings for a role might be predicted as female.
Using Amazon Rekognition to make gender binary predictions is best suited for use cases where aggregategender distribution statistics need to be analyzed without identifying specific users. For example, thepercentage of female users compared to male users on a social media platform.
We don't recommend using gender binary predictions to make decisions that impactan individual's rights, privacy, or access to services.
ContentsConfidence
Level of confidence in the prediction.
Type: Float
Valid Range: Minimum value of 0. Maximum value of 100.
Required: NoValue
The predicted gender of the face.
Type: String
Valid Values: Male | Female
Required: No
See AlsoFor more information about using this API in one of the language-specific AWS SDKs, see the following:
• AWS SDK for C++• AWS SDK for Go• AWS SDK for Java• AWS SDK for Ruby V2
457
Amazon Rekognition 개발자 안내서Geometry
GeometryInformation about where an object (DetectCustomLabels (p. 307)) or text (DetectText (p. 324)) is located onan image.
ContentsBoundingBox
An axis-aligned coarse representation of the detected item's location on the image.
Type: BoundingBox (p. 431) object
Required: NoPolygon
Within the bounding box, a fine-grained polygon around the detected item.
Type: Array of Point (p. 480) objects
Required: No
See AlsoFor more information about using this API in one of the language-specific AWS SDKs, see the following:
• AWS SDK for C++• AWS SDK for Go• AWS SDK for Java• AWS SDK for Ruby V2
458
Amazon Rekognition 개발자 안내서GroundTruthManifest
GroundTruthManifestThe S3 bucket that contains the Ground Truth manifest file.
ContentsS3Object
Provides the S3 bucket name and object name.
The region for the S3 bucket containing the S3 object must match the region you use for AmazonRekognition operations.
For Amazon Rekognition to process an S3 object, the user must have permission to access the S3object. For more information, see 리소스 기반 정책 (p. 246).
Type: S3Object (p. 486) object
Required: No
See AlsoFor more information about using this API in one of the language-specific AWS SDKs, see the following:
• AWS SDK for C++• AWS SDK for Go• AWS SDK for Java• AWS SDK for Ruby V2
459
Amazon Rekognition 개발자 안내서HumanLoopActivationOutput
HumanLoopActivationOutputShows the results of the human in the loop evaluation. If there is no HumanLoopArn, the input did nottrigger human review.
ContentsHumanLoopActivationConditionsEvaluationResults
Shows the result of condition evaluations, including those conditions which activated a human review.
Type: String
Length Constraints: Maximum length of 10240.
Required: NoHumanLoopActivationReasons
Shows if and why human review was needed.
Type: Array of strings
Array Members: Minimum number of 1 item.
Required: NoHumanLoopArn
The Amazon Resource Name (ARN) of the HumanLoop created.
Type: String
Length Constraints: Maximum length of 256.
Required: No
See AlsoFor more information about using this API in one of the language-specific AWS SDKs, see the following:
• AWS SDK for C++• AWS SDK for Go• AWS SDK for Java• AWS SDK for Ruby V2
460
Amazon Rekognition 개발자 안내서HumanLoopConfig
HumanLoopConfigSets up the flow definition the image will be sent to if one of the conditions is met. You can also set certainattributes of the image before review.
ContentsDataAttributes
Sets attributes of the input data.
Type: HumanLoopDataAttributes (p. 462) object
Required: NoFlowDefinitionArn
The Amazon Resource Name (ARN) of the flow definition.
Type: String
Length Constraints: Maximum length of 256.
Required: YesHumanLoopName
The name of the human review used for this image. This should be kept unique within a region.
Type: String
Length Constraints: Minimum length of 1. Maximum length of 63.
Pattern: ^[a-z0-9](-*[a-z0-9])*
Required: Yes
See AlsoFor more information about using this API in one of the language-specific AWS SDKs, see the following:
• AWS SDK for C++• AWS SDK for Go• AWS SDK for Java• AWS SDK for Ruby V2
461
Amazon Rekognition 개발자 안내서HumanLoopDataAttributes
HumanLoopDataAttributesAllows you to set attributes of the image. Currently, you can declare an image as free of personallyidentifiable information.
ContentsContentClassifiers
Sets whether the input image is free of personally identifiable information.
Type: Array of strings
Array Members: Maximum number of 256 items.
Valid Values: FreeOfPersonallyIdentifiableInformation | FreeOfAdultContent
Required: No
See AlsoFor more information about using this API in one of the language-specific AWS SDKs, see the following:
• AWS SDK for C++• AWS SDK for Go• AWS SDK for Java• AWS SDK for Ruby V2
462
Amazon Rekognition 개발자 안내서Image
ImageProvides the input image either as bytes or an S3 object.
You pass image bytes to an Amazon Rekognition API operation by using the Bytes property. For example,you would use the Bytes property to pass an image loaded from a local file system. Image bytes passedby using the Bytes property must be base64-encoded. Your code may not need to encode image bytes ifyou are using an AWS SDK to call Amazon Rekognition API operations.
For more information, see 로컬 파일 시스템에서 불러온 이미지 분석 (p. 31).
You pass images stored in an S3 bucket to an Amazon Rekognition API operation by using the S3Objectproperty. Images stored in an S3 bucket do not need to be base64-encoded.
The region for the S3 bucket containing the S3 object must match the region you use for AmazonRekognition operations.
If you use the AWS CLI to call Amazon Rekognition operations, passing image bytes using the Bytesproperty is not supported. You must first upload the image to an Amazon S3 bucket and then call theoperation using the S3Object property.
For Amazon Rekognition to process an S3 object, the user must have permission to access the S3 object.For more information, see 리소스 기반 정책 (p. 246).
ContentsBytes
Blob of image bytes up to 5 MBs.
Type: Base64-encoded binary data object
Length Constraints: Minimum length of 1. Maximum length of 5242880.
Required: NoS3Object
Identifies an S3 object as the image source.
Type: S3Object (p. 486) object
Required: No
See AlsoFor more information about using this API in one of the language-specific AWS SDKs, see the following:
• AWS SDK for C++• AWS SDK for Go• AWS SDK for Java• AWS SDK for Ruby V2
463
Amazon Rekognition 개발자 안내서ImageQuality
ImageQualityIdentifies face image brightness and sharpness.
ContentsBrightness
Value representing brightness of the face. The service returns a value between 0 and 100 (inclusive). Ahigher value indicates a brighter face image.
Type: Float
Required: NoSharpness
Value representing sharpness of the face. The service returns a value between 0 and 100 (inclusive). Ahigher value indicates a sharper face image.
Type: Float
Required: No
See AlsoFor more information about using this API in one of the language-specific AWS SDKs, see the following:
• AWS SDK for C++• AWS SDK for Go• AWS SDK for Java• AWS SDK for Ruby V2
464
Amazon Rekognition 개발자 안내서Instance
InstanceAn instance of a label returned by Amazon Rekognition Image (DetectLabels (p. 315)) or by AmazonRekognition Video (GetLabelDetection (p. 349)).
ContentsBoundingBox
The position of the label instance on the image.
Type: BoundingBox (p. 431) object
Required: NoConfidence
The confidence that Amazon Rekognition has in the accuracy of the bounding box.
Type: Float
Valid Range: Minimum value of 0. Maximum value of 100.
Required: No
See AlsoFor more information about using this API in one of the language-specific AWS SDKs, see the following:
• AWS SDK for C++• AWS SDK for Go• AWS SDK for Java• AWS SDK for Ruby V2
465
Amazon Rekognition 개발자 안내서KinesisDataStream
KinesisDataStreamThe Kinesis data stream Amazon Rekognition to which the analysis results of a Amazon Rekognitionstream processor are streamed. For more information, see CreateStreamProcessor (p. 284).
ContentsArn
ARN of the output Amazon Kinesis Data Streams stream.
Type: String
Pattern: (^arn:([a-z\d-]+):kinesis:([a-z\d-]+):\d{12}:.+$)
Required: No
See AlsoFor more information about using this API in one of the language-specific AWS SDKs, see the following:
• AWS SDK for C++• AWS SDK for Go• AWS SDK for Java• AWS SDK for Ruby V2
466
Amazon Rekognition 개발자 안내서KinesisVideoStream
KinesisVideoStreamKinesis video stream stream that provides the source streaming video for a Amazon Rekognition Videostream processor. For more information, see CreateStreamProcessor (p. 284).
ContentsArn
ARN of the Kinesis video stream stream that streams the source video.
Type: String
Pattern: (^arn:([a-z\d-]+):kinesisvideo:([a-z\d-]+):\d{12}:.+$)
Required: No
See AlsoFor more information about using this API in one of the language-specific AWS SDKs, see the following:
• AWS SDK for C++• AWS SDK for Go• AWS SDK for Java• AWS SDK for Ruby V2
467
Amazon Rekognition 개발자 안내서Label
LabelStructure containing details about the detected label, including the name, detected instances, parent labels,and level of confidence.
ContentsConfidence
Level of confidence.
Type: Float
Valid Range: Minimum value of 0. Maximum value of 100.
Required: NoInstances
If Label represents an object, Instances contains the bounding boxes for each instance of thedetected object. Bounding boxes are returned for common object labels such as people, cars, furniture,apparel or pets.
Type: Array of Instance (p. 465) objects
Required: NoName
The name (label) of the object or scene.
Type: String
Required: NoParents
The parent labels for a label. The response includes all ancestor labels.
Type: Array of Parent (p. 476) objects
Required: No
See AlsoFor more information about using this API in one of the language-specific AWS SDKs, see the following:
• AWS SDK for C++• AWS SDK for Go• AWS SDK for Java• AWS SDK for Ruby V2
468

Amazon Rekognition 개발자 안내서LabelDetection
LabelDetectionInformation about a label detected in a video analysis request and the time the label was detected in thevideo.
ContentsLabel
Details about the detected label.
Type: Label (p. 468) object
Required: NoTimestamp
Time, in milliseconds from the start of the video, that the label was detected.
Type: Long
Required: No
See AlsoFor more information about using this API in one of the language-specific AWS SDKs, see the following:
• AWS SDK for C++• AWS SDK for Go• AWS SDK for Java• AWS SDK for Ruby V2
469
Amazon Rekognition 개발자 안내서Landmark
LandmarkIndicates the location of the landmark on the face.
ContentsType
Type of landmark.
Type: String
Valid Values: eyeLeft | eyeRight | nose | mouthLeft | mouthRight |leftEyeBrowLeft | leftEyeBrowRight | leftEyeBrowUp | rightEyeBrowLeft |rightEyeBrowRight | rightEyeBrowUp | leftEyeLeft | leftEyeRight | leftEyeUp| leftEyeDown | rightEyeLeft | rightEyeRight | rightEyeUp | rightEyeDown| noseLeft | noseRight | mouthUp | mouthDown | leftPupil | rightPupil| upperJawlineLeft | midJawlineLeft | chinBottom | midJawlineRight |upperJawlineRight
Required: NoX
The x-coordinate from the top left of the landmark expressed as the ratio of the width of the image. Forexample, if the image is 700 x 200 and the x-coordinate of the landmark is at 350 pixels, this value is0.5.
Type: Float
Required: NoY
The y-coordinate from the top left of the landmark expressed as the ratio of the height of the image. Forexample, if the image is 700 x 200 and the y-coordinate of the landmark is at 100 pixels, this value is0.5.
Type: Float
Required: No
See AlsoFor more information about using this API in one of the language-specific AWS SDKs, see the following:
• AWS SDK for C++• AWS SDK for Go• AWS SDK for Java• AWS SDK for Ruby V2
470
Amazon Rekognition 개발자 안내서ModerationLabel
ModerationLabelProvides information about a single type of unsafe content found in an image or video. Each type ofmoderated content has a label within a hierarchical taxonomy. For more information, see 비안전 콘텐츠 감지 (p. 222).
ContentsConfidence
Specifies the confidence that Amazon Rekognition has that the label has been correctly identified.
If you don't specify the MinConfidence parameter in the call to DetectModerationLabels, theoperation returns labels with a confidence value greater than or equal to 50 percent.
Type: Float
Valid Range: Minimum value of 0. Maximum value of 100.
Required: NoName
The label name for the type of unsafe content detected in the image.
Type: String
Required: NoParentName
The name for the parent label. Labels at the top level of the hierarchy have the parent label "".
Type: String
Required: No
See AlsoFor more information about using this API in one of the language-specific AWS SDKs, see the following:
• AWS SDK for C++• AWS SDK for Go• AWS SDK for Java• AWS SDK for Ruby V2
471
Amazon Rekognition 개발자 안내서MouthOpen
MouthOpenIndicates whether or not the mouth on the face is open, and the confidence level in the determination.
ContentsConfidence
Level of confidence in the determination.
Type: Float
Valid Range: Minimum value of 0. Maximum value of 100.
Required: NoValue
Boolean value that indicates whether the mouth on the face is open or not.
Type: Boolean
Required: No
See AlsoFor more information about using this API in one of the language-specific AWS SDKs, see the following:
• AWS SDK for C++• AWS SDK for Go• AWS SDK for Java• AWS SDK for Ruby V2
472
Amazon Rekognition 개발자 안내서Mustache
MustacheIndicates whether or not the face has a mustache, and the confidence level in the determination.
ContentsConfidence
Level of confidence in the determination.
Type: Float
Valid Range: Minimum value of 0. Maximum value of 100.
Required: NoValue
Boolean value that indicates whether the face has mustache or not.
Type: Boolean
Required: No
See AlsoFor more information about using this API in one of the language-specific AWS SDKs, see the following:
• AWS SDK for C++• AWS SDK for Go• AWS SDK for Java• AWS SDK for Ruby V2
473
Amazon Rekognition 개발자 안내서NotificationChannel
NotificationChannelThe Amazon Simple Notification Service topic to which Amazon Rekognition publishes the completionstatus of a video analysis operation. For more information, see Amazon Rekognition Video 작업 불러오기 (p. 53).
ContentsRoleArn
The ARN of an IAM role that gives Amazon Rekognition publishing permissions to the Amazon SNStopic.
Type: String
Pattern: arn:aws:iam::\d{12}:role/?[a-zA-Z_0-9+=,.@\-_/]+
Required: YesSNSTopicArn
The Amazon SNS topic to which Amazon Rekognition to posts the completion status.
Type: String
Pattern: (^arn:aws:sns:.*:\w{12}:.+$)
Required: Yes
See AlsoFor more information about using this API in one of the language-specific AWS SDKs, see the following:
• AWS SDK for C++• AWS SDK for Go• AWS SDK for Java• AWS SDK for Ruby V2
474
Amazon Rekognition 개발자 안내서OutputConfig
OutputConfigThe S3 bucket and folder location where training output is placed.
ContentsS3Bucket
The S3 bucket where training output is placed.
Type: String
Length Constraints: Minimum length of 3. Maximum length of 255.
Pattern: [0-9A-Za-z\.\-_]*
Required: NoS3KeyPrefix
The prefix applied to the training output files.
Type: String
Length Constraints: Maximum length of 1024.
Required: No
See AlsoFor more information about using this API in one of the language-specific AWS SDKs, see the following:
• AWS SDK for C++• AWS SDK for Go• AWS SDK for Java• AWS SDK for Ruby V2
475
Amazon Rekognition 개발자 안내서Parent
ParentA parent label for a label. A label can have 0, 1, or more parents.
ContentsName
The name of the parent label.
Type: String
Required: No
See AlsoFor more information about using this API in one of the language-specific AWS SDKs, see the following:
• AWS SDK for C++• AWS SDK for Go• AWS SDK for Java• AWS SDK for Ruby V2
476

Amazon Rekognition 개발자 안내서PersonDetail
PersonDetailDetails about a person detected in a video analysis request.
ContentsBoundingBox
Bounding box around the detected person.
Type: BoundingBox (p. 431) object
Required: NoFace
Face details for the detected person.
Type: FaceDetail (p. 450) object
Required: NoIndex
Identifier for the person detected person within a video. Use to keep track of the person throughout thevideo. The identifier is not stored by Amazon Rekognition.
Type: Long
Required: No
See AlsoFor more information about using this API in one of the language-specific AWS SDKs, see the following:
• AWS SDK for C++• AWS SDK for Go• AWS SDK for Java• AWS SDK for Ruby V2
477
Amazon Rekognition 개발자 안내서PersonDetection
PersonDetectionDetails and path tracking information for a single time a person's path is tracked in a video. AmazonRekognition operations that track people's paths return an array of PersonDetection objects withelements for each time a person's path is tracked in a video.
For more information, see GetPersonTracking (p. 353).
ContentsPerson
Details about a person whose path was tracked in a video.
Type: PersonDetail (p. 477) object
Required: NoTimestamp
The time, in milliseconds from the start of the video, that the person's path was tracked.
Type: Long
Required: No
See AlsoFor more information about using this API in one of the language-specific AWS SDKs, see the following:
• AWS SDK for C++• AWS SDK for Go• AWS SDK for Java• AWS SDK for Ruby V2
478
Amazon Rekognition 개발자 안내서PersonMatch
PersonMatchInformation about a person whose face matches a face(s) in an Amazon Rekognition collection. Includesinformation about the faces in the Amazon Rekognition collection (FaceMatch (p. 454)), information aboutthe person (PersonDetail (p. 477)), and the time stamp for when the person was detected in a video. Anarray of PersonMatch objects is returned by GetFaceSearch (p. 344).
ContentsFaceMatches
Information about the faces in the input collection that match the face of a person in the video.
Type: Array of FaceMatch (p. 454) objects
Required: NoPerson
Information about the matched person.
Type: PersonDetail (p. 477) object
Required: NoTimestamp
The time, in milliseconds from the beginning of the video, that the person was matched in the video.
Type: Long
Required: No
See AlsoFor more information about using this API in one of the language-specific AWS SDKs, see the following:
• AWS SDK for C++• AWS SDK for Go• AWS SDK for Java• AWS SDK for Ruby V2
479
Amazon Rekognition 개발자 안내서Point
PointThe X and Y coordinates of a point on an image. The X and Y values returned are ratios of the overallimage size. For example, if the input image is 700x200 and the operation returns X=0.5 and Y=0.25, thenthe point is at the (350,50) pixel coordinate on the image.
An array of Point objects, Polygon, is returned by DetectText (p. 324) and byDetectCustomLabels (p. 307). Polygon represents a fine-grained polygon around a detected item. Formore information, see Geometry (p. 458).
ContentsX
The value of the X coordinate for a point on a Polygon.
Type: Float
Required: NoY
The value of the Y coordinate for a point on a Polygon.
Type: Float
Required: No
See AlsoFor more information about using this API in one of the language-specific AWS SDKs, see the following:
• AWS SDK for C++• AWS SDK for Go• AWS SDK for Java• AWS SDK for Ruby V2
480
Amazon Rekognition 개발자 안내서Pose
PoseIndicates the pose of the face as determined by its pitch, roll, and yaw.
ContentsPitch
Value representing the face rotation on the pitch axis.
Type: Float
Valid Range: Minimum value of -180. Maximum value of 180.
Required: NoRoll
Value representing the face rotation on the roll axis.
Type: Float
Valid Range: Minimum value of -180. Maximum value of 180.
Required: NoYaw
Value representing the face rotation on the yaw axis.
Type: Float
Valid Range: Minimum value of -180. Maximum value of 180.
Required: No
See AlsoFor more information about using this API in one of the language-specific AWS SDKs, see the following:
• AWS SDK for C++• AWS SDK for Go• AWS SDK for Java• AWS SDK for Ruby V2
481
Amazon Rekognition 개발자 안내서ProjectDescription
ProjectDescriptionA description of a Amazon Rekognition Custom Labels project.
ContentsCreationTimestamp
The Unix timestamp for the date and time that the project was created.
Type: Timestamp
Required: NoProjectArn
The Amazon Resource Name (ARN) of the project.
Type: String
Length Constraints: Minimum length of 20. Maximum length of 2048.
Pattern: (^arn:[a-z\d-]+:rekognition:[a-z\d-]+:\d{12}:project\/[a-zA-Z0-9_.\-]{1,255}\/[0-9]+$)
Required: NoStatus
The current status of the project.
Type: String
Valid Values: CREATING | CREATED | DELETING
Required: No
See AlsoFor more information about using this API in one of the language-specific AWS SDKs, see the following:
• AWS SDK for C++• AWS SDK for Go• AWS SDK for Java• AWS SDK for Ruby V2
482

Amazon Rekognition 개발자 안내서ProjectVersionDescription
ProjectVersionDescriptionThe description of a version of a model.
ContentsBillableTrainingTimeInSeconds
The duration, in seconds, that the model version has been billed for training. This value is only returnedif the model version has been successfully trained.
Type: Long
Valid Range: Minimum value of 0.
Required: NoCreationTimestamp
The Unix datetime for the date and time that training started.
Type: Timestamp
Required: NoEvaluationResult
The training results. EvaluationResult is only returned if training is successful.
Type: EvaluationResult (p. 445) object
Required: NoMinInferenceUnits
The minimum number of inference units used by the model. For more information, seeStartProjectVersion (p. 413).
Type: Integer
Valid Range: Minimum value of 1.
Required: NoOutputConfig
The location where training results are saved.
Type: OutputConfig (p. 475) object
Required: NoProjectVersionArn
The Amazon Resource Name (ARN) of the model version.
Type: String
Length Constraints: Minimum length of 20. Maximum length of 2048.
Pattern: (^arn:[a-z\d-]+:rekognition:[a-z\d-]+:\d{12}:project\/[a-zA-Z0-9_.\-]{1,255}\/version\/[a-zA-Z0-9_.\-]{1,255}\/[0-9]+$)
Required: No
483
Amazon Rekognition 개발자 안내서ProjectVersionDescription
Status
The current status of the model version.
Type: String
Valid Values: TRAINING_IN_PROGRESS | TRAINING_COMPLETED | TRAINING_FAILED |STARTING | RUNNING | FAILED | STOPPING | STOPPED | DELETING
Required: NoStatusMessage
A descriptive message for an error or warning that occurred.
Type: String
Required: NoTestingDataResult
The manifest file that represents the testing results.
Type: TestingDataResult (p. 496) object
Required: NoTrainingDataResult
The manifest file that represents the training results.
Type: TrainingDataResult (p. 501) object
Required: NoTrainingEndTimestamp
The Unix date and time that training of the model ended.
Type: Timestamp
Required: No
See AlsoFor more information about using this API in one of the language-specific AWS SDKs, see the following:
• AWS SDK for C++• AWS SDK for Go• AWS SDK for Java• AWS SDK for Ruby V2
484
Amazon Rekognition 개발자 안내서RegionOfInterest
RegionOfInterestSpecifies a location within the frame that Rekognition checks for text. Uses a BoundingBox object to set aregion of the screen.
A word is included in the region if the word is more than half in that region. If there is more than one region,the word will be compared with all regions of the screen. Any word more than half in a region is kept in theresults.
ContentsBoundingBox
The box representing a region of interest on screen.
Type: BoundingBox (p. 431) object
Required: No
See AlsoFor more information about using this API in one of the language-specific AWS SDKs, see the following:
• AWS SDK for C++• AWS SDK for Go• AWS SDK for Java• AWS SDK for Ruby V2
485
Amazon Rekognition 개발자 안내서S3Object
S3ObjectProvides the S3 bucket name and object name.
The region for the S3 bucket containing the S3 object must match the region you use for AmazonRekognition operations.
For Amazon Rekognition to process an S3 object, the user must have permission to access the S3 object.For more information, see 리소스 기반 정책 (p. 246).
ContentsBucket
Name of the S3 bucket.
Type: String
Length Constraints: Minimum length of 3. Maximum length of 255.
Pattern: [0-9A-Za-z\.\-_]*
Required: NoName
S3 object key name.
Type: String
Length Constraints: Minimum length of 1. Maximum length of 1024.
Required: NoVersion
If the bucket is versioning enabled, you can specify the object version.
Type: String
Length Constraints: Minimum length of 1. Maximum length of 1024.
Required: No
See AlsoFor more information about using this API in one of the language-specific AWS SDKs, see the following:
• AWS SDK for C++• AWS SDK for Go• AWS SDK for Java• AWS SDK for Ruby V2
486

Amazon Rekognition 개발자 안내서Smile
SmileIndicates whether or not the face is smiling, and the confidence level in the determination.
ContentsConfidence
Level of confidence in the determination.
Type: Float
Valid Range: Minimum value of 0. Maximum value of 100.
Required: NoValue
Boolean value that indicates whether the face is smiling or not.
Type: Boolean
Required: No
See AlsoFor more information about using this API in one of the language-specific AWS SDKs, see the following:
• AWS SDK for C++• AWS SDK for Go• AWS SDK for Java• AWS SDK for Ruby V2
487

Amazon Rekognition 개발자 안내서StartTextDetectionFilters
StartTextDetectionFiltersSet of optional parameters that let you set the criteria text must meet to be included in your response.WordFilter looks at a word's height, width and minimum confidence. RegionOfInterest lets you set aspecific region of the screen to look for text in.
ContentsRegionsOfInterest
Filter focusing on a certain area of the frame. Uses a BoundingBox object to set the region of thescreen.
Type: Array of RegionOfInterest (p. 485) objects
Array Members: Minimum number of 0 items. Maximum number of 10 items.
Required: NoWordFilter
Filters focusing on qualities of the text, such as confidence or size.
Type: DetectionFilter (p. 442) object
Required: No
See AlsoFor more information about using this API in one of the language-specific AWS SDKs, see the following:
• AWS SDK for C++• AWS SDK for Go• AWS SDK for Java• AWS SDK for Ruby V2
488
Amazon Rekognition 개발자 안내서StreamProcessor
StreamProcessorAn object that recognizes faces in a streaming video. An Amazon Rekognition stream processor is createdby a call to CreateStreamProcessor (p. 284). The request parameters for CreateStreamProcessordescribe the Kinesis video stream source for the streaming video, face recognition parameters, and whereto stream the analysis resullts.
ContentsName
Name of the Amazon Rekognition stream processor.
Type: String
Length Constraints: Minimum length of 1. Maximum length of 128.
Pattern: [a-zA-Z0-9_.\-]+
Required: NoStatus
Current status of the Amazon Rekognition stream processor.
Type: String
Valid Values: STOPPED | STARTING | RUNNING | FAILED | STOPPING
Required: No
See AlsoFor more information about using this API in one of the language-specific AWS SDKs, see the following:
• AWS SDK for C++• AWS SDK for Go• AWS SDK for Java• AWS SDK for Ruby V2
489
Amazon Rekognition 개발자 안내서StreamProcessorInput
StreamProcessorInputInformation about the source streaming video.
ContentsKinesisVideoStream
The Kinesis video stream input stream for the source streaming video.
Type: KinesisVideoStream (p. 467) object
Required: No
See AlsoFor more information about using this API in one of the language-specific AWS SDKs, see the following:
• AWS SDK for C++• AWS SDK for Go• AWS SDK for Java• AWS SDK for Ruby V2
490
Amazon Rekognition 개발자 안내서StreamProcessorOutput
StreamProcessorOutputInformation about the Amazon Kinesis Data Streams stream to which a Amazon RekognitionVideo stream processor streams the results of a video analysis. For more information, seeCreateStreamProcessor (p. 284).
ContentsKinesisDataStream
The Amazon Kinesis Data Streams stream to which the Amazon Rekognition stream processorstreams the analysis results.
Type: KinesisDataStream (p. 466) object
Required: No
See AlsoFor more information about using this API in one of the language-specific AWS SDKs, see the following:
• AWS SDK for C++• AWS SDK for Go• AWS SDK for Java• AWS SDK for Ruby V2
491
Amazon Rekognition 개발자 안내서StreamProcessorSettings
StreamProcessorSettingsInput parameters used to recognize faces in a streaming video analyzed by a Amazon Rekognition streamprocessor.
ContentsFaceSearch
Face search settings to use on a streaming video.
Type: FaceSearchSettings (p. 456) object
Required: No
See AlsoFor more information about using this API in one of the language-specific AWS SDKs, see the following:
• AWS SDK for C++• AWS SDK for Go• AWS SDK for Java• AWS SDK for Ruby V2
492

Amazon Rekognition 개발자 안내서Summary
SummaryThe S3 bucket that contains the training summary. The training summary includes aggregated evaluationmetrics for the entire testing dataset and metrics for each individual label.
You get the training summary S3 bucket location by calling DescribeProjectVersions (p. 299).
ContentsS3Object
Provides the S3 bucket name and object name.
The region for the S3 bucket containing the S3 object must match the region you use for AmazonRekognition operations.
For Amazon Rekognition to process an S3 object, the user must have permission to access the S3object. For more information, see 리소스 기반 정책 (p. 246).
Type: S3Object (p. 486) object
Required: No
See AlsoFor more information about using this API in one of the language-specific AWS SDKs, see the following:
• AWS SDK for C++• AWS SDK for Go• AWS SDK for Java• AWS SDK for Ruby V2
493
Amazon Rekognition 개발자 안내서Sunglasses
SunglassesIndicates whether or not the face is wearing sunglasses, and the confidence level in the determination.
ContentsConfidence
Level of confidence in the determination.
Type: Float
Valid Range: Minimum value of 0. Maximum value of 100.
Required: NoValue
Boolean value that indicates whether the face is wearing sunglasses or not.
Type: Boolean
Required: No
See AlsoFor more information about using this API in one of the language-specific AWS SDKs, see the following:
• AWS SDK for C++• AWS SDK for Go• AWS SDK for Java• AWS SDK for Ruby V2
494
Amazon Rekognition 개발자 안내서TestingData
TestingDataThe dataset used for testing. Optionally, if AutoCreate is set, Amazon Rekognition Custom Labels createsa testing dataset using an 80/20 split of the training dataset.
ContentsAssets
The assets used for testing.
Type: Array of Asset (p. 429) objects
Required: NoAutoCreate
If specified, Amazon Rekognition Custom Labels creates a testing dataset with an 80/20 split of thetraining dataset.
Type: Boolean
Required: No
See AlsoFor more information about using this API in one of the language-specific AWS SDKs, see the following:
• AWS SDK for C++• AWS SDK for Go• AWS SDK for Java• AWS SDK for Ruby V2
495
Amazon Rekognition 개발자 안내서TestingDataResult
TestingDataResultA Sagemaker Groundtruth format manifest file representing the dataset used for testing.
ContentsInput
The testing dataset that was supplied for training.
Type: TestingData (p. 495) object
Required: NoOutput
The subset of the dataset that was actually tested. Some images (assets) might not be tested due tofile formatting and other issues.
Type: TestingData (p. 495) object
Required: No
See AlsoFor more information about using this API in one of the language-specific AWS SDKs, see the following:
• AWS SDK for C++• AWS SDK for Go• AWS SDK for Java• AWS SDK for Ruby V2
496
Amazon Rekognition 개발자 안내서TextDetection
TextDetectionInformation about a word or line of text detected by DetectText (p. 324).
The DetectedText field contains the text that Amazon Rekognition detected in the image.
Every word and line has an identifier (Id). Each word belongs to a line and has a parent identifier(ParentId) that identifies the line of text in which the word appears. The word Id is also an index for theword within a line of words.
For more information, see 텍스트 감지 (p. 232).
ContentsConfidence
The confidence that Amazon Rekognition has in the accuracy of the detected text and the accuracy ofthe geometry points around the detected text.
Type: Float
Valid Range: Minimum value of 0. Maximum value of 100.
Required: NoDetectedText
The word or line of text recognized by Amazon Rekognition.
Type: String
Required: NoGeometry
The location of the detected text on the image. Includes an axis aligned coarse bounding boxsurrounding the text and a finer grain polygon for more accurate spatial information.
Type: Geometry (p. 458) object
Required: NoId
The identifier for the detected text. The identifier is only unique for a single call to DetectText.
Type: Integer
Valid Range: Minimum value of 0.
Required: NoParentId
The Parent identifier for the detected text identified by the value of ID. If the type of detected text isLINE, the value of ParentId is Null.
Type: Integer
Valid Range: Minimum value of 0.
Required: No
497
Amazon Rekognition 개발자 안내서TextDetection
Type
The type of text that was detected.
Type: String
Valid Values: LINE | WORD
Required: No
See AlsoFor more information about using this API in one of the language-specific AWS SDKs, see the following:
• AWS SDK for C++• AWS SDK for Go• AWS SDK for Java• AWS SDK for Ruby V2
498
Amazon Rekognition 개발자 안내서TextDetectionResult
TextDetectionResultInformation about text detected in a video. Incudes the detected text, the time in milliseconds from the startof the video that the text was detected, and where it was detected on the screen.
ContentsTextDetection
Details about text detected in a video.
Type: TextDetection (p. 497) object
Required: NoTimestamp
The time, in milliseconds from the start of the video, that the text was detected.
Type: Long
Required: No
See AlsoFor more information about using this API in one of the language-specific AWS SDKs, see the following:
• AWS SDK for C++• AWS SDK for Go• AWS SDK for Java• AWS SDK for Ruby V2
499
Amazon Rekognition 개발자 안내서TrainingData
TrainingDataThe dataset used for training.
ContentsAssets
A Sagemaker GroundTruth manifest file that contains the training images (assets).
Type: Array of Asset (p. 429) objects
Required: No
See AlsoFor more information about using this API in one of the language-specific AWS SDKs, see the following:
• AWS SDK for C++• AWS SDK for Go• AWS SDK for Java• AWS SDK for Ruby V2
500
Amazon Rekognition 개발자 안내서TrainingDataResult
TrainingDataResultA Sagemaker Groundtruth format manifest file that represents the dataset used for training.
ContentsInput
The training assets that you supplied for training.
Type: TrainingData (p. 500) object
Required: NoOutput
The images (assets) that were actually trained by Amazon Rekognition Custom Labels.
Type: TrainingData (p. 500) object
Required: No
See AlsoFor more information about using this API in one of the language-specific AWS SDKs, see the following:
• AWS SDK for C++• AWS SDK for Go• AWS SDK for Java• AWS SDK for Ruby V2
501
Amazon Rekognition 개발자 안내서UnindexedFace
UnindexedFaceA face that IndexFaces (p. 362) detected, but didn't index. Use the Reasons response attribute todetermine why a face wasn't indexed.
ContentsFaceDetail
The structure that contains attributes of a face that IndexFacesdetected, but didn't index.
Type: FaceDetail (p. 450) object
Required: NoReasons
An array of reasons that specify why a face wasn't indexed.• EXTREME_POSE - The face is at a pose that can't be detected. For example, the head is turned too
far away from the camera.• EXCEEDS_MAX_FACES - The number of faces detected is already higher than that specified by theMaxFaces input parameter for IndexFaces.
• LOW_BRIGHTNESS - The image is too dark.• LOW_SHARPNESS - The image is too blurry.• LOW_CONFIDENCE - The face was detected with a low confidence.• SMALL_BOUNDING_BOX - The bounding box around the face is too small.
Type: Array of strings
Valid Values: EXCEEDS_MAX_FACES | EXTREME_POSE | LOW_BRIGHTNESS | LOW_SHARPNESS| LOW_CONFIDENCE | SMALL_BOUNDING_BOX | LOW_FACE_QUALITY
Required: No
See AlsoFor more information about using this API in one of the language-specific AWS SDKs, see the following:
• AWS SDK for C++• AWS SDK for Go• AWS SDK for Java• AWS SDK for Ruby V2
502
Amazon Rekognition 개발자 안내서Video
VideoVideo file stored in an Amazon S3 bucket. Amazon Rekognition video start operations such asStartLabelDetection (p. 406) use Video to specify a video for analysis. The supported file formatsare .mp4, .mov and .avi.
ContentsS3Object
The Amazon S3 bucket name and file name for the video.
Type: S3Object (p. 486) object
Required: No
See AlsoFor more information about using this API in one of the language-specific AWS SDKs, see the following:
• AWS SDK for C++• AWS SDK for Go• AWS SDK for Java• AWS SDK for Ruby V2
503
Amazon Rekognition 개발자 안내서VideoMetadata
VideoMetadataInformation about a video that Amazon Rekognition analyzed. Videometadata is returned in every pageof paginated responses from a Amazon Rekognition video operation.
ContentsCodec
Type of compression used in the analyzed video.
Type: String
Required: NoDurationMillis
Length of the video in milliseconds.
Type: Long
Valid Range: Minimum value of 0.
Required: NoFormat
Format of the analyzed video. Possible values are MP4, MOV and AVI.
Type: String
Required: NoFrameHeight
Vertical pixel dimension of the video.
Type: Long
Valid Range: Minimum value of 0.
Required: NoFrameRate
Number of frames per second in the video.
Type: Float
Required: NoFrameWidth
Horizontal pixel dimension of the video.
Type: Long
Valid Range: Minimum value of 0.
Required: No
See AlsoFor more information about using this API in one of the language-specific AWS SDKs, see the following:
504
Amazon Rekognition 개발자 안내서VideoMetadata
• AWS SDK for C++• AWS SDK for Go• AWS SDK for Java• AWS SDK for Ruby V2
505
Amazon Rekognition 개발자 안내서Amazon Rekognition Image
Amazon Rekognition의 제한 값다음은 Amazon Rekognition에서의 제한 목록입니다. 변경 가능한 제한에 대한 자세한 내용은 AWS 서비스할당량을 참조하십시오. 제한을 변경하려면 Create Case(사례 생성)을 참조하십시오.
TPS(초당 트랜잭션) 제한에 대한 자세한 내용은 AWS 서비스 할당량을 참조하십시오.
Amazon Rekognition Custom Labels 제한에 대해서는 Amazon Rekognition Custom Labels의 제한을 참조하십시오.
Amazon Rekognition Image• Amazon S3 객체로 저장되는 이미지 최대 크기는 15MB로 제한됩니다.• 이미지 최소 크기는 높이 및 너비 80픽셀입니다.• 감지하려면 얼굴이 1920x1080픽셀의 이미지에서 40x40픽셀보다 작아서는 안 됩니다. 1920X1080픽셀보
다 높은 차원의 이미지는 비례적으로 더 큰 최소 얼굴 크기가 필요합니다.• 파라미터로 API에 전달되는 원시 바이트의 최대 이미지 크기는 5MB입니다.• Amazon Rekognition은 PNG 및 JPEG 이미지 형식을 지원합니다. 즉, DetectLabels 및 IndexFaces
등 다양한 API 작업에 입력으로 제공하는 이미지는 지원되는 다음 형식 중 하나여야 합니다.• 단일 얼굴 모음에 저장할 수 있는 최대 얼굴 수는 20만 개입니다.• 검색 API가 반환하는 일치 얼굴의 최대 수는 4096개입니다.• DetectText는 이미지에서 최대 50개 단어를 감지할 수 있습니다.
이미지 및 얼굴 비교에 대한 모범 사례 정보는 센서, 입력 이미지 및 비디오 모범 사례 (p. 109) 단원을 참조하십시오.
Amazon Rekognition Video 저장된 비디오• Amazon Rekognition Video는 최대 10GB의 저장된 비디오를 분석할 수 있습니다.• Amazon Rekognition Video는 최대 6시간 길이의 저장된 비디오를 분석할 수 있습니다.• Amazon Rekognition Video는 계정당 최대 20개의 동시 작업을 지원합니다.• 저장된 비디오는 H.264 코덱을 사용하여 인코딩해야 합니다. 지원되는 파일 형식은 MPEG-4와 MOV입니
다.• 매김 토큰의 TTL(Time To Live) 기간은 24시간입니다. 매김 토큰은 GetLabeldetection 등 Get 작업으
로 반환된 NextToken 필드에 있습니다.
Amazon Rekognition Video 스트리밍 비디오• Kinesis Video 입력 스트림은 최대 1개의 Amazon Rekognition Video 스트림 프로세서와 연결될 수 있습니
다.• Kinesis Data 출력 스트림은 최대 1개의 Amazon Rekognition Video 스트림 프로세서와 연결될 수 있습니
다.• Amazon Rekognition Video 스트림 프로세서와 연결된 Kinesis Video 입력 스트림 및 Kinesis Data 출력 스
트림은 여러 프로세서와 공유될 수 없습니다.
506
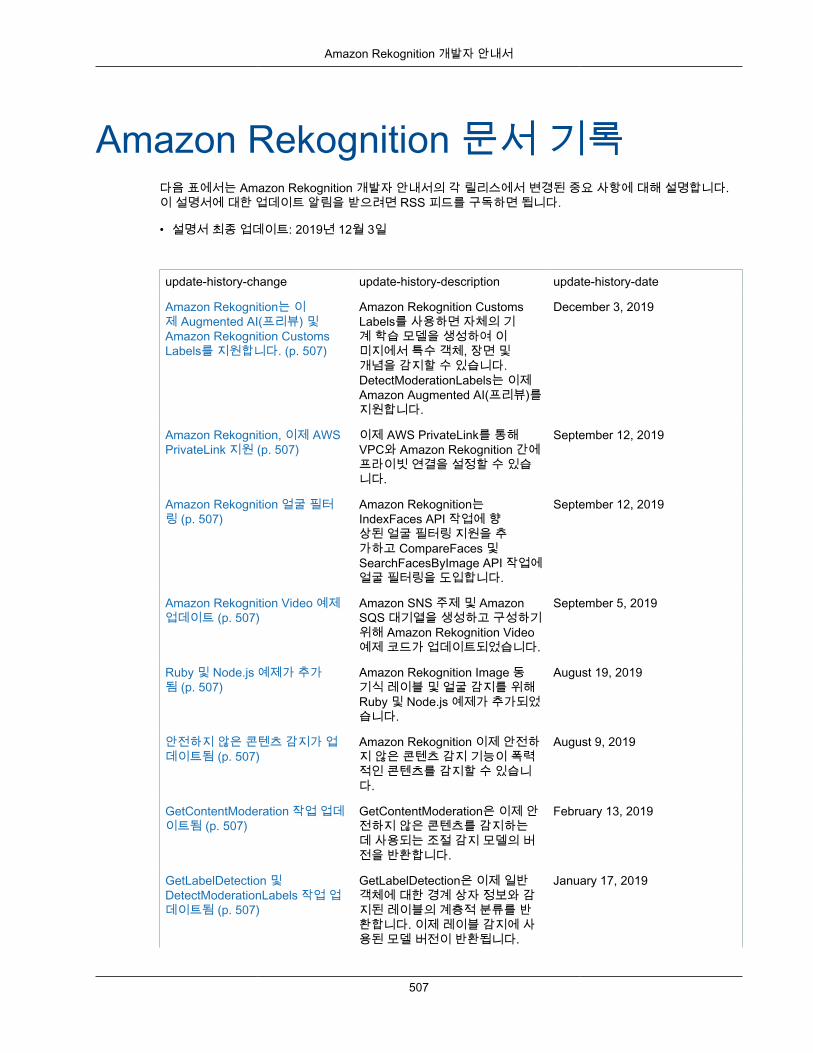
Amazon Rekognition 개발자 안내서
Amazon Rekognition 문서 기록다음 표에서는 Amazon Rekognition 개발자 안내서의 각 릴리스에서 변경된 중요 사항에 대해 설명합니다.이 설명서에 대한 업데이트 알림을 받으려면 RSS 피드를 구독하면 됩니다.
• 설명서 최종 업데이트: 2019년 12월 3일
update-history-change update-history-description update-history-date
Amazon Rekognition는 이제 Augmented AI(프리뷰) 및Amazon Rekognition CustomsLabels를 지원합니다. (p. 507)
Amazon Rekognition CustomsLabels를 사용하면 자체의 기계 학습 모델을 생성하여 이미지에서 특수 객체, 장면 및개념을 감지할 수 있습니다.DetectModerationLabels는 이제Amazon Augmented AI(프리뷰)를지원합니다.
December 3, 2019
Amazon Rekognition, 이제 AWSPrivateLink 지원 (p. 507)
이제 AWS PrivateLink를 통해VPC와 Amazon Rekognition 간에프라이빗 연결을 설정할 수 있습니다.
September 12, 2019
Amazon Rekognition 얼굴 필터링 (p. 507)
Amazon Rekognition는IndexFaces API 작업에 향상된 얼굴 필터링 지원을 추가하고 CompareFaces 및SearchFacesByImage API 작업에얼굴 필터링을 도입합니다.
September 12, 2019
Amazon Rekognition Video 예제업데이트 (p. 507)
Amazon SNS 주제 및 AmazonSQS 대기열을 생성하고 구성하기위해 Amazon Rekognition Video예제 코드가 업데이트되었습니다.
September 5, 2019
Ruby 및 Node.js 예제가 추가됨 (p. 507)
Amazon Rekognition Image 동기식 레이블 및 얼굴 감지를 위해Ruby 및 Node.js 예제가 추가되었습니다.
August 19, 2019
안전하지 않은 콘텐츠 감지가 업데이트됨 (p. 507)
Amazon Rekognition 이제 안전하지 않은 콘텐츠 감지 기능이 폭력적인 콘텐츠를 감지할 수 있습니다.
August 9, 2019
GetContentModeration 작업 업데이트됨 (p. 507)
GetContentModeration은 이제 안전하지 않은 콘텐츠를 감지하는데 사용되는 조절 감지 모델의 버전을 반환합니다.
February 13, 2019
GetLabelDetection 및DetectModerationLabels 작업 업데이트됨 (p. 507)
GetLabelDetection은 이제 일반객체에 대한 경계 상자 정보와 감지된 레이블의 계층적 분류를 반환합니다. 이제 레이블 감지에 사용된 모델 버전이 반환됩니다.
January 17, 2019
507
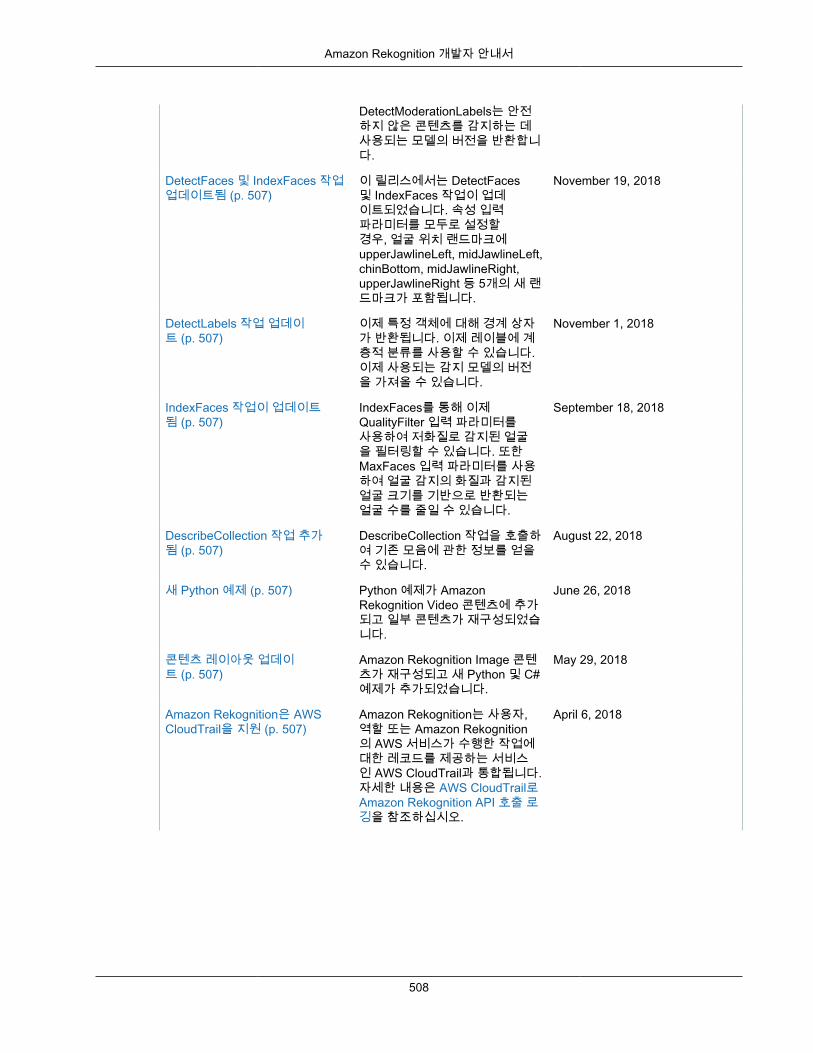
Amazon Rekognition 개발자 안내서
DetectModerationLabels는 안전하지 않은 콘텐츠를 감지하는 데사용되는 모델의 버전을 반환합니다.
DetectFaces 및 IndexFaces 작업업데이트됨 (p. 507)
이 릴리스에서는 DetectFaces및 IndexFaces 작업이 업데이트되었습니다. 속성 입력파라미터를 모두로 설정할경우, 얼굴 위치 랜드마크에upperJawlineLeft, midJawlineLeft,chinBottom, midJawlineRight,upperJawlineRight 등 5개의 새 랜드마크가 포함됩니다.
November 19, 2018
DetectLabels 작업 업데이트 (p. 507)
이제 특정 객체에 대해 경계 상자가 반환됩니다. 이제 레이블에 계층적 분류를 사용할 수 있습니다.이제 사용되는 감지 모델의 버전을 가져올 수 있습니다.
November 1, 2018
IndexFaces 작업이 업데이트됨 (p. 507)
IndexFaces를 통해 이제QualityFilter 입력 파라미터를사용하여 저화질로 감지된 얼굴을 필터링할 수 있습니다. 또한MaxFaces 입력 파라미터를 사용하여 얼굴 감지의 화질과 감지된얼굴 크기를 기반으로 반환되는얼굴 수를 줄일 수 있습니다.
September 18, 2018
DescribeCollection 작업 추가됨 (p. 507)
DescribeCollection 작업을 호출하여 기존 모음에 관한 정보를 얻을수 있습니다.
August 22, 2018
새 Python 예제 (p. 507) Python 예제가 AmazonRekognition Video 콘텐츠에 추가되고 일부 콘텐츠가 재구성되었습니다.
June 26, 2018
콘텐츠 레이아웃 업데이트 (p. 507)
Amazon Rekognition Image 콘텐츠가 재구성되고 새 Python 및 C#예제가 추가되었습니다.
May 29, 2018
Amazon Rekognition은 AWSCloudTrail을 지원 (p. 507)
Amazon Rekognition는 사용자,역할 또는 Amazon Rekognition의 AWS 서비스가 수행한 작업에대한 레코드를 제공하는 서비스인 AWS CloudTrail과 통합됩니다.자세한 내용은 AWS CloudTrail로Amazon Rekognition API 호출 로깅을 참조하십시오.
April 6, 2018
508
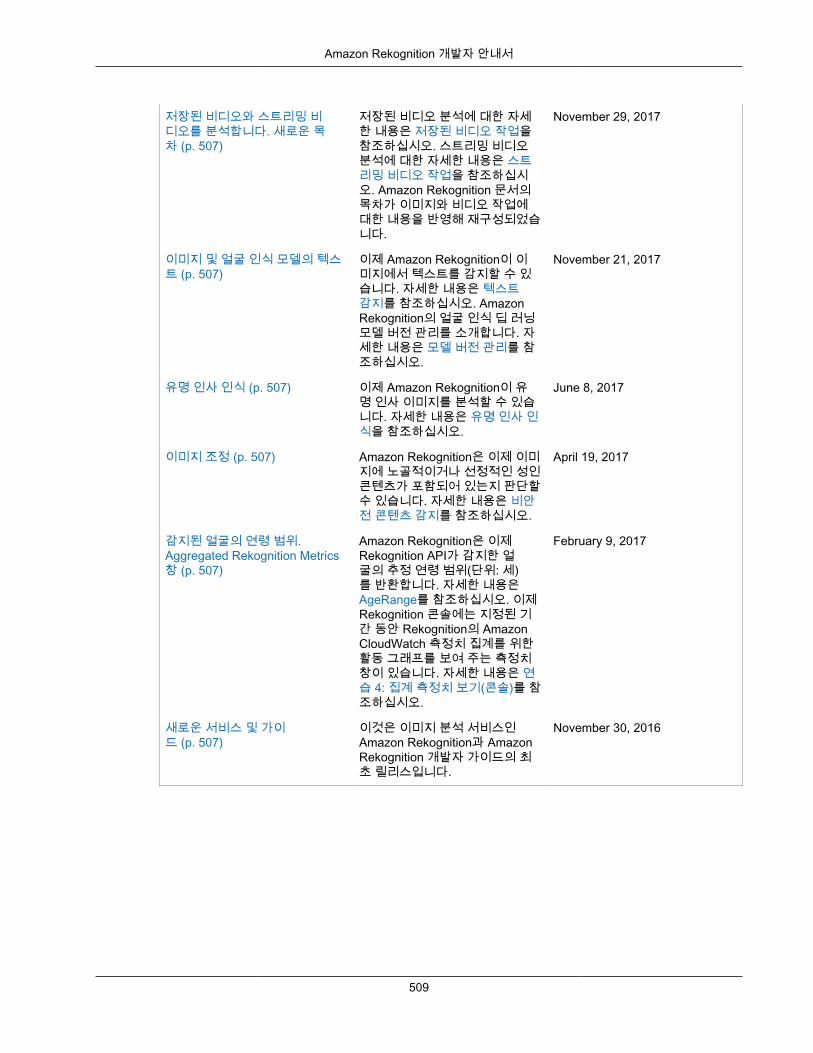
Amazon Rekognition 개발자 안내서
저장된 비디오와 스트리밍 비디오를 분석합니다. 새로운 목차 (p. 507)
저장된 비디오 분석에 대한 자세한 내용은 저장된 비디오 작업을참조하십시오. 스트리밍 비디오분석에 대한 자세한 내용은 스트리밍 비디오 작업을 참조하십시오. Amazon Rekognition 문서의목차가 이미지와 비디오 작업에대한 내용을 반영해 재구성되었습니다.
November 29, 2017
이미지 및 얼굴 인식 모델의 텍스트 (p. 507)
이제 Amazon Rekognition이 이미지에서 텍스트를 감지할 수 있습니다. 자세한 내용은 텍스트감지를 참조하십시오. AmazonRekognition의 얼굴 인식 딥 러닝모델 버전 관리를 소개합니다. 자세한 내용은 모델 버전 관리를 참조하십시오.
November 21, 2017
유명 인사 인식 (p. 507) 이제 Amazon Rekognition이 유명 인사 이미지를 분석할 수 있습니다. 자세한 내용은 유명 인사 인식을 참조하십시오.
June 8, 2017
이미지 조정 (p. 507) Amazon Rekognition은 이제 이미지에 노골적이거나 선정적인 성인콘텐츠가 포함되어 있는지 판단할수 있습니다. 자세한 내용은 비안전 콘텐츠 감지를 참조하십시오.
April 19, 2017
감지된 얼굴의 연령 범위.Aggregated Rekognition Metrics창 (p. 507)
Amazon Rekognition은 이제Rekognition API가 감지한 얼굴의 추정 연령 범위(단위: 세)를 반환합니다. 자세한 내용은AgeRange를 참조하십시오. 이제Rekognition 콘솔에는 지정된 기간 동안 Rekognition의 AmazonCloudWatch 측정치 집계를 위한활동 그래프를 보여 주는 측정치창이 있습니다. 자세한 내용은 연습 4: 집계 측정치 보기(콘솔)를 참조하십시오.
February 9, 2017
새로운 서비스 및 가이드 (p. 507)
이것은 이미지 분석 서비스인Amazon Rekognition과 AmazonRekognition 개발자 가이드의 최초 릴리스입니다.
November 30, 2016
509
Amazon Rekognition 개발자 안내서
AWS GlossaryFor the latest AWS terminology, see the AWS Glossary in the AWS General Reference.
510