Embed Size (px)
Citation preview
Basic Raglan2 models, Slim or Casual
4 sleeve alternativesShoulder details
Size 34-54 (US 4-24)
Detta mönster är upphovsrättsskyddat av Made by Runi. Du får skriva ut kopior av PDF filne för eget privat bruk. Du får ej sälja, byta eller dela mönstret i någon form.
Du får ej kopiera tryckt mösnter, eller PDF filer för att dela med andra. Försäljning av färdiga produkter gjorda av mönstret är tillåtet i liten skala.
Made by Runi ©2018
2
Before you start:Read all instructions before starting project.Seam allowance is NOT included, add that were two pieces are sewn together. Do not add allowance where you’re going to add binding. I usually have a seam allowance of 0.6 cm since I use a serger with a seam that is 0.5cm wide. A flowy stretchy knitted fabric is suitable for this pattern.Prewash all fabrics before sewing to avoid color bleeding and shrinking.Measure the test square on the first page to make sure you printed correctly.It should measure exactly 4x4 cm (or 2x2”)
Make sure you are using the most up to date version of Adobe Reader.
You will need:Sewing machineScissorsThreadBallpoint needle (in machine)Wonder clips or pinsFabricMeasuring tape
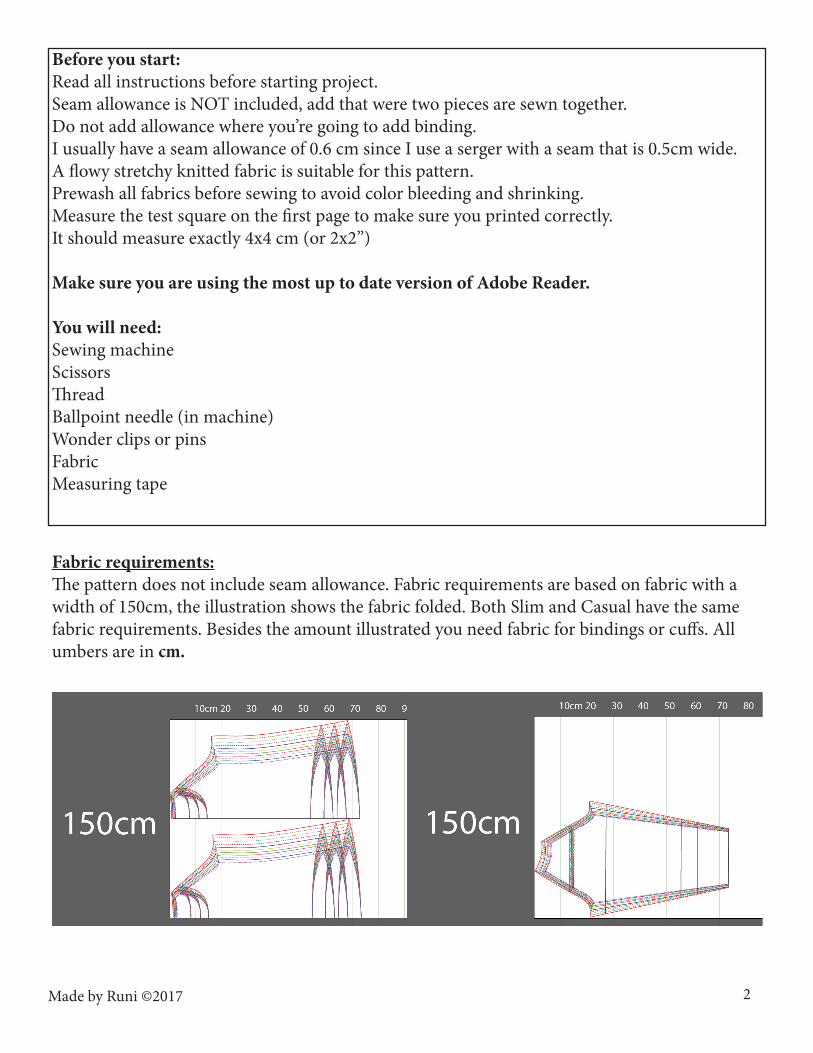
Fabric requirements:The pattern does not include seam allowance. Fabric requirements are based on fabric with a width of 150cm, the illustration shows the fabric folded. Both Slim and Casual have the same fabric requirements. Besides the amount illustrated you need fabric for bindings or cuffs. All umbers are in cm.
Made by Runi ©2017
3
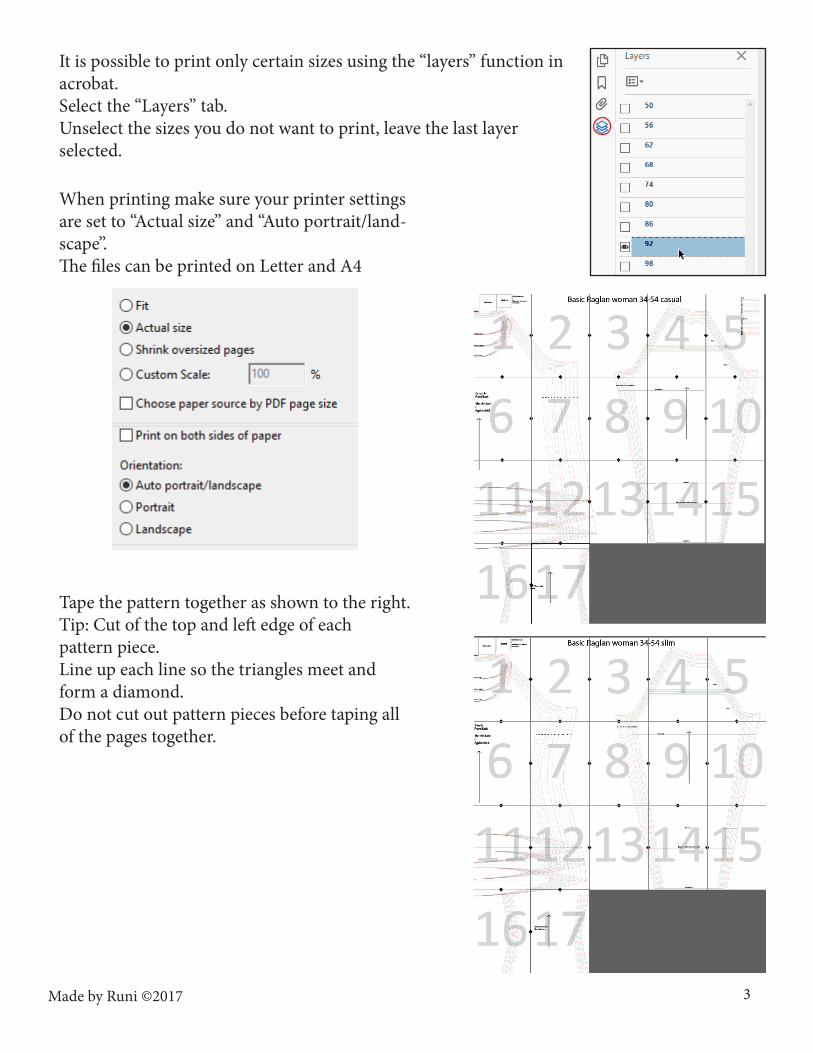
Tape the pattern together as shown to the right.Tip: Cut of the top and left edge of each pattern piece.Line up each line so the triangles meet and form a diamond.Do not cut out pattern pieces before taping all of the pages together.
When printing make sure your printer settings are set to “Actual size” and “Auto portrait/land-scape”.The files can be printed on Letter and A4
Made by Runi ©2017
It is possible to print only certain sizes using the “layers” function in acrobat. Select the “Layers” tab.Unselect the sizes you do not want to print, leave the last layer selected.

4
More photos of finished dresses and more of my designs are posted regularly on: Instagram: @madebyruni (please tag #madebyruni when you post photos of your creations) Facebook: https://www.facebook.com/madebyruni/ https://www.facebook.com/groups/madebyruni
All my patterns are available for purchase at www.madebyruni.com several of them are also available as physical prints for those who prefere that.
More tutorials and options on: www.patternsbyruni.wordpress.com
Made by Runi ©2017
European sizes (cm):Storlek 34 36 38 40 42 44 46 48 50 52 54 Brystvidde 80 84 88 93 96 100 104 110 116 122 128 Midjemål 65 69 73 77 81 85 89 95 101 107 113 Stussvidde 88 92 96 100 104 108 112 117 122 127 132
US sizes (inch):Size 4 6 8 10 12 14 16 18 20 22 24 Bust 31 33 35 37 38 39 41 43 45 48 50 Waist 25,5 27 28,5 30 32 33,5 35 37 39,5 42 44,5 Hip 34,5 36 38 39,5 41 42,5 44 46 48 50 52
5
Basic Raglan
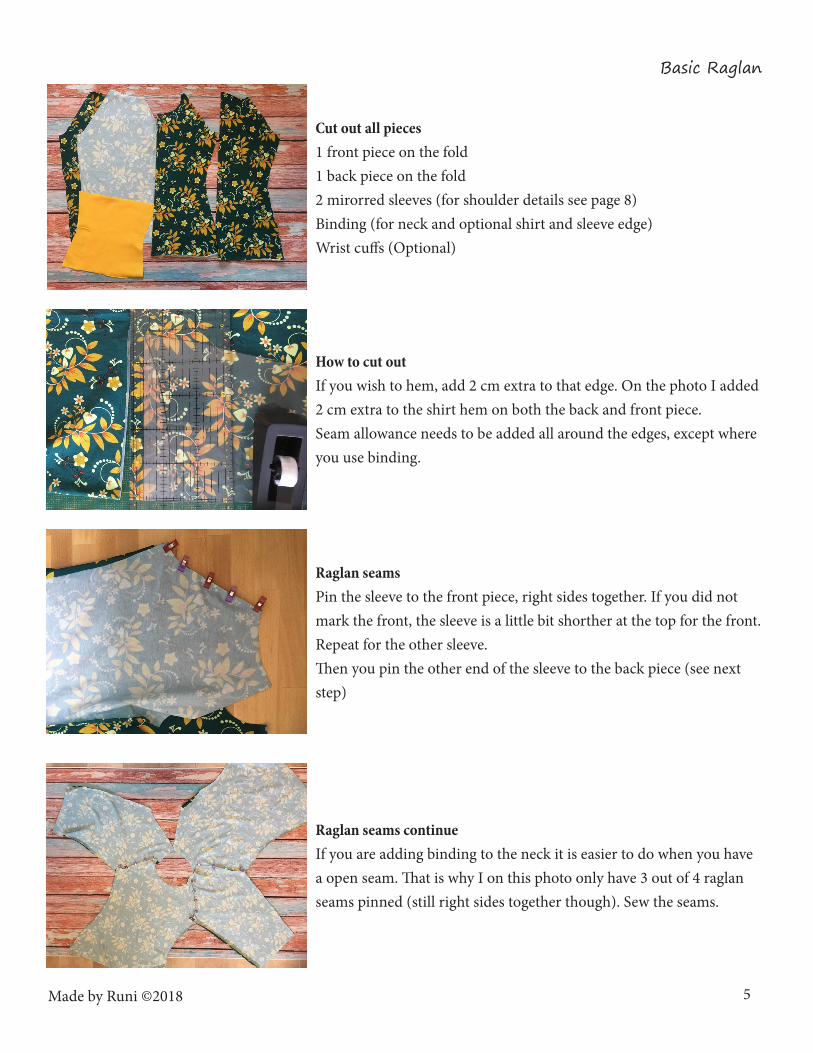
Cut out all pieces1 front piece on the fold1 back piece on the fold2 mirorred sleeves (for shoulder details see page 8)Binding (for neck and optional shirt and sleeve edge)Wrist cuffs (Optional)
How to cut outIf you wish to hem, add 2 cm extra to that edge. On the photo I added 2 cm extra to the shirt hem on both the back and front piece.Seam allowance needs to be added all around the edges, except where you use binding.
Raglan seamsPin the sleeve to the front piece, right sides together. If you did not mark the front, the sleeve is a little bit shorther at the top for the front.Repeat for the other sleeve.Then you pin the other end of the sleeve to the back piece (see next step)
Raglan seams continueIf you are adding binding to the neck it is easier to do when you have a open seam. That is why I on this photo only have 3 out of 4 raglan seams pinned (still right sides together though). Sew the seams.
Made by Runi ©2018
6
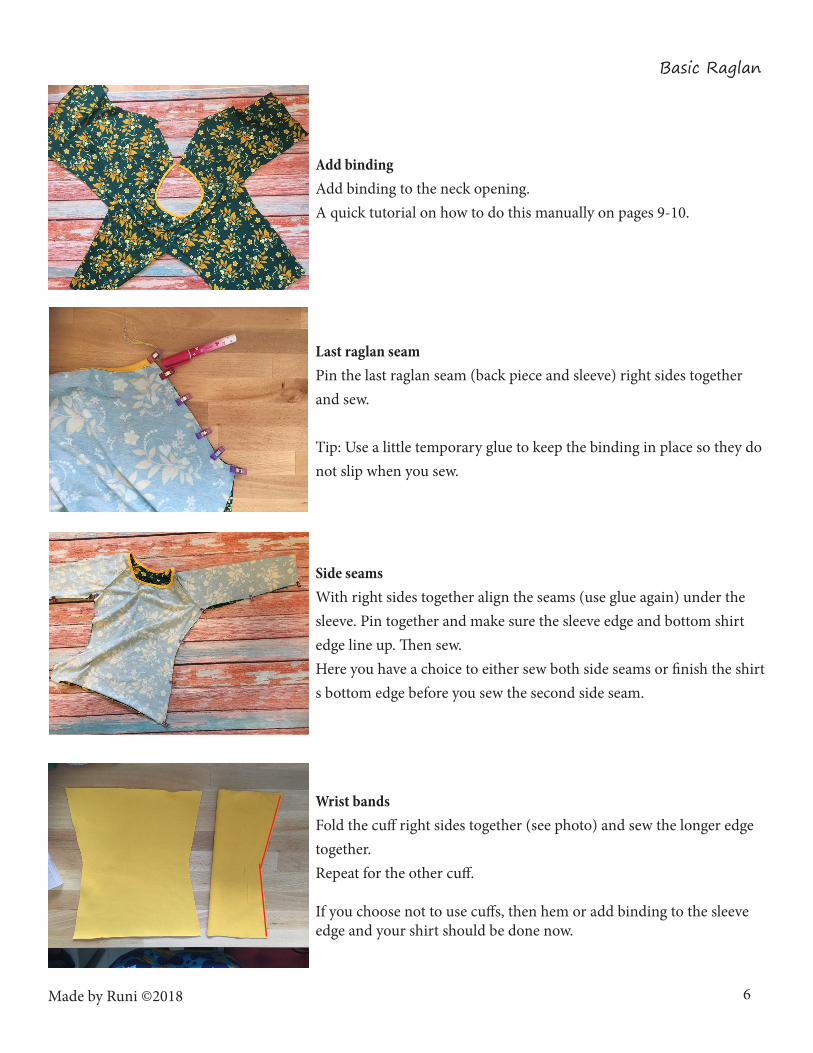
Add bindingAdd binding to the neck opening.A quick tutorial on how to do this manually on pages 9-10.
Last raglan seamPin the last raglan seam (back piece and sleeve) right sides together and sew.
Tip: Use a little temporary glue to keep the binding in place so they do not slip when you sew.
Side seamsWith right sides together align the seams (use glue again) under the sleeve. Pin together and make sure the sleeve edge and bottom shirt edge line up. Then sew. Here you have a choice to either sew both side seams or finish the shirt s bottom edge before you sew the second side seam.
Wrist bandsFold the cuff right sides together (see photo) and sew the longer edge together. Repeat for the other cuff.
If you choose not to use cuffs, then hem or add binding to the sleeve edge and your shirt should be done now.
Made by Runi ©2018
Basic Raglan
7
Basic Raglan
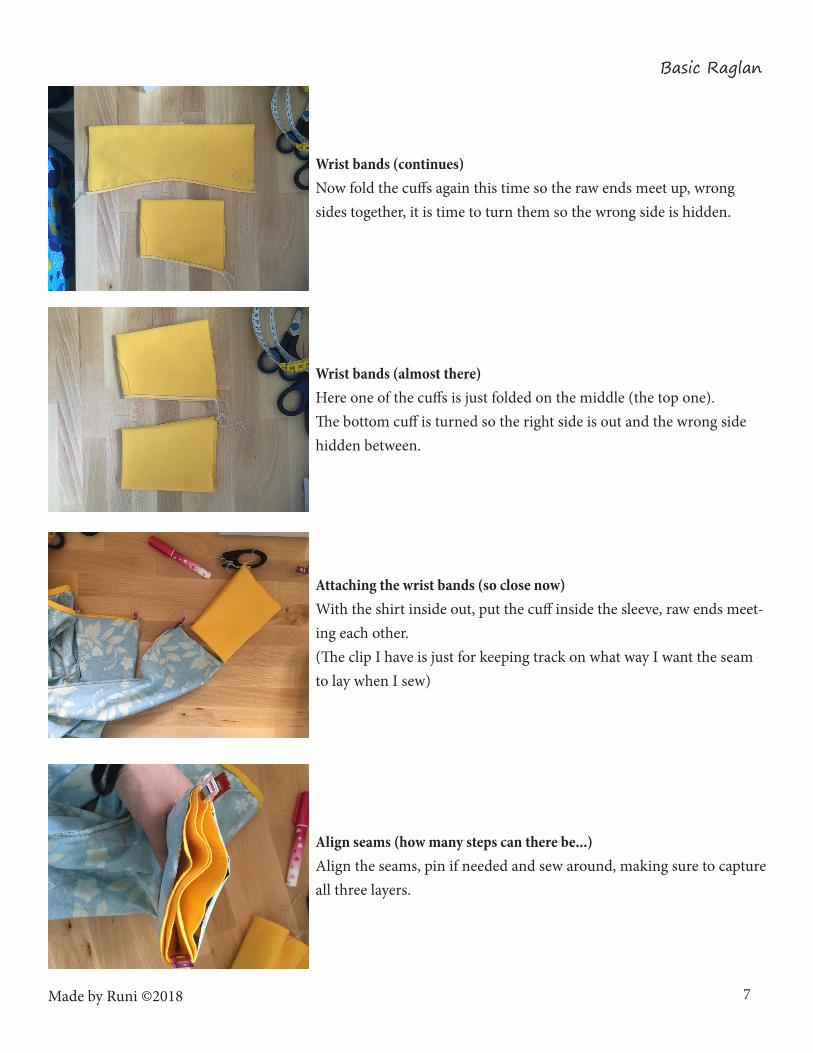
Wrist bands (continues)Now fold the cuffs again this time so the raw ends meet up, wrong sides together, it is time to turn them so the wrong side is hidden.
Wrist bands (almost there)Here one of the cuffs is just folded on the middle (the top one). The bottom cuff is turned so the right side is out and the wrong side hidden between.
Attaching the wrist bands (so close now)With the shirt inside out, put the cuff inside the sleeve, raw ends meet-ing each other. (The clip I have is just for keeping track on what way I want the seam to lay when I sew)
Align seams (how many steps can there be...)Align the seams, pin if needed and sew around, making sure to capture all three layers.
Made by Runi ©2018
8
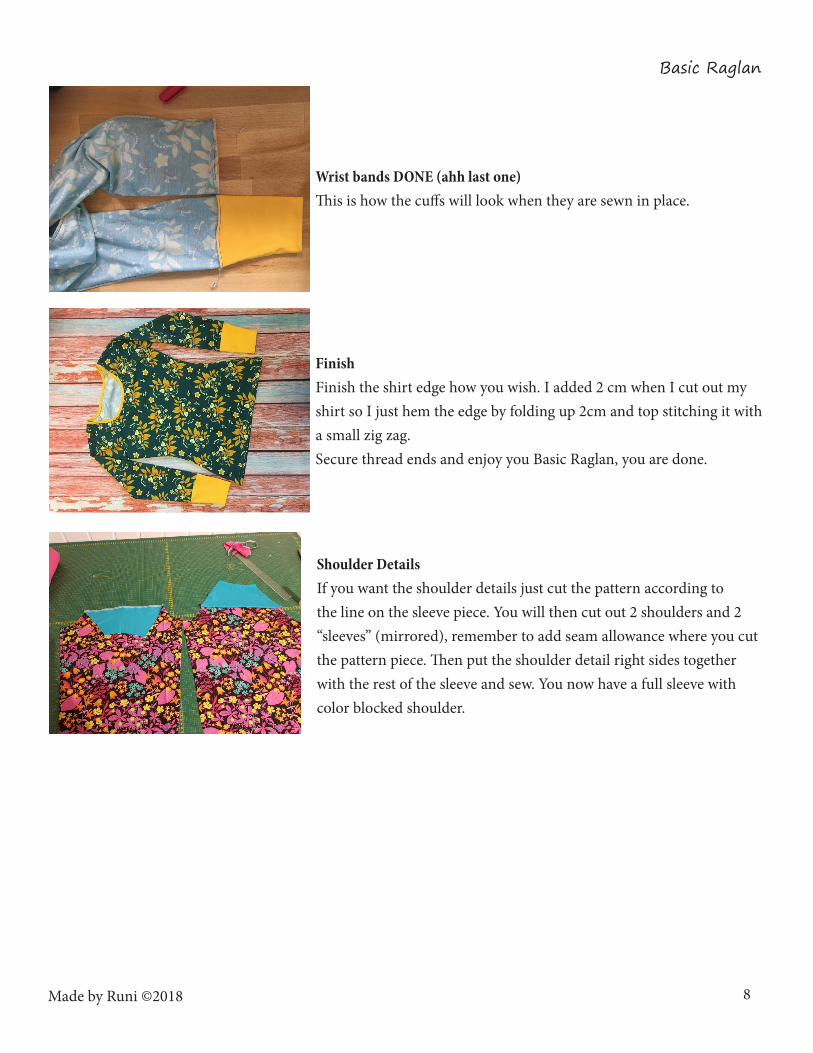
Wrist bands DONE (ahh last one)This is how the cuffs will look when they are sewn in place.
FinishFinish the shirt edge how you wish. I added 2 cm when I cut out my shirt so I just hem the edge by folding up 2cm and top stitching it with a small zig zag.Secure thread ends and enjoy you Basic Raglan, you are done.
Made by Runi ©2018
Basic Raglan
Shoulder DetailsIf you want the shoulder details just cut the pattern according to the line on the sleeve piece. You will then cut out 2 shoulders and 2 “sleeves” (mirrored), remember to add seam allowance where you cut the pattern piece. Then put the shoulder detail right sides together with the rest of the sleeve and sew. You now have a full sleeve with color blocked shoulder.
9
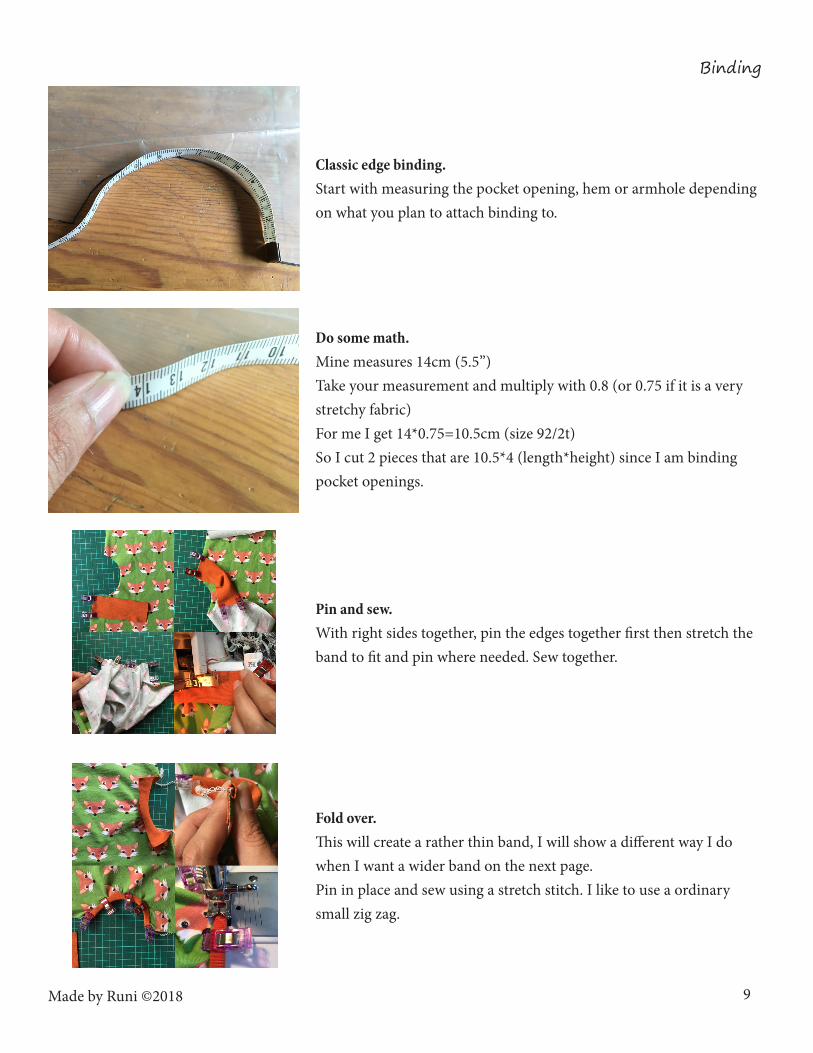
Classic edge binding.Start with measuring the pocket opening, hem or armhole depending on what you plan to attach binding to.
Do some math.Mine measures 14cm (5.5”)Take your measurement and multiply with 0.8 (or 0.75 if it is a very stretchy fabric)For me I get 14*0.75=10.5cm (size 92/2t)So I cut 2 pieces that are 10.5*4 (length*height) since I am binding pocket openings.
Pin and sew.With right sides together, pin the edges together first then stretch the band to fit and pin where needed. Sew together.
Fold over.This will create a rather thin band, I will show a different way I do when I want a wider band on the next page.Pin in place and sew using a stretch stitch. I like to use a ordinary small zig zag.
Made by Runi ©2018
Binding

10
Clean up.Cut of the excess fabric (or next time remember to cut about 3 cm instead for this one). Check out your awesome handy work and move on to sewing the pockets or side seams.
For a wider band.Before I fold over I just use a straight stitch at the width I want the finished band to be.
Fold over.The result is this after folding over. Sew using a stretch or decorative stitch as before.
Finished!
Made by Runi ©2018
Binding