Embed Size (px)
DESCRIPTION
A Power Point Presentation on the use Of Microsoft Excel
Citation preview
©Digital Bridge Institute, Abuja Page 1
Introduction to Microsoft ExcelIntroduction to Microsoft Excel
©Digital Bridge Institute, Abuja Page 2
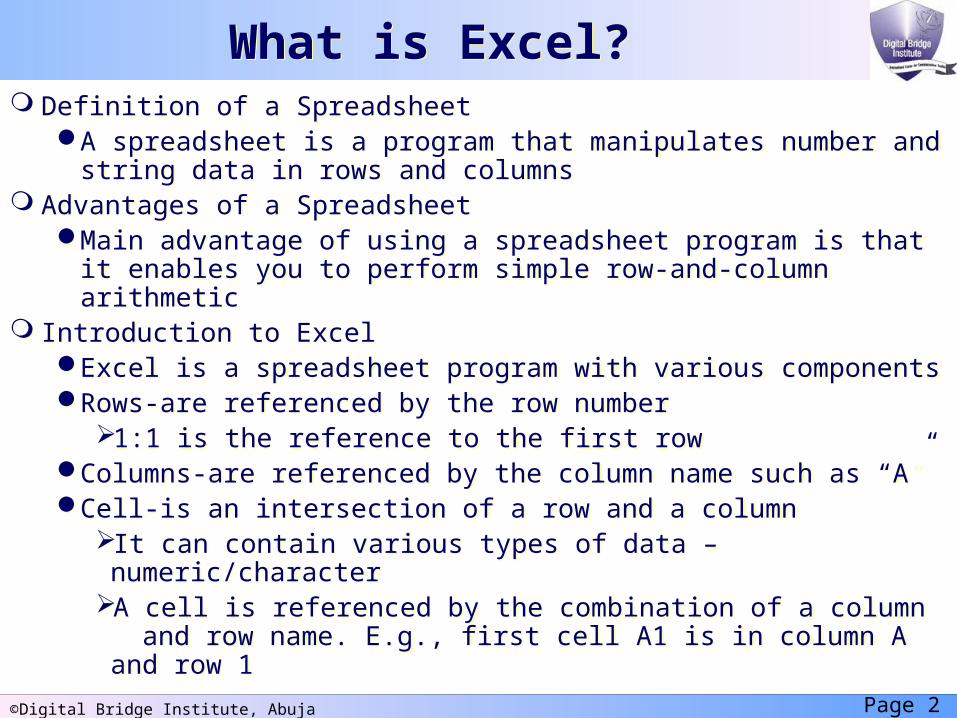
What is Excel?What is Excel? Definition of a Spreadsheet
A spreadsheet is a program that manipulates number and string data in rows and columns
Advantages of a SpreadsheetMain advantage of using a spreadsheet program is that it
enables you to perform simple row-and-column arithmetic Introduction to Excel
Excel is a spreadsheet program with various componentsRows-are referenced by the row number
1:1 is the reference to the first rowColumns-are referenced by the column name such as “A”Cell-is an intersection of a row and a column
It can contain various types of data – numeric/characterA cell is referenced by the combination of a column and row name. E.g., first cell A1 is in column A and row 1
Definition of a SpreadsheetA spreadsheet is a program that manipulates number and
string data in rows and columns Advantages of a Spreadsheet
Main advantage of using a spreadsheet program is that it enables you to perform simple row-and-column arithmetic
Introduction to ExcelExcel is a spreadsheet program with various componentsRows-are referenced by the row number
1:1 is the reference to the first rowColumns-are referenced by the column name such as “A”Cell-is an intersection of a row and a column
It can contain various types of data – numeric/characterA cell is referenced by the combination of a column and row name. E.g., first cell A1 is in column A and row 1
©Digital Bridge Institute, Abuja Page 3
Task Pane
Standard Toolbar
Menu Bar
Formatting Toolbar
Formula Bar Column
Title Bar
Name Box
Cell
Row
Sheet Tab
Horizontal Scrollbar Status Bar
Vertical Scrollbar
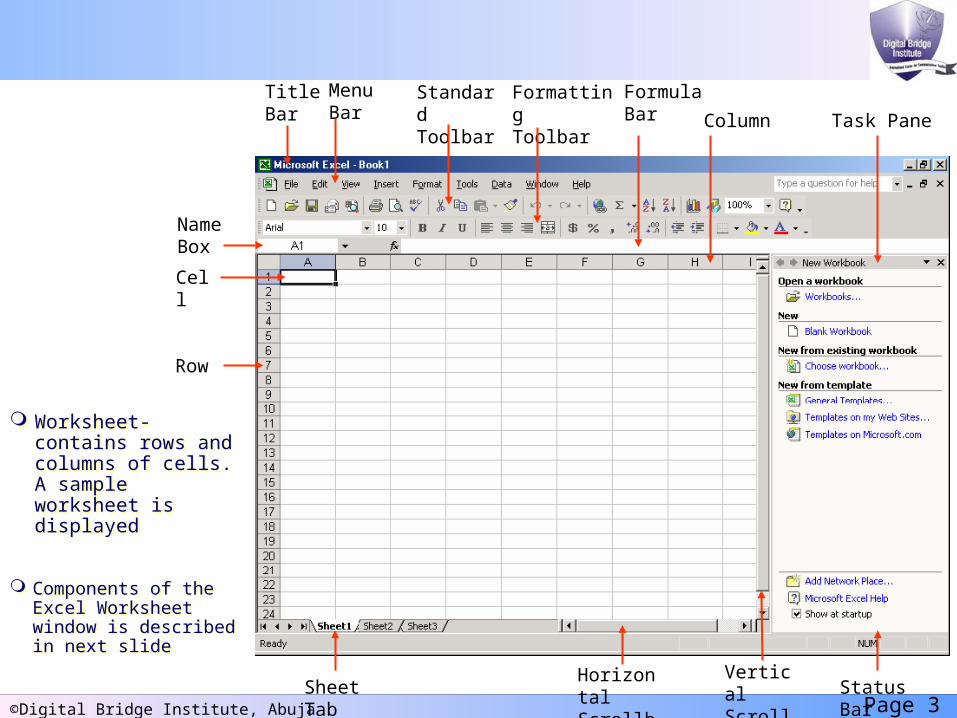
Worksheet-contains rows and columns of cells. A sample worksheet is displayed
Worksheet-contains rows and columns of cells. A sample worksheet is displayed
Components of the Excel Worksheet window is described in next slide
Components of the Excel Worksheet window is described in next slide
©Digital Bridge Institute, Abuja Page 4
The Microsoft Excel Window includes the following components:
Rows: Rows are referenced by the numbers. Columns: Columns are referenced by the alphabets. Cell: A cell is an intersection of a row and a column. Cells can contain various
types of data. A cell is referenced by the name of the column and row. For example, the first cell A1 is in column A and row 1.
Worksheet: A worksheet contains rows and columns and their intersection forms the cells. A worksheet consists of 65,536 rows and 256 columns.
Workbook: A workbook consists of worksheets. It is also referred to as an Excel file. A workbook can be defined as a set of worksheets.
Title bar: A title bar displays the name of the current workbook. Menu bar: A menu bar consists of various menus, such as File, Edit, and View. Toolbar: A toolbar contains buttons that provide easy access to the commands
and functions of Excel. Formula bar: A formula bar contains tools for creating and editing formulas. Name box: A name box displays the name of a selected cell and a range of cells. Task Pane: A task pane serves as an additional navigation tool substituting the
frequently used dialog boxes. The task pane appears each time you start Excel. Horizontal scroll bar: A horizontal scroll bar serves as a tool to view the left or
right part of the worksheet that is not displayed on the screen. Vertical scroll bar: A vertical scroll bar serves as a tool to view the top or bottom
part of the worksheet that is not displayed on the screen. Sheet Tab: A sheet tab helps to navigate between worksheets in a workbook.
The Microsoft Excel Window includes the following components: Rows: Rows are referenced by the numbers. Columns: Columns are referenced by the alphabets. Cell: A cell is an intersection of a row and a column. Cells can contain various
types of data. A cell is referenced by the name of the column and row. For example, the first cell A1 is in column A and row 1.
Worksheet: A worksheet contains rows and columns and their intersection forms the cells. A worksheet consists of 65,536 rows and 256 columns.
Workbook: A workbook consists of worksheets. It is also referred to as an Excel file. A workbook can be defined as a set of worksheets.
Title bar: A title bar displays the name of the current workbook. Menu bar: A menu bar consists of various menus, such as File, Edit, and View. Toolbar: A toolbar contains buttons that provide easy access to the commands
and functions of Excel. Formula bar: A formula bar contains tools for creating and editing formulas. Name box: A name box displays the name of a selected cell and a range of cells. Task Pane: A task pane serves as an additional navigation tool substituting the
frequently used dialog boxes. The task pane appears each time you start Excel. Horizontal scroll bar: A horizontal scroll bar serves as a tool to view the left or
right part of the worksheet that is not displayed on the screen. Vertical scroll bar: A vertical scroll bar serves as a tool to view the top or bottom
part of the worksheet that is not displayed on the screen. Sheet Tab: A sheet tab helps to navigate between worksheets in a workbook.
©Digital Bridge Institute, Abuja Page 5
Starting ExcelStarting Excel
©Digital Bridge Institute, Abuja Page 6
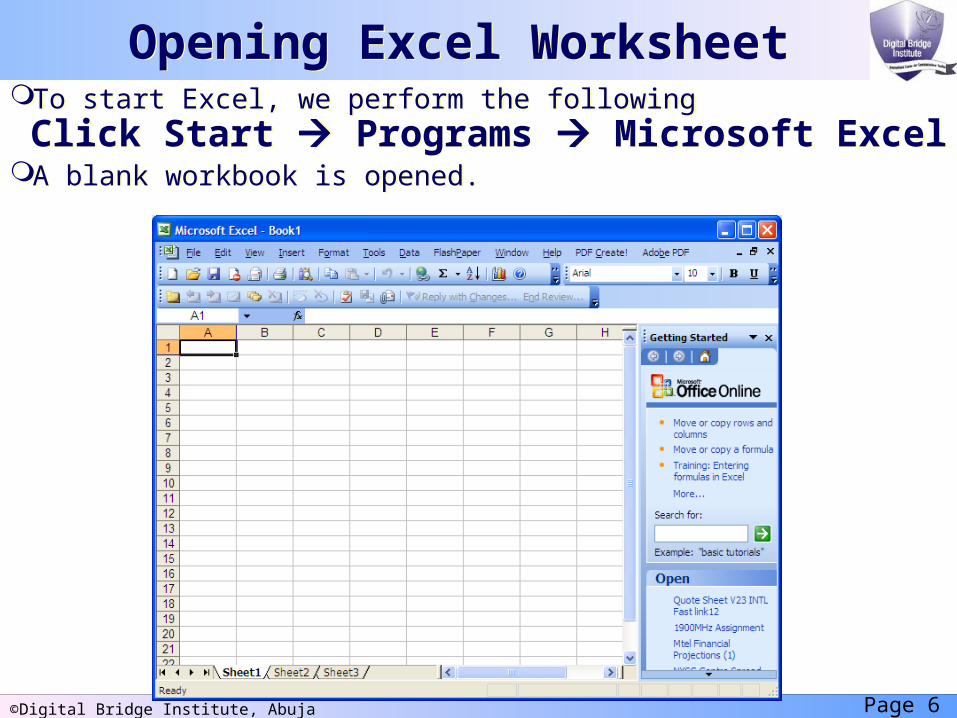
Opening Excel Worksheet Opening Excel WorksheetTo start Excel, we perform the following
Click Start Programs Microsoft ExcelA blank workbook is opened.
To start Excel, we perform the followingClick Start Programs Microsoft Excel
A blank workbook is opened.
©Digital Bridge Institute, Abuja Page 7
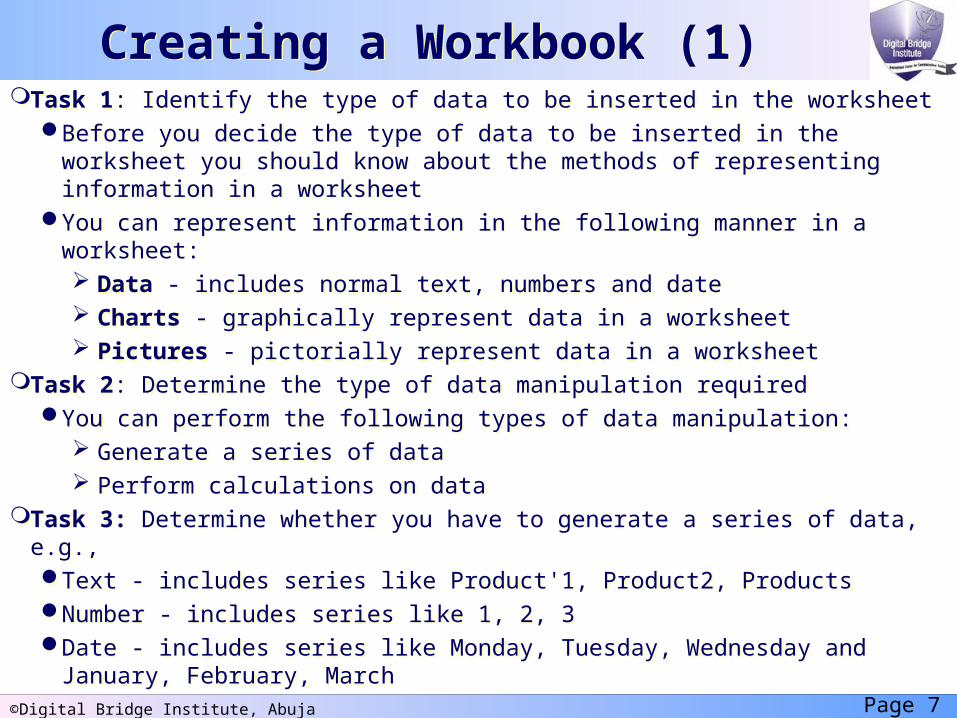
Creating a Workbook (1)Creating a Workbook (1)Task 1: Identify the type of data to be inserted in the worksheet
Before you decide the type of data to be inserted in the worksheet you should know about the methods of representing information in a worksheet
You can represent information in the following manner in a worksheet: Data - includes normal text, numbers and date Charts - graphically represent data in a worksheet Pictures - pictorially represent data in a worksheet
Task 2: Determine the type of data manipulation requiredYou can perform the following types of data manipulation:
Generate a series of data Perform calculations on data
Task 3: Determine whether you have to generate a series of data, e.g.,Text - includes series like Product'1, Product2, ProductsNumber - includes series like 1, 2, 3Date - includes series like Monday, Tuesday, Wednesday and January,
February, March
Task 1: Identify the type of data to be inserted in the worksheetBefore you decide the type of data to be inserted in the worksheet you
should know about the methods of representing information in a worksheetYou can represent information in the following manner in a worksheet:
Data - includes normal text, numbers and date Charts - graphically represent data in a worksheet Pictures - pictorially represent data in a worksheet
Task 2: Determine the type of data manipulation requiredYou can perform the following types of data manipulation:
Generate a series of data Perform calculations on data
Task 3: Determine whether you have to generate a series of data, e.g.,Text - includes series like Product'1, Product2, ProductsNumber - includes series like 1, 2, 3Date - includes series like Monday, Tuesday, Wednesday and January,
February, March
©Digital Bridge Institute, Abuja Page 8
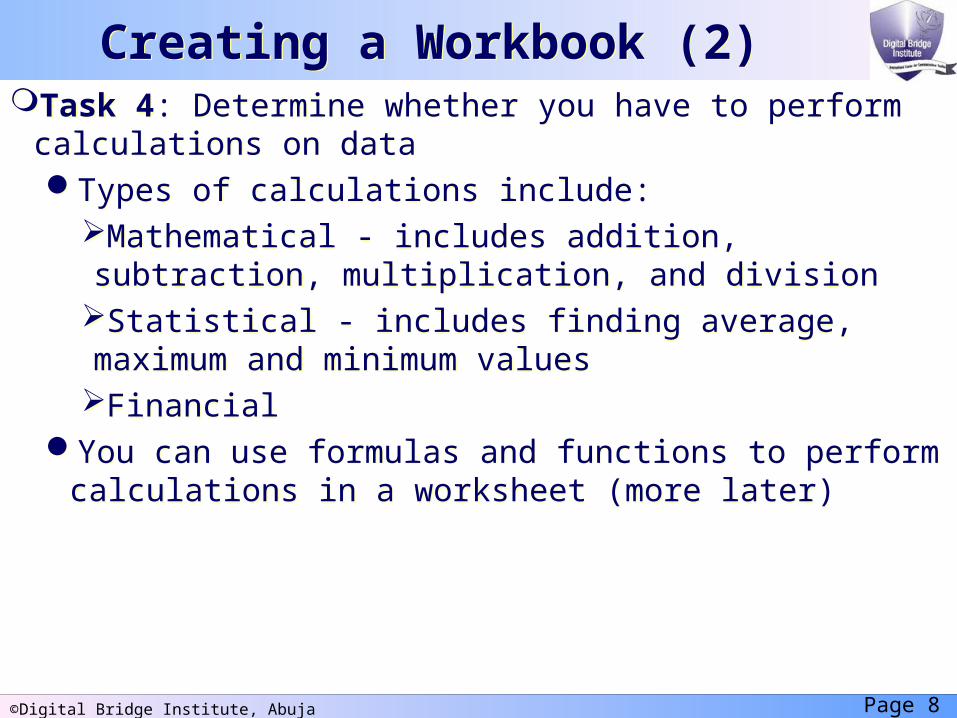
Creating a Workbook (2)Creating a Workbook (2)Task 4: Determine whether you have to perform calculations on
dataTypes of calculations include:
Mathematical - includes addition, subtraction, multiplication, and division
Statistical - includes finding average, maximum and minimum values
FinancialYou can use formulas and functions to perform calculations
in a worksheet (more later)
Task 4: Determine whether you have to perform calculations on dataTypes of calculations include:
Mathematical - includes addition, subtraction, multiplication, and division
Statistical - includes finding average, maximum and minimum values
FinancialYou can use formulas and functions to perform calculations
in a worksheet (more later)
©Digital Bridge Institute, Abuja Page 9
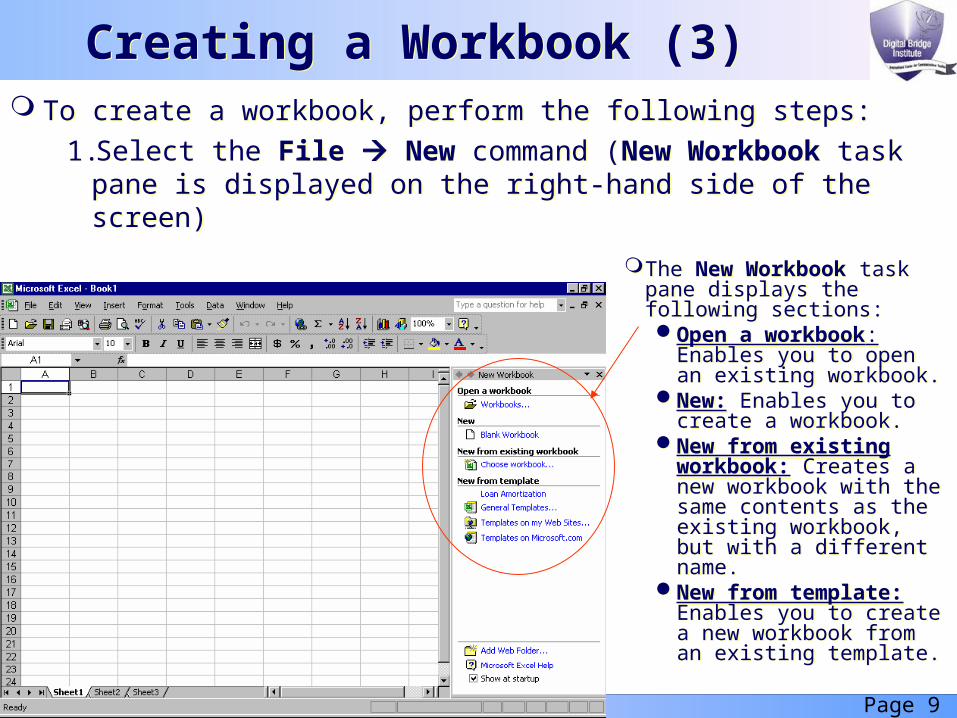
Creating a Workbook (3) Creating a Workbook (3) To create a workbook, perform the following steps:
1.Select the File New command (New Workbook task pane is displayed on the right-hand side of the screen)
To create a workbook, perform the following steps:
1.Select the File New command (New Workbook task pane is displayed on the right-hand side of the screen)
The New Workbook task pane displays the following sections: Open a workbook:
Enables you to open an existing workbook.
New: Enables you to create a workbook.
New from existing workbook: Creates a new workbook with the same contents as the existing workbook, but with a different name.
New from template: Enables you to create a new workbook from an existing template.
©Digital Bridge Institute, Abuja Page 10
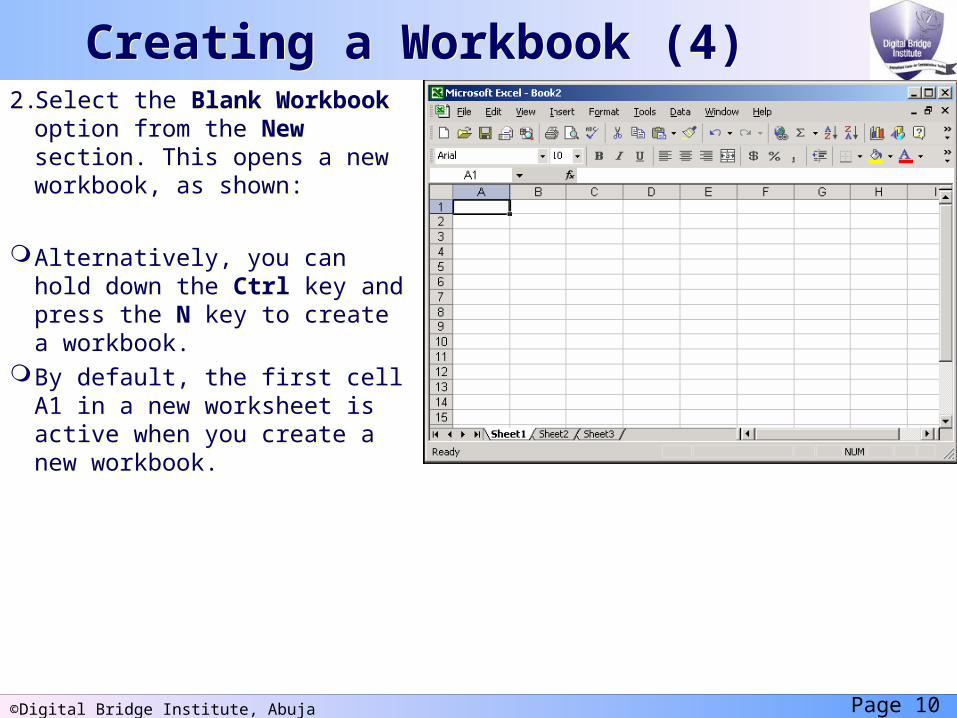
Creating a Workbook (4) Creating a Workbook (4) 2. Select the Blank Workbook
option from the New section. This opens a new workbook, as shown:
Alternatively, you can hold down the Ctrl key and press the N key to create a workbook.
By default, the first cell A1 in a new worksheet is active when you create a new workbook.
2. Select the Blank Workbook option from the New section. This opens a new workbook, as shown:
Alternatively, you can hold down the Ctrl key and press the N key to create a workbook.
By default, the first cell A1 in a new worksheet is active when you create a new workbook.
©Digital Bridge Institute, Abuja Page 11
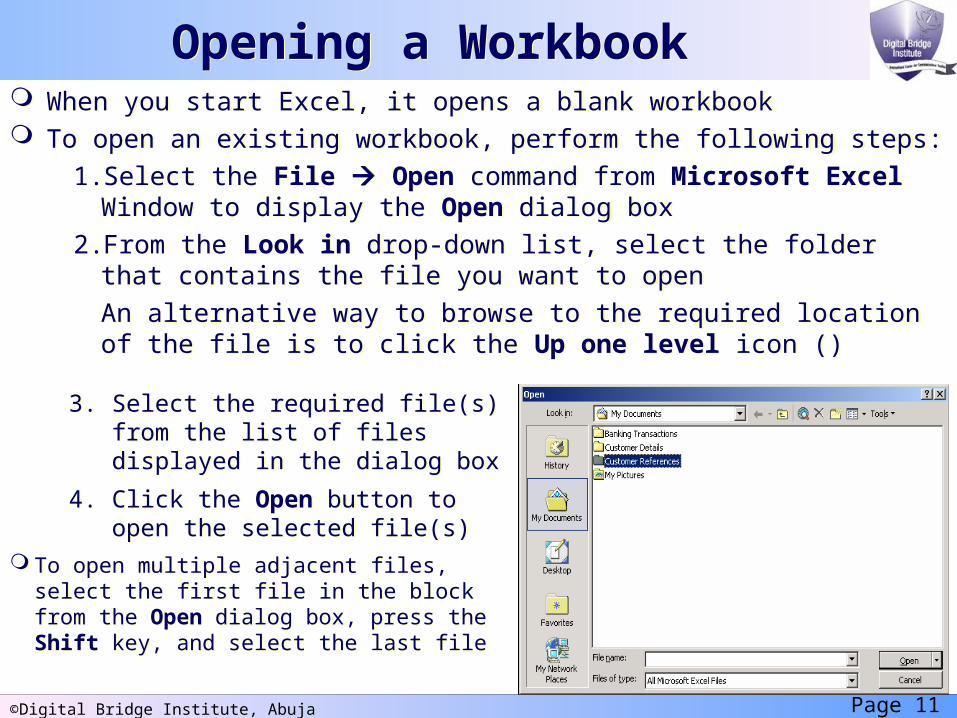
Opening a WorkbookOpening a Workbook When you start Excel, it opens a blank workbook To open an existing workbook, perform the following steps:
1. Select the File Open command from Microsoft Excel Window to display the Open dialog box
2. From the Look in drop-down list, select the folder that contains the file you want to open
An alternative way to browse to the required location of the file is to click the Up one level icon ()
When you start Excel, it opens a blank workbook To open an existing workbook, perform the following steps:
1. Select the File Open command from Microsoft Excel Window to display the Open dialog box
2. From the Look in drop-down list, select the folder that contains the file you want to open
An alternative way to browse to the required location of the file is to click the Up one level icon ()
3. Select the required file(s) from the list of files displayed in the dialog box
4. Click the Open button to open the selected file(s)
To open multiple adjacent files, select the first file in the block from the Open dialog box, press the Shift key, and select the last file
3. Select the required file(s) from the list of files displayed in the dialog box
4. Click the Open button to open the selected file(s)
To open multiple adjacent files, select the first file in the block from the Open dialog box, press the Shift key, and select the last file
©Digital Bridge Institute, Abuja Page 12
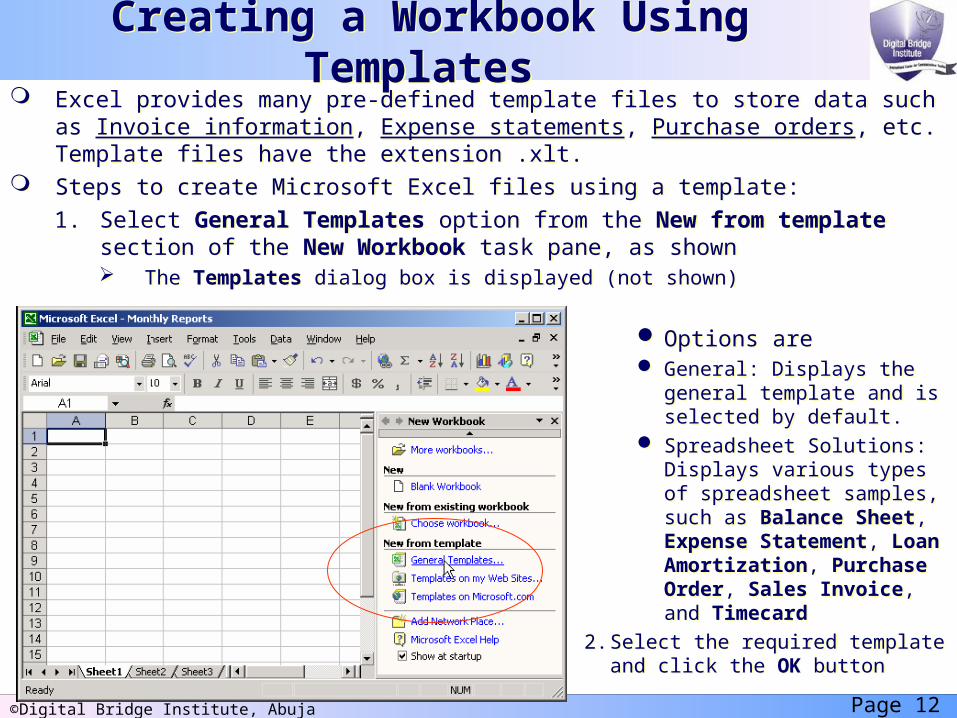
Creating a Workbook Using Templates Creating a Workbook Using Templates Excel provides many pre-defined template files to store data such as Invoice
information, Expense statements, Purchase orders, etc. Template files have the extension .xlt.
Steps to create Microsoft Excel files using a template:
1. Select General Templates option from the New from template section of the New Workbook task pane, as shown The Templates dialog box is displayed (not shown)
Excel provides many pre-defined template files to store data such as Invoice information, Expense statements, Purchase orders, etc. Template files have the extension .xlt.
Steps to create Microsoft Excel files using a template:
1. Select General Templates option from the New from template section of the New Workbook task pane, as shown The Templates dialog box is displayed (not shown)
Options are General: Displays the
general template and is selected by default.
Spreadsheet Solutions: Displays various types of spreadsheet samples, such as Balance Sheet, Expense Statement, Loan Amortization, Purchase Order, Sales Invoice, and Timecard
2. Select the required template and click the OK button
©Digital Bridge Institute, Abuja Page 13
Saving the WorkbookSaving the Workbook Saving a workbook is similar as in saving any file in microsoft office (word,
power point, etc) After adding data to a workbook, you need to save it for future use Steps to save a workbook
1. Select the File Save command from the Microsoft Excel Window (Save As dialog box is displayed)
2. From the Save in list, select the folder in which you want to save the workbook
3. Enter a file name in the File name text box of the Save As dialog box
4. Select the type of file that has to be saved from the Save as type drop-down list
5. Click the Save button to save the workbook
Saving a workbook is similar as in saving any file in microsoft office (word, power point, etc)
After adding data to a workbook, you need to save it for future use Steps to save a workbook
1. Select the File Save command from the Microsoft Excel Window (Save As dialog box is displayed)
2. From the Save in list, select the folder in which you want to save the workbook
3. Enter a file name in the File name text box of the Save As dialog box
4. Select the type of file that has to be saved from the Save as type drop-down list
5. Click the Save button to save the workbook
Alternatively, you can hold down the Ctrl key and press the S key to save a workbook
Alternatively, you can hold down the Ctrl key and press the S key to save a workbook
©Digital Bridge Institute, Abuja Page 14
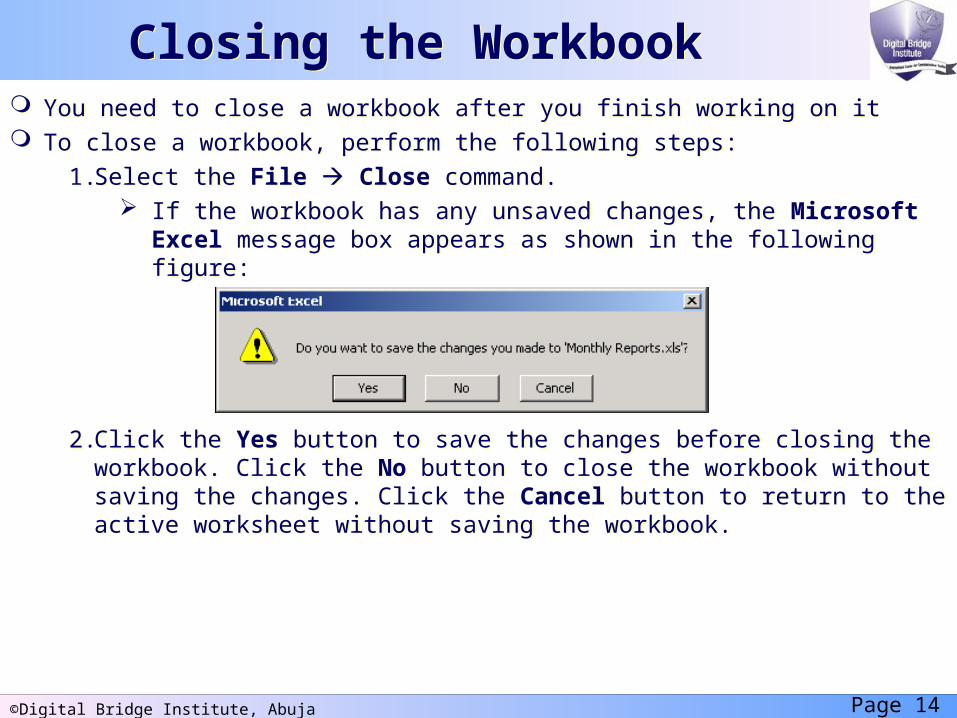
Closing the Workbook Closing the Workbook You need to close a workbook after you finish working on it To close a workbook, perform the following steps:
1. Select the File Close command. If the workbook has any unsaved changes, the Microsoft Excel
message box appears as shown in the following figure:
2. Click the Yes button to save the changes before closing the workbook. Click the No button to close the workbook without saving the changes. Click the Cancel button to return to the active worksheet without saving the workbook.
You need to close a workbook after you finish working on it To close a workbook, perform the following steps:
1. Select the File Close command. If the workbook has any unsaved changes, the Microsoft Excel
message box appears as shown in the following figure:
2. Click the Yes button to save the changes before closing the workbook. Click the No button to close the workbook without saving the changes. Click the Cancel button to return to the active worksheet without saving the workbook.
©Digital Bridge Institute, Abuja Page 15
Performing Operations on Data (1)Performing Operations on Data (1) You can perform the following operations on the data in worksheets and
workbooks:
Entering data
Moving and Copying data
Deleting data You can enter text, numbers, and date and time entries in a worksheet
Entering Text and Numbers To enter text or numbers in a single cell, perform the following steps:
1. Select cell in which you want to enter the text or number2. Type data in the cell
As you type in the cell, the contents of the cell also appear in the Formula bar
3. Press the Enter key
If you want to edit the data of the cell, double-click on the cell or press the F2 key
You can perform the following operations on the data in worksheets and workbooks:
Entering data
Moving and Copying data
Deleting data You can enter text, numbers, and date and time entries in a worksheet
Entering Text and Numbers To enter text or numbers in a single cell, perform the following steps:
1. Select cell in which you want to enter the text or number2. Type data in the cell
As you type in the cell, the contents of the cell also appear in the Formula bar
3. Press the Enter key
If you want to edit the data of the cell, double-click on the cell or press the F2 key
©Digital Bridge Institute, Abuja Page 16
Performing Operations on Data (2)Performing Operations on Data (2) Entering Date and Time
To enter date and time in a cell, perform the following steps:
1. Select the cell where the date and time is to be entered and type the required date and time.
2. There are many formats to enter the date, the most common are date with hyphen or slashes, for example, 08-10-2006 or 08/10/2006
To enter the current date, select the required cell and hold down the Ctrl key and press the ; key.
To enter the current time, select the required cell and hold down the combination of Ctrl and Shift keys and then press the : key.
Entering Date and Time To enter date and time in a cell, perform the following
steps:
1. Select the cell where the date and time is to be entered and type the required date and time.
2. There are many formats to enter the date, the most common are date with hyphen or slashes, for example, 08-10-2006 or 08/10/2006
To enter the current date, select the required cell and hold down the Ctrl key and press the ; key.
To enter the current time, select the required cell and hold down the combination of Ctrl and Shift keys and then press the : key.
©Digital Bridge Institute, Abuja Page 17
Performing Operations on Data (3)Performing Operations on Data (3) Moving and Copying Data
You can move data from one location to another. You can move data by using the Edit menu or by using the shortcut key
To move the contents of selected cells, perform the following steps:
1. Select the range of cells having data to be moved
2. Select the Edit Cut command In case the cell needs to be moved to a location across worksheet
or across workbook, select the destination worksheet. Select the cell in the destination worksheet Select the Edit Paste command to move the selected contents
Alternatively, select the required cells, and drag the border of the selected cells to the desired location in the current worksheet
Moving and Copying Data You can move data from one location to another. You can move data by
using the Edit menu or by using the shortcut key To move the contents of selected cells, perform the following steps:
1. Select the range of cells having data to be moved
2. Select the Edit Cut command In case the cell needs to be moved to a location across worksheet
or across workbook, select the destination worksheet. Select the cell in the destination worksheet Select the Edit Paste command to move the selected contents
Alternatively, select the required cells, and drag the border of the selected cells to the desired location in the current worksheet
©Digital Bridge Institute, Abuja Page 18
Copying Data in a Worksheet
When you want the same data to be present at several locations, it is best to copy this data rather than type it at each location
You can copy data within a worksheet, across worksheets, across workbooks, or even to and from other applications
You can copy a part of the cell’s content or the entire cell. To copy the content you can use menu command or by using the shortcut key.
The steps to copy data to another location in the same worksheet are: 1. Select the range of cells to be copied2. Select Edit Copy command to copy the contents of the selected
range of cells In case the cell needs to be pasted to a location across worksheet or
across workbook, select the destination worksheet
3. Select the cell in the destination worksheet4. Select the Edit Paste command to copy the selected contents
A Paste Options button will appear next to the pasted dataAlternatively, select the required cells, hold down the Ctrl key, and drag
the selected cells to the desired location in the current worksheet
Copying Data in a WorksheetWhen you want the same data to be present at several locations, it is
best to copy this data rather than type it at each locationYou can copy data within a worksheet, across worksheets, across
workbooks, or even to and from other applicationsYou can copy a part of the cell’s content or the entire cell. To copy the
content you can use menu command or by using the shortcut key. The steps to copy data to another location in the same worksheet are:
1. Select the range of cells to be copied2. Select Edit Copy command to copy the contents of the selected
range of cells In case the cell needs to be pasted to a location across worksheet or
across workbook, select the destination worksheet
3. Select the cell in the destination worksheet4. Select the Edit Paste command to copy the selected contents
A Paste Options button will appear next to the pasted dataAlternatively, select the required cells, hold down the Ctrl key, and drag
the selected cells to the desired location in the current worksheet
©Digital Bridge Institute, Abuja Page 19
Copying Data in a Worksheet with Clipboard
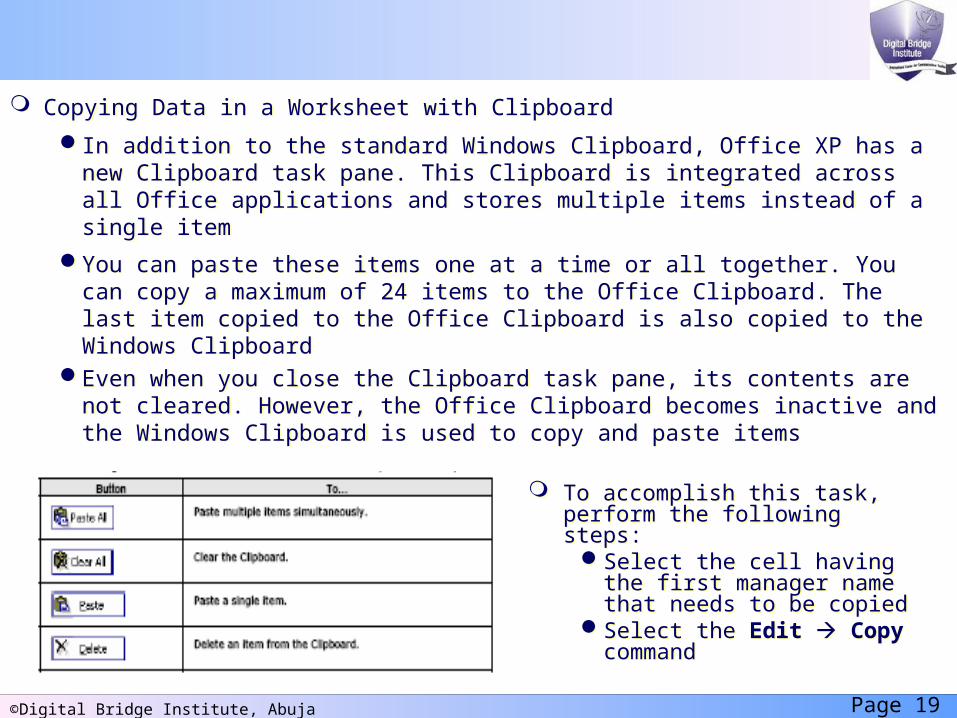
In addition to the standard Windows Clipboard, Office XP has a new Clipboard task pane. This Clipboard is integrated across all Office applications and stores multiple items instead of a single item
You can paste these items one at a time or all together. You can copy a maximum of 24 items to the Office Clipboard. The last item copied to the Office Clipboard is also copied to the Windows Clipboard
Even when you close the Clipboard task pane, its contents are not cleared. However, the Office Clipboard becomes inactive and the Windows Clipboard is used to copy and paste items
Copying Data in a Worksheet with Clipboard
In addition to the standard Windows Clipboard, Office XP has a new Clipboard task pane. This Clipboard is integrated across all Office applications and stores multiple items instead of a single item
You can paste these items one at a time or all together. You can copy a maximum of 24 items to the Office Clipboard. The last item copied to the Office Clipboard is also copied to the Windows Clipboard
Even when you close the Clipboard task pane, its contents are not cleared. However, the Office Clipboard becomes inactive and the Windows Clipboard is used to copy and paste items
To accomplish this task, perform the following steps:
Select the cell having the first manager name that needs to be copied
Select the Edit Copy command
To accomplish this task, perform the following steps:
Select the cell having the first manager name that needs to be copied
Select the Edit Copy command
©Digital Bridge Institute, Abuja Page 20
Implement the SolutionImplement the Solution
1. Open the workbook
2. Insert data in the worksheet
3. Perform data manipulation
3.1 Generate a series of data
3.2 Insert data in the worksheet
3.3 Perform calculations in the worksheet
4. Save the workbook
1. Open the workbook
2. Insert data in the worksheet
3. Perform data manipulation
3.1 Generate a series of data
3.2 Insert data in the worksheet
3.3 Perform calculations in the worksheet
4. Save the workbook
©Digital Bridge Institute, Abuja Page 21
Open the WorkbookOpen the Workbook
1. Click File Open (Open dialog box is displayed)
2. Click on the Look in drop down list box
3. Select the drive in which the workbook is stored
4. Select the folder in which the workbook exists
5. Select the workbook
6. Click Open (The workbook is opened)
1. Click File Open (Open dialog box is displayed)
2. Click on the Look in drop down list box
3. Select the drive in which the workbook is stored
4. Select the folder in which the workbook exists
5. Select the workbook
6. Click Open (The workbook is opened)
©Digital Bridge Institute, Abuja Page 22
Insert data in the worksheetInsert data in the worksheet
1. Click Edit Go To
2. Type the reference of the cell. For example, C6
3. Click Ok
Or
1. Move the mouse pointer to the cell in which you want to enter the data.
Start typing in the cell Press Enter after you finish typing
1. Click Edit Go To
2. Type the reference of the cell. For example, C6
3. Click Ok
Or
1. Move the mouse pointer to the cell in which you want to enter the data.
Start typing in the cell Press Enter after you finish typing

©Digital Bridge Institute, Abuja Page 23
Perform data manipulationPerform data manipulationTask 3.1: Generate a series of data
To generate a series you need to specify the first and second members of the series. For example, to generate a number series you need to specify 1 and 2 in consecutive cells and fill the series. •
AutoFill Feature You can use the AutoFill feature to fill a series of data. The AutoFill
feature displays an AutoFill handle, which is a small plus sign at the bottom right corner of the active cell (refer Figure 1.3). The AutoFill handle appears only when you place the mouse pointer at the bottom right corner of the selected cell(s).
You can drag the handle to fill series.Generate a series of data1 . Select the cell from which you want to start the series2. Enter Monday in the cell and Tuesday in the cell below it3. Select both the cells4. Drag the AutoFill handle over the range of cells you want to fill5. Release the mouse button The data series is generated.
Task 3.1: Generate a series of dataTo generate a series you need to specify the first and second members of
the series. For example, to generate a number series you need to specify 1 and 2 in consecutive cells and fill the series. •
AutoFill Feature You can use the AutoFill feature to fill a series of data. The AutoFill
feature displays an AutoFill handle, which is a small plus sign at the bottom right corner of the active cell (refer Figure 1.3). The AutoFill handle appears only when you place the mouse pointer at the bottom right corner of the selected cell(s).
You can drag the handle to fill series.Generate a series of data1 . Select the cell from which you want to start the series2. Enter Monday in the cell and Tuesday in the cell below it3. Select both the cells4. Drag the AutoFill handle over the range of cells you want to fill5. Release the mouse button The data series is generated.
©Digital Bridge Institute, Abuja Page 24
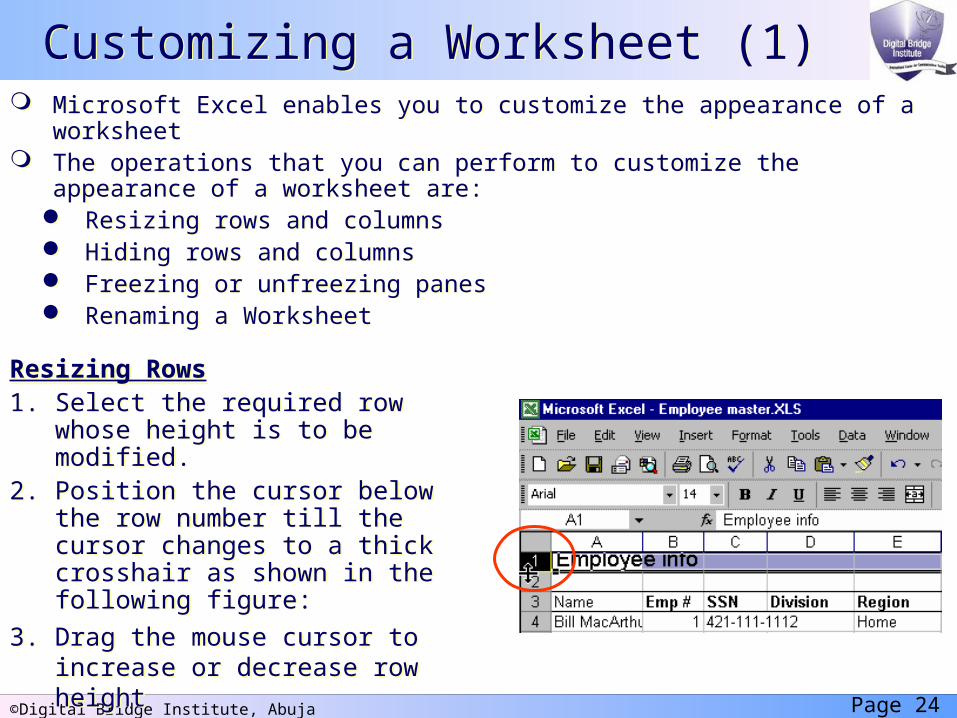
Customizing a Worksheet (1)Customizing a Worksheet (1) Microsoft Excel enables you to customize the appearance of a worksheet The operations that you can perform to customize the appearance of a
worksheet are: Resizing rows and columns Hiding rows and columns Freezing or unfreezing panes Renaming a Worksheet
Microsoft Excel enables you to customize the appearance of a worksheet The operations that you can perform to customize the appearance of a
worksheet are: Resizing rows and columns Hiding rows and columns Freezing or unfreezing panes Renaming a Worksheet
Resizing Rows1. Select the required row whose
height is to be modified. 2. Position the cursor below the row
number till the cursor changes to a thick crosshair as shown in the following figure:
3. Drag the mouse cursor to increase or decrease row height
Resizing Rows1. Select the required row whose
height is to be modified. 2. Position the cursor below the row
number till the cursor changes to a thick crosshair as shown in the following figure:
3. Drag the mouse cursor to increase or decrease row height
©Digital Bridge Institute, Abuja Page 25
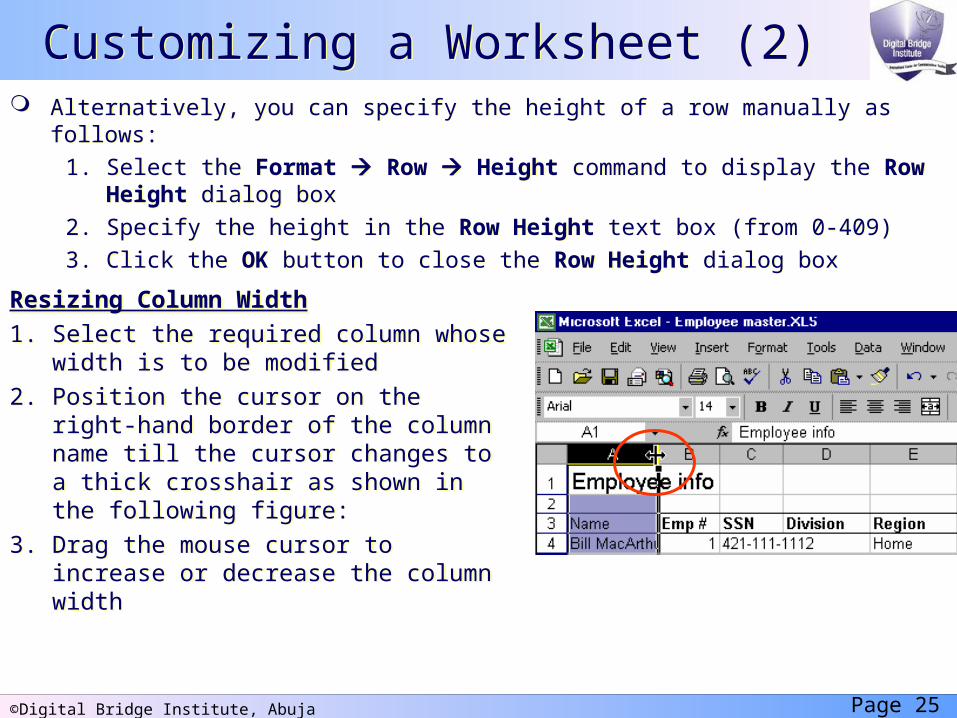
Customizing a Worksheet (2)Customizing a Worksheet (2) Alternatively, you can specify the height of a row manually as follows:
1. Select the Format Row Height command to display the Row Height dialog box
2. Specify the height in the Row Height text box (from 0-409)
3. Click the OK button to close the Row Height dialog box
Alternatively, you can specify the height of a row manually as follows:
1. Select the Format Row Height command to display the Row Height dialog box
2. Specify the height in the Row Height text box (from 0-409)
3. Click the OK button to close the Row Height dialog box
Resizing Column Width
1. Select the required column whose width is to be modified
2. Position the cursor on the right-hand border of the column name till the cursor changes to a thick crosshair as shown in the following figure:
3. Drag the mouse cursor to increase or decrease the column width
Resizing Column Width
1. Select the required column whose width is to be modified
2. Position the cursor on the right-hand border of the column name till the cursor changes to a thick crosshair as shown in the following figure:
3. Drag the mouse cursor to increase or decrease the column width
©Digital Bridge Institute, Abuja Page 26
Customizing a Worksheet (3)Customizing a Worksheet (3) Alternatively, you can specify the width of a column manually as follows:
1. Select the Format Column Width command to display the Column Width dialog box
2. Specify the width in the Column Width text box3. Click the OK button to close the Column Width dialog box
Alternatively, you can specify the width of a column manually as follows:1. Select the Format Column Width command to display the
Column Width dialog box2. Specify the width in the Column Width text box3. Click the OK button to close the Column Width dialog box
©Digital Bridge Institute, Abuja Page 27
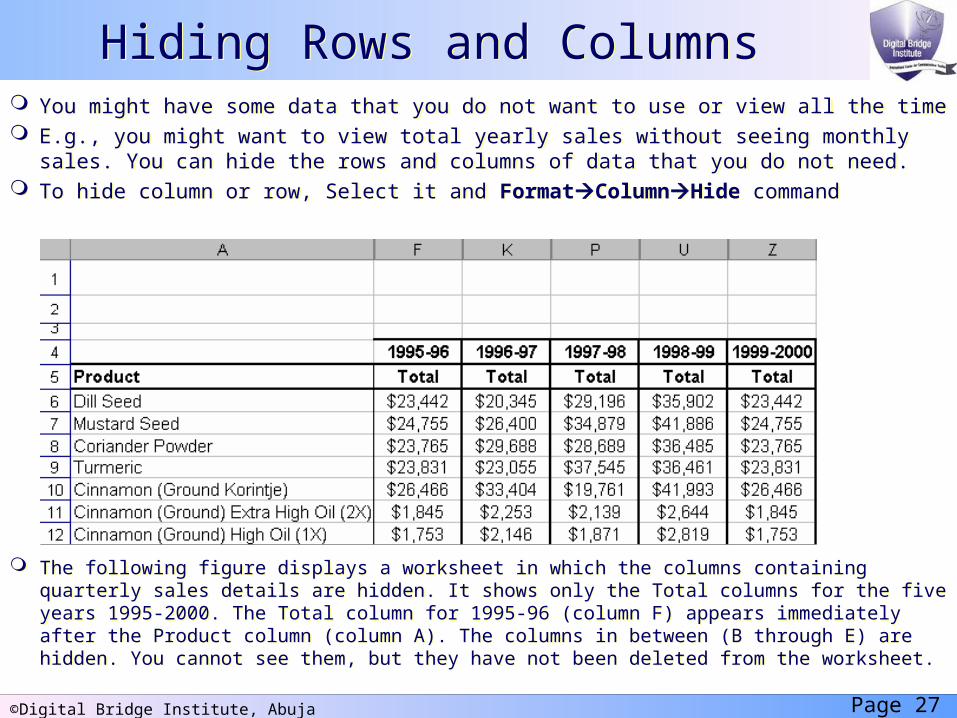
Hiding Rows and ColumnsHiding Rows and Columns You might have some data that you do not want to use or view all the time E.g., you might want to view total yearly sales without seeing monthly sales.
You can hide the rows and columns of data that you do not need. To hide column or row, Select it and FormatColumnHide command
You might have some data that you do not want to use or view all the time E.g., you might want to view total yearly sales without seeing monthly sales.
You can hide the rows and columns of data that you do not need. To hide column or row, Select it and FormatColumnHide command
The following figure displays a worksheet in which the columns containing quarterly sales details are hidden. It shows only the Total columns for the five years 1995-2000. The Total column for 1995-96 (column F) appears immediately after the Product column (column A). The columns in between (B through E) are hidden. You cannot see them, but they have not been deleted from the worksheet.
The following figure displays a worksheet in which the columns containing quarterly sales details are hidden. It shows only the Total columns for the five years 1995-2000. The Total column for 1995-96 (column F) appears immediately after the Product column (column A). The columns in between (B through E) are hidden. You cannot see them, but they have not been deleted from the worksheet.
©Digital Bridge Institute, Abuja Page 28
WORKING WITH WORKSHEETSWORKING WITH WORKSHEETS
Managing worksheets Using Find and Replace feature Using Undo and Redo feature Using sorting feature Using formulas and functions Referencing data
Managing worksheets Using Find and Replace feature Using Undo and Redo feature Using sorting feature Using formulas and functions Referencing data
©Digital Bridge Institute, Abuja Page 29
Managing Worksheets (1)Managing Worksheets (1) An Excel workbook, by default, has three worksheets. However, you can
insert new worksheets in a workbook. You can also delete, move, and copy worksheets from a workbook.
Inserting Worksheets Select the Insert Worksheet option. A blank worksheet is added before
the active worksheet
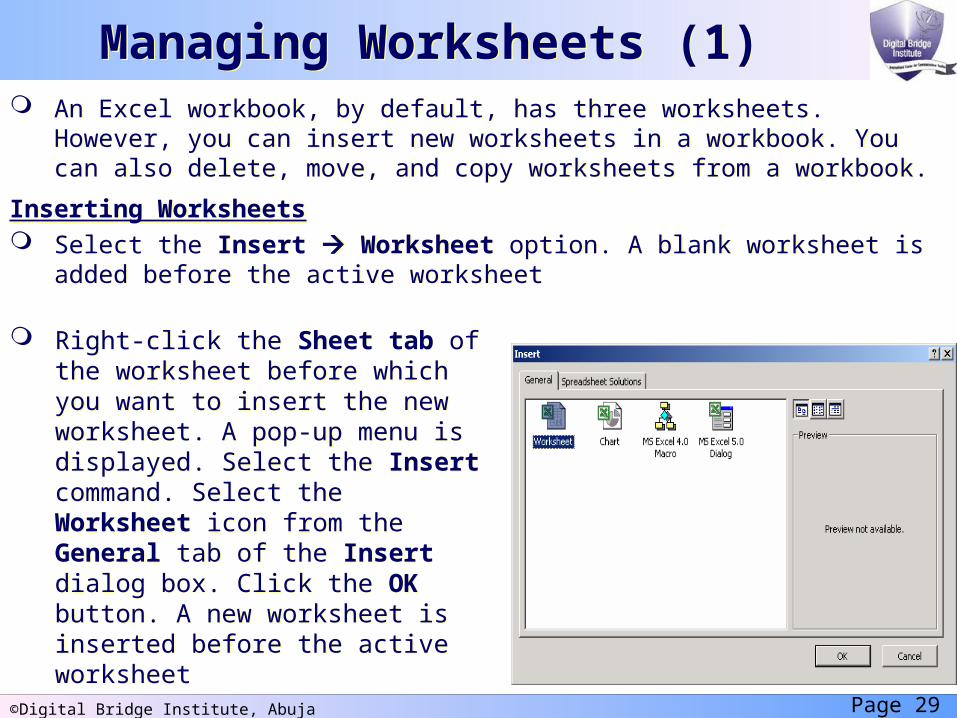
An Excel workbook, by default, has three worksheets. However, you can insert new worksheets in a workbook. You can also delete, move, and copy worksheets from a workbook.
Inserting Worksheets Select the Insert Worksheet option. A blank worksheet is added before
the active worksheet
Right-click the Sheet tab of the worksheet before which you want to insert the new worksheet. A pop-up menu is displayed. Select the Insert command. Select the Worksheet icon from the General tab of the Insert dialog box. Click the OK button. A new worksheet is inserted before the active worksheet
Right-click the Sheet tab of the worksheet before which you want to insert the new worksheet. A pop-up menu is displayed. Select the Insert command. Select the Worksheet icon from the General tab of the Insert dialog box. Click the OK button. A new worksheet is inserted before the active worksheet
©Digital Bridge Institute, Abuja Page 30
Managing Worksheets (2)Managing Worksheets (2)Deleting Worksheets To delete a worksheet, perform the following steps:
1. Activate the worksheet that you want to delete by selecting the sheet tab
2. Right-click the sheet tab
3. From the pop-up menu select the Delete option
4. If the worksheet contains any data then an alert message is displayed, as shown in the following figure:
5. Click the Delete button on the Alert message. The worksheet is deleted.
Alternatively, you can delete a worksheet using the Edit Delete Sheet command
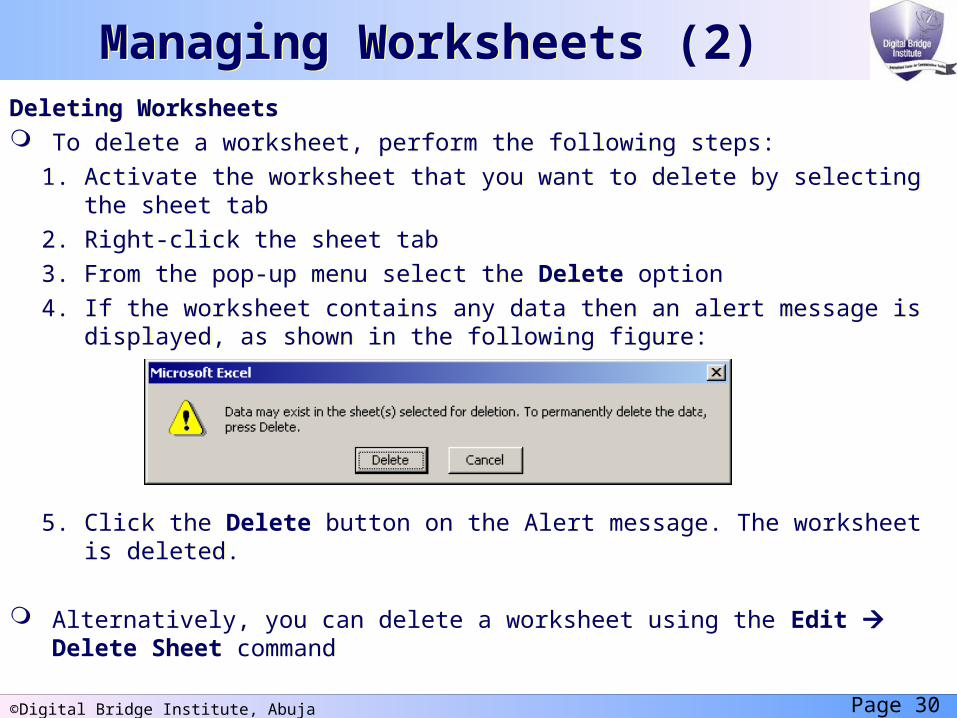
Deleting Worksheets To delete a worksheet, perform the following steps:
1. Activate the worksheet that you want to delete by selecting the sheet tab
2. Right-click the sheet tab
3. From the pop-up menu select the Delete option
4. If the worksheet contains any data then an alert message is displayed, as shown in the following figure:
5. Click the Delete button on the Alert message. The worksheet is deleted.
Alternatively, you can delete a worksheet using the Edit Delete Sheet command
©Digital Bridge Institute, Abuja Page 31
Managing WorksheetsManaging WorksheetsMoving and Copying Worksheets You can move or copy worksheets within a workbook or to another
workbook by using the Move or Copy option
1. Right-click the sheet tab that you want to move or copy.
2. From the pop-up menu select the Move or Copy option. It will display the Move or Copy dialog box as shown in the following figure:
3. In the Move or Copy dialog box, you can specify the workbook name where you want to move or copy the worksheet. Click the To book drop down list to specify the workbook name. By default it will display the current workbook
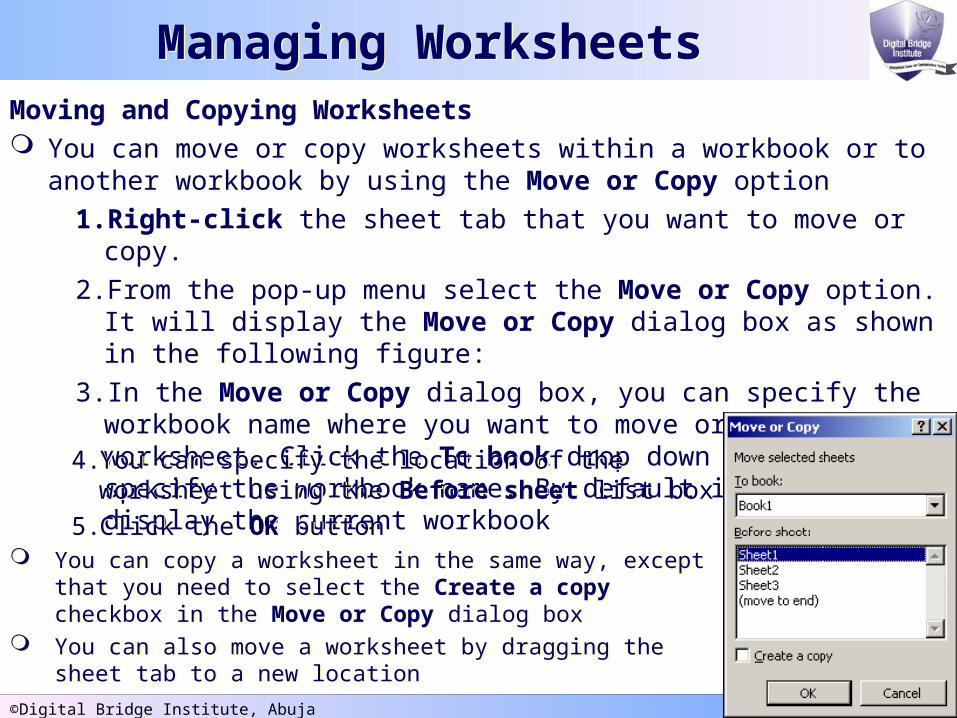
Moving and Copying Worksheets You can move or copy worksheets within a workbook or to another
workbook by using the Move or Copy option
1. Right-click the sheet tab that you want to move or copy.
2. From the pop-up menu select the Move or Copy option. It will display the Move or Copy dialog box as shown in the following figure:
3. In the Move or Copy dialog box, you can specify the workbook name where you want to move or copy the worksheet. Click the To book drop down list to specify the workbook name. By default it will display the current workbook
4. You can specify the location of the worksheet using the Before sheet list box
5. Click the OK button You can copy a worksheet in the same way, except that you
need to select the Create a copy checkbox in the Move or Copy dialog box
You can also move a worksheet by dragging the sheet tab to a new location
©Digital Bridge Institute, Abuja Page 32
Using Sorting FeatureUsing Sorting FeatureExcel enables you to sort data in rows or columns. You can sort data based on
ascending or descending order. To sort data perform the following steps:
1. Select the range of cells containing the data that need to be sorted2. Select the Data Sort command to display the Sort dialog box3. Select the required options and click the OK button
Excel enables you to sort data in rows or columns. You can sort data based on ascending or descending order.
To sort data perform the following steps: 1. Select the range of cells containing the data that need to be sorted2. Select the Data Sort command to display the Sort dialog box3. Select the required options and click the OK button
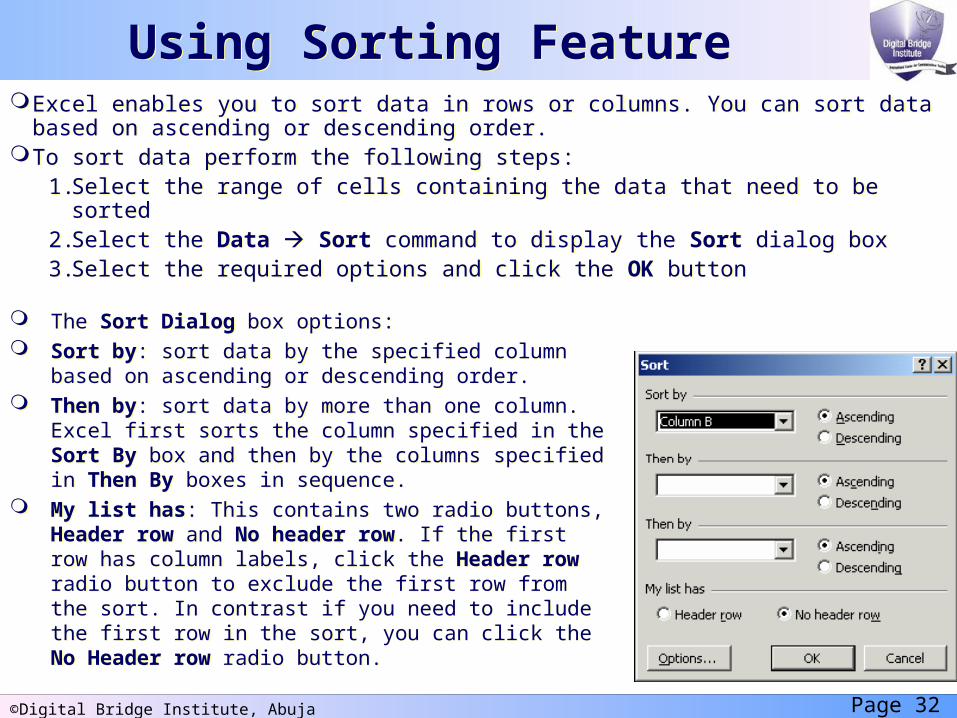
The Sort Dialog box options: Sort by: sort data by the specified column based on
ascending or descending order. Then by: sort data by more than one column. Excel
first sorts the column specified in the Sort By box and then by the columns specified in Then By boxes in sequence.
My list has: This contains two radio buttons, Header row and No header row. If the first row has column labels, click the Header row radio button to exclude the first row from the sort. In contrast if you need to include the first row in the sort, you can click the No Header row radio button.
©Digital Bridge Institute, Abuja Page 33
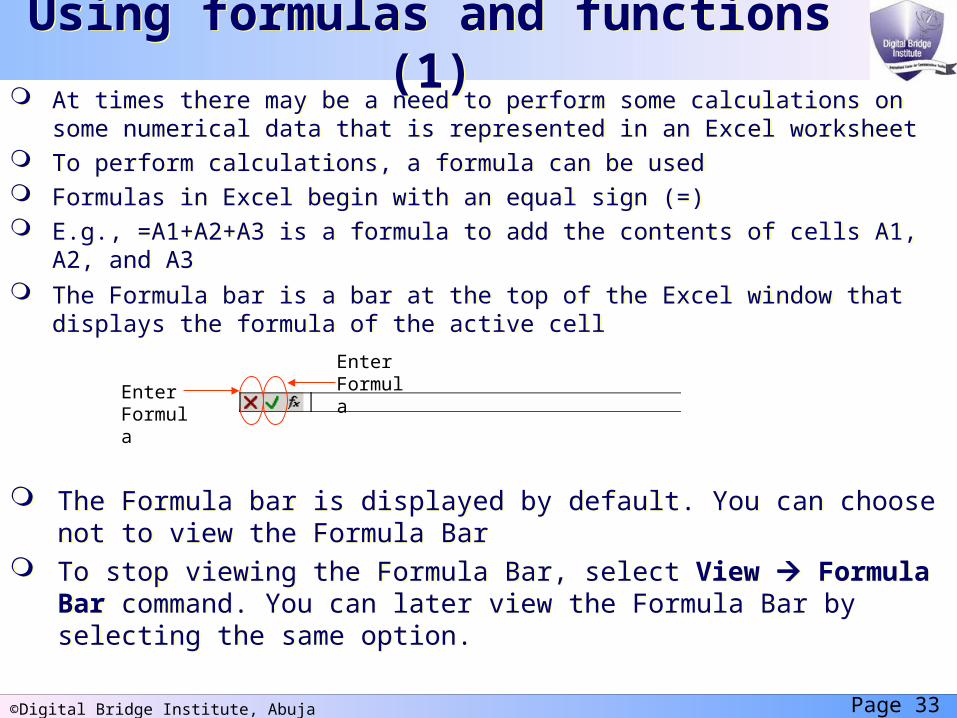
Using formulas and functions (1)Using formulas and functions (1) At times there may be a need to perform some calculations on some
numerical data that is represented in an Excel worksheet To perform calculations, a formula can be used Formulas in Excel begin with an equal sign (=) E.g., =A1+A2+A3 is a formula to add the contents of cells A1, A2, and A3 The Formula bar is a bar at the top of the Excel window that displays the
formula of the active cell
At times there may be a need to perform some calculations on some numerical data that is represented in an Excel worksheet
To perform calculations, a formula can be used Formulas in Excel begin with an equal sign (=) E.g., =A1+A2+A3 is a formula to add the contents of cells A1, A2, and A3 The Formula bar is a bar at the top of the Excel window that displays the
formula of the active cell
The Formula bar is displayed by default. You can choose not to view the Formula Bar
To stop viewing the Formula Bar, select View Formula Bar command. You can later view the Formula Bar by selecting the same option.
The Formula bar is displayed by default. You can choose not to view the Formula Bar
To stop viewing the Formula Bar, select View Formula Bar command. You can later view the Formula Bar by selecting the same option.
Enter FormulaEnter
Formula
©Digital Bridge Institute, Abuja Page 34
Using formulas and functions (2)Using formulas and functions (2) Entering Formulas in a Worksheet
A formula can be typed in a cell to calculate and display the result of the formula in that cell. Eg., in a cell A1 a formula given as =B4+C5 adds the cell contents of cell B4 and cell C5 and display the result in cell A1
The formula specified must be preceded by an equal to (=) sign otherwise the calculation will not be performed
Listed below are some examples of formulas: =35 * 44 =23 ^ 2 =C5 -C3 =C1+C2+C3+C4+C5 =S3 - D6 * 44 / 3
Entering Formulas in a Worksheet A formula can be typed in a cell to calculate and display the result of the
formula in that cell. Eg., in a cell A1 a formula given as =B4+C5 adds the cell contents of cell B4 and cell C5 and display the result in cell A1
The formula specified must be preceded by an equal to (=) sign otherwise the calculation will not be performed
Listed below are some examples of formulas: =35 * 44 =23 ^ 2 =C5 -C3 =C1+C2+C3+C4+C5 =S3 - D6 * 44 / 3
An important and useful feature of Excel is that it automatically recalculates the value of the cell that contains a formula if the values of the cells to which the formula refers to change. For example, the formula =C3+C4 in cell C5 is recalculated if the values of cells C3 or C4 change.
An important and useful feature of Excel is that it automatically recalculates the value of the cell that contains a formula if the values of the cells to which the formula refers to change. For example, the formula =C3+C4 in cell C5 is recalculated if the values of cells C3 or C4 change.
©Digital Bridge Institute, Abuja Page 35
FunctionsFunctions Excel provides many functions - mathematical, statistical, logical, etc. Mathematical functions
Sum(), Product() E.g, to calculate the sum of values stored in cells C1 to C5, use
=SUM(C1:C5). Statistical functions
Average(), Max(), Min(), Count(), Round() Eg., to find the average of the values in cells C1 to C5, use
=AVERAGE(C1:C5). Date and time functions
Now(), Today(), Date(), Time() Eg., =TIME(9,0,0) returns 9:00 A.M and =TIME(20,15,30) returns 8:15
P.M. Logical functions
If(), Not() E.g., For the formula =If(B2>70, “A”, “B”), a grade A is displayed if
marks are above 70 and a grade B is displayed if marks are below or equal to 70.
Excel provides many functions - mathematical, statistical, logical, etc. Mathematical functions
Sum(), Product() E.g, to calculate the sum of values stored in cells C1 to C5, use
=SUM(C1:C5). Statistical functions
Average(), Max(), Min(), Count(), Round() Eg., to find the average of the values in cells C1 to C5, use
=AVERAGE(C1:C5). Date and time functions
Now(), Today(), Date(), Time() Eg., =TIME(9,0,0) returns 9:00 A.M and =TIME(20,15,30) returns 8:15
P.M. Logical functions
If(), Not() E.g., For the formula =If(B2>70, “A”, “B”), a grade A is displayed if
marks are above 70 and a grade B is displayed if marks are below or equal to 70.