Embed Size (px)
Citation preview

Simply This

Simply ThisPrinted and dyed
handmade Projects
fiona fagan

ContentsIntroduction 7
Tools & Materials 12
Elements of Design 15
Upcycling & Embellishment 16
Printing & Dyeing Techniques 18
The Projects 56
Kitchen 58
Dining Room 80
Living 96
Bedroom 128
Lifestyle 148
Templates 174
Index 178
First published 2013 byNew Holland Publishers Pty LtdLondon • Sydney • Cape Town • Auckland
Garfield House 86–88 Edgware Road London W2 2EA United Kingdom
Wembley Square First Floor Solan Road Gardens Cape Town 8001 South Africa
1/66 Gibbes Street Chatswood NSW 2067 Australia
218 Lake Road Northcote Auckland New Zealand
www.newhollandpublishers.com
Copyright © 2013 New Holland Publishers Copyright © 2013 in text Fiona FaganCopyright © 2013 in images: Sue StubbsAll step-by-step images: Fiona Fagan
All rights reserved. No part of this publication may be reproduced, stored in a retrieval system or transmitted, in any form or by any means, electronic, mechanical, photocopying, recording or otherwise, without the prior written permission of the publishers and copyright holders.
A record of this book is held at the British Library AND/OR National Library of Australia
ISBN 978 1 74257 435 6
Publisher: Fiona Schultz Designer: Tracy LoughlinSenior editor: Simona HillProofreader:Photographs: Sue Stubbs and Fiona FaganProduction director: Olga DementievPrinter: XXXXXXX
10 9 8 7 6 5 4 3 2 1
Keep up with New Holland Publishers on Facebook http://www.facebook.com/NewHollandPublishers
To Ella and Tess
AcknowledgementsI would like to thank my mother Jill and grandmother Adrianne for providing me with the inspiration to write this book and a love of fabric; my husband Mark for his support, encouragement and looking after the children while I wrote it all down; my Dad Jimmy for giving me resilience, persistence and strength; my daughters Ella and Tessa for their love; Michelle Leonard for strongly encouraging and supporting me to get on with it! Lliane Clarke for her many ideas and support; Fiona Schultz at New Holland Publishers for agreeing to publish my work; and Jodi de Vantier, Simona Hill and Tracy Loughlinalso to Miranda Herron, Emma Virgona, Jan Redmond, Madeleine van Rijckervorsel and Maree and Lisa Nicole at the Back Room; Brooke Muckersie for my website, www.simplythis.com.au; Helen Ashley for her mentoring; and Sue Stubbs for her intuitive photography.
I would like to thank the following suppliers:Linen Line Australia for supplying fabric to use in this book; Reverse Garbage for recycled materials;The Vintage Shop for lampshades; The Salvation Army for fabric and lampshades; Mitchel St Auction House for lamp bases; Spot Light for haberdashery supplies; Ikea for basic home wares including curtains and pillowcases.


9
Introduction
Choosing and creating a style for your home decor and keeping within budget is a challenge for all of us. Yet, with even the smallest budget it’s possible to create highly desirable soft furnishings that breathe life and colour into our homes and create comfort with their design, shape and texture.
I grew up on a farm and in a family in which most of my clothes were made by my mother. Out of necessity, she never wasted anything. Everything that could be recycled was taken apart and the good parts reused. Our lifestyle and circumstances challenged my mother to provide for the family in a creative way; it’s a skill that I have inherited. I get my thriftiness from my mother. It was she who taught me the value of upcycling and I have a large stash of fabrics, trims, braids and buttons always ready to make and decorate projects as need and the desire dictate.
My grandmother also lived on a farm. She covered everyday items such as books and coathangers with material or card because she liked things to look pretty. She would reuse large canvas bags that were once full of sugar or flour and make them into small decorative bags, which she embellished with woollen embroidery, then used to store shoes or other items. My grandmother’s skills, like women of her generation, were the product of the hardship caused by the Great Depression. Women learned to ‘make do and mend’, using whatever material they

could get their hands on to beautify their homes. My mother taught me to embroider and do cross
stitch, and I began to decorate my own fabrics, using these skills. I soon learned how to form simple decorative stitches and used them to beautify everyday items. Later, I learned to transform cloth with fabric paints, stencils, prints and dyes. Part of my love for colouring fabrics comes from the element of surprise of the dyeing techniques that I use. There is a random quality to dyeing fabric at home. Unwrapping the material once it is removed from the dye bath can bring some surprising results. This is known as mark-making in the textile industry. I am not alone in getting great satisfaction from doing this by hand – it is something really special. Every piece of fabric that we dye or print is unique, and can rarely be produced again.
The advantage of using modern fabric paints and dyes is that it can be done at the kitchen table. It is quick to set up and you will already have many mark-making tools in your kitchen drawer. Don’t be frightened by the paints and dyes – you can purchase these from your local craft store or online. They are inexpensive and offer a fast method by which to transform plain fabrics. They are also safe to use if you follow the manufacturer's instructions. I suggest that when you print or dye fabrics, you make an extra length for another project at the same time. Don’t throw any fabric away. Even the smallest remnants have a use.
CHOOSING A PROJECTThe aim of this book is to show you how to decorate fabrics with prints, or dyes, or embellish them to make them into products for the home. Each
project that I have included is a celebration of fabric texture, colour and design. Some of the projects are easily achieveable over one day, others may take a weekend.
The projects are arranged according to their use within the different rooms of the home, and there's an extra chapter of personal and fun items that I love. As a mum, I spend a lot of time in the kitchen preparing meals for the family, catching up with my girlfriends and entertaining. For this room I have included stylish bowls, a pot holder, trivets, a French coffee press cosy, even a plastic bag holder. For the dining room I have created a sophisticated table runner and napkins. There's even a cutlery roll to take with you on a picnic.
I love cushions; they can be used to add a seasonal change to any room. For example, in autumn and winter I add cushions with warm and earthy tones to my living spaces, swapping them from the fresh neutral palette with which I furnish the home in spring and summer. Ringing the changes in this way is relatively inexpensive and fun to do, expecially if you make the furnishings yourself.
My bedroom is a calm and peaceful sanctuary. For this room I have included ideas to decorate pillows, curtains, cushions and a bedside lampshade.
Some of the projects remind me of my youth – covered coathangers that my mother made, and journal covers that my grandmother would have loved. There's a fun shower cap too, as well as fabric baskets in which you can store all manner of paraphernalia, a nod to the memory of my grandmother.
10 introduction

introduction 13
HOW TO USE THIS BOOKIf you love the soft furnishing ideas in this book but don't want to print or dye the fabric. Go ahead! The project patterns all stand alone. In fact, I've included one or two projects that don't require any fabric printing or dyeing at all. However, if the opportunity to add colour or ring the changes to existing textiles is just too great, I have included plenty of fun methods to create decorative fabric including printing with wooden blocks, toilet rolls, a sponge or egg ring, the edge of a ruler or with bubble wrap. All produce different results. Stencilling is a skill that is easy to master. I show you how to create stencils using a craft knife, self-healing cutting mat and thick plastic, but you could also use a paper doily as a stencil – it creates a lovely lacy effect on the fabric, or if you prefer geometric designs, use masking tape to mask off areas of fabric, and brush colour into the remaining areas.
First choose a project that you'd like to make, then decide which printing, dyeing, or embellishment technique suits that project. Feel free to experiment with the different techniques, or combine them. Cushion covers, for example, may be printed, dyed or embellished - or a combination of all three!
Basic sewing skills are all you'll require for each project. I’ve deliberately kept them simple. I do suggest you to use a sewing machine in the sewing projects however, as it speeds up the process.
Don’t feel like sewing? For some of the projects no sewing is needed, the embellished lampshade, for example requires frayed fabrics and a hot glue gun.
I love textiles. They make me happy and I hope my enthusiasm rubs off on you. I wish you as much pleasure in making and creating these projects as I had in designing these fabrics and projects for you and your home.

14
Craft projects all require a multitude of equipment. Very few specialist items are required for the projects in this book, and many tools will already be in your kitchen drawers.
To draw a stencil design you'll need an HB pencil, tracing paper, scissors, thick sheets of plastic to cut the stencil from, a self-healing cutting mat on which to cut the plastic and a craft knife.
I find the best place to paint fabric is at the kitchen table, although any large flat surface where there's a good source of light will do. If I am dyeing fabric, I prefer to work outside because any spills will stain the floor. Protect the work surface with newspaper so that you don't damage it. I put a cheap plastic throwaway tablecloth on top of the newspaper and use masking tape to hold it in place. If you are painting or dyeing fabric you'll need to be close to a sink.
For fabric painting you will need some inexpensive paint brushes –one or two small, medium or large sizes for applying and mixing paints.
Water-based fabric paint is available in 75 ml (2½ fl oz) tubes or 300 ml (½ pint) pots from craft shops, art suppliers or online and in a huge assortment of colours. I use Permaset Fabric Printing Colour, which is made permanent by ironing the dried paint with a hot iron. After ironing the print is wash-, dry clean- and rub-resistant. Always read the manufacturer's instructions for use since brands and products vary.
You will also need a container in which to mix paint, plastic or glass pots with lids in which to store mixed paint, and your chosen printing tool. For printing, you will need a paint tray (I use a baking tray) that is big enough to accommodate the print tool.
For shibori dyeing you will need 10 blocks of wood, each 10 cm (4 in) long and 1 cm (3/8 in) thick. You'll also need a bucket in which to mix the dye. If you choose one that has a lid, you'll be able to store any unused dye for another project. You'll also need a large bag of plastic cable ties to secure the wood blocks to the fabric, and a packet of fabric dye. For shibori, I use the traditional dark blue colour, denim blue. I use Rit dye but any other brand will work well. For 3 m (3 yd) of fabric a 30 g (1 oz) sachet is sufficient. You'll also need a stick to mix the dye bath. To protect your clothes and skin wear a plastic apron and plastic gloves.
The cloth you choose to work with and from which you will make your project is important. Some dyes and paints will not take to fabrics that contain synthetic or manmade elements, or they may produce a much paler version of the colour you were hoping for. I love using 100 per cent linen or silk. This fabric has a luxurious quality, and has a more open woven texture, which lends itself to producing some interesting effects with print and dye. Because it is a natural product the colour density will be strong.
If you are going to launder the finished item, you will need to wash and dry the fabric before you
tools & materials
colour it. Press the fabric using an iron and ironing board so that it is crease-free before you begin. For fixing (setting) fabric paints, I also recommend that you have an old cloth that you put over the paint to protect the surface of the iron. You don’t need to wash the fabric for other projects such as lampshades.
A sewing machine is an essential tool. Though you could hand sew each item, if you like, a sewing machine will certainly speed up the process. Choose a sewing thread that is natural if you are working with natural fabrics – cotton is fine and will accept fabric dye or paint. Your sewing kit will ideally include a fabric marker, a selection of sewing needles, fabric scissors, a ruler, tape measure, a quick unpick and pins.
Finally to make and decorate the projects an assortment of ribbons, braids, buttons, bias binding, zippers and velcro are used. Some projects require wadding (batting), household brown string, elastic bands, spray glue, a hot glue gun and hot glue.

elements of design 17
elements of design
Unless you're making a project in which the design is to be printed all over - with bubble wrap - for instance, there are a few things to consider before you get busy with the paint.
Do you want an all-over design, in which the motifs are evenly spaced across and along the fabric? If this is what you're after then using a fabric marker to lightly mark the position of each motif on the fabric may produce a more even result than placing a motif by eye, especially if you're not quite sure if you'll get the spacing accurate. Harmonious designs, with evenly-spaced motifs have a rhythm that the eye moves over with ease. These motifs can be any shape, but are usually in proportion with an amount of space around that the eye can rest upon. These designs may look simple, but the larger the piece of fabric, the more work will be required to make sure you have a balanced design. If you're incorporating more than one motif into the design, look at how the shapes work together as well as how they work within the space. Check too, that the space around them makes an interesting shape.
Choose a motif that is an apropriate scale for the item that you are making. A finished small-scale item will look odd if it has an over-sized motif on it that can't be seen clearly. Similarly a very large item with a very small motif will have no momentum and the motif may become lost within the fabric.
Geometric designs may be a good choice for a first project since the shapes you use have a strong design presence. If you want a bold effect, often a
large-scale motif is required. Alternatively, if you are want a subtle, muted effect then the motif will be smaller in scale and possibly lighter in tone.
I suggest that you practise on paper before you start printing on cloth so that you can see how the design elements work together with each other and with your chosen colour. Take your time, and try the design on a scrap of fabric. The fabric texture may affect how much paint you need to use, or how firmly you press on the printing tool.
COLOURAnother consideration is the colour that you will use for the design. You may be designing a project to co-ordinate with existing furnishings, so trialling different colour or tone combinations and leaving them to dry so that you're sure they will dry to the shade that you want is important. Some fabric paints dry to a a darker tone than the wet colour, while others are lighter once they are dry. The base colour of the fabric also affects the finished colour.
Printing tone on tone, meaning choosing a paint colour that is very similar to the fabric colour you are printing on, will give you a very subtle effect. If you are making a range of projects for a room, try to co-ordinate the colours or motifs so that the items look good when placed together.
Whatever colour I use I always start with less paint on the brush and add layers by degrees to see what the effect is. Some motifs may require gradation of paint to create depth and variation to the design.

Shibori is a traditional Japanese technique of creating patterns on fabric by clamping, twisting, stitching, folding and wrapping fabric, then placing it into a vat of dye. The areas of cloth that are tied become impenetrable to the fabric dye. There are many methods of binding the cloth and each creates a different pattern on the finished dyed cloth. Traditionally this dye would have been made from the indigo plant. Today, we can use commercial dyes to create a very similar effect. I love unravelling the dyed fabric. It’s a bit like unwrapping a present – you’re never quite sure what to expect. Every piece of Shibori is unique and that makes it special. I find silk produces the best results because it can be clamped and compressed very tightly, which creates a well defined and even print.
1 Cut a piece of fabric to the length required for the project. Fold the fabric concertina-style, starting at one end and making the folds 5–6 cm (2–2½ in) wide. Press each fold with an iron as you go.
2 Clamp the fabric between two wooden blocks and secure with plastic ties. Make sure you clamp the fabric as tight as possible to stop the dye from penetrating the fabric.
3 Place the next wood blocks at an angle across the folded layers of fabric to create a different pattern. Secure with ties, string or elastic bands at each end of the wooden blocks. Continue to work across the folded fabric.
4 Alternatively, you could wrap a piece of string around the fabric, instead of using wood blocks, which will leave a different mark. Tie the string as tightly as you can to resist the dye.
you will need
silk, silk satin, cotton, rayon fabric
fabric scisors
iron and ironing board
Wooden blocks approximately 10 cm
(4 in) long
Plastic cable ties or string or elastic
bands to tie the wood
blocks to the fabric
fabric dye
Bucket for the dye
stick for mixing dye
clothes airer
dye fixative
japanese shibori resist dyeing
printing & dyeing techniques 55
Below: Mixing the dye the traditional way.

simply this 57
5 Mix the dye in the bucket according to the manufacturer’s instructions.
6 Place the clamped fabric bundles into the dye bucket. The longer you leave the fabric in the dye the more intense the resulting colour will be. Add three or four scraps of fabric to the bucket, then remove each at a time at different intervals so you can get a sense of the strength of colour.
7 When you pull the fabric out, undo the wood blocks and string and hang on the line or over a clothes rack until it dries.
8 You may need to use a fixative so follow the manufacturer’s instructions to set the dye.
Projects decorated with this techniqueWheat bag, scarf, tea towel, cushion covers.
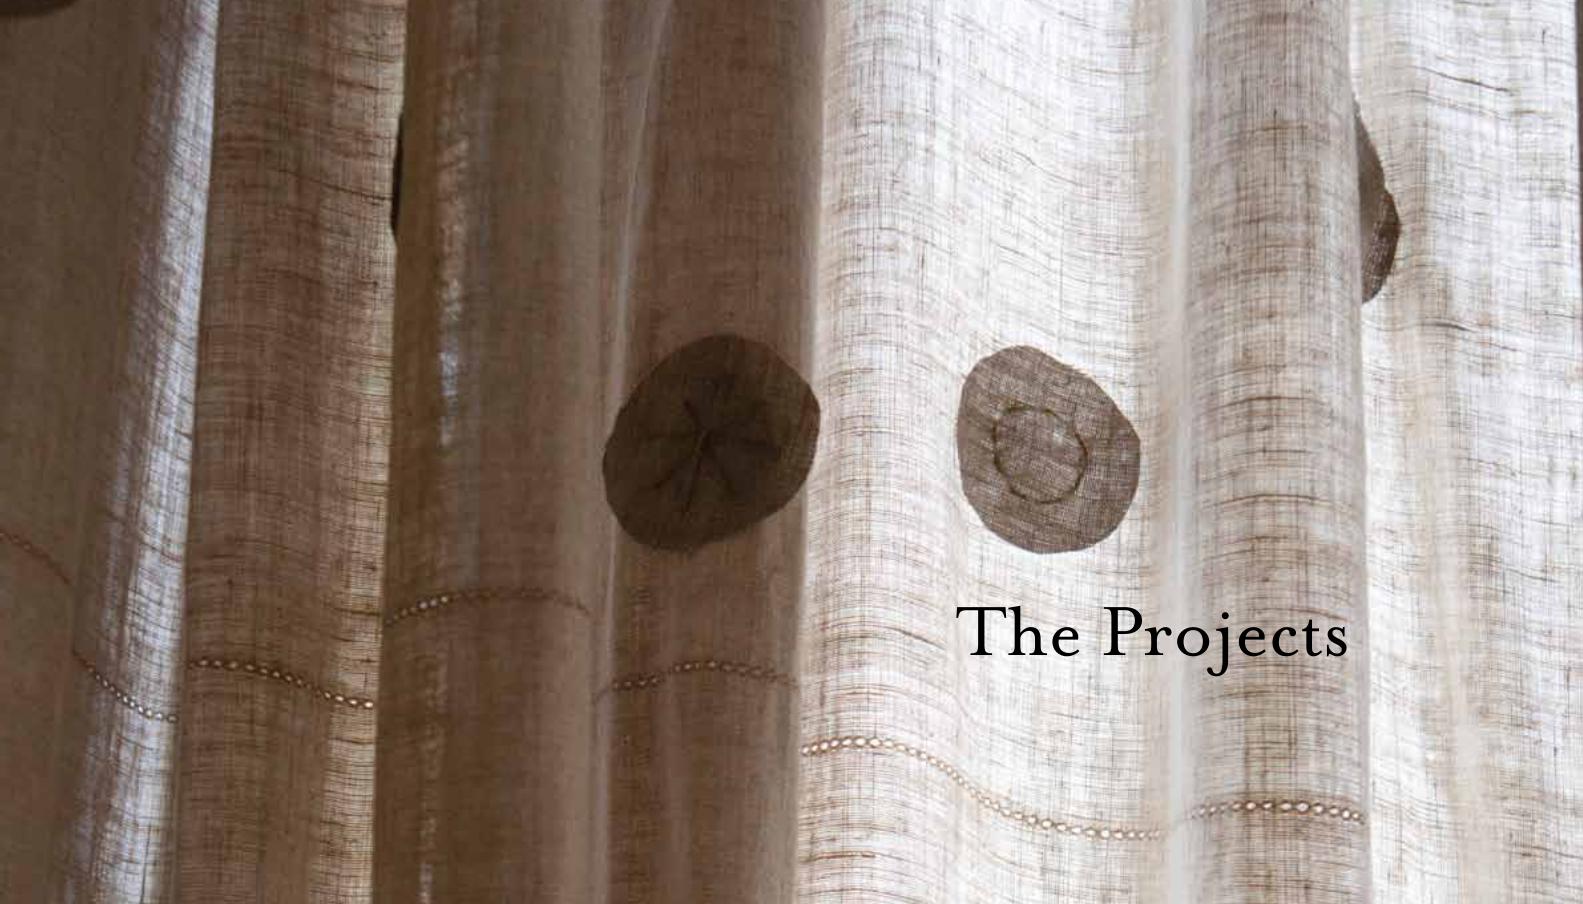
The Projects

Kitchen

62 kitchen
you will need
tape measure
Pencil and paper
Wadding (batting) (optional)
fabric scissors
scraps of co-ordinating fabric
iron and ironing board
Backing fabric
Pins
sewing machine
thread
string or thin ribbon
Pins
I love coffee and like to drink it in leisurely fashion. In order to help keep the coffee warm, I made an upcycled cosy using scraps of fabric.
1 To work out the dimensions of the finished cosy, first measure the height of the coffee press from beneath the pouring lip to the base and note your measurement. Measure around the circumference of the coffee press, not including the handle area and note the measure.
2 Cut a piece of wadding to the dimensions of the measurement if you are using lightweight fabrics. Cut a piece of backing fabric adding 3 cm (1¼ in) to the length and height of your measurement for seam allowances. Press in a small hem all around.
3 Cut the scrap fabrics into strips, each 3 cm (1¼ in) longer than the height measurement of the coffee press, to allow for seam allowances. My strips were 5 cm (2 in) wide. Some of my strips have frayed edges, which I have used as a design feature.
4 Arrange the strips right side up and overlapping slightly. There should be enough strips to fit around the circumference of the coffee press, plus a 3 cm (1¼ in) seam allowance. The overlapping will help provide insulation.
5 Press the strips, pin, then stitch them together using straight or zigzag stitch on the sewing maching and a matching thread. Press. Turn in to the wrong side a 1.5 cm (5/8 in) seam allowance at the top and bottom of the panel.
french coffee Press cosy


kitchen 67
Useful to hold all those surplus carrier bags in one place, this plastic bag holder can be hung in the kitchen or laundry room for easy access. Why not co-ordinate the colourscheme with those of your tea towels or pot holder? For this project I have used the masking tape printing method.
1 Fold the ribbon or tape in half to form a hanging loop and stitch to the side seam, 5 cm (2 in) from the top raw edge (the top is a short end).
2 Fold the printed fabric in half along the short edge, with right sides together and raw edges aligned. Sew the 70 cm (27½ in) edges together using a 1.5 cm (5/8 in) seam allowance. Backstitch over the hanging loop to strengthen it.
3 Turn in a 0.5 cm (¼ in) hem at the top and bottom raw edges and press in place. Turn in another hem at 1.5 cm (5/8 in) and press. Unpick the seam to create an opening into the channel. Stitch in place close to the turned edge to create a small channel through which to thread the elastic.
4 Use a safety pin to pin through the elastic and thread it through the channel. Stitch both ends of the elastic together and then close the small opening with a slipstitch using a needle and thread.
you will need
masking-tape-printed fabric,
70 x 50 cm (27½ x 20 in)
sewing machine
thread
ribbon or tape, 20 cm (8 in)
elastic, 2, lengths each 20 x 1 cm
(8 x ³/8 in) wide
safety pin
sewing needle
Plastic Bag holder


kitchen 71
I have used the masking tape printing technique for this project, which features a masking tape-printed pocket on a plain apron. I have graded the amount of ink so that each stripe had a variation in density. I have co-ordinated the colours of my ties with the print colour used on the pocket.
1 Cut one pocket for the apron from printed fabric 23 x 23 cm (9 x 9 in).
2 From the ribbon, cut two lengths each 1 m (39 in) for the ties and one length 56 cm (22 in) for the neck strap.
3 Using the diagram and the measurements provided in Templates, draft a pattern on paper, add 1.5 cm (5/8 in) all around for seam allowances and then cut out your apron.
4 Turn in and press 0.75 cm (¼ in) all around the apron, then turn in and press 0.75 cm (¼ in) again and topstitch all around the apron using matching thread. Trim any hanging threads and press.
5 Turn in and press a 0.75cm (¼ in) seam allowance all around the pocket, then turn in and press 0.75 cm (¼ in) again. Topstitch the top edge of the pocket to finish off the opening.
6 Pin and stitch the pocket to the apron following the pattern as a guide. Top stitch the sides and bottom of the pocket, backstitching at the beginning and end to reinforce the stitching.
7 Turn in and press a small hem on ribbon ends. Stitch to the neck and waist of the apron. Backstitch to strengthen the stitching.
8 I have added extra ribbon to create a loop design detail at the front of the apron. Back stitch to strengthen also. Press.
apron
you will need
masking-tape printed linen , 23 x 23
cm (9 x 9 in)
Linen, 1.5 x 1.2 m (60 x 48 in)
fabric scissors
ribbon, 2.6 m (2 ¾ yd) x 4 cm
(1 ½ in) wide
fabric
Paper to make a pattern
Pencil
tape measure
iron and ironing board
sewing machine
matching thread


74 kitchen
you will need
fabric scissors
assortment of fabric lengths
hot glue gun
glue
Lengths of fabric are plaited (braided) together. The plait is then formed into a circle and held in place with glue.
1 Cut the fabric into strips approximately 2 cm (¾ in) thick. If you want the finished mat to be thicker, cut the fabric strips wider.
2 Tie three strips of fabric together at one end of the lengths with a knot that is tight and flat.
3 Plait (braid) the strips. You will find that when you get to the end of the fabric it will be uneven. Extend any strip by plaiting new lengths with the old one. Do this for each strip. The more you plait the bigger the mat. For my mat I plaited 2 m (78 in).
4 When you have finished plaiting, join the three strips together with hot glue, following the manufacturer's instructions and trim any excess fabric.
5 Use the knotted end to start turning and gluing the plait into a circle. Work in small sections so that the glue doesn’t dry before the fabric is secured. Tuck the end under to finish and glue it flat.
fabric trivet