Embed Size (px)
Citation preview

Removing Proxy Settings from Windows 7 when using Internet
Explorer/Firefox. Version 1.1
Table of Contents
Removing Proxy server from Firefox – Regardless of Operating System. ............................ 2
Removing Proxy server settings from Windows 7 when using Internet Explorer. ............... 7
IMPORTANT NOTICE:
If you are using Firefox as your Internet browser please ensure that you complete only the instructions on the following pages as Firefox settings work independently of the operating system being used.
If you use Internet Explorer or Google Chrome browsers please refer to the instructions specifically for your operating system (XP, Vista, MAC OS X or Windows 7).
Removing Proxy server from Firefox – Regardless of Operating System.
1. Open Firefox
2. Click the Tools option.
3. A drop down box will appear. Select Options. See screen shot example below
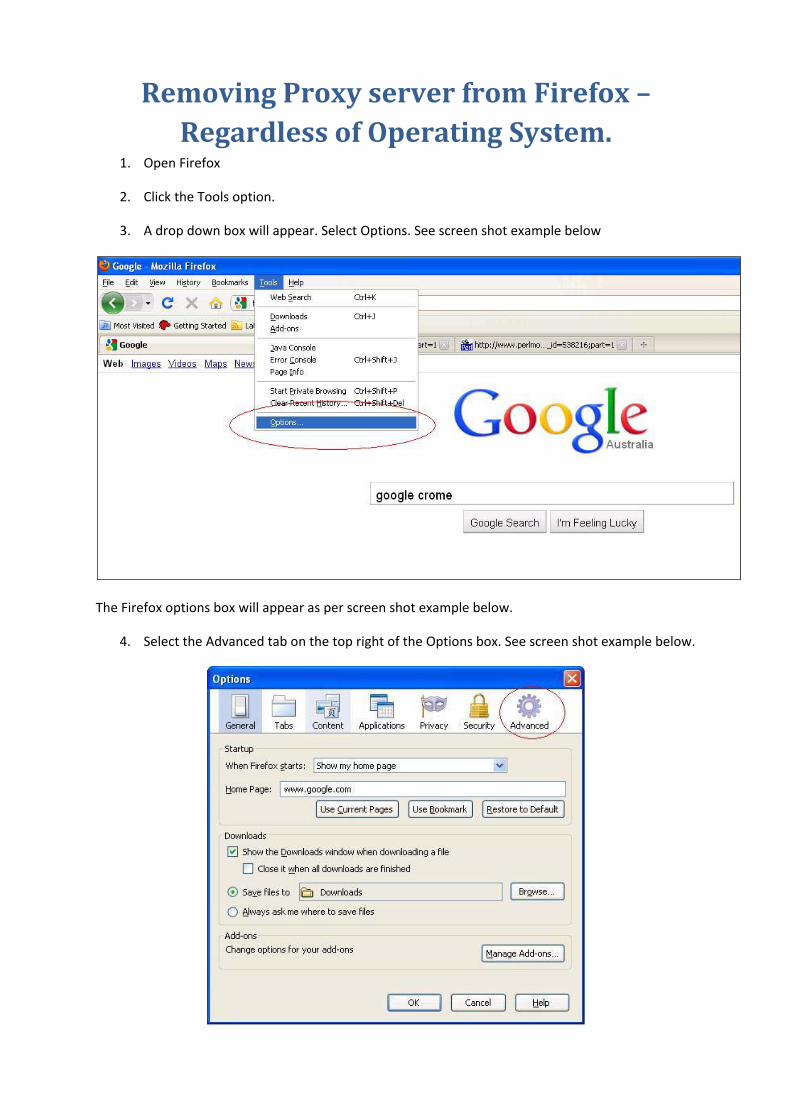
The Firefox options box will appear as per screen shot example below.
4. Select the Advanced tab on the top right of the Options box. See screen shot example below.
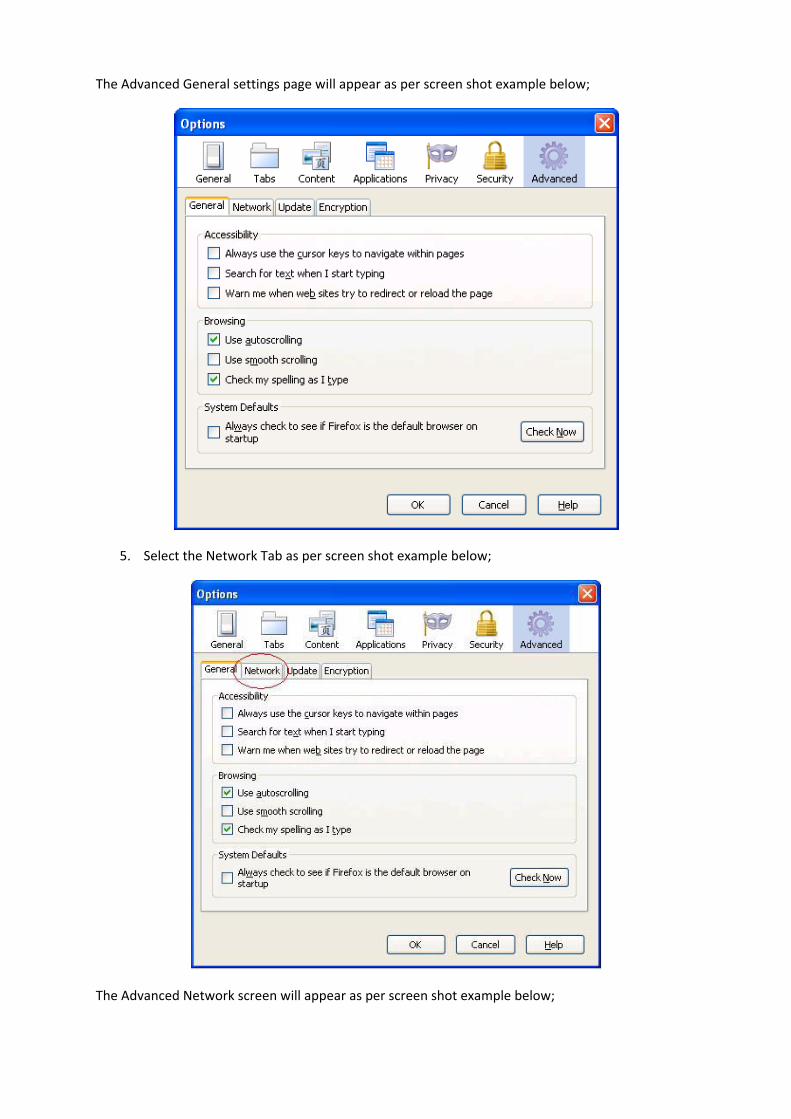
The Advanced General settings page will appear as per screen shot example below;
5. Select the Network Tab as per screen shot example below;
The Advanced Network screen will appear as per screen shot example below;
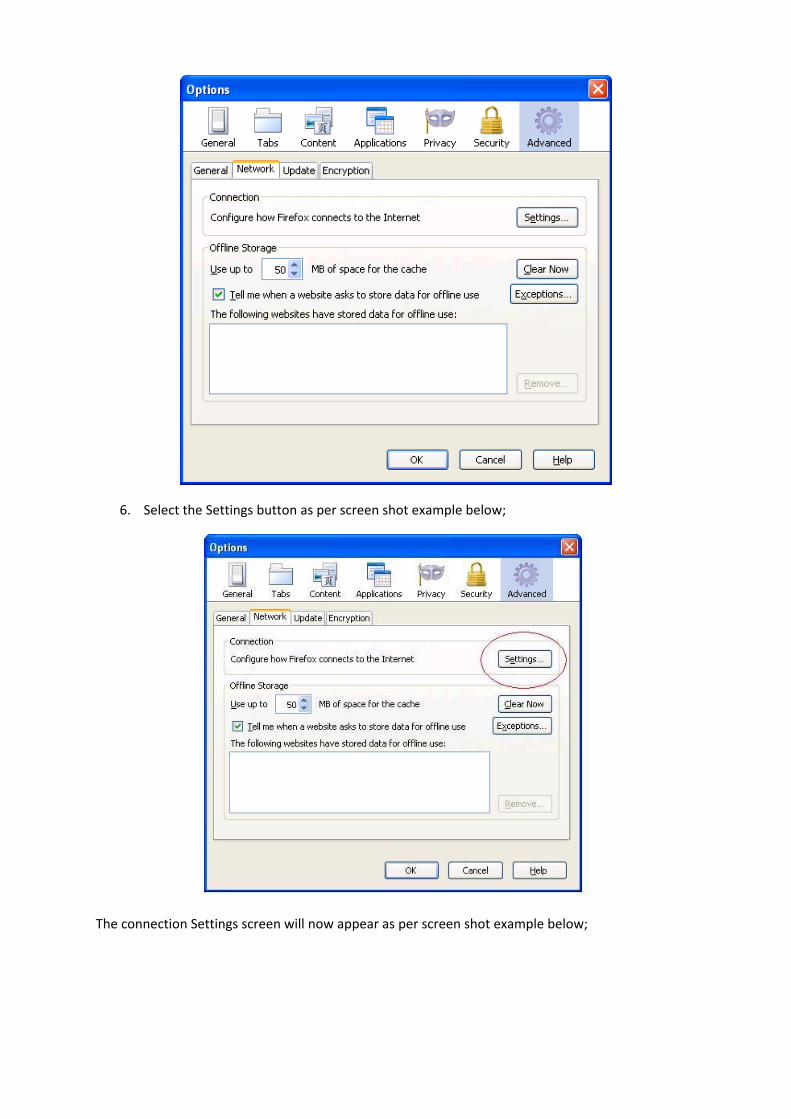
6. Select the Settings button as per screen shot example below;
The connection Settings screen will now appear as per screen shot example below;
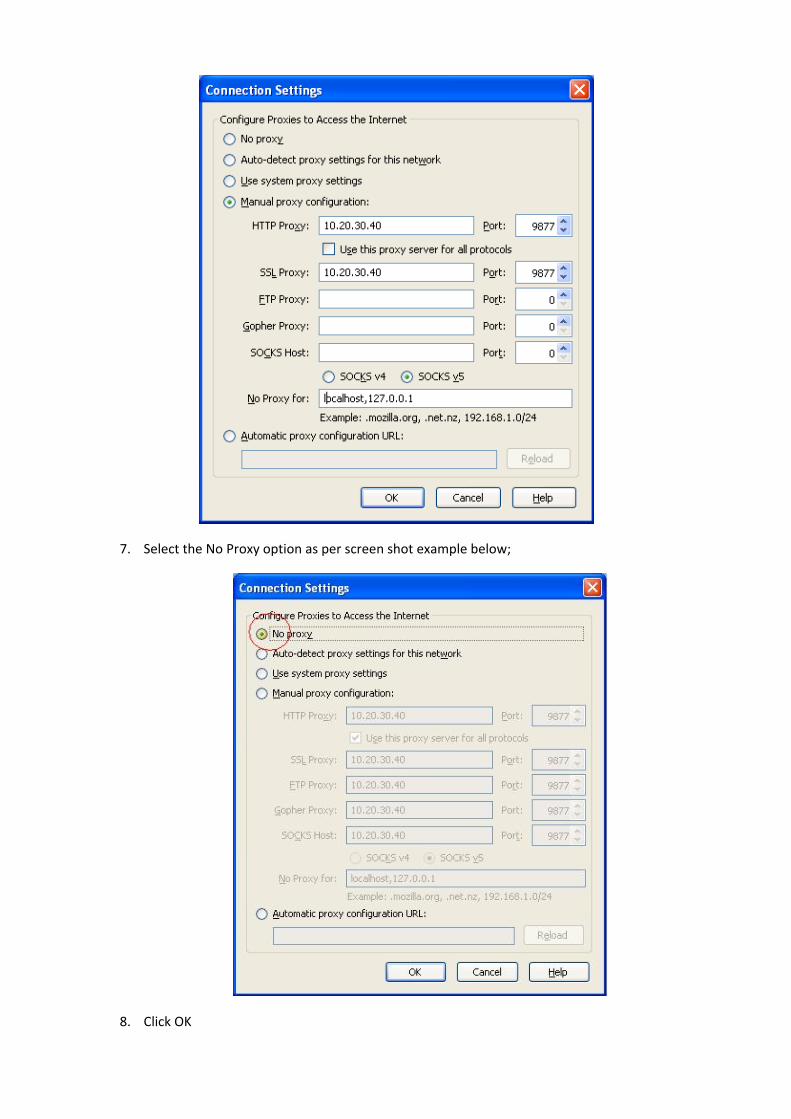
7. Select the No Proxy option as per screen shot example below;
8. Click OK

9. You will be returned to Options Page. See screen show example below
10. Click OK again and the Options box will close.
11. Finally, please close Firefox then re‐open it so that the proxy less settings can take effect.
You are now finished. Thank you for your assistance
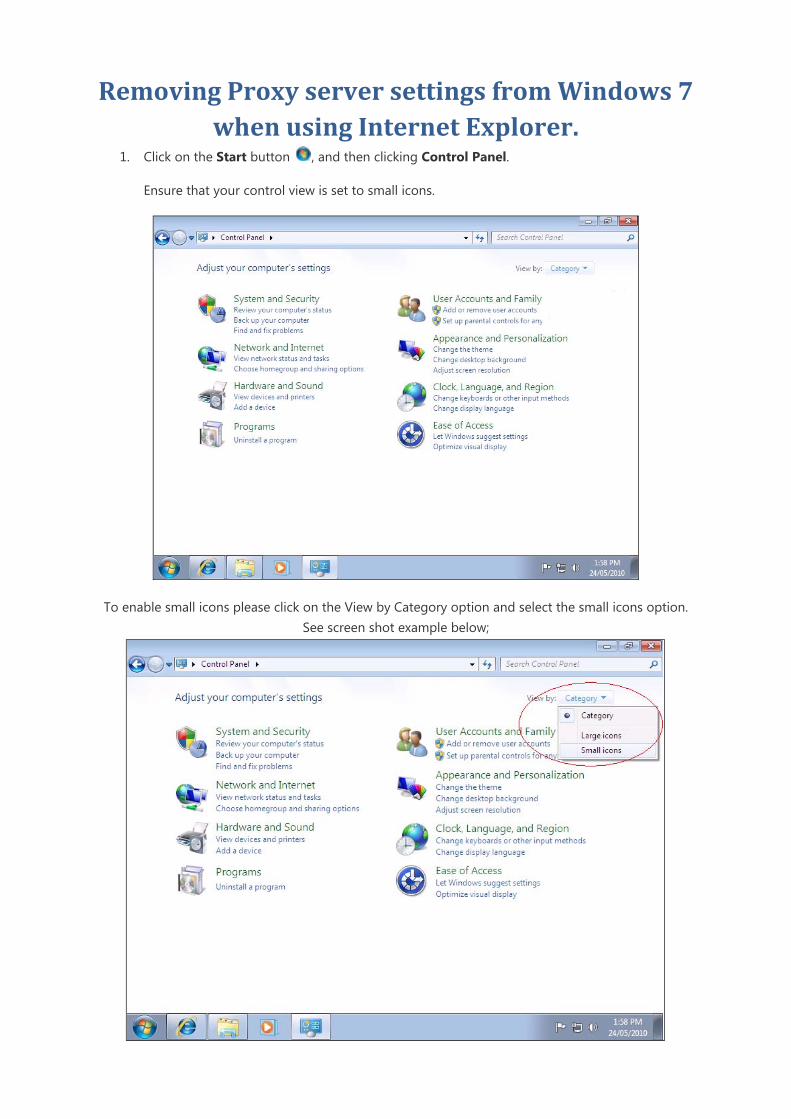
Removing Proxy server settings from Windows 7 when using Internet Explorer.
1. Click on the Start button , and then clicking Control Panel.
Ensure that your control view is set to small icons.
To enable small icons please click on the View by Category option and select the small icons option. See screen shot example below;

2. When the Control panel changes to small icons mode please double click Internet Options.
3. The Internet properties box will open.
4. Select the Connects tab as per screen shot example below;

5. Select the LAN Settings button in the lower right of the Connections page as per screen shot example below;
The Local Area Network (LAN) Settings box will appear as per screen shot example below; Please Note: The address numbers shown in this example will be different from the numbers that you will see on your screen. This is due to each address been unique. The port number however is always 9877.
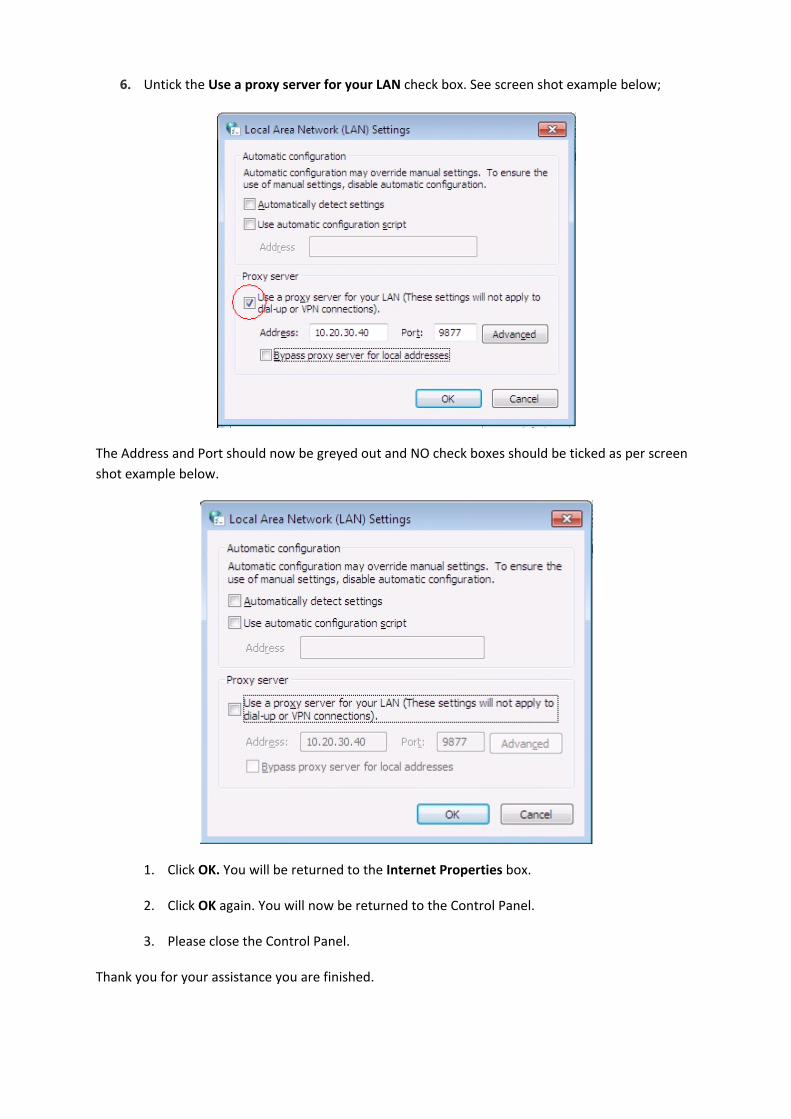
6. Untick the Use a proxy server for your LAN check box. See screen shot example below;
The Address and Port should now be greyed out and NO check boxes should be ticked as per screen shot example below.
1. Click OK. You will be returned to the Internet Properties box.
2. Click OK again. You will now be returned to the Control Panel.
3. Please close the Control Panel.
Thank you for your assistance you are finished.