Embed Size (px)
Citation preview
1
VAT IMPORT DECLARATION USER GUIDE
(REGISTERED AND NON-REGISTERED USERS)
December 2017
2
Contents
1. Brief overview of this user guide .......................................................................... 3
2. Summary of Scenarios for Registered Importers for VAT .................................. 4
3. Summary of scenarios for Non-Registered Importers for VAT ........................... 4
4. VAT Scenarios details for Non-Registered Importers ......................................... 6
Appendix A: Overview of the sign-up process ......................................................... 11
Appendix B: Important On-Screen Tips .................................................................... 13
3
1. Brief overview of this user guide
This guide is prepared to help VAT registered importers understand the different scenarios and steps to be followed in term of importing goods into the UAE, navigate through the Federal Tax Authority (FTA) website and successfully declare goods subject to VAT. It is designed to help you:
understand the process for declaring goods at Customs
navigate to the VAT declarations forms to declare goods subject to VAT
provide accurate answers to the questions on the VAT Declaration Import forms by explaining what information you are required to provide
provide Customs with the appropriate proof to validate the imports declaration and the VAT due; and
understand the icons and symbols included in the forms. Setting up an e-Services account is similar to setting up the other online accounts that you hold. The VAT import declaration form is also designed to be straightforward and wherever possible it will auto-complete information for you. If you need help setting up your e-Services account or have questions on specific fields
in the VAT import declaration form, please contact us.
4
2. Summary of Scenarios for Registered Importers for VAT
As a VAT registered importer, you shall follow specific steps for each scenario to identify
the declarations you will be required to file. The guide covers the following scenarios:
1. Scenario 1: Importing taxable goods into UAE mainland
2. Scenario 2: Importing and then exporting the goods to another country
For scenarios 1-2, you must file your returns and pay the VAT due at the time of filing your VAT return. For details about the filing process for VAT, refer to the VAT returns user guide published on FTA portal.
3. Scenario 3: A traveler importing goods valued up to AED 3000.
4. Scenario 4: Importing returned goods (being certain exported goods which came
back into UAE) into UAE mainland.
5. Scenario 5: A UAE National living abroad or expat coming into the UAE for the first
time importing used personal effects and household items.
6. Scenario 6: The military and internal security forces Importing goods into UAE
mainland.
7. Scenario 7: Importing goods into a VAT designated zone.
8. Scenario 8: Transferring goods from one VAT designated zone to another VAT
designated zone.
For scenarios 3-8, VAT is not applicable. No further details are documented in this
guide.
3. Summary of scenarios for Non-Registered Importers for VAT
Non-registered importers are those who import goods subject to VAT irregularly without
being registered for VAT.
The document covers the following scenarios:
• Scenario 1: Import goods from outside UAE to UAE mainland
• Scenario 2: Import into UAE to export the goods outside the UAE to another country
and it is not considered under customs duty suspension
• Scenario 3: Import to export the goods outside the UAE to a GCC Country that has
implemented VAT and it is not considered under customs duty suspension
For details on steps to be followed under Scenarios 1-3 refer to section 4.1 in this
document.
5
• Scenario 4: Transfer goods from one VAT designated zone to another VAT
designated zone
• Scenario 5: Import goods into the UAE under duty suspension
For details on steps to be followed under Scenarios 4-5 refer to section 4.2 in this
document.
6
4. VAT Scenarios details for Non-Registered Importers
Below are the steps which non-registered importers have to follow in order to prepare their customs declaration, pay their VAT and have their goods cleared at Customs.
4.1 Scenarios 1-3
The process below applies to the following scenarios:
Scenario 1: Import goods into UAE mainland
Scenario 2: Import goods into UAE to export the goods outside the UAE to another country and it is not considered to be under customs duty suspension
Scenario 3: Import to export the goods outside the UAE to a GCC Country that has implemented VAT and it is not considered to be under customs suspension
1. Customs Declaration
The importer shall prepare and submit the customs declaration via standard procedures
and do the following:
Provide the necessary details about all the goods being imported;
Submit Customs Declaration for processing by Customs.
Once the declaration is approved, it moves to a “Pending Tax Payment” status.
2. Await settlement by the Customs
The customs official shall validate the declaration details, settle and approve the
declaration. The importer will receive the approval notification.
IMPORTANT: Once the declaration is sent to FTA, the customs system will not allow any
further editing of the form. The only state that the declaration form can change to is either
“approved” or “declined”.
3. Create an e-Services account
Taxable persons who are not registered but are importing goods to the UAE will first have
to create an e-Services account. The sign up process includes the following steps:
Sign up as a new user;
Verify your e-Services account; and,
Complete the verification by using your e-Services account.
For details on the steps above, please refer to the sign up process documented within
Appendix A.
7
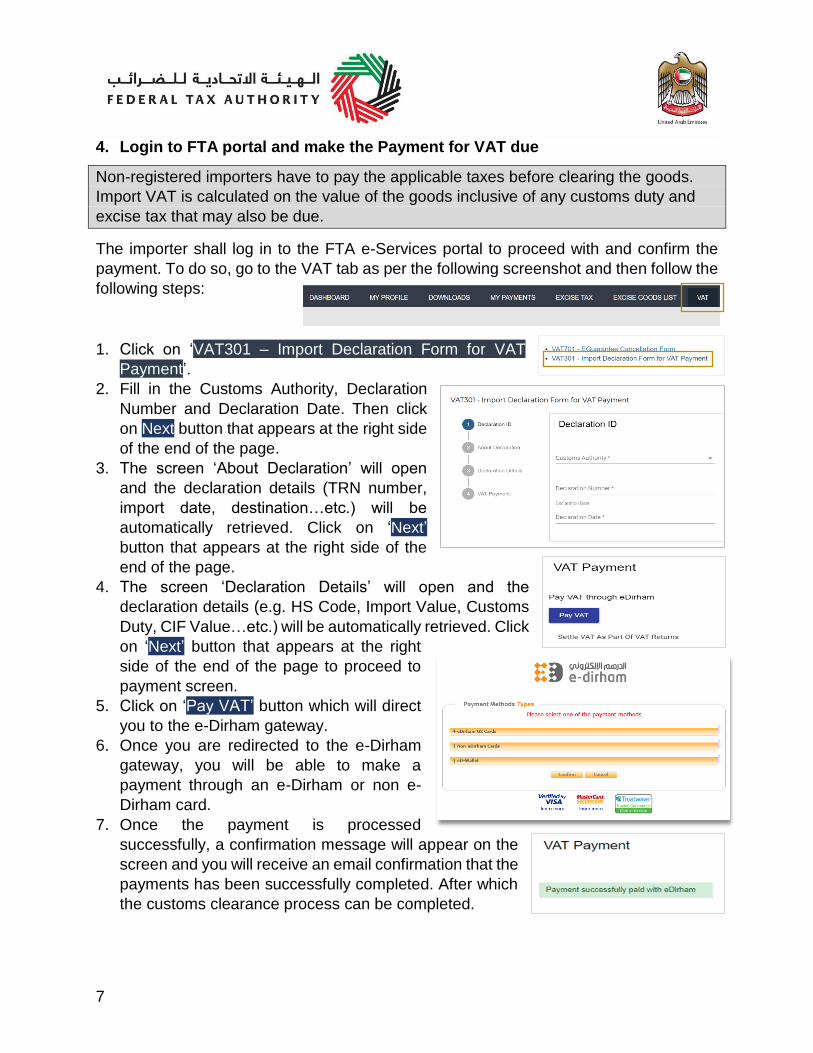
4. Login to FTA portal and make the Payment for VAT due
Non-registered importers have to pay the applicable taxes before clearing the goods.
Import VAT is calculated on the value of the goods inclusive of any customs duty and
excise tax that may also be due.
The importer shall log in to the FTA e-Services portal to proceed with and confirm the
payment. To do so, go to the VAT tab as per the following screenshot and then follow the
following steps:
1. Click on ‘VAT301 – Import Declaration Form for VAT
Payment’.
2. Fill in the Customs Authority, Declaration
Number and Declaration Date. Then click
on Next button that appears at the right side
of the end of the page.
3. The screen ‘About Declaration’ will open
and the declaration details (TRN number,
import date, destination…etc.) will be
automatically retrieved. Click on ‘Next’
button that appears at the right side of the
end of the page.
4. The screen ‘Declaration Details’ will open and the
declaration details (e.g. HS Code, Import Value, Customs
Duty, CIF Value…etc.) will be automatically retrieved. Click
on ‘Next’ button that appears at the right
side of the end of the page to proceed to
payment screen.
5. Click on ‘Pay VAT’ button which will direct
you to the e-Dirham gateway.
6. Once you are redirected to the e-Dirham
gateway, you will be able to make a
payment through an e-Dirham or non e-
Dirham card.
7. Once the payment is processed
successfully, a confirmation message will appear on the
screen and you will receive an email confirmation that the
payments has been successfully completed. After which
the customs clearance process can be completed.
8
4.2 Scenarios 4-5
The process below applies to the following scenarios:
Scenario 4: Transfer of goods from one VAT designated zone to another VAT designated zone;
Scenario 5: Import goods into the UAE under duty suspension.
1. Customs Declaration
The importer shall prepare and submit the customs declaration via standard procedures
and do the following:
Provide the necessary details about all the goods being imported;
Submit Customs Declaration for processing by Customs.
Once the declaration is approved, it moves to a “Pending Tax Payment” status.
2. Obtain e-Guarantee (Financial Security)
Obtain an e-Guarantee equal to the value of VAT due from your Bank.
Obtain the reference number of the e-Guarantee.
IMPORTANT: Once the declaration is sent to the FTA, the customs system will not allow
any further editing of the form. The only state that the declaration form can change to is
“approved” or “declined”.
3. Create an e-Services account
Taxable persons who are not registered but are importing goods to the UAE will first have
to create an e-Services account. The sign up process includes the following steps:
Sign up as a new user;
Verify your e-Services account; and
Complete the verification by using your e-Services account.
For details on the steps above, please refer to the sign up process documented within
Appendix A.
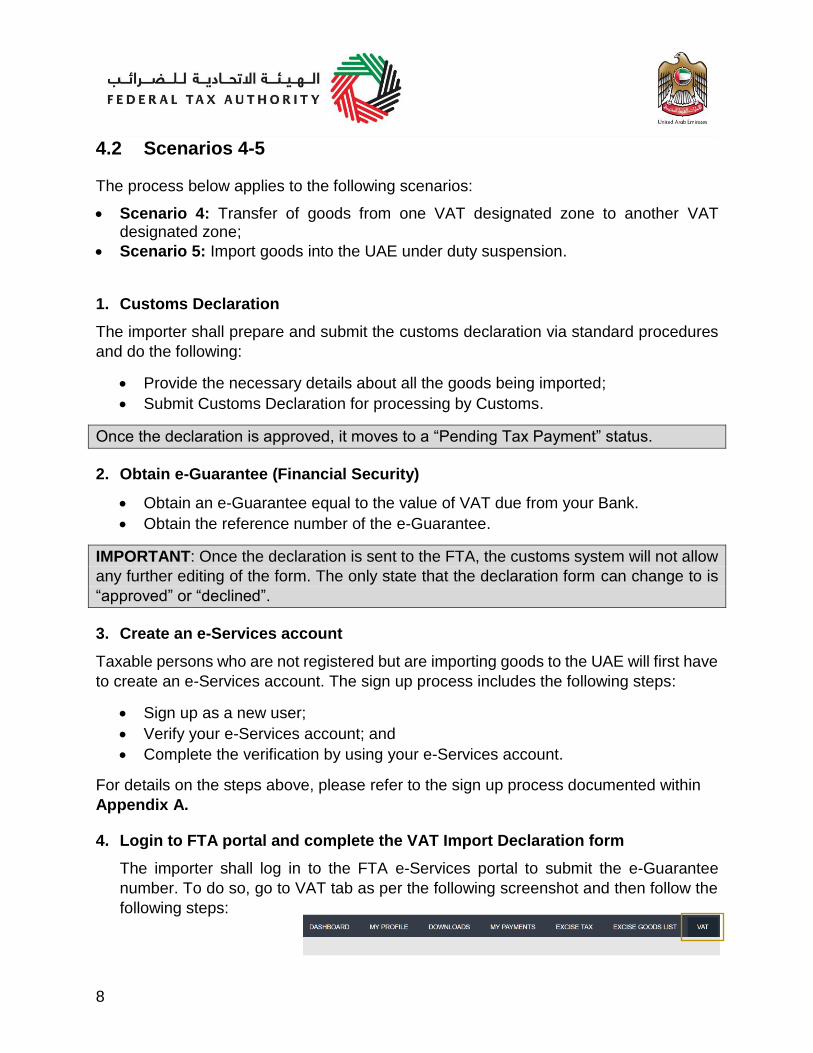
4. Login to FTA portal and complete the VAT Import Declaration form
The importer shall log in to the FTA e-Services portal to submit the e-Guarantee
number. To do so, go to VAT tab as per the following screenshot and then follow the
following steps:
9
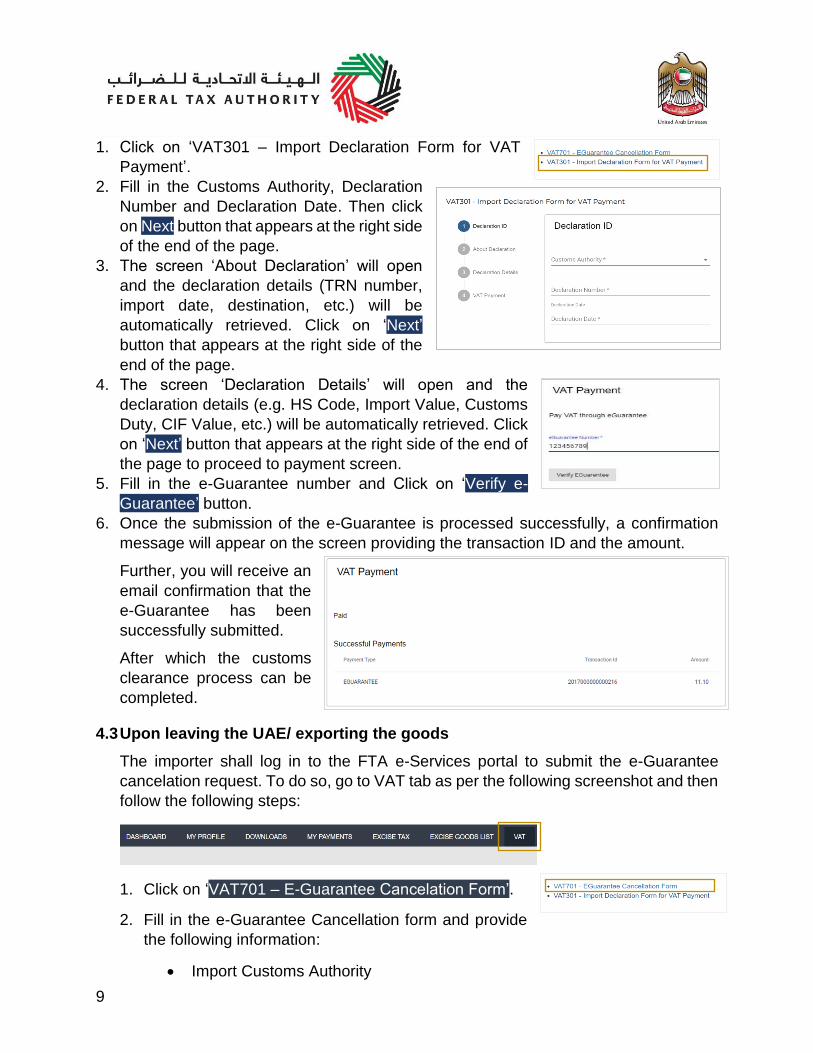
1. Click on ‘VAT301 – Import Declaration Form for VAT
Payment’.
2. Fill in the Customs Authority, Declaration
Number and Declaration Date. Then click
on Next button that appears at the right side
of the end of the page.
3. The screen ‘About Declaration’ will open
and the declaration details (TRN number,
import date, destination, etc.) will be
automatically retrieved. Click on ‘Next’
button that appears at the right side of the
end of the page.
4. The screen ‘Declaration Details’ will open and the
declaration details (e.g. HS Code, Import Value, Customs
Duty, CIF Value, etc.) will be automatically retrieved. Click
on ‘Next’ button that appears at the right side of the end of
the page to proceed to payment screen.
5. Fill in the e-Guarantee number and Click on ‘Verify e-
Guarantee’ button.
6. Once the submission of the e-Guarantee is processed successfully, a confirmation
message will appear on the screen providing the transaction ID and the amount.
Further, you will receive an
email confirmation that the
e-Guarantee has been
successfully submitted.
After which the customs
clearance process can be
completed.
4.3 Upon leaving the UAE/ exporting the goods
The importer shall log in to the FTA e-Services portal to submit the e-Guarantee
cancelation request. To do so, go to VAT tab as per the following screenshot and then
follow the following steps:
1. Click on ‘VAT701 – E-Guarantee Cancelation Form’.
2. Fill in the e-Guarantee Cancellation form and provide
the following information:
Import Customs Authority
10
Import Declaration Number
Import Declaration Date
Import Customs Registration Number
Export Customs Authority
Export Declaration Number
Export Declaration Date
Export Customs Registration Number
E-Guarantee number
Amount subject to refund
E-Guarantee file attachment
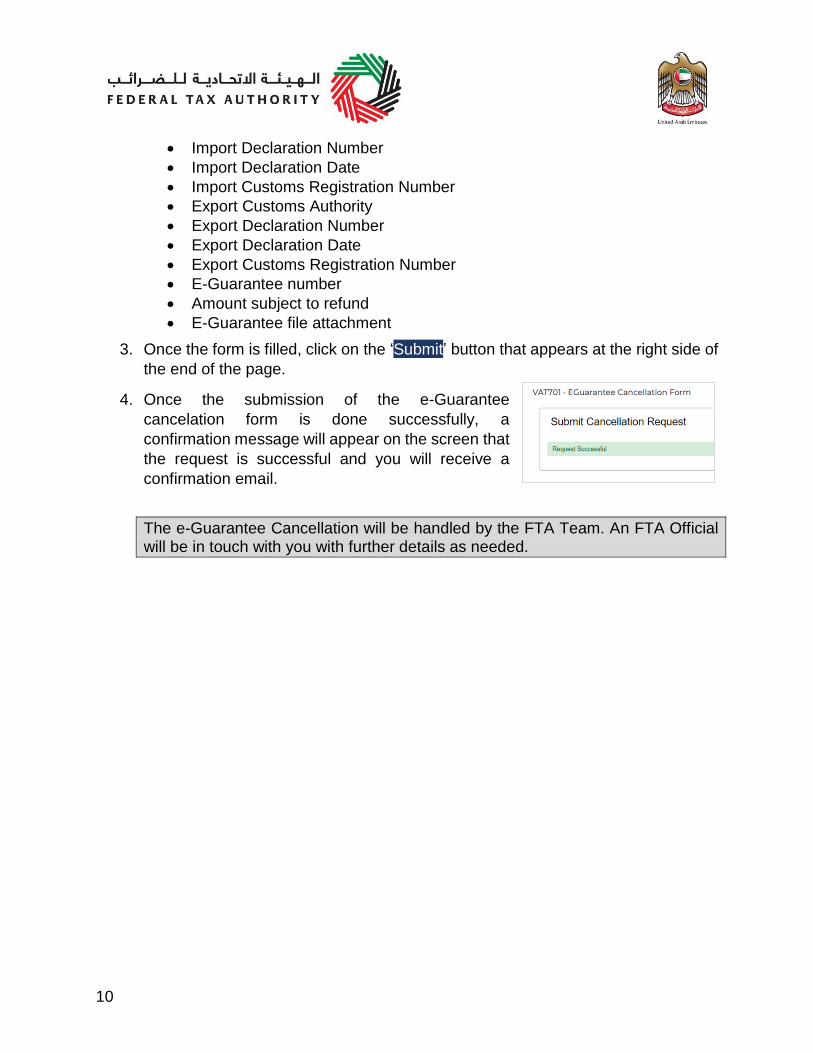
3. Once the form is filled, click on the ‘Submit’ button that appears at the right side of
the end of the page.
4. Once the submission of the e-Guarantee
cancelation form is done successfully, a
confirmation message will appear on the screen that
the request is successful and you will receive a
confirmation email.
The e-Guarantee Cancellation will be handled by the FTA Team. An FTA Official will be in touch with you with further details as needed.
11
Appendix A: Overview of the sign-up process
When you arrive at the FTA website, you will notice in the top right hand corner of the screen you have the option to either Sign up to the e-Services account service, or Login to an existing e-Services account.
1. Create an e-Services account (new users)
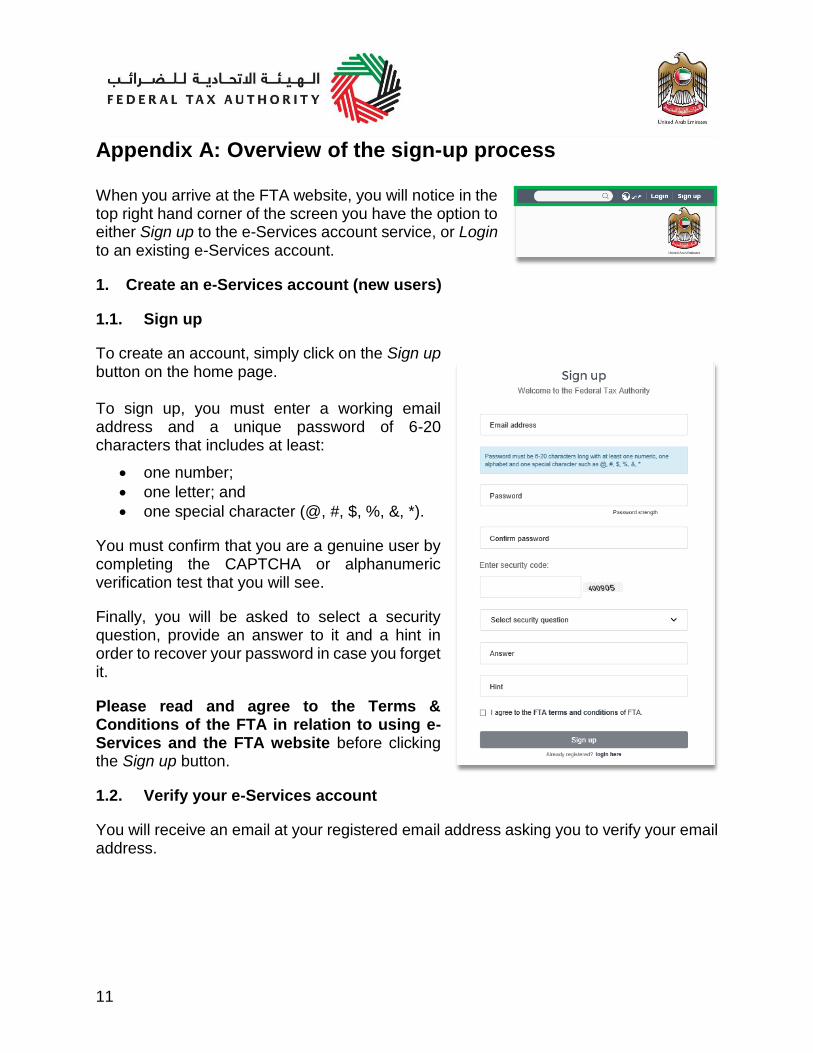
1.1. Sign up
To create an account, simply click on the Sign up button on the home page. To sign up, you must enter a working email address and a unique password of 6-20 characters that includes at least:
one number;
one letter; and
one special character (@, #, $, %, &, *).
You must confirm that you are a genuine user by completing the CAPTCHA or alphanumeric verification test that you will see.
Finally, you will be asked to select a security question, provide an answer to it and a hint in order to recover your password in case you forget it.
Please read and agree to the Terms & Conditions of the FTA in relation to using e-Services and the FTA website before clicking the Sign up button.
1.2. Verify your e-Services account
You will receive an email at your registered email address asking you to verify your email address.
12
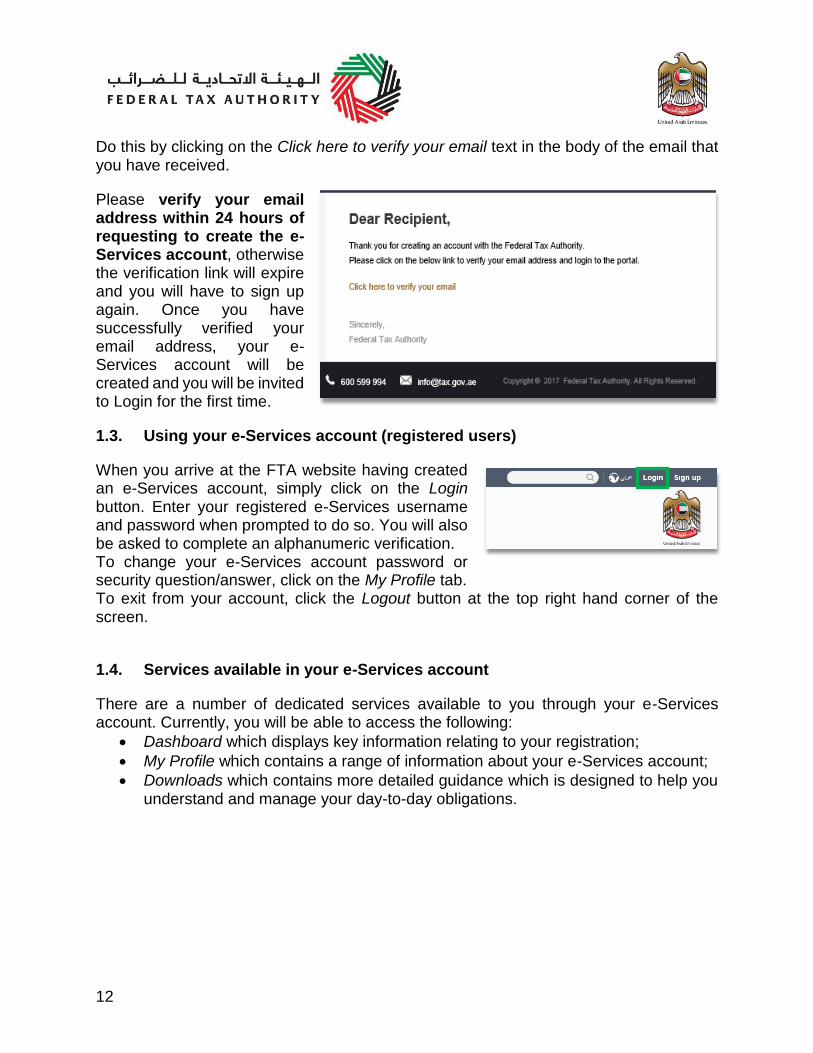
Do this by clicking on the Click here to verify your email text in the body of the email that you have received.
Please verify your email address within 24 hours of requesting to create the e-Services account, otherwise the verification link will expire and you will have to sign up again. Once you have successfully verified your email address, your e-Services account will be created and you will be invited to Login for the first time.
1.3. Using your e-Services account (registered users)
When you arrive at the FTA website having created an e-Services account, simply click on the Login button. Enter your registered e-Services username and password when prompted to do so. You will also be asked to complete an alphanumeric verification. To change your e-Services account password or security question/answer, click on the My Profile tab. To exit from your account, click the Logout button at the top right hand corner of the screen.
1.4. Services available in your e-Services account
There are a number of dedicated services available to you through your e-Services account. Currently, you will be able to access the following:
Dashboard which displays key information relating to your registration;
My Profile which contains a range of information about your e-Services account;
Downloads which contains more detailed guidance which is designed to help you understand and manage your day-to-day obligations.
13
Appendix B: Important On-Screen Tips
You can change the language of the form from Arabic to English. Click on the icon at the
top right hand side of the screen to do so.
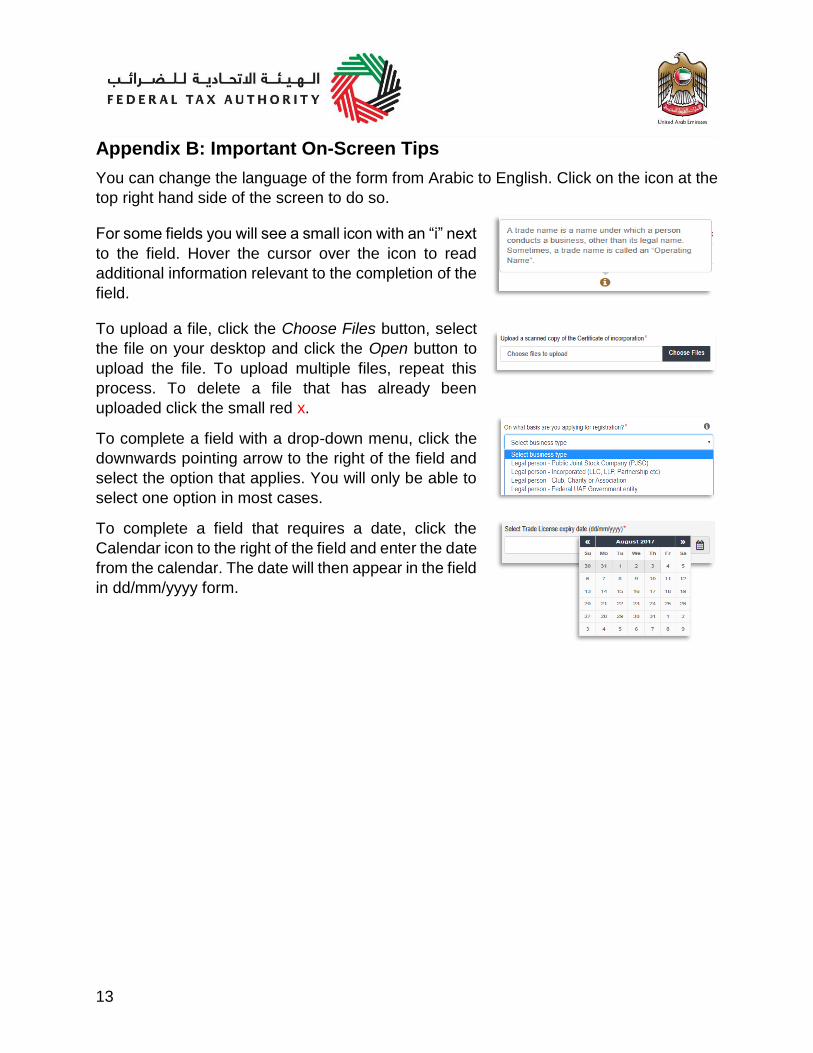
For some fields you will see a small icon with an “i” next
to the field. Hover the cursor over the icon to read
additional information relevant to the completion of the
field.
To upload a file, click the Choose Files button, select
the file on your desktop and click the Open button to
upload the file. To upload multiple files, repeat this
process. To delete a file that has already been
uploaded click the small red x.
To complete a field with a drop-down menu, click the
downwards pointing arrow to the right of the field and
select the option that applies. You will only be able to
select one option in most cases.
To complete a field that requires a date, click the
Calendar icon to the right of the field and enter the date
from the calendar. The date will then appear in the field
in dd/mm/yyyy form.