Embed Size (px)
Citation preview
CREATING A SPRING CHICKEN
A creative tutorial brought to you by:
Brought to you by
Badskirt www.badskirt.com
Sew, Mama, Sew www.sewmamasew.com
CREATING A SPRING CHICKEN
SUPPLIES
MATERIALS
Fabric sizes are approximate. If you are new to sewing, you may want to use larger
pieces to make turning curves easier.
• body fabric – 10”x20”
• beak fabric – small scrap, 5”x3”
• wing fabric – either 7”x24” or 14”x12”
• crown fabric – small scrap, 5”x8”
• feet fabric - 4”x10”
• coordinating spool of thread
• polyester or wool toyfill
• 4 small buttons, safety eyes or felt
• embellishments [optional]
TOOLS
• small hand-sewing needle
• scissors
• pinking shears [optional]
• lacquered chopstick or turning tool
• fabric pins
• hera marker or fabric pen
Brought to you by
Badskirt www.badskirt.com
Sew, Mama, Sew www.sewmamasew.com
CREATING A SPRING CHICKEN
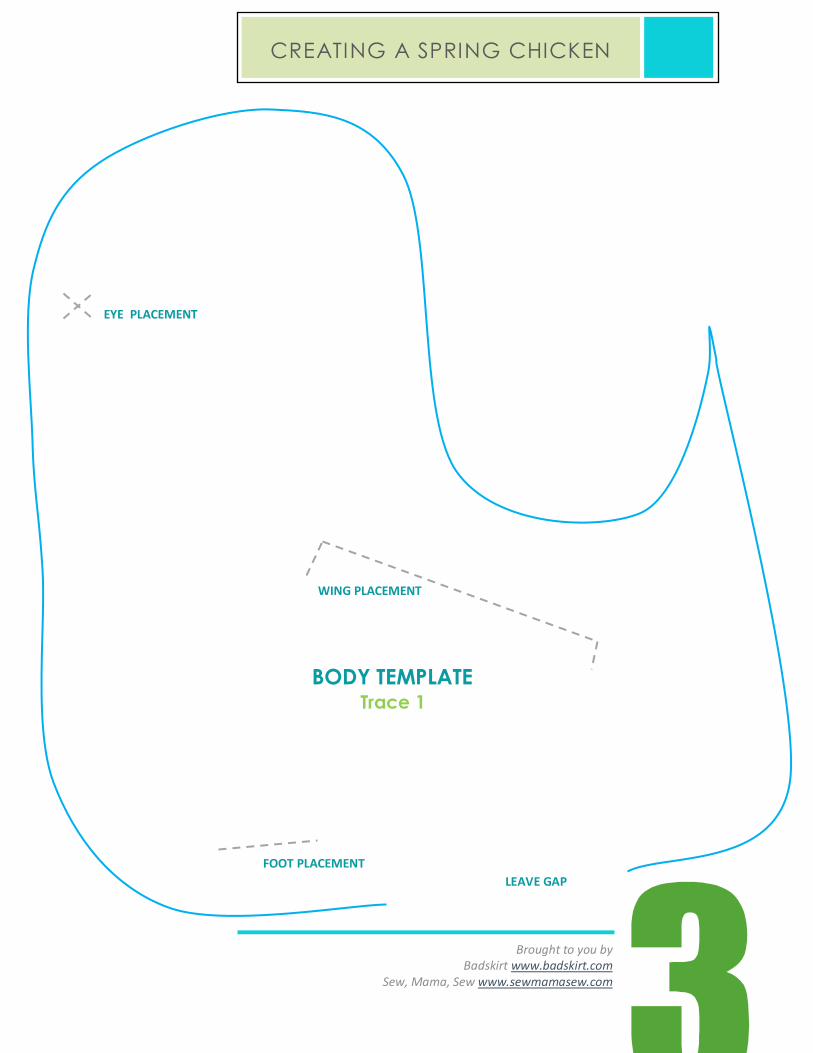
LEAVE GAP
BODY TEMPLATE
EYE PLACEMENT
Trace 1
FOOT PLACEMENT
WING PLACEMENT

Brought to you by
Badskirt www.badskirt.com
Sew, Mama, Sew www.sewmamasew.com
CREATING A SPRING CHICKEN
WING TEMPLATE
CROWN TEMPLATE
FOOT TEMPLATE
Trace 2
Trace 2
Trace 1
Brought to you by
Badskirt www.badskirt.com
Sew, Mama, Sew www.sewmamasew.com
CREATING A SPRING CHICKEN
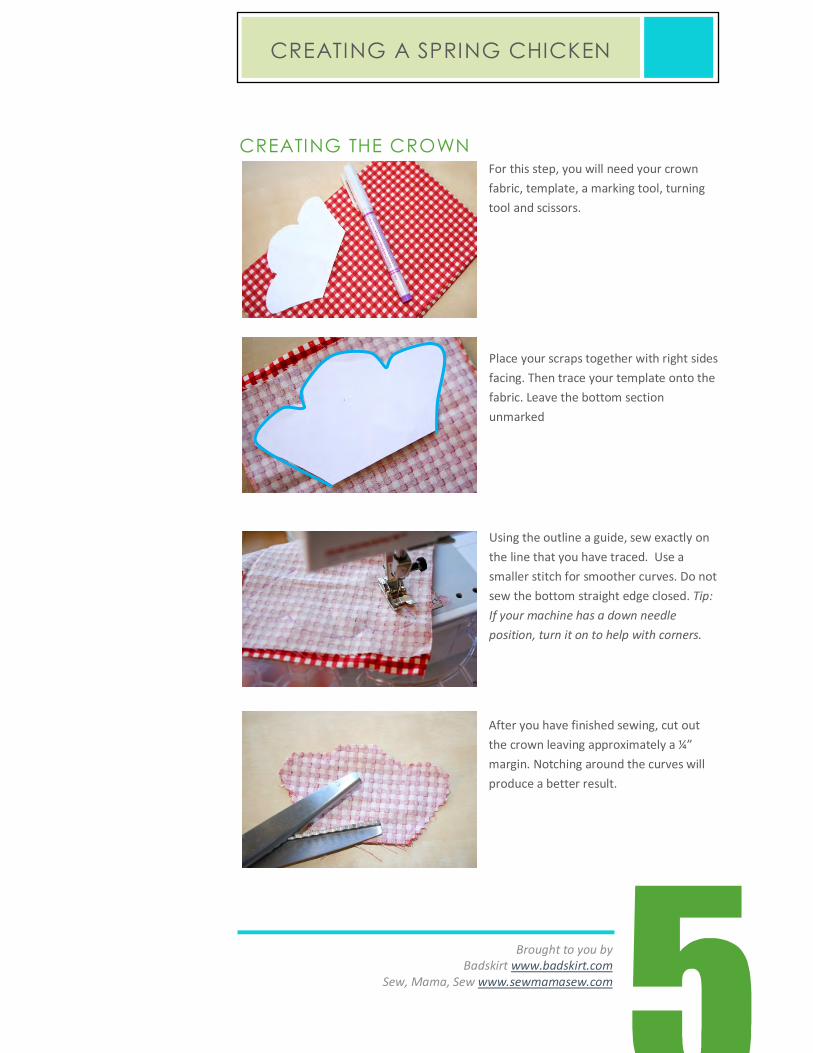
CREATING THE CROWN
For this step, you will need your crown
fabric, template, a marking tool, turning
tool and scissors.
Place your scraps together with right sides
facing. Then trace your template onto the
fabric. Leave the bottom section
unmarked
Using the outline a guide, sew exactly on
the line that you have traced. Use a
smaller stitch for smoother curves. Do not
sew the bottom straight edge closed. Tip:
If your machine has a down needle
position, turn it on to help with corners.
After you have finished sewing, cut out
the crown leaving approximately a ¼”
margin. Notching around the curves will
produce a better result.
Brought to you by
Badskirt www.badskirt.com
Sew, Mama, Sew www.sewmamasew.com
CREATING A SPRING CHICKEN
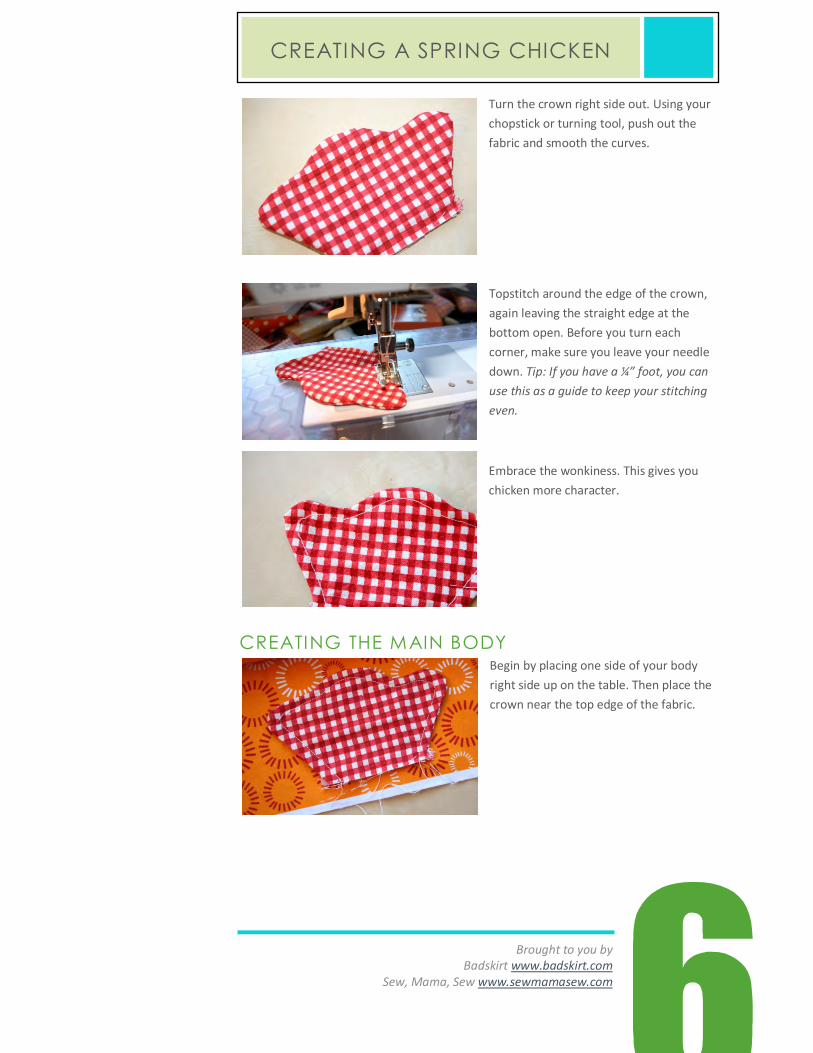
Turn the crown right side out. Using your
chopstick or turning tool, push out the
fabric and smooth the curves.
Topstitch around the edge of the crown,
again leaving the straight edge at the
bottom open. Before you turn each
corner, make sure you leave your needle
down. Tip: If you have a ¼” foot, you can
use this as a guide to keep your stitching
even.
Embrace the wonkiness. This gives you
chicken more character.
CREATING THE MAIN BODY
Begin by placing one side of your body
right side up on the table. Then place the
crown near the top edge of the fabric.
Brought to you by
Badskirt www.badskirt.com
Sew, Mama, Sew www.sewmamasew.com
CREATING A SPRING CHICKEN
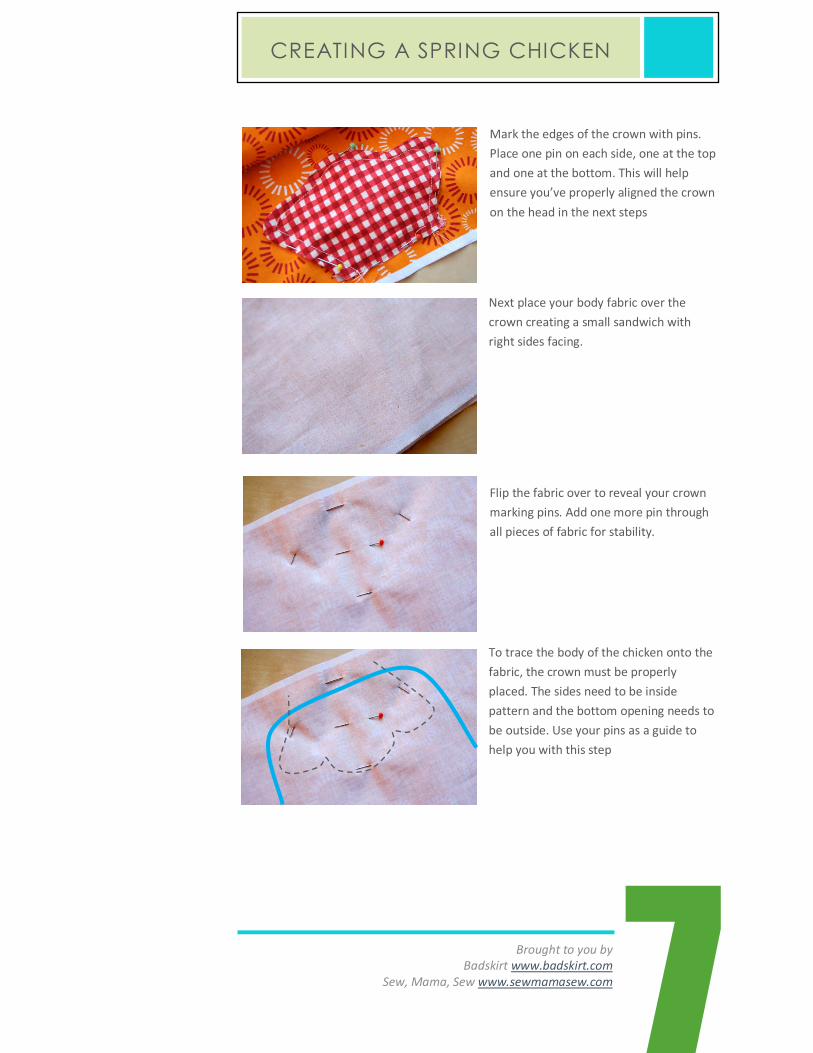
Mark the edges of the crown with pins.
Place one pin on each side, one at the top
and one at the bottom. This will help
ensure you’ve properly aligned the crown
on the head in the next steps
Next place your body fabric over the
crown creating a small sandwich with
right sides facing.
Flip the fabric over to reveal your crown
marking pins. Add one more pin through
all pieces of fabric for stability.
To trace the body of the chicken onto the
fabric, the crown must be properly
placed. The sides need to be inside
pattern and the bottom opening needs to
be outside. Use your pins as a guide to
help you with this step
Brought to you by
Badskirt www.badskirt.com
Sew, Mama, Sew www.sewmamasew.com
CREATING A SPRING CHICKEN
When the template is properly placed,
you should only see a single pin which is
the one closest to the edge.
Trace the body, leaving the a gap at the
marked opening.
Using a small stitch width, sew exactly on
the marked line. Continue around until
you reach the edge of the opening. Be
sure to leave a gap large enough for
turning and stuffing.
Trim around the outside of your sewing
leaving a ¼” margin. Notch your curves
for a better result.
Brought to you by
Badskirt www.badskirt.com
Sew, Mama, Sew www.sewmamasew.com
CREATING A SPRING CHICKEN
Tip: the top of the head will be very thick
with multiple layers of fabric due to our
crown and topstitching. Do not try to cut
this with your good shears. Use older
blades or something designed for thick
fabric.
You should not notch around the bottom
opening. This will make it easier to hand
stitch closed later.
Turn the body inside out through the
opening. Check that you’ve properly
caught the bottom edge of the crown and
haven’t sewn the sides. Tip: Use your
chopstick or turning tool to push out the
point of the tail. You shouldn’t have to
use force. If it’s stuck, gently roll it
between your fingers and then try again.
Using very small pieces, stuff your chicken
body. Use a chopstick to push the pieces
into the tail point. Tip: smaller pieces of
toyfill work better than large ones. I
usually open my bag of toyfill and pull it
into very small pieces before I stuff.
Brought to you by
Badskirt www.badskirt.com
Sew, Mama, Sew www.sewmamasew.com
CREATING A SPRING CHICKEN
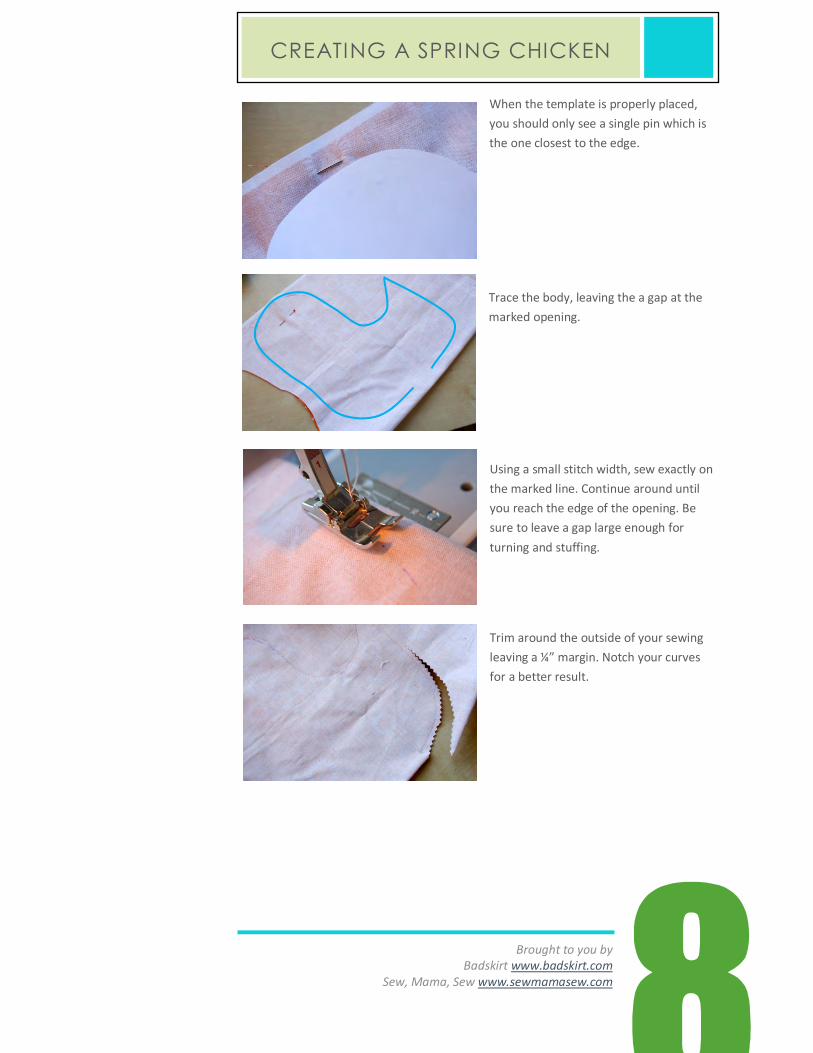
Using a ladder stitch, hand sew the
opening of your body closed.
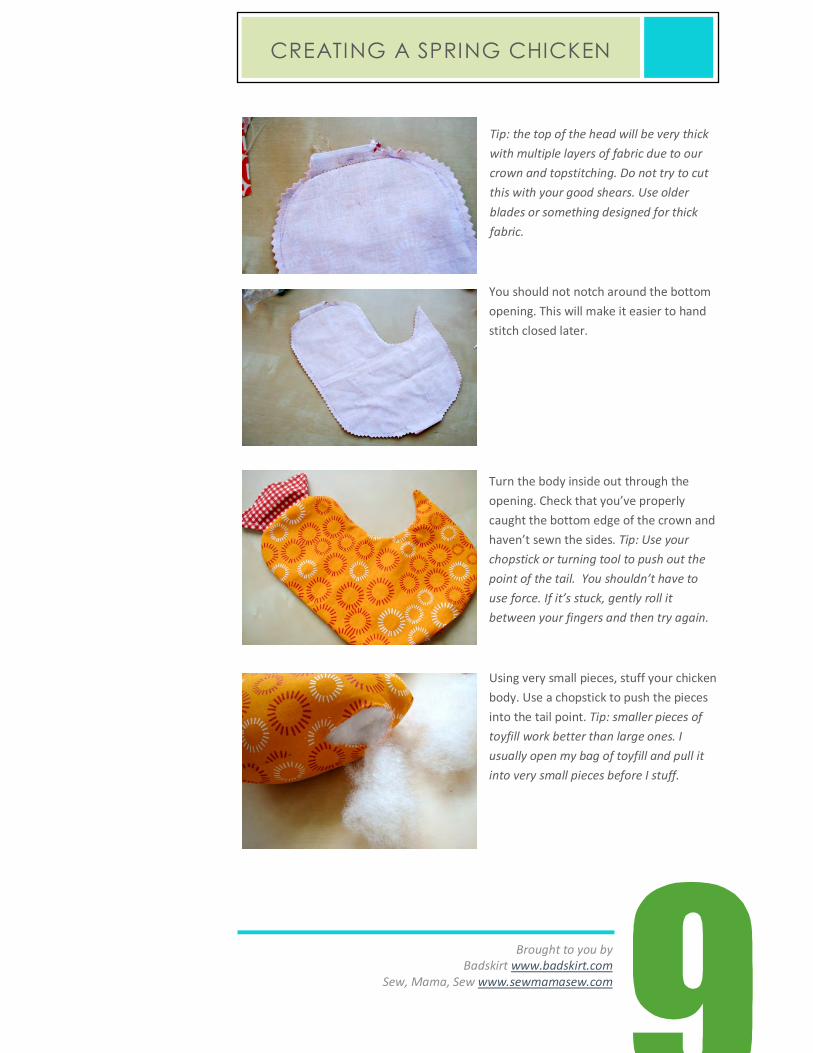
Attach the chicken’s eyes. Double button
eyes are shown, but you can use your
imagination. Felt or safety eyes are the
best options for small children or anything
that will be within reach of pets.
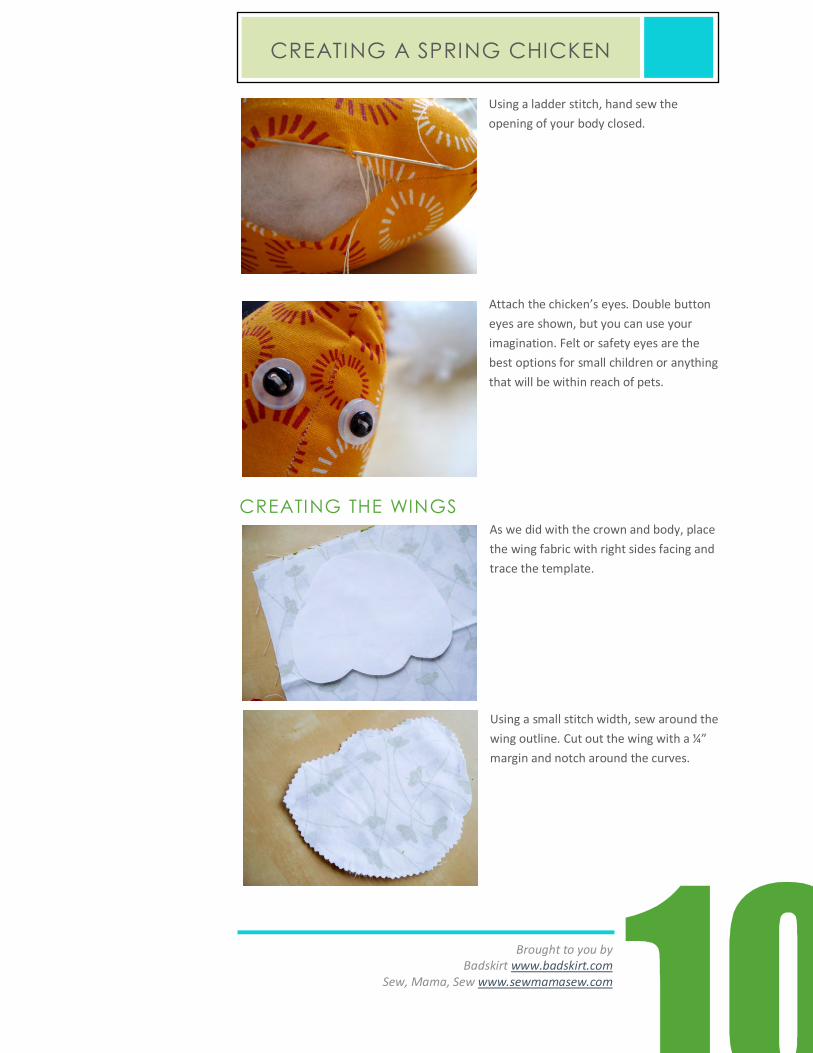
CREATING THE WINGS
As we did with the crown and body, place
the wing fabric with right sides facing and
trace the template.
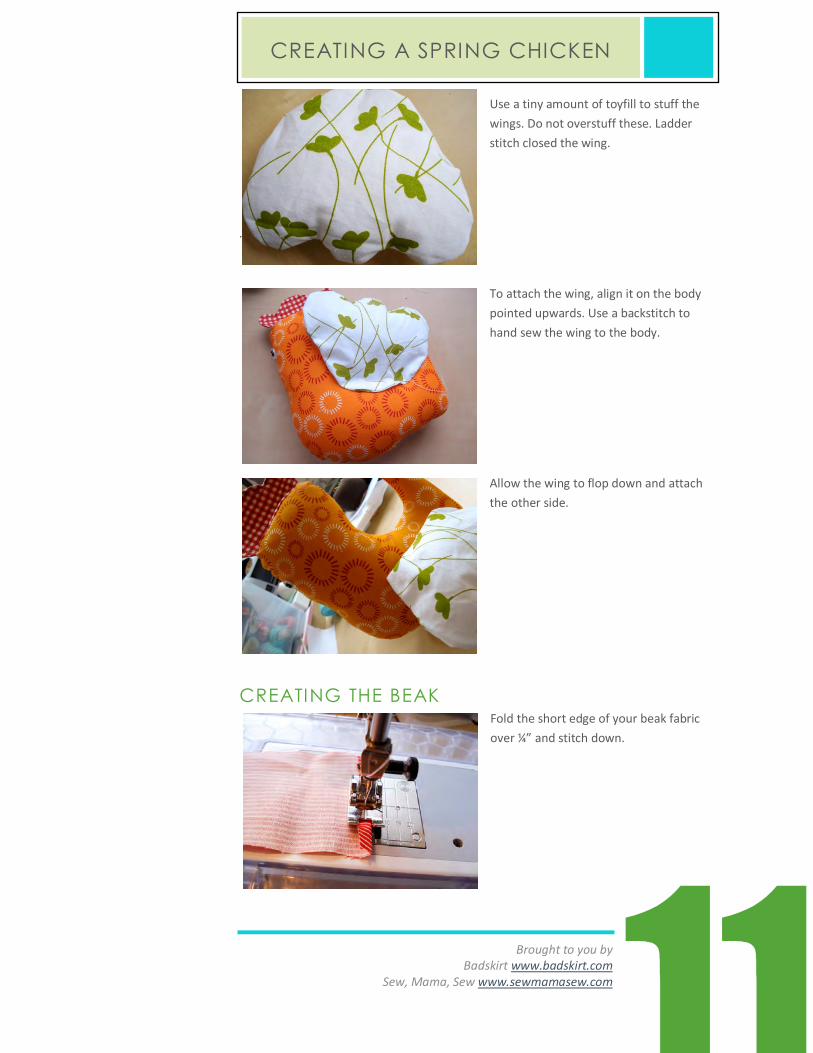
Using a small stitch width, sew around the
wing outline. Cut out the wing with a ¼”
margin and notch around the curves.
Brought to you by
Badskirt www.badskirt.com
Sew, Mama, Sew www.sewmamasew.com
CREATING A SPRING CHICKEN
Use a tiny amount of toyfill to stuff the
wings. Do not overstuff these. Ladder
stitch closed the wing.
.
To attach the wing, align it on the body
pointed upwards. Use a backstitch to
hand sew the wing to the body.
Allow the wing to flop down and attach
the other side.
CREATING THE BEAK
Fold the short edge of your beak fabric
over ¼” and stitch down.
Brought to you by
Badskirt www.badskirt.com
Sew, Mama, Sew www.sewmamasew.com
CREATING A SPRING CHICKEN
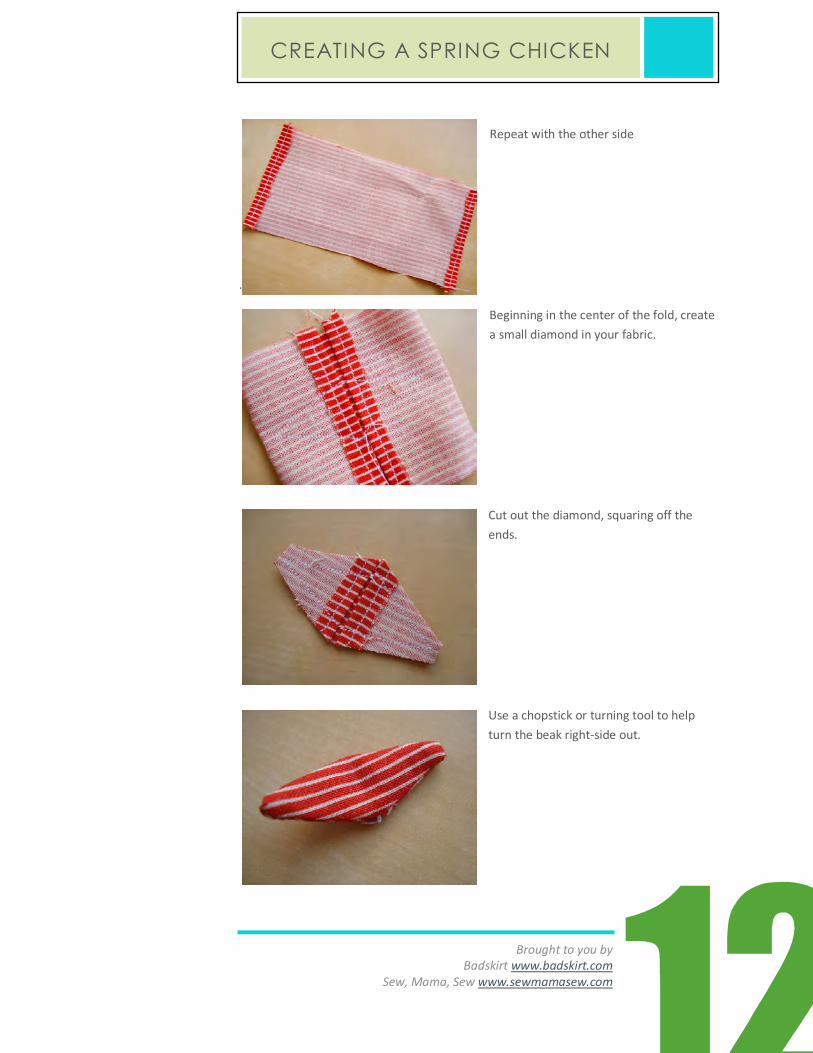
Repeat with the other side
.
Beginning in the center of the fold, create
a small diamond in your fabric.
Cut out the diamond, squaring off the
ends.
Use a chopstick or turning tool to help
turn the beak right-side out.
Brought to you by
Badskirt www.badskirt.com
Sew, Mama, Sew www.sewmamasew.com
CREATING A SPRING CHICKEN
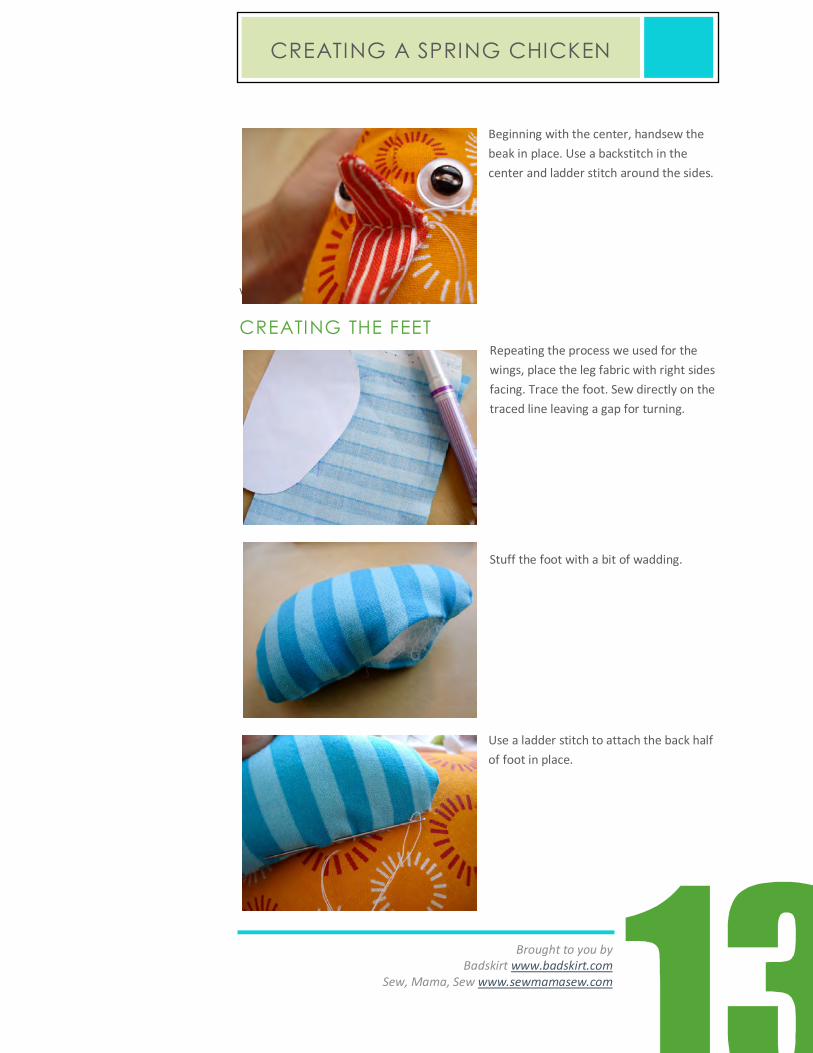
Beginning with the center, handsew the
beak in place. Use a backstitch in the
center and ladder stitch around the sides.
\
CREATING THE FEET
Repeating the process we used for the
wings, place the leg fabric with right sides
facing. Trace the foot. Sew directly on the
traced line leaving a gap for turning.
Stuff the foot with a bit of wadding.
Use a ladder stitch to attach the back half
of foot in place.
Brought to you by
Badskirt www.badskirt.com
Sew, Mama, Sew www.sewmamasew.com
CREATING A SPRING CHICKEN
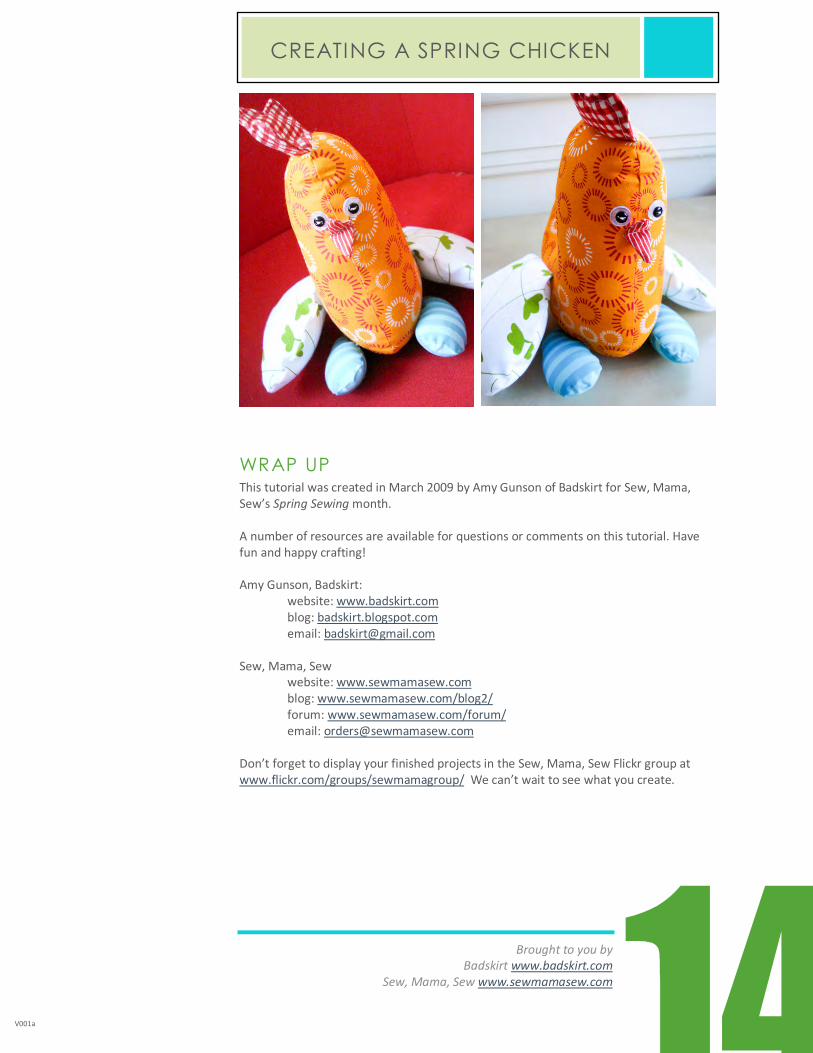
WRAP UP
This tutorial was created in March 2009 by Amy Gunson of Badskirt for Sew, Mama,
Sew’s Spring Sewing month.
A number of resources are available for questions or comments on this tutorial. Have
fun and happy crafting!
Amy Gunson, Badskirt:
website: www.badskirt.com
blog: badskirt.blogspot.com
email: [email protected]
Sew, Mama, Sew
website: www.sewmamasew.com
blog: www.sewmamasew.com/blog2/
forum: www.sewmamasew.com/forum/
email: [email protected]
Don’t forget to display your finished projects in the Sew, Mama, Sew Flickr group at
www.flickr.com/groups/sewmamagroup/ We can’t wait to see what you create.
V001a