Embed Size (px)
Citation preview
8/10/2019 Elastix Elastix Elastix Elastix Elastix Elastix Elastix Elastix Elastix Elastix Elastix Elastix Elastix
http://slidepdf.com/reader/full/elastix-elastix-elastix-elastix-elastix-elastix-elastix-elastix-elastix-elastix 1/11
1
Configuring Elastix 2.0.0 57 forSpitfire SIP Trunks
This document is a guideline for configuring Spitfire SIP trunks onto Elastix 2.0.0 and includes thesettings required for Inbound DDI routing and Outbound CLI presentation. The settings contained withinhave been tested and are known to work at the time of testing.
SIP trunk details such as account number and password will be provided separately.
Provisioning a SIP trunk: Page 2
Outbound Routing – Reference only: Page 9
Inbound Routing: Page 10
Outgoing CLI: Page 11
Please Note: Please make particular note of the addition of extra code on pages 3 & 4. This is necessary to allowinbound DDI’s to be routed.
8/10/2019 Elastix Elastix Elastix Elastix Elastix Elastix Elastix Elastix Elastix Elastix Elastix Elastix Elastix
http://slidepdf.com/reader/full/elastix-elastix-elastix-elastix-elastix-elastix-elastix-elastix-elastix-elastix 2/11
2
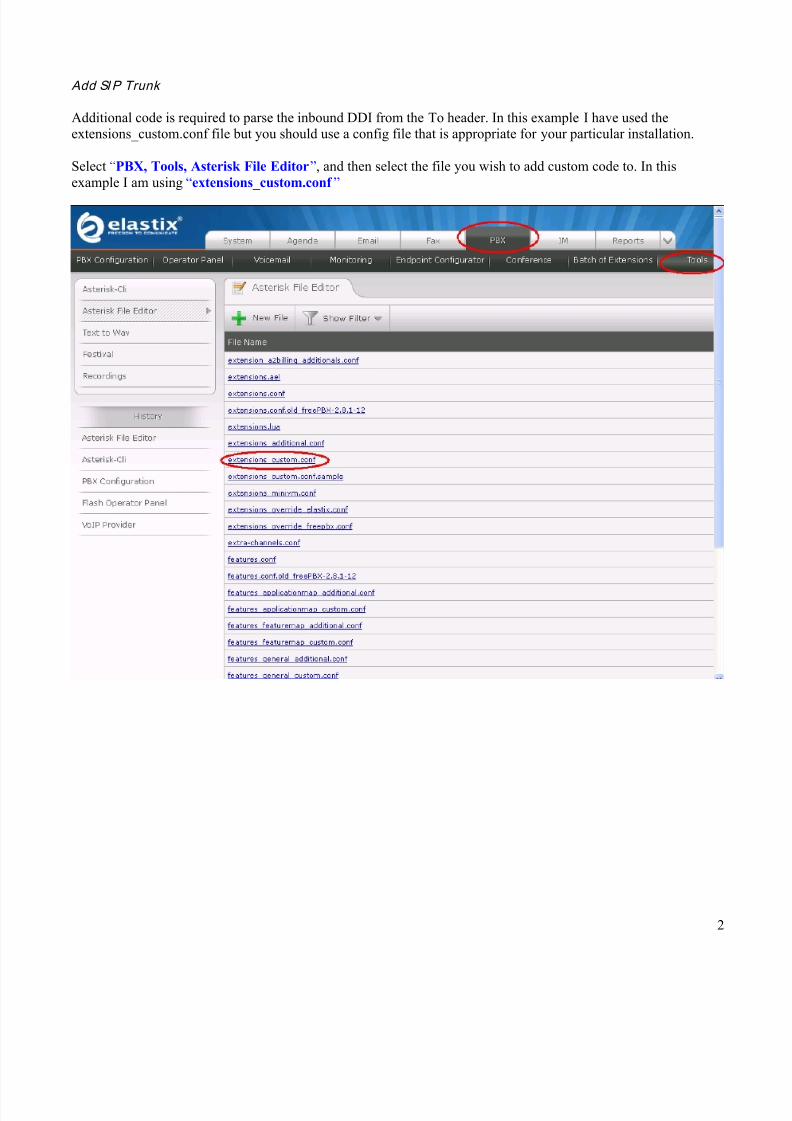
Add SI P Trunk
Additional code is required to parse the inbound DDI from the To header. In this example I have used theextensions_custom.conf file but you should use a config file that is appropriate for your particular installation.
Select “PBX, Tools, Asterisk File Editor ”, and then select the file you wish to add custom code to. In thisexample I am using “extensions_custom.conf ”
8/10/2019 Elastix Elastix Elastix Elastix Elastix Elastix Elastix Elastix Elastix Elastix Elastix Elastix Elastix
http://slidepdf.com/reader/full/elastix-elastix-elastix-elastix-elastix-elastix-elastix-elastix-elastix-elastix 3/11
3
Add SI P Tru nk continued
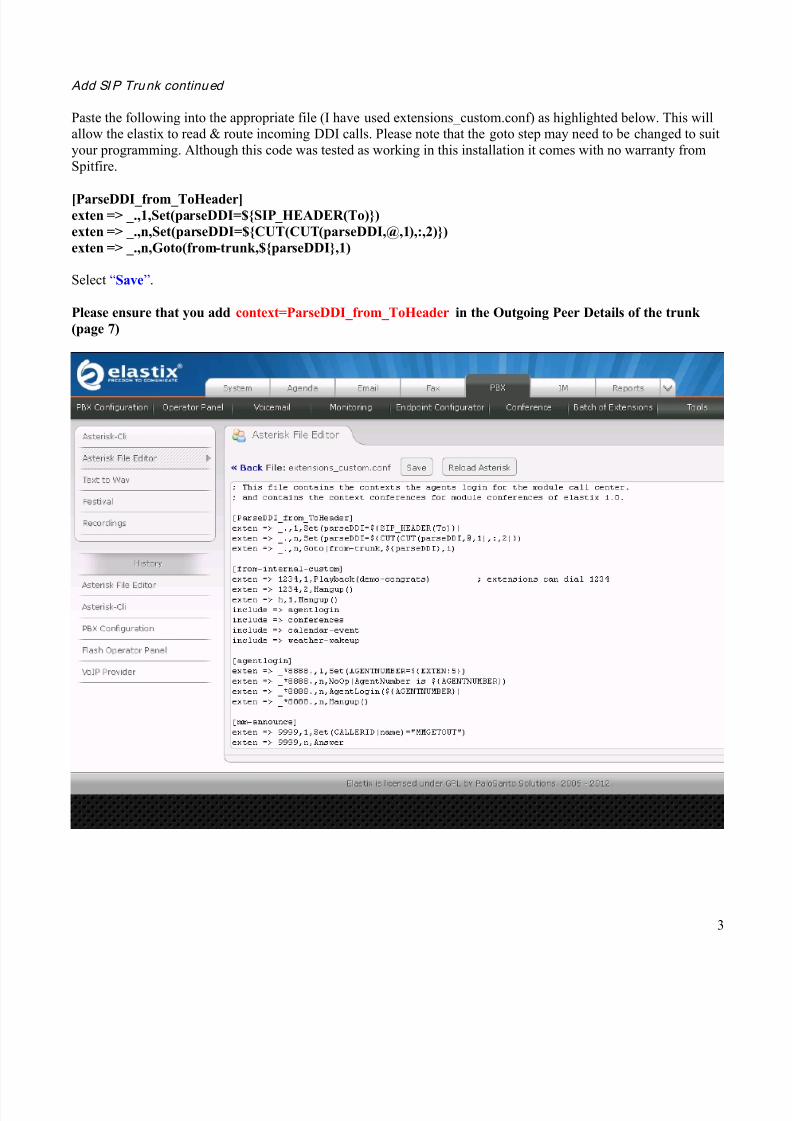
Paste the following into the appropriate file (I have used extensions_custom.conf) as highlighted below. This willallow the elastix to read & route incoming DDI calls. Please note that the goto step may need to be changed to suityour programming. Although this code was tested as working in this installation it comes with no warranty fromSpitfire.
[ParseDDI_from_ToHeader]exten => _.,1,Set(parseDDI=${SIP_HEADER(To)})exten => _.,n,Set(parseDDI=${CUT(CUT(parseDDI,@,1),:,2)})exten => _.,n,Goto(from-trunk,${parseDDI},1)
Select “Save ”.
Please ensure that you add context=ParseDDI_from_ToHeader in the Outgoing Peer Details of the trunk(page 7)
8/10/2019 Elastix Elastix Elastix Elastix Elastix Elastix Elastix Elastix Elastix Elastix Elastix Elastix Elastix
http://slidepdf.com/reader/full/elastix-elastix-elastix-elastix-elastix-elastix-elastix-elastix-elastix-elastix 4/11
4
Add SI P Tru nk continued
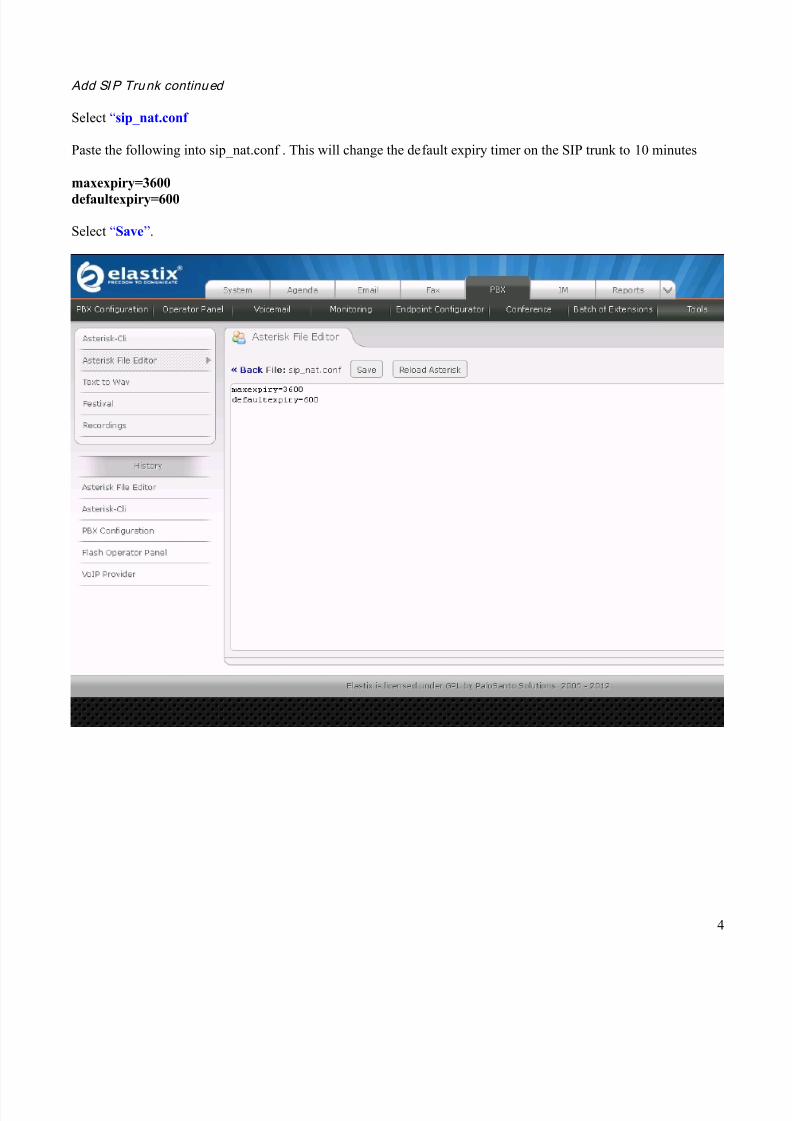
Select “sip_nat.conf
Paste the following into sip_nat.conf . This will change the default expiry timer on the SIP trunk to 10 minutes
maxexpiry=3600defaultexpiry=600
Select “Save ”.
8/10/2019 Elastix Elastix Elastix Elastix Elastix Elastix Elastix Elastix Elastix Elastix Elastix Elastix Elastix
http://slidepdf.com/reader/full/elastix-elastix-elastix-elastix-elastix-elastix-elastix-elastix-elastix-elastix 5/11
5
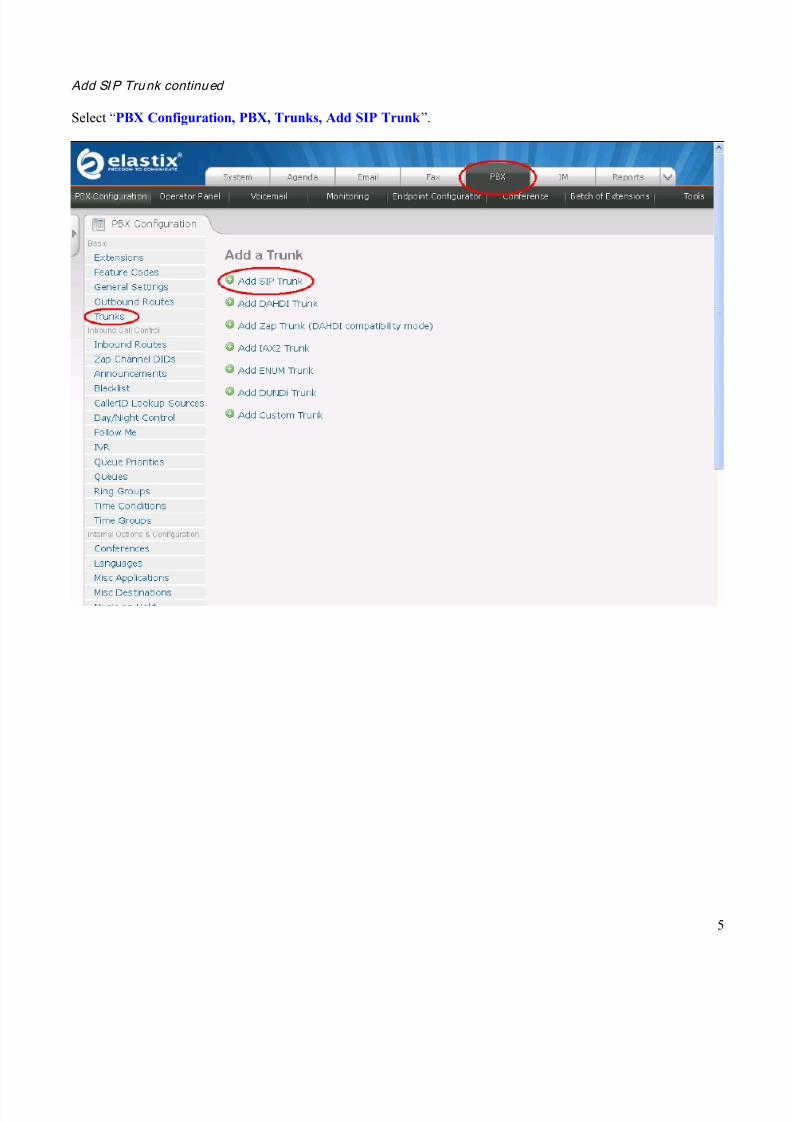
Add SI P Tru nk continued
Select “PBX Configuration, PBX, Trunks, Add SIP Trunk ”.
8/10/2019 Elastix Elastix Elastix Elastix Elastix Elastix Elastix Elastix Elastix Elastix Elastix Elastix Elastix
http://slidepdf.com/reader/full/elastix-elastix-elastix-elastix-elastix-elastix-elastix-elastix-elastix-elastix 6/11
6
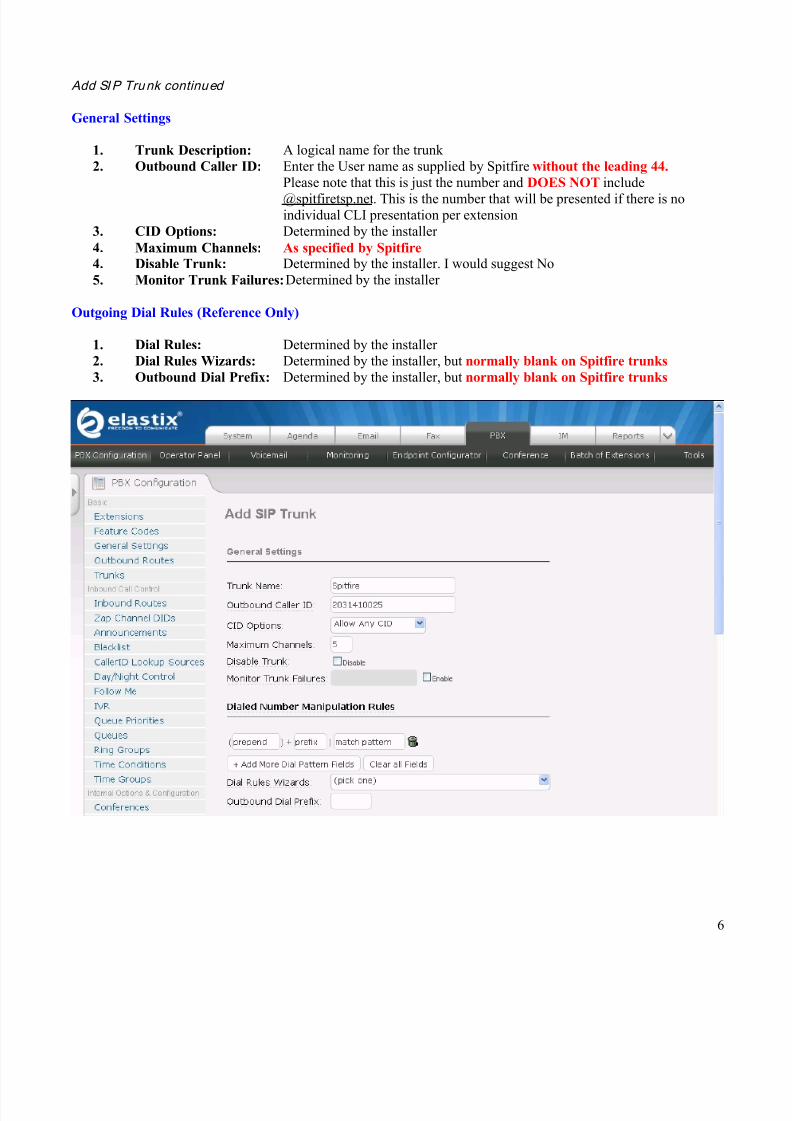
Add SI P Tru nk continued
General Settings
1. Trunk Description: A logical name for the trunk2. Outbound Caller ID: Enter the User name as supplied by Spitfire without the leading 44.
Please note that this is just the number and DOES NOT [email protected] . This is the number that will be presented if there is noindividual CLI presentation per extension
3. CID Options: Determined by the installer4. Maximum Channels: As specified by Spitfire 4. Disable Trunk: Determined by the installer. I would suggest No5. Monitor Trunk Failures: Determined by the installer
Outgoing Dial Rules (Reference Only)
1. Dial Rules: Determined by the installer 2. Dial Rules Wizards: Determined by the installer, but normally blank on Spitfire trunks 3. Outbound Dial Prefix: Determined by the installer, but normally blank on Spitfire trunks
8/10/2019 Elastix Elastix Elastix Elastix Elastix Elastix Elastix Elastix Elastix Elastix Elastix Elastix Elastix
http://slidepdf.com/reader/full/elastix-elastix-elastix-elastix-elastix-elastix-elastix-elastix-elastix-elastix 7/11
7
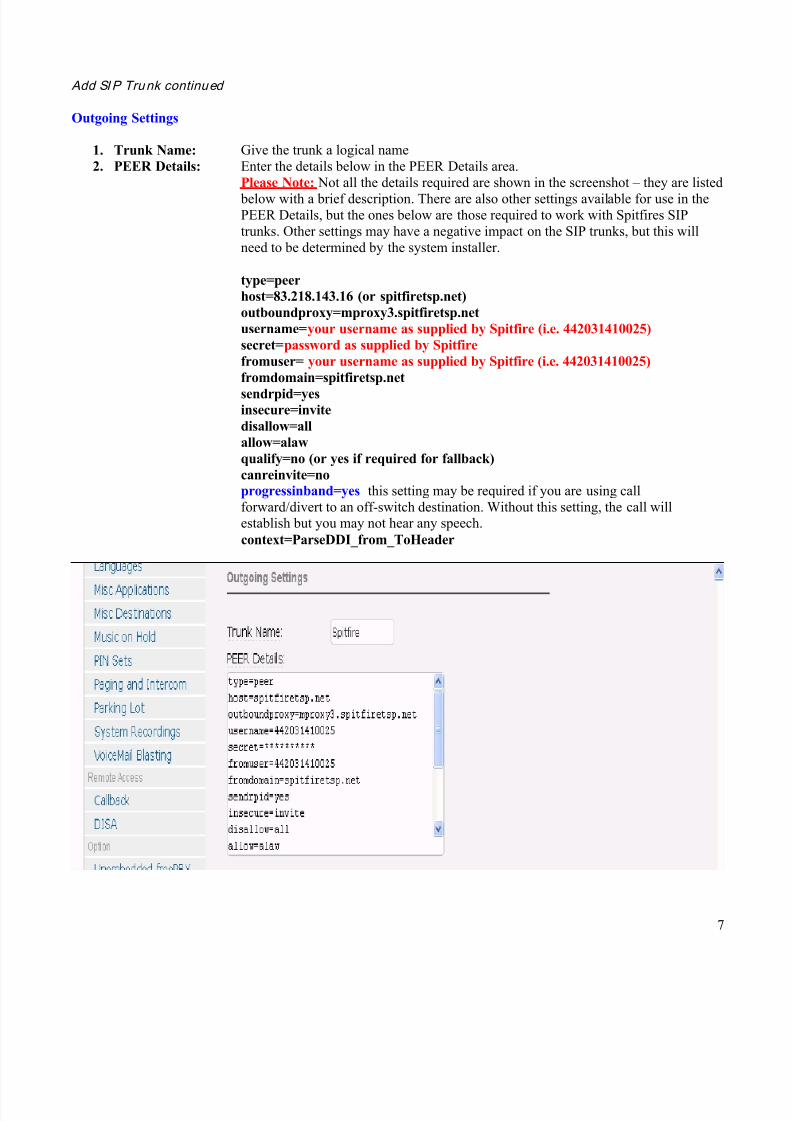
Add SI P Tru nk continued
Outgoing Settings
1. Trunk Name: Give the trunk a logical name2. PEER Details: Enter the details below in the PEER Details area.
Please Note: Not all the details required are shown in the screenshot – they are listed below with a brief description. There are also other settings available for use in thePEER Details, but the ones below are those required to work with Spitfires SIPtrunks. Other settings may have a negative impact on the SIP trunks, but this willneed to be determined by the system installer.
type=peer host=83.218.143.16 (or spitfiretsp.net)outboundproxy=mproxy3.spitfiretsp.netusername= your username as supplied by Spitfire (i.e. 442031410025)secret= password as supplied by Spitfirefromuser= your username as supplied by Spitfire (i.e. 442031410025)fromdomain=spitfiretsp.netsendrpid=yesinsecure=invitedisallow=allallow=alawqualify=no (or yes if required for fallback)canreinvite=noprogressinband=yes this setting may be required if you are using callforward/divert to an off-switch destination. Without this setting, the call willestablish but you may not hear any speech.context=ParseDDI_from_ToHeader
8/10/2019 Elastix Elastix Elastix Elastix Elastix Elastix Elastix Elastix Elastix Elastix Elastix Elastix Elastix
http://slidepdf.com/reader/full/elastix-elastix-elastix-elastix-elastix-elastix-elastix-elastix-elastix-elastix 8/11
8
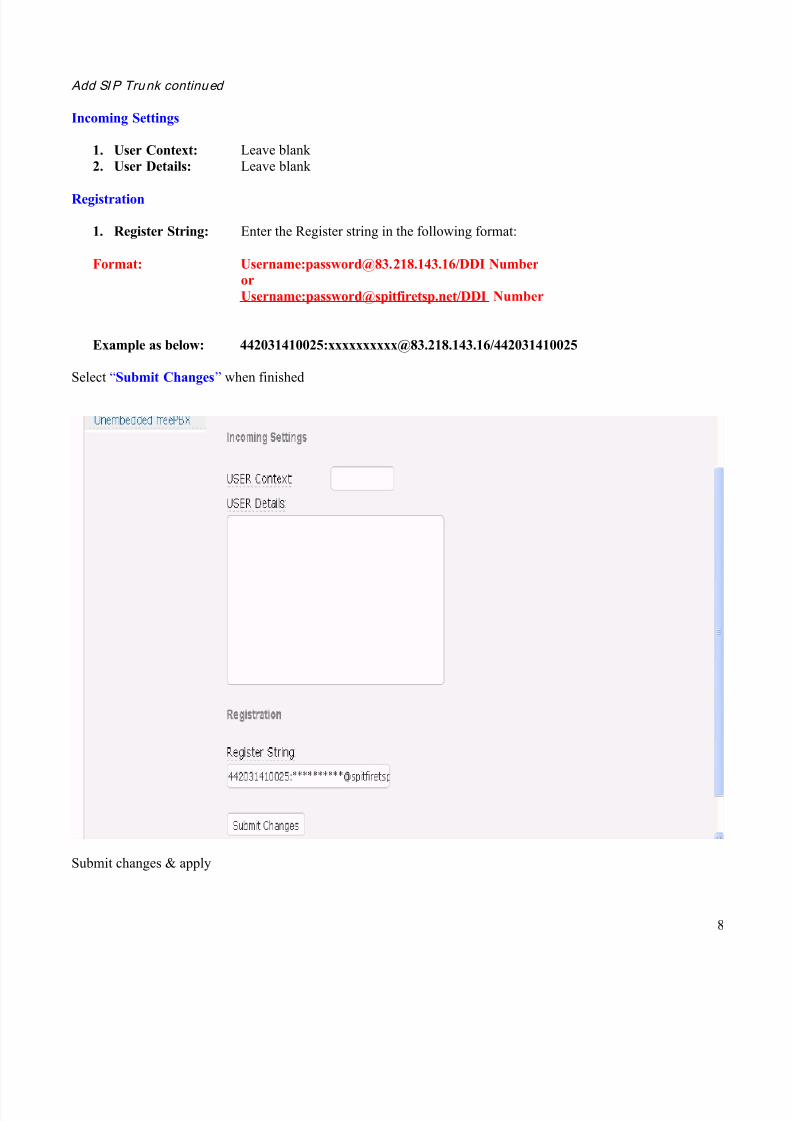
Add SI P Tru nk continued
Incoming Settings
1. User Context: Leave blank2. User Details: Leave blank
Registration
1. Register String: Enter the Register string in the following format:
Format: Username:[email protected]/DDI NumberorUsername:[email protected]/DDI Number
Example as below: 442031410025:[email protected]/442031410025
Select “Submit Changes ” when finished
Submit changes & apply
8/10/2019 Elastix Elastix Elastix Elastix Elastix Elastix Elastix Elastix Elastix Elastix Elastix Elastix Elastix
http://slidepdf.com/reader/full/elastix-elastix-elastix-elastix-elastix-elastix-elastix-elastix-elastix-elastix 9/11
9
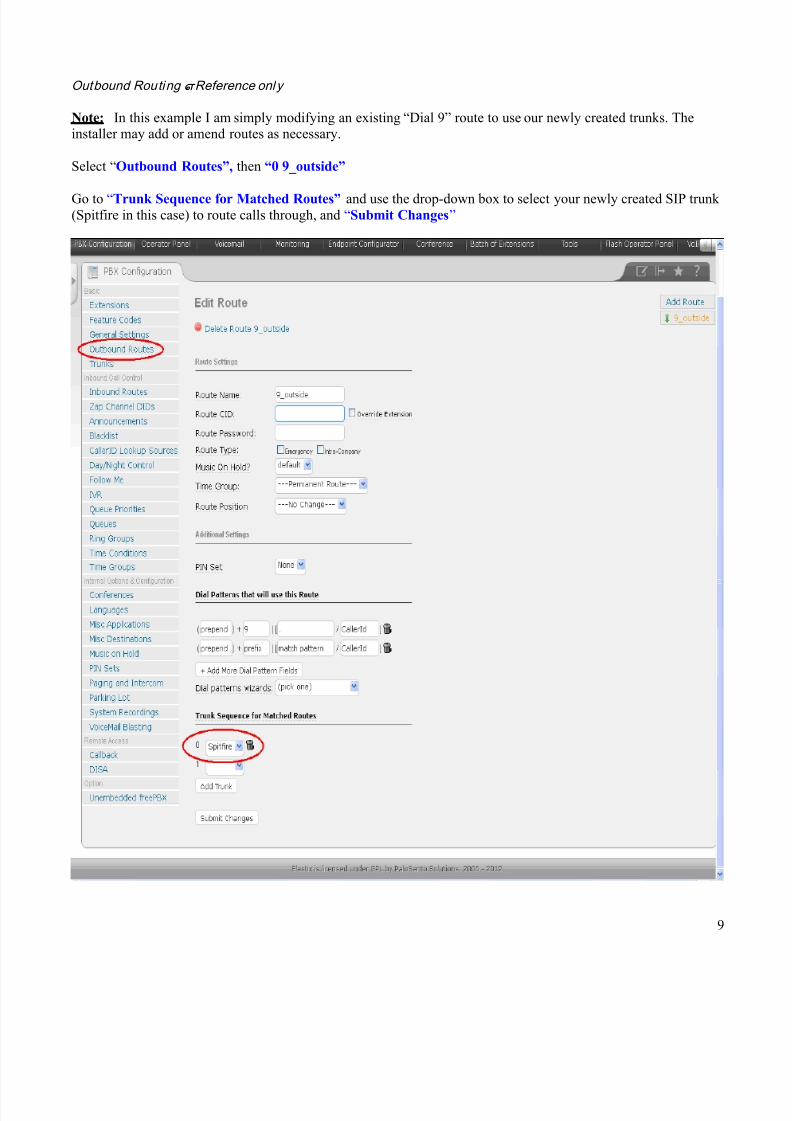
Outbound Routing – Reference onl y
Note: In this example I am simply modifying an existing “Dial 9” route to use our newly created trunks. Theinstaller may add or amend routes as necessary.
Select “ Outbound Routes”, then “0 9_outside”
Go to “Trunk Sequence for Matched Routes” and use the drop-down box to select your newly created SIP trunk(Spitfire in this case) to route calls through, and “Submit Changes ”
8/10/2019 Elastix Elastix Elastix Elastix Elastix Elastix Elastix Elastix Elastix Elastix Elastix Elastix Elastix
http://slidepdf.com/reader/full/elastix-elastix-elastix-elastix-elastix-elastix-elastix-elastix-elastix-elastix 10/11
10
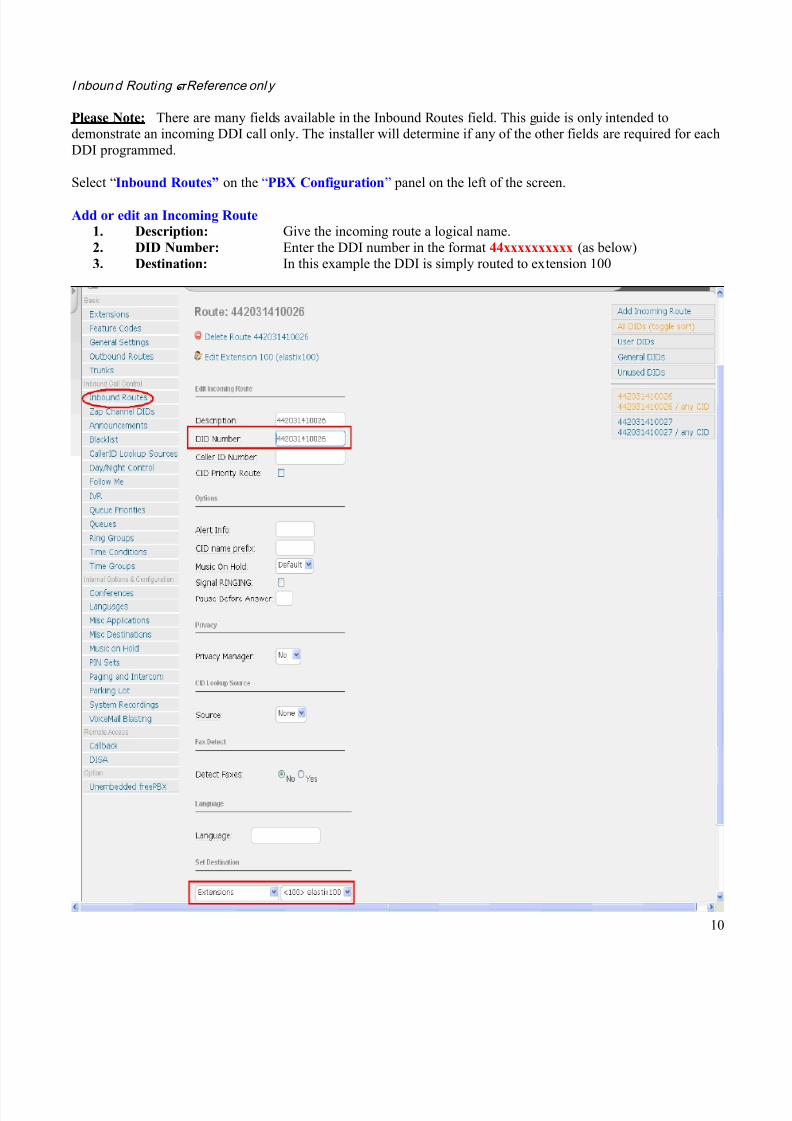
I nboun d Routing – Reference onl y
Please Note: There are many fields available in the Inbound Routes field. This guide is only intended todemonstrate an incoming DDI call only. The installer will determine if any of the other fields are required for eachDDI programmed.
Select “ Inbound Routes” on the “PBX Configuration ” panel on the left of the screen.
Add or edit an Incoming Route1. Description: Give the incoming route a logical name.2. DID Number: Enter the DDI number in the format 44xxxxxxxxxx (as below)3. Destination: In this example the DDI is simply routed to extension 100
8/10/2019 Elastix Elastix Elastix Elastix Elastix Elastix Elastix Elastix Elastix Elastix Elastix Elastix Elastix
http://slidepdf.com/reader/full/elastix-elastix-elastix-elastix-elastix-elastix-elastix-elastix-elastix-elastix 11/11
11
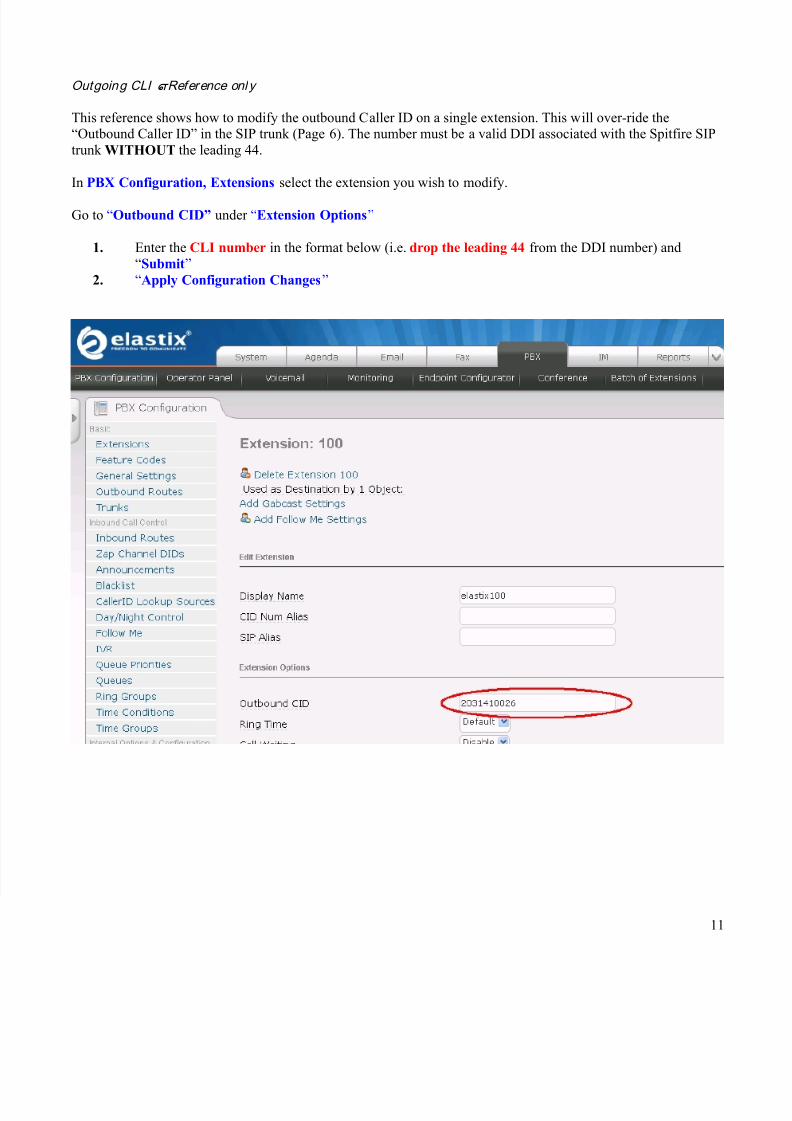
Outgoing CLI – Reference onl y
This reference shows how to modify the outbound Caller ID on a single extension. This will over-ride the“Outbound Caller ID” in the SIP trunk (Page 6). The number must be a valid DDI associated with the Spitfire SIPtrunk WITHOUT the leading 44.
In PBX Configuration, Extensions select the extension you wish to modify.
Go to “Outbound CID” under “Extension Options ”
1. Enter the CLI number in the format below (i.e. drop the leading 44 from the DDI number) and“Submit ”
2. “Apply Configuration Changes ”


![Elastix Book Comunicaciones Unificadas Con Elastix Vol1 V0.8[2]](https://img.pdfslide.tips/doc/110x75/557b2878d8b42a71798b518e/elastix-book-comunicaciones-unificadas-con-elastix-vol1-v082.jpg)