Embed Size (px)
Citation preview
Hair Dryer Heating Element ReplacementInstall a replacement heating element.
撰写者: Mitch
Hair Dryer Heating Element Replacement 草案: 2015-06-10指南 ID: 11257 -
æ ¤æ–‡æ¡£ç”Ÿæˆ äºŽ 2019-10-11 03:56:02 AM (MST)。
© iFixit — CC BY-NC-SA zh.iFixit.com 1 / 7 页

介介绍绍
Use this guide to installa replacement heating element if your hairdryer just isn't drying your hair theway it used to.
工具工具:Phillips #1 Screwdriver (1)Soldering Workstation (1)
Hair Dryer Heating Element Replacement 草案: 2015-06-10指南 ID: 11257 -
æ ¤æ–‡æ¡£ç”Ÿæˆ äºŽ 2019-10-11 03:56:02 AM (MST)。
© iFixit — CC BY-NC-SA zh.iFixit.com 2 / 7 页
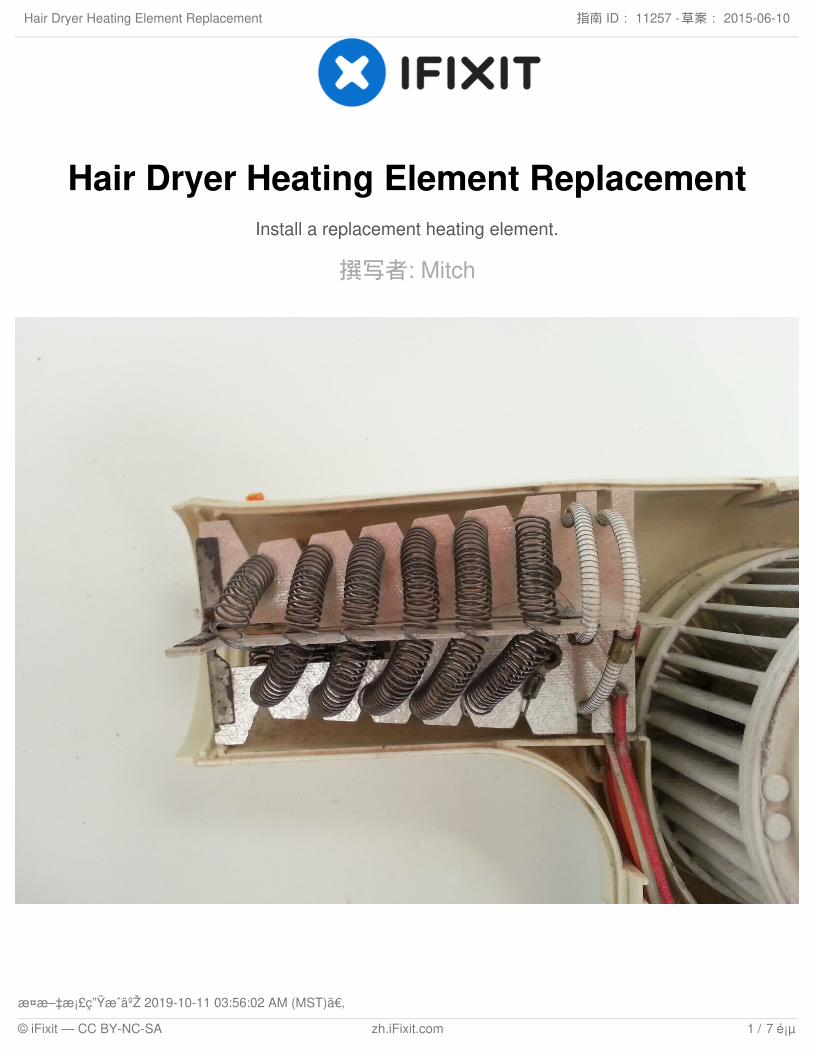
步骤步骤 1 — Nozzle
Identify the black air concentratingnozzle.
步骤步骤 2
Remove the black air concentratingnozzle by gently twisting and pullingthe nozzle.
Hair Dryer Heating Element Replacement 草案: 2015-06-10指南 ID: 11257 -
æ ¤æ–‡æ¡£ç”Ÿæˆ äºŽ 2019-10-11 03:56:02 AM (MST)。
© iFixit — CC BY-NC-SA zh.iFixit.com 3 / 7 页
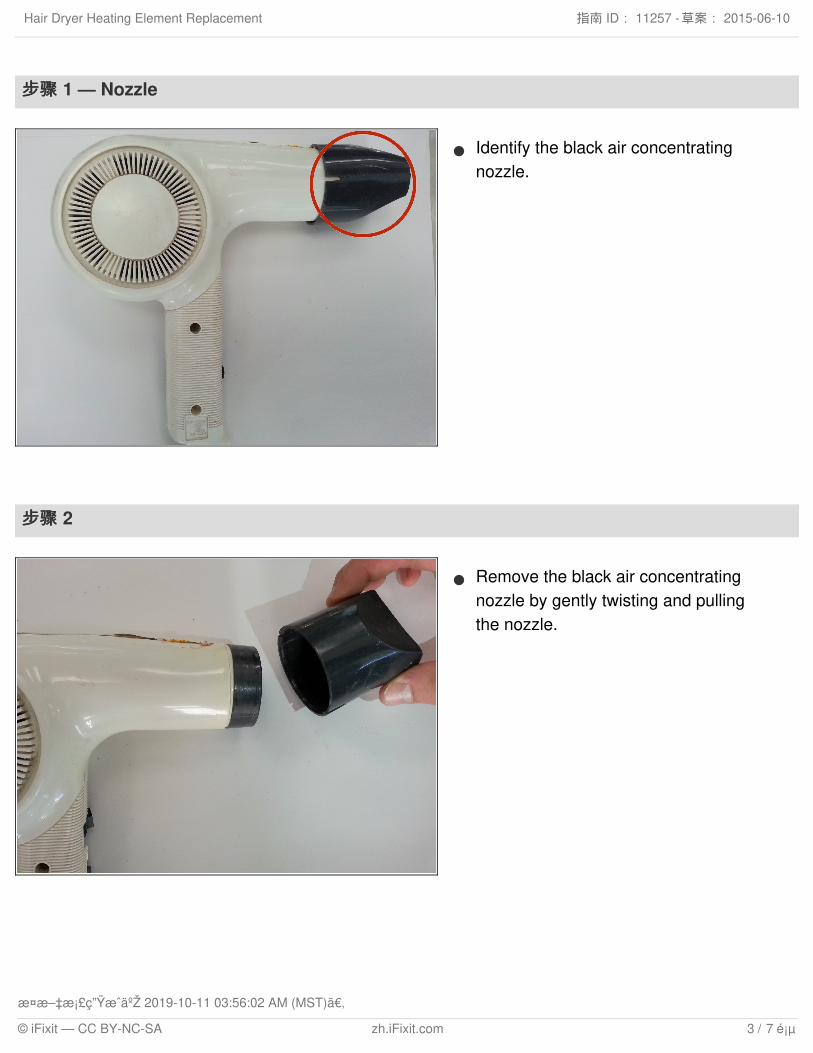
步骤步骤 3 — Grating
Using a screwdriver, remove thescrew located underneath the airconcentrating nozzle. This screwattaches the hair dryer body to thehair dryer grating.
The purpose of this guide is todemonstrate the repair steps for ageneric hair dryer. We do notspecify screw sizes because screwsizes can differ between hair dryers.For most hair dryers, use a Phillips#1 Screwdriver. For hair dryers withsmaller screws, consider using aPhillips #00 Screwdriver.
步骤步骤 4
Detach the hair dryer grating fromthe body by gently twisting thegrating from side to side.
Hair Dryer Heating Element Replacement 草案: 2015-06-10指南 ID: 11257 -
æ ¤æ–‡æ¡£ç”Ÿæˆ äºŽ 2019-10-11 03:56:02 AM (MST)。
© iFixit — CC BY-NC-SA zh.iFixit.com 4 / 7 页
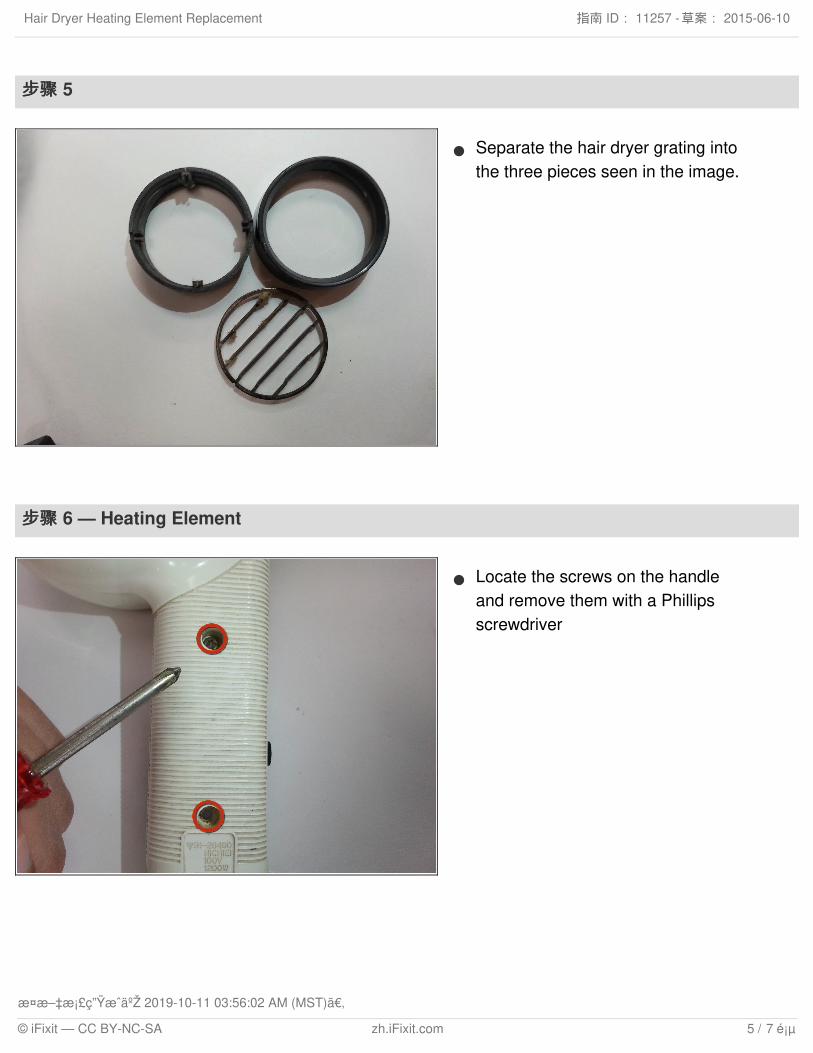
步骤步骤 5
Separate the hair dryer grating intothe three pieces seen in the image.
步骤步骤 6 — Heating Element
Locate the screws on the handleand remove them with a Phillipsscrewdriver
Hair Dryer Heating Element Replacement 草案: 2015-06-10指南 ID: 11257 -
æ ¤æ–‡æ¡£ç”Ÿæˆ äºŽ 2019-10-11 03:56:02 AM (MST)。
© iFixit — CC BY-NC-SA zh.iFixit.com 5 / 7 页
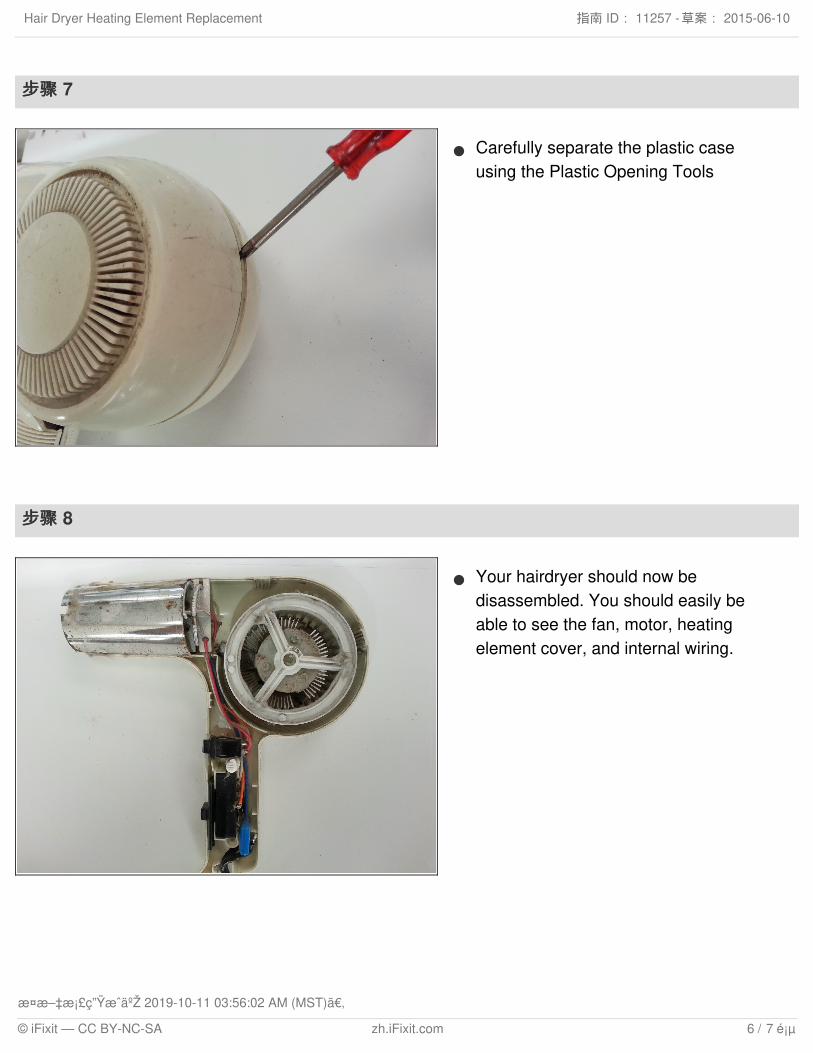
步骤步骤 7
Carefully separate the plastic caseusing the Plastic Opening Tools
步骤步骤 8
Your hairdryer should now bedisassembled. You should easily beable to see the fan, motor, heatingelement cover, and internal wiring.
Hair Dryer Heating Element Replacement 草案: 2015-06-10指南 ID: 11257 -
æ ¤æ–‡æ¡£ç”Ÿæˆ äºŽ 2019-10-11 03:56:02 AM (MST)。
© iFixit — CC BY-NC-SA zh.iFixit.com 6 / 7 页
To reassemble your device, follow these instructions in reverse order.
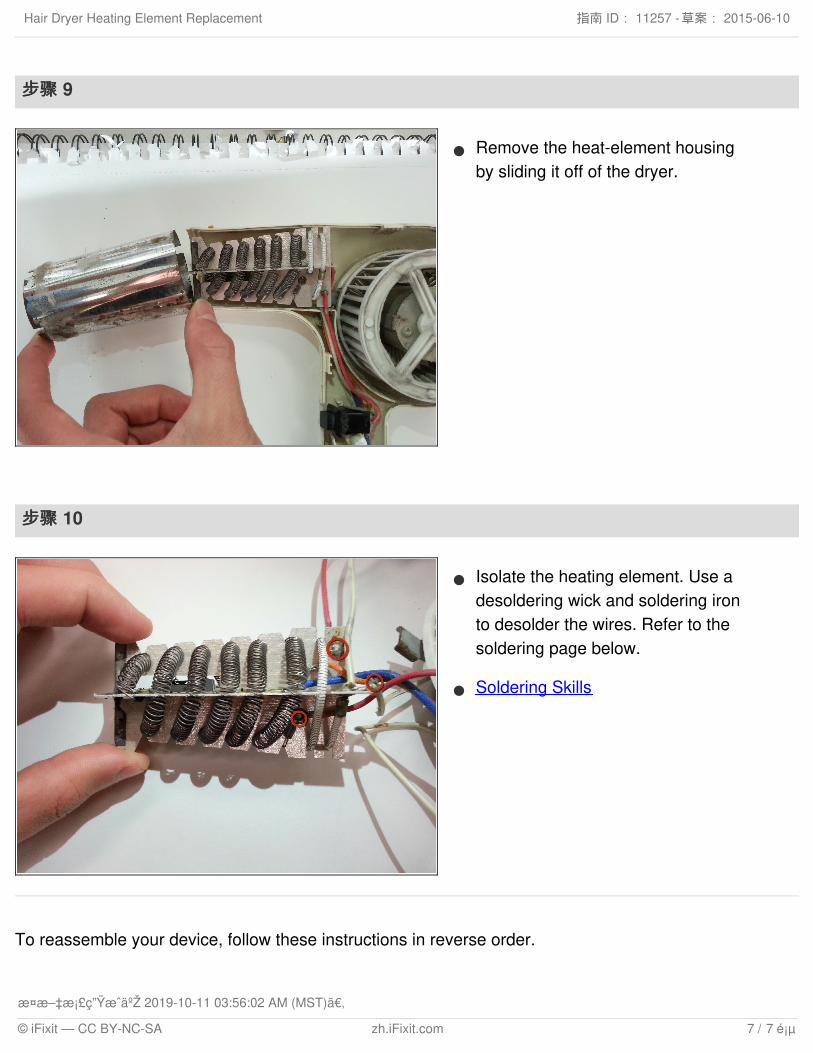
步骤步骤 9
Remove the heat-element housingby sliding it off of the dryer.
步骤步骤 10
Isolate the heating element. Use adesoldering wick and soldering ironto desolder the wires. Refer to thesoldering page below.
Soldering Skills
Hair Dryer Heating Element Replacement 草案: 2015-06-10指南 ID: 11257 -
æ ¤æ–‡æ¡£ç”Ÿæˆ äºŽ 2019-10-11 03:56:02 AM (MST)。
© iFixit — CC BY-NC-SA zh.iFixit.com 7 / 7 页