Embed Size (px)
DESCRIPTION
How to Create and Control Modes of Payment for Individual Channels
Citation preview
How to: Create and control modes of payment for individual channels
Further reading Microsoft Dynamics AX 2012 for Developers [AX 2012] SDK Download
What is the modes of payment for individual channelsWe have introduced in AX 2012 the new payment SDK which allows payments to be made across the different channels. The channels currently supported by AX are:
AX 2012 POS 2012 Online Store (SharePoint)
Any future connectors will be pluggable into the various channels. Currently only one payment connector is available called the “Dynamics Payment Connector” and this will connect to the Dynamics Payment Service.
How to configure the Dynamics Payment Connector
First you must sign-up for the Dynamics Online Payment service and also register with one of the following payment providers (This is cover by other documentation).
Cybersource First Data (TSYS) First Data EMPS PayPal Flat Rate
Then within the AX headquarters the payment connector is configured for the various channels. It should be noted any installed connectors should be installed at the various channel installations, so we can support multi-channel processing.
AX Channel (A/R) Setup
First configure the payment connector for use in AX load up the following form
Accounts receivable->Setup->Payment->Payment Services. See the example below
The form will default certain fields for each new payment service. You can remove items you don’t want this service to support i.e. Supported Currencies and Supported payment methods. Once you have entered all the required data we need to log the public key into the Dynamics Online Service.

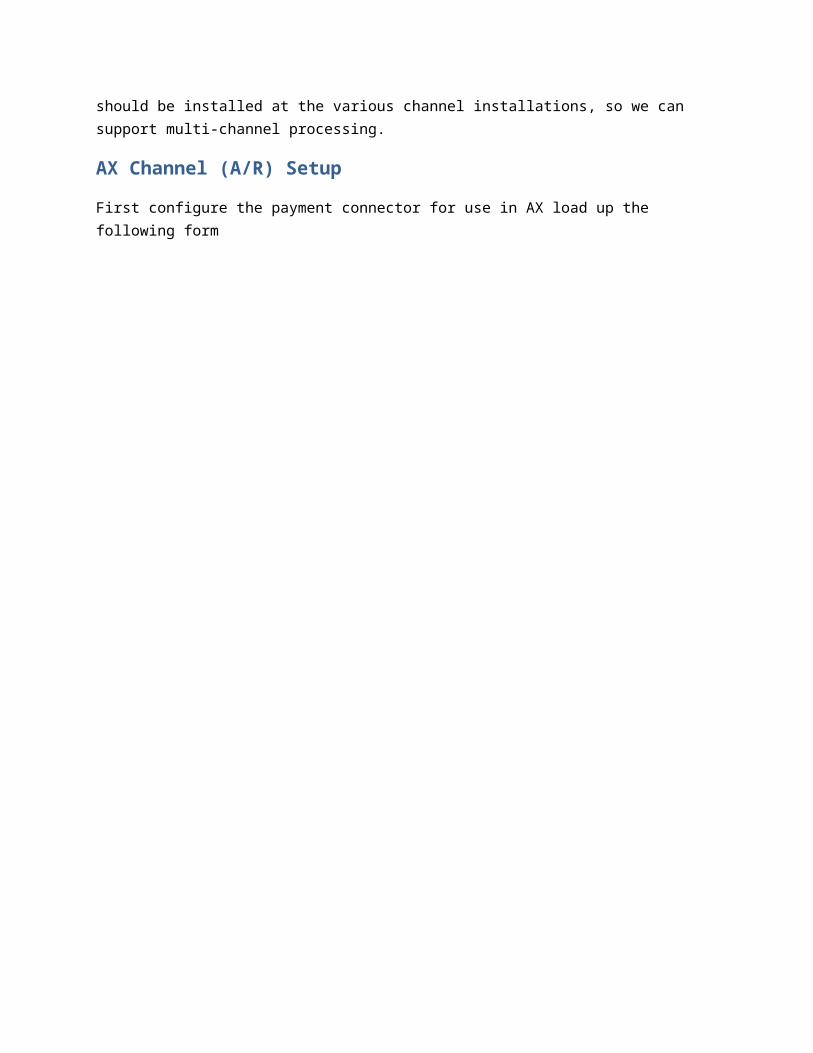
A) You do this by loading the Portal URL into internet explorer. This will load the following page and then click on “For customers”
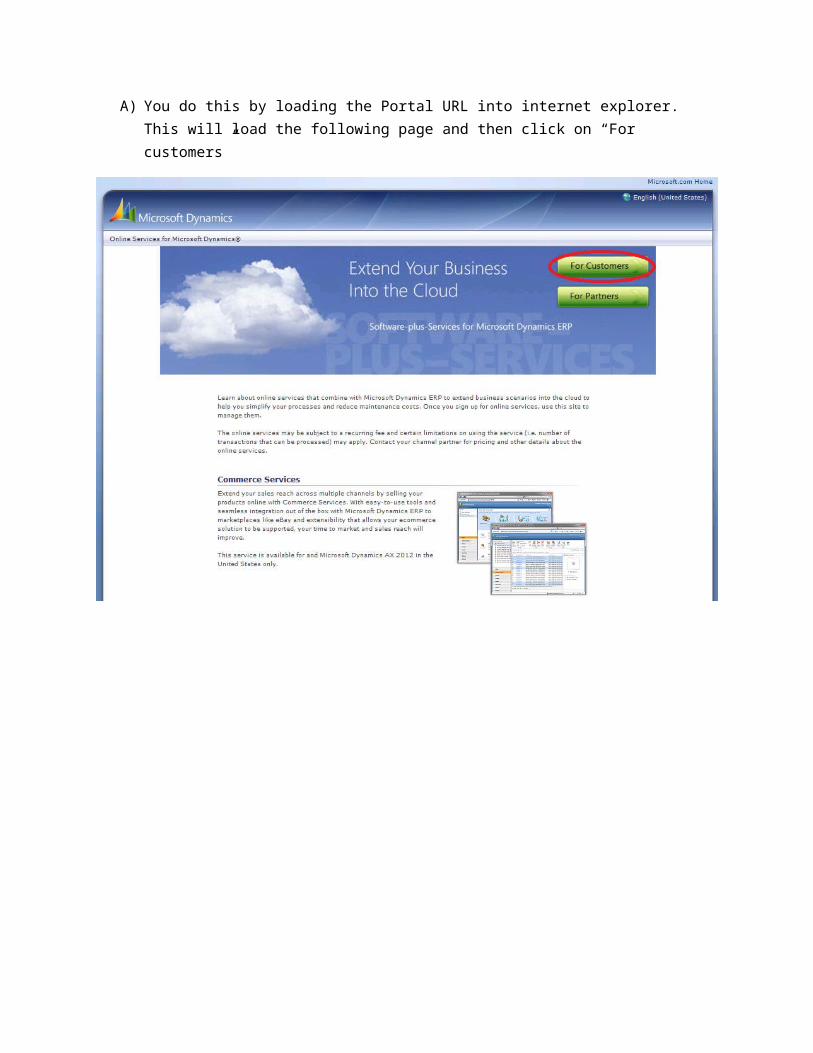
B) Then click on the “Sign in”
C) Using your Microsoft account and password sign into the site
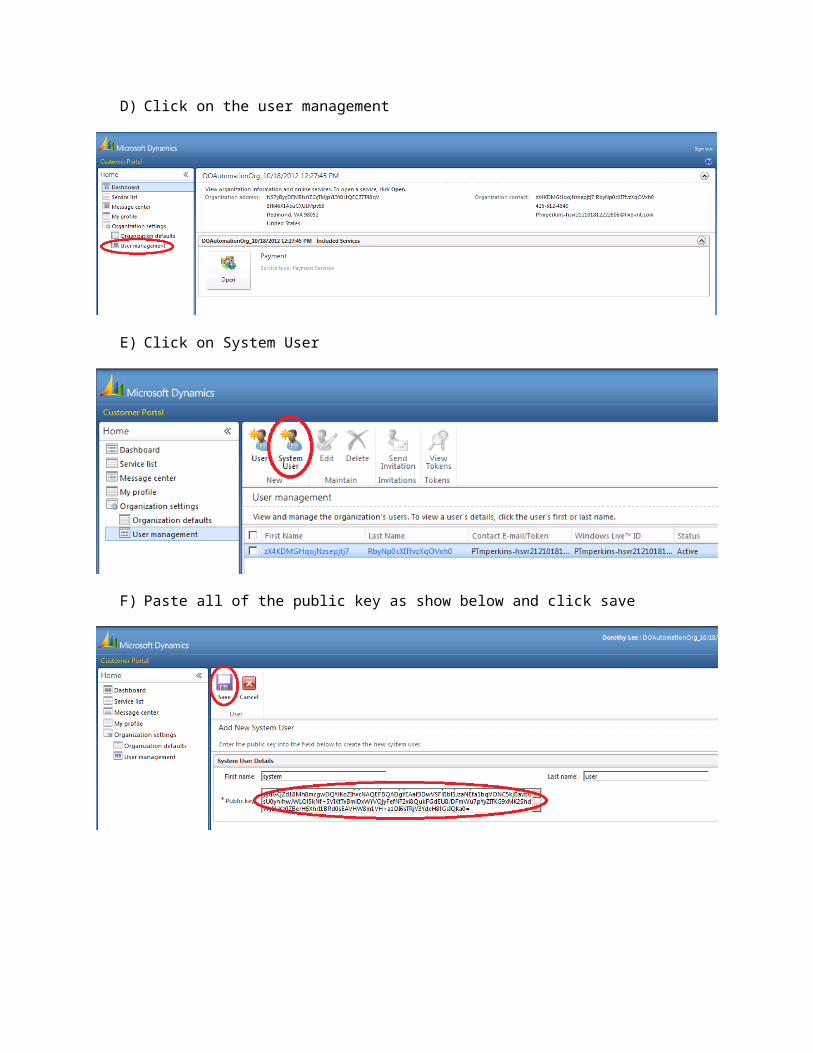
D) Click on the user management
E) Click on System User
F) Paste all of the public key as show below and click save
G) Then edit the created System User
H) Then add the Payment - Administrator role and click save
Then back to AX and click on the Validate button on the Payment service form. If you have setup everything correctly an information box will pop up with “Validation is successful”.
The next step is to click on Credit Card Types button on the Payment service form.

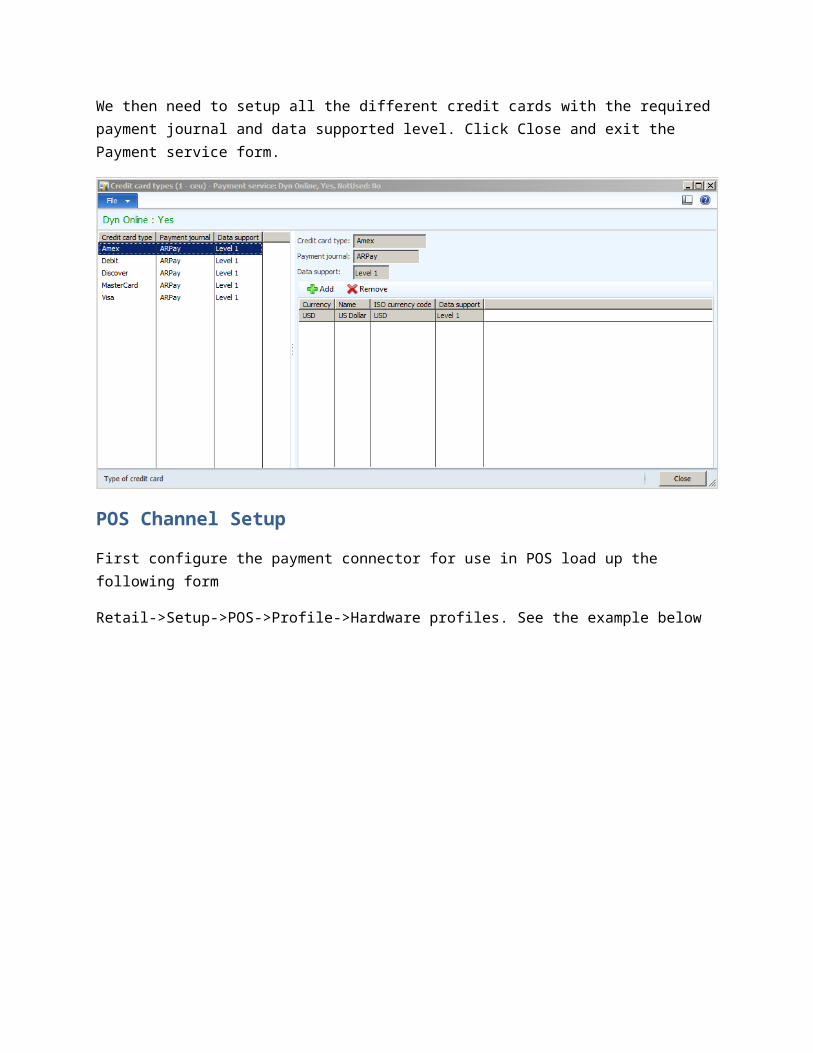
We then need to setup all the different credit cards with the required payment journal and data supported level. Click Close and exit the Payment service form.
POS Channel Setup
First configure the payment connector for use in POS load up the following form
Retail->Setup->POS->Profile->Hardware profiles. See the example below

Once you have selected the Payment Connector all of the installed connectors will be loaded into the drop down. Currently we only support the Dynamics Payment Connector. The hardware profile version represents the version of POS the headquarters will be pushing data to. The merchant account ID is the merchant details printed on the receipt and normally is provided by the payment provider. Before closing the form we must carry out steps A) to H) in the above AX Channel Setup above. When the form is closed you should not see any errors.
Online Channel Setup
First configure the payment connector for use in the Online Channel load up the following form
Retail->Common->Retail channels->Online stores. See the example below
Double click on the store you need to add payment to.
All of the installed connectors will be loaded into the drop down. Currently we only support the Dynamics Payment Connector. To add a connector select the required connector in the drop down and click the add button. Once you have filled in all the data before closing the form we must carry out steps A) to H) in the above AX Channel Setup above. When the form is closed you should not see any errors. The Online Channel supports multiple connectors and loads the first connector that supports the required currency and payment method for the transaction being processed.