Embed Size (px)
Citation preview
Copyright © 2006-2014 Live Systems ProjectAcest program este liber: poate fi redistribuit și/sau modificat înconformitate cu termenii Licenței Publice Generale GNU (GPL),precum este publicată de către Free Software Foundation, fieversiunea 3 a licenței, sau (opțional) orice altă versiune ulterioară..
Acest program este distribuit cu speranța că va fi util, darFĂRĂ NICIO GARANȚIE; fără a avea garanția VANDABILITĂȚIIsau ÎNDEPLINIRII UNUI ANUME SCOP. Vezi Licența PublicăGenerală GNU pentru mai multe detalii.
Ar trebui să fi orimit o copie a Licenței Publice GeneraleGNU împreună cu acest program. În caz contrar, vezi‹http://www.gnu.org/licenses/›.
Textul complet al Licenței Publice Generale poate fi găsit înfișierul /usr/share/common-licenses/GPL-3.
ii
Contents
Contents
Despre 2
Despre acest manual 3
1. Despre acest manual 31.1 For the impatient . . . . . . . . . . . . . . . . . . . . 31.2 Termeni . . . . . . . . . . . . . . . . . . . . . . . . . 31.3 Autori . . . . . . . . . . . . . . . . . . . . . . . . . . 41.4 Cum se poate contribui la acest document . . . . . . 5
1.4.1 Applying changes . . . . . . . . . . . . . . . . 51.4.2 Translation . . . . . . . . . . . . . . . . . . . 5
About the Live Systems Project 7
2. About the Live Systems Project 72.1 Motivatie . . . . . . . . . . . . . . . . . . . . . . . . . 7
2.1.1 Ce nu e bine cu sistemele live actuale . . . . 72.1.2 De ce e nevoie de propriul nostru sistem live ? 7
2.2 Filozofia . . . . . . . . . . . . . . . . . . . . . . . . . 72.2.1 Numai pachete neschimbate din Debian
“main” . . . . . . . . . . . . . . . . . . . . . 72.2.2 Nu vor fi programe de configurare pentru
sistemul live. . . . . . . . . . . . . . . . . . 72.3 Contact . . . . . . . . . . . . . . . . . . . . . . . . . 8
Utilizator 9
Installation 10
3. Installation 103.1 Requirements . . . . . . . . . . . . . . . . . . . . . . 103.2 Installing live-build . . . . . . . . . . . . . . . . . . . 10
3.2.1 From the Debian repository . . . . . . . . . . 103.2.2 From source . . . . . . . . . . . . . . . . . . 103.2.3 From ‘snapshots’ . . . . . . . . . . . . . . . . 11
3.3 Installing live-boot and live-config . . . . . . . . . . . 113.3.1 From the Debian repository . . . . . . . . . . 113.3.2 From source . . . . . . . . . . . . . . . . . . 113.3.3 From ‘snapshots’ . . . . . . . . . . . . . . . . 12
The basics 13
4. The basics 134.1 What is a live system? . . . . . . . . . . . . . . . . . 134.2 Downloading prebuilt images . . . . . . . . . . . . . 134.3 Using the web live image builder . . . . . . . . . . . 14
4.3.1 Web builder usage and caveats . . . . . . . . 144.4 First steps: building an ISO hybrid image . . . . . . 144.5 Using an ISO hybrid live image . . . . . . . . . . . . 15
4.5.1 Burning an ISO image to a physical medium . 154.5.2 Copying an ISO hybrid image to a USB stick 154.5.3 Using the space left on a USB stick . . . . . . 164.5.4 Booting the live medium . . . . . . . . . . . . 16
4.6 Using a virtual machine for testing . . . . . . . . . . 164.6.1 Testing an ISO image with QEMU . . . . . . . 174.6.2 Testing an ISO image with VirtualBox . . . . . 17
4.7 Building and using an HDD image . . . . . . . . . . 174.8 Building a netboot image . . . . . . . . . . . . . . . . 18
4.8.1 DHCP server . . . . . . . . . . . . . . . . . . 194.8.2 TFTP server . . . . . . . . . . . . . . . . . . . 19
iii
Contents
4.8.3 NFS server . . . . . . . . . . . . . . . . . . . 204.8.4 Netboot testing HowTo . . . . . . . . . . . . . 204.8.5 Qemu . . . . . . . . . . . . . . . . . . . . . . 20
4.9 Webbooting . . . . . . . . . . . . . . . . . . . . . . . 204.9.1 Getting the webboot files . . . . . . . . . . . . 214.9.2 Booting webboot images . . . . . . . . . . . . 21
Overview of tools 22
5. Overview of tools 225.1 The live-build package . . . . . . . . . . . . . . . . . 22
5.1.1 The lb config command . . . . . . . . . . . . 225.1.2 The lb build command . . . . . . . . . . . . . 235.1.3 The lb clean command . . . . . . . . . . . . . 23
5.2 The live-boot package . . . . . . . . . . . . . . . . . 235.3 The live-config package . . . . . . . . . . . . . . . . 23
Managing a configuration 24
6. Managing a configuration 246.1 Dealing with configuration changes . . . . . . . . . . 24
6.1.1 Why use auto scripts? What do they do? . . 246.1.2 Use example auto scripts . . . . . . . . . . . 24
6.2 Clone a configuration published via Git . . . . . . . . 25
Customizing contents 26
7. Customization overview 267.1 Build time vs. boot time configuration . . . . . . . . . 267.2 Stages of the build . . . . . . . . . . . . . . . . . . . 267.3 Supplement lb config with files . . . . . . . . . . . . 26
7.4 Customization tasks . . . . . . . . . . . . . . . . . . 27
Customizing package installation 28
8. Customizing package installation 288.1 Package sources . . . . . . . . . . . . . . . . . . . . 28
8.1.1 Distribution, archive areas and mode . . . . . 288.1.2 Distribution mirrors . . . . . . . . . . . . . . . 298.1.3 Distribution mirrors used at build time . . . . 298.1.4 Distribution mirrors used at run time . . . . . 298.1.5 Additional repositories . . . . . . . . . . . . . 29
8.2 Choosing packages to install . . . . . . . . . . . . . 308.2.1 Package lists . . . . . . . . . . . . . . . . . . 308.2.2 Using metapackages . . . . . . . . . . . . . . 308.2.3 Local package lists . . . . . . . . . . . . . . . 318.2.4 Local binary package lists . . . . . . . . . . . 318.2.5 Generated package lists . . . . . . . . . . . . 318.2.6 Using conditionals inside package lists . . . . 318.2.7 Removing packages at install time . . . . . . 328.2.8 Desktop and language tasks . . . . . . . . . 328.2.9 Kernel flavour and version . . . . . . . . . . . 338.2.10 Custom kernels . . . . . . . . . . . . . . . . 33
8.3 Installing modified or third-party packages . . . . . . 348.3.1 Using packages.chroot to install custom
packages . . . . . . . . . . . . . . . . . . . 348.3.2 Using an APT repository to install custom
packages . . . . . . . . . . . . . . . . . . . 348.3.3 Custom packages and APT . . . . . . . . . . 34
8.4 Configuring APT at build time . . . . . . . . . . . . . 358.4.1 Choosing apt or aptitude . . . . . . . . . . . . 358.4.2 Using a proxy with APT . . . . . . . . . . . . 358.4.3 Tweaking APT to save space . . . . . . . . . 358.4.4 Passing options to apt or aptitude . . . . . . . 36
iv
Contents
8.4.5 APT pinning . . . . . . . . . . . . . . . . . . . 36
Customizing contents 38
9. Customizing contents 389.1 Includes . . . . . . . . . . . . . . . . . . . . . . . . . 38
9.1.1 Live/chroot local includes . . . . . . . . . . . 389.1.2 Binary local includes . . . . . . . . . . . . . . 38
9.2 Hooks . . . . . . . . . . . . . . . . . . . . . . . . . . 399.2.1 Live/chroot local hooks . . . . . . . . . . . . . 399.2.2 Boot-time hooks . . . . . . . . . . . . . . . . 399.2.3 Binary local hooks . . . . . . . . . . . . . . . 39
9.3 Preseeding Debconf questions . . . . . . . . . . . . 39
Customizing run time behaviours 40
10. Customizing run time behaviours 4010.1 Customizing the live user . . . . . . . . . . . . . . . 4010.2 Customizing locale and language . . . . . . . . . . 4010.3 Persistence . . . . . . . . . . . . . . . . . . . . . . 41
10.3.1 The persistence.conf file . . . . . . . . . . . 4310.3.2 Using more than one persistence store . . . 43
10.4 Using persistence with encryption . . . . . . . . . . 44
Customizing the binary image 46
11. Customizing the binary image 4611.1 Bootloaders . . . . . . . . . . . . . . . . . . . . . . 4611.2 ISO metadata . . . . . . . . . . . . . . . . . . . . . 46
Customizing Debian Installer 47
12. Customizing Debian Installer 4712.1 Types of Debian Installer . . . . . . . . . . . . . . . 4712.2 Customizing Debian Installer by preseeding . . . . 4812.3 Customizing Debian Installer content . . . . . . . . 48
Proiect 49
Contributing to the project 50
13. Contributing to the project 5013.1 Making changes . . . . . . . . . . . . . . . . . . . . 50
Reporting bugs 52
14. Reporting bugs 5214.1 Known issues . . . . . . . . . . . . . . . . . . . . . 5214.2 Rebuild from scratch . . . . . . . . . . . . . . . . . 5214.3 Use up-to-date packages . . . . . . . . . . . . . . . 5214.4 Collect information . . . . . . . . . . . . . . . . . . 5214.5 Isolate the failing case if possible . . . . . . . . . . 5314.6 Use the correct package to report the bug against . 53
14.6.1 At build time while bootstrapping . . . . . . 5314.6.2 At build time while installing packages . . . 5414.6.3 At boot time . . . . . . . . . . . . . . . . . . 5414.6.4 At run time . . . . . . . . . . . . . . . . . . . 54
14.7 Do the research . . . . . . . . . . . . . . . . . . . . 5414.8 Where to report bugs . . . . . . . . . . . . . . . . . 54
v
Contents
Coding Style 56
15. Coding Style 5615.1 Compatibility . . . . . . . . . . . . . . . . . . . . . . 5615.2 Indenting . . . . . . . . . . . . . . . . . . . . . . . . 5615.3 Wrapping . . . . . . . . . . . . . . . . . . . . . . . . 5615.4 Variables . . . . . . . . . . . . . . . . . . . . . . . . 5615.5 Miscellaneous . . . . . . . . . . . . . . . . . . . . . 57
Procedures 58
16. Procedures 5816.1 Major Releases . . . . . . . . . . . . . . . . . . . . 5816.2 Point Releases . . . . . . . . . . . . . . . . . . . . 58
16.2.1 Last Point Release of a Debian Release . . 5816.2.2 Point release announcement template . . . 58
Git repositories 60
17. Git repositories 6017.1 Handling multiple repositories . . . . . . . . . . . . 60
Exemple 62
Exemple 63
18. Examples 6318.1 Using the examples . . . . . . . . . . . . . . . . . . 6318.2 Tutorial 1: A default image . . . . . . . . . . . . . . 6318.3 Tutorial 2: A web browser utility . . . . . . . . . . . 64
18.4 Tutorial 3: A personalized image . . . . . . . . . . 6418.4.1 First revision . . . . . . . . . . . . . . . . . . 6418.4.2 Second revision . . . . . . . . . . . . . . . . 65
18.5 A VNC Kiosk Client . . . . . . . . . . . . . . . . . . 6618.6 A base image for a 128MB USB key . . . . . . . . 6718.7 A localized GNOME desktop and installer . . . . . 68
Anexă 69
Style guide 70
19. Style guide 7019.1 Guidelines for authors . . . . . . . . . . . . . . . . 70
19.1.1 Linguistic features . . . . . . . . . . . . . . . 7019.1.2 Procedures . . . . . . . . . . . . . . . . . . 71
19.2 Guidelines for translators . . . . . . . . . . . . . . . 7319.2.1 Translation hints . . . . . . . . . . . . . . . . 73
SiSU Metadata, document information 75
vi
Contents
Manualul Live Systems1
1

Contents
Despre2
2
Manualul Live Systems
Despre acest manual3
1. Despre acest manual4
This manual serves as a single access point to all documentation5
related to the Live Systems Project and in particular applies tothe software produced by the project for the Debian 8.0 “jessie” release. An up-to-date version can always be found at ‹http://live-systems.org/›
While live-manual is primarily focused on helping you build a6
live system and not on end-user topics, an end-user may findsome useful information in these sections: ‹The Basics› coversdownloading prebuilt images and preparing images to be bootedfrom media or the network, either using the web builder orrunning live-build directly on your system. ‹Customizing run timebehaviours› describes some options that may be specified at theboot prompt, such as selecting a keyboard layout and locale, andusing persistence.
Anumite comenzi din text trebuie sa fie executate ca ‘super_utilizator’,7
privilegiu care poate fi obtinut fie prin comanda su, sau sudo.Pentru a distinge intre acesti utilizatori se vor folosi $ respectiv # .Aceste simboluri nu fac parte din comenzi.
1.1 For the impatient8
While we believe that everything in this manual is important to at9
least some of our users, we realize it is a lot of material to cover andthat you may wish to experience early success using the softwarebefore delving into the details. Therefore, we suggest reading inthe following order.
First, read this chapter, ‹About this manual›, from the beginning and10
ending with the ‹Terms› section. Next, skip to the three tutorials at
the front of the ‹Examples› section designed to teach you imagebuilding and customization basics. Read ‹Using the examples›first, followed by ‹Tutorial 1: A default image›, ‹Tutorial 2: A webbrowser utility› and finally ‹Tutorial 3: A personalized image›. Bythe end of these tutorials, you will have a taste of what can be donewith live systems.
We encourage you to return to more in-depth study of the manual, 11
perhaps next reading ‹The basics›, skimming or skipping ‹Buildinga netboot image›, and finishing by reading the ‹Customizationoverview› and the chapters that follow it. By this point, we hopeyou are thoroughly excited by what can be done with live systemsand motivated to read the rest of the manual, cover-to-cover.
1.2 Termeni 12
• Live system : An operating system that can boot without 13
installation to a hard drive. Live systems do not alter localoperating system(s) or file(s) already installed on the computerhard drive unless instructed to do so. Live systems are typicallybooted from media such as CDs, DVDs or USB sticks. Somemay also boot over the network (via netboot images, see‹Building a netboot image›), and over the Internet (via the bootparameter fetch=URL, see ‹Webbooting›).
• Live medium : As distinct from live system, the live medium 14
refers to the CD, DVD or USB stick where the binary producedby live-build and used to boot the live system is written. Morebroadly, the term also refers to any place where this binaryresides for the purposes of booting the live system, such as thelocation for the network boot files.
• Live Systems Project : The project which maintains, among 15
others, the live-boot, live-build, live-config, live-tools and live-manual packages.
3
Manualul Live Systems
• Host system : Mediul folosit pentru crearea sistemului live pe un16
sistem dat.
• Target system : Mediul folosit pentru rularea sistemului live.17
• live-boot : O coloctie se scripte folosite la pornirea sistemului18
live.
• live-build : A collection of scripts used to build customized live19
systems.
• live-config : O colectie de scripte folosite la configurarea20
sitemului live in timpul procesului de pornire.
• live-tools : A collection of additional scripts used to perform21
useful tasks within a running live system.
• live-manual : Acest document face parte din pachetul numit live-22
manual.
• Debian Installer (d-i) : Sistemul de instalare oficial pentru23
distributia Debian.
• Boot parameters : Parameti care pot fi adaugati la promptul24
bootloader-ului care sa infuenteze kernelul sau live-config.
• chroot : Programul chroot, chroot(8), permite rularea a diferite25
instante din mediul GNU/Linux pe un singur sistem si in simultanfara a necesita o repornire a sistemului.
• Binary image : A file containing the live system, such as live-26
image-i386.hybrid.iso or live-image-i386.img.
• Target distribution : Dea pe care se bazeaza sistemul live.27
Aceasta distributie poate fi diferita de cea a sistemului gazda.
• stable/testing/unstable : The stable distribution, currently28
codenamed wheezy , contains the latest officially releaseddistribution of Debian. The testing distribution, temporarilycodenamed jessie , is the staging area for the next stable
release. A major advantage of using this distribution is thatit has more recent versions of software relative to the stablerelease. The unstable distribution, permanently codenamedsid , is where active development of Debian occurs. Generally,this distribution is run by developers and those who like to live onthe edge. Throughout the manual, we tend to use codenamesfor the releases, such as jessie or sid , as that is what issupported by the tools themselves.
1.3 Autori 29
Lista autorilor (in ordine alfabetica): 30
• Ben Armstrong 31
• Brendan Sleight 32
• Carlos Zuferri 33
• Chris Lamb 34
• Daniel Baumann 35
• Franklin Piat 36
• Jonas Stein 37
• Kai Hendry 38
• Marco Amadori 39
• Mathieu Geli 40
• Matthias Kirschner 41
• Richard Nelson 42
• Trent W. Buck 43
4
Manualul Live Systems
1.4 Cum se poate contribui la acest document 44
This manual is intended as a community project and all proposals45
for improvements and contributions are extremely welcome.Please see the section ‹Contributing to the project› for detailedinformation on how to fetch the commit key and make goodcommits.
1.4.1 Applying changes46
In order to make changes to the English manual you have to47
edit the right files in manual/en/ but prior to the submission ofyour contribution, please preview your work. To preview the live-manual, ensure the packages needed for building it are installedby executing:
48
# apt-get install make po4a ruby ruby-nokogiri sisu-complete
Pute-ti crea live-manual de la nivelul de sus al directorului Git49
checkout al dvs, prin executatea:
50
$ make build
Since it takes a while to build the manual in all supported51
languages, authors may find it convenient to use one of thefast proofing shortcuts when reviewing the new documentationthey have added to the English manual. Using PROOF=1 buildslive-manual in html format, but without the segmented html files,and using PROOF=2 builds live-manual in pdf format, but only theA4 and letter portraits. That is why using either of the PROOF=
possibilities can save up a considerable amount of time, e.g:
52
$ make build PROOF=1
When proofing one of the translations it is possible to build only one 53
language by executing, e.g:
54
$ make build LANGUAGES=de
It is also possible to build by document type, e.g: 55
56
$ make build FORMATS=pdf
Or combine both, e.g: 57
58
$ make build LANGUAGES=de FORMATS=html
After revising your work and making sure that everything is fine, 59
do not use make commit unless you are updating translations in thecommit, and in that case, do not mix changes to the English manualand translations in the same commit, but use separate commits foreach. See the ‹Translation› section for more details.
1.4.2 Translation 60
In order to translate live-manual, follow these steps depending on 61
whether you are starting a translation from scratch or continueworking on an already existing one:
5
Manualul Live Systems
• Start a new translation from scratch 62
• Translate the about_manual.ssi.pot , about_project.ssi.pot63
and index.html.in.pot files in manual/pot/ to yourlanguage with your favourite editor (such as poedit) andsend the translated .po files to the mailing list to check theirintegrity. live-manual’s integrity check not only ensures thatthe .po files are 100% translated but it also detects possibleerrors.
• Once checked, to enable a new language in the autobuild64
it is enough to add the initial translated files to manual/-
po/${LANGUAGE}/ and run make commit. And then, editmanual/_sisu/home/index.html adding the name of thelanguage and its name in English between brackets.
• Continue with an already started translation65
• If your target language has already been added, you can66
randomly continue translating the remaining .po files inmanual/po/${LANGUAGE}/ using your favourite editor (suchas poedit) .
• Do not forget that you need to run make commit to ensure that67
the translated manuals are updated from the .po files andthen you can review your changes launching make build
before git add ., git commit -m “Translating...” andgit push. Remember that since make build can take aconsiderable amount of time, you can proofread languagesindividually as explained in ‹Applying changes›
After running make commit you will see some text scroll by. These68
are basically informative messages about the processing statusand also some hints about what can be done in order to improvelive-manual. Unless you see a fatal error, you usually can proceedand submit your contribution.
live-manual comes with two utilities that can greatly help translators69
to find untranslated and changed strings. The first one is “maketranslate”. It launches an script that tells you in detail how manyuntranslated strings there are in each .po file. The second one, the“make fixfuzzy” target, only acts upon changed strings but it helpsyou to find and fix them one by one.
Keep in mind that even though these utilities might be really 70
helpful to do translation work on the command line, the use ofan specialized tool like poedit is the recommended way to do thetask. It is also a good idea to read the Debian localization (l10n)documentation and, specifically to live-manual, the ‹Guidelines fortranslators›.
Note: You can use make clean to clean your git tree before 71
pushing. This step is not compulsory thanks to the .gitignore filebut it is a good practice to avoid committing files involuntarily.
6

Manualul Live Systems
About the Live Systems Project72
2. About the Live Systems Project73
2.1 Motivatie74
2.1.1 Ce nu e bine cu sistemele live actuale75
When Live Systems Project was initiated, there were already76
several Debian based live systems available and they are doing agreat job. From the Debian perspective most of them have one ormore of the following disadvantages:
• Ele nu sunt proiecte Debian si drept urmare nu au suport din77
partea Comunitatii Debian
• Ele amalgameaza diferite distributii, ca testing si unstable .78
• Ele suporta doar arhitectura i386.79
• Ele au modificat comportamentul si /sau aspectul programelor80
pentru a castuga spatiu.
• Acestea includ pachete din afara arhivelor Debian81
• Ele folosesc kernele modificate care contin patch-uri ce nu fac82
parte din Debian.
• Ele sunt greoaie si lente datorete marimii lor si deci inapropiate83
pentru situatii de salvare/rescue.
• Ele nu sunt disponibile in diferite sosuri ca CDs, DVDs, USB-stick84
si netboot images.
2.1.2 De ce e nevoie de propriul nostru sistem live ?85
Debian se considera Sistemul de Operare Universal: Are un86
mecanism live pentru a se promova in jur si de a prezenta
cu acuratete sistemul de operare ce are urmatoarele mariavantaje:
• It is a subproject of Debian. 87
• El reflecta starea (actuala) a distributiei. 88
• Se poate utiliza pe maximum de arhitecturi posibile. 89
• Contine doar programe Debian. 90
• Nu contine nici un pachet care nu este din afara arhivelor Debian. 91
• Foloseste un kernel Debian nealterat, fara patch-uri aditionale. 92
2.2 Filozofia 93
2.2.1 Numai pachete neschimbate din Debian “main” 94
Se vor folosi numai pachete din depozitul Debian sectiunea “main”. 95
Sectiunea non-free nu este parte a Debian drept urmare nu poatefi folosita nici un fel la construirea imaginilor live cu Debian.
Nu vor fi facute nici o schimbare in programe. Daca este nevoie de 96
acest lucru, schimbarile vor fi facute in coordonare cu responsabilulde program din Debian.
Ca o exceptie, programele specifice ca live-boot, live-build sau 97
live-config pot fi folosite temporar din depozitele proprii live,pentru nevoi de dezvoltare. (de exemplu pentru creerea dedevelopment snapshots). Acestea vor fi upload-ate in Debian ladate cuvenite.
2.2.2 Nu vor fi programe de configurare pentru sistemul 98
live.
In aceasta faza nu vor fi propuse sau instalate example sau 99
7
Manualul Live Systems
configuratii alternative. Toate programele sunt folosite cuconfiguratia default ‘de baza’, la fel ca in instalatia normaladinDebian.
In caz de nevoie a unei configuratii diferite, aceasta schimbare100
va fii facuta in coordonare cu responsabilui de program dinDebian.
A system for configuring packages is provided using debconf101
allowing custom configured packages to be installed in yourcustom produced live system images, but for the ‹prebuiltlive images› we choose to leave packages in their defaultconfiguration, unless absolutely necessary in order to work inthe live environment. Wherever possible, we prefer to adaptpackages within the Debian archive to work better in a live systemversus making changes to the live toolchain or ‹prebuilt imageconfigurations›. For more information, please see ‹Customizationoverview›.
2.3 Contact102
• Mailing list : The primary contact for the project is the mailing list103
at ‹http://lists.debian.org/debian-live/›. You can email the list directly byaddressing your mail to ‹[email protected].› The list archivesare available at ‹http://lists.debian.org/debian-live/›.
• IRC : Un numar de utilizatori si dezvoltatori sunt prezenti in104
canalul #debian-live pe n irc.debian.org (OFTC). Daca avetio intrebare pentru IRC , fiti cu multa rabdare in asteptarearaspunsului. In caz de lipsa a unui raspuns , folositi mailing list.
• BTS : BTS adica ‹Reporting bugs›.105
8

Manualul Live Systems
Utilizator106
9
Manualul Live Systems
Installation107
3. Installation108
3.1 Requirements109
Building live system images has very few system requirements:110
• Superuser (root) access111
• An up-to-date version of live-build112
• A POSIX-compliant shell, such as bash or dash113
• python3114
• debootstrap or cdebootstrap115
• Linux 2.6 or newer.116
Note that using Debian or a Debian-derived distribution is not117
required - live-build will run on almost any distribution with theabove requirements.
3.2 Installing live-build118
You can install live-build in a number of different ways:119
• From the Debian repository120
• From source121
• From snapshots122
If you are using Debian, the recommended way is to install live-123
build via the Debian repository.
3.2.1 From the Debian repository124
Simply install live-build like any other package:125
126
# apt-get install live-build
3.2.2 From source 127
live-build is developed using the Git version control system. On 128
Debian based systems, this is provided by the git package. Tocheck out the latest code, execute:
129
$ git clone git://live-systems.org/git/live-build.git
You can build and install your own Debian package by 130
executing:
131
$ cd live-build$ dpkg-buildpackage -b -uc -us$ cd ..
Now install whichever of the freshly built .deb files you were 132
interested in, e.g.
133
# dpkg -i live-build_3.0-1_all.deb
You can also install live-build directly to your system by 134
10
Manualul Live Systems
executing:
135
# make install
and uninstall it with:136
137
# make uninstall
3.2.3 From ‘snapshots’138
If you do not wish to build or install live-build from source, you139
can use snapshots. These are built automatically from the latestversion in Git and are available on ‹http://live-systems.org/debian/›.
3.3 Installing live-boot and live-config140
Note: You do not need to install live-boot or live-config on your141
system to create customized live systems. However, doing so willdo no harm and is useful for reference purposes. If you only wantthe documentation, you may now install the live-boot-doc and live-config-doc packages separately.
3.3.1 From the Debian repository142
Both live-boot and live-config are available from the Debian143
repository as per ‹Installing live-build›.
3.3.2 From source144
To use the latest source from git, you can follow the process 145
below. Please ensure you are familiar with the terms mentioned in‹Terms›.
• Checkout the live-boot and live-config sources 146
147
$ git clone git://live-systems.org/git/live-boot.git$ git clone git://live-systems.org/git/live-config.git
Consult the live-boot and live-config man pages for details on 148
customizing if that is your reason for building these packages fromsource.
• Build live-boot and live-config .deb files 149
You must build either on your target distribution or in a chroot 150
containing your target platform: this means if your target is jessiethen you should build against jessie .
Use a personal builder such as pbuilder or sbuild if you need to 151
build live-boot for a target distribution that differs from your buildsystem. For example, for jessie live images, build live-boot ina jessie chroot. If your target distribution happens to matchyour build system distribution, you may build directly on the buildsystem using dpkg-buildpackage (provided by the dpkg-devpackage):
152
$ cd live-boot$ dpkg-buildpackage -b -uc -us$ cd ../live-config$ dpkg-buildpackage -b -uc -us
11
Manualul Live Systems
• Use applicable generated .deb files 153
As live-boot and live-config are installed by live-build system,154
installing the packages in the host system is not sufficient: youshould treat the generated .deb files like any other custompackages. Since your purpose for building from source is likelyto test new things over the short term before the official release,follow ‹Installing modified or third-party packages› to temporarilyinclude the relevant files in your configuration. In particular,notice that both packages are divided into a generic part, adocumentation part and one or more back-ends. Include thegeneric part, only one back-end matching your configuration, andoptionally the documentation. Assuming you are building a liveimage in the current directory and have generated all .deb files fora single version of both packages in the directory above, thesebash commands would copy all of the relevant packages includingdefault back-ends:
155
$ cp ../live-boot{_,-initramfs-tools,-doc}*.deb config/packages.chroot/$ cp ../live-config{_,-sysvinit,-doc}*.deb config/packages.chroot/
3.3.3 From ‘snapshots’156
You can let live-build automatically use the latest snapshots of157
live-boot and live-config by configuring the package repositoryon live-systems.org as a third-party repository in your live-buildconfiguration directory.
12

Manualul Live Systems
The basics158
4. The basics159
This chapter contains a brief overview of the build process and160
instructions for using the three most commonly used image types.The most versatile image type, iso-hybrid, may be used on avirtual machine, optical medium or USB portable storage device. Incertain special cases, as explained later, the hdd type may be moresuitable. The chapter includes detailed instructions for building andusing a netboot type image, which is a bit more involved due to thesetup required on the server. This is an slightly advanced topic foranyone who is not already familiar with netbooting, but it is includedhere because once the setup is done, it is a very convenient wayto test and deploy images for booting on the local network withoutthe hassle of dealing with image media.
The section finishes with a quick introduction to ‹webbooting› which161
is, perhaps, the easiest way of using different images for differentpurposes, switching from one to the other as needed using theinternet as a means.
Throughout the chapter, we will often refer to the default filenames162
produced by live-build. If you are ‹downloading a prebuilt image›instead, the actual filenames may vary.
4.1 What is a live system?163
A live system usually means an operating system booted on a164
computer from a removable medium, such as a CD-ROM or USBstick, or from a network, ready to use without any installation onthe usual drive(s), with auto-configuration done at run time (see‹Terms›).
With live systems, it’s an operating system, built for one of the165
supported architectures (currently amd64 and i386). It is madefrom the following parts:
• Linux kernel image , usually named vmlinuz* 166
• Initial RAM disk image (initrd) : a RAM disk set up for the Linux 167
boot, containing modules possibly needed to mount the Systemimage and some scripts to do it.
• System image : The operating system’s filesystem image. 168
Usually, a SquashFS compressed filesystem is used tominimize the live system image size. Note that it is read-only.So, during boot the live system will use a RAM disk and ‘union’mechanism to enable writing files within the running system.However, all modifications will be lost upon shutdown unlessoptional persistence is used (see ‹Persistence›).
• Bootloader : A small piece of code crafted to boot from the 169
chosen medium, possibly presenting a prompt or menu to allowselection of options/configuration. It loads the Linux kernel andits initrd to run with an associated system filesystem. Differentsolutions can be used, depending on the target medium andformat of the filesystem containing the previously mentionedcomponents: isolinux to boot from a CD or DVD in ISO9660format, syslinux for HDD or USB drive booting from a VFATpartition, extlinux for ext2/3/4 and btrfs partitions, pxelinux forPXE netboot, GRUB for ext2/3/4 partitions, etc.
You can use live-build to build the system image from your 170
specifications, set up a Linux kernel, its initrd, and a bootloader torun them, all in one medium-dependant format (ISO9660 image,disk image, etc.).
4.2 Downloading prebuilt images 171
While the focus of this manual is developing and building your own 172
13
Manualul Live Systems
live images, you may simply wish to try one of our prebuilt images,either as an introduction to their use or instead of building your own.These images are built using our ‹live-images git repository› andofficial stable releases are published at ‹http://www.debian.org/CD/live/›.In addition, older and upcoming releases, and unofficial imagescontaining non-free firmware and drivers are available at ‹http://live-systems.org/cdimage/release/›.
4.3 Using the web live image builder173
As a service to the community, we run a web-based live image174
builder service at ‹http://live-build.debian.net/›. This site is maintainedon a best effort basis. That is, although we strive to keep it up-to-date and operational at all times, and do issue notices for significantoperational outages, we cannot guarantee 100% availability or fastimage building, and the service may occasionally have issues thattake some time to resolve. If you have problems or questions aboutthe service, please ‹contact us›, providing us with the link to yourbuild.
4.3.1 Web builder usage and caveats175
The web interface currently makes no provision to prevent the176
use of invalid combinations of options, and in particular, wherechanging an option would normally (i.e. using live-build directly)change defaults of other options listed in the web form, the webbuilder does not change these defaults. Most notably, if youchange --architectures from the default i386 to amd64, youmust change the corresponding option --linux-flavours fromthe default 486 to amd64. See the lb_config man page for theversion of live-build installed on the web builder for more details.The version number of live-build is listed at the bottom of the webbuilder page.
The time estimate given by the web builder is a crude estimate 177
only and may not reflect how long your build actually takes. Noris the estimate updated once it is displayed. Please be patient.Do not refresh the page you land on after submitting the build,as this will resubmit a new build with the same parameters. Youshould ‹contact us› if you don’t receive notification of your buildonly once you are certain you’ve waited long enough and verifiedthe notification e-mail did not get caught by your own e-mail spamfilter.
The web builder is limited in the kinds of images it can build. This 178
keeps it simple and efficient to use andmaintain. If you would like tomake customizations that are not provided for by the web interface,the rest of this manual explains how to build your own images usinglive-build.
4.4 First steps: building an ISO hybrid image 179
Regardless of the image type, you will need to perform the same 180
basic steps to build an image each time. As a first example, createa build directory, change to that directory and then execute thefollowing sequence of live-build commands to create a basic ISOhybrid image containing a default live system without X.org. It issuitable for burning to CD or DVD media, and also to copy onto aUSB stick.
The name of the working directory is absolutely up to you, but if 181
you take a look at the examples used throughout live-manual, it isa good idea to use a name that helps you identify the image youare working with in each directory, especially if you are workingor experimenting with different image types. In this case you aregoing to build a default system so let’s call it, for example, live-default.
182
14
Manualul Live Systems
$ mkdir live-default && cd live-default
Then, run the lb config commands. This will create a “config/”183
hierarchy in the current directory for use by other commands:
184
$ lb config
No parameters are passed to these commands, so defaults for all185
of their various options will be used. See ‹The lb config command›for more details.
Now that the “config/” hierarchy exists, build the image with the lb186
build command:
187
# lb build
This process can take a while, depending on the speed of your188
computer and your network connection. When it is complete, thereshould be a live-image-i386.hybrid.iso image file, ready to use,in the current directory.
4.5 Using an ISO hybrid live image189
After either building or downloading an ISO hybrid image, which190
can be obtained at ‹http://www.debian.org/CD/live/›, the usual next stepis to prepare your medium for booting, either CD-R(W) or DVD-R(W) optical media or a USB stick.
4.5.1 Burning an ISO image to a physical medium191
Burning an ISO image is easy. Just install xorriso and use it from192
the command-line to burn the image. For instance:
193
# apt-get install xorriso$ xorriso -as cdrecord -v dev=/dev/sr0 blank=as_needed live-image-i386.←↩
hybrid.iso
4.5.2 Copying an ISO hybrid image to a USB stick 194
ISO images prepared with xorriso, can be simply copied to a USB 195
stick with the cp program or an equivalent. Plug in a USB stickwith a size large enough for your image file and determine whichdevice it is, which we hereafter refer to as ${USBSTICK}. This is thedevice file of your key, such as /dev/sdb, not a partition, such as /-dev/sdb1! You can find the right device name by looking in dmesg’soutput after plugging in the stick, or better yet, ls -l /dev/disk/-
by-id.
Once you are certain you have the correct device name, use the 196
cp command to copy the image to the stick. This will definitelyoverwrite any previous contents on your stick!
197
$ cp live-image-i386.hybrid.iso ${USBSTICK}$ sync
Note: The sync command is useful to ensure that all the data, 198
which is stored in memory by the kernel while copying the image,is written to the USB stick.
15
Manualul Live Systems
4.5.3 Using the space left on a USB stick199
After copying the live-image-i386.hybrid.iso to a USB stick, the200
first partition on the device will be filled up by the live system. To usethe remaining free space, use a partitioning tool such as gpartedor parted to create a new partition on the stick.
201
# gparted ${USBSTICK}
After the partition is created, where ${PARTITION} is the name of202
the partition, such as /dev/sdb2, you have to create a filesystemon it. One possible choice would be ext4.
203
# mkfs.ext4 ${PARTITION}
Note: If you want to use the extra space withWindows, apparently204
that OS cannot normally access any partitions but the first. Somesolutions to this problem have been discussed on our ‹mailing list›,but it seems there are no easy answers.
Remember: Every time you install a new live-image-205
i386.hybrid.iso on the stick, all data on the stick will belost because the partition table is overwritten by the contentsof the image, so back up your extra partition first to restoreagain after updating the live image.
4.5.4 Booting the live medium206
The first time you boot your live medium, whether CD, DVD,207
USB key, or PXE boot, some setup in your computer’s BIOSmay be needed first. Since BIOSes vary greatly in features and
key bindings, we cannot get into the topic in depth here. SomeBIOSes provide a key to bring up a menu of boot devices at boottime, which is the easiest way if it is available on your system.Otherwise, you need to enter the BIOS configuration menu andchange the boot order to place the boot device for the live systembefore your normal boot device.
Once you’ve booted the medium, you are presented with a boot 208
menu. If you just press enter here, the system will boot using thedefault entry, Live and default options. For more information aboutboot options, see the “help” entry in the menu and also the live-bootand live-config man pages found within the live system.
Assuming you’ve selected Live and booted a default desktop 209
live image, after the boot messages scroll by, you should beautomatically logged into the user account and see a desktop,ready to use. If you have booted a console-only image, suchas standard or rescue flavour ‹prebuilt images›, you should beautomatically logged in on the console to the user account andsee a shell prompt, ready to use.
4.6 Using a virtual machine for testing 210
It can be a great time-saver for the development of live images 211
to run them in a virtual machine (VM). This is not without itscaveats:
• Running a VM requires enough RAM for both the guest OS and 212
the host and a CPU with hardware support for virtualization isrecommended.
• There are some inherent limitations to running on a VM, e.g. poor 213
video performance, limited choice of emulated hardware.
• When developing for specific hardware, there is no substitute for 214
running on the hardware itself.
16
Manualul Live Systems
• Occasionally there are bugs that relate only to running in a VM.215
When in doubt, test your image directly on the hardware.
Provided you can work within these constraints, survey the216
available VM software and choose one that is suitable for yourneeds.
4.6.1 Testing an ISO image with QEMU217
The most versatile VM in Debian is QEMU. If your processor218
has hardware support for virtualization, use the qemu-kvmpackage; the qemu-kvm package description briefly lists therequirements.
First, install qemu-kvm if your processor supports it. If not, install219
qemu, in which case the program name is qemu instead of kvm inthe following examples. The qemu-utils package is also valuablefor creating virtual disk images with qemu-img.
220
# apt-get install qemu-kvm qemu-utils
Booting an ISO image is simple:221
222
$ kvm -cdrom live-image-i386.hybrid.iso
See the man pages for more details.223
4.6.2 Testing an ISO image with VirtualBox224
In order to test the ISO with virtualbox:225
226
# apt-get install virtualbox virtualbox-qt virtualbox-dkms$ virtualbox
Create a new virtual machine, change the storage settings to use 227
live-image-i386.hybrid.iso as the CD/DVD device, and start themachine.
Note: For live systems containing X.org that you want to test with 228
virtualbox, you may wish to include the VirtualBox X.org driverpackage, virtualbox-guest-dkms and virtualbox-guest-x11, in yourlive-build configuration. Otherwise, the resolution is limited to800x600.
229
$ echo "virtualbox-guest-dkms virtualbox-guest-x11" >> config/package-lists←↩/my.list.chroot
In order to make the dkms package work, also the kernel headers 230
for the kernel flavour used in your image need to be installed.Instead of manually listing the correct linux-headers package inabove created package list, the selection of the right package canbe done automatically by live-build.
231
$ lb config --linux-packages "linux-image linux-headers"
4.7 Building and using an HDD image 232
Building an HDD image is similar to an ISO hybrid one in all 233
respects except you specify -b hdd and the resulting filenameis live-image-i386.img which cannot be burnt to optical media.It is suitable for booting from USB sticks, USB hard drives, and
17
Manualul Live Systems
various other portable storage devices. Normally, an ISO hybridimage can be used for this purpose instead, but if you have aBIOS which does not handle hybrid images properly, you need anHDD image.
Note: if you created an ISO hybrid image with the previous234
example, you will need to clean up your working directory with thelb clean command (see ‹The lb clean command›):
235
# lb clean --binary
Run the lb config command as before, except this time specifying236
the HDD image type:
237
$ lb config -b hdd
Now build the image with the lb build command:238
239
# lb build
When the build finishes, a live-image-i386.img file should be240
present in the current directory.
The generated binary image contains a VFAT partition and the241
syslinux bootloader, ready to be directly written on a USB device.Once again, using an HDD image is just like using an ISO hybridone on USB. Follow the instructions in ‹Using an ISO hybrid liveimage›, except use the filename live-image-i386.img instead oflive-image-i386.hybrid.iso.
Likewise, to test an HDD image with Qemu, install qemu as242
described above in ‹Testing an ISO image with QEMU›. Then runkvm or qemu, depending on which version your host system needs,specifying live-image-i386.img as the first hard drive.
243
$ kvm -hda live-image-i386.img
4.8 Building a netboot image 244
The following sequence of commands will create a basic netboot 245
image containing a default live system without X.org. It is suitablefor booting over the network.
Note: if you performed any previous examples, you will need to 246
clean up your working directory with the lb clean command:
247
# lb clean
In this specific case, a lb clean --binary would not be enough to 248
clean up the necessary stages. The cause for this is that in netbootsetups, a different initramfs configuration needs to be used whichlive-build performs automatically when building netboot images.Since the initramfs creation belongs to the chroot stage, switchingto netboot in an existing build directory means to rebuild the chrootstage too. Therefore, lb clean (which will remove the chrootstage, too) needs to be used.
Run the lb config command as follows to configure your image 249
for netbooting:
250
18
Manualul Live Systems
$ lb config -b netboot --net-root-path "/srv/debian-live" --net-root-server←↩"192.168.0.2"
In contrast with the ISO and HDD images, netbooting does not,251
itself, serve the filesystem image to the client, so the files mustbe served via NFS. Different network filesystems can be chosenthrough lb config. The --net-root-path and --net-root-server
options specify the location and server, respectively, of the NFSserver where the filesystem image will be located at boot time.Make sure these are set to suitable values for your network andserver.
Now build the image with the lb build command:252
253
# lb build
In a network boot, the client runs a small piece of software which254
usually resides on the EPROM of the Ethernet card. This programsends a DHCP request to get an IP address and information aboutwhat to do next. Typically, the next step is getting a higher levelbootloader via the TFTP protocol. That could be pxelinux, GRUB,or even boot directly to an operating system like Linux.
For example, if you unpack the generated live-image-255
i386.netboot.tar archive in the /srv/debian-live directory,you’ll find the filesystem image in live/filesystem.squashfs andthe kernel, initrd and pxelinux bootloader in tftpboot/.
We must now configure three services on the server to enable256
netbooting: the DHCP server, the TFTP server and the NFSserver.
4.8.1 DHCP server257
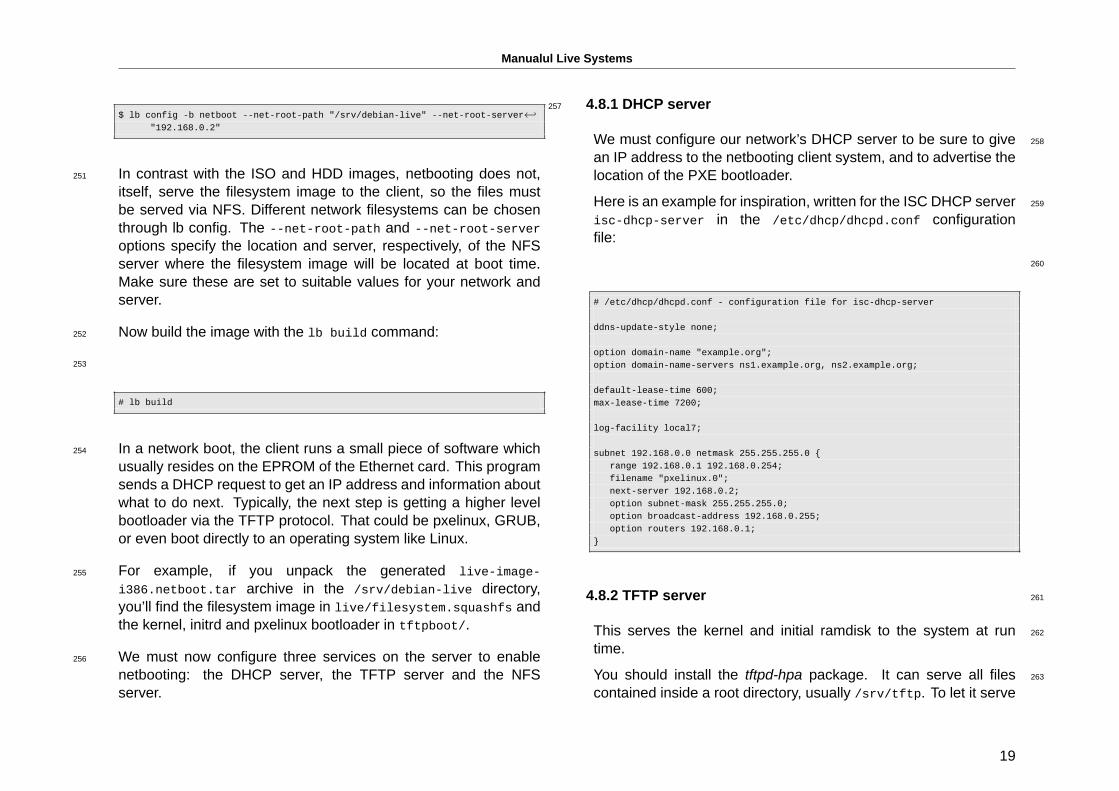
We must configure our network’s DHCP server to be sure to give 258
an IP address to the netbooting client system, and to advertise thelocation of the PXE bootloader.
Here is an example for inspiration, written for the ISC DHCP server 259
isc-dhcp-server in the /etc/dhcp/dhcpd.conf configurationfile:
260
# /etc/dhcp/dhcpd.conf - configuration file for isc-dhcp-server
ddns-update-style none;
option domain-name "example.org";option domain-name-servers ns1.example.org, ns2.example.org;
default-lease-time 600;max-lease-time 7200;
log-facility local7;
subnet 192.168.0.0 netmask 255.255.255.0 {range 192.168.0.1 192.168.0.254;filename "pxelinux.0";next-server 192.168.0.2;option subnet-mask 255.255.255.0;option broadcast-address 192.168.0.255;option routers 192.168.0.1;
}
4.8.2 TFTP server 261
This serves the kernel and initial ramdisk to the system at run 262
time.
You should install the tftpd-hpa package. It can serve all files 263
contained inside a root directory, usually /srv/tftp. To let it serve
19
Manualul Live Systems
files inside /srv/debian-live/tftpboot, run as root the followingcommand:
264
# dpkg-reconfigure -plow tftpd-hpa
and fill in the new tftp server directory when being asked about265
it.
4.8.3 NFS server266
Once the guest computer has downloaded and booted a Linux267
kernel and loaded its initrd, it will try to mount the Live filesystemimage through a NFS server.
You need to install the nfs-kernel-server package.268
Then, make the filesystem image available through NFS by adding269
a line like the following to /etc/exports:
270
/srv/debian-live *(ro,async,no_root_squash,no_subtree_check)
and tell the NFS server about this new export with the following271
command:
272
# exportfs -rv
Setting up these three services can be a little tricky. You might273
need some patience to get all of them working together. For moreinformation, see the syslinux wiki at ‹http://www.syslinux.org/wiki/index.php/PXELINUX› or the Debian Installer Manual’s TFTP Net Booting
section at ‹http://d-i.alioth.debian.org/manual/en.i386/ch04s05.html›. Theymight help, as their processes are very similar.
4.8.4 Netboot testing HowTo 274
Netboot image creation is made easy with live-build, but testing the 275
images on physical machines can be really time consuming.
To make our life easier, we can use virtualization. 276
4.8.5 Qemu 277
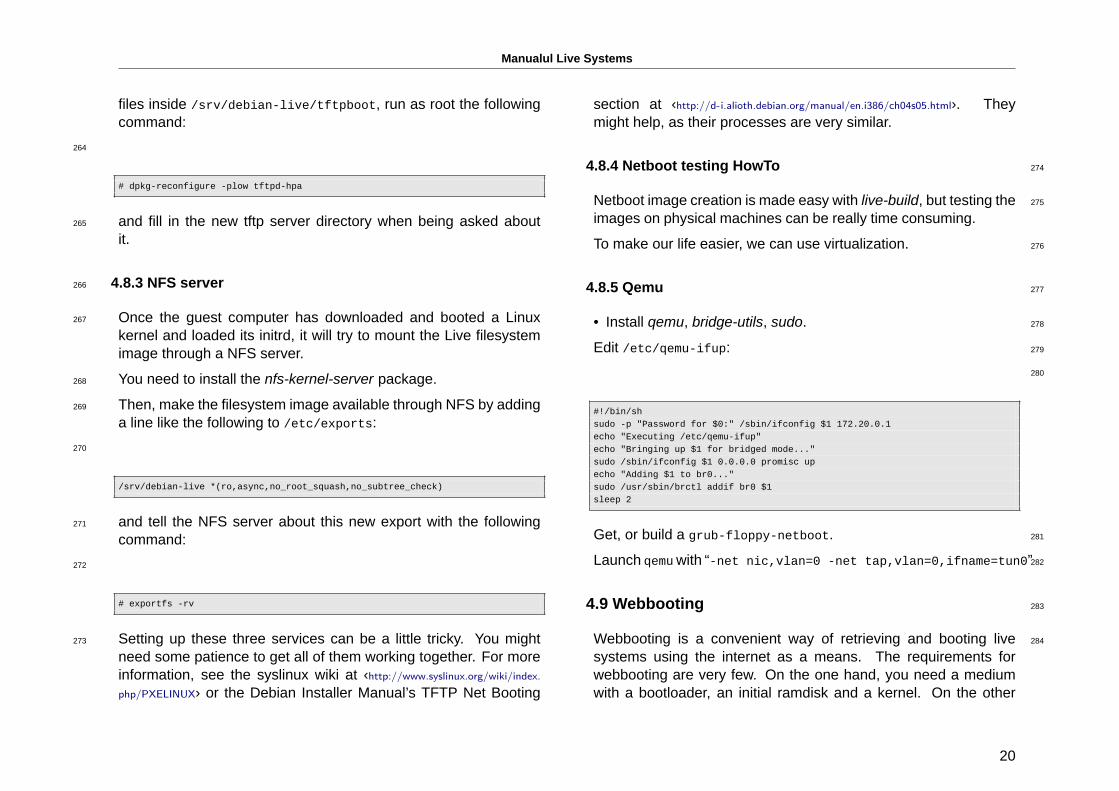
• Install qemu, bridge-utils, sudo. 278
Edit /etc/qemu-ifup: 279
280
#!/bin/shsudo -p "Password for $0:" /sbin/ifconfig $1 172.20.0.1echo "Executing /etc/qemu-ifup"echo "Bringing up $1 for bridged mode..."sudo /sbin/ifconfig $1 0.0.0.0 promisc upecho "Adding $1 to br0..."sudo /usr/sbin/brctl addif br0 $1sleep 2
Get, or build a grub-floppy-netboot. 281
Launch qemuwith “-net nic,vlan=0 -net tap,vlan=0,ifname=tun0”282
4.9 Webbooting 283
Webbooting is a convenient way of retrieving and booting live 284
systems using the internet as a means. The requirements forwebbooting are very few. On the one hand, you need a mediumwith a bootloader, an initial ramdisk and a kernel. On the other
20
Manualul Live Systems
hand, a web server to store the squashfs files which contain thefilesystem.
4.9.1 Getting the webboot files285
As usual, you can build the images yourself or use the pre-286
built files, which are available on the project’s homepage at‹http://live-systems.org/›. Using pre-built images would be handy fordoing initial testing until one can fine tune their own needs. If youhave built a live image you will find the files needed for webbootingin the build directory under binary/live/. The files are calledvmlinuz, initrd.img and filesystem.squashfs.
It is also possible to extract those files from an already existing287
iso image. In order to achieve that, loopback mount the image asfollows:
288
# mount -o loop image.iso /mnt
The files are to be found under the live/ directory. In this specific289
case, it would be /mnt/live/. This method has the disadvantagethat you need to be root to be able to mount the image. However,it has the advantage that it is easily scriptable and thus, easilyautomatized.
But undoubtedly, the easiest way of extracting the files from an290
iso image and uploading it to the web server at the same time, isusing the midnight commander ormc. If you have the genisoimagepackage installed, the two-pane file manager allows you to browsethe contents of an iso file in one pane and upload the files via ftp inthe other pane. Even though this method requires manual work, itdoes not require root privileges.
4.9.2 Booting webboot images 291
While some users will prefer virtualization to test webbooting, we 292
refer to real hardware here tomatch the following possible use casewhich should only be considered as an example.
In order to boot a webboot image it is enough to have the 293
components mentioned above, i.e. vmlinuz and initrd.img in ausb stick inside a directory named live/ and install syslinux asbootloader. Then boot from the usb stick and type fetch=URL/-
PATH/TO/FILE at the boot options. live-boot will retrieve thesquashfs file and store it into ram. This way, it is possible to usethe downloaded compressed filesystem as a regular live system.For example:
294
append boot=live components fetch=http://192.168.2.50/images/webboot/←↩filesystem.squashfs
Use case: You have a web server in which you have stored two 295
squashfs files, one which contains a full desktop, like for examplegnome, and a rescue one. If you need a graphical environmentfor one machine, you can plug your usb stick in and webboot thegnome image. If you need the rescue tools included in the secondtype of image, perhaps for another machine, you can webboot therescue one.
21
Manualul Live Systems
Overview of tools296
5. Overview of tools297
This chapter contains an overview of the three main tools used in298
building live systems: live-build, live-boot and live-config.
5.1 The live-build package299
live-build is a collection of scripts to build live systems. These300
scripts are also referred to as “commands”.
The idea behind live-build is to be a framework that uses a301
configuration directory to completely automate and customize allaspects of building a Live image.
Many concepts are similar to those used to build Debian packages302
with debhelper:
• The scripts have a central location for configuring their operation.303
In debhelper, this is the debian/ subdirectory of a package tree.For example, dh_install will look, among others, for a file calleddebian/install to determine which files should exist in aparticular binary package. In much the same way, live-buildstores its configuration entirely under a config/ subdirectory.
• The scripts are independent - that is to say, it is always safe to304
run each command.
Unlike debhelper, live-build provides the tools to generate a305
skeleton configuration directory. This could be considered to besimilar to tools such as dh-make. For more information aboutthese tools, read on, since the remainder of this section discusesthe four most important commands. Note that the preceding lb isa generic wrapper for live-build commands.
• lb config : Responsible for initializing and configuring a Live306
system configuration directory. See The lb config command formore information.
• lb build : Responsible for starting a Live system build. See ‹The 307
lb build command› for more information.
• lb clean : Responsible for removing parts of a Live system build. 308
See ‹The lb clean command› for more information.
5.1.1 The lb config command 309
As discussed in ‹live-build›, the scripts that make up live-build read 310
their configuration with the source command from a single directorynamed config/. As constructing this directory by hand would betime-consuming and error-prone, the lb config command can beused to create the initial skeleton configuration tree.
The lb config command creates the following directories inside 311
config/: hooks/, includes/, several other includes subdirectoriesfor each stage of the build process and package-lists/. The latterincludes a list of several important live packages like live-boot, live-config and live-config-sysvinit.
Issuing lb config without any arguments completes the config/ 312
subdirectory which it populates with some default settings inconfiguration files, and two skeleton trees named auto/ andlocal/.
313
$ lb config[2014-04-25 17:14:34] lb configP: Updating config tree for a debian/wheezy/i386 system
Using lb config without any arguments would be suitable for 314
22
Manualul Live Systems
users who need a very basic image, or who intend to provide amore complete configuration via auto/config later (see ‹Managinga configuration› for details).
Normally, you will want to specify some options. For example,315
to specify which package manager to use while building theimage:
316
$ lb config --apt aptitude
It is possible to specify many options, such as:317
318
$ lb config --binary-images netboot --bootappend-live "boot=live components←↩hostname=live-host username=live-user" ...
A full list of options is available in the lb_config man page.319
5.1.2 The lb build command320
The lb build command reads in your configuration from the321
config/ directory. It then runs the lower level commands neededto build your Live system.
5.1.3 The lb clean command322
It is the job of the lb clean command to remove various parts of a323
build so subsequent builds can start from a clean state. By default,chroot, binary and source stages are cleaned, but the cache isleft intact. Also, individual stages can be cleaned. For example,if you have made changes that only affect the binary stage, uselb clean --binary prior to building a new binary. If your changes
invalidate the bootstrap and/or package caches, e.g. changes to--mode, --architecture, or --bootstrap, you must use lb clean
--purge. See the lb_cleanman page for a full list of options.
5.2 The live-boot package 324
live-boot is a collection of scripts providing hooks for the initramfs- 325
tools, used to generate an initramfs capable of booting livesystems, such as those created by live-build. This includes thelive system ISOs, netboot tarballs, and USB stick images.
At boot time it will look for read-only media containing a /- 326
live/ directory where a root filesystem (often a compressedfilesystem image like squashfs) is stored. If found, it will create awritable environment, using aufs, for Debian like systems to bootfrom.
More information on initial ramfs in Debian can be found in the 327
Debian Linux Kernel Handbook at ‹http://kernel-handbook.alioth.debian.org/› in the chapter on initramfs.
5.3 The live-config package 328
live-config consists of the scripts that run at boot time after live-boot 329
to configure the live system automatically. It handles such tasks assetting the hostname, locales and timezone, creating the live user,inhibiting cron jobs and performing autologin of the live user.
23
Manualul Live Systems
Managing a configuration330
6. Managing a configuration331
This chapter explains how tomanage a live configuration from initial332
creation, through successive revisions and successive releases ofboth the live-build software and the live image itself.
6.1 Dealing with configuration changes333
Live configurations rarely are perfect on the first try. It may be fine to334
pass lb config options from the command-line to perform a singlebuild, but it is more typical to revise those options and build againuntil you are satisfied. To support these changes, you will needauto scripts which ensure your configuration is kept in a consistentstate.
6.1.1 Why use auto scripts? What do they do?335
The lb config command stores the options you pass to it in336
config/* files along with many other options set to default values.If you run lb config again, it will not reset any option that wasdefaulted based on your initial options. So, for example, if yourun lb config again with a new value for --binary-images, anydependent options that were defaulted for the old image type mayno longer work with the new ones. Nor are these files intended tobe read or edited. They store values for over a hundred options,so nobody, let alone yourself, will be able to see in these whichoptions you actually specified. And finally, if you run lb config,then upgrade live-build and it happens to rename an option,config/* would still contain variables named after the old optionthat are no longer valid.
For all these reasons, auto/* scripts will make your life easier.337
They are simple wrappers to the lb config, lb build andlb clean commands that are designed to help you manageyour configuration. The auto/config script stores your lb
config command with all desired options, the auto/clean scriptremoves the files containing configuration variable values, and theauto/build script keeps a build.log of each build. Each of thesescripts is run automatically every time you run the correspondinglb command. By using these scripts, your configuration is easierto read and is kept internally consistent from one revision to thenext. Also, it will be much easier for you identify and fix optionswhich need to change when you upgrade live-build after readingthe updated documentation.
6.1.2 Use example auto scripts 338
For your convenience, live-build comes with example auto shell 339
scripts to copy and edit. Start a new, default configuration, thencopy the examples into it:
340
$ mkdir mylive && cd mylive && lb config$ mkdir auto$ cp /usr/share/doc/live-build/examples/auto/* auto/
Edit auto/config, adding any options as you see fit. For 341
instance:
342
#!/bin/shlb config noauto \
--architectures i386 \--linux-flavours 686-pae \--binary-images hdd \--mirror-bootstrap http://ftp.ch.debian.org/debian/ \
24
Manualul Live Systems
--mirror-binary http://ftp.ch.debian.org/debian/ \"${@}"
Now, each time you use lb config, auto/config will reset the343
configuration based on these options. When you want to makechanges to them, edit the options in this file instead of passingthem to lb config. When you use lb clean, auto/clean will cleanup the config/* files along with any other build products. Andfinally, when you use lb build, a log of the build will be writtenby auto/build in build.log.
Note: A special noauto parameter is used here to suppress344
another call to auto/config, thereby preventing infinite recursion.Make sure you don’t accidentally remove it when making edits.Also, take care to ensure when you split the lb config commandacross multiple lines for readability, as shown in the exampleabove, that you don’t forget the backslash ( at the end of each linethat continues to the next.
6.2 Clone a configuration published via Git345
Use the lb config --config option to clone a Git repository that346
contains a live system configuration. If you would like to baseyour configuration on one maintained by the Live Systems Project,look at ‹http://live-systems.org/gitweb/› for the repository named live-
images in the category Packages. This repository contains theconfigurations for the live systems ‹prebuilt images›.
For example, to build a rescue image, use the live-images347
repository as follows:
348
$ mkdir live-images && cd live-images$ lb config --config git://live-systems.org/git/live-images.git$ cd images/rescue
Edit auto/config and any other things you need in the config 349
tree to suit your needs. For example, the unofficial non-freeprebuilt images are made by simply adding --archive-areas
“main contrib non-free”.
You may optionally define a shortcut in your Git configuration by 350
adding the following to your ${HOME}/.gitconfig:
351
[url "git://live-systems.org/git/"]insteadOf = lso:
This enables you to use lso: anywhere you need to specify the 352
address of a live-systems.org git repository. If you also drop theoptional .git suffix, starting a new image using this configurationis as easy as:
353
$ lb config --config lso:live-images
Cloning the entire live-images repository pulls the configurations 354
used for several images. If you feel like building a different imageafter you have finished with the first one, change to anotherdirectory and again and optionally, make any changes to suit yourneeds.
In any case, remember that every time you will have to build the 355
image as superuser: lb build
25

Manualul Live Systems
Customizing contents356
7. Customization overview357
This chapter gives an overview of the various ways in which you358
may customize a live system.
7.1 Build time vs. boot time configuration359
Live system configuration options are divided into build-time360
options which are options that are applied at build time and boot-time options which are applied at boot time. Boot-time optionsare further divided into those occurring early in the boot, appliedby the live-boot package, and those that happen later in the boot,applied by live-config. Any boot-time option may be modified bythe user by specifying it at the boot prompt. The image may alsobe built with default boot parameters so users can normally justboot directly to the live system without specifying any optionswhen all of the defaults are suitable. In particular, the argumentto lb --bootappend-live consists of any default kernel commandline options for the Live system, such as persistence, keyboardlayouts, or timezone. See ‹Customizing locale and language›, forexample.
Build-time configuration options are described in the lb config361
man pages. Boot-time options are described in the man pagesfor live-boot and live-config. Although the live-boot and live-configpackages are installed within the live system you are building, itis recommended that you also install them on your build systemfor easy reference when you are working on your configuration. Itis safe to do so, as none of the scripts contained within them areexecuted unless the system is configured as a live system.
7.2 Stages of the build362
The build process is divided into stages, with various 363
customizations applied in sequence in each. The first stage torun is the bootstrap stage. This is the initial phase of populatingthe chroot directory with packages to make a barebones Debiansystem. This is followed by the chroot stage, which completesthe construction of chroot directory, populating it with all of thepackages listed in the configuration, along with any other materials.Most customization of content occurs in this stage. The final stageof preparing the live image is the binary stage, which buildsa bootable image, using the contents of the chroot directory toconstruct the root filesystem for the Live system, and including theinstaller and any other additional material on the target mediumoutside of the Live system’s filesystem. After the live image is built,if enabled, the source tarball is built in the source stage.
Within each of these stages, there is a particular sequence in which 364
commands are applied. These are arranged in such a way as toensure customizations can be layered in a reasonable fashion. Forexample, within the chroot stage, preseeds are applied before anypackages are installed, packages are installed before any locallyincluded files are copied, and hooks are run later, after all of thematerials are in place.
7.3 Supplement lb config with files 365
Although lb config creates a skeletal configuration in the config/ 366
directory, to accomplish your goals, you may need to provideadditional files in subdirectories of config/. Depending on wherethe files are stored in the configuration, they may be copied intothe live system’s filesystem or into the binary image filesystem, ormay provide build-time configurations of the system that would becumbersome to pass as command-line options. You may include
26
Manualul Live Systems
things such as custom lists of packages, custom artwork, or hookscripts to run either at build time or at boot time, boosting thealready considerable flexibility of debian-live with code of yourown.
7.4 Customization tasks367
The following chapters are organized by the kinds of customization368
task users typically perform: ‹Customizing package installation›,‹Customizing contents› and ‹Customizing locale and language›cover just a few of the things you might want to do.
27
Manualul Live Systems
Customizing package installation369
8. Customizing package installation370
Perhaps the most basic customization of a live system is the371
selection of packages to be included in the image. This chapterguides you through the various build-time options to customizelive-build’s installation of packages. The broadest choicesinfluencing which packages are available to install in the imageare the distribution and archive areas. To ensure decent downloadspeeds, you should choose a nearby distribution mirror. Youcan also add your own repositories for backports, experimentalor custom packages, or include packages directly as files. Youcan define lists of packages, including metapackages which willinstall many related packages at once, such as packages for aparticular desktop or language. Finally, a number of options givesome control over apt, or if you prefer, aptitude, at build time whenpackages are installed. You may find these handy if you use aproxy, want to disable installation of recommended packages tosave space, or need to control which versions of packages areinstalled via APT pinning, to name a few possibilities.
8.1 Package sources372
8.1.1 Distribution, archive areas and mode373
The distribution you choose has the broadest impact on which374
packages are available to include in your live image. Specify thecodename, which defaults to jessie for the jessie version oflive-build. Any current distribution carried in the archive may bespecified by its codename here. (See ‹Terms› for more details.)The --distribution option not only influences the source ofpackages within the archive, but also instructs live-build to behave
as needed to build each supported distribution. For example, tobuild against the unstable release, sid , specify:
375
$ lb config --distribution sid
Within the distribution archive, archive areas are major divisions 376
of the archive. In Debian, these are main, contrib and non-free.Only main contains software that is part of the Debian distribution,hence that is the default. One or more values may be specified,e.g.
377
$ lb config --archive-areas "main contrib non-free"
Experimental support is available for some Debian derivatives 378
through a --mode option. By default, this option is set to debian
only if you are building on a Debian or on an unknown system. Iflb config is invoked on any of the supported derivatives, it willdefault to create an image of that derivative. If lb config is runin e.g. ubuntu mode, the distribution names and archive areasfor the specified derivative are supported instead of the ones forDebian. The mode also modifies live-build behaviour to suit thederivatives.
Note: The projects for whom these modes were added are 379
primarily responsible for supporting users of these options. TheLive Systems Project, in turn, provides development support ona best-effort basis only, based on feedback from the derivativeprojects as we do not develop or support these derivativesourselves.
28
Manualul Live Systems
8.1.2 Distribution mirrors 380
The Debian archive is replicated across a large network of mirrors381
around the world so that people in each region can choose a nearbymirror for best download speed. Each of the --mirror-* optionsgoverns which distribution mirror is used at various stages of thebuild. Recall from ‹Stages of the build› that the bootstrap stage iswhen the chroot is initially populated by debootstrap with a minimalsystem, and the chroot stage is when the chroot used to constructthe live system’s filesystem is built. Thus, the corresponding mirrorswitches are used for those stages, and later, in the binary stage,the --mirror-binary and --mirror-binary-security values areused, superseding any mirrors used in an earlier stage.
8.1.3 Distribution mirrors used at build time382
To set the distribution mirrors used at build time to point at383
a local mirror, it is sufficient to set --mirror-bootstrap, --
mirror-chroot-security and --mirror-chroot-backports asfollows.
384
$ lb config --mirror-bootstrap http://localhost/debian/ \--mirror-chroot-security http://localhost/debian-security/ \--mirror-chroot-backports http://localhost/debian-backports/
The chroot mirror, specified by --mirror-chroot, defaults to the385
--mirror-bootstrap value.
8.1.4 Distribution mirrors used at run time386
The --mirror-binary* options govern the distribution mirrors387
placed in the binary image. These may be used to install
additional packages while running the live system. The defaultsemploy http.debian.net, a service that chooses a geographicallyclose mirror based, among other things, on the user’s IP familyand the availability of the mirrors. This is a suitable choice whenyou cannot predict which mirror will be best for all of your users. Oryou may specify your own values as shown in the example below.An image built from this configuration would only be suitable forusers on a network where “mirror” is reachable.
388
$ lb config --mirror-binary http://mirror/debian/ \--mirror-binary-security http://mirror/debian-security/ \--mirror-binary-backports http://mirror/debian-backports/
8.1.5 Additional repositories 389
You may add more repositories, broadening your package choices 390
beyond what is available in your target distribution. These maybe, for example, for backports, experimental or custom packages.To configure additional repositories, create config/archives/-
your-repository.list.chroot, and/or config/archives/your-
repository.list.binary files. As with the --mirror-* options,these govern the repositories used in the chroot stage whenbuilding the image, and in the binary stage, i.e. for use whenrunning the live system.
For example, config/archives/live.list.chroot allows you to 391
install packages from the debian-live snapshot repository at livesystem build time.
392
deb http://live-systems.org/ sid-snapshots main contrib non-free
29
Manualul Live Systems
If you add the same line to config/archives/live.list.binary,393
the repository will be added to your live system’s /etc/apt/-
sources.list.d/ directory.
If such files exist, they will be picked up automatically.394
You should also put the GPG key used to sign the repository395
into config/archives/your-repository.key.{binary,chroot}
files.
Should you need custom APT pinning, such APT preferences396
snippets can be placed in config/archives/your-repository.-
pref.{binary,chroot} files and will be automatically added toyour live system’s /etc/apt/preferences.d/ directory.
8.2 Choosing packages to install397
There are a number of ways to choose which packages live-build398
will install in your image, covering a variety of different needs.You can simply name individual packages to install in a packagelist. You can also use metapackages in those lists, or selectthem using package control file fields. And finally, you may placepackage files in your config/ tree, which is well suited to testingof new or experimental packages before they are available from arepository.
8.2.1 Package lists399
Package lists are a powerful way of expressing which packages400
should be installed. The list syntax supports conditional sectionswhich makes it easy to build lists and adapt them for use in multipleconfigurations. Package names may also be injected into the listusing shell helpers at build time.
Note: The behaviour of live-build when specifying a package that401
does not exist is determined by your choice of APT utility. See‹Choosing apt or aptitude› for more details.
8.2.2 Using metapackages 402
The simplest way to populate your package list is to use a task 403
metapackage maintained by your distribution. For example:
404
$ lb config$ echo task-gnome-desktop > config/package-lists/desktop.list.chroot
This supercedes the older predefined list method supported in 405
live-build 2.x. Unlike predefined lists, task metapackagesare not specific to the Live System project. Instead, they aremaintained by specialist working groups within the distributionand therefore reflect the consensus of each group about whichpackages best serve the needs of the intended users. They alsocover a much broader range of use cases than the predefined liststhey replace.
All task metapackages are prefixed task-, so a quick way to 406
determine which are available (though it may contain a handfulof false hits that match the name but aren’t metapackages) is tomatch on the package name with:
407
$ apt-cache search --names-only ^task-
In addition to these, you will find other metapackages with various 408
purposes. Some are subsets of broader task packages, likegnome-core, while others are individual specialized parts of aDebian Pure Blend, such as the education-* metapackages.
30
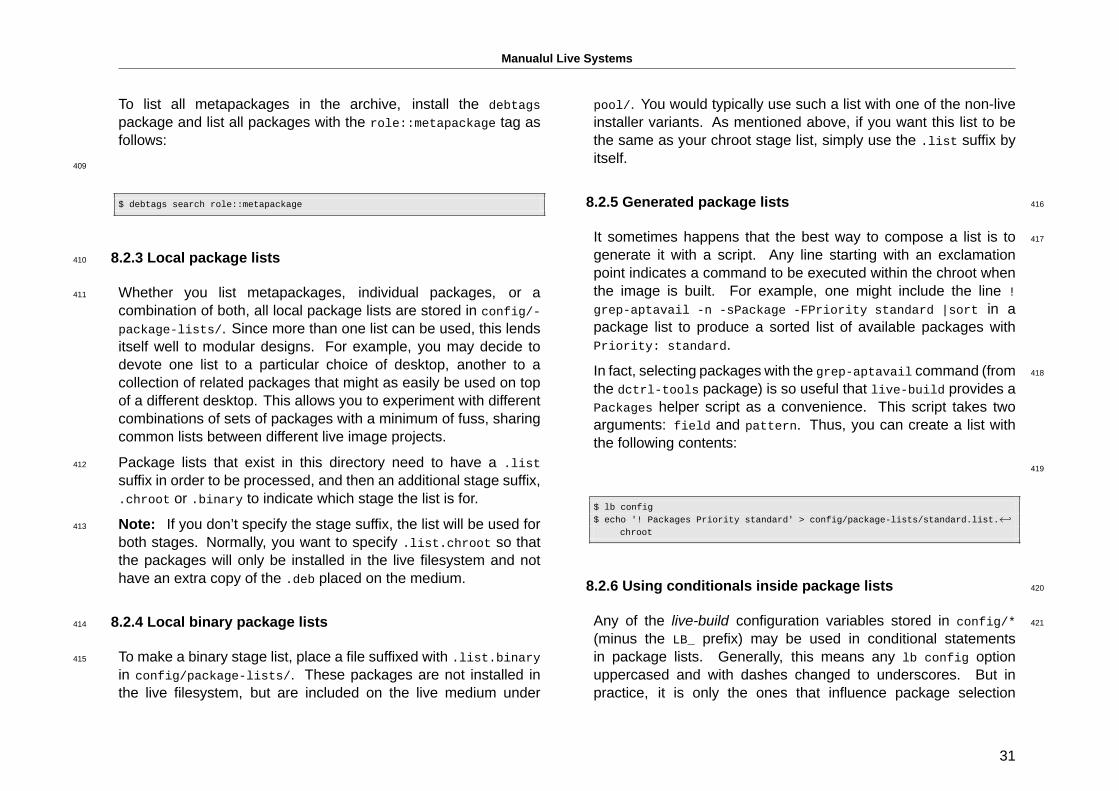
Manualul Live Systems
To list all metapackages in the archive, install the debtags
package and list all packages with the role::metapackage tag asfollows:
409
$ debtags search role::metapackage
8.2.3 Local package lists410
Whether you list metapackages, individual packages, or a411
combination of both, all local package lists are stored in config/-
package-lists/. Since more than one list can be used, this lendsitself well to modular designs. For example, you may decide todevote one list to a particular choice of desktop, another to acollection of related packages that might as easily be used on topof a different desktop. This allows you to experiment with differentcombinations of sets of packages with a minimum of fuss, sharingcommon lists between different live image projects.
Package lists that exist in this directory need to have a .list412
suffix in order to be processed, and then an additional stage suffix,.chroot or .binary to indicate which stage the list is for.
Note: If you don’t specify the stage suffix, the list will be used for413
both stages. Normally, you want to specify .list.chroot so thatthe packages will only be installed in the live filesystem and nothave an extra copy of the .deb placed on the medium.
8.2.4 Local binary package lists414
To make a binary stage list, place a file suffixed with .list.binary415
in config/package-lists/. These packages are not installed inthe live filesystem, but are included on the live medium under
pool/. You would typically use such a list with one of the non-liveinstaller variants. As mentioned above, if you want this list to bethe same as your chroot stage list, simply use the .list suffix byitself.
8.2.5 Generated package lists 416
It sometimes happens that the best way to compose a list is to 417
generate it with a script. Any line starting with an exclamationpoint indicates a command to be executed within the chroot whenthe image is built. For example, one might include the line !
grep-aptavail -n -sPackage -FPriority standard |sort in apackage list to produce a sorted list of available packages withPriority: standard.
In fact, selecting packages with the grep-aptavail command (from 418
the dctrl-tools package) is so useful that live-build provides aPackages helper script as a convenience. This script takes twoarguments: field and pattern. Thus, you can create a list withthe following contents:
419
$ lb config$ echo '! Packages Priority standard' > config/package-lists/standard.list.←↩
chroot
8.2.6 Using conditionals inside package lists 420
Any of the live-build configuration variables stored in config/* 421
(minus the LB_ prefix) may be used in conditional statementsin package lists. Generally, this means any lb config optionuppercased and with dashes changed to underscores. But inpractice, it is only the ones that influence package selection
31
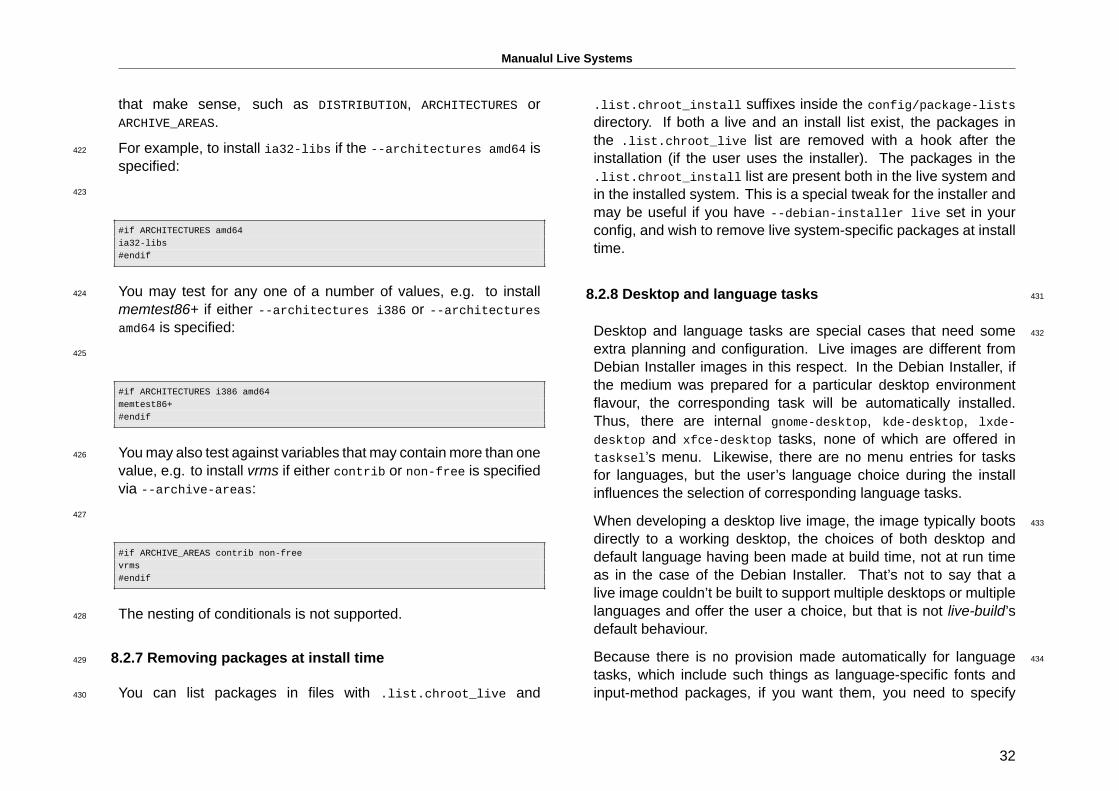
Manualul Live Systems
that make sense, such as DISTRIBUTION, ARCHITECTURES orARCHIVE_AREAS.
For example, to install ia32-libs if the --architectures amd64 is422
specified:
423
#if ARCHITECTURES amd64ia32-libs#endif
You may test for any one of a number of values, e.g. to install424
memtest86+ if either --architectures i386 or --architecturesamd64 is specified:
425
#if ARCHITECTURES i386 amd64memtest86+#endif
Youmay also test against variables that may contain more than one426
value, e.g. to install vrms if either contrib or non-free is specifiedvia --archive-areas:
427
#if ARCHIVE_AREAS contrib non-freevrms#endif
The nesting of conditionals is not supported.428
8.2.7 Removing packages at install time429
You can list packages in files with .list.chroot_live and430
.list.chroot_install suffixes inside the config/package-lists
directory. If both a live and an install list exist, the packages inthe .list.chroot_live list are removed with a hook after theinstallation (if the user uses the installer). The packages in the.list.chroot_install list are present both in the live system andin the installed system. This is a special tweak for the installer andmay be useful if you have --debian-installer live set in yourconfig, and wish to remove live system-specific packages at installtime.
8.2.8 Desktop and language tasks 431
Desktop and language tasks are special cases that need some 432
extra planning and configuration. Live images are different fromDebian Installer images in this respect. In the Debian Installer, ifthe medium was prepared for a particular desktop environmentflavour, the corresponding task will be automatically installed.Thus, there are internal gnome-desktop, kde-desktop, lxde-
desktop and xfce-desktop tasks, none of which are offered intasksel’s menu. Likewise, there are no menu entries for tasksfor languages, but the user’s language choice during the installinfluences the selection of corresponding language tasks.
When developing a desktop live image, the image typically boots 433
directly to a working desktop, the choices of both desktop anddefault language having been made at build time, not at run timeas in the case of the Debian Installer. That’s not to say that alive image couldn’t be built to support multiple desktops or multiplelanguages and offer the user a choice, but that is not live-build’sdefault behaviour.
Because there is no provision made automatically for language 434
tasks, which include such things as language-specific fonts andinput-method packages, if you want them, you need to specify
32
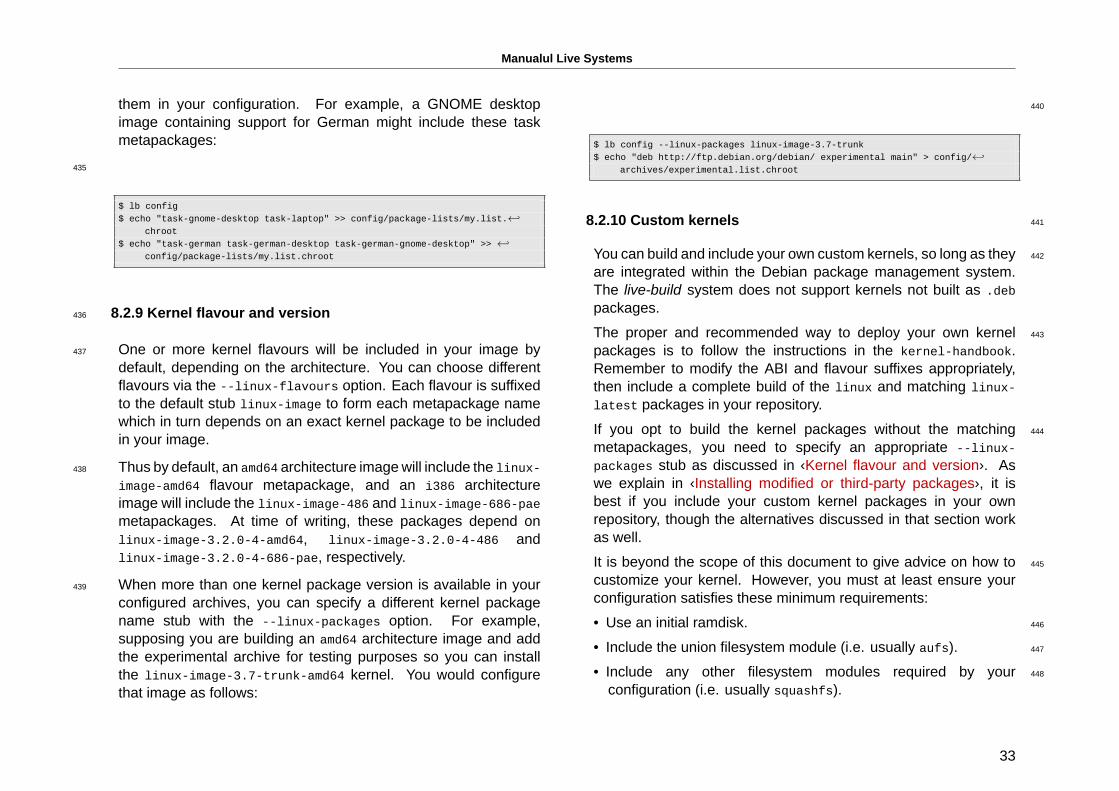
Manualul Live Systems
them in your configuration. For example, a GNOME desktopimage containing support for German might include these taskmetapackages:
435
$ lb config$ echo "task-gnome-desktop task-laptop" >> config/package-lists/my.list.←↩
chroot$ echo "task-german task-german-desktop task-german-gnome-desktop" >> ←↩
config/package-lists/my.list.chroot
8.2.9 Kernel flavour and version436
One or more kernel flavours will be included in your image by437
default, depending on the architecture. You can choose differentflavours via the --linux-flavours option. Each flavour is suffixedto the default stub linux-image to form each metapackage namewhich in turn depends on an exact kernel package to be includedin your image.
Thus by default, an amd64 architecture imagewill include the linux-438
image-amd64 flavour metapackage, and an i386 architectureimage will include the linux-image-486 and linux-image-686-pae
metapackages. At time of writing, these packages depend onlinux-image-3.2.0-4-amd64, linux-image-3.2.0-4-486 andlinux-image-3.2.0-4-686-pae, respectively.
When more than one kernel package version is available in your439
configured archives, you can specify a different kernel packagename stub with the --linux-packages option. For example,supposing you are building an amd64 architecture image and addthe experimental archive for testing purposes so you can installthe linux-image-3.7-trunk-amd64 kernel. You would configurethat image as follows:
440
$ lb config --linux-packages linux-image-3.7-trunk$ echo "deb http://ftp.debian.org/debian/ experimental main" > config/←↩
archives/experimental.list.chroot
8.2.10 Custom kernels 441
You can build and include your own custom kernels, so long as they 442
are integrated within the Debian package management system.The live-build system does not support kernels not built as .deb
packages.
The proper and recommended way to deploy your own kernel 443
packages is to follow the instructions in the kernel-handbook.Remember to modify the ABI and flavour suffixes appropriately,then include a complete build of the linux and matching linux-
latest packages in your repository.
If you opt to build the kernel packages without the matching 444
metapackages, you need to specify an appropriate --linux-
packages stub as discussed in ‹Kernel flavour and version›. Aswe explain in ‹Installing modified or third-party packages›, it isbest if you include your custom kernel packages in your ownrepository, though the alternatives discussed in that section workas well.
It is beyond the scope of this document to give advice on how to 445
customize your kernel. However, you must at least ensure yourconfiguration satisfies these minimum requirements:
• Use an initial ramdisk. 446
• Include the union filesystem module (i.e. usually aufs). 447
• Include any other filesystem modules required by your 448
configuration (i.e. usually squashfs).
33
Manualul Live Systems
8.3 Installing modified or third-party packages449
While it is against the philosophy of a live system, it may450
sometimes be necessary to build a live system with modifiedversions of packages that are in the Debian repository. Thismay be to modify or support additional features, languages andbranding, or even to remove elements of existing packages thatare undesirable. Similarly, “third-party” packages may be used toadd bespoke and/or proprietary functionality.
This section does not cover advice regarding building or451
maintaining modified packages. Joachim Breitner’s ‘How tofork privately’ method from ‹http://www.joachim-breitner.de/blog/archives/282-How-to-fork-privately.html› may be of interest, however. The creationof bespoke packages is covered in the Debian New Maintainers’Guide at ‹http://www.debian.org/doc/maint-guide/› and elsewhere.
There are two ways of installing modified custom packages:452
• packages.chroot453
• Using a custom APT repository454
Using packages.chroot is simpler to achieve and useful for “one-455
off” customizations but has a number of drawbacks, while using acustom APT repository is more time-consuming to set up.
8.3.1 Using packages.chroot to install custom packages456
To install a custom package, simply copy it to the config/-457
packages.chroot/ directory. Packages that are inside thisdirectory will be automatically installed into the live system duringbuild - you do not need to specify them elsewhere.
Packagesmust be named in the prescribed way. One simple way458
to do this is to use dpkg-name.
Using packages.chroot for installation of custom packages has459
disadvantages:
• It is not possible to use secure APT. 460
• You must install all appropriate packages in the config/- 461
packages.chroot/ directory.
• It does not lend itself to storing live system configurations in 462
revision control.
8.3.2 Using an APT repository to install custom 463
packages
Unlike using packages.chroot, when using a custom APT 464
repository you must ensure that you specify the packageselsewhere. See ‹Choosing packages to install› for details.
While it may seem unnecessary effort to create an APT repository 465
to install custom packages, the infrastructure can be easily re-usedat a later date to offer updates of the modified packages.
8.3.3 Custom packages and APT 466
live-build uses APT to install all packages into the live system 467
so will therefore inherit behaviours from this program. Onerelevant example is that (assuming a default configuration) givena package available in two different repositories with differentversion numbers, APT will elect to install the package with thehigher version number.
Because of this, you may wish to increment the version number 468
in your custom packages’ debian/changelog files to ensure thatyour modified version is installed over one in the official Debianrepositories. This may also be achieved by altering the live
34
Manualul Live Systems
system’s APT pinning preferences - see ‹APT pinning› for moreinformation.
8.4 Configuring APT at build time469
You can configure APT through a number of options applied only470
at build time. (APT configuration used in the running live systemmay be configured in the normal way for live system contents, thatis, by including the appropriate configurations through config/-
includes.chroot/.) For a complete list, look for options startingwith apt in the lb_config man page.
8.4.1 Choosing apt or aptitude471
You can elect to use either apt or aptitude when installing472
packages at build time. Which utility is used is governed by the--apt argument to lb config. Choose the method implementingthe preferred behaviour for package installation, the notabledifference being how missing packages are handled.
• apt: With this method, if a missing package is specified, the473
package installation will fail. This is the default setting.
• aptitude: With this method, if a missing package is specified,474
the package installation will succeed.
8.4.2 Using a proxy with APT475
One commonly required APT configuration is to deal with building476
an image behind a proxy. You may specify your APT proxy withthe --apt-ftp-proxy or --apt-http-proxy options as needed,e.g.
477
$ lb config --apt-http-proxy http://proxy/
8.4.3 Tweaking APT to save space 478
You may find yourself needing to save some space on the image 479
medium, in which case one or the other or both of the followingoptions may be of interest.
If you don’t want to include APT indices in the image, you can omit 480
those with:
481
$ lb config --apt-indices false
This will not influence the entries in /etc/apt/sources.list, but 482
merely whether /var/lib/apt contains the indices files or not. Thetradeoff is that APT needs those indices in order to operate in thelive system, so before performing apt-cache search or apt-getinstall, for instance, the user must apt-get update first to createthose indices.
If you find the installation of recommended packages bloats your 483
image too much, provided you are prepared to deal with theconsequences discussed below, you may disable that defaultoption of APT with:
484
$ lb config --apt-recommends false
The most important consequence of turning off recommends is 485
that live-boot and live-config themselves recommend somepackages that provide important functionality used by most
35
Manualul Live Systems
Live configurations, such as user-setup which live-config
recommends and is used to create the live user. In all but the mostexceptional circumstances you need to add back at least someof these recommends to your package lists or else your imagewill not work as expected, if at all. Look at the recommendedpackages for each of the live-* packages included in your buildand if you are not certain you can omit them, add them back intoyour package lists.
The more general consequence is that if you don’t install486
recommended packages for any given package, that is,“packages that would be found together with this one in allbut unusual installations” (Debian Policy Manual, section 7.2),some packages that users of your Live system actually needmay be omitted. Therefore, we suggest you review the differenceturning off recommends makes to your packages list (see thebinary.packages file generated by lb build) and re-includein your list any missing packages that you still want installed.Alternatively, if you find you only want a small number ofrecommended packages left out, leave recommends enabled andset a negative APT pin priority on selected packages to preventthem from being installed, as explained in ‹APT pinning›.
8.4.4 Passing options to apt or aptitude487
If there is not a lb config option to alter APT’s behaviour in488
the way you need, use --apt-options or --aptitude-options
to pass any options through to your configured APT tool. Seethe man pages for apt and aptitude for details. Note that bothoptions have default values that you will need to retain in additionto any overrides you may provide. So, for example, supposeyou have included something from snapshot.debian.org fortesting purposes and want to specify Acquire::Check-Valid-
Until=false to make APT happy with the stale Release file, you
would do so as per the following example, appending the newoption after the default value --yes:
489
$ lb config --apt-options "--yes -oAcquire::Check-Valid-Until=false"
Please check the man pages to fully understand these options 490
and when to use them. This is an example only and should notbe construed as advice to configure your image this way. Thisoption would not be appropriate for, say, a final release of a liveimage.
For more complicated APT configurations involving apt.conf 491
options you might want to create a config/apt/apt.conf fileinstead. See also the other apt-* options for a few convenientshortcuts for frequently needed options.
8.4.5 APT pinning 492
For background, please first read the apt_preferences(5) man 493
page. APT pinning can be configured either for build time, or elsefor run time. For the former, create config/archives/*.pref,config/archives/*.pref.chroot, and config/apt/preferences.For the latter, create config/includes.chroot/etc/apt/-
preferences.
Let’s say you are building a jessie live system but need all the live 494
packages that end up in the binary image to be installed from sidat build time. You need to add sid to your APT sources and pin thelive packages from it higher, but all other packages from it lower,than the default priority. Thus, only the packages you want areinstalled from sid at build time and all others are taken from thetarget system distribution, jessie . The following will accomplishthis:
36
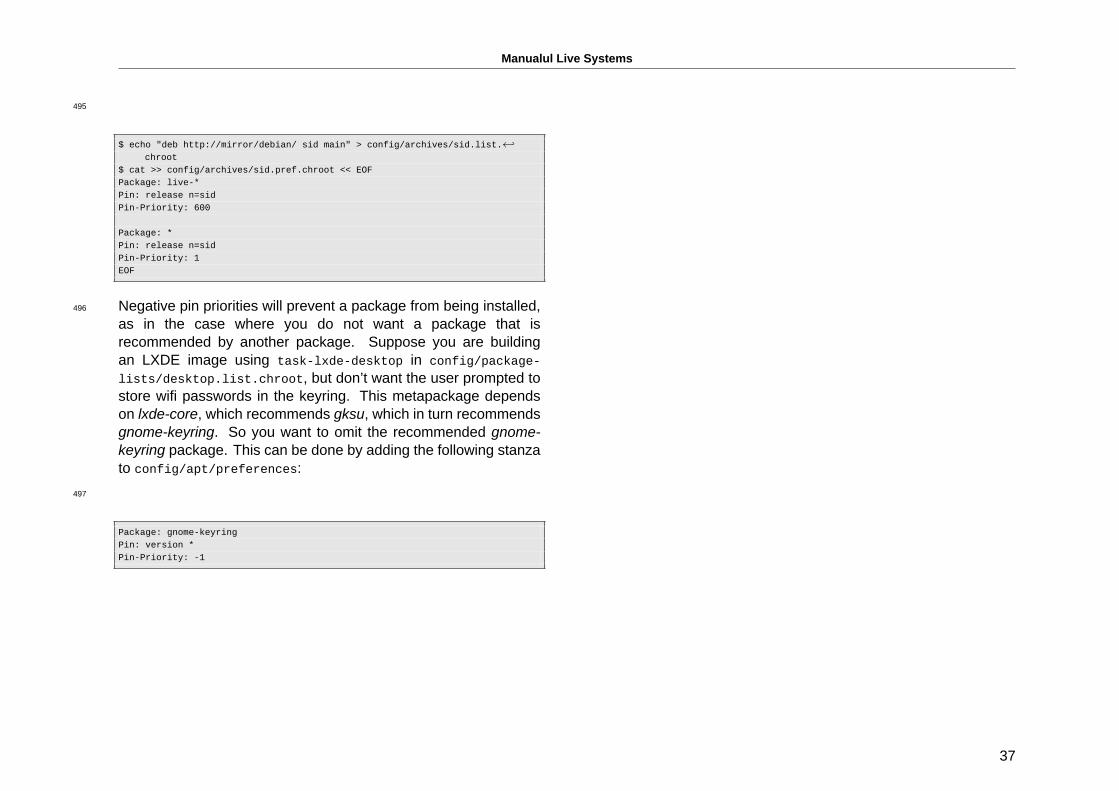
Manualul Live Systems
495
$ echo "deb http://mirror/debian/ sid main" > config/archives/sid.list.←↩chroot
$ cat >> config/archives/sid.pref.chroot << EOFPackage: live-*Pin: release n=sidPin-Priority: 600
Package: *Pin: release n=sidPin-Priority: 1EOF
Negative pin priorities will prevent a package from being installed,496
as in the case where you do not want a package that isrecommended by another package. Suppose you are buildingan LXDE image using task-lxde-desktop in config/package-
lists/desktop.list.chroot, but don’t want the user prompted tostore wifi passwords in the keyring. This metapackage dependson lxde-core, which recommends gksu, which in turn recommendsgnome-keyring. So you want to omit the recommended gnome-keyring package. This can be done by adding the following stanzato config/apt/preferences:
497
Package: gnome-keyringPin: version *Pin-Priority: -1
37
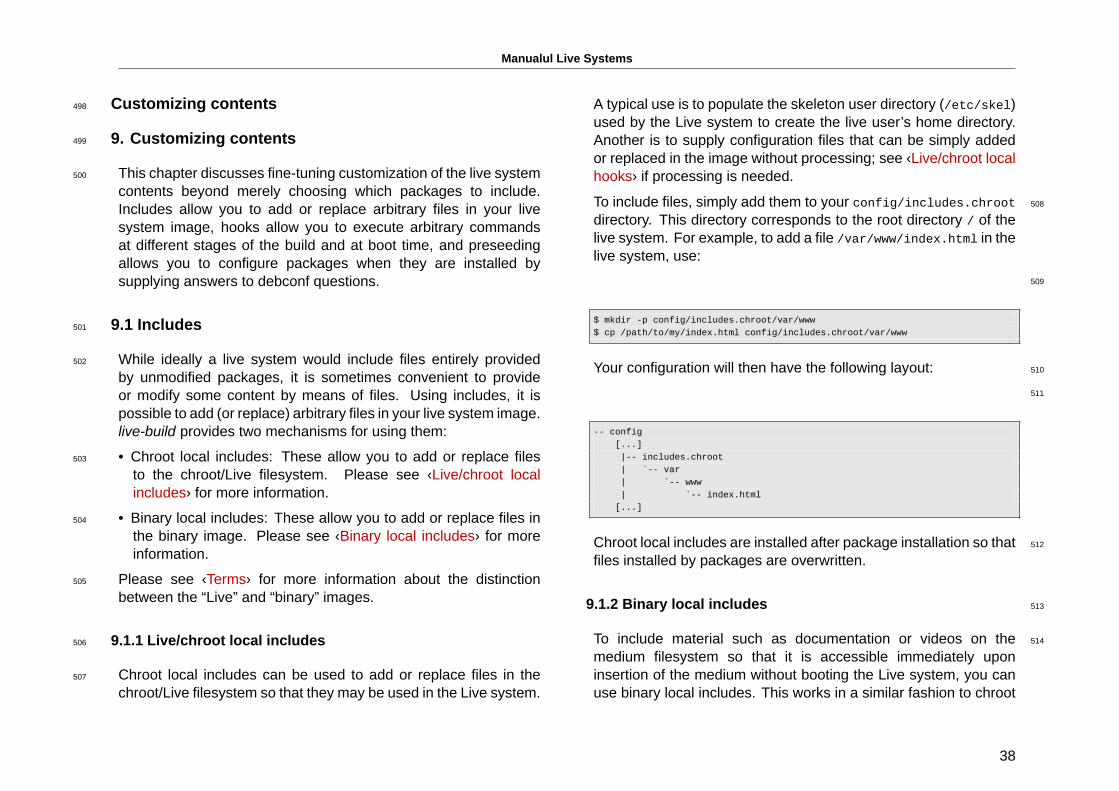
Manualul Live Systems
Customizing contents498
9. Customizing contents499
This chapter discusses fine-tuning customization of the live system500
contents beyond merely choosing which packages to include.Includes allow you to add or replace arbitrary files in your livesystem image, hooks allow you to execute arbitrary commandsat different stages of the build and at boot time, and preseedingallows you to configure packages when they are installed bysupplying answers to debconf questions.
9.1 Includes501
While ideally a live system would include files entirely provided502
by unmodified packages, it is sometimes convenient to provideor modify some content by means of files. Using includes, it ispossible to add (or replace) arbitrary files in your live system image.live-build provides two mechanisms for using them:
• Chroot local includes: These allow you to add or replace files503
to the chroot/Live filesystem. Please see ‹Live/chroot localincludes› for more information.
• Binary local includes: These allow you to add or replace files in504
the binary image. Please see ‹Binary local includes› for moreinformation.
Please see ‹Terms› for more information about the distinction505
between the “Live” and “binary” images.
9.1.1 Live/chroot local includes506
Chroot local includes can be used to add or replace files in the507
chroot/Live filesystem so that they may be used in the Live system.
A typical use is to populate the skeleton user directory (/etc/skel)used by the Live system to create the live user’s home directory.Another is to supply configuration files that can be simply addedor replaced in the image without processing; see ‹Live/chroot localhooks› if processing is needed.
To include files, simply add them to your config/includes.chroot 508
directory. This directory corresponds to the root directory / of thelive system. For example, to add a file /var/www/index.html in thelive system, use:
509
$ mkdir -p config/includes.chroot/var/www$ cp /path/to/my/index.html config/includes.chroot/var/www
Your configuration will then have the following layout: 510
511
-- config[...]|-- includes.chroot| `-- var| `-- www| `-- index.html
[...]
Chroot local includes are installed after package installation so that 512
files installed by packages are overwritten.
9.1.2 Binary local includes 513
To include material such as documentation or videos on the 514
medium filesystem so that it is accessible immediately uponinsertion of the medium without booting the Live system, you canuse binary local includes. This works in a similar fashion to chroot
38
Manualul Live Systems
local includes. For example, suppose the files ~/video_demo.*are demo videos of the live system described by and linked toby an HTML index page. Simply copy the material to config/-
includes.binary/ as follows:
515
$ cp ~/video_demo.* config/includes.binary/
These files will now appear in the root directory of the live516
medium.
9.2 Hooks517
Hooks allow commands to be performed in the chroot and binary518
stages of the build in order to customize the image.
9.2.1 Live/chroot local hooks519
To run commands in the chroot stage, create a hook script with520
a .hook.chroot suffix containing the commands in the config/-
hooks/ directory. The hook will run in the chroot after the rest ofyour chroot configuration has been applied, so remember to ensureyour configuration includes all packages and files your hook needsin order to run. See the example chroot hook scripts for variouscommon chroot customization tasks provided in /usr/share/doc/-live-build/examples/hooks which you can copy or symlink to usethem in your own configuration.
9.2.2 Boot-time hooks521
To execute commands at boot time, you can supply live-config522
hooks as explained in the “Customization” section of its man page.
Examine live-config’s own hooks provided in /lib/live/config/-
, noting the sequence numbers. Then provide your own hookprefixed with an appropriate sequence number, either as a chrootlocal include in config/includes.chroot/lib/live/config/, or asa custom package as discussed in ‹Installing modified or third-partypackages›.
9.2.3 Binary local hooks 523
To run commands in the binary stage, create a hook script 524
with a .hook.binary suffix containing the commands in theconfig/hooks/ directory. The hook will run after all other binarycommands are run, but before binary_checksums, the very lastbinary command. The commands in your hook do not run in thechroot, so take care to not modify any files outside of the buildtree, or you may damage your build system! See the examplebinary hook scripts for various common binary customizationtasks provided in /usr/share/doc/live-build/examples/-
hooks which you can copy or symlink to use them in your ownconfiguration.
9.3 Preseeding Debconf questions 525
Files in the config/preseed/ directory suffixed with .cfg followed 526
by the stage (.chroot or .binary) are considered to be debconfpreseed files and are installed by live-build using debconf-set-
selections during the corresponding stage.
For more information about debconf, please see debconf(7) in the 527
debconf package.
39
Manualul Live Systems
Customizing run time behaviours528
10. Customizing run time behaviours529
All configuration that is done during run time is done by live-config.530
Here are some of themost common options of live-config that usersare interested in. A full list of all possibilities can be found in theman page of live-config.
10.1 Customizing the live user531
One important consideration is that the live user is created by live-532
boot at boot time, not by live-build at build time. This not onlyinfluences where materials relating to the live user are introducedin your build, as discussed in ‹Live/chroot local includes›, but alsoany groups and permissions associated with the live user.
You can specify additional groups that the live user will belong to by533
using any of the possibilities to configure live-config. For example,to add the live user to the fuse group, you can either add thefollowing file in config/includes.chroot/etc/live/config/user-
setup.conf:
534
LIVE_USER_DEFAULT_GROUPS="audio cdrom dip floppy video plugdev netdev ←↩powerdev scanner bluetooth fuse"
or use live-config.user-default-groups=audio,cdrom,dip,floppy,video,plugdev,netdev,powerdev,scanner,bluetooth,fuse535
as a boot parameter.
It is also possible to change the default username “user” and the536
default password “live”. If you want to do that for any reason, youcan easily achieve it as follows:
To change the default username you can simply specify it in your537
config:
538
$ lb config --bootappend-live "boot=live components username=live-user"
One possible way of changing the default password is by means of 539
a hook as described in ‹Boot-time hooks›. In order to do that youcan use the “passwd” hook from /usr/share/doc/live-config/-
examples/hooks, prefix it accordingly (e.g. 2000-passwd) and addit to config/includes.chroot/lib/live/config/
10.2 Customizing locale and language 540
When the live system boots, language is involved in two 541
steps:
• the locale generation 542
• setting the keyboard configuration 543
The default locale when building a Live system is locales=en_US.UTF-5448. To define the locale that should be generated, use the locales
parameter in the --bootappend-live option of lb config,e.g.
545
$ lb config --bootappend-live "boot=live components locales=de_CH.UTF-8"
Multiple locales may be specified as a comma-delimited list. 546
This parameter, as well as the keyboard configuration parameters 547
indicated below, can also be used at the kernel command line.You can specify a locale by language_country (in which case thedefault encoding is used) or the full language_country.encoding
40
Manualul Live Systems
word. A list of supported locales and the encoding for each can befound in /usr/share/i18n/SUPPORTED.
Both the console and X keyboard configuration are performed548
by live-config using the console-setup package. To configurethem, use the keyboard-layouts, keyboard-variants, keyboard-options and keyboard-model boot parameters via the --
bootappend-live option. Valid options for these can be foundin /usr/share/X11/xkb/rules/base.lst. To find layouts andvariants for a given language, try searching for the English nameof the language and/or the country where the language is spoken,e.g:
549
$ egrep -i '(^!|german.*switzerland)' /usr/share/X11/xkb/rules/base.lst! model! layout
ch German (Switzerland)! variant
legacy ch: German (Switzerland, legacy)de_nodeadkeys ch: German (Switzerland, eliminate dead keys)de_sundeadkeys ch: German (Switzerland, Sun dead keys)de_mac ch: German (Switzerland, Macintosh)
! option
Note that each variant lists the layout to which it applies in the550
description.
Often, only the layout needs to be configured. For example, to get551
the locale files for German and Swiss German keyboard layout inX use:
552
$ lb config --bootappend-live "boot=live components locales=de_CH.UTF-8 ←↩keyboard-layouts=ch"
However, for very specific use cases, youmay wish to include other553
parameters. For example, to set up a French systemwith a French-Dvorak layout (called Bepo) on a TypeMatrix EZ-Reach 2030 USBkeyboard, use:
554
$ lb config --bootappend-live \"boot=live components locales=fr_FR.UTF-8 keyboard-layouts=fr keyboard←↩
-variants=bepo keyboard-model=tm2030usb"
Multiple values may be specified as comma-delimited lists for each 555
of the keyboard-* options, with the exception of keyboard-model,which accepts only one value. Please see the keyboard(5) manpage for details and examples of XKBMODEL, XKBLAYOUT, XKBVARIANTand XKBOPTIONS variables. If multiple keyboard-variants valuesare given, they will be matched one-to-one with keyboard-layouts
values (see setxkbmap(1) -variant option). Empty values areallowed; e.g. to define two layouts, the default being US QWERTYand the other being US Dvorak, use:
556
$ lb config --bootappend-live \"boot=live components keyboard-layouts=us,us keyboard-variants=,dvorak←↩
"
10.3 Persistence 557
A live cd paradigm is a pre-installed system which runs from read- 558
only media, like a cdrom, where writes and modifications do notsurvive reboots of the host hardware which runs it.
A live system is a generalization of this paradigm and thus supports 559
other media in addition to CDs; but still, in its default behaviour, itshould be considered read-only and all the run-time evolutions ofthe system are lost at shutdown.
41
Manualul Live Systems
‘Persistence’ is a common name for different kinds of solutions for560
saving across reboots some, or all, of this run-time evolution of thesystem. To understand how it works it would be handy to knowthat even if the system is booted and run from read-only media,modifications to the files and directories are written on writablemedia, typically a ram disk (tmpfs) and ram disks’ data do notsurvive reboots.
The data stored on this ramdisk should be saved on a writable561
persistent medium like local storage media, a network share oreven a session of a multisession (re)writable CD/DVD. All thesemedia are supported in live systems in different ways, and all butthe last one require a special boot parameter to be specified at boottime: persistence.
If the boot parameter persistence is set (and nopersistence is562
not set), local storage media (e.g. hard disks, USB drives) willbe probed for persistence volumes during boot. It is possible torestrict which types of persistence volumes to use by specifyingcertain boot parameters described in the live-boot(7) man page. Apersistence volume is any of the following:
• a partition, identified by its GPT name.563
• a filesystem, identified by its filesystem label.564
• an image file located on the root of any readable filesystem (even565
an NTFS partition of a foreign OS), identified by its filename.
The volume label for overlays must be persistence but it will be566
ignored unless it contains in its root a file named persistence.confwhich is used to fully customize the volume’s persistence, this isto say, specifying the directories that you want to save in yourpersistence volume after a reboot. See ‹The persistence.conf file›for more details.
Here are some examples of how to prepare a volume to be used567
for persistence. It can be, for instance, an ext4 partition on a harddisk or on a usb key created with, e.g.:
568
# mkfs.ext4 -L persistence /dev/sdb1
See also ‹Using the space left on a USB stick›. 569
If you already have a partition on your device, you could just change 570
the label with one of the following:
571
# tune2fs -L persistence /dev/sdb1 # for ext2,3,4 filesystems
Here’s an example of how to create an ext4-based image file to be 572
used for persistence:
573
$ dd if=/dev/null of=persistence bs=1 count=0 seek=1G # for a 1GB sized ←↩image file
$ /sbin/mkfs.ext4 -F persistence
Once the image file is created, as an example, to make /usr 574
persistent but only saving the changes you make to that directoryand not all the contents of /usr, you can use the “union” option. Ifthe image file is located in your home directory, copy it to the root ofyour hard drive’s filesystem and mount it in /mnt as follows:
575
# cp persistence /# mount -t ext4 /persistence /mnt
Then, create the persistence.conf file adding content and 576
42
Manualul Live Systems
unmount the image file.
577
# echo "/usr union" >> /mnt/persistence.conf# umount /mnt
Now, reboot into your live medium with the boot parameter578
“persistence”.
10.3.1 The persistence.conf file579
A volume with the label persistence must be configured by580
means of the persistence.conf file to make arbitrary directoriespersistent. That file, located on the volume’s filesystem root,controls which directories it makes persistent, and in whichway.
How custom overlay mounts are configured is described in full581
detail in the persistence.conf(5) man page, but a simple exampleshould be sufficient for most uses. Let’s say we want to make ourhome directory and APT cache persistent in an ext4 filesystem onthe /dev/sdb1 partition:
582
# mkfs.ext4 -L persistence /dev/sdb1# mount -t ext4 /dev/sdb1 /mnt# echo "/home" >> /mnt/persistence.conf# echo "/var/cache/apt" >> /mnt/persistence.conf# umount /mnt
Then we reboot. During the first boot the contents of /home and /-583
var/cache/aptwill be copied into the persistence volume, and fromthen on all changes to these directories will live in the persistencevolume. Please note that any paths listed in the persistence.conf
file cannot contain white spaces or the special . and .. pathcomponents. Also, neither /lib, /lib/live (or any of their sub-directories) nor / can be made persistent using custom mounts.As a workaround for this limitation you can add / union to yourpersistence.conf file to achieve full persistence.
10.3.2 Using more than one persistence store 584
There are different methods of using multiple persistence store for 585
different use cases. For instance, using several volumes at thesame time or selecting only one, among various, for very specificpurposes.
Several different custom overlay volumes (with their own 586
persistence.conf files) can be used at the same time, but ifseveral volumes make the same directory persistent, only one ofthem will be used. If any two mounts are “nested” (i.e. one is a sub-directory of the other) the parent will be mounted before the childso no mount will be hidden by the other. Nested custom mountsare problematic if they are listed in the same persistence.conf
file. See the persistence.conf(5) man page for how to handle thatcase if you really need it (hint: you usually don’t).
One possible use case: If you wish to store the user data i.e. /home 587
and the superuser data i.e. /root in different partitions, create twopartitions with the persistence label and add a persistence.conf
file in each one like this, # echo “/home” > persistence.conf
for the first partition that will save the user’s files and # echo
“/root” > persistence.conf for the second partition which willstore the superuser’s files. Finally, use the persistence bootparameter.
If a user would need multiple persistence store of the same type 588
for different locations or testing, such as private and work, theboot parameter persistence-label used in conjunction with the
43
Manualul Live Systems
boot parameter persistence will allow for multiple but uniquepersistence media. An example would be if a user wanted touse a persistence partition labeled private for personal datalike browser bookmarks or other types, they would use the bootparameters: persistence persistence-label=private. And tostore work related data, like documents, research projects orother types, they would use the boot parameters: persistence
persistence-label=work.
It is important to remember that each of these volumes, private589
and work, also needs a persistence.conf file in its root. The live-boot man page contains more information about how to use theselabels with legacy names.
10.4 Using persistence with encryption590
Using the persistence featuremeans that some sensible datamight591
get exposed to risk. Especially if the persistent data is stored on aportable device such as a usb stick or an external hard drive. Thatis when encryption comes in handy. Even if the entire proceduremight seem complicated because of the number of steps to betaken, it is really easy to handle encrypted partitions with live-boot.In order to use luks , which is the supported encryption type, youneed to install cryptsetup both on the machine you are creating theencrypted partition with and also in the live system you are goingto use the encrypted persistent partition with.
To install cryptsetup on your machine:592
593
# apt-get install cryptsetup
To install cryptsetup in your live system, add it to your package-594
lists:
595
$ lb config$ echo "cryptsetup" > config/package-lists/encryption.list.chroot
Once you have your live system with cryptsetup, you basically 596
only need to create a new partition, encrypt it and boot with thepersistence and persistence-encryption=luks parameters.We could have already anticipated this step and added the bootparameters following the usual procedure:
597
$ lb config --bootappend-live "boot=live components persistence persistence←↩-encryption=luks"
Let’s go into the details for all of those who are not familiar with 598
encryption. In the following example we are going to use a partitionon a usb stick which corresponds to /dev/sdc2. Please be warnedthat you need to determine which partition is the one you are goingto use in your specific case.
The first step is plugging in your usb stick and determine which 599
device it is. The recommended method of listing devices in live-manual is using ls -l /dev/disk/by-id. After that, create a newpartition and then, encrypt it with a passphrase as follows:
600
# cryptsetup --verify-passphrase luksFormat /dev/sdc2
Then open the luks partition in the virtual device mapper. Use any 601
name you like. We use live here as an example:
602
44
Manualul Live Systems
# cryptsetup luksOpen /dev/sdc2 live
The next step is filling the device with zeros before creating the603
filesystem:
604
# dd if=/dev/zero of=/dev/mapper/live
Now, we are ready to create the filesystem. Notice that we are605
adding the label persistence so that the device is mounted aspersistence store at boot time.
606
# mkfs.ext4 -L persistence /dev/mapper/live
To continue with our setup, we need to mount the device, for607
example in /mnt.
608
# mount /dev/mapper/live /mnt
And create the persistence.conf file in the root of the partition.609
This is, as explained before, strictly necessary. See ‹Thepersistence.conf file›.
610
# echo "/ union" > /mnt/persistence.conf
Then unmount the mount point:611
612
# umount /mnt
And optionally, although it might be a good way of securing the data 613
we have just added to the partition, we can close the device:
614
# cryptsetup luksClose live
Let’s summarize the process. So far, we have created an 615
encryption capable live system, which can be copied to a usb stickas explained in ‹Copying an ISO hybrid image to a USB stick›. Wehave also created an encrypted partition, which can be locatedin the same usb stick to carry it around and we have configuredthe encrypted partition to be used as persistence store. So now,we only need to boot the live system. At boot time, live-bootwill prompt us for the passphrase and will mount the encryptedpartition to be used for persistence.
45
Manualul Live Systems
Customizing the binary image616
11. Customizing the binary image617
11.1 Bootloaders618
live-build uses syslinux and some of its derivatives (depending on619
the image type) as bootloaders by default. They can be easilycustomized to suit your needs.
In order to use a full theme, copy /usr/share/live/build/-620
bootloaders into config/bootloaders and edit the files in there.If you do not want to bother modifying all supported bootloaderconfigurations, only providing a local customized copy of one ofthe bootloaders, e.g. isolinux in config/bootloaders/isolinux
is enough too, depending on your use case.
When modifying one of the default themes, if you want to use a621
personalized background image that will be displayed together withthe boot menu, add a splash.png picture of 640x480 pixels. Then,remove the splash.svg file.
There are many possibilities when it comes to making changes.622
For instance, syslinux derivatives are configured by default with atimeout of 0 (zero) which means that they will pause indefinitely attheir splash screen until you press a key.
To modify the boot timeout of a default iso-hybrid image just edit623
a default isolinux.cfg file specifying the timeout in units of 1/10seconds. A modified isolinux.cfg to boot after five seconds wouldbe similar to this:
624
include menu.cfgdefault vesamenu.c32prompt 0
timeout 50
11.2 ISO metadata 625
When creating an ISO9660 binary image, you can use the following 626
options to add various textual metadata for your image. This canhelp you easily identify the version or configuration of an imagewithout booting it.
• LB_ISO_APPLICATION/--iso-application NAME: This should 627
describe the application that will be on the image. Themaximum length for this field is 128 characters.
• LB_ISO_PREPARER/--iso-preparer NAME: This should describe 628
the preparer of the image, usually with some contact details.The default for this option is the live-build version you are using,which may help with debugging later. The maximum length forthis field is 128 characters.
• LB_ISO_PUBLISHER/--iso-publisher NAME: This should 629
describe the publisher of the image, usually with some contactdetails. The maximum length for this field is 128 characters.
• LB_ISO_VOLUME/--iso-volume NAME: This should specify the 630
volume ID of the image. This is used as a user-visible labelon some platforms such as Windows and Apple Mac OS. Themaximum length for this field is 32 characters.
46
Manualul Live Systems
Customizing Debian Installer631
12. Customizing Debian Installer632
Live system images can be integrated with Debian Installer. There633
are a number of different types of installation, varying in what isincluded and how the installer operates.
Please note the careful use of capital letters when referring to the634
“Debian Installer” in this section - when used like this we referexplicitly to the official installer for the Debian system, not anythingelse. It is often seen abbreviated to “d-i”.
12.1 Types of Debian Installer635
The three main types of installer are:636
“Normal” Debian Installer : This is a normal live system image637
with a separate kernel and initrd which (when selected from theappropriate bootloader) launches into a standard Debian Installerinstance, just as if you had downloaded a CD image of Debianand booted it. Images containing a live system and such anotherwise independent installer are often referred to as “combinedimages”.
On such images, Debian is installed by fetching and installing .deb638
packages using debootstrap, from local media or some network-based network, resulting in a default Debian system being installedto the hard disk.
This whole process can be preseeded and customized in a number639
of ways; see the relevant pages in the Debian Installer manualfor more information. Once you have a working preseeding file,live-build can automatically put it in the image and enable it foryou.
“Live” Debian Installer : This is a live system image with640
a separate kernel and initrd which (when selected from theappropriate bootloader) launches into an instance of the DebianInstaller.
Installation will proceed in an identical fashion to the “normal” 641
installation described above, but at the actual package installationstage, instead of using debootstrap to fetch and install packages,the live filesystem image is copied to the target. This is achievedwith a special udeb called live-installer.
After this stage, the Debian Installer continues as normal, 642
installing and configuring items such as bootloaders and localusers, etc.
Note: to support both normal and live installer entries in the 643
bootloader of the same live medium, you must disable live-installerby preseeding live-installer/enable=false.
“Desktop” Debian Installer : Regardless of the type of Debian 644
Installer included, d-i can be launched from theDesktop by clickingon an icon. This is user friendlier in some situations. In order tomake use of this, the debian-installer-launcher package needs tobe included.
Note that by default, live-build does not include Debian Installer 645
images in the images, it needs to be specifically enabled with lb
config. Also, please note that for the “Desktop” installer to work,the kernel of the live system must match the kernel d-i uses forthe specified architecture. For example:
646
$ lb config --architectures i386 --linux-flavours 486 \--debian-installer live
$ echo debian-installer-launcher >> config/package-lists/my.list.chroot
47
Manualul Live Systems
12.2 Customizing Debian Installer by preseeding647
As described in the Debian Installer Manual, Appendix B at648
‹http://www.debian.org/releases/stable/i386/apb.html›, “Preseeding providesa way to set answers to questions asked during the installationprocess, without having to manually enter the answers while theinstallation is running. This makes it possible to fully automatemost types of installation and even offers some features notavailable during normal installations.” This kind of customizationis best accomplished with live-build by placing the configuration ina preseed.cfg file included in config/includes.installer/. Forexample, to preseed setting the locale to en_US:
649
$ echo "d-i debian-installer/locale string en_US" \>> config/includes.installer/preseed.cfg
12.3 Customizing Debian Installer content650
For experimental or debugging purposes, you might want to651
include locally built d-i component udeb packages. Place these inconfig/packages.binary/ to include them in the image. Additionalor replacement files and directories may be included in the installerinitrd as well, in a similar fashion to ‹Live/chroot local includes›, byplacing the material in config/includes.installer/.
48

Manualul Live Systems
Proiect652
49
Manualul Live Systems
Contributing to the project653
13. Contributing to the project654
When submitting a contribution, please clearly identify its copyright655
holder and include any applicable licensing statement. Note thatto be accepted, the contribution must be licensed under the samelicense as the rest of the documents, namely, GPL version 3 orlater.
Contributions to the project, such as translations and patches, are656
greatly welcome. Anyone can directly commit to the repositories,however, we ask you to send bigger changes to the mailinglist to discuss them first. See the section ‹Contact› for moreinformation.
The Live Systems Project uses Git as version control system and657
source code management. As explained in ‹Git repositories› thereare two main development branches: debian and debian-next. Everybody can commit to the debian-next branches of the live-boot, live-build, live-config, live-images, live-manual and live-toolsrepositories.
However, there are certain restrictions. The server will reject:658
• Non fast-forward pushes.659
• Merge commits.660
• Adding or removing tags or branches.661
Even though all commits might be revised, we ask you to use662
your common sense and make good commits with good commitmessages.
• Write commit messages that consist of complete, meaningful663
sentences in English, starting with a capital letter and endingwith a full stop. Usually, these will start with the form “Fixing/-Adding/Removing/Correcting/Translating/...”.
• Write good commit messages. The first line must be an accurate 664
summary of the contents of the commit which will be included inthe changelog. If you need to make some further explanations,write them below leaving a blank line after the first one and thenanother blank line after each paragraph. Lines of paragraphsshould not exceed 80 characters in length.
• Commit atomically, this is to say, do not mix unrelated things in 665
the same commit. Make one different commit for each changeyou make.
13.1 Making changes 666
In order to push to the repositories, you must follow the following 667
procedure. Here we use live-manual as an example so replace itwith the name of the repository you want to work with. For detailedinformation on how to edit live-manual see ‹Contributing to thisdocument›.
• Fetch the public commit key: 668
669
$ mkdir -p ~/.ssh/keys$ wget http://live-systems.org/other/keys/[email protected] -O ~/.ssh/←↩
keys/[email protected]$ wget http://live-systems.org/other/keys/[email protected] -O ~/.←↩
ssh/keys/[email protected]$ chmod 0600 ~/.ssh/keys/[email protected]*
• Adaugati urmatoarea sectiuna la openssh-client config: 670
671
$ cat >> ~/.ssh/config << EOFHost live-systems.org
Hostname live-systems.orgUser git
50
Manualul Live Systems
IdentitiesOnly yesIdentityFile ~/.ssh/keys/[email protected]
EOF
• Check out a clone of live-manual through ssh:672
673
$ git clone [email protected]:/live-manual.git$ cd live-manual && git checkout debian-next
• Make sure you have Git author and email set:674
675
$ git config user.name "John Doe"$ git config user.email [email protected]
Important: Remember that you should commit any changes on676
the debian-next branch.
• Make your changes. In this example you would first write a677
new section dealing with applying patches and then prepare tocommit adding the files and writing your commit message likethis:
678
$ git commit -a -m "Adding a section on applying patches."
• Primite commit-ul la server:679
680
$ git push
51
Manualul Live Systems
Reporting bugs681
14. Reporting bugs682
Live systems are far from being perfect, but we want to make it683
as close as possible to perfect - with your help. Do not hesitate toreport a bug. It is better to fill a report twice than never. However,this chapter includes recommendations on how to file good bugreports.
For the impatient:684
• Always check first the image status updates on our homepage at685
‹http://live-systems.org/› for known issues.
• Before submitting a bug report always try to reproduce the bug686
with the most recent versions of the branch of live-build, live-boot, live-config and live-tools that you’re using (like the newest4.x version of live-build if you’re using live-build 4).
• Try to give as specific information as possible about the bug.687
This includes (at least) the version of live-build, live-boot, live-config, and live-tools used and the distribution of the live systemyou are building.
14.1 Known issues688
Since Debian testing and Debian unstable distributions are689
moving targets, when you specify either of them as the targetsystem distribution, a successful build may not always bepossible.
If this causes too much difficulty for you, do not build a system690
based on testing or unstable , but rather, use stable . live-buildalways defaults to the stable release.
Currently known issues are listed under the section ‘status’ on our691
homepage at ‹http://live-systems.org/›.
It is out of the scope of this manual to train you to correctly identify 692
and fix problems in packages of the development distributions,however, there are two things you can always try: If a build failswhen the target distribution is testing , try unstable . If unstabledoes not work either, revert to testing and pin the newer versionof the failing package from unstable (see ‹APT pinning› fordetails).
14.2 Rebuild from scratch 693
To ensure that a particular bug is not caused by an uncleanly built 694
system, please always rebuild the whole live system from scratchto see if the bug is reproducible.
14.3 Use up-to-date packages 695
Using outdated packages can cause significant problems when 696
trying to reproduce (and ultimately fix) your problem. Make sureyour build system is up-to-date and any packages included in yourimage are up-to-date as well.
14.4 Collect information 697
Please provide enough information with your report. Include, at 698
least, the exact version of live-build where the bug is encounteredand the steps to reproduce it. Please use your common sense andprovide any other relevant information if you think that it might helpin solving the problem.
To make the most out of your bug report, we require at least the 699
following information:
52
Manualul Live Systems
• Architecture of the host system 700
• Distribution of the host system701
• Version of live-build on the host system702
• Version of Python on the host system703
• Version of debootstrap and/or cdebootstrap on the host system704
• Architecture of the live system705
• Distribution of the live system706
• Version of live-boot on the live system707
• Version of live-config on the live system708
• Version of live-tools on the live system709
You can generate a log of the build process by using the710
tee command. We recommend doing this automatically withan auto/build script (see ‹Managing a configuration› fordetails).
711
# lb build 2>&1 | tee build.log
At boot time, live-boot and live-config store their logfiles in /var/-712
log/live/. Check them for error messages.
Additionally, to rule out other errors, it is always a good idea to713
tar up your config/ directory and upload it somewhere (do notsend it as an attachment to the mailing list), so that we can try toreproduce the errors you encountered. If this is difficult (e.g. due tosize) you can use the output of lb config --dump which producesa summary of your config tree (i.e. lists files in subdirectories ofconfig/ but does not include them).
Remember to send in any logs that were produced with English714
locale settings, e.g. run your live-build commands with a leadingLC_ALL=C or LC_ALL=en_US.
14.5 Isolate the failing case if possible 715
If possible, isolate the failing case to the smallest possible change 716
that breaks. It is not always easy to do this so if you cannotmanage it for your report, do not worry. However, if you planyour development cycle well, using small enough change sets periteration, you may be able to isolate the problem by constructinga simpler ‘base’ configuration that closely matches your actualconfiguration plus just the broken change set added to it. If youhave a hard time sorting out which of your changes broke, it maybe that you are including too much in each change set and shoulddevelop in smaller increments.
14.6 Use the correct package to report the bug 717
against
If you do not know what component is responsible for the bug or 718
if the bug is a general bug concerning live systems, you can fill abug against the debian-live pseudo-package.
However, we would appreciate it if you try to narrow it down 719
according to where the bug appears.
14.6.1 At build time while bootstrapping 720
live-build first bootstraps a basic Debian system with debootstrap 721
or cdebootstrap. Depending on the bootstrapping tool used and theDebian distribution it is bootstrapping, it may fail. If a bug appearshere, check if the error is related to a specific Debian package (mostlikely), or if it is related to the bootstrapping tool itself.
53

Manualul Live Systems
In both cases, this is not a bug in the live system, but rather722
in Debian itself and probably we cannot fix it directly. Pleasereport such a bug against the bootstrapping tool or the failingpackage.
14.6.2 At build time while installing packages723
live-build installs additional packages from the Debian archive and724
depending on the Debian distribution used and the daily archivestate, it can fail. If a bug appears here, check if the error is alsoreproducible on a normal system.
If this is the case, this is not a bug in the live system, but rather725
in Debian - please report it against the failing package. Runningdebootstrap separately from the Live system build or running lb
bootstrap --debug will give you more information.
Also, if you are using a local mirror and/or any sort of proxy and726
you are experiencing a problem, please always reproduce it firstby bootstrapping from an official mirror.
14.6.3 At boot time727
If your image does not boot, please report it to the mailing list728
together with the information requested in ‹Collect information›. Donot forget to mention, how/when the image failed exactly, whetherusing virtualization or real hardware. If you are using a virtualizationtechnology of any kind, please always run it on real hardwarebefore reporting a bug. Providing a screenshot of the failure is alsovery helpful.
14.6.4 At run time729
If a package was successfully installed, but fails while actually730
running the Live system, this is probably a bug in the live system.However:
14.7 Do the research 731
Before filing the bug, please search the web for the particular error 732
message or symptom you are getting. As it is highly unlikely thatyou are the only person experiencing a particular problem. Thereis always a chance that it has been discussed elsewhere and apossible solution, patch, or workaround has been proposed.
You should pay particular attention to the live systems mailing list, 733
as well as the homepage, as these are likely to contain the mostup-to-date information. If such information exists, always includethe references to it in your bug report.
In addition, you should check the current bug lists for live-build, live- 734
boot, live-config and live-tools to see whether something similarhas already been reported.
14.8 Where to report bugs 735
The Live Systems Project keeps track of all bugs in the Bug 736
Tracking System (BTS). For information on how to use the system,please see ‹http://bugs.debian.org/›. You can also submit the bugs byusing the reportbug command from the package with the samename.
In general, you should report build time errors against the live- 737
build package, boot time errors against live-boot, and run timeerrors against live-config. If you are unsure of which packageis appropriate or need more help before submitting a bug report,please report it against the debian-live pseudo-package. We willthen take care about it and reassign it where appropriate.
54
Manualul Live Systems
Please note that bugs found in distributions derived from Debian738
(such as Ubuntu and others) should not be reported to the DebianBTS unless they can be also reproduced on a Debian system usingofficial Debian packages.
55
Manualul Live Systems
Coding Style739
15. Coding Style740
This chapter documents the coding style used in live741
systems.
15.1 Compatibility742
• Don’t use syntax or semantics that are unique to the Bash shell.743
For example, the use of array constructs.
• Only use the POSIX subset - for example, use $(foo) over ‘foo‘.744
• You can check your scripts with ‘sh -n’ and ‘checkbashisms’.745
• Make sure all shell code runs with ‘set -e’.746
15.2 Indenting747
• Always use tabs over spaces.748
15.3 Wrapping749
• Generally, lines are 80 chars at maximum.750
• Use the “Linux style” of line breaks:751
Bad:752
753
if foo; thenbar
fi
Good:754
755
if foothen
barfi
• The same holds for functions: 756
Bad: 757
758
Foo () {bar
}
Good: 759
760
Foo (){
bar}
15.4 Variables 761
• Variables are always in capital letters. 762
• Variables used in live-build always start with LB_ prefix. 763
• Internal temporary variables in live-build should start with the 764
<=underscore>LB_ prefix.
• Local variables start with live-build <=underscore><=underscore>LB_765prefix.
56
Manualul Live Systems
• Variables in connection to a boot parameter in live-config start766
with LIVE_.
• All other variables in live-config start with _ prefix.767
• Use braces around variables; e.g. write ${FOO} instead of $FOO.768
• Always protect variables with quotes to respect potential769
whitespaces: write “${FOO}” not ${FOO}.
• For consistency reasons, always use quotes when assigning770
values to variables:
Bad:771
772
FOO=bar
Good:773
774
FOO="bar"
• If multiple variables are used, quote the full expression:775
Bad:776
777
if [ -f "${FOO}"/foo/"${BAR}"/bar ]then
foobarfi
Good:778
779
if [ -f "${FOO}/foo/${BAR}/bar" ]then
foobarfi
15.5 Miscellaneous 780
• Use “|” (without the surround quotes) as a separator in calls to 781
sed, e.g. “sed -e `s|'” (without “”).
• Don’t use the test command for comparisons or tests, use “[” “]” 782
(without “”); e.g. ”if [ -x /bin/foo ]; ...“ and not ”if test
-x /bin/foo; ...”.
• Use case wherever possible over test, as it’s easier to read and 783
faster in execution.
• Use capitalized names for functions to limit messing with the 784
users environment.
57
Manualul Live Systems
Procedures785
16. Procedures786
This chapter documents the procedures within the Live Systems787
Project for various tasks that need cooperation with other teams inDebian.
16.1 Major Releases788
Releasing a new stable major version of Debian includes a lot789
of different teams working together to make it happen. At somepoint, the Live team comes in and builds live system images. Therequirements to do this are:
• A mirror containing the released versions for the debian and790
debian-security archives which the debian-live buildd canaccess.
• The names of the image need to be known (e.g. debian-live-791
VERSION-ARCH-FLAVOUR.iso).
• The data from debian-cd needs to be synced (udeb exclude lists).792
• Images are built and mirrored on cdimage.debian.org.793
16.2 Point Releases794
• Again, we need updated mirrors of debian and debian-security.795
• Images are built and mirrored on cdimage.debian.org.796
• Send announcement mail.797
16.2.1 Last Point Release of a Debian Release798
Remember to adjust both chroot and binary mirrors when building799
the last set of images for a Debian release after it has been movedaway from ftp.debian.org to archive.debian.org. That way, oldprebuilt live images are still useful without user modifications.
16.2.2 Point release announcement template 800
An announcement mail for point releases can be generated using 801
the template below and the following command:
802
$ sed \-e 's|@MAJOR@|7.0|g' \-e 's|@MINOR@|7.0.1|g' \-e 's|@CODENAME@|wheezy|g' \-e 's|@ANNOUNCE@|2013/msgXXXXX.html|g'
Please check the mail carefully before sending and pass it to others 803
for proof-reading.
804
Updated Live @MAJOR@: @MINOR@ released
The Live Systems Project is pleased to announce the @MINOR@ update of theLive images for the stable distribution Debian @MAJOR@ (codename "←↩
@CODENAME@").
The images are available for download at:
<http://live-systems.org/cdimage/release/current/>
and later at:
<http://cdimage.debian.org/cdimage/release/current-live/>
This update includes the changes of the Debian @MINOR@ release:
58
Manualul Live Systems
<http://lists.debian.org/debian-announce/@ANNOUNCE@>
Additionally it includes the following Live-specific changes:
* [INSERT LIVE-SPECIFIC CHANGE HERE]* [INSERT LIVE-SPECIFIC CHANGE HERE]* [LARGER ISSUES MAY DESERVE THEIR OWN SECTION]
About Live Systems------------------The Live Systems Project produces the tools used to build officiallive systems and the official live images themselves for Debian.
About Debian------------The Debian Project is an association of Free Software developers whovolunteer their time and effort in order to produce the completely freeoperating system Debian.
Contact Information-------------------For further information, please visit the Live Systems web pages at<http://live-systems.org/>, or contact the Live Systems team at<[email protected]>.
59
Manualul Live Systems
Git repositories805
17. Git repositories806
The list of all the available repositories of the Live Systems Project807
can be found at ‹http://live-systems.org/gitweb/›. The project’s git URLshave the form: protocol://live-systems.org/git/repository.-Thus, in order to clone live-manual read-only, launch:
808
$ git clone git://live-systems.org/git/live-manual.git
Or,809
810
$ git clone https://live-systems.org/git/live-manual.git
Or,811
812
$ git clone http://live-systems.org/git/live-manual.git
The cloning addresses with write permission have the form:813
[email protected]:/repository.
So, again, to clone live-manual over ssh you must type:814
815
$ git clone [email protected]:live-manual.git
The git tree is made up of several different branches. The debian816
and the debian-next branches are particularly noteworthy
because they contain the actual work that will eventually beincluded in each new release.
After cloning any of the existing repositories, you will be on the 817
debian branch. This is appropriate to take a look at the state ofthe project’s latest release but before starting work it is crucial toswitch to the debian-next branch. To do so:
818
$ git checkout debian-next
The debian-next branch, which is not always fast-forward, is 819
where all the changes are committed first before being mergedinto the debian branch. To make an analogy, it is like a testingground. If you are working on this branch and need to pull, you willhave to do a git pull --rebase so that your local modificationsare staged while pulling from the server and then your changeswill be put on top of it all.
17.1 Handling multiple repositories 820
If you intend to clone several of the live systems repositories and 821
want to switch to the debian-next branch right away to check thelatest code, write a patch or contribute with a translation you oughtto know that the git server provides a mrconfig file to ease thehandling of multiple repositories. In order to use it you need toinstall the mr package and after that, launch:
822
$ mr bootstrap http://live-systems.org/other/mr/mrconfig
This command will automatically clone and checkout to the 823
debian-next branch the development repositories of the Debian
60
Manualul Live Systems
packages produced by the project. These include, among others,the live-images repository, which contains the configurations usedfor the prebuilt images that the project publishes for general use.For more information on how to use this repository, see ‹Clone aconfiguration published via Git›
61

Manualul Live Systems
Exemple824
62
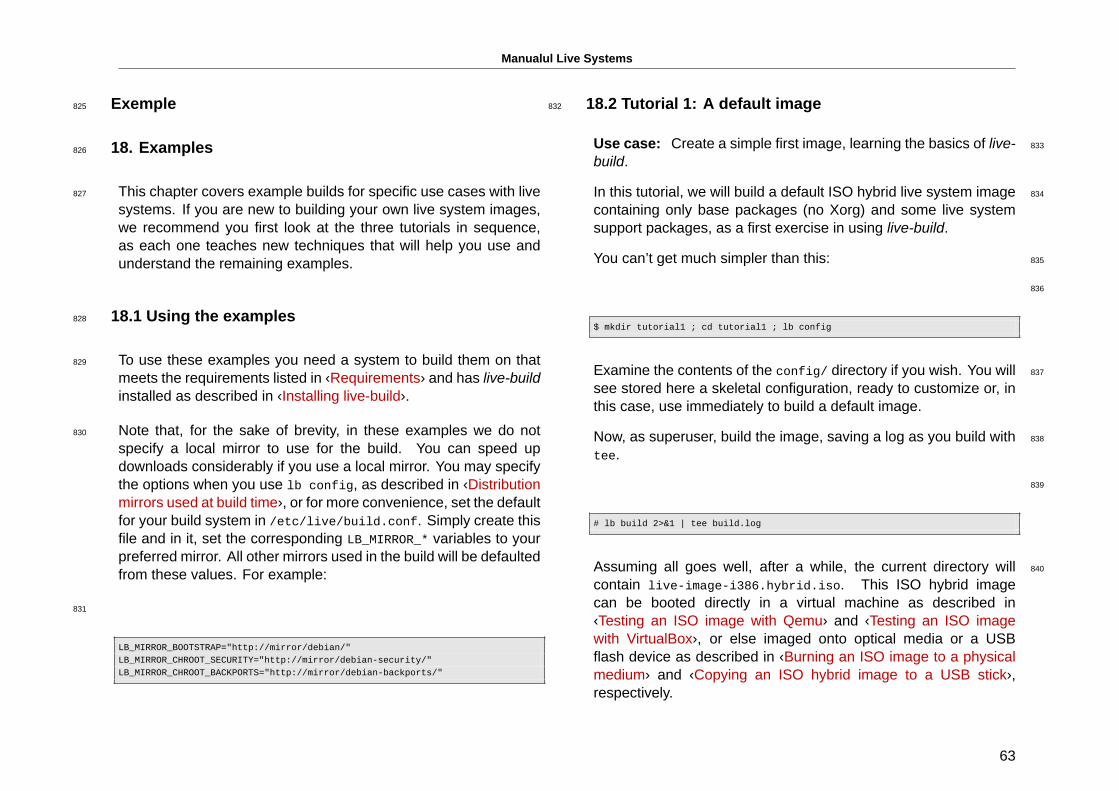
Manualul Live Systems
Exemple825
18. Examples826
This chapter covers example builds for specific use cases with live827
systems. If you are new to building your own live system images,we recommend you first look at the three tutorials in sequence,as each one teaches new techniques that will help you use andunderstand the remaining examples.
18.1 Using the examples828
To use these examples you need a system to build them on that829
meets the requirements listed in ‹Requirements› and has live-buildinstalled as described in ‹Installing live-build›.
Note that, for the sake of brevity, in these examples we do not830
specify a local mirror to use for the build. You can speed updownloads considerably if you use a local mirror. You may specifythe options when you use lb config, as described in ‹Distributionmirrors used at build time›, or for more convenience, set the defaultfor your build system in /etc/live/build.conf. Simply create thisfile and in it, set the corresponding LB_MIRROR_* variables to yourpreferred mirror. All other mirrors used in the build will be defaultedfrom these values. For example:
831
LB_MIRROR_BOOTSTRAP="http://mirror/debian/"LB_MIRROR_CHROOT_SECURITY="http://mirror/debian-security/"LB_MIRROR_CHROOT_BACKPORTS="http://mirror/debian-backports/"
18.2 Tutorial 1: A default image832
Use case: Create a simple first image, learning the basics of live- 833
build.
In this tutorial, we will build a default ISO hybrid live system image 834
containing only base packages (no Xorg) and some live systemsupport packages, as a first exercise in using live-build.
You can’t get much simpler than this: 835
836
$ mkdir tutorial1 ; cd tutorial1 ; lb config
Examine the contents of the config/ directory if you wish. You will 837
see stored here a skeletal configuration, ready to customize or, inthis case, use immediately to build a default image.
Now, as superuser, build the image, saving a log as you build with 838
tee.
839
# lb build 2>&1 | tee build.log
Assuming all goes well, after a while, the current directory will 840
contain live-image-i386.hybrid.iso. This ISO hybrid imagecan be booted directly in a virtual machine as described in‹Testing an ISO image with Qemu› and ‹Testing an ISO imagewith VirtualBox›, or else imaged onto optical media or a USBflash device as described in ‹Burning an ISO image to a physicalmedium› and ‹Copying an ISO hybrid image to a USB stick›,respectively.
63

Manualul Live Systems
18.3 Tutorial 2: A web browser utility 841
Use case: Create a web browser utility image, learning how to842
apply customizations.
In this tutorial, we will create an image suitable for use as a web843
browser utility, serving as an introduction to customizing live systemimages.
844
$ mkdir tutorial2$ cd tutorial2$ lb config$ echo "task-lxde-desktop iceweasel" >> config/package-lists/my.list.chroot$ lb config
Our choice of LXDE for this example reflects our desire to provide845
a minimal desktop environment, since the focus of the image is thesingle use we have in mind, the web browser. We could go evenfurther and provide a default configuration for the web browser inconfig/includes.chroot/etc/iceweasel/profile/, or additionalsupport packages for viewing various kinds of web content, but weleave this as an exercise for the reader.
Build the image, again as superuser, keeping a log as in ‹Tutorial846
1›:
847
# lb build 2>&1 | tee build.log
Again, verify the image is OK and test, as in ‹Tutorial 1›.848
18.4 Tutorial 3: A personalized image849
Use case: Create a project to build a personalized image,850
containing your favourite software to take with you on a USB stickwherever you go, and evolving in successive revisions as yourneeds and preferences change.
Since we will be changing our personalized image over a number 851
of revisions, and we want to track those changes, trying thingsexperimentally and possibly reverting them if things don’t work out,we will keep our configuration in the popular git version controlsystem. We will also use the best practice of autoconfiguration viaauto scripts as described in ‹Managing a configuration›.
18.4.1 First revision 852
853
$ mkdir -p tutorial3/auto$ cp /usr/share/doc/live-build/examples/auto/* tutorial3/auto/$ cd tutorial3
Edit auto/config to read as follows: 854
855
#!/bin/sh
lb config noauto \--architectures i386 \--linux-flavours 686-pae \"${@}"
Perform lb config to generate the config tree, using the 856
auto/config script you just created:
857
$ lb config
64
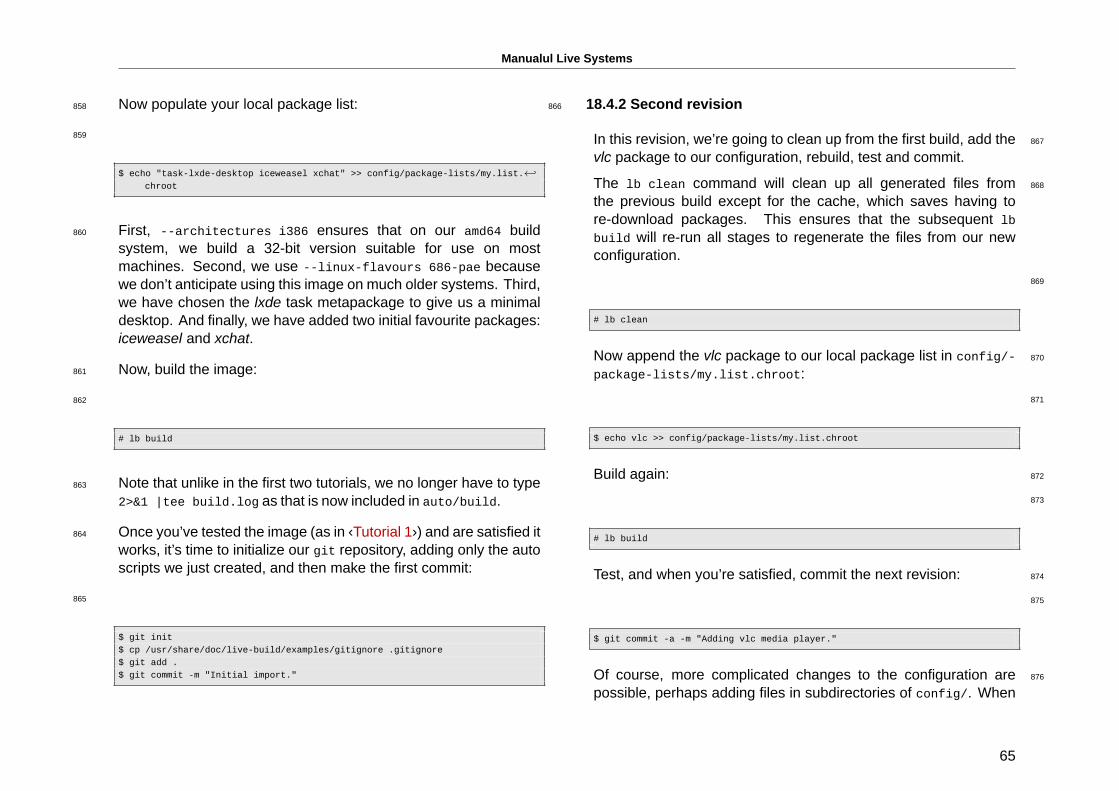
Manualul Live Systems
Now populate your local package list:858
859
$ echo "task-lxde-desktop iceweasel xchat" >> config/package-lists/my.list.←↩chroot
First, --architectures i386 ensures that on our amd64 build860
system, we build a 32-bit version suitable for use on mostmachines. Second, we use --linux-flavours 686-pae becausewe don’t anticipate using this image on much older systems. Third,we have chosen the lxde task metapackage to give us a minimaldesktop. And finally, we have added two initial favourite packages:iceweasel and xchat.
Now, build the image:861
862
# lb build
Note that unlike in the first two tutorials, we no longer have to type863
2>&1 |tee build.log as that is now included in auto/build.
Once you’ve tested the image (as in ‹Tutorial 1›) and are satisfied it864
works, it’s time to initialize our git repository, adding only the autoscripts we just created, and then make the first commit:
865
$ git init$ cp /usr/share/doc/live-build/examples/gitignore .gitignore$ git add .$ git commit -m "Initial import."
18.4.2 Second revision866
In this revision, we’re going to clean up from the first build, add the 867
vlc package to our configuration, rebuild, test and commit.
The lb clean command will clean up all generated files from 868
the previous build except for the cache, which saves having tore-download packages. This ensures that the subsequent lb
build will re-run all stages to regenerate the files from our newconfiguration.
869
# lb clean
Now append the vlc package to our local package list in config/- 870
package-lists/my.list.chroot:
871
$ echo vlc >> config/package-lists/my.list.chroot
Build again: 872
873
# lb build
Test, and when you’re satisfied, commit the next revision: 874
875
$ git commit -a -m "Adding vlc media player."
Of course, more complicated changes to the configuration are 876
possible, perhaps adding files in subdirectories of config/. When
65
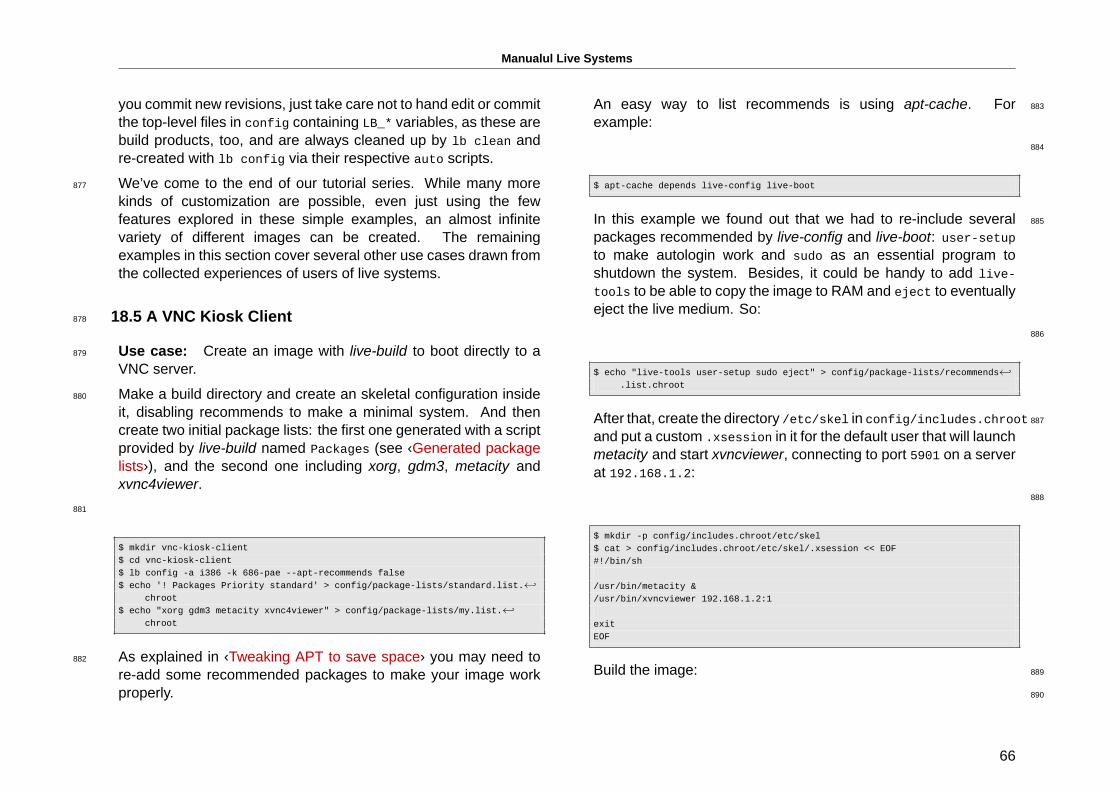
Manualul Live Systems
you commit new revisions, just take care not to hand edit or committhe top-level files in config containing LB_* variables, as these arebuild products, too, and are always cleaned up by lb clean andre-created with lb config via their respective auto scripts.
We’ve come to the end of our tutorial series. While many more877
kinds of customization are possible, even just using the fewfeatures explored in these simple examples, an almost infinitevariety of different images can be created. The remainingexamples in this section cover several other use cases drawn fromthe collected experiences of users of live systems.
18.5 A VNC Kiosk Client878
Use case: Create an image with live-build to boot directly to a879
VNC server.
Make a build directory and create an skeletal configuration inside880
it, disabling recommends to make a minimal system. And thencreate two initial package lists: the first one generated with a scriptprovided by live-build named Packages (see ‹Generated packagelists›), and the second one including xorg, gdm3, metacity andxvnc4viewer.
881
$ mkdir vnc-kiosk-client$ cd vnc-kiosk-client$ lb config -a i386 -k 686-pae --apt-recommends false$ echo '! Packages Priority standard' > config/package-lists/standard.list.←↩
chroot$ echo "xorg gdm3 metacity xvnc4viewer" > config/package-lists/my.list.←↩
chroot
As explained in ‹Tweaking APT to save space› you may need to882
re-add some recommended packages to make your image workproperly.
An easy way to list recommends is using apt-cache. For 883
example:
884
$ apt-cache depends live-config live-boot
In this example we found out that we had to re-include several 885
packages recommended by live-config and live-boot: user-setupto make autologin work and sudo as an essential program toshutdown the system. Besides, it could be handy to add live-
tools to be able to copy the image to RAM and eject to eventuallyeject the live medium. So:
886
$ echo "live-tools user-setup sudo eject" > config/package-lists/recommends←↩.list.chroot
After that, create the directory /etc/skel in config/includes.chroot 887
and put a custom .xsession in it for the default user that will launchmetacity and start xvncviewer, connecting to port 5901 on a serverat 192.168.1.2:
888
$ mkdir -p config/includes.chroot/etc/skel$ cat > config/includes.chroot/etc/skel/.xsession << EOF#!/bin/sh
/usr/bin/metacity &/usr/bin/xvncviewer 192.168.1.2:1
exitEOF
Build the image: 889
890
66
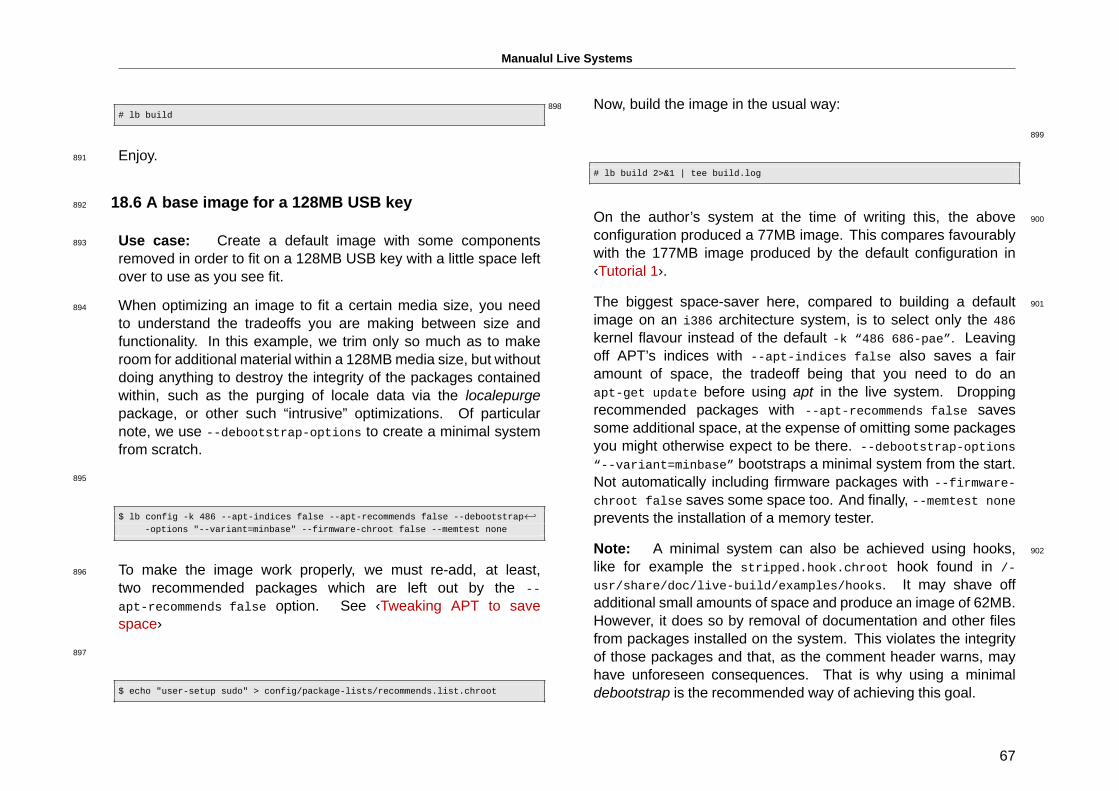
Manualul Live Systems
# lb build
Enjoy.891
18.6 A base image for a 128MB USB key892
Use case: Create a default image with some components893
removed in order to fit on a 128MB USB key with a little space leftover to use as you see fit.
When optimizing an image to fit a certain media size, you need894
to understand the tradeoffs you are making between size andfunctionality. In this example, we trim only so much as to makeroom for additional material within a 128MBmedia size, but withoutdoing anything to destroy the integrity of the packages containedwithin, such as the purging of locale data via the localepurgepackage, or other such “intrusive” optimizations. Of particularnote, we use --debootstrap-options to create a minimal systemfrom scratch.
895
$ lb config -k 486 --apt-indices false --apt-recommends false --debootstrap←↩-options "--variant=minbase" --firmware-chroot false --memtest none
To make the image work properly, we must re-add, at least,896
two recommended packages which are left out by the --
apt-recommends false option. See ‹Tweaking APT to savespace›
897
$ echo "user-setup sudo" > config/package-lists/recommends.list.chroot
Now, build the image in the usual way:898
899
# lb build 2>&1 | tee build.log
On the author’s system at the time of writing this, the above 900
configuration produced a 77MB image. This compares favourablywith the 177MB image produced by the default configuration in‹Tutorial 1›.
The biggest space-saver here, compared to building a default 901
image on an i386 architecture system, is to select only the 486
kernel flavour instead of the default -k “486 686-pae”. Leavingoff APT’s indices with --apt-indices false also saves a fairamount of space, the tradeoff being that you need to do anapt-get update before using apt in the live system. Droppingrecommended packages with --apt-recommends false savessome additional space, at the expense of omitting some packagesyou might otherwise expect to be there. --debootstrap-options
“--variant=minbase” bootstraps a minimal system from the start.Not automatically including firmware packages with --firmware-
chroot false saves some space too. And finally, --memtest none
prevents the installation of a memory tester.
Note: A minimal system can also be achieved using hooks, 902
like for example the stripped.hook.chroot hook found in /-
usr/share/doc/live-build/examples/hooks. It may shave offadditional small amounts of space and produce an image of 62MB.However, it does so by removal of documentation and other filesfrom packages installed on the system. This violates the integrityof those packages and that, as the comment header warns, mayhave unforeseen consequences. That is why using a minimaldebootstrap is the recommended way of achieving this goal.
67
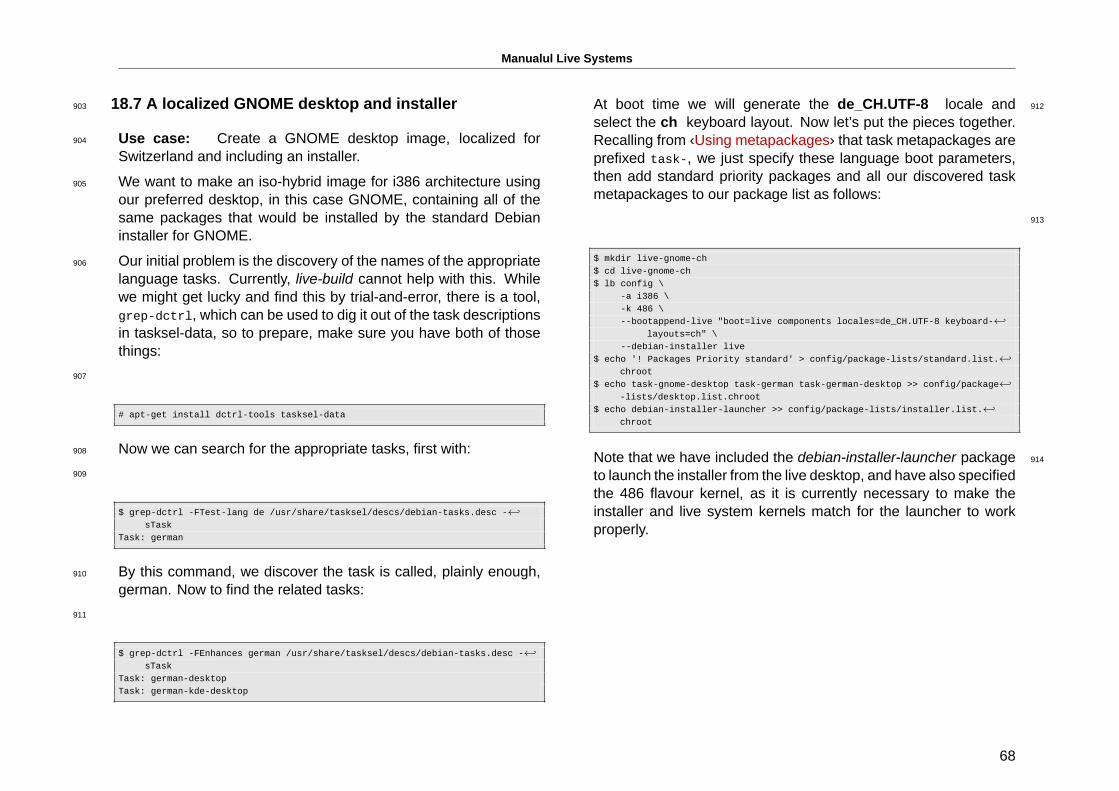
Manualul Live Systems
18.7 A localized GNOME desktop and installer903
Use case: Create a GNOME desktop image, localized for904
Switzerland and including an installer.
We want to make an iso-hybrid image for i386 architecture using905
our preferred desktop, in this case GNOME, containing all of thesame packages that would be installed by the standard Debianinstaller for GNOME.
Our initial problem is the discovery of the names of the appropriate906
language tasks. Currently, live-build cannot help with this. Whilewe might get lucky and find this by trial-and-error, there is a tool,grep-dctrl, which can be used to dig it out of the task descriptionsin tasksel-data, so to prepare, make sure you have both of thosethings:
907
# apt-get install dctrl-tools tasksel-data
Now we can search for the appropriate tasks, first with:908
909
$ grep-dctrl -FTest-lang de /usr/share/tasksel/descs/debian-tasks.desc -←↩sTask
Task: german
By this command, we discover the task is called, plainly enough,910
german. Now to find the related tasks:
911
$ grep-dctrl -FEnhances german /usr/share/tasksel/descs/debian-tasks.desc -←↩sTask
Task: german-desktopTask: german-kde-desktop
At boot time we will generate the de_CH.UTF-8 locale and 912
select the ch keyboard layout. Now let’s put the pieces together.Recalling from ‹Using metapackages› that task metapackages areprefixed task-, we just specify these language boot parameters,then add standard priority packages and all our discovered taskmetapackages to our package list as follows:
913
$ mkdir live-gnome-ch$ cd live-gnome-ch$ lb config \
-a i386 \-k 486 \--bootappend-live "boot=live components locales=de_CH.UTF-8 keyboard-←↩
layouts=ch" \--debian-installer live
$ echo '! Packages Priority standard' > config/package-lists/standard.list.←↩chroot
$ echo task-gnome-desktop task-german task-german-desktop >> config/package←↩-lists/desktop.list.chroot
$ echo debian-installer-launcher >> config/package-lists/installer.list.←↩chroot
Note that we have included the debian-installer-launcher package 914
to launch the installer from the live desktop, and have also specifiedthe 486 flavour kernel, as it is currently necessary to make theinstaller and live system kernels match for the launcher to workproperly.
68

Manualul Live Systems
Anexă915
69
Manualul Live Systems
Style guide916
19. Style guide917
19.1 Guidelines for authors918
This section deals with some general considerations to be taken919
into account when writing technical documentation for live-manual.They are divided into linguistic features and recommendedprocedures.
Note: Authors should first read ‹Contributing to this920
document›
19.1.1 Linguistic features921
• Use plain English922
Keep in mind that a high percentage of your readers are not923
native speakers of English. So as a general rule try to use short,meaningful sentences, followed by a full stop.
This does not mean that you have to use a simplistic, naive style.924
It is a suggestion to try to avoid, as much as possible, complexsubordinate sentences that make the text difficult to understand fornon-native speakers of English.
• Variety of English925
The most widely spread varieties of English are British and926
American so it is very likely that most authors will use either oneor the other. In a collaborative environment, the ideal varietywould be “International English” but it is very difficult, not to sayimpossible, to decide on which variety among all the existing ones,is the best to use.
We expect that different varieties may mix without creating927
misunderstandings but in general terms you should try to becoherent and before deciding on using British, American or anyother English flavour at your discretion, please take a look at howother people write and try to imitate them.
• Be balanced 928
Do not be biased. Avoid including references to ideologies 929
completely unrelated to live-manual. Technical writing shouldbe as neutral as possible. It is in the very nature of scientificwriting.
• Be politically correct 930
Try to avoid sexist language as much as possible. If you need to 931
make references to the third person singular preferably use “they”rather than “he” or “she” or awkward inventions such as “s/he”,“s(he)” and the like.
• Be concise 932
Go straight to the point and do not wander around aimlessly. Give 933
as much information as necessary but do not give more informationthan necessary, this is to say, do not explain unnecessary details.Your readers are intelligent. Presume some previous knowledgeon their part.
• Minimize translation work 934
Keep in mind that whatever you write will have to be translated 935
into several other languages. This implies that a number of peoplewill have to do an extra work if you add useless or redundantinformation.
• Be coherent 936
As suggested before, it is almost impossible to standardize a 937
collaborative document into a perfectly unified whole. However,every effort on your side to write in a coherent way with the rest ofthe authors will be appreciated.
70
Manualul Live Systems
• Be cohesive938
Use as many text-forming devices as necessary to make your text939
cohesive and unambiguous. (Text-forming devices are linguisticmarkers such as connectors).
• Be descriptive940
It is preferable to describe the point in one or several paragraphs941
than merely using a number of sentences in a typical “changelog”style. Describe it! Your readers will appreciate it.
• Dictionary942
Look up the meaning of words in a dictionary or encyclopedia if943
you do not know how to express certain concepts in English. Butkeep in mind that a dictionary can either be your best friend orcan turn into your worst enemy if you do not know how to use itcorrectly.
English has the largest vocabulary that exists (with over one million944
words). Many of these words are borrowings from other languages.When looking up the meaning of words in a bilingual dictionary thetendency of a non-native speaker of English is to choose the onethat sounds more similar in their mother tongue. This often turnsinto an excessively formal discourse which does not sound quitenatural in English.
As a general rule, if a concept can be expressed using different945
synonyms, it is a good advice to choose the first word proposedby the dictionary. If in doubt, choosing words of Germanic origin(Usually monosyllabic words) is often the right thing to do. Bewarned that these two techniques might produce a rather informaldiscourse but at least your choice of words will be of wide use andgenerally accepted.
Using a dictionary of collocations is recommended. They are946
extremely helpful when it comes to know which words usuallyoccur together.
Again it is a good practice to learn from the work of others. Using a 947
search engine to check how other authors use certain expressionsmay help a lot.
• False friends, idioms and other idiomatic expressions 948
Watch out for false friends. No matter how proficient you are in 949
a foreign language you cannot help falling from time to time inthe trap of the so called “false friends”, words that look similar intwo languages but whose meanings or uses might be completelydifferent.
Try to avoid idioms as much as possible. “Idioms” are expressions 950
that may convey a completely different meaning from what theirindividual words seem to mean. Sometimes, idioms might bedifficult to understand even for native speakers of English!
• Avoid slang, abbreviations, contractions... 951
Even though you are encouraged to use plain, everyday 952
English, technical writing belongs to the formal register ofthe language.
Try to avoid slang, unusual abbreviations that are difficult to 953
understand and above all contractions that try to imitate thespoken language. Not to mention typical irc and family friendlyexpressions.
19.1.2 Procedures 954
• Test before write 955
It is important that authors test their examples before adding 956
them to live-manual to ensure that everything works as described.Testing on a clean chroot or VM can be a good starting point.
71
Manualul Live Systems
Besides, it would be ideal if the tests were then carried outon different machines with different hardware to spot possibleproblems that may arise.
• Examples957
When providing an example try to be as specific as you can. An958
example is, after all, just an example.
It is often better to use a line that only applies to a specific case959
than using abstractions that may confuse your readers. In this caseyou can provide a brief explanation of the effects of the proposedexample.
There may be some exceptions when the example suggests using960
some potentially dangerous commands that, if misused, maycause data loss or other similar undesirable effects. In this caseyou should provide a thorough explanation of the possible sideeffects.
• External links961
Links to external sites should only be used when the information962
on those sites is crucial when it comes to understanding a specialpoint. Even so, try to use links to external sites as sparselyas possible. Internet links are likely to change from time totime resulting in broken links and leaving your arguments in anincomplete state.
Besides, people who read the manual offline will not have the963
chance to follow those links.
• Avoid branding and things that violate the license under which964
the manual is published
Try to avoid branding as much as possible. Keep in mind that other965
downstream projects might make use of the documentation youwrite. So you are complicating things for them if you add certainspecific material.
live-manual is licensed under the GNU GPL. This has a number 966
of implications that apply to the distribution of the material (of anykind, including copyrighted graphics or logos) that is published withit.
• Write a first draft, revise, edit, improve, redo if necessary 967
- Brainstorm!. You need to organize your ideas first in a logical 968
sequence of events.
- Once you have somehow organized those ideas in yourmind write 969
a first draft.
- Revise grammar, syntax and spelling. Keep in mind that the 970
proper names of the releases, such as jessie or sid , should notbe capitalized when referred to as code names. In order to checkthe spelling you can run the “spell” target. i.e. make spell
- Improve your statements and redo any part if necessary. 971
• Chapters 972
Use the conventional numbering system for chapters and subtitles. 973
e.g. 1, 1.1, 1.1.1, 1.1.2 ... 1.2, 1.2.1, 1.2.2 ... 2, 2.1 ... and so on.See markup below.
If you have to enumerate a series of steps or stages in your 974
description, you can also use ordinal numbers: First, second, third... or First, Then, After that, Finally ... Alternatively you can usebulleted items.
• Markup 975
And last but not least, live-manual uses ‹SiSU› to process the text 976
files and produce a multiple format output. It is recommended totake a look at ‹SiSU’s manual› to get familiar with its markup, orelse type:
977
72
Manualul Live Systems
$ sisu --help markup
Here are some markup examples that may prove useful:978
- For emphasis/bold text:979
980
*{foo}* or !{foo}!
produces: foo or foo . Use it to emphasize certain key981
words.
- For italics:982
983
/{foo}/
produces: foo. Use them e.g. for the names of Debian984
packages.
- For monospace:985
986
#{foo}#
produces: foo. Use it e.g. for the names of commands. And also987
to highlight some key words or things like paths.
- For code blocks:988
989
code{
$ foo
# bar
}code
produces: 990
991
$ foo# bar
Use code{ to open and }code to close the tags. It is important 992
to remember to leave a space at the beginning of each line ofcode.
19.2 Guidelines for translators 993
This section deals with some general considerations to be taken 994
into account when translating the contents of live-manual.
As a general recommendation, translators should have read 995
and understood the translation rules that apply to their specificlanguages. Usually, translation groups and mailing lists provideinformation on how to produce translated work that complies withDebian quality standards.
Note: Translators should also read ‹Contributing to this 996
document›. In particular the section ‹Translation›
19.2.1 Translation hints 997
• Comments 998
The role of the translator is to convey as faithfully as possible the 999
meaning of words, sentences, paragraphs and texts as written bythe original authors into their target language.
73
Manualul Live Systems
So they should refrain from adding personal comments or extra1000
bits of information of their own. If they want to add a comment forother translators working on the same documents, they can leaveit in the space reserved for that. That is, the header of the stringsin the po files preceded by a number sign # . Most graphicaltranslation programs can automatically handle those types ofcomments.
• TN, Translator’s Note1001
It is perfectly acceptable however, to include a word or an1002
expression in brackets in the translated text if, and only if, thatmakes the meaning of a difficult word or expression clearer to thereader. Inside the brackets the translator should make evident thatthe addition was theirs using the abbreviation “TN” or “Translator’sNote”.
• Impersonal sentences1003
Documents written in English make an extensive use of the1004
impersonal form “you”. In some other languages that do not sharethis characteristic, this might give the false impression that theoriginal texts are directly addressing the reader when they areactually not doing so. Translators must be aware of that fact andreflect it in their language as accurately as possible.
• False friends1005
The trap of “false friends” explained before especially applies to1006
translators. Double check the meaning of suspicious false friendsif in doubt.
• Markup1007
Translators working initially with pot files and later on with po files1008
will find many markup features in the strings. They can translatethe text anyway, as long as it is translatable, but it is extremely
important that they use exactly the same markup as the originalEnglish version.
• Code blocks 1009
Even though the code blocks are usually untranslatable, including 1010
them in the translation is the only way to score a 100% completetranslation. And even though it means more work at first because itmight require the intervention of the translators if the code changes,it is the best way, in the long run, to identify what has already beentranslated and what has not when checking the integrity of the .pofiles.
• Newlines 1011
The translated texts need to have the exact same newlines as 1012
the original texts. Be careful to press the “Enter” key or type ifthey appear in the original files. These newlines often appear, forinstance, in the code blocks.
Make no mistake, this does not mean that the translated text needs 1013
to have the same length as the English version. That is nearlyimpossible.
• Untranslatable strings 1014
Translators should never translate: 1015
- The code names of releases (which should be written in 1016
lowercase)
- The names of programs 1017
- The commands given as examples 1018
- Metadata (often between colons :metadata: ) 1019
- Links 1020
- Paths 1021
74
Manualul Live Systems
SiSU Metadata, document information
Document Manifest @:
‹http://complete.sisudoc.org/manual/manifest/live-manual.ro.html›Title: Manualul Live Systems
Creator: Proiectul Live Systems <[email protected]>
Rights: Copyright: Copyright (C) 2006-2014 Live Systems Project
License: Acest program este liber: poate fi redistribuit și/sau modificat în conformitate
cu termenii Licenței Publice Generale GNU (GPL), precum este publicată de către Free
Software Foundation, fie versiunea 3 a licenței, sau (opțional) orice altă versiune ulterioară..
Acest program este distribuit cu speranța că va fi util, dar FĂRĂ NICIO GARANȚIE; fără
a avea garanția VANDABILITĂȚII sau ÎNDEPLINIRII UNUI ANUME SCOP. Vezi Licența
Publică Generală GNU pentru mai multe detalii.
Ar trebui să fi orimit o copie a Licenței Publice Generale GNU împreună cu acest
program. În caz contrar, vezi ‹http://www.gnu.org/licenses/›.
Textul complet al Licenței Publice Generale poate fi găsit în fișierul /usr/share/-
common-licenses/GPL-3.
Publisher: Proiectul Live Systems <[email protected]>
Date: 2014-08-27
Version Information
Sourcefile: live-manual.ssm.sstFiletype: UTF-8 assumed, file encoding check program unavailable
Source Digest: SHA256(live-manual.ssm.sst)=06cf962f43c21e98708e3ebf343f4d43-215dd14d5b4f2986beeb99865d0d116f
Generated
Document (ao) last generated: 2017-06-19 16:16:36 +0000
Generated by: SiSU 7.1.9 of 2016w30/7 (2016-07-31)
Ruby version: ruby 2.1.3p242 (2014-09-19) [x86_64-linux-gnu]
75