Embed Size (px)
Citation preview
spine=.72”
Brian K. DavidsonDavid “Chef Dave” FoutsKaren Meyers, MS, RD/LDForeword by Garth Davis, MD, bariatric surgeon on TLC’s Big Medicine
Learn to:• Enjoy a nutritious post-surgery lifestyle
• Know which foods to buy and how to prepare them
• Make delicious meals that are high in flavor and low in fat and calories
Weight Loss
Surgery Cookbook
Making Everything Easier!™
Open the book and find:
• Dietary guidelines and menus for clear liquids, full liquids, smooth foods, soft foods, and regular foods
• Tips on meal-planning, setting up your kitchen, and stocking your pantry
• Coverage of common cooking methods
• Proper portion sizes for you to stay on track
• Easy-to-find ingredients and nearly 150 easy-to-prepare recipes
• Nutrition information included with each recipe
• Ten tips for long-term success
Brian K. Davidson is the coauthor of Weight Loss Surgery For Dummies.
David “Chef Dave” Fouts is the exclusive chef for WLS Lifestyles magazine.
Karen Meyers, MS, RD/LD, is a registered, licensed dietitian and certified
personal trainer.
$19.99 US / $23.99 CN / £14.99 UK
ISBN 978-0-470-64018-0
Cooking/Health/Weight Control
Go to Dummies.com®
for videos, step-by-step examples, how-to articles, or to shop!
Get empowered to lose weight and keep it off after surgeryThis friendly, hands-on guide is all about what foods to buy, how to prepare them, and how to enjoy a nutritious post-surgery diet. It helps you solidify new eating habits and enjoy some new recipes, as well as better understand nutrition and your food intake so that you can maintain your weight loss long after surgery.
• Get to know the new you — discover dietary guidelines from day one after the surgery, and on through the four stages that lead up to eating regular foods (clear liquids, full liquids, smooth foods, and soft foods)
• Stay on course — find out how healthy eating plans, portion sizes, nutrition, food diaries, and wise food choices can help you keep the weight off after surgery
• Start cookin’, good lookin’ — start making healthy, hearty, and de-licious dishes for meals from breakfast through dinner, organized by type of food for quick reference
• Enjoy snacks, salads, and more — get simple and scrumptious recipes to enjoy anytime, from smoothies and appetizers to soups and sides
Weight Loss
Surgery Cookbook
DavidsonFouts
Meyers

spine=.72”
Mobile Apps
There’s a Dummies App for This and ThatWith more than 200 million books in print and over 1,600 unique titles, Dummies is a global leader in how-to information. Now you can get the same great Dummies information in an App. With topics such as Wine, Spanish, Digital Photography, Certification, and more, you’ll have instant access to the topics you need to know in a format you can trust.
To get information on all our Dummies apps, visit the following:
www.Dummies.com/go/mobile from your computer.
www.Dummies.com/go/iphone/apps from your phone.
Start with FREE Cheat SheetsCheat Sheets include • Checklists • Charts • Common Instructions • And Other Good Stuff!
Get Smart at Dummies.com Dummies.com makes your life easier with 1,000s of answers on everything from removing wallpaper to using the latest version of Windows.
Check out our • Videos • Illustrated Articles • Step-by-Step Instructions
Plus, each month you can win valuable prizes by entering our Dummies.com sweepstakes. *
Want a weekly dose of Dummies? Sign up for Newsletters on • Digital Photography • Microsoft Windows & Office • Personal Finance & Investing • Health & Wellness • Computing, iPods & Cell Phones • eBay • Internet • Food, Home & Garden
Find out “HOW” at Dummies.com
*Sweepstakes not currently available in all countries; visit Dummies.com for official rules.
Get More and Do More at Dummies.com®
To access the Cheat Sheet created specifically for this book, go to www.dummies.com/cheatsheet/weightlosssurgerycookbook

by Brian K. Davidson, Chef David Fouts, and Karen Meyers, MS, RD/LD
Weight Loss Surgery Cookbook
FOR
DUMmIES‰
01_640180-ffirs.indd i01_640180-ffirs.indd i 8/27/10 10:36 PM8/27/10 10:36 PM
Weight Loss Surgery Cookbook For Dummies®
Published byWiley Publishing, Inc.111 River St.Hoboken, NJ 07030-5774www.wiley.com
Copyright © 2010 by Wiley Publishing, Inc., Indianapolis, Indiana
Published simultaneously in Canada
No part of this publication may be reproduced, stored in a retrieval system or transmitted in any form or by any means, electronic, mechanical, photocopying, recording, scanning or otherwise, except as permit-ted under Sections 107 or 108 of the 1976 United States Copyright Act, without either the prior written per-mission of the Publisher, or authorization through payment of the appropriate per-copy fee to the Copyright Clearance Center, 222 Rosewood Drive, Danvers, MA 01923, (978) 750-8400, fax (978) 646-8600. Requests to the Publisher for permission should be addressed to the Permissions Department, John Wiley & Sons, Inc., 111 River Street, Hoboken, NJ 07030, (201) 748-6011, fax (201) 748-6008, or online at http://www.wiley.com/go/permissions.
Trademarks: Wiley, the Wiley Publishing logo, For Dummies, the Dummies Man logo, A Reference for the Rest of Us!, The Dummies Way, Dummies Daily, The Fun and Easy Way, Dummies.com, Making Everything Easier, and related trade dress are trademarks or registered trademarks of John Wiley & Sons, Inc. and/or its affiliates in the United States and other countries, and may not be used without written permission. All other trademarks are the property of their respective owners. Wiley Publishing, Inc., is not associated with any product or vendor mentioned in this book.
LIMIT OF LIABILITY/DISCLAIMER OF WARRANTY: THE PUBLISHER AND THE AUTHOR MAKE NO REPRESENTATIONS OR WARRANTIES WITH RESPECT TO THE ACCURACY OR COMPLETENESS OF THE CONTENTS OF THIS WORK AND SPECIFICALLY DISCLAIM ALL WARRANTIES, INCLUDING WITH-OUT LIMITATION WARRANTIES OF FITNESS FOR A PARTICULAR PURPOSE. NO WARRANTY MAY BE CREATED OR EXTENDED BY SALES OR PROMOTIONAL MATERIALS. THE ADVICE AND STRATEGIES CONTAINED HEREIN MAY NOT BE SUITABLE FOR EVERY SITUATION. THIS WORK IS SOLD WITH THE UNDERSTANDING THAT THE PUBLISHER IS NOT ENGAGED IN RENDERING LEGAL, ACCOUNTING, OR OTHER PROFESSIONAL SERVICES. IF PROFESSIONAL ASSISTANCE IS REQUIRED, THE SERVICES OF A COMPETENT PROFESSIONAL PERSON SHOULD BE SOUGHT. NEITHER THE PUBLISHER NOR THE AUTHOR SHALL BE LIABLE FOR DAMAGES ARISING HEREFROM. THE FACT THAT AN ORGANIZA-TION OR WEBSITE IS REFERRED TO IN THIS WORK AS A CITATION AND/OR A POTENTIAL SOURCE OF FURTHER INFORMATION DOES NOT MEAN THAT THE AUTHOR OR THE PUBLISHER ENDORSES THE INFORMATION THE ORGANIZATION OR WEBSITE MAY PROVIDE OR RECOMMENDATIONS IT MAY MAKE. FURTHER, READERS SHOULD BE AWARE THAT INTERNET WEBSITES LISTED IN THIS WORK MAY HAVE CHANGED OR DISAPPEARED BETWEEN WHEN THIS WORK WAS WRITTEN AND WHEN IT IS READ.
For general information on our other products and services, please contact our Customer Care Department within the U.S. at 877-762-2974, outside the U.S. at 317-572-3993, or fax 317-572-4002.
For technical support, please visit www.wiley.com/techsupport.
Wiley also publishes its books in a variety of electronic formats. Some content that appears in print may not be available in electronic books.
Library of Congress Control Number: 2010933463
ISBN: 978-0-470-64018-0
Manufactured in the United States of America
10 9 8 7 6 5 4 3 2 1
01_640180-ffirs.indd ii01_640180-ffirs.indd ii 8/27/10 10:36 PM8/27/10 10:36 PM

About the AuthorsBrian K. Davidson is the coauthor of Weight Loss Surgery For Dummies. He has been featured on television, spoken at various industry events, and consulted with hundreds of leading industry professionals and patients. He is a passionate advocate of improving obesity awareness and increasing public education for this devastating disease. Brian lives in Connecticut and is the proud father of his daughter, Grace, and son, Riley.
Chef Dave Fouts received his culinary degree in 1994 from the Florida Culinary Institute in sunny West Palm Beach, Florida. Soon thereafter he was hired by the prestigious AAA Five-Diamond Award–winning hotel The Breakers in Palm Beach, where he worked for several years. Other professional appointments included director of food services at Hippocrates Health Institute, one of the premier vegan/vegetarian resorts in South Florida; executive chef for Omni Hotels; and personal chef for a wonderful family in Naples, Florida. In 2008, Chef Dave joined talents with Vicki Bovee, MS, RD/LD, and started Simply Smart Food, Inc. Currently Simply Smart Food, Inc., is serving as a consultant for Obesity Help, Inc. and JourneyLite, a subsidiary of ASCIRA LLC. Chef Dave is the creator of the Simply Smart Food pilot program which is being hailed a success in the Edmond Public School District for eliminating processed foods and bringing from-scratch cooking back to the schools.
Over the last several years, Chef Dave has written, contributed, and advised on several editorial boards for publications throughout the country. Chef Dave is the exclusive chef for WLS Lifestyles magazine and food columnist for the Edmond Sun. Chef Dave’s cookbook 90 Ways to Ditch Your Diet was released in January 2009 and a revised edition, Ditch Your Diet in 30 Days, was published in 2010.
These days, you can find Chef Dave lecturing and performing cooking seminars across the country. He advises on food and product developing teams for companies such as Keebler, Uncle Ben’s, Coca-Cola, PepsiCo, and many others. In addition, Chef Dave is on the advisory board for WLS Lifestyles and Obesity Action Coalition. In 2009 he was featured on the front cover of WLS Lifestyles magazine. Besides his national speaking engagements, Chef Dave is proud to say he is kept very busy in Edmond, Oklahoma, where he lives with his lovely wife and two children. He is actively involved in his community and work, and enjoys leisure and travel time with his family.
Karen Meyers, MS, RD/LD is a registered, licensed dietitian, certified per-sonal trainer through the American Council on Exercise, and certified Wellcoach. She is an honors graduate of the University of Central Oklahoma with a bachelors’ degree and a master’s of science degree in nutrition and food management. Karen teaches nutrition on the college level and has exten-sive clinical and bariatric experience both in clinical and outpatient settings.
01_640180-ffirs.indd iii01_640180-ffirs.indd iii 8/27/10 10:36 PM8/27/10 10:36 PM

She has a certificate of training in Adult Weight Management from the ADA. Karen has served as president of the Oklahoma Dietetic Association (ODA) and has been named Outstanding Dietetic Educator in the state of Oklahoma and Emerging Leader in Dietetics by the ODA.
Karen lives in Edmond, Oklahoma, where she is the owner of NutriFit of Oklahoma. She provides nutrition, fitness, and wellness coaching services to both clients and corporations. She is married to Greg, mother of two, and grandmother of four.
DedicationFrom Brian:
To my children Grace and Riley who inspire me with the beauty of their spirit, compassion, joy, and love. You are my true motivation for wanting to make a difference.
Authors’ AcknowledgmentsFrom Brian:
I’m indebted and grateful to the thousands of patients and professionals who have shared their experiences and stories. A special thanks goes out to Chef Dave — I couldn’t imagine this book happening without his and Karen Meyers’ involvement.
A heartfelt thanks goes out to the wonderful folks at Wiley who made this book possible, starting with Michael Lewis, acquisitions editor, who was the catalyst for getting this book started. A huge thank you to Christina Guthrie, senior project editor, for her guidance, expertise, and patience. Thanks also to Caitie Copple, copy editor; Rachel Nix, technical review; Emily Nolan, recipe tester, and Patty Santelli, nutritional analyst.
From Chef Dave:
Growing up obese, I was made fun of by the kids at school, wore adult-sized clothes as a child, and had low self-esteem. I continued to keep gaining weight until I was 28 and decided it was time to have gastric bypass surgery. Bariatric surgery changed my life! What I have realized is that bariatric surgery doesn’t define who I am, but has allowed me to become what I always aspired to be, a chef.
01_640180-ffirs.indd iv01_640180-ffirs.indd iv 8/27/10 10:36 PM8/27/10 10:36 PM
For those of you who have had weight loss surgery, you know it is sometimes bumpy ride, but weight loss friends all support each other. For this, I thank you and hope this cookbook brings you healthful recipes that you have trusted me to bring to you over the years. To my friends in the weight loss profession, thanks for helping me keep my dream alive and introducing my work to so many of your patients.
Vicki Bovee, my business partner and friend. Your help has been invaluable on this project. You have been the second half of our success. We have done many great projects together, from publishing cookbooks to changing the face of the National School Lunch Program. Simply Smart Food is truly making a difference in obesity. I know no other dietitian who “gets” the weight loss surgery lifestyle as well as you do.
To Mary, my wife of almost 15 years, you have been there with me every step of the way. Thanks for keeping me sane and grounded. To Noah and Michael, my two boys, you are awesome! I could not ask for more creative, playful spirits, and you give me joy every day of my life.
Cook smart. Our mission statement: To help fight the disease of obesity one meal at a time by educating, inspiring, and motivating people to live healthier lives.
From Karen:
Working with bariatric patients is one of the most rewarding things I have done as a dietitian. Thanks to all of you who have helped me to remember that every day is a gift and we have to appreciate the wonderful things we are able to do, no matter how small.
Thanks to Chef Dave Fouts for giving me the opportunity to work on this project. He and Vicki Bovee, RD/LD have turned out to be terrific friends as well as colleagues.
Special thanks to my amazing husband, Greg, for his love and encourage-ment. I would not have done many of the things I have done without him to inspire me and give me a push when I need it. Many thanks to the rest of my wonderful family for always supporting me in everything I do.
01_640180-ffirs.indd v01_640180-ffirs.indd v 8/27/10 10:36 PM8/27/10 10:36 PM

Publisher’s Acknowledgments
We’re proud of this book; please send us your comments at http://dummies.custhelp.com. For other comments, please contact our Customer Care Department within the U.S. at 877-762-2974, outside the U.S. at 317-572-3993, or fax 317-572-4002.
Some of the people who helped bring this book to market include the following:
Acquisitions, Editorial, and Media
Development
Senior Project Editor: Christina Guthrie
Acquisitions Editor: Michael Lewis
Copy Editor: Caitlin Copple
Senior Editorial Assistant: David Lutton
Technical Editor: Rachel C. Nix
Recipe Tester: Emily Nolan
Nutritional Analyst: Patty Santelli
Editorial Manager: Christine Meloy Beck
Editorial Assistants: Rachelle Amick, Jennette ElNaggar
Photographer: TJ Hine Photography, Inc.
Food Stylist: Lisa Bishop
Art Coordinator: Alicia B. South
Cartoons: Rich Tennant (www.the5thwave.com)
Composition Services
Project Coordinator: Sheree Montgomery
Layout and Graphics: Ashley Chamberlain,Christin Swinford
Special Art:
Interior illustrations by Liz Kurtzman
Proofreaders: Jacqueline Brownstein, John Greenough
Indexer: Becky Hornyak
Publishing and Editorial for Consumer Dummies
Diane Graves Steele, Vice President and Publisher, Consumer Dummies
Kristin Ferguson-Wagstaffe, Product Development Director, Consumer Dummies
Ensley Eikenburg, Associate Publisher, Travel
Kelly Regan, Editorial Director, Travel
Publishing for Technology Dummies
Andy Cummings, Vice President and Publisher, Dummies Technology/General User
Composition Services
Debbie Stailey, Director of Composition Services
01_640180-ffirs.indd vi01_640180-ffirs.indd vi 8/27/10 10:36 PM8/27/10 10:36 PM
Contents at a GlanceForeword ....................................................................xxi
Introduction ................................................................ 1
Part I: Eating Right with Every Bite .............................. 7Chapter 1: Fueling the New You: Ingredients for Success ............................................ 9Chapter 2: Step By Step: What to Expect and What
to Eat the Days and Weeks after Surgery ................................................................... 15Chapter 3: Maintaining Healthy Eating For Life ........................................................... 37Chapter 4: The Art of Meal Planning ............................................................................. 67Chapter 5: Kitchen and Pantry Makeover ..................................................................... 81Chapter 6: Tips for Food Preparation and Cooking..................................................... 93
Part II: Now You’re Cooking! Healthy and Hearty Dishes ....................................... 113Chapter 7: Balanced Breakfasts ................................................................................... 115Chapter 8: Bunches of Lunches and Brunches .......................................................... 131Chapter 9: Umm . . . Tastes Like Chicken: Poultry Dishes ........................................ 149Chapter 10: Let’s Meat in the Kitchen: Beef and Pork Recipes ................................ 165Chapter 11: Let’s Not Forget: Lamb and Other Meats ............................................... 183Chapter 12: Catching On to Fish and Seafood ............................................................ 195Chapter 13: Viva la Vegetarian ..................................................................................... 209
Part III: Simple Recipes to Enjoy Anytime ................. 221Chapter 14: Scrumptious Smoothies ........................................................................... 223Chapter 15: Alluring Appetizers ................................................................................... 233Chapter 16: Sumptuous Soups and Stews .................................................................. 245Chapter 17: Completing the Meal: Pasta and Side Dishes ........................................ 255Chapter 18: Smart Snacking .......................................................................................... 267Chapter 19: Divine Desserts ......................................................................................... 275Chapter 20: Super Simple Cooking for One . . . or Two ............................................. 285
02_640180-ftoc.indd vii02_640180-ftoc.indd vii 8/27/10 10:37 PM8/27/10 10:37 PM
Part IV: The Part of Tens .......................................... 295Chapter 21: Ten Tips for Long-Term Success ............................................................ 297Chapter 22: Ten Easy-to-Prepare Meals Your Family Will Love ............................... 301Chapter 23: Ten Sample Menus for Different Calorie Levels .................................... 309Appendix: Metric Conversion Guide ........................................................................... 321
Index ...................................................................... 325
02_640180-ftoc.indd viii02_640180-ftoc.indd viii 8/27/10 10:37 PM8/27/10 10:37 PM
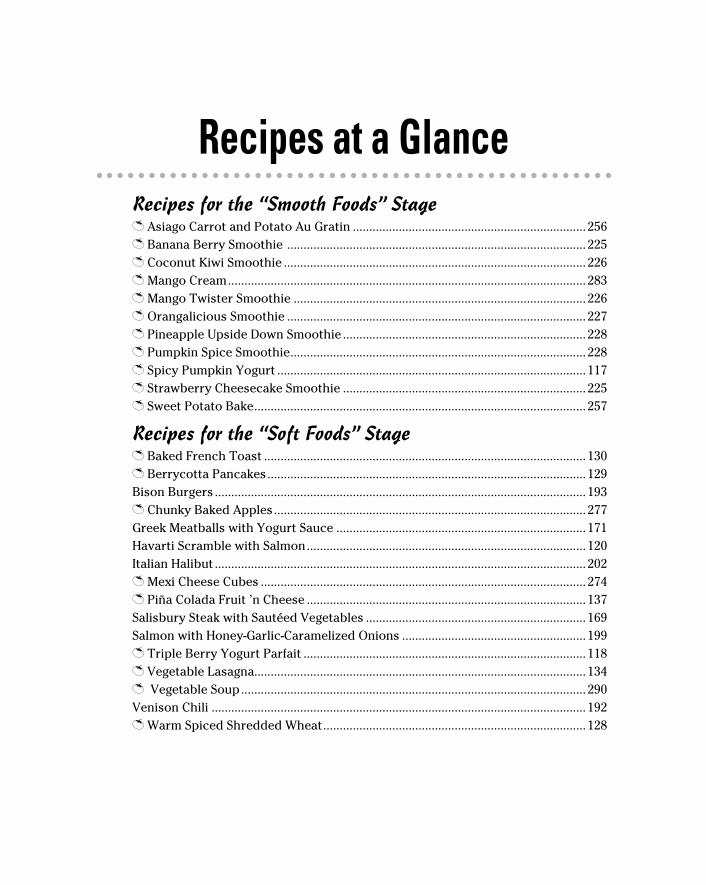
Recipes at a GlanceRecipes for the “Smooth Foods” StageT Asiago Carrot and Potato Au Gratin ....................................................................... 256T Banana Berry Smoothie ........................................................................................... 225T Coconut Kiwi Smoothie ............................................................................................ 226T Mango Cream ............................................................................................................. 283T Mango Twister Smoothie ......................................................................................... 226T Orangalicious Smoothie ........................................................................................... 227T Pineapple Upside Down Smoothie .......................................................................... 228T Pumpkin Spice Smoothie .......................................................................................... 228T Spicy Pumpkin Yogurt .............................................................................................. 117T Strawberry Cheesecake Smoothie .......................................................................... 225T Sweet Potato Bake ..................................................................................................... 257
Recipes for the “Soft Foods” StageT Baked French Toast .................................................................................................. 130T Berrycotta Pancakes ................................................................................................. 129Bison Burgers ................................................................................................................. 193T Chunky Baked Apples ............................................................................................... 277Greek Meatballs with Yogurt Sauce ............................................................................ 171Havarti Scramble with Salmon ..................................................................................... 120Italian Halibut ................................................................................................................. 202T Mexi Cheese Cubes ................................................................................................... 274T Piña Colada Fruit ’n Cheese ..................................................................................... 137Salisbury Steak with Sautéed Vegetables ................................................................... 169Salmon with Honey-Garlic-Caramelized Onions ........................................................ 199T Triple Berry Yogurt Parfait ...................................................................................... 118T Vegetable Lasagna..................................................................................................... 134T Vegetable Soup ......................................................................................................... 290Venison Chili .................................................................................................................. 192T Warm Spiced Shredded Wheat ................................................................................ 128
02_640180-ftoc.indd ix02_640180-ftoc.indd ix 8/27/10 10:37 PM8/27/10 10:37 PM
Weight Loss Surgery Cookbook For Dummies x
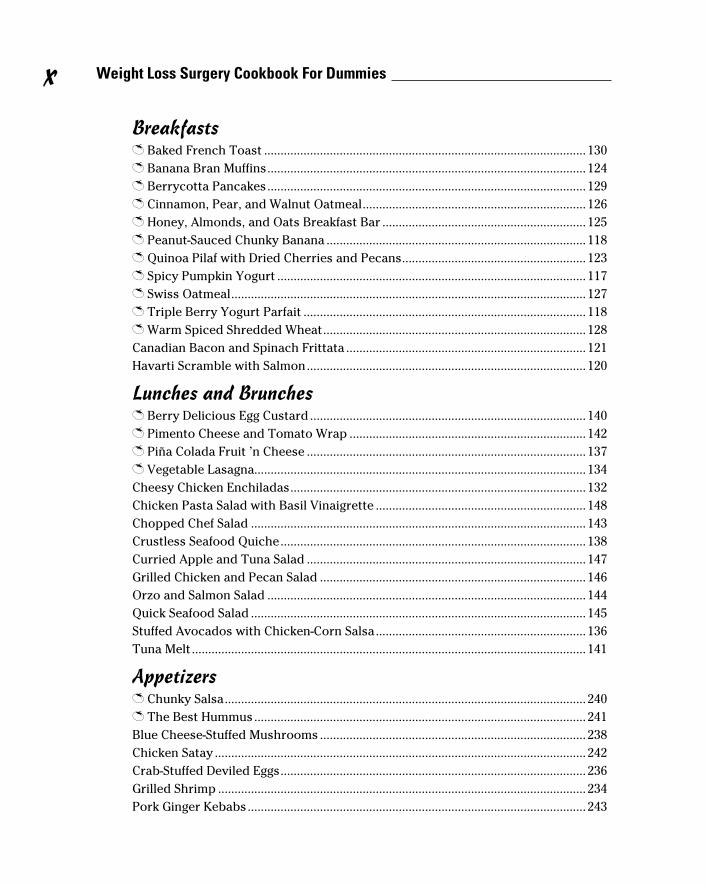
BreakfastsT Baked French Toast .................................................................................................. 130T Banana Bran Muffins ................................................................................................. 124T Berrycotta Pancakes ................................................................................................. 129T Cinnamon, Pear, and Walnut Oatmeal .................................................................... 126T Honey, Almonds, and Oats Breakfast Bar .............................................................. 125T Peanut-Sauced Chunky Banana ............................................................................... 118T Quinoa Pilaf with Dried Cherries and Pecans ........................................................ 123T Spicy Pumpkin Yogurt .............................................................................................. 117T Swiss Oatmeal ............................................................................................................ 127T Triple Berry Yogurt Parfait ...................................................................................... 118T Warm Spiced Shredded Wheat ................................................................................ 128Canadian Bacon and Spinach Frittata ......................................................................... 121Havarti Scramble with Salmon ..................................................................................... 120
Lunches and BrunchesT Berry Delicious Egg Custard .................................................................................... 140T Pimento Cheese and Tomato Wrap ........................................................................ 142T Piña Colada Fruit ’n Cheese ..................................................................................... 137T Vegetable Lasagna..................................................................................................... 134Cheesy Chicken Enchiladas .......................................................................................... 132Chicken Pasta Salad with Basil Vinaigrette ................................................................ 148Chopped Chef Salad ...................................................................................................... 143Crustless Seafood Quiche ............................................................................................. 138Curried Apple and Tuna Salad ..................................................................................... 147Grilled Chicken and Pecan Salad ................................................................................. 146Orzo and Salmon Salad ................................................................................................. 144Quick Seafood Salad ...................................................................................................... 145Stuffed Avocados with Chicken-Corn Salsa ................................................................ 136Tuna Melt ........................................................................................................................ 141
AppetizersT Chunky Salsa .............................................................................................................. 240T The Best Hummus ..................................................................................................... 241Blue Cheese-Stuffed Mushrooms ................................................................................. 238Chicken Satay ................................................................................................................. 242Crab-Stuffed Deviled Eggs ............................................................................................. 236Grilled Shrimp ................................................................................................................ 234Pork Ginger Kebabs ....................................................................................................... 243
02_640180-ftoc.indd x02_640180-ftoc.indd x 8/27/10 10:37 PM8/27/10 10:37 PM
xi Table of Contents
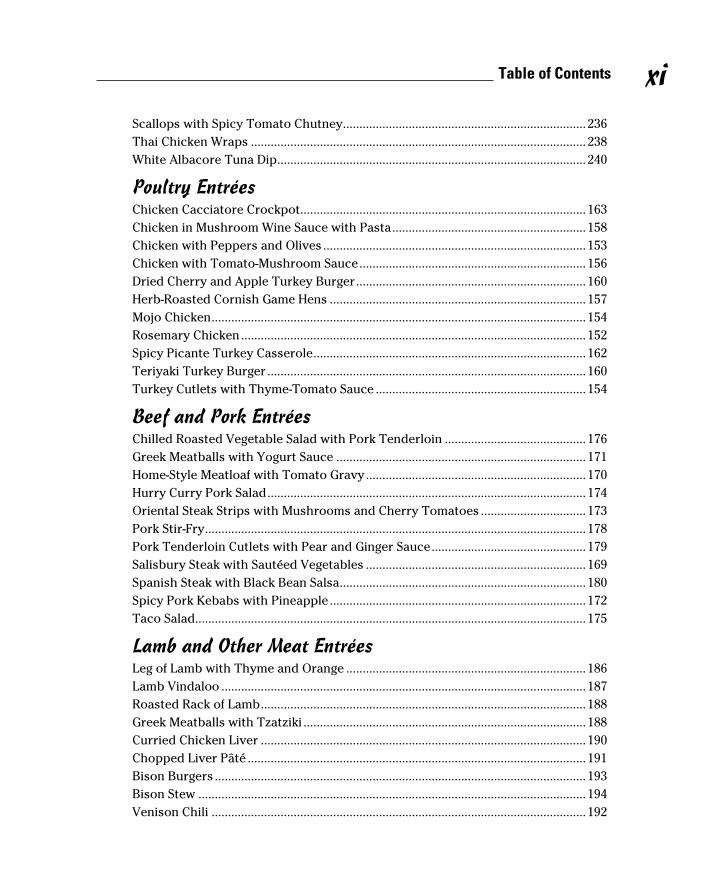
Scallops with Spicy Tomato Chutney .......................................................................... 236Thai Chicken Wraps ...................................................................................................... 238White Albacore Tuna Dip .............................................................................................. 240
Poultry EntréesChicken Cacciatore Crockpot....................................................................................... 163Chicken in Mushroom Wine Sauce with Pasta ........................................................... 158Chicken with Peppers and Olives ................................................................................ 153Chicken with Tomato-Mushroom Sauce ..................................................................... 156Dried Cherry and Apple Turkey Burger ...................................................................... 160Herb-Roasted Cornish Game Hens .............................................................................. 157Mojo Chicken .................................................................................................................. 154Rosemary Chicken ......................................................................................................... 152Spicy Picante Turkey Casserole ................................................................................... 162Teriyaki Turkey Burger ................................................................................................. 160Turkey Cutlets with Thyme-Tomato Sauce ................................................................ 154
Beef and Pork EntréesChilled Roasted Vegetable Salad with Pork Tenderloin ........................................... 176Greek Meatballs with Yogurt Sauce ............................................................................ 171Home-Style Meatloaf with Tomato Gravy ................................................................... 170Hurry Curry Pork Salad ................................................................................................. 174Oriental Steak Strips with Mushrooms and Cherry Tomatoes ................................ 173Pork Stir-Fry .................................................................................................................... 178Pork Tenderloin Cutlets with Pear and Ginger Sauce ............................................... 179Salisbury Steak with Sautéed Vegetables ................................................................... 169Spanish Steak with Black Bean Salsa ........................................................................... 180Spicy Pork Kebabs with Pineapple .............................................................................. 172Taco Salad....................................................................................................................... 175
Lamb and Other Meat EntréesLeg of Lamb with Thyme and Orange ......................................................................... 186Lamb Vindaloo ............................................................................................................... 187Roasted Rack of Lamb ................................................................................................... 188Greek Meatballs with Tzatziki ...................................................................................... 188Curried Chicken Liver ................................................................................................... 190Chopped Liver Pâté ....................................................................................................... 191Bison Burgers ................................................................................................................. 193Bison Stew ...................................................................................................................... 194Venison Chili .................................................................................................................. 192
02_640180-ftoc.indd xi02_640180-ftoc.indd xi 8/27/10 10:37 PM8/27/10 10:37 PM
Weight Loss Surgery Cookbook For Dummies xii
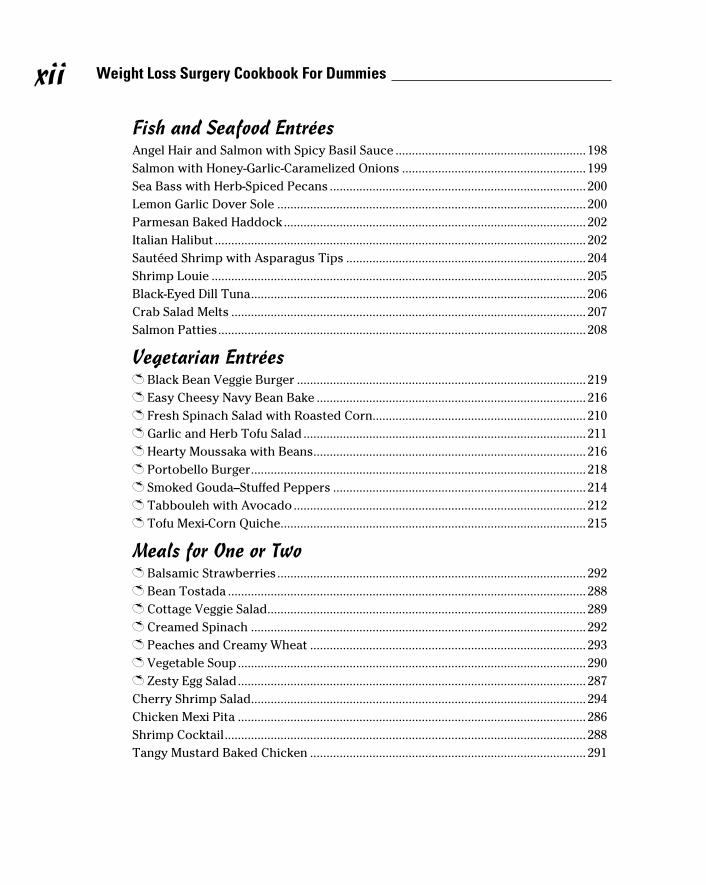
Fish and Seafood EntréesAngel Hair and Salmon with Spicy Basil Sauce .......................................................... 198Salmon with Honey-Garlic-Caramelized Onions ........................................................ 199Sea Bass with Herb-Spiced Pecans .............................................................................. 200Lemon Garlic Dover Sole .............................................................................................. 200Parmesan Baked Haddock ............................................................................................ 202Italian Halibut ................................................................................................................. 202Sautéed Shrimp with Asparagus Tips ......................................................................... 204Shrimp Louie .................................................................................................................. 205Black-Eyed Dill Tuna ...................................................................................................... 206Crab Salad Melts ............................................................................................................ 207Salmon Patties ................................................................................................................ 208
Vegetarian EntréesT Black Bean Veggie Burger ........................................................................................ 219T Easy Cheesy Navy Bean Bake .................................................................................. 216T Fresh Spinach Salad with Roasted Corn................................................................. 210T Garlic and Herb Tofu Salad ...................................................................................... 211T Hearty Moussaka with Beans ................................................................................... 216T Portobello Burger ...................................................................................................... 218T Smoked Gouda–Stuffed Peppers ............................................................................. 214T Tabbouleh with Avocado ......................................................................................... 212T Tofu Mexi-Corn Quiche ............................................................................................. 215
Meals for One or TwoT Balsamic Strawberries .............................................................................................. 292T Bean Tostada ............................................................................................................. 288T Cottage Veggie Salad ................................................................................................. 289T Creamed Spinach ...................................................................................................... 292T Peaches and Creamy Wheat .................................................................................... 293T Vegetable Soup .......................................................................................................... 290T Zesty Egg Salad .......................................................................................................... 287Cherry Shrimp Salad...................................................................................................... 294Chicken Mexi Pita .......................................................................................................... 286Shrimp Cocktail .............................................................................................................. 288Tangy Mustard Baked Chicken .................................................................................... 291
02_640180-ftoc.indd xii02_640180-ftoc.indd xii 8/27/10 10:37 PM8/27/10 10:37 PM
xiii Table of Contents
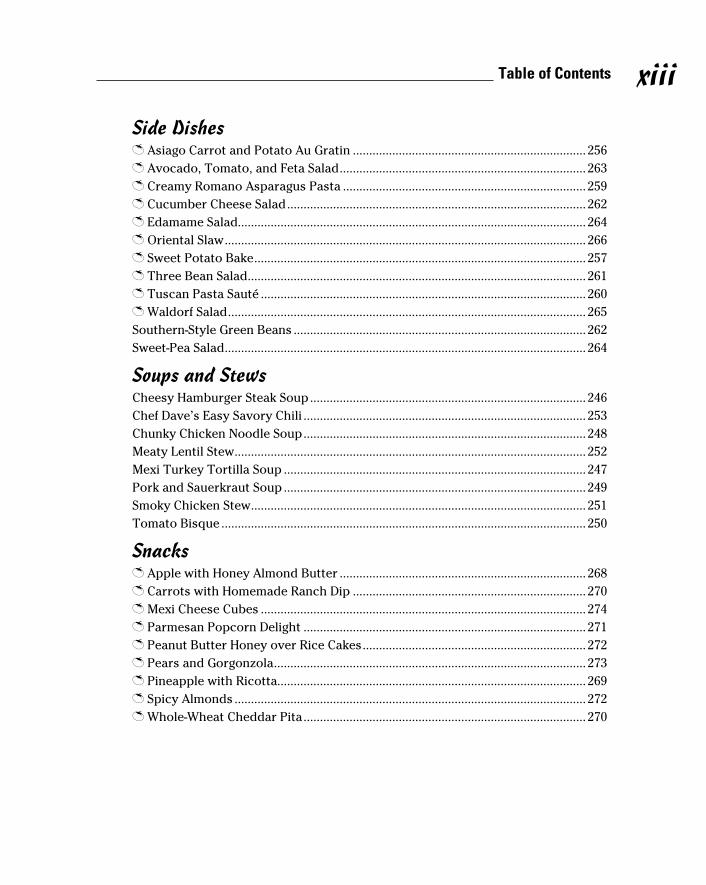
Side DishesT Asiago Carrot and Potato Au Gratin ....................................................................... 256T Avocado, Tomato, and Feta Salad ........................................................................... 263T Creamy Romano Asparagus Pasta .......................................................................... 259T Cucumber Cheese Salad ........................................................................................... 262T Edamame Salad.......................................................................................................... 264T Oriental Slaw .............................................................................................................. 266T Sweet Potato Bake ..................................................................................................... 257T Three Bean Salad ....................................................................................................... 261T Tuscan Pasta Sauté ................................................................................................... 260T Waldorf Salad ............................................................................................................. 265Southern-Style Green Beans ......................................................................................... 262Sweet-Pea Salad .............................................................................................................. 264
Soups and StewsCheesy Hamburger Steak Soup .................................................................................... 246Chef Dave’s Easy Savory Chili ...................................................................................... 253Chunky Chicken Noodle Soup ...................................................................................... 248Meaty Lentil Stew ........................................................................................................... 252Mexi Turkey Tortilla Soup ............................................................................................ 247Pork and Sauerkraut Soup ............................................................................................ 249Smoky Chicken Stew ...................................................................................................... 251Tomato Bisque ............................................................................................................... 250
SnacksT Apple with Honey Almond Butter ........................................................................... 268T Carrots with Homemade Ranch Dip ....................................................................... 270T Mexi Cheese Cubes ................................................................................................... 274T Parmesan Popcorn Delight ...................................................................................... 271T Peanut Butter Honey over Rice Cakes .................................................................... 272T Pears and Gorgonzola ............................................................................................... 273T Pineapple with Ricotta.............................................................................................. 269T Spicy Almonds ........................................................................................................... 272T Whole-Wheat Cheddar Pita ...................................................................................... 270
02_640180-ftoc.indd xiii02_640180-ftoc.indd xiii 8/27/10 10:37 PM8/27/10 10:37 PM
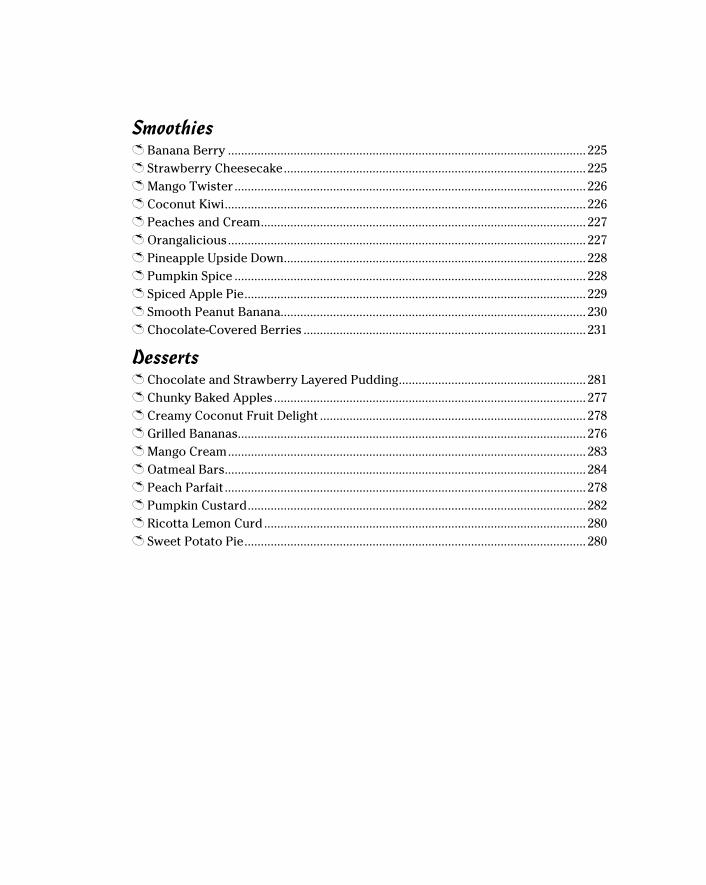
SmoothiesT Banana Berry ............................................................................................................. 225T Strawberry Cheesecake ............................................................................................ 225T Mango Twister ........................................................................................................... 226T Coconut Kiwi .............................................................................................................. 226T Peaches and Cream ................................................................................................... 227T Orangalicious ............................................................................................................. 227T Pineapple Upside Down ............................................................................................ 228T Pumpkin Spice ........................................................................................................... 228T Spiced Apple Pie ........................................................................................................ 229T Smooth Peanut Banana............................................................................................. 230T Chocolate-Covered Berries ...................................................................................... 231
DessertsT Chocolate and Strawberry Layered Pudding ......................................................... 281T Chunky Baked Apples ............................................................................................... 277T Creamy Coconut Fruit Delight ................................................................................. 278T Grilled Bananas.......................................................................................................... 276T Mango Cream ............................................................................................................. 283T Oatmeal Bars.............................................................................................................. 284T Peach Parfait .............................................................................................................. 278T Pumpkin Custard ....................................................................................................... 282T Ricotta Lemon Curd .................................................................................................. 280T Sweet Potato Pie ........................................................................................................ 280
02_640180-ftoc.indd xiv02_640180-ftoc.indd xiv 8/27/10 10:37 PM8/27/10 10:37 PM
Table of ContentsForeword .....................................................................xxi
Introduction ................................................................. 1About This Book .............................................................................................. 1Conventions Used in This Book ..................................................................... 2What You’re Not to Read ................................................................................ 3Foolish Assumptions ....................................................................................... 4How This Book Is Organized .......................................................................... 4
Part I: Eating Right with Every Bite...................................................... 4Part II: Now You’re Cooking! Healthy and Hearty Dishes ................. 5Part III: Simple Recipes to Enjoy Anytime ........................................... 5Part IV: The Parts of Tens ..................................................................... 5
Icons Used in This Book ................................................................................. 5Where to Go from Here ................................................................................... 6
Part I: Eating Right with Every Bite .............................. 7
Chapter 1: Fueling the New You: Ingredients for Success . . . . . . . . . . 9
Understanding the Bariatric Surgery Diet .................................................. 10Making Healthy Choices ............................................................................... 11
Getting what you need in smaller portions ...................................... 11Drinking enough water at the right time ........................................... 11Checking out eating guidelines .......................................................... 11Keeping a food diary............................................................................ 12
Organizing and Readying Your Kitchen ...................................................... 13Planning to Eat Well ...................................................................................... 13Practicing Food Safety in the Kitchen ......................................................... 14
Chapter 2: Step By Step: What to Expect and What to Eat the Days and Weeks after Surgery . . . . . . . . . . . . . . . . . . . . . . . . 15
Living With Your New Pouch ....................................................................... 16Staving off nausea and vomiting ........................................................ 17Staying regular ..................................................................................... 18Keeping properly hydrated ................................................................ 19Avoiding the dreaded dumping syndrome ....................................... 20Figuring out food intolerances ........................................................... 21
02_640180-ftoc.indd xv02_640180-ftoc.indd xv 8/27/10 10:37 PM8/27/10 10:37 PM

Easing Back into Eating after Your Weight Loss Surgery ......................... 22Following your surgeon’s guidelines ................................................. 23Eating and adding foods step by step ............................................... 26
Stage 1: Clear Liquids .................................................................................... 27What you can eat ................................................................................. 28Clear liquid tips .................................................................................... 28Sample menu for a clear-liquid diet ................................................... 28
Stage 2: Full Liquids ....................................................................................... 28What you can eat ................................................................................. 28Full liquid tips ....................................................................................... 28Sample menu for a full-liquid diet ...................................................... 30
Stage 3: Smooth Foods .................................................................................. 30What you can eat ................................................................................. 30Preparing puréed meals ...................................................................... 31Smooth food tips .................................................................................. 32Sample menu for a smooth-food diet ................................................ 33
Stage 4: Soft Foods ......................................................................................... 34What you can eat ................................................................................. 34Soft foods tips....................................................................................... 35Sample menu for a soft-food diet ....................................................... 36
Chapter 3: Maintaining Healthy Eating For Life . . . . . . . . . . . . . . . . . . . 37
Following the Cardinal Rule: Your Pouch Rules ........................................ 38Keeping your pouch from overstretching ........................................ 38Avoiding angering your pouch ........................................................... 39
Being Mindful of Portion Sizes ..................................................................... 40Determining an accurate portion ....................................................... 41Estimating the size of your meals ...................................................... 42
Making Wise Food Choices ........................................................................... 44The building blocks of nutrition ........................................................ 45Fiber facts ............................................................................................. 51
Keeping a Food Diary to Stay On Track ...................................................... 53Finding out what’s in it for you .......................................................... 53Choosing and using a food diary ....................................................... 54
Fitting In Fast Food ........................................................................................ 55General tips for surviving the fast-food menu board ...................... 55Good choices for a variety of restaurants ........................................ 56
Hydration Motivation .................................................................................... 58Water works.......................................................................................... 59Beverage do’s and don’ts .................................................................... 60
Supplementing Your Diet .............................................................................. 61Discovering what vitamins and minerals can do for you ............... 62Meeting your protein goal with supplements .................................. 65
Chapter 4: The Art of Meal Planning . . . . . . . . . . . . . . . . . . . . . . . . . . . . 67
Discovering Why to Plan Ahead .................................................................. 68You save time ....................................................................................... 68You save money ................................................................................... 69You can eat hassle-free ....................................................................... 69
xvi Weight Loss Surgery Cookbook For Dummies
02_640180-ftoc.indd xvi02_640180-ftoc.indd xvi 8/27/10 10:37 PM8/27/10 10:37 PM
Laying the Groundwork for Meal Planning ................................................. 70Breaking down your favorite foods ................................................... 70Making a list and checking it twice .................................................... 72
Shopping Smart Aisle by Aisle ..................................................................... 73Produce ................................................................................................. 74Meat, poultry, and seafood ................................................................. 75Dairy ...................................................................................................... 75Grains and cereals ............................................................................... 76Center aisle staples.............................................................................. 76Frozen foods ......................................................................................... 77
Understanding Nutrition Labels .................................................................. 77Finding out what all those numbers mean ....................................... 78Making the label work for you ............................................................ 80
Chapter 5: Kitchen and Pantry Makeover . . . . . . . . . . . . . . . . . . . . . . . . 81
Preparing Your Kitchen: Purging and Organizing ..................................... 81Examining Essential Tools ............................................................................ 82
Cookware .............................................................................................. 82Gadgets.................................................................................................. 83Knives .................................................................................................... 85Cutting boards ...................................................................................... 86Small appliances .................................................................................. 87
Stocking Your Pantry, Refrigerator, and Freezer with Good Ingredients ............................................................................... 88
Herbs, spices, and more ..................................................................... 88Canned ingredients .............................................................................. 90Dry pantry items .................................................................................. 91Refrigerated foods ............................................................................... 92Frozen fruits and veggies .................................................................... 92
Chapter 6: Tips for Food Preparation and Cooking . . . . . . . . . . . . . . . . 93
Brushing Up on Food Safety ......................................................................... 94Taking care of fresh and raw foods ................................................... 94Cooking foods to the proper temperature ....................................... 95Keeping leftovers safe ......................................................................... 98
Reviewing Cooking Methods 101 ................................................................. 98Dry cooking methods .......................................................................... 99Moist cooking methods ..................................................................... 100
Cooking and Consuming Meat after Weight Loss Surgery ..................... 101Beef ...................................................................................................... 102Poultry ................................................................................................. 102Pork, lamb, and liver ......................................................................... 103Fish and seafood ................................................................................ 103
Measuring Up: A Guide to Measuring Common Ingredients .................. 104Measuring weight versus volume .................................................... 104Measuring liquids .............................................................................. 105Measuring solids ................................................................................ 105Choosing and using a food scale...................................................... 106
Using Alcohol in Cooking ............................................................................ 107
xvii Table of Contents
02_640180-ftoc.indd xvii02_640180-ftoc.indd xvii 8/27/10 10:37 PM8/27/10 10:37 PM
Weight Loss Surgery Cookbook For Dummies xviiiMaking Healthy Substitutions .................................................................... 108
Saving calories and cutting the fat .................................................. 109Checking out other ways to save calories ...................................... 110
Relying on Convenience Foods .................................................................. 111
Part II: Now You’re Cooking! Healthy and Hearty Dishes ....................................... 113
Chapter 7: Balanced Breakfasts . . . . . . . . . . . . . . . . . . . . . . . . . . . . . . . 115
Starting Your Day the Pouch-Friendly Way .............................................. 115Waking Up Your Pouch Gently with Yogurt and Fruit Recipes ............. 116Exploring Easy Egg Dishes .......................................................................... 119Having Healthy Whole-Grain Mornings ..................................................... 122Whipping Up Weekend Treats ................................................................... 128
Chapter 8: Bunches of Lunches and Brunches . . . . . . . . . . . . . . . . . . 131
Putting Together One-Dish Meals .............................................................. 132Preparing Egg Dishes with Style ................................................................ 138Satisfying Hunger with a Sandwich or Wrap ............................................ 141Making Unbeatable Salads .......................................................................... 142
Chapter 9: Umm . . . Tastes Like Chicken: Poultry Dishes . . . . . . . . . 149
Popular Poultry Cooking Methods ............................................................ 150Sautéing ............................................................................................... 150Roasting .............................................................................................. 150
Roasted, Sautéed, and Baked Poultry ....................................................... 151Turkey, the White Meat Burger ................................................................. 159Casseroles Everyone Will Flock To ........................................................... 161
Chapter 10: Let’s Meat in the Kitchen: Beef and Pork Recipes . . . . 165
Choosing Beef and Pork You Can Eat after Surgery ................................ 166USDA Beef Grades .............................................................................. 166Which cuts makes the cut................................................................. 166
Cooking Phenomenal Ground-Beef Dishes ............................................... 168Making Meaty Meals on a Stick .................................................................. 172Creating Can’t-Go-Wrong Meaty Dinner Salads ....................................... 174Preparing Pork and Beef Main Entrées ..................................................... 177
Chapter 11: Let’s Not Forget: Lamb and Other Meats . . . . . . . . . . . . . 183
Trying Out Lamb, Another Red Meat ........................................................ 184Discovering Lick-Your-Plate Liver Dishes ................................................ 190Staying Lean with Venison and Bison Meals ............................................ 192
02_640180-ftoc.indd xviii02_640180-ftoc.indd xviii 8/27/10 10:37 PM8/27/10 10:37 PM

xix Table of Contents
Chapter 12: Catching On to Fish and Seafood . . . . . . . . . . . . . . . . . . . 195
Buying, Storing, and Cooking Fish and Seafood ......................................... 195Buying tips .......................................................................................... 195Storing tips.......................................................................................... 196Cooking tips ........................................................................................ 197
Grilling, Sautéing, and Baking Fish ............................................................ 197Serving Up Super Shrimp Recipes ............................................................. 203Taking Shortcuts with Canned Fish and Seafood .................................... 205
Chapter 13: Viva la Vegetarian . . . . . . . . . . . . . . . . . . . . . . . . . . . . . . . . 209
Developing Delicious Dinner Salads .......................................................... 209Making “Meaty” Baked Dishes ................................................................... 213Cooking Full-Flavor Vegetarian Burgers ................................................... 218
Part III: Simple Recipes to Enjoy Anytime .................. 221
Chapter 14: Scrumptious Smoothies . . . . . . . . . . . . . . . . . . . . . . . . . . . 223
Smoothie-Making Tips ................................................................................. 224Healthy Fruity Smoothies ........................................................................... 224Spice-It-Up Delights ..................................................................................... 228Peanut Butter and Chocolate Temptations .............................................. 230
Chapter 15: Alluring Appetizers . . . . . . . . . . . . . . . . . . . . . . . . . . . . . . . 233
Making Tasty Morsels ................................................................................. 234No Double Dipping! Stirring Up Salsas and Dips ..................................... 239Putting Snacks on a Stick ............................................................................ 242
Chapter 16: Sumptuous Soups and Stews . . . . . . . . . . . . . . . . . . . . . . 245
Serving Up Satisfying Soups ....................................................................... 246Savoring Home-Style Stews and Chili ........................................................ 250
Chapter 17: Completing the Meal: Pasta and Side Dishes . . . . . . . . 255
Packing Flavor into Potato Dishes ............................................................. 256Making a Little Go a Long Way: Pasta Side Dishes .................................. 258Putting Veggies and Side Salads in the Spotlight .................................... 260
Chapter 18: Smart Snacking . . . . . . . . . . . . . . . . . . . . . . . . . . . . . . . . . . 267
Finding Not-So-Ordinary Fruit Snacks ....................................................... 268Quelling Cravings for Crunchy Bites ......................................................... 270Making Everything Better with Cheese ..................................................... 273
Chapter 19: Divine Desserts . . . . . . . . . . . . . . . . . . . . . . . . . . . . . . . . . . 275
Enjoying Sweet Fruits without Added Calories ....................................... 276Savoring Creamy and Chewy Tasty Treats .............................................. 279
02_640180-ftoc.indd xix02_640180-ftoc.indd xix 8/27/10 10:37 PM8/27/10 10:37 PM

Weight Loss Surgery Cookbook For Dummies xxChapter 20: Super Simple Cooking for One . . . or Two . . . . . . . . . . . . 285
Wasting Nothing with Recipes for One ..................................................... 285Preparing Quick and Easy Dishes for Two ............................................... 290
Part IV: The Part of Tens ........................................... 295
Chapter 21: Ten Tips for Long-Term Success . . . . . . . . . . . . . . . . . . . . 297
Eat on a Schedule ........................................................................................ 297Put Good-Quality Foods First ..................................................................... 298Chew, Chew, Chew ...................................................................................... 298Watch Your Portion Sizes ........................................................................... 298Stop Eating When Your Pouch Is Full ....................................................... 299Don’t Drink Beverages with Meals ............................................................ 299Stay Hydrated ............................................................................................... 299Take Your Supplements .............................................................................. 299Add Physical Activity .................................................................................. 300Continue to Follow Up with Your Surgeon ............................................... 300
Chapter 22: Ten Easy-to-Prepare Meals Your Family Will Love . . . . 301
Warming Up with Chili Pie .......................................................................... 301Starting with the Slow Cooker: Pork and Sauerkraut Soup .................... 302Mixing Up a Home-Style Meatloaf Meal .................................................... 303Keeping It Light with Crab Salad Melts ..................................................... 303Saving Time with Hurry Curry Pork Salad ................................................ 304Grilling Turkey Burgers with Dried Cherries and Apples ....................... 305Partying Down with an Enchilada Fiesta .................................................. 306Having Your Quiche and Eating It Too ..................................................... 306Making It Meatless: Veggie Lasagna .......................................................... 307Cookin’ a Quick Chicken Dinner ................................................................ 308
Chapter 23: Ten Sample Menus for Different Calorie Levels . . . . . . 309
1,000 Calorie Menus .................................................................................... 3101,200 Calorie Menus .................................................................................... 3121,400 Calorie Menus .................................................................................... 3141,600 Calorie Menus .................................................................................... 3161,800 Calorie Menus .................................................................................... 318
Appendix: Metric Conversion Guide ............................ 321
Index ....................................................................... 325
02_640180-ftoc.indd xx02_640180-ftoc.indd xx 8/27/10 10:37 PM8/27/10 10:37 PM
Foreword
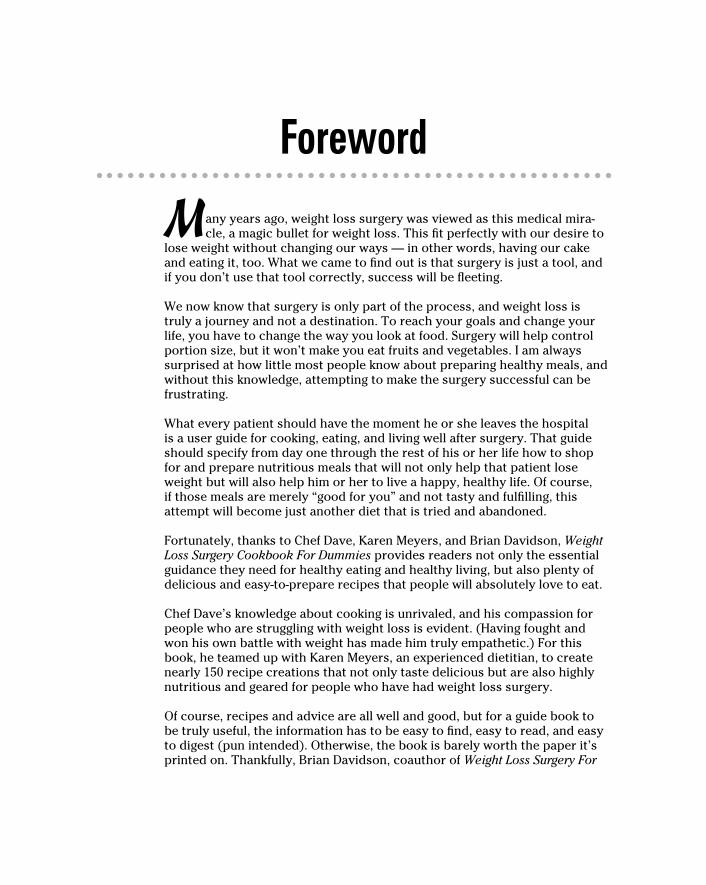
Many years ago, weight loss surgery was viewed as this medical mira-cle, a magic bullet for weight loss. This fi t perfectly with our desire to
lose weight without changing our ways — in other words, having our cake and eating it, too. What we came to fi nd out is that surgery is just a tool, and if you don’t use that tool correctly, success will be fl eeting.
We now know that surgery is only part of the process, and weight loss is truly a journey and not a destination. To reach your goals and change your life, you have to change the way you look at food. Surgery will help control portion size, but it won’t make you eat fruits and vegetables. I am always surprised at how little most people know about preparing healthy meals, and without this knowledge, attempting to make the surgery successful can be frustrating.
What every patient should have the moment he or she leaves the hospital is a user guide for cooking, eating, and living well after surgery. That guide should specify from day one through the rest of his or her life how to shop for and prepare nutritious meals that will not only help that patient lose weight but will also help him or her to live a happy, healthy life. Of course, if those meals are merely “good for you” and not tasty and fulfi lling, this attempt will become just another diet that is tried and abandoned.
Fortunately, thanks to Chef Dave, Karen Meyers, and Brian Davidson, Weight Loss Surgery Cookbook For Dummies provides readers not only the essential guidance they need for healthy eating and healthy living, but also plenty of delicious and easy-to-prepare recipes that people will absolutely love to eat.
Chef Dave’s knowledge about cooking is unrivaled, and his compassion for people who are struggling with weight loss is evident. (Having fought and won his own battle with weight has made him truly empathetic.) For this book, he teamed up with Karen Meyers, an experienced dietitian, to create nearly 150 recipe creations that not only taste delicious but are also highly nutritious and geared for people who have had weight loss surgery.
Of course, recipes and advice are all well and good, but for a guide book to be truly useful, the information has to be easy to fi nd, easy to read, and easy to digest (pun intended). Otherwise, the book is barely worth the paper it’s printed on. Thankfully, Brian Davidson, coauthor of Weight Loss Surgery For
03_640180-flast.indd xxi03_640180-flast.indd xxi 8/27/10 10:37 PM8/27/10 10:37 PM

Weight Loss Surgery Cookbook For Dummies xxiixxiiDummies, joined this project and utilized his expertise and wordsmithing skills to ensure that this book is worth the paper it’s printed on and so much more. Readers can be sure that they’ll have an easy-to-read and easy-to-fol-low guide to better eating that’s also a lot of fun.
Weight Loss Surgery Cookbook For Dummies is the most complete educational tool I have seen written for postbariatric patients. I can think of no better way of making a bypass or band work than having my patients leave the hospital with this book in their hands.
Garth Davis, MDMedical Director of Bariatric Surgery at Memorial City HospitalStar of TLC’s Big Medicine
03_640180-flast.indd xxii03_640180-flast.indd xxii 8/27/10 10:37 PM8/27/10 10:37 PM
Introduction
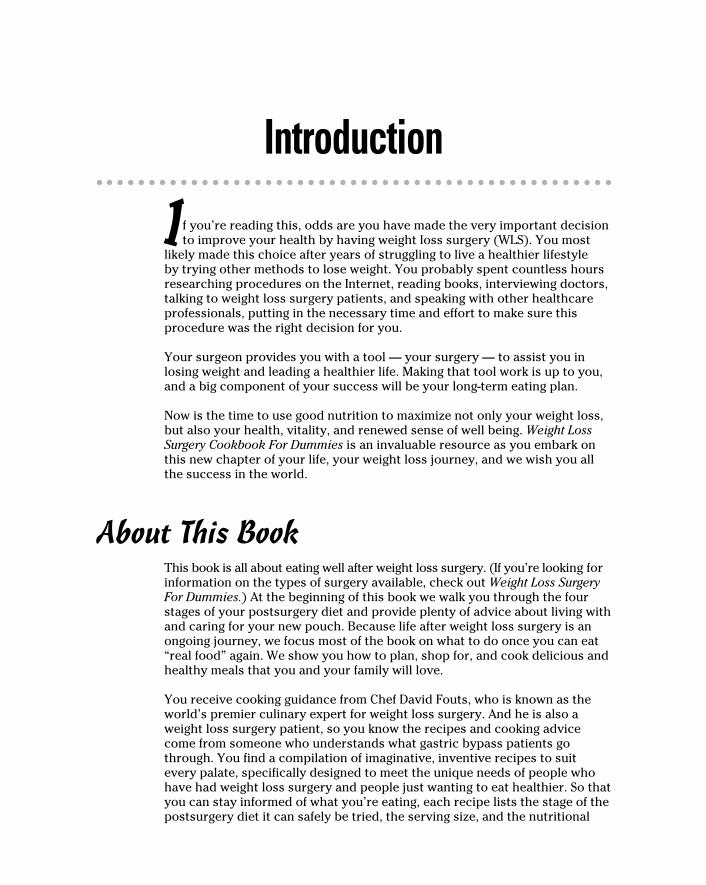
If you’re reading this, odds are you have made the very important decision to improve your health by having weight loss surgery (WLS). You most
likely made this choice after years of struggling to live a healthier lifestyle by trying other methods to lose weight. You probably spent countless hours researching procedures on the Internet, reading books, interviewing doctors, talking to weight loss surgery patients, and speaking with other healthcare professionals, putting in the necessary time and effort to make sure this procedure was the right decision for you.
Your surgeon provides you with a tool — your surgery — to assist you in losing weight and leading a healthier life. Making that tool work is up to you, and a big component of your success will be your long-term eating plan.
Now is the time to use good nutrition to maximize not only your weight loss, but also your health, vitality, and renewed sense of well being. Weight Loss Surgery Cookbook For Dummies is an invaluable resource as you embark on this new chapter of your life, your weight loss journey, and we wish you all the success in the world.
About This BookThis book is all about eating well after weight loss surgery. (If you’re looking for information on the types of surgery available, check out Weight Loss Surgery For Dummies.) At the beginning of this book we walk you through the four stages of your postsurgery diet and provide plenty of advice about living with and caring for your new pouch. Because life after weight loss surgery is an ongoing journey, we focus most of the book on what to do once you can eat “real food” again. We show you how to plan, shop for, and cook delicious and healthy meals that you and your family will love.
You receive cooking guidance from Chef David Fouts, who is known as the world’s premier culinary expert for weight loss surgery. And he is also a weight loss surgery patient, so you know the recipes and cooking advice come from someone who understands what gastric bypass patients go through. You find a compilation of imaginative, inventive recipes to suit every palate, specifically designed to meet the unique needs of people who have had weight loss surgery and people just wanting to eat healthier. So that you can stay informed of what you’re eating, each recipe lists the stage of the postsurgery diet it can safely be tried, the serving size, and the nutritional
04_640180-intro.indd 104_640180-intro.indd 1 8/27/10 10:37 PM8/27/10 10:37 PM
2 Weight Loss Surgery Cookbook For Dummies
information. You can eat with confidence, knowing you’re eating healthfully, helping manage your weight, and maintaining your overall well being.
If you’re familiar with a For Dummies book (Weight Loss Surgery For Dummies, perhaps?), you know they’re divided into parts and chapters. The editors and authors designed this book in a nonlinear fashion so you can read it cover to cover or skip around to the areas that interest you the most. For those of you who are accustomed to the post-op lifestyle and handy in the kitchen, you may want to want to dig right in to Chef Dave’s delicious recipes (which have been tested by a professional recipe tester).
Conventions Used in This BookThe following are a few conventions that you find in this book and that you should be aware of:
✓ We usually discuss “weight loss surgery” in general and are referring to all types of surgeries. We only specify a particular type of surgery when necessary.
✓ New terms appear in italics in each chapter, followed by a brief definition.
✓ Web sites appear in monofont to help them stand out.
The recipes in this book appear in a standard format and include how much time is needed for preparation, marinating, chilling, and cooking; ingredients; steps for preparation; yield (how much it makes); and serving sizes. We also tell you in what stage of the postsurgery diet progression the recipe can be eaten. Many of these tasty dishes are for a regular diet that you adopt a couple of months or so after the surgery, but some can be enjoyed sooner.
Each recipe has also been carefully analyzed for its nutritional content, and we tell you the number of calories, grams of fat, cholesterol, sodium, carbohydrates and fiber, protein, and sugar. At the end of each recipe you find the information presented like this:
Per serving: Calories 110 (From Fat 80); Fat 9g (Saturated 3g); Cholesterol 5mg; Sodium 200mg; Carbohydrate 5g (Dietary Fiber 3g); Protein 4g; Sugar 1g.
We stick with easy-to-find ingredients and easy-to-prepare recipes so they’re practical in your busy life. Read all the way through a recipe before beginning so you aren’t surprised by any steps. When preparing recipes, keep the following conventions in mind:
04_640180-intro.indd 204_640180-intro.indd 2 8/27/10 10:37 PM8/27/10 10:37 PM
3 Introduction
✓ All eggs are large.
✓ All butter is salted. Don’t substitute margarine unless specifically noted.
✓ Mushrooms are white button unless otherwise specified.
✓ All sugar is granulated unless otherwise specified.
✓ Pepper is freshly ground black pepper unless otherwise specified.
✓ All salt is table salt unless otherwise specified.
✓ All herbs are fresh unless dried herbs are specified.
✓ When a recipe calls for sugar substitute, any sugar substitute that contains no sugar is acceptable. Some are sweeter than others, and personal preferences vary, so you may want to experiment by starting with a smaller amount than the recipe calls for and increasing the amount if needed.
✓ Water used for boiling is not listed in the ingredients.
✓ Nonstick cooking spray is not included in ingredient lists but should be kept on hand.
✓ All temperatures are Fahrenheit. (Refer to the Metric Conversion Appendix for information about converting temperatures to Celsius.)
✓ Nutrition information that appears at the end of each recipe is per serving. Keep in mind that substituting ingredients or changing the serving size will alter the nutrition information.
✓ All nutrition analysis is based on the weight of volume of the ingredient. For example, if a recipe calls for 8 ounces boneless, skinless chicken breast, raw weight was used. If the recipe calls for 8 ounces cooked chicken breast, weight after cooking is used.
T This symbol indicates a vegetarian recipe. Note that these recipes may still include eggs and dairy.
What You’re Not to ReadFor Dummies books are full of useful extras that pop out at you while you’re reading. Fun facts and key points, marked with icons, and useful sidebars that appear in gray shaded boxes give you inspiration and greater details to assist you on your weight loss surgery journey. Sometimes, though, you just want to cut to the chase. If you aren’t in the mood for extra information, you can skip these tidbits and just dive into the areas that are most useful to you. You don’t have to read them to understand the topic or master the recipes. You can always go back and catch up on them later.
04_640180-intro.indd 304_640180-intro.indd 3 8/27/10 10:37 PM8/27/10 10:37 PM
4 Weight Loss Surgery Cookbook For Dummies
Foolish AssumptionsIn writing this book, we made the following assumptions about you:
✓ You or someone you care about is considering or has had weight loss surgery.
✓ You want to improve your skills in the kitchen and learn how to make delicious weight loss surgery–friendly recipes.
✓ You want to give yourself and the surgery the best opportunity for success.
✓ You want to continue on your journey for a healthier, happier life.
✓ Or, you are a professional who works with weight loss surgery patients. You want to understand more and provide a trusted resource for your patients.
How This Book Is OrganizedWeight Loss Surgery Cookbook For Dummies is divided into four parts. The material is organized so you don’t have to start at the beginning. Here is a rundown of what you’ll find in each section.
Part I: Eating Right with Every BiteThe six chapters in this part include everything but the recipes. In the first chapter you find a brief overview of what the entire book entails. Chapter 2 details your diet, starting from day one after the surgery on through the four stages that lead up to eating solid foods. A healthy eating plan, portion sizes, nutrition, food diaries, and wise food choices are covered in Chapter 3, and Chapter 4 features how to make a meal plan and what the benefits are. In Chapter 5 you get empowered to stock your kitchen and shelves with the right ingredients and tools. And to get you started cooking like a pro, Chapter 6 provides you with food preparation tips.
04_640180-intro.indd 404_640180-intro.indd 4 8/27/10 10:37 PM8/27/10 10:37 PM

5 Introduction
Part II: Now You’re Cooking! Healthy and Hearty DishesThis part kicks off with main courses for breakfast through dinner that are sure to delight. These recipes are designed to show you that you can eat not only very healthy food but delicious food as well. We divide the chapters by type of food, so if you’re in the mood for a relaxed brunch or want a quick fish dinner, you can easily flip to the right place.
Part III: Simple Recipes to Enjoy AnytimeIn this part you find recipes for smoothies, appetizers, salads, soups, stews, vegetables, side dishes, snacks, and desserts — everything you need to complete meals or satisfy hunger in between them. At the end of this part we also provide some simple recipes that can be made for one or two people, so you don’t have to keep leftovers.
Part IV: The Part of TensNo For Dummies book would be complete without the Part of Tens. This part consists of three chapters with tips for long-term success, easy-to-prepare family meals, and sample menus for different calorie levels. When you need a quick menu idea or a reminder of how to keep on track in your new healthy lifestyle, turn to this part.
Icons Used in This BookAs you read through the chapters of this book, you find the following friendly icons that are designed to draw your attention to different nuggets of information and useful tidbits:
Be sure to pay attention to the information next to this icon. This advice can help you make good choices, eliminate risks, and improve your skills in the kitchen.
04_640180-intro.indd 504_640180-intro.indd 5 8/27/10 10:37 PM8/27/10 10:37 PM
6 Weight Loss Surgery Cookbook For Dummies
When you see this icon, you’re sure to find good ideas that will help you along on your journey.
Pay close attention to this icon. It will help you avoid common pitfalls and mistakes.
This icon indicates an advanced discussion of the topic. You don’t have to read this info, but you may find it interesting.
Where to Go from HereWeight Loss Surgery Cookbook For Dummies is written so you can start wher-ever you like. This may depend on where you are in your weight loss surgery journey and your skill set in the kitchen. If you are considering but haven’t had the surgery, you may want to read this book cover to cover in a linear fashion to gain a clear understanding of your post-op restrictions and life-style changes. If you have already had weight loss surgery and are beyond the transition phase to solid foods, you may want to start at Chapter 3.
If you’re a novice and want to learn how to prepare your kitchen, what tools you need, and what items to have on hand to cook like a pro, start with Chapter 5. If you’re an experienced cook and are looking to dig right in to some new and delicious recipes, feel free to start at Chapter 7.
04_640180-intro.indd 604_640180-intro.indd 6 8/27/10 10:37 PM8/27/10 10:37 PM

Part I
Eating Right with Every Bite
05_640180-pp01.indd 705_640180-pp01.indd 7 8/27/10 10:38 PM8/27/10 10:38 PM

In this part . . .
This part gives you step-by-step dietary guidelines for the transition from clear liquids to solid foods, starting
with day one after surgery. You find out about portion sizes, your new nutritional requirements, and the benefits of meal planning. We cover what you need for a well-stocked fridge, freezer, and cupboards. You also get tips on how to care for fresh and raw foods, cooking methods, choosing the right temperature, and measuring guides for common ingredients.
05_640180-pp01.indd 805_640180-pp01.indd 8 8/27/10 10:38 PM8/27/10 10:38 PM
Chapter 1
Fueling the New You: Ingredients for Success
In This Chapter▶ Taking a look at your new healthy eating plan
▶ Setting up and preparing your kitchen for success
In order to make the most of your surgery, you need to change your lifestyle after you have your procedure. This doesn’t have to be a chore —
in fact, when you see how good you feel when you give your body all the nutrients it needs, you’ll want to continue doing it.
Establishing new eating and exercise habits is an essential part of achieving and maintaining a healthier weight. Each patient is expected to change the foods eaten, the amount of food eaten, and how that food is eaten, in order to provide the body with the nutrition it needs and to promote weight loss. These dietary changes and nutritional guidelines are meant to be followed for the rest of your life.
In this chapter and throughout this book, we start you at the beginning, from your first day at the hospital, through your transition to solid foods, to sticking with a healthy eating plan for life. We outline portion sizes and general guidelines to assist in making your transition as easy as possible.
A weight loss surgery lifestyle includes planning and preparing small, high-protein meals, chewing every bite thoroughly, exercising, keeping a diet and exercise diary, and more. Your bariatric team will provide nutrition and fitness guidance and help you develop plans that will work best for you.
When it comes to food, different people have different tastes and schedules. Listen to your body and your surgeon’s directions and call your bariatric team if you have a question about your specific situation.
06_640180-ch01.indd 906_640180-ch01.indd 9 8/27/10 10:38 PM8/27/10 10:38 PM
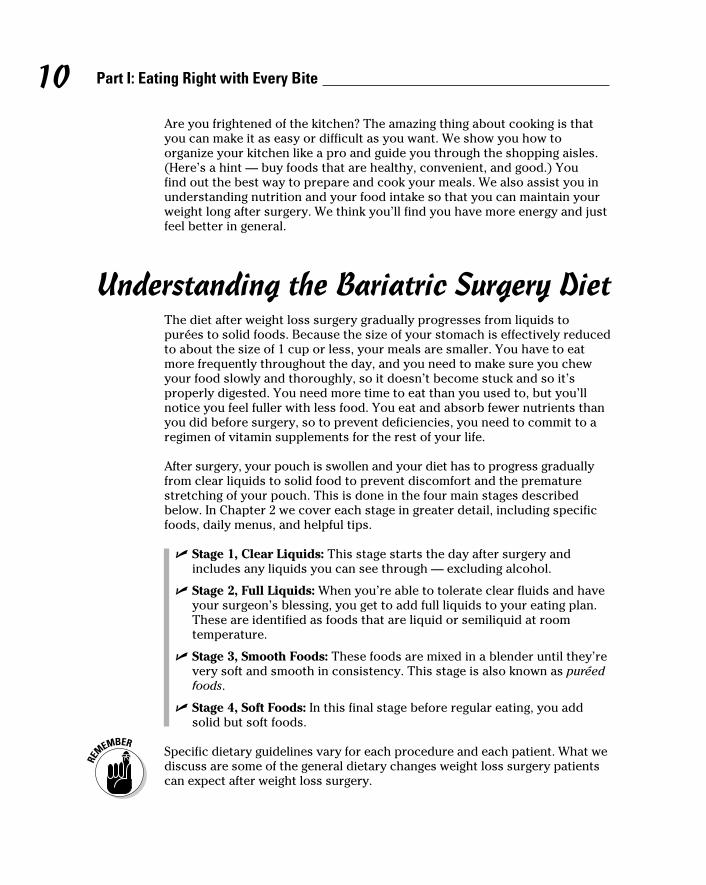
10 Part I: Eating Right with Every Bite
Are you frightened of the kitchen? The amazing thing about cooking is that you can make it as easy or difficult as you want. We show you how to organize your kitchen like a pro and guide you through the shopping aisles. (Here’s a hint — buy foods that are healthy, convenient, and good.) You find out the best way to prepare and cook your meals. We also assist you in understanding nutrition and your food intake so that you can maintain your weight long after surgery. We think you’ll find you have more energy and just feel better in general.
Understanding the Bariatric Surgery DietThe diet after weight loss surgery gradually progresses from liquids to purées to solid foods. Because the size of your stomach is effectively reduced to about the size of 1 cup or less, your meals are smaller. You have to eat more frequently throughout the day, and you need to make sure you chew your food slowly and thoroughly, so it doesn’t become stuck and so it’s properly digested. You need more time to eat than you used to, but you’ll notice you feel fuller with less food. You eat and absorb fewer nutrients than you did before surgery, so to prevent deficiencies, you need to commit to a regimen of vitamin supplements for the rest of your life.
After surgery, your pouch is swollen and your diet has to progress gradually from clear liquids to solid food to prevent discomfort and the premature stretching of your pouch. This is done in the four main stages described below. In Chapter 2 we cover each stage in greater detail, including specific foods, daily menus, and helpful tips.
✓ Stage 1, Clear Liquids: This stage starts the day after surgery and includes any liquids you can see through — excluding alcohol.
✓ Stage 2, Full Liquids: When you’re able to tolerate clear fluids and have your surgeon’s blessing, you get to add full liquids to your eating plan. These are identified as foods that are liquid or semiliquid at room temperature.
✓ Stage 3, Smooth Foods: These foods are mixed in a blender until they’re very soft and smooth in consistency. This stage is also known as puréed foods.
✓ Stage 4, Soft Foods: In this final stage before regular eating, you add solid but soft foods.
Specific dietary guidelines vary for each procedure and each patient. What we discuss are some of the general dietary changes weight loss surgery patients can expect after weight loss surgery.
06_640180-ch01.indd 1006_640180-ch01.indd 10 8/27/10 10:38 PM8/27/10 10:38 PM
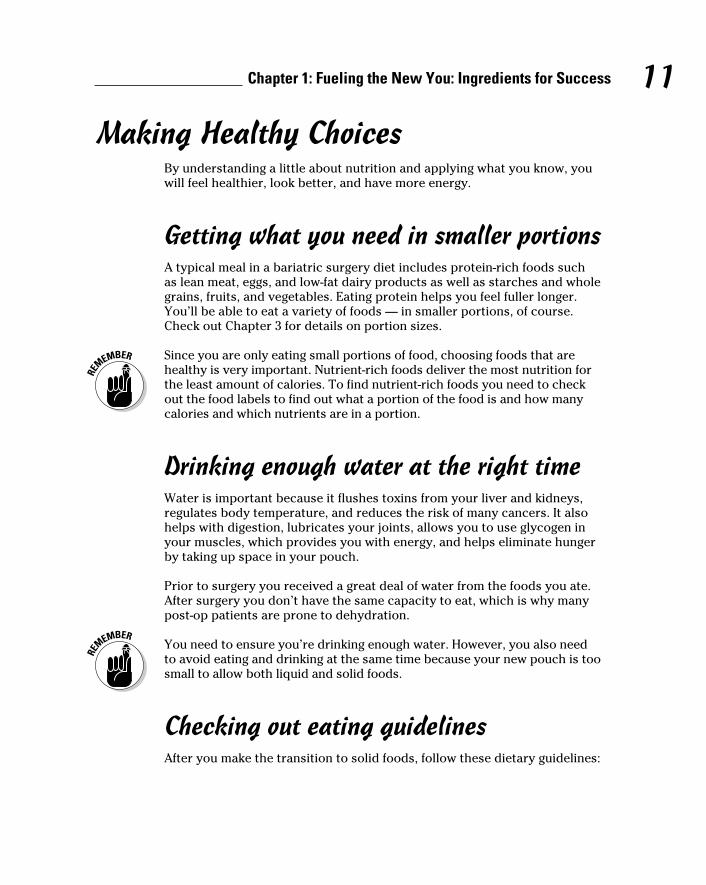
11 Chapter 1: Fueling the New You: Ingredients for Success
Making Healthy ChoicesBy understanding a little about nutrition and applying what you know, you will feel healthier, look better, and have more energy.
Getting what you need in smaller portionsA typical meal in a bariatric surgery diet includes protein-rich foods such as lean meat, eggs, and low-fat dairy products as well as starches and whole grains, fruits, and vegetables. Eating protein helps you feel fuller longer. You’ll be able to eat a variety of foods — in smaller portions, of course. Check out Chapter 3 for details on portion sizes.
Since you are only eating small portions of food, choosing foods that are healthy is very important. Nutrient-rich foods deliver the most nutrition for the least amount of calories. To find nutrient-rich foods you need to check out the food labels to find out what a portion of the food is and how many calories and which nutrients are in a portion.
Drinking enough water at the right timeWater is important because it flushes toxins from your liver and kidneys, regulates body temperature, and reduces the risk of many cancers. It also helps with digestion, lubricates your joints, allows you to use glycogen in your muscles, which provides you with energy, and helps eliminate hunger by taking up space in your pouch.
Prior to surgery you received a great deal of water from the foods you ate. After surgery you don’t have the same capacity to eat, which is why many post-op patients are prone to dehydration.
You need to ensure you’re drinking enough water. However, you also need to avoid eating and drinking at the same time because your new pouch is too small to allow both liquid and solid foods.
Checking out eating guidelinesAfter you make the transition to solid foods, follow these dietary guidelines:
06_640180-ch01.indd 1106_640180-ch01.indd 11 8/27/10 10:38 PM8/27/10 10:38 PM

12 Part I: Eating Right with Every Bite
✓ Plan your meals.
✓ Eat three meals a day.
✓ Start each meal with a protein source.
✓ Chew, chew, chew each bite.
✓ Don’t overeat — stop before you feel full.
✓ Drink between each meal, not with your meals.
✓ Don’t eat in front of the TV, in the car, or while you’re reading.
✓ Keep healthy foods available and get tempting unhealthy foods out of the house.
✓ If you’re going to a party, offer to bring a healthy food item to ensure you’ll have something there you can eat.
✓ Pay attention to the taste of your food.
✓ Try not to eat late in the day.
✓ Use a food diary to keep track of what and when you eat and how you feel.
Finding out what foods your new pouch will tolerate after surgery is a matter of trial and error. Dumping syndrome, a common condition for gastric bypass surgery patients, occurs after you eat foods that are high in sugar, fat, or sometimes dairy, or high-calorie liquids. It can cause nausea, diarrhea, light headedness, cold sweats, abdominal cramping, weakness, and a fast heartbeat. (We talk more about dumping syndrome in Chapter 2.) Many people who experience dumping find it good incentive to avoid the foods that triggered the reaction for a while.
Keeping a food diaryA food diary is a useful tool not only when you’re losing weight but also when you’re trying to maintain your weight. A diary helps you be aware of what you’re eating and whether you’re veering from your healthy eating plan. Diaries can also help you to increase your awareness of why you’re eating. If you write down any emotions you feel when you think you’re hungry, you may discover that the feeling is something else — maybe thirst, fatigue, or stress.
Check out Chapter 3 for more information on how a food diary can help you achieve and maintain your weight loss goals.
06_640180-ch01.indd 1206_640180-ch01.indd 12 8/27/10 10:38 PM8/27/10 10:38 PM
13 Chapter 1: Fueling the New You: Ingredients for Success
Organizing and Readying Your KitchenBefore starting on your cooking adventure, make sure you have your kitchen in order. Nothing is more frustrating than starting a recipe and being unable to find your favorite cookware or utensils or realizing you don’t have the necessary ingredients on hand.
The first step to getting organized is to assess what you have, edit down to what you really need, and arrange it in an efficient setup, the primary goal of which should be accessibility. In Chapter 5 we help you organize your kitchen, stock your cupboards, and introduce you to essential equipment. By laying this groundwork you can make your cooking experience more efficient and enjoyable, which will help you stay on track with healthy meal preparation.
Planning to Eat WellBy taking the time to plan meals ahead of time, you’re more likely to stick with your eating plan, stay within your budget, and find ways to use up what you already have on hand.
To take out all of the guesswork and free up time every day, take a little time one day a week and plan your meals for the week. You can extract a grocery list from your menu choices and do the week’s shopping in one trip, which prevents frantic dashes to the grocery store for a forgotten ingredient. Cooking will be more enjoyable because you’re more prepared.
Smart shopping is the name of the game. This means purchasing foods that are healthy, convenient, and good. Here are some smart shopping tips:
✓ Buy foods that are the least processed (closest to their original form) you can find.
✓ Shop with a list.
✓ Don’t shop when you’re hungry.
✓ If possible, shop alone so it’s easier to focus on healthy foods and buy just what you need.
✓ Read labels carefully.
06_640180-ch01.indd 1306_640180-ch01.indd 13 8/27/10 10:38 PM8/27/10 10:38 PM
14 Part I: Eating Right with Every Bite
Practicing Food Safety in the Kitchen
Fresh fruits, vegetables, and raw meats are always better than processed, but “safety first” is the rule.
It’s upsetting to think about, but the foods you eat to stay healthy can make you sick. Fortunately, you can do many things to protect yourself and your family from foodborne illness. At the grocery store, avoid cans that are bulging and jars that have cracks or loose lids. At home, follow these tips from the Food and Drug Administration:
✓ Be sure that your refrigerator and freezer are the right temperature for storing food.
✓ Refrigerate or freeze perishable foods right away.
✓ Throw away anything that looks or smells suspicious. If you think a food might be bad, don’t taste it!
✓ Wash your hands well before preparing food.
✓ Keep your work area, wash rags, and utensils clean.
✓ Cook meats thoroughly.
Check out Chapter 6 for more tips and tricks to ensure all your meals are safe to eat.
06_640180-ch01.indd 1406_640180-ch01.indd 14 8/27/10 10:38 PM8/27/10 10:38 PM
Chapter 2
Step by Step: What to Expect and What to Eat the Days and
Weeks after SurgeryIn This Chapter▶ Treating your pouch well
▶ Following your surgeon’s and dietitian’s guidelines for eating safely
▶ Getting familiar with the four stages of your postsurgery diet
Chances are, before your surgery you got a lot of information from your doctor about what to expect afterwards. You probably also sat in
your surgeon’s office with a registered dietitian who painstakingly explained the diet you have to follow for the few weeks following surgery until you’re able to eat “real” food again. The facts, guidelines, and warnings probably made perfect sense at the time, until you left the office and it all suddenly became very overwhelming. Don’t feel bad — you’re not alone!
Be reassured, your period of healing and adjustment will come to an end and you will be able to eat regular food again. You need to be conscientious of what you eat and the portion sizes, but having weight loss surgery certainly doesn’t mean that life as you knew it has come to an end. You’ll be able to go to a restaurant and have a lovely meal with friends. You just may want to split an entrée or take some home!
In this chapter we explain what to expect from your new pouch and some of the new sensations and symptoms you may experience. We show you what you can eat in the days and weeks after your weight loss surgery, walking you through each of the four initial stages of foods. We also clue you in on food preparation tips and provide some sample menus to get you started in the right direction.
Here are a few things to remember as you recover:
07_640180-ch02.indd 1507_640180-ch02.indd 15 8/27/10 10:38 PM8/27/10 10:38 PM
16 Part I: Eating Right with Every Bite
✓ Every person is different, and every surgery is different. You may have friends or family members who had weight loss surgery, and they all have stories about their experiences. Remember that this is your own unique journey and they may experience things you don’t and vice versa. For example, some people can’t tolerate rice, but you may do just fine with it. If you have a question about whether something is normal, call you surgeon’s office, not your next-door neighbor.
✓ Keep in mind your surgeon’s directions as well as your own specific tolerances. The guidelines we provide in this chapter are suggestions based on clinical nutrition guidelines from the American Society for Metabolic and Bariatric Surgery and the American Dietetic Association. However, you and your surgeon know the details of your particular situation, so be sure to follow doctor’s orders, and listen to your body! Again, call your surgeon or dietitian if you have a question about your specific situation.
✓ Your bariatric team is just that — your team. Your surgeon, dietitian, bariatric coordinator, and psychologist are all committed to helping you make this the best experience possible so you achieve the success you deserve. Don’t hesitate to call on them if you have any question or concerns.
✓ Get support! Research shows that people who attend support groups are more successful at weight loss than those who don’t, so regularly attend and participate in a support group. Face it, if you knew everything you needed to know, you wouldn’t be reading this book. A support group is a great place to talk to others, share experiences and ideas, and get information resources, and they can be a lot of fun! Take your spouse or family members, because they’re in this for the long haul, too. Your hospital may have a support group, or you can find groups online. A note of caution: Not everything you read on the Internet is absolutely true. Use reputable Web sites, and if you have questions, ask your bariatric team.
Living with Your New PouchYour pouch is about the size of an egg and holds one to two ounces. You know how gently you have to handle an egg? Well, the pouch also requires special care, which begins in the hospital and continues throughout your life.
After surgery, the pouch is swollen for anywhere from a few weeks (if you had adjustable gastric banding, AGB) to a few months (if you had Roux-en-Y gastric bypass, RYGB, also called simply gastric bypass, GBP; or biliopancreatic diversion with or without duodenal switch, BPD/DS). This in itself makes it difficult to eat much food at all. As time goes on, you’re able to eat more. Some hunger is normal, so you may also want to eat more. At this point, it can be helpful to use smaller plates and utensils so it looks as if you’re eating
07_640180-ch02.indd 1607_640180-ch02.indd 16 8/27/10 10:38 PM8/27/10 10:38 PM
17 Chapter 2: What to Expect and What to Eat
more and to help guide you in taking small bites. Forming good eating habits now (this means watching portion sizes) is important so you don’t return to old eating habits and stretch the pouch.
Foods may taste a little different after surgery, especially if you had gastric bypass. If it tastes metallic, which is common, you can use plastic forks and spoons to minimize the taste. Cold foods tend to have less aroma, so eating chilled foods may also help unusual tastes. This side effect usually passes with time.
Keep in mind that no matter how closely you follow your surgeon’s instructions, you are probably going to experience side effects at some time. By following instructions closely, however, you can minimize the frequency and severity of the symptoms. The following sections describe common side effects you may experience and how to deal with them. Keep in mind that in addition to increased severity of these side effects, not following your surgeon’s instructions can result in not achieving your weight loss goals, nutritional deficiencies, decreased energy, and just not feeling well.
Staving off nausea and vomitingCommon complaints after surgery are nausea and vomiting. If you feel pressure or fullness in the center of your abdomen, stop eating! Nausea and vomiting may occur during the first few months after surgery as you get used to your new pouch.
If you experience nausea and vomiting, chances are you have done one (or more) of the following:
✓ Not chewed your food well enough. Chew each bite of food 25 to 30 times until it has a puréed consistency.
✓ Eaten too quickly. Put your fork down between bites. Don’t be rushed by others. Take 20 to 30 minutes to eat a meal.
✓ Eaten too much at one time. Measure all foods. Take pencil-eraser-size bites. Stop when you are physically satisfied — not full.
✓ Eaten a food that’s hard to digest. Avoid fibrous foods such as celery, popcorn, and tough meats.
✓ Eaten a food you don’t tolerate well. Introduce new foods one at a time so if you don’t feel well after, you know which food you didn’t tolerate.
✓ Consumed fluids with a meal. Do not eat and drink at the same time! Stop drinking about five to ten minutes before you eat to make sure the pouch is empty and wait about 30 minutes after you eat to begin drink-ing again. If your pouch is full of fluids, you won’t be able to eat. Drinking too soon after a meal overfills the pouch and may make you nauseated.
07_640180-ch02.indd 1707_640180-ch02.indd 17 8/27/10 10:38 PM8/27/10 10:38 PM
18 Part I: Eating Right with Every Bite
Vomiting is more than simply a nuisance and discomfort. Unresolved vomiting can lead to complications such as:
✓ Obstruction of the opening to your pouch due to swelling of the lining of the stomach
✓ Development of a hernia (an abnormal opening in the abdominal wall that allows the contents of the abdomen to protrude through) at the incision site
✓ Dehydration, which can result in symptoms such as fatigue and headache, or more serious consequences such as decreased kidney function and electrolyte imbalances
✓ Breakdown or tearing apart of the staple line in the stomach or incision
✓ Nutritional deficiencies that can cause other health problems
If you experience nausea and vomiting, stop eating until it passes. If you have any question about whether your symptoms are normal, or you cannot keep water down, consult your surgeon immediately.
Staying regularSurgery itself can affect your digestive system, but the lifestyle changes that come with a pouch can also cause you to experience irregularities. The following sections provide tips to help you get back on track.
Don’t assume that any sudden change in bowel habits is a result of your surgery. If the symptoms (diarrhea or constipation) don’t subside with treatment, see your surgeon to rule out other causes.
Curing constipationConstipation is a common complaint after surgery. Right after surgery you’re sore and that’s probably the last thing you want to think about, but it happens. Usually it means you need to drink more fluids — the more, the better.
Immediately after surgery, you may be constipated due to the effect of the anesthesia or pain medication, which slows bowel function. Keep sipping fluids and move around as much as possible to move things along.
If you experience constipation later, it’s most likely due to insufficient fluid intake. Some supplements, like calcium and iron, can also contribute to constipation. Don’t stop taking your supplements, just keep drinking!
Another reason for constipation is lack of fiber, which can happen easily when your intake of fruits and veggies is restricted. If you’re in Stage 2 of the
07_640180-ch02.indd 1807_640180-ch02.indd 18 8/27/10 10:38 PM8/27/10 10:38 PM
19 Chapter 2: What to Expect and What to Eat
eating plan, be sure you’re drinking 48 to 64 ounces of fluid a day. In Stage 3 you can try soft cooked fruits and vegetables. In Stage 4 you’re free to try fresh fruits and vegetables. Later, high fiber cereals are a really good option.
Suppositories, stool softeners, fiber supplements, and enemas can also help, but talk to your surgeon about the problem first and find out what she advises.
Just remember, if you add fiber to your diet, you need to add more water, too. And don’t forget to get up and move around! Exercise (even just walking) can often get things going.
Dealing with diarrheaOn the other end of the spectrum is another common complaint: loose stools, or what we typically call diarrhea. If you have diarrhea or are having more than four or five bowel movements a day, call your surgeon. And be sure to drink plenty of water, because you can become dehydrated quickly.
You’re more likely to experience diarrhea if you have had GBP or BPD/DS than if you have had AGB. Diarrhea is often due to the following causes:
✓ Unabsorbed fat from eating fatty foods
✓ Sugar alcohols like sorbitol or mannitol that are found in sugar-free foods and tend to cause gas, bloating, and diarrhea
✓ Intolerance to lactose (found in dairy foods), which can cause gas, bloating and diarrhea
✓ Eating foods you don’t tolerate well
Your surgeon may prescribe medication or probiotics to treat the diarrhea. Probiotics are supplements that can be used to change or improve the natural bacterial balance of intestinal tract.
Keeping properly hydratedIf you remember one thing from the pre-op information you received from the dietitian, it’s probably how important fluids are. Fluids are necessary for almost every bodily process as well as fighting off fatigue — not to mention helping your metabolism to encourage weight loss. We recommend you get 48 to 64 ounces of fluid a day. Because you can’t drink very much at one time, this means you need to have something with you at all times so you can be sipping.
A really good way to gauge if you’re getting enough fluids is by the color of your urine. If it’s pale yellow or clear, good job! If it’s gold, drink more.
07_640180-ch02.indd 1907_640180-ch02.indd 19 8/27/10 10:38 PM8/27/10 10:38 PM
20 Part I: Eating Right with Every Bite
In addition to dark urine, other signs of dehydration include
✓ Parched mouth
✓ Dry skin
✓ Fatigue
Water is certainly the best thing to drink. If you don’t like the taste of water, try adding some lemon or lime juice or a sugar-free flavoring packet. Try to stay away from fruit juice because it can lead to dumping syndrome, which is discussed later in this section. Juice can also sabotage weight loss because it contains a lot of sugar and calories. If you must drink fruit juice, limit yourself to about four ounces a day and dilute it 50/50 with water.
If you love coffee, tea, or carbonated beverages, you’re going to have to make some changes. The caffeine in coffee, tea, and colas can be dehydrating, and it will be challenging enough to stay hydrated as it is. Go for decaffeinated tea or coffee, and don’t add calorie-laden cream and sugar. A little skim milk and artificial sweetener should be fine. Carbonated beverages are not recommended because they can distend your pouch and lead to uncomfortable gas and bloating.
Just a word about alcohol — don’t. Like the drinks above, alcohol is a diuretic, meaning it has a dehydrating effect on your body. You may also metabolize alcohol differently than you did before surgery. Always check with your surgeon before introducing alcohol into your diet.
Sip fluids slowly and don’t use straws. Drinking too quickly can lead to nausea and a feeling of fullness and even vomiting. Straws can introduce air into your pouch and lead to gas and bloating. (Chewing gum does the same thing.)
Avoiding the dreaded dumping syndromeDumping syndrome is a miserable condition that may happen to those of you who have gastric bypass surgery. Symptoms can range from mild to severe and may include
✓ Nausea
✓ Diarrhea
✓ Light headedness
✓ Cold sweats
✓ Abdominal cramping
✓ Weakness
✓ Fast heartbeat
07_640180-ch02.indd 2007_640180-ch02.indd 20 8/27/10 10:38 PM8/27/10 10:38 PM
21 Chapter 2: What to Expect and What to Eat
Dumping syndrome occurs after you eat foods that are high in sugar, fat, or sometimes dairy, or consume high-calorie liquids. These kinds of foods travel quickly through your pouch and are “dumped” into your small intestine. Doctors believe this triggers a series of hormonal responses that cause you to experience symptoms, sometimes right after eating and sometimes hours later.
Dumping syndrome can last from ten minutes to four hours depending on what and how much you have eaten. Unfortunately, time is the only cure; you can’t take anything to get rid of it. The best suggestion is just to go to bed and ride it out.
Some people may experience less dumping syndrome as time passes. For others, it may be a chronic condition.
If you had GBP, your surgeon can give you recommendations about how much added sugar (as opposed to natural sugar in fruit and dairy) you can safely eat at one time. The following additional guidelines may also help you avoid dumping syndrome:
✓ Avoid foods high in sugar.
✓ Avoid foods high in fat.
✓ Have small, frequent meals.
✓ Increase protein intake.
✓ Increase fiber.
✓ Increase complex carbohydrates.
Most people who experience dumping find it good incentive to follow these guidelines for a while. If these measures don’t help you, let your surgeon and dietitian know.
Figuring out food intolerancesAnyone who has had weight loss surgery has some experience with food intolerances. Unfortunately, there’s no rhyme or reason for who has what intolerances. For some people it’s dairy, for some it’s beef, for some it’s applesauce. You may suddenly be nauseated by something you have eaten all your life. The following foods are commonly not tolerated well:
✓ Meat
✓ Pasta
✓ Doughy bread
✓ Rice
✓ Potatoes
07_640180-ch02.indd 2107_640180-ch02.indd 21 8/27/10 10:38 PM8/27/10 10:38 PM

22 Part I: Eating Right with Every Bite
A food intolerance is not a food allergy. It happens when your pouch is not ready to accept a new consistency or is irritated by the offending food. The most mysterious part of food intolerances is that they often subside — a week or two later you may be able to eat problem foods again. If you discover an intolerance, wait a while and try it again. However, some people find that certain intolerances are more or less permanent.
After surgery, reintroduce yourself to foods one at a time so you may be able to identify what doesn’t sit well. Also, when introducing a new food, eat a very small amount of it. The best way to avoid intolerances is to take it slow and stick to the phases of your diet as instructed by your dietician.
Easing Back into Eating after Your Weight Loss Surgery
No matter what kind of weight loss surgery you have had, the size of your new pouch limits the amount of food you can eat at one time. Before surgery, your stomach was approximately the size of your fist, with the ability to expand and stretch. After surgery, your pouch is much smaller and may only hold a few ounces of food at one time. If you have had GBP, your pouch is about the size of an egg. It cannot stretch like your old stomach, so because your food intake is limited, the food that enters your pouch needs to be nutritious.
Since you have just had stomach surgery, you need to let your insides heal. In order to facilitate this healing, you progress through four stages of a recommended postsurgery diet. The diet stages give your pouch time to heal and adjust without putting strain on it. You don’t want to get food stuck that would cause you to vomit and run the risk of tearing the sutures your surgeon has made. Although no diet rules are set in stone, there are general nutrition recommendations written by bariatric medical professionals that most surgeons follow. The length of time you’re instructed to follow each stage of the diet depends on the type of weight loss surgery you had and your surgeon’s specific instructions.
You may also find that you don’t have much of an appetite at first. If you had AGB surgery, you may find yourself getting hungry by about two weeks after surgery. This is because the swelling around the band has gone down. If you had GBP surgery, it may be weeks or months before you start to feel hunger.
07_640180-ch02.indd 2207_640180-ch02.indd 22 8/27/10 10:38 PM8/27/10 10:38 PM
23 Chapter 2: What to Expect and What to Eat
Following your surgeon’s guidelinesEvery surgeon’s schedule for getting you back to “real” food may be a little different. Their instructions are based on research, best practices, and personal experience. Although this book and other sources can give you good guidelines, it’s important that you follow the directions your surgeon gives you.
Why is this important? You probably have heard over and over that your surgery is a tool in your weight loss journey. Hopefully, you wouldn’t try to build a house without the right tools and a blueprint to show you how to complete your project. Your surgery is the tool you need, and the surgeon’s guidelines are like the blueprint to success. They work together to help you achieve your goal without banging your thumb too many times!
Your surgeon’s guidelines will have very specific instructions regarding the kinds and textures of liquids or foods you’re allowed at each stage of your recovery, based on what kind of surgery you had. Remember, your body is healing for the first six to eight weeks after surgery. Some of the very good reasons for paying attention to these directions are to
✓ Lessen the chance of an obstruction caused by eating food you’re not ready for or too large a particle
✓ Decrease your chances of nausea, vomiting, diarrhea, and dumping syndrome
✓ Keep you well hydrated
✓ Prevent vitamin and mineral deficiencies
✓ Reduce your risk of developing protein calorie malnutrition
✓ Ensure you lose weight and look and feel great!
Your surgeon will probably require you to return to his office for a series of postoperative visits (no, not just one) during the first year and then annually after that. Keeping these appointments is important even if you think you’re doing fine. You need to have ongoing monitoring of your weight loss, lab values to detect possible vitamin or mineral deficiencies, and nutrition intake and a chance to address other medical concerns you or your surgeon may have.
07_640180-ch02.indd 2307_640180-ch02.indd 23 8/27/10 10:38 PM8/27/10 10:38 PM
24 Part I: Eating Right with Every Bite
Eating and adding foods step by step Different types of foods and liquids empty from your pouch at different rates.
One of the most important things to remember from now on is the more solid the food, the longer it stays in your pouch, and the longer the food stays in your pouch, the longer you feel full. Even though your head may tell you that you’re ready for solids, your pouch can’t handle the strain until enough time has passed. Your dietitian can help you with the guidelines and make your transition through each stage of the diet easier.
Following is a quick rundown of the four dietary stages (we go into more specifics on each stage in the remaining sections of this chapter):
✓ Stage 1, Clear Liquids: In this context, a clear liquid is one you can see through, without added sugar, carbonation, or caffeine. You’re in this stage for the first few days after surgery.
Your surgeon lets you know when you can move to the next stage.
✓ Stage 2, Full Liquids: A full liquid diet consists of food that pours off a spoon and has no added sugar, is low fat, and has no lumps.
You usually follow this stage for one to two weeks or as directed by your surgeon.
✓ Stage 3, Smooth Foods: Smooth foods, also called puréed foods, have no lumps but sit on the plate without running all over. You want foods with no sugar added and low fat.
The length of time you’re on this stage varies greatly among surgeons. Always follow your doctor’s orders since she knows best for your circumstances. If you have complications from the surgery, you may be on this stage longer than usual.
✓ Stage 4, Soft Foods: Soft foods are solid foods that you can mash with a fork. You still don’t want to run the risk of getting too-solid pieces of food stuck or have problems with vomiting, so these foods are well cooked, not too chewy, and in small pieces, like ground meat instead of a chunk of meat. The same rules apply to this stage as the others: no added sugar, and low fat.
You eat soft foods for at least two weeks. This amount of time depends on the kind of surgery you have had (GBP patients may stay on this stage a little longer) and how well you tolerated what you ate in the previous stage.
Don’t push through the diet stages too fast. Your pouch and head need time to adjust. You will have fewer problems like nausea, vomiting, and food sticking if you take your time. Some people are anxious to eat normally again, but you need to develop a new normal.
07_640180-ch02.indd 2407_640180-ch02.indd 24 8/27/10 10:38 PM8/27/10 10:38 PM

25 Chapter 2: What to Expect and What to Eat
Even with the same type of surgery, some people are able to move to the next diet stage sooner than others, so try not to compare yourself to someone else who had surgery. Remember to always follow your doctor’s orders.
Stage 1: Clear LiquidsInitially, while you’re recovering in the hospital, you’re fed ice chips and possibly clear liquids. You may be a little nauseated, and the liquids minimize the risk of vomiting (which you definitely want to avoid at this point). Generally, you’re on clear liquids only a day or two.
What you can eatBasically, clear liquids are just liquids you can see through. Water immediately comes to mind, but several other liquids qualify as well:
✓ Thin, pulp-free juices that have been diluted 50/50 with water (orange juice and tomato juice are not allowed at this stage)
✓ Clear beef, chicken, or vegetable broth (look for high-protein broth)
✓ Clear sugar-free gelatin
✓ Sugar-free ice pops
✓ Decaf coffee and tea (even though you can’t see through coffee, it’s allowed)
✓ Sugar-free, noncarbonated fruit drinks
✓ Flavored sugar-free, noncarbonated waters
✓ Clear liquid sugar-free supplements
Clear liquid tipsClear liquids tend to be better tolerated either at room temperature or warm. Remember, sip, sip, sip! Try to drink 2 or 3 ounces every 30 minutes. Strive for 48 to 64 ounces of liquid each day.
Measuring liquids is easy if you ask your nurse to give you a cup with measurements marked. The hospital staff tracks how much you drink as well and will have measuring cups on hand. Take a cup home and use it until your diet is advanced. If you feel nauseated while drinking, stop and let a nurse know.
07_640180-ch02.indd 2507_640180-ch02.indd 25 8/27/10 10:38 PM8/27/10 10:38 PM
26 Part I: Eating Right with Every Bite
Sample menu for a clear-liquid dietThe following sample menu shows what you may consume in a day during Stage 1:
✓ Breakfast
• Apple juice diluted 50/50 with water
• Chicken broth
• Sugar-free gelatin
• Decaf coffee
✓ Snack
• Clear liquid sugar-free supplement
✓ Lunch
• Beef broth
• Sugar-free gelatin
• Decaf tea
• Sugar-free ice pop
✓ Snack
• Clear liquid sugar-free supplement
✓ Dinner
• Chicken broth
• Sugar-free flavored water
• Sugar-free ice pop
• Sugar-free gelatin
✓ Snack
• Clear liquid sugar-free supplement
You won’t have much of an appetite after surgery, but don’t worry if a nurse brings you a tray with a lot of liquids on it. It’s just to give you some variety; you’re not meant to drink all of them. As long as you stay hydrated, just drink what you comfortably can.
In this stage, your focus is on staying hydrated. It may seem strange not to be receiving food, but you’ll only be in this stage a day or two. Your surgeon will let you know when to progress to the next stage.
07_640180-ch02.indd 2607_640180-ch02.indd 26 8/27/10 10:38 PM8/27/10 10:38 PM
27 Chapter 2: What to Expect and What to Eat
Being sugar savvyWe mention sugar-free food numerous times in the diet guidelines, but it can be difficult to determine if a food is truly sugar free. Always check ingredient labels, and in addition to the word sugar, be on the lookout for sugar’s many aliases:
✓ Honey
✓ Dextrin/dextrose
✓ High fructose corn syrup
✓ Fructose
✓ Glucose
✓ Sucrose
✓ Galactose
✓ Fruit juice concentrate
✓ Cane syrup
✓ Lactose
✓ Maltose
✓ Turbinado
✓ Brown sugar
✓ Molasses
Some sweeteners known as sugar alcohols have fewer calories than sugar but may produce gas, bloating, and diarrhea. They are may be listed as
✓ Mannitol
✓ Sorbitol
✓ Xylitol
✓ Maltitol
✓ Isomalt
Using sugar substitutes in moderation is perfectly okay. They tend to be low in calories, but remember that just because a food has a sugar substitute doesn’t mean it’s lower in calories than foods that contain sugar. If sugar is taken out of a product, it’s often replaced with fat, so make sure you read nutrition labels carefully. Some popular sugar substitutes include
✓ Acesulfame-K
✓ Aspartame
✓ Saccharin
✓ Sucralose
✓ Tagatose
✓ Stevia
Watch out for the terms sugar free and no added sugar. There’s a big difference! Sugar free means just that — it has no sugar. Think diet soda or diet (sugar-free) gelatin. No added sugar doesn’t necessarily mean it has no sugar. Some foods, like fruit, have natural sugar, which is why you have to dilute fruit juice 50/50 with water, particularly if you are a bypass patient (though it’s a good idea for everyone in terms of calories avoided).
Stage 2: Full LiquidsFull liquids are foods that are liquid or semi-liquid at room temperature and you can’t see through. These foods should pour off a spoon (not just fall off in a lump). If you’re tolerating clear liquids, your surgeon may approve full liquids as soon as the second day after surgery.
Eat slowly, listen to your body, and stop eating before you are full. Eating past this point may result in nausea and/or vomiting. Remember that it typically takes 20 minutes for your brain to register that your stomach is full. The quicker you eat, the less opportunity it has to register in your brain that you’re satisfied.
07_640180-ch02.indd 2707_640180-ch02.indd 27 8/27/10 10:38 PM8/27/10 10:38 PM
28 Part I: Eating Right with Every Bite
How long you remain on full liquids varies among surgeons, but generally it’s one to three weeks. Remember to follow your surgeon’s and dietitian’s instructions.
What you can eatFollowing are some foods you can eat when you’re in the full-liquid stage:
✓ All liquids from the clear-liquid phase. Get half of your fluid intake from clear liquids.
✓ Low-fat strained or puréed soups.
✓ Cooked cereals that have been thinned and are a soupy consistency.
✓ All juices (remember to dilute fruit juice 50/50 with water).
✓ Skim or 1 percent milk; plain, low-fat soy milk; or buttermilk (or lactose-free milk if you’re lactose intolerant).
✓ Sugar-free custards or puddings.
✓ Sugar-free hot chocolate.
✓ Protein shakes and powder with at least 10 grams of protein per 100 calories, fewer than 3 grams of fat per 100 calories, and fewer than 12 grams of carbohydrate per serving.
✓ Light yogurt with no added sugar (no fruit on the bottom).
Full liquid tipsAt this stage, reinstate mealtime. Even if you don’t consider full liquids real food, make mealtime special. Sit down at the table with your family, turn off the television, and really be mindful of what you’re eating.
Your pouch is able to tolerate about 2 ounces of full-liquid foods at each meal in this stage. Remember, this is 2 ounces by volume, not by weight! Little medicine cups work great to help you portion your meal. Take 20 to 30 minutes to finish your 2-ounce liquid meal. Keep in mind that you may need to consume a lot of small meals a day and constantly sip clear liquids between meals to get enough fluids (48 to 64 ounces a day).
Following are tips to help keep you healthy and feeling good in the full-liquid stage:
✓ Eat (well, drink) slowly. Take about 30 minutes to finish your meal.
✓ Liquids at room temperature or warm may be easier to tolerate.
07_640180-ch02.indd 2807_640180-ch02.indd 28 8/27/10 10:38 PM8/27/10 10:38 PM
29 Chapter 2: What to Expect and What to Eat
✓ Use a cup with measurements to track your intake, and don’t use straws.
✓ Use a baby spoon and put it down between bites of food to help you eat slowly.
✓ To fortify the protein content of full liquids, mix in a small amount of powdered nonfat milk or protein powder.
You can even fortify milk with powdered nonfat milk. Mix 1⁄3 cup powdered skim milk into 8 ounces of nonfat milk before drinking or using in soups or pudding.
✓ Prepare any puddings, soups, and so on with nonfat milk to maximize protein and minimize fat and calories.
✓ Use only protein powder or shakes containing fewer than 3 grams of fat, fewer than 12 grams of carbohydrate, and at least 10 grams of protein per 100 calories.
✓ Get in the habit now of keeping a food diary. (See the sidebar “Food diary = weight loss success.”)
✓ Take your multivitamin and any other supplements your surgeon or dietitian has recommended. Make this a lifelong habit.
Another habit to begin: protein supplements. As you consume fluids in between your meals, focus on meeting your protein needs. Your dietitian will help you establish a daily protein goal based on your specific needs. You can also find out more about protein supplements in Chapter 4.
Food diary = weight loss successFood diaries are a great tool for weight loss and weight loss surgery recovery for the following reasons:
✓ Food diaries make you more aware of what you eat and the quantity of food you eat. If you get in the habit of writing down every morsel, you’re less likely to mindlessly graze.
✓ Food diaries can be important in figuring out which foods you’re not tolerating well. If you note any symptoms, you can check out your diary and find trends (“Oh yes, I felt bad the last time I ate cauliflower, too”).
✓ Food diaries make it easy to show your surgeon and dietitian what you’ve been
eating if you reach a plateau or begin to lose weight too rapidly.
✓ The best reason of all? Research shows that people who write down what they eat lose more weight than people who don’t.
Your diary doesn’t have to be anything fancy; it can be a little notebook or you can purchase a food diary from a bookstore. You can also choose from many online tracking programs as well as applications for smartphones (check out Chapter 3 for more details). Just find what works for you and make it a habit.
07_640180-ch02.indd 2907_640180-ch02.indd 29 8/27/10 10:38 PM8/27/10 10:38 PM
30 Part I: Eating Right with Every Bite
Sample menu for a full-liquid dietYour top priority right now is to stay hydrated. Make sure you get 48 to 64 ounces of fluid each day, 24 to 32 ounces of clear liquid and the remaining 24 to 32 ounces of full liquids. Your meals should not measure more than 2 ounces of food.
✓ Breakfast
• Cooked wheat cereal made with skim milk
• Sugar-free light yogurt (no fruit on bottom)
✓ Snack
• Low-carb protein supplement
✓ Lunch
• Cream of tomato soup made with nonfat milk
• Light yogurt with no added sugar (no fruit on bottom)
✓ Snack
• Low-carb protein supplement
✓ Dinner
• Strained cream of mushroom soup made with nonfat milk
• Mashed potatoes thinned with nonfat milk
✓ Snack
• Low-carb protein supplement (if needed to meet protein needs)
Stage 3: Smooth FoodsCongratulations, you’re on your way to “real” food! If you’re at this stage, your surgeon has determined you’re healing well and tolerating the full-liquid phase of your recovery plan. Smooth foods (also known as puréed foods) are foods that have been put through the blender or food processor to smooth them out. You may follow this phase for up to four weeks depending on your surgeon’s recommendations.
What you can eatYou can enjoy some very soft normal foods again. In addition to the liquids you have enjoyed up until now, you can add things like
07_640180-ch02.indd 3007_640180-ch02.indd 30 8/27/10 10:38 PM8/27/10 10:38 PM
31 Chapter 2: What to Expect and What to Eat
✓ Blended low-fat cottage cheese (great source of protein!)
✓ Blended scrambled eggs
✓ Blended cooked vegetables
✓ Mashed or blended bananas
✓ Mashed potatoes made with skim milk
✓ Silken tofu
✓ Sugar-free applesauce
✓ Blended meats
✓ Low-fat ricotta cheese
You still can’t consume large amounts of food. More than likely, you can only eat about 1⁄4 cup at once if you had gastric bypass, or 1⁄4 to 1⁄2 cup if you have a band.
Make sure your stomach is ready for this volume increase by increasing portions slowly. Listen to your body!
Preparing puréed mealsYou need to blend or food process most of your smooth foods to make them the right consistency. This is a bit of an art, and you may experience difficulty getting the right consistency at first. Should you need to thicken foods, you can add things like
✓ 1 tablespoon mashed potato flakes
✓ 1 tablespoon nonfat powdered milk
✓ 1 tablespoon instant grits
✓ 1 tablespoon instant rice cereal
✓ 1 to 11⁄2 tablespoons unflavored gelatin or sugar-free gelatin
✓ Commercial thickeners (ask your pharmacist or support-group friends about the commercial thickeners they recommend)
If the consistency is too thick, you can thin with
✓ Nonfat milk
✓ Water
✓ Vegetable juice
✓ Broth
Invest in a food processor for smooth foods. You’ll enjoy a much nicer result.
07_640180-ch02.indd 3107_640180-ch02.indd 31 8/27/10 10:38 PM8/27/10 10:38 PM
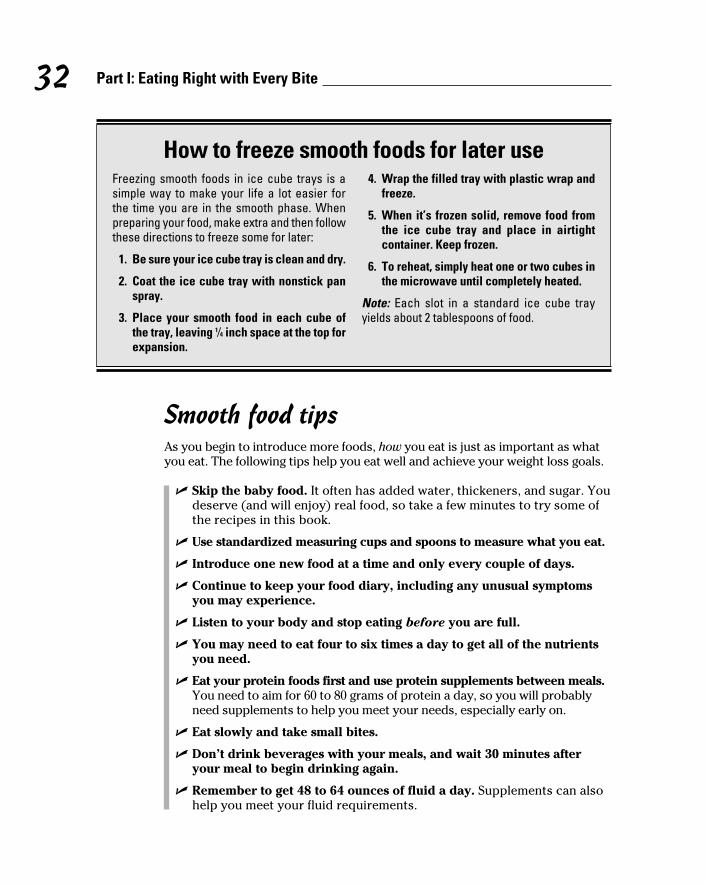
32 Part I: Eating Right with Every Bite
Smooth food tipsAs you begin to introduce more foods, how you eat is just as important as what you eat. The following tips help you eat well and achieve your weight loss goals.
✓ Skip the baby food. It often has added water, thickeners, and sugar. You deserve (and will enjoy) real food, so take a few minutes to try some of the recipes in this book.
✓ Use standardized measuring cups and spoons to measure what you eat.
✓ Introduce one new food at a time and only every couple of days.
✓ Continue to keep your food diary, including any unusual symptoms you may experience.
✓ Listen to your body and stop eating before you are full.
✓ You may need to eat four to six times a day to get all of the nutrients you need.
✓ Eat your protein foods first and use protein supplements between meals. You need to aim for 60 to 80 grams of protein a day, so you will probably need supplements to help you meet your needs, especially early on.
✓ Eat slowly and take small bites.
✓ Don’t drink beverages with your meals, and wait 30 minutes after your meal to begin drinking again.
✓ Remember to get 48 to 64 ounces of fluid a day. Supplements can also help you meet your fluid requirements.
How to freeze smooth foods for later useFreezing smooth foods in ice cube trays is a simple way to make your life a lot easier for the time you are in the smooth phase. When preparing your food, make extra and then follow these directions to freeze some for later:
1. Be sure your ice cube tray is clean and dry.
2. Coat the ice cube tray with nonstick pan spray.
3. Place your smooth food in each cube of the tray, leaving 1⁄4 inch space at the top for expansion.
4. Wrap the filled tray with plastic wrap and freeze.
5. When it’s frozen solid, remove food from the ice cube tray and place in airtight container. Keep frozen.
6. To reheat, simply heat one or two cubes in the microwave until completely heated.
Note: Each slot in a standard ice cube tray yields about 2 tablespoons of food.
07_640180-ch02.indd 3207_640180-ch02.indd 32 8/27/10 10:38 PM8/27/10 10:38 PM

33 Chapter 2: What to Expect and What to Eat
✓ Because you’re able to eat only limited amounts, you need to eat nutrient-rich foods. In other words, you want to get the most nutritional bang for your calorie buck.
✓ Continue to stick with foods that are low fat and sugar free.
✓ Use small plates and utensils to control portions.
✓ Take your multivitamins and any other supplements your surgeon or dietitian has recommended.
Sample menu for a smooth-food dietYou have many more options in this stage, which means it’s easier to meet your nutritional needs (especially protein). Focus on using foods to meet your needs and only use supplements to fill in the gaps. The following sample menu shows what you may eat in a typical day:
✓ Breakfast
• No-sugar-added yogurt
• Unsweetened applesauce
✓ Snack
• Low-carb protein supplement
✓ Lunch
• Cream of tomato soup made with nonfat milk
• Blended chicken moistened with chicken broth
• Blended green beans
• Sugar-free pudding
✓ Snack
• Low-carb protein supplement
✓ Dinner
• Blended meatballs with beef broth
• Mashed potatoes made with nonfat milk
• Fat-free gravy
• Blended carrots
• Sugar-free applesauce
✓ Snack
• Sugar-free pudding made with fortified nonfat milk or low-carb protein supplement (if needed to meet protein needs)
07_640180-ch02.indd 3307_640180-ch02.indd 33 8/27/10 10:38 PM8/27/10 10:38 PM
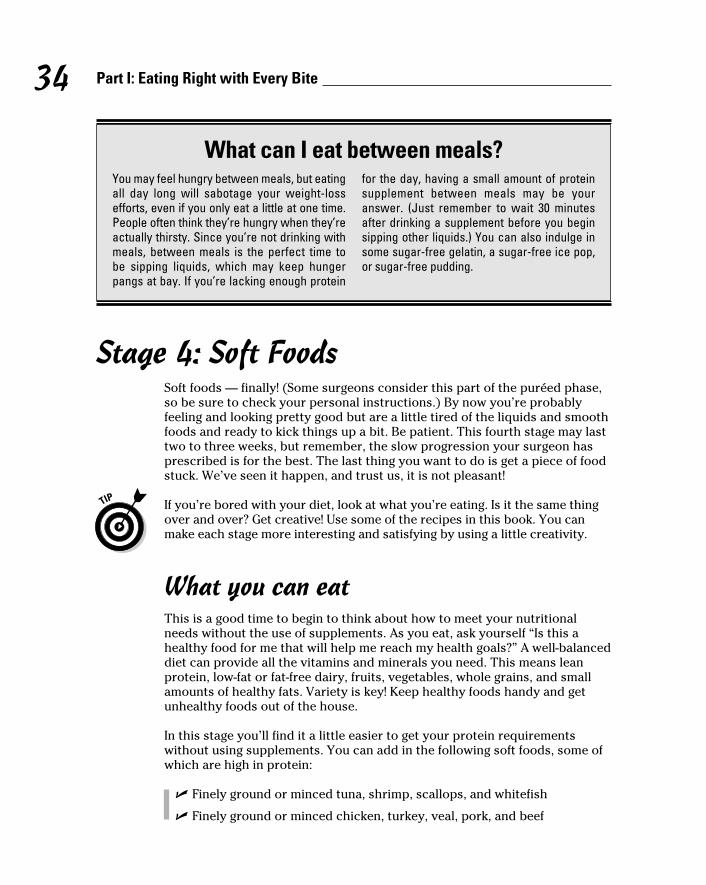
34 Part I: Eating Right with Every Bite
Stage 4: Soft FoodsSoft foods — finally! (Some surgeons consider this part of the puréed phase, so be sure to check your personal instructions.) By now you’re probably feeling and looking pretty good but are a little tired of the liquids and smooth foods and ready to kick things up a bit. Be patient. This fourth stage may last two to three weeks, but remember, the slow progression your surgeon has prescribed is for the best. The last thing you want to do is get a piece of food stuck. We’ve seen it happen, and trust us, it is not pleasant!
If you’re bored with your diet, look at what you’re eating. Is it the same thing over and over? Get creative! Use some of the recipes in this book. You can make each stage more interesting and satisfying by using a little creativity.
What you can eatThis is a good time to begin to think about how to meet your nutritional needs without the use of supplements. As you eat, ask yourself “Is this a healthy food for me that will help me reach my health goals?” A well-balanced diet can provide all the vitamins and minerals you need. This means lean protein, low-fat or fat-free dairy, fruits, vegetables, whole grains, and small amounts of healthy fats. Variety is key! Keep healthy foods handy and get unhealthy foods out of the house.
In this stage you’ll find it a little easier to get your protein requirements without using supplements. You can add in the following soft foods, some of which are high in protein:
✓ Finely ground or minced tuna, shrimp, scallops, and whitefish
✓ Finely ground or minced chicken, turkey, veal, pork, and beef
What can I eat between meals?You may feel hungry between meals, but eating all day long will sabotage your weight-loss efforts, even if you only eat a little at one time. People often think they’re hungry when they’re actually thirsty. Since you’re not drinking with meals, between meals is the perfect time to be sipping liquids, which may keep hunger pangs at bay. If you’re lacking enough protein
for the day, having a small amount of protein supplement between meals may be your answer. (Just remember to wait 30 minutes after drinking a supplement before you begin sipping other liquids.) You can also indulge in some sugar-free gelatin, a sugar-free ice pop, or sugar-free pudding.
07_640180-ch02.indd 3407_640180-ch02.indd 34 8/27/10 10:38 PM8/27/10 10:38 PM
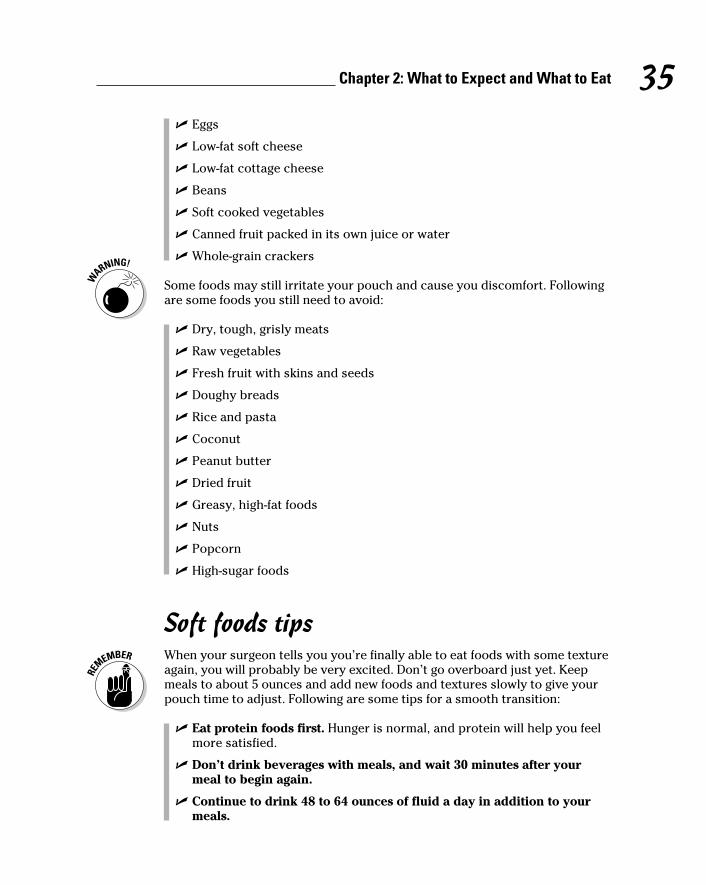
35 Chapter 2: What to Expect and What to Eat
✓ Eggs
✓ Low-fat soft cheese
✓ Low-fat cottage cheese
✓ Beans
✓ Soft cooked vegetables
✓ Canned fruit packed in its own juice or water
✓ Whole-grain crackers
Some foods may still irritate your pouch and cause you discomfort. Following are some foods you still need to avoid:
✓ Dry, tough, grisly meats
✓ Raw vegetables
✓ Fresh fruit with skins and seeds
✓ Doughy breads
✓ Rice and pasta
✓ Coconut
✓ Peanut butter
✓ Dried fruit
✓ Greasy, high-fat foods
✓ Nuts
✓ Popcorn
✓ High-sugar foods
Soft foods tips When your surgeon tells you you’re finally able to eat foods with some texture
again, you will probably be very excited. Don’t go overboard just yet. Keep meals to about 5 ounces and add new foods and textures slowly to give your pouch time to adjust. Following are some tips for a smooth transition:
✓ Eat protein foods first. Hunger is normal, and protein will help you feel more satisfied.
✓ Don’t drink beverages with meals, and wait 30 minutes after your meal to begin again.
✓ Continue to drink 48 to 64 ounces of fluid a day in addition to your meals.
07_640180-ch02.indd 3507_640180-ch02.indd 35 8/27/10 10:38 PM8/27/10 10:38 PM
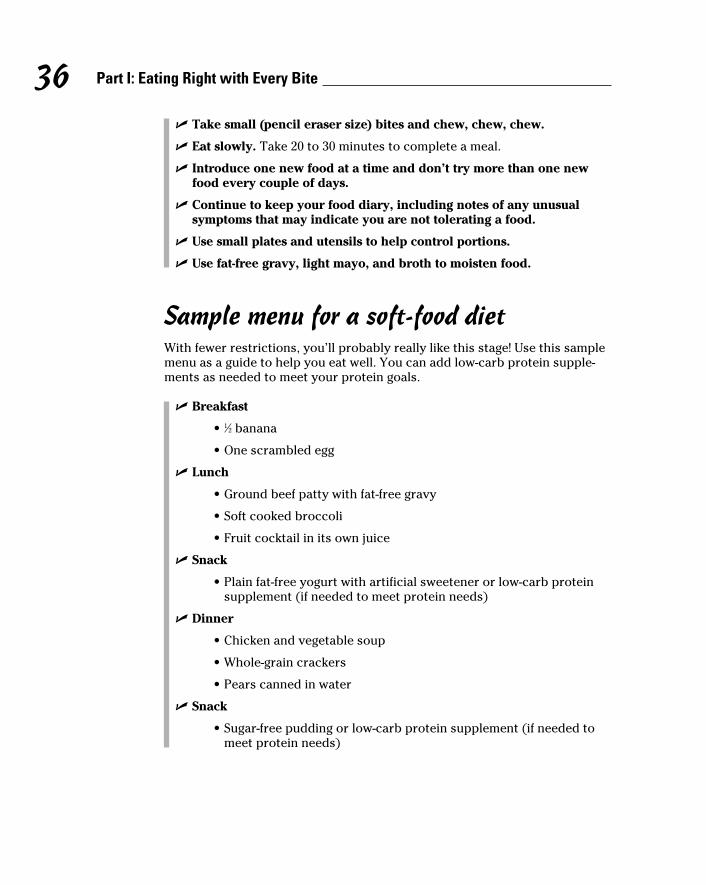
36 Part I: Eating Right with Every Bite
✓ Take small (pencil eraser size) bites and chew, chew, chew.
✓ Eat slowly. Take 20 to 30 minutes to complete a meal.
✓ Introduce one new food at a time and don’t try more than one new food every couple of days.
✓ Continue to keep your food diary, including notes of any unusual symptoms that may indicate you are not tolerating a food.
✓ Use small plates and utensils to help control portions.
✓ Use fat-free gravy, light mayo, and broth to moisten food.
Sample menu for a soft-food dietWith fewer restrictions, you’ll probably really like this stage! Use this sample menu as a guide to help you eat well. You can add low-carb protein supple-ments as needed to meet your protein goals.
✓ Breakfast
• 1⁄2 banana
• One scrambled egg
✓ Lunch
• Ground beef patty with fat-free gravy
• Soft cooked broccoli
• Fruit cocktail in its own juice
✓ Snack
• Plain fat-free yogurt with artificial sweetener or low-carb protein supplement (if needed to meet protein needs)
✓ Dinner
• Chicken and vegetable soup
• Whole-grain crackers
• Pears canned in water
✓ Snack
• Sugar-free pudding or low-carb protein supplement (if needed to meet protein needs)
07_640180-ch02.indd 3607_640180-ch02.indd 36 8/27/10 10:38 PM8/27/10 10:38 PM
Chapter 3
Maintaining Healthy Eating for Life
In This Chapter▶ Respecting your pouch
▶ Knowing how much is too much
▶ Making every calorie count
▶ Keeping a food diary
▶ Figuring out how fast food can be a reality
By having weight loss surgery, you have made a lifelong commitment to taking very good care of yourself. This may not be something you’re
accustomed to doing. Not only does your diet affect what goes on the outside, it also definitely affects what is going on inside, and because you can’t eat as much as before, what you do eat is much more important. Making sure you get all the nutrients you need takes some work. By understanding a little about nutrition and applying what you know, you’ll feel better, look better, have more energy, and perhaps get off some of those medications you have been on for years. No one said it’s easy, but following a nutrition plan can make a world of difference in how you feel about yourself.
Everyone who has had weight loss surgery is different, and what affects one person may not affect the next. And unfortunately, sometimes finding the best plan is a matter of trial and error. If you find you have questions (as you most certainly will), call your surgeon, bariatric coordinator, or dietitian, even if your question arises long after your surgery. The bariatric team is there to support you successfully through this process. And if your surgeon requires you do to things a little differently than what we say in this book, always follow her instructions.
This chapter has all the nitty-gritty of what you need to know about eating a well-balanced diet in the correct portions. It also tells you about some of the tools you need to help you achieve your goals. If you’re like us, you lead a very busy life and need to know how to make good choices and even eat at a fast food place occasionally. Because this is a lifelong commitment, you need to know how to eat for the rest of your life. So let’s get going!
08_640180-ch03.indd 3708_640180-ch03.indd 37 8/27/10 10:39 PM8/27/10 10:39 PM
38 Part I: Eating Right with Every Bite
Following the Cardinal Rule: Your Pouch Rules
So you’re back to eating “real” food again. Think it will be like it was before surgery? Think again! You’re going to find that you frequently answer to your pouch, even now that it has healed. Eat too much and your pouch will rebel. Eat too fast and your pouch will let you know. Don’t chew your food thoroughly and woe be to you! You had the surgery to create this new phenomenon called your pouch, and it demands your respect.
While that may sound harsh, your pouch is also the tool that will help you finally reach your weight loss goals. If you take good care of it and treat it right, it will be your new best friend!
If you had adjustable gastric banding, your weight loss will be somewhat slower than for someone who had gastric bypass. Don’t blame your pouch; it’s just the nature of the surgery. In some ways, if you have a band you have to work a little harder than someone who had bypass surgery. You won’t experience dumping syndrome (discussed in Chapter 2) when you eat something too sugary or fatty, and you can pretty much continue to eat the foods you ate before surgery, just in smaller amounts, more frequently. Hence, without the physical limitations of someone with gastric bypass, it becomes very important that you stay focused on your goals and be diligent about tracking the calories you put into your body each and every day.
Keeping your pouch from overstretchingImmediately after surgery, your pouch is about the size of an egg and holds about one to two ounces of food, but it does stretch over time. The key is not to stretch it so much that you sabotage your weight loss efforts. To make sure you don’t stretch it out too much or too fast, you need to
✓ Eat only three small meals a day and one to two snacks. You’ll find your energy level is higher and you won’t be so ravenous at dinner if you have an afternoon snack. Be sure to read the Chapter 18 on snacking and making good choices.
✓ Eat slowly so you don’t overfill the pouch. Try to take 20 to 30 minutes to eat your meals (remember, it takes 20 minutes for your brain to register that you have had your fill!).
✓ Remember that constant snacking even in small amounts (otherwise known as grazing) may not stretch out the pouch but certainly can inhibit weight loss. Those calories add up quickly!
08_640180-ch03.indd 3808_640180-ch03.indd 38 8/27/10 10:39 PM8/27/10 10:39 PM
39 Chapter 3: Maintaining Healthy Eating for Life
Avoiding angering your pouchEver heard the expression “try to fit a square peg into a round hole”? When you find yourself nauseated or vomit after eating, you’ve tried to do the same thing. You may have committed one of the following no-no’s:
✓ Eaten too much. We discuss portion sizes in the later section “Being Mindful of Portion Sizes.”
✓ Eaten too fast. Put your utensil down between bites. Learn to savor your food and don’t be rushed. Take 20 to 30 minutes to eat a meal.
✓ Not chewed your food thoroughly enough. Chew each bite 25 to 30 times to a puréed consistency. Otherwise, chunks of food can get stuck. Trust us, this is very uncomfortable!
✓ Continued drinking with meals. Stop drinking 5 to 10 minutes before you eat to make sure the pouch is empty and wait about 30 minutes after you eat to begin again. If your pouch is full of liquids, you won’t be able to eat. Drinking too soon after a meal may overfill the pouch.
✓ Experienced a food intolerance. This is very individual and can be frustrating. Introduce each new food one at a time so you know which food you didn’t tolerate if you don’t feel well later. Wait a few weeks and reintroduce the food. The following foods may give you a problem:
• Stringy or dry meat
• Bread or biscuits, especially if made from white flour
• Pasta, especially if made from white flour
• Rice, especially white rice
• Peanut butter
• Membranes of citrus fruits and vegetables
• Peels, seeds, cores, and skins of fruits
• Fibrous vegetables such as corn, celery, spaghetti squash
• Nuts
• Popcorn
• Coconut
• Greasy or fried foods
• High-fat meats such as sausage, bacon, bologna
• Carbonated beverages
Texture can be an issue with intolerances. You may be able to tolerate finely chopped celery in a recipe but munching on a celery stick causes problems. Be sure to follow recipe directions in this book closely.
08_640180-ch03.indd 3908_640180-ch03.indd 39 8/27/10 10:39 PM8/27/10 10:39 PM
40 Part I: Eating Right with Every Bite
What if you do experience nausea or vomiting? Stop eating and drinking until the feeling passes. If you’re vomiting to the point where you can’t keep down water, call your surgeon immediately.
Being Mindful of Portion SizesPortion size is key to your weight loss efforts. We often find that people basically know what to eat but just eat too much of it. For example, you probably know that olive oil is much healthier than lard. But did you know that each has the same number of calories — about 135 calories per tablespoon? So more isn’t better just because something is good for you!
The advantage you now have is that your pouch will let you know when you have eaten too much (of course, by then it may be too late and you may feel nauseated). By having to slow down your eating, you will tend to eat less. To help you eat slowly, try the following tips:
✓ Take pencil-eraser-size bites of food.
✓ Use smaller utensils, such as infant spoons and forks and salad plates to help control portions.
As you learn to savor your food and are more aware of your eating, really listen to your body and stop when you are satisfied. You may need to relearn how to do this. While you’re eating, ask yourself frequently, “Am I still hungry?” By eating more slowly, you reach the point of satisfaction and are able to recognize it before you get too full. Do not keep eating until you are stuffed.
Your dietitian may provide you with menu suggestions. You may want to follow these for a while until you get the hang of meal planning, at which time you can get creative with foods you like. Many foods can be adapted to lower fat or lower sugar versions that promote weight loss if consumed in the correct portions. This book provides many easy, tasty, healthy recipes that you will want to try.
Use the bariatric food guide pyramid (shown in Figure 3-1) to help you design your own menus in the recommended portion size. Remember, the portion sizes are recommended as the limit. Listen to your body and stop when you are satisfied!
08_640180-ch03.indd 4008_640180-ch03.indd 40 8/27/10 10:39 PM8/27/10 10:39 PM
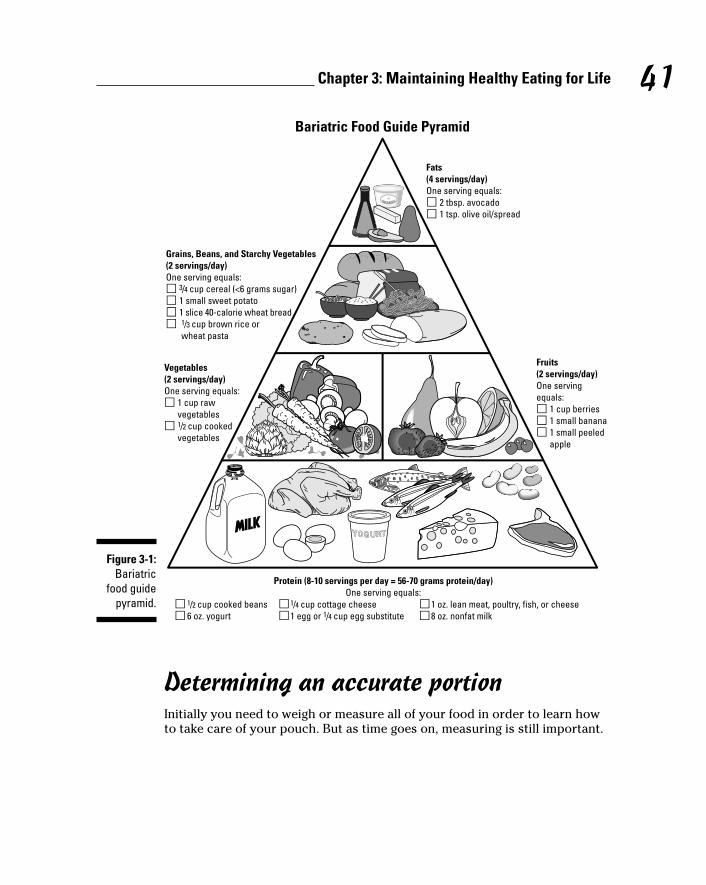
41 Chapter 3: Maintaining Healthy Eating for Life
Figure 3-1: Bariatric
food guide pyramid.
Bariatric Food Guide Pyramid
Protein (8-10 servings per day = 56-70 grams protein/day)One serving equals:
Vegetables(2 servings/day)One serving equals:
1 cup rawvegetables1/2 cup cookedvegetables
Fruits(2 servings/day)One servingequals:
1 cup berries1 small banana1 small peeledapple
Grains, Beans, and Starchy Vegetables(2 servings/day)One serving equals:
3/4 cup cereal (<6 grams sugar)1 small sweet potato1 slice 40-calorie wheat bread 1/3 cup brown rice or wheat pasta
Fats(4 servings/day)One serving equals:
2 tbsp. avocado1 tsp. olive oil/spread
1/2 cup cooked beans 1/4 cup cottage cheese 1 oz. lean meat, poultry, fish, or cheese6 oz. yogurt 1 egg or 1/4 cup egg substitute 8 oz. nonfat milk
Determining an accurate portionInitially you need to weigh or measure all of your food in order to learn how to take care of your pouch. But as time goes on, measuring is still important.
08_640180-ch03.indd 4108_640180-ch03.indd 41 8/27/10 10:39 PM8/27/10 10:39 PM

42 Part I: Eating Right with Every Bite
Researchers estimate that most people underestimate their portion sizes by as much as 25 percent, which can really add up. Stay honest with yourself about the calories you take in. A time will come when you think you know what 3⁄4 cup of cereal looks like in your bowl and you don’t have to measure each time. We strongly recommend measuring every time you can. However, should you become that confident, at least check yourself periodically to make sure you’re not experiencing the dreaded “portion creep.” And if you eat from a bowl that measures one cup, it will be easier to monitor portion sizes.
Sometimes it isn’t feasible to measure or weigh your foods (like when you go out to eat). Here’s a guide so that you can visualize what a portion looks like:
✓ 1 cup cereal = a baseball
✓ 1⁄2 cup cooked or raw vegetables = a baseball
✓ 1 ounce or 2 tablespoons avocado or peanut butter = a golf ball
✓ 1 tablespoon olive oil, salad dressing, or mayonnaise = a poker chip
✓ 3 ounces chicken or meat = a deck of cards
✓ 3 ounces fish = a checkbook
✓ 1 slice of bread = a cassette tape
✓ 1 baked or sweet potato = a computer mouse
Estimating the size of your mealsThe Japanese have a saying: hara hachi bunme, which means “eat until you are 80 percent full.” If you take smaller bites, eat slower, and use internal cues instead of external ones, you’ll enjoy your food more and feel satisfied sooner.
Your surgeon or dietitian will recommend a calorie level for you to adhere to, and it varies from practitioner to practitioner. Men may be put on a general level of 1,300 to 1,500 calories and women at 1,200 to 1,400, or your surgeon may have you breathe into a small machine to see how many calories you actually require a day. Whatever the case, follow the recommendation.
You may also be given a meal plan to follow. While some plans require only three meals a day, some include two or three small snacks. A typical menu with three snacks may look something like this:
08_640180-ch03.indd 4208_640180-ch03.indd 42 8/27/10 10:39 PM8/27/10 10:39 PM
43 Chapter 3: Maintaining Healthy Eating for Life
✓ Breakfast
• 1⁄2 small banana
• 1 scrambled egg
• 1⁄2 slice whole-grain toast
• 1 teaspoon margarine
✓ Midmorning snack
• Protein shake or 1 cup skim milk
✓ Lunch
• 2 ounces baked fish
• 1 small sweet potato
• 1⁄2 cup green beans
• 1⁄2 apple
✓ Midafternoon snack
• Protein shake or 1⁄2 cup sugar-free, fat-free pudding
✓ Dinner
• 3 ounces chicken
• 1⁄3 cup brown rice
• 1⁄2 cup stir-fry vegetables prepared with 1 teaspoon olive oil
• 1⁄2 cup berries
✓ Evening snack
• 6 ounces sugar-free, fat-free yogurt
Some plans don’t allow any pasta, rice, bread, or potatoes — ever. Again, please follow your surgeon and dietitian’s recommendations.
No liquids are included in the meals. To keep from overfilling your pouch, you need to continue to observe the “no drinking with meals” rule. Stop at least 5 to 10 minutes before you eat and do not drink for 30 minutes after you finish.
You may also have noticed there is no junk food in the menu. Remember, because you can’t eat as much, it is very important that the foods you eat are nutrient rich. Foods like the ones in the menu above give you more nutrition bang for your calorie buck!
08_640180-ch03.indd 4308_640180-ch03.indd 43 8/27/10 10:39 PM8/27/10 10:39 PM

44 Part I: Eating Right with Every Bite
You are not required to finish your meals. Listen to your body and don’t eat until you feel pressure or fullness in your chest or abdomen, signaling you may be ready to vomit.
You may have times when you simply aren’t hungry (and you may really enjoy that feeling), but don’t skip meals or forget to eat. You need to get enough nutrients so you stay healthy. And believe it or not, not eating enough can also slow down your weight loss. When you don’t eat enough calories, your body goes into self-preservation mode and becomes much more efficient at hanging on to the fat it already has.
Making Wise Food ChoicesBy now you’re realizing that you’re limited in the amount of food you can eat. To be able to eat well without overeating, select nutrient-rich foods, including fruits, vegetables, whole grains, lean protein, and low-fat or fat-free dairy, which deliver the most nutrition for the fewest calories. To do this, you must read labels. You need to know what a portion (or serving) of the food is (no, it is not the whole bag in most cases) and how many calories and which nutrients there are in a portion.
After all, which is going to be better for you: a 60-calorie apple or 60 calories worth of jelly beans? Before you eat something, just ask yourself the following questions:
✓ Is this particular food going to move me toward my weight loss goal?
✓ Is this food good for my body?
Consider your personal financial budget. You have a limited amount of money, just like you have an optimal amount of calories you consume a day. Everyone wants to get the most for their money. Same thing with calories — you want the most nutrition you can get for the calories you have to “spend” each day. Your weight loss success and good health depends on how much nutrition you can get for your calorie dollar.
On the opposite end of the health spectrum from nutrient-rich foods are foods and beverages that are considered empty calories. These foods include things like chips, candy, cookies, pastries, and high-calorie beverages, including alcohol. Besides the fact that you don’t get many nutrients (but a lot of calories) from these foods, they’re likely to contribute to dumping syndrome (go back to Chapter 2 for more on dumping syndrome).
08_640180-ch03.indd 4408_640180-ch03.indd 44 8/27/10 10:39 PM8/27/10 10:39 PM

45 Chapter 3: Maintaining Healthy Eating for Life
Another concept you need to consider when making menu choices is variety. When thinking about meeting your nutritional needs, select different foods each day, because different foods provide different nutrients. You may drink milk for calcium and protein but be neglecting meat, which is high in iron (and milk is not). Strawberries are high in vitamin C, but apricots are high in vitamin A. Remember, variety is the spice of life!
When putting together a healthy, varied diet, you need to know some basic food facts. The following sections give you need-to-know info on protein, carbohydrates, and fats, the core breakdown of any diet. We also discuss fiber, a key ingredient in the recipe for health and weight loss.
The building blocks of nutritionThe foundation of your diet comes from protein, carbohydrates (carbs), and fats. These are known as macronutrients and provide the calories in your diet. Each of the macronutrients contributes to health in its own way. Keep in mind, many foods contain combinations of protein, carbs, and fats, so you may see some of the same foods discussed in each of the following sections.
There has been a lot of discussion in recent years about diet. Are carbs bad? Should we eat more protein? Less protein? Is fat good or bad? The truth of the matter is that we need all three — protein, carbs, and fats.
In light of the surgery you have had, it’s vital that you have a basic under-standing of nutrition and apply it to your daily life in order to decrease risk of malnutrition, feel good, look good, and have lots of energy. In this section we discuss the nuts and bolts of good nutrition so that you know what to choose to eat, and not just how much.
Eating protein firstIn your pre-op surgery class or visit with the surgeon you heard all the reasons protein is important. Probably all you recall at this point is “If I don’t eat enough protein, I’ll lose my hair!” (Hair loss can also occur as a result of the surgery.) Protein is important for many other reasons, though — so important that it’s the base of the bariatric food guide pyramid (refer to Figure 3-1 earlier in this chapter). Protein-containing food contributes nutrients such as zinc, B vitamins, phosphorous, selenium, thiamine, iron, and magnesium, and helps your body do the following things:
✓ Heal after surgery
✓ Build muscle
08_640180-ch03.indd 4508_640180-ch03.indd 45 8/27/10 10:39 PM8/27/10 10:39 PM
46 Part I: Eating Right with Every Bite
✓ Contract your muscles
✓ Maintain healthy blood
✓ Maintain a healthy immune system
✓ Have more energy
✓ Feel full longer
Without adequate protein, your body will develop a deficiency called protein malnutrition (PM). This results in your body breaking down its own muscle for energy (not a good thing), weakness, anemia, and of course hair loss.
Your surgeon and dietitian will give you a level of protein they want you to strive for each day. In general, this is anywhere from 60 to 80 grams a day. Some people tolerate protein better than others after surgery. While getting your nutrients from real food is best, using protein supplements will likely be necessary, especially if you don’t tolerate protein foods well. (We discuss protein supplements in the later section “Meeting your protein goal with supplements.”)
Good sources of proteinSo what do you eat to get this all-important protein? Well, you get protein from a variety of foods, the best sources being animal products. The protein in plants is found in smaller amounts and isn’t as high quality. The following list shows you sources of protein and the amount of protein you can expect to get. For packaged goods, comparison shop to find the option with the highest amount of protein.
✓ Meat, fish, and poultry* (7 grams per ounce)
✓ Cheese (be sure it is low fat or fat free)* (7 grams per ounce)
✓ Eggs* (7 grams each)
✓ Yogurt (again, low fat or fat free and no added sugar )* (12 grams per cup)
✓ 1 percent or fat-free milk* (12 grams per cup)
✓ Tofu* (7 grams per ounce)
✓ Legumes (beans) (7 grams per 1⁄2 cup)
✓ Nuts and seeds (4 grams per 1⁄4 cup)
✓ Soy milk* (12 grams per cup)
✓ Vegetables (2 grams per 1⁄2 cup cooked)
✓ Whole grains (3 grams per serving)
✓ Cottage cheese* (7 grams per 1⁄4 cup)
✓ Nut butters (7 grams per 2 tablespoons)
*Sources of high-quality protein
08_640180-ch03.indd 4608_640180-ch03.indd 46 8/27/10 10:39 PM8/27/10 10:39 PM
47 Chapter 3: Maintaining Healthy Eating for Life
Protein tipsProtein is so important that half of your plate at each meal should be protein and you should eat it first.
Eat 15 to 20 grams of protein at each meal, which is about 2 to 3 ounces. Your protein for the day should equal about 30 percent of your daily calories.
When eating proteins like meat, be sure you take very small bites, and chew, chew, chew! Make sure the meat is very moist and not stringy. Dry, stringy, inadequately chewed food can stick causing problems.
Make sure you know what the correct portion size is for the food you’re eating and look at the nutrition facts to see how many grams of protein are in that serving. If there’s no nutrition label, you can look up the information on the Internet. Then record the amount of protein you consume at each meal or snack in your food diary.
Checking out carbsAre carbs good or bad? Well, they can be either. The right kinds are definitely good for you. Many people have the misconception that all carbs make you gain weight. Too much of anything can contribute to weight gain, but carbs like soda pop, candy, and cookies are particularly bad. These empty calorie foods provide calories but few nutrients.
Going for healthy carbsCarbs are necessary for energy for both the body and brain. Without adequate carbs, your thinking may be fuzzy and you may feel sluggish and tired. Healthy carbs are good sources of vitamins A and C, potassium, folate, iron, magnesium, selenium, calcium, and B vitamins like thiamine and riboflavin. Carbs also provide fiber, antioxidants, and phytochemicals necessary for good health. Healthy carbs include the following foods:
Protein-filled snack ideasOf all of the macronutrients (protein, carbs, and fats), protein is the most satiating and will make you feel full longer. Pretty good reason to eat your protein, isn’t it? Include some source of protein at each meal and snack. A snack may consist of:
✓ String cheese and an apple
✓ Peanut butter and whole-grain crackers
✓ Cottage cheese and fruit
✓ Whole-grain cereal and low-fat or fat-free milk
Be sure to check out Chapter 18 for good snacking ideas.
08_640180-ch03.indd 4708_640180-ch03.indd 47 8/27/10 10:39 PM8/27/10 10:39 PM
48 Part I: Eating Right with Every Bite
✓ 100 percent whole-grain bread
✓ Brown rice
✓ Fruits
✓ Vegetables
✓ Low-fat or fat-free dairy
✓ Beans
✓ Whole-grain cereals
✓ Whole-wheat pasta
Carbs should equal about 40 to 50 percent of your daily calories. Your goal is to consume a minimum of 100 grams a day.
Staying away from added sugarsWhen you read labels you see the category Sugars. These sugars count as carbs, and they may include natural sugars found in healthy carbs (like the lactose in milk and fructose in fruit) as well as added or simple sugars. You need to look at the ingredient label to see if the food has added sugar, in which case, avoid it. Check out Chapter 2 for all of sugar’s aliases.
Interestingly, many foods you wouldn’t suspect, such as ketchup, barbeque sauce, pasta sauce, and bread, have added sugar in them. The next time you go to the grocery store, inspect ingredient labels for added sugar before adding foods to your cart.
Besides increasing your calorie intake, eating too much sugar may cause the dreaded dumping syndrome. While not everyone experiences dumping syndrome (generally only gastric bypass patients), the resulting diarrhea, nausea, and shakiness will make an anti-added-sugar believer out of you. (Refer back to Chapter 2 for a refresher on dumping syndrome.)
Getting the skinny on fatsLike carbs, fat has been given a bad name. In fact, we need some healthy fat in our diet. Too much fat, though, especially saturated and trans fats, not only sabotages your weight loss but also can increase your risk for chronic disease.
Without adequate fat in your diet you’ll experience the following outcomes:
✓ Your hair and nails will be brittle and dry.
✓ Your skin will be dry.
✓ You may develop deficiencies of some of the fat-soluble vitamins.
08_640180-ch03.indd 4808_640180-ch03.indd 48 8/27/10 10:39 PM8/27/10 10:39 PM
49 Chapter 3: Maintaining Healthy Eating for Life
✓ You may develop deficiencies of essential fatty acids (ones you have to ingest through food).
✓ You’ll have less energy when you need it.
The key is too eat enough of the right fats. What do we mean by “the right fats”? You may have heard terms like monounsaturated, polyunsaturated, saturated, and trans fats. These terms have to do with the chemical makeup of the fat, which affects how your body uses it. Saturated and trans fats are not good for you, but monounsaturated and polyunsaturated are considered “heart healthy” fats. Read on to find out how and why to incorporate healthy fats into your diet.
Sources of healthy fatsThe following foods are good sources of healthy monounsaturated and polyunsaturated fats:
✓ Olive oil
✓ Canola oil
✓ Peanut oil
✓ Avocados
✓ Vegetable oils (safflower, sesame, soybean, corn, and sunflower)
✓ Nuts and seeds, especially walnuts and ground flaxseed
✓ Fatty fish, such as sardines, salmon, and mackerel
These fats help prevent heart disease by decreasing total cholesterol and LDL (the unhealthy kind of cholesterol in the blood) and increasing HDL (the healthy cholesterol in the blood).
Getting the benefit from heart-healthy fats is not a case of adding them to your current diet. Instead, exchange unhealthy fats already in your diet for some of these heart-healthy fats. It’s also definitely not a case of “if a little will do a little good, a lot will do a lot of good.” Fat is a much more concentrated source of calories than either protein or carbs. Compare the numbers:
✓ Protein has 4 calories per gram.
✓ Carbs have 4 calories per gram.
✓ Fat has 9 calories per gram.
So even with healthy fats you have to watch portion size (particularly if you’re prone to dumping syndrome) and count the calories. Olive oil, a healthy fat, has the same number of calories as lard, which as most people know is not a healthy fat. (Both have 135 calories per tablespoon.) Stick to about 1 teaspoon healthy fat at each meal.
08_640180-ch03.indd 4908_640180-ch03.indd 49 8/27/10 10:39 PM8/27/10 10:39 PM
50 Part I: Eating Right with Every Bite
Identifying unhealthy fatsYou may be asking “How do I know what unhealthy fats are in my diet?” After all, you may or may not be able to see and identify fats in some foods. The types you want to avoid are saturated and trans fats.
Saturated fats are often implicated in increasing your LDL (bad cholesterol) and increase your risk of heart disease. Fats from animal sources are the main sources of saturated fats.
Note: Small amounts of butter are used in some of the recipes in this book. This contributes significantly to the flavor, and per serving it is a very small amount. As with anything, it is important to practice moderation.
Trans fats are predominantly found in processed foods like cookies, crackers, doughnuts, and fried foods. These unhealthy fats come from hydrogenated oils, liquid oils that have been turned solid in order to extend the shelf life of processed foods. It’s the reason why cake-type snacks stay good in your pantry for a very long time. Many manufacturers are now required to list trans fats on nutrition labels. The problem is that a food product can have up to 1⁄2 a gram of trans fat per serving and still be called trans fat free. In order to completely avoid trans fats, you have to read ingredient labels and avoid foods with anything fully hydrogenated or partially hydrogenated.
The following list is some general guideline for trimming unhealthy fats from your diet:
✓ Don’t use fat as a primary seasoning. Learn to use herbs and spices instead.
✓ Trim visible fats.
✓ Use 1 percent or fat-free dairy products.
✓ Replace high-fat foods with lower-fat alternatives (but remember they can still have just as many calories!).
✓ Avoid cream sauces.
✓ Avoid fried foods.
✓ Avoid pastries, cookies, and cakes.
✓ Focus on whole grains, fruits, vegetables, lean protein, low-fat or fat-free dairy, and healthy fats in moderation.
08_640180-ch03.indd 5008_640180-ch03.indd 50 8/27/10 10:39 PM8/27/10 10:39 PM
51 Chapter 3: Maintaining Healthy Eating for Life
Fiber factsFiber is found in plant-derived foods such as whole grains, vegetables, fruits, nuts and seeds, and legumes (beans) and cannot be broken down by the body. As a result, these fibers pass through the body and carry other things off with them. Fiber helps to protect against heart disease, diabetes, and contributes to gastrointestinal (GI) health by preventing constipation and helping to prevent diseases of the GI tract like diverticular disease and colon cancer.
Many people don’t get the 25 to 30 grams of fiber a day recommended by the American Cancer Society. Getting enough fiber is even more difficult after weight loss surgery because you’re eating much smaller amounts of higher-fiber foods. You can find the fiber content (in grams per serving) of a food by looking under Total Carbohydrate on the nutrition label.
Keeping things movingFiber is sorted into two categories: soluble and insoluble. Soluble fiber forms a gel in water and help to protect against heart disease by binding cholesterol and moving it through the body. These fibers also help lower glucose levels.
Soluble fibers are found in the following foods:
✓ Whole grains like oatmeal and barley
✓ Oat bran
✓ Beans and peas
✓ Citrus fruits and apples
✓ Nuts
Insoluble fiber does not form a gel in water. They promote bowel movements and prevent constipation, which can lead to diverticular disease and hemorrhoids. Insoluble fibers are found in the following foods:
✓ Whole grains
✓ Vegetables
✓ Fruit skins
✓ Wheat and corn bran
✓ Seeds and nuts
08_640180-ch03.indd 5108_640180-ch03.indd 51 8/27/10 10:39 PM8/27/10 10:39 PM
52 Part I: Eating Right with Every Bite
Most foods are a combination of both kinds of fiber. An apple is a great example. The skin is a source of insoluble fiber and the inside is loaded with soluble fiber. No wonder the old saying advises you to “eat an apple a day” (just chew them well)!
Besides protecting against heart disease and helping bowel movements, another benefit of fiber is that it can make you feel full longer. Foods with fiber tend to stay in the stomach a little longer, which is why oatmeal makes a hearty breakfast that staves off hunger for hours. Because you don’t feel hungry as often, fiber is a great weight loss tool as well.
You may have trouble with fiber for a while after surgery, and may actually be told to not include fiber in your diet for a while. Let your surgeon and dietitian’s specific recommendations regarding fiber be your guide.
If you suspect you would benefit from a fiber supplement, several supplements are available on the market. Some are flavorless and can be mixed into a food or beverage. Others may be flavored and get mixed into water. Call your surgeon for his or her recommendation in terms of brand and dosage.
Checking out fiber-filled foodsFollow these fiber tips for the best results:
✓ Eat at least five portions of fruits and vegetables per day. You can increase your intake by adding vegetables to pasta sauces and soups and having fruit for dessert or a snack.
✓ Look for breakfast cereals with at least 5 grams of fiber per serving.
✓ Swap white bread for 100 percent whole-grain bread. Avoid breads with the word enriched in the ingredient list.
✓ Try brown rice instead of white rice.
✓ Experiment with less-popular whole grains like quinoa, barley, and bulgur.
✓ Give up white pasta for whole wheat.
✓ Include beans in soup and salads.
When trying to increase your fiber intake, remember that refined processed and refined foods are low in fiber. Consider an apple: A medium apple has 3.3 grams of fiber, a half cup of applesauce has 1.5 grams of fiber, and a half cup of apple juice has a mere 0.1 grams. Whole foods or foods that are closer to their natural state are higher in fiber as well as many other nutrients that are stripped out by the refining process.
A couple of words about increasing the fiber in your diet:
08_640180-ch03.indd 5208_640180-ch03.indd 52 8/27/10 10:39 PM8/27/10 10:39 PM
53 Chapter 3: Maintaining Healthy Eating for Life
✓ Do it slowly. Increase gradually to allow your GI tract to adjust. Increasing fiber quickly results in gas, cramping, and bloating. Very unpleasant!
✓ Make sure you stay well hydrated because fiber absorbs water.
Keeping a Food Diary to Stay On TrackEarlier in the chapter we discuss how your calorie budget is similar to your financial budget. How do you know when you’re out of money (or calories) if you don’t keep track of them? Just a few days of being “overdrawn” on your daily calories can mean the difference between gaining or losing weight.
Research tells us that people who keep track of their calories lose twice as much weight as people who don’t. Seems like a small thing to do, right?
Don’t stop keeping your diary after you have achieved your desired weight loss. Just like the surgery is a tool you have committed to for life, the food diary should also be a lifelong tool to help you maintain the weight loss.
Finding out what’s in it for youTracking calories is definitely an important tool for weight loss and maintenance. By writing down what and how much you eat, you are able to stay aware of your food intake and whether or not you tend to graze. Food diaries can also help you to increase your awareness of why you’re eating. If you write down any emotions you feel when you just want “something to nibble on,” you may decide that rather than a cookie, what you really need is a short nap.
Food diaries also help you to plan what you are going to eat each day. Some people write down what they’re going to eat each day first thing in the morning. After all, if you fail to plan, you plan to fail.
If you experience nausea or vomiting, it can be due to a food intolerance. By tracking what you eat, as well as any symptoms you may be experiencing, you may be able to identify trends. It may be that the last couple of times you drank milk, you became nauseated. If this is the case, wait a couple of weeks and try milk again.
And tracking calories isn’t just for your benefit. If you aren’t achieving optimal weight loss, your surgeon or dietitian will want to see your food diary to see where you may be off track or whether or not you need another fill if you have an adjustable gastric band.
08_640180-ch03.indd 5308_640180-ch03.indd 53 8/27/10 10:39 PM8/27/10 10:39 PM
54 Part I: Eating Right with Every Bite
Choosing and using a food diaryIdeally, a food diary for someone who had weight loss surgery should have the following components:
✓ Time of day
✓ How you feel, both mentally and physically
✓ What food you’re eating
✓ How much food you’re eating
✓ Number of calories
✓ Number of grams of protein
✓ Ounces of water consumed each day
You may also want to include other information, such as if you’ve taken your supplements or exercised.
There are a variety of sources for food diaries. Your surgeon or dietitian may give you a form you can download and print yourself. You can find many logs and journals available at bookstores. Or, if you’re really resourceful, you can customize and create your own. It can be a simple as a small notepad you keep in your purse or pocket.
In addition, there are now many online food diaries for those of you who are computer savvy. Many of them can be customized to meet your individual needs and are really handy, particularly if you use a smartphone or carry a laptop with you throughout the day. Many of these tools are totally free, and others let you try out the tools on a trial basis before paying a monthly fee. Some of the more popular Web sites are:
✓ fitday.com
✓ sparkpeople.com
✓ www.calorieking.com
✓ www.thedailyplate.com
✓ www.obesityhelp.com
If you have had adjustable gastric banding with a LapBand or Realize band, you have access to terrific online monitoring tools through Web sites developed specifically for their patients.
Any of these tools can be effective. The bottom line is to find the tool that works for you — the one that you will use.
08_640180-ch03.indd 5408_640180-ch03.indd 54 8/27/10 10:39 PM8/27/10 10:39 PM
55 Chapter 3: Maintaining Healthy Eating for Life
Fitting In Fast FoodLike most people, you likely lead a very busy life. Between errands, work, and carting kids around, it’s probably inevitable that most of us will find ourselves at the mercy of fast food at some point.
Don’t panic!
Healthy eating is all about making good choices, watching portion sizes, and knowing what’s in the food you’re eating (watch out for sugar and fried foods!). Fortunately, more and more fast food establishments are making it easier to eat more healthfully.
Many fast-food restaurants are making nutritional information available in brochures or on their Web sites. (And as for the ones that don’t make this information available, what are they hiding? It’s up to you to patronize restaurants that will support your weight loss goals with healthy foods choices.) In the meantime, you can go to your local bookstore or take to the Internet to find calorie, carbohydrate, protein, and fat contents of commonly consumed foods. Many of these books (such as The Calorie Counter For Dummies [Wiley]) list chain restaurants by name and are small enough to keep in your purse or car so you have the information at hand.
Most surgeons have a card they can give you identifying you as someone who has had weight loss surgery. By showing the card to restaurant employees, you can order off the kid’s menu or receive smaller portions of entrées.
General tips for surviving the fast-food menu board
Now, what happens if you find yourself standing in line at a fast-food restaurant without nutrition information available? Here are some guidelines you should consider when making good fast-food choices:
✓ Pay attention to the descriptions of foods. Avoid foods that have the words deep fried, creamy, breaded, crispy, and similar words in their descriptions.
✓ The plainer you can eat your food, the better off you will be. Don’t be afraid to ask to have something prepared the way you want it.
• Have them leave off the “special sauce,” full-fat cheese, and mayo.
• Get your salad dressing on the side and dip your lettuce or fork into the dressing.
08_640180-ch03.indd 5508_640180-ch03.indd 55 8/27/10 10:39 PM8/27/10 10:39 PM
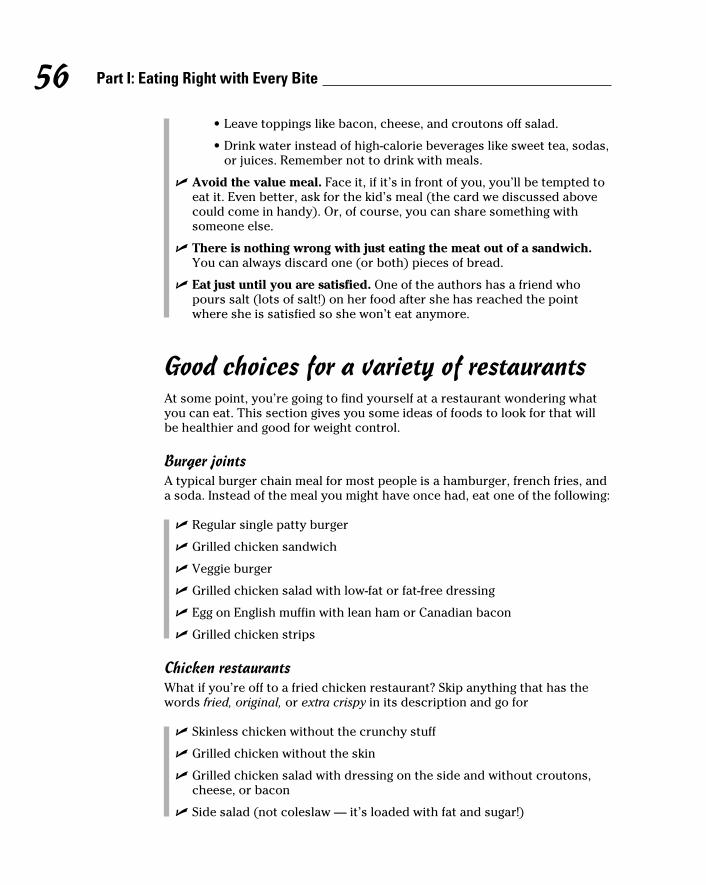
56 Part I: Eating Right with Every Bite
• Leave toppings like bacon, cheese, and croutons off salad.
• Drink water instead of high-calorie beverages like sweet tea, sodas, or juices. Remember not to drink with meals.
✓ Avoid the value meal. Face it, if it’s in front of you, you’ll be tempted to eat it. Even better, ask for the kid’s meal (the card we discussed above could come in handy). Or, of course, you can share something with someone else.
✓ There is nothing wrong with just eating the meat out of a sandwich. You can always discard one (or both) pieces of bread.
✓ Eat just until you are satisfied. One of the authors has a friend who pours salt (lots of salt!) on her food after she has reached the point where she is satisfied so she won’t eat anymore.
Good choices for a variety of restaurantsAt some point, you’re going to find yourself at a restaurant wondering what you can eat. This section gives you some ideas of foods to look for that will be healthier and good for weight control.
Burger jointsA typical burger chain meal for most people is a hamburger, french fries, and a soda. Instead of the meal you might have once had, eat one of the following:
✓ Regular single patty burger
✓ Grilled chicken sandwich
✓ Veggie burger
✓ Grilled chicken salad with low-fat or fat-free dressing
✓ Egg on English muffin with lean ham or Canadian bacon
✓ Grilled chicken strips
Chicken restaurantsWhat if you’re off to a fried chicken restaurant? Skip anything that has the words fried, original, or extra crispy in its description and go for
✓ Skinless chicken without the crunchy stuff
✓ Grilled chicken without the skin
✓ Grilled chicken salad with dressing on the side and without croutons, cheese, or bacon
✓ Side salad (not coleslaw — it’s loaded with fat and sugar!)
08_640180-ch03.indd 5608_640180-ch03.indd 56 8/27/10 10:39 PM8/27/10 10:39 PM
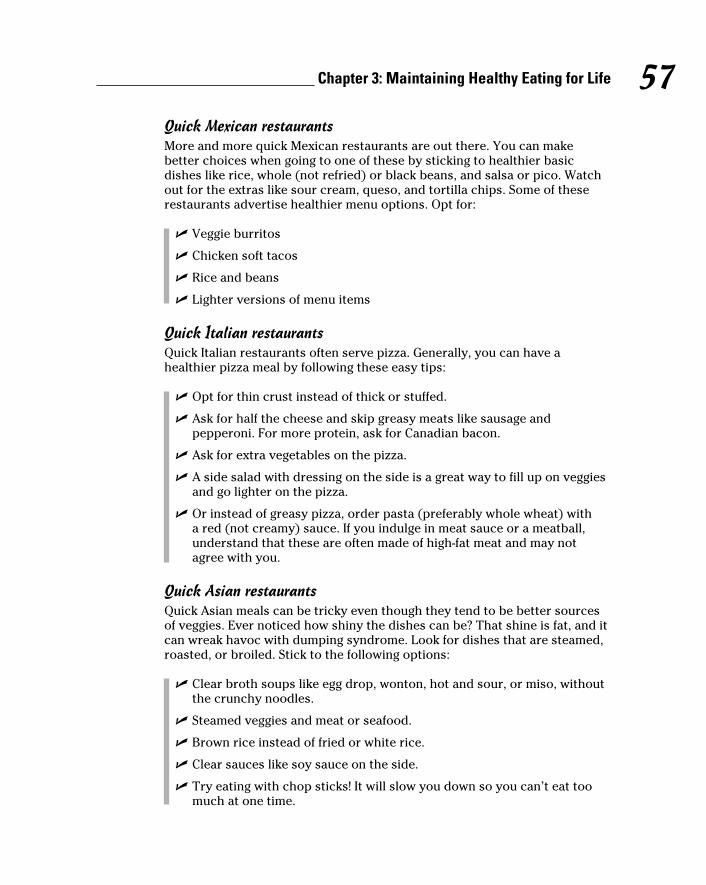
57 Chapter 3: Maintaining Healthy Eating for Life
Quick Mexican restaurantsMore and more quick Mexican restaurants are out there. You can make better choices when going to one of these by sticking to healthier basic dishes like rice, whole (not refried) or black beans, and salsa or pico. Watch out for the extras like sour cream, queso, and tortilla chips. Some of these restaurants advertise healthier menu options. Opt for:
✓ Veggie burritos
✓ Chicken soft tacos
✓ Rice and beans
✓ Lighter versions of menu items
Quick Italian restaurantsQuick Italian restaurants often serve pizza. Generally, you can have a healthier pizza meal by following these easy tips:
✓ Opt for thin crust instead of thick or stuffed.
✓ Ask for half the cheese and skip greasy meats like sausage and pepperoni. For more protein, ask for Canadian bacon.
✓ Ask for extra vegetables on the pizza.
✓ A side salad with dressing on the side is a great way to fill up on veggies and go lighter on the pizza.
✓ Or instead of greasy pizza, order pasta (preferably whole wheat) with a red (not creamy) sauce. If you indulge in meat sauce or a meatball, understand that these are often made of high-fat meat and may not agree with you.
Quick Asian restaurantsQuick Asian meals can be tricky even though they tend to be better sources of veggies. Ever noticed how shiny the dishes can be? That shine is fat, and it can wreak havoc with dumping syndrome. Look for dishes that are steamed, roasted, or broiled. Stick to the following options:
✓ Clear broth soups like egg drop, wonton, hot and sour, or miso, without the crunchy noodles.
✓ Steamed veggies and meat or seafood.
✓ Brown rice instead of fried or white rice.
✓ Clear sauces like soy sauce on the side.
✓ Try eating with chop sticks! It will slow you down so you can’t eat too much at one time.
08_640180-ch03.indd 5708_640180-ch03.indd 57 8/27/10 10:39 PM8/27/10 10:39 PM

58 Part I: Eating Right with Every Bite
Restaurant saladsWhile salads may seem like the perfect choice when eating out, be very careful! Some salads can pack on a whole day’s worth of calories. To stay on plan, really pay attention to the add-ons and follow these tips:
✓ Request low-fat dressing on the side and either dip your fork into the dressing and then pick up the lettuce or dip the lettuce lightly into the dressing. Vinaigrettes are usually a better choice than creamy dressings.
✓ Avoid croutons and bacon and add just a sprinkling of cheese.
✓ Add lean protein like chopped ham, egg, tofu, or beans. You will feel full longer.
✓ Add nutritious vegetables to the salad. Look for beets, tomatoes, sugar snap peas, and green beans.
Frozen dinnersNot going out but still need fast food? Many of us rely on frozen dinners from time to time. Not all frozen meals are created equal, so carefully read nutrition facts labels. You may have to take a little extra time in the frozen food aisle to find a frozen dinner you like that meets your nutritional requirements. Many frozen dinners, though considered “healthy,” rely heavily on starches like pasta and are light on protein. They can be very high in sodium, as well.
Keep these tips in mind when shopping for frozen dinners:
✓ Watch calories. Limit calories to 250 to 350.
✓ Make sure the meal has at least 15 grams of protein.
✓ Choose meals with less than 600 milligrams of sodium.
✓ Make certain the meal has 3 to 5 grams of fiber.
✓ Look for entrées that include lots of vegetables. They’ll be lower in calories and fill you up more.
✓ Choose meals with whole grains or brown rice.
✓ Look for meals with 0 grams trans fat and limit saturated fat to 4 grams.
You can also round out the meal with a side salad or piece of fruit.
Hydration MotivationBefore beginning this section, go pour yourself a glass of water. In a few minutes, you’ll be glad you did!
08_640180-ch03.indd 5808_640180-ch03.indd 58 8/27/10 10:39 PM8/27/10 10:39 PM
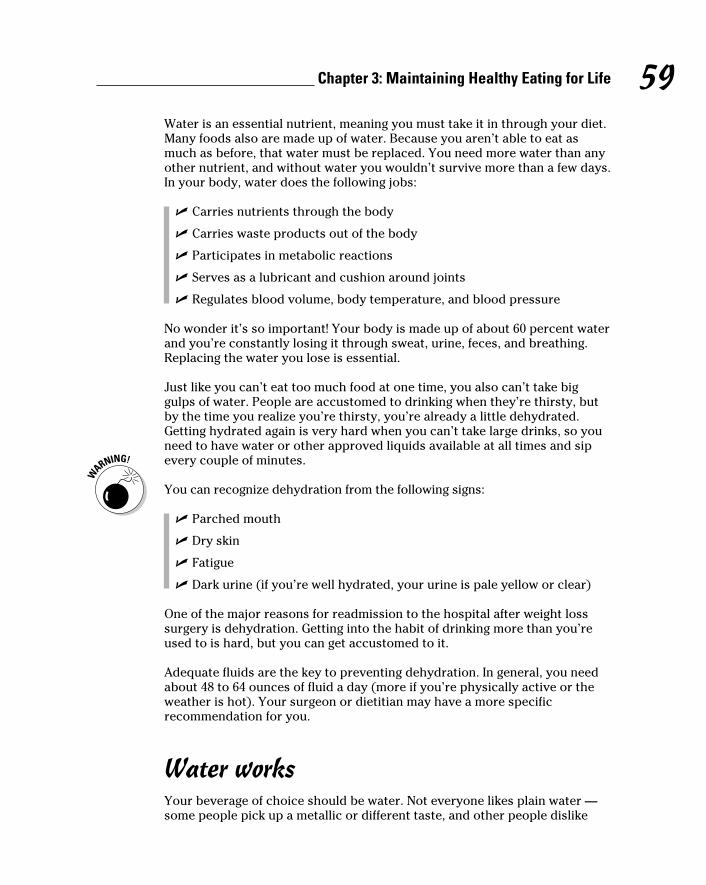
59 Chapter 3: Maintaining Healthy Eating for Life
Water is an essential nutrient, meaning you must take it in through your diet. Many foods also are made up of water. Because you aren’t able to eat as much as before, that water must be replaced. You need more water than any other nutrient, and without water you wouldn’t survive more than a few days. In your body, water does the following jobs:
✓ Carries nutrients through the body
✓ Carries waste products out of the body
✓ Participates in metabolic reactions
✓ Serves as a lubricant and cushion around joints
✓ Regulates blood volume, body temperature, and blood pressure
No wonder it’s so important! Your body is made up of about 60 percent water and you’re constantly losing it through sweat, urine, feces, and breathing. Replacing the water you lose is essential.
Just like you can’t eat too much food at one time, you also can’t take big gulps of water. People are accustomed to drinking when they’re thirsty, but by the time you realize you’re thirsty, you’re already a little dehydrated. Getting hydrated again is very hard when you can’t take large drinks, so you need to have water or other approved liquids available at all times and sip every couple of minutes.
You can recognize dehydration from the following signs:
✓ Parched mouth
✓ Dry skin
✓ Fatigue
✓ Dark urine (if you’re well hydrated, your urine is pale yellow or clear)
One of the major reasons for readmission to the hospital after weight loss surgery is dehydration. Getting into the habit of drinking more than you’re used to is hard, but you can get accustomed to it.
Adequate fluids are the key to preventing dehydration. In general, you need about 48 to 64 ounces of fluid a day (more if you’re physically active or the weather is hot). Your surgeon or dietitian may have a more specific recommendation for you.
Water worksYour beverage of choice should be water. Not everyone likes plain water — some people pick up a metallic or different taste, and other people dislike
08_640180-ch03.indd 5908_640180-ch03.indd 59 8/27/10 10:39 PM8/27/10 10:39 PM
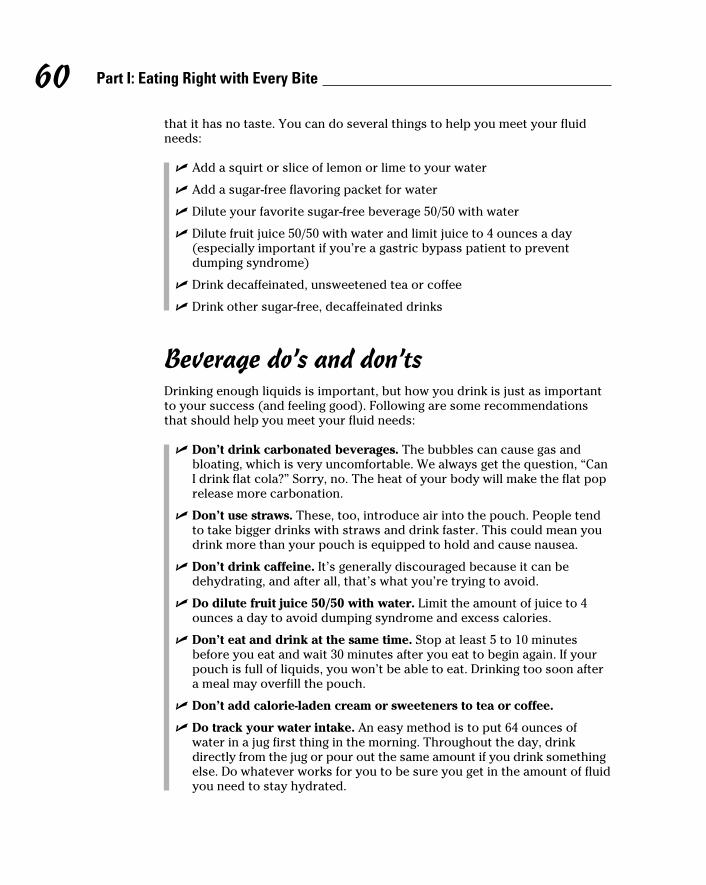
60 Part I: Eating Right with Every Bite
that it has no taste. You can do several things to help you meet your fluid needs:
✓ Add a squirt or slice of lemon or lime to your water
✓ Add a sugar-free flavoring packet for water
✓ Dilute your favorite sugar-free beverage 50/50 with water
✓ Dilute fruit juice 50/50 with water and limit juice to 4 ounces a day (especially important if you’re a gastric bypass patient to prevent dumping syndrome)
✓ Drink decaffeinated, unsweetened tea or coffee
✓ Drink other sugar-free, decaffeinated drinks
Beverage do’s and don’tsDrinking enough liquids is important, but how you drink is just as important to your success (and feeling good). Following are some recommendations that should help you meet your fluid needs:
✓ Don’t drink carbonated beverages. The bubbles can cause gas and bloating, which is very uncomfortable. We always get the question, “Can I drink flat cola?” Sorry, no. The heat of your body will make the flat pop release more carbonation.
✓ Don’t use straws. These, too, introduce air into the pouch. People tend to take bigger drinks with straws and drink faster. This could mean you drink more than your pouch is equipped to hold and cause nausea.
✓ Don’t drink caffeine. It’s generally discouraged because it can be dehydrating, and after all, that’s what you’re trying to avoid.
✓ Do dilute fruit juice 50/50 with water. Limit the amount of juice to 4 ounces a day to avoid dumping syndrome and excess calories.
✓ Don’t eat and drink at the same time. Stop at least 5 to 10 minutes before you eat and wait 30 minutes after you eat to begin again. If your pouch is full of liquids, you won’t be able to eat. Drinking too soon after a meal may overfill the pouch.
✓ Don’t add calorie-laden cream or sweeteners to tea or coffee.
✓ Do track your water intake. An easy method is to put 64 ounces of water in a jug first thing in the morning. Throughout the day, drink directly from the jug or pour out the same amount if you drink something else. Do whatever works for you to be sure you get in the amount of fluid you need to stay hydrated.
08_640180-ch03.indd 6008_640180-ch03.indd 60 8/27/10 10:39 PM8/27/10 10:39 PM
61 Chapter 3: Maintaining Healthy Eating for Life
✓ Do drink before, during, and after exercising. Aim for at least 64 ounces of water if not more each day if you’re exercising (and we hope you are!).
✓ Don’t drink alcohol. A couple of reasons why not to imbibe are
• Alcohol is a diuretic, which means it’s dehydrating.
• Alcohol affects some people who have had gastric bypass surgery very differently than most people. The limited capacity of your pouch means alcohol moves into your small intestine more quickly where it is absorbed faster. It may only take a little alcohol to make you inebriated.
If you really want to enjoy a drink, check with your physician beforehand. Also, never drive after a drink. You may think you feel okay, but your blood alcohol level will tell otherwise. No one wants a DUI!
Supplementing Your DietWe repeatedly bring to your attention the fact that you cannot eat as much as you were able to before (like you didn’t know that, right?). Because of this, the foods you do eat should be nutrient-rich foods to keep you from developing some nutritional deficiencies. Even if you do everything you can to eat a healthy diet, deficiencies may still occur. Generally, this is more likely to occur in patients who had surgeries that affect the absorption of nutrients, such as gastric bypass. However, they can occur in anyone who’s not eating wisely, not eating enough, or not taking supplements.
Even with a well-balanced diet, taking a supplement like a multivitamin is necessary. Others supplements may be required as well based on your own particular needs. Keeping your follow-up appointments is vital so that your surgeon has a chance to monitor your nutrient levels and determine what your changing needs are. Deficiencies aren’t obvious until they’re severe enough to manifest physically, so by keeping your appointments and getting your lab work done as ordered, they can be identified early and treated.
Any supplements your surgeon prescribes are a requirement, not a recommendation. After all, you went through all the trouble of having the surgery to feel better, so why not feel the best you can?
08_640180-ch03.indd 6108_640180-ch03.indd 61 8/27/10 10:39 PM8/27/10 10:39 PM
62 Part I: Eating Right with Every Bite
Discovering what vitamins and minerals can do for youVitamins and minerals play a huge role in your health. They regulate the following body functions:
✓ Appetite
✓ Nutrient absorption
✓ Hunger
✓ Metabolic rate
✓ Fat and sugar metabolism
✓ Energy storage
You can see that vitamins and minerals are necessary not only for good health, but also for weight loss.
Vitamins and minerals must be taken in through diet or supplementation. Getting as many nutrients as you can in your food is preferable, but getting them through supplements is much better than nothing. The nutrients in foods are used more efficiently by your body. Supplements often consist of binders and fillers that your body doesn’t need or use. And food tastes better!
MultivitaminsWhen looking for a multivitamin, it’s essential that you read labels carefully and consider the following points:
✓ Time-release and enteric coated vitamins are not recommended for weight loss surgery patients.
✓ Children’s vitamins are not recommended because they don’t have all the vitamins and minerals you need.
✓ Several specialized bariatric formulas are available, and your surgeon may have a brand preference.
For about the first month after surgery, chewable or liquid vitamins are recommended no matter what kind of surgery you had. After the first month, gastric bypass patients may absorb liquid vitamins better than solid or chewable. If bypass patients choose to use tablets, a good rule of thumb is they must be no larger than the eraser of a pencil. If larger, they may be cut or ground (be certain they’re not time release). For convenience sake, chewables may be better than tablets. Chewing breaks them down, making absorption easier. Saliva has some digestive enzymes that also help you absorb the supplement.
08_640180-ch03.indd 6208_640180-ch03.indd 62 8/27/10 10:39 PM8/27/10 10:39 PM
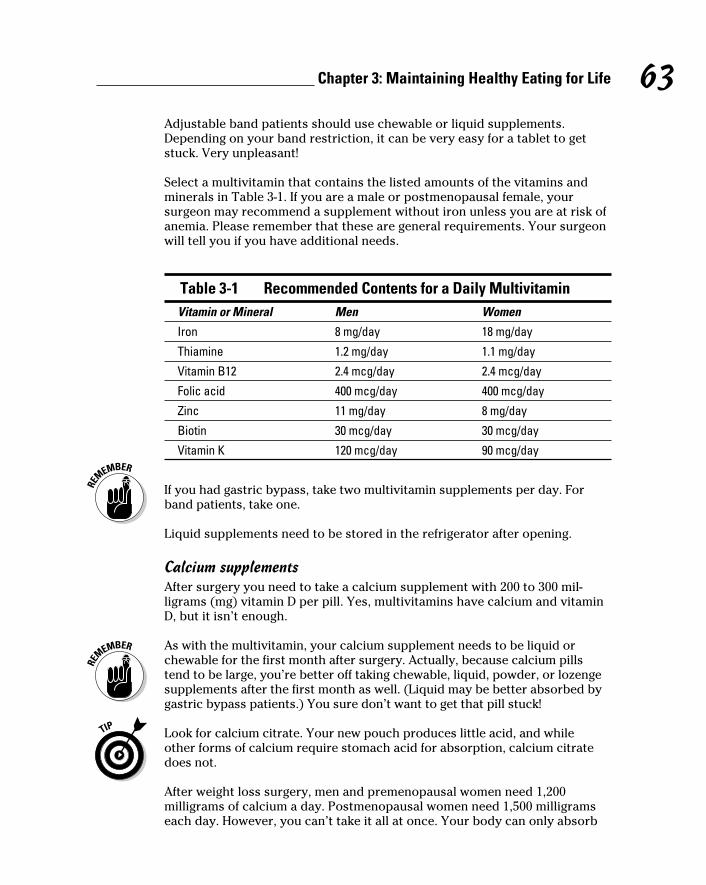
63 Chapter 3: Maintaining Healthy Eating for Life
Adjustable band patients should use chewable or liquid supplements. Depending on your band restriction, it can be very easy for a tablet to get stuck. Very unpleasant!
Select a multivitamin that contains the listed amounts of the vitamins and minerals in Table 3-1. If you are a male or postmenopausal female, your surgeon may recommend a supplement without iron unless you are at risk of anemia. Please remember that these are general requirements. Your surgeon will tell you if you have additional needs.
Table 3-1 Recommended Contents for a Daily Multivitamin
Vitamin or Mineral Men Women
Iron 8 mg/day 18 mg/day
Thiamine 1.2 mg/day 1.1 mg/day
Vitamin B12 2.4 mcg/day 2.4 mcg/day
Folic acid 400 mcg/day 400 mcg/day
Zinc 11 mg/day 8 mg/day
Biotin 30 mcg/day 30 mcg/day
Vitamin K 120 mcg/day 90 mcg/day
If you had gastric bypass, take two multivitamin supplements per day. For band patients, take one.
Liquid supplements need to be stored in the refrigerator after opening.
Calcium supplementsAfter surgery you need to take a calcium supplement with 200 to 300 mil-ligrams (mg) vitamin D per pill. Yes, multivitamins have calcium and vitamin D, but it isn’t enough.
As with the multivitamin, your calcium supplement needs to be liquid or chewable for the first month after surgery. Actually, because calcium pills tend to be large, you’re better off taking chewable, liquid, powder, or lozenge supplements after the first month as well. (Liquid may be better absorbed by gastric bypass patients.) You sure don’t want to get that pill stuck!
Look for calcium citrate. Your new pouch produces little acid, and while other forms of calcium require stomach acid for absorption, calcium citrate does not.
After weight loss surgery, men and premenopausal women need 1,200 milligrams of calcium a day. Postmenopausal women need 1,500 milligrams each day. However, you can’t take it all at once. Your body can only absorb
08_640180-ch03.indd 6308_640180-ch03.indd 63 8/27/10 10:39 PM8/27/10 10:39 PM
64 Part I: Eating Right with Every Bite
about 600 milligrams at once, so calcium supplements usually come in 500 to 600 milligram doses. As such, you need to divide your doses — one in the morning and one at night. (And if you need more calcium, another one in the afternoon.) To maximize absorption, take your calcium supplements a couple of hours before or after your multivitamin supplement.
Your supplement regimen may look something like this:
✓ 8 a.m. calcium supplement
✓ 10 a.m. multivitamin supplement
✓ 8 p.m. calcium supplement
✓ 10 p.m. multivitamin supplement (if you have had bypass surgery)
Other supplementsYour surgeon will tell you what other vitamin and mineral supplements you require and when to take them. The following list gives you an overview of the three most commonly needed supplements:
✓ Vitamin B12: You absorb vitamin B12 when stomach acid releases it from protein foods. Because after surgery you don’t have as much acid production and you’re eating less protein, you may be at risk of a vitamin B12 deficiency. B12 supplements come in a sublingual (under the tongue) form, which is better absorbed than a pill. Alternatively, your surgeon may give you injections of B12.
✓ Iron: Dietary iron comes in two forms:
• Heme iron is found in animal protein and is easily absorbed.
• Nonheme iron is found in many vegetables, fruits, whole grains, and nuts as well as in meat, but it’s not as well absorbed as heme.
Iron deficiency can result in fatigue and lethargy. No one wants that, right? It is fairly common in menstruating women and adolescents. Avoid drinking a lot of tea, because the tannins in tea decrease the absorbability of iron. To increase your natural absorption of nonheme iron, have some form of vitamin C (citrus fruits, tomato, peppers) at each meal. Iron supplements come in tablet or capsule form and should be taken two hours before or after your calcium supplement.
✓ B complex vitamins: B complex vitamins, also called B50 complex, include many B vitamins that are found in a variety of foods including whole grains, fruits and vegetables, meats, and dairy. They’re important in helping your body use carbohydrates, and they play a role in appetite control. Deficiencies of some of the B vitamins, like thiamine, can result in neurological symptoms, some of which may be irreversible. The B vitamins are water-soluble, meaning they are not retained for long lengths of time in your body, and must be replaced frequently.
08_640180-ch03.indd 6408_640180-ch03.indd 64 8/27/10 10:39 PM8/27/10 10:39 PM
65 Chapter 3: Maintaining Healthy Eating for Life
Remember, these supplements are used to supplement (not take the place of) healthy food. They need to be taken as directed for the rest of your life. It’s a requirement, not a recommendation.
Meeting your protein goal with supplementsYou may have difficulty getting in your 60 to 80 grams of protein a day. Remember, when you first start eating after surgery, you can only consume about 2 ounces of food. Even if you choose high-protein foods (like eggs at 3.5 grams per ounce), this is a max of 21 grams of protein a day from your meals. A far cry from what your body needs to heal! In the first few months after surgery, meeting your protein needs from food alone is almost impossible. This is where protein supplements come in. Like multivitamin supplements, these are meant to be used in addition to the healthy proteins you eat.
If you don’t receive adequate protein over time, you’ll experience muscle wasting and weakness, which will sabotage your weight loss efforts. Muscle helps you burn more calories, and if you’re too weak to exercise, you won’t build muscle. (Oh, and did we mention that lack of protein also causes hair loss?)
Taking a look at your optionsA plethora of protein supplements are available. The challenge is finding one that tastes good, has a palatable texture, is affordable, and is the right kind of protein. Some types provide everything you need to maintain lean body mass, but others don’t, so reading labels is very important.
The highest quality protein comes in the form of whey protein. Whey, a liquid byproduct of cheese production, is rapidly digested and absorbed. It doesn’t sit in the stomach very long, so it tends to be well tolerated. Some supplements have whey concentrates or whey isolates. Whey concentrates have a small amount of lactose. If you have a severe lactose intolerance, you may want to look for whey isolates, which are lactose free. Avoid supplements containing collagen, because it’s not a high-quality protein.
Protein supplements come in a variety of forms. You can find shakes, drinks, puddings, bars, teas, and soups. You can also purchase unflavored, odorless protein supplements that you can mix into your food. Because protein supplements can be somewhat expensive, your support group is a great place to find out what other people like without having to incur the expense of trial and error. Some companies send samples to surgery centers so you can try before you purchase.
08_640180-ch03.indd 6508_640180-ch03.indd 65 8/27/10 10:39 PM8/27/10 10:39 PM
66 Part I: Eating Right with Every Bite
Getting enough protein dailyFocus on eating high-quality protein at breakfast, lunch, and dinner when possible. By using a protein supplement once or twice a day in the place of snacks, you can be sure to get enough protein in your diet. Track the grams of protein you consume daily so you’re certain to get the recommended amount of protein based on your specific needs (generally 60 to 80 grams each day).
Like with all types of supplements, protein supplements should not be your whole source of protein. You may be tempted by the seemingly simple solution of meal-replacement supplements and bars. They’re blends of several kinds of protein including whey, casein, and soy, and may have added vitamins and minerals, carbohydrates, fiber, and fat. However, they’re meant to be used as an occasional meal replacement, not on a regular basis as a meal replacement. Real foods provide many more nutrients than a meal replacement bar ever can.
Your dietitian should be able to provide you with a list of appropriate supplements available in local stores. Other protein supplements are manufactured by the same companies who sell specialized supplements and must be ordered. However, more and more surgeons are selling some supplements out of their offices.
08_640180-ch03.indd 6608_640180-ch03.indd 66 8/27/10 10:39 PM8/27/10 10:39 PM
Chapter 4
The Art of Meal PlanningIn This Chapter▶ Finding out the benefits of planning ahead
▶ Exploring how to plan meals
▶ Navigating the grocery store for healthy shopping
▶ Getting acquainted with nutrition and ingredient labels
Ever feel like you’re spinning your wheels where meal planning is concerned? If you’re like many people, you spend a lot of time wandering
around the grocery store but end up
✓ Without the components of a complete meal
✓ Throwing a lot of uneaten food away
✓ With outrageous grocery bills
✓ With a bunch of food in the cart that wasn’t planned for
By spending a little time upfront and then just a few minutes each week in planning, you can have healthy home-cooked meals every day.
You may think you don’t have time to cook, but surely you can make 20 to 25 minutes available. It’s not too much to ask after you have invested in weight loss surgery. Don’t you want to give yourself every opportunity to be successful? You don’t have to entirely give up eating out, but if you take the time to prepare even a few meals each week, you may find the food is better and more satisfying (not to mention easier on the pocket book). A majority of the recipes in this book take 25 minutes or less to prepare. Actual time before serving may take longer because of marinating, baking, or chilling, but the time you have to actively be doing something will be 25 minutes or less.
In this chapter we show you how to plan and organize your meals in order to ensure you’re meeting your nutritional needs and become a smart and efficient grocery shopper. The system we present in this chapter works really well if you give it a chance. Commit to using it for a few weeks. It won’t take long before you’re able to see real time and money savings. Like anything else, it becomes a habit. You are, after all, forming lots of new habits for this new life you have.
09_640180-ch04.indd 6709_640180-ch04.indd 67 8/27/10 10:40 PM8/27/10 10:40 PM
68 Part I: Eating Right with Every Bite
Discovering Why to Plan Ahead“If you fail to plan, you plan to fail.” You’ve probably heard this quote before. In no case is it more appropriate than when you’re planning your meals. If you don’t adequately plan for healthy, quick, and convenient meals, achieving your weight loss goal is going to be very difficult.
No one said this weight loss journey was going to be easy. You didn’t get to the point in your life where surgery was an option by really thinking about what and when you were going to eat a week in advance. Mealtime was probably a “whatever is handy, quick, and cheap” proposition. Planning meals ahead of time may be a foreign concept for many of us who lead busy lives (and who doesn’t these days?).
Not to worry! We’re going to give you the tools to be able to plan meals. It will take a little work at first, but trust us, you will come to love being able to go to the grocery only once a week. Fast food will come to have a whole new meaning! You’ll enjoy having fresh, healthy foods at your fingertips. Eating nutrient-rich foods on a daily basis will give you more energy and time and just make you feel better in general.
You save timeHow much time do you spend each day thinking about what you’re feeding yourself and/or your family? It may be more time than you think. You can make the process much more efficient and take all the guesswork out of each meal by taking a little time one day a week and planning your meals for the week. You no longer spend time wandering the aisles at the grocery store trying to figure out what you want to prepare. There are no more dashes to the store for a forgotten ingredient, and there’s no need to thaw something last-minute for a meal. With planning, it’s already done.
Most families prepare the same seven or so meals over and over. The first thing to do is to write down everything you and your family eat in a typical week. Then examine the list and identify places where you can substitute healthier ingredients, prepare something in a different way, or add more nutritious components for a more balanced diet. Of course, we don’t expect you to completely change everything you eat, but making a number of small changes can add up to big improvements.
Commit to trying new recipes as well (like the ones in this book). You could make Sunday night “new recipe night” at your house and try at least one new recipe each week. Then add to your “library” of menus as you find recipes you and your family like.
09_640180-ch04.indd 6809_640180-ch04.indd 68 8/27/10 10:40 PM8/27/10 10:40 PM
69 Chapter 4: The Art of Meal Planning
Because food companies have listened to consumer input and developed foods that can be prepared quickly, the grocery store has lots of time-saving, convenient foods. However, you have to be very careful to purchase healthy convenience foods. Following are some examples of good choices:
✓ Roasted chicken
✓ Vegetables in bags that can be popped in the microwave
✓ Prepackaged salad greens
✓ Prewashed and chopped fruits and vegetables
✓ Healthy frozen dinners (Low fat, no added sugar, easy on the refined carbs like pasta)
✓ Instant grains
If you post the weekly menu plan somewhere visible, it’s very easy for someone else in your household to take the initiative to begin meal preparation if you get hung up in traffic. Now that is a time saver!
You save moneyIf you go to the grocery store without a list, you’ll be tempted to buy foods that are unhealthy and will go to waste. Going to the store with a list and going only once a week or less will definitely save money. You’ll be more effi-cient in your spending and resist impulse buying. Planning meals also allows you to
✓ Look at the grocery ads to take advantage of bargains.
✓ Utilize leftovers. Sunday night’s leftover pot roast becomes Tuesday night’s barbeque sandwiches.
✓ Make double recipes to stockpile in the freezer for future busy evenings.
✓ Purchase frequently used items in bulk.
You can eat hassle-freeImagine waking up and knowing exactly what you’re going to eat for breakfast and having your lunch and snack already packed for the day. You get home after a long day at work and know exactly what you’re going to prepare for dinner. You put dinner in the oven and have time to go for a walk while it’s cooking. When you get home you make a few last-minute preparations and voilà, dinner is ready! The best part is, everything you need for the day was
09_640180-ch04.indd 6909_640180-ch04.indd 69 8/27/10 10:40 PM8/27/10 10:40 PM
70 Part I: Eating Right with Every Bite
already purchased and you didn’t have to stop at the store on the way home, saving you a lot of extra time.
Sounds good, doesn’t it? Well, by planning your meals ahead of time, this scenario is easy to make reality.
Laying the Groundwork for Meal Planning
This chapter is called “The Art of Meal Planning” because planning meals really is a little like art. It’s all about composition and presentation. The composition of your meals is very important in terms of eating a variety of nutrient-rich foods. You know how important protein is, but just as important are whole grains, fruits and vegetables, low-fat or fat-free dairy, and healthy fats. Each of your meals should be composed of a food from each of these groups.
Have you ever thought of food as beautiful? The next time you go to the grocery store, take a minute in the produce section to look at all of the vibrantly colored fruits and vegetables — reds, oranges, purples, greens, and yellows. Notice the different textures of the skins and leaves. A dinner of grilled chicken breast, mashed potatoes, and cauliflower looks pretty blah, doesn’t it? But if the chicken breast is served with a baked sweet potato and broccoli, the varied colors make it much more appealing.
This section shows you how to examine your regular meals to see how they measure up in nutritional composition and find out where you can improve them to make them a real work of art.
Breaking down your favorite foodsTo get started with healthy meal planning, write down on separate pieces of paper your favorite foods (entrées, sides, desserts, and snacks) that you eat on a weekly basis. If you have a family, enlist their help. Every meal should have all the food groups represented, so on each page, make a checklist:
✓ Protein
✓ Whole grains and starches
✓ Fruits
✓ Vegetables
✓ Healthy fats
✓ Low-fat or fat-free dairy
09_640180-ch04.indd 7009_640180-ch04.indd 70 8/27/10 10:40 PM8/27/10 10:40 PM
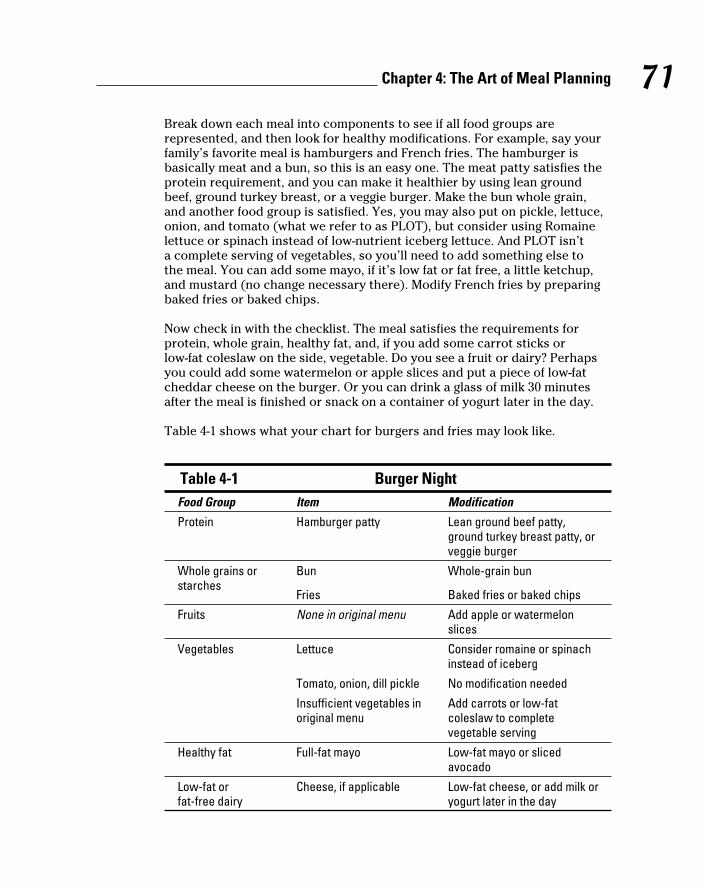
71 Chapter 4: The Art of Meal Planning
Break down each meal into components to see if all food groups are represented, and then look for healthy modifications. For example, say your family’s favorite meal is hamburgers and French fries. The hamburger is basically meat and a bun, so this is an easy one. The meat patty satisfies the protein requirement, and you can make it healthier by using lean ground beef, ground turkey breast, or a veggie burger. Make the bun whole grain, and another food group is satisfied. Yes, you may also put on pickle, lettuce, onion, and tomato (what we refer to as PLOT), but consider using Romaine lettuce or spinach instead of low-nutrient iceberg lettuce. And PLOT isn’t a complete serving of vegetables, so you’ll need to add something else to the meal. You can add some mayo, if it’s low fat or fat free, a little ketchup, and mustard (no change necessary there). Modify French fries by preparing baked fries or baked chips.
Now check in with the checklist. The meal satisfies the requirements for protein, whole grain, healthy fat, and, if you add some carrot sticks or low-fat coleslaw on the side, vegetable. Do you see a fruit or dairy? Perhaps you could add some watermelon or apple slices and put a piece of low-fat cheddar cheese on the burger. Or you can drink a glass of milk 30 minutes after the meal is finished or snack on a container of yogurt later in the day.
Table 4-1 shows what your chart for burgers and fries may look like.
Table 4-1 Burger Night
Food Group Item Modification
Protein Hamburger patty Lean ground beef patty, ground turkey breast patty, or veggie burger
Whole grains or starches
Bun
Fries
Whole-grain bun
Baked fries or baked chips
Fruits None in original menu Add apple or watermelon slices
Vegetables Lettuce Consider romaine or spinach instead of iceberg
Tomato, onion, dill pickle No modification needed
Insufficient vegetables in original menu
Add carrots or low-fat coleslaw to complete vegetable serving
Healthy fat Full-fat mayo Low-fat mayo or sliced avocado
Low-fat or fat-free dairy
Cheese, if applicable Low-fat cheese, or add milk or yogurt later in the day
09_640180-ch04.indd 7109_640180-ch04.indd 71 8/27/10 10:40 PM8/27/10 10:40 PM
72 Part I: Eating Right with Every Bite
Some foods may fall into more than one group. For example, pizza may fall into grain, protein, and dairy. Then you only have to add extra vegetables (maybe a salad) and some fruit.
Making a list and checking it twiceTake the information you wrote down in the preceding section (menu and ingredients) and transfer this information to an index card or small notebook. You now have a meal plan at your fingertips.
Your card may look something like this:
Menu:
✓ Hamburger
✓ Baked fries
✓ PLOT
✓ Carrots with Homemade Ranch Dip (see Chapter 18)
✓ Apple slices
Ingredients:
✓ Ground turkey breast
✓ Whole-grain buns
✓ Mustard
✓ Low-fat mayo or avocado
✓ Ketchup
✓ Low-fat cheese
✓ PLOT (pickle, Romaine lettuce, onion, and tomato)
✓ Frozen French fries
✓ Baby carrots
✓ Fat-free sour cream
✓ Lemon juice
✓ Dried parsley
✓ Granulated garlic
✓ Salt and pepper
✓ Apples
09_640180-ch04.indd 7209_640180-ch04.indd 72 8/27/10 10:40 PM8/27/10 10:40 PM
73 Chapter 4: The Art of Meal Planning
Every week, pick out the meals you’re going to have and select the new recipes you’re going to try. Consider your schedule. If you know you have evening commitments, plan easy, quick meals for those evenings. Save the more time-consuming menus for weekends or other days when you have more time.
Look at the ingredients, check to see what ingredients you have in your refrigerator or pantry, and make a list of the things you need to purchase for the week.
Begin to develop your own grocery list. You can do this on the computer very easily. Think about the foods your family uses on a regular basis. Weekly, enlist their help in circling the foods you need as you need them. That way if someone eats the last piece of cheese, he’s responsible for marking it on the list. Another timesaver for you!
If you want to take your list a step further to save even more time, pick up a map of your grocery store at the customer service desk, if available. Sort your list according to how the store is laid out so you don’t have to backtrack. If you have to go to more than one store weekly, sort into two lists.
Stay flexible! Sometimes you’ll want to take advantage of seasonal produce or sale items, or you just won’t want green beans, and you absolutely can make modifications to your set meals. Perhaps you’d rather have beets than green beans one night. No problem! Just make the change to your list. Maybe the asparagus at the store looks really good and is on special. You can also modify existing menus with new recipes you find in this book.
Shopping Smart Aisle by AisleSmart eating requires smart shopping. This means purchasing foods that are healthy, convenient, and good, which can take a little time and may make you feel totally overwhelmed. You will need to compare items and make notes.
To make shopping easier, as you prepare the meals you have on your weekly menu, make notes of brands you like. You may find that other people in your family are willing to help out with the weekly shopping if you have a detailed list complete with brand names.
The best buys for your nutritional buck are nutrient-rich foods. These are foods that give you a lot of nutrition for fewer calories. It often has nothing to do with how much a food costs. Even though many fast foods and processed foods are inexpensive, they cost you a lot in terms of health and weight loss. When grocery shopping for nutrient-rich foods, follow these tips:
09_640180-ch04.indd 7309_640180-ch04.indd 73 8/27/10 10:40 PM8/27/10 10:40 PM
74 Part I: Eating Right with Every Bite
✓ Look for foods that are as close to their original form as possible. The more foods are processed, the more vitamins and minerals have been stripped out of them. They also often lack the fiber of their less-processed counterparts.
✓ Look for foods that are in season. Strawberries in December are going to be expensive and probably not very good. Buy frozen or wait until June.
✓ Look for locally grown foods. Fruits and vegetables that have been shipped across the country have lost many of their nutrients en route. When was the last time you visited your local farmers market? Not only is it fun, but you can’t get better vegetables and locally produced products.
Visualize your grocery store. What do you see around the outside edge of the store? Generally, it’s produce, dairy, meats, and frozen foods. Now visualize what you see in the middle. That’s where you find chips, cookies, soda pop, and processed foods. Get the drift? Focus most of your shopping around the edge of the store and shop smart on the inside aisles. In general
✓ Buy foods that are the least processed you can find.
✓ Shop with a list.
✓ Don’t shop when you’re hungry.
✓ If possible, shop alone. Focusing on healthy foods and buying just what you need is easier without the influence of a spouse or child with a sweet tooth.
✓ Just because a foods says it’s healthy doesn’t mean it is. The fronts of boxes and packaging are meant to sell items to consumers. You have to read labels!
ProduceWhen it comes to buying produce, knock yourself out! Just don’t get carried away. Purchase only what you need and will eat for the week. Experimenting with fruits and vegetables you haven’t tried before may introduce you to a new favorite healthy food. Look for seasonal and locally grown foods. Some produce is good eaten raw, and you can keep an eye out for produce packaged in microwavable bags to let you quickly cook vegetables for a side. Don’t forget about frozen fruit and vegetables. These items can be useful later in the week when you may have eaten the fresh produce you purchased.
Try to buy produce in a variety of colors — green, red, yellow, orange, and yellow. The more color you incorporate, the more vitamins, minerals, and fiber you give your body (without many calories!).
09_640180-ch04.indd 7409_640180-ch04.indd 74 8/27/10 10:40 PM8/27/10 10:40 PM
75 Chapter 4: The Art of Meal Planning
Avocados are a great source of monounsaturated fats, which are heart healthy. They’re also loaded with calories, so eat smart. One-eighth of an avocado is 45 calories (the same as a teaspoon of oil).
Meat, poultry, and seafoodMeat, poultry, and seafood are generally along the back wall of the grocery store.
✓ Look for the words round or loin (tenderloin, ground round, sirloin) when purchasing meat. These terms indicate lean cuts of meat.
✓ Fish is always a good option unless it’s breaded or fried. Fatty fish (salmon and mackerel) are particularly good for you because of the omega-3 fatty acids, which are healthy fats.
✓ Go ahead and purchase poultry with the skin. It is more moist if cooked with the skin on. Just be sure to pull it off before eating.
✓ When purchasing ground turkey, be sure to get ground turkey breast. Some ground turkey has the skin and dark meat ground into it.
✓ Meat and fish in pouches or cans are a real time saver. They also tend to be lower in sodium than deli meats.
✓ Remember that you can also get protein from beans, tofu, and dairy like cottage cheese.
DairyThe dairy aisle can be confusing. What exactly is low fat? Is butter better than margarine? Follow these tips:
✓ Look for cheese and cream cheese that has less than 75 calories and 6 grams of fat per serving.
✓ Look for trans-fat-free margarine to use on a daily basis. You can use butter occasionally, but do it sparingly.
✓ Drink 1-pecent or fat-free milk. If you’re used to whole milk, this may take a little getting used to, but hang in there and it will grow on you.
✓ When buying yogurt, look for the fat-free variety with no added sugar. Greek yogurt is a great product, having twice the protein of other yogurts. It can also be used in the place of sour cream in many dishes.
09_640180-ch04.indd 7509_640180-ch04.indd 75 8/27/10 10:40 PM8/27/10 10:40 PM
76 Part I: Eating Right with Every Bite
Grains and cerealsGrains and cereals can be very confusing. How can sugary cereals be whole grain? Are all breads labeled whole wheat healthy? The truth about whole grain is really pretty simple.
When purchasing bread, crackers, English muffins, pastas, and cereals, look for products that say 100% whole grain or 100% whole wheat. If a loaf of bread just says whole wheat, it’s white bread with caramel coloring added to it. And sugary cereals labeled whole grain may have a little whole grain but the majority is still made of white flour. 100% is the key that ensures you’ll get some good vitamins and minerals as well as fiber. If in doubt, look at the ingredients. If you see the word enriched, put it back!
Center aisle staplesThought you should focus on the perimeter of the store, you have to forge into the center aisles for some foods.
Many of the fats are located in the center aisles. Since oils, salad dressings, and condiments comprise much of the fat in a typical diet, knowing what you’re buying is particularly important.
✓ Buy regular salad dressings with no more than 100 to 150 calories per 2-tablespoon serving. And remember that you don’t have to eat 2 tablespoons; 1 is often sufficient. If you have GBP, you may get dumping syndrome from eating full-fat salad dressings.
✓ Reduced-fat dressings should have no more than 100 calories per 2 tablespoons. It’s still important to measure.
✓ If you must use mayo, look for reduced-fat or fat-free versions. If you only like full fat or the salad dressing kind, measure it carefully and use sparingly.
✓ Use olive oil, peanut oil, and canola oil when you can in place of other oils. These oils are healthy, but still loaded with calories, so use sparingly!
✓ Remember that trans fats are bad for you. Even though the label may say trans fat free, look for the word hydrogenated in the ingredients. If you see this word, put it back!
What about canned goods? They can be great timesavers. Contrary to what many people believe, they can also be very healthy. Vegetables for canning are picked at their peak and processed quickly; they aren’t sitting on a truck for days at a time. However, canned beans, soups, and vegetables can be high in sodium. When possible, buy reduced-sodium brands. Rinse canned beans
09_640180-ch04.indd 7609_640180-ch04.indd 76 8/27/10 10:40 PM8/27/10 10:40 PM
77 Chapter 4: The Art of Meal Planning
and vegetables and add back a little water before heating to serve. Doing so greatly reduces the sodium content. Purchase canned fruits that are canned in their own juice or water (not syrup).
Focus on broth-based soups instead of cream-based soups. They are much lower in calories and fat. Homemade soups are super easy to make yourself and let you control the sodium and calories. You can put all the ingredients in a crockpot before you leave the house in the morning and have soup ready when you come home.
Frozen foodsWe love frozen fruits and vegetables! They are a great go-to food for those nights when you get in late and need to put a healthy supper on the table quickly. Like canned vegetables, these frozen alternatives can be very healthy. Avoid any that are breaded or have cream or cheese sauce on them.
A plethora of frozen dinners are on the market. Many of them claim to be healthy, and some actually are. The trouble is that many are often too low in calories and pasta heavy to be satisfying, sometimes having less than 200 calories and leaving you hungry later.
When checking the ingredients in a frozen meal, apply the same principles to frozen dinners that we applied to your menu. Does it have protein, whole grains, vegetables, fruit, a little fat (usually not a problem), and low-fat or fat-free dairy? If you’re lucky, a typical frozen meal may have whole grains, a dab of vegetables, and a little protein. You can always pump up the calories and nutrition by adding a salad or another vegetable, a piece of fruit, and 30 minutes after the meal, a glass of milk. Look for meals that have 200 to 300 calories, less than 5 grams of saturated fat, less than 600 milligrams of sodium, and more than 15 grams of protein.
Don’t forget to watch the sugar! Manufacturers sneak it into everything — ketchup, spaghetti sauce, bread, salad dressings, peanut butter, and the list goes on and on. You have to look at the ingredients and look for words that indicate sugar, like dextrose, cane syrup, high fructose corn syrup, honey, and so on. If one of these words appears in the first three ingredients, avoid that food.
Understanding Nutrition LabelsWe talk a lot about reading labels. They can be very confusing. Manufacturers often design packaging so that you think you are getting a nutritious food, when in fact, it’s full of sugar or sodium or the portion size is ridiculous.
09_640180-ch04.indd 7709_640180-ch04.indd 77 8/27/10 10:40 PM8/27/10 10:40 PM
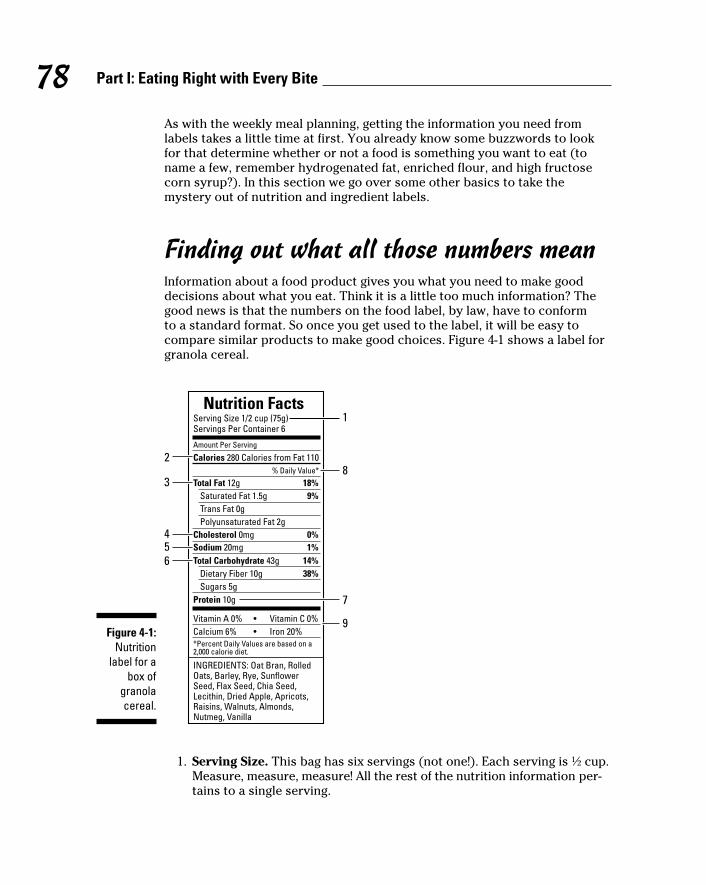
78 Part I: Eating Right with Every Bite
As with the weekly meal planning, getting the information you need from labels takes a little time at first. You already know some buzzwords to look for that determine whether or not a food is something you want to eat (to name a few, remember hydrogenated fat, enriched flour, and high fructose corn syrup?). In this section we go over some other basics to take the mystery out of nutrition and ingredient labels.
Finding out what all those numbers meanInformation about a food product gives you what you need to make good decisions about what you eat. Think it is a little too much information? The good news is that the numbers on the food label, by law, have to conform to a standard format. So once you get used to the label, it will be easy to compare similar products to make good choices. Figure 4-1 shows a label for granola cereal.
Figure 4-1: Nutrition
label for a box of
granola cereal.
Nutrition FactsServing Size 1/2 cup (75g)Servings Per Container 6
1
7
9
82
3
456
Amount Per Serving
*Percent Daily Values are based on a2,000 calorie diet.
% Daily Value*
Calories 280 Calories from Fat 110
Total Fat 12g 18%
Saturated Fat 1.5g 9%
Trans Fat 0g Polyunsaturated Fat 2g
Total Carbohydrate 43g 14%
Dietary Fiber 10g 38%
Sugars 5g
Vitamin A 0% • Vitamin C 0%Calcium 6% • Iron 20%
INGREDIENTS: Oat Bran, RolledOats, Barley, Rye, SunflowerSeed, Flax Seed, Chia Seed,Lecithin, Dried Apple, Apricots,Raisins, Walnuts, Almonds,Nutmeg, Vanilla
Cholesterol 0mg 0%
Sodium 20mg 1%
Protein 10g
1. Serving Size. This bag has six servings (not one!). Each serving is ½ cup. Measure, measure, measure! All the rest of the nutrition information per-tains to a single serving.
09_640180-ch04.indd 7809_640180-ch04.indd 78 8/27/10 10:40 PM8/27/10 10:40 PM
79 Chapter 4: The Art of Meal Planning
2. Calories per serving. Each serving has 280 calories. If you eat half the bag, you have to triple the calories. If you eat the whole bag, you have eaten 1,680 calories!
3. Fats. In particular, pay close attention to the unhealthy fat (saturated and trans). Keep saturated as low as possible and avoid trans fats all together.
4. Cholesterol. The American Heart Association recommends limiting cholesterol to less than 300 milligrams a day. Cholesterol is found only in animal foods.
5. Sodium. Limit sodium to less than 2,300 milligrams a day. Remember, the more processed a food is, the higher it is likely to be in sodium.
6. Carbohydrate. Fiber and sugars fall under carbohydrates. Aim for 25 grams of fiber a day if you’re a female and 30 if you’re a male. Sugars may include naturally occurring sugar like the lactose in milk and fructose in fruit. You need to read the ingredients to look for sources of added sugar.
7. Protein. Aim for 60 to 80 grams (or the number of grams that have been specifically recommended for you) of protein a day.
8. % Daily Values. These numbers are based on a 2,000 calorie diet and are a rough guideline to tell if a food is high or low in a particular nutrient. For example, this label means if you are following a 2,000 calorie diet, the fat in this food provides 18 percent of the recommended fat allow-ance for the day.
• If a product has 5 percent or less, it’s low in that nutrient. This could be good or bad, depending on the nutrient. If it’s sodium, it’s a good thing. If it’s fiber, maybe not so good.
• If a product has more than 20 percent, it’s high in that nutrient. Again, this can be good or bad.
9. % Daily Value of vitamins and minerals. These numbers for vitamin A, vitamin C, calcium, and iron are a good way to compare levels of nutrients between similar foods.
Reading ingredient labels in addition to nutrition labels lets you know exactly what you are eating. Ingredients are listed in descending order according to weight. For example, look at the ingredients for the granola cereal in Figure 3-1. From this list you should be able to tell that the cereal contains no enriched or refined grain, hence it’s 100 percent whole grain. It does have some sugar (the fruit), but it appears toward the end of the ingredients so there is relatively little sugar (and no added sugar) per serving. Compared to many other cereals, this one has fewer ingredients, so it may be a good choice.
09_640180-ch04.indd 7909_640180-ch04.indd 79 8/27/10 10:40 PM8/27/10 10:40 PM
80 Part I: Eating Right with Every Bite
Making the label work for youSo what’s the bottom line when comparing similar items and deciding what to buy?
✓ Know what a portion size is. It may not be the whole bag, muffin, or so on. This can make a huge difference in how many calories you consume each day.
✓ Check protein. Eat 15 to 20 grams of protein at each meal. This is about 2 to 3 ounces. Your protein for the day should equal about 30 percent of your daily calories.
✓ Eat enough carbs. Carbohydrates should equal about 40 to 50 percent of your daily calories. It may take a while, but the goal is to consume a minimum of 100 grams a day.
✓ Make sure you get enough fiber. Aim for 25 to 30 grams a day. Good sources of fiber are 100 percent whole grains, fruits, and vegetables.
✓ Minimize saturated fat and avoid trans fats. If you see the word hydrogenated in the ingredient list, don’t buy it.
✓ Avoid added sugar. When reading the ingredient list, look for sources such as high fructose corn syrup, dextrose, sucrose, honey and brown sugar.
09_640180-ch04.indd 8009_640180-ch04.indd 80 8/27/10 10:40 PM8/27/10 10:40 PM
Chapter 5
Kitchen and Pantry MakeoverIn This Chapter▶ Setting up your kitchen workspace for success
▶ Making your life easier with essential utensils and small appliances
▶ Stocking healthy staples for convenient meal prep
As you begin this new journey of food and cooking after weight loss surgery, nothing can be more important than having a kitchen well
stocked with all the correct equipment and staples. Your space may be lim-ited, but with careful planning you can make the most of the area you have.
Whether you’re a cooking pro or a beginner, this chapter guides you through the details of necessary knives, utensils, cookware, and small appliances. Each serves a function and makes being in the kitchen more time efficient. In addition we provide a list of dry, refrigerated, and frozen staples to make sure the next time you start a recipe you’re not dashing out the door for a forgotten ingredient.
Preparing Your Kitchen: Purging and Organizing
You’re ready to start cooking and you have no idea where anything is. You have kitchen gadgets, trinkets, and gag gifts that everyone knew you had to have to make your kitchen more exciting. But now’s the time to figure out what you do and don’t need to make your cooking successful. Clean out the junk and get your kitchen organized!
Start with three boxes. The first box is for things to keep, the second box is for donations, and the third box is for trash. Divide your kitchen into sections, sorting into the three boxes. Trying to tackle the whole kitchen all at once can be overwhelming and you may waver over gidgets and gadgets. Get boxes two and three out of the kitchen before you change your mind and clutter up the kitchen again.
10_640180-ch05.indd 8110_640180-ch05.indd 81 8/27/10 10:40 PM8/27/10 10:40 PM
82 Part I: Eating Right with Every Bite
After going through all your cupboards, organize your kitchen so that it makes the most out of your space. Professional kitchens are set up in a manner where the person hired to do a specific job doesn’t waste time walking from one end of the kitchen to the next. For example, the baker has all baking items and pans needed to do the job close to where production is happening. Even the ovens are within a short distance. The salad chef, on the other hand, is closer to the sinks, strainers, and refrigerators. You can make the most of your time in the kitchen if yours is set up the same way. Have your knives close to the cutting boards; cooking utensils, pots, and pans closer to the stove and oven; and spices and herbs close to the food preparation areas. Put dishes, silverware, cups, and glasses close to the dish washing area.
The maxim, “Out with the old and in with the new” is never more appropriate than when cleaning out your kitchen. Having ineffective equipment in the kitchen slows prep time and can be downright dangerous. Equipment should be sturdy when placed on an even surface. Cords should be securely attached. If cords have internal wires showing or not attached properly, they can be a fire hazard or give you an electrical shock.
Examining Essential ToolsCooking can only become easy with the proper utensils. Having an under-standing of what’s needed makes your time in the kitchen easier and more enjoyable. Which cookware and utensils are best? You want to get the best that your budget allows. Even though competing products may look the same on the outside, there are different levels of quality.
CookwareCookware is essential in your kitchen, and price does determine quality. More-expensive cookware has a heavier bottom to help conduct heat more evenly and aid in keeping food from burning to the bottom. In addition, different cookware is infused with different metals, and nonstick coatings are added to the finish to help with sticking once food is in the pan. Inexpensive cookware is lighter, so doesn’t conduct heat evenly. It can cause cold spots that make your food cook unevenly. The nonstick coating is lighter as well and scratches more easily. In general, cheaper cookware typically lasts for one to two years. More-expensive cookware sometimes comes with a lifetime warranty.
Different sizes of cookware serve different functions, and the size of the pan is just as important as what’s being cooked in it. If the pan is too large, the empty surface area around the food being cooked is being heated. This gets the pan hotter than intended and causes your food to dry out and, in some
10_640180-ch05.indd 8210_640180-ch05.indd 82 8/27/10 10:40 PM8/27/10 10:40 PM
83 Chapter 5: Kitchen and Pantry Makeover
cases, burn. When full, your pot or pan should have at least an inch of room from the top to keep the food from splattering out. On the other end of the spectrum, the food should fill at least a third of the pot. If you’re sautéing, the bottom of the pan should be at least half covered.
The quality of the pan is important, but which is better: coated or noncoated pans? When shopping for pots and pans, you may notice the higher-end cookware doesn’t have nonstick coatings. They don’t require coating because the metals are infused in such a way that keeps the food from sticking while cooking. Less-expensive (lower-quality) pans need a coating, or food sticks. But every rule has exceptions, and in this case, it’s the omelet pan. This is a 8-inch sauté pan in which eggs and only eggs are cooked. Both high-end and lower quality omelet pans should have a nonstick coating. Used this pan only for eggs, and store it with a small hand towel folded in the middle to keep the surface protected.
To keep your cookware cooking at its best, take good care of it. Don’t put it in the dishwasher, because most dishwasher detergents are too harsh and can harm the finish over time. Hand-wash the pots and pans and dry them thoroughly before storing. If you stack or nest the cookware, put small towels or paper towels between them to protect from nicks and scratches.
Microwaving is a quick and easy way of cooking, but make sure the dishes you use are microwave safe. The microwave cooks food differently than standard stove tops, and the dishes are made in such a way to aid cooking the food in the microwave. The glass needs to be tempered to keep from shattering when the temperature adjusts, and the surfaces can’t have metal pieces. In addition, microwave dishes are normally smaller in size, and they have vents in the lids to allow steam to escape while keeping the food from splattering all over the microwave.
Vegetable steamers are a healthy way of cooking and are inexpensive to purchase. Two versions are available. The first is a conventional steamer that comes in three pieces. Water is boiled in a larger pot, and a smaller pot perforated with holes holds the food and fits nestled inside the larger pot. Steam seeps through the holes and steams the food, and a fitted lid helps hold the steam in. The second version is an electric steamer. It works the same way, but it’s self-contained and sits on your countertop.
GadgetsKitchen gadgets make life easier, and the list below makes choosing the right gadget a breeze:
✓ Metal or plastic spatula: Also known as pancake turners, spatulas come in many different sizes. Metal spatulas are more durable but can scratch your pans. Plastic spatulas are a better choice to keep from scratching
10_640180-ch05.indd 8310_640180-ch05.indd 83 8/27/10 10:40 PM8/27/10 10:40 PM
84 Part I: Eating Right with Every Bite
the inside of the pan, but make sure your plastic spatula is heat resistant so it won’t melt.
✓ Wire whisk: Use this tool to incorporate air into batters or liquids to make them lighter. You can find plastic whisks, but they don’t work as well as metal. Whisks come in different sizes, and you’ll find it handy to have a small, medium, and large in your kitchen.
✓ Mixing spoons: You need a lot of these because they’re such a handy tool, but you won’t mind since they’re inexpensive. We recommend you have ten. Wooden spoons are perfect for the mixing jobs you have and won’t scratch your nonstick cookware. To keep them in good condition, hand-wash these to clean ’em up.
✓ Dry and liquid measuring cups: Dry measuring cups are used for measuring dry or solid ingredients like flour, mayonnaise, fruits, and vegetables. They typically come in sets ranging in volume from 1⁄4 cup to 1 cup. Liquid measuring cups measure differently than dry ones, so both types are needed. Liquid measuring cups have a small spout for pouring liquids and usually come in sizes ranging from 1 cup to 4 cups.
✓ Measuring spoons: These come in metal or plastic. Measuring spoons are needed for measuring out small amounts of ingredients. Unlike mea-suring cups, measuring spoons are used for both dry and liquid measure.
✓ Food scale: Weighing ingredients to get the right amount is important in some recipes. Scales also help in determining serving sizes. They come in a wide range of prices and features. Small scales, under $10, can give you a weight of a food up to 16 ounces. Some digital scales have computer chips in them that provide you with nutrition information for the food you are eating. You can put your grapes on the scale platform, program the code for the grapes, and the scale gives you a reading for calories, fat, protein, and carbohydrates. Some of these scales have a memory built in so you can tally your intake for the day.
✓ Meat thermometer: A meat thermometer measures the degree of doneness of meats, poultry, fish, and seafood. Most meat thermometers are not oven-safe, but you can spend a little extra money and get one that can stay in your protein while it cooks.
✓ Quick-read thermometer: This simple thermometer is used to measure the internal temperature of any food, cold or hot. They’re not oven-proof.
✓ Oven thermometer: These thermometers are used to make sure the oven is calibrated to correct temperature. Older ovens can be 20 degrees under or over their setting and cause your dish to over- or undercook. If your oven temperature is way off, you can call an appliance repair man to come and adjust it.
✓ Mixing bowls: When you’re preparing multiple dishes or complicated recipes, the more mixing bowls you have, the better. We recommend having three small, three medium, three large, and one really big.
10_640180-ch05.indd 8410_640180-ch05.indd 84 8/27/10 10:40 PM8/27/10 10:40 PM
85 Chapter 5: Kitchen and Pantry Makeover
✓ Colander: Also known as a strainer, this tool is used to let liquid drain out while keeping solids in the colander. They come in plastic or metal.
✓ Garlic press: You use a press to crush garlic without using a knife. Garlic presses come in plastic or metal, and the metal ones work best by far.
✓ Cheese box grater: These large graters have four sides. Two are different grating sizes, one is a zester, and one side is a slicer for vegetables and fruits such as zucchini, carrots, and bananas.
✓ Meat pounder: A pounder, or tenderizer, is used to pound protein or other foods to a thinner size. This is typically done for cuts of meat that aren’t as tender as you want or to make the meat a uniform thickness so it cooks evenly.
KnivesIn this section we talk about the one of the most neglected but most needed tools in the kitchen. Knives are important, but you can have too much of a good thing. Do you have a knife drawer and/or knife block packed with knives? How many of them are sharp? How many of them are in good condition? How many of them do you actually use? Most of the time you probably find yourself looking for a particular knife while pushing the other knives out of the way because you like the feel of the knife or it’s sharper.
Gather all your knives and lay them out on the counter for a knife inspection. Check each one for the following points:
✓ Is the handle firmly attached?
✓ Is the blade straight and free of nicks and gashes?
✓ Have you use the knife in the past 60 days?
✓ If the knife is dull, can it be sharpened?
If you answer no to any of these questions, throw or give it away.
You don’t need knives that can cut through metal blocks and aluminum cans. Those gimmicky sets normally come with 20 knives or more, and you’d be wasting money on knives you’ll never use. You only need four basic knives:
✓ Chef’s knife: This essential knife is used for cutting large pieces of food and for dicing and chopping as well. It comes in 6-, 8-, and 10-inch blades. Most women prefer the 6-inch knife because it suits smaller hands better, and men typically like the feel of an 8-inch blade.
✓ Paring knife: This knife has a much smaller blade and is used for cutting smaller foods.
10_640180-ch05.indd 8510_640180-ch05.indd 85 8/27/10 10:40 PM8/27/10 10:40 PM
86 Part I: Eating Right with Every Bite
✓ Serrated knife: Also known as a bread knife, the serrated knife is about 8 to 10 inches long and is great for cutting through bread and thick rinds of fruits such as watermelon and pineapple.
✓ Utility knife: Smaller than a chef’s knife and slightly bigger than a paring knife, this knife is used for all the foods in between. For example, a utility knife is great for cutting grapefruit and eggplant.
Any of the above knives are great for cutting and trimming meat, poultry, seafood, and fish as well.
The quality of the knife is just as important as what type it is, so buy what you can afford. Cheaper knives normally have plastic handles and the blades are thin and not able to be sharpened. More-expensive knives have thicker blades made from high-carbon stainless steel and can be sharpened when they gets dull. The part of the blade that runs through the handle is called the tang. Pick knives that let you see the tang run through the entire length of the handle, because knives with a full tang last longer. Knives range from $7 to over $150 each. Protect your investment by washing in soapy water and drying thoroughly before storing. Don’t put your knives in the dishwasher, especially if they have wooden handles.
Keeping your knives sharp is important. Dull knives cause more cuts then sharp ones because when a knife isn’t sharp, most people apply more pressure to cut through the food. This excessive pressure can cause more damage if you cut yourself. Food prep also is much quicker when sharp knives are used because sharp knives do all the work. Most areas of the country have knife sharpening services, and the cost is generally around $3 a knife. You can also learn to sharpen them yourself. Most knives need to be sharpened at least every six months.
Although it’s not a knife, a pair of kitchen shears, or scissors, deserves a place in your knife block. You may want to have one pair designated for food for snipping the stems from herbs, and another pair for opening packages.
Cutting boardsThe job of a cutting board is to protect your countertops and to provide a slight cushion for your knife to keep the blade from dulling. Although it may look nice, don’t use a glass cutting board. This is the worst on your knives, and when the blade meets the surface of the glass, it slips. Wood and polyurethane boards are the best options. There is some controversy over which cutting board holds bacteria, and the answer is neither, as long as they are cleaned and sterilized well. The advantage to the polyurethane board is that it’s dishwasher safe. A wood cutting board needs to be hand-washed and air dried. You may want to have one or more of each on hand. If you’re worried about food safety with raw meats, use a polyurethane board so that you can stick in the dishwasher.
10_640180-ch05.indd 8610_640180-ch05.indd 86 8/27/10 10:40 PM8/27/10 10:40 PM
87 Chapter 5: Kitchen and Pantry Makeover
Small appliancesThe following items make your life in the kitchen much easier:
✓ Blender: A blender is used for mixing, puréeing, and whipping drinks and small pieces of food. A blender’s blades are shaped like an X and point down so the liquids and foods are pulled downwards toward the blade. Liquid is needed to help with the blending.
✓ Food processor: This appliance is used for chopping, dicing, puréeing, and shredding. The blades are S shaped and stacked on top of each other. A food processor doesn’t require liquid to work. If you are in Stage 3 of the diet progression, smooth foods, use a food processor to make your food smooth but not soupy.
Note: A food processor and blender are not the same piece of equipment. Take caution when reading recipes, and if the recipe states a food processor, a blender generally won’t work.
✓ Mini chopper: A smaller version of a food processor, a mini chopper typically comes with a 1-cup capacity. It’s great for small jobs such as chopping an onion quickly, and it’s faster to clean (which saves you time) and takes up less space than a full-sized food processor.
✓ Mixer: Two types of mixers are used to whip, stir, and blend ingredients together. A hand mixer, great for small jobs, normally has two metal beaters and a wire whisk for whipping. Countertop mixers have an attached bowl, wire whisk, paddle, and dough hook. The countertop mixer costs more money but has a larger motor to mix larger batches at a time.
✓ Toaster oven: This miniature oven placed on your countertop has broiling, toasting, and baking functions. It’s great for smaller items. Instead of heating up your large oven, you can save electricity with the small toaster oven.
✓ Slow cooker: You can make lean cuts of meat tender and moist by cooking with low heat over a long period of time in a slow cooker. When quickly cooking lean cuts of protein, the muscle fiber shrinks up, causing the meat to become tough and chewy. However, when slow cooked, the muscle fiber begins to break down after about four to five hours and by the eighth hour the protein is tender and delicious. Slow and low works great for all lean cuts of meat.
A slow cooker can also save you time. How great is it to walk in the door and smell your dinner cooking? Just fix it in the morning and forget it; no rushing around in the evening to feed the hungry troops. If you’re rushed for time in the morning, you can assemble the recipe ingredients the night before and put the pot in the refrigerator until morning.
Although electronic countertop “grilling” appliances can reduce the fat and calorie content of some foods, we do not recommend them for people who
10_640180-ch05.indd 8710_640180-ch05.indd 87 8/27/10 10:40 PM8/27/10 10:40 PM
88 Part I: Eating Right with Every Bite
had weight loss surgery. They don’t actually grill (a dry cooking method with indirect heat from below). Instead, they use two heated metal plates with raised metal lines. However, they don’t stay hot long enough to sear the food, so the device turns into a steamer. Steam opens the pores of the food and causes the moisture to flow out, leaving you with tough food. Why does this matter to a weight loss surgery patient? To avoid getting food stuck in your pouch, you need your food to be moist and tender, not tough and chewy. So stick to a real grill.
Stocking Your Pantry, Refrigerator, and Freezer with Good Ingredients
Nothing can be more frustrating than going into the kitchen to make a recipe only to find out that you’re missing one or two ingredients. Maintaining a run-ning list of staples for your pantry, fridge, and freezer keeps you prepared for almost anything you want to prepare in the kitchen.
Herbs, spices, and moreIf you keep the following spices, herbs, oils, and extracts in your pantry, you’ll be ready to add a ton of flavor to your dishes.
Herbs and spices:
✓ Apple pie spice
✓ Basil, dried
✓ Bay leaves
✓ Black pepper
✓ Caraway seeds
✓ Cayenne pepper
✓ Celery seed
✓ Chili powder
✓ Cinnamon
✓ Cloves, ground
✓ Coriander, ground
✓ Cumin, ground
✓ Curry powder
✓ Dill, dried
✓ Garlic powder
✓ Italian seasoning
✓ Lemon pepper
✓ Marjoram, dried
✓ Mustard, dry
✓ Nutmeg, ground
✓ Old Bay seasoning
✓ Onion powder
✓ Oregano, dried
✓ Paprika
✓ Parsley flakes
10_640180-ch05.indd 8810_640180-ch05.indd 88 8/27/10 10:40 PM8/27/10 10:40 PM

89 Chapter 5: Kitchen and Pantry Makeover
Oils:
✓ Canola oil
✓ Olive oil
✓ Peanut oil
✓ Sesame oil
✓ Nonstick cooking spray
Extracts:
✓ Almond extract
✓ Lemon extract
✓ Vanilla extract
✓ Peppercorns
✓ Poppy seeds
✓ Pumpkin pie spice
✓ Red pepper flakes
✓ Rosemary, crushed
✓ Sage, dried
✓ Salt
✓ Taco seasoning mix
✓ Tarragon, dried
✓ Thyme, ground
✓ Turmeric
What’s the difference between herbs and spices?Herbs are from the leaf of a plant, and the flavor is found in the natural oil that the leaves exude when the membrane is ruptured. Dried herbs, fresh herbs that have been dried, vary in price from as low as $0.99 to over $5.00 for the same amount. The difference is the cheaper one has more stems added when being processed. The stems are bitter, but this way manufactures can save on cost. When buying dried herbs you get what you pay for, with stems or without.
Spices come from seeds, bark, or berries from a plant and are dried and then ground. For example, cinnamon is the bark from a tree, nutmeg is a seed, and mace is the shell from which the nutmeg is removed. Some spices are sold whole and then ground at home. The most common whole spice is peppercorns,
which are placed in a pepper mill and ground when needed.
Storing herbs and spices correctly is essential to maintaining their freshness. Remove fresh herbs from the package they were purchased in. Cut about 1⁄2 inch from the bottom of the stems so they can absorb water and stay fresh longer. Then place the freshly cut herbs into 2 inches of water and store them in the refrigerator with a damp paper towel over the top. Some herbs come in small soil-filled pots. Keep the herbs where they can get sunlight and keep them watered. Dried spices and herbs have a one-year shelf life. Write the date on the dried herb or spice container when you unpack it from your grocery bag so you know how long you have had it.
10_640180-ch05.indd 8910_640180-ch05.indd 89 8/27/10 10:40 PM8/27/10 10:40 PM
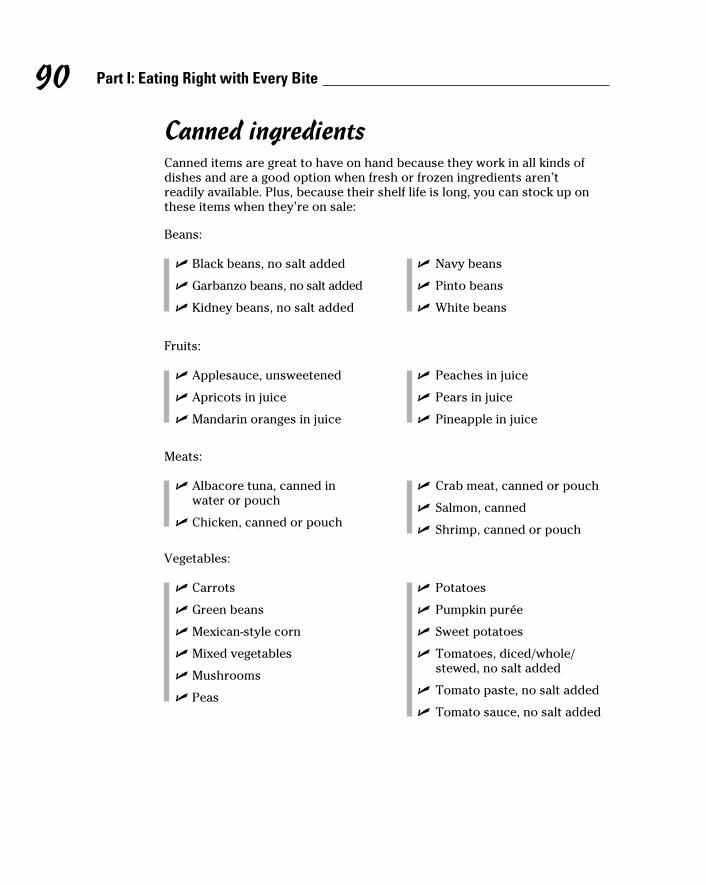
90 Part I: Eating Right with Every Bite
Meats:
✓ Albacore tuna, canned in water or pouch
✓ Chicken, canned or pouch
✓ Crab meat, canned or pouch
✓ Salmon, canned
✓ Shrimp, canned or pouch
Canned ingredientsCanned items are great to have on hand because they work in all kinds of dishes and are a good option when fresh or frozen ingredients aren’t readily available. Plus, because their shelf life is long, you can stock up on these items when they’re on sale:
Beans:
✓ Black beans, no salt added
✓ Garbanzo beans, no salt added
✓ Kidney beans, no salt added
✓ Navy beans
✓ Pinto beans
✓ White beans
Vegetables:
✓ Carrots
✓ Green beans
✓ Mexican-style corn
✓ Mixed vegetables
✓ Mushrooms
✓ Peas
✓ Potatoes
✓ Pumpkin purée
✓ Sweet potatoes
✓ Tomatoes, diced/whole/ stewed, no salt added
✓ Tomato paste, no salt added
✓ Tomato sauce, no salt added
Fruits:
✓ Applesauce, unsweetened
✓ Apricots in juice
✓ Mandarin oranges in juice
✓ Peaches in juice
✓ Pears in juice
✓ Pineapple in juice
10_640180-ch05.indd 9010_640180-ch05.indd 90 8/27/10 10:40 PM8/27/10 10:40 PM
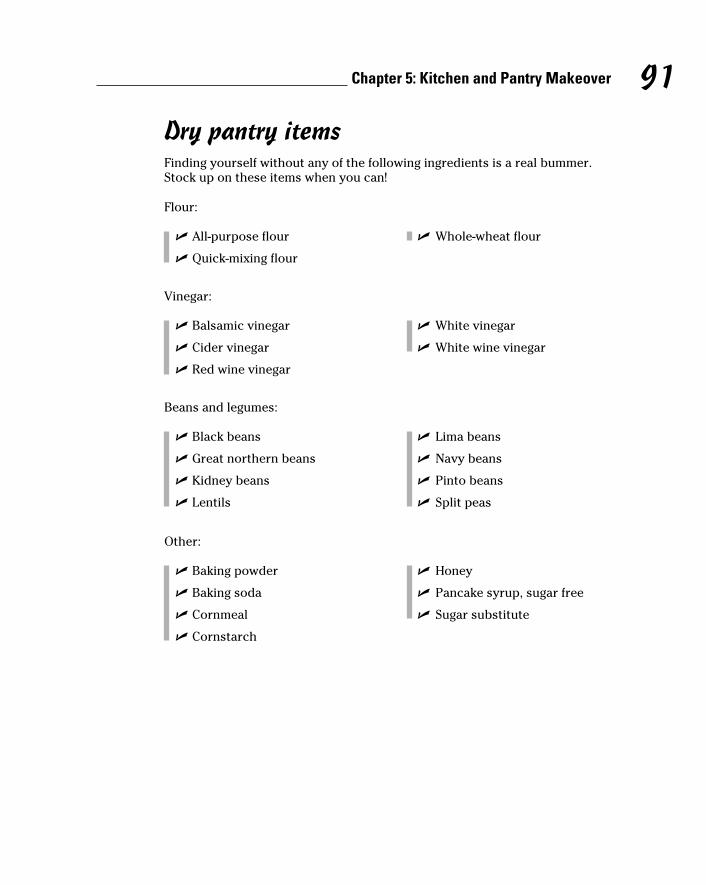
91 Chapter 5: Kitchen and Pantry Makeover
Dry pantry itemsFinding yourself without any of the following ingredients is a real bummer. Stock up on these items when you can!
Flour:
✓ All-purpose flour
✓ Quick-mixing flour
✓ Whole-wheat flour
Vinegar:
✓ Balsamic vinegar
✓ Cider vinegar
✓ Red wine vinegar
✓ White vinegar
✓ White wine vinegar
Beans and legumes:
✓ Black beans
✓ Great northern beans
✓ Kidney beans
✓ Lentils
✓ Lima beans
✓ Navy beans
✓ Pinto beans
✓ Split peas
Other:
✓ Baking powder
✓ Baking soda
✓ Cornmeal
✓ Cornstarch
✓ Honey
✓ Pancake syrup, sugar free
✓ Sugar substitute
10_640180-ch05.indd 9110_640180-ch05.indd 91 8/27/10 10:40 PM8/27/10 10:40 PM
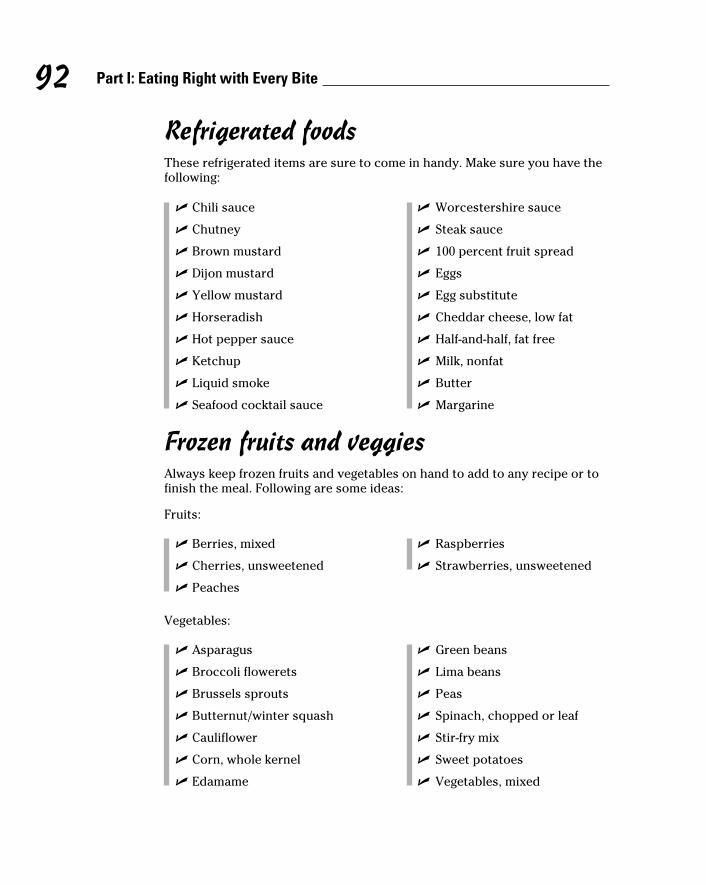
92 Part I: Eating Right with Every Bite
Vegetables:
✓ Asparagus
✓ Broccoli flowerets
✓ Brussels sprouts
✓ Butternut/winter squash
✓ Cauliflower
✓ Corn, whole kernel
✓ Edamame
✓ Green beans
✓ Lima beans
✓ Peas
✓ Spinach, chopped or leaf
✓ Stir-fry mix
✓ Sweet potatoes
✓ Vegetables, mixed
Refrigerated foodsThese refrigerated items are sure to come in handy. Make sure you have the following:
✓ Chili sauce
✓ Chutney
✓ Brown mustard
✓ Dijon mustard
✓ Yellow mustard
✓ Horseradish
✓ Hot pepper sauce
✓ Ketchup
✓ Liquid smoke
✓ Seafood cocktail sauce
✓ Worcestershire sauce
✓ Steak sauce
✓ 100 percent fruit spread
✓ Eggs
✓ Egg substitute
✓ Cheddar cheese, low fat
✓ Half-and-half, fat free
✓ Milk, nonfat
✓ Butter
✓ Margarine
Frozen fruits and veggiesAlways keep frozen fruits and vegetables on hand to add to any recipe or to finish the meal. Following are some ideas:
Fruits:
✓ Berries, mixed
✓ Cherries, unsweetened
✓ Peaches
✓ Raspberries
✓ Strawberries, unsweetened
10_640180-ch05.indd 9210_640180-ch05.indd 92 8/27/10 10:40 PM8/27/10 10:40 PM
Chapter 6
Tips for Food Preparation and Cooking
In This Chapter▶ Keeping your food safe to eat
▶ Using the best cooking method for the job
▶ Selecting and cooking meat to make your pouch happy
▶ Accurately measuring ingredients for good results
▶ Modifying your favorite recipes for your new lifestyle
You may not consider yourself to be a chef, but good cooking can be easier than you think. The great thing about cooking is that you can
make it as easy or as challenging as you want it to be. Can’t make anything but a bowl of cereal? Look at it as putting food together instead of cooking, and get comfortable with some simple recipes. Are you a foodie with a passion for the kitchen? You can satisfy that interest after surgery, too. Just think of all those “to die for” recipes that can be modified to fit your new lifestyle.
Things do need to change after surgery. After all, for a lot of you, your love of food or lack of time and skill to prepare healthy food is what brought you to the surgeon’s office. And after surgery your pouch just can’t handle some of the old foods that you ate. Some foods get stuck or just don’t “set well” in the pouch.
This book gives you some great recipes, but we know you’re not going to cook our recipes for the rest of your life. This chapter tells you how to cook after weight loss surgery to suit your tastes, ability, and new lifestyle. Who better to help you than a chef who had gastric bypass himself?
11_640180-ch06.indd 9311_640180-ch06.indd 93 8/27/10 10:41 PM8/27/10 10:41 PM
94 Part I: Eating Right with Every Bite
Brushing Up on Food SafetyFood safety is not an option but a necessity. No matter how great your food tastes, if your food, cooking utensils, and cutting boards are not handled properly you meal can be ruined by foodborne illness. In this section you find out how to keep your kitchen and food as clean and safe as possible.
Taking care of fresh and raw foodsFresh fruits and vegetables and raw meats are always better than processed, but “safety first” is the rule to keep from getting sick. With a few tips and tricks you can ensure all your meals are safe to eat.
After vegetables are picked from the fields they go through a rinse cycle before being packed and shipped to stores to be sold. However, a lot of food is cleaned at a time and it doesn’t get the tender love and care you personally can give your vegetables and fruits before eating.
Following are some tips for safely handling and prepping produce:
✓ Choose fresh fruits and vegetables carefully. When shopping, look for produce that’s not damaged or bruised and make sure that precut produce is refrigerated.
✓ Clean all surfaces and utensils with soap and hot water, including cutting boards, peelers, countertops, and knives that will touch fresh produce. Wash hands with soap and warm water for at least 20 seconds before and after handling fresh fruits and vegetables.
✓ Rinse fresh fruits and vegetables, including those with skins and rinds that are not eaten, under clean running water and avoid using detergents or bleach.
• Remove the outer leaves of leafy vegetables such as lettuce and cabbage before washing.
• Produce with firm skin, such as potatoes, may require rubbing with a vegetable brush while rinsing under clean running water to remove all soil.
• Don’t rinse until just before eating, to avoid premature spoilage.
✓ Dry fruits and vegetables with a clean towel.
11_640180-ch06.indd 9411_640180-ch06.indd 94 8/27/10 10:41 PM8/27/10 10:41 PM
95 Chapter 6: Tips for Food Preparation and Cooking
✓ Packaged produce labeled ready to eat, prewashed, or triple washed can be used without further washing.
✓ Keep produce separate from all raw meats in your shopping cart, grocery bags, refrigerator, and when prepping food.
• Throw away any produce that will not be cooked if it has touched raw meat or eggs.
• After preparing raw meats, clean your cutting board and knives with hot water and soap before and after preparing fresh fruits and vegetables.
• Store raw meat below ready-to-eat produce and other foods in the refrigerator so it can’t leak onto them.
✓ Refrigerate all cut, peeled, or cooked produce within two hours. Harmful bacteria may grow on produce and increase the risk of foodborne illness.
Cooking foods to the proper temperatureRaw meats and eggs need to be handled with extreme care to keep the risk of foodborne illness low. Thorough cooking kills harmful bacteria. If you eat meat, poultry, fish, seafood, or eggs that are raw or only partially cooked, you may be exposing yourself to bacteria that can make you ill. This is particularly important for children, pregnant women, the elderly, and those whose immune systems are compromised. Check out the following sections for specific info on safely cooking meats.
Salmonella, a bacteria that causes food poisoning, can grow inside fresh, unbroken eggs and raw poultry. Be sure to cook eggs until the yolk and white are firm, not runny. Scramble eggs to a firm texture. Avoid recipes in which eggs remain raw or only partially cooked (for example, mousse, egg drinks, Caesar dressing, and more). Pasteurized eggs or egg substitute can be used instead.
Use a meat thermometer to ensure that meat, poultry, and fish are cooked to the appropriate temperature. Insert the sterile metal tip into the center and/or the thickest part off the food.
Red meatTable 6-1 shows the correct cooking temps for red meat, depending on the desired doneness.
11_640180-ch06.indd 9511_640180-ch06.indd 95 8/27/10 10:41 PM8/27/10 10:41 PM
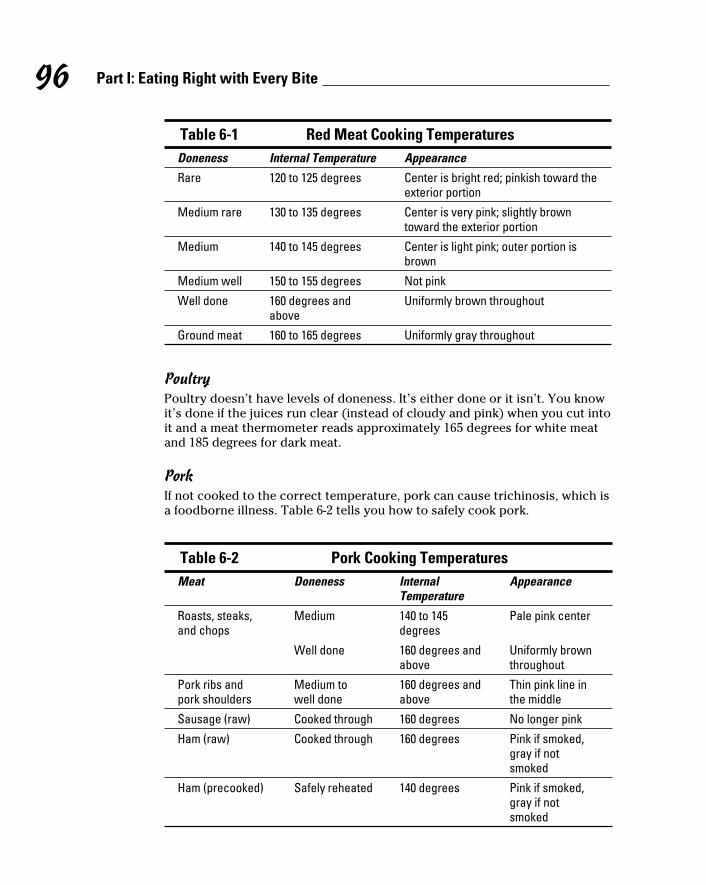
96 Part I: Eating Right with Every Bite
Table 6-1 Red Meat Cooking Temperatures
Doneness Internal Temperature Appearance
Rare 120 to 125 degrees Center is bright red; pinkish toward the exterior portion
Medium rare 130 to 135 degrees Center is very pink; slightly brown toward the exterior portion
Medium 140 to 145 degrees Center is light pink; outer portion is brown
Medium well 150 to 155 degrees Not pink
Well done 160 degrees and above
Uniformly brown throughout
Ground meat 160 to 165 degrees Uniformly gray throughout
PoultryPoultry doesn’t have levels of doneness. It’s either done or it isn’t. You know it’s done if the juices run clear (instead of cloudy and pink) when you cut into it and a meat thermometer reads approximately 165 degrees for white meat and 185 degrees for dark meat.
PorkIf not cooked to the correct temperature, pork can cause trichinosis, which is a foodborne illness. Table 6-2 tells you how to safely cook pork.
Table 6-2 Pork Cooking Temperatures
Meat Doneness Internal Temperature
Appearance
Roasts, steaks, and chops
Medium 140 to 145 degrees
Pale pink center
Well done 160 degrees and above
Uniformly brown throughout
Pork ribs and pork shoulders
Medium to well done
160 degrees and above
Thin pink line in the middle
Sausage (raw) Cooked through 160 degrees No longer pink
Ham (raw) Cooked through 160 degrees Pink if smoked, gray if not smoked
Ham (precooked) Safely reheated 140 degrees Pink if smoked, gray if not smoked
11_640180-ch06.indd 9611_640180-ch06.indd 96 8/27/10 10:41 PM8/27/10 10:41 PM
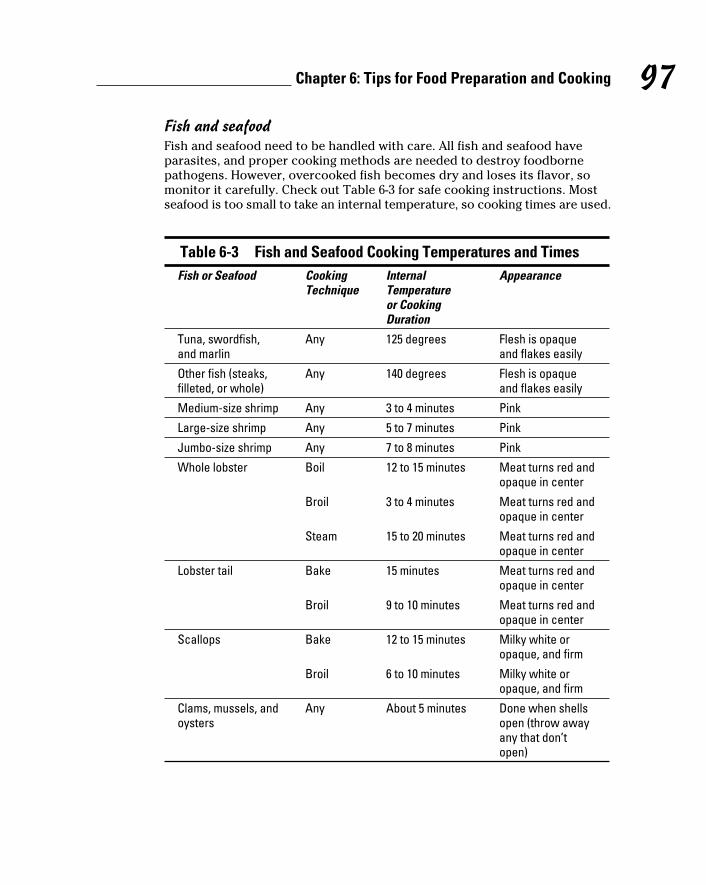
97 Chapter 6: Tips for Food Preparation and Cooking
Fish and seafoodFish and seafood need to be handled with care. All fish and seafood have parasites, and proper cooking methods are needed to destroy foodborne pathogens. However, overcooked fish becomes dry and loses its flavor, so monitor it carefully. Check out Table 6-3 for safe cooking instructions. Most seafood is too small to take an internal temperature, so cooking times are used.
Table 6-3 Fish and Seafood Cooking Temperatures and Times
Fish or Seafood Cooking Technique
Internal Temperature or Cooking Duration
Appearance
Tuna, swordfish, and marlin
Any 125 degrees Flesh is opaque and flakes easily
Other fish (steaks, filleted, or whole)
Any 140 degrees Flesh is opaque and flakes easily
Medium-size shrimp Any 3 to 4 minutes Pink
Large-size shrimp Any 5 to 7 minutes Pink
Jumbo-size shrimp Any 7 to 8 minutes Pink
Whole lobster Boil 12 to 15 minutes Meat turns red and opaque in center
Broil 3 to 4 minutes Meat turns red and opaque in center
Steam 15 to 20 minutes Meat turns red and opaque in center
Lobster tail Bake 15 minutes Meat turns red and opaque in center
Broil 9 to 10 minutes Meat turns red and opaque in center
Scallops Bake 12 to 15 minutes Milky white or opaque, and firm
Broil 6 to 10 minutes Milky white or opaque, and firm
Clams, mussels, and oysters
Any About 5 minutes Done when shells open (throw away any that don’t open)
11_640180-ch06.indd 9711_640180-ch06.indd 97 8/27/10 10:41 PM8/27/10 10:41 PM
98 Part I: Eating Right with Every Bite
Keeping leftovers safeWhether frozen or refrigerated, leftovers need to be handled safely. Don’t let leftover food that you’ve cooked and want to save sit out for more than two hours.
When freezing, place the food in an airtight container and freeze within 24 hours. The shelf life varies once frozen, but the food usually keeps close to 100-percent quality for 60 to 90 days. Any longer and the food starts to break down and the quality is significantly compromised.
Refrigerating leftovers is a great way to have a meal all ready to go. Refrigerated food is good for between 72 to 96 hours (three to four days). Soon thereafter the food begins to break down quickly and spoilage sets in. Again, store food in an airtight container.
Reviewing Cooking Methods 101Different cooking methods produce different results, and having an under-standing of what they are will carry over into successful meals every time. You may see the terms sauté, broil, stew, and braise, but do you know how that applies to food? No matter how great a recipe is, if you cook the food the way you think it should be done instead of the way the recipe intended, or try a cooking shortcut, you have no one to blame but yourself if the meal turns out badly.
Pot and pan sizes matter and the recipe will turn out differently if the appropriate pan size isn’t used. If the pan or pot is too big, the food will likely dry out while cooking. If too small, the food may take longer to cook and become chewy and/or overcooked.
Some cooking methods are dry, and others are moist. One easy-to-remember rule to follow in choosing between the two is if the animal walks on land, dry cooking methods are recommended, and if it lives in water, moist cooking has better results.
What about sushi?Sushi grade fish is served raw, but it’s handled much differently then fish that’s going to be cooked. The fish goes through a rigorous inspection before being graded for sushi,
and it’s then kept below 40 degrees at all times. However, you are still taking a risk by consuming sushi-like raw meats.
11_640180-ch06.indd 9811_640180-ch06.indd 98 8/27/10 10:41 PM8/27/10 10:41 PM
99 Chapter 6: Tips for Food Preparation and Cooking
No matter which cooking method you use, having a better understanding of cooking methods saves you time and improves your dishes each time you’re in the kitchen.
Dry cooking methodsDry cooking methods are recommended when cooking meat from land animals. This includes sautéing, rotisserie cooking, grilling, broiling, roasting, and baking. Sautéing and rotisserie roasting make food especially moist and tender, so are recommended for cooking both meats and fish in the first three months after your surgery when you may experience the most difficulty tolerating foods and preventing sticking.
✓ Sautéing: Cooking food in a preheated pan or griddle with minimum amount of fat
This method of cooking is an easy and preferred procedure because cooking time is short (normally under seven minutes) and because only a few guidelines need to be followed.
• Make certain the pieces of meat are no more than 1⁄2 inch thick, or the outside may burn while the inside remains uncooked.
• Preheat the pan before adding meat to ensure that it cooks quickly and retains its moisture.
• Never walk away while cooking is in progress. The sauté method requires only two to seven minutes, and overcooking reduces moisture, making food difficult to swallow and digest.
✓ Rotisserie cooking: Cooking food in dry heat while rotating
Rotisserie cooking helps meat retain moisture, so it’s a good method to improve your protein intake during the first few months after your surgery. Home rotisserie cooking devices are available and generally require little effort, other than time, for food preparation. Most grocery stores and many restaurants sell rotisserie-cooked meats, making moist and tender meats readily available.
Rotisserie-cooked poultry typically cooks with the skin on, but you should discard it to avoid adding unnecessary fat and calories to your meal.
✓ Grilling: Cooking food from heat below
When grilling, a gas flame or a hot charcoal briquette is 3 to 4 inches below a metal or cast-iron grate. The food is slow cooked to the right temperature. The hot dry heat sears in the juices, which keeps the food moist and, depending on the cut, tender. The charcoal or flame adds a distinct flavor and look that cannot be duplicated. Electrically heated indoor grilling gadgets actually steam your food instead of grilling, and in most cases, they cause the meat to become tough and flavorless when cooked. (They do add a few pretty grill line marks on the food, though.)
11_640180-ch06.indd 9911_640180-ch06.indd 99 8/27/10 10:41 PM8/27/10 10:41 PM
100 Part I: Eating Right with Every Bite
✓ Roasting: Cooking food in dry heat with the aid of fat
To roast food correctly, use a roasting rack and a roasting pan with sides no higher than 21⁄2 to 3 inches. The rack lifts the meat out of the pan and allows the food to be exposed to heat all the way around. Fill the pan 1⁄4 inch with a liquid, such as canned chicken stock, which collects the drippings to start a gravy (and also keeps the drippings from burning when they hit the bottom of the pan). While roasting, baste the food with the stock and drippings from the pan. Never wrap or cover the meat when roasting, because it either breaks the sear (causes the meat to leak juices) or keeps the protein from forming a tight sear, and your protein will be chewy and dry.
✓ Broiling: Cooking food from heat above
You may already use your oven broiler to brown the tops of casseroles and melt cheese, but that’s also a quick way to quickly cook thin cuts of meats, fish, seafood, and vegetables. Preheat the broiler on high before putting food in the oven. Space the food out on the top of a broiler pan (all ovens come standard with them). Add seasoning and, if needed, a little oil. Place the broiler pan in the oven so the food is 6 inches beneath the broiler, and leave the oven door open a crack. At this point you can’t walk away, because food begins to brown quickly. When desired browning has occurred, flip the food over and broil until desired doneness on the other side.
Moist cooking methodsMoist cooking methods include deep frying, pan frying, stewing, braising, poaching, and boiling. Moist cooking techniques can be used to cook meats, such as poultry, beef, lamb, or pork. Boiling and poaching can cause most meats to be tough unless cooked low and slow to break down the muscle. On the other hand, moist cooking methods, particularly poaching and steaming, are very effective in maintaining the tenderness of fish and seafood.
✓ Deep frying: Cooking food totally immersed in preheated fat or oil
Deep frying is typically done at 350 degrees so the submerged food is seared on the outside (keeping excess fat from seeping in) and keeps its moisture in. If done correctly, fried food is lower in fat on the inside but higher in fat and calories on the outside. (If the food on the inside is greasy, the food was fried at a temperature below 350 degrees or the oil is old.) That fatty outside, often battered, is where the most fat is found. If eating deep-fried food, peel off the fried skin or batter and eat only the moist tender food on the inside.
✓ Pan frying: Cooking food partially immersed in preheated fat or oil
Pan frying is the same as deep frying except that the food is only submersed halfway in the heated oil, and then turned to finish cooking the other side. Again, discard the fatty outside before eating pan-fried foods.
11_640180-ch06.indd 10011_640180-ch06.indd 100 8/27/10 10:41 PM8/27/10 10:41 PM
101 Chapter 6: Tips for Food Preparation and Cooking
✓ Stewing: Cooking small pieces of food submerged in liquid below simmering temperature
Stewing is the key to ready prepared meals. Your recipe can be started in the morning and during the day your food will cook and be ready just in time for dinner. Stews are cooked at a low temperature with the lid on, so most of the liquid is retained in the pot. With most cooking methods, the water in meats and vegetables turns to steam and evaporates, but with stewing, the steam collects on the lid and drips down again, basting the food.
✓ Braising: Cooking in a closed container with liquid in the oven or on the stove
Braising is very similar to stewing, but the food sits in a small amount of liquid instead of being submerged in it. The food is cooked low and slow.
✓ Poaching: Cooking food in liquid at a temperature below boiling
Poaching is done on the stove and the liquid is just below a light simmer. This technique works well with fish, seafood, and eggs. Cooking times vary depending on thickness, but on average 5 to 10 minutes is all it takes.
Poaching is usually done around 160 degrees.
✓ Boiling: Cooking in a liquid at 212 degrees
Boiling is done on the stove. Root vegetables, eggs, pasta, stews, and soups are mostly boiled. Boiling is used to bring soup and stews to a safe temperature when heated, and it cooks root vegetables and pasta quickly.
Cooking and Consuming Meat after Weight Loss Surgery
Foods containing the highest quality protein are beef, chicken, turkey, lamb, eggs, cheese, pork, seafood, fish, shellfish, veal, and liver. Every ounce of these high-quality protein foods has 6 to 8 grams of protein. A 3-ounce piece of chicken breast, for example, contains 21 grams of protein. Processed meats, however, such as hot dogs, bologna, salami, liverwurst, deviled ham, and others, are not high-quality protein foods. A 2-ounce hot dog, for instance, contains only 5 to 7 grams of protein. In addition, processed meats contain large amounts of fillers such as sugar and starches that may possibly cause dumping syndrome, and they’re also high in fat and sodium. Some of these foods have a rubbery texture that increases the chances of sticking. You can eat deli meat, but only sparingly because of the high sodium con-tent, and choose meats that are highest in protein, such as turkey breast, ham, and top round roast beef.
11_640180-ch06.indd 10111_640180-ch06.indd 101 8/27/10 10:41 PM8/27/10 10:41 PM
102 Part I: Eating Right with Every Bite
Other foods high in protein include dairy products, such as cheese and milk. One 8-ounce glass of milk, for instance, may have as much as 13 grams of protein. Eggs are also high in protein, with 6.5 grams. Eggs can be fried, hard-boiled, poached, scrambled, or prepared as omelets or egg salad, but you may find that certain preparation methods work better than others for you. Everyone is different, so while a hard-boiled egg may work for you, it may not work for your friend.
The following sections provide additional guidance and tips for enjoying various kinds of meat safely while getting the most protein bang for your buck.
BeefFor easier consumption, beef should be cooked medium to rare. Medium is a warm, pink center, and rare is a cool, red center. Refer to Table 6-1 for more specific cooking instructions. When overcooked, beef loses its moisture and becomes tough, chewy, and nearly impossible for the gastric bypass patient to swallow. Ground beef also becomes difficult to digest if overcooked. As a rule, ground beef should be cooked until it turns gray, not brown. Dry heat cooking methods are recommended for all cuts of beef (see “Dry cooking methods” earlier for more info). If moist cooking methods are used, such as stewing or braising, expensive cuts of meat are necessary and should be cooked at low temperatures for prolonged periods of time, up to eight hours, to ensure tenderness.
PoultryAfter surgery, you may find that when eating poultry, you prefer dark meat (legs and thighs) to white pieces (breast and wings) because the darker pieces contain more moisture and are easier to chew and swallow. However, this doesn’t mean that white poultry can’t be eaten, only that it has to be prepared and cooked differently to maintain moisture. When preparing white poultry, thinner cuts are better, preferably only about a quarter of an inch thick. The thickness of the meat can be adjusted by using a meat cleaver to tenderize the piece. You can also ask the butcher to slice the raw breast meat into 1⁄4-inch slices.
Dry heat cooking methods are recommended for poultry. (Check out “Dry cooking methods” earlier to find out more.) For thinner cuts of poultry (1⁄4-inch thick), sautéing is best. To sauté poultry, meat should be cooked for a minute and a half on each side in a preheated large skillet over medium-high heat. If the poultry isn’t cooked through in 3 minutes, the pan wasn’t hot enough or the meat was too thick. The number one reason why white-meat poultry is often too dry to eat is because it’s overcooked.
11_640180-ch06.indd 10211_640180-ch06.indd 102 8/27/10 10:41 PM8/27/10 10:41 PM
103 Chapter 6: Tips for Food Preparation and Cooking
For thicker pieces of poultry, such as a whole bird or large cuts, rotisserie cook-ing, roasting, grilling, and baking are appropriate dry heat cooking methods. Cook white-meat poultry until it reaches an internal temperature of 165 degrees, and dark meat to 185 degrees. Cooking to a higher temperature than necessary dries out the poultry, and lower temperatures may leave the poultry partially uncooked. Leaving the skin on the poultry while cooking helps with flavor and moisture, but we don’t recommend eating it. Skin is fat, and if consumed, you won’t have enough room left in your pouch to eat the needed amount of protein. Marinating poultry in acidic marinades helps tenderize the chicken while adding flavor. And remember that leftover poultry can be used for cold salads.
Pork, lamb, and liverPork, lamb, and liver are good protein sources and are most tender when cooked in dry heat (see “Dry cooking methods” earlier for more info). Pork and lamb are good meats to marinate and can be cut up and used in stir-fries or placed on skewers and grilled over medium-low heat. Both American lamb and New Zealand lamb can be found in most supermarkets and some restaurants. American sheep are fed grains, whereas New Zealand sheep eat grass. For this reason, New Zealand lamb sometimes tastes gamy and is not as sweet or tender as American lamb. Beef and chicken liver are very soft and can be made into fresh liver pâté or sautéed and seasoned. However, liver is very high in cholesterol, so consume in moderation. Lamb, liver, and pork can be used in any recipe where beef or poultry is recommended.
Fish and seafoodFish (from fresh water or the sea) and shellfish such as shrimp, lobster, scallops, oysters, clams, and crab are excellent sources of protein that you will probably find easy to consume after weight loss surgery.
Fish and seafood is best eaten fresh. Fish that has been frozen has less moisture and flavor. However, beware of fresh fish that smells fishy. Good fresh fish and seafood has almost no smell at all. Don’t purchase or consume smelly or slimy fish.
Fish and shellfish may be cooked using moist or dry cooking methods, but moist methods tend to keep the fish and seafood moist while cooking. A popular cooking method for fish is poaching, which is submerging it into a flavored liquid, such as white wine infused with dill, and cooking just below the simmering point (approximately 185 degrees). Poaching is a quick and healthy way to infuse flavor into the fish and shellfish. Other popular cooking methods for seafood and fish are grilling, sautéing, and broiling. Most cooked fish and shellfish can be used the next day for cold salad preparations, such as seafood salad with calypso sauce, shrimp salad with dill, and salmon fish dip with capers and fresh lemon juice.
11_640180-ch06.indd 10311_640180-ch06.indd 103 8/27/10 10:41 PM8/27/10 10:41 PM
104 Part I: Eating Right with Every Bite
Measuring Up: A Guide to Measuring Common Ingredients
Maybe you remember watching Mom or Grandma making a great meal without measuring a thing. You may have old recipes that call for a “handful” or a “chunk” of a food instead of today’s recipes that have more precise measurements. Well, Mom and Grandma may not have measured, but after a lot of years of cooking they just knew how much a cup or 4 ounces were by eyeballing the amount.
We still recommend using the proper utensils to get the amounts in a recipe correct. If you’re baking, a little more or less of an ingredient can really make the difference between success and failure of the end product. In cooking, the dish may still turn out okay, but the taste may be changed.
Use your measuring spoons to measure out small amounts of liquids, such as oils, and dry foods, like seasonings. Too much or too little will really make a difference in the finished food. Don’t measure over the bowl or the pot, because if you accidentally overpour, you’re stuck. You usually can’t get it out after you’ve put it in! Measurements are level on the top, not heaping. Heaping measures can be double the amount you want, and more is not always better.
The recipes in this book use United States customary units for measurements. See the Appendix for metric conversions.
Measuring weight versus volumeOne thing that gets folks confused with measuring is weight and volume. All ounces are not equal. Fluid ounces measure liquids like broth, water, milk, or oil. Other ounces measure the weight of solid foods like chicken, flour, or cheese. This may seem puzzling, so check out the following examples:
✓ 1⁄4 cup of vegetable oil measures 2 fluid ounces (liquid) but weighs 11⁄2 ounces.
✓ 1⁄2 cup of shredded cheese also weighs 2 ounces (dry), not four ounces as you may think because of the previous example.
✓ 1⁄2 cup of puffed rice cereal measures the same volume as 1⁄2 cup of peanut butter, but they don’t weigh the same!
When you’re reading a recipe:
✓ If the ingredient is a solid food, like pasta or meat, and the amount is in ounces, it is weight. Time to get out the food scale.
11_640180-ch06.indd 10411_640180-ch06.indd 104 8/27/10 10:41 PM8/27/10 10:41 PM
105 Chapter 6: Tips for Food Preparation and Cooking
✓ If the ingredient is a solid food, like pasta or meat, and the amount is in cups, it is a volume measurement. Use measuring cups.
✓ If the ingredient is a liquid and the amount is in ounces, it is fluid ounces, not weight. Use the liquid measuring cup.
Measuring liquidsMeasure liquids (anything that pours) using the liquid measuring cup. It has a little spout to make pouring easier and leaves some room at the top so you won’t spill the contents. Set the measuring cup on the counter and pour in the liquid. You can’t get an accurate reading from looking down into the cup, so get down to eye level to check the amount. The liquid level should be right on the marking lines.
Here are some handy measurements for wet ingredients:
✓ 8 fluid ounces (fl. oz.) = 1 cup (c.)
✓ 16 fl. oz. = 2 c. = 1 pint (pt.)
✓ 32 fl. oz. = 4 c. = 2 pt. = 1 quart (qt.)
✓ 64 fl. oz. = 8 c. = 4 pt. = 2 qt. = 1⁄2 gallon (gal.)
✓ 128 fl. oz. = 4 qt. =1 gal.
Have several liquid measuring cups of varying size. Getting a reading for 1⁄4 cup in a 1-cup measuring cup is easier than in a 4-cup measuring cup.
Measuring solidsFollowing are some common measurements for dry ingredients:
✓ 3 teaspoons (tsp.) = 1 tablespoon (Tbsp.)
✓ 4 Tbsp. = 1⁄4 cup (c.)
✓ 51⁄3 Tbsp. = 1⁄3 c.
✓ 8 Tbsp. = 1⁄2 c.
✓ 12 Tbsp. = 3⁄4 c.
✓ 16 Tbsp. = 1 c.
✓ 16 (dry) ounces (oz.) = 1 pound (lb.)
Measuring cups come in graduated sizes, usually starting at 1⁄4 cup and going up to 1 cup. You can also find sets that give you a 2⁄3 cup and a 3⁄4 cup measure.
11_640180-ch06.indd 10511_640180-ch06.indd 105 8/27/10 10:41 PM8/27/10 10:41 PM

106 Part I: Eating Right with Every Bite
Having more than one set is a good idea. Having to stop where you are to wash and dry measuring cups when you’re cooking is real hassle.
Following are some tips for measuring common foods:
✓ If the recipe calls for a raw protein food to be cooked, the weight in the ingredient list refers to the weight before cooking; for instance, 8 ounces boneless, skinless chicken breast.
✓ If the recipe calls for cooked meat, like in a salad, the weight given refers to after cooking; for example, 8 ounces cooked chicken breast.
✓ Check the form of the food. The smaller the pieces, the more that fits into the cup. For example, 1⁄4 cup of walnut halves is fewer nuts than 1⁄4 cup chopped walnuts.
✓ Recipes call for level measurements, so when you fill the cup with a fine ingredient (such as sugar or flour), take a table knife and run it across the top of the cup to make the food level with the top of the cup.
✓ Flour gets packed down in the bag, so it needs to be stirred up in the bag or sifted before measuring. Measure flour by spooning it from the bag into the measuring cup.
✓ Brown sugar is measured either unpacked or packed. Unpacked means you can just scoop it out with the spoon or cup and level if off. Packed means you need to put it into the cup or spoon and pushed down to pack it tightly.
✓ Anything semi-liquid, like peanut butter, sour cream, or cottage cheese, gets measured in measuring cups unless the recipe specifies weight.
Choosing and using a food scaleIf you have a food scale stuck in the back of your cupboard, dig it out, blow off the dust, and put it to use. You may think weighing out food is a hassle, but it’s a skill worth developing. People are not born knowing what 3 ounces of chicken looks like, and the way to learn this is to weigh chicken a bunch of times. The more you use the food scale, the better you become at eyeballing portions.
You have a wide choice of food scales available at department stores and home specialty or kitchen stores. Smaller scales can measure up to 16 ounces and are used mostly for determining portion sizes. Home kitchen scales can weigh foods up to 10 pounds or more and are great for cooking measure-ments. Make sure your scale has a function to set the scale to zero weight, or tare. Some scales give you a reading with a moving pointer and others have a digital screen. Digital scales weigh out in fractions and the display may be easier to read than scales with a pointer.
11_640180-ch06.indd 10611_640180-ch06.indd 106 8/27/10 10:41 PM8/27/10 10:41 PM
107 Chapter 6: Tips for Food Preparation and Cooking
Some digital scales have food codes programmed in so you can get nutrition information as well as weight. You just enter the code and weigh out your food, and there you have it: calories, carbohydrates, fat, protein, and maybe some other nutrients depending on the specific programming. This feature is especially great for figuring out how many calories you’re eating in foods that don’t have nutrition labels, like fruit. How many grapes are in 1⁄2 cup depends on the size of the grapes. Is that a small, medium, or large apple? Most of us underestimate the sizes. The scale tells you how much you are eating and you don’t have to guess at the size. Some scales also have a memory function so as you weigh your food throughout the day, it keeps a running total of your calories and grams of protein, carbs, and fat.
If you’re trying to figure how many grams of protein you’re eating in your fish, chicken, beef, or pork, weigh the food after cooking. Some of the water in these foods cooks out, so the cooked food weighs less than the raw food. The excess water weight can throw off your nutrition calculations.
Figuring out pasta measurements can get confusing. Say a recipe calls for 2 cups of cooked pasta and you don’t want to make extra. How much dry pasta do you need to start with? Part of the answer depends on the shape of the pasta. The size and shape dictates how much will fit in a measuring cup so weight is always the best option for measuring pasta. Generally, 8 ounces of dry pasta equals 4 cups of cooked pasta. So in this case you weigh out 4 ounces on your food scale and cook it up. No leftovers! The exception to the rule is egg noodles. Eight ounces of egg noodles cook up to 21⁄2 cups.
Using Alcohol in CookingThe main reason alcoholic beverages are used in recipes is to add flavor. After all, the most premium of extracts with the most concentrated flavors are alcohol-based, particularly vanilla.
In many recipes the alcohol is an important component to achieve a desired chemical reaction in a dish. Alcohol causes many foods to release flavors that cannot be experienced without the interaction of alcohol. Beer contains yeast which leavens breads and batters. Alcoholic beverages also helps break down tough fibers in marinades. In addition, some dishes use alcoholic content to provide entertainment, such as flambé and flaming dishes. As for fondue, wine and kirsch are added because they lower the boiling point of the cheese, which helps prevent curdling.
Alcohol evaporates even without heat, and the majority burns off during the cooking process. How much remains in the dish depends on the cooking method and amount of cooking time. Those alcohol-soaked fruitcakes turn into solid bricks before the alcohol evaporates. A bottle of beer in a long-simmered stew doesn’t leave a significantly measurable alcohol residue,
11_640180-ch06.indd 10711_640180-ch06.indd 107 8/27/10 10:41 PM8/27/10 10:41 PM
108 Part I: Eating Right with Every Bite
but does add a rich, robust flavor. A quick flambé may not burn off all the alcohol, whereas a wine reduction sauce leaves little if any alcohol content. Heat and time are the keys. Obviously, uncooked foods with alcohol retain the most alcohol.
In most cases you have to use your own judgment on substituting alcohol in recipes. Sweet recipes require different substitutions than savory. Amounts also make a difference. For example, you don’t want to use a quarter cup of almond extract to replace the same amount of amaretto liqueur. And remember, even with reasonable replacements, the final product won’t be what the original recipe intended.
Making Healthy SubstitutionsWhen it comes to providing a healthier alternative for your or your family’s meal plan, substituting ingredients is a great way to decrease calories while increasing flavor and nutrition. However, it’s important to understand that not all substitutions are created equal, and while something may save you calories from fat, it may possibly increase calories in other areas such as from sugar.
Product labels are designed to sell. So understanding how to read the back of the labels where the nutritional information is located helps to get past appealing labels and keep your pantry free of unhealthy substitutions. The front product label is usually colorful and highlights words such as natural, 10% more, now with more fiber, made with less sugar, and fat free. Although these claims are true, what they’re not telling you is in most cases they have increased other areas of the formulation to bring back flavor that was lost during the making of the product. Generally sugar and/or sodium content is increased, especially in fat-free and low-fat products.
The healthy-substitution market is filled with new products on a monthly basis, and some are worth mentioning:
✓ Salad dressing: Always use vinaigrette dressing instead of cream based. A great product is vinegar-based spray salad dressing. It adds a ton of flavor with the added benefit of no calories or fat.
✓ Butter: “I Can’t Believe It’s Not Butter” spray is a good product that adds almost no calories or fat but covers your food and adds butter flavor.
✓ Eggs: Eggs are healthy, but do contain saturated fat, so you can make them healthier by just using the egg whites or egg substitutes. Egg substitutes are made from real egg whites with the benefits of added vitamins and minerals. The yellow color comes from the added beta carotene.
11_640180-ch06.indd 10811_640180-ch06.indd 108 8/27/10 10:41 PM8/27/10 10:41 PM
109 Chapter 6: Tips for Food Preparation and Cooking
✓ Cheese: We don’t recommend fat-free cheese, because it lacks flavor and doesn’t melt, but low-fat cheese is a good substitution idea. If a recipe calls for 1 cup of cheddar cheese, substitute with low-fat cheddar, or use just a half cup of a sharper cheese with stronger flavor.
✓ Sour cream and cream cheese: These foods are generally used as garnishes or in small amounts, so fat-free versions work fine.
If you’re changing a recipe that has been a family favorite, change one ingredient at a time. Making too many changes at one time may change the final product so much that it ends up inedible!
Saving calories and cutting the fatOne of the easiest ways to make your food healthier and reduce calories is by reducing or substituting the high-fat ingredients. A little bit of fat carries a bunch of calories. Remember that:
✓ 1 gram protein = 4 calories
✓ 1 gram carbohydrate = 4 calories
✓ 1 gram fat = 9 calories
You can substitute many high-fat regular ingredients with lower-fat versions or similar products. Use the handy list below to help you out.
Sour cream substitutes:
✓ Plain nonfat Greek yogurt
✓ Fat-free sour cream
Cheese substitutes:
✓ Low-fat, skim-milk cheese
✓ Cheese with less than 5 grams of fat per ounce
Ricotta cheese substitutes:
✓ Low-fat or nonfat cottage cheese
✓ Part-skim or nonfat ricotta cheese
Milk/cream substitutes:
✓ 1 percent or nonfat milk
✓ Fat-free half-and-half
11_640180-ch06.indd 10911_640180-ch06.indd 109 8/27/10 10:41 PM8/27/10 10:41 PM
110 Part I: Eating Right with Every Bite
Ground beef substitutes:
✓ Extra-lean ground beef
✓ Lean ground turkey or chicken
Sausage substitutes:
✓ Lean ground turkey sausage
✓ 95 percent fat-free sausage
✓ Soy-based sausage products
Mayonnaise and salad dressing substitutes:
✓ Low-fat mayonnaise
✓ Low-fat or fat-free dressings
Butter substitutes:
✓ Low-fat margarine
✓ Spray margarine
Checking out other ways to save caloriesAnother way to reduce your calorie intake is by using less of the ingredient. Many times a recipe calls for sautéing something in 2 tablespoons of oil. Usually you can cut this amount in half. Reducing the amount of cheese in a recipe is an easy change. You can also put in less pasta and/or rice so the dish is easier for you to tolerate as well as lower-calorie. Another easy place to cut back is in a recipe that includes nuts. Nuts are typically included just for flavor, not to dominate the food. Don’t decrease the amount of vegetables, though!
You can leave many ingredients out entirely. Sometimes an ingredient is added for appearance sake or as a garnish. You don’t have to top a taco with sour cream and guacamole. If the ingredient isn’t critical to the recipe, just don’t put it in.
You can change some ingredients. If a cooking recipe (not for a baked item) calls for sugar, use sugar substitute. In addition, herbs and spices can add a lot of flavor without calories. They’re interchangeable and can be substituted to suit your tastes.
You can change the cooking method. We give you lots of good information at the beginning of this chapter to help you pick the right cooking method for the food, so find a healthier option for the dish you want to make.
11_640180-ch06.indd 11011_640180-ch06.indd 110 8/27/10 10:41 PM8/27/10 10:41 PM
111 Chapter 6: Tips for Food Preparation and Cooking
Relying on Convenience FoodsWe’re all looking for timesavers. You get home at dinnertime and the last thing you want to do is spend an hour standing in the kitchen and fixing dinner. Using convenience foods can really save you time and money. Money? Yup, your time is worth money, and convenience foods can result in less food waste.
Note that we’re talking convenience foods here, not highly processed food. If you have a recipe that calls for shredded carrots and you buy preshredded carrots from the produce department, that’s a convenience food, not a highly processed food. We mean convenience foods that are pretty much in their natural state, no additives, no long list of ingredients, just the food itself put into a different form to save you time.
The produce department is a great place to save time. You can buy all kinds of vegetables already cleaned, cut, and ready to go. Some of these come in plastic steamer bags. No more excuses that you don’t know how or don’t have the time to prepare fresh veggies. You can buy fresh fruit already cleaned and cut. Probably the biggest sellers are the prepackaged lettuce varieties and salads. If you buy a packaged salad mix with all the toppings, pick one that that has a light dressing.
Frozen vegetables are also a quick-dinner solution, but watch out for pack-ages that come with unhealthy sauce included. Try cooking plain frozen veg-etables and then adding a little spray butter and a sprinkle of your favorite herbs.
If a recipe calls for cooked chicken, a rotisserie chicken from the deli is a great timesaver. You could also use a rotisserie turkey breast and then you have only white meat. It’s cooked and ready to go; you just need to take the skin off the meat and the meat off the bones.
11_640180-ch06.indd 11111_640180-ch06.indd 111 8/27/10 10:41 PM8/27/10 10:41 PM

112 Part I: Eating Right with Every Bite
11_640180-ch06.indd 11211_640180-ch06.indd 112 8/27/10 10:41 PM8/27/10 10:41 PM

Part II
Now You’re Cooking! Healthy and Hearty Dishes
12_640180-pp02.indd 11312_640180-pp02.indd 113 8/27/10 10:41 PM8/27/10 10:41 PM

In this part . . .
Rise and shine for a good, balanced breakfast, and prepare food fast (that isn’t fast food) for lunches
that aren’t to be taken lightly and healthy dinners to die for. We provide you with fabulous recipes for main dish entrées featuring poultry, beef, pork, lamb, fish, seafood, and vegetarian options. With these recipes you have plenty of variety and don’t have to worry about a thing, because they’re all weight loss surgery friendly.
12_640180-pp02.indd 11412_640180-pp02.indd 114 8/27/10 10:41 PM8/27/10 10:41 PM
Chapter 7
Balanced BreakfastsIn This Chapter▶ Starting the day on track
▶ Waking up with easy fruit and yogurt dishes
▶ Scrambling more than an egg
▶ Loving whole grains in the morning
▶ Taking more time for leisurely weekend breakfasts
In the old days, before surgery, you may have been a breakfast skipper. Now that you have
your pouch and follow the rule of eating three regular meals a day (right?), you’re a breakfast eater. You may not feel hungry when you get up, but your pouch needs to be fed. Eating breakfast jump starts your metabolism. Hello to another day of losing weight! You also need to keep your body’s blood-sugar level stable to feel your best. Skipping breakfast, or any meal, is likely to make you feel lightheaded and unfocused and may give you a headache.
You need to eat breakfast within 90 minutes of getting up, so this may take some planning on your part. If you’re always in a rush, turn to one of the on-the-go meals we include in this chapter. We also tell you which recipes can be made the night before for a quick start to your day.
Starting Your Day the Pouch-Friendly Way
Starting the day with a pouch-friendly meal can help set you up for on-track eating the rest of the day. Making healthy food choices gives you a positive attitude toward eating to carry you right through dinner. It may be harder for you to get some foods down in the morning, so choose breakfast foods that
Recipes in This Chapter
T Spicy Pumpkin YogurtT Peanut-Sauced Chunky
BananaT Triple Berry Yogurt
Parfait▶ Havarti Scramble with
Salmon▶ Canadian Bacon and
Spinach FrittataT Quinoa Pilaf with Dried
Cherries and PecansT Banana Bran MuffinsT Honey, Almonds, and
Oats Breakfast BarT Cinnamon, Pear, and
Walnut OatmealT Swiss OatmealT Warm Spiced Shredded
WheatT Berrycotta PancakesT Baked French Toast
13_640180-ch07.indd 11513_640180-ch07.indd 115 8/27/10 10:41 PM8/27/10 10:41 PM

116 Part II: Now You’re Cooking! Healthy and Hearty Dishes
won’t get stuck. Getting food stuck your first meal of the day can make you miserable all day and limit your food choices.
Sometimes after surgery, when you wake up in the morning your stomach pouch may feel unsettled, or if you had AGB, your band may feel “tight.” This is due to bodily fluids that collect in your pouch overnight. Sipping a warm beverage, such as decaffeinated tea or warm water, can help calm your pouch and make it easier for you to eat breakfast.
Coffee, both regular and decaffeinated, may not be tolerated in the early months after surgery because coffee beans themselves can be irritants. Caffeine is also a diuretic, so decaffeinated tea may be your best choice after surgery.
Take 20 to 30 minutes to eat your breakfast, and if you’re in a big hurry to get out the door in the morning, make a breakfast that you can take with you. Pick a recipe that you can make in five minutes or less. Or if you want to have a more leisurely family breakfast on the weekend, choose a recipe that takes longer. We include recipes that taste good to everybody, so your whole family can enjoy the breakfast you prepare.
Note that the portion sizes in these recipes are intended for people who are at least a few months out from surgery. If you’re still eating smaller meals, split the recipe into more portions and eat only the amount you need.
Waking Up Your Pouch Gently with Yogurt and Fruit Recipes
Getting your pouch ready to take on the day is not easy for some. So begin with a few sips of warm liquid such as decaf coffee, herbal tea, or warm water to allow the pouch to relax and get ready to start taking in breakfast. Fruit is about 80 percent water, so it’s easy to eat. In addition, it’s loaded with vitamins and minerals. Fruit doesn’t provide protein, though, which is where yogurt comes in.
13_640180-ch07.indd 11613_640180-ch07.indd 116 8/27/10 10:41 PM8/27/10 10:41 PM
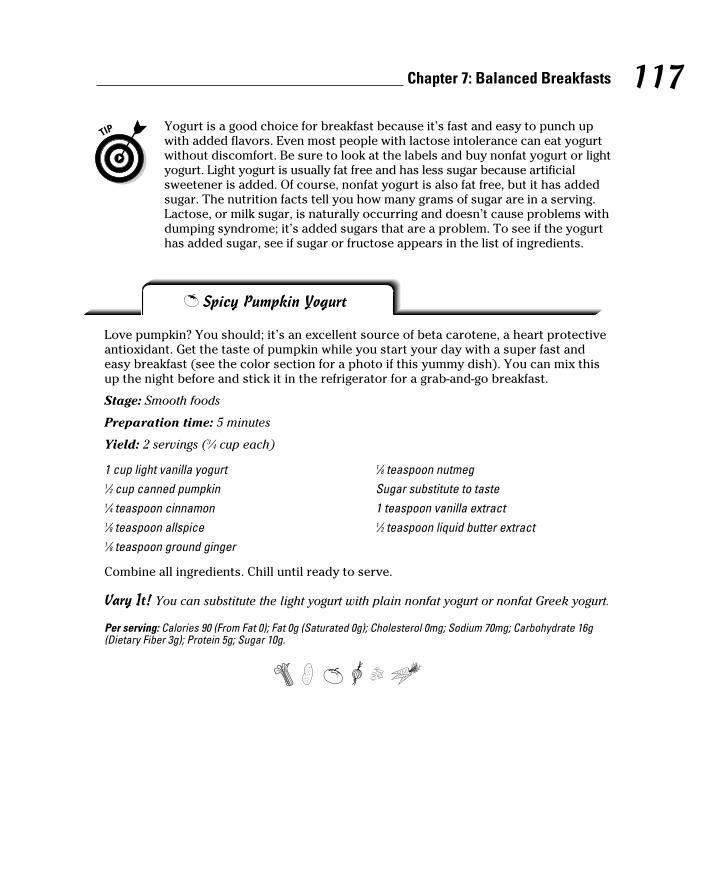
117 Chapter 7: Balanced Breakfasts
T Spicy Pumpkin Yogurt
Love pumpkin? You should; it’s an excellent source of beta carotene, a heart protective antioxidant. Get the taste of pumpkin while you start your day with a super fast and easy breakfast (see the color section for a photo if this yummy dish). You can mix this up the night before and stick it in the refrigerator for a grab-and-go breakfast.
Stage: Smooth foods
Preparation time: 5 minutes
Yield: 2 servings (3⁄4 cup each)
1 cup light vanilla yogurt1⁄2 cup canned pumpkin1⁄4 teaspoon cinnamon1⁄8 teaspoon allspice1⁄8 teaspoon ground ginger
1⁄8 teaspoon nutmegSugar substitute to taste1 teaspoon vanilla extract1⁄2 teaspoon liquid butter extract
Combine all ingredients. Chill until ready to serve.
Vary It! You can substitute the light yogurt with plain nonfat yogurt or nonfat Greek yogurt.
Per serving: Calories 90 (From Fat 0); Fat 0g (Saturated 0g); Cholesterol 0mg; Sodium 70mg; Carbohydrate 16g (Dietary Fiber 3g); Protein 5g; Sugar 10g.
Yogurt is a good choice for breakfast because it’s fast and easy to punch up with added flavors. Even most people with lactose intolerance can eat yogurt without discomfort. Be sure to look at the labels and buy nonfat yogurt or light yogurt. Light yogurt is usually fat free and has less sugar because artificial sweetener is added. Of course, nonfat yogurt is also fat free, but it has added sugar. The nutrition facts tell you how many grams of sugar are in a serving. Lactose, or milk sugar, is naturally occurring and doesn’t cause problems with dumping syndrome; it’s added sugars that are a problem. To see if the yogurt has added sugar, see if sugar or fructose appears in the list of ingredients.
13_640180-ch07.indd 11713_640180-ch07.indd 117 8/27/10 10:41 PM8/27/10 10:41 PM
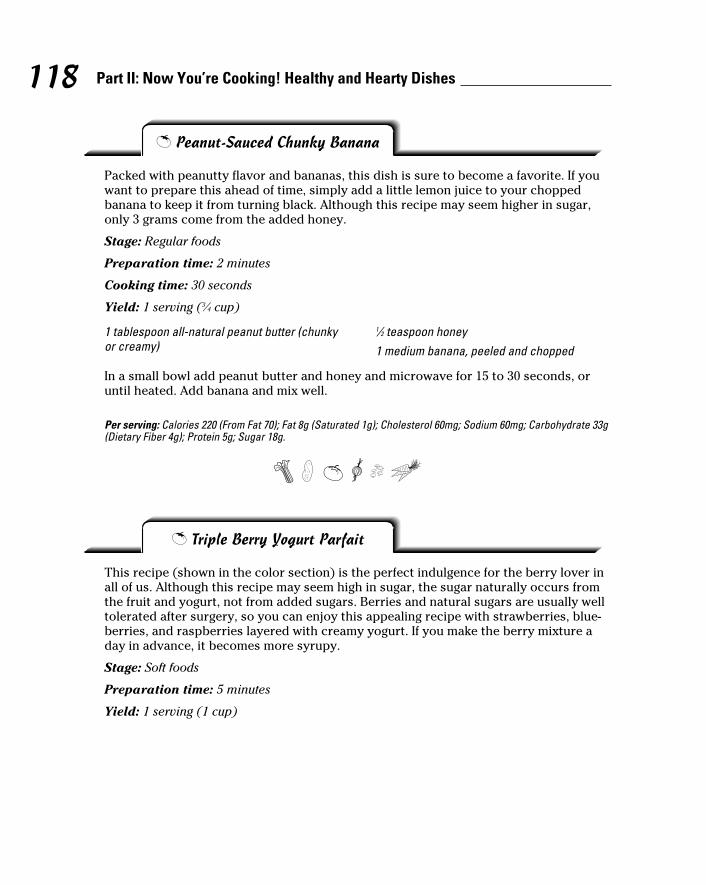
118 Part II: Now You’re Cooking! Healthy and Hearty Dishes
T Peanut-Sauced Chunky Banana
Packed with peanutty flavor and bananas, this dish is sure to become a favorite. If you want to prepare this ahead of time, simply add a little lemon juice to your chopped banana to keep it from turning black. Although this recipe may seem higher in sugar, only 3 grams come from the added honey.
Stage: Regular foods
Preparation time: 2 minutes
Cooking time: 30 seconds
Yield: 1 serving (3⁄4 cup)
1 tablespoon all-natural peanut butter (chunky or creamy)
1⁄2 teaspoon honey1 medium banana, peeled and chopped
In a small bowl add peanut butter and honey and microwave for 15 to 30 seconds, or until heated. Add banana and mix well.
Per serving: Calories 220 (From Fat 70); Fat 8g (Saturated 1g); Cholesterol 60mg; Sodium 60mg; Carbohydrate 33g (Dietary Fiber 4g); Protein 5g; Sugar 18g.
T Triple Berry Yogurt Parfait
This recipe (shown in the color section) is the perfect indulgence for the berry lover in all of us. Although this recipe may seem high in sugar, the sugar naturally occurs from the fruit and yogurt, not from added sugars. Berries and natural sugars are usually well tolerated after surgery, so you can enjoy this appealing recipe with strawberries, blue-berries, and raspberries layered with creamy yogurt. If you make the berry mixture a day in advance, it becomes more syrupy.
Stage: Soft foods
Preparation time: 5 minutes
Yield: 1 serving (1 cup)
13_640180-ch07.indd 11813_640180-ch07.indd 118 8/27/10 10:41 PM8/27/10 10:41 PM
119 Chapter 7: Balanced Breakfasts
1 In a small bowl mix the berries, sugar substitute, and vanilla.
2 Place half the yogurt in the bottom of an 8-ounce glass. Add half the berry mixture over the yogurt. Layer the remaining yogurt and berries.
Vary It! Substitute the light yogurt with plain nonfat yogurt or nonfat Greek yogurt.
Per serving: Calories 110 (From Fat 0); Fat 0g (Saturated 0g); Cholesterol 0mg; Sodium 65mg; Carbohydrate 22g (Dietary Fiber 3g); Protein 4g; Sugar 14g.
Exploring Easy Egg DishesDid you know that an egg is one of nature’s most nutritious foods? Eggs are a high-quality protein food, are low in sodium, and contain vitamins and minerals. They’re also inexpensive and easy to prepare.
Cook eggs with medium to low temperature and careful timing. When eggs are cooked at too high a temperature or for too long at a low temperature, the whites shrink and become tough and rubbery and the yolks become tough and may turn gray-green.
After surgery some people have difficulty tolerating eggs. This has a lot to do with the texture: If a cooked egg is too rubbery, like a hardboiled egg, you may have trouble getting it down and keeping it down. Try a fluffy scrambled egg instead.
4 medium strawberries, tops removed, chopped2 tablespoons blueberries2 tablespoons raspberries
1 or 2 packets sugar substitute, or to taste1⁄4 teaspoon vanilla extract1⁄2 cup light vanilla yogurt
13_640180-ch07.indd 11913_640180-ch07.indd 119 8/27/10 10:41 PM8/27/10 10:41 PM
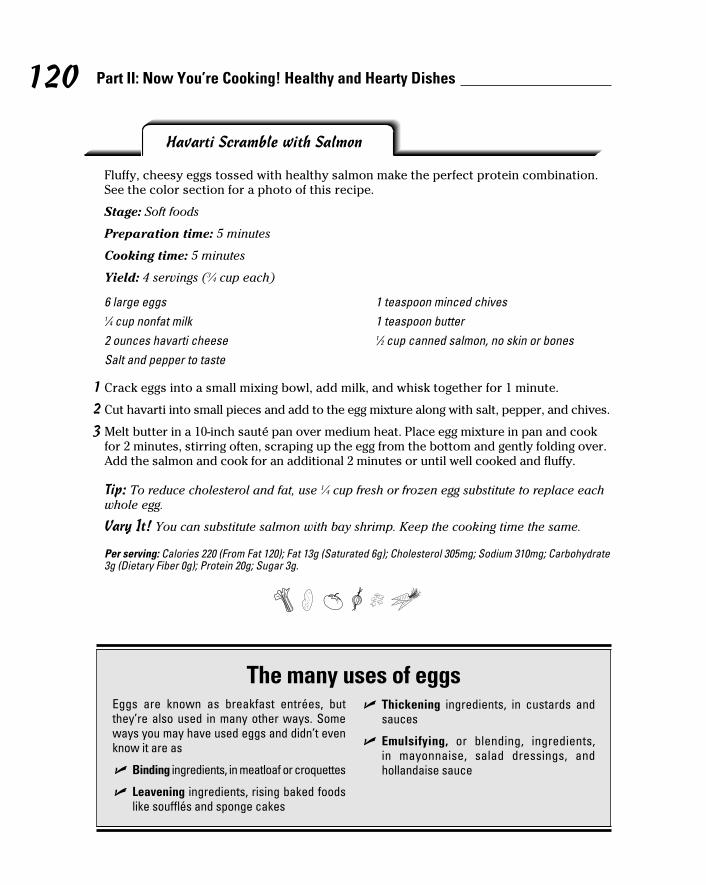
120 Part II: Now You’re Cooking! Healthy and Hearty Dishes
Havarti Scramble with Salmon
Fluffy, cheesy eggs tossed with healthy salmon make the perfect protein combination. See the color section for a photo of this recipe.
Stage: Soft foods
Preparation time: 5 minutes
Cooking time: 5 minutes
Yield: 4 servings (3⁄4 cup each)
6 large eggs1⁄4 cup nonfat milk2 ounces havarti cheeseSalt and pepper to taste
1 teaspoon minced chives1 teaspoon butter1⁄2 cup canned salmon, no skin or bones
1 Crack eggs into a small mixing bowl, add milk, and whisk together for 1 minute.
2 Cut havarti into small pieces and add to the egg mixture along with salt, pepper, and chives.
3 Melt butter in a 10-inch sauté pan over medium heat. Place egg mixture in pan and cook for 2 minutes, stirring often, scraping up the egg from the bottom and gently folding over. Add the salmon and cook for an additional 2 minutes or until well cooked and fluffy.
Tip: To reduce cholesterol and fat, use 1⁄4 cup fresh or frozen egg substitute to replace each whole egg.
Vary It! You can substitute salmon with bay shrimp. Keep the cooking time the same.
Per serving: Calories 220 (From Fat 120); Fat 13g (Saturated 6g); Cholesterol 305mg; Sodium 310mg; Carbohydrate 3g (Dietary Fiber 0g); Protein 20g; Sugar 3g.
The many uses of eggsEggs are known as breakfast entrées, but they’re also used in many other ways. Some ways you may have used eggs and didn’t even know it are as
✓ Binding ingredients, in meatloaf or croquettes
✓ Leavening ingredients, rising baked foods like soufflés and sponge cakes
✓ Thickening ingredients, in custards and sauces
✓ Emulsifying, or blending, ingredients, in mayonnaise, salad dressings, and hollandaise sauce
13_640180-ch07.indd 12013_640180-ch07.indd 120 8/27/10 10:41 PM8/27/10 10:41 PM

121 Chapter 7: Balanced Breakfasts
Canadian Bacon and Spinach Frittata
A frittata is basically a crustless quiche in which cooked meats and raw vegetables are mixed with egg and baked to perfection. The eggs cook quicker than meat does, so all meats need to be cooked first. As an added health benefit, you can drain all excess fat from your cooked meat before you use it. This dish is also a good way to sneak in some veggies! Check out a photo of this recipe in the color section.
Stage: Regular food
Preparation time: 6 minutes
Cooking time: 25 minutes
Yield: 8 servings (1⁄2 cup each)
12 large eggs8 ounces Canadian bacon, cut into 1⁄4-inch cubes and cooked1⁄2 cup chopped green onions1⁄2 teaspoon paprika1⁄4 teaspoon garlic powder
1⁄4 teaspoon dried mustard1⁄4 teaspoon salt1⁄4 teaspoon black pepper2 cups fresh baby spinach1 cup shredded low-fat sharp cheddar cheese
1 Preheat the oven to 350 degrees. Spray a 9-x-9-inch baking dish with nonstick spray.
2 In a large mixing bowl whisk eggs for 2 minutes. Add the Canadian bacon, green onions, and spices and mix well. Pour the mixture into the baking dish and top with baby spinach and cheddar cheese.
3 Bake for 25 minutes, or until the center of frittata is firm. Let cool for 5 minutes before cutting.
Per serving: Calories 175 (From Fat 91); Fat 10g (Saturated 4g); Cholesterol 332mg; Sodium 541mg; Carbohydrate 3g (Dietary Fiber 1g); Protein 18g; Sugar 1g.
13_640180-ch07.indd 12113_640180-ch07.indd 121 8/27/10 10:41 PM8/27/10 10:41 PM
122 Part II: Now You’re Cooking! Healthy and Hearty Dishes
Having Healthy Whole-Grain MorningsA wide variety of whole grains provide valuable vitamins and minerals. Whole grains are high in fiber and help you feel full longer. Some whole grains, like oatmeal, are good sources of soluble fiber, which helps lower bad cholesterol. Many whole grains are convenient, quick to make, and taste good, making them perfect foods for busy mornings.
Choose products that list whole-grain foods as the first ingredient in the ingredient list. Look for the key words whole or whole grain before the grain ingredient’s name.
Labels and packaging are designed to get you to purchase their product. Beware of foods labeled with the words multigrain, stone-ground, 100% wheat, cracked wheat, seven-grain, or bran because they are usually not 100 percent whole-grain products. In addition, brown color is not an indication of a whole grain; it can come from molasses or other added ingredients. Read the ingredient list to see if something is a whole grain.
Whole grains use warm, moist environments to expand, and your pouch is the perfect place. After whole grains are eaten, they expand in your pouch and may cause you discomfort and/or vomiting. To help prevent too much expansion, add more liquid while the whole grain is cooking. This requires a longer cook time, but better it absorbs liquid in the pot than in your pouch. As a general rule of thumb, increase the liquid by one fourth. For example, rice is usually cooked at a ratio of 1 cup rice to 2 cups liquid, but instead use 2 1⁄2 cups liquid to 1 cup rice. Note: We have already adjusted the liquid for the recipes in this book.
Good old oatsOne of the most popular whole grains is oats, which are used in a wide variety of foods from breakfast cereals to meatloaf to desserts. Different kinds of oatmeal have different cooking times and uses.
✓ Steel-cut oats are hulled and cracked oats that are chopped into little pieces. They require a longer cooking time and are chewier than other types. You can usually find them at your natural food store or in the health food section of your grocery store.
✓ Old-fashioned oats are also from hulled and cracked oats, but they’re steamed and rolled to flatten them. This is usually the least expensive type of oats.
✓ Quick oats are old-fashioned oats that have been rolled thinner to make them cook up faster. They’re softer than the thicker oats.
✓ Instant oatmeal comes is packets and usually has flavoring and sugar added. Buy the unflavored ones and add your own sweeteners and flavors to make it the way you like it and cut down on the added sugars.
13_640180-ch07.indd 12213_640180-ch07.indd 122 8/27/10 10:41 PM8/27/10 10:41 PM
123 Chapter 7: Balanced Breakfasts
T Quinoa Pilaf with Dried Cherries and Pecans
Quinoa (pronounced keen-wah) is a gluten-free nutty whole grain that when cooked has an amazing flavor and texture. This may be a new grain to some of you, but after you make this dish you’ll want to make it a regular part of your diet. Quinoa has more protein than other grains and is a great source of fiber. It’s a great choice for vegetarians because it contains all the essential amino acids, making it a complete protein.
Stage: Regular foods
Preparation time: 5 minutes
Cooking time: 30 minutes
Yield: 8 servings (1⁄2 cup each)
11⁄2 cups quinoa2 teaspoons butter31⁄4 cups nonfat milk1⁄3 cup dried cherries
1⁄2 teaspoon vanilla extract1⁄4 cup chopped pecans1⁄4 cup sugar substitute
1 Place quinoa in a colander and rinse under warm running water for 3 minutes to rinse off its natural bitter coating. Drain well.
2 In a large skillet, heat butter over medium heat. Stir in quinoa and cook 2 to 3 minutes or until lightly toasted. Add milk, cherries, vanilla, and pecans.
3 Bring to a simmer, cover, and cook 20 to 25 minutes, or until quinoa is tender. Stir in sugar substitute.
Per serving: Calories 200 (From Fat 50); Fat 5g (Saturated 1g); Cholesterol 5mg; Sodium 50mg; Carbohydrate 30g (Dietary Fiber 4g); Protein 8g; Sugar 7g.
13_640180-ch07.indd 12313_640180-ch07.indd 123 8/27/10 10:41 PM8/27/10 10:41 PM
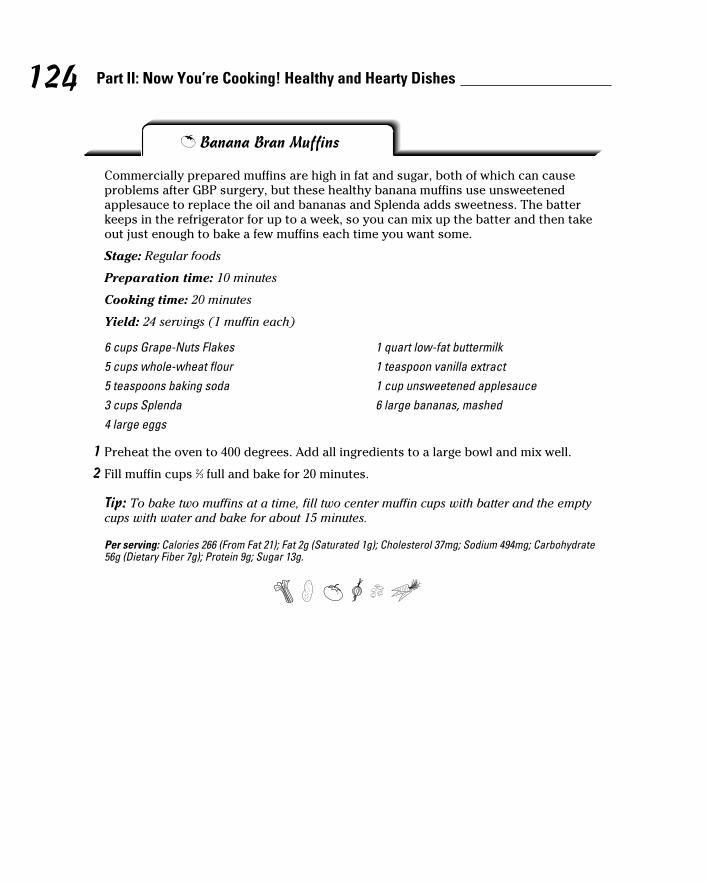
124 Part II: Now You’re Cooking! Healthy and Hearty Dishes
T Banana Bran Muffins
Commercially prepared muffins are high in fat and sugar, both of which can cause problems after GBP surgery, but these healthy banana muffins use unsweetened applesauce to replace the oil and bananas and Splenda adds sweetness. The batter keeps in the refrigerator for up to a week, so you can mix up the batter and then take out just enough to bake a few muffins each time you want some.
Stage: Regular foods
Preparation time: 10 minutes
Cooking time: 20 minutes
Yield: 24 servings (1 muffin each)
6 cups Grape-Nuts Flakes5 cups whole-wheat flour5 teaspoons baking soda3 cups Splenda4 large eggs
1 quart low-fat buttermilk1 teaspoon vanilla extract1 cup unsweetened applesauce6 large bananas, mashed
1 Preheat the oven to 400 degrees. Add all ingredients to a large bowl and mix well.
2 Fill muffin cups 2⁄3 full and bake for 20 minutes.
Tip: To bake two muffins at a time, fill two center muffin cups with batter and the empty cups with water and bake for about 15 minutes.
Per serving: Calories 266 (From Fat 21); Fat 2g (Saturated 1g); Cholesterol 37mg; Sodium 494mg; Carbohydrate 56g (Dietary Fiber 7g); Protein 9g; Sugar 13g.
13_640180-ch07.indd 12413_640180-ch07.indd 124 8/27/10 10:41 PM8/27/10 10:41 PM

125 Chapter 7: Balanced Breakfasts
T Honey, Almonds, and Oats Breakfast Bar
Quick, easy, and delicious, this breakfast bar will quickly become a family favorite. Why spend a lot of money on premade cereal bars when these can made for less? The bars can be made ahead of time and stored in an airtight container for a week. If you’re out running errands or traveling, they’re a good food to wrap up and take with you because they don’t need refrigeration and can pass through airport security.
Stage: Regular foods
Preparation time: 5 minutes
Cooking time: 3 minutes
Yield: 8 servings (Two 2-square-inch bars each)
1 1⁄3 cups Wheat Chex or Shreddies cereal, broken into smaller pieces2⁄3 cup crispy brown rice cereal2⁄3 cup sliced almonds
1⁄3 cup instant whole oats1⁄3 cup honey1⁄2 cup all-natural creamy peanut butter1⁄4 teaspoon liquid butter extract
1 In a large bowl, toss together the cereals, almonds, and oats. Grease an 8-x-8-inch dish with nonstick cooking spray. Set both aside.
2 In a medium saucepan over medium heat, stir together the honey and peanut butter. Cook mixture until it’s heated through but not simmering, about 11⁄2 minutes, stirring constantly to keep it from burning to the bottom of the pan.
3 Remove from heat and quickly stir in butter extract. Pour the mixture into the bowl with the cereals and mix well.
4 Press into the prepared pan. Let cool until set. Cut into bars and serve.
Per serving: Calories 241 (From Fat 112); Fat 13g (Saturated 1g); Cholesterol 0mg; Sodium 131mg; Carbohydrate 25g (Dietary Fiber 3g); Protein 6g; Sugar 13g.
13_640180-ch07.indd 12513_640180-ch07.indd 125 8/27/10 10:41 PM8/27/10 10:41 PM
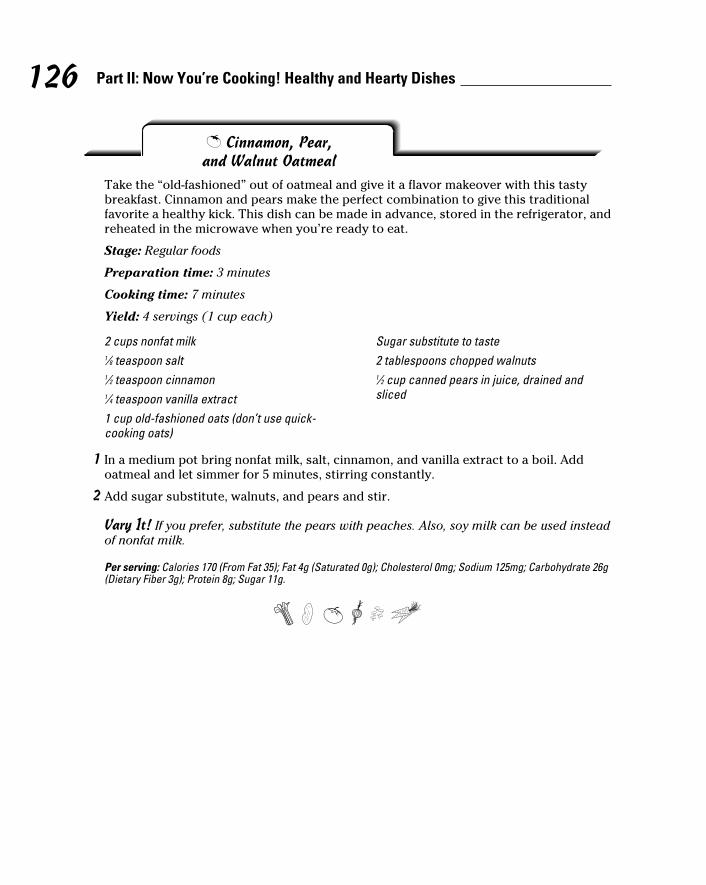
126 Part II: Now You’re Cooking! Healthy and Hearty Dishes
T Cinnamon, Pear, and Walnut Oatmeal
Take the “old-fashioned” out of oatmeal and give it a flavor makeover with this tasty breakfast. Cinnamon and pears make the perfect combination to give this traditional favorite a healthy kick. This dish can be made in advance, stored in the refrigerator, and reheated in the microwave when you’re ready to eat.
Stage: Regular foods
Preparation time: 3 minutes
Cooking time: 7 minutes
Yield: 4 servings (1 cup each)
2 cups nonfat milk1⁄8 teaspoon salt1⁄2 teaspoon cinnamon1⁄4 teaspoon vanilla extract1 cup old-fashioned oats (don’t use quick-cooking oats)
Sugar substitute to taste2 tablespoons chopped walnuts1⁄2 cup canned pears in juice, drained and sliced
1 In a medium pot bring nonfat milk, salt, cinnamon, and vanilla extract to a boil. Add oatmeal and let simmer for 5 minutes, stirring constantly.
2 Add sugar substitute, walnuts, and pears and stir.
Vary It! If you prefer, substitute the pears with peaches. Also, soy milk can be used instead of nonfat milk.
Per serving: Calories 170 (From Fat 35); Fat 4g (Saturated 0g); Cholesterol 0mg; Sodium 125mg; Carbohydrate 26g (Dietary Fiber 3g); Protein 8g; Sugar 11g.
13_640180-ch07.indd 12613_640180-ch07.indd 126 8/27/10 10:41 PM8/27/10 10:41 PM
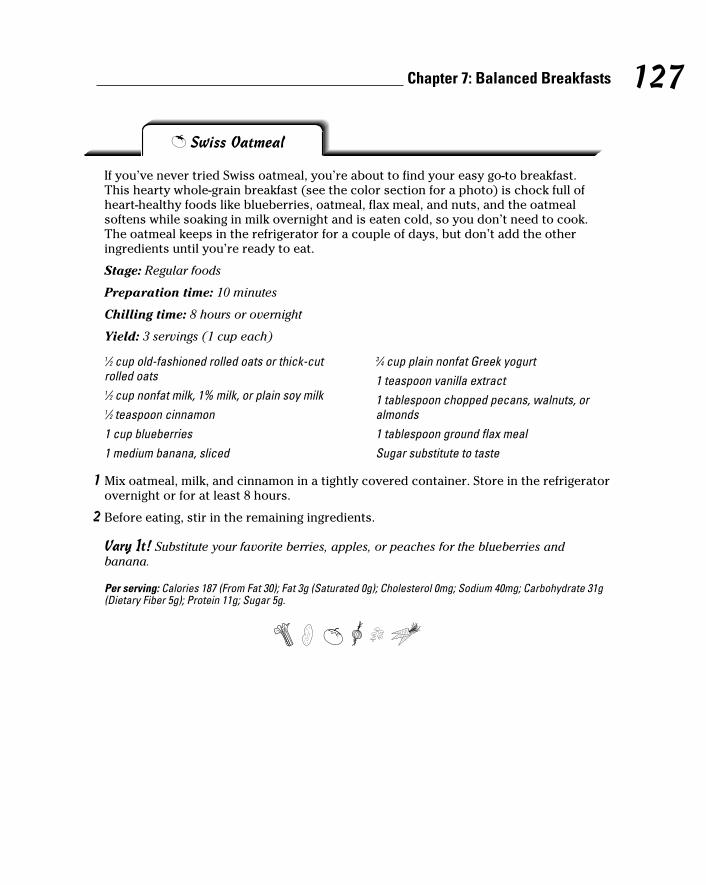
127 Chapter 7: Balanced Breakfasts
T Swiss Oatmeal
If you’ve never tried Swiss oatmeal, you’re about to find your easy go-to breakfast. This hearty whole-grain breakfast (see the color section for a photo) is chock full of heart-healthy foods like blueberries, oatmeal, flax meal, and nuts, and the oatmeal softens while soaking in milk overnight and is eaten cold, so you don’t need to cook. The oatmeal keeps in the refrigerator for a couple of days, but don’t add the other ingredients until you’re ready to eat.
Stage: Regular foods
Preparation time: 10 minutes
Chilling time: 8 hours or overnight
Yield: 3 servings (1 cup each)
1⁄2 cup old-fashioned rolled oats or thick-cut rolled oats1⁄2 cup nonfat milk, 1% milk, or plain soy milk1⁄2 teaspoon cinnamon1 cup blueberries1 medium banana, sliced
3⁄4 cup plain nonfat Greek yogurt1 teaspoon vanilla extract1 tablespoon chopped pecans, walnuts, or almonds1 tablespoon ground flax mealSugar substitute to taste
1 Mix oatmeal, milk, and cinnamon in a tightly covered container. Store in the refrigerator overnight or for at least 8 hours.
2 Before eating, stir in the remaining ingredients.
Vary It! Substitute your favorite berries, apples, or peaches for the blueberries and banana.
Per serving: Calories 187 (From Fat 30); Fat 3g (Saturated 0g); Cholesterol 0mg; Sodium 40mg; Carbohydrate 31g (Dietary Fiber 5g); Protein 11g; Sugar 5g.
13_640180-ch07.indd 12713_640180-ch07.indd 127 8/27/10 10:41 PM8/27/10 10:41 PM

128 Part II: Now You’re Cooking! Healthy and Hearty Dishes
T Warm Spiced Shredded Wheat
Shredded wheat has never tasted so good as in this recipe. Shredded wheat is usually eaten cold, but here you make a bowl of warm goodness with a hint of pumpkin spice and a touch of butter — mornings may never be the same. You can even make this the night before, store it in the fridge, and reheat it in the microwave for a quick breakfast. Soaking the shredded wheat in the milk makes it soft enough for the Stage 3 diet.
Stage: Soft foods
Preparation time: 3 minutes
Cooking time: 8 minutes
Yield: 2 servings (1 cup each)
2 teaspoons butter2 large biscuits of shredded wheat, crumbled2 cups nonfat milk
2 teaspoons sugar substitute1⁄2 teaspoon pumpkin spice
1 Heat a medium saucepan over medium heat; add butter. When butter is melted, add shredded wheat and stir for 2 minutes to toast the wheat.
2 Add the milk, sugar substitute, and pumpkin spice and bring to a simmer. Let simmer for 5 minutes or until thickened.
Per serving: Calories 200 (From Fat 45); Fat 5g (Saturated 3g); Cholesterol 15mg; Sodium 135mg; Carbohydrate 31g (Dietary Fiber 3g); Protein 11g; Sugar 12g.
Whipping Up Weekend TreatsHot pancakes or French toast in the morning is a real treat. They’re easy to make, and just about everybody loves them. In this section you get pancakes with protein and baked French toast with lots of egg custard that turn guilty breakfasts into a guilt-free morning meals.
13_640180-ch07.indd 12813_640180-ch07.indd 128 8/27/10 10:41 PM8/27/10 10:41 PM

129 Chapter 7: Balanced Breakfasts
T Berrycotta Pancakes
Yup, you can still eat pancakes. These pancakes are made with whole-wheat flour for some added fiber and ricotta cheese to give you a protein boost to start your day. If you have any extra, these pancakes freeze well and can be reheated in the microwave for a quick breakfast on another day. Regular syrup has loads of sugar, so serve these pancakes with sugar-free syrup or a dollop of 100 percent fruit preserves.
Stage: Soft foods
Preparation time: 10 minutes
Cooking time: 10 minutes
Yield: 6 servings (2 pancakes each)
3⁄4 cup whole-wheat flour3⁄4 cups all-purpose flour1 teaspoon baking powder1⁄4 teaspoon baking soda1⁄4 teaspoon salt1 1⁄2 teaspoons sugar2 tablespoons melted butter
3⁄4 cup part-skim ricotta cheese1 large egg1⁄2 cup orange juice1⁄3 cup nonfat milk1⁄2 teaspoon vanilla extract1 cup blueberries, fresh or frozen
1 In a bowl, combine both flours with baking powder, baking soda, salt, and sugar. In another bowl, whisk together the butter, ricotta cheese, egg, orange juice, milk, and vanilla.
2 Combine and stir the wet and dry ingredients until just blended. Gently stir in the blueberries.
3 Spray a skillet or griddle with nonstick cooking spray and heat over medium heat. Spoon a small amount of batter onto the hot skillet and cook for about 2 minutes or until browned on the underside, then flip the pancake. Cook until golden brown.
Vary It! Substitute the blueberries with diced apples or peaches.
Per serving: Calories 229 (From Fat 69); Fat 8g (Saturated 4g); Cholesterol 56mg; Sodium 272mg; Carbohydrate 32g (Dietary Fiber 3g); Protein 9g; Sugar 8g.
13_640180-ch07.indd 12913_640180-ch07.indd 129 8/27/10 10:41 PM8/27/10 10:41 PM
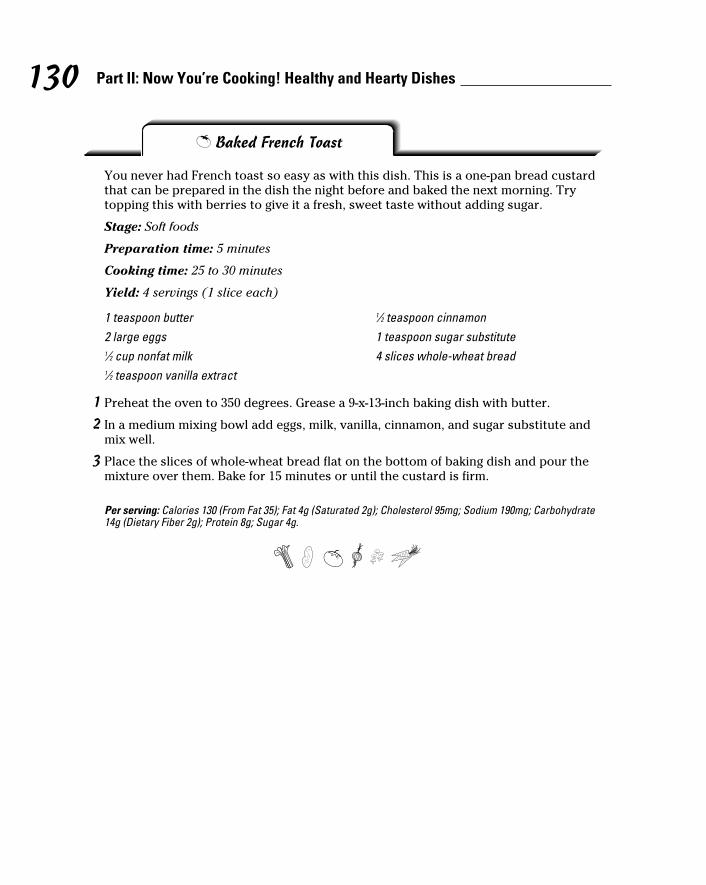
130 Part II: Now You’re Cooking! Healthy and Hearty Dishes
T Baked French Toast
You never had French toast so easy as with this dish. This is a one-pan bread custard that can be prepared in the dish the night before and baked the next morning. Try topping this with berries to give it a fresh, sweet taste without adding sugar.
Stage: Soft foods
Preparation time: 5 minutes
Cooking time: 25 to 30 minutes
Yield: 4 servings (1 slice each)
1 teaspoon butter2 large eggs1⁄2 cup nonfat milk1⁄2 teaspoon vanilla extract
1⁄2 teaspoon cinnamon1 teaspoon sugar substitute4 slices whole-wheat bread
1 Preheat the oven to 350 degrees. Grease a 9-x-13-inch baking dish with butter.
2 In a medium mixing bowl add eggs, milk, vanilla, cinnamon, and sugar substitute and mix well.
3 Place the slices of whole-wheat bread flat on the bottom of baking dish and pour the mixture over them. Bake for 15 minutes or until the custard is firm.
Per serving: Calories 130 (From Fat 35); Fat 4g (Saturated 2g); Cholesterol 95mg; Sodium 190mg; Carbohydrate 14g (Dietary Fiber 2g); Protein 8g; Sugar 4g.
13_640180-ch07.indd 13013_640180-ch07.indd 130 8/27/10 10:41 PM8/27/10 10:41 PM
Chapter 8
Bunches of Lunches and BrunchesIn This Chapter▶ Preparing an altogether meal: One-dish wonders
▶ Exploring the possibilities of eggs
▶ Enjoying a sandwich or a wrap
▶ Making salads work for you
The word lunch may bring thoughts of “What do I eat? What can I pack?” while brunch
brings thoughts of relaxation and social time. But whether you’re hurried or leisurely and whether it’s lunch or brunch, you can make a meal that fits your time schedule and your health needs. By planning ahead, you can make some of your lunch or brunch the night before so you aren’t rushing around in the morning to get your food together.
Lunches and brunches are easy when you always have staples on hand. Keep your pantry stocked with canned low-sodium beans, prepacked fish, whole grain pasta, and plenty of spices. In your refrigerator, make sure you have eggs, several types of shredded cheeses, fat-free sour cream, hot sauce, low-fat salad dressings, low-fat mayo, and reduced-sodium deli meats. Also, don’t forget nature’s easy foods: fruits and veggies. With these few items you have plenty of options to makes quick, easy, and nutritious lunches and brunches.
Eat three meals a day. If you’re planning to have brunch hours after you wake up, you still need to eat a small breakfast like a protein shake or smoothie to get started. If you wait too long to eat, you may not feel well by the time brunch rolls around.
When you can’t eat at home, packing your lunch can make your eating easier and save you money. And besides, getting in your car, waiting in drive-through, and driving back to work is not fast food. Following are some tips for improving your homemade to-go lunch:
Recipes in This Chapter
▶ Cheesy Chicken Enchiladas
T Vegetable Lasagna▶ Stuffed Avocados with
Chicken-Corn SalsaT Piña Colada Fruit ’n
Cheese▶ Crustless Seafood
QuicheT Berry Delicious Egg
Custard▶ Tuna MeltT Pimento Cheese and
Tomato Wrap▶ Chopped Chef Salad▶ Orzo and Salmon Salad▶ Quick Seafood Salad▶ Grilled Chicken and
Pecan Salad▶ Curried Apple and Tuna
Salad▶ Chicken Pasta Salad
with Basil Vinaigrette
14_640180-ch08.indd 13114_640180-ch08.indd 131 8/27/10 10:42 PM8/27/10 10:42 PM
132 Part II: Now You’re Cooking! Healthy and Hearty Dishes
Cheesy Chicken Enchiladas
Easy and cheesy is just the beginning of these simple but delicious enchiladas. Packed with flavor and a quick and traditional homemade enchilada sauce, this dish is not only great served family style but also freezes well. The recipe has a lot of chili powder, but it’s not as spicy as you may expect. Chili peppers are claimed to help with weight loss, prevent stomach ulcers, lower your risk of type 2 diabetes, provide cardiovascular benefits, boost your immunity, and help clear congestion. More studies need to be done to confirm the claims, but true or not, chili powder sure adds a kick to your meal. (If you don’t tend to tolerate spicy foods well, go light on the sauce.)
✓ Pack condiments or vegetables separately so they don’t make your sandwich soggy.
✓ Try new flavors of condiments, such as the many flavors of mustards, or add some herbs to your light mayo.
✓ Use a thermos for hot or cold food.
✓ Find a lunch buddy or buddies at work. You can take turns bringing in lunch so you get a day off.
✓ Don’t forget your lunch! When you pack your lunch bag, drop your keys in it so you can’t leave home without it.
✓ Wash out your lunch box regularly. Bacteria can grow anywhere.
Note that the portion sizes in the following recipes are intended for people who are months out from their weight loss surgery. If you are still eating very small meals, adjust the portion sizes as necessary to meet your needs.
Putting Together One-Dish MealsThree cheers for one-dish meals! Cleanup is easy and the food combinations are endless. And we’re not just talking your traditional casseroles mixed with canned soup. You can make your altogether meal hot or cold, fresh on the spot or made ahead.
One-pot meals often feature pasta or rice, and by following a couple of tips you can lower the risk of problems that those foods often cause for weight loss surgery patients. Mixing flour and water leads to paste that can lump up like dough and won’t set well in your pouch. Use whole-wheat pasta instead of regular, because it doesn’t get as gummy. Cook rice with more liquid so that it swells up more before you eat it, not when it’s in your pouch. And be sure to eat very small portions of rice and pasta.
14_640180-ch08.indd 13214_640180-ch08.indd 132 8/27/10 10:42 PM8/27/10 10:42 PM

133 Chapter 8: Bunches of Lunches and Brunches
8 ounces cooked and shredded boneless, skinless chicken breast1⁄2 cup shredded low-fat cheddar cheese1 1⁄2 cups shredded pepper jack cheese, divided
Six 6-inch whole-wheat flour tortillas1 1⁄2 cups enchilada sauce (see the following recipe)
1 Preheat the oven to 350 degrees. Using nonstick cooking spray, grease a 9-x-13 baking dish.
2 In a small bowl, combine chicken, low-fat cheddar cheese, and 1⁄2 cup pepper jack cheese; toss until mixed well.
3 Place 1⁄3 cup of cheese-and-chicken mixture into the center of one whole-wheat tortilla, tightly roll, and place seam-down into the baking dish. Repeat with the remaining 5 tortillas.
4 Place 1⁄4 cup of enchilada sauce over each stuffed enchilada and top with the remaining pepper jack cheese. Bake for 12 minutes, or until cheese is melted and bubbly.
Enchilada Sauce
Stage: Regular foods
Preparation time: 10 minutes
Cooking time: 12 minutes
Yield: 6 servings (6 ounces each)
1⁄4 cup vegetable oil2 tablespoons all-purpose flour1⁄4 cup chili powderOne 8-ounce can low-sodium tomato sauce
1 1⁄2 cups water1⁄4 teaspoon ground cumin1⁄4 teaspoon garlic powder1⁄4 teaspoon onion powder
1 In a small pot, heat oil over medium-high heat.
2 When the oil is hot, add the flour and chili powder.
3 Reduce heat to medium and cook until light brown, stirring constantly to prevent the flour from burning.
4 Add the tomato sauce, water, cumin, garlic powder, and onion powder to the pot and stir until smooth. Continue cooking for 10 minutes, or until thickened slightly.
Per serving: Calories 370 (From Fat 135); Fat 15g (Saturated 7g); Cholesterol 60mg; Sodium 540mg; Carbohydrate 31g (Dietary Fiber 4g); Protein 25g; Sugar 4g.
14_640180-ch08.indd 13314_640180-ch08.indd 133 8/27/10 10:42 PM8/27/10 10:42 PM
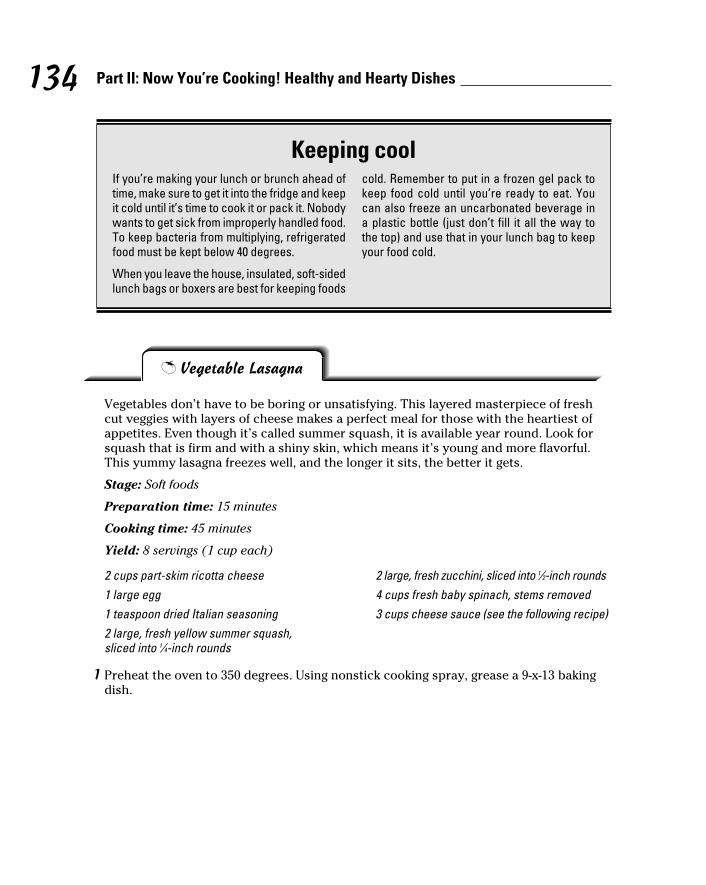
134 Part II: Now You’re Cooking! Healthy and Hearty Dishes
T Vegetable Lasagna
Vegetables don’t have to be boring or unsatisfying. This layered masterpiece of fresh cut veggies with layers of cheese makes a perfect meal for those with the heartiest of appetites. Even though it’s called summer squash, it is available year round. Look for squash that is firm and with a shiny skin, which means it’s young and more flavorful. This yummy lasagna freezes well, and the longer it sits, the better it gets.
Stage: Soft foods
Preparation time: 15 minutes
Cooking time: 45 minutes
Yield: 8 servings (1 cup each)
2 cups part-skim ricotta cheese1 large egg1 teaspoon dried Italian seasoning2 large, fresh yellow summer squash, sliced into 1⁄4-inch rounds
2 large, fresh zucchini, sliced into 1⁄2-inch rounds4 cups fresh baby spinach, stems removed3 cups cheese sauce (see the following recipe)
1 Preheat the oven to 350 degrees. Using nonstick cooking spray, grease a 9-x-13 baking dish.
Keeping coolIf you’re making your lunch or brunch ahead of time, make sure to get it into the fridge and keep it cold until it’s time to cook it or pack it. Nobody wants to get sick from improperly handled food. To keep bacteria from multiplying, refrigerated food must be kept below 40 degrees.
When you leave the house, insulated, soft-sided lunch bags or boxers are best for keeping foods
cold. Remember to put in a frozen gel pack to keep food cold until you’re ready to eat. You can also freeze an uncarbonated beverage in a plastic bottle (just don’t fill it all the way to the top) and use that in your lunch bag to keep your food cold.
14_640180-ch08.indd 13414_640180-ch08.indd 134 8/27/10 10:42 PM8/27/10 10:42 PM
135 Chapter 8: Bunches of Lunches and Brunches
1 Melt butter in a medium pot over medium-high heat. When it’s fully melted, add the garlic and sauté for 30 seconds.
2 Add the flour to the pot and whisk until it forms a paste. Add salt and pepper; stir for 1 minute.
3 Very slowly add about 1 cup of the milk, whisking constantly. When the flour mixture is smooth, add the remaining 2 cups of milk and bring to a simmer. This may take up to 5 minutes, but continue stirring constantly to keep the milk from burning to the bottom of the pan.
4 When the mixture comes to a simmer, turn the heat down to medium low and stir in the cheddar cheese. When the cheese melts, remove the pot from heat and reserve the sauce for the vegetable lasagna.
Per serving: Calories 260 (From Fat 110); Fat 12g (Saturated 7g); Cholesterol 60mg; Sodium 570mg; Carbohydrate 21g (Dietary Fiber 3g); Protein 17g; Sugar 9g.
1⁄4 cup butter2 cloves garlic, minced1⁄2 cup all-purpose flour1 teaspoon salt
1⁄2 teaspoon black pepper3 cups nonfat milk1 cup shredded low-fat sharp cheddar cheese
2 In a small mixing bowl, combine ricotta cheese, egg, and Italian seasoning and mix well.
3 Place half of the summer squash on the bottom of the pan to form a single even layer. Spread half the ricotta cheese mixture over the summer squash. Top the cheese with an even layer of half the spinach. Layer half the zucchini on top of the spinach.
4 Repeat the layers of yellow squash, cheese, spinach, and zucchini with the remaining quantities of each. Pour cheese sauce over the top of the lasagna.
5 Place in the preheated oven and bake uncovered for 45 minutes.
Cheese Sauce
14_640180-ch08.indd 13514_640180-ch08.indd 135 8/27/10 10:42 PM8/27/10 10:42 PM
136 Part II: Now You’re Cooking! Healthy and Hearty Dishes
Stuffed Avocados with Chicken-Corn Salsa
The sweetness of the corn and heartiness of the chicken complement this avocado dish, which is featured in the color section. Mixed with fresh cilantro, garlic, onion, and chili powder, you may never want to eat avocados any other way. Although avocados are high in fat, it’s heart-healthy fat.
Stage: Regular foods
Preparation time: 10 minutes
Chilling time: 2 hours
Yield: 4 servings (1 cup each)
1 cup 1⁄2-inch pieces of cooked chicken1⁄2 cup frozen corn, defrosted under cold water1⁄2 cup low-sodium canned black beans1⁄4 cup chopped fresh cilantro1 clove garlic, minced1⁄2 teaspoon chili powder
1⁄2 teaspoon cumin1⁄4 cup fresh lemon juice1⁄4 cup diced red onion1 tablespoon olive oil2 avocados
1 In a large mixing bowl, combine chicken, corn, black beans, cilantro, garlic, chili powder, cumin, lemon juice, onion, and olive oil and mix well.
2 Refrigerate mixture for 2 hours.
3 Peel the avocados, then cut in half and seed (see Figure 8-1). Place avocado halves flat side up and fill each with 1⁄2 cup of the chicken-corn salsa.
Tip: When choosing avocados, they should be firm to the touch yet soft when you apply pressure. Hass avocados are the most common, and they should be dark in appearance. If they’re green, they’re not ripe yet.
Tip: If you don’t have time to cook your own chicken, you can pick up a rotisserie chicken from the deli and cut the meat into 1⁄2-inch pieces.
Per serving: Calories 290 (From Fat 180); Fat 20g (Saturated 3g); Cholesterol 30mg; Sodium 100mg; Carbohydrate 19g (Dietary Fiber 9g); Protein 15g; Sugar 2g.
14_640180-ch08.indd 13614_640180-ch08.indd 136 8/27/10 10:42 PM8/27/10 10:42 PM
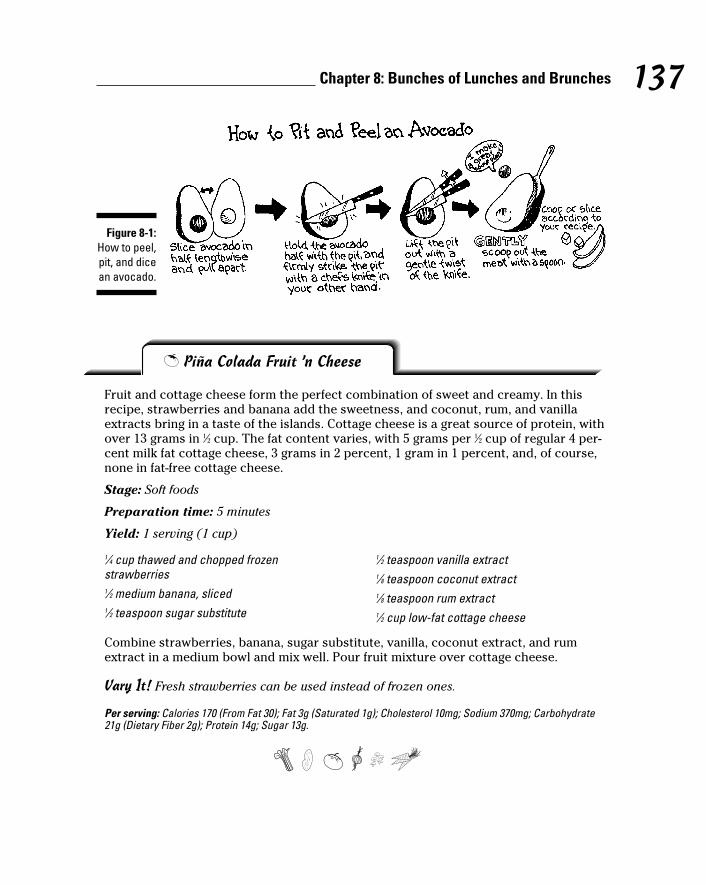
137 Chapter 8: Bunches of Lunches and Brunches
Figure 8-1: How to peel, pit, and dice an avocado.
T Piña Colada Fruit ’n Cheese
Fruit and cottage cheese form the perfect combination of sweet and creamy. In this recipe, strawberries and banana add the sweetness, and coconut, rum, and vanilla extracts bring in a taste of the islands. Cottage cheese is a great source of protein, with over 13 grams in 1⁄2 cup. The fat content varies, with 5 grams per 1⁄2 cup of regular 4 per-cent milk fat cottage cheese, 3 grams in 2 percent, 1 gram in 1 percent, and, of course, none in fat-free cottage cheese.
Stage: Soft foods
Preparation time: 5 minutes
Yield: 1 serving (1 cup)
1⁄4 cup thawed and chopped frozen strawberries1⁄2 medium banana, sliced1⁄2 teaspoon sugar substitute
1⁄2 teaspoon vanilla extract1⁄8 teaspoon coconut extract1⁄8 teaspoon rum extract1⁄2 cup low-fat cottage cheese
Combine strawberries, banana, sugar substitute, vanilla, coconut extract, and rum extract in a medium bowl and mix well. Pour fruit mixture over cottage cheese.
Vary It! Fresh strawberries can be used instead of frozen ones.
Per serving: Calories 170 (From Fat 30); Fat 3g (Saturated 1g); Cholesterol 10mg; Sodium 370mg; Carbohydrate 21g (Dietary Fiber 2g); Protein 14g; Sugar 13g.
14_640180-ch08.indd 13714_640180-ch08.indd 137 8/27/10 10:42 PM8/27/10 10:42 PM
138 Part II: Now You’re Cooking! Healthy and Hearty Dishes
Preparing Egg Dishes with StyleBecause eggs are high in protein and can be kept soft, they are an ideal food for someone who’s undergone weight loss surgery. Eggs have many different applications, from scrambled eggs to light and airy soufflés. No other food is as versatile or can be so diverse in so many recipes.
Egg substitutes are often used to help lower the fat and cholesterol contents of a dish. These products are made mostly of egg whites, which contain a good amount of protein. They’re excellent to use in dishes that contain high-fat ingredients, like cheese, to help keep the calories and fat content lower.
If you’re making scrambled eggs, you can substitute the whites of two eggs for each whole egg. So if you’re scrambling four eggs for breakfast, make it healthier by using two whole eggs and four more egg whites. If you want to reduce the cholesterol even more, use one whole egg and six egg whites.
Crustless Seafood Quiche
Seafood is good, but when it’s part of a quiche, it’s even better. Though egg substitute can be used in many recipes, it’s not a good option here because egg yolks are needed to bind the quiche.
Stage: Regular foods
Preparation time: 15 minutes
Cooking time: 30 minutes
Yield: 6 servings (1⁄2 cup each)
4 large eggs, whisked1 cup fat-free sour cream1 cup part-skim ricotta cheese1⁄4 cup grated Parmesan cheese1 teaspoon onion powder1 teaspoon nutmeg
1 cup shredded pepper jack cheese4 ounces crabmeat, canned or fresh4 ounces cooked bay shrimp6 large mushrooms, thinly sliced1 tablespoon chopped green onion1 teaspoon lemon juice
14_640180-ch08.indd 13814_640180-ch08.indd 138 8/27/10 10:42 PM8/27/10 10:42 PM
139 Chapter 8: Bunches of Lunches and Brunches
1 Preheat the oven to 350 degrees. Spray an 8-x-8 baking dish with nonstick cooking spray.
2 In a medium mixing bowl, combine eggs, sour cream, ricotta, Parmesan, onion powder, and nutmeg and whisk for 2 minutes or until smooth.
3 In a small mixing bowl, combine jack cheese, crab, shrimp, mushrooms, green onions, and lemon juice and mix well.
4 Spread seafood mixture evenly into the baking dish. Pour the egg mixture over the sea-food mixture.
5 Place the dish in the oven and bake for 30 minutes, or until a knife inserted in center comes out clean. Let stand 5 minutes before serving.
Vary It! Shredded cooked chicken can be substituted for seafood.
Per serving: Calories 273 (From Fat 128); Fat 14g (Saturated 8g); Cholesterol 234mg; Sodium 418mg; Carbohydrate 9g (Dietary Fiber 0g); Protein 25g; Sugar 4g.
White eggs or brown? It doesn’t matter!Eggshell color has nothing to do with the nutritional value, flavor, or cooking of the egg. The color of the shell comes from the breed of chicken laying the egg. White-feathered
chickens with white ear lobes lay white-shelled eggs, and hens with red feathers and red ear lobes lay brown eggs.
14_640180-ch08.indd 13914_640180-ch08.indd 139 8/27/10 10:42 PM8/27/10 10:42 PM
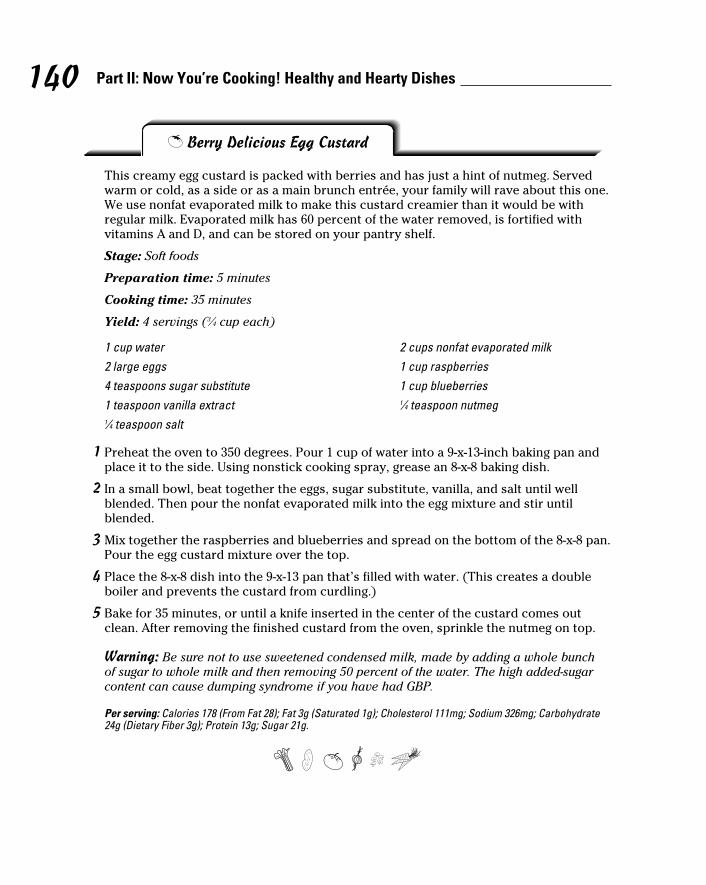
140 Part II: Now You’re Cooking! Healthy and Hearty Dishes
T Berry Delicious Egg Custard
This creamy egg custard is packed with berries and has just a hint of nutmeg. Served warm or cold, as a side or as a main brunch entrée, your family will rave about this one. We use nonfat evaporated milk to make this custard creamier than it would be with regular milk. Evaporated milk has 60 percent of the water removed, is fortified with vitamins A and D, and can be stored on your pantry shelf.
Stage: Soft foods
Preparation time: 5 minutes
Cooking time: 35 minutes
Yield: 4 servings (3⁄4 cup each)
1 cup water2 large eggs4 teaspoons sugar substitute1 teaspoon vanilla extract1⁄4 teaspoon salt
2 cups nonfat evaporated milk1 cup raspberries1 cup blueberries1⁄4 teaspoon nutmeg
1 Preheat the oven to 350 degrees. Pour 1 cup of water into a 9-x-13-inch baking pan and place it to the side. Using nonstick cooking spray, grease an 8-x-8 baking dish.
2 In a small bowl, beat together the eggs, sugar substitute, vanilla, and salt until well blended. Then pour the nonfat evaporated milk into the egg mixture and stir until blended.
3 Mix together the raspberries and blueberries and spread on the bottom of the 8-x-8 pan. Pour the egg custard mixture over the top.
4 Place the 8-x-8 dish into the 9-x-13 pan that’s filled with water. (This creates a double boiler and prevents the custard from curdling.)
5 Bake for 35 minutes, or until a knife inserted in the center of the custard comes out clean. After removing the finished custard from the oven, sprinkle the nutmeg on top.
Warning: Be sure not to use sweetened condensed milk, made by adding a whole bunch of sugar to whole milk and then removing 50 percent of the water. The high added-sugar content can cause dumping syndrome if you have had GBP.
Per serving: Calories 178 (From Fat 28); Fat 3g (Saturated 1g); Cholesterol 111mg; Sodium 326mg; Carbohydrate 24g (Dietary Fiber 3g); Protein 13g; Sugar 21g.
14_640180-ch08.indd 14014_640180-ch08.indd 140 8/27/10 10:42 PM8/27/10 10:42 PM
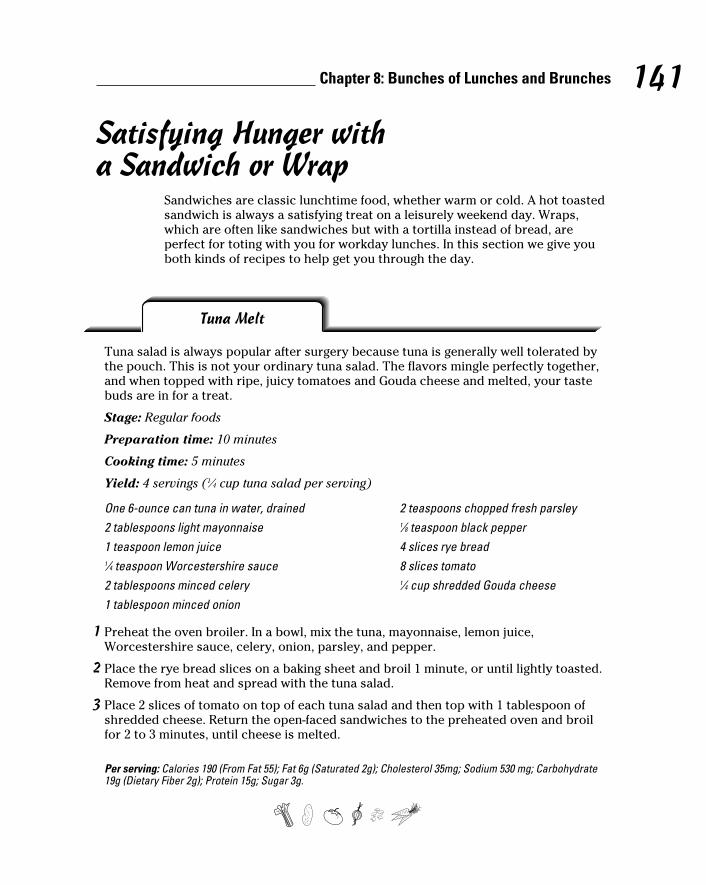
141 Chapter 8: Bunches of Lunches and Brunches
Satisfying Hunger with a Sandwich or Wrap
Sandwiches are classic lunchtime food, whether warm or cold. A hot toasted sandwich is always a satisfying treat on a leisurely weekend day. Wraps, which are often like sandwiches but with a tortilla instead of bread, are perfect for toting with you for workday lunches. In this section we give you both kinds of recipes to help get you through the day.
Tuna Melt
Tuna salad is always popular after surgery because tuna is generally well tolerated by the pouch. This is not your ordinary tuna salad. The flavors mingle perfectly together, and when topped with ripe, juicy tomatoes and Gouda cheese and melted, your taste buds are in for a treat.
Stage: Regular foods
Preparation time: 10 minutes
Cooking time: 5 minutes
Yield: 4 servings (1⁄4 cup tuna salad per serving)
One 6-ounce can tuna in water, drained2 tablespoons light mayonnaise1 teaspoon lemon juice1⁄4 teaspoon Worcestershire sauce2 tablespoons minced celery1 tablespoon minced onion
2 teaspoons chopped fresh parsley1⁄8 teaspoon black pepper4 slices rye bread8 slices tomato1⁄4 cup shredded Gouda cheese
1 Preheat the oven broiler. In a bowl, mix the tuna, mayonnaise, lemon juice, Worcestershire sauce, celery, onion, parsley, and pepper.
2 Place the rye bread slices on a baking sheet and broil 1 minute, or until lightly toasted. Remove from heat and spread with the tuna salad.
3 Place 2 slices of tomato on top of each tuna salad and then top with 1 tablespoon of shredded cheese. Return the open-faced sandwiches to the preheated oven and broil for 2 to 3 minutes, until cheese is melted.
Per serving: Calories 190 (From Fat 55); Fat 6g (Saturated 2g); Cholesterol 35mg; Sodium 530 mg; Carbohydrate 19g (Dietary Fiber 2g); Protein 15g; Sugar 3g.
14_640180-ch08.indd 14114_640180-ch08.indd 141 8/27/10 10:42 PM8/27/10 10:42 PM
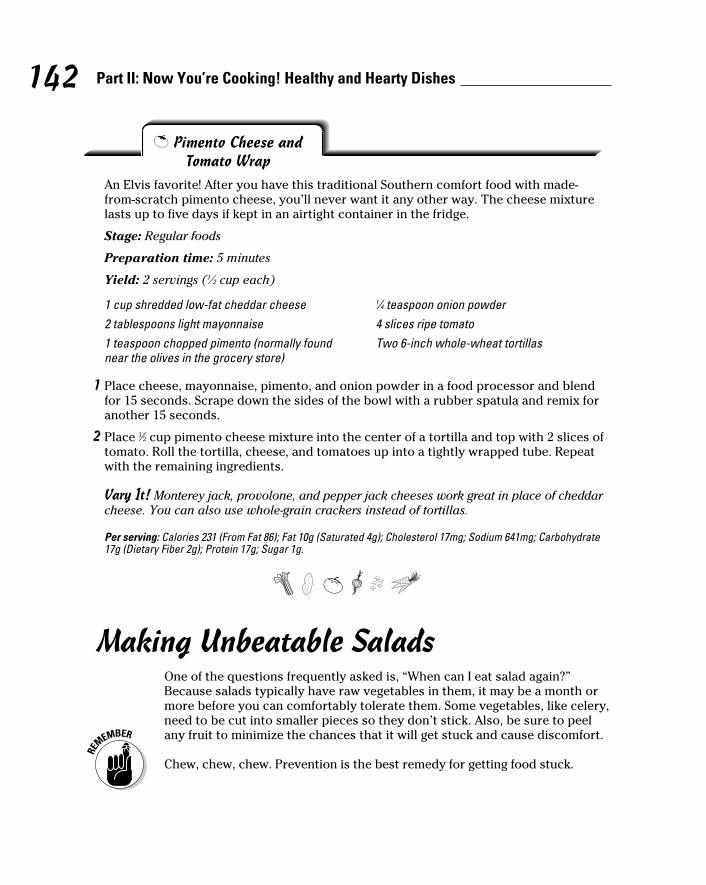
142 Part II: Now You’re Cooking! Healthy and Hearty Dishes
T Pimento Cheese and Tomato Wrap
An Elvis favorite! After you have this traditional Southern comfort food with made-from-scratch pimento cheese, you’ll never want it any other way. The cheese mixture lasts up to five days if kept in an airtight container in the fridge.
Stage: Regular foods
Preparation time: 5 minutes
Yield: 2 servings (1⁄2 cup each)
1 cup shredded low-fat cheddar cheese2 tablespoons light mayonnaise1 teaspoon chopped pimento (normally found near the olives in the grocery store)
1⁄4 teaspoon onion powder4 slices ripe tomatoTwo 6-inch whole-wheat tortillas
1 Place cheese, mayonnaise, pimento, and onion powder in a food processor and blend for 15 seconds. Scrape down the sides of the bowl with a rubber spatula and remix for another 15 seconds.
2 Place 1⁄2 cup pimento cheese mixture into the center of a tortilla and top with 2 slices of tomato. Roll the tortilla, cheese, and tomatoes up into a tightly wrapped tube. Repeat with the remaining ingredients.
Vary It! Monterey jack, provolone, and pepper jack cheeses work great in place of cheddar cheese. You can also use whole-grain crackers instead of tortillas.
Per serving: Calories 231 (From Fat 86); Fat 10g (Saturated 4g); Cholesterol 17mg; Sodium 641mg; Carbohydrate 17g (Dietary Fiber 2g); Protein 17g; Sugar 1g.
Making Unbeatable SaladsOne of the questions frequently asked is, “When can I eat salad again?” Because salads typically have raw vegetables in them, it may be a month or more before you can comfortably tolerate them. Some vegetables, like celery, need to be cut into smaller pieces so they don’t stick. Also, be sure to peel any fruit to minimize the chances that it will get stuck and cause discomfort.
Chew, chew, chew. Prevention is the best remedy for getting food stuck.
14_640180-ch08.indd 14214_640180-ch08.indd 142 8/27/10 10:42 PM8/27/10 10:42 PM

143 Chapter 8: Bunches of Lunches and Brunches
Chopped Chef Salad
With fresh, crisp romaine, lots of veggies, and cheese and meats all chopped up, this salad combines plenty of healthy ingredients in one easy step. Check at the deli for lower-sodium lunchmeats. They’re not low sodium but do have less sodium than regular lunchmeats. Reduced-sodium turkey is usually softer and more moist, making it easier to eat.
Stage: Regular foods
Preparation time: 10 minutes
Yield: 4 servings (1 cup each)
2 cups chopped romaine lettuce1⁄4 cup thinly sliced fresh carrots1⁄4 cup peeled, seeded, and chopped cucumber1⁄4 cup black olives1⁄4 cup red onion, chopped
1⁄4 cup shredded low-fat cheddar cheese, shredded1⁄4 cup chopped reduced-sodium ham1⁄4 cup chopped reduced-sodium turkey2 large eggs, hard-boiled and chopped1⁄4 cup reduced-fat ranch dressing
In a large mixing bowl, combine all ingredients and mix well.
Tip: If you don’t want to eat right away, everything can be chopped up ahead of time and combined with ranch dressing when you’re ready to serve.
Tip: To hard-boil eggs, place eggs into a medium-sized pot and cover with water. Place on the stove and bring to a boil, then turn off the heat and let the eggs sit in the hot water for 12 to 15 minutes. Refrigerate eggs until you’re ready to use them.
Per serving: Calories 151 (From Fat 90); Fat 10g (Saturated 2g); Cholesterol 124mg; Sodium 378mg; Carbohydrate 5g (Dietary Fiber 1g); Protein 10g; Sugar 3g.
If you use a commercially prepared salad dressing, choose a light or reduced-fat variety. Salad dressings are fat based, and fat carries a lot of calories with the flavor. If you have had GBP, the high-fat salad dressings may cause the highly unpleasant experience of dumping syndrome.
14_640180-ch08.indd 14314_640180-ch08.indd 143 8/27/10 10:42 PM8/27/10 10:42 PM
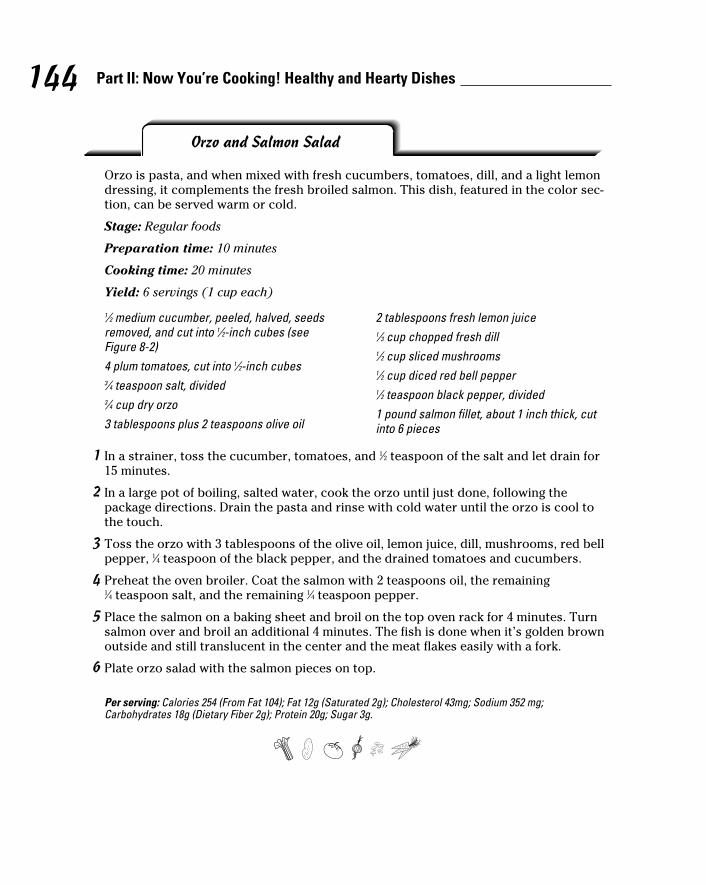
144 Part II: Now You’re Cooking! Healthy and Hearty Dishes
Orzo and Salmon Salad
Orzo is pasta, and when mixed with fresh cucumbers, tomatoes, dill, and a light lemon dressing, it complements the fresh broiled salmon. This dish, featured in the color sec-tion, can be served warm or cold.
Stage: Regular foods
Preparation time: 10 minutes
Cooking time: 20 minutes
Yield: 6 servings (1 cup each)
1⁄2 medium cucumber, peeled, halved, seeds removed, and cut into 1⁄2-inch cubes (see Figure 8-2)4 plum tomatoes, cut into 1⁄2-inch cubes3⁄4 teaspoon salt, divided3⁄4 cup dry orzo3 tablespoons plus 2 teaspoons olive oil
2 tablespoons fresh lemon juice1⁄3 cup chopped fresh dill1⁄2 cup sliced mushrooms1⁄2 cup diced red bell pepper1⁄2 teaspoon black pepper, divided1 pound salmon fillet, about 1 inch thick, cut into 6 pieces
1 In a strainer, toss the cucumber, tomatoes, and 1⁄2 teaspoon of the salt and let drain for 15 minutes.
2 In a large pot of boiling, salted water, cook the orzo until just done, following the package directions. Drain the pasta and rinse with cold water until the orzo is cool to the touch.
3 Toss the orzo with 3 tablespoons of the olive oil, lemon juice, dill, mushrooms, red bell pepper, 1⁄4 teaspoon of the black pepper, and the drained tomatoes and cucumbers.
4 Preheat the oven broiler. Coat the salmon with 2 teaspoons oil, the remaining 1⁄4 teaspoon salt, and the remaining 1⁄4 teaspoon pepper.
5 Place the salmon on a baking sheet and broil on the top oven rack for 4 minutes. Turn salmon over and broil an additional 4 minutes. The fish is done when it’s golden brown outside and still translucent in the center and the meat flakes easily with a fork.
6 Plate orzo salad with the salmon pieces on top.
Per serving: Calories 254 (From Fat 104); Fat 12g (Saturated 2g); Cholesterol 43mg; Sodium 352 mg; Carbohydrates 18g (Dietary Fiber 2g); Protein 20g; Sugar 3g.
14_640180-ch08.indd 14414_640180-ch08.indd 144 8/27/10 10:42 PM8/27/10 10:42 PM
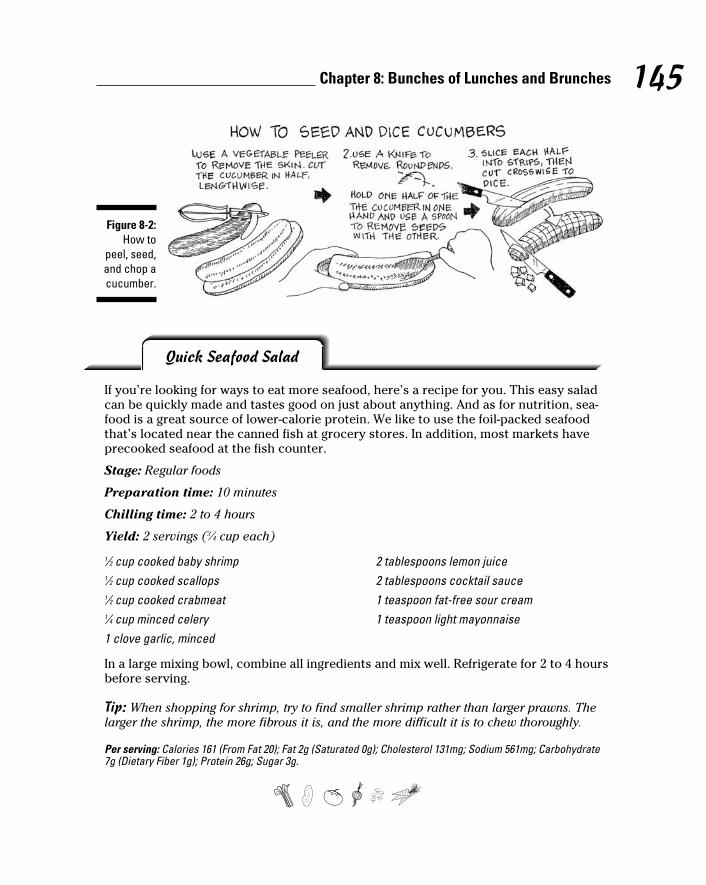
145 Chapter 8: Bunches of Lunches and Brunches
Figure 8-2: How to
peel, seed, and chop a cucumber.
Quick Seafood Salad
If you’re looking for ways to eat more seafood, here’s a recipe for you. This easy salad can be quickly made and tastes good on just about anything. And as for nutrition, sea-food is a great source of lower-calorie protein. We like to use the foil-packed seafood that’s located near the canned fish at grocery stores. In addition, most markets have precooked seafood at the fish counter.
Stage: Regular foods
Preparation time: 10 minutes
Chilling time: 2 to 4 hours
Yield: 2 servings (3⁄4 cup each)
1⁄2 cup cooked baby shrimp1⁄2 cup cooked scallops1⁄2 cup cooked crabmeat1⁄4 cup minced celery1 clove garlic, minced
2 tablespoons lemon juice2 tablespoons cocktail sauce1 teaspoon fat-free sour cream1 teaspoon light mayonnaise
In a large mixing bowl, combine all ingredients and mix well. Refrigerate for 2 to 4 hours before serving.
Tip: When shopping for shrimp, try to find smaller shrimp rather than larger prawns. The larger the shrimp, the more fibrous it is, and the more difficult it is to chew thoroughly.
Per serving: Calories 161 (From Fat 20); Fat 2g (Saturated 0g); Cholesterol 131mg; Sodium 561mg; Carbohydrate 7g (Dietary Fiber 1g); Protein 26g; Sugar 3g.
14_640180-ch08.indd 14514_640180-ch08.indd 145 8/27/10 10:42 PM8/27/10 10:42 PM
146 Part II: Now You’re Cooking! Healthy and Hearty Dishes
Grilled Chicken and Pecan Salad
Fresh grilled chicken breast is low in fat yet high in flavor and protein, and this tasty chicken salad with crunchy pecans and a hint of lemon makes a perfect filling for a wrap or topping for a fresh tossed salad. Did you know that pecans are the only nut tree native to the United States? These tasty nuts are a good source of vitamin E, an antioxi-dant, and can help lower LDL (bad) cholesterol.
Stage: Regular foods
Preparation time: 5 minutes
Cooking time: 8 minutes
Chilling time: 4 to 6 hours
Yield: 4 servings (1 cup each)
1⁄2 teaspoon paprika1⁄2 teaspoon garlic powder1⁄2 teaspoon onion powder1⁄4 teaspoon black pepper1⁄4 teaspoon salt1 pound boneless skinless chicken breast
1 teaspoon olive oil1⁄4 cup minced celery1 teaspoon lemon juice1⁄4 cup chopped green onions1⁄4 cup pecans, chopped1⁄4 cup light mayonnaise
1 Prepare a medium-hot fire in a charcoal or gas grill.
2 In a medium mixing bowl, combine paprika, garlic, onion powder, black pepper, and salt. Brush the chicken with oil and then toss with the spice mixture.
3 Place the chicken on the hot grill and cook for 4 minutes. Turn the chicken over and grill an additional 4 minutes. Test doneness by inserting an instant-read thermometer into the thickest part of the chicken and checking that it registers 165 degrees.
4 Let chicken cool until you can handle it; then cut into 1⁄2-inch cubes. In a medium mixing bowl, combine chicken, celery, lemon juice, green onions, pecans, and mayonnaise and mix well.
5 Refrigerate for 4 to 6 hours before serving.
Per serving: Calories 240 (From Fat 120); Fat 13g (Saturated 1g); Cholesterol 70mg; Sodium 350mg; Carbohydrate 4g (Dietary Fiber 1g); Protein 27g; Sugar 1g.
14_640180-ch08.indd 14614_640180-ch08.indd 146 8/27/10 10:42 PM8/27/10 10:42 PM
147 Chapter 8: Bunches of Lunches and Brunches
Curried Apple and Tuna Salad
Curry powder is a blend of spices and varies in different countries and regions. Turmeric is common to all curry blends and gives it its yellow color. The curcumin in turmeric is thought to act as an anti-inflammatory agent. Enjoy the taste of curry with the crunch of apples and the meatiness of tuna in this perfect combination of goodness. Check out the color section for a photo of this recipe.
Stage: Regular food
Preparation time: 10 minutes
Chilling time: 2 to 4 hours
Yield: 2 servings (1 cup each)
1 small Granny Smith apple, peeled, cored, and chopped1 tablespoon lemon juice1⁄4 cup minced celery1⁄4 cup chopped green onions1⁄2 cup peeled, seeded, and diced cucumber4 ounces canned tuna in water, drained and flaked
1⁄4 cup plain nonfat yogurt2 teaspoons light mayonnaise1⁄2 teaspoon curry powder2 teaspoons sugar substitute1⁄4 teaspoon garlic powderSalt to taste
1 Combine apple, lemon juice, celery, green onions, cucumber, and tuna in a bowl, toss lightly, and set aside.
2 In a separate small bowl, add yogurt, mayonnaise, curry, sugar substitute, garlic powder, and salt and mix well. Pour dressing over the apple-tuna mixture and mix well. Refrigerate for 2 to 4 hours before serving.
Per serving: Calories 133 (From Fat 30); Fat 3g (Saturated 1g); Cholesterol 20mg; Sodium 524mg; Carbohydrate 15g (Dietary Fiber 2g); Protein 12g; Sugar 9g.
14_640180-ch08.indd 14714_640180-ch08.indd 147 8/27/10 10:42 PM8/27/10 10:42 PM
148 Part II: Now You’re Cooking! Healthy and Hearty Dishes
Chicken Pasta Salad with Basil Vinaigrette
This great salad is packed with veggies and chicken and finished with just enough pasta. Adding fresh basil and olive oil knocks it out of the park. This salad makes a great picnic dish; just remember to keep it cold!
Stage: Regular foods
Preparation time: 15 minutes
Cooking time: 10 minutes
Chilling time: 2 hours
Yield: 4 servings (3⁄4 cup each)
1 ounce whole-wheat rotini or penne pasta1 cup cooked chicken, cut into small cubes1⁄4 cup chopped red bell pepper1⁄4 cup thin sliced red onion2 tablespoons sliced black olives1⁄4 cup chopped tomatoes1⁄4 cup chopped fresh basil
2 ounces part-skim mozzarella cheese, cut into small cubes3 tablespoons olive oil2 teaspoons lemon juice1⁄2 teaspoon salt1⁄2 teaspoon pepper
1 Cook pasta until it’s soft all the way through (not al dente). Drain and rinse with cold water.
2 In a medium bowl combine all ingredients and mix well. Chill for 2 hours and serve cold.
Tip: Instead of taking time to cook chicken at home, buy cooked rotisserie chicken from the deli. You can also use canned chicken in this recipe if needed.
Per serving: Calories 230 (From Fat 130); Fat 15g (Saturated 4g); Cholesterol 35mg; Sodium 280mg; Carbohydrate 8g (Dietary Fiber 1g); Protein 16g; Sugar 1g.
14_640180-ch08.indd 14814_640180-ch08.indd 148 8/27/10 10:42 PM8/27/10 10:42 PM
Chapter 9
Umm . . . Tastes Like Chicken: Poultry Dishes
In This Chapter▶ Preparing poultry to get the best texture and flavor
▶ Baking, roasting, and sautéing tasty poultry dishes
▶ Enjoying easy-to-eat turkey burgers
▶ Making casseroles to save time
Finding another protein food as versatile as poultry is difficult. You can eat poultry
hot or cold, baked, grilled, broiled, or sautéed, by itself or mixed with an endless number of complementing ingredients. In this chapter we provide chicken and turkey dishes that are cooked with a variety of methods. After you feel comfortable with these preparations, you have endless options for experimenting and creating your own recipes with turkey and chicken.
Whether you’re cooking chicken, turkey, or small Cornish hens, the internal temperature needs to reach 165 degrees for white meat and 180 degrees for dark meat before you stop cooking. The meat con-tinues to cook after you remove it from the heat source, so it will reach the food-safety-recommended temperatures of 170 and 185 degrees, respectively, on its own. The actual cook time will vary based on the size of the cuts.
Recipes in This Chapter
▶ Rosemary Chicken▶ Chicken with Peppers
and Olives▶ Turkey Cutlets with
Thyme-Tomato Sauce▶ Mojo Chicken▶ Chicken with Tomato-
Mushroom Sauce▶ Herb-Roasted Cornish
Game Hens▶ Chicken in Mushroom
Wine Sauce with Pasta▶ Teriyaki Turkey Burger▶ Dried Cherry and Apple
Turkey Burger▶ Spicy Picante Turkey
Casserole▶ Chicken Cacciatore
Crockpot
15_640180-ch09.indd 14915_640180-ch09.indd 149 8/27/10 10:43 PM8/27/10 10:43 PM
150 Part II: Now You’re Cooking! Healthy and Hearty Dishes
Popular Poultry Cooking MethodsCooking methods are especially important when preparing poultry because it’s an easy food to overcook. Dry, overcooked poultry is difficult to eat because it’s likely to get stuck when passing through the pouch or gastric band. By learning the following two methods for properly cooking various types of poultry to make them moist, tender, and flavorful, you’ll be more eager to cook high-quality meats and improve your protein intake.
SautéingWhen you sauté food, you cook it in a preheated pan or griddle with a small amount of added fat such as oil or butter. Because you start with a hot pan and fat, the cooking time is short (usually under seven minutes), which makes sautéing a popular method. Keeping an eye on the cooking food when you sauté is easy to do, and it’s actually an important guideline because unmonitored sautéed food can overcook quickly. Because food cooks so quickly, pieces of meat need to be small and uniform so that the inside isn’t still undercooked when the outside is burning.
RoastingRoasting, if done correctly, can be a great way to cook large cuts of poultry. If done with a roasting rack, it sears the juices in from all sides, whereas baking only sears the top. To roast, place in a shallow pan with a baking rack to lift
Considering free-range and organic chickenWhen shopping for chicken, you may notice some labels indicating that the product is free range or organic. Free range means the birds have access to the outside, as opposed to living their whole lives in small cages. The demand for free-range chicken has grown because people think that the birds are treated more humanely. However, no standard is in place for how much space or time birds need out-side the coop. You may think of the chickens
happily pecking around the grass, but their “free range” may be a small plot of dirt or gravel.
Organic chicken must meet stricter stan-dards. The birds must have access to the out-doors, and their indoor space is larger than nonorganic birds. They’re fed certified organic feed and treated with antibiotics only when needed, not routinely, and probiotics are often used to replace growth-promoting drugs. With all these requirements, you can see why organic chicken costs more.
15_640180-ch09.indd 15015_640180-ch09.indd 150 8/27/10 10:43 PM8/27/10 10:43 PM

151 Chapter 9: Umm . . . Tastes Like Chicken: Poultry Dishes
the poutry just above the pan so the poultry will cook from 360 degrees. The follow instructions are a general guideline for roasting poultry:
1. Preheat your oven to 500 degrees.
2. Using a roasting pan with 3-inch-high sides, add water or broth to fill the pan with one inch of liquid.
If you plan to use the liquid as gravy, chicken broth adds more flavor than water. The liquid in the pan keeps the drippings from the poultry from burning or evaporating from the pan.
3. Place your roasting rack over the liquid and put the cut of poultry on the rack.
The roasting rack lifts the poultry just above the pan so the heat from the oven can cook the bird all the way around.
4. Place your prepared poultry into the preheated oven and roast for 5 minutes.
The high heat sears the outside of the bird and locks in the moisture.
5. Turn down the heat to 325 degrees and continue to roast until your poultry is cooked to your desired doneness.
To use a meat thermometer, insert it into the thickest part of the poultry and stay clear of cartilage and bone. The thermometer takes about 20 seconds to register the internal temperature.
Some meat thermometers are oven safe, meaning they can be left in the meat while it cooks in the oven, but unless yours specifically states “oven safe,” assume it isn’t. Remove it from the oven as soon as you get a temperature reading.
Roasting bags are available in stores, but they don’t really roast your food. They braise the food (cook it in liquid), causing poultry to be moist but chewy.
Poultry skin, which is fat, naturally bastes (moistens) the poultry as it cooks. When you’re grilling, baking, or roasting, you can leave the skin on, but remove the skin before eating to avoid adding extra fat to your meal. If you choose not to use the skin when cooking, you need to baste the chicken with a healthy substitute such as canola or olive oil to help keep it moist.
Roasted, Sautéed, and Baked PoultryThis section has recipes that will keep your house wafting with the aroma of delicious poultry. These easy-to-make poultry dishes will keep your family coming back for more.
15_640180-ch09.indd 15115_640180-ch09.indd 151 8/27/10 10:43 PM8/27/10 10:43 PM
152 Part II: Now You’re Cooking! Healthy and Hearty Dishes
A typical chicken breast is more than one serving. A serving of cooked chicken is 3 ounces by weight, and most chicken breasts are 6 or more ounces. To ensure that you divide each dish into the correct number of appropriately sized servings, check the weight on the label to make sure you start with the right amount of meat, and take note of each recipe’s yield.
Rosemary Chicken
In our opinions, few dishes taste as good as sautéed chicken with fresh rosemary and Dijon mustard. This quick and easy poultry dish is great cold or hot and reheats up well. You can substitute 3⁄4 teaspoon dried rosemary, but honestly, fresh is best in this case. We use low-sodium broth, which significantly reduces the amount of sodium. (You can substitute low-sodium broth for regular in most recipes.)
Stage: Regular foods
Preparation time: 5 minutes
Cooking time: 15 minutes
Yield: 2 servings (4 ounces each)
1⁄2 pound boneless, skinless chicken breasts, cut into 4-ounce pieces1⁄4 teaspoon salt, divided1⁄4 teaspoon black pepper, divided2 teaspoons olive oil, divided
1 small shallot, finely chopped1⁄2 cup reduced-sodium chicken broth2 teaspoons chopped fresh rosemary2 teaspoons Dijon mustard2 teaspoons light sour cream
1 Season chicken on both sides with 1⁄8 teaspoon salt and 1⁄8 teaspoon black pepper.
2 Heat 1 teaspoon of oil in a medium sauté pan over medium-high heat. When oil is hot, add the chicken and cook until well-browned on both sides, about 3 minutes per side. Put chicken on a plate and cover with foil to keep warm.
3 Reduce heat to medium and add the remaining 1 teaspoon oil to the pan. Add the shallot and cook, stirring, until softened, about 1 minute.
4 Return the chicken to the pan and add broth and rosemary, bring to a simmer, and cook until the liquid is reduced by half and the chicken is cooked through, about 2 to 3 minutes.
5 Put the chicken on two plates. Stir mustard and sour cream into the sauce in the pan and heat thoroughly. Spoon sauce over chicken.
Per serving: Calories 190 (From Fat 60); Fat 7g (Saturated 2g); Cholesterol 65mg; Sodium 450mg; Carbohydrate 3g (Dietary Fiber 0g); Protein 28g; Sugar 1g.
15_640180-ch09.indd 15215_640180-ch09.indd 152 8/27/10 10:43 PM8/27/10 10:43 PM
153 Chapter 9: Umm . . . Tastes Like Chicken: Poultry Dishes
Chicken with Peppers and Olives
Green olives and capers complement chicken in this recipe to make poultry king. Healthy and tasty only begin to describe this amazing combination of flavors. Capers, which are unripened flower buds, have a distinctive flavor and texture, so don’t leave them out of this recipe. They come packed in a brine that contains salt, and you can rinse them if you like, but it won’t change the sodium content very much.
Stage: Regular food
Preparation time: 10 minutes
Cooking time: 30 minutes
Yield: 6 servings (3⁄4 cup each)
2 tablespoons olive oil, divided11⁄2 pounds boneless, skinless chicken breast, cut into six 4-ounce pieces2 cloves garlic, crushed1 large red onion, sliced3 medium bell peppers (red, green, and yellow), cut into strips
1⁄2 cup pitted green olives2 tablespoons capersOne 8-ounce can no-salt-added tomato sauce1 cup low-sodium chicken broth2 teaspoons chopped fresh marjoram1⁄2 teaspoon black pepper
1 Heat 1 tablespoon of oil in a large sauté pan over medium-high heat. Brown the chicken pieces on all sides. Remove the chicken from the pan and set aside.
2 Add the remaining 1 tablespoon of oil to the pan and sauté the garlic and onion until softened, about 2 minutes. Stir in the bell peppers, olives, capers, and tomato sauce.
3 Return the chicken to the sauté pan and add the broth, marjoram, and pepper. Cover and simmer for 20 minutes, or until the chicken reaches 165 degrees internally.
Vary It! You can substitute fresh oregano for marjoram if you prefer.
Per serving: Calories 240 (From Fat 80); Fat 9g (Saturated 2g); Cholesterol 65mg; Sodium 400mg; Carbohydrate 11g (Dietary Fiber 3g); Protein 29g; Sugar 5g.
15_640180-ch09.indd 15315_640180-ch09.indd 153 8/27/10 10:43 PM8/27/10 10:43 PM
154 Part II: Now You’re Cooking! Healthy and Hearty Dishes
Mojo Chicken
Mojo, also known as Spanish barbecue sauce, is made of citrus juices, garlic, fresh oregano, and olive oil. No tomatoes are needed for this citrus marinade to turn your everyday chicken dish into a fiesta. We use a combination of white and dark meat in this recipe. Dark meat is slightly higher in calories because it contains more fat; however, the fat helps keeps the chicken more moist, so some people who have undergone weight loss surgery can tolerate dark meat better than white meat. Though roasting is typically done with a rack, in this recipe the chicken roasts right in the pan.
Turkey Cutlets with Thyme-Tomato Sauce
Turkey cutlets are thin slices of turkey breast. This recipe isn’t what you may imagine when you think turkey, but we bet it’s tasty enough to get Thanksgiving turkey out of your mind. The cutlets cook quickly, so keep an eye on the clock.
Stage: Regular foods
Preparation time: 5 minutes
Cooking time: 12 minutes
Yield: 8 servings (4 ounces each)
8 teaspoons olive oil, divided2 pounds turkey cutlets1 teaspoon salt, divided1 teaspoon black pepper, divided
1 tablespoon chopped fresh thyme1 teaspoon minced garlic3 cups chopped tomato2 tablespoons white wine vinegar
1 Heat 4 teaspoons of the oil in a large skillet over medium-high heat.
2 Sprinkle turkey on both sides with 1⁄2 teaspoon salt and 1⁄2 teaspoon pepper. Add turkey to the pan and cook for 2 to 5 minutes on each side, or until done. Remove from the pan and keep warm.
3 Add the remaining 4 teaspoons of oil, thyme, and garlic to pan. Saute for 1 minute.
4 Add the tomatoes and cook for 1 minute, stirring frequently. Stir in the remaining 1⁄2 teaspoon salt, 1⁄2 teaspoon pepper, and vinegar. Serve over turkey.
Tip: If tomatoes aren’t in season, you can use a drained 28-ounce can of diced tomatoes. However, this will increase the sodium content of the dish.
Per serving: Calories 180 (From Fat 45); Fat 5g (Saturated 1g); Cholesterol 45mg; Sodium 390mg; Carbohydrate 3g (Dietary Fiber 1g); Protein 29g; Sugar 2g.
15_640180-ch09.indd 15415_640180-ch09.indd 154 8/27/10 10:43 PM8/27/10 10:43 PM
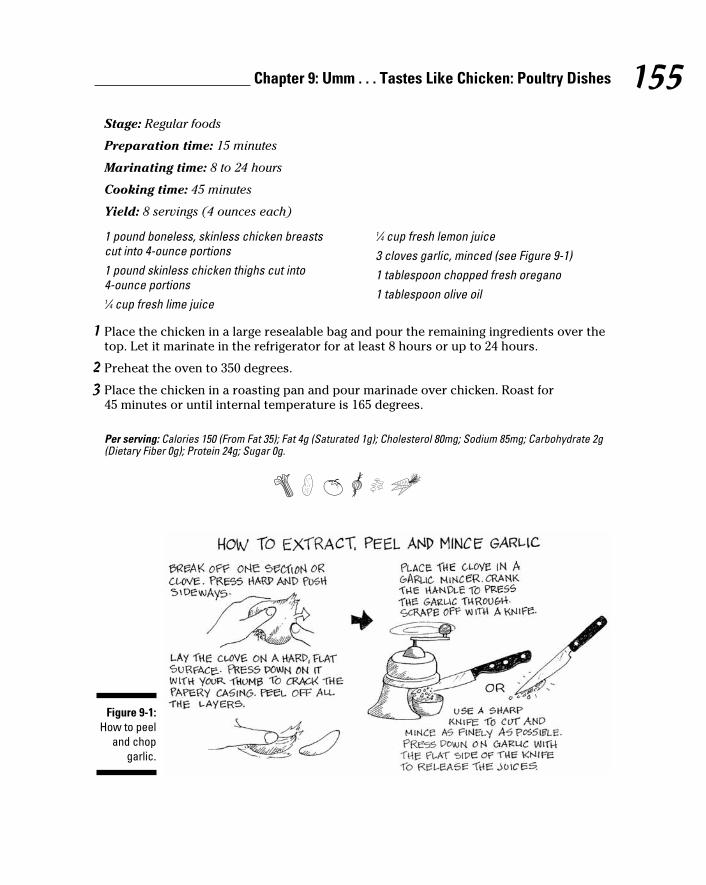
155 Chapter 9: Umm . . . Tastes Like Chicken: Poultry Dishes
1 pound boneless, skinless chicken breasts cut into 4-ounce portions1 pound skinless chicken thighs cut into 4-ounce portions1⁄4 cup fresh lime juice
1⁄4 cup fresh lemon juice3 cloves garlic, minced (see Figure 9-1)1 tablespoon chopped fresh oregano1 tablespoon olive oil
1 Place the chicken in a large resealable bag and pour the remaining ingredients over the top. Let it marinate in the refrigerator for at least 8 hours or up to 24 hours.
2 Preheat the oven to 350 degrees.
3 Place the chicken in a roasting pan and pour marinade over chicken. Roast for 45 minutes or until internal temperature is 165 degrees.
Per serving: Calories 150 (From Fat 35); Fat 4g (Saturated 1g); Cholesterol 80mg; Sodium 85mg; Carbohydrate 2g (Dietary Fiber 0g); Protein 24g; Sugar 0g.
Figure 9-1: How to peel
and chop garlic.
Stage: Regular foods
Preparation time: 15 minutes
Marinating time: 8 to 24 hours
Cooking time: 45 minutes
Yield: 8 servings (4 ounces each)
15_640180-ch09.indd 15515_640180-ch09.indd 155 8/27/10 10:43 PM8/27/10 10:43 PM
156 Part II: Now You’re Cooking! Healthy and Hearty Dishes
Chicken with Tomato-Mushroom Sauce
Kids love this recipe because the flavors are simple, so it’s a great one for the whole family. The recipe (shown in the color section) gets a lot of flavor from a technique called deglazing: a room-temperature liquid is added to a hot pan and the pan is scraped to lift the caramelized goodness off the bottom and mix it into the sauce. If you don’t want to use wine in the sauce, you can use extra chicken broth instead. Turkey cutlets can also be substituted for the chicken.
Stage: Regular foods
Preparation time: 15 minutes
Cooking time: 20 minutes
Yield: 8 servings (4 ounces each)
1⁄4 cup olive oil2 pounds boneless, skinless chicken breasts, cut in half1⁄2 teaspoon salt1⁄2 teaspoon pepper3 tablespoons all-purpose flour
1⁄2 cup white wine2 medium tomatoes, peeled and chopped1⁄2 cup fresh sliced mushrooms1⁄2 cup chopped green onions1 clove fresh garlic, chopped1⁄2 cup chicken broth
1 Heat the olive oil in a large sauté pan over medium-high heat.
2 Salt and pepper the chicken breasts. Lightly coat with flour. Add them to the pan and sauté until chicken is golden brown, approximately 31⁄2 minutes on each side.
3 When the chicken is browned on both sides, add white wine and scrape the bottom of the pan with a spatula to deglaze the pan.
4 Add the tomatoes, mushrooms, green onions, garlic, and chicken broth to pan. Simmer for 10 minutes or until the chicken is cooked through. The sauce will thicken while cooking.
Tip: Fresh chicken breasts are thicker on one end than the other end. To make sure the chicken cooks evenly, pound the chicken breast with a meat mallet until it’s even thickness.
Per serving: Calories 220 (From Fat 70); Fat 9g (Saturated 2g); Cholesterol 65mg; Sodium 260mg; Carbohydrate 5g (Dietary Fiber 1g); Protein 27g; Sugar 2g.
15_640180-ch09.indd 15615_640180-ch09.indd 156 8/27/10 10:43 PM8/27/10 10:43 PM
157 Chapter 9: Umm . . . Tastes Like Chicken: Poultry Dishes
Herb-Roasted Cornish Game Hens
Although Cornish game hen may sound gourmet, it’s simply a young male or female chicken, not a game bird. In the United States they were first used in the early 1950s and have been a hit ever since. Because of their small size, each bird makes two perfect servings.
Stage: Regular foods
Preparation time: 10 minutes
Cooking time: 45 minutes
Yield: 4 servings (1⁄2 Cornish hen each)
2 Cornish hens1⁄2 teaspoon salt1 teaspoon black pepper2 sliced garlic cloves2 teaspoons minced fresh rosemary2 teaspoons minced fresh thyme
1 bay leaf2 shallots, roughly chopped11⁄2 carrots, roughly chopped into 1-inch pieces11⁄2 stalks celery, roughly chopped into 1-inch pieces1 lemon
1 Preheat the oven to 375 degrees.
2 Rinse the Cornish hens with cold water, remove giblets (if included), and pat dry. Season with salt and pepper inside and out. Stuff the inside of the hens with garlic, rosemary, thyme, and 1⁄2 bay leaf each.
3 Place the shallots, carrots, and celery on the bottom of a roasting pan and place the hens on top of the vegetables. Squeeze juice from the lemon all over the hens.
4 Roast in the oven until the hens are golden brown and crisp and the juices run clear when the thigh is pierced with a sharp knife, about 45 minutes. Transfer the hens to a serving platter and let rest for about 5 minutes, and then remove the bay leaf before serving.
Tip: The vegetables in this recipe are at the bottom of the pan to add flavor to the chicken. If you want to eat them with the hen, be sure to cut up the celery and carrots into small pieces so they don’t get stuck.
Per serving (including vegetables): Calories 160 (From Fat 35); Fat 4g (Saturated 1g); Cholesterol 110mg; Sodium 410mg; Carbohydrate 6g (Dietary Fiber 1g); Protein 25g; Sugar 2g.
15_640180-ch09.indd 15715_640180-ch09.indd 157 8/27/10 10:43 PM8/27/10 10:43 PM
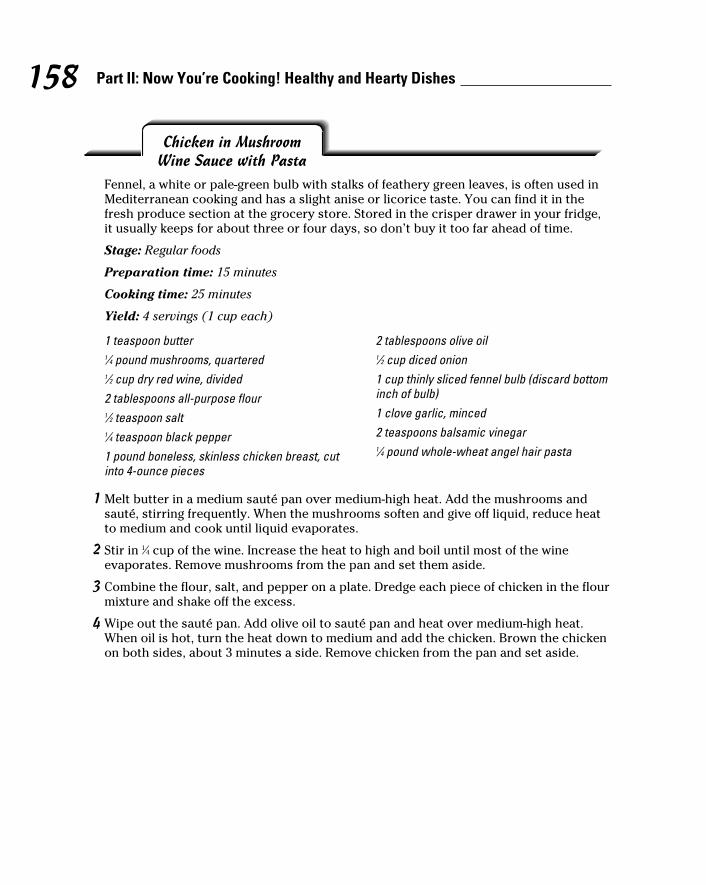
158 Part II: Now You’re Cooking! Healthy and Hearty Dishes
Chicken in Mushroom Wine Sauce with Pasta
Fennel, a white or pale-green bulb with stalks of feathery green leaves, is often used in Mediterranean cooking and has a slight anise or licorice taste. You can find it in the fresh produce section at the grocery store. Stored in the crisper drawer in your fridge, it usually keeps for about three or four days, so don’t buy it too far ahead of time.
Stage: Regular foods
Preparation time: 15 minutes
Cooking time: 25 minutes
Yield: 4 servings (1 cup each)
1 teaspoon butter1⁄4 pound mushrooms, quartered1⁄2 cup dry red wine, divided2 tablespoons all-purpose flour1⁄2 teaspoon salt1⁄4 teaspoon black pepper1 pound boneless, skinless chicken breast, cut into 4-ounce pieces
2 tablespoons olive oil1⁄2 cup diced onion1 cup thinly sliced fennel bulb (discard bottom inch of bulb)1 clove garlic, minced2 teaspoons balsamic vinegar1⁄4 pound whole-wheat angel hair pasta
1 Melt butter in a medium sauté pan over medium-high heat. Add the mushrooms and sauté, stirring frequently. When the mushrooms soften and give off liquid, reduce heat to medium and cook until liquid evaporates.
2 Stir in 1⁄4 cup of the wine. Increase the heat to high and boil until most of the wine evaporates. Remove mushrooms from the pan and set them aside.
3 Combine the flour, salt, and pepper on a plate. Dredge each piece of chicken in the flour mixture and shake off the excess.
4 Wipe out the sauté pan. Add olive oil to sauté pan and heat over medium-high heat. When oil is hot, turn the heat down to medium and add the chicken. Brown the chicken on both sides, about 3 minutes a side. Remove chicken from the pan and set aside.
15_640180-ch09.indd 15815_640180-ch09.indd 158 8/27/10 10:43 PM8/27/10 10:43 PM
159 Chapter 9: Umm . . . Tastes Like Chicken: Poultry Dishes
5 Add the onion and fennel to the drippings in the pan, cooking over medium heat until the onion softens and fennel begins to brown.
6 Stir in the garlic and cook 2 to 3 minutes more. Increase heat to high and stir in the remaining 1⁄4 cup wine.
7 Add the sautéed mushrooms and return the chicken to the pan. Cover tightly, reduce heat, and bring to a simmer. Cook until chicken is thoroughly cooked, about 5 minutes. Remove from heat and stir in balsamic vinegar.
8 Prepare angel hair pasta according to package directions until it’s soft all the way through, not al dente; drain. Serve immediately with chicken and mushroom sauce.
Per serving: Calories 350 (From Fat 90); Fat 10g (Saturated 2g); Cholesterol 70mg; Sodium 390mg; Carbohydrate 28g (Dietary Fiber 4g); Protein 31g; Sugar 3g.
Turkey, the White Meat BurgerSometimes you just feel like having a burger. But after weight-loss surgery, many people have difficulty tolerating beef. It just may not “sit well.” However, you can still have a burger if you swap the beef for ground turkey.
Ground meat is less likely to get stuck because the stringy meat fibers have been mechanically broken down for you. In the meat case you can find ground turkey and ground turkey breast. Ground turkey is less expensive than ground turkey breast because it’s made with both white and dark meat, and usually has some turkey skin added. So although you save some money, ounce for ounce you get less protein and more fat with regular ground turkey.
Even ground meat can be difficult to swallow and digest if it gets dry, so cook the turkey burgers just until they reach an internal temperature of 165 degrees. This temperature is low enough to keep your turkey burgers moist while ensuring they’re thoroughly cooked.
15_640180-ch09.indd 15915_640180-ch09.indd 159 8/27/10 10:43 PM8/27/10 10:43 PM
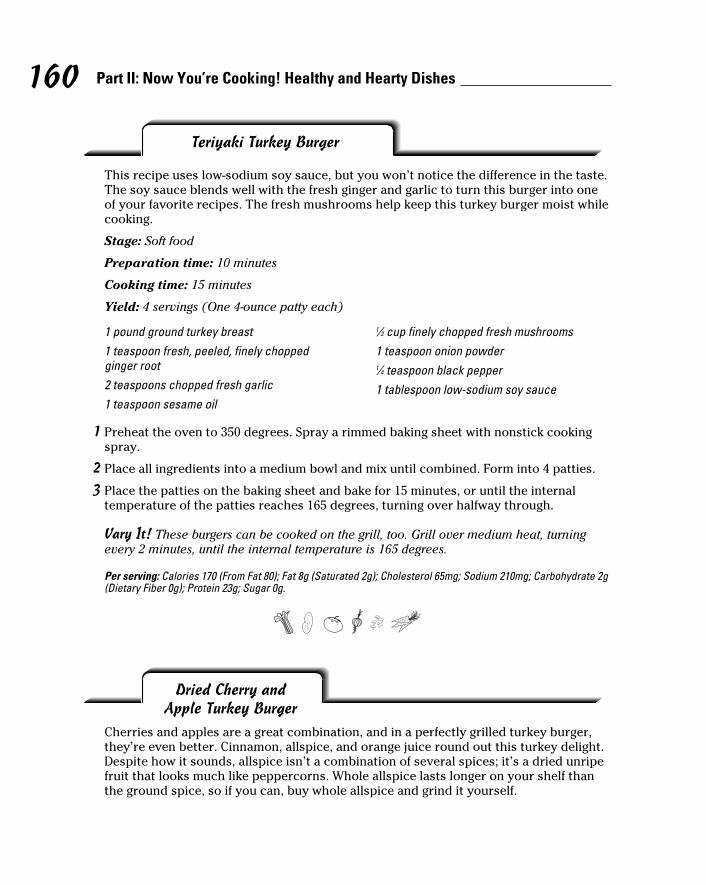
160 Part II: Now You’re Cooking! Healthy and Hearty Dishes
Dried Cherry and Apple Turkey Burger
Cherries and apples are a great combination, and in a perfectly grilled turkey burger, they’re even better. Cinnamon, allspice, and orange juice round out this turkey delight. Despite how it sounds, allspice isn’t a combination of several spices; it’s a dried unripe fruit that looks much like peppercorns. Whole allspice lasts longer on your shelf than the ground spice, so if you can, buy whole allspice and grind it yourself.
Teriyaki Turkey Burger
This recipe uses low-sodium soy sauce, but you won’t notice the difference in the taste. The soy sauce blends well with the fresh ginger and garlic to turn this burger into one of your favorite recipes. The fresh mushrooms help keep this turkey burger moist while cooking.
Stage: Soft food
Preparation time: 10 minutes
Cooking time: 15 minutes
Yield: 4 servings (One 4-ounce patty each)
1 pound ground turkey breast1 teaspoon fresh, peeled, finely chopped ginger root2 teaspoons chopped fresh garlic1 teaspoon sesame oil
1⁄2 cup finely chopped fresh mushrooms1 teaspoon onion powder1⁄4 teaspoon black pepper1 tablespoon low-sodium soy sauce
1 Preheat the oven to 350 degrees. Spray a rimmed baking sheet with nonstick cooking spray.
2 Place all ingredients into a medium bowl and mix until combined. Form into 4 patties.
3 Place the patties on the baking sheet and bake for 15 minutes, or until the internal temperature of the patties reaches 165 degrees, turning over halfway through.
Vary It! These burgers can be cooked on the grill, too. Grill over medium heat, turning every 2 minutes, until the internal temperature is 165 degrees.
Per serving: Calories 170 (From Fat 80); Fat 8g (Saturated 2g); Cholesterol 65mg; Sodium 210mg; Carbohydrate 2g (Dietary Fiber 0g); Protein 23g; Sugar 0g.
15_640180-ch09.indd 16015_640180-ch09.indd 160 8/27/10 10:43 PM8/27/10 10:43 PM

161 Chapter 9: Umm . . . Tastes Like Chicken: Poultry Dishes
1⁄4 cup chopped dried cherries1⁄2 cup peeled and chopped apples1⁄3 cup quick-cooking oats1⁄4 cup chopped green onions2 tablespoons fresh orange juice2 tablespoons chopped fresh parsley
1 pound ground turkey breast1⁄2 teaspoon ground allspice1⁄2 teaspoon ground ginger1⁄2 teaspoon cinnamon1⁄4 teaspoon black pepper
1 Preheat grill to medium-high heat and lightly grease grill grates with nonstick cooking spray.
2 Place cherries, apples, oats, onions, orange juice, and parsley in a food processor and pulse until mixed. Transfer the mixture to a bowl, add the turkey, and mix until combined. Form into 4 patties.
3 Grill over medium-high heat for 5 to 7 minutes per side, or until meat is no longer pink in center and internal temperature reaches 165 degrees.
Vary It! Top with mozzarella cheese, lettuce, and cucumber slices if desired.
Per serving: Calories 220 (From Fat 80); Fat 8g (Saturated 2g); Cholesterol 65mg; Sodium 80mg; Carbohydrate 15g (Dietary Fiber 4g); Protein 24g; Sugar 5g.
Casseroles Everyone Will Flock ToCasseroles are one-dish meals. They always have some sort of liquid added, so they’re moist and easy to eat after you have had weight loss surgery. They’re easy to make, too: You can put them in the slow cooker or prepare them ahead of time and refrigerate them until it’s time to heat. Leftovers can be packed for lunch or frozen for another time-saving meal. One of our favorite things about casseroles is that they often taste better the next day! Just remember to reheat the food to 160 degrees before eating.
Stage: Regular food
Preparation time: 10 minutes
Cooking time: 14 minutes
Yield: 4 servings (One 4-ounce patty each)
15_640180-ch09.indd 16115_640180-ch09.indd 161 8/27/10 10:43 PM8/27/10 10:43 PM
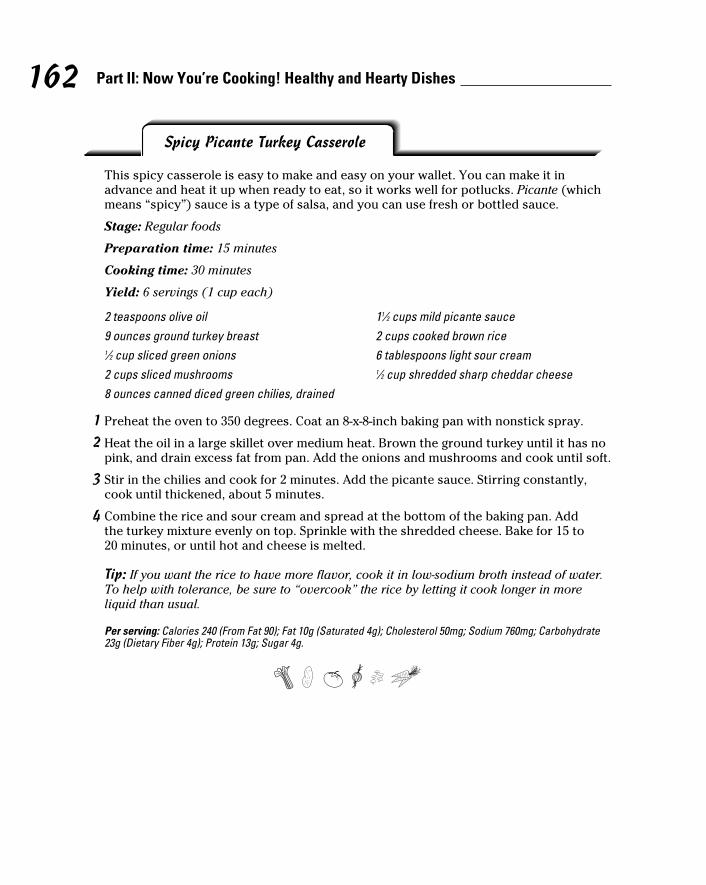
162 Part II: Now You’re Cooking! Healthy and Hearty Dishes
Spicy Picante Turkey Casserole
This spicy casserole is easy to make and easy on your wallet. You can make it in advance and heat it up when ready to eat, so it works well for potlucks. Picante (which means “spicy”) sauce is a type of salsa, and you can use fresh or bottled sauce.
Stage: Regular foods
Preparation time: 15 minutes
Cooking time: 30 minutes
Yield: 6 servings (1 cup each)
2 teaspoons olive oil9 ounces ground turkey breast1⁄2 cup sliced green onions2 cups sliced mushrooms8 ounces canned diced green chilies, drained
11⁄2 cups mild picante sauce2 cups cooked brown rice6 tablespoons light sour cream1⁄2 cup shredded sharp cheddar cheese
1 Preheat the oven to 350 degrees. Coat an 8-x-8-inch baking pan with nonstick spray.
2 Heat the oil in a large skillet over medium heat. Brown the ground turkey until it has no pink, and drain excess fat from pan. Add the onions and mushrooms and cook until soft.
3 Stir in the chilies and cook for 2 minutes. Add the picante sauce. Stirring constantly, cook until thickened, about 5 minutes.
4 Combine the rice and sour cream and spread at the bottom of the baking pan. Add the turkey mixture evenly on top. Sprinkle with the shredded cheese. Bake for 15 to 20 minutes, or until hot and cheese is melted.
Tip: If you want the rice to have more flavor, cook it in low-sodium broth instead of water. To help with tolerance, be sure to “overcook” the rice by letting it cook longer in more liquid than usual.
Per serving: Calories 240 (From Fat 90); Fat 10g (Saturated 4g); Cholesterol 50mg; Sodium 760mg; Carbohydrate 23g (Dietary Fiber 4g); Protein 13g; Sugar 4g.
15_640180-ch09.indd 16215_640180-ch09.indd 162 8/27/10 10:43 PM8/27/10 10:43 PM
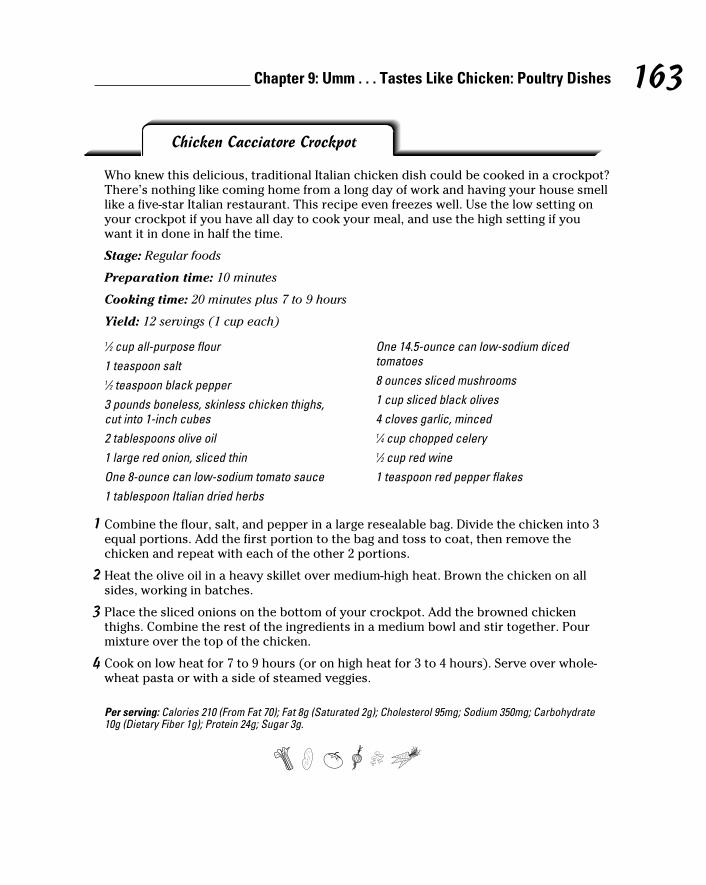
163 Chapter 9: Umm . . . Tastes Like Chicken: Poultry Dishes
Chicken Cacciatore Crockpot
Who knew this delicious, traditional Italian chicken dish could be cooked in a crockpot? There’s nothing like coming home from a long day of work and having your house smell like a five-star Italian restaurant. This recipe even freezes well. Use the low setting on your crockpot if you have all day to cook your meal, and use the high setting if you want it in done in half the time.
Stage: Regular foods
Preparation time: 10 minutes
Cooking time: 20 minutes plus 7 to 9 hours
Yield: 12 servings (1 cup each)
1⁄2 cup all-purpose flour1 teaspoon salt1⁄2 teaspoon black pepper3 pounds boneless, skinless chicken thighs, cut into 1-inch cubes2 tablespoons olive oil1 large red onion, sliced thinOne 8-ounce can low-sodium tomato sauce1 tablespoon Italian dried herbs
One 14.5-ounce can low-sodium diced tomatoes8 ounces sliced mushrooms1 cup sliced black olives4 cloves garlic, minced1⁄4 cup chopped celery1⁄2 cup red wine1 teaspoon red pepper flakes
1 Combine the flour, salt, and pepper in a large resealable bag. Divide the chicken into 3 equal portions. Add the first portion to the bag and toss to coat, then remove the chicken and repeat with each of the other 2 portions.
2 Heat the olive oil in a heavy skillet over medium-high heat. Brown the chicken on all sides, working in batches.
3 Place the sliced onions on the bottom of your crockpot. Add the browned chicken thighs. Combine the rest of the ingredients in a medium bowl and stir together. Pour mixture over the top of the chicken.
4 Cook on low heat for 7 to 9 hours (or on high heat for 3 to 4 hours). Serve over whole-wheat pasta or with a side of steamed veggies.
Per serving: Calories 210 (From Fat 70); Fat 8g (Saturated 2g); Cholesterol 95mg; Sodium 350mg; Carbohydrate 10g (Dietary Fiber 1g); Protein 24g; Sugar 3g.
15_640180-ch09.indd 16315_640180-ch09.indd 163 8/27/10 10:43 PM8/27/10 10:43 PM

164 Part II: Now You’re Cooking! Healthy and Hearty Dishes
15_640180-ch09.indd 16415_640180-ch09.indd 164 8/27/10 10:43 PM8/27/10 10:43 PM
Chapter 10
Let’s Meat in the Kitchen: Beef and Pork Recipes
In This Chapter▶ Choosing the correct cut of meat
▶ Shaping up ground beef
▶ Adding variety with meaty kebabs and salads
▶ Making meat the main course of your meal
“Will I be able to eat red meat again after surgery?” is a question we often hear.
Red meat is one of those foods that works for some people and not for others, even if they’ve had the same surgery. So the response to this question is answered by your pouch. If you had gastric bypass surgery, you may find that red meat does not “set well” in your pouch, meaning it will make your pouch feel uncomfortable. No matter what kind of weight-loss surgery you had, the meat fibers can be difficult to chew thoroughly and can get stuck in the stoma or the band, causing great discomfort.
When you decide to eat red meat, start with ground meat. The fibers are already broken down, so it is easier to tolerate than a piece or chunk of meat. Choosing the right grade and cut of meat and using the best cooking method make all the difference in the world in how well you tolerate it. In this chapter we show you which grades and cuts of beef and pork are best, and we provide lots of delicious and easy recipes in which to use them.
Note that the portion sizes in this chapter may be too large if you’re still in the postsurgery diet progression. Be sure to check each recipe’s yield and adjust for your needs as necessary.
Recipes in This Chapter
▶ Salisbury Steak with Sautéed Vegetables
▶ Home-Style Meatloaf with Tomato Gravy
▶ Greek Meatballs with Yogurt Sauce
▶ Spicy Pork Kebabs with Pineapple
▶ Oriental Steak Strips with Mushrooms and Cherry Tomatoes
▶ Hurry Curry Pork Salad▶ Taco Salad▶ Chilled Roasted
Vegetable Salad with Pork Tenderloin
▶ Pork Stir-Fry▶ Pork Tenderloin Cutlets
with Pear and Ginger Sauce
▶ Spanish Steak with Black Bean Salsa
16_640180-ch10.indd 16516_640180-ch10.indd 165 8/27/10 10:43 PM8/27/10 10:43 PM
166 Part II: Now You’re Cooking! Healthy and Hearty Dishes
Choosing Beef and Pork You Can Eat after Surgery
U.S. Department of Agriculture grades are based on nationally uniform standards, so no matter where in the United States you buy meat, it must meet the same criteria. Grading of meat for quality is voluntary and the meat plant must pay for the service of having their products graded.
USDA Beef GradesThe USDA (U.S. Department of Agriculture) designates eight beef grades, used to classify the meat according to marbling, or the fat running through the muscle, and age of the beef. The three grades commonly available to consumers are
✓ Prime: Prime meat is heavily marbled which makes for a tender and flavorful steak. Only 2 percent of graded beef is prime. Prime meats are generally served in restaurants and sold in high-end grocery stores.
✓ Choice: The majority of graded beef is graded choice. It’s moderately marbled and is still tender, but the flavor isn’t as great as prime.
✓ Select: Select beef has very little marbling therefore the cooked meat is drier, tougher, and has less flavor than prime and choice cuts.
The grade is the quality of the meat when inspected. It doesn’t necessarily affect tolerance when eaten, although tender meat tends to be better for weight loss surgery patients than drier, tougher pieces.
Which cuts makes the cutNot all steaks are created equal. The tenderness of a steak depends on where the steak is cut from. Beef is a muscle, and the more the muscle is worked, the leaner and less fatty it will be. Steaks that have less fat are not as tender and tend to be tough if overcooked. Top round, bottom round, and blade steaks are examples of leaner steaks. When the muscle is worked less, it gets more marbling, thin lines of fat throughout, making it more tender. Examples of tender steaks are fillet mignon, New York strips, and rib-eye.
16_640180-ch10.indd 16616_640180-ch10.indd 166 8/27/10 10:43 PM8/27/10 10:43 PM
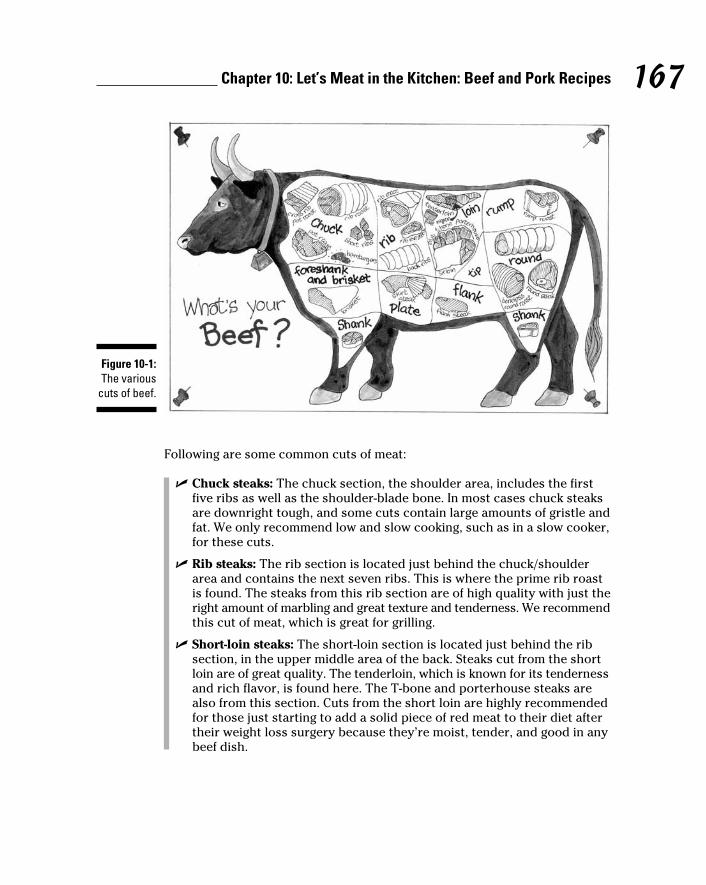
167 Chapter 10: Let’s Meat in the Kitchen: Beef and Pork Recipes
Figure 10-1: The various
cuts of beef.
Following are some common cuts of meat:
✓ Chuck steaks: The chuck section, the shoulder area, includes the first five ribs as well as the shoulder-blade bone. In most cases chuck steaks are downright tough, and some cuts contain large amounts of gristle and fat. We only recommend low and slow cooking, such as in a slow cooker, for these cuts.
✓ Rib steaks: The rib section is located just behind the chuck/shoulder area and contains the next seven ribs. This is where the prime rib roast is found. The steaks from this rib section are of high quality with just the right amount of marbling and great texture and tenderness. We recommend this cut of meat, which is great for grilling.
✓ Short-loin steaks: The short-loin section is located just behind the rib section, in the upper middle area of the back. Steaks cut from the short loin are of great quality. The tenderloin, which is known for its tenderness and rich flavor, is found here. The T-bone and porterhouse steaks are also from this section. Cuts from the short loin are highly recommended for those just starting to add a solid piece of red meat to their diet after their weight loss surgery because they’re moist, tender, and good in any beef dish.
16_640180-ch10.indd 16716_640180-ch10.indd 167 8/27/10 10:43 PM8/27/10 10:43 PM
168 Part II: Now You’re Cooking! Healthy and Hearty Dishes
✓ Sirloin steaks: The sirloin section is behind the loin section and in some areas of the country is referred to as the hip area. Sirloin steaks are fairly large but thin, and the meat isn’t as tender as the short-loin cuts, but they have great flavor. Because these cuts require a little more chewing, they’re best for those who have been on a regular diet for at least six months and have tolerated short-loin steak. This cut is great for stews and roast.
✓ Flank steak: The flank steak is located on the underside belly area, directly below the short loin and sirloin. Steaks from this area have a rich, beefy flavor but must be sliced thin and against the grain to keep the texture of meat from being chewy.
We do not recommended flank steak, because it’s too stringy and chewy to be digested well.
Pork is high in saturated fat, so we recommend that you look for leaner cuts. The best choices for pork cuts are pork tenderloin and pork loin. Other cuts, such as the butt and shoulder, are tender but much higher in fat.
Cooking Phenomenal Ground-Beef DishesWho hasn’t started with a pound of ground beef and made a meal for six or more people? Few other high-protein foods have the versatility and low price of ground beef. From stews to burgers, ground meats can be the complement to the dish or the center of attention. We use ground beef in the recipes in this section, but you can substitute ground venison, bison, or turkey.
Ground beef comes from different cuts of meat that determine the fat content and price of the beef. Not all types of ground meat work for all recipes. If you’re making a ground-meat dish that has other ingredients in it to help keep it moist, you can use a leaner ground beef, one with 5 to 10 percent fat. If you’re making burgers, use a ground beef with more fat, 15 to 20 percent, because the fat keeps the meat moist. Grilling extra-lean beef patties gives you a dry, tough burger.
Whether you choose extra-lean or regular ground beef, it all contains about equal amounts of iron, vitamin B12, niacin, and protein. Regular ground beef has more calories than lean ground beef because it has more fat. A 3-ounce serving of broiled 95 percent lean ground beef has 140 calories and 5 grams of fat, versus a 3-ounce broiled serving of 80 percent lean ground beef with 210 calories and 14 grams of fat.
Because ground meat is exposed to more bacteria during processing, it doesn’t keep as long as a solid piece of meat. You can refrigerate it for up to two days or keep it in the freezer for three months.
16_640180-ch10.indd 16816_640180-ch10.indd 168 8/27/10 10:43 PM8/27/10 10:43 PM
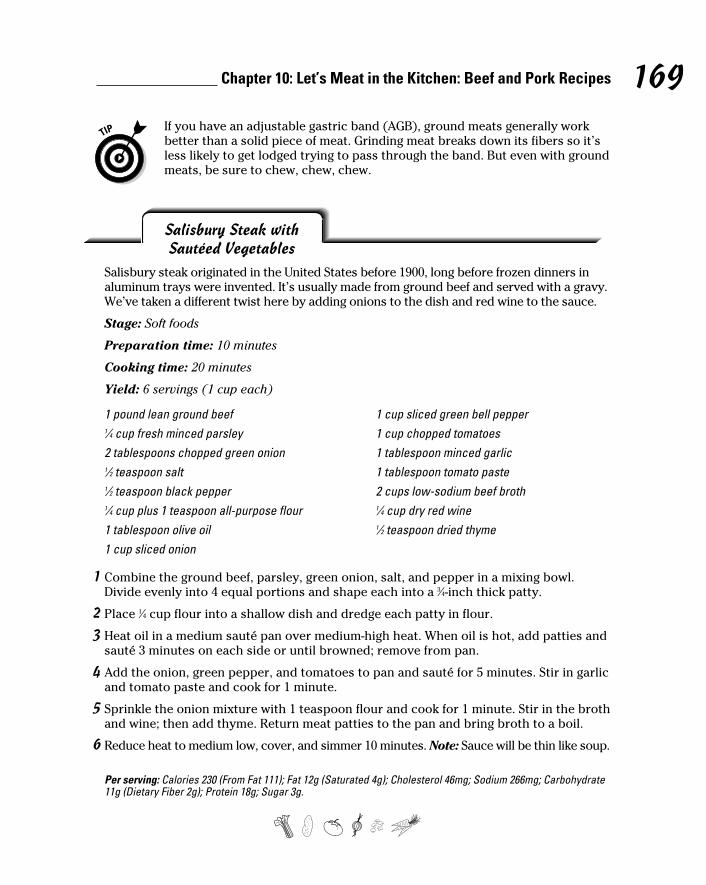
169 Chapter 10: Let’s Meat in the Kitchen: Beef and Pork Recipes
If you have an adjustable gastric band (AGB), ground meats generally work better than a solid piece of meat. Grinding meat breaks down its fibers so it’s less likely to get lodged trying to pass through the band. But even with ground meats, be sure to chew, chew, chew.
Salisbury Steak with Sautéed Vegetables
Salisbury steak originated in the United States before 1900, long before frozen dinners in aluminum trays were invented. It’s usually made from ground beef and served with a gravy. We’ve taken a different twist here by adding onions to the dish and red wine to the sauce.
Stage: Soft foods
Preparation time: 10 minutes
Cooking time: 20 minutes
Yield: 6 servings (1 cup each)
1 pound lean ground beef1⁄4 cup fresh minced parsley2 tablespoons chopped green onion1⁄2 teaspoon salt1⁄2 teaspoon black pepper1⁄4 cup plus 1 teaspoon all-purpose flour1 tablespoon olive oil1 cup sliced onion
1 cup sliced green bell pepper1 cup chopped tomatoes1 tablespoon minced garlic1 tablespoon tomato paste2 cups low-sodium beef broth1⁄4 cup dry red wine1⁄2 teaspoon dried thyme
1 Combine the ground beef, parsley, green onion, salt, and pepper in a mixing bowl. Divide evenly into 4 equal portions and shape each into a 3⁄4-inch thick patty.
2 Place 1⁄4 cup flour into a shallow dish and dredge each patty in flour.
3 Heat oil in a medium sauté pan over medium-high heat. When oil is hot, add patties and sauté 3 minutes on each side or until browned; remove from pan.
4 Add the onion, green pepper, and tomatoes to pan and sauté for 5 minutes. Stir in garlic and tomato paste and cook for 1 minute.
5 Sprinkle the onion mixture with 1 teaspoon flour and cook for 1 minute. Stir in the broth and wine; then add thyme. Return meat patties to the pan and bring broth to a boil.
6 Reduce heat to medium low, cover, and simmer 10 minutes. Note: Sauce will be thin like soup.
Per serving: Calories 230 (From Fat 111); Fat 12g (Saturated 4g); Cholesterol 46mg; Sodium 266mg; Carbohydrate 11g (Dietary Fiber 2g); Protein 18g; Sugar 3g.
16_640180-ch10.indd 16916_640180-ch10.indd 169 8/27/10 10:43 PM8/27/10 10:43 PM
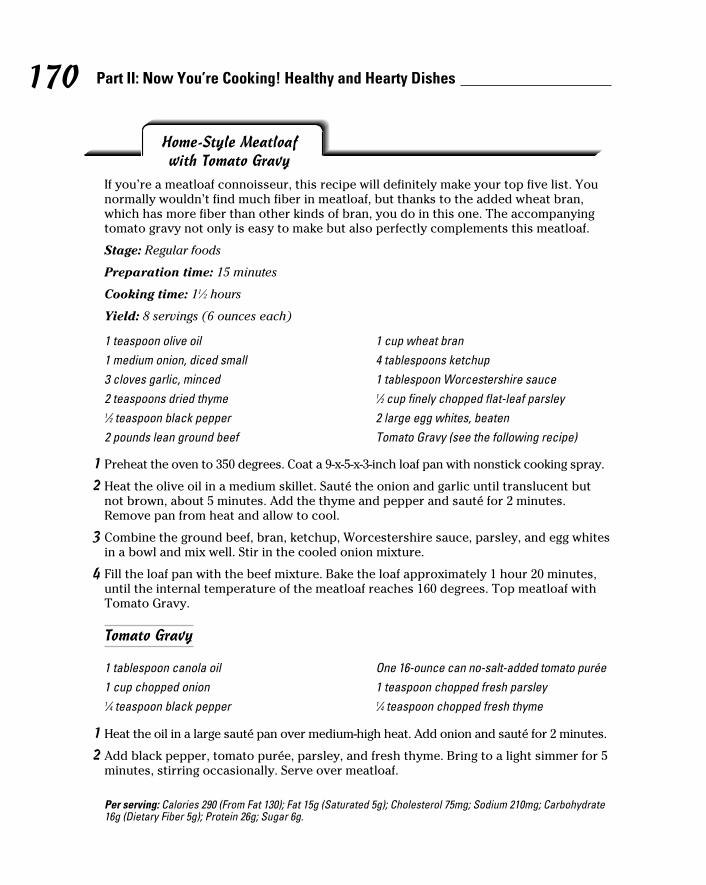
170 Part II: Now You’re Cooking! Healthy and Hearty Dishes
Home-Style Meatloaf with Tomato Gravy
If you’re a meatloaf connoisseur, this recipe will definitely make your top five list. You normally wouldn’t find much fiber in meatloaf, but thanks to the added wheat bran, which has more fiber than other kinds of bran, you do in this one. The accompanying tomato gravy not only is easy to make but also perfectly complements this meatloaf.
Stage: Regular foods
Preparation time: 15 minutes
Cooking time: 11⁄2 hours
Yield: 8 servings (6 ounces each)
1 teaspoon olive oil1 medium onion, diced small3 cloves garlic, minced2 teaspoons dried thyme1⁄2 teaspoon black pepper2 pounds lean ground beef
1 cup wheat bran4 tablespoons ketchup1 tablespoon Worcestershire sauce1⁄2 cup finely chopped flat-leaf parsley2 large egg whites, beatenTomato Gravy (see the following recipe)
1 Preheat the oven to 350 degrees. Coat a 9-x-5-x-3-inch loaf pan with nonstick cooking spray.
2 Heat the olive oil in a medium skillet. Sauté the onion and garlic until translucent but not brown, about 5 minutes. Add the thyme and pepper and sauté for 2 minutes. Remove pan from heat and allow to cool.
3 Combine the ground beef, bran, ketchup, Worcestershire sauce, parsley, and egg whites in a bowl and mix well. Stir in the cooled onion mixture.
4 Fill the loaf pan with the beef mixture. Bake the loaf approximately 1 hour 20 minutes, until the internal temperature of the meatloaf reaches 160 degrees. Top meatloaf with Tomato Gravy.
Tomato Gravy
1 tablespoon canola oil1 cup chopped onion1⁄4 teaspoon black pepper
One 16-ounce can no-salt-added tomato purée1 teaspoon chopped fresh parsley1⁄4 teaspoon chopped fresh thyme
1 Heat the oil in a large sauté pan over medium-high heat. Add onion and sauté for 2 minutes.
2 Add black pepper, tomato purée, parsley, and fresh thyme. Bring to a light simmer for 5 minutes, stirring occasionally. Serve over meatloaf.
Per serving: Calories 290 (From Fat 130); Fat 15g (Saturated 5g); Cholesterol 75mg; Sodium 210mg; Carbohydrate 16g (Dietary Fiber 5g); Protein 26g; Sugar 6g.
16_640180-ch10.indd 17016_640180-ch10.indd 170 8/27/10 10:43 PM8/27/10 10:43 PM
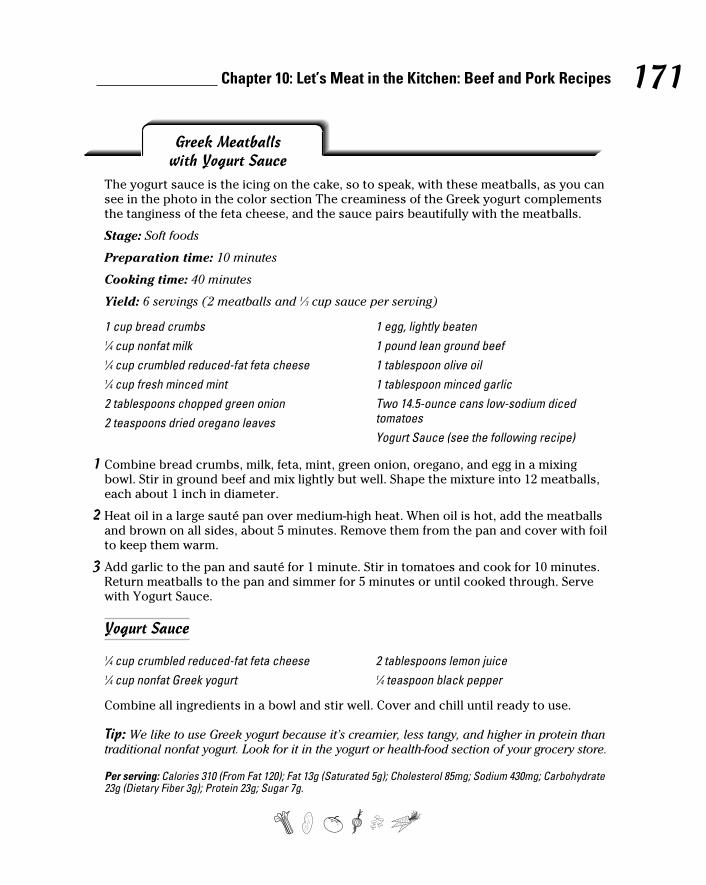
171 Chapter 10: Let’s Meat in the Kitchen: Beef and Pork Recipes
Greek Meatballs with Yogurt Sauce
The yogurt sauce is the icing on the cake, so to speak, with these meatballs, as you can see in the photo in the color section The creaminess of the Greek yogurt complements the tanginess of the feta cheese, and the sauce pairs beautifully with the meatballs.
Stage: Soft foods
Preparation time: 10 minutes
Cooking time: 40 minutes
Yield: 6 servings (2 meatballs and 1⁄3 cup sauce per serving)
1 cup bread crumbs1⁄4 cup nonfat milk1⁄4 cup crumbled reduced-fat feta cheese1⁄4 cup fresh minced mint2 tablespoons chopped green onion2 teaspoons dried oregano leaves
1 egg, lightly beaten1 pound lean ground beef1 tablespoon olive oil1 tablespoon minced garlicTwo 14.5-ounce cans low-sodium diced tomatoesYogurt Sauce (see the following recipe)
1 Combine bread crumbs, milk, feta, mint, green onion, oregano, and egg in a mixing bowl. Stir in ground beef and mix lightly but well. Shape the mixture into 12 meatballs, each about 1 inch in diameter.
2 Heat oil in a large sauté pan over medium-high heat. When oil is hot, add the meatballs and brown on all sides, about 5 minutes. Remove them from the pan and cover with foil to keep them warm.
3 Add garlic to the pan and sauté for 1 minute. Stir in tomatoes and cook for 10 minutes. Return meatballs to the pan and simmer for 5 minutes or until cooked through. Serve with Yogurt Sauce.
Yogurt Sauce
1⁄4 cup crumbled reduced-fat feta cheese1⁄4 cup nonfat Greek yogurt
2 tablespoons lemon juice1⁄4 teaspoon black pepper
Combine all ingredients in a bowl and stir well. Cover and chill until ready to use.
Tip: We like to use Greek yogurt because it’s creamier, less tangy, and higher in protein than traditional nonfat yogurt. Look for it in the yogurt or health-food section of your grocery store.
Per serving: Calories 310 (From Fat 120); Fat 13g (Saturated 5g); Cholesterol 85mg; Sodium 430mg; Carbohydrate 23g (Dietary Fiber 3g); Protein 23g; Sugar 7g.
16_640180-ch10.indd 17116_640180-ch10.indd 171 8/27/10 10:43 PM8/27/10 10:43 PM
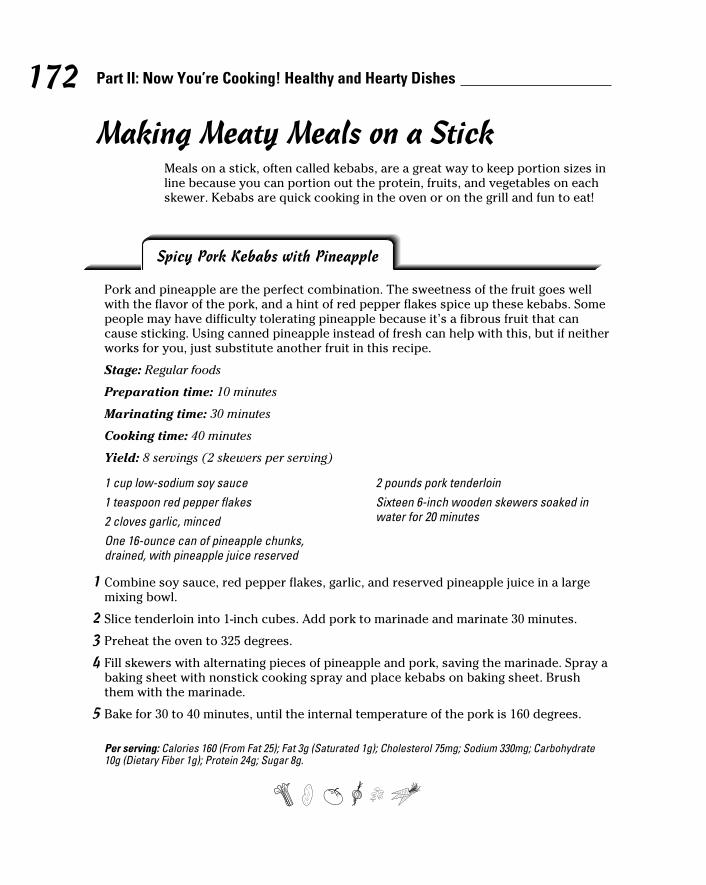
172 Part II: Now You’re Cooking! Healthy and Hearty Dishes
Making Meaty Meals on a StickMeals on a stick, often called kebabs, are a great way to keep portion sizes in line because you can portion out the protein, fruits, and vegetables on each skewer. Kebabs are quick cooking in the oven or on the grill and fun to eat!
Spicy Pork Kebabs with Pineapple
Pork and pineapple are the perfect combination. The sweetness of the fruit goes well with the flavor of the pork, and a hint of red pepper flakes spice up these kebabs. Some people may have difficulty tolerating pineapple because it’s a fibrous fruit that can cause sticking. Using canned pineapple instead of fresh can help with this, but if neither works for you, just substitute another fruit in this recipe.
Stage: Regular foods
Preparation time: 10 minutes
Marinating time: 30 minutes
Cooking time: 40 minutes
Yield: 8 servings (2 skewers per serving)
1 cup low-sodium soy sauce1 teaspoon red pepper flakes2 cloves garlic, mincedOne 16-ounce can of pineapple chunks, drained, with pineapple juice reserved
2 pounds pork tenderloinSixteen 6-inch wooden skewers soaked in water for 20 minutes
1 Combine soy sauce, red pepper flakes, garlic, and reserved pineapple juice in a large mixing bowl.
2 Slice tenderloin into 1-inch cubes. Add pork to marinade and marinate 30 minutes.
3 Preheat the oven to 325 degrees.
4 Fill skewers with alternating pieces of pineapple and pork, saving the marinade. Spray a baking sheet with nonstick cooking spray and place kebabs on baking sheet. Brush them with the marinade.
5 Bake for 30 to 40 minutes, until the internal temperature of the pork is 160 degrees.
Per serving: Calories 160 (From Fat 25); Fat 3g (Saturated 1g); Cholesterol 75mg; Sodium 330mg; Carbohydrate 10g (Dietary Fiber 1g); Protein 24g; Sugar 8g.
16_640180-ch10.indd 17216_640180-ch10.indd 172 8/27/10 10:43 PM8/27/10 10:43 PM
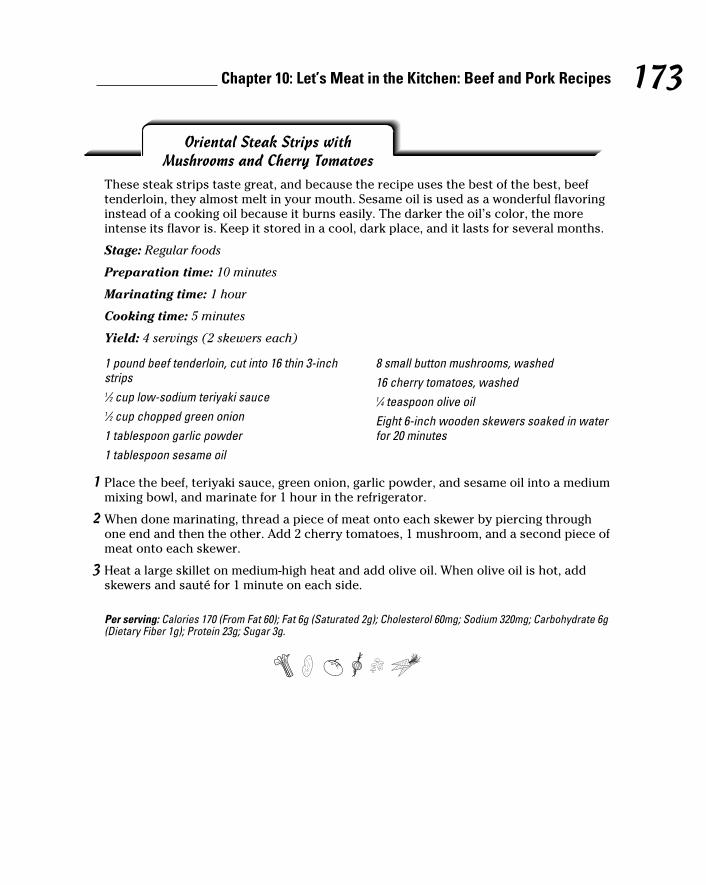
173 Chapter 10: Let’s Meat in the Kitchen: Beef and Pork Recipes
Oriental Steak Strips with Mushrooms and Cherry Tomatoes
These steak strips taste great, and because the recipe uses the best of the best, beef tenderloin, they almost melt in your mouth. Sesame oil is used as a wonderful flavoring instead of a cooking oil because it burns easily. The darker the oil’s color, the more intense its flavor is. Keep it stored in a cool, dark place, and it lasts for several months.
Stage: Regular foods
Preparation time: 10 minutes
Marinating time: 1 hour
Cooking time: 5 minutes
Yield: 4 servings (2 skewers each)
1 pound beef tenderloin, cut into 16 thin 3-inch strips1⁄2 cup low-sodium teriyaki sauce1⁄2 cup chopped green onion1 tablespoon garlic powder1 tablespoon sesame oil
8 small button mushrooms, washed16 cherry tomatoes, washed1⁄4 teaspoon olive oilEight 6-inch wooden skewers soaked in water for 20 minutes
1 Place the beef, teriyaki sauce, green onion, garlic powder, and sesame oil into a medium mixing bowl, and marinate for 1 hour in the refrigerator.
2 When done marinating, thread a piece of meat onto each skewer by piercing through one end and then the other. Add 2 cherry tomatoes, 1 mushroom, and a second piece of meat onto each skewer.
3 Heat a large skillet on medium-high heat and add olive oil. When olive oil is hot, add skewers and sauté for 1 minute on each side.
Per serving: Calories 170 (From Fat 60); Fat 6g (Saturated 2g); Cholesterol 60mg; Sodium 320mg; Carbohydrate 6g (Dietary Fiber 1g); Protein 23g; Sugar 3g.
16_640180-ch10.indd 17316_640180-ch10.indd 173 8/27/10 10:43 PM8/27/10 10:43 PM
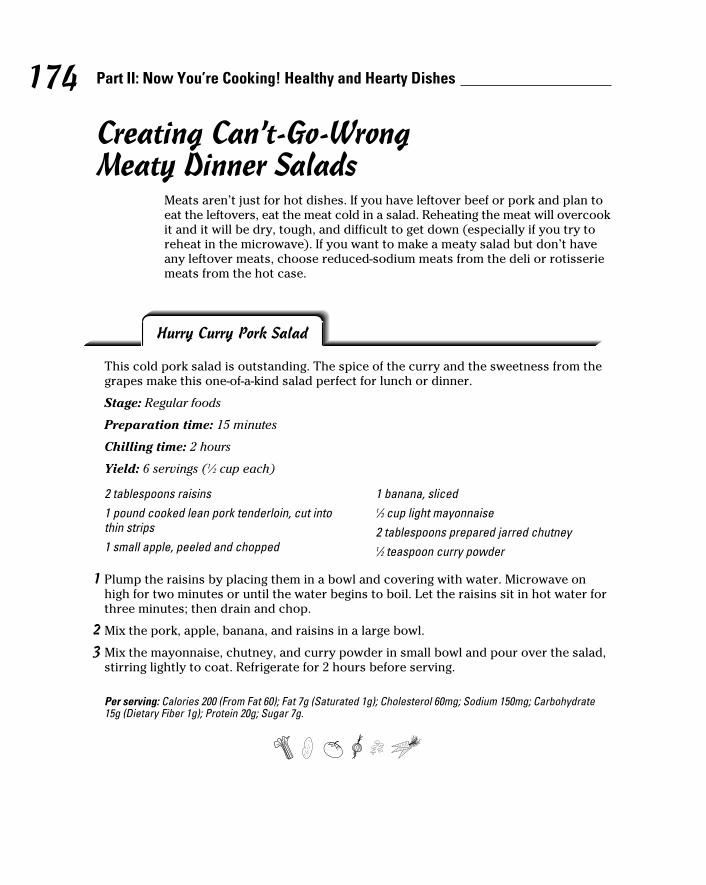
174 Part II: Now You’re Cooking! Healthy and Hearty Dishes
Creating Can’t-Go-Wrong Meaty Dinner Salads
Meats aren’t just for hot dishes. If you have leftover beef or pork and plan to eat the leftovers, eat the meat cold in a salad. Reheating the meat will overcook it and it will be dry, tough, and difficult to get down (especially if you try to reheat in the microwave). If you want to make a meaty salad but don’t have any leftover meats, choose reduced-sodium meats from the deli or rotisserie meats from the hot case.
Hurry Curry Pork Salad
This cold pork salad is outstanding. The spice of the curry and the sweetness from the grapes make this one-of-a-kind salad perfect for lunch or dinner.
Stage: Regular foods
Preparation time: 15 minutes
Chilling time: 2 hours
Yield: 6 servings (1⁄2 cup each)
2 tablespoons raisins1 pound cooked lean pork tenderloin, cut into thin strips1 small apple, peeled and chopped
1 banana, sliced1⁄3 cup light mayonnaise2 tablespoons prepared jarred chutney1⁄2 teaspoon curry powder
1 Plump the raisins by placing them in a bowl and covering with water. Microwave on high for two minutes or until the water begins to boil. Let the raisins sit in hot water for three minutes; then drain and chop.
2 Mix the pork, apple, banana, and raisins in a large bowl.
3 Mix the mayonnaise, chutney, and curry powder in small bowl and pour over the salad, stirring lightly to coat. Refrigerate for 2 hours before serving.
Per serving: Calories 200 (From Fat 60); Fat 7g (Saturated 1g); Cholesterol 60mg; Sodium 150mg; Carbohydrate 15g (Dietary Fiber 1g); Protein 20g; Sugar 7g.
16_640180-ch10.indd 17416_640180-ch10.indd 174 8/27/10 10:43 PM8/27/10 10:43 PM
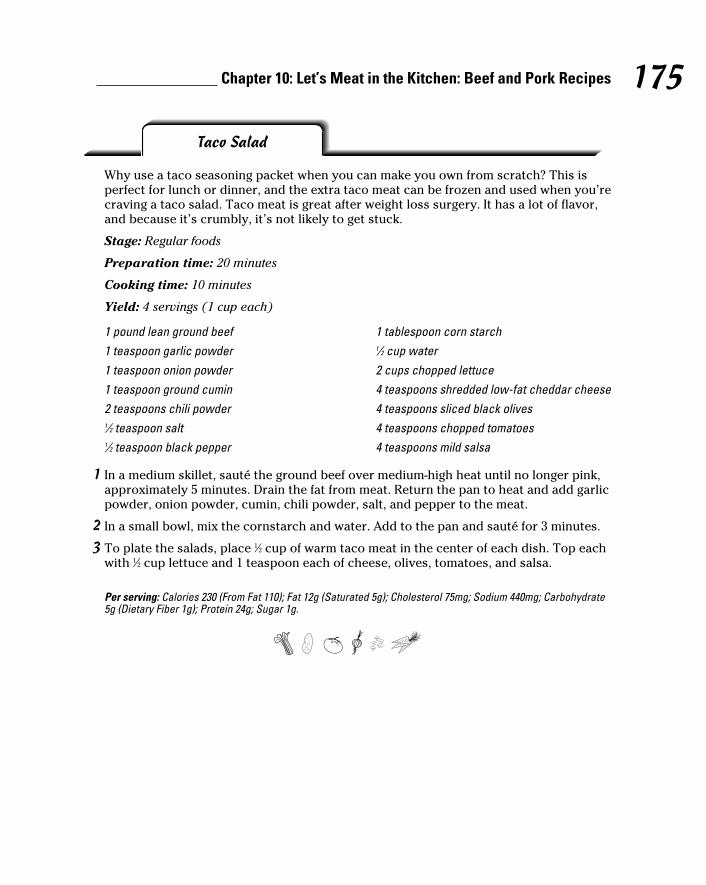
175 Chapter 10: Let’s Meat in the Kitchen: Beef and Pork Recipes
Taco Salad
Why use a taco seasoning packet when you can make you own from scratch? This is perfect for lunch or dinner, and the extra taco meat can be frozen and used when you’re craving a taco salad. Taco meat is great after weight loss surgery. It has a lot of flavor, and because it’s crumbly, it’s not likely to get stuck.
Stage: Regular foods
Preparation time: 20 minutes
Cooking time: 10 minutes
Yield: 4 servings (1 cup each)
1 pound lean ground beef1 teaspoon garlic powder1 teaspoon onion powder1 teaspoon ground cumin2 teaspoons chili powder1⁄2 teaspoon salt1⁄2 teaspoon black pepper
1 tablespoon corn starch1⁄2 cup water2 cups chopped lettuce4 teaspoons shredded low-fat cheddar cheese4 teaspoons sliced black olives4 teaspoons chopped tomatoes4 teaspoons mild salsa
1 In a medium skillet, sauté the ground beef over medium-high heat until no longer pink, approximately 5 minutes. Drain the fat from meat. Return the pan to heat and add garlic powder, onion powder, cumin, chili powder, salt, and pepper to the meat.
2 In a small bowl, mix the cornstarch and water. Add to the pan and sauté for 3 minutes.
3 To plate the salads, place 1⁄2 cup of warm taco meat in the center of each dish. Top each with 1⁄2 cup lettuce and 1 teaspoon each of cheese, olives, tomatoes, and salsa.
Per serving: Calories 230 (From Fat 110); Fat 12g (Saturated 5g); Cholesterol 75mg; Sodium 440mg; Carbohydrate 5g (Dietary Fiber 1g); Protein 24g; Sugar 1g.
16_640180-ch10.indd 17516_640180-ch10.indd 175 8/27/10 10:43 PM8/27/10 10:43 PM
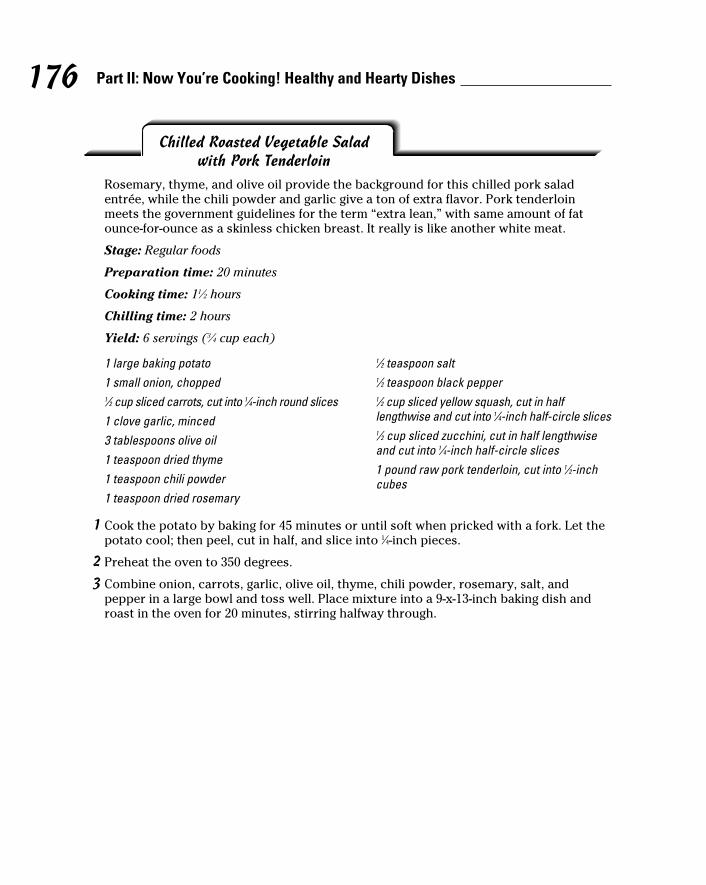
176 Part II: Now You’re Cooking! Healthy and Hearty Dishes
Chilled Roasted Vegetable Salad with Pork Tenderloin
Rosemary, thyme, and olive oil provide the background for this chilled pork salad entrée, while the chili powder and garlic give a ton of extra flavor. Pork tenderloin meets the government guidelines for the term “extra lean,” with same amount of fat ounce-for-ounce as a skinless chicken breast. It really is like another white meat.
Stage: Regular foods
Preparation time: 20 minutes
Cooking time: 11⁄2 hours
Chilling time: 2 hours
Yield: 6 servings (3⁄4 cup each)
1 large baking potato1 small onion, chopped1⁄2 cup sliced carrots, cut into 1⁄4-inch round slices1 clove garlic, minced3 tablespoons olive oil1 teaspoon dried thyme1 teaspoon chili powder1 teaspoon dried rosemary
1⁄2 teaspoon salt1⁄2 teaspoon black pepper1⁄2 cup sliced yellow squash, cut in half lengthwise and cut into 1⁄4-inch half-circle slices1⁄2 cup sliced zucchini, cut in half lengthwise and cut into 1⁄4-inch half-circle slices1 pound raw pork tenderloin, cut into 1⁄2-inch cubes
1 Cook the potato by baking for 45 minutes or until soft when pricked with a fork. Let the potato cool; then peel, cut in half, and slice into 1⁄4-inch pieces.
2 Preheat the oven to 350 degrees.
3 Combine onion, carrots, garlic, olive oil, thyme, chili powder, rosemary, salt, and pepper in a large bowl and toss well. Place mixture into a 9-x-13-inch baking dish and roast in the oven for 20 minutes, stirring halfway through.
16_640180-ch10.indd 17616_640180-ch10.indd 176 8/27/10 10:43 PM8/27/10 10:43 PM
177 Chapter 10: Let’s Meat in the Kitchen: Beef and Pork Recipes
4 Remove the dish from the oven and mix in the potatoes, squash, and zucchini. Cook for another 10 minutes.
5 Remove the dish from the oven and stir in the pork cubes, and then cook for another 10 to 15 minutes until the internal temperature of the pork is 160 degrees. Let the dish chill for 2 hours before serving.
Per serving: Calories 197 (From Fat 86); Fat 10g (Saturated 2g); Cholesterol 42mg; Sodium 239mg; Carbohydrate 11g (Dietary Fiber 2g); Protein 17g; Sugar 2g.
Preparing Pork and Beef Main Entrées“What’s for dinner?” is the question of the day in the late afternoon. The typical response is a protein food, and protein remains the star of the show in these recipes. After weight loss surgery, you can combine a piece of meat with fruit or veggies to make a total meal. No matter how far out you are from surgery, meeting the protein guidelines from your surgeon will always be important.
Eating the same food prepared the same way can be monotonous. We bet the following recipes are something new for you. They’ll be a treat for your family and are good enough for when company’s comin’.
Don’t be afraid to get all your prep done the morning or the day before. This speeds things up when you get home and gives you a head start on dinner. You can buy some vegetables already cut up from the produce department. They may cost a bit more, but your time is valuable, and there is less waste because you don’t have to trim the produce and you may be able to buy a smaller quantity, getting just what you need.
16_640180-ch10.indd 17716_640180-ch10.indd 177 8/27/10 10:43 PM8/27/10 10:43 PM
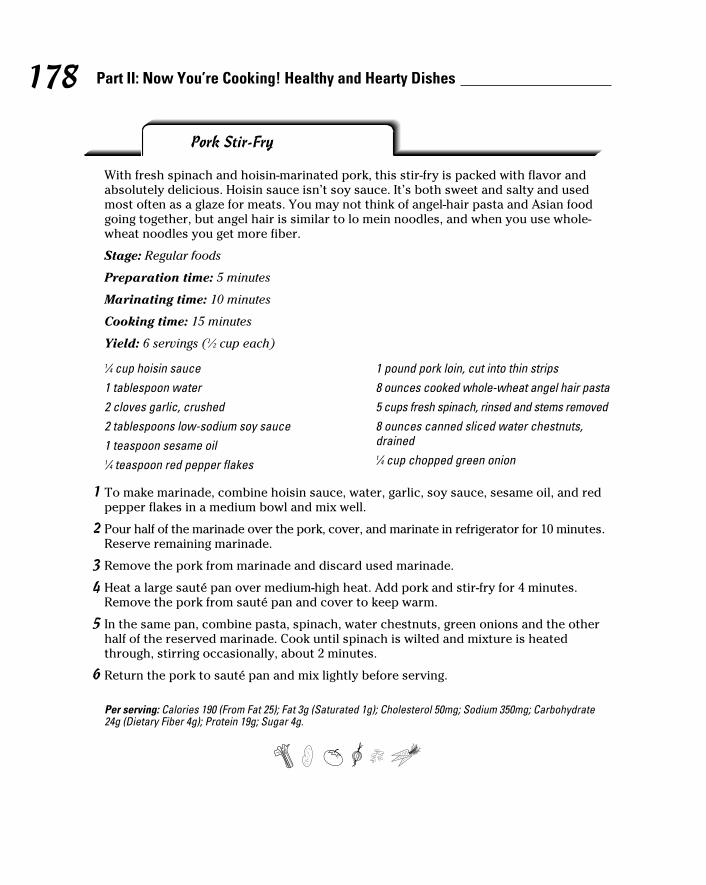
178 Part II: Now You’re Cooking! Healthy and Hearty Dishes
Pork Stir-Fry
With fresh spinach and hoisin-marinated pork, this stir-fry is packed with flavor and absolutely delicious. Hoisin sauce isn’t soy sauce. It’s both sweet and salty and used most often as a glaze for meats. You may not think of angel-hair pasta and Asian food going together, but angel hair is similar to lo mein noodles, and when you use whole-wheat noodles you get more fiber.
Stage: Regular foods
Preparation time: 5 minutes
Marinating time: 10 minutes
Cooking time: 15 minutes
Yield: 6 servings (1⁄2 cup each)
1⁄4 cup hoisin sauce1 tablespoon water2 cloves garlic, crushed2 tablespoons low-sodium soy sauce1 teaspoon sesame oil1⁄4 teaspoon red pepper flakes
1 pound pork loin, cut into thin strips8 ounces cooked whole-wheat angel hair pasta5 cups fresh spinach, rinsed and stems removed8 ounces canned sliced water chestnuts, drained1⁄4 cup chopped green onion
1 To make marinade, combine hoisin sauce, water, garlic, soy sauce, sesame oil, and red pepper flakes in a medium bowl and mix well.
2 Pour half of the marinade over the pork, cover, and marinate in refrigerator for 10 minutes. Reserve remaining marinade.
3 Remove the pork from marinade and discard used marinade.
4 Heat a large sauté pan over medium-high heat. Add pork and stir-fry for 4 minutes. Remove the pork from sauté pan and cover to keep warm.
5 In the same pan, combine pasta, spinach, water chestnuts, green onions and the other half of the reserved marinade. Cook until spinach is wilted and mixture is heated through, stirring occasionally, about 2 minutes.
6 Return the pork to sauté pan and mix lightly before serving.
Per serving: Calories 190 (From Fat 25); Fat 3g (Saturated 1g); Cholesterol 50mg; Sodium 350mg; Carbohydrate 24g (Dietary Fiber 4g); Protein 19g; Sugar 4g.
16_640180-ch10.indd 17816_640180-ch10.indd 178 8/27/10 10:43 PM8/27/10 10:43 PM
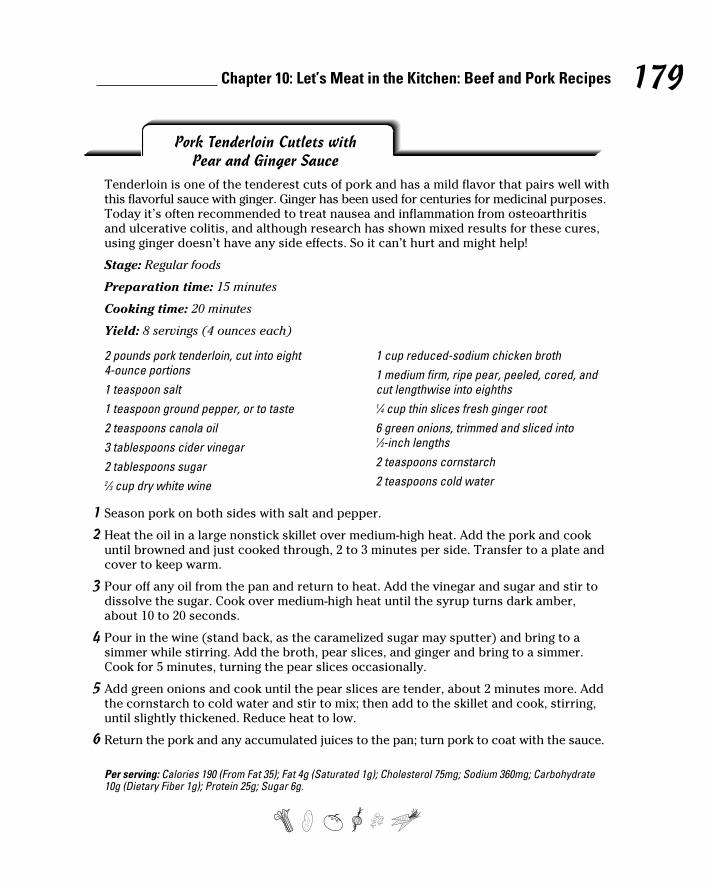
179 Chapter 10: Let’s Meat in the Kitchen: Beef and Pork Recipes
Pork Tenderloin Cutlets with Pear and Ginger Sauce
Tenderloin is one of the tenderest cuts of pork and has a mild flavor that pairs well with this flavorful sauce with ginger. Ginger has been used for centuries for medicinal purposes. Today it’s often recommended to treat nausea and inflammation from osteoarthritis and ulcerative colitis, and although research has shown mixed results for these cures, using ginger doesn’t have any side effects. So it can’t hurt and might help!
Stage: Regular foods
Preparation time: 15 minutes
Cooking time: 20 minutes
Yield: 8 servings (4 ounces each)
2 pounds pork tenderloin, cut into eight 4-ounce portions1 teaspoon salt1 teaspoon ground pepper, or to taste2 teaspoons canola oil3 tablespoons cider vinegar2 tablespoons sugar2⁄3 cup dry white wine
1 cup reduced-sodium chicken broth1 medium firm, ripe pear, peeled, cored, and cut lengthwise into eighths1⁄4 cup thin slices fresh ginger root6 green onions, trimmed and sliced into 1⁄2-inch lengths2 teaspoons cornstarch2 teaspoons cold water
1 Season pork on both sides with salt and pepper.
2 Heat the oil in a large nonstick skillet over medium-high heat. Add the pork and cook until browned and just cooked through, 2 to 3 minutes per side. Transfer to a plate and cover to keep warm.
3 Pour off any oil from the pan and return to heat. Add the vinegar and sugar and stir to dissolve the sugar. Cook over medium-high heat until the syrup turns dark amber, about 10 to 20 seconds.
4 Pour in the wine (stand back, as the caramelized sugar may sputter) and bring to a simmer while stirring. Add the broth, pear slices, and ginger and bring to a simmer. Cook for 5 minutes, turning the pear slices occasionally.
5 Add green onions and cook until the pear slices are tender, about 2 minutes more. Add the cornstarch to cold water and stir to mix; then add to the skillet and cook, stirring, until slightly thickened. Reduce heat to low.
6 Return the pork and any accumulated juices to the pan; turn pork to coat with the sauce.
Per serving: Calories 190 (From Fat 35); Fat 4g (Saturated 1g); Cholesterol 75mg; Sodium 360mg; Carbohydrate 10g (Dietary Fiber 1g); Protein 25g; Sugar 6g.
16_640180-ch10.indd 17916_640180-ch10.indd 179 8/27/10 10:43 PM8/27/10 10:43 PM
180 Part II: Now You’re Cooking! Healthy and Hearty Dishes
Spanish Steak with Black Bean Salsa
You won’t be hearing “Where’s the beef?” with this recipe. It’s a one-two punch of pro-tein with sirloin steak and black beans. The lime brings out the garlic in this dish and gives the beef an amazing flavor.
Stage: Regular foods
Preparation time: 15 minutes
Cooking time: 5 minutes
Yield: 4 servings (4-ounce steak and 1⁄2 cup serving of black bean salsa each)
Four 4-ounce thin-sliced, boneless sirloin steaks1 tablespoon olive oil3 tablespoons lime juice
2 teaspoons butter3 cloves garlic, peeled and mincedSalt and freshly ground black pepper to taste1 fresh lime, cut into wedges
1 Place the steaks between two sheets of plastic wrap and pound with a meat mallet to make them 1⁄4-inch thick.
2 Heat the olive oil in a large sauté pan over high heat. Just before the oil starts to smoke, drop the steaks in, one or two at a time. Be very quick; cook each side no more than 1 minute.
3 When the steaks are cooked, remove them and cover to keep warm. Remove the pan from heat. Immediately deglaze the pan by adding lime juice and scraping up drippings from the bottom of the pan with a rubber spatula.
4 Add butter and garlic to the pan. Return the pan to low heat and cook until the garlic starts to brown. Pour the sauce over the steaks, season with salt and pepper, and serve with fresh lime sections and Black Bean Salsa (see the following recipe).
16_640180-ch10.indd 18016_640180-ch10.indd 180 8/27/10 10:43 PM8/27/10 10:43 PM
181 Chapter 10: Let’s Meat in the Kitchen: Beef and Pork Recipes
1 large tomato, cut into pieces1 tomatillo, cut into pieces1⁄2 small onion, cut into small pieces4 cloves garlic, peeled and left whole3 tablespoons chopped fresh cilantro
1⁄2 teaspoon cumin6 tablespoons fresh lime juice1 jalapeño pepper, seeded and veins removed1⁄2 teaspoon salt1 cup canned no-salt-added black beans, rinsed and drained
1 Place all ingredients except black beans into a food processor and pulse for 15 seconds. Using a rubber spatula, wipe down the sides of the bowl and pulse for 15 more seconds.
2 Stir in black beans. Serve 1⁄2 cup black bean salsa with each steak.
Per serving: Calories 340 (From Fat 170); Fat 19g (Saturated 7g); Cholesterol 75mg; Sodium 490mg; Carbohydrate 17g (Dietary Fiber 4g); Protein 29g; Sugar 4g.
Black Bean Salsa
16_640180-ch10.indd 18116_640180-ch10.indd 181 8/27/10 10:43 PM8/27/10 10:43 PM

182 Part II: Now You’re Cooking! Healthy and Hearty Dishes
16_640180-ch10.indd 18216_640180-ch10.indd 182 8/27/10 10:43 PM8/27/10 10:43 PM
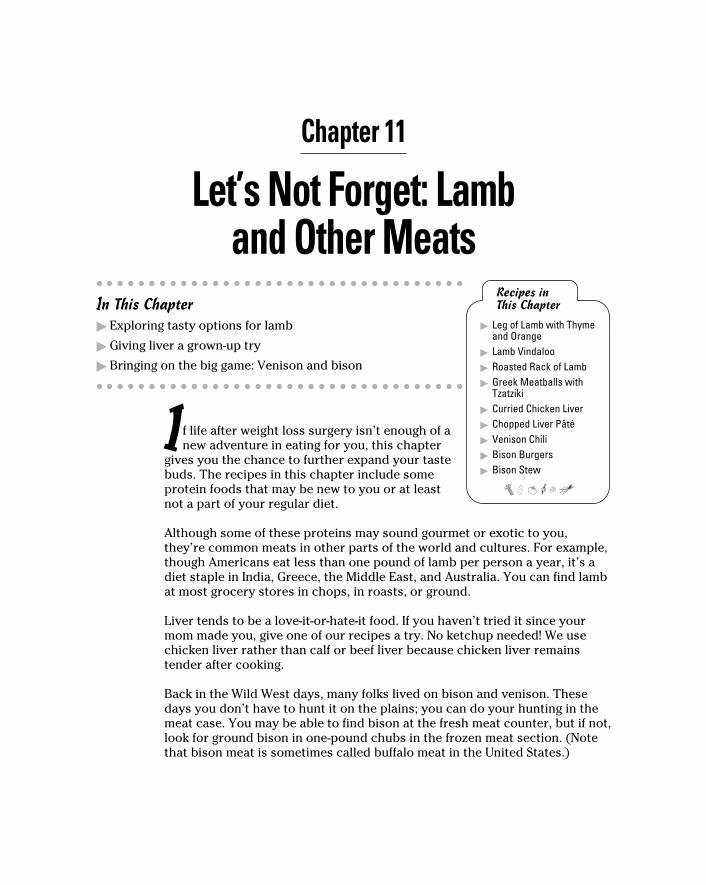
Chapter 11
Let’s Not Forget: Lamb and Other Meats
In This Chapter▶ Exploring tasty options for lamb
▶ Giving liver a grown-up try
▶ Bringing on the big game: Venison and bison
If life after weight loss surgery isn’t enough of a new adventure in eating for you, this chapter
gives you the chance to further expand your taste buds. The recipes in this chapter include some protein foods that may be new to you or at least not a part of your regular diet.
Although some of these proteins may sound gourmet or exotic to you, they’re common meats in other parts of the world and cultures. For example, though Americans eat less than one pound of lamb per person a year, it’s a diet staple in India, Greece, the Middle East, and Australia. You can find lamb at most grocery stores in chops, in roasts, or ground.
Liver tends to be a love-it-or-hate-it food. If you haven’t tried it since your mom made you, give one of our recipes a try. No ketchup needed! We use chicken liver rather than calf or beef liver because chicken liver remains tender after cooking.
Back in the Wild West days, many folks lived on bison and venison. These days you don’t have to hunt it on the plains; you can do your hunting in the meat case. You may be able to find bison at the fresh meat counter, but if not, look for ground bison in one-pound chubs in the frozen meat section. (Note that bison meat is sometimes called buffalo meat in the United States.)
Recipes in This Chapter
▶ Leg of Lamb with Thyme and Orange
▶ Lamb Vindaloo▶ Roasted Rack of Lamb▶ Greek Meatballs with
Tzatziki▶ Curried Chicken Liver▶ Chopped Liver Pâté▶ Venison Chili▶ Bison Burgers▶ Bison Stew
17_640180-ch11.indd 18317_640180-ch11.indd 183 8/27/10 10:44 PM8/27/10 10:44 PM
184 Part II: Now You’re Cooking! Healthy and Hearty Dishes
Trying Out Lamb, Another Red MeatLamb is considered a red meat, but American domestic and imported lambs have very different taste and texture. American lamb is grain fed, which tends to give the meat a sweeter taste and smoother texture. Lamb imported to the United States comes mostly from Australia and is grass fed, which tends to make the meat taste a bit grainy and gamy (strong and tangy).
Lamb, like beef, is easiest to digest when cooked to medium doneness. This gives the fat a chance to melt and flavor and moisten the meat without overcooking. If left rare, the fat doesn’t have a chance to cook through the muscle and the lamb may be tough. If cooked medium well to well done, most of the fat is cooked out and the lamb will be tough.
The four main cuts of lamb are the shoulder, rack, leg, and loin (see Figure 11-1). Most of the grilling cuts come from the shoulder. The loin, leg, and racks are frequently used for roasting. Additionally, chops and riblets, the best cuts, are commonly found in your local grocer’s meat department.
Buying lamb can be a bit confusing. Here are a few quick tips for buying the best cut for your recipe:
✓ If you need a boneless leg of lamb, choose sirloin. It has the least amount of connective tissue, making it the most tender part of the leg.
✓ If your recipe calls for rack of lamb, be prepared: It’s the most expensive cut of lamb. Rack of lamb is most commonly served rare to medium rare. If overcooked, the lamb can become tough.
✓ If you’re looking for lamb chops, go for loin chops. They’re the leanest and turn out well when grilled or sautéed.
✓ If you want a cut of lamb for low and slow cooking, choose a roast or shoulder. They’re larger and tougher than other cuts, so plenty of cooking time over low heat makes them tender.
17_640180-ch11.indd 18417_640180-ch11.indd 184 8/27/10 10:44 PM8/27/10 10:44 PM
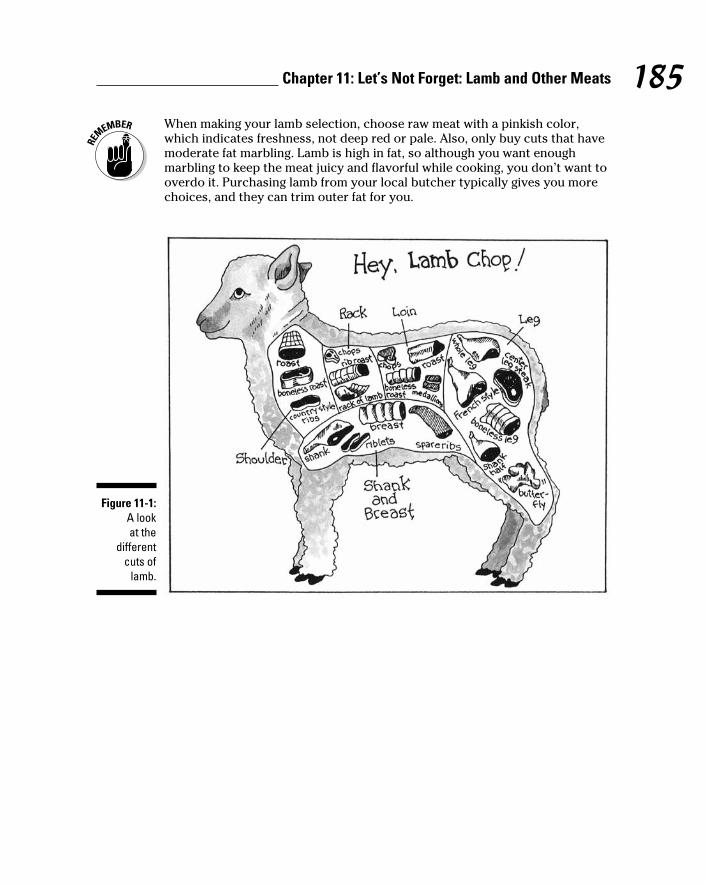
185 Chapter 11: Let’s Not Forget: Lamb and Other Meats
When making your lamb selection, choose raw meat with a pinkish color, which indicates freshness, not deep red or pale. Also, only buy cuts that have moderate fat marbling. Lamb is high in fat, so although you want enough marbling to keep the meat juicy and flavorful while cooking, you don’t want to overdo it. Purchasing lamb from your local butcher typically gives you more choices, and they can trim outer fat for you.
Figure 11-1: A look at the
different cuts of
lamb.
17_640180-ch11.indd 18517_640180-ch11.indd 185 8/27/10 10:44 PM8/27/10 10:44 PM
186 Part II: Now You’re Cooking! Healthy and Hearty Dishes
Leg of Lamb with Thyme and Orange
If orange and thyme are a perfect combination (and they are!), then adding garlic puts this leg of lamb over the top. Get your broiler on high and be ready for some mouth-watering lamb.
Stage: Regular foods
Preparation time: 15 minutes
Cooking time: 10 minutes
Yield: 8 servings (4 ounces each)
1 tablespoon chopped fresh thyme1 tablespoon orange zest3 cloves garlic, minced1 teaspoon salt
1 teaspoon black pepper2 pounds boneless lamb leg (3–31⁄2 pounds bone-in. Have the butcher debone a cut if you can’t find boneless.)1 tablespoon olive oil
1 Preheat the broiler to high.
2 Combine the thyme, orange zest, garlic, salt, and pepper in a small bowl.
3 Place the lamb on a rimmed baking sheet. Using a sharp knife, make half a dozen 1⁄2-inch-deep slits on each side of the lamb. Fill each slit with 1⁄2 teaspoon of the thyme mixture. Rub any remaining mixture over both sides of lamb.
4 Brush the lamb lightly with olive oil. Broil until brown and crusty on top, about 5 minutes, and then flip over and broil for 5 more minutes. If needed, continue to broil until a meat thermometer inserted into thickest part registers 135 degrees for medium rare.
5 Transfer lamb to platter and let stand for 15 minutes. Slice thinly to serve.
Tip: To zest an orange, first wash and dry the fruit. Using a medium-fine grater, scrape the peel, stopping when you get to the bitter white layer, called the pith. Or you can use a chef’s knife to cut off the colored part of the peel and finely dice it.
Per serving: Calories 230 (From Fat 130); Fat 15g (Saturated 6g); Cholesterol 75mg; Sodium 360mg; Carbohydrate 1g (Dietary Fiber 0g); Protein 22g; Sugar 0g.
17_640180-ch11.indd 18617_640180-ch11.indd 186 8/27/10 10:44 PM8/27/10 10:44 PM
187 Chapter 11: Let’s Not Forget: Lamb and Other Meats
Lamb Vindaloo
Vindaloo is a spicy Indian meat dish sometimes made with chicken. Traditionally it’s quite hot, but we turn it down a notch here. You may think of cinnamon, one of this dish’s spices, as reserved only for baked goods or desserts, but it works well with savory entrées too. And besides tasting good, cinnamon has been shown to have health benefits.
Stage: Regular foods
Preparation time: 10 minutes
Marinating time: 8 hours
Cooking time: 50 minutes
Yield: 8 servings (1⁄2 cup each)
2 pounds boneless lamb loin, cut into 3⁄4-inch cubes3 tablespoons cider vinegar2 teaspoons tamarind pasteSalt to taste1 tablespoon plus 2 tablespoons canola oil1 large white onion, quartered, plus 2 cups thinly slices onions6 garlic cloves
2 tablespoons peeled and chopped fresh ginger root1 teaspoon ground cumin1 teaspoon ground mustard2 teaspoons turmeric1⁄2 teaspoon cayenne pepper3 teaspoons paprika1 teaspoon ground cinnamonAbout 2 1⁄4 cups hot water
1 Place the lamb cubes in a nonmetallic bowl with the vinegar, tamarind, and salt. Cover and marinade in the refrigerator for at least 8 hours.
2 Put 1 tablespoon of oil, the onion quarters, garlic, and ginger in a food processor, purée, and set aside.
3 Heat 2 tablespoons of oil in large skillet over medium-high heat.
4 Add the sliced onions and sauté until they’re caramel brown, stirring constantly to avoid burning. Add the lamb (reserving the marinade) and cook until slightly seared on all sides, about 10 minutes total.
5 Add the onion purée to the pan. Reduce the heat to medium and add cumin, mustard, turmeric, cayenne pepper, paprika, and cinnamon.
6 Add enough hot water to the marinade to make 21⁄2 cups of liquid. Pour it into the pan and bring to a boil, then lower the heat and simmer, partially covered, until the meat is very tender (about 30 minutes).
Per serving: Calories 240 (From Fat 120); Fat 13g (Saturated 4g); Cholesterol 75mg; Sodium 90mg; Carbohydrate 6g (Dietary Fiber 1g); Protein 25g; Sugar 2g.
17_640180-ch11.indd 18717_640180-ch11.indd 187 8/27/10 10:44 PM8/27/10 10:44 PM
188 Part II: Now You’re Cooking! Healthy and Hearty Dishes
Greek Meatballs with Tzatziki
This Greek dish is perfect for grilling with family or guests. Tzatziki (dza-dzee-kee) sauce develops a richer flavor if you allow it to sit overnight, and the meatballs can be made up to 12 hours in advance of cooking, so you can do all the prep work the night before and then relax until it’s time to fire up the grill. This dish is made with ground meat, so you don’t need to worry about those stringy meat fibers, and the cucumber in the tzatziki is grated, so the peel won’t cause you any problems either.
Roasted Rack of Lamb
Rack of lamb has a lot of flavor by itself, so be careful not to overseason. A little thyme, salt, and pepper is all that is needed when roasting this delicate cut of lamb.
Stage: Regular foods
Preparation time: 15 minutes
Cooking time: 30 minutes
Yield: 8 servings (4 ounces each)
2 teaspoons fresh thyme1 teaspoon salt1 teaspoon black pepper
2 pounds rack of lamb chops1 tablespoon olive oil
1 Preheat the oven to 350 degrees.
2 Combine the thyme, salt, and pepper in a small bowl. Sprinkle the seasoning all over the meat.
3 Add olive oil to a large skillet and heat over high heat. Brown the lamb for 3 minutes on each side.
4 Transfer the lamb to roasting pan and roast, fat side up, in the middle of the oven for 14 to 16 minutes, or until the internal temperature is 130 degrees for medium rare.
5 Transfer the rack of lamb to a warm platter and let it rest for 10 minutes. Cut the rack into individual chops and serve.
Per serving: Calories 210 (From Fat 110); Fat 12g (Saturated 4g); Cholesterol 75mg; Sodium 370mg; Carbohydrate 0g (Dietary Fiber 0g); Protein 23g; Sugar 0g.
17_640180-ch11.indd 18817_640180-ch11.indd 188 8/27/10 10:44 PM8/27/10 10:44 PM
189 Chapter 11: Let’s Not Forget: Lamb and Other Meats
1 pound lamb loin ground4 cloves garlic, minced3 tablespoons grated onion3 tablespoons chopped fresh flat-leaf parsley1 teaspoon ground coriander1 teaspoon ground cumin1⁄2 teaspoon ground allspice
1⁄4 teaspoon cayenne pepper1⁄2 teaspoon black pepperEight 6-inch wooden skewers soaked in water for 20 minutes1 tablespoon olive oilTzatziki sauce (see the following recipe)
1 Place lamb and the next 8 ingredients in a large bowl and mix well. Divide the meat mixture into 8 balls.
2 Mold each piece around the pointed end of a skewer, making a 2-inch oval meatball that comes to a point just covering the tip of the skewer. Lay the skewers on a foil-lined pan, cover, and refrigerate for at least 30 minutes and up to 12 hours.
3 Heat a grill to medium heat. Brush the grill grates with olive oil. Place the skewered meatballs on the grill, turning occasionally, until brown all over and just cooked through, about 6 minutes.
4 Slide meatballs off the skewers onto a serving platter and serve with tzatziki.
Tzatziki
Stage: Regular foods
Preparation time: 5 minutes
Chilling time: 30 minutes to 12 hours
Cooking time: 6 minutes
Yield: 4 servings (2 meatballs each)
1⁄2 medium cucumber, grated1⁄2 cup fat-free sour cream1 clove garlic, minced
11⁄2 teaspoons lemon juice11⁄2 teaspoons olive oil1⁄2 teaspoon salt
1 After cucumber is grated, squeeze out all the moisture by placing it in a strainer and pressing against it with the back of a large spoon. Discard the liquid.
2 In a medium bowl, mix together the squeezed cucumber, sour cream, minced garlic, lemon juice, oil, and salt. Refrigerate until ready to use.
Per serving: Calories 290 (From Fat 150); Fat 17g (Saturated 8g); Cholesterol 80mg; Sodium 400mg; Carbohydrate 8g (Dietary Fiber 1g); Protein 24g; Sugar 3g.
17_640180-ch11.indd 18917_640180-ch11.indd 189 8/27/10 10:44 PM8/27/10 10:44 PM
190 Part II: Now You’re Cooking! Healthy and Hearty Dishes
Discovering Lick-Your-Plate Liver DishesCome into this section with an open mind. Sure, as a kid you dreaded liver, which no amount of ketchup could improve. But when liver is prepared cor-rectly, you don’t need the ketchup bottle to get it down.
Calf and chicken liver are both tasty and can be cooked in similar ways. However, calf liver can only be cooked until pink in the center or it becomes tough and chewy, and chicken liver remains tender even when thoroughly cooked. To cook, sautéing is recommended. Make sure the pan is hot before adding the meat to allow it to cook quickly and stay tender.
Protein-rich liver is loaded with B vitamins, vitamins A and D, iron, selenium, and zinc. However, it’s also very high in cholesterol. Ounce for ounce, chicken liver is higher in cholesterol and iron than beef liver and slightly lower in calories. Braunschweiger, or liver sausage, is almost double the calories of fresh animal liver because it is very high in fat, and it has less protein, cholesterol, and iron. If you’re a liver lover, limit your intake of any kind of liver to no more than once a week because of the high cholesterol and vitamin A content. (Too much vitamin A over a short period of time can cause hypervitaminosis A, which can cause a host of ailments including liver problems and bone loss.)
Curried Chicken Liver
Chicken liver is tender and tasty, and sautéing it with spices makes it a hit. This dish goes perfectly with whole-grain rice.
Stage: Soft foods
Preparation time: 5 minutes
Cooking time: 20 minutes
Yield: 4 servings (4 ounces each)
5 teaspoons curry powder1⁄4 teaspoon ground cloves1 teaspoon onion powder1 tablespoon poppy seeds1 pinch saffron1 tablespoon canola oil
1⁄4 teaspoon turmeric1⁄2 teaspoon red chili powder1 teaspoon minced garlic1 teaspoon minced ginger1 pound fresh chicken liver, washed, drained, and trimmed3⁄4 cup low-sodium chicken broth
1 Mix together the curry powder, cloves, onion powder, poppy seeds, and saffron. Set aside.
2 Heat oil in a large skillet over medium-high heat. Add turmeric, chili powder, garlic, and ginger and sauté for 2 minutes. Add liver and the spice mixture and sauté for 3 minutes.
17_640180-ch11.indd 19017_640180-ch11.indd 190 8/27/10 10:44 PM8/27/10 10:44 PM
191 Chapter 11: Let’s Not Forget: Lamb and Other Meats
3 Add the chicken broth. Cover and cook over medium heat for 15 minutes, or until sauce thickens.
Per serving: Calories 190 (From Fat 100); Fat 11g (Saturated 3g); Cholesterol 390mg; Sodium 100mg; Carbohydrate 2g (Dietary Fiber 0g); Protein 21g; Sugar 0g.
Chopped Liver Pâté
Pâté is traditionally made with butter, eggs, and liver. In this recipe you make a healthier version of pâté by omitting the butter and the eggs, but although this isn’t a “true” pâté, it still tastes mighty fine.
Stage: Soft foods
Preparation time: 10 minutes
Cooking time: 25 minutes
Chilling time: 2 hours
Yield: 4 servings (4 ounces each)
1 tablespoon olive oil1 cup finely diced onions1 pound fresh chicken liver, washed, drained, and trimmed
1⁄4 cup low-sodium chicken broth1⁄2 teaspoon salt1⁄2 teaspoon black pepper
1 Heat oil in a large sauté pan over medium-high heat. When oil is hot, add onions and sauté until they’re golden brown, about 5 minutes.
2 Add the chicken liver and cook for approximately 15 minutes over medium heat, until firm to the touch and the middle is no longer raw. Transfer the chicken liver to a plate, leaving the onions in the pan over medium heat. Add chicken stock to the sauté pan and scrape the pan to lift the food bits from the bottom of the pan.
3 Finely chop the cooked liver, or place it in a food processor and pulse until chopped fine. Add the liver back to the pan and stir with the onions. Stir in salt and pepper.
4 Place the entire mixture in a nonmetallic bowl, cover, and refrigerate for at least two hours. Serve with whole-wheat crackers and chopped veggies.
Per serving: Calories 180 (From Fat 80); Fat 9g (Saturated 3g); Cholesterol 390mg; Sodium 380mg; Carbohydrate 4g (Dietary Fiber 1g); Protein 20g; Sugar 2g.
17_640180-ch11.indd 19117_640180-ch11.indd 191 8/27/10 10:44 PM8/27/10 10:44 PM
192 Part II: Now You’re Cooking! Healthy and Hearty Dishes
Staying Lean with Venison and Bison Meals
Home on the range in your own kitchen is where you can cook bison (also called buffalo in the United States). Bison is becoming more popular with con-sumers because of its sweet taste and low fat content. Unlike most beef cattle, which are grain-fed, bison are usually grass- or pasture-fed, which means the meat is lower in saturated fat and cholesterol. Grass-fed animals aren’t con-fined or caged but allowed to roam about, and they’re generally free of antibi-otics, pesticides, and hormones. (Note that bison may be fed grain and forage just prior to processing.) And there’s no need to worry about bison becoming extinct. Through careful breeding, bison numbers have returned.
Venison typically refers to meat from the deer family. Most venison eaten at home comes from animals shot in the wild, but venison farms do exist. Restaurants that have venison listed on their menus generally buy farmed meat. If you haven’t tried it before, be prepared for its gamy taste, which some people love.
Bison and venison are very lean, so they can be tough if cooked past medium. Venison is easiest to digest if cooked to medium rare or medium, although to be safe you may want to cook until it reaches an internal temperature of 155 degrees. Bison is leaner than beef, so to maintain its tenderness you need to cook it low and slow to allow the juices to flow as it’s cooking.
Venison Chili
This quick chili is a family favorite. The flavors are just right, it’s not too spicy, and it has plenty of protein. We add two kinds of beans to pump up the fiber.
Stage: Soft foods
Preparation time: 5 minutes
Cooking time: 20 minutes
Yield: 8 servings (3⁄4 cup each)
1 pound ground venison2 teaspoons chopped garlic1⁄2 cup chopped onions
14 ounces no-salt-added tomato sauce14 ounces no-salt-added diced tomatoes, drained
17_640180-ch11.indd 19217_640180-ch11.indd 192 8/27/10 10:44 PM8/27/10 10:44 PM
193 Chapter 11: Let’s Not Forget: Lamb and Other Meats
Place all ingredients into a medium pot and bring to a simmer. Cook for 20 minutes.
Per serving: Calories 177 (From Fat 41); Fat 5g (Saturated 1g); Cholesterol 46mg; Sodium 378mg; Carbohydrate 16g (Dietary Fiber 5g); Protein 17g; Sugar 2g.
Bison Burgers
If you think an all-beef burger is delish, this bison burger will knock your socks off. This recipe, which calls for a little salt, pepper, and garlic, results in a burger that isn’t overseasoned but still has flavor. Serve this on a whole-wheat roll with your favorite burger toppings.
Stage: Soft foods
Preparation time: 5 minutes
Cooking time: 4 minutes
Yield: 4 servings (One 4-ounce patty each)
1 pound ground bison1⁄2 teaspoon salt
1 teaspoon garlic powder1 teaspoon black pepper
1 Preheat the grill to medium heat.
2 Place all ingredients in a mixing bowl and mix well. Form into 4 equal-sized balls and press into 1⁄4-inch thick patties.
3 Grill for 2 minutes, and then turn patties over and cook an additional 2 minutes.
Per serving: Calories 260 (From Fat 160); Fat 18g (Saturated 8g); Cholesterol 80mg; Sodium 370mg; Carbohydrate 1g (Dietary Fiber 0g); Protein 21g; Sugar 0g.
2 teaspoons chili powder1 teaspoon ground cumin1⁄2 teaspoon black pepper
1 cup canned black beans, drained1 cup canned pinto beans, drained
17_640180-ch11.indd 19317_640180-ch11.indd 193 8/27/10 10:44 PM8/27/10 10:44 PM
194 Part II: Now You’re Cooking! Healthy and Hearty Dishes
Bison Stew
This simple one-pot stew is perfect for days when you know you won’t have time to cook a meal when you get home. This dish freezes well and is great served over fresh steamed spaghetti squash. We use shiitake mushrooms instead of traditional white mushrooms because shiitakes are heartier and add a smoky flavor. Shiitake mushrooms have been used in Chinese medicine for thousands of years and have been found to be high in antioxidants.
Stage: Regular foods
Preparation time: 10 minutes
Cooking time: 8 hours
Yield: 8 servings (1 cup each)
1 pound cubed bison stewing meat8 small red potatoes cut into quarters1⁄2 cup chopped onions8 ounces baby carrots2 cups sliced fresh shiitake mushroomsOne 14.5-ounce can low-sodium beef broth
1⁄2 cup all-purpose flour1 tablespoon Worcestershire sauce1 teaspoon salt1 teaspoon dried marjoram leaves1⁄4 teaspoon pepper1⁄2 cup red wine
Place all ingredients in a crockpot and stir. Cover and cook on medium setting for 8 hours.
Tip: If your crockpot only has low and high settings, use high to cook and low to keep the dish warm.
Per serving: Calories 250 (From Fat 50); Fat 6g (Saturated 2g); Cholesterol 30mg; Sodium 380mg; Carbohydrate 29g (Dietary Fiber 4g); Protein 18g; Sugar 4g.
17_640180-ch11.indd 19417_640180-ch11.indd 194 8/27/10 10:44 PM8/27/10 10:44 PM
Chapter 12
Catching On to Fish and SeafoodIn This Chapter▶ Picking fresh fish and seafood
▶ Cooking up tasty fish and shrimp dishes
▶ Making it easy with canned fish and seafood
Fish and other seafood work well for people recovering from weight loss surgery. When
cooked correctly, it’s soft and moist and is one of the first solid foods you can introduce back into your diet. Your pouch can tolerate it well, so you don’t experience that “ugh” feeling of food not setting well that you may get with meat.
Buying, Storing, and Cooking Fish and Seafood
Fish and seafood taste great, but in order to get great tasting dishes you need to make sure your fish and seafood are in their best condition. This section gives you great pointers on how to store, buy, and cook your proteins from the water. These tips are practical and easy to follow.
Buying tipsThe two most common ways to purchase fish are fresh and frozen. Fresh fish is a great option if you live near the coast or your grocery stocks good-quality seafood, but in some landlocked places, frozen is a better choice because fresh fish can take up to two days to get to the store.
Don’t buy fresh fish that’s slimy to the touch or has a strong odor. The eyes of a fish can tell you a lot as well: If the eyes are cloudy, the fish is old, so make sure they’re clear. You can also test freshness by seeing if the flesh of
Recipes in This Chapter
▶ Angel Hair and Salmon with Spicy Basil Sauce
▶ Salmon with Honey-Garlic-Caramelized Onions
▶ Lemon Garlic Dover Sole▶ Sea Bass with Herb-
Spiced Pecans▶ Parmesan Baked Halibut▶ Italian Halibut▶ Sautéed Shrimp with
Asparagus Tips▶ Shrimp Louie▶ Black-Eyed Dill Tuna▶ Crab Salad Melts▶ Salmon Patties
18_640180-ch12.indd 19518_640180-ch12.indd 195 8/27/10 10:44 PM8/27/10 10:44 PM
196 Part II: Now You’re Cooking! Healthy and Hearty Dishes
the fish springs back up when you press down on it. Beware of “fresh frozen,” which is just a marketing term used for selling frozen fish.
Frozen fish typically comes IQF, individual quality frozen, which means each piece of fish is frozen separately and bagged together. This allows you to take out what you need and leave the remainder for another meal. You may also find cryovact frozen fish, which means that each single serving or piece of fish is sealed inside airtight plastic wrap. All frozen fish has an expiration date, so make sure you check the date before you buy.
Due to high demand for fish and seafood around the world, many types are overfished or caught or farmed in destructive ways, which can lead to damaged ecosystems and possible extinction of some species. To find out the best choices when shopping for seafood, check out the Seafood Watch guide put out by the Monterey Bay Aquarium, available at www.seafoodwatch.org.
Storing tipsTo properly store fresh fish and seafood, follow these steps:
1. Remove from store wrapping.
2. Wipe its surface with a damp cloth. If the fish is whole, wash and pat dry.
3. Wrap food in wax paper and place in a tightly covered container.
4. Refrigerate immediately at 34 to 36 degrees.
For long-term storage, freeze immediately.
Here are some tips for storing frozen fish and seafood:
✓ If in a sealed package (not store-packaged), keep products in their original sealed packages and store immediately in the freezer.
✓ Keep store-packaged products in their original wrapping and seal inside an airtight freezer bag or container. Store immediately in the freezer.
✓ Store at 0 degrees or lower.
✓ Use within the following recommended storage periods:
• Lean fish (cod, Dover sole, haddock, snapper): 6 months
• Medium-fat fish (halibut, sea bass, orange roughy): 4 months
• Fatty fish (salmon, tuna, mahi-mahi): 2 months
• Shrimp: 4 months
18_640180-ch12.indd 19618_640180-ch12.indd 196 8/27/10 10:44 PM8/27/10 10:44 PM
197 Chapter 12: Catching On to Fish and Seafood
Cooking tipsMany people are afraid to cook fish at home, but it doesn’t have to be difficult. Fish is not only healthy but also easy to cook. The average cooking time is typically the same as or less than for poultry.
Overcooking fish makes the meat tough and destroys flavor. Fish is done when the flesh turns opaque and begins to flake easily when tested with a fork. Cooking times vary with each fish and cut. The following are typical cooking times:
✓ 10 minutes per inch of fresh or thawed fish cooked without sauce
✓ 5 minutes per inch of fresh or thawed fish cooked in a sauce
✓ 20 minutes per inch of fish if cooked from frozen
There’s a delicate balance between perfectly cooked fish and overcooked fish. For best results, cook fish until it’s almost done; then remove it from heat and let stand for a few minutes to finish cooking with residual heat.
Fish is versatile and many cooking methods work well. The best method is sautéing, which uses high heat and little fat and cooks the fish quickly. The oven also works great when broiling under high heat or baking at 350 degrees. Grilling also works, but make sure the grill isn’t too hot; medium heat is recommended.
Stewing and use of a slow cooker are not recommended. When subjected to long cooking, fish becomes mushy and falls apart.
Grilling, Sautéing, and Baking FishWhen shopping for fish, you have dozens of varieties to choose from, even if you don’t live near water. Salmon is the most popular fish in the United States and for good reason; it tastes good and is good for you.
If you don’t like a strong tasting fish, whitefish is your best choice because of its delicate flavor. And when it comes to seafood, shrimp is the first choice in the United States. About 90 percent of the shrimp consumed in the United States is imported from overseas and a majority of that is farmed-raised. If the option is available to you, buy wild fish and seafood rather than farm raised. Wild fish and seafood have less fat, more protein, and fewer pollutants than farm raised. You can taste the difference.
18_640180-ch12.indd 19718_640180-ch12.indd 197 8/27/10 10:44 PM8/27/10 10:44 PM
198 Part II: Now You’re Cooking! Healthy and Hearty Dishes
Angel Hair and Salmon with Spicy Basil Sauce
The fresh jalapeños kick this dish up a spice notch, and the half-and-half pulls the sauce together. Salmon is a rich source of omega-3 fatty acids, the heart-healthy fat. Wild-caught salmon, though more expensive, is higher in omega-3 and vitamin D.
Stage: Regular foods
Preparation time: 10 minutes
Cooking time: 20 minutes
Yield: 3 servings (1 cup each)
1 tablespoon butter8 ounces fresh salmon, boned and skinned 1 small onion, minced1 teaspoon chopped fresh jalapeño pepper, seeds and veins removed1 medium tomato, chopped1⁄4 cup bottled clam juice
1⁄4 cup dry white wine1⁄2 cup fat-free half-and-half3 tablespoons finely chopped basil1 tablespoon finely chopped fresh parsley1⁄2 teaspoon salt1⁄2 teaspoon pepper4 ounces dry whole-wheat angel hair pasta
1 Cook pasta until it is soft all the way through (not al dente). Drain and set aside.
2 Melt 1 tablespoon butter in a medium sauté pan over medium heat. When the butter has melted, add the salmon and sauté until opaque, 2 to 3 minutes. Transfer to a plate and cut into 3⁄4-inch cubes.
3 Add the onion, jalapeño, and tomato to the pan and sauté for 2 minutes. Add the clam juice and wine. Turn heat to high and boil until sauce thickens, about 5 minutes.
4 Add the half-and-half and basil to the sauté pan. Lightly simmer until the sauce thickens again, about 5 minutes.
5 Turn the heat to low. Fold in the parsley, salt, and pepper. Add the cooked pasta and salmon to the sauce, toss gently, and serve.
Per serving: Calories 302 (From Fat 66); Fat 7g (Saturated 3g); Cholesterol 54mg; Sodium 528mg; Carbohydrate 34g (Dietary Fiber 5g); Protein 24g; Sugar 5g.
18_640180-ch12.indd 19818_640180-ch12.indd 198 8/27/10 10:44 PM8/27/10 10:44 PM
199 Chapter 12: Catching On to Fish and Seafood
Salmon with Honey- Garlic-Caramelized Onions
Honey and garlic are perfect complements to salmon. Caramelizing the onions, slowly cooking to bring out the natural sugar, gives the onions a wonderful flavor. Adding bal-samic vinegar brings out even more flavor.
Stage: Soft foods
Preparation time: 10 minutes
Cooking time: 35 minutes
Yield: 4 servings (4 ounces each)
1 tablespoon butter1 large onion, cut in half lengthwise, sliced, and separated into thin rings1 tablespoon balsamic vinegar
2 teaspoons honey1 clove fresh garlic minced1 pound salmon fillets cut into 4 equal piecesSalt and pepper to taste
1 Preheat the oven to 400 degrees. Spray a baking sheet with nonstick cooking spray.
2 Melt butter in a large skillet over medium-high heat. Add onion rings to the pan.
3 Reduce heat to low and cook onion for 10 minutes, stirring frequently. Reduce heat to low and cook for 10 more minutes. Then stir in vinegar, honey, and garlic.
4 While onions are cooking, rinse salmon and place on the prepared baking sheet. Sprinkle both sides with a little salt and pepper. Bake for 10 to 15 minutes, depending on thickness. Serve topped with onions.
Per serving: Calories 290 (From Fat 160); Fat 18g (Saturated 5g); Cholesterol 70mg; Sodium 95mg; Carbohydrate 7g (Dietary Fiber 1g); Protein 24g; Sugar 5g.
18_640180-ch12.indd 19918_640180-ch12.indd 199 8/27/10 10:44 PM8/27/10 10:44 PM
200 Part II: Now You’re Cooking! Healthy and Hearty Dishes
Lemon Garlic Dover Sole
Dover sole is one of the lightest and flakiest fishes. This recipe works well when you’re starting to add soft foods to your diet. Because sole is thin and flakes easily, it’s less likely to cause sticking problems.
Stage: Soft foods
Preparation time: 5 minutes
Cooking time: 6 minutes
Yield: 4 servings (4 ounces each)
1 tablespoon butter2 teaspoons minced garlic1 teaspoon lemon pepper
1 pound Dover sole fillets1 lemon wedge
1 Melt butter in a large skillet over medium-high heat. Stir in the garlic.
2 Season the fish on both sides with lemon pepper. Place the fish in the pan and cook for 2 to 3 minutes on the first side; then turn fillets and cook for an additional 1 minute, or until fish flakes easily with a fork.
3 Squeeze the lemon wedge over the cooked fish to sprinkle with juice.
Per serving: Calories 140 (From Fat 45); Fat 5g (Saturated 2g); Cholesterol 60mg; Sodium 150mg; Carbohydrate 1g (Dietary Fiber 0g); Protein 21g; Sugar 0g.
Sea Bass with Herb-Spiced Pecans
Perfectly spiced warm pecans are a wonderful complement to the delicate texture of sea bass. Although we recommend grilling the fish, this recipe is also great when baked at 350 degrees for about 7 to 9 minutes. The spice mixture makes more than you need for this recipe, so store it in an airtight container and use it to season fish, poultry, or vegetables.
Stage: Regular foods
Preparation time: 10 minutes
Cooking time: 15 minutes
Yield: 4 servings (4 ounces each)
18_640180-ch12.indd 20018_640180-ch12.indd 200 8/27/10 10:44 PM8/27/10 10:44 PM
201 Chapter 12: Catching On to Fish and Seafood
1 In a small saucepan over high heat, bring wine, vinegar, and onion to a boil. Cook until most of the liquid is gone, about 2 minutes.
2 Add fat-free half-and-half and 3⁄4 of the tomato. Turn heat to low and simmer, approximately 6 minutes. Keep warm while cooking fish.
3 Heat the grill to medium-high heat.
4 Brush butter over the fish fillets. Sprinkle the fish with Spice Mixture. Grill for 2 to 3 minutes per side.
5 Ladle the sauce onto a warmed serving plate. Lay the cooked fish fillet on top of the sauce. Sprinkle with the Spicy Pecans and then top with the remaining chopped tomatoes.
Spice Mixture
1⁄4 cup dry white wine2 tablespoons white wine vinegar2 tablespoons finely chopped onion2 tablespoons fat-free half-and-half1 large tomato, chopped
1 tablespoon melted butter1 pound sea bass, skinned and filleted1⁄4 teaspoon Spice Mixture (see the following recipe)Spicy Pecans (see the following recipe)
1 teaspoon paprika1⁄4 teaspoon onion powder1⁄4 teaspoon dried basil1⁄4 teaspoon white pepper1⁄2 teaspoon garlic powder
1⁄4 teaspoon dried thyme1⁄8 teaspoon dry mustard1⁄8 teaspoon dried oregano1⁄8 teaspoon crushed rosemary
Combine all spices in a bowl and set aside.
Spicy Pecans
1⁄4 cup coarsely chopped pecans1⁄4 teaspoon dried thyme1⁄4 teaspoon dried oregano
1⁄4 teaspoon Spice Mixture (see previous recipe)1⁄8 teaspoon allspice2 teaspoons butter
1 Mix all the ingredients except butter in a small bowl.
2 Melt the butter in a small skillet over medium heat and add the spices and pecans. Sauté for 4 minutes or until pecans are golden brown. Transfer nuts to a small dish once toasted.
Per serving: Calories 230 (From Fat 110); Fat 12g (Saturated 4g); Cholesterol 60mg; Sodium 125mg; Carbohydrate 4g (Dietary Fiber 1g); Protein 22g; Sugar 2g.
18_640180-ch12.indd 20118_640180-ch12.indd 201 8/27/10 10:44 PM8/27/10 10:44 PM
202 Part II: Now You’re Cooking! Healthy and Hearty Dishes
Parmesan Baked Haddock
Haddock is a popular fish and can be found fresh, frozen, or smoked. Rather than buying prebreaded haddock from the freezer section, buy fresh fish and coat it yourself for a more flavorful meal. Even though it’s baked, not fried, it still comes out crispy.
Stage: Soft foods
Preparation time: 10 minutes
Cooking time: 20 minutes
Yield: 4 servings (4 ounces each)
1⁄2 cup all-purpose flour1 pound haddock fillets cut into 4 equal pieces1 egg white4 teaspoons grated Parmesan cheese
1⁄4 teaspoon salt1⁄4 teaspoon pepper1⁄2 teaspoon paprika
1 Preheat the oven to 375 degrees. Put the flour in a shallow bowl or small plate and coat fish on each side with flour.
2 Beat egg white in a bowl with a fork until foamy. Dip fish on each side in egg white.
3 Spray a baking sheet with nonstick cooking spray. Place fish on the baking sheet and sprinkle evenly with Parmesan cheese, salt, pepper, and paprika.
4 Bake for 15 to 20 minutes, or until fish is browned and flakes easily with a fork.
Per serving: Calories 120 (From Fat 20); Fat 2g (Saturated 0g); Cholesterol 65mg; Sodium 260mg; Carbohydrate 2g (Dietary Fiber 0g); Protein 23g; Sugar 0g.
Italian Halibut
Imagine fresh mushrooms, black olives, and tomato sauce baked to perfection with halibut (or just take a look at the photo in the color section). Now open your eyes and get ready to make this tasty, awesome dish. This firm white fish has a delicate flavor that makes its taste appealing to many people. Because this recipe is ready for the oven in a jiffy, it’s perfect for a weeknight dinner.
18_640180-ch12.indd 20218_640180-ch12.indd 202 8/27/10 10:44 PM8/27/10 10:44 PM
203 Chapter 12: Catching On to Fish and Seafood
1 Preheat the oven to 400 degrees. Spray a baking pan with nonstick cooking spray. Place fish in the pan.
2 Top with the mushrooms and olives. Pour spaghetti sauce over the top and bake for 10 minutes.
3 Remove from the oven and sprinkle with cheese. Bake 10 more minutes or until the fish flakes easily with a fork.
Per serving: Calories 180 (From Fat 45); Fat 5g (Saturated 2g); Cholesterol 40mg; Sodium 380mg; Carbohydrate 6g (Dietary Fiber 2g); Protein 26g; Sugar 3g.
Serving Up Super Shrimp RecipesWe’re not just fishing around in this chapter; there are other treasures in the sea. Shrimp is the most popular seafood. You can find it fresh or frozen, raw or cooked, tail on or tail off.
There are also different sizes of shrimp ranging from colossal to extra small. The larger the shrimp, the more fibrous it is and more chewing it requires. Picking smaller shrimp makes it less likely that the shrimp will cause sticking problems.
No matter the size, they’re not shrimpy in the nutrition department. Shrimp are low calorie, low fat, and high in protein. They are high in cholesterol but have half the amount of cholesterol of eggs for the same weight.
11⁄2 pounds halibut fillets, cut into 6 equal pieces1⁄2 cup sliced mushrooms1⁄4 cup sliced black olives
1 cup prepared spaghetti sauce1⁄2 cup shredded part-skim mozzarella cheese
Stage: Soft foods
Preparation time: 5 minutes
Cooking time: 20 minutes
Yield: 6 servings (6 ounces each)
18_640180-ch12.indd 20318_640180-ch12.indd 203 8/27/10 10:44 PM8/27/10 10:44 PM
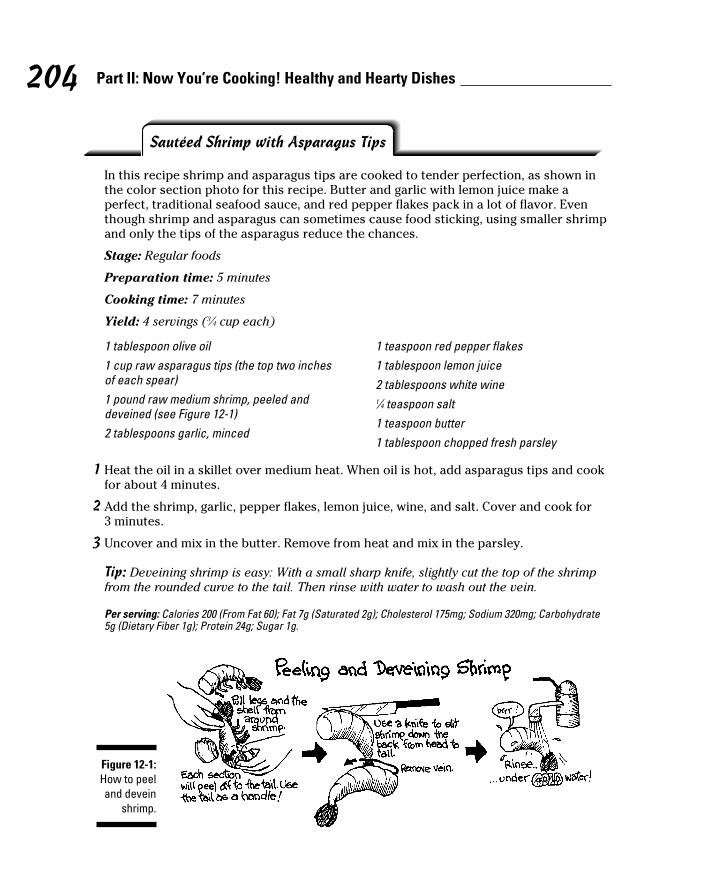
204 Part II: Now You’re Cooking! Healthy and Hearty Dishes
Sautéed Shrimp with Asparagus Tips
In this recipe shrimp and asparagus tips are cooked to tender perfection, as shown in the color section photo for this recipe. Butter and garlic with lemon juice make a perfect, traditional seafood sauce, and red pepper flakes pack in a lot of flavor. Even though shrimp and asparagus can sometimes cause food sticking, using smaller shrimp and only the tips of the asparagus reduce the chances.
Stage: Regular foods
Preparation time: 5 minutes
Cooking time: 7 minutes
Yield: 4 servings (3⁄4 cup each)
1 tablespoon olive oil1 cup raw asparagus tips (the top two inches of each spear)1 pound raw medium shrimp, peeled and deveined (see Figure 12-1)2 tablespoons garlic, minced
1 teaspoon red pepper flakes1 tablespoon lemon juice2 tablespoons white wine1⁄4 teaspoon salt1 teaspoon butter1 tablespoon chopped fresh parsley
1 Heat the oil in a skillet over medium heat. When oil is hot, add asparagus tips and cook for about 4 minutes.
2 Add the shrimp, garlic, pepper flakes, lemon juice, wine, and salt. Cover and cook for 3 minutes.
3 Uncover and mix in the butter. Remove from heat and mix in the parsley.
Tip: Deveining shrimp is easy: With a small sharp knife, slightly cut the top of the shrimp from the rounded curve to the tail. Then rinse with water to wash out the vein.
Per serving: Calories 200 (From Fat 60); Fat 7g (Saturated 2g); Cholesterol 175mg; Sodium 320mg; Carbohydrate 5g (Dietary Fiber 1g); Protein 24g; Sugar 1g.
Figure 12-1: How to peel and devein
shrimp.
18_640180-ch12.indd 20418_640180-ch12.indd 204 8/27/10 10:44 PM8/27/10 10:44 PM
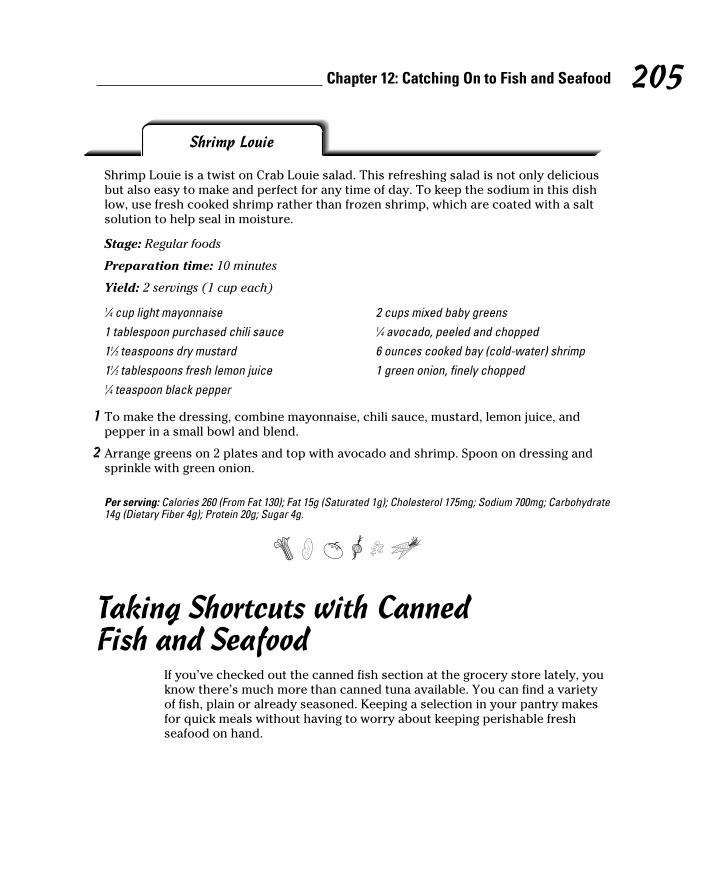
205 Chapter 12: Catching On to Fish and Seafood
Shrimp Louie
Shrimp Louie is a twist on Crab Louie salad. This refreshing salad is not only delicious but also easy to make and perfect for any time of day. To keep the sodium in this dish low, use fresh cooked shrimp rather than frozen shrimp, which are coated with a salt solution to help seal in moisture.
1⁄4 cup light mayonnaise1 tablespoon purchased chili sauce11⁄2 teaspoons dry mustard11⁄2 tablespoons fresh lemon juice1⁄4 teaspoon black pepper
2 cups mixed baby greens1⁄4 avocado, peeled and chopped6 ounces cooked bay (cold-water) shrimp1 green onion, finely chopped
1 To make the dressing, combine mayonnaise, chili sauce, mustard, lemon juice, and pepper in a small bowl and blend.
2 Arrange greens on 2 plates and top with avocado and shrimp. Spoon on dressing and sprinkle with green onion.
Per serving: Calories 260 (From Fat 130); Fat 15g (Saturated 1g); Cholesterol 175mg; Sodium 700mg; Carbohydrate 14g (Dietary Fiber 4g); Protein 20g; Sugar 4g.
Taking Shortcuts with Canned Fish and Seafood
If you’ve checked out the canned fish section at the grocery store lately, you know there’s much more than canned tuna available. You can find a variety of fish, plain or already seasoned. Keeping a selection in your pantry makes for quick meals without having to worry about keeping perishable fresh seafood on hand.
Stage: Regular foods
Preparation time: 10 minutes
Yield: 2 servings (1 cup each)
18_640180-ch12.indd 20518_640180-ch12.indd 205 8/27/10 10:44 PM8/27/10 10:44 PM
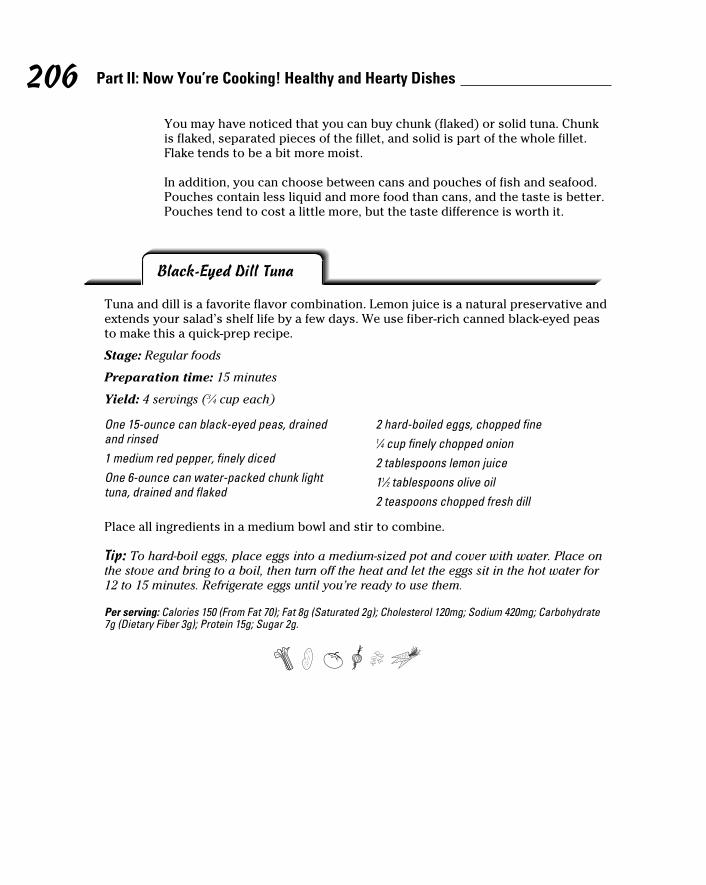
206 Part II: Now You’re Cooking! Healthy and Hearty Dishes
Black-Eyed Dill Tuna
Tuna and dill is a favorite flavor combination. Lemon juice is a natural preservative and extends your salad’s shelf life by a few days. We use fiber-rich canned black-eyed peas to make this a quick-prep recipe.
Stage: Regular foods
Preparation time: 15 minutes
Yield: 4 servings (3⁄4 cup each)
One 15-ounce can black-eyed peas, drained and rinsed1 medium red pepper, finely dicedOne 6-ounce can water-packed chunk light tuna, drained and flaked
2 hard-boiled eggs, chopped fine1⁄4 cup finely chopped onion2 tablespoons lemon juice11⁄2 tablespoons olive oil2 teaspoons chopped fresh dill
Place all ingredients in a medium bowl and stir to combine.
Tip: To hard-boil eggs, place eggs into a medium-sized pot and cover with water. Place on the stove and bring to a boil, then turn off the heat and let the eggs sit in the hot water for 12 to 15 minutes. Refrigerate eggs until you’re ready to use them.
Per serving: Calories 150 (From Fat 70); Fat 8g (Saturated 2g); Cholesterol 120mg; Sodium 420mg; Carbohydrate 7g (Dietary Fiber 3g); Protein 15g; Sugar 2g.
You may have noticed that you can buy chunk (flaked) or solid tuna. Chunk is flaked, separated pieces of the fillet, and solid is part of the whole fillet. Flake tends to be a bit more moist.
In addition, you can choose between cans and pouches of fish and seafood. Pouches contain less liquid and more food than cans, and the taste is better. Pouches tend to cost a little more, but the taste difference is worth it.
18_640180-ch12.indd 20618_640180-ch12.indd 206 8/27/10 10:44 PM8/27/10 10:44 PM
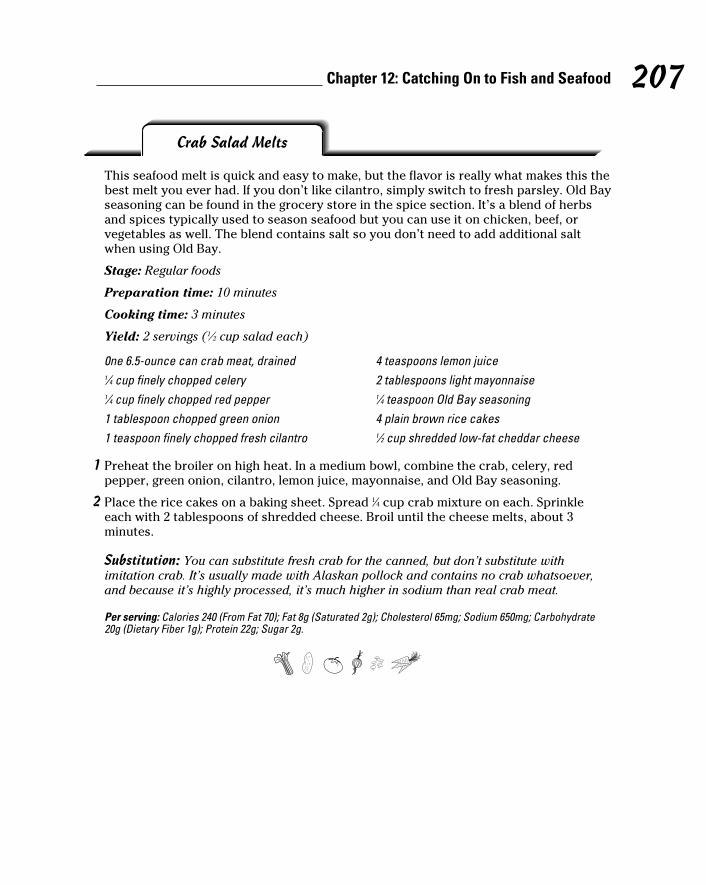
207 Chapter 12: Catching On to Fish and Seafood
1 Preheat the broiler on high heat. In a medium bowl, combine the crab, celery, red pepper, green onion, cilantro, lemon juice, mayonnaise, and Old Bay seasoning.
2 Place the rice cakes on a baking sheet. Spread 1⁄4 cup crab mixture on each. Sprinkle each with 2 tablespoons of shredded cheese. Broil until the cheese melts, about 3 minutes.
Substitution: You can substitute fresh crab for the canned, but don’t substitute with imitation crab. It’s usually made with Alaskan pollock and contains no crab whatsoever, and because it’s highly processed, it’s much higher in sodium than real crab meat.
Per serving: Calories 240 (From Fat 70); Fat 8g (Saturated 2g); Cholesterol 65mg; Sodium 650mg; Carbohydrate 20g (Dietary Fiber 1g); Protein 22g; Sugar 2g.
Crab Salad Melts
This seafood melt is quick and easy to make, but the flavor is really what makes this the best melt you ever had. If you don’t like cilantro, simply switch to fresh parsley. Old Bay seasoning can be found in the grocery store in the spice section. It’s a blend of herbs and spices typically used to season seafood but you can use it on chicken, beef, or vegetables as well. The blend contains salt so you don’t need to add additional salt when using Old Bay.
Stage: Regular foods
Preparation time: 10 minutes
Cooking time: 3 minutes
Yield: 2 servings (1⁄2 cup salad each)
0ne 6.5-ounce can crab meat, drained1⁄4 cup finely chopped celery1⁄4 cup finely chopped red pepper1 tablespoon chopped green onion1 teaspoon finely chopped fresh cilantro
4 teaspoons lemon juice2 tablespoons light mayonnaise1⁄4 teaspoon Old Bay seasoning4 plain brown rice cakes1⁄2 cup shredded low-fat cheddar cheese
18_640180-ch12.indd 20718_640180-ch12.indd 207 8/27/10 10:44 PM8/27/10 10:44 PM
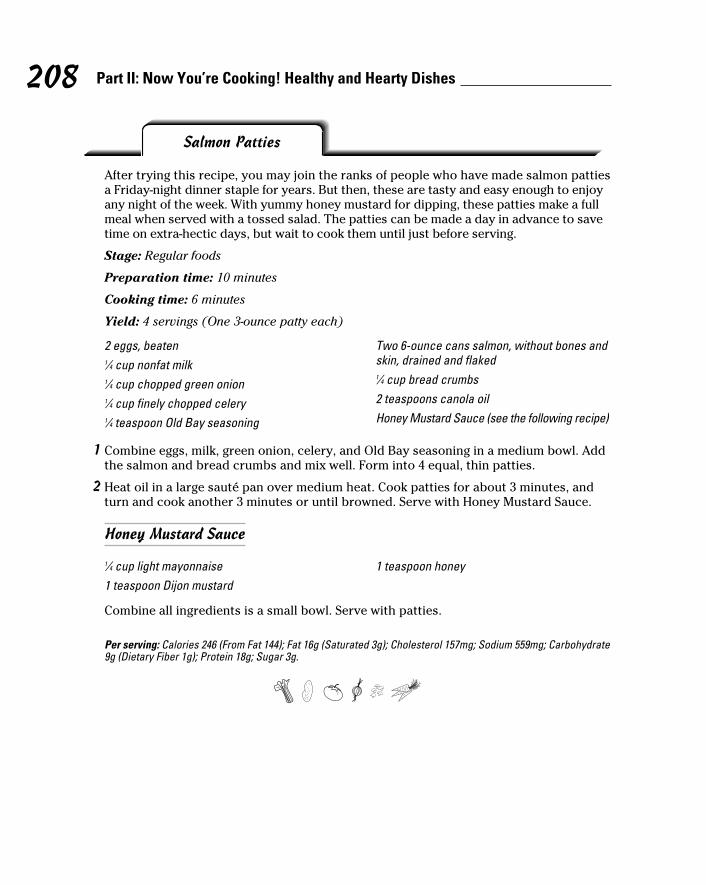
208 Part II: Now You’re Cooking! Healthy and Hearty Dishes
Salmon Patties
After trying this recipe, you may join the ranks of people who have made salmon patties a Friday-night dinner staple for years. But then, these are tasty and easy enough to enjoy any night of the week. With yummy honey mustard for dipping, these patties make a full meal when served with a tossed salad. The patties can be made a day in advance to save time on extra-hectic days, but wait to cook them until just before serving.
Stage: Regular foods
Preparation time: 10 minutes
Cooking time: 6 minutes
Yield: 4 servings (One 3-ounce patty each)
2 eggs, beaten1⁄4 cup nonfat milk1⁄4 cup chopped green onion1⁄4 cup finely chopped celery1⁄4 teaspoon Old Bay seasoning
Two 6-ounce cans salmon, without bones and skin, drained and flaked1⁄4 cup bread crumbs2 teaspoons canola oilHoney Mustard Sauce (see the following recipe)
1 Combine eggs, milk, green onion, celery, and Old Bay seasoning in a medium bowl. Add the salmon and bread crumbs and mix well. Form into 4 equal, thin patties.
2 Heat oil in a large sauté pan over medium heat. Cook patties for about 3 minutes, and turn and cook another 3 minutes or until browned. Serve with Honey Mustard Sauce.
Honey Mustard Sauce
1⁄4 cup light mayonnaise1 teaspoon Dijon mustard
1 teaspoon honey
Combine all ingredients is a small bowl. Serve with patties.
Per serving: Calories 246 (From Fat 144); Fat 16g (Saturated 3g); Cholesterol 157mg; Sodium 559mg; Carbohydrate 9g (Dietary Fiber 1g); Protein 18g; Sugar 3g.
18_640180-ch12.indd 20818_640180-ch12.indd 208 8/27/10 10:44 PM8/27/10 10:44 PM
Chapter 13
Viva la VegetarianIn This Chapter▶ Staying sated and satisfied with hearty salads
▶ Making meatless baked entrées
▶ Building better burgers
Some people may choose to eat vegetarian after weight loss surgery because they have
difficulty tolerating meat. Sometimes this difficulty lessens as time goes on, but for some people, intolerance is long term. Whatever your reason for eating vegetarian, you can still meet your protein goals and enjoy delicious food. This chapter provides you with some tasty meatless recipes that are sure to please even the most devoted carnivore.
If you omit high-protein animal foods on a regular basis, you have to do some careful planning to make sure you meet your protein goals. Taking your vita-min and mineral supplements after surgery is always critical, but if you regu-larly eat vegetarian, you may need extra. To monitor your health, be sure to keep all your follow-up appointments and get your lab work done as ordered by your surgeon.
Developing Delicious Dinner SaladsA dinner salad can be so much more than lettuce and tomatoes. It can be part of dinner, or it can be satisfying enough to be dinner itself. You can save prep time by shopping in the produce department for packaged veggies that are cleaned, cut, and ready to go. They may cost more, but your time is valuable, too. Plus there is no waste because you can buy smaller quantities.
Recipes in This Chapter
T Fresh Spinach Salad with Roasted Corn
T Garlic and Herb Tofu Salad
T Tabbouleh with AvocadoT Smoked Gouda–Stuffed
PeppersT Tofu Mexi-Corn QuicheT Easy Cheesy Navy Bean
BakeT Hearty Moussaka with
BeansT Portobello BurgerT Black Bean Veggie
Burger
19_640180-ch13.indd 20919_640180-ch13.indd 209 8/27/10 10:45 PM8/27/10 10:45 PM
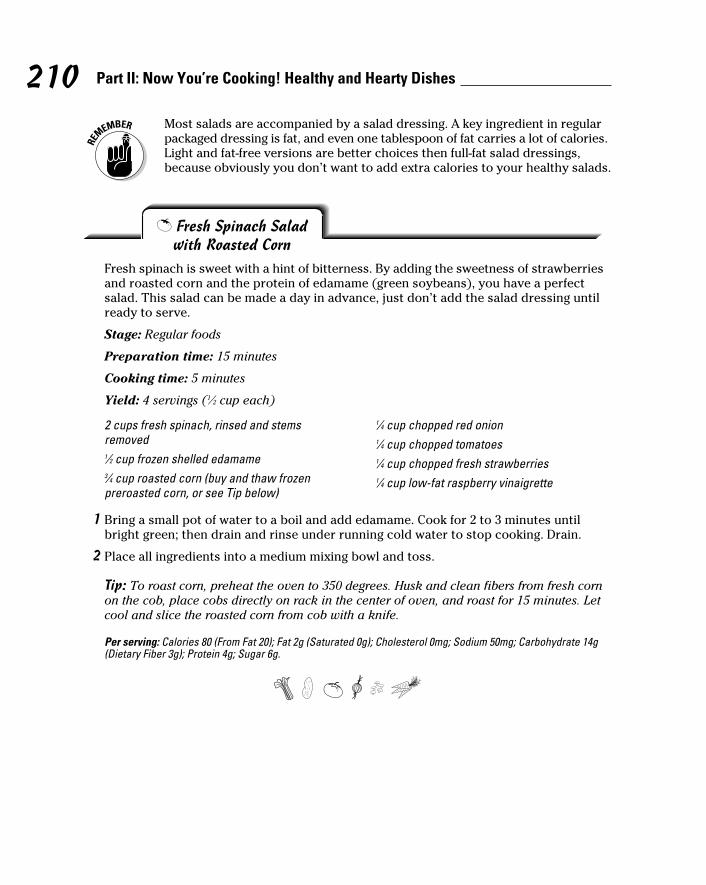
210 Part II: Now You’re Cooking! Healthy and Hearty Dishes
Most salads are accompanied by a salad dressing. A key ingredient in regular packaged dressing is fat, and even one tablespoon of fat carries a lot of calories. Light and fat-free versions are better choices then full-fat salad dressings, because obviously you don’t want to add extra calories to your healthy salads.
T Fresh Spinach Salad with Roasted Corn
Fresh spinach is sweet with a hint of bitterness. By adding the sweetness of strawberries and roasted corn and the protein of edamame (green soybeans), you have a perfect salad. This salad can be made a day in advance, just don’t add the salad dressing until ready to serve.
Stage: Regular foods
Preparation time: 15 minutes
Cooking time: 5 minutes
Yield: 4 servings (1⁄2 cup each)
2 cups fresh spinach, rinsed and stems removed1⁄2 cup frozen shelled edamame3⁄4 cup roasted corn (buy and thaw frozen preroasted corn, or see Tip below)
1⁄4 cup chopped red onion1⁄4 cup chopped tomatoes1⁄4 cup chopped fresh strawberries1⁄4 cup low-fat raspberry vinaigrette
1 Bring a small pot of water to a boil and add edamame. Cook for 2 to 3 minutes until bright green; then drain and rinse under running cold water to stop cooking. Drain.
2 Place all ingredients into a medium mixing bowl and toss.
Tip: To roast corn, preheat the oven to 350 degrees. Husk and clean fibers from fresh corn on the cob, place cobs directly on rack in the center of oven, and roast for 15 minutes. Let cool and slice the roasted corn from cob with a knife.
Per serving: Calories 80 (From Fat 20); Fat 2g (Saturated 0g); Cholesterol 0mg; Sodium 50mg; Carbohydrate 14g (Dietary Fiber 3g); Protein 4g; Sugar 6g.
19_640180-ch13.indd 21019_640180-ch13.indd 210 8/27/10 10:45 PM8/27/10 10:45 PM
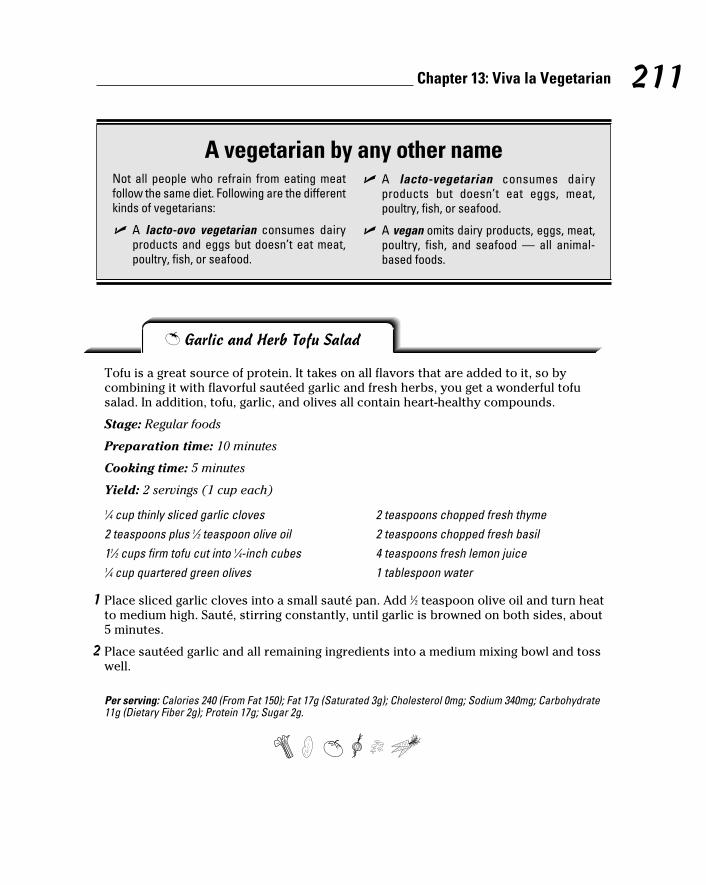
211 Chapter 13: Viva la Vegetarian
T Garlic and Herb Tofu Salad
Tofu is a great source of protein. It takes on all flavors that are added to it, so by combining it with flavorful sautéed garlic and fresh herbs, you get a wonderful tofu salad. In addition, tofu, garlic, and olives all contain heart-healthy compounds.
Stage: Regular foods
Preparation time: 10 minutes
Cooking time: 5 minutes
Yield: 2 servings (1 cup each)
A vegetarian by any other nameNot all people who refrain from eating meat follow the same diet. Following are the different kinds of vegetarians:
✓ A lacto-ovo vegetarian consumes dairy products and eggs but doesn’t eat meat, poultry, fish, or seafood.
✓ A lacto-vegetarian consumes dairy products but doesn’t eat eggs, meat, poultry, fish, or seafood.
✓ A vegan omits dairy products, eggs, meat, poultry, fish, and seafood — all animal-based foods.
1⁄4 cup thinly sliced garlic cloves2 teaspoons plus 1⁄2 teaspoon olive oil11⁄2 cups firm tofu cut into 1⁄4-inch cubes1⁄4 cup quartered green olives
2 teaspoons chopped fresh thyme2 teaspoons chopped fresh basil4 teaspoons fresh lemon juice1 tablespoon water
1 Place sliced garlic cloves into a small sauté pan. Add 1⁄2 teaspoon olive oil and turn heat to medium high. Sauté, stirring constantly, until garlic is browned on both sides, about 5 minutes.
2 Place sautéed garlic and all remaining ingredients into a medium mixing bowl and toss well.
Per serving: Calories 240 (From Fat 150); Fat 17g (Saturated 3g); Cholesterol 0mg; Sodium 340mg; Carbohydrate 11g (Dietary Fiber 2g); Protein 17g; Sugar 2g.
19_640180-ch13.indd 21119_640180-ch13.indd 211 8/27/10 10:45 PM8/27/10 10:45 PM
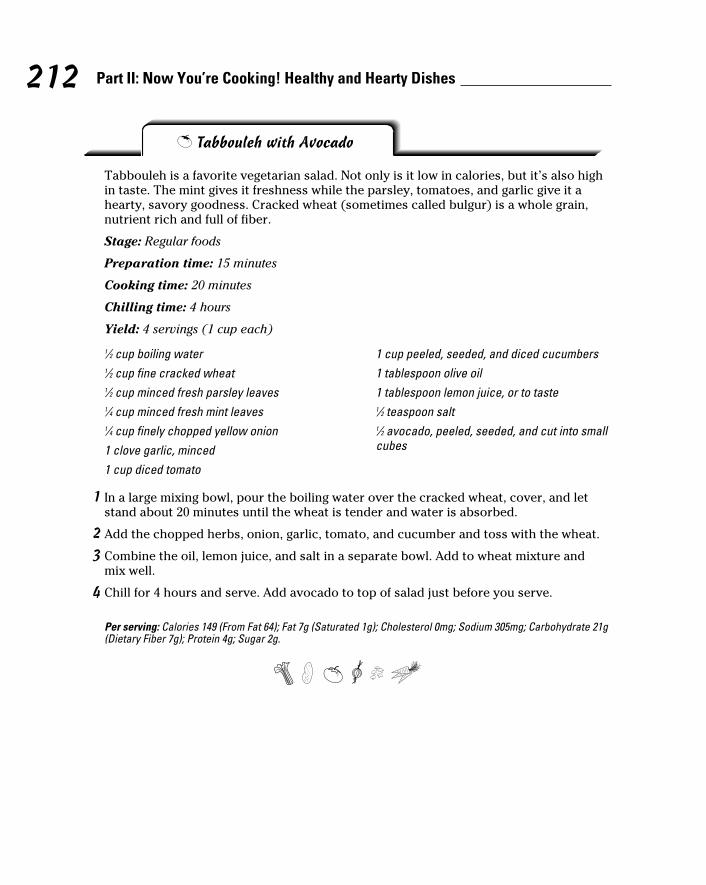
212 Part II: Now You’re Cooking! Healthy and Hearty Dishes
1 In a large mixing bowl, pour the boiling water over the cracked wheat, cover, and let stand about 20 minutes until the wheat is tender and water is absorbed.
2 Add the chopped herbs, onion, garlic, tomato, and cucumber and toss with the wheat.
3 Combine the oil, lemon juice, and salt in a separate bowl. Add to wheat mixture and mix well.
4 Chill for 4 hours and serve. Add avocado to top of salad just before you serve.
Per serving: Calories 149 (From Fat 64); Fat 7g (Saturated 1g); Cholesterol 0mg; Sodium 305mg; Carbohydrate 21g (Dietary Fiber 7g); Protein 4g; Sugar 2g.
T Tabbouleh with Avocado
Tabbouleh is a favorite vegetarian salad. Not only is it low in calories, but it’s also high in taste. The mint gives it freshness while the parsley, tomatoes, and garlic give it a hearty, savory goodness. Cracked wheat (sometimes called bulgur) is a whole grain, nutrient rich and full of fiber.
Stage: Regular foods
Preparation time: 15 minutes
Cooking time: 20 minutes
Chilling time: 4 hours
Yield: 4 servings (1 cup each)
1⁄2 cup boiling water1⁄2 cup fine cracked wheat1⁄2 cup minced fresh parsley leaves1⁄4 cup minced fresh mint leaves1⁄4 cup finely chopped yellow onion1 clove garlic, minced1 cup diced tomato
1 cup peeled, seeded, and diced cucumbers1 tablespoon olive oil1 tablespoon lemon juice, or to taste1⁄2 teaspoon salt1⁄2 avocado, peeled, seeded, and cut into small cubes
19_640180-ch13.indd 21219_640180-ch13.indd 212 8/27/10 10:45 PM8/27/10 10:45 PM

213 Chapter 13: Viva la Vegetarian
Getting to know tofuTofu has been around for over 2,000 years, but maybe you never tried it because you aren’t sure what it is or how to use it. We’re here to fill you in.
Tofu is made from soybeans, a good source of protein. By itself, tofu is bland, but that’s part of what makes it great because it can go well in a wide variety of dishes and pick up the flavors of the other ingredients. Although all tofu is smooth in texture, it comes in different forms:
✓ Silken tofu has a softer texture and works best in sauces, salad dressings, and desserts. It doesn’t have to be refrigerated until it’s opened, so you can probably find it on the shelf.
✓ Regular tofu comes in different textures such as soft, firm, and extra firm. Recipes usually tell you which kind you need. This tofu is usually found in a refrigerator case near the produce or dairy department. After opening, put any leftovers in a container, cover with water, and put a cover on the container. It will keep for about a week.
Lots of commercially prepared tofu foods are available at the grocery. You can find tofu cheese, yogurt, ice cream, and smoothies. Remember to check the nutrition labels for sugar and fat content — just because it’s made from tofu doesn’t mean it meets your weight loss surgery dietary guidelines.
Making “Meaty” Baked DishesEven a meat-and-potatoes person may be convinced to go meatless on occasion after giving some tasty vegetarian dishes a try. Meatless meals can be just as filling as those with meat because they tend to be high in fiber, which is filling.
You can find meat-substitute products that are tasty and lower in fat in the freezer section of the grocery store. These products are also softer and more moist than meat products, so are less likely to cause food-sticking problems.
19_640180-ch13.indd 21319_640180-ch13.indd 213 8/27/10 10:45 PM8/27/10 10:45 PM
214 Part II: Now You’re Cooking! Healthy and Hearty Dishes
T Smoked Gouda–Stuffed Peppers
Sweet green peppers go well with smoked Gouda and fresh basil in this baked entrée. Dry basil simply won’t give it the same flavor. We use veggie protein crumbles to replace traditional sausage, reducing the saturated fat and increasing the fiber.
Stage: Regular foods
Preparation time: 10 minutes
Cooking time: 20 minutes
Yield: 4 servings (1⁄2 pepper each)
2 large green bell peppers, cut in half lengthwise and seededWater6 ounces Morningstar Farm Sausage Style Recipe Crumbles
3⁄4 cup low-sodium vegetable broth1 large chopped plum tomato2⁄3 cup instant brown rice1⁄3 cup chopped fresh basil1⁄3 cup finely shredded smoked Gouda cheese
1 Preheat the oven to 350 degrees.
2 Place peppers cut-side down in a large, microwave-safe dish. Fill the dish with 1⁄2 inch water, cover, and microwave on high until the peppers are tender crisp, 7 to 10 minutes. Drain the water and transfer the peppers to a roasting pan.
3 While peppers are in the microwave, heat a medium sauté pan. When hot, add breakfast crumbles, broth, tomato, and rice. Bring to a simmer, cover, reduce heat to medium low, and simmer until the rice is softened but still moist, about 10 minutes.
4 Stir the basil and half the cheese into the rice mixture. Divide the filling into the peppers, then top with the remaining cheese. Bake until the cheese is melted, approximately 10 minutes.
Per serving: Calories 190 (From Fat 50); Fat 6g (Saturated 2g); Cholesterol 10mg; Sodium 440mg; Carbohydrate 21g (Dietary Fiber 5g); Protein 13g; Sugar 3g.
19_640180-ch13.indd 21419_640180-ch13.indd 214 8/27/10 10:45 PM8/27/10 10:45 PM
215 Chapter 13: Viva la Vegetarian
T Tofu Mexi-Corn Quiche
The name says quiche, but this easy, crustless, meatless version is not your typical quiche. Delicious Mexican flavors and healthy tofu make this awesome quiche a welcome weeknight dinner.
Stage: Regular foods
Preparation time: 10 minutes
Cooking time: 35 minutes
Yield: 4 servings (1 cup each)
12 ounces firm tofu, drained and cubed2 egg whites1 whole egg1⁄3 cup nonfat milk11⁄2 teaspoons taco seasoning
1⁄2 cup shredded sharp cheddar cheese, divided2 tablespoons minced onion4 tablespoons salsaOne 7-ounce can whole kernel corn, drained4 tablespoons fat-free sour cream
1 Preheat the oven to 350 degrees. Spray a 9-inch pie pan with nonstick cooking spray.
2 In a food processor combine tofu, egg whites, the whole egg, milk, taco seasoning, and 1⁄4 cup of the shredded cheese. Process until smooth. Stir in onion, salsa, and corn. Pour mixture into 8- to 9-inch pie pan.
3 Bake uncovered for 30 minutes, or until a knife inserted in the center comes out clean. Sprinkle with the remaining 1⁄4 cup of cheese and bake for 3 minutes more, or until cheese is slightly browned. Serve with 1 tablespoon of fat-free sour cream per serving.
Per serving: Calories 210 (From Fat 90); Fat 10g (Saturated 5g); Cholesterol 65mg; Sodium 390mg; Carbohydrate 14g (Dietary Fiber 1g); Protein 15g; Sugar 6g.
19_640180-ch13.indd 21519_640180-ch13.indd 215 8/27/10 10:45 PM8/27/10 10:45 PM

216 Part II: Now You’re Cooking! Healthy and Hearty Dishes
T Hearty Moussaka with Beans
This layered masterpiece is easy to make and takes an hour to bake. You form layers with eggplant and zucchini, replace the usual ground meat with beans, and top it off with a creamy white sauce. Food doesn’t get any better than this! Salting and rinsing the eggplant improves its taste by drawing out bitter liquid, and peeling the eggplant reduces the chance of food getting stuck.
T Easy Cheesy Navy Bean Bake
Canned beans make a quick high-fiber meal. In this recipe we add vegetables and cheese to jazz them up. If you want a fast meal, you can mix up the dish ahead of time and store it in refrigerator. Just pop the pan into the oven when you get home, and 30 minutes later, dinner is done!
Stage: Regular foods
Preparation time: 15 minutes
Cooking time: 36 minutes
Yield: 6 servings (3⁄4 cup each)
1 teaspoon olive oil2 cloves fresh garlic, chopped fine1⁄2 cup diced onion1⁄4 cup diced green pepper1 cup diced tomato1 teaspoon dried thyme
One 14.5-ounce can navy beans, rinsed and drainedOne 14.5-ounce can low-sodium pinto beans, rinsed and drained1⁄2 cup low-sodium vegetable broth1 cup shredded low-fat cheddar cheese
1 Preheat the oven to 325 degrees. Coat an 8-x-8-inch ovenproof pan with nonstick cooking spray.
2 Add oil to a medium sauté pan over medium-high heat. Add the garlic, onion, green pepper, tomato, and thyme and sauté for 3 minutes. Add the beans and broth and bring to a simmer for 3 minutes.
3 Pour the bean mixture into the pan. Top with cheese and bake for 30 minutes, or until cheese is bubbly. Let stand to thicken slightly and serve.
Per serving: Calories 180 (From Fat 30); Fat 3g (Saturated 1g); Cholesterol 5mg; Sodium 430mg; Carbohydrate 26g (Dietary Fiber 7g); Protein 13g; Sugar 2g.
19_640180-ch13.indd 21619_640180-ch13.indd 216 8/27/10 10:45 PM8/27/10 10:45 PM
217 Chapter 13: Viva la Vegetarian
1 eggplant, peeled and sliced into 1⁄4-inch rounds1 teaspoon salt1 teaspoon vegetable oil1 medium onion, roughly chopped1 garlic clove, mincedOne 14-ounce can no-salt-added diced tomatoes
One 7-ounce can no-salt-added navy beans, drained and chopped1⁄2 cup low-sodium vegetable broth1 teaspoon dried oregano1 medium zucchini, sliced into 1⁄4-inch rounds1 cup crumbled reduced-fat feta cheeseTopping Sauce (see the following recipe)1⁄4 cup fresh grated Parmesan cheese
1 Sprinkle the slices of eggplant with salt and let sit for at least 30 minutes. Rinse off the salt.
2 Preheat the oven to 350 degrees and coat a 9-x-11-inch casserole dish with nonstick cooking spray.
3 Heat oil in a medium sauté pan over medium-high heat. Sauté onion and garlic until browned, about 3 minutes. Add tomatoes, navy beans, vegetable broth, and oregano. Cover and simmer on medium low for about 15 minutes.
4 Using 1⁄3 of each, layer eggplant, zucchini, and feta, and pour 1⁄3 of the tomato and bean mixture over the top. Repeat all the layers 2 more times.
5 Bake for about 25 minutes. While baking, make the Topping Sauce.
6 Remove the vegetable casserole from the oven and pour the Topping Sauce over it. Top with Parmesan cheese and continue to bake for another 30 minutes.
Topping Sauce
Stage: Regular foods
Preparation time: 15 minutes
Resting time: 30 minutes
Cooking time: 1 hour, 15 minutes
Yield: 6 servings (3⁄4 cup each)
2 tablespoons butter2 tablespoons all-purpose flour11⁄4 cups nonfat milk
1⁄8 teaspoon nutmeg1 egg, beaten
Mix together butter, flour, and milk. While whisking, bring to a boil. When it’s thick and smooth, add nutmeg. Remove from heat and let the mixture cool for about 5 minutes. Mix in the beaten egg.
Per serving: Calories 210 (From Fat 80); Fat 9g (Saturated 5g); Cholesterol 50mg; Sodium 510mg; Carbohydrate 21g (Dietary Fiber 7g); Protein 13g; Sugar 8g.
19_640180-ch13.indd 21719_640180-ch13.indd 217 8/27/10 10:45 PM8/27/10 10:45 PM
218 Part II: Now You’re Cooking! Healthy and Hearty Dishes
Cooking Full-Flavor Vegetarian BurgersAmericans love their burgers! They eat an average of one to three burgers a week, making it the most popular sandwich sold in the country. Burger is the name given to a ground meat, fish, poultry, or vegetarian product that’s made into a patty and typically served on a bun with condiments. The possible combinations are endless, and no beef is needed to make a “meaty” burger that can satisfy your burger desire.
To grill or not to grill? It depends on the recipe. Grilling veggie burgers lends grilled flavor to the burger. However, if the grill is too hot, your veggie burger will quickly dry out, so low heat is the key. Coat the grill grates with nonstick cooking spray to keep your veggie burger from sticking to them. Cooking time varies depending on grill and patty thickness, but in general it’s close to the time stated in each recipe.
T Portobello Burger
Who doesn’t like a freshly made portobello burger? Many high-end restaurants have them on the menu, but now you have the secret recipe to make your own. Mushrooms have no fat and are low in calories and sodium, making them a perfect alternative to a meat burger.
Stage: Regular foods
Preparation time: 5 minutes
Marinating time: 20 minutes
Cooking time: 8 minutes
Yield: 4 servings (1 burger each)
4 large portobello mushrooms, stems removed1 tablespoon olive oil1 teaspoon garlic powder1 teaspoon onion powder1⁄4 teaspoon salt
1 tablespoon balsamic vinegar4 whole-wheat hamburger bunsFour 1-ounce slices low-fat cheddar cheese4 tomato slices4 romaine lettuce leaves
1 In a medium mixing bowl combine whole mushrooms caps, olive oil, garlic powder, onion powder, salt, and balsamic vinegar and let marinate for 20 minutes.
2 Preheat the oven broiler on high. Remove mushrooms from the marinade and place on an ungreased cookie sheet. Broil on the middle rack for 4 minutes. Turn mushrooms over and broil an additional 4 minutes.
19_640180-ch13.indd 21819_640180-ch13.indd 218 8/27/10 10:45 PM8/27/10 10:45 PM
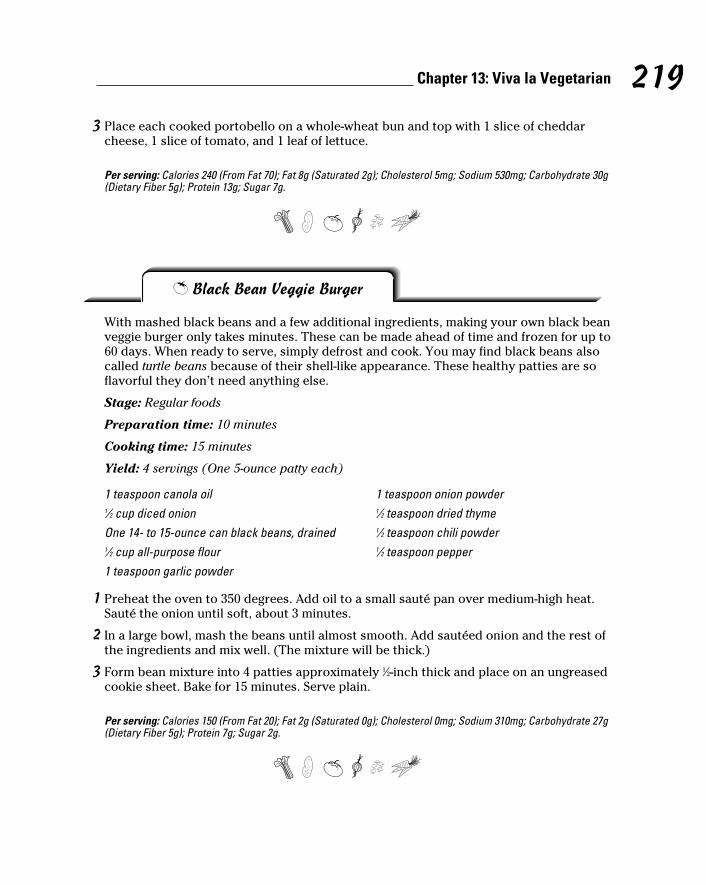
219 Chapter 13: Viva la Vegetarian
3 Place each cooked portobello on a whole-wheat bun and top with 1 slice of cheddar cheese, 1 slice of tomato, and 1 leaf of lettuce.
Per serving: Calories 240 (From Fat 70); Fat 8g (Saturated 2g); Cholesterol 5mg; Sodium 530mg; Carbohydrate 30g (Dietary Fiber 5g); Protein 13g; Sugar 7g.
T Black Bean Veggie Burger
With mashed black beans and a few additional ingredients, making your own black bean veggie burger only takes minutes. These can be made ahead of time and frozen for up to 60 days. When ready to serve, simply defrost and cook. You may find black beans also called turtle beans because of their shell-like appearance. These healthy patties are so flavorful they don’t need anything else.
Stage: Regular foods
Preparation time: 10 minutes
Cooking time: 15 minutes
Yield: 4 servings (One 5-ounce patty each)
1 teaspoon canola oil1⁄2 cup diced onionOne 14- to 15-ounce can black beans, drained1⁄2 cup all-purpose flour1 teaspoon garlic powder
1 teaspoon onion powder1⁄2 teaspoon dried thyme1⁄2 teaspoon chili powder1⁄2 teaspoon pepper
1 Preheat the oven to 350 degrees. Add oil to a small sauté pan over medium-high heat. Sauté the onion until soft, about 3 minutes.
2 In a large bowl, mash the beans until almost smooth. Add sautéed onion and the rest of the ingredients and mix well. (The mixture will be thick.)
3 Form bean mixture into 4 patties approximately 1⁄2-inch thick and place on an ungreased cookie sheet. Bake for 15 minutes. Serve plain.
Per serving: Calories 150 (From Fat 20); Fat 2g (Saturated 0g); Cholesterol 0mg; Sodium 310mg; Carbohydrate 27g (Dietary Fiber 5g); Protein 7g; Sugar 2g.
19_640180-ch13.indd 21919_640180-ch13.indd 219 8/27/10 10:45 PM8/27/10 10:45 PM

220 Part II: Now You’re Cooking! Healthy and Hearty Dishes
19_640180-ch13.indd 22019_640180-ch13.indd 220 8/27/10 10:45 PM8/27/10 10:45 PM

Part III
Simple Recipes to Enjoy Anytime
20_640180-pp03.indd 22120_640180-pp03.indd 221 8/27/10 10:45 PM8/27/10 10:45 PM

In this part . . .
In this part are simple recipes you can enjoy anytime. You find a great collection of soups, salads, and savory
stews and recipes for snacks, appetizers, and side dishes for those times you really need to have a little something to tide you over until the next meal. You also find healthy and delicious smoothie and dessert recipes. Chapter 20 wraps up this part with a special selection of recipes that can be made if you’re cooking for one or two.
20_640180-pp03.indd 22220_640180-pp03.indd 222 8/27/10 10:45 PM8/27/10 10:45 PM
Chapter 14
Scrumptious SmoothiesIn This Chapter▶ Making healthy smoothies for a snack or a meal
▶ Blending fruit into fabulous smoothies
▶ Spicing up smoothies with spices and flavorings
▶ Whipping up dessert-worthy chocolate and peanut butter smoothies
Smoothies just seem to work well for people who had weight loss surgery. They’re easy
to make, portable, and taste good. You don’t have to remember to chew them, the varieties are endless, and they can give you a good shot of protein. What’s not to like?
Because all the smoothies in this chapter are made in the blender, they work great for Stage 3, smooth foods, in your postoperative diet progression. If you had AGB surgery, these recipes work perfectly when you get a fill, or adjust-ment, and must follow the smooth food diet stage for a day or two.
If you’re still in the stages of the diet progression, take careful note of the yield for each recipe, because it’s probably more than you can or should eat. Either split it into two portions to share with someone else or halve the recipe for yourself. If you’re months or years out from surgery, you know your portion sizes have increased over time. You may want to double the recipe if you use it for a meal; otherwise it can be a snack.
Note that sugar occurs naturally in milk, as lactose, and in fruit, as fructose. These sugars do not cause dumping syndrome unless they’re concentrated, like in fruit juice. We use sugar substitutes in our recipes, so the sugar content is not from added sugars.
Recipes in This Chapter
T Banana BerryT Strawberry CheesecakeT Mango TwisterT Coconut KiwiT Peaches and CreamT OrangaliciousT Pineapple Upside DownT Pumpkin SpiceT Spiced Apple PieT Smooth Peanut BananaT Chocolate-Covered
Berries
21_640180-ch14.indd 22321_640180-ch14.indd 223 8/27/10 10:45 PM8/27/10 10:45 PM
224 Part III: Simple Recipes to Enjoy Anytime
Smoothie-Making TipsA smoothie may seem like the easiest thing to make. You just throw it in the blender, right? Well, you can, but the following tips can improve the final product. You’ll get tasty smoothies that are grit- and lump-free and not too foamy and find out how to incorporate them into your new diet.
✓ Take advantage of smoothies as a great opportunity to get some much-needed protein. Our recipes are made without supplemental protein powders, but you can easily add your favorite flavored or unflavored protein powder to increase the protein in any smoothie. Choose a good-quality protein powder made from whey protein isolates or soy protein.
✓ Feel free to use either nonfat milk, lactose-free milk, or light, unsweetened soy milk depending on your tolerance, regardless of what we specify in the recipe. We also include nonfat dry powdered milk in some of the recipes to add some protein and calcium. If you’re lactose intolerant, omit the powdered milk.
✓ Use a blender to make smoothies, not a food processor. It’s all about the blades! In a blender the blades make an X and are pointed toward the bottom, which draws the ingredients down into the blender to blend evenly. A food processor’s blades are arranged differently and will never get your drink smooth enough.
✓ Use small pieces of ice if you can. Using small cubes allows your smoothie to mix quicker and stay creamy instead of frothy.
✓ Check out the spice section at your supermarket for smoothie flavorings. Extract flavorings can change the taste from ho-hum to yum. These little bottles of flavor are sugar-free and zero calories. However, you want to use them sparingly because they’re very concentrated.
Healthy Fruity SmoothiesNothing beats fresh fruit, unless it’s frozen! When the fresh fruit isn’t in season, it can be pretty expensive. You can buy frozen fruit instead, but make sure to get it with no added sugar. When using frozen fruit, you can omit the ice because the frozen fruit will thicken your smoothie like ice. You may have to add a little more of the liquid of your choice to thin it so it blends easily.
21_640180-ch14.indd 22421_640180-ch14.indd 224 8/27/10 10:45 PM8/27/10 10:45 PM
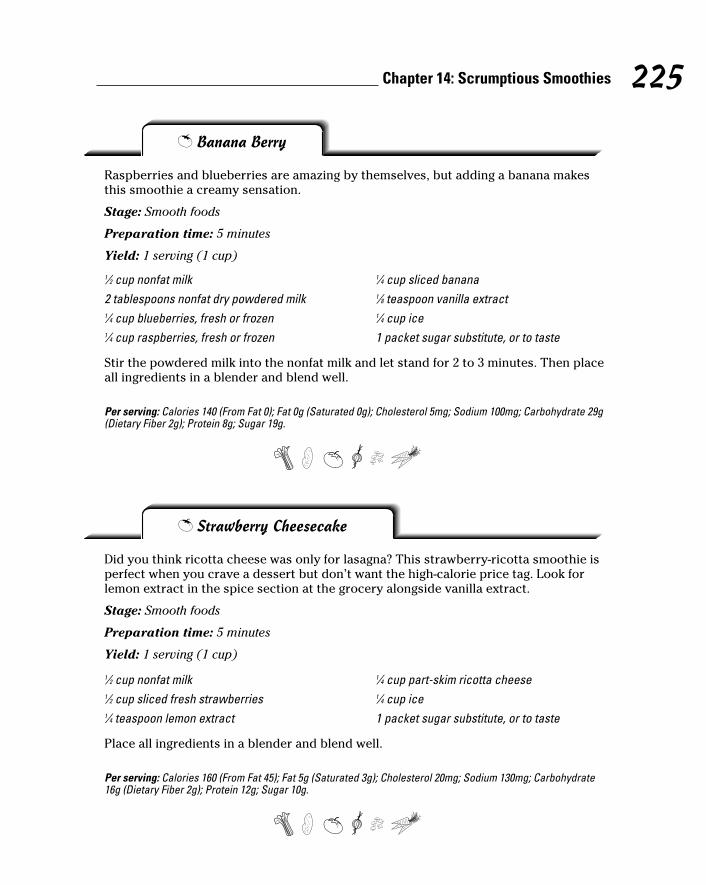
225 Chapter 14: Scrumptious Smoothies
T Banana Berry
Raspberries and blueberries are amazing by themselves, but adding a banana makes this smoothie a creamy sensation.
Stage: Smooth foods
Preparation time: 5 minutes
Yield: 1 serving (1 cup)
1⁄2 cup nonfat milk2 tablespoons nonfat dry powdered milk1⁄4 cup blueberries, fresh or frozen1⁄4 cup raspberries, fresh or frozen
1⁄4 cup sliced banana1⁄8 teaspoon vanilla extract1⁄4 cup ice1 packet sugar substitute, or to taste
Stir the powdered milk into the nonfat milk and let stand for 2 to 3 minutes. Then place all ingredients in a blender and blend well.
Per serving: Calories 140 (From Fat 0); Fat 0g (Saturated 0g); Cholesterol 5mg; Sodium 100mg; Carbohydrate 29g (Dietary Fiber 2g); Protein 8g; Sugar 19g.
T Strawberry Cheesecake
Did you think ricotta cheese was only for lasagna? This strawberry-ricotta smoothie is perfect when you crave a dessert but don’t want the high-calorie price tag. Look for lemon extract in the spice section at the grocery alongside vanilla extract.
Stage: Smooth foods
Preparation time: 5 minutes
Yield: 1 serving (1 cup)
1⁄2 cup nonfat milk1⁄2 cup sliced fresh strawberries1⁄4 teaspoon lemon extract
1⁄4 cup part-skim ricotta cheese1⁄4 cup ice1 packet sugar substitute, or to taste
Place all ingredients in a blender and blend well.
Per serving: Calories 160 (From Fat 45); Fat 5g (Saturated 3g); Cholesterol 20mg; Sodium 130mg; Carbohydrate 16g (Dietary Fiber 2g); Protein 12g; Sugar 10g.
21_640180-ch14.indd 22521_640180-ch14.indd 225 8/27/10 10:45 PM8/27/10 10:45 PM
226 Part III: Simple Recipes to Enjoy Anytime
T Mango Twister
When you purée mango it becomes irresistibly sweet. Mangoes, a tropical fruit, are a good source of vitamin C. If you don’t want try your hand at cutting up a mango (see Chapter 19 for an illustration), you can buy frozen slices.
Stage: Smooth foods
Preparation time: 5 minutes
Yield: 1 serving (11⁄4 cups)
1⁄4 cup plain calcium-enriched soy milk2 tablespoons nonfat dry powdered milk1⁄2 cup peeled, seeded, and chopped fresh mango
1⁄4 cup orange juice1⁄4 cup ice1 packet sugar substitute, or to taste
Stir the powdered milk into the soy milk and let stand for 1 to 2 minutes. Then place all ingredients in a blender and blend well.
Per serving: Calories 140 (From Fat 10); Fat 1g (Saturated 0g); Cholesterol 0mg; Sodium 70mg; Carbohydrate 29g (Dietary Fiber 2g); Protein 5g; Sugar 19g.
T Coconut Kiwi
Kiwis, tiny tropical fruits, are smoothie worthy and a good source of nutrients — one kiwi has the same amount of potassium as a small banana and more vitamin C than an orange. Tofu takes on the fruit taste and makes the smoothie really creamy. Tastes good and good for you! Check out a photo of this smoothie in the color section.
Stage: Smooth foods
Preparation time: 5 minutes
Yield: 1 serving (1 cup)
1⁄4 cup nonfat milk1⁄4 cup peeled and chopped kiwi1⁄4 cup canned crushed pineapple in its own juice, drained1⁄4 teaspoon coconut extract
1⁄4 cup silken soft tofu1⁄4 cup ice1⁄4 cup water1 packet sugar substitute, or to taste
Place all ingredients in a blender and blend well.
Per serving: Calories 100 (From Fat 20); Fat 2g (Saturated 0g); Cholesterol 0mg; Sodium 30mg; Carbohydrate 18g (Dietary Fiber 2g); Protein 5g; Sugar 14g.
21_640180-ch14.indd 22621_640180-ch14.indd 226 8/27/10 10:45 PM8/27/10 10:45 PM
227 Chapter 14: Scrumptious Smoothies
T Peaches and Cream
Peaches and cream aren’t just a topping for oatmeal; they make a delicious smoothie. We make this smoothie extra creamy by adding yogurt.
Stage: Smooth foods
Preparation time: 5 minutes
Yield: 1 serving (11⁄4 cups)
1⁄4 cup nonfat milk2 tablespoons nonfat dry powdered milk1⁄2 cup canned no-sugar-added peaches, drained
1⁄4 teaspoon vanilla extract1⁄4 cup plain nonfat yogurt1⁄4 cup ice1 packet sugar substitute, or to taste
Stir the powdered milk into the nonfat milk and let stand for 2 to 3 minutes. Then place all ingredients in a blender and blend well.
Per serving: Calories 110 (From Fat 0); Fat 0g (Saturated 0g); Cholesterol 5mg; Sodium 110mg; Carbohydrate 20g (Dietary Fiber 2g); Protein 8g; Sugar 17g.
T Orangalicious
By combining mandarin oranges, dry milk, and orange juice, you can make the best (and healthiest) orange-cream drink ever.
Stage: Smooth foods
Preparation time: 5 minutes
Yield: 1 serving (11⁄4 cups)
1⁄2 cup orange juice1⁄3 cup nonfat dry powdered milk1⁄4 cup mandarin oranges
1⁄8 teaspoon lemon extract1⁄3 cup ice
Stir the powdered milk into the orange juice and let stand for 2 to 3 minutes. Then place all ingredients in a blender and blend well.
Per serving: Calories 150 (From Fat 0); Fat 0g (Saturated 0g); Cholesterol 5mg; Sodium 130mg; Carbohydrate 29g (Dietary Fiber 1g); Protein 9g; Sugar 16g.
21_640180-ch14.indd 22721_640180-ch14.indd 227 8/27/10 10:45 PM8/27/10 10:45 PM
228 Part III: Simple Recipes to Enjoy Anytime
T Pineapple Upside Down
Taking the Southern-U.S. dessert pineapple upside-down cake and turning it into a smoothie is just downright awesome! Because pineapple is fibrous and can cause food-sticking problems, puréeing it in the blender makes it easier to eat and enjoy.
Stage: Smooth foods
Preparation time: 5 minutes
Yield: 1 serving (1 cup)
1⁄4 cup plain calcium-enriched soy milk2 tablespoons nonfat dry powdered milk1⁄4 cup crushed pineapple in its own juice, drained1⁄4 teaspoon coconut extract
1⁄8 teaspoon lemon extract1⁄8 teaspoon butter extract1⁄4 cup plain nonfat yogurt1⁄4 cup ice1 packet sugar substitute, or to taste
Stir the powdered milk into the soy milk and let stand for 1 to 2 minutes. Then place all ingredients in a blender and blend well.
Per serving: Calories 110 (From Fat 10); Fat 1g (Saturated 0g); Cholesterol 0mg; Sodium 105mg; Carbohydrate 21g (Dietary Fiber 1g); Protein 7g; Sugar 17g.
Spice-It-Up DelightsYou can experiment with your smoothies by adding different flavorings. Look in your spice pantry to see what you have available. If you would add it to a dessert, you can add it to a smoothie. For example, cinnamon makes a great addition to many drinks. Try the smoothies with spice blends in this section until you’re brave enough to invent your own.
T Pumpkin Spice
Pumpkin pie in a glass — yum! The tofu and yogurt make this smoothie extra creamy, and the pumpkin with spices makes it a masterpiece. Be sure you don’t use pumpkin pie filling, because it has added sugar.
Stage: Smooth foods
Preparation time: 5 minutes
Yield: 1 serving (11⁄4 cups)
21_640180-ch14.indd 22821_640180-ch14.indd 228 8/27/10 10:45 PM8/27/10 10:45 PM
229 Chapter 14: Scrumptious Smoothies
Place all ingredients in a blender and blend well.
Per serving: Calories 110 (From Fat 30); Fat 3g (Saturated 0g); Cholesterol 0mg; Sodium 60mg; Carbohydrate 12g (Dietary Fiber 2g); Protein 10g; Sugar 7g.
1⁄4 cup nonfat milk2 tablespoons canned pumpkin1⁄4 teaspoon pumpkin pie spice1⁄8 teaspoon liquid butter extract
1⁄2 cup silken tofu1⁄4 cup plain nonfat yogurt1⁄4 cup ice2 packets sugar substitute, or to taste
T Spiced Apple Pie
Applesauce is perfect for making apple smoothies, and you can spice it up with apple pie spice. If you can’t find apple pie spice at the supermarket, you can make your own by blending together 1⁄2 teaspoon ground cinnamon, 1⁄4 teaspoon ground nutmeg,1⁄8 teaspoon ground allspice, and 1⁄8 teaspoon ground cardamom.
Stage: Smooth foods
Preparation time: 5 minutes
Yield: 1 serving (1 cup)
1⁄4 cup nonfat milk1⁄4 cup unsweetened applesauce1⁄4 teaspoon apple pie spice1⁄8 teaspoon vanilla extract
1⁄2 cup plain nonfat yogurt1⁄4 cup ice2 packets sugar substitute, or to taste
Place all ingredients in a blender and blend well.
Per serving: Calories 100 (From Fat 0); Fat 0g (Saturated 0g); Cholesterol 5mg; Sodium 95mg; Carbohydrate 19g (Dietary Fiber 1g); Protein 7g; Sugar 15g.
21_640180-ch14.indd 22921_640180-ch14.indd 229 8/27/10 10:45 PM8/27/10 10:45 PM
230 Part III: Simple Recipes to Enjoy Anytime
Peanut Butter and Chocolate Temptations
Peanut butter and chocolate are at the top of the list when it comes to favorite flavors. Chocolate is made from cocoa beans, the most eaten bean in the world. After it’s dried and pounded into cocoa powder, this taste sensation is used in innumerable desserts and dishes. For smoothies, sugar-free chocolate syrup works the best. It gives you that chocolatey flavor but none of the calories.
If you have a peanut allergy, or just want some more variety, try almond, cashew, or walnut butter. They all have about 100 calories and 3 grams of protein per tablespoon. Because they’re high in calories, watch your portion size!
T Smooth Peanut Banana
Peanut butter and bananas are such a delicious combination that even Elvis famously made sandwiches with them. Creamy, nutty, and fruity; what else could you ask for? Not all peanut butters are the same. Some have sugar and hydrogenated oils added, so look for natural peanut butter that contains only peanuts and a dash of salt.
Stage: Smooth foods
Preparation time: 5 minutes
Yield: 1 serving (1 cup)
1⁄4 cup plain calcium-enriched soy milk1 tablespoon creamy natural peanut butter1⁄4 cup sliced bananas
1⁄2 cup plain nonfat yogurt1⁄4 cup ice1 packet sugar substitute, or to taste
Place all ingredients in a blender and blend well.
Per serving: Calories 210 (From Fat 80); Fat 9g (Saturated 1g); Cholesterol 5mg; Sodium 150mg; Carbohydrate 26g (Dietary Fiber 2g); Protein 10g; Sugar 15g.
21_640180-ch14.indd 23021_640180-ch14.indd 230 8/27/10 10:45 PM8/27/10 10:45 PM
231 Chapter 14: Scrumptious Smoothies
T Chocolate-Covered Berries
Chocolate, raspberries, and strawberries make this easy and downright awesome smoothie a home run. You can find sugar-free chocolate syrup with the other ice cream toppings or flavored milk mixes at the grocery.
Stage: Smooth foods
Preparation time: 5 minutes
Yield: 1 serving (11⁄4 cups)
1⁄4 cup nonfat milk2 tablespoons nonfat dry powdered milk1⁄4 cup raspberries1⁄4 cup sliced strawberries
1 tablespoon sugar-free chocolate syrup1⁄4 cup plain nonfat yogurt1⁄4 cup ice1 packet sugar substitute, or to taste
Stir the powdered milk into the nonfat milk and let stand for 2 to 3 minutes. Then place all ingredients in a blender and blend well.
Per serving: Calories 110 (From Fat 0); Fat 0g (Saturated 0g); Cholesterol 5mg; Sodium 170mg; Carbohydrate 22g (Dietary Fiber 1g); Protein 8g; Sugar 13g.
21_640180-ch14.indd 23121_640180-ch14.indd 231 8/27/10 10:45 PM8/27/10 10:45 PM

232 Part III: Simple Recipes to Enjoy Anytime
21_640180-ch14.indd 23221_640180-ch14.indd 232 8/27/10 10:45 PM8/27/10 10:45 PM

Chapter 15
Alluring AppetizersIn This Chapter▶ Cooking tasty small portions for appetizers or mini-meals
▶ Blending up some dips
▶ Making food more fun: Appetizers on sticks
Appetizers have a new meaning after weight loss surgery. Before surgery, who would
have thought that appetizer portions would be enough to fill you up? Now, they can easily be a meal.
If you’re at a party or restaurant and appetizers are available, choose wisely. Many of them are high-calorie, high-fat foods that don’t help you meet your goals. And if you had GBP surgery and are prone to dumping syndrome, many traditional appetizers may cause you problems.
Of course, to get around these problems, your best bet is to make and serve your own appetizers, starting with the recipes in this chapter.
The portion sizes in our recipes have been adjusted to an appetizer amount for someone who has had weight loss surgery. If you plan to serve these to guests who have not had weight loss surgery, you may want to double the portion size we list. If you had weight loss surgery and are serving appetizers as part of a meal, plan on two servings of appetizers. If you’re only serving appetizers, plan on four servings. For diners who have not had weight loss surgery, that means four appetizer servings with a meal, and eight as the meal.
Recipes in This Chapter
▶ Grilled Shrimp▶ Crab-Stuffed Deviled
Eggs▶ Scallops with Spicy
Tomato Chutney▶ Blue Cheese–Stuffed
Mushrooms▶ Thai Chicken Wraps▶ White Albacore
Tuna DipT Chunky SalsaT The Best Hummus▶ Chicken Satay▶ Pork Ginger Kebabs
22_640180-ch15.indd 23322_640180-ch15.indd 233 8/27/10 10:46 PM8/27/10 10:46 PM
234 Part III: Simple Recipes to Enjoy Anytime
Making Tasty MorselsThe great thing about appetizers is that many of them can be made ahead of time so you’re not in the kitchen the entire time your guests are visiting. If appetizers are served hot, you can still make them up early in the day and keep them refrigerated until it’s time to heat and serve.
You want to serve a balance of tastes and textures. Make sure to have some sweet, spicy, soft, and crunchy. Color is important, too, so pick foods of different colors. If all your appetizers are brown, they won’t look too appetizing.
Knowing your appsThe culinary world has many words for appetizer-type foods. Hors d’oeuvres, which translates loosely to “outside the meal,” are small hot or cold appetizers served before a meal to stimulate the appetite. One type is canapés, bite-sized appetizers served on an
edible base like crackers or toast. Another word you might run across is crudités. This is a fancy word for a raw vegetables cut into sticks or bite size pieces and served on a tray together, often with a dipping sauce.
Grilled Shrimp
With horseradish and tarragon bringing a little bit of spice and tomato and garlic packing a whole lot of flavor, this shrimp appetizer is a crowd pleaser.
Stage: Regular foods
Preparation time: 10 minutes
Marinating time: 30 minutes
Cooking time: 4 minutes
Yield: 8 servings (2 ounces each)
22_640180-ch15.indd 23422_640180-ch15.indd 234 8/27/10 10:46 PM8/27/10 10:46 PM
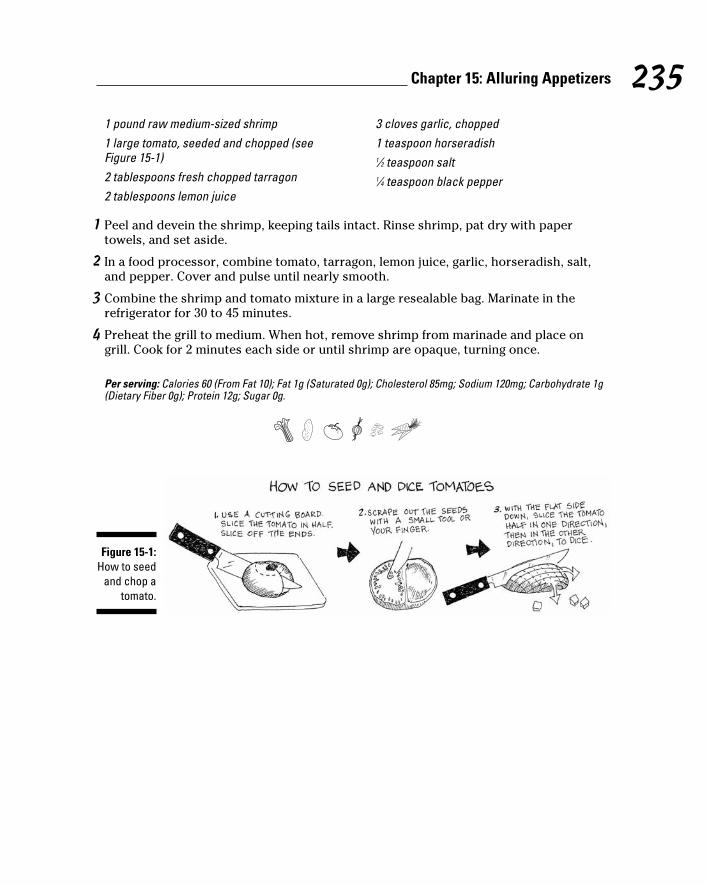
235 Chapter 15: Alluring Appetizers
1 Peel and devein the shrimp, keeping tails intact. Rinse shrimp, pat dry with paper towels, and set aside.
2 In a food processor, combine tomato, tarragon, lemon juice, garlic, horseradish, salt, and pepper. Cover and pulse until nearly smooth.
3 Combine the shrimp and tomato mixture in a large resealable bag. Marinate in the refrigerator for 30 to 45 minutes.
4 Preheat the grill to medium. When hot, remove shrimp from marinade and place on grill. Cook for 2 minutes each side or until shrimp are opaque, turning once.
Per serving: Calories 60 (From Fat 10); Fat 1g (Saturated 0g); Cholesterol 85mg; Sodium 120mg; Carbohydrate 1g (Dietary Fiber 0g); Protein 12g; Sugar 0g.
Figure 15-1: How to seed
and chop a tomato.
1 pound raw medium-sized shrimp1 large tomato, seeded and chopped (see Figure 15-1)2 tablespoons fresh chopped tarragon2 tablespoons lemon juice
3 cloves garlic, chopped1 teaspoon horseradish1⁄2 teaspoon salt1⁄4 teaspoon black pepper
22_640180-ch15.indd 23522_640180-ch15.indd 235 8/27/10 10:46 PM8/27/10 10:46 PM
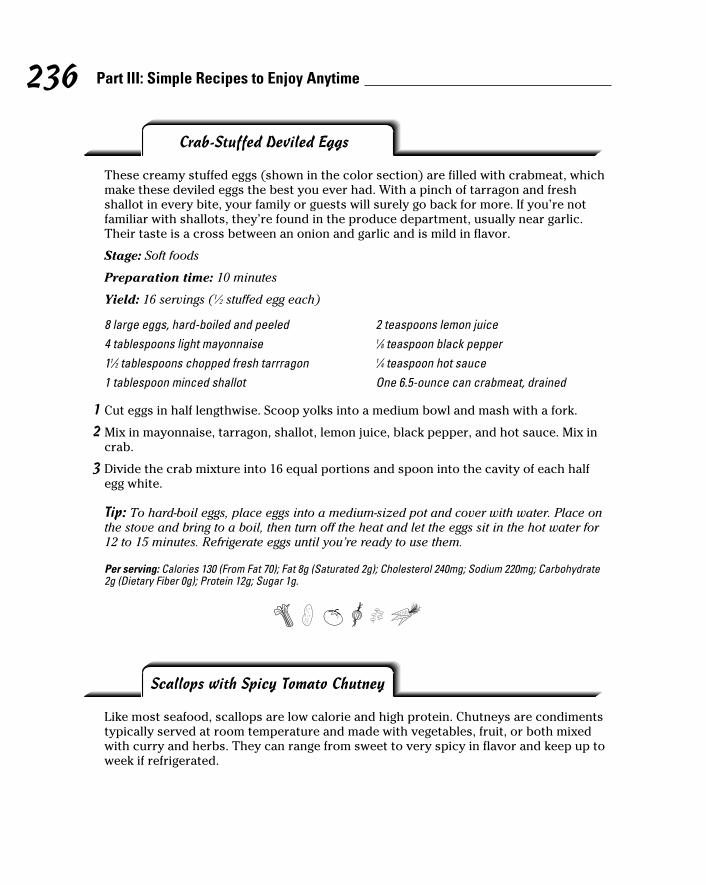
236 Part III: Simple Recipes to Enjoy Anytime
Crab-Stuffed Deviled Eggs
These creamy stuffed eggs (shown in the color section) are filled with crabmeat, which make these deviled eggs the best you ever had. With a pinch of tarragon and fresh shallot in every bite, your family or guests will surely go back for more. If you’re not familiar with shallots, they’re found in the produce department, usually near garlic. Their taste is a cross between an onion and garlic and is mild in flavor.
Stage: Soft foods
Preparation time: 10 minutes
Yield: 16 servings (1⁄2 stuffed egg each)
8 large eggs, hard-boiled and peeled4 tablespoons light mayonnaise11⁄2 tablespoons chopped fresh tarrragon1 tablespoon minced shallot
2 teaspoons lemon juice1⁄8 teaspoon black pepper1⁄4 teaspoon hot sauceOne 6.5-ounce can crabmeat, drained
1 Cut eggs in half lengthwise. Scoop yolks into a medium bowl and mash with a fork.
2 Mix in mayonnaise, tarragon, shallot, lemon juice, black pepper, and hot sauce. Mix in crab.
3 Divide the crab mixture into 16 equal portions and spoon into the cavity of each half egg white.
Tip: To hard-boil eggs, place eggs into a medium-sized pot and cover with water. Place on the stove and bring to a boil, then turn off the heat and let the eggs sit in the hot water for 12 to 15 minutes. Refrigerate eggs until you’re ready to use them.
Per serving: Calories 130 (From Fat 70); Fat 8g (Saturated 2g); Cholesterol 240mg; Sodium 220mg; Carbohydrate 2g (Dietary Fiber 0g); Protein 12g; Sugar 1g.
Scallops with Spicy Tomato Chutney
Like most seafood, scallops are low calorie and high protein. Chutneys are condiments typically served at room temperature and made with vegetables, fruit, or both mixed with curry and herbs. They can range from sweet to very spicy in flavor and keep up to week if refrigerated.
22_640180-ch15.indd 23622_640180-ch15.indd 236 8/27/10 10:46 PM8/27/10 10:46 PM
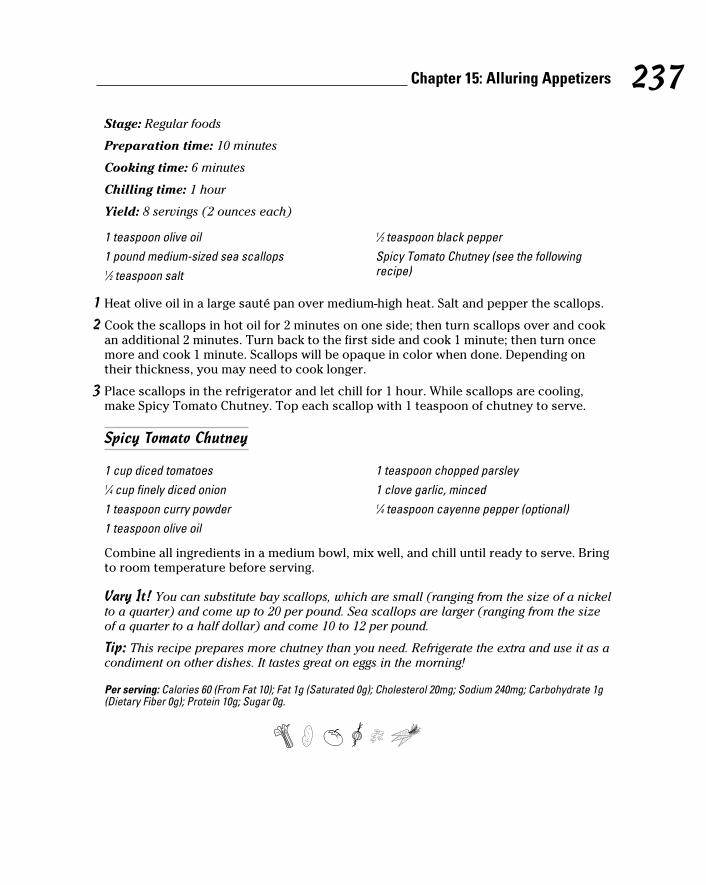
237 Chapter 15: Alluring Appetizers
Stage: Regular foods
Preparation time: 10 minutes
Cooking time: 6 minutes
Chilling time: 1 hour
Yield: 8 servings (2 ounces each)
1 teaspoon olive oil1 pound medium-sized sea scallops1⁄2 teaspoon salt
1⁄2 teaspoon black pepperSpicy Tomato Chutney (see the following recipe)
1 Heat olive oil in a large sauté pan over medium-high heat. Salt and pepper the scallops.
2 Cook the scallops in hot oil for 2 minutes on one side; then turn scallops over and cook an additional 2 minutes. Turn back to the first side and cook 1 minute; then turn once more and cook 1 minute. Scallops will be opaque in color when done. Depending on their thickness, you may need to cook longer.
3 Place scallops in the refrigerator and let chill for 1 hour. While scallops are cooling, make Spicy Tomato Chutney. Top each scallop with 1 teaspoon of chutney to serve.
Spicy Tomato Chutney
1 cup diced tomatoes1⁄4 cup finely diced onion1 teaspoon curry powder1 teaspoon olive oil
1 teaspoon chopped parsley1 clove garlic, minced1⁄4 teaspoon cayenne pepper (optional)
Combine all ingredients in a medium bowl, mix well, and chill until ready to serve. Bring to room temperature before serving.
Vary It! You can substitute bay scallops, which are small (ranging from the size of a nickel to a quarter) and come up to 20 per pound. Sea scallops are larger (ranging from the size of a quarter to a half dollar) and come 10 to 12 per pound.
Tip: This recipe prepares more chutney than you need. Refrigerate the extra and use it as a condiment on other dishes. It tastes great on eggs in the morning!
Per serving: Calories 60 (From Fat 10); Fat 1g (Saturated 0g); Cholesterol 20mg; Sodium 240mg; Carbohydrate 1g (Dietary Fiber 0g); Protein 10g; Sugar 0g.
22_640180-ch15.indd 23722_640180-ch15.indd 237 8/27/10 10:46 PM8/27/10 10:46 PM
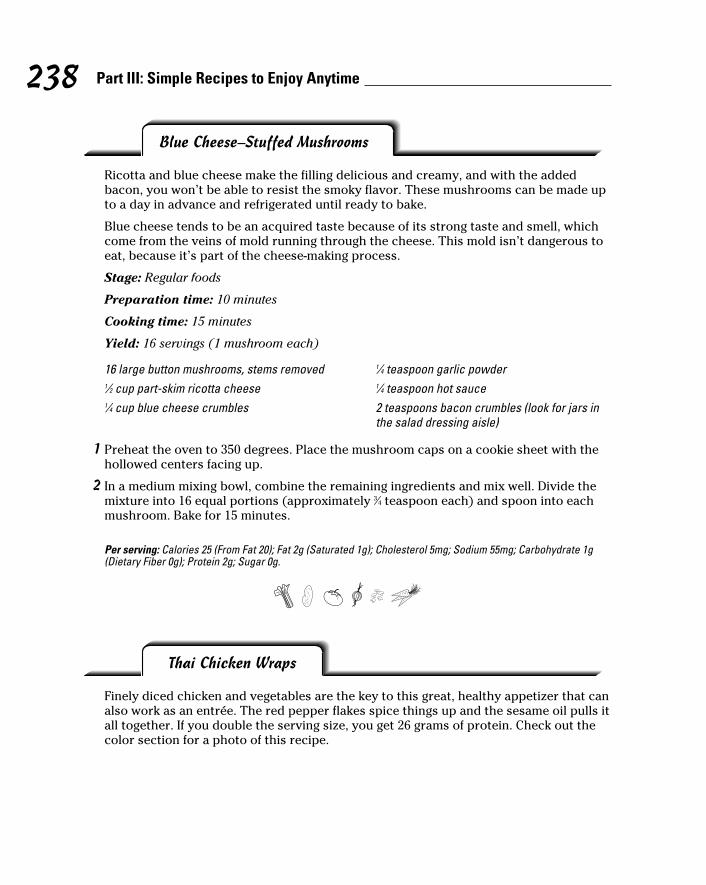
238 Part III: Simple Recipes to Enjoy Anytime
Blue Cheese–Stuffed Mushrooms
Ricotta and blue cheese make the filling delicious and creamy, and with the added bacon, you won’t be able to resist the smoky flavor. These mushrooms can be made up to a day in advance and refrigerated until ready to bake.
Blue cheese tends to be an acquired taste because of its strong taste and smell, which come from the veins of mold running through the cheese. This mold isn’t dangerous to eat, because it’s part of the cheese-making process.
Stage: Regular foods
Preparation time: 10 minutes
Cooking time: 15 minutes
Yield: 16 servings (1 mushroom each)
16 large button mushrooms, stems removed1⁄2 cup part-skim ricotta cheese1⁄4 cup blue cheese crumbles
1⁄4 teaspoon garlic powder1⁄4 teaspoon hot sauce2 teaspoons bacon crumbles (look for jars in the salad dressing aisle)
1 Preheat the oven to 350 degrees. Place the mushroom caps on a cookie sheet with the hollowed centers facing up.
2 In a medium mixing bowl, combine the remaining ingredients and mix well. Divide the mixture into 16 equal portions (approximately 3⁄4 teaspoon each) and spoon into each mushroom. Bake for 15 minutes.
Per serving: Calories 25 (From Fat 20); Fat 2g (Saturated 1g); Cholesterol 5mg; Sodium 55mg; Carbohydrate 1g (Dietary Fiber 0g); Protein 2g; Sugar 0g.
Thai Chicken Wraps
Finely diced chicken and vegetables are the key to this great, healthy appetizer that can also work as an entrée. The red pepper flakes spice things up and the sesame oil pulls it all together. If you double the serving size, you get 26 grams of protein. Check out the color section for a photo of this recipe.
22_640180-ch15.indd 23822_640180-ch15.indd 238 8/27/10 10:46 PM8/27/10 10:46 PM
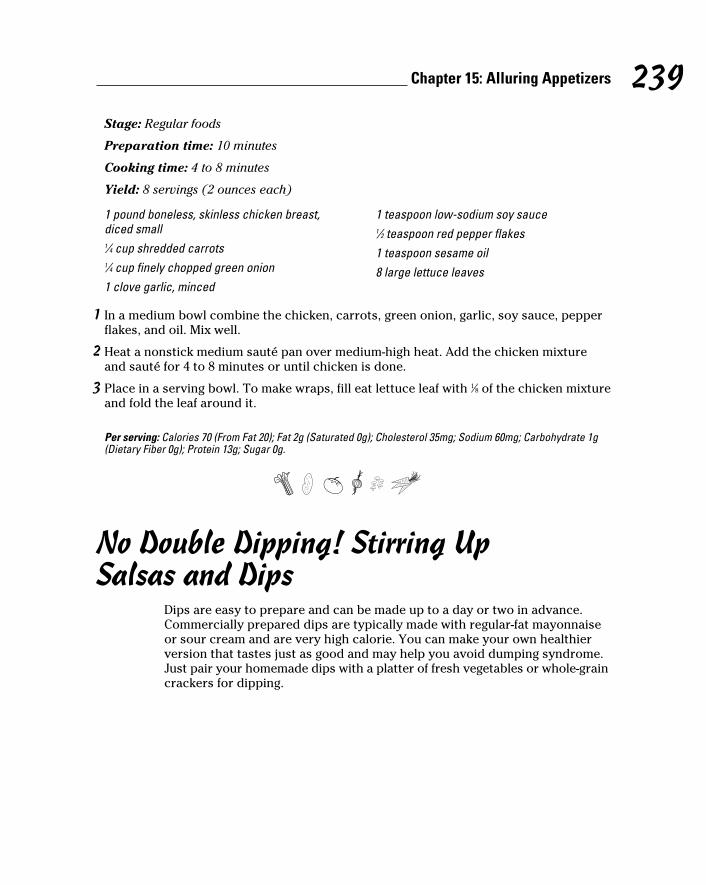
239 Chapter 15: Alluring Appetizers
1 In a medium bowl combine the chicken, carrots, green onion, garlic, soy sauce, pepper flakes, and oil. Mix well.
2 Heat a nonstick medium sauté pan over medium-high heat. Add the chicken mixture and sauté for 4 to 8 minutes or until chicken is done.
3 Place in a serving bowl. To make wraps, fill eat lettuce leaf with 1⁄8 of the chicken mixture and fold the leaf around it.
Per serving: Calories 70 (From Fat 20); Fat 2g (Saturated 0g); Cholesterol 35mg; Sodium 60mg; Carbohydrate 1g (Dietary Fiber 0g); Protein 13g; Sugar 0g.
No Double Dipping! Stirring Up Salsas and Dips
Dips are easy to prepare and can be made up to a day or two in advance. Commercially prepared dips are typically made with regular-fat mayonnaise or sour cream and are very high calorie. You can make your own healthier version that tastes just as good and may help you avoid dumping syndrome. Just pair your homemade dips with a platter of fresh vegetables or whole-grain crackers for dipping.
1 pound boneless, skinless chicken breast, diced small1⁄4 cup shredded carrots1⁄4 cup finely chopped green onion1 clove garlic, minced
1 teaspoon low-sodium soy sauce1⁄2 teaspoon red pepper flakes1 teaspoon sesame oil8 large lettuce leaves
Stage: Regular foods
Preparation time: 10 minutes
Cooking time: 4 to 8 minutes
Yield: 8 servings (2 ounces each)
22_640180-ch15.indd 23922_640180-ch15.indd 239 8/27/10 10:46 PM8/27/10 10:46 PM
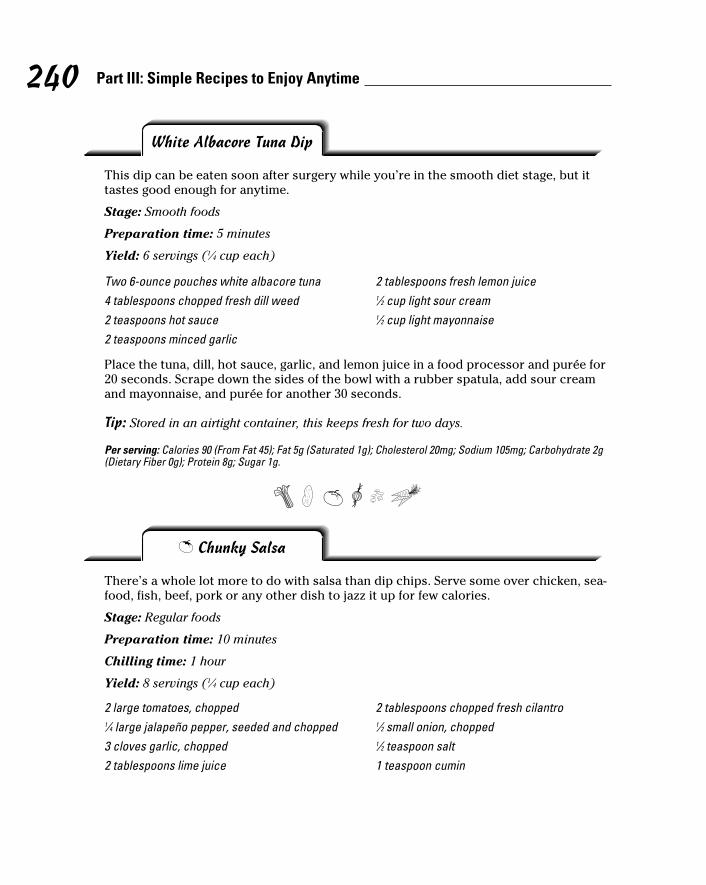
240 Part III: Simple Recipes to Enjoy Anytime
Place the tuna, dill, hot sauce, garlic, and lemon juice in a food processor and purée for 20 seconds. Scrape down the sides of the bowl with a rubber spatula, add sour cream and mayonnaise, and purée for another 30 seconds.
Tip: Stored in an airtight container, this keeps fresh for two days.
Per serving: Calories 90 (From Fat 45); Fat 5g (Saturated 1g); Cholesterol 20mg; Sodium 105mg; Carbohydrate 2g (Dietary Fiber 0g); Protein 8g; Sugar 1g.
White Albacore Tuna Dip
This dip can be eaten soon after surgery while you’re in the smooth diet stage, but it tastes good enough for anytime.
Stage: Smooth foods
Preparation time: 5 minutes
Yield: 6 servings (1⁄4 cup each)
Two 6-ounce pouches white albacore tuna4 tablespoons chopped fresh dill weed2 teaspoons hot sauce2 teaspoons minced garlic
2 tablespoons fresh lemon juice1⁄2 cup light sour cream1⁄2 cup light mayonnaise
T Chunky Salsa
There’s a whole lot more to do with salsa than dip chips. Serve some over chicken, sea-food, fish, beef, pork or any other dish to jazz it up for few calories.
Stage: Regular foods
Preparation time: 10 minutes
Chilling time: 1 hour
Yield: 8 servings (1⁄4 cup each)
2 large tomatoes, chopped1⁄4 large jalapeño pepper, seeded and chopped3 cloves garlic, chopped2 tablespoons lime juice
2 tablespoons chopped fresh cilantro1⁄2 small onion, chopped1⁄2 teaspoon salt1 teaspoon cumin
22_640180-ch15.indd 24022_640180-ch15.indd 240 8/27/10 10:46 PM8/27/10 10:46 PM

241 Chapter 15: Alluring Appetizers
Place all ingredients in a small bowl and mix. Refrigerate for at least 1 hour to let flavors blend.
Vary It! If you want a smoother salsa, you can make this in a food processor. Pulse until it reaches your desired consistency.
Per serving: Calories 14 (From Fat 0); Fat 0g (Saturated 0g); Cholesterol 0mg; Sodium 150mg; Carbohydrate 3g (Dietary Fiber 1g); Protein 1g; Sugar 2g.
T The Best Hummus
Homemade hummus is so easy to make, you may never buy commercially prepared hummus again. It’s great dip for fresh veggies. Tahini, which provides one of the characteristic flavors of hummus, is made from ground sesame seeds mixed with oil.
Stage: Regular foods
Preparation time: 10 minutes
Yield: 10 servings (1⁄4 cup each)
2 cups canned low-sodium garbanzo beans, drained and rinsed2 tablespoons fresh lemon juice2 cloves garlic, chopped
1 dash cayenne pepper1⁄4 cup tahini2 tablespoons olive oil1⁄4 cup fresh chopped parsley
Place all ingredients in a food processor and blend well. If hummus is too thick, add 1 tablespoon water at a time until it reaches your desired consistency.
Tip: Use leftover tahini on bread or crackers like you would use peanut butter. Keep it refrigerated after opening.
Per serving: Calories 70 (From Fat 35); Fat 4g (Saturated 1g); Cholesterol 0mg; Sodium 10mg; Carbohydrate 7g (Dietary Fiber 1g); Protein 2g; Sugar 0g.
22_640180-ch15.indd 24122_640180-ch15.indd 241 8/27/10 10:46 PM8/27/10 10:46 PM
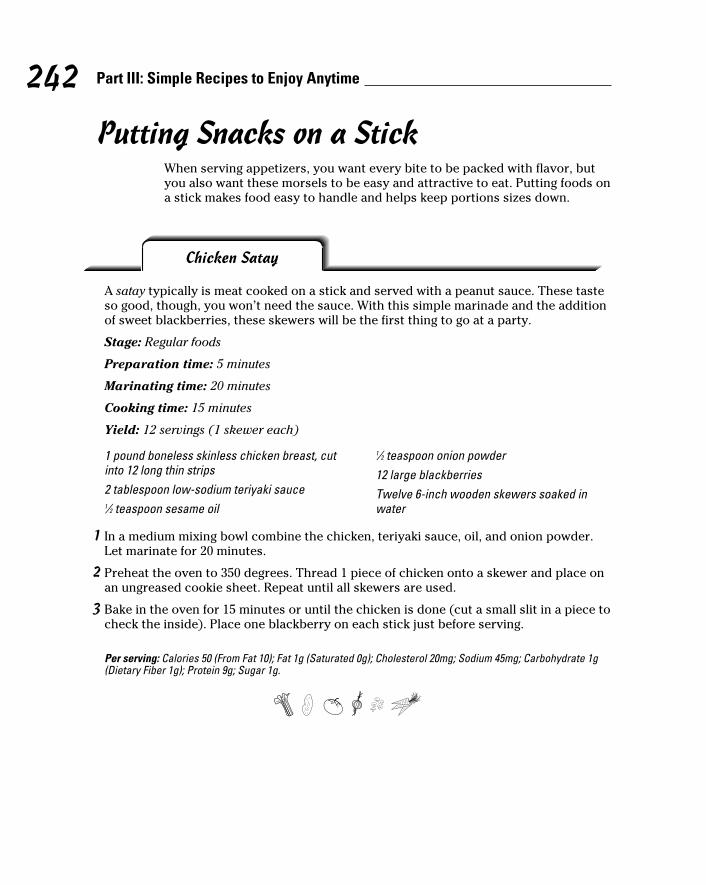
242 Part III: Simple Recipes to Enjoy Anytime
Putting Snacks on a StickWhen serving appetizers, you want every bite to be packed with flavor, but you also want these morsels to be easy and attractive to eat. Putting foods on a stick makes food easy to handle and helps keep portions sizes down.
Chicken Satay
A satay typically is meat cooked on a stick and served with a peanut sauce. These taste so good, though, you won’t need the sauce. With this simple marinade and the addition of sweet blackberries, these skewers will be the first thing to go at a party.
Stage: Regular foods
Preparation time: 5 minutes
Marinating time: 20 minutes
Cooking time: 15 minutes
Yield: 12 servings (1 skewer each)
1 pound boneless skinless chicken breast, cut into 12 long thin strips2 tablespoon low-sodium teriyaki sauce1⁄2 teaspoon sesame oil
1⁄2 teaspoon onion powder12 large blackberriesTwelve 6-inch wooden skewers soaked in water
1 In a medium mixing bowl combine the chicken, teriyaki sauce, oil, and onion powder. Let marinate for 20 minutes.
2 Preheat the oven to 350 degrees. Thread 1 piece of chicken onto a skewer and place on an ungreased cookie sheet. Repeat until all skewers are used.
3 Bake in the oven for 15 minutes or until the chicken is done (cut a small slit in a piece to check the inside). Place one blackberry on each stick just before serving.
Per serving: Calories 50 (From Fat 10); Fat 1g (Saturated 0g); Cholesterol 20mg; Sodium 45mg; Carbohydrate 1g (Dietary Fiber 1g); Protein 9g; Sugar 1g.
22_640180-ch15.indd 24222_640180-ch15.indd 242 8/27/10 10:46 PM8/27/10 10:46 PM
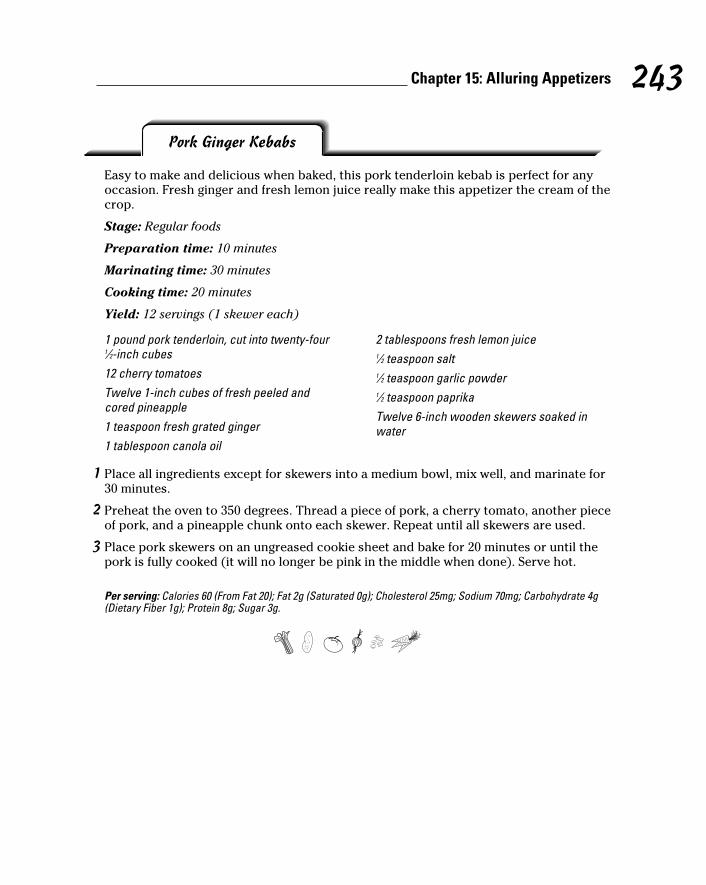
243 Chapter 15: Alluring Appetizers
Pork Ginger Kebabs
Easy to make and delicious when baked, this pork tenderloin kebab is perfect for any occasion. Fresh ginger and fresh lemon juice really make this appetizer the cream of the crop.
Stage: Regular foods
Preparation time: 10 minutes
Marinating time: 30 minutes
Cooking time: 20 minutes
Yield: 12 servings (1 skewer each)
1 pound pork tenderloin, cut into twenty-four 1⁄2-inch cubes12 cherry tomatoesTwelve 1-inch cubes of fresh peeled and cored pineapple1 teaspoon fresh grated ginger1 tablespoon canola oil
2 tablespoons fresh lemon juice1⁄2 teaspoon salt1⁄2 teaspoon garlic powder1⁄2 teaspoon paprikaTwelve 6-inch wooden skewers soaked in water
1 Place all ingredients except for skewers into a medium bowl, mix well, and marinate for 30 minutes.
2 Preheat the oven to 350 degrees. Thread a piece of pork, a cherry tomato, another piece of pork, and a pineapple chunk onto each skewer. Repeat until all skewers are used.
3 Place pork skewers on an ungreased cookie sheet and bake for 20 minutes or until the pork is fully cooked (it will no longer be pink in the middle when done). Serve hot.
Per serving: Calories 60 (From Fat 20); Fat 2g (Saturated 0g); Cholesterol 25mg; Sodium 70mg; Carbohydrate 4g (Dietary Fiber 1g); Protein 8g; Sugar 3g.
22_640180-ch15.indd 24322_640180-ch15.indd 243 8/27/10 10:46 PM8/27/10 10:46 PM

244 Part III: Simple Recipes to Enjoy Anytime
22_640180-ch15.indd 24422_640180-ch15.indd 244 8/27/10 10:46 PM8/27/10 10:46 PM
Chapter 16
Sumptuous Soups and StewsIn This Chapter▶ Souping up your protein
▶ Stewing up hearty, healthy meals
When you want a comforting meal, a cup of hot soup or stew really hits the spot.
It warms you up from the top of your head to the tips of your toes. They’re easy to make, and when you prepare them yourself, you can control the ingredients to make sure you get enough nutrients.
Salad and soup combinations are endless and can please everyone. Making them is a cinch and doesn’t require a whole lot of cooking skills. If you can chop, you can make salads and soups. Pair any of the soup or stew recipes in this chapter with a salad for an easy, satisfying meal.
Serving Up Satisfying SoupsWe’re believers in homemade soup, which allows you to control the ingredients. In the case of commercially prepared soups, not all soups are created equal. Canned soups are high in sodium unless you buy the low-sodium versions. We use low-sodium broth in our recipes, so you can rest assured these soups have less sodium than most canned. Some soups, both canned and prepacked in the deli section of the supermarket, are high in fat. If you had GBP surgery, some of them have enough fat to give you dumping syndrome. If you had AGB, you still want to avoid these soups because the fat makes them very high in calories.
Soups aren’t usually a great source of protein unless you choose bean or lentil soups. We put more meat in our soup recipes than you find in the soups at the store, because if the soup is your meal, you need to get in your protein!
Recipes in This Chapter
▶ Cheesy Hamburger Steak Soup
▶ Mexi Turkey Tortilla Soup
▶ Chunky Chicken Noodle Soup
▶ Pork and Sauerkraut Soup
▶ Tomato Bisque▶ Smoky Chicken Stew▶ Meaty Lentil Stew▶ Chef Dave’s Easy Savory
Chili
23_640180-ch16.indd 24523_640180-ch16.indd 245 8/27/10 11:00 PM8/27/10 11:00 PM
246 Part III: Simple Recipes to Enjoy Anytime
Cheesy Hamburger Steak Soup
You don’t need a bun to eat this “cheese steak,” and we make it with “the works.” Don’t leave out the pickles! The surprising crunch puts the topping on this soon-to-be family favorite.
Stage: Regular foods
Preparation time: 10 minutes
Cooking time: 35 minutes
Yield: 8 servings (1 cup each)
1 pound extra-lean ground beef1 cup diced onion1⁄2 cup minced celery1⁄2 cup diced carrot1 teaspoon minced garlic3 cups low-sodium beef broth1 large russet potato, peeled and diced
3 tablespoons butter1⁄4 cup all-purpose flour11⁄2 cups 1% milk1 cup shredded Monterey Jack cheese1⁄4 cup ketchup2 tablespoons yellow mustard1⁄2 cup chopped dill pickle
1 Heat a large pot over medium heat. Add the ground beef. When the beef starts to brown, add the onion, celery, carrot, and garlic. Sauté about 10 minutes.
2 Stir in the broth and potato. Bring to a boil; then reduce heat and simmer until the potatoes are cooked through, about 10 minutes.
3 Meanwhile, melt the butter in a medium saucepan over medium heat. Whisk in the flour and cook, whisking constantly, for 1 to 2 minutes. Add the milk and whisk until smooth, scraping the bottom of the pan.
4 Add the milk mixture to the soup and bring to a boil. Reduce heat to a simmer. Add the cheese, ketchup, and mustard. Stir until the cheese is melted.
5 Serve topped with chopped pickle.
Per serving: Calories 240 (From Fat 110); Fat 12g (Saturated 6g); Cholesterol 55mg; Sodium 410mg; Carbohydrate 15g (Dietary Fiber 1g); Protein 19g; Sugar 6g.
23_640180-ch16.indd 24623_640180-ch16.indd 246 8/27/10 11:00 PM8/27/10 11:00 PM
247 Chapter 16: Sumptuous Soups and Stews
Mexi Turkey Tortilla Soup
Tasty and easy to make, this tortilla soup is perfectly spiced. The tortillas are mixed into the soup and act as a thickener. Be sure to use corn tortillas, not flour, because they’re lower in sodium and won’t make the soup cloudy. Then to top off this fiesta of a soup, head over to Chapter 10 and make the black bean salsa.
Stage: Regular foods
Preparation time: 15 minutes
Cooking time: 25 minutes
Yield: 8 servings (1 cup each)
1 tablespoon olive oil1 cup chopped onion2 tablespoons minced garlicThree 6-inch corn tortillas, cut into 1-inch piecesOne 14.5-ounce can diced tomatoes2 tablespoons chopped green chili pepper4 cups low-sodium chicken broth1 teaspoon ground cumin1 teaspoon ground coriander
1 teaspoon dried oregano12 ounces cooked ground or shredded turkey breast1 cup frozen corn kernels1⁄2 cup fat-free half-and-half1 cup shredded Monterey Jack cheese2 tablespoons fresh lime juice1⁄4 cup chopped fresh cilantro (optional)1⁄2 cup fat-free sour cream (optional)Black Bean Salsa (optional) (see Chapter 10)
1 Heat oil in a large saucepan over medium-high heat. Add the onion and garlic and sauté for 3 minutes. Stir in the tortilla pieces and sauté until they are crisp.
2 Add the tomatoes, green chili peppers, broth, and spices and bring to a boil. Remove from the heat and let cool for 5 minutes.
3 Purée the soup in small batches in a blender and return to the saucepan. Add the turkey, corn, and half-and-half. Bring to a boil and simmer for 5 minutes, or until the soup begins to thicken.
4 Reduce heat to medium, sprinkle in the cheese, and stir until melted. Add lime juice. Serve in bowls, topped with cilantro, sour cream, and Black Bean Salsa if desired.
Tip: To prevent the soup from leaking out the top of the blender, purée in small batches.
Tip: You can buy precooked turkey at most delis. When purchasing, ask for the amount you need to be weighed and sliced thick so that you can cube or shred it.
Per serving: Calories 220 (From Fat 70); Fat 8g (Saturated 4g); Cholesterol 50mg; Sodium 300 mg; Carbohydrate 16g (Dietary Fiber 1g); Protein 20g; Sugar 3g.
23_640180-ch16.indd 24723_640180-ch16.indd 247 8/27/10 11:00 PM8/27/10 11:00 PM
248 Part III: Simple Recipes to Enjoy Anytime
Chunky Chicken Noodle Soup
A bowl of chicken noodle soup can really make you feel good inside. This classic comfort food used to be made from stewing chickens, or hens that were too old and stringy to be cooked for a short period of time. Finding stewing chickens is difficult nowadays, so you can use the fresh chicken you find at the store. You don’t have to worry about skimming the fat off the top of the broth if you use breast meat.
Stage: Regular foods
Preparation time: 10 minutes
Cooking time: 35 minutes
Yield: 8 servings (1 cup each)
Fresh versus dried herbsFresh and dried herbs are great for cooking and fresh preparations, but knowing when to use them makes all the difference in the way your meals taste. Use dried herbs for dishes that cook more than 30 minutes. Use fresh herbs in fresh salad preparations and when cooking
less than 30 minutes. If you cook fresh herbs too long, they become bitter and black, and they can also burn in high-heat preparations, such as sautéing, grilling, and broiling, so use your best judgment when preparing your favorite recipes.
1 tablespoon butter1 pound boneless skinless chicken breast cut into 1⁄2-inch pieces1 large celery stalk, thinly sliced1 large carrot, thinly sliced1⁄2 cup chopped onion1⁄2 teaspoon dried basil
1⁄4 teaspoon dried rosemary1⁄4 teaspoon black pepper1⁄2 teaspoon salt2 teaspoons all-purpose flour6 cups low-sodium chicken broth1 cup water2 ounces thin egg noodles
1 Melt the butter in a large pot. Add the chicken, celery, carrot, onion, basil, rosemary, pepper, and salt and sauté for 3 minutes.
2 Add flour and sauté an additional 2 minutes; then stir in chicken broth and water and bring to a simmer. Simmer for 30 minutes, adding egg noodles for the last 10 minutes.
Per serving: Calories 140 (From Fat 35); Fat 4g (Saturated 2g); Cholesterol 45mg; Sodium 270mg; Carbohydrate 10g (Dietary Fiber 1g); Protein 18g; Sugar 2g.
23_640180-ch16.indd 24823_640180-ch16.indd 248 8/27/10 11:00 PM8/27/10 11:00 PM
249 Chapter 16: Sumptuous Soups and Stews
Pork and Sauerkraut Soup
You may not be a lover of sauerkraut, fermented cabbage, but this soup may change your mind. The pork becomes fall-apart tender when slowly simmered, and the sauerkraut and mashed potatoes make a great combination. Sauerkraut can be found on the shelf canned or jarred, or in a refrigerated jar. If you’re watching your sodium intake, check the labels. The sauerkraut in the refrigerated section, while still high in sodium, may be lower than the shelf products.
Stage: Regular foods
Preparation time: 5 minutes
Cooking time: 2 hours, 20 minutes
Yield: 8 servings (11⁄4 cups each)
1 pound pork loin, trimmed1 cup chopped onion1 teaspoon dried basil1 teaspoon dried thyme
1 teaspoon garlic powder6 cups low-sodium chicken brothOne 14.5-ounce can sauerkraut, drained2 cups mashed potatoes
1 Put the pork, onion, basil, thyme, garlic powder, and broth in a medium pot. Bring to a light simmer, cover, and continue to simmer lightly for 2 hours.
2 Remove the pork from the broth, and using 2 forks, pull it apart into small pieces. Return the pork to the pot. Add the sauerkraut and bring back to a simmer.
3 Let simmer for 5 minutes. Serve 1 cup of soup over 1⁄4 cup warmed mashed potatoes.
Tip: To make prep easier, you can use the mashed potatoes from the refrigerator section or the deli at the grocery, or make them from mashed potato flakes.
Per serving: Calories 170 (From Fat 45); Fat 5g (Saturated 2g); Cholesterol 45mg; Sodium 590mg; Carbohydrate 15g (Dietary Fiber 3g); Protein 17g; Sugar 3g.
23_640180-ch16.indd 24923_640180-ch16.indd 249 8/27/10 11:00 PM8/27/10 11:00 PM
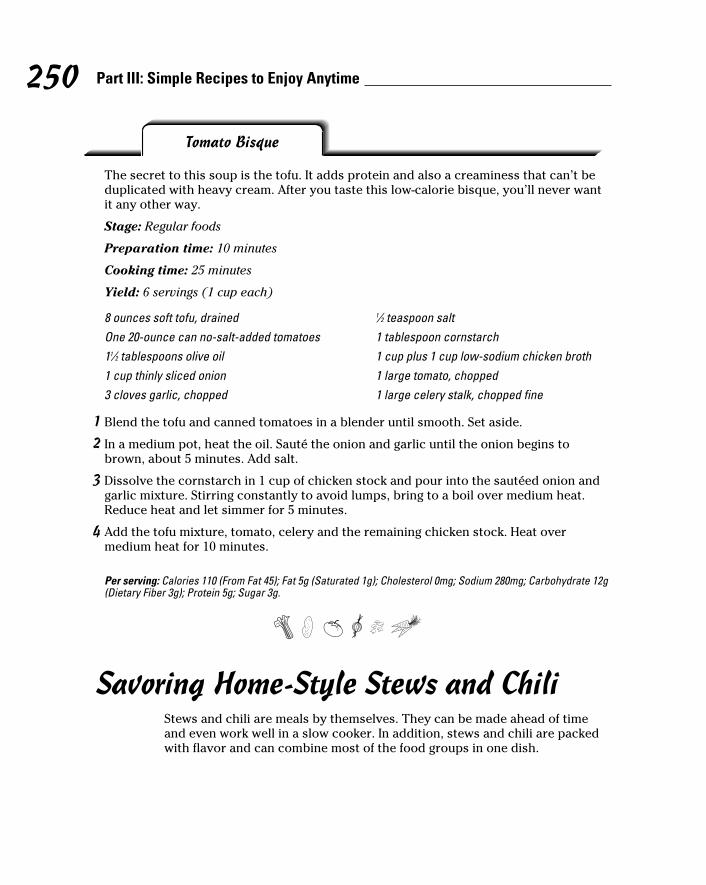
250 Part III: Simple Recipes to Enjoy Anytime
Tomato Bisque
The secret to this soup is the tofu. It adds protein and also a creaminess that can’t be duplicated with heavy cream. After you taste this low-calorie bisque, you’ll never want it any other way.
Stage: Regular foods
Preparation time: 10 minutes
Cooking time: 25 minutes
Yield: 6 servings (1 cup each)
8 ounces soft tofu, drainedOne 20-ounce can no-salt-added tomatoes11⁄2 tablespoons olive oil1 cup thinly sliced onion3 cloves garlic, chopped
1⁄2 teaspoon salt1 tablespoon cornstarch1 cup plus 1 cup low-sodium chicken broth1 large tomato, chopped1 large celery stalk, chopped fine
1 Blend the tofu and canned tomatoes in a blender until smooth. Set aside.
2 In a medium pot, heat the oil. Sauté the onion and garlic until the onion begins to brown, about 5 minutes. Add salt.
3 Dissolve the cornstarch in 1 cup of chicken stock and pour into the sautéed onion and garlic mixture. Stirring constantly to avoid lumps, bring to a boil over medium heat. Reduce heat and let simmer for 5 minutes.
4 Add the tofu mixture, tomato, celery and the remaining chicken stock. Heat over medium heat for 10 minutes.
Per serving: Calories 110 (From Fat 45); Fat 5g (Saturated 1g); Cholesterol 0mg; Sodium 280mg; Carbohydrate 12g (Dietary Fiber 3g); Protein 5g; Sugar 3g.
Savoring Home-Style Stews and ChiliStews and chili are meals by themselves. They can be made ahead of time and even work well in a slow cooker. In addition, stews and chili are packed with flavor and can combine most of the food groups in one dish.
23_640180-ch16.indd 25023_640180-ch16.indd 250 8/27/10 11:00 PM8/27/10 11:00 PM
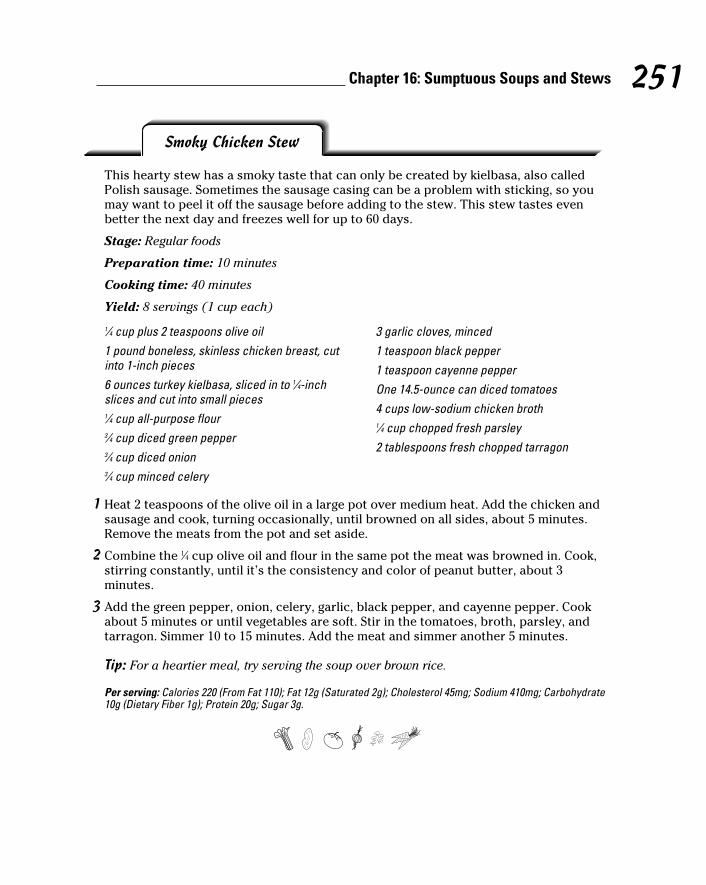
251 Chapter 16: Sumptuous Soups and Stews
Smoky Chicken Stew
This hearty stew has a smoky taste that can only be created by kielbasa, also called Polish sausage. Sometimes the sausage casing can be a problem with sticking, so you may want to peel it off the sausage before adding to the stew. This stew tastes even better the next day and freezes well for up to 60 days.
Stage: Regular foods
Preparation time: 10 minutes
Cooking time: 40 minutes
Yield: 8 servings (1 cup each)
1⁄4 cup plus 2 teaspoons olive oil1 pound boneless, skinless chicken breast, cut into 1-inch pieces6 ounces turkey kielbasa, sliced in to 1⁄4-inch slices and cut into small pieces1⁄4 cup all-purpose flour3⁄4 cup diced green pepper3⁄4 cup diced onion3⁄4 cup minced celery
3 garlic cloves, minced1 teaspoon black pepper1 teaspoon cayenne pepperOne 14.5-ounce can diced tomatoes4 cups low-sodium chicken broth1⁄4 cup chopped fresh parsley2 tablespoons fresh chopped tarragon
1 Heat 2 teaspoons of the olive oil in a large pot over medium heat. Add the chicken and sausage and cook, turning occasionally, until browned on all sides, about 5 minutes. Remove the meats from the pot and set aside.
2 Combine the 1⁄4 cup olive oil and flour in the same pot the meat was browned in. Cook, stirring constantly, until it’s the consistency and color of peanut butter, about 3 minutes.
3 Add the green pepper, onion, celery, garlic, black pepper, and cayenne pepper. Cook about 5 minutes or until vegetables are soft. Stir in the tomatoes, broth, parsley, and tarragon. Simmer 10 to 15 minutes. Add the meat and simmer another 5 minutes.
Tip: For a heartier meal, try serving the soup over brown rice.
Per serving: Calories 220 (From Fat 110); Fat 12g (Saturated 2g); Cholesterol 45mg; Sodium 410mg; Carbohydrate 10g (Dietary Fiber 1g); Protein 20g; Sugar 3g.
23_640180-ch16.indd 25123_640180-ch16.indd 251 8/27/10 11:00 PM8/27/10 11:00 PM
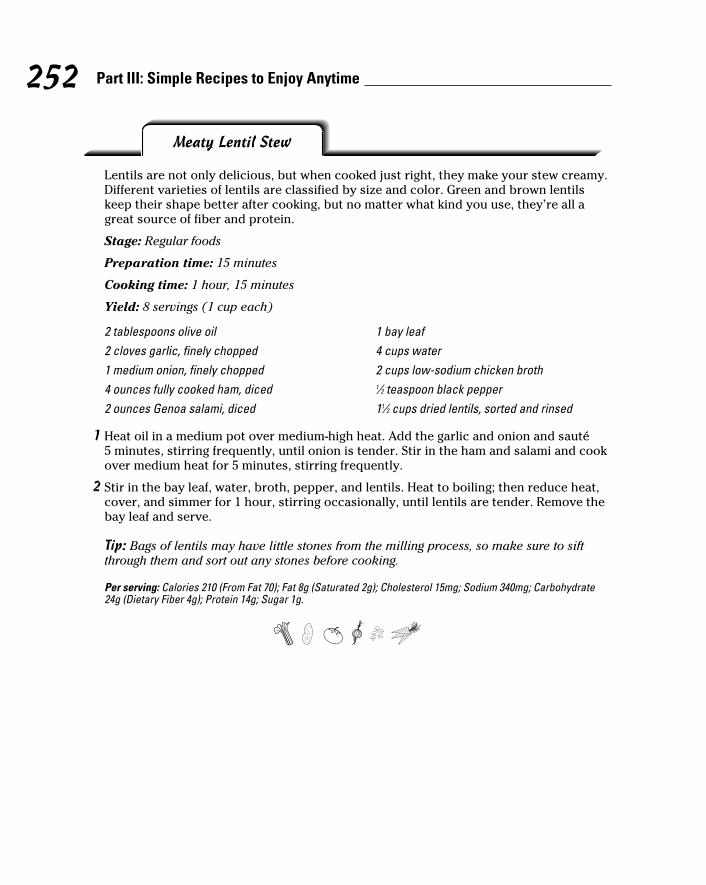
252 Part III: Simple Recipes to Enjoy Anytime
Meaty Lentil Stew
Lentils are not only delicious, but when cooked just right, they make your stew creamy. Different varieties of lentils are classified by size and color. Green and brown lentils keep their shape better after cooking, but no matter what kind you use, they’re all a great source of fiber and protein.
Stage: Regular foods
Preparation time: 15 minutes
Cooking time: 1 hour, 15 minutes
Yield: 8 servings (1 cup each)
2 tablespoons olive oil2 cloves garlic, finely chopped1 medium onion, finely chopped4 ounces fully cooked ham, diced2 ounces Genoa salami, diced
1 bay leaf4 cups water2 cups low-sodium chicken broth1⁄2 teaspoon black pepper11⁄2 cups dried lentils, sorted and rinsed
1 Heat oil in a medium pot over medium-high heat. Add the garlic and onion and sauté 5 minutes, stirring frequently, until onion is tender. Stir in the ham and salami and cook over medium heat for 5 minutes, stirring frequently.
2 Stir in the bay leaf, water, broth, pepper, and lentils. Heat to boiling; then reduce heat, cover, and simmer for 1 hour, stirring occasionally, until lentils are tender. Remove the bay leaf and serve.
Tip: Bags of lentils may have little stones from the milling process, so make sure to sift through them and sort out any stones before cooking.
Per serving: Calories 210 (From Fat 70); Fat 8g (Saturated 2g); Cholesterol 15mg; Sodium 340mg; Carbohydrate 24g (Dietary Fiber 4g); Protein 14g; Sugar 1g.
23_640180-ch16.indd 25223_640180-ch16.indd 252 8/27/10 11:00 PM8/27/10 11:00 PM
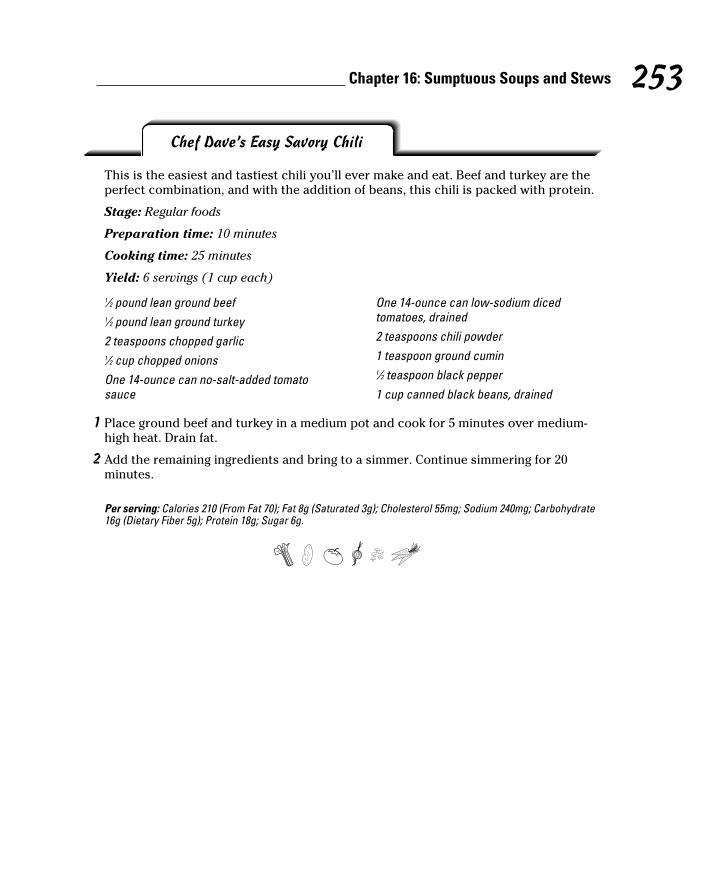
253 Chapter 16: Sumptuous Soups and Stews
Chef Dave’s Easy Savory Chili
This is the easiest and tastiest chili you’ll ever make and eat. Beef and turkey are the perfect combination, and with the addition of beans, this chili is packed with protein.
Stage: Regular foods
Preparation time: 10 minutes
Cooking time: 25 minutes
Yield: 6 servings (1 cup each)
1⁄2 pound lean ground beef1⁄2 pound lean ground turkey2 teaspoons chopped garlic1⁄2 cup chopped onionsOne 14-ounce can no-salt-added tomato sauce
One 14-ounce can low-sodium diced tomatoes, drained2 teaspoons chili powder1 teaspoon ground cumin1⁄2 teaspoon black pepper1 cup canned black beans, drained
1 Place ground beef and turkey in a medium pot and cook for 5 minutes over medium-high heat. Drain fat.
2 Add the remaining ingredients and bring to a simmer. Continue simmering for 20 minutes.
Per serving: Calories 210 (From Fat 70); Fat 8g (Saturated 3g); Cholesterol 55mg; Sodium 240mg; Carbohydrate 16g (Dietary Fiber 5g); Protein 18g; Sugar 6g.
23_640180-ch16.indd 25323_640180-ch16.indd 253 8/27/10 11:00 PM8/27/10 11:00 PM

254 Part III: Simple Recipes to Enjoy Anytime
23_640180-ch16.indd 25423_640180-ch16.indd 254 8/27/10 11:00 PM8/27/10 11:00 PM
Chapter 17
Completing the Meal: Vegetables and Side Dishes
In This Chapter▶ Keeping potatoes healthy
▶ Cooking perfect pasta
▶ Vegging out on salads and cooked veggies
Fred Astaire was a great dancer, but when he was paired with Ginger Rogers, they were
unbeatable on the dance floor. The best part of the meal isn’t always the entrée; sometimes it’s what’s sitting next to it. Though you may focus on preparing a wonderful protein-based entrée, the food you use to complement it can take the meal from ho-hum to yahoo.
A side dish is a smaller portion size than the entrée. Your side dish can be hot or cold, smooth or crunchy, sweet or sour. Typically side dishes are vegetables, salads, or starches, such as potatoes, rice, pasta, or bread. Because your meals are smaller after weight loss surgery, you may only have room in your pouch for one side dish to accompany your entrée. If you aren’t far out from surgery, a side dish may be enough food for your entire meal.
Here are some things to think about when picking a side dish for your meal:
✓ Prep time: If your entrée is going to take you some time to prepare, pick a side dish that requires little preparation or one that can be made ahead of time.
✓ Tastes good together: Make sure your dishes go together, but don’t go overboard. You don’t want everything to taste salty or sweet.
✓ Looks good together: Baked fish with cauliflower looks boring, but baked fish with sautéed broccoli and red peppers is a pretty sight, which makes meals more appetizing.
Recipes in This Chapter
T Asiago Carrot and Potato Au Gratin
T Sweet Potato BakeT Creamy Romano
Asparagus PastaT Tuscan Pasta SautéT Three Bean Salad▶ Southern-Style Green
BeansT Cucumber Cheese SaladT Avocado, Tomato, and
Feta Salad▶ Sweet-Pea SaladT Edamame SaladT Waldorf SaladT Oriental Slaw
24_640180-ch17.indd 25524_640180-ch17.indd 255 8/27/10 10:47 PM8/27/10 10:47 PM
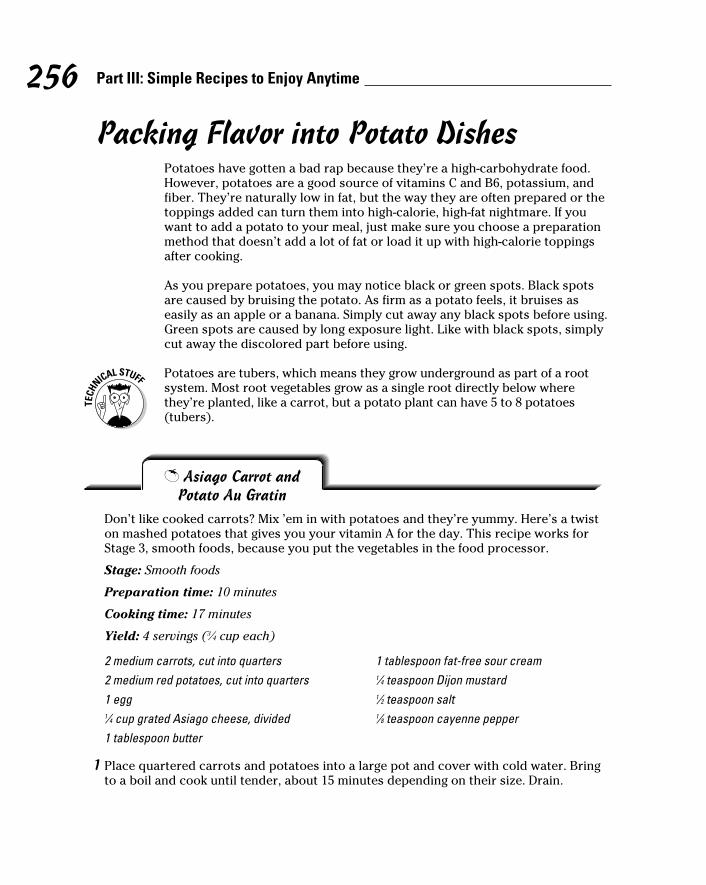
256 Part III: Simple Recipes to Enjoy Anytime
Packing Flavor into Potato DishesPotatoes have gotten a bad rap because they’re a high-carbohydrate food. However, potatoes are a good source of vitamins C and B6, potassium, and fiber. They’re naturally low in fat, but the way they are often prepared or the toppings added can turn them into high-calorie, high-fat nightmare. If you want to add a potato to your meal, just make sure you choose a preparation method that doesn’t add a lot of fat or load it up with high-calorie toppings after cooking.
As you prepare potatoes, you may notice black or green spots. Black spots are caused by bruising the potato. As firm as a potato feels, it bruises as easily as an apple or a banana. Simply cut away any black spots before using. Green spots are caused by long exposure light. Like with black spots, simply cut away the discolored part before using.
Potatoes are tubers, which means they grow underground as part of a root system. Most root vegetables grow as a single root directly below where they’re planted, like a carrot, but a potato plant can have 5 to 8 potatoes (tubers).
T Asiago Carrot and Potato Au Gratin
Don’t like cooked carrots? Mix ’em in with potatoes and they’re yummy. Here’s a twist on mashed potatoes that gives you your vitamin A for the day. This recipe works for Stage 3, smooth foods, because you put the vegetables in the food processor.
Stage: Smooth foods
Preparation time: 10 minutes
Cooking time: 17 minutes
Yield: 4 servings (3⁄4 cup each)
2 medium carrots, cut into quarters2 medium red potatoes, cut into quarters1 egg1⁄4 cup grated Asiago cheese, divided1 tablespoon butter
1 tablespoon fat-free sour cream1⁄4 teaspoon Dijon mustard1⁄2 teaspoon salt1⁄8 teaspoon cayenne pepper
1 Place quartered carrots and potatoes into a large pot and cover with cold water. Bring to a boil and cook until tender, about 15 minutes depending on their size. Drain.
24_640180-ch17.indd 25624_640180-ch17.indd 256 8/27/10 10:47 PM8/27/10 10:47 PM
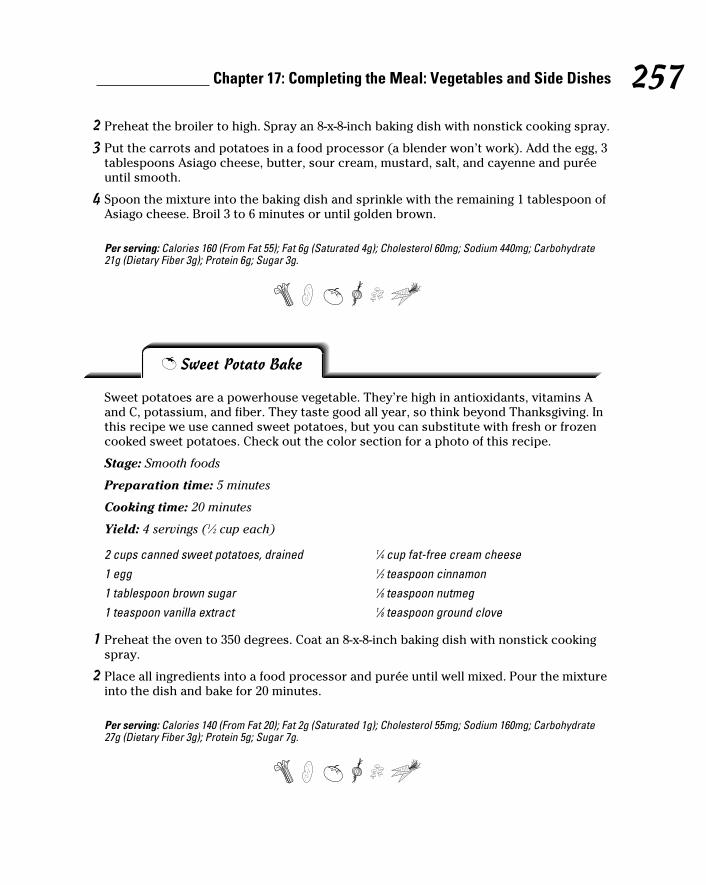
257 Chapter 17: Completing the Meal: Vegetables and Side Dishes
2 Preheat the broiler to high. Spray an 8-x-8-inch baking dish with nonstick cooking spray.
3 Put the carrots and potatoes in a food processor (a blender won’t work). Add the egg, 3 tablespoons Asiago cheese, butter, sour cream, mustard, salt, and cayenne and purée until smooth.
4 Spoon the mixture into the baking dish and sprinkle with the remaining 1 tablespoon of Asiago cheese. Broil 3 to 6 minutes or until golden brown.
Per serving: Calories 160 (From Fat 55); Fat 6g (Saturated 4g); Cholesterol 60mg; Sodium 440mg; Carbohydrate 21g (Dietary Fiber 3g); Protein 6g; Sugar 3g.
T Sweet Potato Bake
Sweet potatoes are a powerhouse vegetable. They’re high in antioxidants, vitamins A and C, potassium, and fiber. They taste good all year, so think beyond Thanksgiving. In this recipe we use canned sweet potatoes, but you can substitute with fresh or frozen cooked sweet potatoes. Check out the color section for a photo of this recipe.
Stage: Smooth foods
Preparation time: 5 minutes
Cooking time: 20 minutes
Yield: 4 servings (1⁄2 cup each)
2 cups canned sweet potatoes, drained1 egg1 tablespoon brown sugar1 teaspoon vanilla extract
1⁄4 cup fat-free cream cheese1⁄2 teaspoon cinnamon1⁄8 teaspoon nutmeg1⁄8 teaspoon ground clove
1 Preheat the oven to 350 degrees. Coat an 8-x-8-inch baking dish with nonstick cooking spray.
2 Place all ingredients into a food processor and purée until well mixed. Pour the mixture into the dish and bake for 20 minutes.
Per serving: Calories 140 (From Fat 20); Fat 2g (Saturated 1g); Cholesterol 55mg; Sodium 160mg; Carbohydrate 27g (Dietary Fiber 3g); Protein 5g; Sugar 7g.
24_640180-ch17.indd 25724_640180-ch17.indd 257 8/27/10 10:47 PM8/27/10 10:47 PM
258 Part III: Simple Recipes to Enjoy Anytime
Making a Little Go a Long Way: Pasta Side Dishes
Pasta doesn’t have to be a food of the past after weight loss surgery. Granted, some pastas work better than others, and chances are you won’t be able to eat a whole bowl of pasta like you did before. Being restricted to a smaller portion size is just part of the reason. The type of flour makes the difference in how well it sets in the pouch.
Pasta made with white flour typically doesn’t work well because it sticks together and forms big lumps. If you’ve ever cooked pasta, put it in the drainer without rinsing, and left it for a few minutes, you know that you ended up with a big clump of noodles all stuck together. That’s what happens to it in your pouch, too, and you won’t feel good. Whole-wheat pasta has a lot more fiber and doesn’t clump together after cooking, so it won’t lump up in your pouch as much, either.
Pasta can be served as a main dish or a side dish. What’s the difference? If the recipe contains a protein food like chicken or seafood, consider it a main dish. If there isn’t a protein food in the recipe, consider it a side dish and pair it with a protein food. Pasta is an especially good side dish when paired with lots of vegetables.
Here are a few tips for cooking pasta:
✓ When cooked correctly, pasta is al dente: soft to the touch with a slight firmness in the center. However, pasta will probably set better in the pouch if you cook it until it’s soft all the way through. No two packaged pastas are the same, so be sure to read the directions before cooking. Contrary to popular belief, throwing the pasta in the air and having it stick the ceiling is not an accurate way to test doneness.
✓ Don’t add oil to the water when cooking pasta. The oil coats the pasta and keeps sauces and other foods from clinging to it.
Sweet potatoes versus yamsSweet potatoes and yams are not the same thing. Most of the “yams” you see in the grocery store are really sweet potatoes. The USDA requires that anything called a yam also be labeled “sweet potato,” but they come from
different botanical families. Sweet potatoes are about the size of regular potatoes, yams can grow up to 70 pounds! Yams are not as moist or as sweet as sweet potatoes and contain less beta-carotene.
24_640180-ch17.indd 25824_640180-ch17.indd 258 8/27/10 10:47 PM8/27/10 10:47 PM
259 Chapter 17: Completing the Meal: Vegetables and Side Dishes
✓ Add salt to the water when cooking pasta. Salt adds flavor to the pasta, and if it’s not added to the water it’s almost impossible to make your pasta flavorful after cooking. Use 1 teaspoon of salt for every gallon of water used.
T Creamy Romano Asparagus Pasta
Asparagus and Romano cheese are a perfect combination, and when they’re tossed in a fresh lemon-cream sauce with a hint of tarragon, your taste buds will sing. We save you some cooking time by cooking the pasta and asparagus together in the same pot.
Stage: Regular foods
Preparation time: 10 minutes
Cooking time: 15 minutes
Yield: 6 servings (3⁄4 cup each)
2 ounces dry whole-wheat rigatoni pasta2 cups asparagus pieces (peel and cut the top half into 3⁄4-inch pieces)3⁄4 cup fat-free half-and-half2 teaspoons whole-grain mustard2 teaspoons all-purpose flour1⁄4 teaspoon black pepper
1 teaspoon olive oil2 teaspoons minced garlic1 teaspoon minced fresh tarragon1 teaspoon lemon juice1⁄2 cup fresh grated Romano cheese, divided
1 Cook pasta according to the package directions, adding the asparagus and stirring occasionally for the last three minutes. Drain and return to the pot.
2 Meanwhile, whisk half-and-half, mustard, flour, and pepper in a medium bowl.
3 Heat oil in a small saucepan over medium-high heat. Add garlic and cook, stirring constantly, for 30 seconds. Whisk in the half-and-half mixture. Bring to a simmer, stirring constantly, and cook until thickened, 2 minutes. Stir in tarragon and lemon juice.
4 Stir the cooked pasta and asparagus into the sauce and cook over medium-high heat, stirring constantly, until the sauce is thick, creamy, and coats the pasta.
5 Stir 1⁄4 cup Romano cheese into the pasta until combined. Serve the pasta topped with the remaining 1⁄4 cup Romano cheese.
Per serving: Calories 110 (From Fat 40); Fat 4g (Saturated 2g); Cholesterol 5mg; Sodium 200mg; Carbohydrate 13g (Dietary Fiber 2g); Protein 6g; Sugar 3g.
24_640180-ch17.indd 25924_640180-ch17.indd 259 8/27/10 10:47 PM8/27/10 10:47 PM
260 Part III: Simple Recipes to Enjoy Anytime
T Tuscan Pasta Sauté
This tasty, healthy recipe tosses fresh plum tomatoes, peppers, carrots, and zucchini with olive oil and garlic. To keep the vegetable colors bright, don’t overcook them. Overcooked vegetables also lose more vitamin C than properly cooked vegetables.
Stage: Regular foods
Preparation time: 10 minutes
Cooking time: 15 minutes
Yield: 4 servings (3⁄4 cup each)
2 ounces dry whole-wheat angel hair pasta1 tablespoon olive oil2 cloves fresh garlic, minced1⁄2 cup chopped plum tomatoes1⁄2 cup peeled and thin sliced carrots
1⁄2 cup thin strips green bell peppers1⁄2 cup chopped zucchini1⁄4 cup chopped fresh basil1⁄2 teaspoon salt1⁄4 teaspoon red pepper flakes
1 Cook pasta according to the package directions and set aside.
2 Heat oil in a large sauté pan over medium-high heat. Add garlic and sauté for 30 seconds. Add tomatoes, carrots, peppers, and zucchini, and sauté for 3 minutes.
3 Mix in the cooked pasta and sauté for 2 minutes. Toss with fresh basil, salt, and red pepper flakes.
Per serving: Calories 100 (From Fat 40); Fat 4g (Saturated 1g); Cholesterol 0mg; Sodium 310mg; Carbohydrate 15g (Dietary Fiber 3g); Protein 3g; Sugar 3g.
Putting Veggies and Side Salads in the Spotlight
Whether eaten cooked or raw, vegetables are a must at every meal. They’re low in calories, fat, and sodium, and add flavor, color, and texture to most of your favorite dishes. In this section we provide you with some cooked veggie recipes as well as some delicious side salads.
Rinse and scrub fresh vegetables to remove any dirt or chemicals that may remain from the farm. Don’t cut vegetables in advance if you can avoid it — they begin to lose quality and nutrients and go bad in two to three days.
24_640180-ch17.indd 26024_640180-ch17.indd 260 8/27/10 10:47 PM8/27/10 10:47 PM
261 Chapter 17: Completing the Meal: Vegetables and Side Dishes
When cooking vegetables, the variety and size of the vegetables matter greatly. You want to use pieces of vegetables that take the same amount of cook time. Hard vegetables like potatoes and carrots should be cut smaller and faster-cooking veggies like broccoli and squash should be cut into larger pieces so when they’re all cooked together they finish cooking at the same time.
For best results, store vegetables in a cool, dark place. The best spot is in your refrigerator crisper drawer. The exception here is tomatoes; store these at room temperature. If you’re not sure of the best way to store your veggies, look at how they’re displayed at the store. You won’t find tomatoes in the cooler and you won’t find lettuce in unchilled cases.
T Three Bean Salad
This salad is easy to make and really tastes great. It’s packed with protein and plenty of fresh dill, garlic, and lemon juice. This salad tastes best when made a day ahead of time. To turn this into a main dish, add shrimp or cooked chicken.
Stage: Regular foods
Preparation time: 10 minutes
Yield: 6 servings (1⁄2 cup each)
1⁄2 cup garbanzo beans, drained and rinsed1 cup no-salt-added kidney beans, drained and rinsed1 cup no-salt-added black beans, drained and rinsed1⁄2 small onion, chopped fine
1⁄4 cup thinly sliced green olivesOne 4-ounce can mushrooms, drained1⁄4 cup finely chopped fresh dill3 cloves garlic, minced1 tablespoon olive oil1⁄4 cup fresh lemon juice
Place all ingredients into a large mixing bowl and mix well.
Per serving: Calories 90 (From Fat 30); Fat 3g (Saturated 0g); Cholesterol 0mg; Sodium 320mg; Carbohydrate 13g (Dietary Fiber 4g); Protein 4g; Sugar 2g.
24_640180-ch17.indd 26124_640180-ch17.indd 261 8/27/10 10:47 PM8/27/10 10:47 PM
262 Part III: Simple Recipes to Enjoy Anytime
Southern-Style Green Beans
Bacon and green beans are best friends in the Southern United States. Just a little bit of bacon goes a long way in adding flavor. Add in a little garlic and dill, and you’ll never want green beans any other way. Fresh green beans are available all year but are at their best in the summer. Southern green beans are meant to be soft and cooked longer. This gives the green beans a chance absorb more flavor.
Stage: Regular foods
Preparation time: 10 minutes
Cooking time: 45 minutes
Yield: 8 servings (1⁄2 cup each)
4 slices chopped bacon1 large onion, chopped2 teaspoons chopped garlic11⁄2 pounds fresh green beans, cleaned and ends removed
1⁄4 cup chopped fresh dill1 teaspoon black pepperWater
1 In a medium pot over medium-high heat, add bacon and sauté until bacon is well done. Do not drain fat. Add onion and garlic to pan and sauté for 3 minutes.
2 Add fresh green beans, dill, and pepper to the pot, and fill pot with just enough water to cover the beans. Simmer on low for 30 minutes or until beans become soft. Drain.
Per serving: Calories 60 (From Fat 15); Fat 2g (Saturated 1g); Cholesterol 5mg; Sodium 100mg; Carbohydrate 8g (Dietary Fiber 3g); Protein 3g; Sugar 2g.
T Cucumber Cheese Salad
With fresh cucumbers and diced Monterey Jack cheese, this salad is the best. Marinating with onion, pepper, white wine vinegar, Dijon mustard, and Worcestershire sauce kicks up a traditional cucumber salad a few notches. (Betcha didn’t know that 96 percent of the weight of a cucumber comes from the water content.)
Stage: Regular foods
Preparation time: 10 minutes
Chilling time: 30 minutes
Yield: 4 servings (1⁄2 cup each)
24_640180-ch17.indd 26224_640180-ch17.indd 262 8/27/10 10:47 PM8/27/10 10:47 PM
263 Chapter 17: Completing the Meal: Vegetables and Side Dishes
1 Combine the cucumber, red pepper, green onion, celery, and cheese in a medium bowl.
2 Combine yogurt, white wine vinegar, mustard, Worcestershire sauce, salt, and pepper in a small bowl.
3 Pour the dressing over the vegetables and cheese. Mix well and refrigerate for 30 to 60 minutes before serving.
Per serving: Calories 80 (From Fat 45); Fat 5g (Saturated 3g); Cholesterol 15mg; Sodium 230mg; Carbohydrate 5g (Dietary Fiber 1g); Protein 5g; Sugar 3g.
1 medium cucumber, peeled and thinly sliced1⁄2 cup julienne cut red bell pepper1⁄4 cup sliced green onion1⁄4 cup finely diced celery2 ounces Monterey Jack cheese, cut into small cubes
1⁄4 cup plain nonfat yogurt11⁄2 teaspoons white wine vinegar1⁄2 teaspoon Dijon mustard1⁄4 teaspoon Worcestershire sauce1⁄8 teaspoon salt1⁄8 teaspoon black pepper
T Avocado, Tomato, and Feta Salad
This easy salad has just the right blend of fresh vegetables and herbs with the tanginess of feta cheese. Be sure to allow enough time for chilling to blend the flavors.
Stage: Regular foods
Preparation time: 10 minutes
Chilling time: 1 hour
Yield: 4 servings (1⁄2 cup each)
1⁄2 medium cucumber, peeled, seeded, and chopped2 chopped Roma tomatoes2 tablespoons finely chopped green onions1 clove garlic, minced1 tablespoons minced fresh parsley
1 teaspoon chopped fresh dill2 ounces crumbled reduced-fat feta cheese1 teaspoon fresh lemon juice1 tablespoon olive oil1⁄2 avocado, sliced into 8 slices
1 Combine the cucumber, tomato, green onions, garlic, parsley, dill, feta cheese, lemon juice, and olive oil in a bowl and refrigerate for 1 hour.
2 Divide salad mixture evenly on four plates and top each with 2 slices of avocado.
Per serving: Calories 110 (From Fat 80); Fat 9g (Saturated 3g); Cholesterol 5mg; Sodium 200mg; Carbohydrate 5g (Dietary Fiber 3g); Protein 4g; Sugar 1g.
24_640180-ch17.indd 26324_640180-ch17.indd 263 8/27/10 10:47 PM8/27/10 10:47 PM
264 Part III: Simple Recipes to Enjoy Anytime
Sweet-Pea Salad
The sharpness of the cheese and smoky flavor of the turkey bacon make this sweet-pea salad a perfect accompaniment for meals with poultry, pork, and beef. This can be made the day before and even tastes better the next day. Turkey bacon is a good alter-native for people who do not eat pork.
Stage: Regular foods
Preparation time: 15 minutes
Chilling time: 2 hours
Yield: 8 servings (1⁄2 cup each)
3 cups frozen sweet green peas, thawed2 slices turkey bacon, cooked crisp and chopped1⁄4 cup shredded low-fat cheddar cheese1 tablespoon canola oil1⁄4 cup finely chopped onion2 plum tomatoes, chopped
2 cloves garlic, minced1⁄2 cup chopped red bell pepper1⁄4 cup finely chopped fresh parsley2 tablespoons lemon juice1⁄2 teaspoon salt1⁄4 teaspoon pepper
Place all ingredients into a large bowl and mix well. Refrigerate for 2 to 3 hours before serving.
Per serving: Calories 80 (From Fat 25); Fat 3g (Saturated 0g); Cholesterol 5mg; Sodium 270mg; Carbohydrate 9g (Dietary Fiber 3g); Protein 4g; Sugar 3g.
T Edamame Salad
This colorful salad tastes as good as it looks. And to top it off, it’s good for you! Edamame, soy beans, are a high-quality protein and a good source of fiber. They are also one of the few plant sources that contain omega-3 fatty acids.
Stage: Regular foods
Preparation time: 15 minutes
Yield: 4 servings (1⁄2 cup each)
8 ounces frozen shelled edamame11⁄2 cups frozen petite corn kernels1⁄2 red bell pepper, chopped1⁄2 cup sliced green onion
1⁄4 cup finely chopped red onion1⁄4 cup chopped fresh flat-leaf parsley1 tablespoon chopped fresh oregano or basilDressing (see the following recipe)
24_640180-ch17.indd 26424_640180-ch17.indd 264 8/27/10 10:47 PM8/27/10 10:47 PM
265 Chapter 17: Completing the Meal: Vegetables and Side Dishes
1 Prepare the edamame according to package directions. Drain, rinse with cold water, and drain again thoroughly.
2 Combine edamame, corn, red bell pepper, green onion, red onion, parsley, and oregano or basil in a large bowl. Pour dressing over veggies and toss to coat.
Dressing
1⁄4 cup fresh lemon juice1 tablespoon Dijon mustard1 tablespoon olive oil
1⁄4 teaspoon salt1⁄4 teaspoon fresh ground black pepper
In a small bowl, whisk together all ingredients.
Per serving: Calories 180 (From Fat 60); Fat 7g (Saturated 1g); Cholesterol 0mg; Sodium 240mg; Carbohydrate 22g (Dietary Fiber 4g); Protein 9g; Sugar 7g.
T Waldorf Salad
Definitely a crowd pleaser, this apple salad is perfect with fish and chicken dishes. Although traditional Waldorf salad includes celery, we leave it out because the combination of fibrous celery and grape skins can cause sticking.
Stage: Regular foods
Preparation time: 15 minutes
Chilling time: 2 hours
Yield: 6 servings (1⁄2 cup each)
2 cups peeled and chopped Granny Smith apples1 tablespoon lemon juice3 tablespoons light mayonnaise1⁄3 cup nonfat plain Greek yogurt
1⁄2 cup halved grapes3 tablespoons chopped walnuts2 tablespoons sugar substitute
Place all ingredients into a medium mixing bowl and mix well. Refrigerate before serving.
Per serving: Calories 90 (From Fat 45); Fat 5g (Saturated 1g); Cholesterol 5mg; Sodium 70mg; Carbohydrate 10g (Dietary Fiber 1g); Protein 2g; Sugar 7g.
24_640180-ch17.indd 26524_640180-ch17.indd 265 8/27/10 10:47 PM8/27/10 10:47 PM
266 Part III: Simple Recipes to Enjoy Anytime
T Oriental Slaw
Coleslaw is tasty, but oriental slaw is better. Sprinkling with sunflower seeds and almonds and finishing with green onions and sesame oil makes this dish impeccable. Cabbage is a cruciferous vegetable that has been shown to reduce the risk of certain types of cancer.
Stage: Regular foods
Preparation time: 15 minutes
Chilling time: 2 hours
Yield: 6 servings (1⁄2 cup each)
1⁄4 cup green onion, sliced2 cups finely shredded cabbage1 cup shredded carrots1⁄4 cup water chestnuts, drained and cut into thin strips1⁄4 cup julienne cut red bell pepper1⁄4 cup unsalted sunflower seeds
1⁄4 cup sliced almonds3 tablespoons sugar substitute1 tablespoon sesame oil3⁄4 teaspoon salt1 teaspoon black pepper4 tablespoons cider vinegar
Place all ingredients into a medium bowl and mix well. Refrigerate before serving.
Tip: No time to shred cabbage and carrots? Buy it already shredded and bagged in the produce section of the supermarket.
Per serving: Calories 100 (From Fat 60); Fat 1g (Saturated 6g); Cholesterol 0mg; Sodium 310mg; Carbohydrate 7g (Dietary Fiber 2g); Protein 3g; Sugar 2g.
24_640180-ch17.indd 26624_640180-ch17.indd 266 8/27/10 10:47 PM8/27/10 10:47 PM
Chapter 18
Smart SnackingIn This Chapter▶ Snacking on healthy fruits
▶ Satisfying your urge to crunch
▶ Making sensible snacks with cheese
Everyone has that time of day when the urge to snack hits you. Snacks are okay, but
grazing is not. What’s the difference? A snack is eating a set amount of food at one time, but grazing is that nibbling and picking that goes on all day and leads to weight regain. Although your pouch may not hold a lot of food at one time, if you eat every hour it will hold a lot of food throughout the day. That’s why planning your snacks is just as important as planning your meals.
Your surgeon may have recommendations for you about snacking. If you had GBP, you may find that you feel better if you eat about every three hours, keeping your blood sugar stable. If you had AGB and go too long between eating, you may find yourself getting too hungry and then wanting to eat too much and too fast.
If you have had weight loss surgery a few weeks or months ago, your surgeon or dietitian may advise you to choose protein supplement-type snacks, such as shakes or bars, so that you can meet your protein goals before choosing snacks that have a lower protein content.
What makes a good snack? The same rules apply for snacks as for meals. Include some protein, carbs, and fat. A snack with some fiber keeps you feeling fuller longer than a snack of a dry, crumbly, high-carb food like pretzels. If you want to eat some crackers, make them whole grain and add a protein-based food to them. The snack recipes in this chapter are sure to keep your hunger at bay and help you meet your nutritional needs.
Recipes in This Chapter
T Apple with Honey Almond Butter
T Pineapple with RicottaT Whole-Wheat Cheddar
PitaT Carrots with Homemade
Ranch DipT Parmesan Popcorn
DelightT Spicy AlmondsT Peanut Butter Honey
over Rice CakesT Pears and GorgonzolaT Mexi Cheese Cubes
25_640180-ch18.indd 26725_640180-ch18.indd 267 8/27/10 10:48 PM8/27/10 10:48 PM
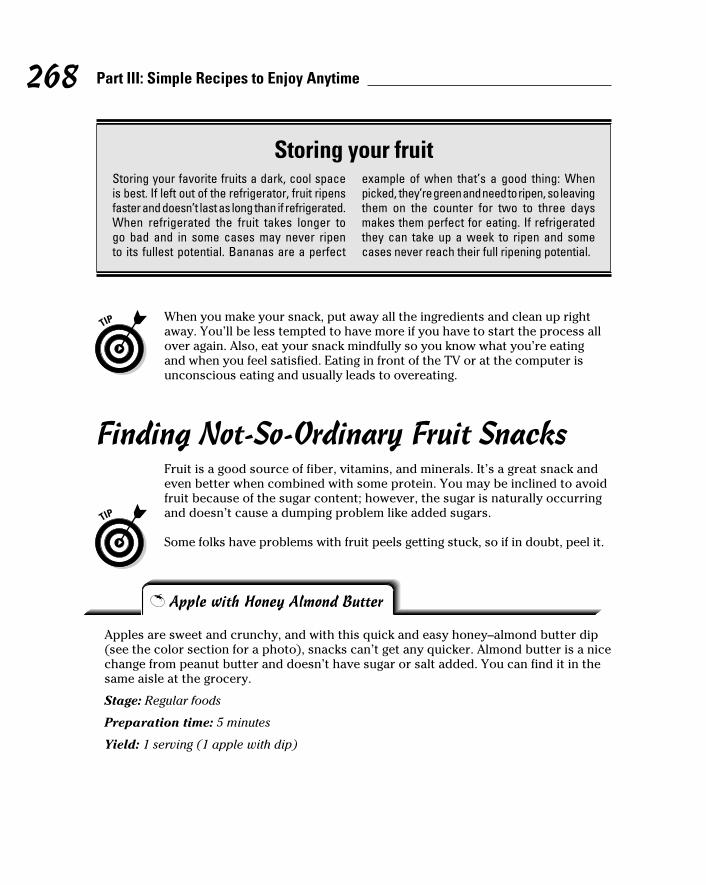
268 Part III: Simple Recipes to Enjoy Anytime
When you make your snack, put away all the ingredients and clean up right away. You’ll be less tempted to have more if you have to start the process all over again. Also, eat your snack mindfully so you know what you’re eating and when you feel satisfied. Eating in front of the TV or at the computer is unconscious eating and usually leads to overeating.
Finding Not-So-Ordinary Fruit SnacksFruit is a good source of fiber, vitamins, and minerals. It’s a great snack and even better when combined with some protein. You may be inclined to avoid fruit because of the sugar content; however, the sugar is naturally occurring and doesn’t cause a dumping problem like added sugars.
Some folks have problems with fruit peels getting stuck, so if in doubt, peel it.
Storing your fruitStoring your favorite fruits a dark, cool space is best. If left out of the refrigerator, fruit ripens faster and doesn’t last as long than if refrigerated. When refrigerated the fruit takes longer to go bad and in some cases may never ripen to its fullest potential. Bananas are a perfect
example of when that’s a good thing: When picked, they’re green and need to ripen, so leaving them on the counter for two to three days makes them perfect for eating. If refrigerated they can take up a week to ripen and some cases never reach their full ripening potential.
T Apple with Honey Almond Butter
Apples are sweet and crunchy, and with this quick and easy honey–almond butter dip (see the color section for a photo), snacks can’t get any quicker. Almond butter is a nice change from peanut butter and doesn’t have sugar or salt added. You can find it in the same aisle at the grocery.
Stage: Regular foods
Preparation time: 5 minutes
Yield: 1 serving (1 apple with dip)
25_640180-ch18.indd 26825_640180-ch18.indd 268 8/27/10 10:48 PM8/27/10 10:48 PM

269 Chapter 18: Smart Snacking
2 teaspoons almond butter1⁄2 teaspoon honey
1⁄8 teaspoon cinnamon1 small apple, cored, peeled and cut into 8 slices
In a small bowl combine almond butter, honey, and cinnamon and mix well. Serve with apple slices for dipping.
Note: 16 grams of sugar in this recipe come from the apple. We’ve added just a touch of honey, so it won’t be a problem if you are prone to dumping syndrome. Eating too much honey at one time can give you dumping because it is a concentrated sugar.
Per serving: Calories 150 (From Fat 60); Fat 6g (Saturated 1g); Cholesterol 0mg; Sodium 50mg; Carbohydrate 26g (Dietary Fiber 2g); Protein 2g; Sugar 19g.
T Pineapple with Ricotta
Creamy ricotta cheese and pineapple make a good match, and when they’re paired with low-fat graham crackers, your taste buds will be singing. Graham crackers are made from graham flour, which is a combination of white flour, ground wheat bran, and wheat germ.
Stage: Regular foods
Preparation time: 5 minutes
Yield: 1 serving (3⁄4 cup)
1⁄4 cup crushed pineapple, packed in juice, drained1⁄4 cup part-skim ricotta cheese1⁄2 teaspoon lemon juice
1 teaspoon sugar substitute4 low-fat graham cracker squares
In a small bowl mix pineapple, ricotta, lemon juice, and sugar substitute. Serve with graham crackers.
Per serving: Calories 170 (From Fat 55); Fat 6g (Saturated 3g); Cholesterol 20mg; Sodium 150mg; Carbohydrate 22g (Dietary Fiber 1g); Protein 8g; Sugar 11g.
25_640180-ch18.indd 26925_640180-ch18.indd 269 8/27/10 10:48 PM8/27/10 10:48 PM
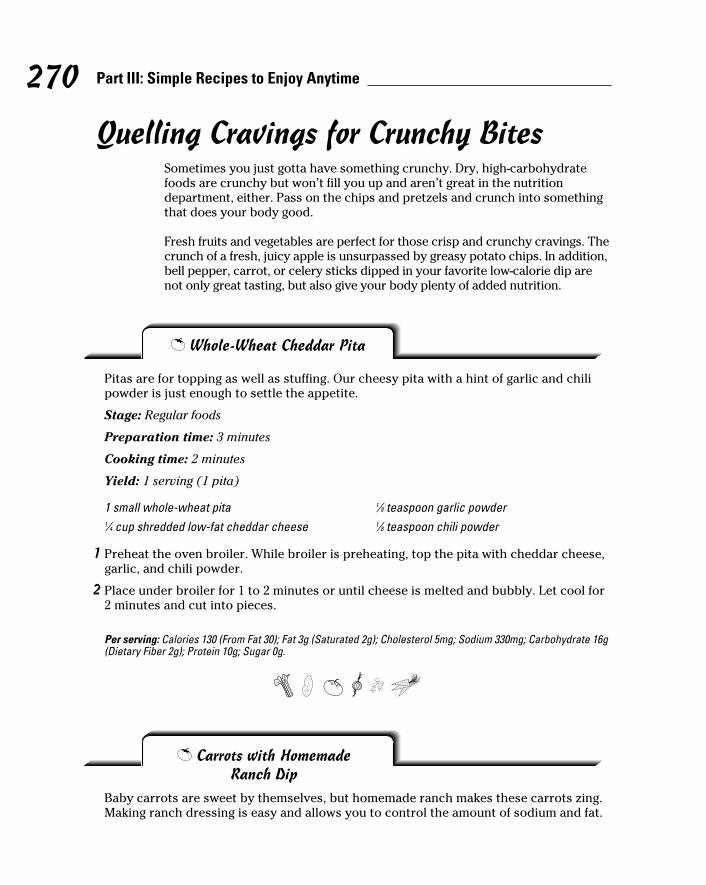
270 Part III: Simple Recipes to Enjoy Anytime
Quelling Cravings for Crunchy BitesSometimes you just gotta have something crunchy. Dry, high-carbohydrate foods are crunchy but won’t fill you up and aren’t great in the nutrition department, either. Pass on the chips and pretzels and crunch into something that does your body good.
Fresh fruits and vegetables are perfect for those crisp and crunchy cravings. The crunch of a fresh, juicy apple is unsurpassed by greasy potato chips. In addition, bell pepper, carrot, or celery sticks dipped in your favorite low-calorie dip are not only great tasting, but also give your body plenty of added nutrition.
T Whole-Wheat Cheddar Pita
Pitas are for topping as well as stuffing. Our cheesy pita with a hint of garlic and chili powder is just enough to settle the appetite.
Stage: Regular foods
Preparation time: 3 minutes
Cooking time: 2 minutes
Yield: 1 serving (1 pita)
1 small whole-wheat pita1⁄4 cup shredded low-fat cheddar cheese
1⁄8 teaspoon garlic powder1⁄8 teaspoon chili powder
1 Preheat the oven broiler. While broiler is preheating, top the pita with cheddar cheese, garlic, and chili powder.
2 Place under broiler for 1 to 2 minutes or until cheese is melted and bubbly. Let cool for 2 minutes and cut into pieces.
Per serving: Calories 130 (From Fat 30); Fat 3g (Saturated 2g); Cholesterol 5mg; Sodium 330mg; Carbohydrate 16g (Dietary Fiber 2g); Protein 10g; Sugar 0g.
T Carrots with Homemade Ranch Dip
Baby carrots are sweet by themselves, but homemade ranch makes these carrots zing. Making ranch dressing is easy and allows you to control the amount of sodium and fat.
25_640180-ch18.indd 27025_640180-ch18.indd 270 8/27/10 10:48 PM8/27/10 10:48 PM
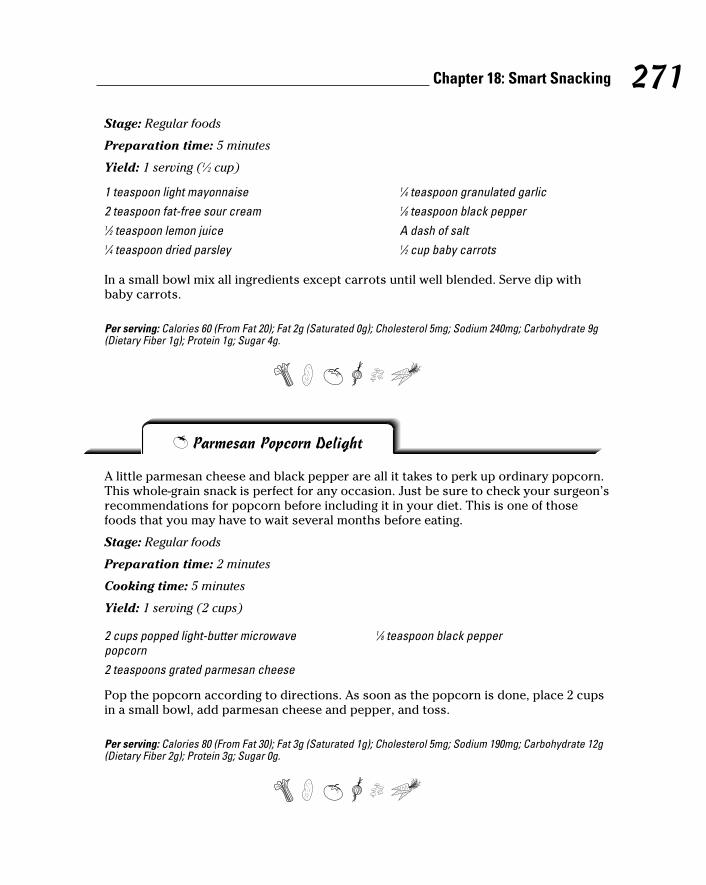
271 Chapter 18: Smart Snacking
Stage: Regular foods
Preparation time: 5 minutes
Yield: 1 serving (1⁄2 cup)
1 teaspoon light mayonnaise2 teaspoon fat-free sour cream1⁄2 teaspoon lemon juice1⁄4 teaspoon dried parsley
1⁄4 teaspoon granulated garlic1⁄8 teaspoon black pepperA dash of salt1⁄2 cup baby carrots
T Parmesan Popcorn Delight
A little parmesan cheese and black pepper are all it takes to perk up ordinary popcorn. This whole-grain snack is perfect for any occasion. Just be sure to check your surgeon’s recommendations for popcorn before including it in your diet. This is one of those foods that you may have to wait several months before eating.
Stage: Regular foods
Preparation time: 2 minutes
Cooking time: 5 minutes
Yield: 1 serving (2 cups)
2 cups popped light-butter microwave popcorn2 teaspoons grated parmesan cheese
1⁄8 teaspoon black pepper
Pop the popcorn according to directions. As soon as the popcorn is done, place 2 cups in a small bowl, add parmesan cheese and pepper, and toss.
Per serving: Calories 80 (From Fat 30); Fat 3g (Saturated 1g); Cholesterol 5mg; Sodium 190mg; Carbohydrate 12g (Dietary Fiber 2g); Protein 3g; Sugar 0g.
In a small bowl mix all ingredients except carrots until well blended. Serve dip with baby carrots.
Per serving: Calories 60 (From Fat 20); Fat 2g (Saturated 0g); Cholesterol 5mg; Sodium 240mg; Carbohydrate 9g (Dietary Fiber 1g); Protein 1g; Sugar 4g.
25_640180-ch18.indd 27125_640180-ch18.indd 271 8/27/10 10:48 PM8/27/10 10:48 PM
272 Part III: Simple Recipes to Enjoy Anytime
T Spicy Almonds
The little almond is a cardio-healthy food with its monounsaturated fat. Plus, it’s high in antioxidants. Plain almonds are good but adding a little spice and olive oil makes them great. Although almonds are high in fat, it is the “good” fat; portion control is important.
Stage: Regular foods
Preparation time: 3 minutes
Cooking time: 5 minutes
Yield: 1 serving (1⁄4 cup)
1⁄4 cup whole raw almonds1⁄4 teaspoon olive oilA dash of salt
1⁄8 teaspoon onion powder1⁄8 teaspoon red pepper flakes
1 Preheat the oven to 350 degrees. In a small bowl add all the ingredients and mix well.
2 Place the mix on a ungreased cookie sheet and roast for 5 minutes, turning the almonds once. Let cool.
Per serving: Calories 220 (From Fat 170); Fat 19g (Saturated 2g); Cholesterol 0mg; Sodium 160mg; Carbohydrate 8g (Dietary Fiber 4g); Protein 7g; Sugar 2g.
T Peanut Butter Honey over Rice Cakes
Rice cakes are bland by themselves, but when you give them a smear of peanut butter with honey, they can become one of your favorite snack foods. We like to use creamy peanut butter because it’s easier to spread on the rice cake. Remember to check the ingredient label on your peanut butter: You want “natural” peanut butter that’s just made up of peanuts and salt.
Stage: Regular foods
Preparation time: 3 minutes
Yield: 1 serving (2 rice cakes each)
1 tablespoon natural creamy peanut butter1⁄2 teaspoon honey
1⁄4 teaspoon vanilla extract2 brown rice cakes
25_640180-ch18.indd 27225_640180-ch18.indd 272 8/27/10 10:48 PM8/27/10 10:48 PM
273 Chapter 18: Smart Snacking
Making Everything Better with CheeseMoooove over for cheese, a favorite food for a lot of folks. Creamy or hard, sharp or mild; a type of cheese exists for even the pickiest of eaters.
Keep in mind that because of its high fat content, cheese is not a low-calorie food. Cheese is labeled with different levels of fat: regular, reduced fat, and fat free. Regular cheese is the highest in fat and calories. Reduced fat cheese has less fat but is not a low-fat food. It’s made with 2 percent milk and has 25 per-cent less fat than regular cheese. Reduced fat cheese melts and can be used in cooking. Fat-free cheeses have a rubbery texture and do not melt. They only work if you eat a slice on a cold sandwich or sprinkle some on a salad.
T Pears and Gorgonzola
The sharpness of Gorgonzola and the sweet crispness of pears make for perfect snaking when your craving is for something tangy and sweet. Store pears loose in the refrigerator and ripen them on the counter. Keep them away from strong-smelling foods because they absorb odors easily.
Stage: Regular foods
Preparation time: 3 minutes
Yield: 1 serving (1 pear)
2 teaspoons Gorgonzola crumbles1 teaspoon fat-free cream cheese, softened1⁄8 teaspoon black pepper
1 small pear, peeled, cored, and cut into 6 sections
In a small bowl combine gorgonzola, cream cheese, and pepper and mix well. Serve with pear slices.
Note: Some pears have a thin skin and may not cause you sticking problems. We peel ours just to be save. Prevention is the best remedy for food sticking.
Per serving: Calories 110 (From Fat 20); Fat 2g (Saturated 1g); Cholesterol 5mg; Sodium 100mg; Carbohydrate 24g (Dietary Fiber 3g); Protein 2g; Sugar 15g.
Place peanut butter, honey, and vanilla extract into a small bowl and mix well. Spread over rice cakes.
Per serving: Calories 180 (From Fat 80); Fat 9g (Saturated 1g); Cholesterol 0mg; Sodium 120mg; Carbohydrate 21g (Dietary Fiber 2g); Protein 5g; Sugar 4g.
25_640180-ch18.indd 27325_640180-ch18.indd 273 8/27/10 10:48 PM8/27/10 10:48 PM
274 Part III: Simple Recipes to Enjoy Anytime
T Mexi Cheese Cubes
Plain cheese cubes can be boring, but add a little spice and cheese becomes an awesome adventure.
Stage: Soft foods
Preparation time: 3 minutes
Yield: 1 serving (1⁄2 cup)
1⁄2 cup small cubes reduced-fat Monterey Jack cheese1⁄4 teaspoon chili powder1⁄4 teaspoon cumin powder
1⁄4 teaspoon garlic powder1⁄4 teaspoon onion powder
In a small bowl add all ingredients and mix well. (The seasoning sticks to the outside of the cheese.) Keep cold until ready to serve.
Per serving: Calories 170 (From Fat 110); Fat 12g (Saturated 7g); Cholesterol 40mg; Sodium 490mg; Carbohydrate 4g (Dietary Fiber 1g); Protein 15g; Sugar 0g.
25_640180-ch18.indd 27425_640180-ch18.indd 274 8/27/10 10:48 PM8/27/10 10:48 PM
Chapter 19
Divine DessertsIn This Chapter▶ Keeping your sweet tooth under control with fruit desserts
▶ Satisfying your desire for comforting smooth and chewy treats
Desserts take on a new meaning after weight loss surgery. You may have had a sweet
tooth before surgery and now you notice your desire for sweets has changed. This can be from the surgery itself (if you had GBP) or simply because you eat less sugar as a part of your new lifestyle and therefore crave it less often. After weight loss surgery you can still enjoy desserts, but you need to keep some things in mind.
You don’t want to fill up your pouch with foods that don’t provide good nutrition, so choose your desserts wisely. Look for desserts that include some protein, fruit, or whole-grain carbs. Making your own sweets is healthier than buying packaged foods from the supermarket because packaged foods usually contain high-fructose corn syrup or trans fats. “Sugar-free” desserts are usually made with sugar alcohols, which doesn’t mean they’re calorie-free. Some folks have a problem tolerating sugar alcohols, as they can cause gastric discomfort, so watch the portion size if you choose to eat these foods.
Some folks decide to have GBP surgery rather than AGB because they want the possibility of getting dumping syndrome. This miserable reaction to high-sugar and/or high-fat foods helps keep people on the straight and narrow. Over time the severity of dumping syndrome usually lessens, and some folks are tempted to push the envelope to see just how much they can eat before getting sick. If you let sweets start creeping into your diet with more frequency, before you know it, your sweet tooth is back. By limiting sweets and sticking with healthier desserts like the recipes in this chapter, you can keep your sugar cravings at bay and stay on track for your weight loss goals.
Recipes in This Chapter
T Grilled BananasT Chunky Baked ApplesT Peach ParfaitT Creamy Coconut Fruit
DelightT Sweet Potato PieT Ricotta Lemon CurdT Chocolate and
Strawberry Layered Pudding
T Pumpkin CustardT Mango CreamT Oatmeal Bars
26_640180-ch19.indd 27526_640180-ch19.indd 275 8/27/10 10:48 PM8/27/10 10:48 PM

276 Part III: Simple Recipes to Enjoy Anytime
Enjoying Sweet Fruits without Added Calories
Sweet and good for you, fruit makes a fantastic dessert. Fruits provide vitamins, minerals, phytonutrients (healthy compounds found in fruits and vegetables), and fiber; plus they’re naturally low in fat and sodium. Some people have problems with fruit skins getting stuck, so if you’re in doubt about a certain fruit or your own pouch, peel the fruit to be safe.
If you had GBP, your surgeon probably gave you recommendations about how much sugar you can safely eat at one time. These recommendations, typically ranging from 8 to 15 grams of sugar, are for added sugars, not the naturally occurring sugars found in fruits and dairy foods. It’s the added sugars that will cause you problems. Unfortunately, the nutrition facts on food labels don’t tell you if the sugars are natural or added. When shopping for packaged fruit or dairy foods, check the list of ingredients for added sugars, keeping in mind that sugar travels under a lot of names.
Several different kinds of sugar substitutes are available on the market and the choice is yours. If you use a sugar substitute in a recipe that requires baking or cooking, be sure to use one that is heat-stable, like Splenda.
T Grilled Bananas
You may not think of using your grill to make a dessert, but this recipe is a perfect ending to your cookout. Grilled bananas are so naturally sweet that they’ll please any sweet tooth. Port wine is a sweet dessert wine. You can substitute it with no-sugar-added grape jelly, but it doesn’t give you the same taste. Grape jelly will make the bananas taste like candy, whereas the port wine adds a little sweetness.
Stage: Regular foods
Preparation time: 5 minutes
Cooking time: 5 minutes
Yield: 4 servings (1⁄2 banana each)
2 bananas, peeled and cut in half1 teaspoon honey
1⁄4 cup orange juice2 tablespoons port wine
26_640180-ch19.indd 27626_640180-ch19.indd 276 8/27/10 10:48 PM8/27/10 10:48 PM
277 Chapter 19: Divine Desserts
1 Preheat the grill to medium heat. In a small bowl combine honey, orange juice, and port wine.
2 Place bananas on the hot grill. With a basting brush, coat the bananas with the honey mixture.
3 Grill for 5 minutes, turning the bananas every 45 seconds and basting every time you turn. Serve warm.
Per serving: Calories 60 (From Fat 0); Fat 0g (Saturated 0g); Cholesterol 0mg; Sodium 0mg; Carbohydrate 15g (Dietary Fiber 2g); Protein 1g; Sugar 8g.
T Chunky Baked Apples
When cooked, apples become sweeter and soft. Add a little butter and cinnamon and they become dessert. If you want to make this into a meal with some protein, put these baked apples over cottage cheese.
Stage: Soft foods
Preparation time: 10 minutes
Cooking time: 30 minutes
Yield: 6 servings (3⁄4 cup each)
6 medium Granny Smith apples, peeled, cored, and chopped into chunks2 tablespoons lemon juice1 teaspoon cinnamon1⁄2 teaspoon ground ginger
2 tablespoons sugar substitute1⁄4 teaspoon salt2 tablespoons melted butter
1 Preheat the oven to 350 degrees. In a medium bowl, combine all ingredients and mix well.
2 Pour the apple mixture into a 9-x-13-inch baking dish and cover. Bake for 30 minutes, or until apples are soft. Serve warm or cold.
Per serving: Calories 120 (From Fat 35); Fat 4g (Saturated 3g); Cholesterol 10mg; Sodium 130mg; Carbohydrate 22g (Dietary Fiber 2g); Protein 0g; Sugar 16g.
26_640180-ch19.indd 27726_640180-ch19.indd 277 8/27/10 10:48 PM8/27/10 10:48 PM

278 Part III: Simple Recipes to Enjoy Anytime
T Peach Parfait
Light, fluffy, and delicious! Peaches layered with creamy yogurt and cream cheese are perfect with any meal. Store fresh peaches at room temperature, because storing them in the refrigerator decreases the flavor of the fruit. If fresh peaches aren’t available, you can substitute canned peach slices packed in juice or unsweetened frozen peaches.
Stage: Regular foods
Preparation time: 10 minutes
Chilling time: 2 hours
Yield: 4 servings (1⁄2 cup each)
1⁄2 cup plain nonfat Greek yogurt1⁄4 cup fat-free cream cheese, softened1⁄4 cup part-skim ricotta cheese
1⁄4 teaspoon vanilla extract2 tablespoons sugar substitute2 medium peaches, peeled and sliced
1 In a medium bowl add the yogurt, cream cheese, ricotta, vanilla, and sugar substitute and blend with an electric mixer for 2 minutes or until smooth.
2 Place 1⁄4 peach in the bottom of an 8-ounce glass and top with 2 tablespoons of the cream mixture. Top with another 1⁄4 peach and 2 more tablespoons of the cream mixture. Repeat for three additional glasses. Refrigerate for 2 hours before serving.
Per serving: Calories 80 (From Fat 20); Fat 2g (Saturated 2g); Cholesterol 5mg; Sodium 130mg; Carbohydrate 11g (Dietary Fiber 1g); Protein 7g; Sugar 8g.
T Creamy Coconut Fruit Delight
Here we take the old ambrosia recipe and make it bariatric friendly by reducing the sugar and fat and keeping the coconut flavor with extract. Use fresh fruit when it’s available, but you can substitute thawed frozen fruit if needed to make this refreshing dessert any time of the year.
Stage: Regular foods
Preparation time: 10 minutes
Chilling time: 2 hours
Yield: 6 servings (3⁄4 cup each)
26_640180-ch19.indd 27826_640180-ch19.indd 278 8/27/10 10:48 PM8/27/10 10:48 PM
279 Chapter 19: Divine Desserts
Combine the yogurt, powdered milk, sour cream, vanilla, coconut extract, and sugar substitute in a medium bowl. Gently fold in the banana, strawberries, and blueberries. Refrigerate for 2 hours and then stir before serving.
Per serving: Calories 80 (From Fat 0); Fat 0g (Saturated 0g); Cholesterol 0mg; Sodium 45 mg; Carbohydrate 14g (Dietary Fiber 1g); Protein 6g; Sugar 9g.
Savoring Creamy and Chewy Tasty Treats
Sometimes you just want the comforting texture of a smooth food. In the old days before weight loss surgery you may have headed to the freezer for the ice cream, but ice cream, frozen yogurt, and sherbet are foods to eat with caution. If you had AGB, these foods melt and slide right through the band with no problem, meaning you can a eat a lot of calories and never feel full. If you had GBP, either the sugar or the fat can cause dumping.
Pudding can be a great substitute for ice cream and provide some extra protein. The small prepackaged cups of pudding in the supermarket are convenient but not a good source of protein. You can increase your protein intake by making your own pudding using the packaged dry sugar-free, fat-free mix and whipping it up with nonfat milk. If you want to add more protein, add some nonfat dry powdered milk or unflavored protein powder to the mixing bowl. Other creamy foods, like ricotta cheese, puréed sweet potatoes, and pumpkin, can also satisfy your cravings in a more healthful way.
Bars, unlike cookies, can be baked all in single pan and then cut into different shapes. Bars are typically rectangular, but you can cut other shapes to make your bars more fun and bring attention to your dessert.
Always use the middle rack when baking bars to make sure they bake evenly. The bars are probably done when the edges brown and pull away from the pan. Most importantly, allow the pan to cool at least a little before cutting. Some bars may require you to cut them while warm, and others may need to cool completely first. Recipes instruct you on which method is preferred.
1 cup plain nonfat Greek yogurt1⁄3 cup nonfat dry powdered milk1⁄3 cup fat-free sour cream1 teaspoon vanilla extract1 teaspoon coconut extract
1 tablespoon sugar substitute1 medium banana, sliced1 cup sliced strawberries1⁄2 cup blueberries
26_640180-ch19.indd 27926_640180-ch19.indd 279 8/27/10 10:48 PM8/27/10 10:48 PM
280 Part III: Simple Recipes to Enjoy Anytime
T Sweet Potato Pie
If you think pumpkin pie is great, this awesome Southern twist will knock your socks off! We save you some calories from the traditional recipe by using nonfat milk and sugar substitute. Make sure you use a sugar substitute that’s good for baking.
Stage: Regular foods
Preparation time: 20 minutes
Cooking time: 1 hour 25 minutes
Yield: 10 servings (1 slice each)
1 pound sweet potatoes, peeled and cubed1⁄4 cup butter, softened1⁄3 cup sugar substitute4 eggs1 teaspoon cinnamon
1⁄2 teaspoon nutmeg1⁄4 teaspoon cloves1⁄2 teaspoon salt7 ounces evaporated nonfat milkOne 9-inch pie crust shell, unbaked
1 Boil sweet potatoes in water until easily pierced by fork, about 20 minutes. Cool slightly.
2 Preheat the oven and a cookie sheet to 375 degrees.
3 Place cooked potatoes in large mixing bowl and beat with an electric mixer until smooth. Stir in butter and sugar substitute.
4 Beat in eggs one at a time. Mix in the spices and evaporated milk, and then pour the mixture into an unbaked pie crust.
5 Bake on the preheated cookie sheet near the center of the oven for 70 minutes or until knife inserted in center comes out clean.
Per serving: Calories 220 (From Fat 100); Fat 11g (Saturated 5g); Cholesterol 85mg; Sodium 300mg; Carbohydrate 24g (Dietary Fiber 2g); Protein 6g; Sugar 6g.
T Ricotta Lemon Curd
You can enjoy this recipe even if you’re only a few weeks out from surgery. No lumps or bumps in here to get stuck!
Stage: Smooth foods
Preparation time: 5 minutes
Chilling time: 2 hours
Yield: 4 servings (1⁄2 cup each)
26_640180-ch19.indd 28026_640180-ch19.indd 280 8/27/10 10:48 PM8/27/10 10:48 PM
281 Chapter 19: Divine Desserts
Place all ingredients into a medium mixing bowl and whip for two minutes with a mixer on medium speed. Refrigerate for 2 hours before serving.
Per serving: Calories 140 (From Fat 65); Fat 7g (Saturated 5g); Cholesterol 30mg; Sodium 115mg; Carbohydrate 8g (Dietary Fiber 0g); Protein 11g; Sugar 1g.
11⁄2 cups part-skim ricotta cheese1⁄2 cup plain nonfat Greek Yogurt1⁄4 cup lemon juice
1⁄4 cup sugar substitute1⁄2 teaspoon butter extract1 teaspoon lemon zest
T Chocolate and Strawberry Layered Pudding
This attractive dish (shown in the color section) is a chocolate lover’s delight, with just a hint of almond. For a change, you can use sliced bananas instead of strawberries. Either way, we bet you’ll make this recipe again and again.
Stage: Regular foods
Preparation time: 15 minutes
Chilling time: 1 hour
Yield: 4 servings (3⁄4 cup each)
2 cups nonfat milkOne 1-ounce package sugar-free, fat-free instant chocolate pudding mix1 teaspoon almond extract
8 whole strawberries, stems removed, rinsed, and cut in half1 cup light whipped topping
1 Pour the milk into a large bowl. Add the pudding mix and almond extract and beat with a wire whisk for 2 minutes or until well blended. Let stand 5 minutes.
2 Layer an 8-ounce glass with 1⁄4 cup of pudding. Add 2 strawberry halves. Repeat both layers and top with 1⁄4 cup whipped topping. Repeat the layers for three additional glasses. Refrigerate for 1 hour before serving.
Per serving: Calories 118 (From Fat 20); Fat 2g (Saturated 2g); Cholesterol 3mg; Sodium 142mg; Carbohydrate 18g (Dietary Fiber 1g); Protein 5g; Sugar 10g.
26_640180-ch19.indd 28126_640180-ch19.indd 281 8/27/10 10:48 PM8/27/10 10:48 PM
282 Part III: Simple Recipes to Enjoy Anytime
T Pumpkin Custard
The richness of creamy Greek yogurt and the heartiness of pumpkin go perfectly together to make this no-bake dessert a true favorite. Plus it fits in the Stage 3 diet plan, so you don’t have long to wait before enjoying this one!
Stage: Smooth foods
Preparation time: 10 minutes
Chilling time: 1 hour
Yield: 4 servings (1⁄2 cup each)
1 cup pumpkin purée1⁄4 teaspoon nutmeg1 teaspoon cinnamon, divided1⁄4 teaspoon ginger
2 tablespoons brown sugar1⁄4 cup sugar substitute1 cup nonfat plain Greek yogurt2 tablespoon orange zest
1 In a large bowl combine pumpkin, nutmeg, 1⁄2 teaspoon cinnamon, ginger, brown sugar, and sugar substitute. Mix well and set aside.
2 In another large bowl mix the yogurt and orange zest.
3 In a glass add 1⁄8 cup of the pumpkin mixture and layer 1⁄8 cup of yogurt on top. Repeat both layers; then do the same for 3 additional glasses. Dust the tops with the remaining 1⁄2 teaspoon cinnamon and refrigerate for 1 hour before serving.
Per serving: Calories 80 (From Fat 0); Fat 0g (Saturated 0g); Cholesterol 0mg; Sodium 25mg; Carbohydrate 13g (Dietary Fiber 3g); Protein 6g; Sugar 9g.
26_640180-ch19.indd 28226_640180-ch19.indd 282 8/27/10 10:48 PM8/27/10 10:48 PM
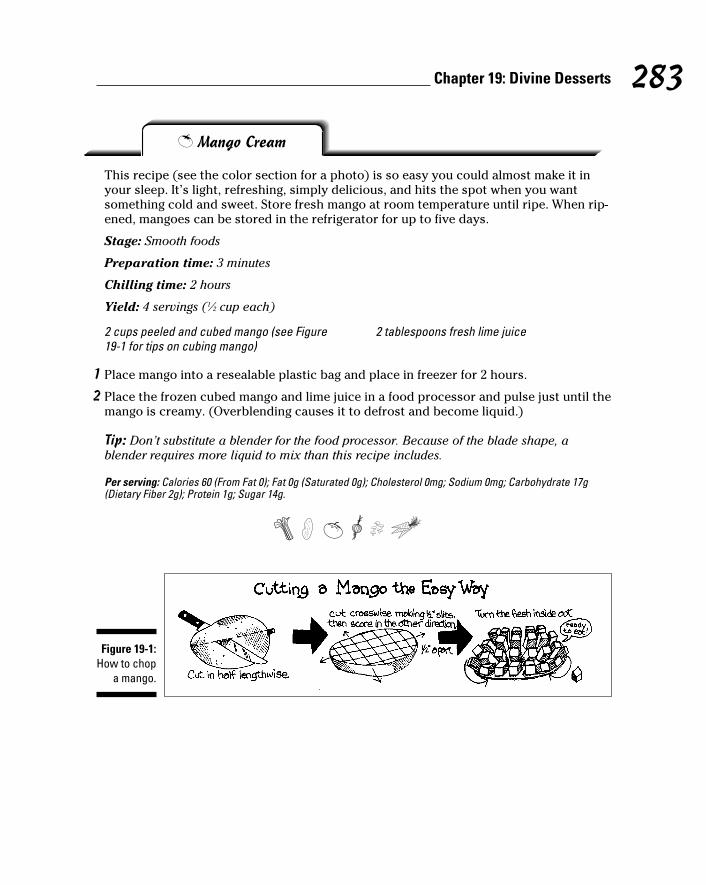
283 Chapter 19: Divine Desserts
1 Place mango into a resealable plastic bag and place in freezer for 2 hours.
2 Place the frozen cubed mango and lime juice in a food processor and pulse just until the mango is creamy. (Overblending causes it to defrost and become liquid.)
Tip: Don’t substitute a blender for the food processor. Because of the blade shape, a blender requires more liquid to mix than this recipe includes.
Per serving: Calories 60 (From Fat 0); Fat 0g (Saturated 0g); Cholesterol 0mg; Sodium 0mg; Carbohydrate 17g (Dietary Fiber 2g); Protein 1g; Sugar 14g.
Figure 19-1: How to chop
a mango.
T Mango Cream
This recipe (see the color section for a photo) is so easy you could almost make it in your sleep. It’s light, refreshing, simply delicious, and hits the spot when you want something cold and sweet. Store fresh mango at room temperature until ripe. When rip-ened, mangoes can be stored in the refrigerator for up to five days.
Stage: Smooth foods
Preparation time: 3 minutes
Chilling time: 2 hours
Yield: 4 servings (1⁄2 cup each)
2 cups peeled and cubed mango (see Figure 19-1 for tips on cubing mango)
2 tablespoons fresh lime juice
26_640180-ch19.indd 28326_640180-ch19.indd 283 8/27/10 10:48 PM8/27/10 10:48 PM
284 Part III: Simple Recipes to Enjoy Anytime
T Oatmeal Bars
Oatmeal is great, but adding a little honey and spices makes this chewy bar the best you ever had. We make this cookie bar with lots of whole-grain fiber. It’s a great dessert or snack, and it’s easy to carry with you if you’re out and about. If stored in an airtight container, they keep for up to a week.
Stage: Regular foods
Preparation time: 10 minutes
Cooking time: 20 minutes
Yield: 16 servings (1 bar each)
1 cup quick-cooking oats1 cup bran cereal1⁄4 cup whole-wheat flour1⁄2 cup walnut pieces1⁄2 cup nonfat powdered milk
1⁄2 teaspoon ground cinnamon1⁄4 teaspoon ground ginger1⁄4 cup honey2 large eggs
1 Preheat the oven to 350 degrees. Coat a 9-x-13-inch baking pan with nonstick spray.
2 Place oats, cereal, flour, walnuts, powdered milk, cinnamon, and ginger in a food pro-cessor and coarsely chop and mix. Add the honey and eggs and pulse until the mixture is well combined.
3 Place the mixture in the pan and spread evenly. Bake until lightly browned around the edges, about 20 minutes.
4 Let cool for 20 minutes; then cut into 16 bars.
Per serving: Calories 90 (From Fat 35); Fat 4g (Saturated 0g); Cholesterol 25mg; Sodium 30mg; Carbohydrate 14g (Dietary Fiber 2g); Protein 4g; Sugar 6g.
26_640180-ch19.indd 28426_640180-ch19.indd 284 8/27/10 10:48 PM8/27/10 10:48 PM
Chapter 20
Super Simple Cooking for One . . . or Two
In This Chapter▶ Dishing up a single serving
▶ Cooking small portions for two
People who have had weight loss surgery often ask us how to cook for one or two.
Making small meals is a challenge. Your portions are a lot smaller, so traditional recipes servings are way more than you need or can eat. Even if you don’t want to be a short order cook and prepare more than one meal, sometimes you just can’t eat what the rest of the family is eating. If you live alone you don’t want to spend a lot of time in the kitchen and eat the same leftover meal for the next week.
Food at the supermarket isn’t usually packaged for one or two people. If you go to the fresh meat and seafood counter where the food is in cases, you can ask for just the amount you need. If the meat, fish, or poultry is already packaged, you can ask the butcher to break down the package to the size you need. The same goes for the produce department. You don’t need to buy bags of apples, oranges, or potatoes. Buy just what you need for less waste. Yes, it’s usually a little more expensive to buy smaller quantities, but if you don’t have to throw out spoiled food you couldn’t eat in time, you may actually save money.
We’re here to help you more with your small meals dilemma. In this chapter we provide you with plenty of quick and delicious recipes that are meant to be enjoyed by one or two people. If you do happen to want leftovers or have a few additional mouths to feed, you can always double or triple the recipes to suit your needs. Enjoy!
Recipes in This Chapter
▶ Chicken Mexi PitaT Zesty Egg Salad▶ Shrimp CocktailT Bean TostadaT Cottage Veggie SaladT Vegetable Soup▶ Tangy Mustard Baked
ChickenT Creamed SpinachT Balsamic StrawberriesT Peaches and Creamy
Wheat▶ Cherry Shrimp Salad
27_640180-ch20.indd 28527_640180-ch20.indd 285 8/27/10 10:48 PM8/27/10 10:48 PM

286 Part III: Simple Recipes to Enjoy Anytime
Wasting Nothing with Recipes for OneYou can’t just always take a recipe for four to six servings or more and cut it down to one or two servings. When cooking smaller portions you need to take into consideration pan size, the temperature that you’re cooking your food, and how the food will hold before serving. Without measuring, most people tend to make too much food when cooking for one or two, which can make your food costs go higher.
Pots and pans need to be smaller when cooking for one. If the pots and pans are too big, the food will likely overcook and become dry, and then it’s more likely to cause problems with sticking. Using small pots and pans cooks the food evenly and keep it moist and tender. For small meals, a good sized sauté pan is 6 inches and a 1-quart pot is plenty large enough. Not all cookware sets come with these small sizes. Invest in a good-quality small pot and pan because you’ll get a lot of use out of them. And both the small size and good quality make clean up easier!
If you’re eating alone, set the table for yourself. Use your good dishes. Use a placemat and cloth napkin. Turn off the TV. Treat yourself like a guest. Focus on the food, chewing, and eating slowly. Food tastes better when it is savored.
Chicken Mexi Pita
Quick, easy, and delish! This pita fiesta has a little spice and a ton of flavor. The chicken takes on the flavor of the spices and has melted cheese on top. This may become your go-to chicken dish.
Stage: Regular foods
Preparation time: 7 minutes
Cooking time: 5 minutes
Yield: 1 serving
1⁄2 teaspoon canola oil4 ounces boneless skinless chicken breast, cut into 1⁄4-inch cubes1 tablespoon chopped onion1 tablespoon chopped bell pepper1⁄2 teaspoon hot sauce
1⁄4 teaspoon chili powder1⁄4 teaspoon garlic powder1⁄8 teaspoon black pepperOne 4-inch whole-wheat pita2 tablespoons shredded low-fat cheddar cheese
27_640180-ch20.indd 28627_640180-ch20.indd 286 8/27/10 10:48 PM8/27/10 10:48 PM
287 Chapter 20: Super Simple Cooking for One . . . or Two
T Zesty Egg Salad
Still making the same old egg salad? Time for a change? Egg salad is a great way to get in your protein — one egg has about 7 grams of protein — so try something new and a little more exciting. With a few changes, egg salad never tasted so good, and with red pepper flakes and feta cheese, never so zesty!
Stage: Regular foods
Preparation time: 10 minutes
Yield: 1 serving
1 In a small sauté pan over medium-high heat, add oil. When oil is hot, add chicken, onion, bell pepper, hot sauce, chili powder, garlic powder, and pepper. Sauté for 5 min-utes or until chicken is done.
2 Stuff the chicken mixture into the pita and sprinkle cheese on top.
Per serving: Calories 250 (From Fat 55); Fat 6g (Saturated 2g); Cholesterol 70mg; Sodium 380mg; Carbohydrate 18g (Dietary Fiber 3g); Protein 33g; Sugar 1g.
2 hard-boiled eggs, chopped fine11⁄2 teaspoon light mayonnaise1⁄8 teaspoon red pepper flakes
1 teaspoon feta cheese1⁄2 teaspoon chopped black olives4 reduced-fat whole-wheat crackers
Place eggs, mayonnaise, pepper flakes, feta cheese, and olives into a small bowl and mix well. Serve with crackers.
Tip: To hard-boil eggs, place eggs into a medium-sized pot and cover with water. Place on the stove and bring to a boil, then turn off the heat and let the eggs sit in the hot water for 12 to 15 minutes. Refrigerate eggs until you’re ready to use them.
Per serving: Calories 260 (From Fat 140); Fat 16g (Saturated 4g); Cholesterol 430mg; Sodium 330 mg; Carbohydrate 14g (Dietary Fiber 2g); Protein 15g; Sugar 1g.
27_640180-ch20.indd 28727_640180-ch20.indd 287 8/27/10 10:48 PM8/27/10 10:48 PM
288 Part III: Simple Recipes to Enjoy Anytime
Shrimp Cocktail
Talk about fast and easy! Nothing is better than a traditional shrimp cocktail served with fresh lemon and cocktail sauce. Commercially prepared cocktail sauce is really high in sodium. We give you the recipe to make your own low-sodium version.
Stage: Regular foods
Preparation time: 5 minutes
Yield: 1 serving
2 tablespoons low-sodium ketchup1⁄2 teaspoon prepared horseradish1⁄2 teaspoon fresh lemon juice
4 ounces peeled and deveined cooked shrimp1⁄2 teaspoon Old Bay seasoning1 lemon wedge
1 For the cocktail sauce, combine ketchup, horseradish, and lemon juice in a small bowl.
2 Sprinkle Old Bay seasoning over shrimp and squeeze the lemon wedge to sprinkle juice over the top. Serve with cocktail sauce.
Tip: You can buy peeled, deveined, cooked shrimp at the seafood counter at your grocery.
Per serving: Calories 170 (From Fat 20); Fat 2g (Saturated 0g); Cholesterol 230mg; Sodium 660mg; Carbohydrate 8g (Dietary Fiber 0g); Protein 29g; Sugar 7g.
T Bean Tostada
Beans with pizzazz make this vegetarian meal perfect for any time of day. This recipe gives you a double punch of fiber from beans and a whole-wheat tortilla. If you want, top with some salsa and a dollop of fat-free sour cream.
Stage: Regular foods
Preparation time: 5 minutes
Cooking time: 3 minutes
Yield: 1 serving
1⁄2 cup canned no-salt-added black beans, drained and rinsed1⁄4 teaspoon diced jalapeño peppers2 teaspoon shredded carrots1⁄4 teaspoon chili powder1⁄4 teaspoon garlic powder
1⁄4 teaspoon onion powder1⁄8 teaspoon cuminOne 6-inch whole-wheat tortilla1 tablespoon shredded low-fat cheddar cheese
27_640180-ch20.indd 28827_640180-ch20.indd 288 8/27/10 10:48 PM8/27/10 10:48 PM
289 Chapter 20: Super Simple Cooking for One . . . or Two
T Cottage Veggie Salad
With a little spice and a hint of green onion, this cottage cheese is perfect to go with an assortment of fresh veggies. This is an easy take-to-work lunch. You can mix up the cottage cheese and pack your veggies the night before and store in the fridge. Then in the morning you really have a grab-and-go meal. Now that’s fast food!
Stage: Regular foods
Preparation time: 5 minutes
Yield: 1 serving
1 In a small bowl, slightly mash beans with a fork. Add jalapeño, carrots, chili powder, garlic powder, onion powder, and cumin. Mix well.
2 Coat a 9- or 10-inch nonstick skillet with nonstick spray and place over medium heat. Place the tortilla in the center of the pan.
3 Spread bean mixture over the tortilla, leaving 1 inch of space around the edge. Sprinkle cheese on the top and cook for 2 minutes or until the cheese melts.
Per serving: Calories 230 (From Fat 35); Fat 4g (Saturated 0g); Cholesterol 0mg; Sodium 480mg; Carbohydrate 41g (Dietary Fiber 9g); Protein 11g; Sugar 3g.
3⁄4 cup low-fat cottage cheese1 teaspoon chopped chives1⁄4 teaspoon chili powder
6 peeled cucumber slices4 halved cherry tomatoes
In a small bowl mix cottage cheese, chives, and chili powder. Serve with cucumber slices and cherry tomatoes.
Per serving: Calories 170 (From Fat 45); Fat 5g (Saturated 2g); Cholesterol 15mg; Sodium 570mg; Carbohydrate 10g (Dietary Fiber 1g); Protein 21g; Sugar 9g.
27_640180-ch20.indd 28927_640180-ch20.indd 289 8/27/10 10:48 PM8/27/10 10:48 PM
290 Part III: Simple Recipes to Enjoy Anytime
Preparing Quick and Easy Dishes for TwoCooking for two can be both harder and easier than cooking just for yourself. You have to consider the other person’s tastes and remember if he has allergies, but your options are wider when cooking for two. Most recipes can be made for two, and when you buy a larger quantity of ingredients, you may save money.
When cooking for two, medium-sized pots and pans work well. Use an 8- to 10-inch skillet and a 2-quart pot. If the pans are too small, the food may take longer to cook and become chewy. If they’re too big, the food can be overcooked and dry. As a rule of thumb, you want your protein to have at least 1⁄2 inch of space between pieces. When sautéing veggies, your pan should be no more than 2⁄3 full to keep food from spilling out.
We made the following recipes for two people, but you can make them for one and then have the leftovers at another meal to save you kitchen time.
T Vegetable Soup
There’s nothing like a bowl of fresh homemade vegetable soup. This soup (shown in the color section) is delicious and packed with vitamins, and it reheats well so you can make a bigger batch and have leftovers. If you want to increase the protein and calories, you can add some cooked chicken or beef.
Stage: Soft foods
Preparation time: 15 minutes
Cooking time: 30 minutes
Yield: 2 serving (11⁄2 cup each)
1 cup vegetable broth1⁄2 cup canned navy beans, drained and rinsed1⁄4 cup fresh green beans cut in 1-inch pieces1⁄4 cup thinly sliced fresh carrots1⁄4 cup finely chopped cabbage
1⁄2 cup chopped tomatoes1 clove garlic, minced1⁄4 teaspoon black pepper1⁄4 teaspoon dried thyme1⁄4 teaspoon dried basil
In a small pot add all ingredients and bring to a simmer. Cover and continue to simmer for 25 minutes.
Per serving: Calories 100 (From Fat 0); Fat 0g (Saturated 0g); Cholesterol 0mg; Sodium 570mg; Carbohydrate 20g (Dietary Fiber 6g); Protein 6g; Sugar 3g.
27_640180-ch20.indd 29027_640180-ch20.indd 290 8/27/10 10:48 PM8/27/10 10:48 PM
291 Chapter 20: Super Simple Cooking for One . . . or Two
Tangy Mustard Baked Chicken
This perfectly coated chicken with a hint of citrus and mustard will be a new chicken favorite. Panko bread crumbs are also referred to as Japanese bread crumbs. The crumbs are light yet bigger then tradition bread crumbs, which makes the cooked food crispier. You can find them in most supermarkets next to regular bread crumbs.
Stage: Regular foods
Preparation time: 10 minutes
Marinating time: 30 minutes
Cooking time: 20 to 30 minutes
Yield: 2 servings (4 ounces each)
2 tablespoons fresh lime juice2 tablespoons fresh lemon juice1 tablespoon spicy ground mustard8 ounces boneless, skinless chicken breastA dash white pepper
1⁄8 teaspoon curry powder1 teaspoon lemon zest1⁄3 cup fine panko bread crumbs2 teaspoons melted butter
1 In a small bowl combine the lime juice, lemon juice, and mustard. Brush over the chicken; cover and refrigerate for about 30 minutes.
2 Preheat the oven to 400 degrees. Coat a cooking sheet with nonstick spray.
3 Remove the chicken from the marinade mixture and roll in the bread crumbs, coating both sides. In a small dish combine the pepper, curry powder, and lemon zest, and then sprinkle the mixture over both sides of the chicken.
4 Place chicken on the cooking sheet and drizzle melted butter over the top. Bake for 20 to 30 minutes or until juices run clear.
Per serving: Calories 240 (From Fat 55); Fat 6g (Saturated 3g); Cholesterol 75mg; Sodium 300mg; Carbohydrate 15g (Dietary Fiber 1g); Protein 29g; Sugar 2g.
27_640180-ch20.indd 29127_640180-ch20.indd 291 8/27/10 10:48 PM8/27/10 10:48 PM
292 Part III: Simple Recipes to Enjoy Anytime
T Creamed Spinach
A new twist on an old favorite makes this creamed spinach a perfect meal or side dish. The nutmeg kicks this dish up a notch, the Parmesan adds sharpness, and the light cream cheese pulls everything together. This may make a spinach eater of you, and that would be a good thing. Nutrition-wise, spinach is right at the top of list, serving as an excellent source of phytonutrients, vitamins, and minerals.
1 cup waterOne 6-ounce bag fresh baby spinach, stems removed2 tablespoons light cream cheese
1 teaspoon softened butterA dash of nutmeg1 tablespoon grated Parmesan cheese
1 Preheat the oven to 350 degrees. Coat an 8-x-8-inch pan with nonstick spray and set aside.
2 Pour 1 cup of water into a 2-quart pot and bring to a boil. Add spinach and cover with a tight lid. Remove from heat and let sit for 3 minutes; then drain the spinach.
3 Combine the cream cheese, butter, and nutmeg and stir well. Stir in the spinach and gently spoon the mixture into the pan. Sprinkle with the Parmesan cheese, cover, and bake for 30 minutes.
Per serving: Calories 90 (From Fat 45); Fat 5g (Saturated 3g); Cholesterol 15mg; Sodium 260mg; Carbohydrate 10g (Dietary Fiber 4g); Protein 4g; Sugar 1g.
Stage: Soft foods
Preparation time: 15 minutes
Cooking time: 35 minutes
Yield: 2 servings (3⁄4 cup each)
T Balsamic Strawberries
Here’s a new way to jazz up strawberries. The unique taste of balsamic vinegar brings out the best flavors of strawberries. The longer balsamic vinegar is aged, the sweeter and thicker it gets. The downside is the older the vintage, the more the balsamic vinegar costs. Like a lot of things, you get what you pay for. Store the opened bottle in a cool, dark place and it will keep for a long time.
27_640180-ch20.indd 29227_640180-ch20.indd 292 8/27/10 10:48 PM8/27/10 10:48 PM
293 Chapter 20: Super Simple Cooking for One . . . or Two
T Peaches and Creamy Wheat
Peaches and milk make ho-hum hot cereal yummy. Cooking the Cream of Wheat with milk rather than water gives you more protein and calcium and makes your cereal creamier.
Stage: Soft foods
Preparation time: 3 minutes
Cooking time: 3 to 7 minutes
Yield: 2 servings (1 cup each)
6 tablespoons dry Cream of Wheat or 2 packets unflavored Cream of Wheat11⁄2 cups nonfat milk
1⁄2 cup diced canned peaches in light syrup3 teaspoons sugar substitute
Add all ingredients to a small bowl if microwaving or a small pot if cooking on the stove top. Cook according to package directions.
Tip: To add 2 grams of protein per serving, stir 2 tablespoons nonfat dry powdered milk into the Cream of Wheat.
Vary It!: If you want to try some different flavors, add 2 to 3 drops of lemon extract, vanilla extract, or almond extract.
Per serving: Calories 200 (From Fat 0); Fat 0g (Saturated 0g); Cholesterol 5mg; Sodium 80mg; Carbohydrate 38g (Dietary Fiber 2g); Protein 9g; Sugar 12g.
2 cups sliced fresh strawberries1 teaspoon sugar substitute
1 teaspoon balsamic vinegar
Toss the strawberries, sugar substitute, and balsamic vinegar in a bowl. Let stand 20 minutes before serving.
Per serving: Calories 60 (From Fat 0); Fat 0g (Saturated 0g); Cholesterol 0mg; Sodium 0mg; Carbohydrate 13g (Dietary Fiber 3g); Protein 1g; Sugar 9g.
Stage: Regular foods
Preparation time: 5 minutes
Resting time: 20 minutes
Yield: 2 servings (1 cup each)
27_640180-ch20.indd 29327_640180-ch20.indd 293 8/27/10 10:48 PM8/27/10 10:48 PM
294 Part III: Simple Recipes to Enjoy Anytime
Cherry Shrimp Salad
Using canned shrimp makes this salad easy to prepare, but you can use fresh shrimp if you prefer. The yogurt, lemon, and oregano add strong flavor while the cherries and green onions add a twist. Serve some crispy baked pita chips on the side for a refreshing, light meal.
Stage: Regular foods
Preparation time: 10 minutes
Chilling time: 1 hour
Yield: 2 servings (3⁄4 cup each)
6 ounces canned shrimp, drained3 tablespoons dried tart cherries, plumped1⁄2 cup halved cherry tomatoes2 green onions, chopped2 tablespoons light mayonnaise
2 tablespoons nonfat plain yogurt1 tablespoon fresh lemon juice1⁄2 teaspoon chopped fresh oreganoBlack pepper to taste2 cups chopped Bibb lettuce
1 In a large bowl, combine shrimp, cherries, tomatoes, and green onions and mix well.
2 Combine mayonnaise, yogurt, lemon juice, oregano, and pepper in a small bowl and pour over the shrimp mixture. Mix together gently, cover, and refrigerate for one to two hours.
3 Place one cup chopped lettuce on a salad plate. Top each with half of the shrimp salad.
Tip: To plump dried cherries, pour 1⁄2 cup boiling water over dried cherries and let sit for 5 minutes. Drain before using.
Per serving: Calories 110 (From Fat 35); Fat 4g (Saturated 0g); Cholesterol 90mg; Sodium 190mg; Carbohydrate 8g (Dietary Fiber 2g); Protein 12g; Sugar 4g.
27_640180-ch20.indd 29427_640180-ch20.indd 294 8/27/10 10:48 PM8/27/10 10:48 PM

Part IV
The Part of Tens
28_640180-pp04.indd 29528_640180-pp04.indd 295 8/27/10 10:49 PM8/27/10 10:49 PM

In this part . . .
The Part of Tens provides you with lists of helpful info to guide you when you need quick reminders or meal
ideas. In this part we give you ten tips to keep you on track and make weight loss surgery a successful lifetime journey. We provide family-friendly menu ideas, and also give you ideas for meals at different calorie levels so you know exactly how much you’re consuming as you transition to a regular diet.
28_640180-pp04.indd 29628_640180-pp04.indd 296 8/27/10 10:49 PM8/27/10 10:49 PM
Chapter 21
Ten Tips for Long-Term SuccessIn This Chapter▶ Eating well
▶ Drinking well
▶ Staying active
Your weight loss surgery is just the beginning. You have embarked on a lifelong journey, and you’re going to have to make some permanent
changes in order to be successful not only with long-term weight loss, but also in overall health. The whole process can be overwhelming, but if you take it step by step and one day at a time, those changes will become second nature.
In this chapter we go over a few of the most important things you have to remember to keep you healthy so that you can achieve your weight loss goals. Remember, just as each surgeon is different (and you should always abide by what yours recommends), each weight loss patient is also different. Follow these tips while figuring out what works for you, and remember that your journey may be nothing like your friend or coworker’s experience.
Eat on a ScheduleNo longer is it possible for you to eat everything you want, any time you want. By having the surgery, you have made an investment in your lifelong health. But the surgery is just a tool. Success still depends on a lot of hard work on your part.
By eating on a schedule, you will avoid grazing, which leads to weight gain. You may not experience hunger in the early days after surgery, but a point may come when you will. This decreased hunger will actually help you stay on your meal plan. By forming good habits now, it will be easier to avoid any weight gain down the road.
29_640180-ch21.indd 29729_640180-ch21.indd 297 8/27/10 10:49 PM8/27/10 10:49 PM
298 Part IV: The Part of Tens
Put Good-Quality Foods FirstBeing aware of what you’re eating is more important now than ever before. Because you can’t eat as much as before surgery, you need to make sure you get the most nutritional bang for your calorie buck. Focus on nutrient-rich foods that are loaded with vitamins and minerals and tend to be lower in calories. Keep healthy foods in the house and junk food out!
Think about foods that are as close to their natural state as possible, focusing on
✓ Proteins — remember to eat these first!
✓ Fruits
✓ Vegetables
✓ 100 percent whole grains
✓ Healthy fats
✓ Low-fat or fat-free dairy
Chew, Chew, ChewOne of the most important habits to adopt after weight loss surgery is to take very small bites (the size of a pencil eraser) and chew food thoroughly. This helps you to avoid nausea, vomiting, and food getting stuck. Trust us, none of those are pleasant!
Chew each bite 20 to 30 times until it’s a smooth consistency. Put your utensils down between bites. The longer you take to eat, the fuller you feel with less food. After all, that’s the goal, isn’t it?
Watch Your Portion SizesPortion size is key to weight loss. It is estimated that people tend to underestimate the calories they consume by 25 percent. This can really add up in terms of calories consumed.
You need to weigh and measure everything you eat. Alternatively, eat 1 cup of cereal (or other food) out of a 1 cup container to make sure you don’t exceed that amount. If you aren’t careful, you may experience “portion creep,” in which you make portions larger as time goes by because you forget what they should look like. Measuring your portions keeps you honest and helps move you toward your goals.
29_640180-ch21.indd 29829_640180-ch21.indd 298 8/27/10 10:49 PM8/27/10 10:49 PM
299 Chapter 21: Ten Tips for Long-Term Success
Stop Eating When Your Pouch Is FullThink back to the last holiday meal you had before surgery. You may have eaten a lot very quickly. You probably went from hungry to stuffed in a matter of a few minutes. Stuffed is not going to cut it anymore!
You now have the advantage of having a smaller capacity to store food. In order for you to achieve your weight loss goals and not experience nausea and vomiting, you have to stop eating when your hunger is satisfied. By eating slower, it will be easier for you to realize when you have had enough. Pay attention to the pouch!
Don’t Drink Beverages with MealsIf your pouch is full of liquids, you won’t be able to eat, and drinking too soon after a meal may overfill the pouch, causing nausea. You certainly don’t want to fill up on liquids and not be able to eat, do you? So be sure you stop drinking 5 to 10 minutes before you eat a meal, and don’t begin drinking again for 30 minutes after you finish.
Stay HydratedKeep something with you at all times (except at meals) and sip, sip, sip. You can’t hold as much liquid as you could before, so if you get dehydrated it will be difficult for your body to catch up. Check the color of your urine to monitor your hydration status. It should be pale yellow or clear, not dark yellow.
Don’t wait until you’re thirsty to drink. By the time you’re thirsty, you are already dehydrated. Your goal is about 64 ounces a day of decaffeinated, sugar-free liquids, and more on hot or humid days and if you’re sweating excessively.
Take Your SupplementsTaking supplements is a requirement, not a recommendation. Because you can’t eat as much as you could before surgery, consider your supplements an insurance policy to make sure you get all of the vitamins and minerals you need to stay healthy.
29_640180-ch21.indd 29929_640180-ch21.indd 299 8/27/10 10:49 PM8/27/10 10:49 PM
300 Part IV: The Part of Tens
Remember, supplements are just that. They’re not meant to take the place of food, but to supplement what you get from the foods you eat.
Add Physical ActivityCalories in minus calories out equals weight loss, right? Physical activity is half of the equation for weight loss success.
Find activities you enjoy and make them part of your lifestyle. You do not have to go to a gym for hours each day. Break physical activity up into smaller pieces. Get out and walk for 10 minutes three times a day if you can’t find 30 minutes to exercise.
Any extra movement is good. Remember, physical activity increases your metabolism, improves energy, and boosts your mood. Incorporate movement into your day by
✓ Parking further away from your office
✓ Taking the stairs instead of the elevator
✓ Marching or doing squats while talking on the phone
✓ Exercising during commercials
✓ Going outside and playing with your kids
Continue to Follow Up with Your SurgeonYour surgeon needs to be your lifelong friend. You made this a lifelong commitment, and he or she is part of that commitment.
Your surgeon should require you return to his or her office for a series of postoperative visits (no, not just one) during the first year, and then annually after that. It’s important that you keep these appointments, even if you think you’re doing fine. You need to have ongoing monitoring of your weight loss, lab values (to detect possible vitamin or mineral deficiencies), nutritional status, and other medical concerns you or your surgeon may have.
29_640180-ch21.indd 30029_640180-ch21.indd 300 8/27/10 10:49 PM8/27/10 10:49 PM
Chapter 22
Ten Easy-to-Prepare Meals Your Family Will Love
In This Chapter▶ Making well-balanced meals to please the whole family
▶ Adjusting portion sizes for kids, adults, and weight loss surgery patients
In this chapter you find some quick and easy meal ideas that are pleasing to adults and kids alike. Each meal utilizes at least one recipe from this
book, and we provide guidelines for serving sizes for everyone.
If meal planning and eating together as a family is something new for you, check out Part I.
Warming Up with Chili PieChili is perfect on a cool fall night. Chili Pie is an easy dish to make for the family, and the assembly makes it perfect for your family to take their own serving size.
To assemble Chili Pie, start by preparing Chef Dave’s Easy Savory Chili recipe from Chapter 16. Take a small handful of baked tortilla chips and place them in the bottom of a bowl. Add chili over the top, and top with low-fat cheddar cheese and fat-free sour cream.
Menu:
✓ Chili Pie (Chef Dave’s Easy Savory Chili, Chapter 16)
✓ Green beans
✓ Mandarin oranges
See the following table for serving sizes:
30_640180-ch22.indd 30130_640180-ch22.indd 301 8/27/10 10:50 PM8/27/10 10:50 PM
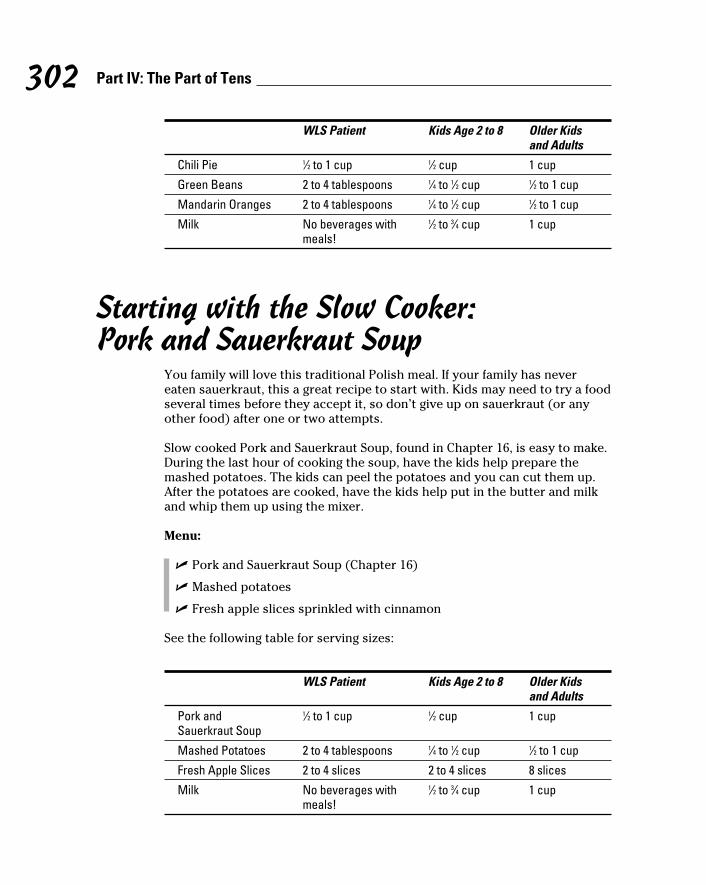
302 Part IV: The Part of Tens
WLS Patient Kids Age 2 to 8 Older Kids and Adults
Chili Pie 1⁄2 to 1 cup 1⁄2 cup 1 cup
Green Beans 2 to 4 tablespoons 1⁄4 to 1⁄2 cup 1⁄2 to 1 cup
Mandarin Oranges 2 to 4 tablespoons 1⁄4 to 1⁄2 cup 1⁄2 to 1 cup
Milk No beverages with meals!
1⁄2 to 3⁄4 cup 1 cup
Starting with the Slow Cooker: Pork and Sauerkraut Soup
You family will love this traditional Polish meal. If your family has never eaten sauerkraut, this a great recipe to start with. Kids may need to try a food several times before they accept it, so don’t give up on sauerkraut (or any other food) after one or two attempts.
Slow cooked Pork and Sauerkraut Soup, found in Chapter 16, is easy to make. During the last hour of cooking the soup, have the kids help prepare the mashed potatoes. The kids can peel the potatoes and you can cut them up. After the potatoes are cooked, have the kids help put in the butter and milk and whip them up using the mixer.
Menu:
✓ Pork and Sauerkraut Soup (Chapter 16)
✓ Mashed potatoes
✓ Fresh apple slices sprinkled with cinnamon
See the following table for serving sizes:
WLS Patient Kids Age 2 to 8 Older Kids and Adults
Pork and Sauerkraut Soup
1⁄2 to 1 cup 1⁄2 cup 1 cup
Mashed Potatoes 2 to 4 tablespoons 1⁄4 to 1⁄2 cup 1⁄2 to 1 cup
Fresh Apple Slices 2 to 4 slices 2 to 4 slices 8 slices
Milk No beverages with meals!
1⁄2 to 3⁄4 cup 1 cup
30_640180-ch22.indd 30230_640180-ch22.indd 302 8/27/10 10:50 PM8/27/10 10:50 PM
303 Chapter 22: Ten Easy-to-Prepare Meals Your Family Will Love
Mixing Up a Home-Style Meatloaf MealMeatloaf has been around for many years, but it’s still a welcome addition to anyone’s menu. This meatloaf recipe from Chapter 10 still has the beloved ketchup in it, but we top it with tomato gravy, too. Kids love to work with their hands, and making meatloaf is the perfect opportunity. After having your kids wash their hands, place all the ingredients for the meatloaf into a large bowl and let them mix away. This is a perfect way to introduce different ingredients to your kids, and since they helped, they’ll love to eat it. The leftovers make great sandwiches the next day.
Menu:
✓ Home-Style Meatloaf with Tomato Gravy (Chapter 10)
✓ Corn on the cob
✓ Fresh strawberries
See the following table for serving sizes:
WLS Patient Kids Age 2 to 8 Older Kids and Adults
Meatloaf with Tomato Gravy
2 to 3 ounces 1 to 2 ounces 3 ounces
Corn on the Cob 1⁄4 medium ear 1⁄4 to 1⁄2 medium ear
1 medium ear
Fresh Strawberries 2 to 4 berries 2 to 4 berries 4 to 8 berries
Milk No beverages with meals!
1⁄2 to 3⁄4 cup 1 cup
Keeping It Light with Crab Salad MeltsNeed a quick dinner after a busy day, or a light weekend lunch? Tuna sandwiches are great, but easy-to-make crab melts are even better. Your family may be surprised by this change in a melt, but we bet they’ll like it. Have the kids find the Crab Salad Melts recipe in Chapter 12, help assemble all the ingredients, and mix up the crab salad. Each person can make her own sandwich (but make sure an adult cooks them up).
30_640180-ch22.indd 30330_640180-ch22.indd 303 8/27/10 10:50 PM8/27/10 10:50 PM
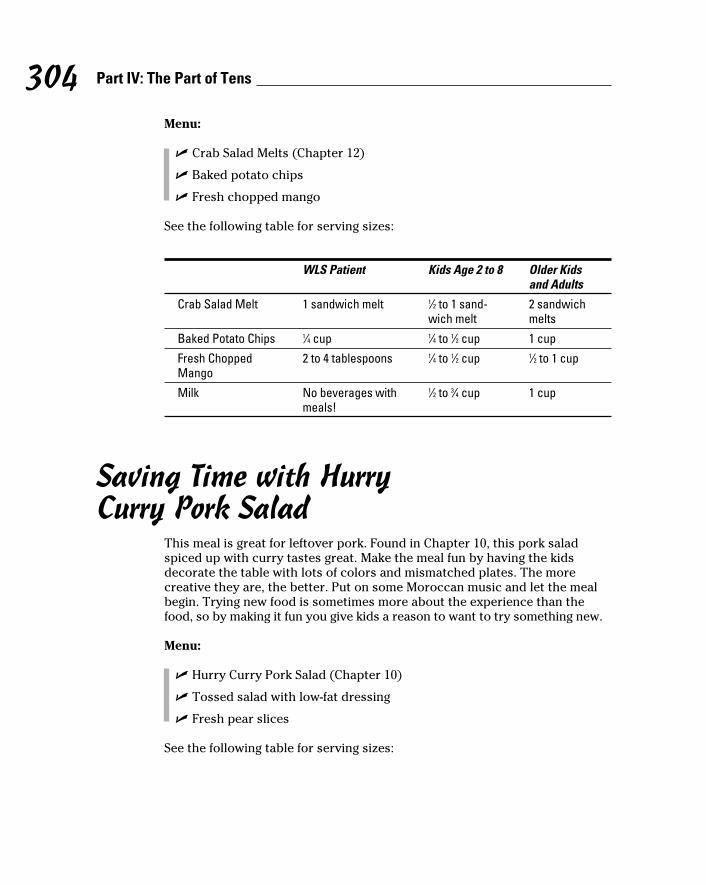
304 Part IV: The Part of Tens
Menu:
✓ Crab Salad Melts (Chapter 12)
✓ Baked potato chips
✓ Fresh chopped mango
See the following table for serving sizes:
WLS Patient Kids Age 2 to 8 Older Kids and Adults
Crab Salad Melt 1 sandwich melt 1⁄2 to 1 sand-wich melt
2 sandwich melts
Baked Potato Chips 1⁄4 cup 1⁄4 to 1⁄2 cup 1 cup
Fresh Chopped Mango
2 to 4 tablespoons 1⁄4 to 1⁄2 cup 1⁄2 to 1 cup
Milk No beverages with meals!
1⁄2 to 3⁄4 cup 1 cup
Saving Time with Hurry Curry Pork Salad
This meal is great for leftover pork. Found in Chapter 10, this pork salad spiced up with curry tastes great. Make the meal fun by having the kids decorate the table with lots of colors and mismatched plates. The more creative they are, the better. Put on some Moroccan music and let the meal begin. Trying new food is sometimes more about the experience than the food, so by making it fun you give kids a reason to want to try something new.
Menu:
✓ Hurry Curry Pork Salad (Chapter 10)
✓ Tossed salad with low-fat dressing
✓ Fresh pear slices
See the following table for serving sizes:
30_640180-ch22.indd 30430_640180-ch22.indd 304 8/27/10 10:50 PM8/27/10 10:50 PM

305 Chapter 22: Ten Easy-to-Prepare Meals Your Family Will Love
WLS Patient Kids Age 2 to 8 Older Kids and Adults
Hurry Curry Pork Salad
1⁄2 cup 1⁄4 to 1⁄2 cup 1 cup
Tossed Salad with Low-Fat Dressing
1⁄2 cup 1⁄2 cup 1 to 2 cups
Fresh Pear Slices 2 to 4 slices 2 to 4 slices 8 slices
Milk No beverages with meals!
1⁄2 to 3⁄4 cup 1 cup
Grilling Turkey Burgers with Dried Cherries and Apples
Grilling is great in any season, but summertime makes grilling especially appealing. These tasty turkey burgers, found in Chapter 9, are a nice change from the traditional beef burger and can be eaten with or without a bun. The kids will have a great time mixing the ingredients. Instead of round patties, have each member of the family make their own patty in the shape they like. Since you have the grill going, you can also slice the pineapple and put it on the grill. Be sure to take small bites of pineapple and chew well because it’s a fibrous food.
Menu:
✓ Dried Cherry and Apple Turkey Burger (Chapter 9)
✓ Fresh tomatoes slices drizzled with balsamic vinegar
✓ Fresh cut pineapple
See the following table for serving sizes:
WLS Patient Kids Age 2 to 8 Older Kids and Adults
Turkey Burger 1 burger 1⁄2 to 1 burger 1 burger
Tomato Slices 1 to 2 slices 1 to 2 slices 4 slices
Fresh Pineapple 1 to 2 tablespoons 1⁄4 to 1⁄2 cup 1⁄2 to 1 cup
Milk No beverages with meals!
1⁄2 to 3⁄4 cup 1 cup
30_640180-ch22.indd 30530_640180-ch22.indd 305 8/27/10 10:50 PM8/27/10 10:50 PM
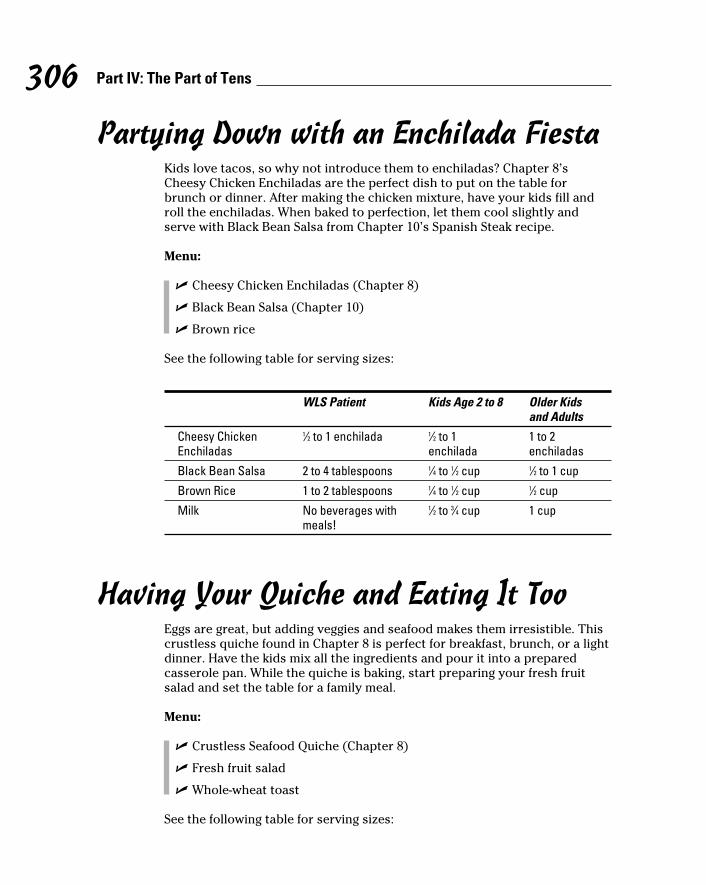
306 Part IV: The Part of Tens
Partying Down with an Enchilada FiestaKids love tacos, so why not introduce them to enchiladas? Chapter 8’s Cheesy Chicken Enchiladas are the perfect dish to put on the table for brunch or dinner. After making the chicken mixture, have your kids fill and roll the enchiladas. When baked to perfection, let them cool slightly and serve with Black Bean Salsa from Chapter 10’s Spanish Steak recipe.
Menu:
✓ Cheesy Chicken Enchiladas (Chapter 8)
✓ Black Bean Salsa (Chapter 10)
✓ Brown rice
See the following table for serving sizes:
WLS Patient Kids Age 2 to 8 Older Kids and Adults
Cheesy Chicken Enchiladas
1⁄2 to 1 enchilada 1⁄2 to 1 enchilada
1 to 2 enchiladas
Black Bean Salsa 2 to 4 tablespoons 1⁄4 to 1⁄2 cup 1⁄2 to 1 cup
Brown Rice 1 to 2 tablespoons 1⁄4 to 1⁄2 cup 1⁄2 cup
Milk No beverages with meals!
1⁄2 to 3⁄4 cup 1 cup
Having Your Quiche and Eating It TooEggs are great, but adding veggies and seafood makes them irresistible. This crustless quiche found in Chapter 8 is perfect for breakfast, brunch, or a light dinner. Have the kids mix all the ingredients and pour it into a prepared casserole pan. While the quiche is baking, start preparing your fresh fruit salad and set the table for a family meal.
Menu:
✓ Crustless Seafood Quiche (Chapter 8)
✓ Fresh fruit salad
✓ Whole-wheat toast
See the following table for serving sizes:
30_640180-ch22.indd 30630_640180-ch22.indd 306 8/27/10 10:50 PM8/27/10 10:50 PM
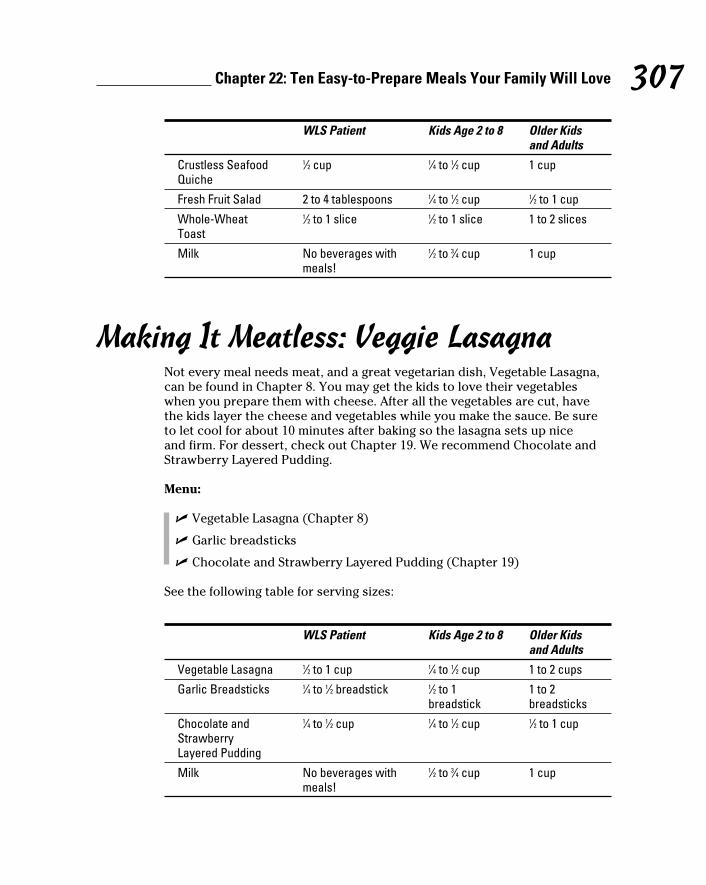
307 Chapter 22: Ten Easy-to-Prepare Meals Your Family Will Love
WLS Patient Kids Age 2 to 8 Older Kids and Adults
Crustless Seafood Quiche
1⁄2 cup 1⁄4 to 1⁄2 cup 1 cup
Fresh Fruit Salad 2 to 4 tablespoons 1⁄4 to 1⁄2 cup 1⁄2 to 1 cup
Whole-Wheat Toast
1⁄2 to 1 slice 1⁄2 to 1 slice 1 to 2 slices
Milk No beverages with meals!
1⁄2 to 3⁄4 cup 1 cup
Making It Meatless: Veggie LasagnaNot every meal needs meat, and a great vegetarian dish, Vegetable Lasagna, can be found in Chapter 8. You may get the kids to love their vegetables when you prepare them with cheese. After all the vegetables are cut, have the kids layer the cheese and vegetables while you make the sauce. Be sure to let cool for about 10 minutes after baking so the lasagna sets up nice and firm. For dessert, check out Chapter 19. We recommend Chocolate and Strawberry Layered Pudding.
Menu:
✓ Vegetable Lasagna (Chapter 8)
✓ Garlic breadsticks
✓ Chocolate and Strawberry Layered Pudding (Chapter 19)
See the following table for serving sizes:
WLS Patient Kids Age 2 to 8 Older Kids and Adults
Vegetable Lasagna 1⁄2 to 1 cup 1⁄4 to 1⁄2 cup 1 to 2 cups
Garlic Breadsticks 1⁄4 to 1⁄2 breadstick 1⁄2 to 1 breadstick
1 to 2 breadsticks
Chocolate and Strawberry Layered Pudding
1⁄4 to 1⁄2 cup 1⁄4 to 1⁄2 cup 1⁄2 to 1 cup
Milk No beverages with meals!
1⁄2 to 3⁄4 cup 1 cup
30_640180-ch22.indd 30730_640180-ch22.indd 307 8/27/10 10:50 PM8/27/10 10:50 PM
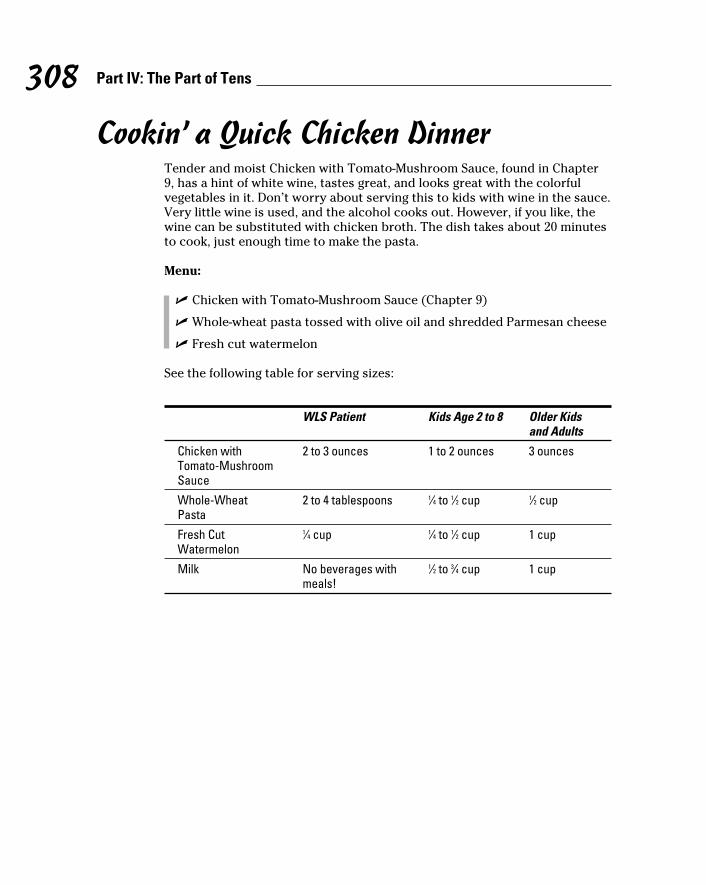
308 Part IV: The Part of Tens
Cookin’ a Quick Chicken DinnerTender and moist Chicken with Tomato-Mushroom Sauce, found in Chapter 9, has a hint of white wine, tastes great, and looks great with the colorful vegetables in it. Don’t worry about serving this to kids with wine in the sauce. Very little wine is used, and the alcohol cooks out. However, if you like, the wine can be substituted with chicken broth. The dish takes about 20 minutes to cook, just enough time to make the pasta.
Menu:
✓ Chicken with Tomato-Mushroom Sauce (Chapter 9)
✓ Whole-wheat pasta tossed with olive oil and shredded Parmesan cheese
✓ Fresh cut watermelon
See the following table for serving sizes:
WLS Patient Kids Age 2 to 8 Older Kids and Adults
Chicken with Tomato-Mushroom Sauce
2 to 3 ounces 1 to 2 ounces 3 ounces
Whole-Wheat Pasta
2 to 4 tablespoons 1⁄4 to 1⁄2 cup 1⁄2 cup
Fresh Cut Watermelon
1⁄4 cup 1⁄4 to 1⁄2 cup 1 cup
Milk No beverages with meals!
1⁄2 to 3⁄4 cup 1 cup
30_640180-ch22.indd 30830_640180-ch22.indd 308 8/27/10 10:50 PM8/27/10 10:50 PM
Chapter 23
Ten Sample Menus for Different Calorie Levels
In This Chapter▶ Keeping your eating habits healthy when you transition to a regular diet
▶ Finding a menu that’s right for your calorie level
Throughout this book we emphasize that cooking your own meals is healthier, saves time and money, and advances you toward your weight
loss goals. In this chapter you’re provided with menus at a variety of calorie levels to help you plan the meals you cook for yourself. These menus are meant to help you stick to the calorie level your surgeon and dietitian recommend for you when you progress to a regular diet. You certainly don’t have to follow these menus to the letter. Use them for some ideas to tailor your own menus to your own taste. Be creative!
You can find some wonderful recipes in this book, many of which we include in the menus here. Try different ones every week. You’ll enjoy the interesting flavors, textures, and colors, and your body is going to thank you for your new way of eating. As you lose weight, you’ll feel better, be healthier, and have boundless energy, and healthy, delicious food will become the norm.
Remember that even if your recommended calorie level is, for example, 1,600 calories, you don’t have to eat everything on the menu. It’s still very important for you to be mindful of how much you’re eating, listen to your body, and stop before you’re full. This helps prevent any nausea or vomiting resulting from eating too much. Also, continue to measure foods carefully, read nutrition labels on the foods you eat, and keep track of calories in your food diary. Because of the variation between brands, your nutrient counts may end up being a little different than the ones we provide with each recipe and menu.
31_640180-ch23.indd 30931_640180-ch23.indd 309 8/27/10 10:50 PM8/27/10 10:50 PM

310 Part IV: The Part of Tens
As you enjoy your own delicious cooking, be sure to follow the principles discussed in previous chapters:
✓ No drinking with meals. Stop drinking 5 to 10 minutes before a meal and wait 30 minutes after a meal to prevent overfilling your pouch.
✓ Eat on a schedule. Grazing can sabotage weight-loss efforts.
✓ Watch portion sizes.
✓ Eat pencil-eraser-size bites. Using smaller utensils makes this easier.
✓ Chew, chew, chew. Your food should be puréed consistency before you swallow.
✓ Eat slowly. Put down your utensils between bites.
✓ Make half your meal protein, and eat it first.
✓ Aim for 25 to 30 grams of fiber every day.
✓ Focus on nutrient-rich foods. Get the most nutrition for your calorie buck.
✓ If a food doesn’t agree with you, wait a few weeks and try it again.
✓ Read labels.
✓ Keep a food diary!
1,000 Calorie MenusAlthough 1,000 calories a day may not seem like a lot, we think you’ll find that when you’re eating healthy food, it is very satisfying. The snacks keep you going between meals. Use your low-carb protein supplement between meals if you have trouble meeting your protein requirement.
31_640180-ch23.indd 31031_640180-ch23.indd 310 8/27/10 10:50 PM8/27/10 10:50 PM
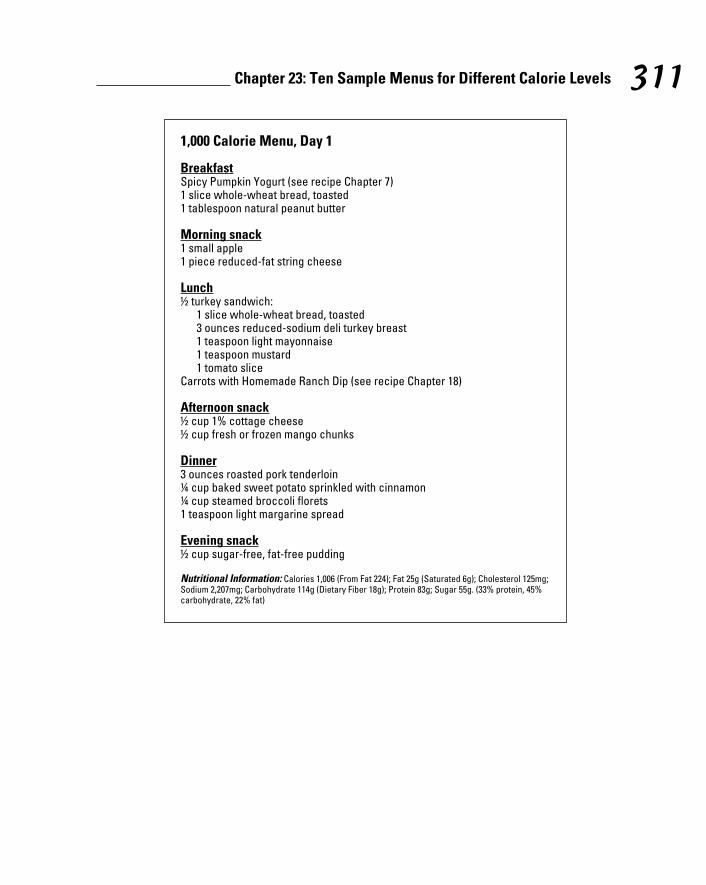
311 Chapter 23: Ten Sample Menus for Different Calorie Levels
1,000 Calorie Menu, Day 1
BreakfastSpicy Pumpkin Yogurt (see recipe Chapter 7)1 slice whole-wheat bread, toasted1 tablespoon natural peanut butter
Morning snack1 small apple1 piece reduced-fat string cheese
Lunch½ turkey sandwich: 1 slice whole-wheat bread, toasted 3 ounces reduced-sodium deli turkey breast 1 teaspoon light mayonnaise 1 teaspoon mustard 1 tomato sliceCarrots with Homemade Ranch Dip (see recipe Chapter 18)
Afternoon snack½ cup 1% cottage cheese½ cup fresh or frozen mango chunks
Dinner3 ounces roasted pork tenderloin¼ cup baked sweet potato sprinkled with cinnamon¼ cup steamed broccoli florets1 teaspoon light margarine spread
Evening snack½ cup sugar-free, fat-free pudding
Nutritional Information: Calories 1,006 (From Fat 224); Fat 25g (Saturated 6g); Cholesterol 125mg;Sodium 2,207mg; Carbohydrate 114g (Dietary Fiber 18g); Protein 83g; Sugar 55g. (33% protein, 45% carbohydrate, 22% fat)
31_640180-ch23.indd 31131_640180-ch23.indd 311 8/27/10 10:50 PM8/27/10 10:50 PM
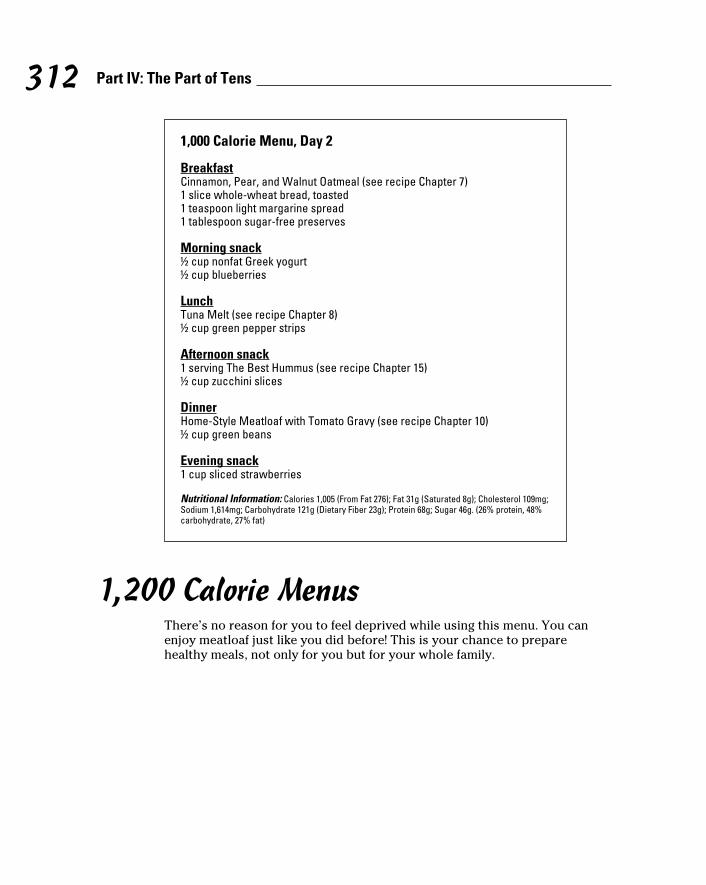
312 Part IV: The Part of Tens
1,000 Calorie Menu, Day 2
BreakfastCinnamon, Pear, and Walnut Oatmeal (see recipe Chapter 7)1 slice whole-wheat bread, toasted1 teaspoon light margarine spread1 tablespoon sugar-free preserves
Morning snack½ cup nonfat Greek yogurt½ cup blueberries
LunchTuna Melt (see recipe Chapter 8)½ cup green pepper strips
Afternoon snack1 serving The Best Hummus (see recipe Chapter 15)½ cup zucchini slices
DinnerHome-Style Meatloaf with Tomato Gravy (see recipe Chapter 10)½ cup green beans
Evening snack1 cup sliced strawberries
Nutritional Information: Calories 1,005 (From Fat 276); Fat 31g (Saturated 8g); Cholesterol 109mg; Sodium 1,614mg; Carbohydrate 121g (Dietary Fiber 23g); Protein 68g; Sugar 46g. (26% protein, 48% carbohydrate, 27% fat)
1,200 Calorie MenusThere’s no reason for you to feel deprived while using this menu. You can enjoy meatloaf just like you did before! This is your chance to prepare healthy meals, not only for you but for your whole family.
31_640180-ch23.indd 31231_640180-ch23.indd 312 8/27/10 10:50 PM8/27/10 10:50 PM
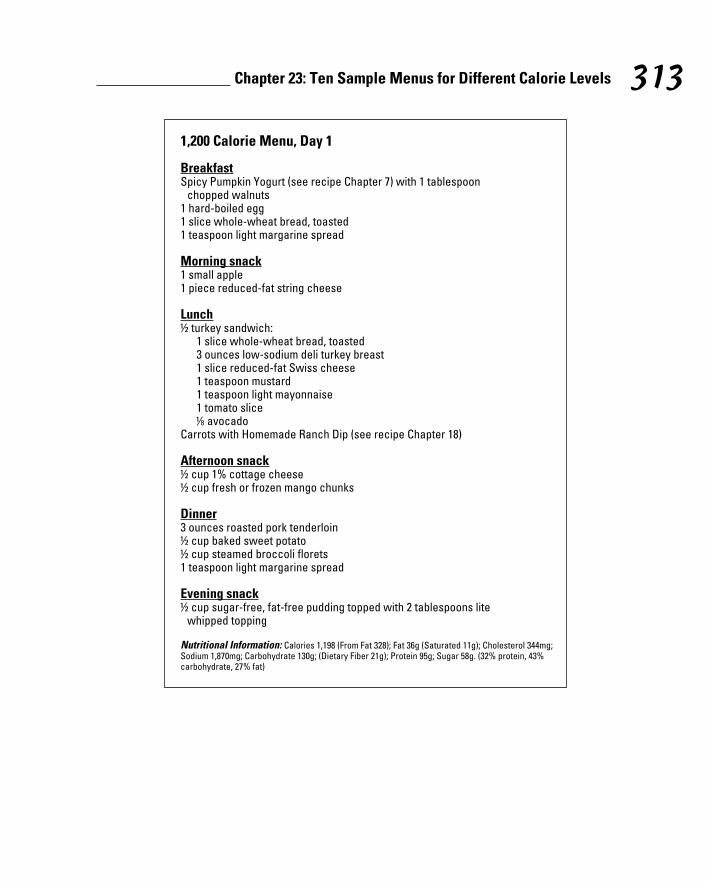
313 Chapter 23: Ten Sample Menus for Different Calorie Levels
1,200 Calorie Menu, Day 1
BreakfastSpicy Pumpkin Yogurt (see recipe Chapter 7) with 1 tablespoon
chopped walnuts1 hard-boiled egg1 slice whole-wheat bread, toasted1 teaspoon light margarine spread
Morning snack1 small apple1 piece reduced-fat string cheese
Lunch½ turkey sandwich: 1 slice whole-wheat bread, toasted 3 ounces low-sodium deli turkey breast 1 slice reduced-fat Swiss cheese 1 teaspoon mustard 1 teaspoon light mayonnaise 1 tomato slice ½ avocadoCarrots with Homemade Ranch Dip (see recipe Chapter 18)
Afternoon snack½ cup 1% cottage cheese½ cup fresh or frozen mango chunks
Dinner3 ounces roasted pork tenderloin½ cup baked sweet potato½ cup steamed broccoli florets1 teaspoon light margarine spread
Evening snack½ cup sugar-free, fat-free pudding topped with 2 tablespoons lite
whipped topping
Nutritional Information: Calories 1,198 (From Fat 328); Fat 36g (Saturated 11g); Cholesterol 344mg; Sodium 1,870mg; Carbohydrate 130g; (Dietary Fiber 21g); Protein 95g; Sugar 58g. (32% protein, 43% carbohydrate, 27% fat)
31_640180-ch23.indd 31331_640180-ch23.indd 313 8/27/10 10:50 PM8/27/10 10:50 PM
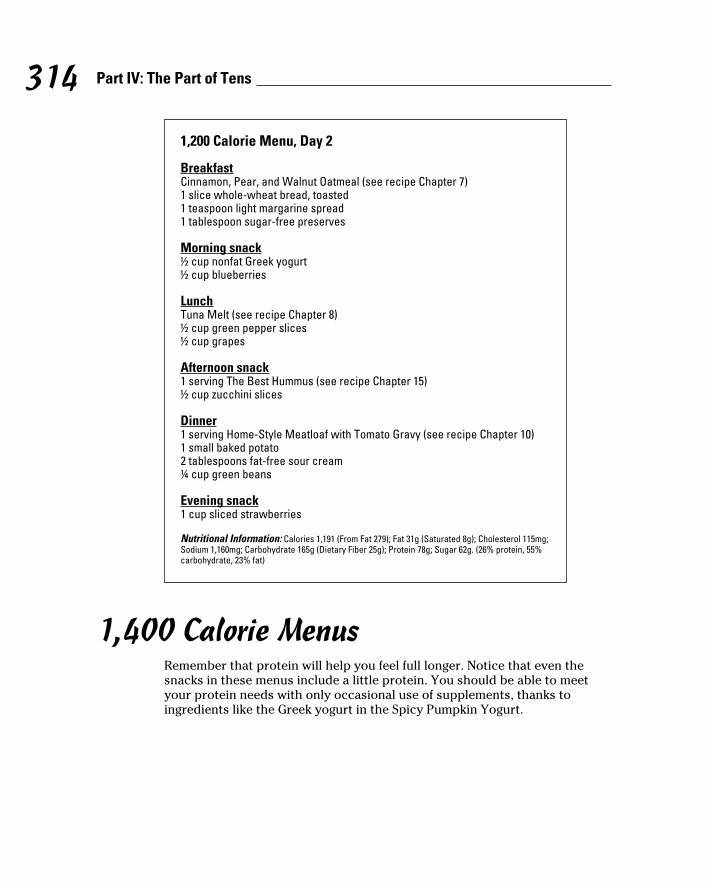
314 Part IV: The Part of Tens
1,200 Calorie Menu, Day 2
BreakfastCinnamon, Pear, and Walnut Oatmeal (see recipe Chapter 7)1 slice whole-wheat bread, toasted1 teaspoon light margarine spread1 tablespoon sugar-free preserves
Morning snack½ cup nonfat Greek yogurt½ cup blueberries
LunchTuna Melt (see recipe Chapter 8)½ cup green pepper slices½ cup grapes
Afternoon snack1 serving The Best Hummus (see recipe Chapter 15)½ cup zucchini slices
Dinner1 serving Home-Style Meatloaf with Tomato Gravy (see recipe Chapter 10)1 small baked potato2 tablespoons fat-free sour cream¼ cup green beans
Evening snack1 cup sliced strawberries
Nutritional Information: Calories 1,191 (From Fat 279); Fat 31g (Saturated 8g); Cholesterol 115mg; Sodium 1,160mg; Carbohydrate 165g (Dietary Fiber 25g); Protein 78g; Sugar 62g. (26% protein, 55% carbohydrate, 23% fat)
1,400 Calorie MenusRemember that protein will help you feel full longer. Notice that even the snacks in these menus include a little protein. You should be able to meet your protein needs with only occasional use of supplements, thanks to ingredients like the Greek yogurt in the Spicy Pumpkin Yogurt.
31_640180-ch23.indd 31431_640180-ch23.indd 314 8/27/10 10:50 PM8/27/10 10:50 PM

315 Chapter 23: Ten Sample Menus for Different Calorie Levels
1,400 Calorie Menu, Day 1
BreakfastSpicy Pumpkin Yogurt (see recipe Chapter 7) with 2 teaspoons
chopped walnuts1 hard-boiled egg1 slice whole-wheat bread, toasted1 teaspoon light margarine spread1 tablespoon sugar-free fruit preserves
Morning snack1 medium apple2 tablespoons natural peanut butter
LunchPita turkey sandwich: 6-inch whole-wheat pita 3 ounces reduced-sodium deli turkey breast 1 slice reduced-fat Swiss cheese 1 teaspoon mustard 1 teaspoon light mayonnaise 1 tomato slice ¼ avocado, slicedCarrots with Homemade Ranch Dip (see recipe Chapter 18)
Afternoon snack¾ cup 1% cottage cheese½ cup fresh or frozen mango chunks
Dinner3 ounces roasted pork tenderloin½ cup baked sweet potato½ cup steamed broccoli florets1 teaspoon light margarine spread
Evening snack½ cup sugar-free, fat-free pudding topped with 2 tablespoons lite
whipped topping½ medium banana
Nutritional Information: Calories 1,416 (From Fat 398); Fat 44g (Saturated 11g); Cholesterol 305mg; Sodium 2,190mg; Carbohydrate 163g (Dietary Fiber 28g); Protein 102g; Sugar 73g. (28% protein, 46% carbohydrate, 28% fat)
31_640180-ch23.indd 31531_640180-ch23.indd 315 8/27/10 10:50 PM8/27/10 10:50 PM
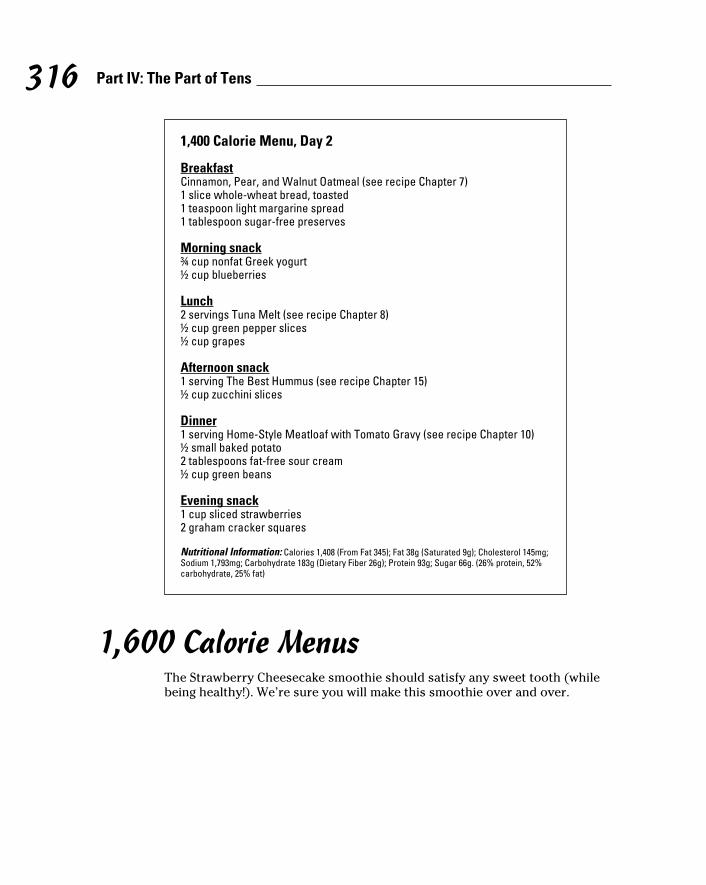
316 Part IV: The Part of Tens
1,400 Calorie Menu, Day 2
BreakfastCinnamon, Pear, and Walnut Oatmeal (see recipe Chapter 7)1 slice whole-wheat bread, toasted1 teaspoon light margarine spread1 tablespoon sugar-free preserves
Morning snack¾ cup nonfat Greek yogurt½ cup blueberries
Lunch2 servings Tuna Melt (see recipe Chapter 8)½ cup green pepper slices½ cup grapes
Afternoon snack1 serving The Best Hummus (see recipe Chapter 15)½ cup zucchini slices
Dinner1 serving Home-Style Meatloaf with Tomato Gravy (see recipe Chapter 10)½ small baked potato2 tablespoons fat-free sour cream½ cup green beans
Evening snack1 cup sliced strawberries2 graham cracker squares
Nutritional Information: Calories 1,408 (From Fat 345); Fat 38g (Saturated 9g); Cholesterol 145mg; Sodium 1,793mg; Carbohydrate 183g (Dietary Fiber 26g); Protein 93g; Sugar 66g. (26% protein, 52% carbohydrate, 25% fat)
1,600 Calorie MenusThe Strawberry Cheesecake smoothie should satisfy any sweet tooth (while being healthy!). We’re sure you will make this smoothie over and over.
31_640180-ch23.indd 31631_640180-ch23.indd 316 8/27/10 10:50 PM8/27/10 10:50 PM

317 Chapter 23: Ten Sample Menus for Different Calorie Levels
1,600 Calorie Menu, Day 1
Breakfast1½ servings Spicy Pumpkin Yogurt (see recipe Chapter 7) with 1 tablespoon
chopped walnuts1 hard-boiled egg1 slice whole-wheat bread, toasted1 teaspoon light margarine spread1 tablespoon sugar-free fruit preserves
Morning snack1 medium apple2 tablespoons natural peanut butter
LunchPita turkey sandwich: 6-inch whole-wheat pita 3 ounces reduced-sodium deli turkey breast 1 slice reduced-fat Swiss cheese 1 teaspoon mustard 1 teaspoon light mayonnaise 2 tomato slices ¼ avocado, slicedCarrots with Homemade Ranch Dip (see recipe Chapter 18)
Afternoon snackStrawberry Cheesecake smoothie (see recipe Chapter 14)
Dinner3 ounces roasted pork tenderloin½ cup baked sweet potato½ cup steamed broccoli florets1 teaspoon light margarine spread
Evening snack½ cup sugar-free, fat-free pudding topped with 2 tablespoons lite
whipped topping1 medium banana
Nutritional Information: Calories 1,636 (From Fat 481); Fat 53g (Saturated 14g); Cholesterol 321mg; Sodium 2,041mg; Carbohydrate 202g (Dietary Fiber 34g); Protein 101g; Sugar 80g. (25% protein, 49% carbohydrate, 29% fat)
31_640180-ch23.indd 31731_640180-ch23.indd 317 8/27/10 10:50 PM8/27/10 10:50 PM

318 Part IV: The Part of Tens
1,600 Calorie Menu, Day 2
BreakfastCinnamon, Pear, and Walnut Oatmeal (see recipe Chapter 7)½ slice whole-wheat bread, toasted1 teaspoon light margarine spread
Morning snack¾ cup nonfat Greek yogurt½ cup blueberries
Lunch2 servings Tuna Melt (see recipe Chapter 8)½ cup green pepper slices½ cup grapes
Afternoon snack1 serving The Best Hummus (see recipe Chapter 15)½ cup zucchini slices
Dinner1 serving Home-Style Meatloaf with Tomato Gravy (see recipe Chapter 10)1 small baked potato2 tablespoons fat-free sour cream½ cup green beans
Evening snack1 cup sliced strawberries2 graham cracker squares
Nutritional Information: Calories 1,600 (From Fat 383); Fat 43g (Saturated 10g); Cholesterol 148mg; Sodium 1,845mg; Carbohydrate 199g (Dietary Fiber 30g); Protein 102g; Sugar 80g. (26% protein, 50% carbohydrate, 24% fat)
1,800 Calorie MenusYou’ll look forward to waking up when you know Cinnamon, Pear, and Walnut Oatmeal is on the menu. The fiber in the oatmeal will satisfy you and keep you going all morning.
31_640180-ch23.indd 31831_640180-ch23.indd 318 8/27/10 10:50 PM8/27/10 10:50 PM
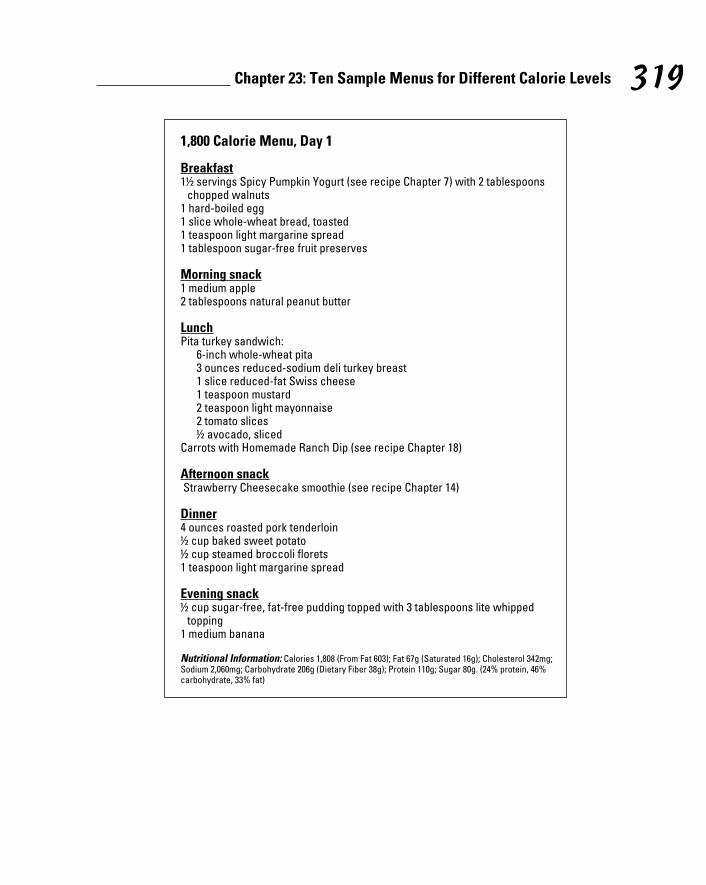
319 Chapter 23: Ten Sample Menus for Different Calorie Levels
1,800 Calorie Menu, Day 1
Breakfast1½ servings Spicy Pumpkin Yogurt (see recipe Chapter 7) with 2 tablespoons
chopped walnuts1 hard-boiled egg1 slice whole-wheat bread, toasted1 teaspoon light margarine spread1 tablespoon sugar-free fruit preserves
Morning snack1 medium apple2 tablespoons natural peanut butter
LunchPita turkey sandwich: 6-inch whole-wheat pita 3 ounces reduced-sodium deli turkey breast 1 slice reduced-fat Swiss cheese 1 teaspoon mustard 2 teaspoon light mayonnaise 2 tomato slices ½ avocado, slicedCarrots with Homemade Ranch Dip (see recipe Chapter 18)
Afternoon snack Strawberry Cheesecake smoothie (see recipe Chapter 14)
Dinner4 ounces roasted pork tenderloin½ cup baked sweet potato½ cup steamed broccoli florets1 teaspoon light margarine spread
Evening snack½ cup sugar-free, fat-free pudding topped with 3 tablespoons lite whipped
topping1 medium banana
Nutritional Information: Calories 1,808 (From Fat 603); Fat 67g (Saturated 16g); Cholesterol 342mg; Sodium 2,060mg; Carbohydrate 206g (Dietary Fiber 38g); Protein 110g; Sugar 80g. (24% protein, 46% carbohydrate, 33% fat)
31_640180-ch23.indd 31931_640180-ch23.indd 319 8/27/10 10:50 PM8/27/10 10:50 PM
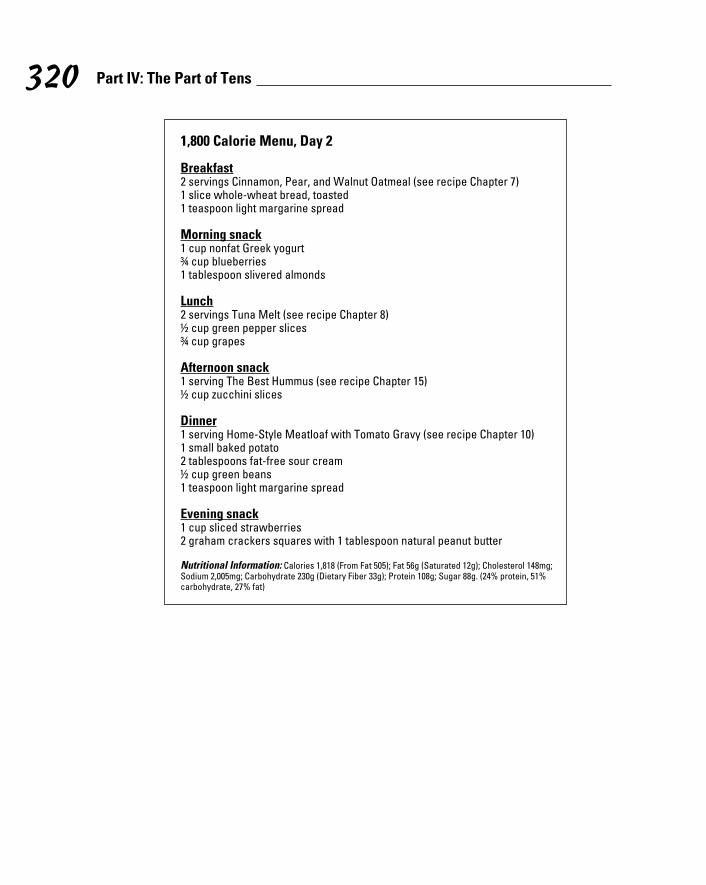
320 Part IV: The Part of Tens
1,800 Calorie Menu, Day 2
Breakfast2 servings Cinnamon, Pear, and Walnut Oatmeal (see recipe Chapter 7)1 slice whole-wheat bread, toasted1 teaspoon light margarine spread
Morning snack1 cup nonfat Greek yogurt¾ cup blueberries1 tablespoon slivered almonds
Lunch2 servings Tuna Melt (see recipe Chapter 8)½ cup green pepper slices¾ cup grapes
Afternoon snack1 serving The Best Hummus (see recipe Chapter 15)½ cup zucchini slices
Dinner1 serving Home-Style Meatloaf with Tomato Gravy (see recipe Chapter 10)1 small baked potato2 tablespoons fat-free sour cream½ cup green beans1 teaspoon light margarine spread
Evening snack1 cup sliced strawberries2 graham crackers squares with 1 tablespoon natural peanut butter
Nutritional Information: Calories 1,818 (From Fat 505); Fat 56g (Saturated 12g); Cholesterol 148mg; Sodium 2,005mg; Carbohydrate 230g (Dietary Fiber 33g); Protein 108g; Sugar 88g. (24% protein, 51% carbohydrate, 27% fat)
31_640180-ch23.indd 32031_640180-ch23.indd 320 8/27/10 10:50 PM8/27/10 10:50 PM
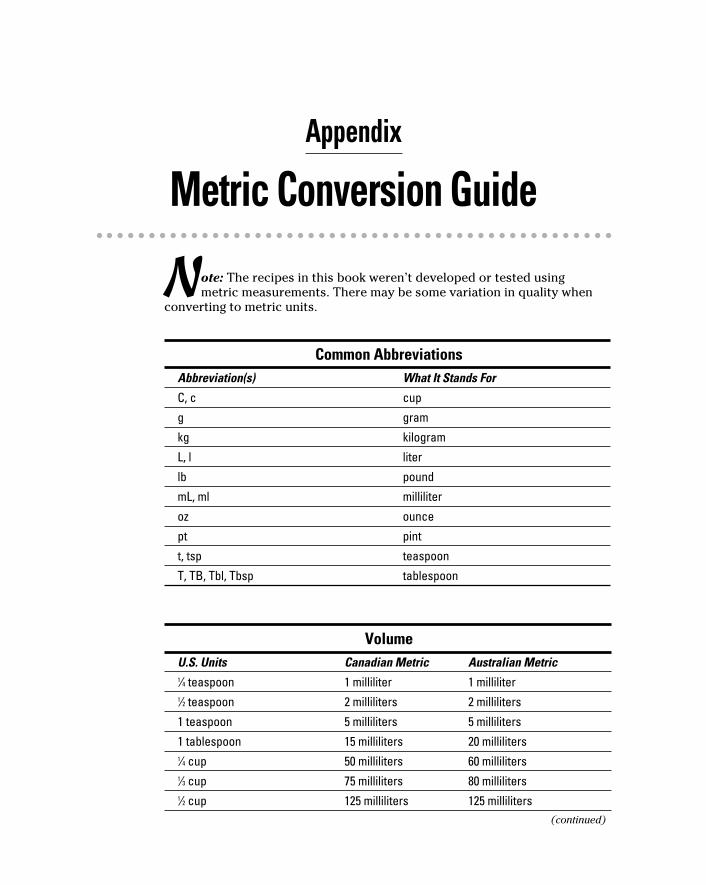
Appendix
Metric Conversion Guide
Note: The recipes in this book weren’t developed or tested using metric measurements. There may be some variation in quality when
converting to metric units.
Common Abbreviations
Abbreviation(s) What It Stands For
C, c cup
g gram
kg kilogram
L, l liter
lb pound
mL, ml milliliter
oz ounce
pt pint
t, tsp teaspoon
T, TB, Tbl, Tbsp tablespoon
Volume
U.S. Units Canadian Metric Australian Metric
1⁄4 teaspoon 1 milliliter 1 milliliter1⁄2 teaspoon 2 milliliters 2 milliliters
1 teaspoon 5 milliliters 5 milliliters
1 tablespoon 15 milliliters 20 milliliters1⁄4 cup 50 milliliters 60 milliliters1⁄3 cup 75 milliliters 80 milliliters1⁄2 cup 125 milliliters 125 milliliters
(continued)
32_640180-bapp01.indd 32132_640180-bapp01.indd 321 8/27/10 10:50 PM8/27/10 10:50 PM
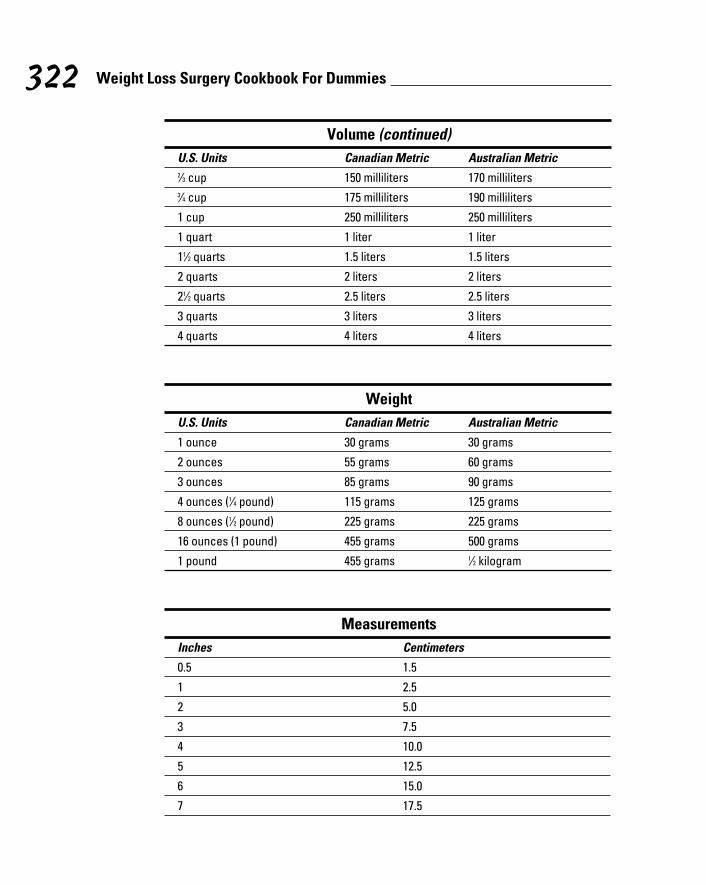
322 Weight Loss Surgery Cookbook For Dummies
Volume (continued)
U.S. Units Canadian Metric Australian Metric
2⁄3 cup 150 milliliters 170 milliliters3⁄4 cup 175 milliliters 190 milliliters
1 cup 250 milliliters 250 milliliters
1 quart 1 liter 1 liter
11⁄2 quarts 1.5 liters 1.5 liters
2 quarts 2 liters 2 liters
21⁄2 quarts 2.5 liters 2.5 liters
3 quarts 3 liters 3 liters
4 quarts 4 liters 4 liters
Weight
U.S. Units Canadian Metric Australian Metric
1 ounce 30 grams 30 grams
2 ounces 55 grams 60 grams
3 ounces 85 grams 90 grams
4 ounces (1⁄4 pound) 115 grams 125 grams
8 ounces (1⁄2 pound) 225 grams 225 grams
16 ounces (1 pound) 455 grams 500 grams
1 pound 455 grams 1⁄2 kilogram
Measurements
Inches Centimeters
0.5 1.5
1 2.5
2 5.0
3 7.5
4 10.0
5 12.5
6 15.0
7 17.5
32_640180-bapp01.indd 32232_640180-bapp01.indd 322 8/27/10 10:50 PM8/27/10 10:50 PM

323 Appendix: Metric Conversion Guide
Inches Centimeters
8 20.5
9 23.0
10 25.5
11 28.0
12 30.5
13 33.0
Temperature (Degrees)
Fahrenheit Celsius
32 0
212 100
250 120
275 140
300 150
325 160
350 180
375 190
400 200
425 220
450 230
475 240
500 260
32_640180-bapp01.indd 32332_640180-bapp01.indd 323 8/27/10 10:50 PM8/27/10 10:50 PM

324 Weight Loss Surgery Cookbook For Dummies
32_640180-bapp01.indd 32432_640180-bapp01.indd 324 8/27/10 10:50 PM8/27/10 10:50 PM

Index
• A •abbreviations in recipes, 321adjustable gastric banding (AGB)
canned soups and, 245ground meats and, 169hunger and, 22smoothies and, 223snacking and, 267swelling of pouch and, 16weight loss after, 38
AGB. See adjustable gastric bandingalcoholic beverages
in cooking, 107–108drinking, 20, 61
allspice, 160almonds, 272Angel Hair and Salmon with Spicy Basil
Sauce, 198appetite, return of after surgery, 22appetizers
portion size and, 233recipes for, 234–239salsas and dips, 239–241on sticks, 242–243
Apple with Honey Almond Butter, 268–269Asiago Carrot and Potato Au Gratin, 256–257Asian restaurants, eating at, 57Avocado, Tomato, and Feta Salad, 263avocados, 75, 136, 137awareness of food when eating, 298
• B •B complex vitamin supplements, 64Baked French Toast, 130baking, 279Balsamic Strawberries, 292–293balsamic vinegar, 292Banana Berry smoothie, 225
Banana Bran Muffi ns, 124bariatric surgery diet. See also stages of
bariatric surgery dieteating guidelines, 11–12food guide pyramid, 40–41portion size and, 11surgeon guidelines, 23
bariatric team, support from, 16, 37Bean Tostada, 288–289beans, canned, 76–77beef. See also red meat
cooking and consuming, 102cuts of, 166–168ground-beef dishes, 168–171substitutes for, 110USDA grades of, 166
Berry Delicious Egg Custard, 140Berrycotta Pancakes, 129The Best Hummus, 241biliopancreatic diversion with or without
duodenal switch and swelling of pouch, 16
bisoncooking, 192shopping for, 183
Bison Burgers, 193Bison Stew, 194Black Bean Salsa, 181, 306Black Bean Veggie Burger, 219Black-Eyed Dill Tuna, 206blenders, 87, 224Blue Cheese–Stuffed Mushrooms, 238boiling, 101braising, 101breakfast
egg dishes, 119–121importance of, 115weekend treat recipes, 128–130whole-grain recipes, 122–128yogurt and fruit recipes, 116–119
33_640180-bindex.indd 32533_640180-bindex.indd 325 8/27/10 10:51 PM8/27/10 10:51 PM
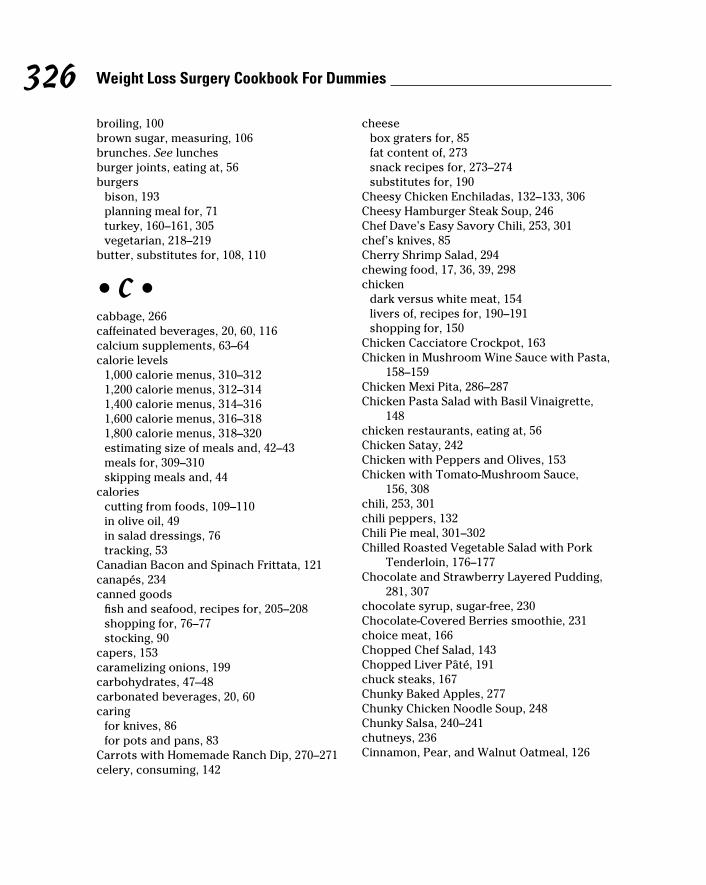
326 Weight Loss Surgery Cookbook For Dummies
broiling, 100brown sugar, measuring, 106brunches. See lunchesburger joints, eating at, 56burgers
bison, 193planning meal for, 71turkey, 160–161, 305vegetarian, 218–219
butter, substitutes for, 108, 110
• C •cabbage, 266caffeinated beverages, 20, 60, 116calcium supplements, 63–64calorie levels
1,000 calorie menus, 310–3121,200 calorie menus, 312–3141,400 calorie menus, 314–3161,600 calorie menus, 316–3181,800 calorie menus, 318–320estimating size of meals and, 42–43meals for, 309–310skipping meals and, 44
caloriescutting from foods, 109–110in olive oil, 49in salad dressings, 76tracking, 53
Canadian Bacon and Spinach Frittata, 121canapés, 234canned goods
fi sh and seafood, recipes for, 205–208shopping for, 76–77stocking, 90
capers, 153caramelizing onions, 199carbohydrates, 47–48carbonated beverages, 20, 60caring
for knives, 86for pots and pans, 83
Carrots with Homemade Ranch Dip, 270–271celery, consuming, 142
cheesebox graters for, 85fat content of, 273snack recipes for, 273–274substitutes for, 190
Cheesy Chicken Enchiladas, 132–133, 306Cheesy Hamburger Steak Soup, 246Chef Dave’s Easy Savory Chili, 253, 301chef’s knives, 85Cherry Shrimp Salad, 294chewing food, 17, 36, 39, 298chicken
dark versus white meat, 154livers of, recipes for, 190–191shopping for, 150
Chicken Cacciatore Crockpot, 163Chicken in Mushroom Wine Sauce with Pasta,
158–159Chicken Mexi Pita, 286–287Chicken Pasta Salad with Basil Vinaigrette,
148chicken restaurants, eating at, 56Chicken Satay, 242Chicken with Peppers and Olives, 153Chicken with Tomato-Mushroom Sauce,
156, 308chili, 253, 301chili peppers, 132Chili Pie meal, 301–302Chilled Roasted Vegetable Salad with Pork
Tenderloin, 176–177Chocolate and Strawberry Layered Pudding,
281, 307chocolate syrup, sugar-free, 230Chocolate-Covered Berries smoothie, 231choice meat, 166Chopped Chef Salad, 143Chopped Liver Pâté, 191chuck steaks, 167Chunky Baked Apples, 277Chunky Chicken Noodle Soup, 248Chunky Salsa, 240–241chutneys, 236Cinnamon, Pear, and Walnut Oatmeal, 126
33_640180-bindex.indd 32633_640180-bindex.indd 326 8/27/10 10:51 PM8/27/10 10:51 PM
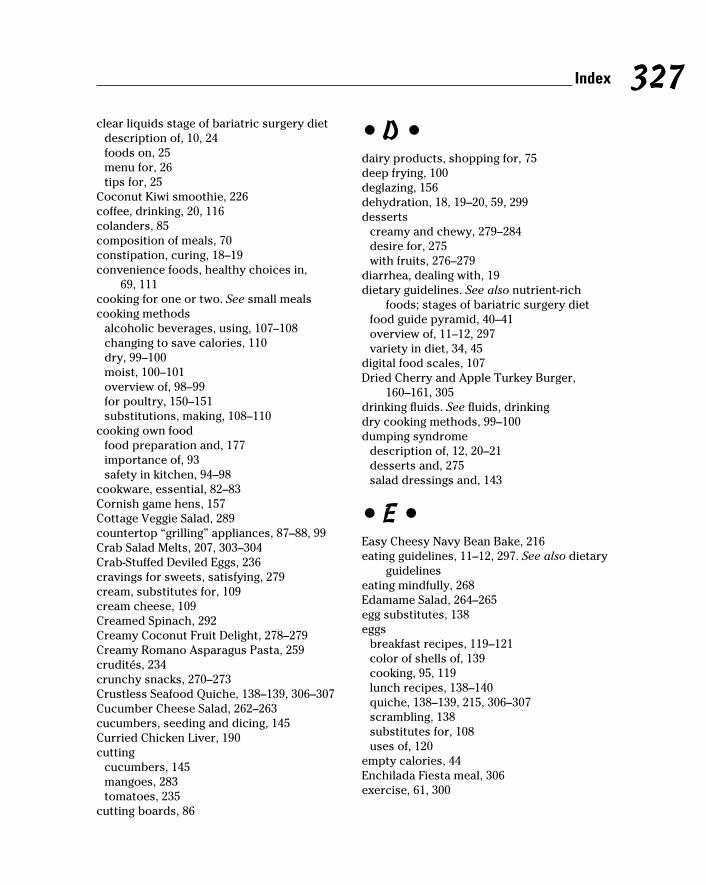
327327 Index
clear liquids stage of bariatric surgery dietdescription of, 10, 24foods on, 25menu for, 26tips for, 25
Coconut Kiwi smoothie, 226coffee, drinking, 20, 116colanders, 85composition of meals, 70constipation, curing, 18–19convenience foods, healthy choices in,
69, 111cooking for one or two. See small mealscooking methods
alcoholic beverages, using, 107–108changing to save calories, 110dry, 99–100moist, 100–101overview of, 98–99for poultry, 150–151substitutions, making, 108–110
cooking own foodfood preparation and, 177importance of, 93safety in kitchen, 94–98
cookware, essential, 82–83Cornish game hens, 157Cottage Veggie Salad, 289countertop “grilling” appliances, 87–88, 99Crab Salad Melts, 207, 303–304Crab-Stuffed Deviled Eggs, 236cravings for sweets, satisfying, 279cream, substitutes for, 109cream cheese, 109Creamed Spinach, 292Creamy Coconut Fruit Delight, 278–279Creamy Romano Asparagus Pasta, 259crudités, 234crunchy snacks, 270–273Crustless Seafood Quiche, 138–139, 306–307Cucumber Cheese Salad, 262–263cucumbers, seeding and dicing, 145Curried Chicken Liver, 190cutting
cucumbers, 145mangoes, 283tomatoes, 235
cutting boards, 86
• D •dairy products, shopping for, 75deep frying, 100deglazing, 156dehydration, 18, 19–20, 59, 299desserts
creamy and chewy, 279–284desire for, 275with fruits, 276–279
diarrhea, dealing with, 19dietary guidelines. See also nutrient-rich
foods; stages of bariatric surgery dietfood guide pyramid, 40–41overview of, 11–12, 297variety in diet, 34, 45
digital food scales, 107Dried Cherry and Apple Turkey Burger,
160–161, 305drinking fl uids. See fl uids, drinkingdry cooking methods, 99–100dumping syndrome
description of, 12, 20–21desserts and, 275salad dressings and, 143
• E •Easy Cheesy Navy Bean Bake, 216eating guidelines, 11–12, 297. See also dietary
guidelineseating mindfully, 268Edamame Salad, 264–265egg substitutes, 138eggs
breakfast recipes, 119–121color of shells of, 139cooking, 95, 119lunch recipes, 138–140quiche, 138–139, 215, 306–307scrambling, 138substitutes for, 108uses of, 120
empty calories, 44Enchilada Fiesta meal, 306exercise, 61, 300
33_640180-bindex.indd 32733_640180-bindex.indd 327 8/27/10 10:51 PM8/27/10 10:51 PM
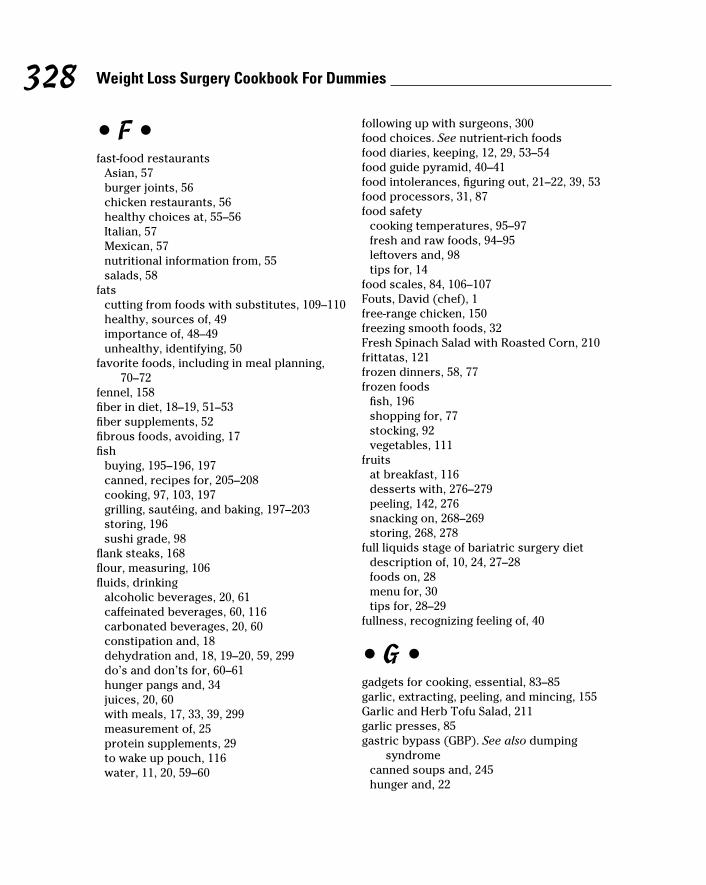
328 Weight Loss Surgery Cookbook For Dummies
• F •fast-food restaurants
Asian, 57burger joints, 56chicken restaurants, 56healthy choices at, 55–56Italian, 57Mexican, 57nutritional information from, 55salads, 58
fatscutting from foods with substitutes, 109–110healthy, sources of, 49importance of, 48–49unhealthy, identifying, 50
favorite foods, including in meal planning, 70–72
fennel, 158fi ber in diet, 18–19, 51–53fi ber supplements, 52fi brous foods, avoiding, 17fi sh
buying, 195–196, 197canned, recipes for, 205–208cooking, 97, 103, 197grilling, sautéing, and baking, 197–203storing, 196sushi grade, 98
fl ank steaks, 168fl our, measuring, 106fl uids, drinking
alcoholic beverages, 20, 61caffeinated beverages, 60, 116carbonated beverages, 20, 60constipation and, 18dehydration and, 18, 19–20, 59, 299do’s and don’ts for, 60–61hunger pangs and, 34juices, 20, 60with meals, 17, 33, 39, 299measurement of, 25protein supplements, 29to wake up pouch, 116water, 11, 20, 59–60
following up with surgeons, 300food choices. See nutrient-rich foodsfood diaries, keeping, 12, 29, 53–54food guide pyramid, 40–41food intolerances, fi guring out, 21–22, 39, 53food processors, 31, 87food safety
cooking temperatures, 95–97fresh and raw foods, 94–95leftovers and, 98tips for, 14
food scales, 84, 106–107Fouts, David (chef), 1free-range chicken, 150freezing smooth foods, 32Fresh Spinach Salad with Roasted Corn, 210frittatas, 121frozen dinners, 58, 77frozen foods
fi sh, 196shopping for, 77stocking, 92vegetables, 111
fruitsat breakfast, 116desserts with, 276–279peeling, 142, 276snacking on, 268–269storing, 268, 278
full liquids stage of bariatric surgery dietdescription of, 10, 24, 27–28foods on, 28menu for, 30tips for, 28–29
fullness, recognizing feeling of, 40
• G •gadgets for cooking, essential, 83–85garlic, extracting, peeling, and mincing, 155Garlic and Herb Tofu Salad, 211garlic presses, 85gastric bypass (GBP). See also dumping
syndromecanned soups and, 245hunger and, 22
33_640180-bindex.indd 32833_640180-bindex.indd 328 8/27/10 10:51 PM8/27/10 10:51 PM

329329 Index
snacking and, 267soft foods stage of diet and, 24swelling of pouch and, 16weight loss after, 38
GBP. See gastric bypassginger, 178grains and cereals, shopping for, 76graters, box, 85Greek Meatballs with Tzatziki, 188–189Greek Meatballs with Yogurt Sauce, 171Grilled Bananas, 276–277Grilled Chicken and Pecan Salad, 146Grilled Shrimp, 234–235grilling, 99, 305. See also indoor grillsgrocery lists, 73grocery shopping
for dairy products, 75for frozen foods, 77for grains and cereals, 76for meat, poultry, and seafood, 75nutrition labels, reading, 77–80for produce, 74–75for staples, 76–77tips for, 13, 73–74
ground meatschoosing, 168consuming, 159, 165
ground-beef dishes, 168–171
• H •haddock, 202hair loss, 45Havarti Scramble with Salmon, 120Hearty Moussaka with Beans, 216–217Herb-Roasted Cornish Game Hens, 157herbs, 88–89, 248hernias, 18hoisin sauce, 178Home-Style Meatloaf with Tomato Gravy,
170, 303Honey, Almonds, and Oats Breakfast Bar, 125hors d’oeuvres, 234. See also appetizershummus, 241hunger, experiencing after surgery, 22Hurry Curry Pork Salad, 174, 304–305hydrogenated oils, 50
• I •indoor grills, 87–88, 99ingredients, leaving out or changing to save
calories, 110insoluble fi bers, 51Internet, information from, 16introducing foods into diet, 17, 22iron supplements, 64Italian Halibut, 202–203Italian restaurant food, 57
• J •juices, drinking, 20, 60junk foods, 44, 45
• K •kebab recipes, 172–173, 243kitchen. See also pantry, stocking
cookware, 82–83cutting boards, 86gadgets, 83–85knives, 85–86organizing, 13, 82purging, 81safety in, 14, 94–98small appliances, 87–88
kiwis, 226knives, essential, 85–86
• L •labels on foods, reading, 77–80lacto-ovo and lacto vegetarians, 211lamb
cooking and consuming, 103cuts of, 185recipes for, 186–189shopping for, 184–185
Lamb Vindaloo, 187leftovers, keeping safe, 98Leg of Lamb with Thyme and Orange, 186Lemon Garlic Dover Sole, 200lentils, 252
33_640180-bindex.indd 32933_640180-bindex.indd 329 8/27/10 10:51 PM8/27/10 10:51 PM
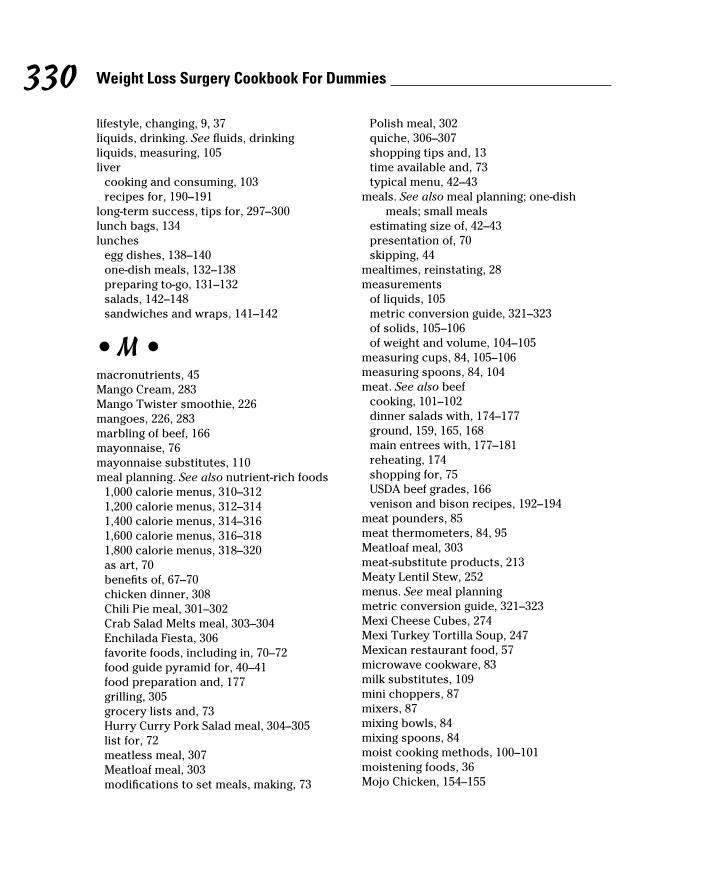
330 Weight Loss Surgery Cookbook For Dummies
lifestyle, changing, 9, 37liquids, drinking. See fl uids, drinkingliquids, measuring, 105liver
cooking and consuming, 103recipes for, 190–191
long-term success, tips for, 297–300lunch bags, 134lunches
egg dishes, 138–140one-dish meals, 132–138preparing to-go, 131–132salads, 142–148sandwiches and wraps, 141–142
• M •macronutrients, 45Mango Cream, 283Mango Twister smoothie, 226mangoes, 226, 283marbling of beef, 166mayonnaise, 76mayonnaise substitutes, 110meal planning. See also nutrient-rich foods
1,000 calorie menus, 310–3121,200 calorie menus, 312–3141,400 calorie menus, 314–3161,600 calorie menus, 316–3181,800 calorie menus, 318–320as art, 70benefi ts of, 67–70chicken dinner, 308Chili Pie meal, 301–302Crab Salad Melts meal, 303–304Enchilada Fiesta, 306favorite foods, including in, 70–72food guide pyramid for, 40–41food preparation and, 177grilling, 305grocery lists and, 73Hurry Curry Pork Salad meal, 304–305list for, 72meatless meal, 307Meatloaf meal, 303modifi cations to set meals, making, 73
Polish meal, 302quiche, 306–307shopping tips and, 13time available and, 73typical menu, 42–43
meals. See also meal planning; one-dish meals; small meals
estimating size of, 42–43presentation of, 70skipping, 44
mealtimes, reinstating, 28measurements
of liquids, 105metric conversion guide, 321–323of solids, 105–106of weight and volume, 104–105
measuring cups, 84, 105–106measuring spoons, 84, 104meat. See also beef
cooking, 101–102dinner salads with, 174–177ground, 159, 165, 168main entrees with, 177–181reheating, 174shopping for, 75USDA beef grades, 166venison and bison recipes, 192–194
meat pounders, 85meat thermometers, 84, 95Meatloaf meal, 303meat-substitute products, 213Meaty Lentil Stew, 252menus. See meal planningmetric conversion guide, 321–323Mexi Cheese Cubes, 274Mexi Turkey Tortilla Soup, 247Mexican restaurant food, 57microwave cookware, 83milk substitutes, 109mini choppers, 87mixers, 87mixing bowls, 84mixing spoons, 84moist cooking methods, 100–101moistening foods, 36Mojo Chicken, 154–155
33_640180-bindex.indd 33033_640180-bindex.indd 330 8/27/10 10:51 PM8/27/10 10:51 PM

331331 Index
money, saving by planning meals, 69Monterey Bay Aquarium, Seafood Watch
guide, 196multivitamins, 62–63
• N •nausea after surgery, 17–18, 40“no added sugar” labels, 27nonstick coatings on pans, 83nutrient-rich foods
carbohydrates, 47–48description of, 44–45fats, 48–50, 109–110grocery shopping for, 73–74protein, 45–47, 65, 101–103putting fi rst, 298types of, 45
nutrition labels on foods, reading, 78–79
• O •oatmeal, 122, 126–127Oatmeal Bars, 284oils
healthy, 76olive, 49sesame, 173
Old Bay seasoning, 207olive oil, calories in, 49omega-3 fatty acids, 198, 264omelet pans, 83one-dish meals
for lunches, 132–138with poultry, 161–162
onions, caramelizing, 199online food tracking programs, 29, 54Orangalicious smoothie, 227organic chicken, 150Oriental Slaw, 266Oriental Steak Strips with Mushrooms and
Cherry Tomatoes, 173Orzo and Salmon Salad, 144overfi shing, 196overstretching pouch, 38
• P •pan frying, 100panko bread crumbs, 291pans, essential, 82–83pantry, stocking
canned foods, 90herbs and spices, 88–89for lunches, 131staples, 91
paring knives, 85Parmesan Baked Haddock, 202Parmesan Popcorn Delight, 271pasta
cooking, 258–259measuring, 107side dishes with, 259–260
pâté, 191Peach Parfait, 278Peaches and Cream smoothie, 227Peaches and Creamy Wheat, 293Peanut Butter Honey over Rice Cakes,
272–273Peanut-Sauced Chunky Banana, 118Pears and Gorgonzola, 273peeling
avocados, 137fruits, 142, 276garlic, 155sausage, 251shrimp, 204
physical activity and weight loss success, 300pickle, lettuce, onion, and tomato (PLOT), 71Pimento Cheese and Tomato Wrap, 142Piña Colada Fruit ’n’ Cheese, 137pineapple, tolerance for, 172Pineapple Upside Down smoothie, 228Pineapple with Ricotta, 269pitting and peeling avocados, 137planning meals. See meal planningplates, size of, 16–17PLOT (pickle, lettuce, onion, and tomato), 71poaching, 101Polish meal, 302
33_640180-bindex.indd 33133_640180-bindex.indd 331 8/27/10 10:51 PM8/27/10 10:51 PM

332 Weight Loss Surgery Cookbook For Dummies
porkcooking, 96, 103cuts of, 168
Pork and Sauerkraut Soup, 249, 302Pork Ginger Kebabs, 243Pork Stir-Fry, 178pork tenderloin, 176, 179Pork Tenderloin Cutlets with Pear and Ginger
Sauce, 179port wine, 276portion sizes
appetizers and, 233chicken breasts, 152measurement of, 28, 41–42nutrient-rich foods and, 11in recipes, 116watching, 298
Portobello Burger, 218–219postoperative visits to surgeons, 23potato side dishes, 256–257pouch
angering, 39–40calming in mornings, 116full-liquid foods and, 28prevention of overstretching of, 38size of, 16swelling of after surgery, 16–17as tool to reach weight loss goals, 38
poultrycasserole recipes, 161–163cooking, 96, 102–103, 149cooking methods for, 150–151liver, recipes for, 190–191roasted, sautéed, and baked, 151–159rotisserie-cooked, 99, 111shopping for, 75, 150skin of, eating, 103, 151turkey burger recipes, 159–161
presentation of meals, 70prime meat, 166produce
convenience foods, healthy choices in, 111handling and prepping, 94–95shopping for, 74–75
proteinadding to smoothies, 224cooking and consuming, 101–103
eating fi rst, 45–46eating vegetarian and, 209quinoa, 123snacks with, 47in soups, 245sources of, 46, 65, 101–102weighing, 107
protein malnutrition, 46protein supplements, 29, 32, 65–66pudding, 279pumpkin, 117Pumpkin Custard, 282Pumpkin Spice smoothie, 228–229puréed foods. See also Smooth Foods stage of
bariatric surgery dietdescription of, 24freezing, 32preparing, 31
• Q •quality
of cookware, 82, 83of knives, 86
Quick Seafood Salad, 145Quinoa Pilaf with Dried Cherries and Pecans,
123
• R •raw foods
cooking to proper temperature, 95–97handling and prepping, 94–95sushi grade fi sh, 98
reading nutrition labels on foods, 77–80recipes
abbreviations in, 321adapting, 40appetizers, 234–239for canned fi sh and seafood, 205–208casseroles, 161–162cheese snacks, 273–274chocolate smoothies, 231conventions for, 2–3crunchy snacks, 270–273desserts, 279–284egg dishes, 119–121, 138–140
33_640180-bindex.indd 33233_640180-bindex.indd 332 8/27/10 10:51 PM8/27/10 10:51 PM
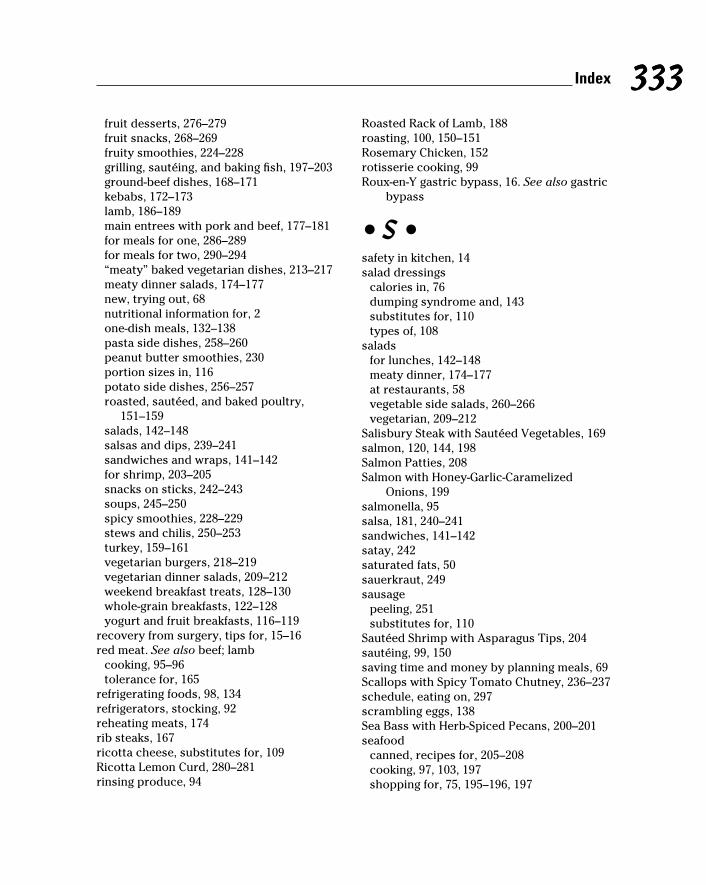
333333 Index
fruit desserts, 276–279fruit snacks, 268–269fruity smoothies, 224–228grilling, sautéing, and baking fi sh, 197–203ground-beef dishes, 168–171kebabs, 172–173lamb, 186–189main entrees with pork and beef, 177–181for meals for one, 286–289for meals for two, 290–294“meaty” baked vegetarian dishes, 213–217meaty dinner salads, 174–177new, trying out, 68nutritional information for, 2one-dish meals, 132–138pasta side dishes, 258–260peanut butter smoothies, 230portion sizes in, 116potato side dishes, 256–257roasted, sautéed, and baked poultry,
151–159salads, 142–148salsas and dips, 239–241sandwiches and wraps, 141–142for shrimp, 203–205snacks on sticks, 242–243soups, 245–250spicy smoothies, 228–229stews and chilis, 250–253turkey, 159–161vegetarian burgers, 218–219vegetarian dinner salads, 209–212weekend breakfast treats, 128–130whole-grain breakfasts, 122–128yogurt and fruit breakfasts, 116–119
recovery from surgery, tips for, 15–16red meat. See also beef; lamb
cooking, 95–96tolerance for, 165
refrigerating foods, 98, 134refrigerators, stocking, 92reheating meats, 174rib steaks, 167ricotta cheese, substitutes for, 109Ricotta Lemon Curd, 280–281rinsing produce, 94
Roasted Rack of Lamb, 188roasting, 100, 150–151Rosemary Chicken, 152rotisserie cooking, 99Roux-en-Y gastric bypass, 16. See also gastric
bypass
• S •safety in kitchen, 14salad dressings
calories in, 76dumping syndrome and, 143substitutes for, 110types of, 108
saladsfor lunches, 142–148meaty dinner, 174–177at restaurants, 58vegetable side salads, 260–266vegetarian, 209–212
Salisbury Steak with Sautéed Vegetables, 169salmon, 120, 144, 198Salmon Patties, 208Salmon with Honey-Garlic-Caramelized
Onions, 199salmonella, 95salsa, 181, 240–241sandwiches, 141–142satay, 242saturated fats, 50sauerkraut, 249sausage
peeling, 251substitutes for, 110
Sautéed Shrimp with Asparagus Tips, 204sautéing, 99, 150saving time and money by planning meals, 69Scallops with Spicy Tomato Chutney, 236–237schedule, eating on, 297scrambling eggs, 138Sea Bass with Herb-Spiced Pecans, 200–201seafood
canned, recipes for, 205–208cooking, 97, 103, 197shopping for, 75, 195–196, 197
33_640180-bindex.indd 33333_640180-bindex.indd 333 8/27/10 10:51 PM8/27/10 10:51 PM
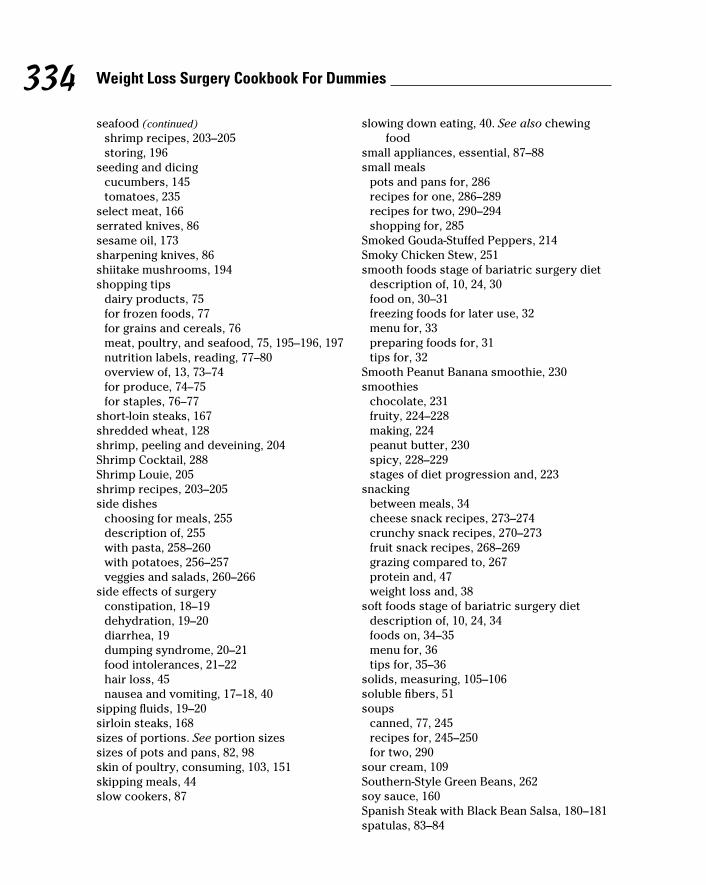
334 Weight Loss Surgery Cookbook For Dummies
seafood (continued)
shrimp recipes, 203–205storing, 196
seeding and dicingcucumbers, 145tomatoes, 235
select meat, 166serrated knives, 86sesame oil, 173sharpening knives, 86shiitake mushrooms, 194shopping tips
dairy products, 75for frozen foods, 77for grains and cereals, 76meat, poultry, and seafood, 75, 195–196, 197nutrition labels, reading, 77–80overview of, 13, 73–74for produce, 74–75for staples, 76–77
short-loin steaks, 167shredded wheat, 128shrimp, peeling and deveining, 204Shrimp Cocktail, 288Shrimp Louie, 205shrimp recipes, 203–205side dishes
choosing for meals, 255description of, 255with pasta, 258–260with potatoes, 256–257veggies and salads, 260–266
side effects of surgeryconstipation, 18–19dehydration, 19–20diarrhea, 19dumping syndrome, 20–21food intolerances, 21–22hair loss, 45nausea and vomiting, 17–18, 40
sipping fl uids, 19–20sirloin steaks, 168sizes of portions. See portion sizessizes of pots and pans, 82, 98skin of poultry, consuming, 103, 151skipping meals, 44slow cookers, 87
slowing down eating, 40. See also chewing food
small appliances, essential, 87–88small meals
pots and pans for, 286recipes for one, 286–289recipes for two, 290–294shopping for, 285
Smoked Gouda-Stuffed Peppers, 214Smoky Chicken Stew, 251smooth foods stage of bariatric surgery diet
description of, 10, 24, 30food on, 30–31freezing foods for later use, 32menu for, 33preparing foods for, 31tips for, 32
Smooth Peanut Banana smoothie, 230smoothies
chocolate, 231fruity, 224–228making, 224peanut butter, 230spicy, 228–229stages of diet progression and, 223
snackingbetween meals, 34cheese snack recipes, 273–274crunchy snack recipes, 270–273fruit snack recipes, 268–269grazing compared to, 267protein and, 47weight loss and, 38
soft foods stage of bariatric surgery dietdescription of, 10, 24, 34foods on, 34–35menu for, 36tips for, 35–36
solids, measuring, 105–106soluble fi bers, 51soups
canned, 77, 245recipes for, 245–250for two, 290
sour cream, 109Southern-Style Green Beans, 262soy sauce, 160Spanish Steak with Black Bean Salsa, 180–181spatulas, 83–84
33_640180-bindex.indd 33433_640180-bindex.indd 334 8/27/10 10:51 PM8/27/10 10:51 PM
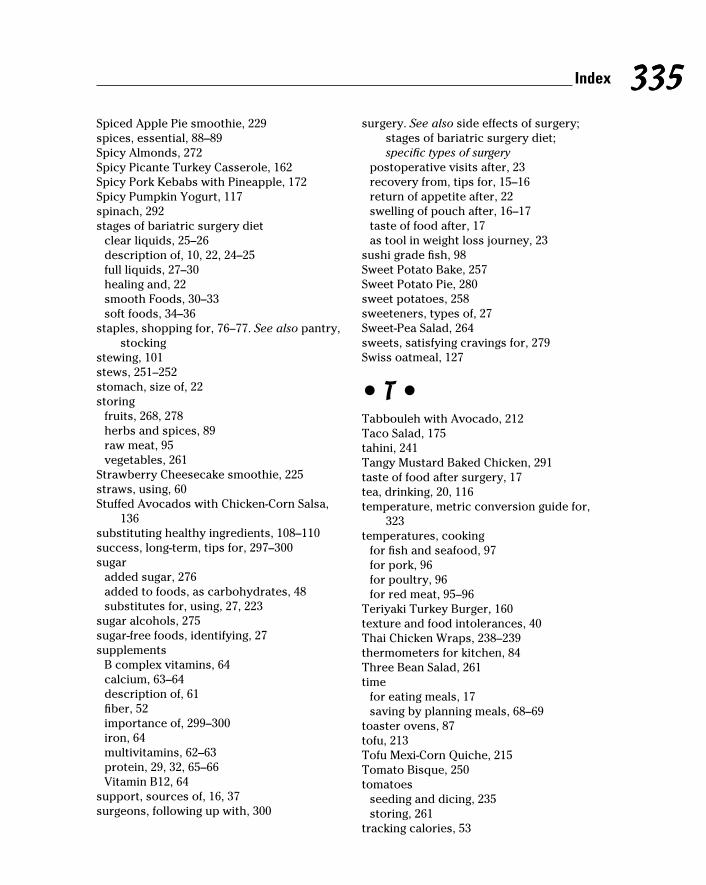
335335 Index
Spiced Apple Pie smoothie, 229spices, essential, 88–89Spicy Almonds, 272Spicy Picante Turkey Casserole, 162Spicy Pork Kebabs with Pineapple, 172Spicy Pumpkin Yogurt, 117spinach, 292stages of bariatric surgery diet
clear liquids, 25–26description of, 10, 22, 24–25full liquids, 27–30healing and, 22smooth Foods, 30–33soft foods, 34–36
staples, shopping for, 76–77. See also pantry, stocking
stewing, 101stews, 251–252stomach, size of, 22storing
fruits, 268, 278herbs and spices, 89raw meat, 95vegetables, 261
Strawberry Cheesecake smoothie, 225straws, using, 60Stuffed Avocados with Chicken-Corn Salsa,
136substituting healthy ingredients, 108–110success, long-term, tips for, 297–300sugar
added sugar, 276added to foods, as carbohydrates, 48substitutes for, using, 27, 223
sugar alcohols, 275sugar-free foods, identifying, 27supplements
B complex vitamins, 64calcium, 63–64description of, 61fi ber, 52importance of, 299–300iron, 64multivitamins, 62–63protein, 29, 32, 65–66Vitamin B12, 64
support, sources of, 16, 37surgeons, following up with, 300
surgery. See also side effects of surgery; stages of bariatric surgery diet; specifi c types of surgery
postoperative visits after, 23recovery from, tips for, 15–16return of appetite after, 22swelling of pouch after, 16–17taste of food after, 17as tool in weight loss journey, 23
sushi grade fi sh, 98Sweet Potato Bake, 257Sweet Potato Pie, 280sweet potatoes, 258sweeteners, types of, 27Sweet-Pea Salad, 264sweets, satisfying cravings for, 279Swiss oatmeal, 127
• T •Tabbouleh with Avocado, 212Taco Salad, 175tahini, 241Tangy Mustard Baked Chicken, 291taste of food after surgery, 17tea, drinking, 20, 116temperature, metric conversion guide for,
323temperatures, cooking
for fi sh and seafood, 97for pork, 96for poultry, 96for red meat, 95–96
Teriyaki Turkey Burger, 160texture and food intolerances, 40Thai Chicken Wraps, 238–239thermometers for kitchen, 84Three Bean Salad, 261time
for eating meals, 17saving by planning meals, 68–69
toaster ovens, 87tofu, 213Tofu Mexi-Corn Quiche, 215Tomato Bisque, 250tomatoes
seeding and dicing, 235storing, 261
tracking calories, 53
33_640180-bindex.indd 33533_640180-bindex.indd 335 8/27/10 10:51 PM8/27/10 10:51 PM
336 Weight Loss Surgery Cookbook For Dummies
trans fats, 50, 76Triple Berry Yogurt Parfait, 118–119tubers, 256Tuna Melt, 141turkey burgers, cooking, 159Turkey Cutlets with Thyme-Tomato Sauce,
154turkey recipes, 159–161Tuscan Pasta Sauté, 260tzatziki sauce, 188
• U •urine, color of, and dehydration, 19–20utility knives, 86
• V •variety in diet, 34, 45vegans, 211Vegetable Lasagna, 134–135, 307Vegetable Soup, 290vegetable steamers, 83vegetables
canned, 76–77, 90cleaning, 260cooking, 261side dishes and salads, 260–266
vegetarian recipesburgers, 218–219dinner salads, 209–212“meaty” baked dishes, 213–217symbol for, 3
venison, cooking, 192Venison Chili, 192–193vindaloo, 187visualizing portion sizes, 42vitamin B12 supplements, 64vitamin supplements, importance of, 10, 61volume
of foods, 104–105metric conversion guide for, 321–322
vomiting after surgery, 17–18, 40
• W •Waldorf Salad, 265Warm Spiced Shredded Wheat, 128water, drinking, 11, 20, 59–60. See also fl uids,
drinkingWeb sites
food diaries, 54Seafood Watch guide, 196
weight, metric conversion guide for, 322weight loss. See also food diaries, keeping
exercise and, 300fi ber and, 52pouch as tool for, 38skipping meals and, 44
Weight Loss Surgery For Dummies, 1weight of foods, 104–105whey protein, 65White Albacore Tuna Dip, 240whole-grain or whole-wheat products
breakfast recipes using, 122–128cooking, 122shopping for, 76
Whole-Wheat Cheddar Pita, 270wild fi sh and seafood, 197wire whisks, 84wraps for lunches, 141–142
• Y •yams, 258yogurt for breakfast, 117
• Z •Zesty Egg Salad, 287
33_640180-bindex.indd 33633_640180-bindex.indd 336 8/27/10 10:51 PM8/27/10 10:51 PM

Apple & Macs
iPad For Dummies 978-0-470-58027-1
iPhone For Dummies, 4th Edition 978-0-470-87870-5
MacBook For Dummies, 3rd Edition 978-0-470-76918-8
Mac OS X Snow Leopard For Dummies 978-0-470-43543-4
Business
Bookkeeping For Dummies 978-0-7645-9848-7
Job Interviews For Dummies, 3rd Edition 978-0-470-17748-8
Resumes For Dummies, 5th Edition 978-0-470-08037-5
Starting an Online Business For Dummies, 6th Edition 978-0-470-60210-2
Stock Investing For Dummies, 3rd Edition 978-0-470-40114-9
Successful Time Management For Dummies 978-0-470-29034-7
Computer Hardware
BlackBerry For Dummies, 4th Edition 978-0-470-60700-8
Computers For Seniors For Dummies, 2nd Edition 978-0-470-53483-0
PCs For Dummies, Windows 7 Edition 978-0-470-46542-4
Laptops For Dummies, 4th Edition 978-0-470-57829-2
Cooking & Entertaining
Cooking Basics For Dummies, 3rd Edition 978-0-7645-7206-7
Wine For Dummies, 4th Edition 978-0-470-04579-4
Diet & Nutrition
Dieting For Dummies, 2nd Edition 978-0-7645-4149-0
Nutrition For Dummies, 4th Edition 978-0-471-79868-2
Weight Training For Dummies, 3rd Edition 978-0-471-76845-6
Digital Photography
Digital SLR Cameras & Photography For Dummies, 3rd Edition 978-0-470-46606-3
Photoshop Elements 8 For Dummies 978-0-470-52967-6
Gardening
Gardening Basics For Dummies 978-0-470-03749-2
Organic Gardening For Dummies, 2nd Edition 978-0-470-43067-5
Green/Sustainable
Raising Chickens For Dummies 978-0-470-46544-8
Green Cleaning For Dummies 978-0-470-39106-8
Health
Diabetes For Dummies, 3rd Edition 978-0-470-27086-8
Food Allergies For Dummies 978-0-470-09584-3
Living Gluten-Free For Dummies, 2nd Edition 978-0-470-58589-4
Hobbies/General
Chess For Dummies, 2nd Edition 978-0-7645-8404-6
Drawing Cartoons & Comics For Dummies 978-0-470-42683-8
Knitting For Dummies, 2nd Edition 978-0-470-28747-7
Organizing For Dummies 978-0-7645-5300-4
Su Doku For Dummies 978-0-470-01892-7
Home Improvement
Home Maintenance For Dummies, 2nd Edition 978-0-470-43063-7
Home Theater For Dummies, 3rd Edition 978-0-470-41189-6
Living the Country Lifestyle All-in-One For Dummies 978-0-470-43061-3
Solar Power Your Home For Dummies, 2nd Edition 978-0-470-59678-4
Available wherever books are sold. For more information or to order direct: U.S. customers visit www.dummies.com or call 1-877-762-2974.U.K. customers visit www.wileyeurope.com or call (0) 1243 843291. Canadian customers visit www.wiley.ca or call 1-800-567-4797.
34_640180-badvert01.indd 337 8/27/10 10:51 PM

Internet
Blogging For Dummies, 3rd Edition 978-0-470-61996-4
eBay For Dummies, 6th Edition 978-0-470-49741-8
Facebook For Dummies, 3rd Edition 978-0-470-87804-0
Web Marketing For Dummies, 2nd Edition 978-0-470-37181-7
WordPress For Dummies, 3rd Edition 978-0-470-59274-8
Language & Foreign Language
French For Dummies 978-0-7645-5193-2
Italian Phrases For Dummies 978-0-7645-7203-6
Spanish For Dummies, 2nd Edition 978-0-470-87855-2
Spanish For Dummies, Audio Set 978-0-470-09585-0
Math & Science
Algebra I For Dummies, 2nd Edition 978-0-470-55964-2
Biology For Dummies, 2nd Edition 978-0-470-59875-7
Calculus For Dummies 978-0-7645-2498-1
Chemistry For Dummies 978-0-7645-5430-8
Microsoft Office
Excel 2010 For Dummies 978-0-470-48953-6
Office 2010 All-in-One For Dummies 978-0-470-49748-7
Office 2010 For Dummies, Book + DVD Bundle 978-0-470-62698-6
Word 2010 For Dummies 978-0-470-48772-3
Music
Guitar For Dummies, 2nd Edition 978-0-7645-9904-0
iPod & iTunes For Dummies, 8th Edition 978-0-470-87871-2
Piano Exercises For Dummies 978-0-470-38765-8
Parenting & Education
Parenting For Dummies, 2nd Edition 978-0-7645-5418-6
Type 1 Diabetes For Dummies 978-0-470-17811-9
Pets
Cats For Dummies, 2nd Edition 978-0-7645-5275-5
Dog Training For Dummies, 3rd Edition 978-0-470-60029-0
Puppies For Dummies, 2nd Edition 978-0-470-03717-1
Religion & Inspiration
The Bible For Dummies 978-0-7645-5296-0
Catholicism For Dummies 978-0-7645-5391-2
Women in the Bible For Dummies 978-0-7645-8475-6
Self-Help & Relationship
Anger Management For Dummies 978-0-470-03715-7
Overcoming Anxiety For Dummies, 2nd Edition 978-0-470-57441-6
Sports
Baseball For Dummies, 3rd Edition 978-0-7645-7537-2
Basketball For Dummies, 2nd Edition 978-0-7645-5248-9
Golf For Dummies, 3rd Edition 978-0-471-76871-5
Web Development
Web Design All-in-One For Dummies 978-0-470-41796-6
Web Sites Do-It-Yourself For Dummies, 2nd Edition 978-0-470-56520-9
Windows 7
Windows 7 For Dummies 978-0-470-49743-2
Windows 7 For Dummies, Book + DVD Bundle 978-0-470-52398-8
Windows 7 All-in-One For Dummies 978-0-470-48763-1
Available wherever books are sold. For more information or to order direct: U.S. customers visit www.dummies.com or call 1-877-762-2974.U.K. customers visit www.wileyeurope.com or call (0) 1243 843291. Canadian customers visit www.wiley.ca or call 1-800-567-4797.
Learn to:• Create a Pro�le, navigate the site,
and use privacy features
• Find friends and post messages
• Add applications and uploadphotos to your Facebook page
• Build a fan page or get the word out about an event
Leah PearlmanCarolyn Abram
3rd EditionMaking Everything Easier!™
Peter WeverkaAuthor of PowerPoint All-in-One For Dummies
8 IN 1BOOKSBOOKS
• Common O�ce Tools• Word• Outlook®• PowerPoint®• Excel®• Access®• Publisher• O�ce 2010 — One Step Beyond
O�ce 2010A L L - I N - O N E
Making Everything Easier!™
Microsoft®
ART IS TK
TO BE INSERTED
DURING
ROUTINGEdward C. BaigBob “Dr. Mac” LeVitus
• Set up your iPad, use the multitouch interface, and get connected
• Surf the Web, listen to music, watch videos, and download apps
• Turn your iPad into a portable game console
IN FULL COLOR!
Learn to:
iPad™
Making Everything Easier!™
Andy RathboneAuthor of all previous editions of Windows For Dummies
Learn to:• potksed7 swodniW ruoy ezilanosreP
with your own photos
• ni-tliub htiw swodniW pu deepS shortcuts
• lno ot sgninraw swodniW ezimotsuC ygive the notices you want
• evoM your files from your old PC to a Windows 7 computer
Windows® 7
™
34_640180-badvert01.indd 338 8/27/10 10:51 PM

spine=.72”
Mobile Apps
There’s a Dummies App for This and ThatWith more than 200 million books in print and over 1,600 unique titles, Dummies is a global leader in how-to information. Now you can get the same great Dummies information in an App. With topics such as Wine, Spanish, Digital Photography, Certification, and more, you’ll have instant access to the topics you need to know in a format you can trust.
To get information on all our Dummies apps, visit the following:
www.Dummies.com/go/mobile from your computer.
www.Dummies.com/go/iphone/apps from your phone.
Start with FREE Cheat SheetsCheat Sheets include • Checklists • Charts • Common Instructions • And Other Good Stuff!
Get Smart at Dummies.com Dummies.com makes your life easier with 1,000s of answers on everything from removing wallpaper to using the latest version of Windows.
Check out our • Videos • Illustrated Articles • Step-by-Step Instructions
Plus, each month you can win valuable prizes by entering our Dummies.com sweepstakes. *
Want a weekly dose of Dummies? Sign up for Newsletters on • Digital Photography • Microsoft Windows & Office • Personal Finance & Investing • Health & Wellness • Computing, iPods & Cell Phones • eBay • Internet • Food, Home & Garden
Find out “HOW” at Dummies.com
*Sweepstakes not currently available in all countries; visit Dummies.com for official rules.
Get More and Do More at Dummies.com®
To access the Cheat Sheet created specifically for this book, go to www.dummies.com/cheatsheet/weightlosssurgerycookbook
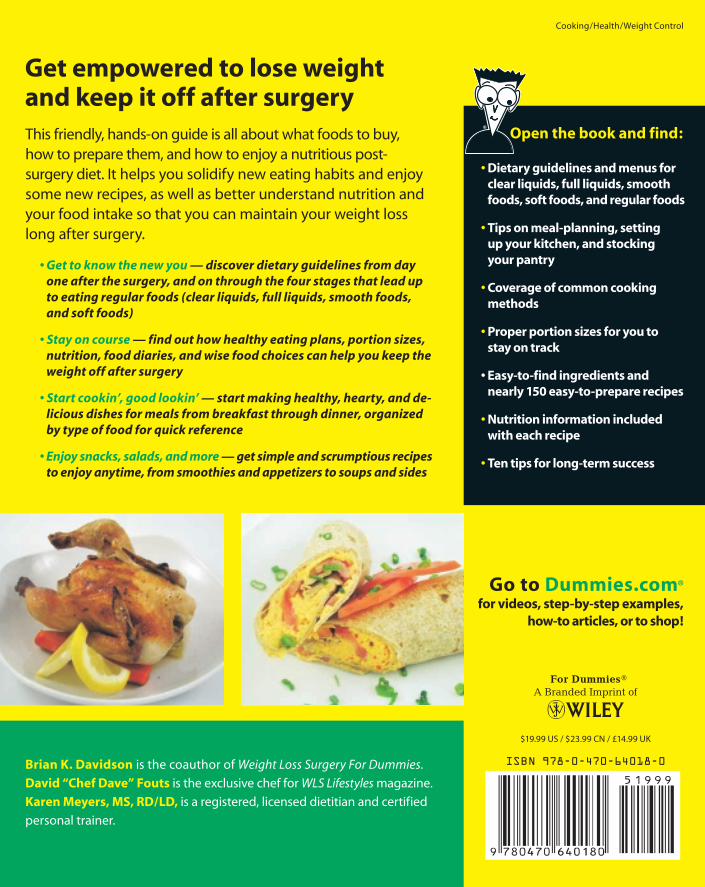
spine=.72”
Brian K. DavidsonDavid “Chef Dave” FoutsKaren Meyers, MS, RD/LDForeword by Garth Davis, MD, bariatric surgeon on TLC’s Big Medicine
Learn to:• Enjoy a nutritious post-surgery lifestyle
• Know which foods to buy and how to prepare them
• Make delicious meals that are high in flavor and low in fat and calories
Weight Loss
Surgery Cookbook
Making Everything Easier!™
Open the book and find:
• Dietary guidelines and menus for clear liquids, full liquids, smooth foods, soft foods, and regular foods
• Tips on meal-planning, setting up your kitchen, and stocking your pantry
• Coverage of common cooking methods
• Proper portion sizes for you to stay on track
• Easy-to-find ingredients and nearly 150 easy-to-prepare recipes
• Nutrition information included with each recipe
• Ten tips for long-term success
Brian K. Davidson is the coauthor of Weight Loss Surgery For Dummies.
David “Chef Dave” Fouts is the exclusive chef for WLS Lifestyles magazine.
Karen Meyers, MS, RD/LD, is a registered, licensed dietitian and certified
personal trainer.
$19.99 US / $23.99 CN / £14.99 UK
ISBN 978-0-470-64018-0
Cooking/Health/Weight Control
Go to Dummies.com®
for videos, step-by-step examples, how-to articles, or to shop!
Get empowered to lose weight and keep it off after surgeryThis friendly, hands-on guide is all about what foods to buy, how to prepare them, and how to enjoy a nutritious post-surgery diet. It helps you solidify new eating habits and enjoy some new recipes, as well as better understand nutrition and your food intake so that you can maintain your weight loss long after surgery.
• Get to know the new you — discover dietary guidelines from day one after the surgery, and on through the four stages that lead up to eating regular foods (clear liquids, full liquids, smooth foods, and soft foods)
• Stay on course — find out how healthy eating plans, portion sizes, nutrition, food diaries, and wise food choices can help you keep the weight off after surgery
• Start cookin’, good lookin’ — start making healthy, hearty, and de-licious dishes for meals from breakfast through dinner, organized by type of food for quick reference
• Enjoy snacks, salads, and more — get simple and scrumptious recipes to enjoy anytime, from smoothies and appetizers to soups and sides
Weight Loss
Surgery Cookbook
DavidsonFouts
Meyers