Embed Size (px)
Citation preview
OrlandoOrtho.com
The Patient’s Guide to OutpatientTotal Knee Replacement

2
THE PATIENT’S GUIDE TO OUTPATIENT TOTAL KNEE REPLACEMENT
RECLAIMING YOUR QUALITY OF LIFE
TABLE OF CONTENTS
Welcome -‐-‐-‐-‐-‐-‐-‐-‐-‐-‐-‐-‐-‐-‐-‐-‐-‐-‐-‐-‐-‐-‐-‐-‐-‐-‐-‐-‐-‐-‐-‐-‐-‐-‐-‐-‐-‐-‐-‐-‐-‐-‐-‐-‐-‐-‐-‐-‐-‐-‐-‐-‐-‐-‐-‐-‐-‐-‐-‐-‐-‐-‐-‐-‐-‐-‐-‐-‐-‐-‐-‐-‐-‐-‐-‐-‐-‐-‐-‐-‐-‐-‐-‐-‐-‐-‐-‐-‐-‐-‐-‐-‐-‐-‐-‐-‐-‐-‐-‐-‐-‐-‐-‐-‐-‐-‐-‐-‐-‐-‐-‐-‐-‐-‐-‐-‐-‐-‐-‐-‐-‐-‐-‐-‐-‐-‐-‐-‐-‐-‐-‐-‐-‐-‐-‐-‐-‐-‐-‐-‐-‐-‐-‐-‐-‐-‐-‐ 3 Partnering for Success -‐-‐-‐-‐-‐-‐-‐-‐-‐-‐-‐-‐-‐-‐-‐-‐-‐-‐-‐-‐-‐-‐-‐-‐-‐-‐-‐-‐-‐-‐-‐-‐-‐-‐-‐-‐-‐-‐-‐-‐-‐-‐-‐-‐-‐-‐-‐-‐-‐-‐-‐-‐-‐-‐-‐-‐-‐-‐-‐-‐-‐-‐-‐-‐-‐-‐-‐-‐-‐-‐-‐-‐-‐-‐-‐-‐-‐-‐-‐-‐-‐-‐-‐-‐-‐-‐-‐-‐-‐-‐-‐-‐-‐-‐-‐-‐-‐-‐-‐-‐-‐-‐-‐-‐-‐-‐-‐-‐-‐-‐-‐-‐-‐-‐-‐-‐-‐-‐-‐-‐-‐-‐ 4 Outpatient Total Knee Replacement -‐-‐-‐-‐-‐-‐-‐-‐-‐-‐-‐-‐-‐-‐-‐-‐-‐-‐-‐-‐-‐-‐-‐-‐-‐-‐-‐-‐-‐-‐-‐-‐-‐-‐-‐-‐-‐-‐-‐-‐-‐-‐-‐-‐-‐-‐-‐-‐-‐-‐-‐-‐-‐-‐-‐-‐-‐-‐-‐-‐-‐-‐-‐-‐-‐-‐-‐-‐-‐-‐-‐-‐-‐-‐-‐-‐-‐-‐-‐-‐-‐-‐-‐-‐-‐-‐-‐-‐-‐-‐-‐-‐-‐-‐-‐-‐-‐-‐-‐-‐-‐-‐ 5 Preparing for Surgery -‐-‐-‐-‐-‐-‐-‐-‐-‐-‐-‐-‐-‐-‐-‐-‐-‐-‐-‐-‐-‐-‐-‐-‐-‐-‐-‐-‐-‐-‐-‐-‐-‐-‐-‐-‐-‐-‐-‐-‐-‐-‐-‐-‐-‐-‐-‐-‐-‐-‐-‐-‐-‐-‐-‐-‐-‐-‐-‐-‐-‐-‐-‐-‐-‐-‐-‐-‐-‐-‐-‐-‐-‐-‐-‐-‐-‐-‐-‐-‐-‐-‐-‐-‐-‐-‐-‐-‐-‐-‐-‐-‐-‐-‐-‐-‐-‐-‐-‐-‐-‐-‐-‐-‐-‐-‐-‐-‐-‐-‐-‐-‐-‐-‐-‐-‐-‐-‐-‐-‐-‐-‐-‐-‐-‐-‐ 6 Scheduling and Medications -‐-‐-‐-‐-‐-‐-‐-‐-‐-‐-‐-‐-‐-‐-‐-‐-‐-‐-‐-‐-‐-‐-‐-‐-‐-‐-‐-‐-‐-‐-‐-‐-‐-‐-‐-‐-‐-‐-‐-‐-‐-‐-‐-‐-‐-‐-‐-‐-‐-‐-‐-‐-‐-‐-‐-‐-‐-‐-‐-‐-‐-‐-‐-‐-‐-‐-‐-‐-‐-‐-‐-‐-‐-‐-‐-‐-‐-‐-‐-‐-‐-‐-‐-‐-‐-‐-‐-‐-‐-‐-‐-‐-‐-‐-‐-‐-‐-‐-‐-‐-‐-‐-‐-‐-‐-‐-‐-‐-‐-‐-‐-‐ 6 Medical History and Health Status -‐-‐-‐-‐-‐-‐-‐-‐-‐-‐-‐-‐-‐-‐-‐-‐-‐-‐-‐-‐-‐-‐-‐-‐-‐-‐-‐-‐-‐-‐-‐-‐-‐-‐-‐-‐-‐-‐-‐-‐-‐-‐-‐-‐-‐-‐-‐-‐-‐-‐-‐-‐-‐-‐-‐-‐-‐-‐-‐-‐-‐-‐-‐-‐-‐-‐-‐-‐-‐-‐-‐-‐-‐-‐-‐-‐-‐-‐-‐-‐-‐-‐-‐-‐-‐-‐-‐-‐-‐-‐-‐-‐-‐-‐-‐-‐-‐-‐-‐-‐-‐-‐ 7 Pre-‐surgical Orientation -‐-‐-‐-‐-‐-‐-‐-‐-‐-‐-‐-‐-‐-‐-‐-‐-‐-‐-‐-‐-‐-‐-‐-‐-‐-‐-‐-‐-‐-‐-‐-‐-‐-‐-‐-‐-‐-‐-‐-‐-‐-‐-‐-‐-‐-‐-‐-‐-‐-‐-‐-‐-‐-‐-‐-‐-‐-‐-‐-‐-‐-‐-‐-‐-‐-‐-‐-‐-‐-‐-‐-‐-‐-‐-‐-‐-‐-‐-‐-‐-‐-‐-‐-‐-‐-‐-‐-‐-‐-‐-‐-‐-‐-‐-‐-‐-‐-‐-‐-‐-‐-‐-‐-‐-‐-‐-‐-‐-‐-‐-‐-‐-‐-‐-‐-‐-‐-‐-‐ 8 Pre-‐surgical exercises -‐-‐-‐-‐-‐-‐-‐-‐-‐-‐-‐-‐-‐-‐-‐-‐-‐-‐-‐-‐-‐-‐-‐-‐-‐-‐-‐-‐-‐-‐-‐-‐-‐-‐-‐-‐-‐-‐-‐-‐-‐-‐-‐-‐-‐-‐-‐-‐-‐-‐-‐-‐-‐-‐-‐-‐-‐-‐-‐-‐-‐-‐-‐-‐-‐-‐-‐-‐-‐-‐-‐-‐-‐-‐-‐-‐-‐-‐-‐-‐-‐-‐-‐-‐-‐-‐-‐-‐-‐-‐-‐-‐-‐-‐-‐-‐-‐-‐-‐-‐-‐-‐-‐-‐-‐-‐-‐-‐-‐-‐-‐-‐-‐-‐-‐-‐-‐-‐-‐-‐-‐-‐-‐ 9 Preparing your home for your return -‐-‐-‐-‐-‐-‐-‐-‐-‐-‐-‐-‐-‐-‐-‐-‐-‐-‐-‐-‐-‐-‐-‐-‐-‐-‐-‐-‐-‐-‐-‐-‐-‐-‐-‐-‐-‐-‐-‐-‐-‐-‐-‐-‐-‐-‐-‐-‐-‐-‐-‐-‐-‐-‐-‐-‐-‐-‐-‐-‐-‐-‐-‐-‐-‐-‐-‐-‐-‐-‐-‐-‐-‐-‐-‐-‐-‐-‐-‐-‐-‐-‐-‐-‐-‐-‐-‐-‐-‐-‐-‐-‐-‐-‐-‐-‐-‐ 12 Days prior to Surgery -‐-‐-‐-‐-‐-‐-‐-‐-‐-‐-‐-‐-‐-‐-‐-‐-‐-‐-‐-‐-‐-‐-‐-‐-‐-‐-‐-‐-‐-‐-‐-‐-‐-‐-‐-‐-‐-‐-‐-‐-‐-‐-‐-‐-‐-‐-‐-‐-‐-‐-‐-‐-‐-‐-‐-‐-‐-‐-‐-‐-‐-‐-‐-‐-‐-‐-‐-‐-‐-‐-‐-‐-‐-‐-‐-‐-‐-‐-‐-‐-‐-‐-‐-‐-‐-‐-‐-‐-‐-‐-‐-‐-‐-‐-‐-‐-‐-‐-‐-‐-‐-‐-‐-‐-‐-‐-‐-‐-‐-‐-‐-‐-‐-‐-‐-‐-‐-‐-‐-‐-‐-‐ 13 Surgery -‐-‐-‐-‐-‐-‐-‐-‐-‐-‐-‐-‐-‐-‐-‐-‐-‐-‐-‐-‐-‐-‐-‐-‐-‐-‐-‐-‐-‐-‐-‐-‐-‐-‐-‐-‐-‐-‐-‐-‐-‐-‐-‐-‐-‐-‐-‐-‐-‐-‐-‐-‐-‐-‐-‐-‐-‐-‐-‐-‐-‐-‐-‐-‐-‐-‐-‐-‐-‐-‐-‐-‐-‐-‐-‐-‐-‐-‐-‐-‐-‐-‐-‐-‐-‐-‐-‐-‐-‐-‐-‐-‐-‐-‐-‐-‐-‐-‐-‐-‐-‐-‐-‐-‐-‐-‐-‐-‐-‐-‐-‐-‐-‐-‐-‐-‐-‐-‐-‐-‐-‐-‐-‐-‐-‐-‐-‐-‐-‐-‐-‐-‐-‐-‐-‐-‐-‐-‐-‐-‐-‐-‐-‐-‐-‐-‐-‐-‐ 15 Day of surgery -‐-‐-‐-‐-‐-‐-‐-‐-‐-‐-‐-‐-‐-‐-‐-‐-‐-‐-‐-‐-‐-‐-‐-‐-‐-‐-‐-‐-‐-‐-‐-‐-‐-‐-‐-‐-‐-‐-‐-‐-‐-‐-‐-‐-‐-‐-‐-‐-‐-‐-‐-‐-‐-‐-‐-‐-‐-‐-‐-‐-‐-‐-‐-‐-‐-‐-‐-‐-‐-‐-‐-‐-‐-‐-‐-‐-‐-‐-‐-‐-‐-‐-‐-‐-‐-‐-‐-‐-‐-‐-‐-‐-‐-‐-‐-‐-‐-‐-‐-‐-‐-‐-‐-‐-‐-‐-‐-‐-‐-‐-‐-‐-‐-‐-‐-‐-‐-‐-‐-‐-‐-‐-‐-‐-‐-‐-‐-‐-‐-‐-‐-‐-‐ 16 After Surgery -‐-‐-‐-‐-‐-‐-‐-‐-‐-‐-‐-‐-‐-‐-‐-‐-‐-‐-‐-‐-‐-‐-‐-‐-‐-‐-‐-‐-‐-‐-‐-‐-‐-‐-‐-‐-‐-‐-‐-‐-‐-‐-‐-‐-‐-‐-‐-‐-‐-‐-‐-‐-‐-‐-‐-‐-‐-‐-‐-‐-‐-‐-‐-‐-‐-‐-‐-‐-‐-‐-‐-‐-‐-‐-‐-‐-‐-‐-‐-‐-‐-‐-‐-‐-‐-‐-‐-‐-‐-‐-‐-‐-‐-‐-‐-‐-‐-‐-‐-‐-‐-‐-‐-‐-‐-‐-‐-‐-‐-‐-‐-‐-‐-‐-‐-‐-‐-‐-‐-‐-‐-‐-‐-‐-‐-‐-‐-‐-‐-‐-‐-‐-‐-‐-‐-‐-‐-‐ 17 Use of the CPM machine -‐-‐-‐-‐-‐-‐-‐-‐-‐-‐-‐-‐-‐-‐-‐-‐-‐-‐-‐-‐-‐-‐-‐-‐-‐-‐-‐-‐-‐-‐-‐-‐-‐-‐-‐-‐-‐-‐-‐-‐-‐-‐-‐-‐-‐-‐-‐-‐-‐-‐-‐-‐-‐-‐-‐-‐-‐-‐-‐-‐-‐-‐-‐-‐-‐-‐-‐-‐-‐-‐-‐-‐-‐-‐-‐-‐-‐-‐-‐-‐-‐-‐-‐-‐-‐-‐-‐-‐-‐-‐-‐-‐-‐-‐-‐-‐-‐-‐-‐-‐-‐-‐-‐-‐-‐-‐-‐-‐-‐-‐-‐-‐-‐-‐-‐-‐ 20 Post-‐op Physical Therapy -‐-‐-‐-‐-‐-‐-‐-‐-‐-‐-‐-‐-‐-‐-‐-‐-‐-‐-‐-‐-‐-‐-‐-‐-‐-‐-‐-‐-‐-‐-‐-‐-‐-‐-‐-‐-‐-‐-‐-‐-‐-‐-‐-‐-‐-‐-‐-‐-‐-‐-‐-‐-‐-‐-‐-‐-‐-‐-‐-‐-‐-‐-‐-‐-‐-‐-‐-‐-‐-‐-‐-‐-‐-‐-‐-‐-‐-‐-‐-‐-‐-‐-‐-‐-‐-‐-‐-‐-‐-‐-‐-‐-‐-‐-‐-‐-‐-‐-‐-‐-‐-‐-‐-‐-‐-‐-‐-‐-‐-‐-‐-‐-‐-‐-‐-‐-‐-‐-‐ 23 Living with Your Resurfaced Knee -‐-‐-‐-‐-‐-‐-‐-‐-‐-‐-‐-‐-‐-‐-‐-‐-‐-‐-‐-‐-‐-‐-‐-‐-‐-‐-‐-‐-‐-‐-‐-‐-‐-‐-‐-‐-‐-‐-‐-‐-‐-‐-‐-‐-‐-‐-‐-‐-‐-‐-‐-‐-‐-‐-‐-‐-‐-‐-‐-‐-‐-‐-‐-‐-‐-‐-‐-‐-‐-‐-‐-‐-‐-‐-‐-‐-‐-‐-‐-‐-‐-‐-‐-‐-‐-‐-‐-‐-‐-‐-‐-‐-‐-‐-‐-‐-‐-‐-‐-‐-‐-‐-‐-‐-‐ 28 Antibiotic Protection of Implanted Joint Prostheses -‐-‐-‐-‐-‐-‐-‐-‐-‐-‐-‐-‐-‐-‐-‐-‐-‐-‐-‐-‐-‐-‐-‐-‐-‐-‐-‐-‐-‐-‐-‐-‐-‐-‐-‐-‐-‐-‐-‐-‐-‐-‐-‐-‐-‐-‐-‐-‐-‐-‐-‐-‐-‐-‐-‐-‐-‐-‐-‐-‐-‐-‐-‐-‐-‐-‐-‐-‐-‐-‐-‐-‐-‐-‐-‐-‐ 29
3
Total Knee Replacement (Arthroplasty) is the surgical resurfacing of the damaged surfaces of your knee, and one of the most effective ways to reduce pain and restore mobility. Our outpatient Knee Replacement Program eliminates hospital stays and supports your recovery. With extensive patient education and a comprehensive continuum of care, this program is designed to ensure you have the information, care and support you need every step of the way.
RECLAIMING YOUR QUALITY OF LIFE
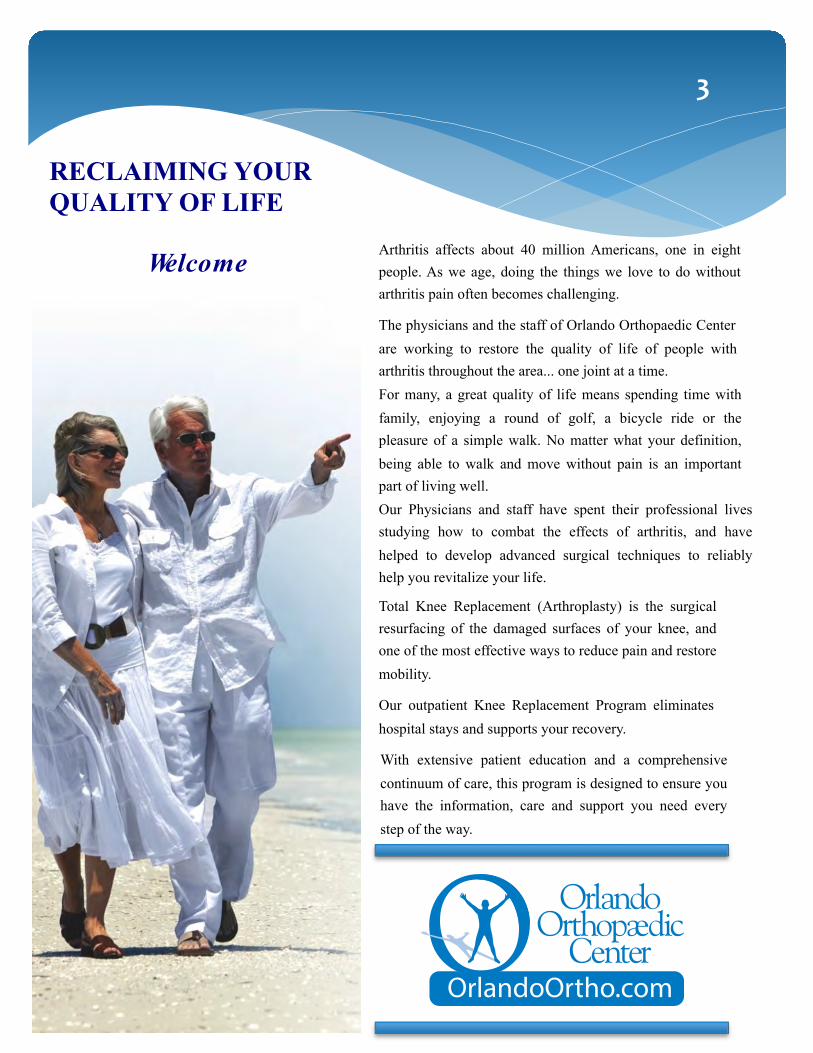
Welcome Arthritis affects about 40 million Americans, one in eight people. As we age, doing the things we love to do without arthritis pain often becomes challenging. The physicians and the staff of Orlando Orthopaedic Center are working to restore the quality of life of people with arthritis throughout the area... one joint at a time. For many, a great quality of life means spending time with family, enjoying a round of golf, a bicycle ride or the pleasure of a simple walk. No matter what your definition, being able to walk and move without pain is an important part of living well. Our Physicians and staff have spent their professional lives studying how to combat the effects of arthritis, and have helped to develop advanced surgical techniques to reliably help you revitalize your life.
OrlandoOrtho.com
4
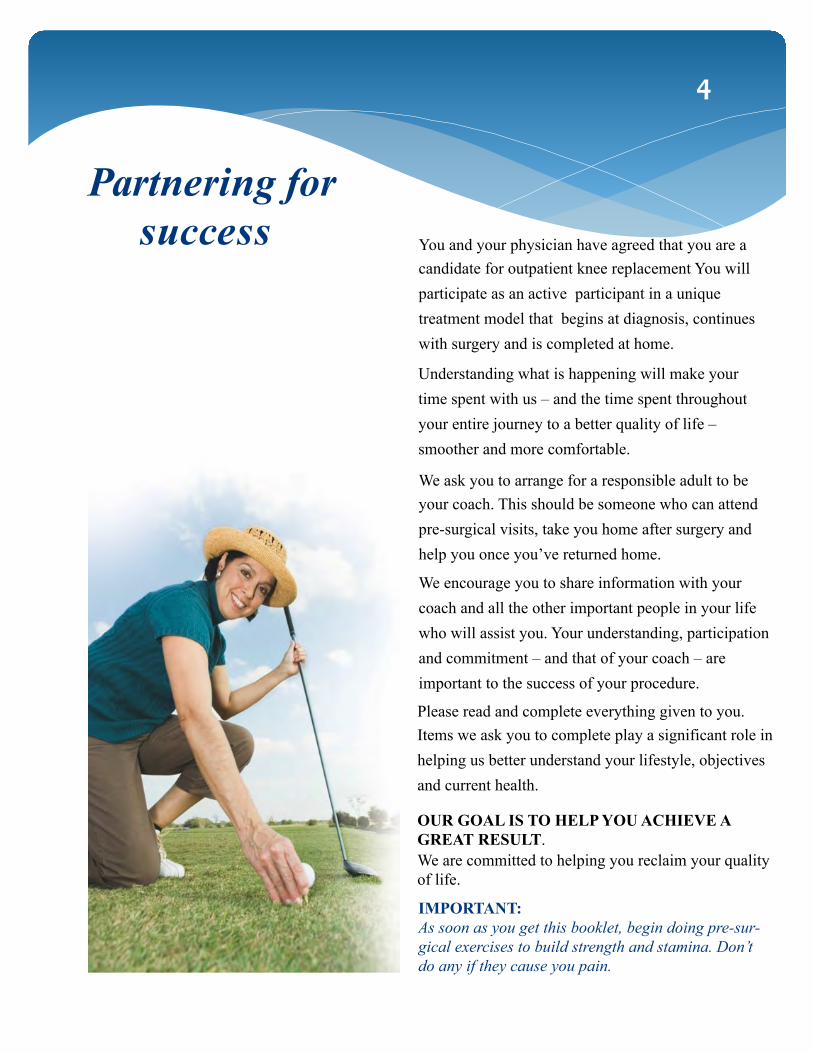
Partnering for success You and your physician have agreed that you are a
candidate for outpatient knee replacement You will participate as an active participant in a unique treatment model that begins at diagnosis, continues with surgery and is completed at home.
Understanding what is happening will make your time spent with us – and the time spent throughout your entire journey to a better quality of life – smoother and more comfortable.
We ask you to arrange for a responsible adult to be your coach. This should be someone who can attend pre-surgical visits, take you home after surgery and help you once you’ve returned home.
We encourage you to share information with your coach and all the other important people in your life who will assist you. Your understanding, participation and commitment – and that of your coach – are important to the success of your procedure.
Please read and complete everything given to you. Items we ask you to complete play a significant role in helping us better understand your lifestyle, objectives and current health. OUR GOAL IS TO HELP YOU ACHIEVE A GREAT RESULT. We are committed to helping you reclaim your quality of life.
IMPORTANT: As soon as you get this booklet, begin doing pre-sur- gical exercises to build strength and stamina. Don’t do any if they cause you pain.
5
RECLAIMING YOUR QUALITY OF LIFE: OUTPATIENT TOTAL KNEE REPLACEMENT
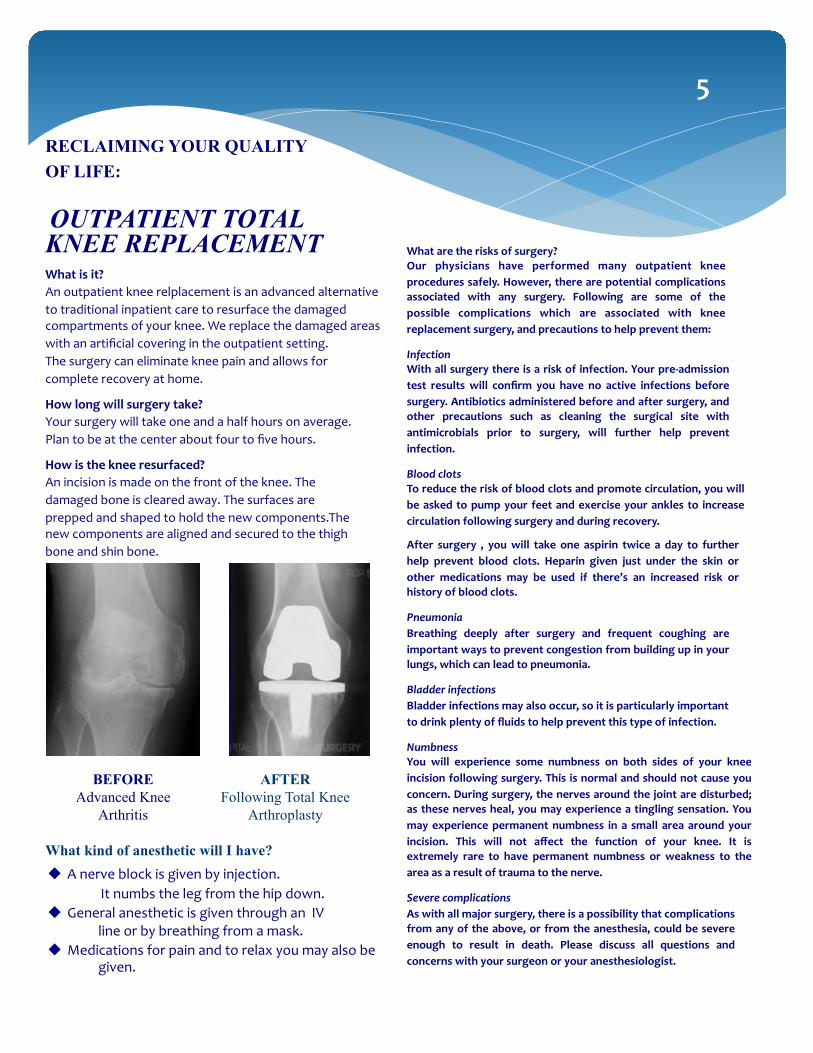
What is it? An outpatient knee relplacement is an advanced alternative to traditional inpatient care to resurface the damaged compartments of your knee. We replace the damaged areas with an artificial covering in the outpatient setting. The surgery can eliminate knee pain and allows for complete recovery at home. How long will surgery take? Your surgery will take one and a half hours on average. Plan to be at the center about four to five hours. How is the knee resurfaced? An incision is made on the front of the knee. The damaged bone is cleared away. The surfaces are prepped and shaped to hold the new components.The new components are aligned and secured to the thigh bone and shin bone.
BEFORE Advanced Knee
Arthritis
AFTER Following Total Knee
Arthroplasty
What kind of anesthetic will I have? u A nerve block is given by injection.
It numbs the leg from the hip down. u General anesthetic is given through an IV
line or by breathing from a mask. u Medications for pain and to relax you may also be
given.
What are the risks of surgery? Our physicians have performed many outpatient knee procedures safely. However, there are potential complications associated with any surgery. Following are some of the possible complications which are associated with knee replacement surgery, and precautions to help prevent them: Infection With all surgery there is a risk of infection. Your pre-‐admission test results will confirm you have no active infections before surgery. Antibiotics administered before and after surgery, and other precautions such as cleaning the surgical site with antimicrobials prior to surgery, will further help prevent infection. Blood clots To reduce the risk of blood clots and promote circulation, you will be asked to pump your feet and exercise your ankles to increase circulation following surgery and during recovery. After surgery , you will take one aspirin twice a day to further help prevent blood clots. Heparin given just under the skin or other medications may be used if there’s an increased risk or history of blood clots. Pneumonia Breathing deeply after surgery and frequent coughing are important ways to prevent congestion from building up in your lungs, which can lead to pneumonia. Bladder infections Bladder infections may also occur, so it is particularly important to drink plenty of fluids to help prevent this type of infection. Numbness You will experience some numbness on both sides of your knee incision following surgery. This is normal and should not cause you concern. During surgery, the nerves around the joint are disturbed; as these nerves heal, you may experience a tingling sensation. You may experience permanent numbness in a small area around your incision. This will not affect the function of your knee. It is extremely rare to have permanent numbness or weakness to the area as a result of trauma to the nerve. Severe complications As with all major surgery, there is a possibility that complications from any of the above, or from the anesthesia, could be severe enough to result in death. Please discuss all questions and concerns with your surgeon or your anesthesiologist.
6
RECLAIMING YOUR QUALITY OF LIFE: Preparing for surgery
Scheduling
Most insurance companies require pre-‐authorization prior to scheduling surgery. Our staff will call
your insurance company to check eligibility and get pre-‐authorization as needed. This may take
several days, depending on the insurance company. Once we have received approval from your insurance, you will be contacted to discuss available surgery
dates, and other important appointments. Medications Once your surgery is scheduled, please inform our office if you are currently taking any of these medications, as they need to be stopped prior to your surgery:
q Coumadin, all blood thinners 5 days q Aspirin 10 days q Methotrexate two weeks q St. John’s Wort two weeks q Prescription diet pills two weeks q All vitamins and supplements ten days
q Anti-inflammatory medications 10 days (Advil, ibuprofen, Aleve, Naprosyn, Relafin, Diclofenac)
q Hormone replacement therapy 7 days
Celebrex can be taken until surgery.
RECLAIMING YOUR QUALITY OF LIFE: Preparing for surgery
Pre-surgical testing Depending upon your age and medical status, we may ask you to go to a local laboratory or diagnostic center for pre-operative testing. These tests may include
Chest X-ray Urine test Blood test Electrocardiogram (EKG) Nasal MRSA culture
IMPORTANT: If you get a fever, cold or rash, call our office regarding your change of health. Your surgery may need to be postponed.
Medical history and health status Before your surgery, we will ask questions regarding your medical history and health status, or for insurance verification. These are some of the questions frequently asked: q Do you have health problems such as diabetes, heart disease or high blood pressure?
q Are you taking any medications (This includes over-the-counter products such as aspirin, ibuprofen, vitamins, herbs and teas)? Please have your medication bottles or a complete list available for your physician to review.
q Do you use tobacco, alcohol or recreational drugs?
q Do you have allergies?
q Do you currently have a fever, cold, rash or history of recurring infection?
q Have you had previous surgeries or illnesses?
q Are you or could you be pregnant?
q Have you or any blood relatives had previous problems with anesthesia?
q Have you or any blood relatives had a history of blood clots?
7
8
RECLAIMING YOUR QUALITY OF LIFE: Preparing for surgery
Pre-surgical orientation / Total Joint Class We ask that you schedule an office visit, or schedule a Pre-operative class one to two weeks prior to your surgery for the purpose of pre-surgical orientation. At this visit, you will learn in great detail about the procedure and:
Ø How to prepare your home Ø What to bring to the surgery center Ø What equipment you’ll need Ø What to expect during and after surgery Ø Exercises to prepare for surgery
Provide all necessary prescriptions for post-operative medications, and provide you with a knee immobilizer, crutches or walker, cane, and cold-therapy unit. Confirm that home health care has been arranged and approved by your insurance. Confirm arrangements for delivery of a CPM (continuous passive motion) machine for use post-op. Confirm the date and time of surgery with the surgery center. Review your home medication sheet and make sure you are aware of which medications to continue and which to discontinue before surgery. Review any pre-operative diagnostic studies. Review clearance information from you primary medical physician and/or specialist.
Prior to Surgery we will also:
9
RECLAIMING YOUR QUALITY OF LIFE: Preparing for surgery
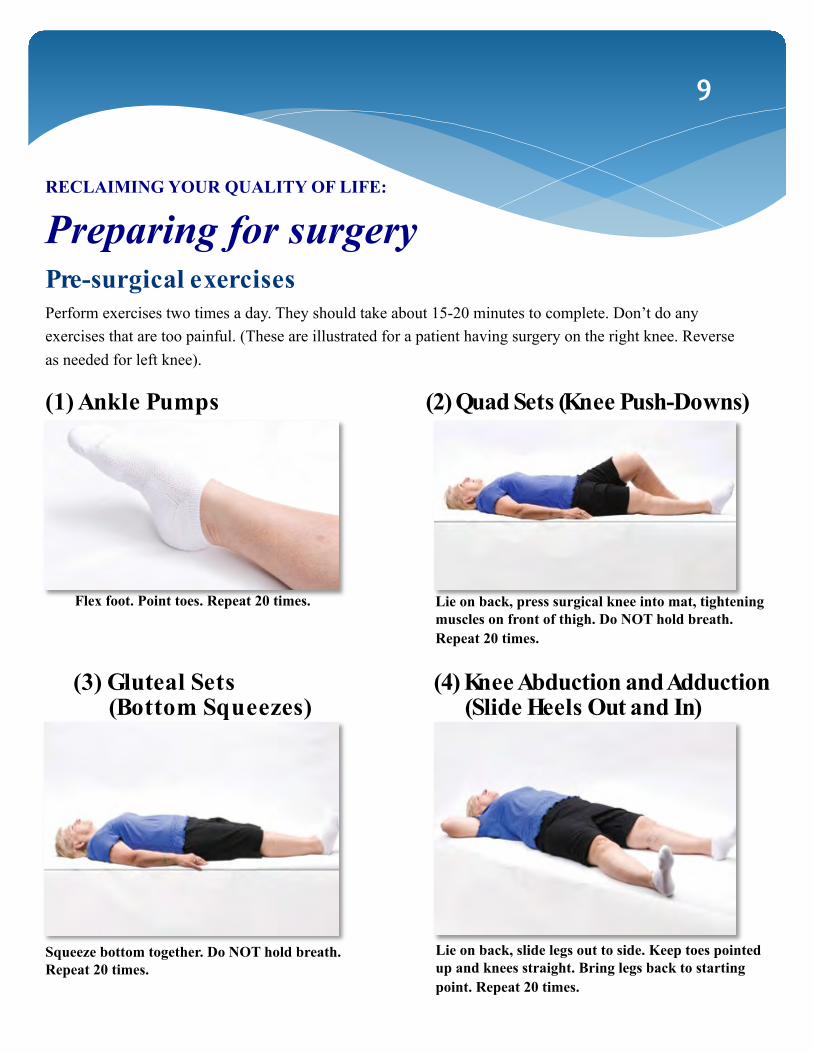
Flex foot. Point toes. Repeat 20 times. Lie on back, press surgical knee into mat, tightening muscles on front of thigh. Do NOT hold breath. Repeat 20 times.
(3) Gluteal Sets (Bottom Squeezes)
(4) Knee Abduction and Adduction (Slide Heels Out and In)
Squeeze bottom together. Do NOT hold breath. Repeat 20 times.
Lie on back, slide legs out to side. Keep toes pointed up and knees straight. Bring legs back to starting point. Repeat 20 times.
Pre-surgical exercises Perform exercises two times a day. They should take about 15-20 minutes to complete. Don’t do any exercises that are too painful. (These are illustrated for a patient having surgery on the right knee. Reverse as needed for left knee).
(1) Ankle Pumps (2) Quad Sets (Knee Push-Downs)
10
RECLAIMING YOUR QUALITY OF LIFE: Preparing for surgery Pre-surgical exercises
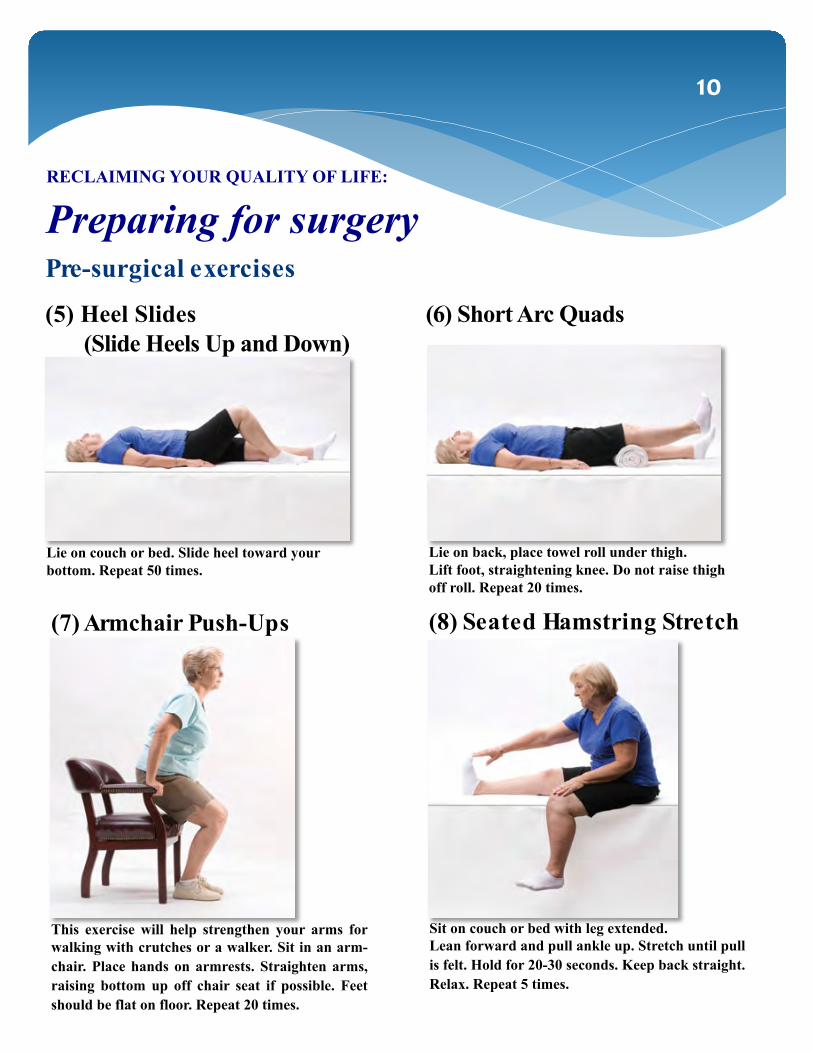
(5) Heel Slides (6) Short Arc Quads (Slide Heels Up and Down)
Lie on couch or bed. Slide heel toward your bottom. Repeat 50 times.
Lie on back, place towel roll under thigh. Lift foot, straightening knee. Do not raise thigh off roll. Repeat 20 times.
(8) Seated Hamstring Stretch (7) Armchair Push-Ups
This exercise will help strengthen your arms for walking with crutches or a walker. Sit in an arm- chair. Place hands on armrests. Straighten arms, raising bottom up off chair seat if possible. Feet should be flat on floor. Repeat 20 times.
Sit on couch or bed with leg extended. Lean forward and pull ankle up. Stretch until pull is felt. Hold for 20-30 seconds. Keep back straight. Relax. Repeat 5 times.
11
RECLAIMING YOUR QUALITY OF LIFE: Preparing for surgery Pre-surgical exercises
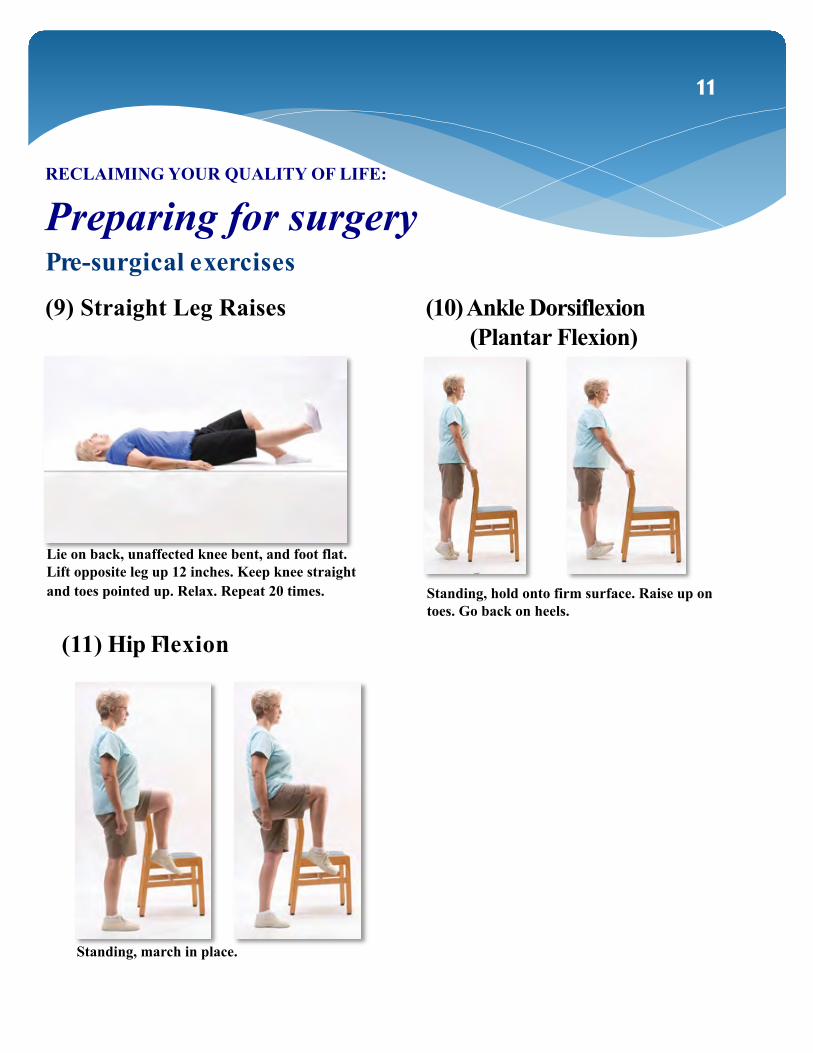
(9) Straight Leg Raises (10) Ankle Dorsiflexion (Plantar Flexion)
(11) Hip Flexion
Lie on back, unaffected knee bent, and foot flat. Lift opposite leg up 12 inches. Keep knee straight and toes pointed up. Relax. Repeat 20 times.
Standing, march in place.
Standing, hold onto firm surface. Raise up on toes. Go back on heels.

12
RECLAIMING YOUR QUALITY OF LIFE: Preparing for surgery
Preparing your home for your return
Please review and complete the follow list of items prior to surgery. This will insure a smooth transition from the surgery center to your home on the day of surgery.
q Prepare meals ahead of time and put fresh linens on your bed.
q Make sure you have an armchair with a firm cushion that you can sit on.
q Water beds are not recommended after your surgery. A flat, firm mattress should be in place.
q Have an ample supply of your prescription medications available.
q Pick up throw rugs and make sure long phone and electrical cords are out of the way.
q Put night lights in bathrooms and dark areas.
q Have non-skid surfaces (strips, etc.) in place in tubs and showers.
q Arrange for pet care if needed.
q Prepare a comfortable rest area with tissues, phone, TV, remote control, etc. nearby. You don’t want to rush for the phone.
q If you are going to be alone part of the day, carry a portable phone and/or personal alarm with you to call for help in case of an emergency.
q Have footwear available with non-skid soles. q Arrange transportation for follow-up visits.
13
RECLAIMING YOUR QUALITY OF LIFE: Preparing for surgery
One week prior to surgery
Schedule office visit for pre-‐operative conference Receive prescriptions: Celebrex, Zofran (to prevent nausea at home), post-‐surgical pain meds (Dilaudid, Hydrocodone, Gabapentin) Receive Hibiclens, antimicrobial wipes, cold-‐therapy unit, knee immobilizer, non-‐rolling walker, single-‐prong cane. Obtain over-‐the-‐counter medications: Aspirin 325 mg (#60), laxative Extra-‐Strength-‐Tylenol Stop all anticoagulants, anti-‐inflammatories, aspirin, fish oil, Vitamin E and supplements. IT IS OK TO CONTINUE CELEBREX if you are taking it pre-‐op. Schedule Visiting Nurse and Home Physical Therapy appointments for the first post-‐operative day Continue pre-‐surgical exercises Shower with Hibiclens STOP SMOKING !!! Continue pre-‐surgical exercises to build strength and stamina
Two days prior to surgery
14
RECLAIMING YOUR QUALITY OF LIFE: Preparing for surgery
One day prior to surgery
Shower with Hibiclens
Use antimicrobial wipes over surgical site Have nothing to eat or drink after midnight – including mints, gum or water. Your surgery may be cancelled or delayed if you do Eat a ‘regular-‐sized’ dinner – the day before surgery is not the time to “feast” on large quantities of heavy or rich foods Take 400 mg of Celebrex (2 tablets) Take 300 mg of Gabapentin (1 tablet) Take all routine medications except those already stopped – if there is any question about which medications to take, please check with our office
At Home u Use the last set of anti-‐microbial wipes over the surgical site – DO NOT SHOWER u Wear comfortable, loose clothing u Do not use lotions, talcum, perfume, make-‐up or nail polish u Take heart and blood pressure medications with sip of water.
Do not take insulin or diabetes medications unless instructed to do so.
u Take 200 mg of Celebrex (1 tablet)
u Take 300 mg of Gabapentin (1 tablet)
u Nothing to eat or drink
At the Surgery Center u Bring knee immobilizer, cold-‐therapy unit and walker u Bring photo-‐ID, bag for dentures, cases for contact lenses, glasses u Family member or significant other must accompany you to the surgery center u In the pre-‐op area:
§ You will sign the surgical and anesthesia consent forms § IV will be started and pre-‐op sedatives and antibiotics will be administered § A nerve block will be performed by the anesthesiologist § The knee will be shaved and prepped with betadine or hibiclens § Your surgeon will meet you and your family in the pre-‐op area, confirm and
mark the surgical site, and answer any last questions you may have § You will then be transferred to the OR (family members to the waiting area)
15
RECLAIMING YOUR QUALITY OF LIFE: Day of surgery
16
RECLAIMING YOUR QUALITY OF LIFE: Day of surgery
Post-‐op / Recovery At the end of the surgery, anesthesia will be reversed and you will transfer to the recovery room. You’ll wake up with the knee immobilizer and cold-‐therapy unit on your knee. You will leave the surgery center with them on. In the recovery area, the nurses will monitor your vital signs and keep you comfortable. Medications will be administered as necessary for pain or nausea. You will be monitored in the recovery area for a few hours. You will be discharged home once we are sure that you are stable and comfortable. The medications administered at the surgery center, as well as the nerve block, should provide excellent pain relief at home. It is extremely important, however, to follow the post-‐operative pain management protocol to insure ongoing pain relief. Prior to discharge, physical therapy will have you walk and confirm that you are stable for discharge. You will be given a brief home instruction sheet – detailed home instructions are on the next several pages of this booklet.
Discharge checklist: q All home medication prescriptions filled q Home health agency contacted – visit by nurse and therapist confirmed for day
after surgery q All necessary home equipment has been acquired – walker, cane, CPM, Cold
Therapy q Post-‐op appointment scheduled q OK to shower on the third post-‐op day q Family member/significant other will be with me for 24 hours after discharge
17
RECLAIMING YOUR QUALITY OF LIFE: After surgery MANAGING YOUR PAIN Our primary goal is to keep you as comfortable as possible following your surgery.
Your pain will be assessed from the time you leave the operating room until the time you leave the surgery center. You will frequently be asked to rate your discomfort on a pain scale that will help us determine if your current method of pain control is adequate or if changes need to be made. Oral or injected pain medications may be used to relieve discomfort.
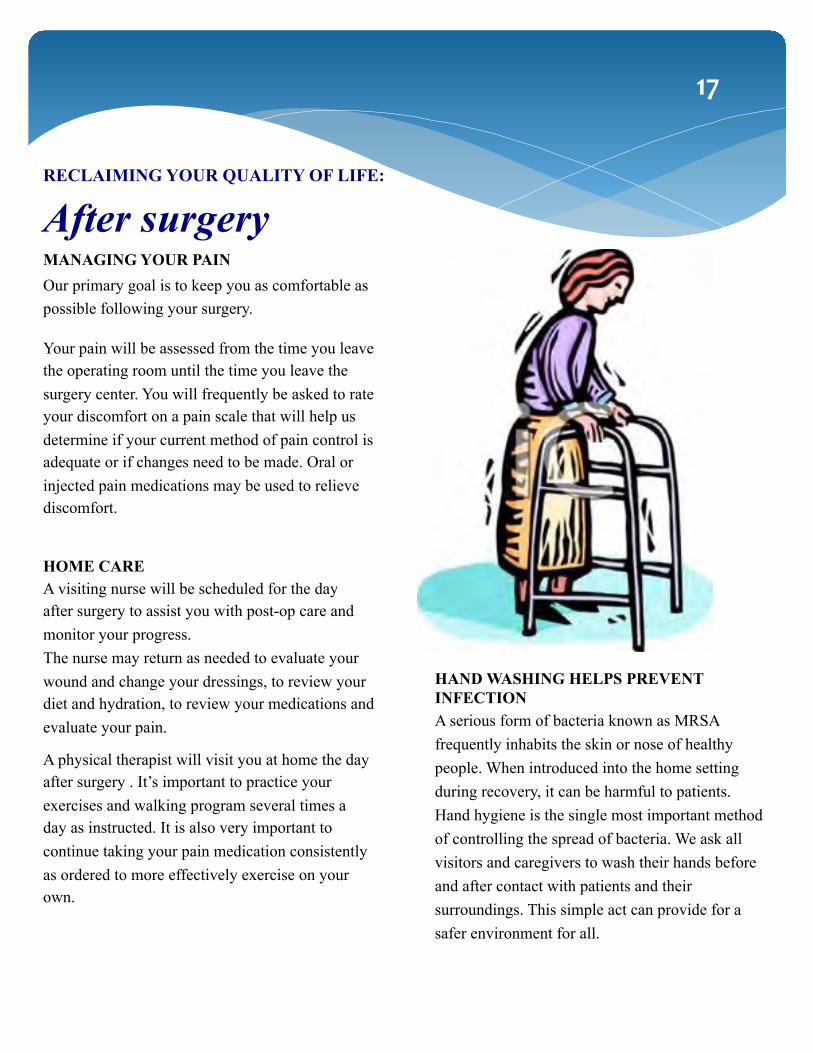
HOME CARE A visiting nurse will be scheduled for the day after surgery to assist you with post-op care and monitor your progress. The nurse may return as needed to evaluate your wound and change your dressings, to review your diet and hydration, to review your medications and evaluate your pain.
A physical therapist will visit you at home the day after surgery . It’s important to practice your exercises and walking program several times a day as instructed. It is also very important to continue taking your pain medication consistently as ordered to more effectively exercise on your own.
HAND WASHING HELPS PREVENT INFECTION A serious form of bacteria known as MRSA frequently inhabits the skin or nose of healthy people. When introduced into the home setting during recovery, it can be harmful to patients. Hand hygiene is the single most important method of controlling the spread of bacteria. We ask all visitors and caregivers to wash their hands before and after contact with patients and their surroundings. This simple act can provide for a safer environment for all.
18
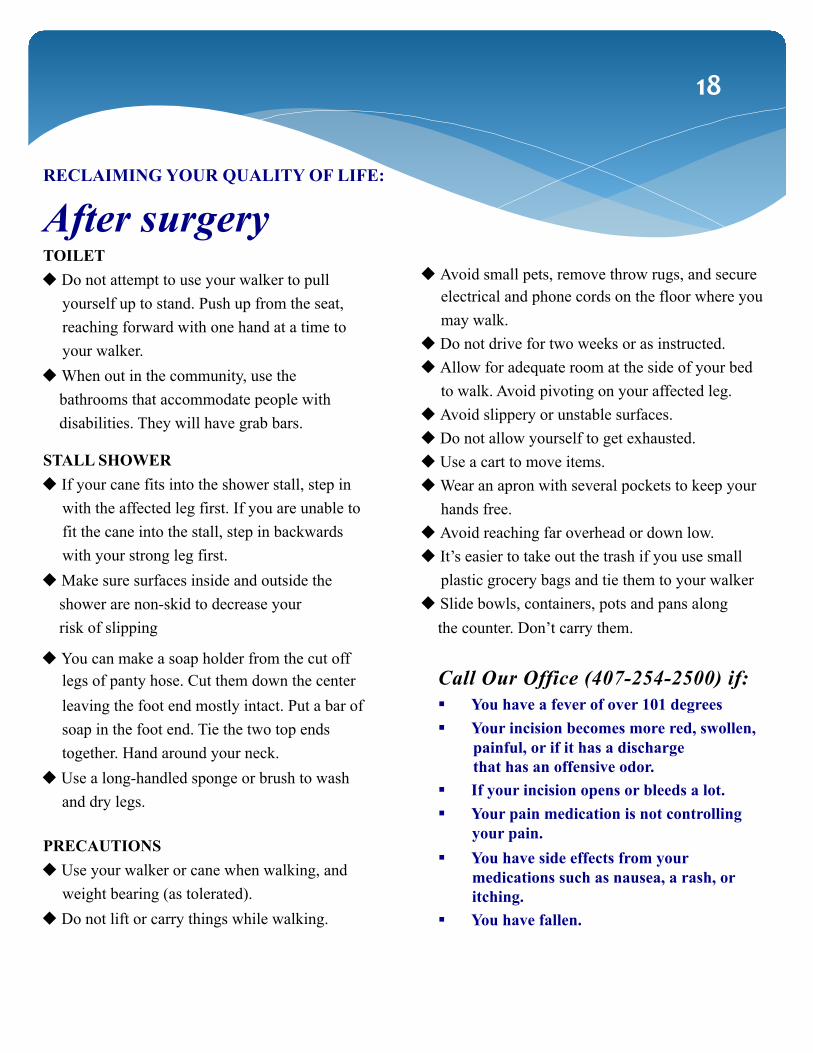
RECLAIMING YOUR QUALITY OF LIFE: After surgery TOILET u Do not attempt to use your walker to pull
yourself up to stand. Push up from the seat, reaching forward with one hand at a time to your walker.
u When out in the community, use the bathrooms that accommodate people with disabilities. They will have grab bars.
STALL SHOWER u If your cane fits into the shower stall, step in
with the affected leg first. If you are unable to fit the cane into the stall, step in backwards with your strong leg first.
u Make sure surfaces inside and outside the shower are non-skid to decrease your risk of slipping
u You can make a soap holder from the cut off legs of panty hose. Cut them down the center leaving the foot end mostly intact. Put a bar of soap in the foot end. Tie the two top ends together. Hand around your neck.
u Use a long-handled sponge or brush to wash and dry legs.
PRECAUTIONS u Use your walker or cane when walking, and
weight bearing (as tolerated). u Do not lift or carry things while walking.
u Avoid small pets, remove throw rugs, and secure electrical and phone cords on the floor where you may walk.
u Do not drive for two weeks or as instructed. u Allow for adequate room at the side of your bed
to walk. Avoid pivoting on your affected leg. u Avoid slippery or unstable surfaces. u Do not allow yourself to get exhausted. u Use a cart to move items. u Wear an apron with several pockets to keep your
hands free. u Avoid reaching far overhead or down low. u It’s easier to take out the trash if you use small
plastic grocery bags and tie them to your walker u Slide bowls, containers, pots and pans along
the counter. Don’t carry them.
Call Our Office (407-254-2500) if: § You have a fever of over 101 degrees § Your incision becomes more red, swollen,
painful, or if it has a discharge that has an offensive odor.
§ If your incision opens or bleeds a lot. § Your pain medication is not controlling
your pain. § You have side effects from your
medications such as nausea, a rash, or itching.
§ You have fallen.

RECLAIMING YOUR QUALITY OF LIFE: After surgery
Day One Post-op u Resume Fluids, Resume Healthy Diet u Bowel management – Take an over-the-counter
laxative – pain medications are constipating. u Take one aspirin(325 mg) twice a day to further help
prevent blood clots. Patients with a history of blood clots may be prescribed daily Lovenox (heparin) injections or other medications.
u Take 200 mg of Celebrex (one tablet) u Take Gabapentin 300 mg twice daily– one tab in the
morning, and another in the evening u Take Dilaudid (pain medication) as prescribed.
Transition to Hydrocodone as pain level allows. u Continue post-operative exercises, u Out of Bed to chair, Ambulate with walker or cane.
19
Home: Post-op - night of surgery u Keep the surgical dressing dry and intact. u Take one Aspirin – 325 mg and one Gabapentin 300 mg– at 8 PM u Begin Dilaudid 4 mg every 6 hours for the first 24 hours – take first dose
immediately upon arriving home. u Use Zofran as needed for nausea. u Take one dose of an over-the-counter laxative to prevent constipation. u OK to supplement prescription pain medication with
Extra-Strength Tylenol – do not take more than 6 in 24 hours (maximum 3000 mg tylenol).
u The muscle in the leg may be weak from the nerve block for about 24 hours– always use the knee immobilizer and walker for ambulation.

RECLAIMING YOUR QUALITY OF LIFE: After surgery Instructions Regarding Use of CPM Machine
Regaining Range of Motion is extremely important following total knee arthroplasty. Regaining Range of Motion from Full Knee Extension to 90 degrees of Knee Flexion within 10 days is critical to the success of the operation. Begin use of the CPM Machine as soon as the post-‐operative pain is tolerable, but no later than the second day after surgery (If surgery is on Monday, begin use of the CPM by Wednesday). Please be sure that the CPM supplier has instructed you in how to use the machine. Begin at 0 to 30 degrees, slow speed, and increase 10 degrees each day until the machine reaches 90 degrees. Use the CPM at least 6 hours each day (You may certainly use the machine as many hours each day as you wish, and the more you use it, the better, six hours is the minimum). When you can actively move your knee from full extension to 90 degrees of flexion without assistance, you may discontinue the use of the CPM. Please contact our office, or the CPM supplier, if you have any difficulty with the machine, or any questions regarding its use. 407-‐254-‐2500
20
RECLAIMING YOUR QUALITY OF LIFE: After surgery Day Two Post-op u Continue Fluids, Resume healthy diet, continue laxative to prevent constipation. u Step Down from Dilaudid to Hydrocodone. u Continue Aspirin 325 mg twice daily – until one month post-op. u Continue Celebrex 200 mg daily until 2 weeks post-op. u Continue Gabapentin 300 mg twice daily until 7 days post-op. u Ambulate with walker, discontinue knee immobilizer at 48 hours post-op. u Transition to cane if safe and stable. u Continue CPM, increase motion setting 10-15 degrees per day. Day Three Post-op u OK to shower – remove dressing entirely, then pat (DON”T RUB) the incision area dry with a dry,
clean washcloth. u Continue Aspirin 325 mg twice daily – until one month post-op. u Continue Celebrex 200 mg daily until two weeks post-op u Continue Gabapentin 300 mg twice daily until 7 days post-op. u Continue to diminish use of pain medication as tolerated. u Continue physical therapy protocol, independent exercise. u Continue CPM, increase motion setting 10-15 degrees per day.
Day 4 through 13 Post-op
u Continue Physical Therapy and home exercise program u Increase activity as tolerated. u Continue CPM per protocol – OK to discontinue when you can easily move your knee
from fully straight to ninety degrees. u Continue Aspirin 325 mg twice daily – until one month post-op. u Continue Celebrex 200 mg daily until 2 weeks post-op u Continue Gabapentin 300 mg twice daily until 7 days post-op u Begin Outpatient Physical Therapy
21
RECLAIMING YOUR QUALITY OF LIFE: After surgery Two weeks post-op u Continue Aspirin 325 mg twice daily until one month post-op u Post op office visit with your surgeon:
Xray, incision check, review physical therapists reports, evaluation of functional status, level of discomfort.
u Resume activity as tolerated.
Although you may feel that you are doing extremely well at this point, it is important to be seen in our office, for routine follow-up, at 6 weeks, 3 months, and 1 year after surgery.
22
IMPORTANT !! PLEASE CALL OUR OFFICE
407-254-2500 IF YOU EXPERIENCE ANY OF THE
FOLLOWING: q Fever greater than 101 degrees q Increased knee pain q Increased drainage, redness or
swelling to the incision q Calf pain/tenderness or swelling in the
legs q Chest pain q Chest congestion q Problems with breathing or shortness
of breath
RECLAIMING YOUR QUALITY OF LIFE: Post-op Physical Therapy
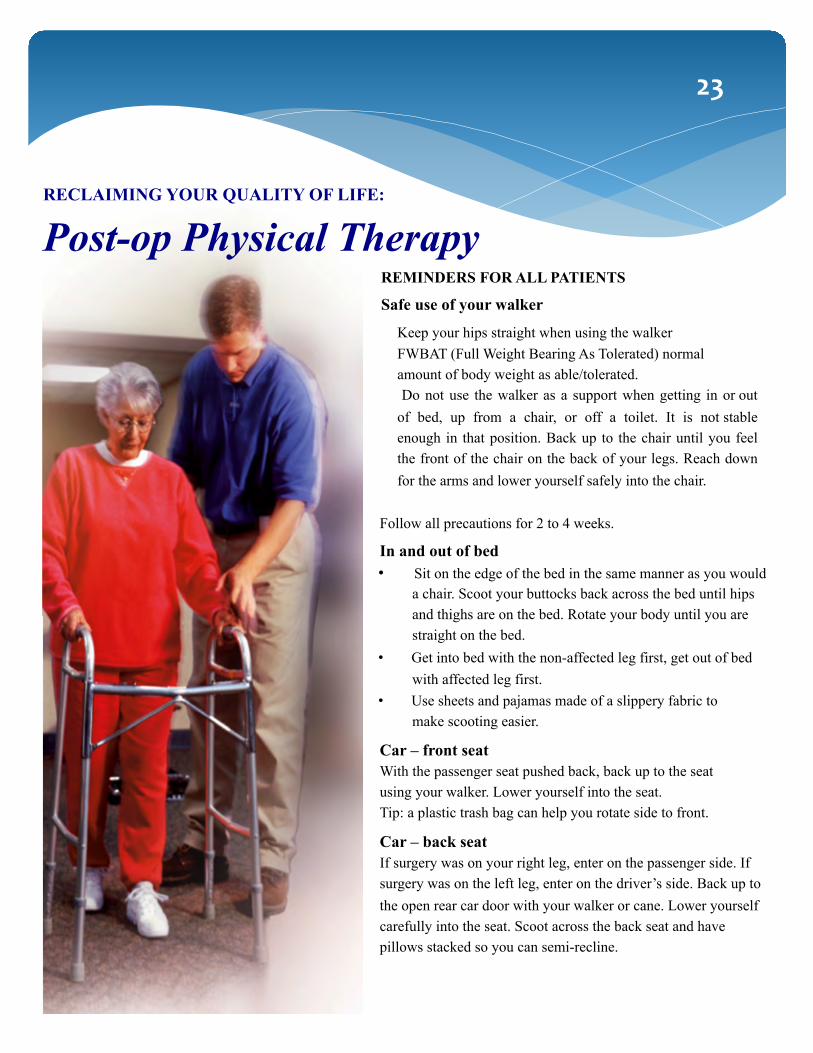
REMINDERS FOR ALL PATIENTS
Safe use of your walker
Keep your hips straight when using the walker FWBAT (Full Weight Bearing As Tolerated) normal amount of body weight as able/tolerated. Do not use the walker as a support when getting in or out
of bed, up from a chair, or off a toilet. It is not stable enough in that position. Back up to the chair until you feel the front of the chair on the back of your legs. Reach down for the arms and lower yourself safely into the chair.
Follow all precautions for 2 to 4 weeks. In and out of bed ¥ Sit on the edge of the bed in the same manner as you would
a chair. Scoot your buttocks back across the bed until hips and thighs are on the bed. Rotate your body until you are straight on the bed.
¥ Get into bed with the non-affected leg first, get out of bed with affected leg first.
¥ Use sheets and pajamas made of a slippery fabric to make scooting easier.
Car – front seat With the passenger seat pushed back, back up to the seat using your walker. Lower yourself into the seat. Tip: a plastic trash bag can help you rotate side to front. Car – back seat If surgery was on your right leg, enter on the passenger side. If surgery was on the left leg, enter on the driver’s side. Back up to the open rear car door with your walker or cane. Lower yourself carefully into the seat. Scoot across the back seat and have pillows stacked so you can semi-recline.
23
24
RECLAIMING YOUR QUALITY OF LIFE: Post-op Physical Therapy
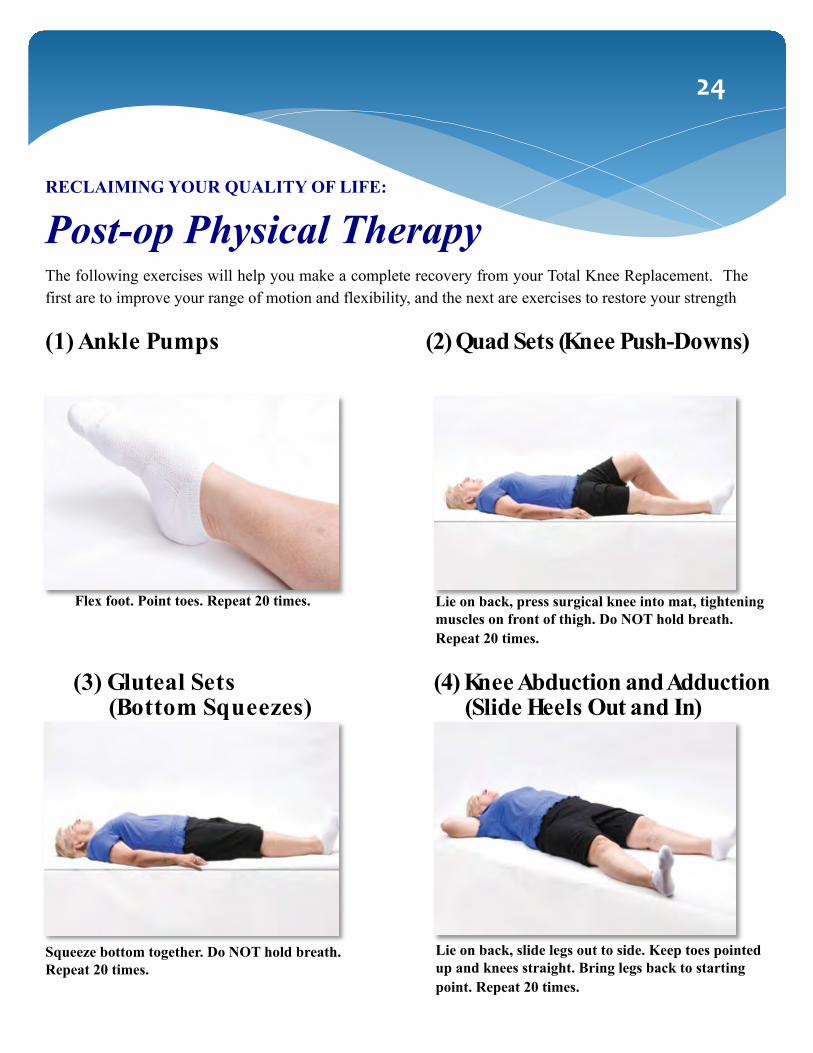
Flex foot. Point toes. Repeat 20 times. Lie on back, press surgical knee into mat, tightening muscles on front of thigh. Do NOT hold breath. Repeat 20 times.
(3) Gluteal Sets (Bottom Squeezes)
(4) Knee Abduction and Adduction (Slide Heels Out and In)
Squeeze bottom together. Do NOT hold breath. Repeat 20 times.
Lie on back, slide legs out to side. Keep toes pointed up and knees straight. Bring legs back to starting point. Repeat 20 times.
The following exercises will help you make a complete recovery from your Total Knee Replacement. The first are to improve your range of motion and flexibility, and the next are exercises to restore your strength
(1) Ankle Pumps (2) Quad Sets (Knee Push-Downs)
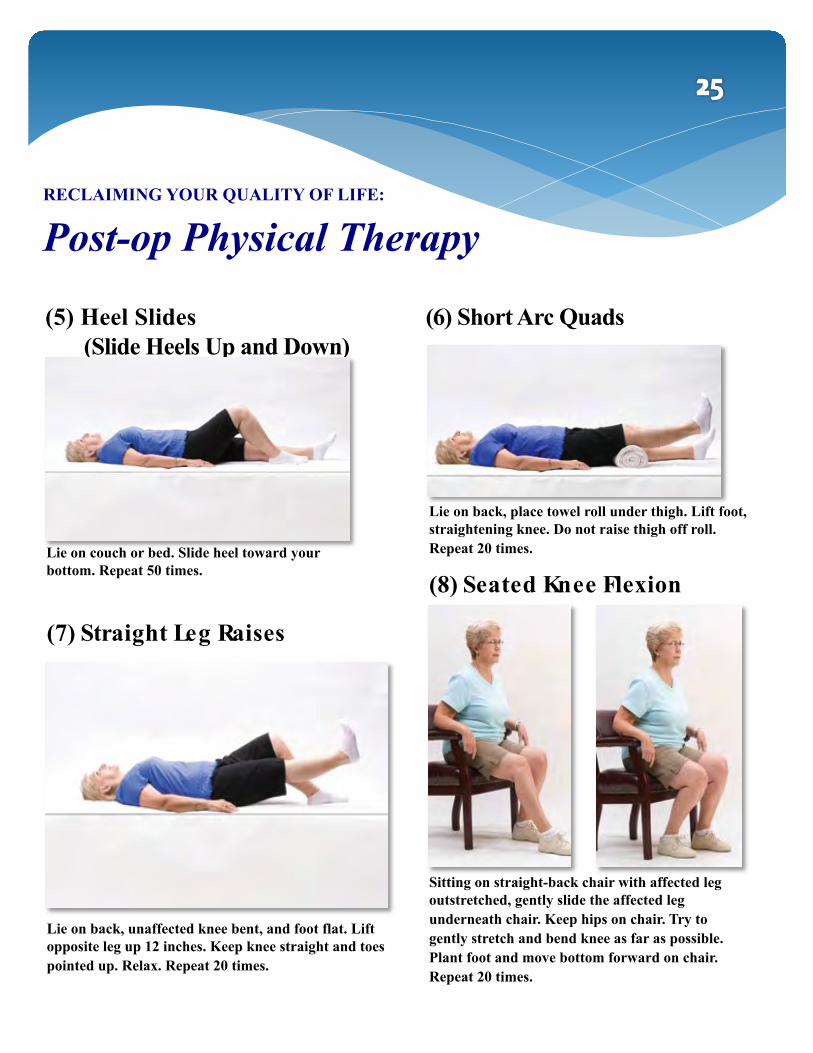
(5) Heel Slides (6) Short Arc Quads (Slide Heels Up and Down)
Lie on couch or bed. Slide heel toward your bottom. Repeat 50 times.
RECLAIMING YOUR QUALITY OF LIFE: Post-op Physical Therapy
(7) Straight Leg Raises
(8) Seated Knee Flexion
Lie on back, unaffected knee bent, and foot flat. Lift opposite leg up 12 inches. Keep knee straight and toes pointed up. Relax. Repeat 20 times.
Sitting on straight-back chair with affected leg outstretched, gently slide the affected leg underneath chair. Keep hips on chair. Try to gently stretch and bend knee as far as possible. Plant foot and move bottom forward on chair. Repeat 20 times.
Lie on back, place towel roll under thigh. Lift foot, straightening knee. Do not raise thigh off roll. Repeat 20 times.

26
RECLAIMING YOUR QUALITY OF LIFE: Post-op Physical Therapy (9) Extension Stretch (10) Prone Knee Flexion Stretch
Prop foot of operated leg up on chair. Place towel roll under ankle and ice pack over knee. Put 5-10 lbs. of weight on top of knee (a 5-10 lb. bag of rice works well). Do for 20 minutes.
Bring heel toward buttocks as far as possible. If this bothers your back, keep a pillow under your stomach. Repeat 20 times.
(11) Seated Hamstring Stretch (12) Knee Extension (Long Arc)
Sit on couch or bed with leg extended. Lean forward and pull ankle up. Stretch until pull is felt. Hold for 20-30 seconds. Keep back straight. Relax. Repeat 5 times.
Sit with back against chair. Straighten knee. Repeat 20 times.
27
RECLAIMING YOUR QUALITY OF LIFE: Post-op Physical Therapy
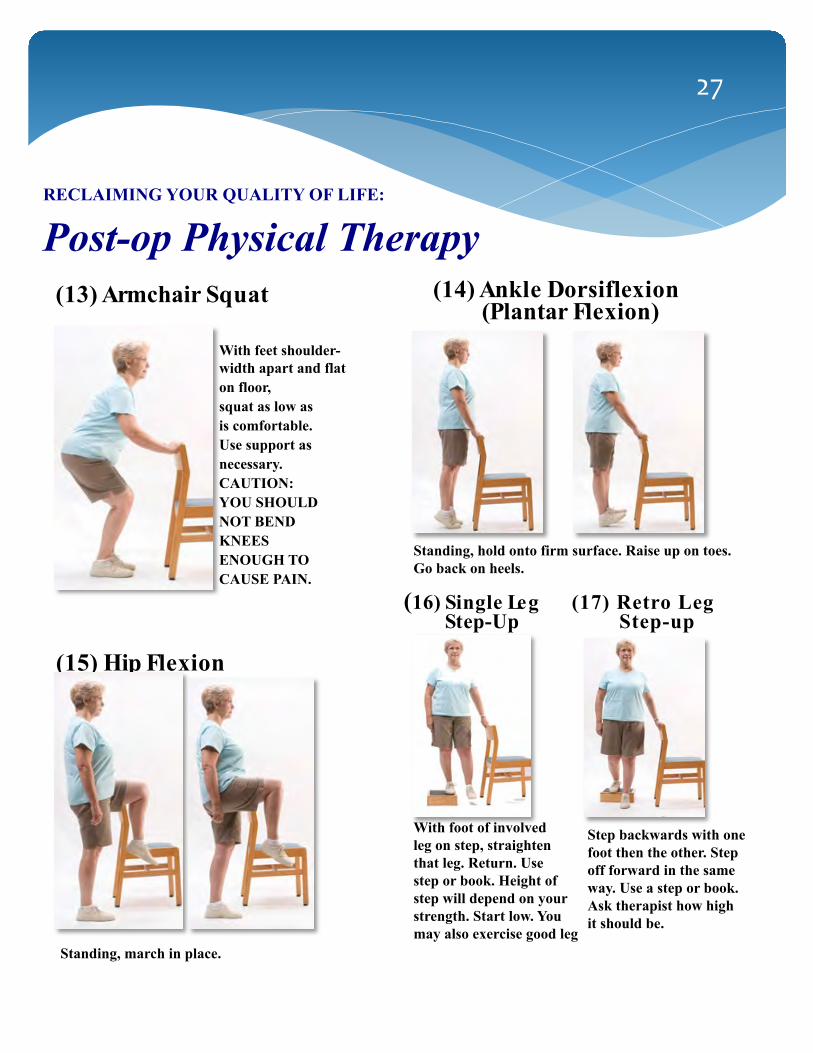
(13) Armchair Squat (14) Ankle Dorsiflexion (Plantar Flexion)
With feet shoulder- width apart and flat on floor, squat as low as is comfortable. Use support as necessary. CAUTION: YOU SHOULD NOT BEND KNEES ENOUGH TO CAUSE PAIN.
Standing, hold onto firm surface. Raise up on toes. Go back on heels.
(15) Hip Flexion
(16) Single Leg (17) Retro Leg Step-Up Step-up
Standing, march in place.
With foot of involved leg on step, straighten that leg. Return. Use step or book. Height of step will depend on your strength. Start low. You may also exercise good leg
Step backwards with one foot then the other. Step off forward in the same way. Use a step or book. Ask therapist how high it should be.
28
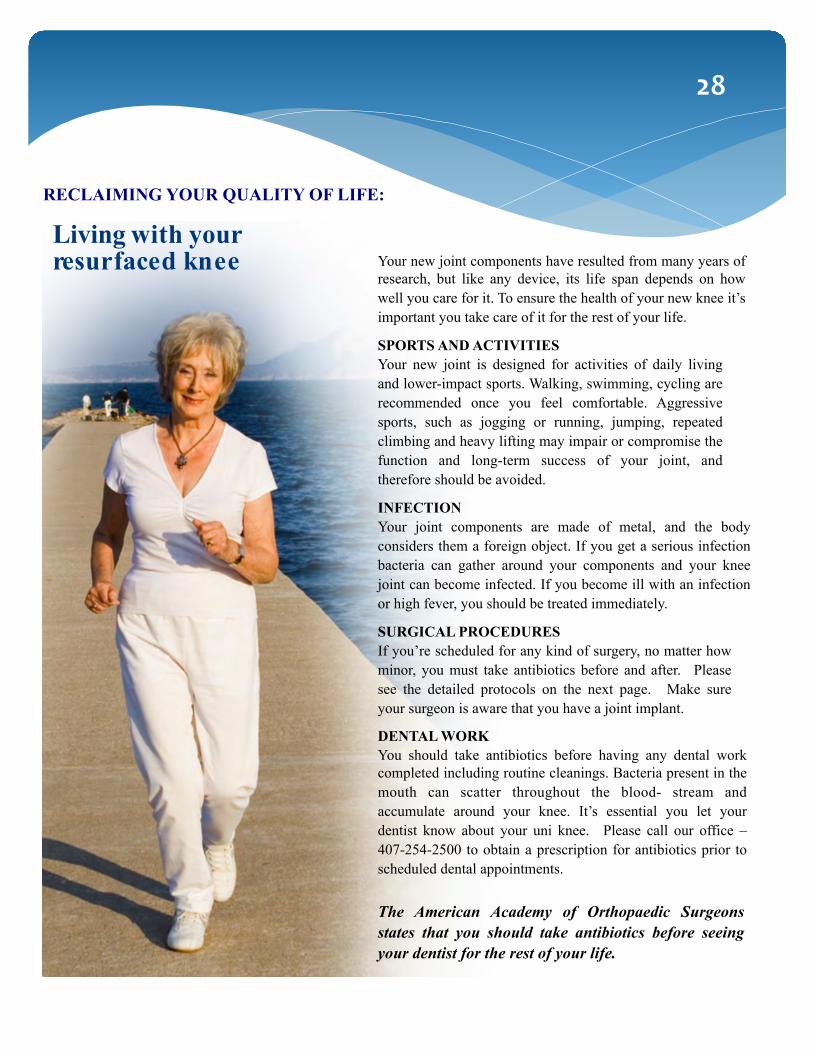
Your new joint components have resulted from many years of research, but like any device, its life span depends on how well you care for it. To ensure the health of your new knee it’s important you take care of it for the rest of your life.
SPORTS AND ACTIVITIES Your new joint is designed for activities of daily living and lower-impact sports. Walking, swimming, cycling are recommended once you feel comfortable. Aggressive sports, such as jogging or running, jumping, repeated climbing and heavy lifting may impair or compromise the function and long-term success of your joint, and therefore should be avoided.
INFECTION Your joint components are made of metal, and the body considers them a foreign object. If you get a serious infection bacteria can gather around your components and your knee joint can become infected. If you become ill with an infection or high fever, you should be treated immediately.
SURGICAL PROCEDURES If you’re scheduled for any kind of surgery, no matter how minor, you must take antibiotics before and after. Please see the detailed protocols on the next page. Make sure your surgeon is aware that you have a joint implant.
DENTAL WORK You should take antibiotics before having any dental work completed including routine cleanings. Bacteria present in the mouth can scatter throughout the blood- stream and accumulate around your knee. It’s essential you let your dentist know about your uni knee. Please call our office – 407-254-2500 to obtain a prescription for antibiotics prior to scheduled dental appointments.
Living with your resurfaced knee
The American Academy of Orthopaedic Surgeons states that you should take antibiotics before seeing your dentist for the rest of your life.
RECLAIMING YOUR QUALITY OF LIFE:
29
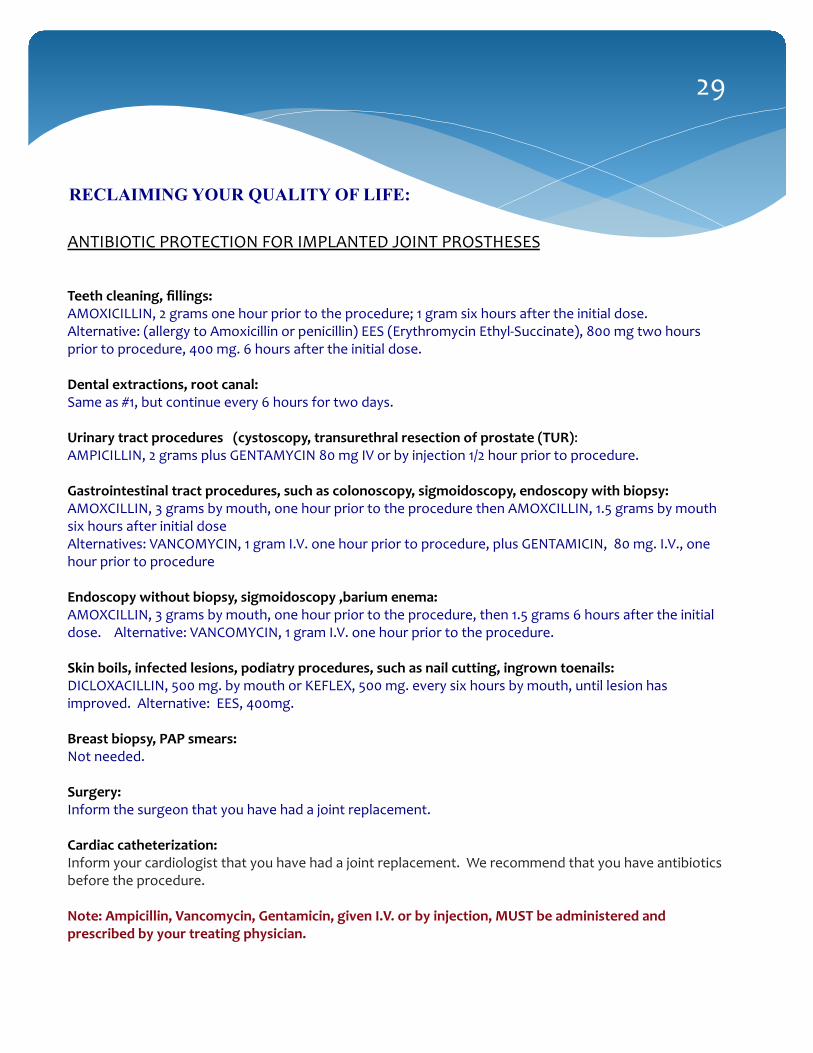
RECLAIMING YOUR QUALITY OF LIFE: ANTIBIOTIC PROTECTION FOR IMPLANTED JOINT PROSTHESES Teeth cleaning, fillings: AMOXICILLIN, 2 grams one hour prior to the procedure; 1 gram six hours after the initial dose. Alternative: (allergy to Amoxicillin or penicillin) EES (Erythromycin Ethyl-‐Succinate), 800 mg two hours prior to procedure, 400 mg. 6 hours after the initial dose. Dental extractions, root canal: Same as #1, but continue every 6 hours for two days. Urinary tract procedures (cystoscopy, transurethral resection of prostate (TUR): AMPICILLIN, 2 grams plus GENTAMYCIN 80 mg IV or by injection 1/2 hour prior to procedure. Gastrointestinal tract procedures, such as colonoscopy, sigmoidoscopy, endoscopy with biopsy: AMOXCILLIN, 3 grams by mouth, one hour prior to the procedure then AMOXCILLIN, 1.5 grams by mouth six hours after initial dose Alternatives: VANCOMYCIN, 1 gram I.V. one hour prior to procedure, plus GENTAMICIN, 80 mg. I.V., one hour prior to procedure Endoscopy without biopsy, sigmoidoscopy ,barium enema: AMOXCILLIN, 3 grams by mouth, one hour prior to the procedure, then 1.5 grams 6 hours after the initial dose. Alternative: VANCOMYCIN, 1 gram I.V. one hour prior to the procedure. Skin boils, infected lesions, podiatry procedures, such as nail cutting, ingrown toenails: DICLOXACILLIN, 500 mg. by mouth or KEFLEX, 500 mg. every six hours by mouth, until lesion has improved. Alternative: EES, 400mg. Breast biopsy, PAP smears: Not needed. Surgery: Inform the surgeon that you have had a joint replacement. Cardiac catheterization: Inform your cardiologist that you have had a joint replacement. We recommend that you have antibiotics before the procedure. Note: Ampicillin, Vancomycin, Gentamicin, given I.V. or by injection, MUST be administered and prescribed by your treating physician.