Embed Size (px)
Citation preview
1
Assorbimento / Absorption / Anschlusswert : 3,7 kW
∅ 160w 1400
∅ 200w 2300(w 3000)
BẾP ĐIỆN TỪ/HỒNG NGOẠI KẾT HỢP - Hướng dẫn sử dụng và bảo dưỡng
ITALIANO IT
ENGLISH GB
DEUTSCH DE
PIANO INDUZIONE VETROCERAMICA Istruzioni per l’uso
INDUCTION VITROCERAMIC HOB User instructions
ELEKTRO-GLASKERAMIK-INDUKTIONS-KOCHFELD Montage- und Gebrauchsanweisung
PLACA INDUCCION VIDRIOCERÁMICA Manual de utilización
TABLE INDUCTION VETR OCERAMIQUE Manuel d’utilisation
TIẾNG VIỆT VN
FRANÇAIS FR
ESPAÑOL ES

2
50 mm
270 mm
490 mm
290 mm510 mm
50 mm
268 mm
510 mm
488 mm
50 mm
Fig.B
Fig.C
Ⓐ
30 m
m
51 m
m51
mm
30 m
m
Ⓑ51
mm
40 m
m
Fig.E
~ 2 mm
NO
YES
Fig.F
min. 50 mm
51 mm
20 mm
Fig.D

3
B E EA B
CD
FF
Fig.J
NL L2L1
220-240V 220-240V2
Fig.GH05V2V2-F 3G
1,5 mm2
Fig.K
Fig.H Fig.I
Ⓐ
Ⓑ
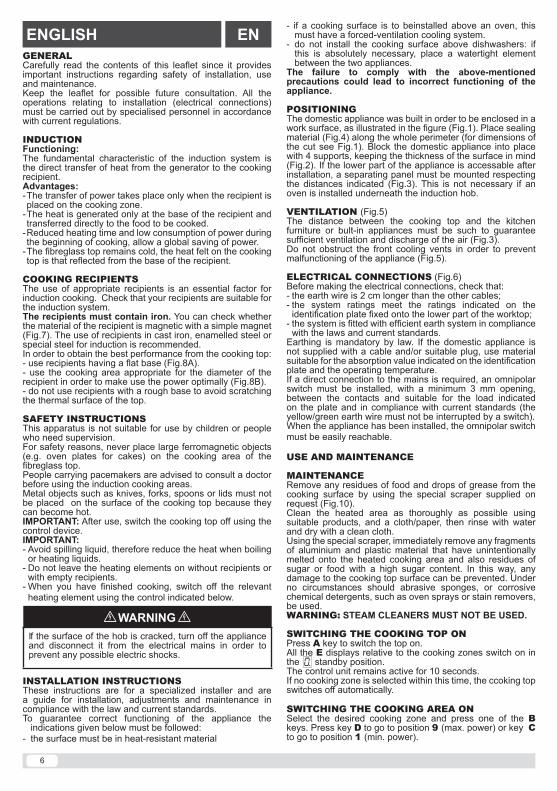
A - ON/OFF key > switch the appliance on and offB - Cooking zoneC - Plus key > increase power level of cooking zoneD - Minus key > reduce power level of cooking zoneE - Cooking Zone Display > cooking zone display (e.g. power, timer)F - Timer LED > the light is on when timer is active
A – nút ON/OFF > bật hoặc tắt thiết bịB – Vùng nấuC – Nút tăng > Tăng mức điện năng cho vùng nấuD – Nút giảm > Giảm mức điện năng cho vùng nấuE – Nút hiển thị vùng nấu > Nút hiển thị vùng nấu (vd: nguồn, thời gian)F – Đèn LED đặt giờ > đèn sáng khi khởi động đặt giờ

4
e fungono da guida per l’installazione, la regolazione e la manutenzione in conformità delle leggi e delle norme vigenti. Per garantire un buon funzionamento dell’apparecchio è necessario seguire le seguenti indicazioni:• il piano d’appoggio deve essere di materiale resistente al
calore.• se si desidera installare il piano cottura sopra un forno, questo deve essere provvisto di un sistema di raffreddamento a ventilazione forzata.• evitare di installare il piano cottura sopra una lavastoviglie:
all’occorrenza frapporre un elemento di separazione a tenuta stagna fra i due apparecchi.
Il mancato rispetto delle suddette precauzioni potrebbe determinare l’errato funzionamento dell’apparecchio.
POSIZIONAMENTOL’elettrodomestico è realizzato per essere incassato in un piano di lavoro, come illustrato nella figura (Fig.1). Predisporre materiale sigillante (Fig.4) lungo l’intero perimetro (vedere Fig.1 per le dimensioni del taglio). Bloccare l’elettrodomestico sul piano di lavoro mediante i 4 sostegni, tenendo presente lo spessore del piano di lavoro (Fig.2). Se dopo l’installazione la parte inferiore dell’apparecchio rimane accessibile, è necessario montare un pannello separatore rispettando le distanze indicate (Fig.3); questo non è necessario se sotto l’apparecchio si installa un forno.
VENTILAZIONELa distanza tra il piano di cottura e i mobili da cucina o gli apparecchi da incasso deve essere tale da garantire una sufficiente ventilazione ed un sufficiente scarico dell’aria (Fig.3). Si raccomanda di non ostruire i fori di raffreddamento anteriori per evitare malfunzionamenti dell’apparecchio (Fig.5).
CONNESSIONI ELETTRICHE (Fig.6) Prima di effettuare le connessioni elettriche assicurarsi che: - il cavo elettrico della terra deve essere di 2 cm più lungo
rispetto agli altri cavi; - le caratteristiche dell’impianto siano tali da soddisfare le
indicazioni sulla targhetta identificativa applicata sulla parte inferiore del piano di lavoro;
- l’impianto sia dotato di una messa a terra efficiente conforme alle norme e alle disposizioni di legge in vigore. La messa a terra è obbligatoria per legge.
Nel caso in cui l’elettrodomestico non sia dotato di cavo e/o della relativa spina, utilizzare materiale adatto per l’assorbimento indicato nella targhetta identificativa e per la temperatura di funzionamento.
Se si desidera una connessione diretta alla linea elettrica, è necessario interporre un interruttore omnipolare, con un’apertura minima di 3mm fra i contatti, appropriato al carico indicato nella targhetta e conforme alle norme vigenti (il conduttore di terra giallo/verde non deve essere interrotto dal commutatore). Terminata l’installazione dell’apparecchiatura, l’interruttore omnipolare deve essere facilmente raggiungibile.
MANUTENZIONERimuovere eventuali residui di cibo e gocce di unto dalla superficie di cottura utilizzando lo speciale raschietto fornito su richiesta (Fig.10). Pulire l’area riscaldata nel miglior modo possibile utilizzando prodotti idonei ed un panno-carta, quindi sciacquare con acqua e asciugare con un panno pulito. Mediante lo speciale raschietto rimuovere immediatamente dall’area riscaldata di cottura frammenti di fogli di alluminio e materiale plastico scioltisi inavvertitamente o residui di zucchero o di cibi ad elevato contenuto di zucchero. In questo modo si evita ogni possibile danno alla superficie del piano. In nessun caso si devono utilizzare spugnette abrasive o detergenti chimici irritanti quali spray per forno o smacchiatori.ATTENZIONE: NON DEVE ESSERE UTILIZZATO UNPULITORE A VAPORE.
ACCENSIONE PIANO COTTURA Premere il tasto A per accendere il piano. Tutti i display E relativi alle zone di cottura si accenderanno in posizione di standby .L’unità di controllo rimarrà attiva per un tempo di 10 secondi.
GENERALITA’ Leggere attentamente il contenuto del presente libretto in quanto fornisce importanti indicazioni riguardanti la sicurezza di installazione, d’uso e di manutenzione. Conservare il libretto per ogni ulteriore consultazione.Tutte le operazioni relative all’installazione (connessioni elettriche) devono essere effettuate da personale specializzato in conformità delle norme vigenti.
INDUZIONEFunzionamento: La caratteristica fondamentale del sistema ad induzione è il trasferimento diretto dell’energia riscaldante dal generatore al recipiente di cottura.Vantaggi: - Il trasferimento di energia avviene solo quando il recipiente è
posto sulla zona di cottura.- Il calore viene generato solo sul fondo del recipiente e
trasmesso direttamente al cibo da cuocere.- Tempi di riscaldamento ridotti e basso consumo di energia
durante l’inizio cottura, consentono un risparmio globale di energia.
- Il piano in vetroceramica rimane freddo. Il calore che si avverte sul piano di cottura è quello riflesso dal fondo del recipiente.
RECIPIENTI PER LA COTTURAAssicuratevi che le vostre pentole siano idonee per il sistema ad induzione. I recipienti devono essere di materiale ferromagnetico, quindi contenere ferro.Per sincerarsi che un recipiente sia ferromagnetico è sufficiente fare una prova con una calamita (Fig.7).Si raccomanda l’uso di recipienti in: ghisa, acciaio smaltato o inox speciale per induzione. Per ottenere le migliori prestazioni dal piano di cottura:• utilizzare recipienti a fondo piatto per garantire la corretta
aderenza (Fig.8A) • utilizzare la zona di cottura appropriata al diametro del
recipiente che si vuole utilizzare per sfruttare l’energia in modo ottimale (Fig.8B).
• non utilizzare recipienti con base ruvida per evitare di graffiare la superficie termica del piano.
AVVERTENZE PER LA SICUREZZAQuesto apparecchio non e adatto per l’uso da parte di bambini o persone che necessitano di supervisione. Per ragioni di sicurezza, non appoggiare mai oggetti ferromagnetici di grandi dimensioni (ad es. placche da forno per torte) sulla zona di cottura del piano in vetroceramica. Per i portatori di pacemaker si consiglia di consultare un medico prima di utilizzare le zone di cottura ad induzione.Oggetti metallici quali coltelli, forchette, cucchiai o coperchi non dovrebbero essere posti sulla superficie del piano di cottura perchè possono surriscaldarsi.
IMPORTANTE: - Dopo l’uso, spegnere il piano di cottura tramite il dispositivo
di comando.- Evitare le fuoriuscite di liquido, pertanto per bollire o
riscaldare liquidi, ridurre l’alimentazione di calore. - Non lasciare gli elementi riscaldanti accesi senza recipienti
o con recipienti vuoti. - Una volta terminato di cucinare, spegnere la relativa
resistenza tramite il comando indicato in seguito.
h ATTENZIONE hSe la superficie del piano è incrinata, spegnere l’apparecchio e disconnettere dalla rete elettrica per evitare l’eventualità di scosse elettriche.
ISTRUZIONI PER L’INSTALLAZIONELe presenti istruzioni sono rivolte ad un installatore specializzato
IT ITALIANO IT
5
Se entro questo termine non verrà selezionata nessuna zona di cottura il piano cottura si spegnerà automaticamente.
ACCENSIONE ZONE COTTURASelezionare la zona di cottura desiderata premendo uno dei tasti B. Premere il tasto D per andare in posizione 9 oppure il tasto C per andare in posizione 1. Effettuata questa operazione si possono scegliere le regolazioni di temperatura con i tasti C o D.La potenza della singola zona di cottura può essere regolata in 9 differenti posizioni, e sarà visualizzata dal display luminoso E con un numero da “1 a 9”.
RISCALDAMENTO VELOCE/BOOSTERQuesta funzione riduce ulteriormente il tempo di cottura di una data zona portando la temperatura alla massima potenza per un intervallo di 10 minuti. Al termine di questo intervallo la potenza della zona di cottura torna automaticamente al livello 9.L’uso di questa funzione è indicato per il riscaldamento in tempi brevissimi di grandi quantità di liquidi (es. acqua per la cottura della pasta) o pietanze. Per attivare questa funzione selezionare la zona di cottura e premere il tasto C fino al livello 9. Premere nuovamente il tasto C. Verrà emesso un segnale acustico ed il simbolo sarà visualizzato nel display relativo alla zona.
CALORE RESIDUO Se la temperatura di una zona di cottura è ancora elevata (superiore a 50°) dopo essere stata spenta, il display relativo a quella zona mostra il simbolo (calore residuo). L’indicazione scompare solo quando non vi è più alcun rischio di ustioni.L’indicazione scompare solo quando non vi è più alcun rischio di ustioni.
RICONOSCIMENTO PENTOLE Se su uno dei display di una zona di cottura B, dovesse comparire il simbolo , significa che: 1) il recipiente utilizzato non è idoneo per la cottura ad
induzione.2) il diametro della pentola utilizzata è inferiore a quello
consentito dall’apparecchio.3) sulla piastra non è presente nessuna pentola.
TIMER Questa funzione permette di stabilire il tempo (da 1 a 99 minuti) per lo spegnimento automatico della zona di cottura selezionata. Attivare una zona cottura e regolarne la potenza.Abilitare il timer premendo contemporaneamente i relativi tasti C e D. Premere nuovamente i tasti C e D per selezionare la zona cottura su cui attivare il timer. Questa verrà indicata dal relativo led posto su uno degli angoli del display.Premere il tasto C o D per selezionare il tempo di autospegnimento desiderato. La zona di cottura con timer attivo sarà segnalata da un led fisso su uno degli angoli del display. Allo scadere del timer la zona cottura si spegnerà automaticamente e verrà emesso un segnale acustico che potrà essere disattivato premendo un qualsiasi tasto dell’area comandi. Per disattivare il timer di una zona di cottura premere contemporaneamente i tasti C e D per entrare nella funzione timer. Premere nuovamente i tasti C e D fino a selezionare il timer della zona cottura desiderata. Premere il tasto D fino al valore .
EGG TIMER/PROMEMORIAE’ possibile impostare un promemoria acustico premendo contemporanemente i tasti C e D. Il led centrale della zona timer lampeggia. Attraverso il tasto C o D regolare un tempo per il promemoria da 1 a 99 minuti. Allo scadere del tempo impostato verrà emesso un segnale acustico che potrà essere disattivato premendo un qualsiasi tasto dell’area comandi. Le zone cottura precedentemente in funzione rimarranno attive. La funzione egg timer/promemoria rimane attiva anche dopo lo spegnimento dell’apparecchio. Per disattivare questa funzione premere contemporaneamente i tasti C e D e successivamente il tasto D fino al valore .
BLOCCO COMANDI E’ possibile bloccare i comandi per evitare il rischio di
modifiche non intenzionali alle regolazioni del piano (bambini, operazioni di pulizia, ecc.). Per attivare il blocco comandi premere contemporaneamente il tasto B in basso a destra ed il tasto D, poi nuovamente il tasto B ; i 2 led mostreranno il simbolo per segnalare l’avvenuto blocco dei comandi. Per sbloccare temporaneamente i comandi e tornare ad agire sulle regolazioni (es. interrompere la cottura) è necessario premere contemporaneamente il tasto B in basso a destra ed il tasto D, i 2 led mostreranno il simbolo lampeggiante e sarà possibile agire sulle regolazioni. Quando il blocco dei comandi è attivo è comunque possibile spegnere il piano di cottura. In questo caso il blocco comandi rimane attivo anche alla riaccesione del piano.Per disattivare definitivamente il blocco dei comandi è necessario premere contemporaneamente il tasto B in basso a destra ed il tasto D poi nuovamente il tasto D . Il piano di cottura si spegnerà ed alla riaccensione il blocco comandi non sarà più inserito.
SPEGNIMENTO ZONE COTTURAPer spegnere una zona di cottura premere il tasto D fino alla posizione .
SPEGNIMENTO PIANO COTTURAPer spegnere completamente il piano di cottura premere il tasto A.
SPEGNIMENTO DI SICUREZZAL’apparecchio è provvisto di un sistema di sicurezza che spegne automaticamente il grill trascorso il tempo limite di accensione ad una data potenza.
POTENZA TEMPO LIMITE ACCENSIONE (ore)
1 - 2 6
3 - 4 5
5 4
6 - 7 - 8 - 9 1,5
DISMISSIONE DEGLI ELETTRODOMESTICILa direttiva Europea 2002/96/CE sui rifiuti di apparecchiature elettriche ed elettroniche (RAEE), prevede che gli elettrodomestici non debbano essere smaltiti nel normale flusso dei rifiuti solidi urbani. Gli apparecchi dismessi devono essere raccolti separatamente per ottimizzare il tasso di recupero e riciclaggio dei materiali che li compongono ed impedire potenziali danni
per la salute e l’ambiente. Il simbolo del cestino barrato è riportato su tutti i prodotti per ricordare gli obblighi di raccolta separata. Per ulteriori informazioni, sulla corretta dismissione degli elettrodomestici, i detentori potranno rivolgersi al servizio pubblico preposto o ai rivenditori.SI DECLINA OGNI RESPONSABILITÀ PER EVENTUALI DANNI PROVOCATI DALLA INOSSERVANZA DELLE SUDDETTE AVVERTENZE. LA GARANZIA NON E’ VALIDA NEL CASO DI DANNI DERIVANTI DALLA INOSSERVANZA DELLE SUDDETTE AVVERTENZE.
6
GENERALCarefully read the contents of this leaflet since it provides important instructions regarding safety of installation, use and maintenance. Keep the leaflet for possible future consultation. All the operations relating to installation (electrical connections) must be carried out by specialised personnel in accordance with current regulations.
INDUCTIONFunctioning: The fundamental characteristic of the induction system is the direct transfer of heat from the generator to the cooking recipient. Advantages: - The transfer of power takes place only when the recipient is placed on the cooking zone.
- The heat is generated only at the base of the recipient and transferred directly to the food to be cooked.
- Reduced heating time and low consumption of power during the beginning of cooking, allow a global saving of power.
- The fibreglass top remains cold, the heat felt on the cooking top is that reflected from the base of the recipient.
COOKING RECIPIENTSThe use of appropriate recipients is an essential factor for induction cooking. Check that your recipients are suitable for the induction system. The recipients must contain iron. You can check whether the material of the recipient is magnetic with a simple magnet (Fig.7). The use of recipients in cast iron, enamelled steel or special steel for induction is recommended.In order to obtain the best performance from the cooking top:- use recipients having a flat base (Fig.8A). - use the cooking area appropriate for the diameter of the recipient in order to make use the power optimally (Fig.8B).- do not use recipients with a rough base to avoid scratching the thermal surface of the top.
SAFETY INSTRUCTIONSThis apparatus is not suitable for use by children or people who need supervision. For safety reasons, never place large ferromagnetic objects (e.g. oven plates for cakes) on the cooking area of the fibreglass top. People carrying pacemakers are advised to consult a doctor before using the induction cooking areas. Metal objects such as knives, forks, spoons or lids must not be placed on the surface of the cooking top because they can become hot. IMPORTANT: After use, switch the cooking top off using the control device. IMPORTANT:- Avoid spilling liquid, therefore reduce the heat when boiling
or heating liquids.- Do not leave the heating elements on without recipients or
with empty recipients.- When you have finished cooking, switch off the relevant
heating element using the control indicated below.
h WARNING hIf the surface of the hob is cracked, turn off the appliance and disconnect it from the electrical mains in order to prevent any possible electric shocks.
INSTALLATION INSTRUCTIONSThese instructions are for a specialized installer and are a guide for installation, adjustments and maintenance in compliance with the law and current standards. To guarantee correct functioning of the appliance the
indications given below must be followed:- the surface must be in heat-resistant material
- if a cooking surface is to beinstalled above an oven, this must have a forced-ventilation cooling system.
- do not install the cooking surface above dishwashers: if this is absolutely necessary, place a watertight element between the two appliances.
The failure to comply with the above-mentioned precautions could lead to incorrect functioning of the appliance.
POSITIONING The domestic appliance was built in order to be enclosed in a work surface, as illustrated in the figure (Fig.1). Place sealing material (Fig.4) along the whole perimeter (for dimensions of the cut see Fig.1). Block the domestic appliance into place with 4 supports, keeping the thickness of the surface in mind (Fig.2). If the lower part of the appliance is accessable after installation, a separating panel must be mounted respecting the distances indicated (Fig.3). This is not necessary if an oven is installed underneath the induction hob.
VENTILATION (Fig.5)The distance between the cooking top and the kitchen furniture or bult-in appliances must be such to guarantee sufficient ventilation and discharge of the air (Fig.3). Do not obstruct the front cooling vents in order to prevent malfunctioning of the appliance (Fig.5).
ELECTRICAL CONNECTIONS (Fig.6)Before making the electrical connections, check that:- the earth wire is 2 cm longer than the other cables;- the system ratings meet the ratings indicated on the
identification plate fixed onto the lower part of the worktop;- the system is fitted with efficient earth system in compliance
with the laws and current standards.Earthing is mandatory by law. If the domestic appliance is not supplied with a cable and/or suitable plug, use material suitable for the absorption value indicated on the identification plate and the operating temperature. If a direct connection to the mains is required, an omnipolar switch must be installed, with a minimum 3 mm opening, between the contacts and suitable for the load indicated on the plate and in compliance with current standards (the yellow/green earth wire must not be interrupted by a switch). When the appliance has been installed, the omnipolar switch must be easily reachable.
USE AND MAINTENANCE
MAINTENANCERemove any residues of food and drops of grease from the cooking surface by using the special scraper supplied on request (Fig.10). Clean the heated area as thoroughly as possible using suitable products, and a cloth/paper, then rinse with water and dry with a clean cloth. Using the special scraper, immediately remove any fragments of aluminium and plastic material that have unintentionally melted onto the heated cooking area and also residues of sugar or food with a high sugar content. In this way, any damage to the cooking top surface can be prevented. Under no circumstances should abrasive sponges, or corrosive chemical detergents, such as oven sprays or stain removers, be used.WARNING: STEAM CLEANERS MUST NOT BE USED.
SWITCHING THE COOKING TOP ON Press A key to switch the top on. All the E displays relative to the cooking zones switch on in the standby position. The control unit remains active for 10 seconds. If no cooking zone is selected within this time, the ccoking top switches off automatically.
SWITCHING THE COOKING AREA ONSelect the desired cooking zone and press one of the B keys. Press key D to go to position 9 (max. power) or key C to go to position 1 (min. power).
EN ENGLISH EN
7
Once this operation has been completed you can adjust the temperature with the C or D keys. The power of the single cooking zone can be adjusted in 9 different positions and will be shown on luminous display E with a number from “1 to 9”.
QUICK / BOOSTER HEATING This function further reduces cooking time in a given area taking the temperature to the maximum power for a 10 minute interval. At the end of this interval, the cooking area power automatically returns to level 9.The use of this function is recommended for heating a large quantity of liquid in a very short time (i.e. water for cooking pasta) or other dishes. To activate this function, select the cooking area and press the key C up to level 9. Press the C key again. An acoustic signal will be emitted and a symbol will be visualised on the display relative to the area.
RESIDUAL HEAT If the temperature of the cooking area is still high (over 50°) after it has been switched off, the relative display will indicate the symbol (residual heat). The symbol will only switch off when the burn risk in no longer present.
POT DETECTION If the symbol should appear on one of the cooking area displays, it means that: 1)The recipient being used is not suitable for induction
cooking.2)The diameter of the recipient used is inferior to that allowed
by the appliance.3) No recipient is present.
TIMER This function allows establishing the time (from 1 to 99 minutes) for automatically switching the selected cooking zone off. Switch on at least one cooking zone and adjust the temperature.Press simultaneously the C and D key to enter the timer function. Press again the C and D key simoultaneously to select the cooking zone on which you want to activate the timer. The selected cooking zone will be indicated by a flashing led located on one of the corners of the timer display.Set the auto switching off time by pressing the C or D key. The cooking zone on which the timer has been activated is indicated by a steady led at one of the corners of the timer display.An acoustic signal will indicate the timer expiration and the relative cooking zone will automatically switch off. Press any of the keys to stop the acoustic signal.In order to disable the timer on a cooking zone press simultaneously the C and D key to enter the timer function. Press again the C and D key simoultaneously to select the desired cooking zone. Press the key D until reaching position .
EGG TIMER / REMINDERTo set a ‘reminder time’ press simultaneously the C and D key. The led located at the bottom-center of the timer display will be flashing. Set the ‘reminder time’ (from 1 to 99 minutes) by pressing the C or D key. An acoustic signal will indicate the ‘reminder time’ expiration. Press any key to stop the acoustic signal. The egg timer remains active even if the appliance is switched off. In order to disable the egg timer press simultaneously the C and D key to enter the egg timer function. Press the D key until reaching position .
CONTROL PANEL LOCK It is possible to block the controls to prevent the risk of unintentional modification of the settings (children, cleaning etc.). To activate the control panel lock press simultaneously the B key at the lower right and the D key, then press again the B key. The 2 leds will show the symbol . To temporarily release the controls and change the settings (e.g.interrupt cooking), press simultaneously the B key at the lower right and the D key.
The 2 leds will show a flashing , then it will be possible to modify the settings. The cooking top can however be switched off even when the controls block is activated. In this case the controls block remains active when the top is switched on again.To definitely switch the control panel lock off press simultaneously the B key at the lower right and the D key, then press again the D key. The cooking top switches off. The control panel lock is not active when the top is switched on again.
SWITCHING THE COOKING AREA OFFTo switch a cooking zone off, press the D key until reaching position .
SWITCHING THE COOKING TOP OFFTo turn off the cooking top entirely hold down the A key..
SAFETY SWITCHThe appliance has a safety switch that automatically switch-es off the cooking zones when they have been operating for a certain amount of time at a given power level.
POWER LEVEL OPERATING TIME LIMIT (hours)
1 - 2 6
3 - 4 5
5 4
6 - 7 - 8 - 9 1,5
DISPOSAL OF ELECTRICAL APPLIANCESThe European Directive 2002/96/EC regarding Waste Electrical and Electronic Equipment (WEEE), envisions that electrical household appliances must not be disposed of in the normal unsorted municipal waste stream. The appliances must be collected separately in order to optimise the recovery and recycling of the materials they
contain and reduce the impact on human health and the environment. The crossed-out dustbin symbol is found on all products to remind of the obligation regarding separated waste collection. Consumers should contact their local public service or their local dealer for more information on the correct disposal of old household appliances.
THE MANUFACTURER DECLINES ALL RESPONSIBILITY FOR EVENTUAL DAMAGES CAUSED BY BREAKING THE ABOVE WARNINGS. THE WARRANTY IS NOT VALID IN THE CASE OF DAMAGE CAUSED BY FAILURE TO COMPLY WITH THE ABOVE WARNINGS.
BITTE NOTIEREN SIE HIER ZUM NACHWEIS DES ORDNUNGSGEMÄSSEN ANSCHLUSSES:
Montagefirma
Name des Monteurs
Qualifikation bzw. Ausbildung des Monteurs
Datum der Montage
Rechnungsnummer
Datum der Rechnung
Für den Fall, dass im Reklamationsfall diese Daten nicht nachweisbar sind, erlischt die gesetzliche Gewährleistung des Herstellers.

8
1. MONTAGE1.1 Vorbemerkung zur SicherheitDer Einbau und der Anschluss dürfen nur von einem qualifizierten Fachmann auf der Basis der geltenden Vorschriften ausgeführt werden. Der Anschluss und die sachgerechte Absicherung sind von einem ausgebildeten Elektriker vorzunehmen. Anschlussfehler, die von „Nichtfachleuten“ verursacht sind und dadurch das Gerät beschädigen, führen zum Erlöschen der gesetzlichen Gewährleistung.Das Glaskeramikfeld darf nur in temperaturbeständigen Möbeln und Arbeitsplatten eingebaut werden, die mindestens einer Temperatur von 100 °C standhalten.Der Ausschnitt in der Arbeitsplatte ist gemäß der Maßzeichnung (Abb. 1) anzubringen. Der Abstand von der Wand muss mindestens 50 mm betragen. Zwischen der Glaskeramik und der Arbeitsplatte ist das mitgelieferte Dichtungsband anzubringen (Abb.4).Die Befestigung des Glaskeramikfeldes im Ausschnitt der Arbeitsplatte erfolgt mit den mitgelieferten Klammern (Abb.2).Sollte unter dem Glaskeramikfeld ein Einbaubackofen oder ein sonstiges Elektrogerät, das Wärme erzeugt, installiert sein, muss das Glaskeramikfeld mit geeignetem Dämmmaterial gegen diese Temperatureinflüsse so isoliert werden, dass die Temperatur des unteren Bodens des Glaskeramikfeldes stets unter 60°C bleibt. Backöfen, die unter dem Glaskeramikfeld installiert werden, müssen mit einem so genannten Querstromlüfter ausgerüstet sein. Von der Installation über einem Geschirrspüler wird abgeraten, es sei denn, dass die Temperaturgrenzen eingehalten werden, was in jedem Fall nachzuweisen ist, um die Garantieansprüche aufrecht zu erhalten.Die Nichtbeachtung dieser Vorschrift kann Fehlfunktionen der Elektronik des Glaskeramikfeldes auslösen und die Garantie erlischt in diesem Fall.Wenn die Unterseite des Glaskeramikfeldes nach der Montage von unten her berührbar wäre, muss ein Trennboden eingebaut werden, der diese Berührungsmöglichkeit ausschließt (Abb.3). Die einzuhaltenden Maße sind in der Abbildung angegeben.Der Abstand zwischen dem Kochfeld und den Küchenmöbeln bzw. Einbaugeräten muss so gewählt sein, dass eine ausreichende Be- und Entlüftung gewährleistet ist (Abb. 3). Um Störungen des Geräts zu vermeiden, dürfen die vorderen Belüftungsöffnungen niemals abgedeckt werden (Abb.5 ).
1.2 StromanschlussDie Anschlussschemata für die verschiedenen Stromarten, Spannungen und die einzusetzenden Kabel sind in Abbildung 6 (Abb.6) für den Fachmann eindeutig dargestellt.Vor dem elektrischen Anschluss ist sicherzustellen, dass die Stromversorgung einer der für das Glaskeramikfeld vorgesehenen Stromarten und Spannungen (Abb.6) entspricht.Es ist ein entsprechend der Stromart und der Spannung zugelassenes Anschlusskabel zu verwenden, das den gesetzlichen Vorschriften entspricht.Das Glaskeramikfeld ist unbedingt zu erden.Das Glaskeramikfeld ist unbedingt mit einer Festanschlussdose anzuschließen. Der Betrieb über einen Stecker und eine Steckdose ist nicht zulässig. Es ist bei diesem Festanschluss eine allpolige Trennvorrichtung mit einer Kontaktöffnungsweite von mindestens 3 mm vorzusehen. Die Erdleitung darf nicht durch den Schalter unterbrochen werden. Dieser Hauptschalter muss jederzeit gut zugänglich sein. Die Kabelführung ist so zu wählen, dass sich das Kabel an keinem Punkt über 50°C über Zimmertemperatur erwärmen kann. Bei unsachgemäßem Anschluss ist jede Haftung des Herstellers ausgeschlossen
1.3 MontageablaufZwischen dem Gerät und der Arbeitsplatte ist auf dem gesamten Umfang das mitgelieferte Dichtungsband anzubringen (Abb.4). Diese Dichtung verhindert das Eindringen von Flüssigkeit zwischen dem Glaskeramikfeld
und der Arbeitsplatte.Die Befestigung des Glaskeramikfeldes im Ausschnitt der Arbeitsplatte erfolgt mit den mitgelieferten Klammern (Abb.2). Durch Drehen der Klammern kann die Montage alternativ in Arbeitsplatten mit der Stärke 30 mm oder 40 mm ausgeführt werden.
2. GEBRAUCH2.1 Vorbemerkungen zum InduktionskochenDie wesentliche Eigenschaft des Induktionssystems ist die direkte Übertragung der Energie zum Erhitzen der Speisen von der Induktionsquelle auf das Kochgeschirr.Vorteile:• Die Energieübertragung geschieht nur dann, wenn ein Topf
auf der Kochfläche steht.• Die Wärme wird nur am Topfboden erzeugt und direkt auf die
zu garenden Speisen übertragen.• Kürzere Erwärmungszeiten und geringerer Stromverbrauch
zu Beginn der Garzeit erlauben insgesamt eine Energieeinsparung.
• Die Glaskeramikfläche bleibt kalt. Auf dem Kochfeld wahrgenommen wird nur die Wärme, die von dem Boden des Topfes reflektiert wird.
• Vergewissern Sie sich bitte, dass Ihr Kochgeschirr für das Induktionssystem geeignet ist. Die Töpfe und Pfannen müssen aus ferromagnetischem Material sein, d.h. Eisen enthalten. Ob das Material Ihres Kochgeschirrs ferromagnetisch ist, können Sie ganz einfach mit einem Magneten feststellen (Abb.7). Es wird empfohlen Kochgeschirr aus Gusseisen, emalliertem Stahl oder speziellem Edelstahl für das Induktionskochen zu verwenden.
2.2 Vorbemerkungen zur Sicherheit• Personen, die einen Herzschrittmacher tragen, sollten Ihren
Arzt zu Rate ziehen, bevor sie die Induktionskochfläche verwenden.
• Stellen Sie keine großen ferromagnetischen Gegenstände (z.B. Backbleche) auf die Glaskeramikkochfläche.
• Nur Kochgeschirr mit ebenem und ausreichend dickem Boden benutzen. Der Boden muss wenigstens dem Durchmesser der Kochzone entsprechen oder darf höchstens leicht größer sein als diese. (Abb.8)
• Das Kochgeschirr darf keinen rauen Boden haben, um nicht die Glaskeramik zu verkratzen.
• Die Kochzonen dürfen nicht aufgeheizt werden, ohne dass ein gefülltes Kochgeschirr darauf steht.
• Nichts direkt auf der heißen Kochzone ohne Kochgeschirr braten oder grillen.
• Keine Gegenstände auf das Kochfeld legen.• Darauf achten, dass das Kochgut nicht überkocht und direkt
auf die heiße Kochzone läuft.• Schalten Sie die Kochzone ab, bevor Sie das Kochgeschirr
vom Kochfeld nehmen.
BEDIENUNGSSPERRE Es besteht die Möglichkeit, die Bedienungsfunktionen zu sperren, wodurch die Gefahr von ungewollten Änderungen der Kochfeldeinstellungen ausgeschlossen werden kann (Kinder, Reinigung, etc.). Zum Aktivieren der Bedienungssperre gleichzeitig die Taste C rechts unten und die Taste D drücken, dann nochmals die Taste C. Auf den vier LEDs erscheint das Symbol um die durchgeführte Bedienungssperre anzuzeigen. Um die Bedienungsfunktionen vorübergehend zu entsperren und wieder Einstellungen vornehmen zu können (z.B. zum Unterbrechen des Kochvorgangs), gleichzeitig die Taste C rechts unten und die Taste D drücken. Auf den vier LEDs erscheint blinkend das Symbol und es können wieder Einstellungen vorgenommen werden.Wenn die Bedienungssperre aktiviert ist, kann man das Kochfeld dennoch abschalten. In diesem Fall bleibt die Sperre auch beim neuerlichen Einschalten des Kochfelds aktiv.Um die Bedienungssperre endgültig auszuschalten, gleichzeitig die Taste C rechts unten und die Taste D drücken, dann nochmals die Taste D. Das Kochfeld schaltet sich ab und beim neuerlichen Einschalten ist die Sperre nicht mehr aktiviert.
EINSCHALTEN DES KOCHFELDES Beim ersten Einschalten des Kochfeldes befindet sich das
DEUTSCH DE

9
Gerät in Sicherheitsposition, die Taste B leuchtet. Um das Gerät verwenden zu können, muss die Sicherheitsfunktion deaktiviert werden. Dazu drücken Sie die Taste B solange bis die Kontrollleuchte erlischt. Die Taste A drücken, um das Glaskeramikfeld einzuschalten. Die Anzeige (Abb.9) schaltet sich im Standby-Modus ein. Die Kontrolleinheit bleibt für die Dauer von 10 Sekunden eingeschaltet. Wird innerhalb dieses Zeitraumes das Kochfeld nicht betätigt, geht die Elektronik automatisch wieder in die OFF-Position über. Es muss dann der eben beschriebene Vorgang wiederholt werden, um das Kochfeld einzuschalten.
EINSCHALTEN DER KOCHZONENDrücken Sie die Taste C um die gewählte Kochzone auf Stufe 1, oder die Taste D, um die gewählte Kochzone auf Stufe 9 einzuschalten. Die Stufen 4 und 9 sind die am meisten verwendeten Kochstufen, daher fängt die Elektronik dort mit dem Zählen an. Mit den Tasten C und D können Sie jede gewünschte Heizleistung einstellen. Die Leistung der einzelnen Kochzonen kann in 9 verschiedene Positionen eingestellt werden und wird von der Anzeige mit einer Zahl von “1 bis 9” angezeigt.
ERKENNUNG DES KOCHGESCHIRRS Sollte auf dem Display G der Kochzonen das Symbol erscheinen, so bedeutet dies daß hinsichtlich des Kochgeschirrs mindestens eine der folgenden Voraussetzungen nicht erfüllt ist:1. Das verwendete Kochgeschirr ist nicht für das
Induktionskochen geeignet2. Der Durchmesser des Kochgeschirrs ist geringer als der der
Kochzone 3. Auf der Kochzone befindet sich kein Kochgeschirr.
RESTWÄRMEANZEIGE Wenn eine Kochzone auf OFF gestellt wird und die Temperatur auf dem Glas des Kochfeldes 50°C überschreitet, erscheint der Buchstabe auf der Anzeige G, die der noch warmen Kochzone entspricht. Diese Anzeige erlischt erst, wenn keine Verbrennungsgefahr mehr besteht.
TIMERMit dieser Funktion können Sie die Zeit (1 bis 99 Minuten) automatisch ausschaltet, die Kochzone gewählt gesetzt. Aktivieren einer Kochnische und passen Sie die Macht.Aktivieren Sie den Timer durch Drücken der entsprechenden Tasten. Drücken Sie die Tasten und, um den Kochbereich, auf dem der Timer zu aktivieren, um auszuwählen. Dies wird durch eine LED auf einer der Ecken des Displays angezeigt werden.Drücken Sie die Taste oder, um die gewünschte Sleep-Zeit wählen. Der Kochbereich mit einer laufenden Timer wird durch eine LED auf einer der Ecken des Displays befestigt signalisiert werden. Der Timer schaltet sich automatisch aus dem Kochbereich und Sie werden einen Signalton aus, der durch Drücken einer der Befehle können gedreht werden hören. Um den Timer in einer Küche und drücken Sie die Tasten sperren, um die Timer-Funktion geben. Drücken Sie die Tasten und, um den gewünschten Timer-Kochzone auswählen. Drücken Sie die Taste, bis der Wert.
EGG TIMER / ERINNERUNGUnd ‚möglich, um eine Erinnerung Ton durch Drücken der Tasten einstellen. Die zentrale Zone LED-Timer blinkt. Durch die Taste oder stellen Sie eine Zeit für Erinnerungen von 1 bis 99 Minuten. Zur eingestellten Zeit ertönt ein Signalton, dass durch Drücken einer der Befehle gedreht werden kann. Die Kochzone bleibt auf bereits aktiv. Die Funktion der Eieruhr / Erinnerung bleibt auch nach dem Ausschalten aktiv.Um diese Funktion Tasten deaktivieren und dann die Taste drücken, um Wert.
ABSCHALTEN DER KOCHZONENUm eine Kochzone auszuschalten, gleichzeitig die Tasten C und D der entsprechenden Kochzone drücken, bis zur Position .
ABSCHALTEN DES KOCHFELDES
Um die Kochfläche komplett auszuschalten, die Taste A drücken.
SICHERHEITSABSCHALTUNGDas Gerät ist mit einer Sicherheitsabschaltung ausgestattet, die automatisch das Gerät ausschaltet, wenn an der Temperatureinstellung des Kochfeldes keine Veränderungen vorgenommen werden. Nach welcher Zeit die Sicherheitsabschaltung in Kraft tritt, hängt von der gewählten Temperaturstufe ab.
Temperaturstufe max. Betriebszeit (in Stunden)
1 - 2 6
3 - 4 5
5 4
6 - 7 - 8 - 9 1,5
3. WARTUNG
3.1 PflegeÜbergelaufenes Kochgut und Fett können mit einem handelsüblichen Schaber für Glaskeramikfelder entfernt werden (Abb.10). Es wird empfohlen die Glaskochfläche mit Papiertüchern und nicht ätzenden oder kratzenden Reinigungsmitteln wie z.B. Stahlfix oder ähnlichen Produkten zu säubern.
HINWEIS: ES DARF KEIN DAMPFREINIGUNGSGERÄT VERWENDET WERDEN.
3.2 Technische Eingriffe und KundendienstTechnische Eingriffe am Gerät dürfen nur von Personen durchgeführt werden, die zum Kundendienst autorisiert sind. Nur diese Personen verfügen über die erforderlichen technischen Unterlagen und Kenntnisse. Nicht autorisierte Eingriffe am Gerät führen zum Erlöschen der Gewährleistung.
4. ENTSORGUNG DES GERÄTS IN DER ZUKUNFTGemäß der Europäischen Richtlinie 2002/96/EG über Elektro- und Elektronik-Altgeräte (WEEE) dürfen Elektrohaushalts-Altgeräte nicht mit dem normalen Hausmüll entsorgt werden. Die Geräte müssen am Ende ihrer Lebensdauer separat gesammelt werden, um die Wiederverwertungs- und Recycling-Quote der beinhalteten Materialien
zu verbessern und mögliche Schäden auf Umwelt und Gesundheit zu verhindern. Das Symbol „durchgestrichene
10
ESPAÑOL ESGENERALIDADESLea atentamente el contenido de este manual, pues contiene indicaciones de seguridad importantes sobre la instalación, el uso y el mantenimiento.Conservar el manual para futuras consultas. Todas las operaciones relativas a la instalación (conexiones eléctricas) deben ser realizadas por personal especializado de acuerdo con las normas vigentes.
INDUCCIÓN Funcionamiento: La característica principal de los sistemas de inducción es la transmisión directa de la energía de calentamiento desde el generador al recipiente de cocción. Ventajas: - La transmisión de energía solamente tiene lugar cuando el
recipiente es puesto sobre la zona de cocción. - El calor se genera sólo en el fondo del recipiente y se transmite
directamente a los alimentos que han de cocinarse. - El poco tiempo necesario para el calentamiento y el bajo
consumo de energía durante el inicio de la cocción permiten un ahorro global de energía.
- La placa vitrocerámica se enfriará. El calor que se advierte en la placa es el reflejado por el fondo del recipiente.
RECIPIENTES DE COCCIÓNCompruebe que sus ollas son idóneas para el sistema por inducción. Los recipientes han de ser de material ferromagnético, por lo tanto tienen que contener hierro. Puede averiguar si el material de la olla es ferromagnético con un simple imán (Fig.7). Se recomienda utilizar recipientes de: hierro fundido, acero esmaltado o de acero inoxidable especial para inducción.Para obtener las mejores prestaciones de la placa de cocción:• utilizar recipientes de fondo plano para garantizar una
adherencia correcta (Fig.8A).• utilizar una zona de cocción acorde con el tamaño del
recipiente para optimizar el uso de energía (Fig.8B). • no utilizar recipientes de base irregular que puedan rayar la
superficie térmica de la placa.
ADVERTENCIAS DE SEGURIDADEste aparato no puede ser utilizado por niños o personas que necesitan supervisión. Por razones de seguridad, no apoye nunca objetos ferromagnéticos de grandes dimensiones (p. ej. placas de horno para tartas) sobre zonas de cocción de la placa vitrocerámica. Para los portadores de marcapasos, se aconseja consultar a un médico antes de utilizar las zonas de cocción por inducción. Objetos metálicos como cuchillos, tenedores, cucharas o tapas no deben ser puestos sobre la superficie de la placa de cocción porque pueden calentarse. IMPORTANTEDespués del uso, apague la placa de cocina a través del dispositivo de mando. - Evite el derramamiento de líquidos, por lo tanto, para hervir
o calentar líquidos, reduzca la alimentación del calor al punto necesario.
- No dejar encendidos los elementos calefactores sin recipientes o con recipientes vacíos encima.
- Una vez terminado de cocinar, apague el elemento calefactor mediante el mando correspondiente.
h ATENCIÓN hSi observa que la superficie de la placa está agrietada, apague inmediatamente el aparato y desenchúfelo, para evitar posibles descargas eléctricas.
INSTRUCCIONES PARA LA INSTALACIONLas presentes instrucciones están dirigidas a un instalador
especializado y sirven de guía para una correcta instalación, regulación y mantenimiento en conformidad con la legislación y normativa vigente.Para garantizar el buen funcionamiento del aparato es necesario seguir estas instrucciones:• la superficie de apoyo debe ser de material resistente al calor.• si se instala el placa de cocina sobre un horno, éste debe
disponer de un sistema de enfriamiento por ventilación forzada.
• no instalar la placa de cocina directamente sobre un lavavajillas: en estos caso colocar un elemento de separación estanco entre los dos aparatos.
No cumplir estas instrucciones podría producir problemas de funcionamiento en el aparato.
POSICIONAMIENTOEste electrodoméstico ha sido diseñado para ser empotrado en una encimera, tal y como ilustra la figura (Fig.1). Colocar el material sellante (Fig.4) a lo largo de todo el perímetro, es necesario efectuar esta operación para impedir que puedan entrar líquidos en la placa, ya que no es posible garantizar la perfecta horizontalidad de la superficie, del cristal y de su acoplamiento (ver la Fig.1 para las dimensiones). Fijar el aparato a la encimera mediante los 4 soportes, teniendo en cuenta el espesor de la encimera (Fig.2).Si después de la instalación se puede acceder a la parte inferior del aparato, es necesario montar un panel separador respetando las distancias indicadas (Fig.3); si se instala un horno debajo de la placa de inducción, esto no es necesario.
VENTILACIÓN La distancia entre el electrodoméstico y los muebles de cocina y los aparatos empotrados debe garantizar una suficiente ventilación y salida de aire (Fig.3).No obstruir los orificios de ventilación anteriores para evitar problemas de funcionamiento (Fig.5).
CONEXIONES ELÉCTRICAS (Fig.6)Antes de efectuar las conexiones eléctricas, comprobar que: - el cable eléctrico correspondiente a la toma a tierra sea 2 cm más largo que los otros dos.
- las características de la instalación correspondan con las indicaciones de la placa de características del aparato, que se encuentra en su parte inferior.
- la instalación esté dotada de una toma a tierra eficiente, de acuerdo con la normativa y legislación vigente. Esta toma a tierra es obligatoria según la legislación vigente.
En el caso que el aparato no estuviera dotado de cable y/o correspondiente enchufe, utilice material adecuado para la absorción eléctrica indicada en la placa de características, y adecuado para la temperatura de funcionamiento. Si se desea una conexión directa a la línea eléctrica, es necesario interponer un interruptor omnipolar, con una apertura mínima de 3 mm entre contactos, apropiado a la carga indicada en la placa y conforme con las normas vigentes (el conductor de tierra amarillo/verde no debe ser interrumpido por el conmutador). Terminada la instalación del aparato, el interruptor omnipolar debe ser fácilmente accesible.
MANTENIMIENTOLimpie de eventuales residuos de comida y grasas la superficie, utilizando la rasqueta especial que se vende bajo pedido (Fig.10). Limpie todo lo que sea posible las zonas de calentamiento, usando productos idóneos y papel de cocina, enjuáguelas con agua y séquelas con un paño limpio. Utilizando la rasqueta especial citada, eliminar inmediatamente cualquier fragmento de papel de aluminio o material plástico que se haya podido adherir a la placa de cocina. Esto es también válido para restos de azúcar o de comida con alto contenido de este producto. Así evitará posibles daños en la superficie vitrocerámica. En ningún caso se deben usar estropajos abrasivos o detergentes químicos irritantes, como sprays para horno o quitamanchas.ATENCION: NO SE DEBE UTILIZAR UN APARATO DE LIMPIEZA A VAPOR.
ENCENDIDO DE LA PLACA DE COCCIÓN Pulse el botón A para encender la placa. Todos los displays E de
11
las zonas de cocción se activarán en posición de standby . La unidad de control permanecerá activa durante 10 segundos. Si en este plazo no se selecciona ninguna zona de cocción, la placa se apagará automáticamente.ENCENDIDO DE LAS ZONAS DE COCCIÓNEscoja la zona de cocción deseada, pulsando una de las teclas C. Pulse la tecla D para ir a la posición 9 o la tecla C para ir a la posición 1. Efectuada esta operación, es posible escoger las regulaciones de temperatura con las teclas C o D. La potencia de la zona individual de cocción, puede ser regulada en 9 posiciones diferentes y será visualizada por el display luminoso B o E con un número de “1 a 9”.
CALOR RESIDUAL Si la temperatura de una zona de cocción es todavía elevada (superior a 50°) después de haberla apagado, su display mostrará el símbolo (calor residual). Esta indicación desaparecerá solamente cuando cese el riesgo de quemaduras.
RECONOCIMIENTO OLLAS Si en un display de una zona de cocción apareciera el símbolo
, significa que: 1) el recipiente utilizado no es adecuado para cocción por
inducción.2) el diámetro del recipiente es inferior al admitido.3) no hay ninguna olla en la placa.
TIMEREsta característica le permite configurar el tiempo (de 1 a 99 minutos) para apagar automáticamente la zona de cocción. Activar una zona de cocción y ajustar la potencia.Activar el temporizador pulsando las teclas correspondientes. Pulse los botones para seleccionar el área de la cocina en la que para activar el temporizador. Esto se indica mediante un LED en una de las esquinas de la pantalla.Pulse el botón o para seleccionar el tiempo deseado. La zona de cocción con un temporizador que se ejecuta, será señalizado por un LED fijo en una de las esquinas de la pantalla. El temporizador se apagará automáticamente la zona de cocción y se escuchará un pitido que se puede desactivar pulsando cualquiera de los comandos. Para desactivar el temporizador en una zona de cocina y presione las teclas para entrar en la función de temporizador. Pulse los botones para seleccionar la zona del temporizador de cocción deseado. Pulse el botón hasta que el valor.
EGG TIMER/RECORDATORIOY ‘posible establecer un tono de aviso pulsando las teclas. La zona central parpadea temporizador. A través de la clave o establecer un tiempo para recordatorios de 1 a 99 minutos. A la hora establecida se oye un pitido que se puede desactivar pulsando cualquiera de los comandos. La zona de cocción se mantendrá activo previamente. La función de reloj de arena / recordatorio permanece activa incluso después de apagar.Para desactivar esta teclas de función y luego presione la tecla de valor.
BLOQUEO DE LOS MANDOS Es posible bloquear los mandos a fin de evitar el riesgo de modificaciones no intencionales a las regulaciones de la superficie de cocción (niños, operaciones de limpieza, etc.).Con el objetivo de activar el bloqueo de los mandos, hay que presionar contemporáneamente la tecla C en la parte inferior derecha y la tecla D; luego, hay que presionar nuevamente la tecla C; los 4 indicadores luminosos mostrarán el símbolo
a fin de señalar el efectivo bloqueo de los mandos.Para desbloquear temporáneamente los mandos y retornar a las regulaciones, (por ejemplo: interrumpir la cocción), es necesario presionar contemporáneamente la tecla C abajo a la derecha y la tecla D; los 4 indicadores luminosos mostrarán el símbolo que centellea; en este momento será posible actuar en las regulaciones.Cuando el bloqueo de los mandos está activo, de todas maneras, es posible apagar la superficie de cocción. En este
caso, el bloqueo de los mandos se mantiene activo, inclusive durante el siguiente encendido de la superficie.Con el objetivo de desactivar definitivamente el bloqueo de los mandos, es necesario presionar contemporáneamente la tecla C, abajo a la derecha, y la tecla D; y luego, nuevamente, la tecla D. La superficie de cocción se apagará y al siguiente encendido el bloqueo mandos ya no estará activo.
APAGADO ZONAS DE COCCIÓNPara apagar una zona de cocción, pulsar simultáneamente sus correspondientes botones C y D , o bien pulsar el botón D hasta la posición .
APAGADO PLACA DE COCCIÓNPara apagar completamente el plano de cocción pulsar el botón A.
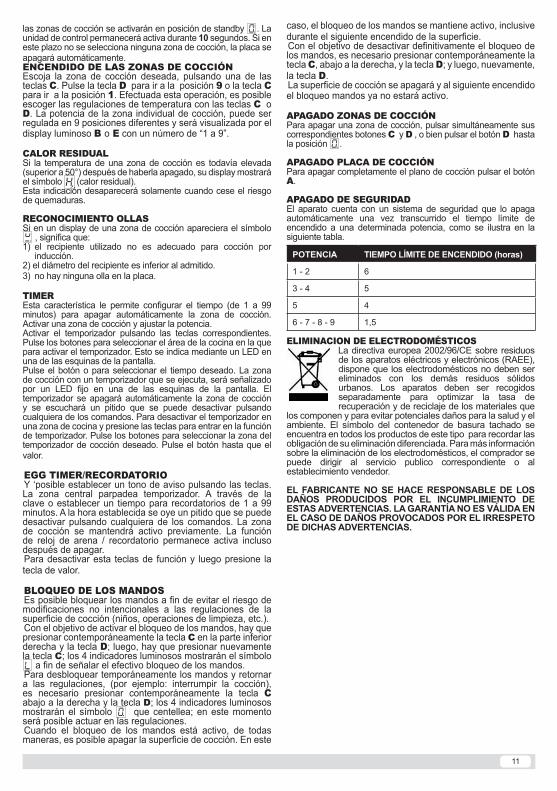
APAGADO DE SEGURIDADEl aparato cuenta con un sistema de seguridad que lo apaga automáticamente una vez transcurrido el tiempo límite de encendido a una determinada potencia, como se ilustra en la siguiente tabla.
POTENCIA TIEMPO LÍMITE DE ENCENDIDO (horas)
1 - 2 6
3 - 4 5
5 4
6 - 7 - 8 - 9 1,5
ELIMINACION DE ELECTRODOMÉSTICOSLa directiva europea 2002/96/CE sobre residuos de los aparatos eléctricos y electrónicos (RAEE), dispone que los electrodomésticos no deben ser eliminados con los demás residuos sólidos urbanos. Los aparatos deben ser recogidos separadamente para optimizar la tasa de recuperación y de reciclaje de los materiales que
los componen y para evitar potenciales daños para la salud y el ambiente. El símbolo del contenedor de basura tachado se encuentra en todos los productos de este tipo para recordar las obligación de su eliminación diferenciada. Para más información sobre la eliminación de los electrodomésticos, el comprador se puede dirigir al servicio publico correspondiente o al establecimiento vendedor.
EL FABRICANTE NO SE HACE RESPONSABLE DE LOS DAÑOS PRODUCIDOS POR EL INCUMPLIMIENTO DE ESTAS ADVERTENCIAS. LA GARANTÍA NO ES VÁLIDA EN EL CASO DE DAÑOS PROVOCADOS POR EL IRRESPETO DE DICHAS ADVERTENCIAS.
12
FRANÇAIS FRGENERALITES Lire attentivement le contenu du présent manuel, car il fournit d’importantes indications concernant la sécurité d’installation, d’utilisation et d’entretien. Conserver ce manuel pour toute consultation ultérieure. Toutes les opérations concernant l’installation (câblage électrique) doivent être effectuées par du personnel qualifié conformément aux normes en vigueur.
AVERTISSEMENTS DE SECURITECet appareil n’est pas adapté à l’utilisation par des enfants ou des personnes devant être surveillées. Pour des motifs de sécurité, ne jamais poser d’objets ferromagnétiques de grande dimension (par exemple, les moules à tarte pour four) sur la zone de cuisson du plan en vitrocéramique. Les personnes ayant un pacemaker doivent consulter leur médecin avant d’utiliser les plaques de cuisson à induction. Les objets métalliques tels que couteaux, fourchettes, cuillères ou couvercles ne devraient pas être posés sur la surface du plan de cuisson car ils peuvent s’échauffer.
IMPORTANT:Après utilisation, éteindre le plan de cuisson à l’aide de son dispositif de commande.
IMPORTANT - éviter les débordements de liquide, ainsi pour faire bouillir ou
chauffer des liquides, réduire l’alimentation de chaleur;- ne pas laisser les plaques chauffantes allumées sans
récipients ou avec des récipients vides;- après avoir terminé de cuisiner, éteindre la résistance
correspondante au moyen de la commande indiquée ci après.
h ATTENTION hSi la surface est fêlée, éteindre l’appareil et déconnecter l’alimentation électrique pour éviter d’éventuelles décharges.
INSTRUTIONS POUR L’INSTALLATIONLes instructions suivantes s’adressent à un installateur spécialisé et servent de guide pour l’installation, le réglage et l’entretient en conformité avec les lois et les normes en vigueur. Si un four encastrable ou n’importe quel autre appareil produisant de la chaleur doit être directement monté sous la surface de cuisson en vitrocéramique, IL EST NÉCESSAIRE QUE CET APPAREIL (four) ET LA SURFACE DE CUISSON EN VITROCÉRAMIQUE SOIENT CONVENABLEMENT ISOLÉS, de manière à ce que la chaleur produite par le four, mesurée sur le côté droit du fond de la surface de cuisson, ne dépasse pas 60°C. Le manque de respect de cette précaution pourrait déterminer le fonctionnement erroné du système TOUCHCONTROL.
POSITIONNEMENT Cet appareil électroménager est conçu pour être encastré dans un plan de travail, comme illustré par la figure (Fig.1). Appliquer le matériel collant (Fig.4) tout le long du périmètre (voir Fig.1 pour les dimensions de la coupe). Cette opération est nécessaire afin d’éviter que d’éventuels liquides ne pénètrent à l’intérieur du plan, puisqu’il n’est pas possible de garantir la planéité du plan de travail et du verre ainsi que leur assemblage. Bloquer l’appareil électroménager sur le plan de travail au moyen des 4 étriers, compte tenu de l’épaisseur du plan de travail (Fig.2). Si, après l’installation, la partie inférieure de l’appareil reste accessible, il faut monter un panneau de séparation tout en respectant les distances indiquées (Fig.3); ceci n’est pas nécessaire si on installe un four en dessous de l’appareil.
VENTILATION La distance entre le plan de cuisson et les meubles de cuisine ou les appareils encastrés doit garantir la ventilation suffisante
de l’air (Fig.3). Nous recommandons de ne pas obstruer les orifices de refroidissement pour éviter un mauvais fonctionnement de l’appareil (Fig.5).
CABLAGE ELECTRIQUE (Fig.6). Avant d’effectuer le câblage électrique, s’assurer que: - le câble électrique de la terre soit bien de 2 cm plus long par
rapport aux autres câbles; - les caractéristiques du réseau électrique soient conformes
aux indications de la plaquette d’identification appliquée sur la partie inférieure du plan de travail;
- l’installation soit dotée d’une mise à terre efficace conformément aux normes et aux dispositions légales en vigueur. La mise à terre est obligatoire aux termes de la loi.
Au cas où l’appareil électroménager ne serait pas doté d’un câble et/ou d’une fiche correspondante, utiliser du matériel apte pour l’absorption indiquée sur la plaquette d’identification et pour la température de fonctionnement. Si on souhaite un branchement direct à la ligne électrique, il est nécessaire d’interposer un interrupteur omnipolaire, d’une ouverture minimale de 3 mm entre les contacts, adéquat à la charge figurant sur la plaquette et conforme aux normes en vigueur (le conducteur de terre jaune/vert ne doit pas être coupé par le commutateur). Après avoir installé l’appareil, l’interrupteur omnipolaire doit être facilement accessible.
MODE D’EMPLOI ET ENTRETIEN La caractéristique fondamentale du système à induction est le transfert direct de l’énergie de chauffe du générateur au récipient de cuisson.Avantages: - Le transfert d’énergie n’a lieu que lorsque le récipient est
placé sur la zone de cuisson.- La chaleur est générée uniquement sur le fond du récipient et
transmise directement aux aliments à cuire.- Des temps de chauffe réduits et une faible consommation
d’énergie au début de la cuisson, assurent une économie globale d’énergie.
- La surface en vitrocéramique reste froide. La chaleur perçue sur le plan de cuisson est celle émanant du
fond du récipient.
RECIPIENTS POUR LA CUISSONVérifier que les casseroles soient adaptées à un système à induction. Les récipients doivent être en matériau ferromagnétique, c’est-à-dire contenir du fer. S’assurer que le matériau de la casserole est adéquat à l’aide d’un simple aimant. (Fig.7).Nous conseillons d’utiliser des récipients en: fonte, acier émaillé ou inox pour induction.Pour obtenir les meilleurs résultats:- utiliser des récipients à fond plat pour assurer une parfaite
adhérence (Fig.8A).- utiliser la zone de cuisson adaptée au diamètre du récipient
que l’on souhaite utiliser pour profiter au maximum de l’énergie (Fig.8B).
- ne pas utiliser de récipients à base rugueuse pour éviter de griffer la surface thermique du plan de cuisson.
ALLUMAGE PLAN DE CUISSON Appuyer sur la touche A pour allumer le plan de cuisson.Tous les affichages relatifs aux zones de cuisson s’allumeront en position standby . L’unité de contrôle restera active pendant 10 secondes. Si pendant ce laps de temps aucune zone de cuisson n’est sélectionnée, le plan de cuisson s’éteindra automatiquement.
ALLUMAGE ZONES DE CUISSONAppuyer sur la touche D pour aller en position 9 ou bien sur la touche C pour aller en position 1. Cette opération effectuée, choisir les réglages de la température à l’aide des touches C ou D. La puissance de chaque zone de cuisson peut être réglée sur 9 positions différentes, qui seront visualisées sur le display lumineux G par un numéro de “1 à 9”.

13
CHALEUR RESIDUELLE Si, après avoir été éteinte, une zone de cuisson est encore à une température élevée (plus de 50º), l’affichage correspondant à cette zone montre le symbole (chaleur résiduelle). L’indication ne disparaît que quand il n’y a plus aucun risque de brûlure.
IDENTIFICATION CASSEROLES Si un des affichage d’une zone de cuisson devait montrer le symbole , cela signifie que:1) le récipient utilisé n’est pas adéquat à la cuisson à induction.2) la casserole utilisée a un diamètre inférieur à celui admis
pour l’appareil.3) il n’y a aucune casserole sur la plaque.
TIMER Cette fonctionnalité vous permet de régler l’heure (de 1 à 99 minutes) pour éteindre automatiquement la zone de cuisson sélectionnée. Activer un coin cuisine et d’ajuster la puissance.Activer la minuterie en appuyant sur les touches correspondantes. Appuyez sur les boutons pour sélectionner la zone de cuisson sur laquelle activer la minuterie. Ce sera indiqué par une LED sur l’un des coins de l’écran.Appuyez sur le bouton ou pour sélectionner le temps de sommeil désiré. La zone de cuisson avec un minuteur sera signalé par une LED fixe sur l’un des coins de l’écran. La minuterie s’éteint automatiquement la zone de cuisson et vous entendrez un bip sonore qui peut être désactivé en appuyant sur l’une des commandes. Pour désactiver la minuterie dans un espace cuisine et appuyer sur les touches pour entrer dans la fonction minuterie. Appuyez sur les boutons pour sélectionner la zone souhaitée minuterie de cuisine. Appuyez sur le bouton jusqu’à ce que la valeur.
EGG TIMER / RAPPELEt ‘possible de définir une tonalité de rappel en appuyant sur les touches. La zone centrale clignote minuterie. Grâce à la clé ou définir un temps pour les rappels de 1 à 99 minutes. A l’heure programmée, vous entendrez un bip qui peut être désactivé en appuyant sur l’une des commandes. La zone de cuisson restera actif auparavant. La fonction de minuterie d’oeuf / rappel reste actif même après mise hors tension.Pour désactiver cette fonction et les touches, puis appuyez sur la clé de la valeur.
BLOCAGE DE COMMANDES On peut bloquer les commandes pour éviter le risque de modifications non voulues aux réglages de la table (enfants, opérations de nettoyage, etc,)Pour activer le blocage des commandes appuyer en même temps sur la touche C en bas à droite et sur la touche D, puis de nouveau sur la touche C ; les 4 leds montreront le symbole pour signaler que le blocage des commandes a été effectué. Pour débloquer temporairement les commandes et pouvoir utiliser les réglages (par exemple interrompre la cuisson) il faut appuyer en même temps sur la touche C en bas à droite et sur la touche D; les 4 leds montreront le symbole clignotant et on pourra effectuer les réglages.Lorsque le blocage des commandes est activé on peut tout de même éteindre la table de cuisson. Dans ce cas le blocage des commandes reste activé même lorsqu’on rallume la table de cuisson. Pour désactiver définitivement le blocage des commandes il faut appuyer en même temps sur la touche C en bas à droite et sur la touche D, puis de nouveau sur la touche D. La table de cuisson s’éteindra, et lors du rallumage le blocage des commandes ne sera plus inséré.
ETEINDRE LES ZONES DE CUISSONPour éteindre une zone de cuisson, enfoncer en même temps les touches C et D, ou appuyer la touche D jusquà la position
.
ETEINDRE LE PLAN DE CUISSONPour éteindre complètement le plan de cuisson, appuyer la
touche A.
EXTINCTION DE SÉCURITÉ L’appareil est doté d’un système de sécurité qui éteint automatiquement l’appareil au moment où expire le temps limite d’allumage à une puissance donnée selon le tableau suivant.
PUISSANCE TEMPS LIMITE ALLUMAGE (heures)
1 - 2 6
3 - 4 5
5 4
6 - 7 - 8 - 9 1,5
ENTRETIENÉliminer tous les résidus éventuels de nourriture ainsi que les gouttes de graisse de la surface de cuisson à l’aide du racloir spécial fourni sur demande (Fig.10). Nettoyer le mieux possible la surface chauffante avec des produits appropriés et un chiffon papier, ensuite rincer avec de l’eau et essuyer avec un chiffon bien propre. Au moyen du racloir spécial, éliminer immédiatement de la surface de cuisson les fragments de feuilles d’aluminium et de matière plastique qui auraient fondu par mégarde ou les résidus de sucre ou d’aliments ayant un contenu élevé de sucre. De cette façon, on évite d’endommager la surface de travail. N’utiliser en aucun cas des éponges abrasives ou des détergents chimiques irritants tels que spray pour four ou dégraisseurs.
ATTENTION: NE PAS UTILISER UN NETTOYEUR À VAPEUR.
ELIMINATION DES APPAREILS ELECTROMÉNAGERS
La Directive Européenne 2002/96/EC sur les Déchets des Equipements Electriques et Electroniques (DEEE), exige que les appareils électroménagers ne soient pas jetés dans le flux normal des déchets municipaux. Les appareils usagés doivent être collectés séparément afin d’optimiser le taux de récupération et de recyclage
des matériaux qui les composent et réduire l’impact sur la santé humaine et l’environnement. Le symbole de la “poubelle barrée” est apposée sur tous les produits pour rappeler les obligations de ramassage séparé. Pour plus d’informations sur l’élimination correcte des appareils électroménagers, les consommateurs pourront s’adresser au service public compétent ou aux revendeurs.
ON DÉCLINE TOUTE RESPONSABILITÉ POUR LES ÉVENTUELS DÉGÂTS PROVOQUÉS PAR L’INOBSERVATION DES SUSDITES INSTRUCTIONS. LA GARANTIE N’EST PAS VALABLE EN CAS DE DOMMAGES PROVOQUES PAR LE NON RESPECT DES MISES EN GARDE CITEES CI-DESSUS.

14
TIẾNG VIỆT VNTỔNG QUANVui lòng đọc kỹ nội dung của tờ hướng dẫn vì tài liệu này đưa ra những hướng dẫn quan trọng liên quan đến an toàn và lắp đặt, sử dụng và bảo trì.Hãy giữ tờ hướng dẫn này để có thể tham khảo trong tương lai. Tất cả các thao tác liên quan đến lắp đặt (kết nối điện) phải được người có chuyên môn thực hiện tuân theo những quy định hiện hành.
HỆ THỐNG TỪ
Hoạt động:Đặc điểm cơ bản của hệ thống từ là truyền nhiệt trực tiếp từ bộ phát điện đến dụng cụ nấu.
Ưu điểm:Chỉ xảy ra truyền điện khi dụng cụ nấu được đặt lên vùng
nấu.- Nhiệt chỉ được tỏa ra từ đáy dụng cụ nấu và truyền trực tiếp
đến thực phẩm cần nấu.- Thời gian làm nóng giảm và tiêu thụ điện năng thấp khi bắt
đầu nấu, cho phép tiết kiệm một lượng điện năng lớn.- Phần trên làm bằng sợi thủy tinh không bị nóng, nhiệt trên
bề mặt nấu là nhiệt được truyền từ đáy dụng cụ nấu.
DỤNG CỤ NẤUViệc sử dụng dụng cụ nấu phù phợp là yếu tố quan trọng
trong đun nấu bằng bếp từ. Hãy kiểm tra các dụng cụ nấu nướng phải phù hợp với hệ thống bếp từ.
Dụng cụ nấu nướng phải làm bằng sắt. Bạn có thể kiểm tra vật liệu dụng cụ nấu có hút nam châm không bằng một thỏi nam châm (Hình 7). Dụng cụ nấu bằng gang, thép tráng men hoặc thép đặc biệt cho bếp từ cũng được khuyến khích sử dụng.
Để đạt được hiệu suất đun nấu cao nhất tại bề mặt nấu:- Hãy sử dụng dụng cụ nấu có phần đáy phẳng (Hình 8A).- Hãy sử dụng vùng nấu phù hợp với đường kính của dụng
cụ nấu để tận dụng tối đa điện năng tỏa ra (Hình 8B).- Không sử dụng dụng cụ nấu có đáy gồ ghề để tránh làm
xước bề mặt nhiệt đun nấu.
HƯỚNG DẪN AN TOÀNTrẻ em hoặc người cần sự trông nom không được sử dụng
thiết bị này.Vì lý do an toàn, không bao giờ đặt vật nhiễm sắt từ (vd: đĩa
lò vi sóng để nướng bánh) lên vùng nấu của bề mặt sợi thủy tinh.
Người mang máy điều hòa nhịp tim nên tham khảo ý kiến của bác sỹ trước khi sử dụng vùng nấu từ.
Các vật bằng kim loại như dao, dĩa, thìa hoặc vung không được để lên trên bề mặt nầu vì những vật này sẽ bị làm nóng.
QUAN TRỌNG: Sau khi sử dụng, tắt vùng nấu bằng cách sử dụng thiết bị điều khiển.
QUAN TRỌNG:- Tránh làm đổ chất lỏng, do đó, hãy giảm nhiệt khi đun hoặc
làm nóng chất lỏng.- Không bật bộ phận làm nóng mà không đặt dụng cụ nấu lên
hoặc đặt dụng cụ nấu không có đồ ăn bên trong.- Sau khi nấu xong, tắt bộ phận làm nóng bằng cách sử dụng
điều khiển được chỉ ra dưới đây.
h CẢNH BÁO hNếu bề mặt bếp bị nứt, hãy tắt thiết bị và ngắt nguồn điện để phòng ngừa tai nạn điện giật có thể xảy ra.
HƯỚNG DẪN LẮP ĐẶTNhững hướng dẫn này dành cho người lắp đặt chuyên
nghiệp và là hướng dẫn để lắp đặt, điều chỉnh và bảo dưỡng theo luật và tiêu chuẩn hiện hành.Để đảm bảo thiết bị hoạt động chính xác cần tuân theo những chỉ dẫn sau đây:- Bề mặt phải làm bằng chất liệu chịu nhiệt.- Nếu bếp nấu được lắp đặt trên một lò nướng, cần có hệ thống làm mát thông gió cưỡng bức.- Không được lắp đặt bếp nấu bên trên máy rửa bát: nếu thực sự cần thiết phải lắp đặt như vậy, hãy đặt một thiết bị kín nước giữa hai thiết bị này.Không thực hiện theo những biện pháp phòng ngừa trên có thể làm cho thiết bị không thể hoạt động chính xác.
CỐ ĐỊNH VỊ TRÍThiết bị gia dụng được lắp đặt để được bao quanh trong một bề mặt hoạt động, như được minh họa trong hình (Hình 1). Đặt vật liệu đệm kín (Hình 4) xung quanh (xem Hình 1 để biết kích thước của miếng đệm). Cố định thiết bị vào vị trí bằng 4 giá đỡ, lưu ý độ dày của bề mặt thiết bị (Hình 2). Nếu phần dưới của thiết bị bị trống sau khi lắp đặt, phải lắp một tấm phân cách tương đương với khoảng cách được chỉ ra (Hình 3). Không cần lắp tấm phân cách này nếu lò suoir được lắp đặt bên dưới bếp từ.
THÔNG GIÓ (Hình 5)Khoảng cách giữa bề mặt nấu và tiện nghi trong bếp hoặc các thiết bị đã có trước phải đảm bảo đủ thông thoáng và thoát không khí (Hình 3).Không được làm tắc lỗ làm mát phía trước nhằm tránh cho thiết bị bị hỏng (Hình 5).
KẾT NỐI ĐIỆN (Hình 6)Trước khi kết nối điện, hãy kiểm tra để đảm bảo:-Dây nối đất dài hơn các dây khác 2 cm;-Công suất của hệ thống đáp ứng công suất được chỉ ra trên bảng ký hiệu được gắn vào phần dưới của thiết bị;-Hệ thống được lắp đặt hệ thống nối đất phù hợp theo luật và tiêu chuẩn hiện hành.Việc nối đất là bắt buộc theo luật. Nếu thiết bị gia dụng không được cung cấp cáp và/hoặc dây cắm phù hợp, hãy sử dụng vật liệu phù hợp với giá trị công suất tiêu thụ được ghi trên bảng ký hiệu và nhiệt độ hoạt động.Nếu cần phải kết nối trực tiếp với dây chính, cần phải lắp đặt công tắc hai cực với khe hở tối thiểu 3mm giữa các tiếp điểm, và phù hợp với tải được ghi trên bảng ký hiệu và tuân theo tiêu chuẩn hiện hành (dây nối đất vàng/xanh lục không được phép bị ngắt bởi một công tắc). Khi thiết bị đã được lắp đặt xong, công tắc hai cực phải dễ dàng tiếp cận được.
SỬ DỤNG VÀ BẢO DƯỠNG
BẢO DƯỠNGLoại bỏ các mảnh vụn thức ăn hoặc giọt mỡ khỏi bề mặt nấu bằng cách sử dụng thiết bị cào đặc biệt được cung cấp theo yêu cầu (Hình 10).Vệ sinh vùng bị làm nóng một cách kỹ lưỡng nhất có thể bằng cách sử dụng những sản phẩm phù hợp, và giẻ lau, sau đó xả lại bằng nước và lau lại bằng giẻ khô.Khi sử dụng thiết bị cào đặc biệt, hãy ngay lập tức loại bỏ các mảnh nhôm hoặc và nhựa vô tình bị làm nóng chảy lên bề mặt nấu bị làm nóng và những hạt đường hoặc mảnh vụn thức ăn có hàm lượng đường lớn. Bằng cách này, có thể ngăn chặn tất cả những hư hỏng cho bề mặt nấu. Trong bất kỳ trường hợp nào, không được sử dụng giẻ xốp làm mòn, hoặc chất tẩy rửa ăn mòn như các loại xịt tẩy rửa.
CẢNH BÁO: KHÔNG ĐƯỢC SỬ DỤNG MÁY VỆ SINH HƠI NƯỚC.
BẬT MẶT NẤUNhấn nút A để bật mặt nấu.Tất cả các nút hiển thị E tương ứng với các vùng nấu bật ở vị trí dự phòng .Thiết bị điều khiển vẫn hoạt động trong 10 giây.Nếu trong thời gian này không có vùng nấu nào được chọn, các công tắc mặt nấu sẽ tự động tắt.

15
BẬT VÙNG NẤULựa chọn vùng nấu mong muốn và nhấn một trong các nút B. Nhấn nút D để đến vị trí 9 (điện năng tối đa) hoặc nút C để về vị trí 1 (điện năng tối thiểu).Khi đã hoàn thành thao tác này, bạn có thể điều chỉnh nhiệt độ với nút C hoặc D.Điện năng của một vùng nấu nào đó có thể được điều chỉnh trong 9 vị trí khác nhau và sẽ được hiển thị trên nút hiển thị phát sáng E với số từ “1 đến 9”.
LÀM NÓNG NHANH/LÀM NÓNG BỔ SUNGChức năng này giúp làm giảm thời gian nấu trong một vùng nấu nhất định, đưa nhiệt độ lên mức điện năng cao nhất trong một khoảng thời gian 10 phút. Sau khi kết thúc khoảng này, điện của vùng nấu sẽ tự động trở về mức 9.Chức năng này được khuyến khích sử dụng để làm nóng một lượng chất lỏng lớn trong thời gian ngắn (vd: nước cho món mỳ ống) hoặc các loại món ăn khác.Để khởi động chức năng này, chọn vùng nấu và nhấn nút C lên mức 9. Rồi nhấn nút C một lần nữa.Một tín hiệu âm thanh được phát ra và biểu tượng sẽ được hiển thị trên nút hiển thị tương ứng với vùng nấu.
LƯỢNG NHIỆT SÓT LẠINếu nhiệt độ của vùng nấu vẫn ở mức cao (hơn 50oC) sau khi đã tắt, nút hiển thị tương ứng sẽ hiển thị biểu tượng (nhiệt lượng còn lại). Biểu tượng này sẽ chỉ tắt khi không còn nguy cơ gây bỏng.
PHAT HIỆN NỒI NẤUNếu biểu tượng xuất hiện trên nút hiển thị vùng nấu, nghĩa là:1) Dụng cụ nấu được sử dụng không phù hợp với bếp từ.2) Đường kính của dụng cụ nấu được sử dụng nhỏ hơn đường kính cho phép của thiết bị.3) Không có dụng cụ nấu.
ĐẶT GIỜChức năng này cho phép đặt thời gian (từ 1 đến 99 phút) để tự động tắt vùng nấu đã chọn. Bật ít nhất một vùng nấu và điều chỉnh nhiệt độ.Nhấn đồng thời nút C và D để vào chức năng đặt giờ. Nhấn đồng thời nút C và D một lần nữa để chọn vùng nấu mà bạn muốn đặt giờ. Vùng nấu được lựa chọn sẽ được biểu thị bằng một đèn led nhấp nháy tại một trong các góc của màn hình đặt giờ. Đặt thời gian tự động tắt bằng cách nhấn nút C hoặc D. Vùng nấu được đặt giờ được biểu thị bằng một đèn led sáng ổn định tại một trong các góc của màn hình đặt giờ.Một tín hiệu âm thanh sẽ báo hiệu hết thời gian đặt giờ và vùng nấu tương ứng sẽ tự động tắt. Nhấn bất kỳ nút nào để tắt tín hiệu âm thanh đó.Để hủy kích hoạt chế độ đặt giờ trên một vùng nấu, nhấn đồng thời nút C và D để vào chức năng đặt giờ. Nhấn đồng thời nút C và D một lần nữa để chọn vùng nấu mong muốn. Nhấn nút D cho tới khi tới vị trí .
HẸN GIỜ ĐẾM NGƯỢC/NHẮC NHỞĐể đặt ‘thời gian nhắc nhở’, nhấn đồng thời nút C và D. Đèn led tại phần chính giữa bên dưới của màn hình hiển thị đặt giờ sẽ nhấp nháy. Đặt ‘thời gian nhắc nhở’ (từ 1 đến 99 phút) bằng cách nhấn nút C hoặc D. Một tín hiệu âm thanh sẽ biểu thị hết ‘thời gian nhắc nhở’. Nhấn bất kỳ nút nào để dừng tín hiệu âm thanh này. Chế độ hẹn giờ đếm ngược vẫn hoạt động kể cả khi thiết bị đã tắt. Để huy kích hoạt hẹn giờ đếm ngược nhấn đồng thời nút C và D để vào chức năng hẹn giờ đếm ngược. Nhấn nút D cho tới khi tới vị trí .
KHÓA BẢNG ĐIỀU KHIỂNCó thể khóa bộ điều khiển để ngăn ngừa nguy cơ vô tình sửa đổi cài đặt (do trẻ em, vệ sinh, v.v...). Để kích hoạt khóa bảng điều khiển, nhấn đồng thời nút B bên phải phía dưới và nút D, sau đó nhấn nút B một lần nữa. Hai đèn led sẽ hiển thị biểu tượng . Để tạm thời kích hoạt lại bộ điều khiển và thay đổi cài đặt (vd: gián đoạn việc nấu), nhấn đồng thời nút
B bên phải phía dưới và nút D.Hai đèn led sẽ hiển thị biểu tượng , sau đó bạn có thể điều chỉnh cài đặt. Tuy nhiên, mặt nấu có thể tắt kể cả khi đã khóa bộ điều khiển.Trong trường hợp này, bộ điều khiển vẫn bị khóa khi mặt nấu được bật lại.Để tắt bỏ hoàn toàn chế độ khóa bộ điều khiển, nhấn đồng thời nút B bên phải phía dưới và nút D, sau đó nhấn nút D một lần nữa. Mặt nấu sẽ tắt. Bộ điều khiển sẽ không bị khóa khi mặt nấu được bật lại.
TẮT VÙNG NẤUĐể tắt vùng nấu, nhấn nút D cho tới khi về vị trí .
TẮT MẶT NẤUĐể tắt hoàn toàn mặt nấu, nhấn và giữ nút A.
CÔNG TẮC AN TOÀNThiết bị có công tắc an toàn có thể dễ dàng tự động tắt vùng nấu khi đã hoạt động trong một khoảng thời gian nhất định tại một mức điện năng nhất định.
MỨC ĐIỆN NĂNG GIỚI HẠN THỜI GIAN HOẠT ĐỘNG (giờ)
1 - 2 6
3 - 4 5
5 4
6 - 7 - 8 - 9 1,5
XỬ LÝ THIẾT BỊ ĐIỆNCHỈ THỊ CHÂU ÂU 2002/96/EC LIÊN QUAN ĐẾN THIẾT BỊ ĐIỆN VÀ ĐIỆN TỬ KHÔNG SỬ DỤNG NỮA (WEEE), QUY ĐỊNH RẰNG THIẾT BỊ ĐIỆN GIA DỤNG KHÔNG ĐƯỢC VỨT BỎ VÀO HỆ THỐNG XỬ LÝ RÁC THÔNG THƯỜNG CHƯA ĐƯỢC PHÂN LOẠI CỦA THÀNH PHỐ. CÁC THIẾT BỊ NÀY PHẢI ĐƯỢC THU GOM RIÊNG ĐỂ TẬN
DỤNG KHÔI PHỤC VÀ TÁI CHẾ CÁC VẬT LIỆU TRONG THIẾT BỊ VÀ LÀM GIẢM TÁC ĐỘNG ĐẾN SỨC KHỎE CON NGƯỜI VÀ MÔI TRƯỜNG.BIỂU TƯỢNG THÙNG RÁC BỊ GẠCH CHÉO CÓ TRÊN TẤT CẢ CÁC SẢN PHẨM ĐỂ NHẮC NHỞ NGHĨA VỤ VỀ THU GOM RÁC RIÊNG BIỆT. KHÁCH HÀNG NÊN LIÊN HỆ CỬA HÀNG DỊCH VỤ ĐỊA PHƯƠNG HOẶC NHÀ PHÂN PHỐI ĐỊA PHƯƠNG ĐỂ BIẾT THÊM CHI TIẾT VỀ XỬ LÝ PHÙ HỢP THIẾT BỊ GIA DỤNG ĐÃ CŨ.
NHÀ SẢN XUẤT KHÔNG CHỊU BẤT KỲ TRÁCH NHIỆM NÀO ĐỐI VỚI NHỮNG HƯ HỎNG NGẪU NHIÊN DO KHÔNG TUÂN THỦ NHỮNG CẢNH BÁO TRÊN. BẢO HÀNH SẼ KHÔNG CÓ HIỆU LỰC TRONG TRƯỜNG HỢP HƯ HỎNG GÂY RA DO KHÔNG TUÂN THỦ NHỮNG CẢNH BÁO TRÊN.

16 3PCLIOBIE320.1 14 Luglio, 2016