Embed Size (px)
Citation preview

Effective September 2011Instructional Leaflet IL04801002E
Eaton® XP and ePro PS Backup/Restore Utility
IntroductionEaton’s Linux-based backup/restore utility provides a simple way for users to backup and restore the CompactFlash™ which holds the operating system (OS). This gives users a field-based recovery meth-od for potential system problems. This utility can be used with Eaton’s XP-702 and PanelMate ePro PS operator interfaces (RoHS silver- backed mod-els only). In particular the XP and ePro PS models which include Visual Designer runtime licenses should be backed up upon receipt of the hardware from the factory so that a restore point is avail-able to the end user. Since the licensing for Visual Designer is unique for each unit a backup image for each unit should be archived by the customer to prevent re-licensing costs and/or delays.
Default factory OS images are available on the Eaton Electrical web site but the only ones which include licensing are those for the Canvas-based ePro PS models.
There are two ways to backup or restore an XP or ePro OS image. The first is called Replica mode where an identical CompactFlash drive is used to store the image. This should only be used when you are sure that the sector size and exact byte count on the source and destination CompactFlash drives are identical. The Replica process will cre-ate an exact sector-by-sector duplicate copy of the source CF drive and is described in the last half of this document. The second, more generally used process is called the Non-Replica mode. When backing up the OS CompactFlash, the non-Replica process creates an image of the CF drive onto a USB memory drive as a zipped image file (.img.gz file). This non-replica process will be described in the first two sections of this document.
Required Equipment• Windows® XP compatible USB keyboard• USB drive (non-Replica) to hold the backup/
restore image• Restore USB Flash Drive
Instructions for backing up the Operating System to a USB drive (non-replica mode):
1. Remove power from the XP or ePro PS unit.
2. Remove all field-installed hardware such as PCI cards (XP), PCMCIA cards (ePro), USB devices, serial devices, or any slave monitor connected to the VGA port of a display unit. This will help avoid initialization errors during the operating system backup process.
3. On an XP unit, install the Linux restore USB drive into USB port 3 and the USB image drive into USB port 4, making sure that you have at least 4 Gigabytes free on the image drive (Note: Usually a backup image is less than 2 Gigabytes in size, however a full 4 Gigabyte OS drive may require more than 3 Gigabytes of storage space for its zipped image.) On an ePro, these USB drives can go into any USB ports.
4. Install a USB keyboard into USB port 1 or 2 on an XP unit. On an ePro PS this can go into any USB port.
5. If you are backing up an XP or ePro PS Blind Node unit, make sure the display is connected to the VGA video port.
6. Apply power to the unit. During boot up, after the BIOS POST screen the unit will boot to the USB memory module and load the Linux operating system. Note: On an XP-702 unit, if the two USB drives are not plugged into the proper ports you will get a prompt saying that “No bootable partition in table”. If this happens, power down, swap the ports of the two USB drives and reboot.
The following prompts will appear on the display:• Loading Linux ……………………..
• Loading minirt.gz …………………
• Next the following screen shown in Figure 1 will appear and the Linux OS will begin to initialize.
Figure 1

2
Instructional Leaflet IL04801002EEffective September 2011
Eaton XP and ePro PS Backup/Restore Utility
eaton corporation www.eaton.com
Once the operating system has completed the initialization process the screen shown in Figure 2 will appear:
Figure 2
7. Hit the ENTER key to select the highlighted option “Backup the image ….” Once you hit ENTER the next screen shown in Figure 3 will appear. Use the cursor down arrow to select “Backup on non-replica Drive ….” as shown in Figure 3 then hit ENTER.
Figure 3
8. Next the screen in Figure 4 will be displayed prompting you to select the source drive. The four devices shown are a) /dev/hdc – the C drive which is what you want to choose as the source; b) /dev/hdd – the D drive which contains your application files which can be backed up through normal Windows methods with the operating system running; c) /dev/sda – the first USB removable drive – depending on boot order this may be your Linux boot device or not. In the example shown below it is not, based on the (BOOT DEVICE) indication on the fourth selection; d) /dev/sdb – in this example it is the Linux boot drive. Note: SIZE’s will vary from that shown.
Figure 4
To backup the operating system drive (C:\) leave the first selection highlighted as shown in Figure 4 and hit ENTER.
9. Next the screen in Figure 5 will be displayed prompting you to select the destination drive. The remaining three devices will be shown. Cursor down to the non-Boot USB drive (in this example the /dev/sda drive) and hit ENTER.
Figure 5
10. The next screen shown in Figure 6, will prompt you to enter the name of the backup zip file. There is a maximum of 64 characters in the file name and the text “restore_image.img.gz” will auto-matically be appended to the file name entered. The example in Figure 6 includes information such as unit serial number and backup date in the file name, but the user is free to use what-ever name seems appropriate. Note: Do not use the backspace key if you mistype the name. You will be given a choice to abort the process, and then restart the utility, if you wish to enter the name correctly. Any subsequent restore process will not work with a renamed zipped image backup.
Figure 6
11. The next screen, shown in Figure 7 will appear. If you mistyped the file name in the previous step you can cursor down to select “No”, then hit ENTER and select “Yes” on the next screen prompting you to restart the utility. Otherwise leave the selec-tion shown in Figure 7 at “Yes” and hit ENTER. Note: Although the prompt indicates an existing image will be erased, this would only be true if you entered the same name of an existing zipped backup file on the previous step. Otherwise existing images on the USB destination drive will not be erased.
Figure 7
3
Instructional Leaflet IL04801002EEffective September 2011
Eaton XP and ePro PS Backup/Restore Utility
eaton corporation www.eaton.com
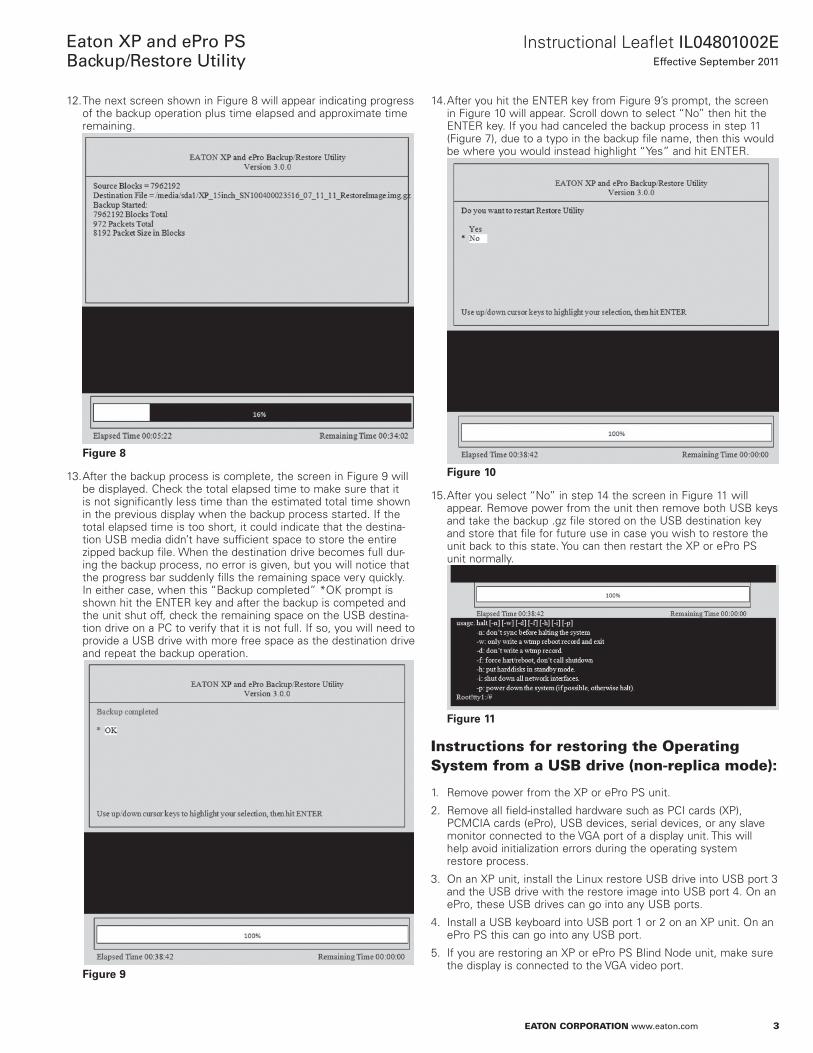
12. The next screen shown in Figure 8 will appear indicating progress of the backup operation plus time elapsed and approximate time remaining.
Figure 8
13. After the backup process is complete, the screen in Figure 9 will be displayed. Check the total elapsed time to make sure that it is not significantly less time than the estimated total time shown in the previous display when the backup process started. If the total elapsed time is too short, it could indicate that the destina-tion USB media didn’t have sufficient space to store the entire zipped backup file. When the destination drive becomes full dur-ing the backup process, no error is given, but you will notice that the progress bar suddenly fills the remaining space very quickly. In either case, when this “Backup completed” *OK prompt is shown hit the ENTER key and after the backup is competed and the unit shut off, check the remaining space on the USB destina-tion drive on a PC to verify that it is not full. If so, you will need to provide a USB drive with more free space as the destination drive and repeat the backup operation.
Figure 9
14. After you hit the ENTER key from Figure 9’s prompt, the screen in Figure 10 will appear. Scroll down to select “No” then hit the ENTER key. If you had canceled the backup process in step 11 (Figure 7), due to a typo in the backup file name, then this would be where you would instead highlight “Yes” and hit ENTER.
Figure 10
15. After you select “No” in step 14 the screen in Figure 11 will appear. Remove power from the unit then remove both USB keys and take the backup .gz file stored on the USB destination key and store that file for future use in case you wish to restore the unit back to this state. You can then restart the XP or ePro PS unit normally.
Figure 11
Instructions for restoring the Operating System from a USB drive (non-replica mode):
1. Remove power from the XP or ePro PS unit.
2. Remove all field-installed hardware such as PCI cards (XP), PCMCIA cards (ePro), USB devices, serial devices, or any slave monitor connected to the VGA port of a display unit. This will help avoid initialization errors during the operating system restore process.
3. On an XP unit, install the Linux restore USB drive into USB port 3 and the USB drive with the restore image into USB port 4. On an ePro, these USB drives can go into any USB ports.
4. Install a USB keyboard into USB port 1 or 2 on an XP unit. On an ePro PS this can go into any USB port.
5. If you are restoring an XP or ePro PS Blind Node unit, make sure the display is connected to the VGA video port.
4
Instructional Leaflet IL04801002EEffective September 2011
Eaton XP and ePro PS Backup/Restore Utility
eaton corporation www.eaton.com
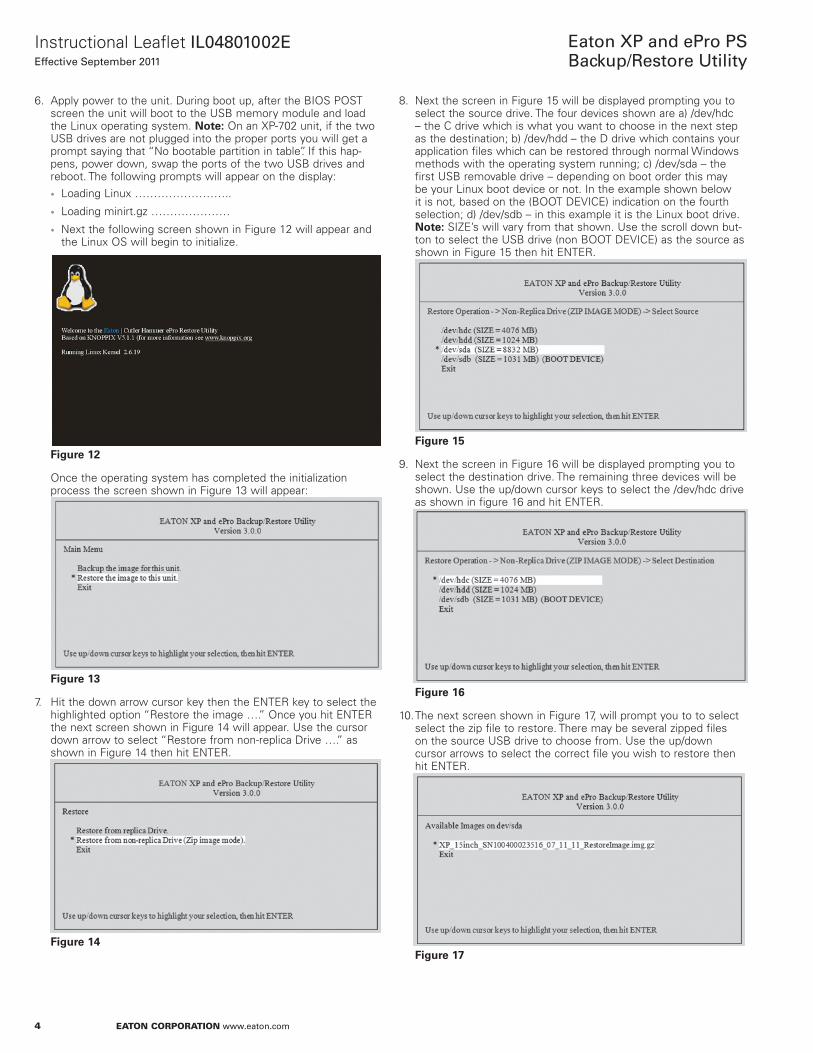
6. Apply power to the unit. During boot up, after the BIOS POST screen the unit will boot to the USB memory module and load the Linux operating system. Note: On an XP-702 unit, if the two USB drives are not plugged into the proper ports you will get a prompt saying that “No bootable partition in table”. If this hap-pens, power down, swap the ports of the two USB drives and reboot. The following prompts will appear on the display:• Loading Linux ……………………..
• Loading minirt.gz …………………
• Next the following screen shown in Figure 12 will appear and the Linux OS will begin to initialize.
Figure 12
Once the operating system has completed the initialization process the screen shown in Figure 13 will appear:
Figure 13
7. Hit the down arrow cursor key then the ENTER key to select the highlighted option “Restore the image ….” Once you hit ENTER the next screen shown in Figure 14 will appear. Use the cursor down arrow to select “Restore from non-replica Drive ….” as shown in Figure 14 then hit ENTER.
Figure 14
8. Next the screen in Figure 15 will be displayed prompting you to select the source drive. The four devices shown are a) /dev/hdc – the C drive which is what you want to choose in the next step as the destination; b) /dev/hdd – the D drive which contains your application files which can be restored through normal Windows methods with the operating system running; c) /dev/sda – the first USB removable drive – depending on boot order this may be your Linux boot device or not. In the example shown below it is not, based on the (BOOT DEVICE) indication on the fourth selection; d) /dev/sdb – in this example it is the Linux boot drive. Note: SIZE’s will vary from that shown. Use the scroll down but-ton to select the USB drive (non BOOT DEVICE) as the source as shown in Figure 15 then hit ENTER.
Figure 15
9. Next the screen in Figure 16 will be displayed prompting you to select the destination drive. The remaining three devices will be shown. Use the up/down cursor keys to select the /dev/hdc drive as shown in figure 16 and hit ENTER.
Figure 16
10. The next screen shown in Figure 17, will prompt you to to select select the zip file to restore. There may be several zipped files on the source USB drive to choose from. Use the up/down cursor arrows to select the correct file you wish to restore then hit ENTER.
Figure 17
5
Instructional Leaflet IL04801002EEffective September 2011
Eaton XP and ePro PS Backup/Restore Utility
eaton corporation www.eaton.com
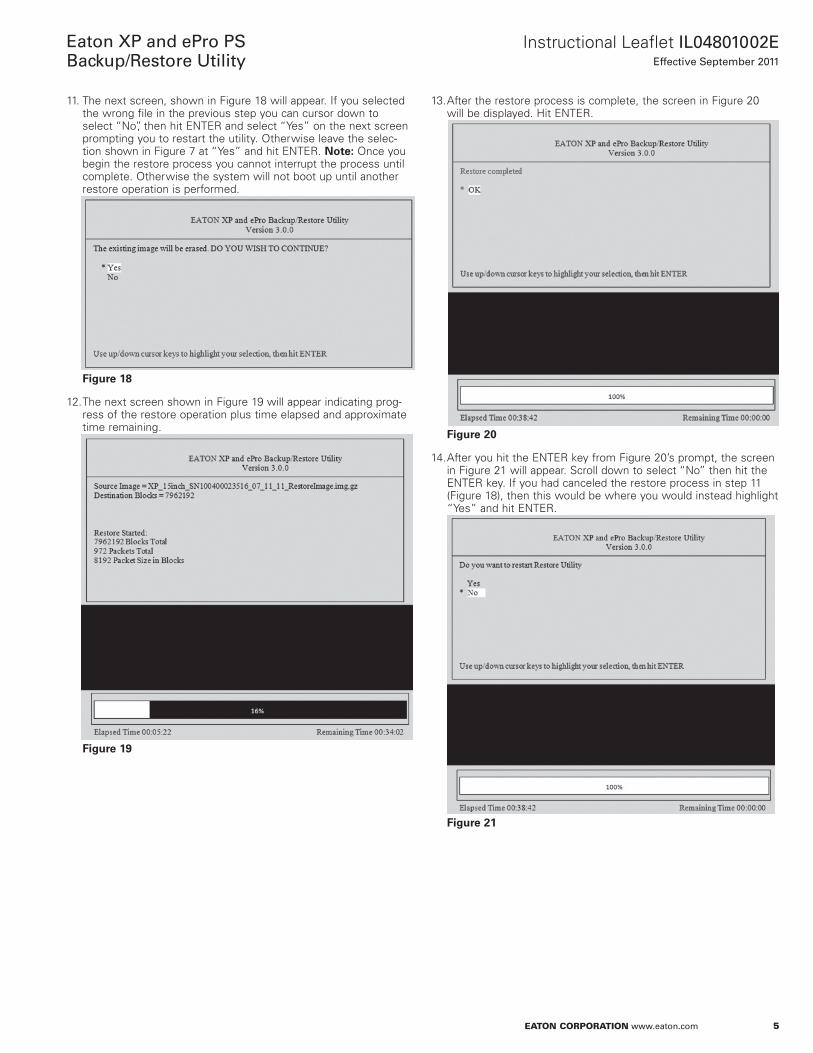
11. The next screen, shown in Figure 18 will appear. If you selected the wrong file in the previous step you can cursor down to select “No”, then hit ENTER and select “Yes” on the next screen prompting you to restart the utility. Otherwise leave the selec-tion shown in Figure 7 at “Yes” and hit ENTER. Note: Once you begin the restore process you cannot interrupt the process until complete. Otherwise the system will not boot up until another restore operation is performed.
Figure 18
12. The next screen shown in Figure 19 will appear indicating prog-ress of the restore operation plus time elapsed and approximate time remaining.
Figure 19
13. After the restore process is complete, the screen in Figure 20 will be displayed. Hit ENTER.
Figure 20
14. After you hit the ENTER key from Figure 20’s prompt, the screen in Figure 21 will appear. Scroll down to select “No” then hit the ENTER key. If you had canceled the restore process in step 11 (Figure 18), then this would be where you would instead highlight “Yes” and hit ENTER.
Figure 21
6
Instructional Leaflet IL04801002EEffective September 2011
Eaton XP and ePro PS Backup/Restore Utility
eaton corporation www.eaton.com
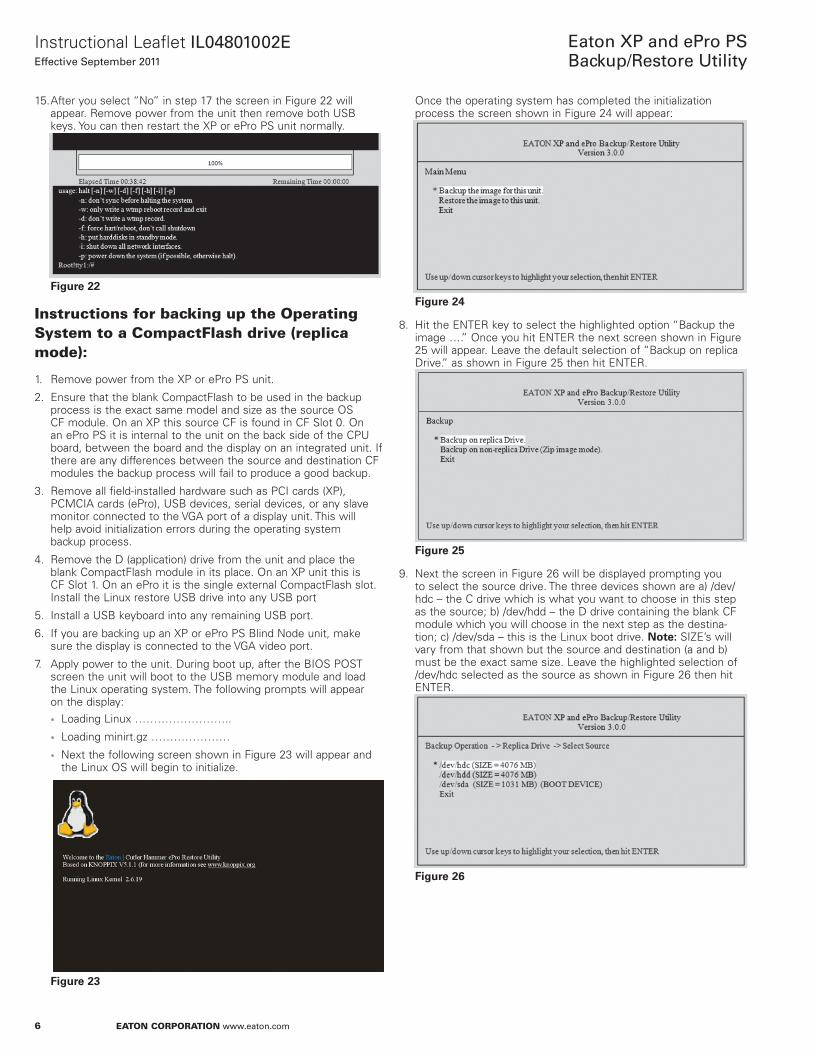
15. After you select “No” in step 17 the screen in Figure 22 will appear. Remove power from the unit then remove both USB keys. You can then restart the XP or ePro PS unit normally.
Figure 22
Instructions for backing up the Operating System to a CompactFlash drive (replica mode):
1. Remove power from the XP or ePro PS unit.
2. Ensure that the blank CompactFlash to be used in the backup process is the exact same model and size as the source OS CF module. On an XP this source CF is found in CF Slot 0. On an ePro PS it is internal to the unit on the back side of the CPU board, between the board and the display on an integrated unit. If there are any differences between the source and destination CF modules the backup process will fail to produce a good backup.
3. Remove all field-installed hardware such as PCI cards (XP), PCMCIA cards (ePro), USB devices, serial devices, or any slave monitor connected to the VGA port of a display unit. This will help avoid initialization errors during the operating system backup process.
4. Remove the D (application) drive from the unit and place the blank CompactFlash module in its place. On an XP unit this is CF Slot 1. On an ePro it is the single external CompactFlash slot. Install the Linux restore USB drive into any USB port
5. Install a USB keyboard into any remaining USB port.
6. If you are backing up an XP or ePro PS Blind Node unit, make sure the display is connected to the VGA video port.
7. Apply power to the unit. During boot up, after the BIOS POST screen the unit will boot to the USB memory module and load the Linux operating system. The following prompts will appear on the display:• Loading Linux ……………………..
• Loading minirt.gz …………………
• Next the following screen shown in Figure 23 will appear and the Linux OS will begin to initialize.
Figure 23
Once the operating system has completed the initialization process the screen shown in Figure 24 will appear:
Figure 24
8. Hit the ENTER key to select the highlighted option “Backup the image ….” Once you hit ENTER the next screen shown in Figure 25 will appear. Leave the default selection of “Backup on replica Drive.” as shown in Figure 25 then hit ENTER.
Figure 25
9. Next the screen in Figure 26 will be displayed prompting you to select the source drive. The three devices shown are a) /dev/hdc – the C drive which is what you want to choose in this step as the source; b) /dev/hdd – the D drive containing the blank CF module which you will choose in the next step as the destina-tion; c) /dev/sda – this is the Linux boot drive. Note: SIZE’s will vary from that shown but the source and destination (a and b) must be the exact same size. Leave the highlighted selection of /dev/hdc selected as the source as shown in Figure 26 then hit ENTER.
Figure 26
7
Instructional Leaflet IL04801002EEffective September 2011
Eaton XP and ePro PS Backup/Restore Utility
eaton corporation www.eaton.com
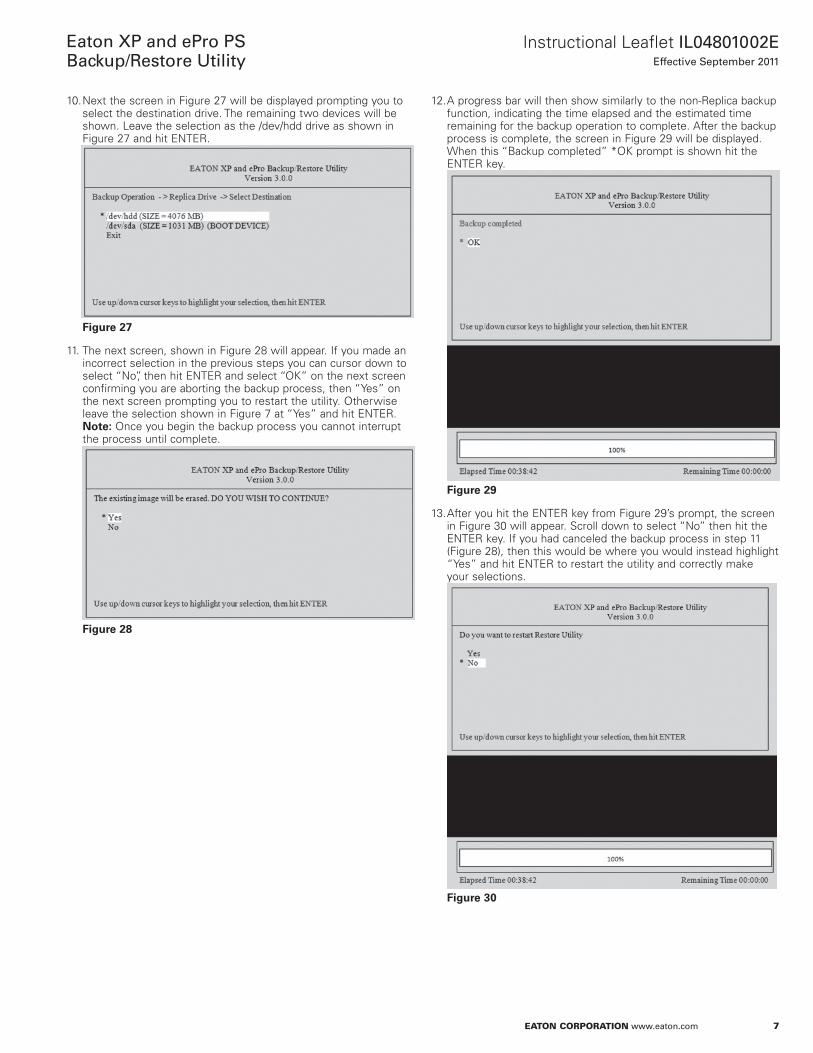
10. Next the screen in Figure 27 will be displayed prompting you to select the destination drive. The remaining two devices will be shown. Leave the selection as the /dev/hdd drive as shown in Figure 27 and hit ENTER.
Figure 27
11. The next screen, shown in Figure 28 will appear. If you made an incorrect selection in the previous steps you can cursor down to select “No”, then hit ENTER and select “OK” on the next screen confirming you are aborting the backup process, then “Yes” on the next screen prompting you to restart the utility. Otherwise leave the selection shown in Figure 7 at “Yes” and hit ENTER. Note: Once you begin the backup process you cannot interrupt the process until complete.
Figure 28
12. A progress bar will then show similarly to the non-Replica backup function, indicating the time elapsed and the estimated time remaining for the backup operation to complete. After the backup process is complete, the screen in Figure 29 will be displayed. When this “Backup completed” *OK prompt is shown hit the ENTER key.
Figure 29
13. After you hit the ENTER key from Figure 29’s prompt, the screen in Figure 30 will appear. Scroll down to select “No” then hit the ENTER key. If you had canceled the backup process in step 11 (Figure 28), then this would be where you would instead highlight “Yes” and hit ENTER to restart the utility and correctly make your selections.
Figure 30
8
Instructional Leaflet IL04801002EEffective September 2011
Eaton XP and ePro PS Backup/Restore Utility
eaton corporation www.eaton.com
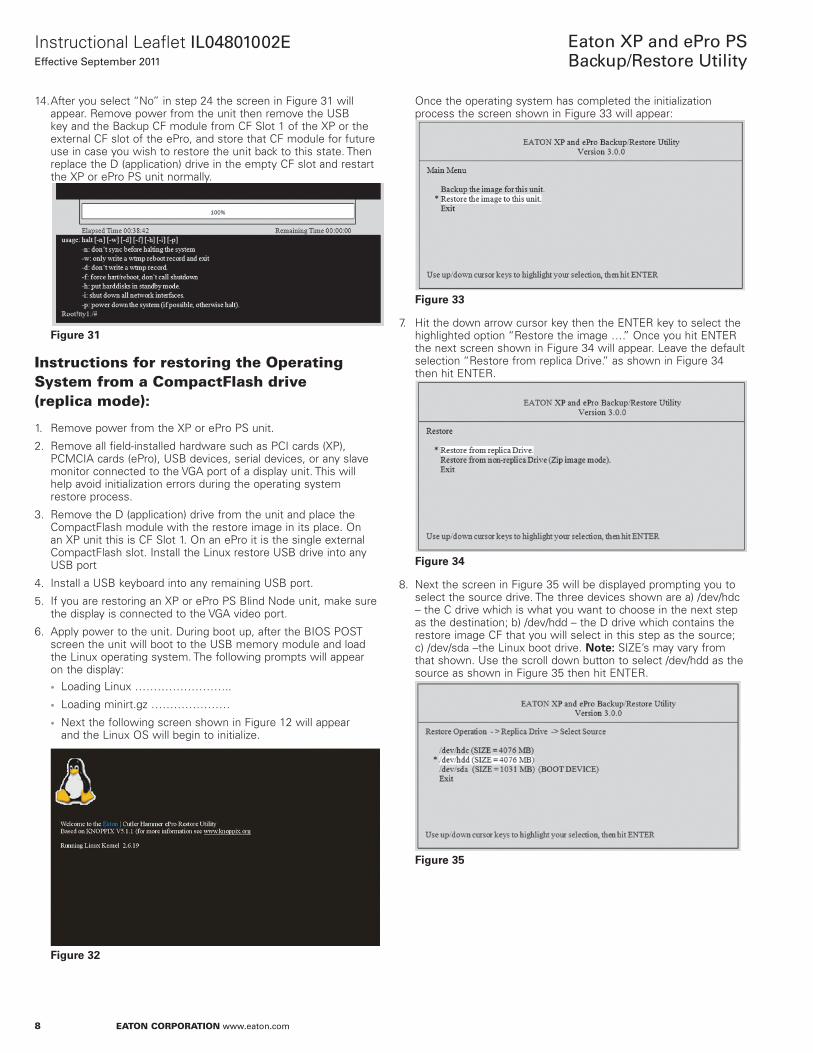
14. After you select “No” in step 24 the screen in Figure 31 will appear. Remove power from the unit then remove the USB key and the Backup CF module from CF Slot 1 of the XP or the external CF slot of the ePro, and store that CF module for future use in case you wish to restore the unit back to this state. Then replace the D (application) drive in the empty CF slot and restart the XP or ePro PS unit normally.
Figure 31
Instructions for restoring the Operating System from a CompactFlash drive (replica mode):
1. Remove power from the XP or ePro PS unit.
2. Remove all field-installed hardware such as PCI cards (XP), PCMCIA cards (ePro), USB devices, serial devices, or any slave monitor connected to the VGA port of a display unit. This will help avoid initialization errors during the operating system restore process.
3. Remove the D (application) drive from the unit and place the CompactFlash module with the restore image in its place. On an XP unit this is CF Slot 1. On an ePro it is the single external CompactFlash slot. Install the Linux restore USB drive into any USB port
4. Install a USB keyboard into any remaining USB port.
5. If you are restoring an XP or ePro PS Blind Node unit, make sure the display is connected to the VGA video port.
6. Apply power to the unit. During boot up, after the BIOS POST screen the unit will boot to the USB memory module and load the Linux operating system. The following prompts will appear on the display:• Loading Linux ……………………..
• Loading minirt.gz …………………
• Next the following screen shown in Figure 12 will appear and the Linux OS will begin to initialize.
Figure 32
Once the operating system has completed the initialization process the screen shown in Figure 33 will appear:
Figure 33
7. Hit the down arrow cursor key then the ENTER key to select the highlighted option “Restore the image ….” Once you hit ENTER the next screen shown in Figure 34 will appear. Leave the default selection “Restore from replica Drive.” as shown in Figure 34 then hit ENTER.
Figure 34
8. Next the screen in Figure 35 will be displayed prompting you to select the source drive. The three devices shown are a) /dev/hdc – the C drive which is what you want to choose in the next step as the destination; b) /dev/hdd – the D drive which contains the restore image CF that you will select in this step as the source; c) /dev/sda –the Linux boot drive. Note: SIZE’s may vary from that shown. Use the scroll down button to select /dev/hdd as the source as shown in Figure 35 then hit ENTER.
Figure 35
9
Instructional Leaflet IL04801002EEffective September 2011
Eaton XP and ePro PS Backup/Restore Utility
eaton corporation www.eaton.com
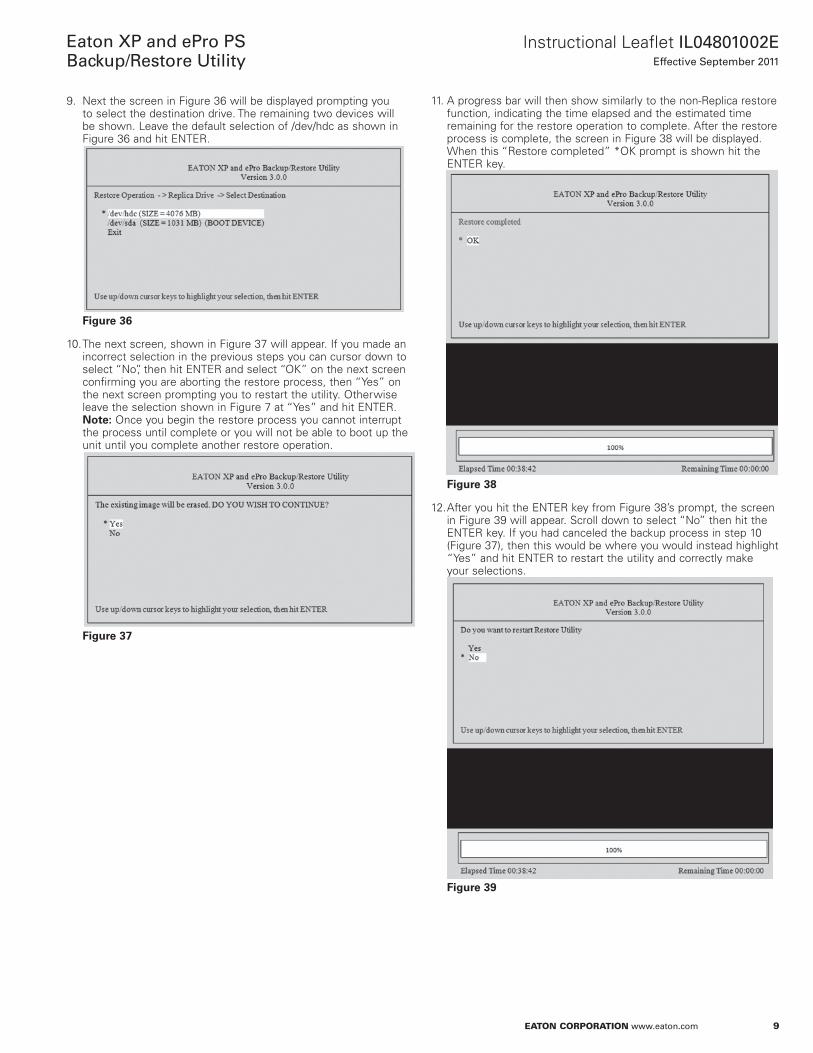
9. Next the screen in Figure 36 will be displayed prompting you to select the destination drive. The remaining two devices will be shown. Leave the default selection of /dev/hdc as shown in Figure 36 and hit ENTER.
Figure 36
10. The next screen, shown in Figure 37 will appear. If you made an incorrect selection in the previous steps you can cursor down to select “No”, then hit ENTER and select “OK” on the next screen confirming you are aborting the restore process, then “Yes” on the next screen prompting you to restart the utility. Otherwise leave the selection shown in Figure 7 at “Yes” and hit ENTER. Note: Once you begin the restore process you cannot interrupt the process until complete or you will not be able to boot up the unit until you complete another restore operation.
Figure 37
11. A progress bar will then show similarly to the non-Replica restore function, indicating the time elapsed and the estimated time remaining for the restore operation to complete. After the restore process is complete, the screen in Figure 38 will be displayed. When this “Restore completed” *OK prompt is shown hit the ENTER key.
Figure 38
12. After you hit the ENTER key from Figure 38’s prompt, the screen in Figure 39 will appear. Scroll down to select “No” then hit the ENTER key. If you had canceled the backup process in step 10 (Figure 37), then this would be where you would instead highlight “Yes” and hit ENTER to restart the utility and correctly make your selections.
Figure 39
Instructional Leaflet IL04801002EEffective September 2011
Eaton XP and ePro PS Backup/Restore Utility
Eaton CorporationElectrical Sector1000 Cherrington ParkwayMoon Township, PA 15108United States877-ETN-CARE (877-386-2273)Eaton.com
© 2011 Eaton CorporationAll Rights ReservedPrinted in USAIL04801002E / TNSeptember 2011
Eaton is a registered trademark of Eaton Corporation.
All other trademarks are property of their respective owners.
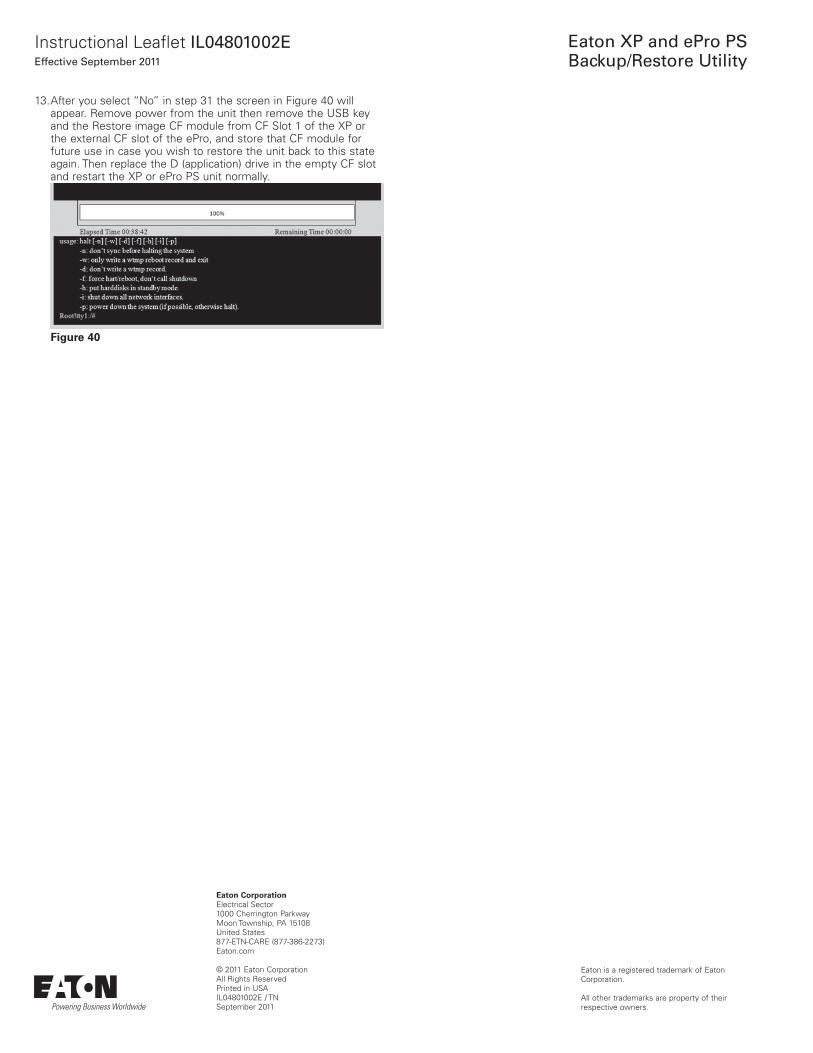
13. After you select “No” in step 31 the screen in Figure 40 will appear. Remove power from the unit then remove the USB key and the Restore image CF module from CF Slot 1 of the XP or the external CF slot of the ePro, and store that CF module for future use in case you wish to restore the unit back to this state again. Then replace the D (application) drive in the empty CF slot and restart the XP or ePro PS unit normally.
Figure 40